Sahar Mosleh & Ahmad R. Hadaegh California State University San Marcos Page 1 Interaction with 3D...
44
Sahar Mosleh & Ahmad R. Hadaegh California State University San Marcos Page 1 Interaction with 3D – Part 1
-
Upload
daisy-austin -
Category
Documents
-
view
218 -
download
4
Transcript of Sahar Mosleh & Ahmad R. Hadaegh California State University San Marcos Page 1 Interaction with 3D...

Sahar Mosleh & Ahmad R. Hadaegh California State University San Marcos Page 1
Interaction
with 3D – Part 1
Sahar Mosleh & Ahmad R. Hadaegh California State University San Marcos Page 2
Description
• Using Blender, you create a world that exists in four dimensions:• left-right, commonly called the x axis • forward-backward, commonly called the y axis • up-down, commonly called the z axis • time-sensitive, through animated objects, materials, and
motion captured in frames
• The problem is, you have a two-dimensional computer screen in front of you! Your mouse can only move left-right and up-down. You cannot go back in time, and you can't literally reach out into the screen and grab an object and move it somewhere
• Instead, you have to tell Blender to do it for you. This section tells you how to navigate around in your virtual world using the unique Blender interface.
Sahar Mosleh & Ahmad R. Hadaegh California State University San Marcos Page 3
Rotating the ViewMode: All Modes Hotkey: MMB / Alt LMB / NumPad 2 / NumPad 4 / NumPad 6 / NumPad 8 Menu: View → View Navigation
• Blender provides four default viewing directions: Side, Front, Top and Camera view. Blender uses a right-angled "Cartesian" coordinate system with:
• "side" corresponds to looking along the X axis • "front" along the Y axis; • and "top" along the Z axis;
• The Camera view shows the current scene as seen from the Camera view point.

Sahar Mosleh & Ahmad R. Hadaegh California State University San Marcos Page 4
Options
• You can select the viewing direction for a 3D Viewport with the View Menu entries (A 3D Viewport's view menu.) or by pressing the hotkeys NumPad 3 for "side", NumPad 1 for "front", NumPad 7 for "top", and NumPad 0 for "Camera".
• If you start at the edge and don't move towards the middle, you can rotate around your viewing axis.
• To change the viewing angle in discrete steps, use NumPad 8 and NumPad 2 (which correspond to vertical MMB dragging), or use NumPad 4 and NumPad 6 (which correspond to horizontal MMB dragging).

Sahar Mosleh & Ahmad R. Hadaegh California State University San Marcos Page 5
Panning the ViewMode: All Modes Hotkey: Shift MMB / Shift Alt LMB /
Ctrl NumPad 2 / Ctrl NumPad 4 / Ctrl NumPad 6 / Ctrl NumPad 8
Menu: View → View Navigation
• To pan the view, hold down Shift and drag MMB in the 3D Viewport.
• For discrete steps, use the hotkeys Ctrl NumPad 8, Ctrl NumPad 2, Ctrl NumPad 4 and Ctrl NumPad 6 as with rotating.
• Or those without a middle mouse button, you can hold Shift Alt while dragging with LMB .

Sahar Mosleh & Ahmad R. Hadaegh California State University San Marcos Page 6
Zooming the ViewMode: All Modes Hotkey: MW / Ctrl MMB / NumPad + / NumPad - / Ctrl Alt LMB Menu: View → View Navigation
• You can zoom in and out by holding down Ctrl and dragging MMB. The hotkeys are NumPad + and NumPad -
• If you have a wheel mouse, you can perform all of the actions that you would do with NumPad + and NumPad - by rotating the wheel ( MW ).
• Since the Buttons window has so many panels, rotating the mouse wheel pans the window left and right in horizontal view.
• If you get lost in 3D space, which is not uncommon, two hotkeys will help you:
• HOME changes the view so that you can see all objects (View>>View All Menu entry,)
• NumPad . zooms the view to the currently selected objects (View>>View Selected Menu entry)

Sahar Mosleh & Ahmad R. Hadaegh California State University San Marcos Page 7
Perspective and Orthographic ProjectionMode: All Modes Menu: View → Perspective/Orthographic
Hotkey: NumPad 5 (This toggles the view between the two)
• Each 3D Viewport supports two different types of projection. These are demonstrated in (Orthographic (right) and perspective (left) ):
• orthographic viewing is very useful (it is the default in Blender and most other 3D applications), because it provides a more "technical" insight into the scene, making it easier to draw and judge proportions.
Prospective Orthogonal
Sahar Mosleh & Ahmad R. Hadaegh California State University San Marcos Page 8
Camera View
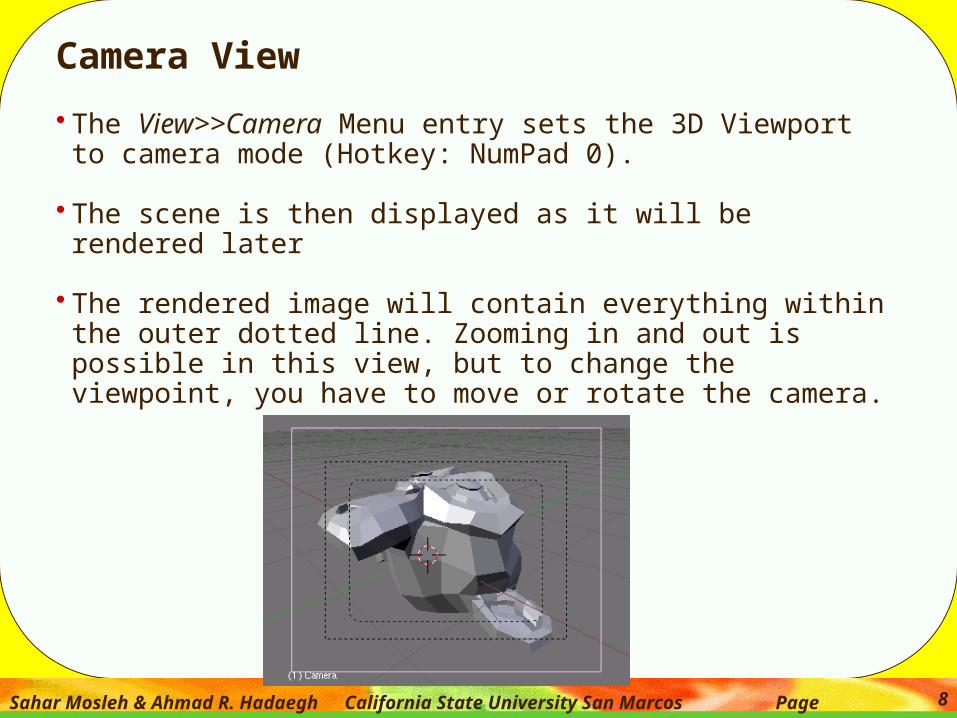
• The View>>Camera Menu entry sets the 3D Viewport to camera mode (Hotkey: NumPad 0).
• The scene is then displayed as it will be rendered later
• The rendered image will contain everything within the outer dotted line. Zooming in and out is possible in this view, but to change the viewpoint, you have to move or rotate the camera.
Sahar Mosleh & Ahmad R. Hadaegh California State University San Marcos Page 9
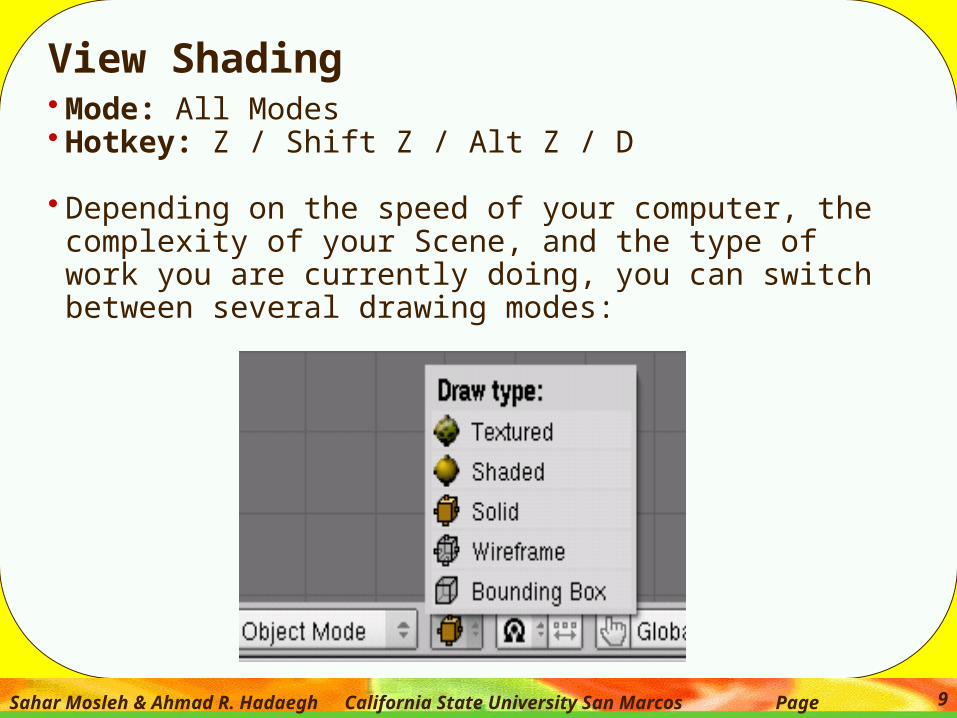
View Shading• Mode: All Modes • Hotkey: Z / Shift Z / Alt Z / D
• Depending on the speed of your computer, the complexity of your Scene, and the type of work you are currently doing, you can switch between several drawing modes:
Sahar Mosleh & Ahmad R. Hadaegh California State University San Marcos Page 10
• Textured (Hot key: Alt Z): • Displays UV image textured models with OpenGL lighting. Procedural
textures will not be shown.
• Shaded Shift Z (Hot key: Shift Z): • Approximates all textures and lighting at each vertex, and blends from
one to the next. Much less accurate than using the render engine to check textures, but much faster. Note that if you have no lighting in your scene, everything will remain black.
• Solid (Hot key: Z or Alt Z): • Surfaces are drawn as solid colors, with built-in OpenGL lighting (not
dependent on scene light sources)
• Wireframe (Hot key: Z or Shift Z): • Objects only consist of lines that make their shapes recognizable. This
is the default drawing mode.
• Bounding Box:• Objects aren't drawn at all; instead, this mode shows only the
rectangular boxes that correspond to each object's size and shape.
Sahar Mosleh & Ahmad R. Hadaegh California State University San Marcos Page 11
Local ViewMode: All Modes Hotkey: NumPad /Menu: View → Local View
• In local view, only the selected objects are displayed, which can make editing easier in complex scenes.
• To enter local view, • first select the objects you want and then • use the View>>Local View Menu entry; • use the View>>Global View Menu entry to go back to
Global View. • The hotkey NumPad / toggles between Local and Global
View.

Sahar Mosleh & Ahmad R. Hadaegh California State University San Marcos Page 12
View Clipping BorderMode: Any mode Hotkey: Alt B Menu: View → Set Clipping Border
• To assist in the process of working with complex models and scenes, you can change the view clipping to visually isolate what you're working on.
• (Region/Volume clipping) is an example of using the clipping tool with a cube.
• Start by activating the tool with Alt B, • see "Start" in the upper left. • This will generate a dashed cross-hair
cursor. • Click with the LMB and drag out a
rectangular region shown in the upper right.
• Now a region is defined and clipping is applied against that region in 3D space.
• The gray area surrounding the volume is the Pyramid volume itself. To deactivate the clipping tool toggle it by applying Alt B a second time.

Sahar Mosleh & Ahmad R. Hadaegh California State University San Marcos Page 13
Other View Options• This menu provides options to control the way
the workspace is viewed:
• Space Handler Scripts - This submenu shows Space Handler Scripts; by default, there aren't any.
• Play Back Animation - This item plays back the animation from the current frame.
• Maximize Window - This item maximizes the 3D View Window to fill the entire Blender window, and once selected this menu item will change to Tile Window, if menu entry Tile Window is then selected the 3D View Window will be restored to it's previous size.

Sahar Mosleh & Ahmad R. Hadaegh California State University San Marcos Page 14
• View All - This command zooms the 3D view to encompass all the objects in the current scene.
• View Selected - This command zooms the 3D view to encompass all the selected objects.
• Set Clipping Border - This command allows you to define a clipping border to limit the 3D view display to a portion of 3D space
• Align View-This submenu (shortcut C) shifts your view to be centered on the cursor. Shift-Center (shortcut Shift C) centers your view and zooms out so that you can see everything in your scene.

Sahar Mosleh & Ahmad R. Hadaegh California State University San Marcos Page 15
• Global /Local View - Global view shows all of the 3D objects in the scene. Local view only displays the selected objects.
• To switch between global and local view use NumPad /
• Cameras - This submenu lists all the cameras in the scene. Selecting one will make it the active camera; there is also a command that sets the current object (which doesn't have to be a camera) as the camera, so you can see what the scene looks like from its point of view.
• Side, Front, Top - These commands change the view to the default side, front, or top views. Pressing the Ctrl key changes to the 'other' corresponding view: Ctrl-NumPad 3 right side, Ctrl-NumPad 1 back, or Ctrl-NumPad 7 bottom-looking-up views.
Sahar Mosleh & Ahmad R. Hadaegh California State University San Marcos Page 16
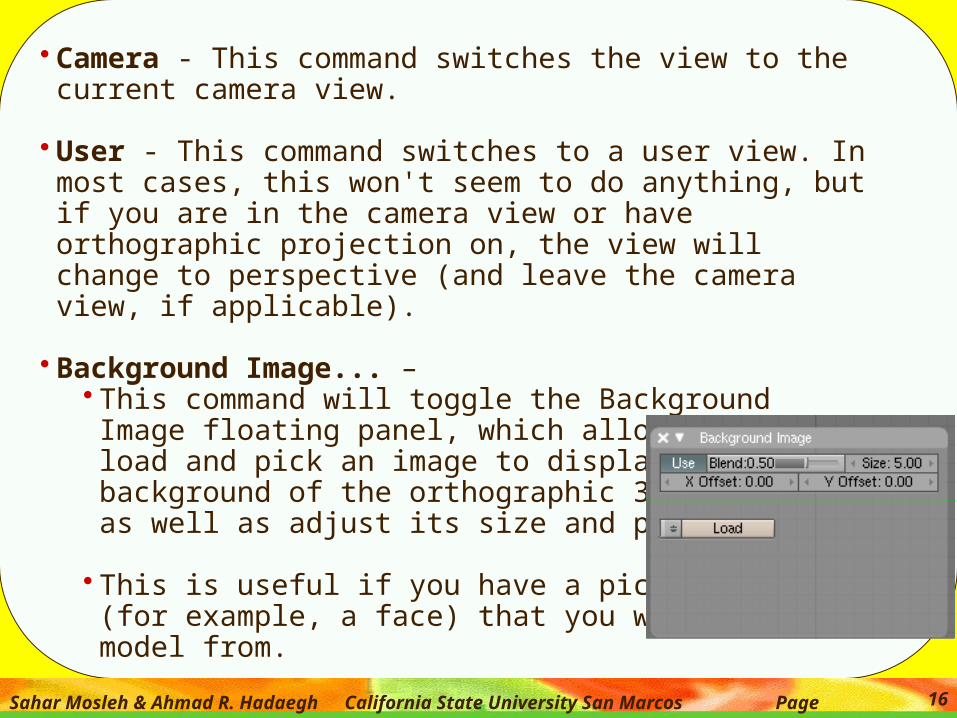
• Camera - This command switches the view to the current camera view.
• User - This command switches to a user view. In most cases, this won't seem to do anything, but if you are in the camera view or have orthographic projection on, the view will change to perspective (and leave the camera view, if applicable).
• Background Image... – • This command will toggle the Background
Image floating panel, which allows you to load and pick an image to display in the background of the orthographic 3D view, as well as adjust its size and position.
• This is useful if you have a picture (for example, a face) that you want to model from.

Sahar Mosleh & Ahmad R. Hadaegh California State University San Marcos Page 17
• View Properties... - This command toggles the View Properties floating panel,
• which allows you to toggle the grid and adjust its spacing,
• adjust the zoom of the camera, • toggle specific axes (X, Y, and Z), • view and change the specific location of the 3D
cursor, • adjust several toggles (outlining the selected
object, showing all object centers, showing relationship lines), and,
• lock the 3D view so that it always points towards a certain object or bone
• Render Preview... - This command toggles the Render Preview panel, which shows a (relatively) live preview render of whatever it is over.
Sahar Mosleh & Ahmad R. Hadaegh California State University San Marcos Page 18
Select Menu• Grouped - Blender has a few ways of grouping items together. This submenu contains
commands to select objects by their various groupings.
• Children - This command selects all the children of the selected object(s) (as in their children, the children of their children, etc.)
• Immediate Children - This command selects the children of the select object(s); however, unlike the previous command, it does not continue selecting the children of the children, just the direct descendants of the parent.
• Parent - This command selects the parent(s) of the selected object(s).
• Siblings (Shared Parent) - This command selects all the objects that shared the parent of an object.
• Objects of Same Type - This command selects all objects of the same type (Lamp, Mesh, Camera, etc.)
• Objects on Shared Layers - This command selects all the objects on the same layers as the selected object(s).
• Objects in Same Group - This command selects all the objects in the groups that the selected object(s) are in.
Sahar Mosleh & Ahmad R. Hadaegh California State University San Marcos Page 19
• Linked - This submenu contains commands that allow you to select objects based on data (Ipo curves, Materials, Textures, etc.) that they share.
• Object Ipo - This command selects all the objects that share the Ipo curves of the selected object(s).
• ObData - This command selects all the objects that share the ObData of the selected object(s).
• Material - This command selects all the object(s) that share the Material(s) of the selected object(s).
• Texture - This command selects all the object(s) that share the Texture(s) of the selected object(s).

Sahar Mosleh & Ahmad R. Hadaegh California State University San Marcos Page 20
• Select All By Type - This submenu contains commands that allow you to select all the objects of a certain type (Mesh, Camera, Lamp, etc.)
• Select All By Layer - This submenu contains commands that allow you to select all the objects in a specified layer.
• Inverse - This command inverts the selection (selects all the deselected objects and deselects all the selected objects.
• Select/Deselect All - This command deselects the current selection if there is one; if nothing is selected, it selects everything.
• Border Select - This command allows you to select objects using the traditional rectangle that most programs use.
• After pressing B or selecting this menu option, click LMB and drag your mouse diagonally through your workspace.
• When you release your LMB , all objects that were totally within the box will be selected.
• If you instead click MMB or RMB and drag, all objects within the box will be de-selected.

Sahar Mosleh & Ahmad R. Hadaegh California State University San Marcos Page 21
Object Menu
• This menu operates on objects as a whole. Many options act on the active object, based on other objects. You can indicate that by select the object(s) and then invoking the menu option.
• Scripts: this submenu lists available python scripts written to extend blender's object handling capability.
• Move to Layer: Objects can be organized into 20 Layers, and only a few layers can be selected for display to avoid clutter. This option moves the selected object(s) to a layer.
• To do so, select the object• Select “Move to Layer” in the object menu• Select one of the 20 layers by clicking on one of the
buttons in the popup window and • click the OK button. If the layer is not selected for
display, the object is removed from view. • To view the objects on a layer, click the appropriate
Layer button located to the right on the header.

Sahar Mosleh & Ahmad R. Hadaegh California State University San Marcos Page 22
• Convert Object Type: Objects can have Modifiers which can be turned on or off; this option applies those modifiers permanently.
• Join Objects: joins multiple selected objects into on single object.
• Boolean Operation: This submenu allows you to perform discrete operations on the active object based on previously selected objects.
• Union extends the object to include all selected objects. • Difference boolean modifies the active object by cutting away
parts where they intersect. • Intersect discards everything except where they intersect.
• Constraints: You can constrain an object based on another object, like a dog on a leash. Various ways to constrain the active object (based on another previously selected object) are by location, rotation, scale, etc.
Sahar Mosleh & Ahmad R. Hadaegh California State University San Marcos Page 23
• Track: You can make an object always point to another object by the Track option. If you move the base object, the active object will rotate so that it always "keeps an eye" on the base object.
• Group: Grouping is a completely arbitrary way for you to group like things together. If you are making a scene of a park, you can group all the trees together if you like.
• Parent: Use this menu to designate the active object as the parent of one or more child objects. When you then move the parent, the children move with it.
• Copy Attributes: An object is in a certain place, called a location. "Location" is an attribute of the object. All selected objects can copy the attributes of active object using this option.
• Make Local: If an object was linked from another scene, this makes a local copy of it for the current scene.

Sahar Mosleh & Ahmad R. Hadaegh California State University San Marcos Page 24
• Make Single User: An object, like an 8-ball, can share the same mesh as another object. In this case the Mesh is called "billiards ball" and has 16 users (15 balls plus the cue ball). Making a local copy assigns a copy of the multi-user mesh to the selected object. You can then edit the local copy without affecting any of the other users.
• Make Links: To Scene This is a way to proxy an object to another scene. It exists in the current scene, but will show up in the linked scene as well. To Object Ipo, Mesh data, etc is a way to make the current object join the multi-user community and share the selected item.
• Delete: It deletes the object
• Duplicate Linked: Makes a copy of the object, but links their mesh as multi-user, so if you change one (like a table leg), all the other table legs match.

Sahar Mosleh & Ahmad R. Hadaegh California State University San Marcos Page 25
• Duplicate: Makes a xerox copy. Well, a three-dimensional xerox copy, if there is such a thing. (Hotkey: Shift D )
• Insert Keyframe: Records the current location, rotation, etc (whatever you select) of the object at that frame. Use this to set up basic animation.
• Snap: This menu allow you to move the select object to the cursor, grid or vice versa. Very handy in making items share the same space
• Clear/Apply: Clears (resets to zero) the object's scale/rotation as selected, or applies current rotation/scale to the object making them default.
• Transform: Use the menu to refresh your memory of the most common hotkeys.
• Transform Properties: Pressing N pops up a floating panel that gives you key information about the active object: location, rotation,
scale, dimension.
Sahar Mosleh & Ahmad R. Hadaegh California State University San Marcos Page 26
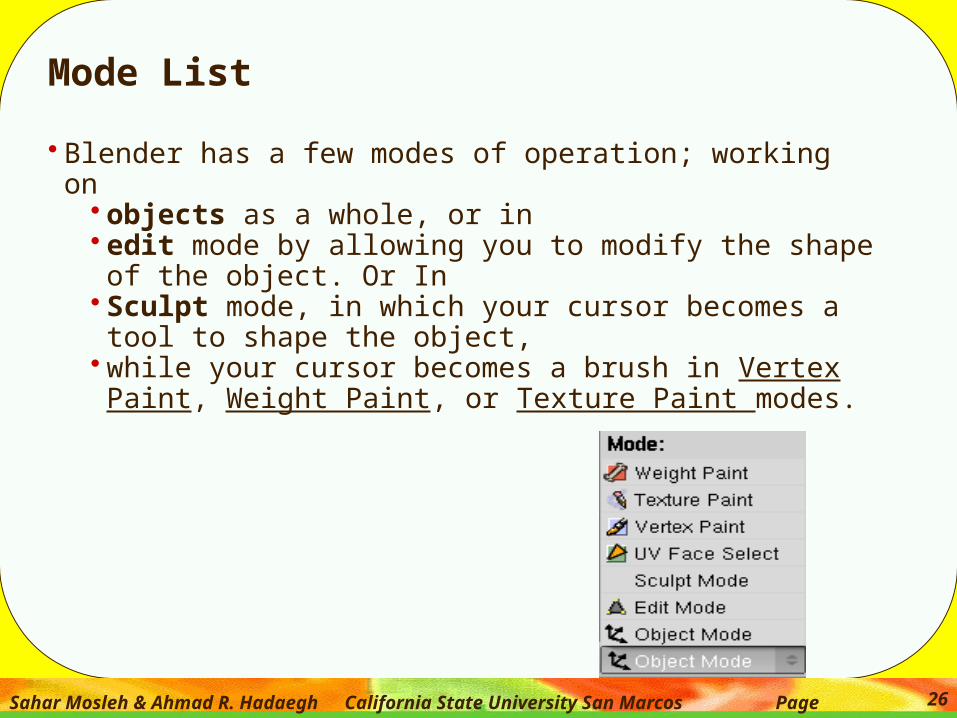
Mode List
• Blender has a few modes of operation; working on • objects as a whole, or in • edit mode by allowing you to modify the shape of the
object. Or In • Sculpt mode, in which your cursor becomes a tool to shape
the object, • while your cursor becomes a brush in Vertex Paint, Weight
Paint, or Texture Paint modes.

Sahar Mosleh & Ahmad R. Hadaegh California State University San Marcos Page 27
Rotation Selector
• When rotating or scaling an object or bunch of vertices/edges/faces, you may want to shift the pivot point in 3D space. Using this selector, you can change the pivot point to the location of the cursor, the average center spot of the selected items (median), etc
• These commands will be explained later in detail

Sahar Mosleh & Ahmad R. Hadaegh California State University San Marcos Page 28
Transform (Manipulator) Selectors
• These handy selectors, also featured in other not-to-be-named CG packages, allow you to rotate or move objects by grabbing (clicking with your mouse) their controls and moving your mouse in the axis. Each color stands for an axis.
• Click on the little finger icon to enable the manipulator. Your object in 3D View will now have the manipulator around its center.
• the transform manipulator is a 3-axis arrow; • the rotate manipulator are three circles, one
for each axis; • click and drag on the arc to rotate on an axis. • The scale manipulator is 3-axis of lines that end in a block.
• LMB click the buttons for a 3D Move, Rotate, or Scale Selector. Shift LMB to activate multiple manipulators at the same time. You can move, rotate or scale according to a Global view, or local, view, etc. Generally, stick with Global view until you get the hang of things.

Sahar Mosleh & Ahmad R. Hadaegh California State University San Marcos Page 29
Using the 3D Window
• In this 3D space, • the active object is highlighted in pink
• Your cursor is a red-white circle with a scope crosshairs.
• LMB clicking moves the cursor.
• Use the Snap button to move the cursor by some means other than aimlessly clicking around.
• RMB clicking selects the object being pointed to unless it is already selected, in which case RMB clicking de-selects it, like a toggle.
• Shift RMB button selects another object and keeps the first one(s) still selected, allowing you to select multiple objects (remember that the last one selected is the active one).

Sahar Mosleh & Ahmad R. Hadaegh California State University San Marcos Page 30
Editing Mode
• Enter Edit mode by the mode selector, or by pressing Tab in the window. In edit mode, you select the components of the object, and modify them
• Some objects, like cameras, cannot be edited. Press Tab again to return to the mode you came from.

Sahar Mosleh & Ahmad R. Hadaegh California State University San Marcos Page 31
3D Window Toolbox (Popup Menu)• Pressing space in the 3D window pops up a very handy little
menu. You can also press LMB or RMB for one second to do so.
• Add• Use this option to add objects to your scene. You can get to
this option by clicking the Add menu item in the User Preferences header at the top of your screen, or pressing space when your mouse cursor is hovering over any 3D view window
• The object, when it is added, is placed wherever your 3D cursor is, and the object is automatically placed in Edit mode because Blender assumes you want to start modifying it right away. To set the location of your 3D cursor, you can:

Sahar Mosleh & Ahmad R. Hadaegh California State University San Marcos Page 32
• To set the location of your 3D cursor, you can: • LMB click in a 3D View window, and the cursor jumps to that
spot. To place the cursor in 3D space, you will have to click in two windows that have different perspectives; once for example in the top view to establish the XY location, and then again in a front view to establish the Z location,
• Use the View ->Properties window and enter an EXACT XYZ location in the 3D Cursor fields, or
• Select an object whose center is where you want the 3D cursor to be, and Shift Snap the Cursor -> Selection, and the cursor will jump to the selected object's location.
Sahar Mosleh & Ahmad R. Hadaegh California State University San Marcos Page 33
• Blender supports many different primitives which can be added to your scene.
• If you add an object in Object mode, the primitive is added as a separate object to the scene.
• If you add an object while in Edit mode for another object, the primitive is added to the other object, forming a compound object from many primitives:
• Mesh - this submenu allows you to add polygonal meshes to your scene.
• Curve - this submenu allows you to add curves or paths to your scene. These are useful for modeling curved objects (roller coasters, legs of fancy furniture, etc) or for making curves for animated objects.
• Surface - this submenu allows you to add NURBS objects to your scene.
• Meta - this submenu allows you to add meta objects to your scene. These are algorithmically-generated objects, and are quite useful for special effects (using two metaballs to animate a cell splitting in half, for example).

Sahar Mosleh & Ahmad R. Hadaegh California State University San Marcos Page 34
• Text - this command allows you to add Text objects to your scene.
• Empty - this command allows you to add Empties to your scene. Empties aren't rendered; rather, they are often used to control aspects of other objects.
• For example, you could use an Empty to control the rotation of an array modifier. Since they don't render, you can use them for all sorts of things such as hooks, etc. that require an object to get a location, rotation and/or size from.
• Group - this submenu allows you to add copies of any groups you have in your scene. This is quite useful if you have entire objects grouped together, as you can easily add copies of them.
• Camera - this command adds a camera to your scene.

Sahar Mosleh & Ahmad R. Hadaegh California State University San Marcos Page 35
• Lamp - this submenu contains various types of lamps you can add to your scene.
• Armature - this command adds an Armature (skeleton) to your scene. These are primarily used for animating arms, legs, etc,
• Lattice - this command adds a Lattice to your scene. • These objects do not do anything themselves; however, you
can use them to deform objects. • In order to have a Lattice deform an object, you have to
add a Lattice Modifier to the object you want to deform. • You can then place the Lattice around the object (like a
cage), and any changes to the Lattice will deform the object.
Sahar Mosleh & Ahmad R. Hadaegh California State University San Marcos Page 36
Edit Mode• Enter Editmode - this command will enter Edit mode, which allows you to edit
the vertices, edges, and faces of a specific object, rather than manipulating the entire object.
• Duplicate - this command makes a separate duplicate of the selected object(s).
• Duplicate Linked - this command makes a duplicate of the selected object; however, the ObData is shared, so the objects share the same mesh (if applicable), curve, etc.
• Delete - this command deletes the selected object(s).
• Object Keys - this submenu contains commands related to keyframes.
• Show/Hide - this command toggles showing wireframe version of the keyframes for the selected object. This is quite useful, as it allows you to visualize the path of the selected object.
• Mirror - This command allows you to mirror (flip) the selection about the appropriate axis. As with all axis-related stuff, Global refers to the view in general, while Local refers to the axis specific to that object.

Sahar Mosleh & Ahmad R. Hadaegh California State University San Marcos Page 37
Other commands in the Object Mode• Clear/Apply - This submenu contains commands that allow you to clear (reset)
or apply (make permanent) the location, rotation, scale, deformation, or duplicates of the selected objects.
• Clear Location - This command clears (resets) the location of the selected object(s) to 0,0,0.
• Clear Rotation - This command clears (resets) the rotation of the selected object(s).
• Clear Scale - This command clears (resets) the scale of the selected object(s).
• Apply Scale/Rotation - This command applies the scale and rotation. The object data (mesh/curve points/etc.) is modified so that the scale is 1 and the object isn't rotated at all.
• Make Duplicates Real - This command makes the duplicates (from using DupliVerts or DupliFrames) real objects (so you can edit them individually).
Sahar Mosleh & Ahmad R. Hadaegh California State University San Marcos Page 38
Add a new camera
Mode: Object Mode Hotkey: Shift A to add new, F9 to change settings. Menu: Add → Camera
• In object-mode simply press space and in the popup menu, choose Add-->Camera. New cameras are directed in parallel with the current viewport.
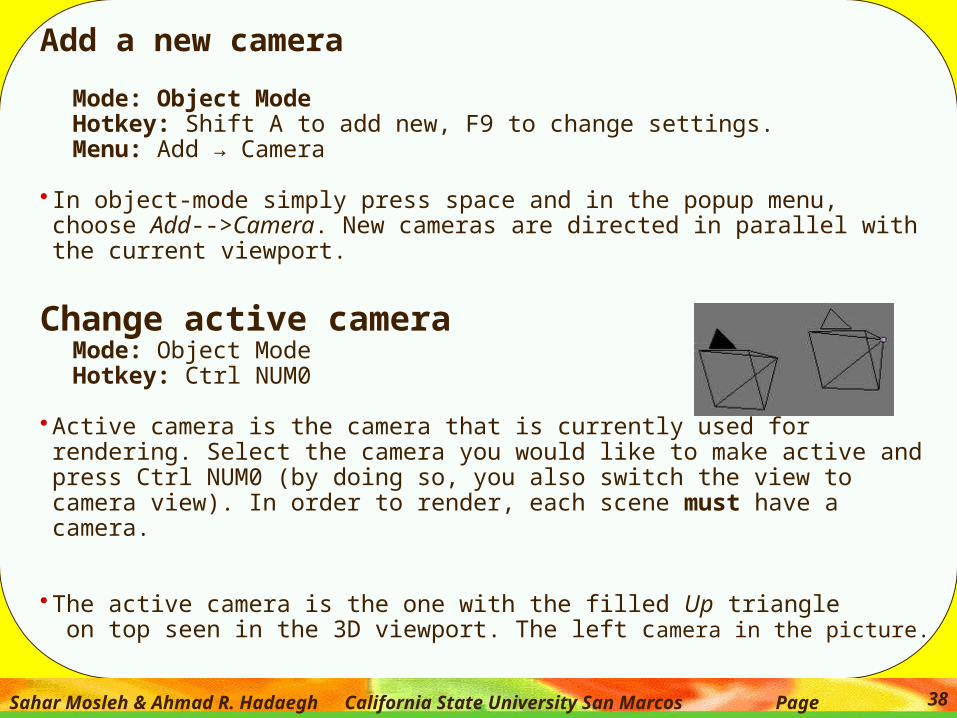
Change active cameraMode: Object Mode Hotkey: Ctrl NUM0
• Active camera is the camera that is currently used for rendering. Select the camera you would like to make active and press Ctrl NUM0 (by doing so, you also switch the view to camera view). In order to render, each scene must have a camera.
• The active camera is the one with the filled Up triangle on top seen in the 3D viewport. The left camera in the picture.

Sahar Mosleh & Ahmad R. Hadaegh California State University San Marcos Page 39
Move active camera to view• Mode: Object Mode • Hotkey: Alt Ctrl NUM0
• Moves the selected camera to current 3D view. Select a camera and then move around in 3D view to a desired position and direction for your camera.
• Now press Alt Ctrl NUM0 and your selected camera positions itself at your spot and switches to camera view.
Camera ViewCameraCamera panel

Sahar Mosleh & Ahmad R. Hadaegh California State University San Marcos Page 40
• Cameras are invisible in a scene; they are never rendered, so they don't have any material or texture settings. However, they do have Object and Editing setting panels available which are displayed when a camera is the active (selected) object.
• Lens - Represents the lens in mm. If Orthographic is selected, this will change to a Scale variable.
• DoFDist - Distance to the point of focus. It is shown as a yellow cross on the camera line of sight. Limits must be enabled to see the cross. It is used in combination with the Defocus Node

Sahar Mosleh & Ahmad R. Hadaegh California State University San Marcos Page 41
• Orthographic - Toggles Orthographic mode for rendering.
• Clipping Start/End - Sets the clipping limits. Only objects within the limits are rendered. If Limits is
enabled, the clipping will be seen as two yellow dots on the camera line of sight.
• Shift X/Y - Shifts the camera viewport.
• Limits - Toggles viewing of the limits on and off.
• Mist - Toggles viewing of the mist limits on and off. The limits are shown as two white dots on the camera line of sight.
• Name - Toggle name on and off.

Sahar Mosleh & Ahmad R. Hadaegh California State University San Marcos Page 42
• Title Safe - When title safe is enabled an extra dotted frame is drawn inside the camera viewport.
• Passepartout Alpha - This mode draws the area outside of the camera's field of view with a different darkness, set by the Alpha setting.
• Size - The draw size of the camera in the 3D view. This doesn't affect the camera's output, it is just a convenience to enable easier selection of the camera object in the viewport. (The camera object can also be scaled using the standard S transform key).
Sahar Mosleh & Ahmad R. Hadaegh California State University San Marcos Page 43
Camera Navigation
• To control the camera while viewing through it (NumPad 0):
• Aiming the camera:• Press Shift F to enter "Camera Fly Mode", then move the
mouse around to aim the camera, LMB to set the new orientation, RMB or ESC to cancel.
• Rolling:• To roll the camera, the camera needs to be selected (while
viewing through it, RMB on the solid rectangular edges selects it), then press R to enter standard object rotation mode, the default will be to rotate the camera in it's local Z axis.

Sahar Mosleh & Ahmad R. Hadaegh California State University San Marcos Page 44
• Pitch:• To rotate along the local X axis, press R, then XX. The first
X (or Y or Z for other axis) selects the global axis, pressing the "axis letter" a second time selects the local axis (this works when rotating any object).
• Dolly:• To dolly the camera, press G then MMB , LMB to
complete.
• Track Camera:• Press G (grab) and move the mouse (LMB to set position)