Retail Term Deposit Account Creation User Manual
42
Retail Term Deposit Account Creation Oracle FLEXCUBE Universal Banking Release 11.3.0 [May] [2011] Oracle Part Number E51511-01
Transcript of Retail Term Deposit Account Creation User Manual

Retail Term Deposit Account Creation Oracle FLEXCUBE Universal Banking
Release 11.3.0 [May] [2011]
Oracle Part Number E51511-01

1-1
Retail Term Deposit Account Creation
Table of Contents 1. CREATION OF RETAIL TERM DEPOSIT ACCOUNT........................................................................... 1-1
1.1 INTRODUCTION........................................................................................................................................... 1-1 1.2 STAGES IN RETAIL TERM DEPOSIT CREATION ............................................................................................ 1-1 1.3 PROCESS FLOW DIAGRAM .......................................................................................................................... 1-2

1-1
1. Creation of Retail Term Deposit Account 1.1 Introduction
This process instigates with the receipt of the term deposit opening form and the related documents from a prospect / customer for opening of a term deposit. The bank verifies the details / documents submitted for opening of a term deposit to ensure completeness. In case of missing details / documents, the bank either decides to proceed further only after obtaining the missing details / documents or processes the request with necessary approvals without waiting for the missing details / documents.
The bank as well captures the details of the term deposit to be opened, which is followed by KYC checks. In case of an existing customer, the bank does the KYC checks only if there are any change in the existing KYC information of the customer and in case of a new customer the bank necessarily performs the KYC checks. If the KYC checks are not passed, the application is rejected. In case the prospect/customer passes the KYC checks, the bank creates a new customer record in case of a new customer / updates the customer details in case of an existing customer. The bank opens a term deposit in the relevant system and dispatches/hand over’s the term deposit receipt/confirmation advice to the customer.
1.2 Stages in Retail Term Deposit Creation
In Oracle FLEXCUBE, the process for opening a retail term deposit is governed by several user roles created to perform different tasks. At every stage, the users (with requisite rights) need to fetch the relevant transactions from their task lists and act upon them. Similarly, at different times, the system will make calls to certain web services to process the transaction.
The retail term deposit opening process comprises the following stages:
Receive and verify term deposit account opening form and other documents
Decide on approval for missing documents / details
Input details of term deposit
Verify details of input
Modify details of input
Sub process – Know your customer (Retail) checks
Block customer in Oracle FLEXCUBE
Generate advice of rejection of request for opening of a term deposit
Dispatch advice of rejection
Check if funds are available for opening term deposit account
Create customer / modify customer details in Oracle FLEXCUBE
Book term deposit
Generate term deposit receipt / confirmation advice
Store document reference number in Oracle FLEXCUBE
Dispatch confirmation advice and store documents collected from customer
Only users who have procured the relevant access rights can perform activities under a stage.

1-2
1.3 Process Flow Diagram

1-3
Step 1. Receive and Verify TD Account Opening form and Documents
In this stage, the bank receives the term deposit opening form and the related documents from a prospect / customer for opening of a term deposit. The bank verifies the details / documents submitted for opening of a term deposit to ensure completeness. In case of missing details/documents, the bank either decides to proceed further only after obtaining the missing details/documents or processes the request with necessary approvals without waiting for the missing details/documents. The bank then captures the details of the term deposit to be opened, which is followed by KYC checks. In case of an existing customer, the bank does the KYC checks only if there are any change in the existing KYC information of the customer and in case of a new customer the bank necessarily performs the KYC checks. If the KYC checks are not passed, the application is rejected. In case the prospect/customer passes the KYC checks, the bank creates a new customer record in case of a new customer/ updates the customer details in case of an existing customer. The bank opens a term deposit in the relevant system and dispatches/hand over’s the term deposit receipt/confirmation advice to the customer.
Users belonging to the user role RCSEROLE (Retail Customer Service Executive) can perform these activities.
Specify the following basic details in this screen:
Workflow Reference
The reference number of the workflow is displayed here.
Priority
Select the priority for the creation of the term deposit account for a customer from the adjoining drop-down list. This list displays:
Low
Medium
High

1-4
Account Details
Capture the basic account details of the customer here:
Branch Code
The current logged in branch is displayed here.
Currency
Specify the currency of the customer account. You can also select the appropriate currency from the adjoining option list. The list displays all the valid currencies maintained in the system.
Account Class
Specify the account class to be used by the account. You can also select the appropriate account class from the adjoining option list. The list displays all the valid account classes maintained in the system. You can choose the appropriate one.
Mode of operation
Select mode of operation from the drop-down list. The options available are:
Single
Jointly
Either – Any one or Survivor
Former or Survivor
Mandate Holder
Account Type
Select the account type from the drop-down list. The options available are:
Single
Joint
Customer No
Specify a valid customer number. For new customer the user needs to specify the customer number here.You can also select the appropriate customer number from the adjoining option list. The list displays all valid customers maintained in the system.
Customer Name
The name of the selected customer is displayed here. In case of new customers it is blank.
Term Deposit Amount
Specify the term deposit amount.
Maturity Date
Specify the maturity date from the option list.
Existing Customer
Check this option if the selected customer is an existing customer.
1-5
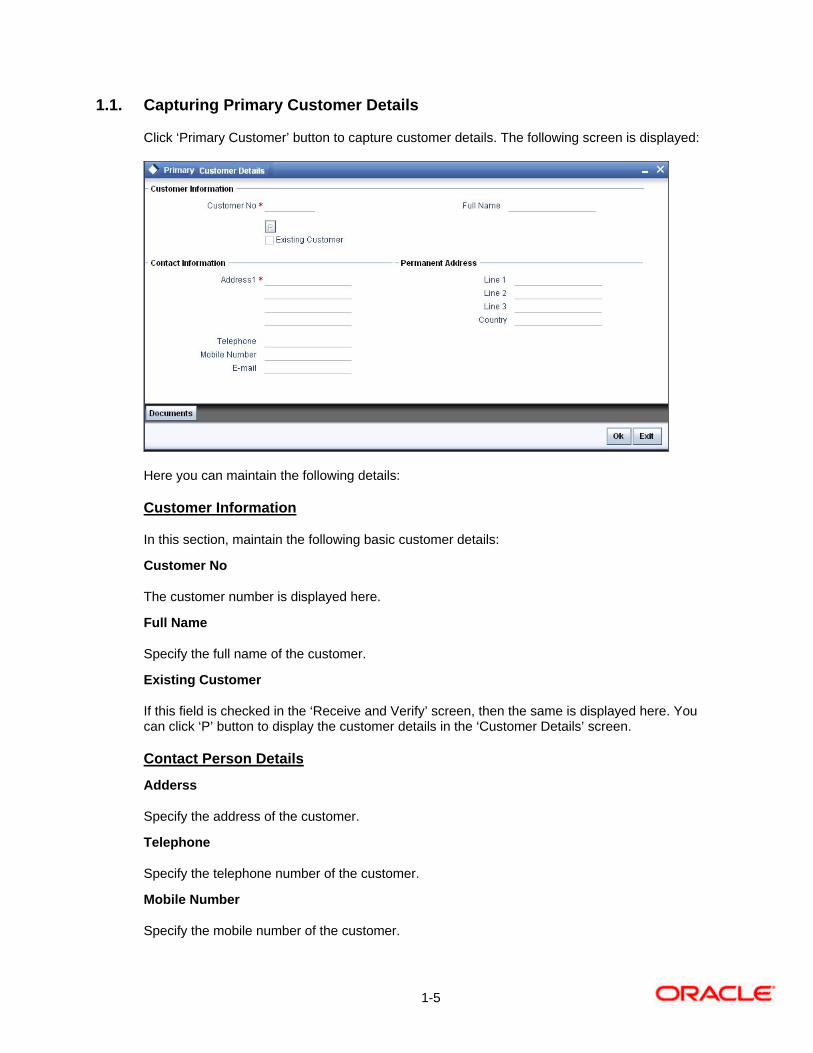
1.1. Capturing Primary Customer Details
Click ‘Primary Customer’ button to capture customer details. The following screen is displayed:
Here you can maintain the following details:
Customer Information
In this section, maintain the following basic customer details:
Customer No
The customer number is displayed here.
Full Name
Specify the full name of the customer.
Existing Customer
If this field is checked in the ‘Receive and Verify’ screen, then the same is displayed here. You can click ‘P’ button to display the customer details in the ‘Customer Details’ screen.
Contact Person Details
Adderss
Specify the address of the customer.
Telephone
Specify the telephone number of the customer.
Mobile Number
Specify the mobile number of the customer.

1-6
E – mail
Specify the e-mail of the customer.
Permanent Address
Line 1
Specify the first line of the permanent address of the customer.
Line 2
Specify the second line of the permanent address of the customer.
Line 3
Specify the third line of the permanent address of the customer.
Country
Specify the country in which the customer resides from the option list.
For new customers all the details mentioned above have to be manually input.
1.2. Uploading Documents
Click ‘Documents’ button to upload the documents. The following screen is displayed:
Here you need to specify the following details:
Document Category
Specify the category of the document to be uploaded.
Document Type
Specify the type of document that is to be uploaded.

1-7
Document Ref Number
The document reference number is displayed on clicking ‘OK’ button.
Document Path
Specify the directory location from where the document has to be uploaded.
Upload
After specifying the document path, click ‘Upload’ button to upload documents.
Once the documents are uploaded, click ’OK’ button. You will be taken back to the ‘Upload Documents’ screen.
If the required documents have been uploaded, select the action ‘PROCEED’ in the text box adjoining the ‘Audit’ button. You will be taken to the ‘Input Details’ task. Similarly, if documents are missing, then select the action ‘DOCSMissing’. You will be taken back to ‘Receive and Verify’ screen. If you are awaiting approval to proceed, then select the option ‘Seek Approval’ from the text box adjoining the ‘Audit’ button in this screen. You will be taken to ‘Approve Account Opening’ task. Remarks are mandatory in case of outcomes other than ‘PROCEED’. Click the save icon in the tool bar. The following screen will be displayed.
Click ‘OK’ button in this screen. The task is then moved to the next activity
Refer the Procedures User Manual for details about task list.

1-8
Step 2. Decide on Approval for Missing Documents / Details
In this stage, the bank decides whether to approve processing the term deposit opening request as an exception, if the account opening with incomplete details / documents as an exception is approved. If the opening of term deposit with incomplete details/documents as an exception is approved, the bank proceeds with processing the request and simultaneously arranges to follow up with the customer for submission of the pending details / documents. The decision/remarks of the approver are captured.
In this screen you can view the basic account, customer and document details. The verifier should be able to view the contents of the document uploaded.
Users belonging to the user role RCSMROLE (Retail Customer Service Manager) can perform these activities.
Go to the pending list in the system. The system displays all the pending activities. Click ‘Acquire’ button adjoining the ‘Approve Account Opening’ task to acquire it. The following screen is displayed:
If you have requisite rights, double click on the task in your ‘Assigned’ task list and invoke the following screen:

1-9
After viewing the details, if you want to obtain the missing documents before approval, then select the action ‘Obtain Missing Documents’ in the text box adjoining the ‘Audit’ button. You will be taken back to ‘Receive and Verify’ screen. However, if you want to proceed with the process of account creation, select the action ‘APPROVE’ in the text box adjoining the ‘Audit’ button. You will be taken to ‘Input Details’ task. Click save icon in the tool bar. The following screen will be displayed:
Click ‘OK’ button in this screen. You will be taken back to the ‘Approve Account Opening’ screen. Click ‘Exit’ button to exit the screen. The task is then moved to the next activity.
Step 3. Input Details of Term Deposit
In this stage, the bank captures the complete details required for opening of a term deposit such as customer information (details of all the applicants in case of joint accounts), contact details, deposit amount, tenor/ maturity date, nominee details, guardian details (in case of minor accounts / nominees), rollover details. The bank also uploads signature and photographs of the prospect/customer.
Users belonging to the user role ROEROLE (Retail Operations Executive) can perform these activities.
Go to the pending list in the system. The system displays all the pending activities. Click ‘Acquire’ button adjoining the ‘Input Details’ task to acquire it. The following screen is displayed:
If you have requisite rights, double click on the task in your ‘Assigned’ task list and invoke the following screen:

1-10
Here you can specify the following details:
Workflow Reference #
The workflow reference number is displayed here. This reference number can be used in future to query the details.
Priority
The priority selected at the first stage is displayed here.
Account Details
Specify the following account details of the customer in this section:
Branch Code
The current branch in which the account is being created is displayed.
Currency
Specify the currency to be used for the account. You can also select the account currency from the adjacent option list. The list displays all the currencies maintained in the system.
Account Class
Specify the account class for the account. You can also select the account class from the option list provided. The list displays all the account classes maintained in the system. Select and click the appropriate account class. All the facilities maintained for the account class will be applicable for the current account to be created.
Mode of Operation
Select mode of operation from the drop-down list. The options available are:
Single

1-11
Jointly
Either – Any one or Survivor
Former or Survivor
Mandate Holder
Account Type
Select the account type from the drop-down list. The options available are:
Single
Joint
Account
Specify the account number of the customer from which the initial deposit is made.
Customer No
Specify the customer for whom the saving account should be created. You can also select the customer from the adjacent option list. The list consists of all the customers maintained in the system.
Existing Customer
This field is checked if this option was checked in the ‘Receive and Verify’ screen.
3.1. Specifying Main Details
Click ‘Main’ Tab to enter the following details:
Media
Specify the media. You can also select the media from the option list provided. The list displays all the media maintained in the system. Select and click the appropriate media.
Statuses
Term Deposit Amount
Specify the amount for term deposit.
Maturity Date
Specify the maturity date from the option list.
Initial Deposit Details
In this section, specify the initial deposit details of the customer.
Required
Check this field to indicate that initial deposit is required.
Amount
Specify the initial deposit amount.

1-12
Currency
Specify the currency in which the initial amount is deposited. You can also select the appropriate currency from the adjacent option list. The list consists of all the currencies maintained in the system.
Payment Mode
Select the mode of initial payment. The options available are:
Cash
Cheque
Account No
Specify the account number if the initial deposit is made though the account.
Cheque No
Specify the cheque number if the initial deposit is made through cheque.
Date
Specify the date of the cheque.
Drawn On
Specify the bank on which the cheque is drawn.
Deposit Details
In this section, specify the deposit details of the customer:
Rollover Type
Select the rollover type from the drop-down list. The options available are:
Principal Principal+Interest Special Amount
Rollover Amount
Specify the rollover amount.
Term Deposit pay in option
Select the term deposit pay in option from the drop-down list. The options available are:
Pay In By GL
Pay in By Cash
Pay in By Savings
Offset Branch
Specify the branch id for the offset account from the option list.
1-13
Account
Specify the customer account from which the money is to be debited for booking the TD. The customer account can also be selected from the option list, which displays valid account numbers that are maintained in the branch specified in the Offset Branch field.
Principal Liquidation Branch
Specify the branch in which the principal liquidation account is maintained from the option list.
Principal Liquidation Account
Specify the account in which the principal should be liquidated. The customer account can also be selected from the option list, which displays valid account numbers that are maintained in the branch specified in the Principal Branch field.
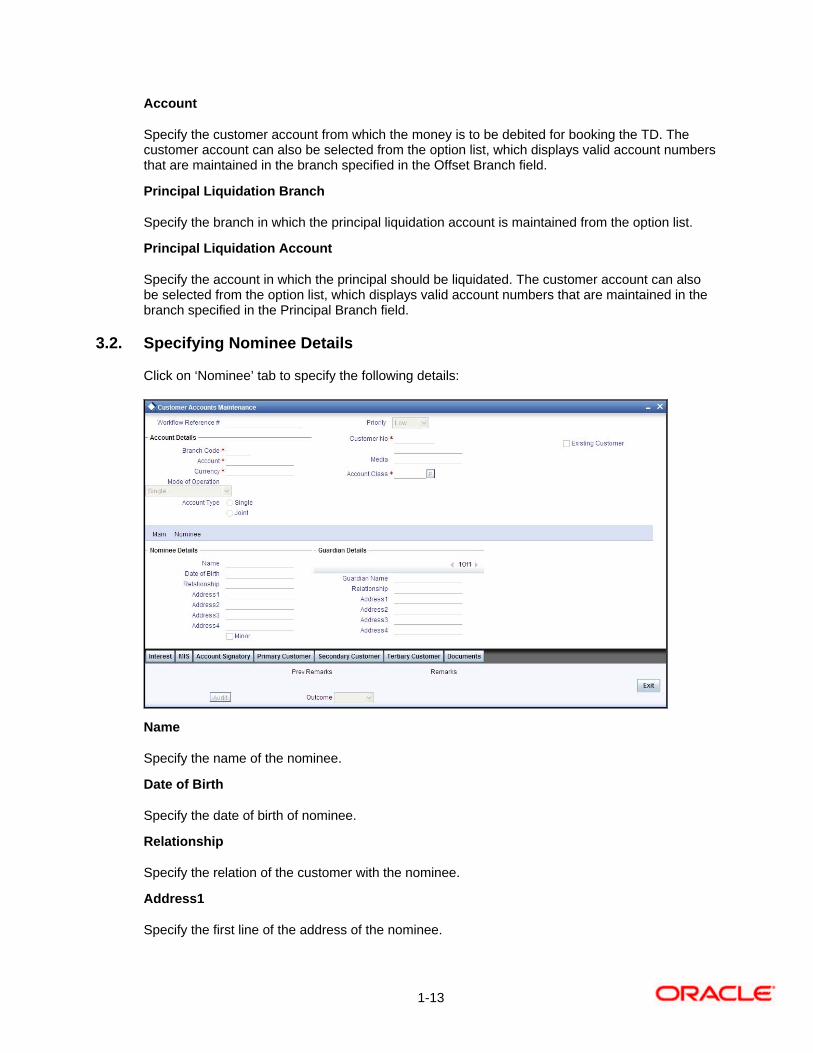
3.2. Specifying Nominee Details
Click on ‘Nominee’ tab to specify the following details:
Name
Specify the name of the nominee.
Date of Birth
Specify the date of birth of nominee.
Relationship
Specify the relation of the customer with the nominee.
Address1
Specify the first line of the address of the nominee.

1-14
Address2
Specify the second line of the address of the nominee.
Address3
Specify the third line of the address of the nominee.
Address4
Specify the forth line of the address of the nominee.
Minor
Select this option if the nominee is a minor.
Guardian Name
Specify the guardian name of the minor.
Relationship
Specify the relation of the minor with the guardian.
Address1
Specify the first line of the address of the guardian.
Address2
Specify the second line of the address of the guardian.
Address3
Specify the third line of the address of the guardian.
Address4
Specify the forth line of the address of the guardian.

1-15
3.3. Specifying Interest Details
Enter interest details by invoking the ‘IC Special Conditions Maintenance’ Screen. Click ‘Interest’ button to invoke this screen
Click ‘Deposit’ tab to input deposit details. The screen is displayed below:

1-16
Refer the ‘Applying Interest Product on Account’ chapter in the ‘Interest and Charges’ User
Manual for details about applying interest to an account.
3.4. Specifying MIS Details
Enter MIS details by invoking the ‘Management Information System’ Screen. Click ‘MIS’ button to invoke this screen

1-17
Refer the Management Information System User Manual for further details.
Click ‘Change Log’ button to invoke ‘Change Log’ screen.
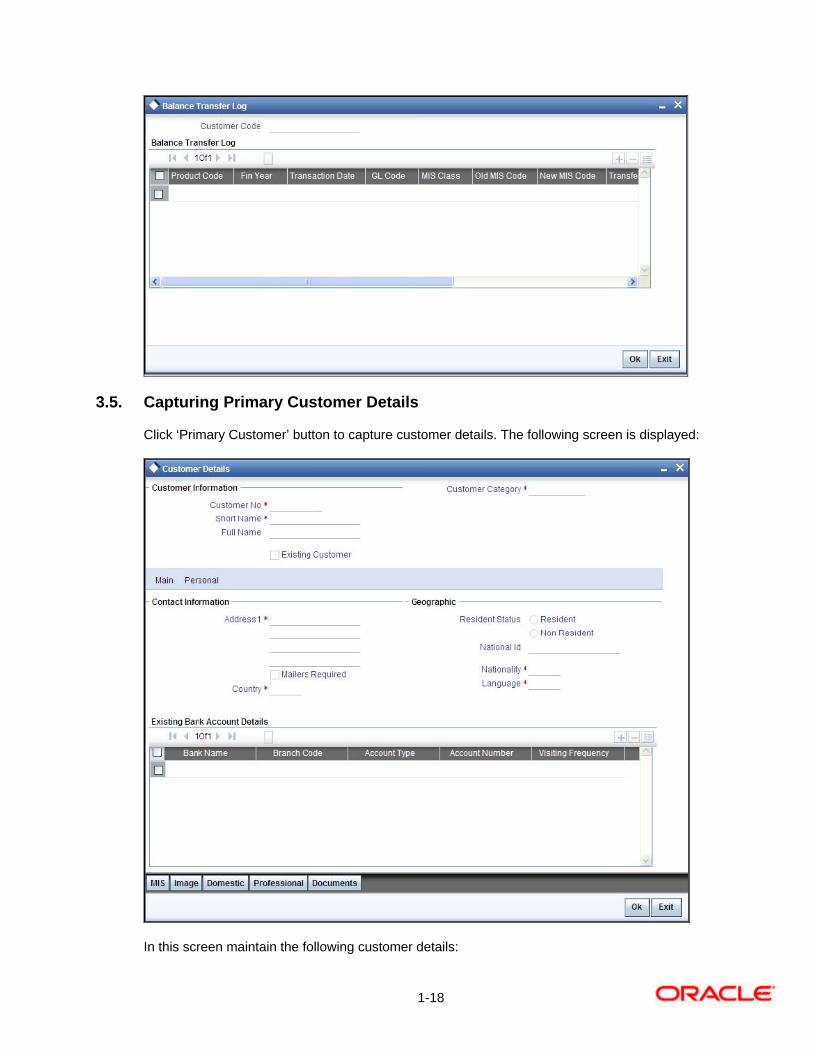
Click ‘Transfer Log’ button to invoke ‘Balance Transfer Log’ screen:
1-18
3.5. Capturing Primary Customer Details
Click ‘Primary Customer’ button to capture customer details. The following screen is displayed:
In this screen maintain the following customer details:

1-19
Customer Information
In this section, specify the basic information of the customer.
Customer No
Specify the customer number for whom the current account is being created. You can also select the appropriate customer from the adjacent option list. The list displays all the valid and authorized customers maintained in the system.
Short Name
Along with the Customer Code you have to capture the customer’s abbreviated name. The description that you capture is unique for each customer. It helps in conducting a quick alpha-search or generating queries regarding the customer.
Full name
The full name of the selected customer is displayed.
Customer Category
Specify the category in which the customer belongs. You can also select the appropriate customer category from the adjacent option list and indicate the category under which the particular customer is categorized. Each customer that you maintain can be categorized under any one of the categories that you have maintained in the system.
Existing Customer
If the customer is the existing customer, then this field is checked and you cannot edit the same.
3.5.1. Capturing Primary Customer Main Details
Click ‘Main’ tab to input the following contact details of the customer:
Address
Specify the address of the customer.
Mailers Required
Check this box to indicate whether the mailers required or not.
Country
Specify the country in which the customer resides. You can also select the appropriate country from the adjacent option list. The list displays a list of countries maintained in the system.
Resident Status
Indicate the customer’s resident status. The options are as given below:
Resident
Non Resident
National ID
Specify the national Id of the customer.
1-20
Nationality
Specify the nationality of the customer. You can also select the nationality of the customer from the adjacent option list. The list displays a list of countries maintained in the system.
Language
As part of maintaining customer accounts and transacting on behalf of your customer, you will need to send periodic updates to your customers in the form of advices, statement of accounts and so on.
Indicate the language in which your customer wants the statements and advices to be generated.
Existing Bank Account Details
If the customer is an existing bank customer, then specify the following details:
Bank Name
Specify the name of the bank in which the customer is holding an account.
Branch Code
Indicate the name of the bank’s branch in which the customer is holding an account.
Account Type
Specify the type of account the customer is holding.
Account No
Specify the existing account number of the customer.
Visiting Frequency
Specify the number of times the customer visits or transacts with the existing bank.
3.5.2. Capturing Primary Customer Personal Details
Click ‘Personal’ tab to view the following given screen:

1-21
Step 4. Verify Details of Input
In this stage, the bank verifies all the details entered to ensure correctness of information captured. In case the details captured are incorrect, the bank needs to make the necessary amendments.
Select the desired record and click the adjoining ’Acquire’ button. The following screen will be displayed.
The task will then be moved to your ‘Assigned’ task list. Double click on the record in your ‘Assigned’ task list. The following screen will be displayed.
The following screen will be displayed which is similar to the screen in the Input details stage.

1-22
The fields in the screen are disabled. The verifier is able to navigate to all tabs and verify data entered/corrected. The verifier can enter comments. In case the outcome selected is ‘Failed’ the process will move to the ‘Modify Input Details’ stage and in case the outcome selected is ‘Successful’, the task will then moved to the next activity once you click the ‘OK’ button in this screen.

1-23
Step 5. Modify Details of Input
In this stage In case verification is not successful, the bank modifies the details captured.
Users belonging to the user role ROEROLE (Retail Operations Executive) can perform these activities.
In case verification is not successful, then you may need to modify few details. Go to the pending list in the system. The system displays all the pending activities. Click ‘Acquire’ button adjoining the required task to acquire it. The following screen will be displayed.
If you have requisite rights, double click on the task in your ‘Assigned’ task list and invoke the following screen:
In this screen you can modify the editable fields. After modifying the required details, click save icon in the tool bar. You will be taken back to ‘Verify Details’ task. Click save icon in the tool bar to save the record. The following screen will be displayed:
1-24
Click the ‘OK’ button in this screen. You will be taken back to the ‘Modify Details’ screen. Click ‘Exit’ button to exit the screen. The task is then moved to the next activity
Step 6. KYC_C Review Info
This process includes checks like SDN check, internal blacklist check, contact details verification, etc. The account is opened only when the customer passes all these checks. In case of non-clearance of any of the checks, the account opening process is terminated. The bank verifies all the details/documents to ensure that the information / documents required to carry out KYC checks are obtained. In case the details captured are incorrect, the bank makes the necessary modifications. If the verification is successful, the bank proceeds to conduct KYC checks. Once KYC checks are carried out, the result is passed on to the parent process.
If any of the checks fail, the relevant regulatory /internal authorities are informed. Once KYC checks are carried out, the result is passed on to the parent process.
Here you perform the Know Your Customer check on the customer. The KYC check depends upon the regulatory environment within which your bank operates and its internal KYC policies.
Bank initiates the process of KYC-C review for a customer as a part of parent process with all the relevant information in the system. This process comprises the following stages:
Verify prospect /customer details
Ascertain if KYC checks are required
SDN checks
Verify SDN Match
Inform Regulatory / Internal authorities on KYC checks failure
Internal Black List check
Verify customer / prospect contact details
Other KYC Checks
KYC Decision

1-25
1-26
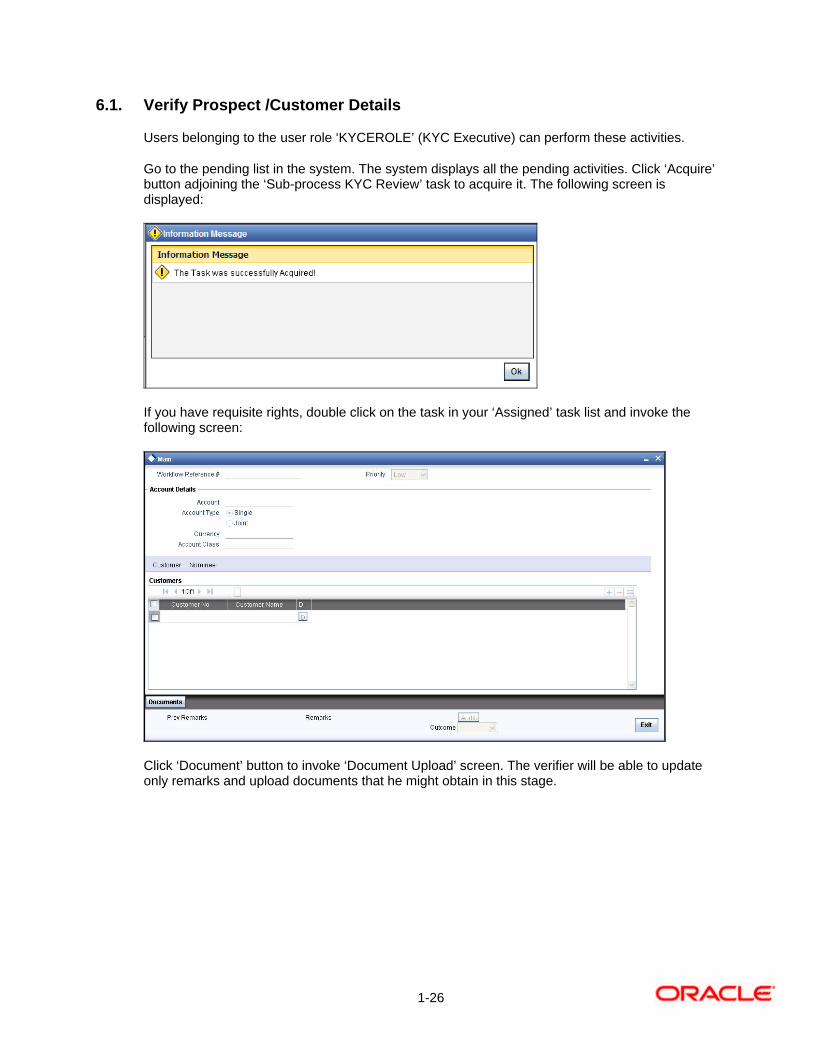
6.1. Verify Prospect /Customer Details
Users belonging to the user role ‘KYCEROLE’ (KYC Executive) can perform these activities.
Go to the pending list in the system. The system displays all the pending activities. Click ‘Acquire’ button adjoining the ‘Sub-process KYC Review’ task to acquire it. The following screen is displayed:
If you have requisite rights, double click on the task in your ‘Assigned’ task list and invoke the following screen:
Click ‘Document’ button to invoke ‘Document Upload’ screen. The verifier will be able to update only remarks and upload documents that he might obtain in this stage.

1-27
You can view the customer details in this screen. If the customer information is complete, then select the outcome as ‘COMPLETE’ and save the record by clicking the save icon in the tool bar. The following screen will be displayed:
The task is then moved to the next activity.
6.2. Ascertain if KYC Checks are Required
Users belonging to the user role ‘KYCMROLE’ (KYC Manager) can perform these activities.
In case of an existing customer, the bank checks if there are any changes to the existing KYC information already available with the bank. The KYC check for an existing customer is performed only if there are changes in the customer information (including details of nominee and mandate holder). In all other cases of new and existing customers, KYC checks are mandatory.

1-28
You can view the customer details in this screen and save the record by clicking the save icon in the tool bar. Outcome for this stage can either ‘REQUIRED’’ or ‘NOT REQUIRED’. The following screen will be displayed:
The task is then moved to the next activity.
6.3. SDN Check
In this stage, the bank checks the applicant’s name for terrorism-related black-listing against the SDN database maintained by the Office of Foreign Assets Control (OFAC). In case of a no match, the process proceeds. In case of a match (positive/partial), you can verify the match again using the OFAC guidelines.
A system Task is created which invokes the external service to do the SDN check for all new applicants and any existing customers whose information is modified. All nominee details are also sent for SDN check.
6.4. Verify SDN Match
The bank checks the applicant’s name for terrorism-related black-listing against the SDN database maintained by the Office of Foreign Assets Control (OFAC). In case of a no match, the process proceeds. In case of a match (positive/partial), you can verify the match again using the OFAC guidelines.

1-29
Users belonging to the user role ‘KYCMROLE’ (KYC Manager) can perform these activities.
Go to the pending list in the system. The system displays all the pending activities. Click ‘Acquire’ button adjoining the ‘Verify SDN Match’ task to acquire it. The following screen is displayed:
If you have requisite rights, double click on the task in your ‘Assigned’ task list and invoke the following screen:
In this screen, you can view the applicant’s details. In case of a positive SDN match, the bank informs the regulatory agency (OFAC or any other similar agency) about the SDN match of the prospect/customer. However, if the match is cleared, you can continue with the subsequent KYC checks. Save the record by clicking the save icon in the tool bar. The Outcomes for this stage are ‘Cleared’, ‘Not Cleared’. The following screen will be displayed:

1-30
Click ‘Ok’ button. The task is then moved to the next activity.
6.5. Inform Regulatory / Internal Authorities on KYC Checks Failure
In case of a positive SDN match, the bank informs the regulatory agency (OFAC or any other similar agency) about the SDN match of the prospect/customer. The bank may also inform its internal authorities in case of positive SDN match and/or if the prospect/customer is blacklisted internally.
Users belonging to the user role ‘KYCMROLE’ (KYC Manager) can perform these activities.
6.6. Internal Blacklist Check
Users belonging to the user role ‘KYCEROLE’ (KYC Executive) can perform these activities.
Go to the pending list in the system. The system displays all the pending activities. Click ‘Acquire’ button adjoining the ‘Internal Blacklist Check’ task to acquire it. The following screen is displayed:
If you have requisite rights, double click on the task in your ‘Assigned’ task list and invoke the following screen:
Click ‘Int. BlackList Check’ button to invoke ‘Blacklist Check’ screen. The verifier will be able to update only remarks and upload documents that he might obtain in this stage.

1-31
In this screen, you can view the applicant’s details. If the applicant’s name is listed in the bank's internal list of global blacklisted customers, you can report it to the internal authorities of the bank. You can continue with the process of creating account only when the customer passes these checks. The outcomes for this stage are ‘PROCEED’ and ‘REJECT’. Select the outcome as ‘PROCEED’ and save the record by clicking the save icon in the tool bar. If the customer clears the check . In case the customer is a blacklisted customer select the outcome as ‘REJECT’ The system then will move to Inform Regulatory Authorities Stage. The following screen will be displayed:
Click ‘Ok’ button. The task is then moved to the next activity.
6.7. Verify Customer / Prospect Contact Details
Users belonging to the user role ‘KYCEROLE’ (KYC Executive) can perform these activities.
Go to the pending list in the system. The system displays all the pending activities. Click ‘Acquire’ button adjoining the ‘Internal Blacklist Check’ task to acquire it. The following screen is displayed:

1-32
If you have requisite rights, double click on the task in your ‘Assigned’ task list and invoke the following screen:
In this screen, you can view the applicant’s details. As per the bank’s mandated policy, you will have to perform the customer identification check. This involves verification of customer address, phone number etc. The outcome of the various stages is displayed in the Audit block for the verifier to make a decision. The outcomes for this stage are ‘PROCEED ‘ and ‘REJECT’ After selecting the outcome save the record by clicking on the save icon of the tool bar.The following screen will be displayed:
Click ‘Ok’ button. You will be taken back to the ‘Verify Prospect Contact Details’ screen. Click ‘Exit’ button to exit the screen. The task is then moved to the next activity.

1-33
6.8. Other KYC Checks
As per the bank’s mandated policy, you will have to other details like verification of the employer information, verification of the income information, sources and uses of funds etc.
Users belonging to the user role ‘KYCEROLE’ (KYC Executive) can perform these activities.
Go to the pending list in the system. The system displays all the pending activities. Click ‘Acquire’ button adjoining the ‘OtherKYCChecks’ task to acquire it. The following screen is displayed:
If you have requisite rights, double click on the task in your ‘Assigned’ task list and invoke the following screen:
In this screen, you can view and verify the applicant’s details. After verifying the details, select the outcome as ‘PROCEED’ and save the record by clicking the save icon in the tool bar. The following screen will be displayed:

1-34
Click ‘Ok’ button. The task is then moved to the next activity.
6.9. KYC Decision
After verifying and evaluating the KYC information, bank decides whether it should enter into a relationship with the prospect/continue relationship (in case of an existing relationship) or not.
Users belonging to the user role ‘KYCMROLE’ (KYC Manager) can perform these activities.
Go to the pending list in the system. The system displays all the pending activities. Click ‘Acquire’ button adjoining the ‘KYCDecision’ task to acquire it. The following screen is displayed:
If you have requisite rights, double click on the task in your ‘Assigned’ task list and invoke the following screen:

1-35
In this screen, you can view the complete information of the applicant. The outcome of various stages of KYC-R sub process is displayed in the Audit block. Based on these information, you can inform the customer if you enter into a relationship with the prospect/continue relationship (in case of an existing relationship) or not as part of the parent process.
Based on the decision, select the outcome as ‘FAILED’ or ‘PASSED’ and save the record by clicking the save icon in the tool bar. The following screen will be displayed:
Click ‘Ok’ button. The task is then moved to the Main process.
Step 7. Block Customer in the System
For an existing customer if the KYC check fails, then the system will block all the existing accounts for the customer as per the bank's internal guidelines. The failed customers will be added into the internal backlist database.
Step 8. Generate Advice of Rejection of Request for Opening TD
In this stage, the bank generates term deposit receipt / confirmation advice mentioning the complete details of the term deposit opened by the bank.
Step 9. Dispatch Advice of Rejection

1-36
In this stage, the bank dispatches the advice of rejection to the prospect. The documents obtained along with the deposit opening form, if any, are also returned as part of this activity.
Users belonging to the user role ROEROLE (Retail Operations Executive) can perform these activities.
Step 10. Check if Funds are Available for Opening TD Account
In this stage, the bank checks whether the funds are available for opening the term deposit account. In case the deposit amount is by way of cash/cheque, the bank checks the appropriate settlement account to confirm receipt of deposit amount. In case the deposit amount is by way of transfer from another account of the bank, the bank checks the account balance.
Users belonging to the user role ROEROLE (Retail Operations Executive) can perform these activities.
Step 11. Create Customer / Modify Customer Details in the System
If the applicant is a new customer, then a new customer record is created in the system. In case of an existing customer, the customer's KYC information is updated. Similarly, if a joint account is opened where multiple customer IDs need to be created/updated, then the same is done in the system as part of this activity.
Step 12. Book Term Deposit
In this stage, the bank creates the term deposit in Oracle FLEXCUBE and also links it to the customer ID. In case of a deposit in joint names, the bank links all the applicable customer IDs to the deposit account.
Step 13. Generate Term Deposit Receipt / Confirmation Advice
In this stage, the bank generates term deposit receipt / confirmation advice mentioning the complete details of the term deposit opened by the bank.

1-37
Step 14. Store Document Reference Number in the System
The bank stores the document reference in Oracle FLEXCUBE for future reference. The documents that are captured and uploaded into the DMS system generates a reference number which are linked to the contract reference number and saved in Oracle FLEXCUBE for future reference.
Step 15. Dispatch Confirmation Advice and Store Documents
In this stage, the bank dispatches / hands over the term deposit receipt/ confirmation advice to the customer. The bank stores the deposit opening form and other supporting documents in a safe and accessible location.
The bank also captures:
The details of the documents stored
While storing, the bank ensures that all the required documents (as per the bank's policy) are available in the storage
Users belonging to the user role ROEROLE (Retail Operations Executive) can perform these activities.
You can store the current account opening form and other supporting documents are stored in a safe and accessible location. This storage information can be recorded using ‘Store Documents’ screen. You can capture the storage details in this stage.
Click ‘Acquire’ button adjoining the ‘Store Documents’ task to acquire it. The following screen will be displayed.
If you have requisite rights, double click on the task in your ‘Assigned’ task list and invoke the following screen.

1-38
In this screen the following information can be stored:
Workflow Reference #
The workflow reference number is displayed.
Priority
Select the priority for maintaining the documents.
Customer Information
The following customer information is displayed:
Customer Name
Customer Number
Account Details
The current account number of the customer is displayed.
Storage Details
Capture the following storage details in this section:
Date Of Storage
Capture the date of storing the documents.
Time Of Storage
Specify the time of storing the documents of the current account.
Place Of Storage
Mention the place where the document is stored.

1-39
Storage Ref. Number
Specify the storage reference number.
Select the action ‘Document Stored’ in the textbox adjoining the ‘Audit’ button in this screen and save the record by clicking the save icon in the tool bar. The following screen will be displayed:
Click ‘Ok’ button.

Retail Term Deposit Account Creation [May] [2011] Version 11.3 Oracle Corporation World Headquarters 500 Oracle Parkway Redwood Shores, CA 94065 U.S.A. Worldwide Inquiries: Phone: +1.650.506.7000 Fax: +1.650.506.7200 www.oracle.com/ financial_services/ Copyright © [2011] Oracle Financial Services Software Limited. All rights reserved. No part of this work may be reproduced, stored in a retrieval system, adopted or transmitted in any form or by any means, electronic, mechanical, photographic, graphic, optic recording or otherwise, translated in any language or computer language, without the prior written permission of Oracle Financial Services Software Limited. Due care has been taken to make this document and accompanying software package as accurate as possible. However, Oracle Financial Services Software Limited makes no representation or warranties with respect to the contents hereof and shall not be responsible for any loss or damage caused to the user by the direct or indirect use of this document and the accompanying Software System. Furthermore, Oracle Financial Services Software Limited reserves the right to alter, modify or otherwise change in any manner the content hereof, without obligation of Oracle Financial Services Software Limited to notify any person of such revision or changes. All company and product names are trademarks of the respective companies with which they are associated.