Resources Healthy Rangers Lones Program STEM Environment ...€¦ · Treasure Hunt in the Snow (S,...
8
Inside this issue: Fun Flexible Creative Self Esteem Special Needs Lones Resources Healthy Lifestyles Rangers STEM Environment Program FunFinder Stuffed (Service) Snowman 1 Fabric Rag Wreath 2 Winter Clothes Relay 2 Snow Painting 2 No-Sew Scarf 2 Snow Treasure Hunt 3 Footprint Freeze Tag 3 No-Sew Hat 3 Snowshoe Charades 4 Snowshoe Hare Chase 4 Hat Crafts 4 Winter “Frosty Says” 4 Ice Hanger 5 Spa Gifts 5 Sock Snowman 6 Winter Pictionary 6 Santa Ornament Craft 6 More Activity Ideas! 7 Program Connections 8 BC PROGRAM COMMITTEE December 2016 © Girl Guides of Canada - BC Program Committee related activities that can be done wherever you are. We had so many ideas for this issue that we added a whole extra section with quick ideas that you can elaborate on however you wish. Check out page 7 to look at this list. As usual, there are Program Connections on the last page. Remember—there are always more program connections to be made, In the last issue of the FunFinder we tried to focus on taking program outdoors. This issue we focus on activities that can be done both inside and outside during the winter months. Even though the weather is getting cold, that doesn’t mean all your meetings need to be inside. There are plenty of things to be done in the snow. If you don’t get very much snow, we’ve got some winter Program in the Winter Wonderland so be creative. Have fun in the magical season of Winter! (S, B, G, P, R) Supplies A roll of toilet paper A pair of white tube socks Fun foam sticky dots Strips of fleece or ribbon Second pair of socks or gloves or small toiletry items (sock stuffers) Directions 1. Take whatever you are using as a sock stuffer and put in the toe of the first sock. Twist the sock around and fold it back onto itself to make a ball. 2. Place this ball into the toe of the second sock. This is the head of the snowman! 3. Stretch the rest of the sock over your roll of toilet paper. Any extra sock can be tucked up into the centre of the roll. 4. Optional: if you are going to donate these, feel free to tuck extra toiletries or a note for the recipient into the inside of the toilet paper roll. 5. Tie the fleece or ribbon around the neck to Stuffed (Service) Snowman! Photo by Elizabeth Hardy create a scarf and wrap some around the top of the head to create a hat. 6. Use the fun foam stickers dots to create a face and your snowman is complete! It is also optional to use permanent felts for this part.
Transcript of Resources Healthy Rangers Lones Program STEM Environment ...€¦ · Treasure Hunt in the Snow (S,...

Inside this issue:
Fun Flexible
Creative Self
Esteem
Special
Needs
Lones
Resources Healthy
Lifestyles Rangers
STEM Environment Program
FunFinder
Stuffed (Service)
Snowman 1
Fabric Rag Wreath 2
Winter Clothes Relay 2
Snow Painting 2
No-Sew Scarf 2
Snow Treasure Hunt 3
Footprint Freeze Tag 3
No-Sew Hat 3
Snowshoe Charades 4
Snowshoe Hare Chase 4
Hat Crafts 4
Winter “Frosty Says” 4
Ice Hanger 5
Spa Gifts 5
Sock Snowman 6
Winter Pictionary 6
Santa Ornament Craft 6
More Activity Ideas! 7
Program Connections 8
BC PROGRAM COMMITTEE
December 2016
© Girl Guides of Canada - BC Program Committee
related activities that can
be done wherever you
are.
We had so many ideas for
this issue that we added a
whole extra section with
quick ideas that you can
elaborate on however you
wish. Check out page 7 to
look at this list.
As usual, there are
Program Connections on
the last page.
Remember—there are
always more program
connections to be made,
In the last issue of the
FunFinder we tried to
focus on taking program
outdoors. This issue we
focus on activities that can
be done both inside and
outside during the winter
months.
Even though the weather
is getting cold, that doesn’t
mean all your meetings
need to be inside. There
are plenty of things to be
done in the snow. If you
don’t get very much snow,
we’ve got some winter
Program in the Winter Wonderland so be creative. Have fun
in the magical season of
Winter!
(S, B, G, P, R) Supplies
A roll of toilet paper
A pair of white tube socks
Fun foam sticky dots
Strips of fleece or ribbon
Second pair of socks or gloves or small
toiletry items (sock stuffers)
Directions
1. Take whatever you are using as a sock stuffer and put in the toe of the first sock. Twist the sock around and fold it back onto itself to make a ball.
2. Place this ball into the toe of the second sock. This is the head of the snowman!
3. Stretch the rest of the sock over your roll of toilet paper. Any extra sock can be tucked up into the centre of the roll.
4. Optional: if you are going to donate these, feel free to tuck extra toiletries or a note for the recipient into the inside of the toilet paper roll.
5. Tie the fleece or ribbon around the neck to
Stuffed (Service) Snowman!
Photo by Elizabeth Hardy
create a scarf and wrap some around the top of the head to create a hat.
6. Use the fun foam stickers dots to create a face and your snowman is complete! It is also optional to use permanent felts for this part.
FunFinder (December 2016) © Girl Guides of Canada - BC Program Committee Page 2
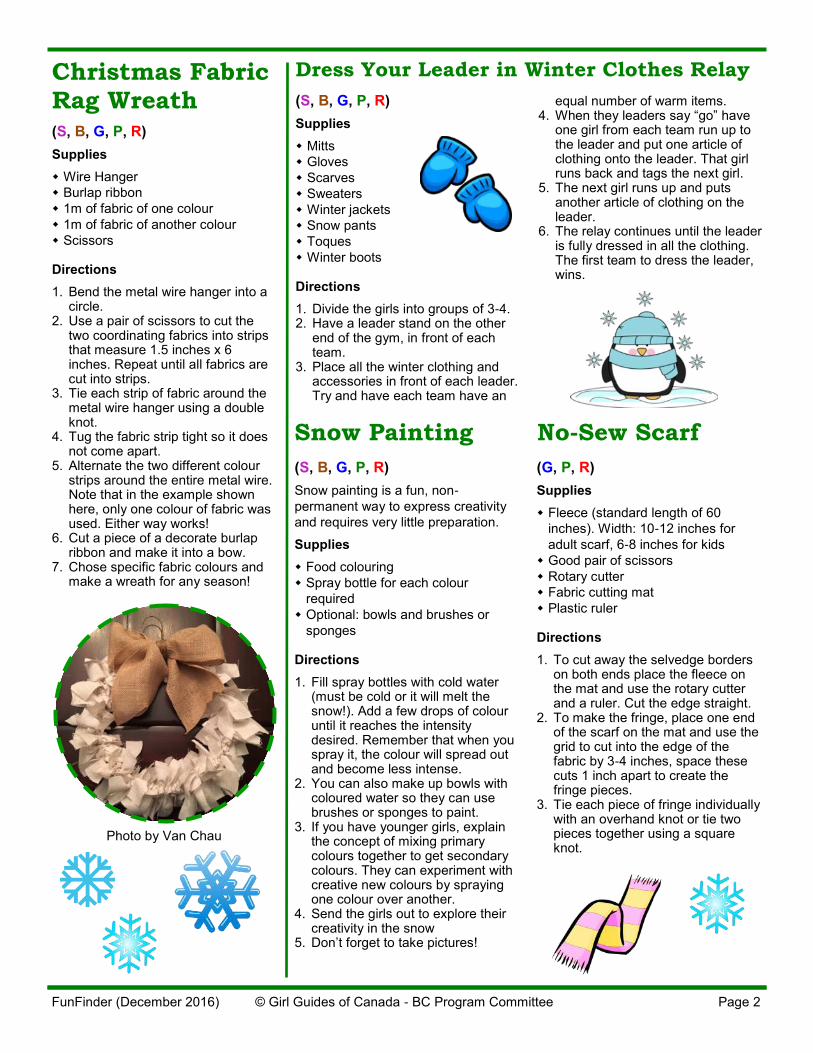
Christmas Fabric Rag Wreath (S, B, G, P, R) Supplies
Wire Hanger
Burlap ribbon
1m of fabric of one colour
1m of fabric of another colour
Scissors
Directions
1. Bend the metal wire hanger into a circle.
2. Use a pair of scissors to cut the two coordinating fabrics into strips that measure 1.5 inches x 6 inches. Repeat until all fabrics are cut into strips.
3. Tie each strip of fabric around the metal wire hanger using a double knot.
4. Tug the fabric strip tight so it does not come apart.
5. Alternate the two different colour strips around the entire metal wire. Note that in the example shown here, only one colour of fabric was used. Either way works!
6. Cut a piece of a decorate burlap ribbon and make it into a bow.
7. Chose specific fabric colours and make a wreath for any season!
(S, B, G, P, R) Supplies
Mitts
Gloves
Scarves
Sweaters
Winter jackets
Snow pants
Toques
Winter boots
Directions
1. Divide the girls into groups of 3-4. 2. Have a leader stand on the other
end of the gym, in front of each team.
3. Place all the winter clothing and accessories in front of each leader. Try and have each team have an
equal number of warm items. 4. When they leaders say “go” have
one girl from each team run up to the leader and put one article of clothing onto the leader. That girl runs back and tags the next girl.
5. The next girl runs up and puts another article of clothing on the leader.
6. The relay continues until the leader is fully dressed in all the clothing. The first team to dress the leader, wins.
Dress Your Leader in Winter Clothes Relay
Snow Painting
(S, B, G, P, R) Snow painting is a fun, non-
permanent way to express creativity
and requires very little preparation.
Supplies
Food colouring
Spray bottle for each colour
required
Optional: bowls and brushes or
sponges
Directions
1. Fill spray bottles with cold water (must be cold or it will melt the snow!). Add a few drops of colour until it reaches the intensity desired. Remember that when you spray it, the colour will spread out and become less intense.
2. You can also make up bowls with coloured water so they can use brushes or sponges to paint.
3. If you have younger girls, explain the concept of mixing primary colours together to get secondary colours. They can experiment with creative new colours by spraying one colour over another.
4. Send the girls out to explore their creativity in the snow
5. Don’t forget to take pictures!
No-Sew Scarf
(G, P, R) Supplies
Fleece (standard length of 60
inches). Width: 10-12 inches for
adult scarf, 6-8 inches for kids
Good pair of scissors
Rotary cutter
Fabric cutting mat
Plastic ruler
Directions
1. To cut away the selvedge borders on both ends place the fleece on the mat and use the rotary cutter and a ruler. Cut the edge straight.
2. To make the fringe, place one end of the scarf on the mat and use the grid to cut into the edge of the fabric by 3-4 inches, space these cuts 1 inch apart to create the fringe pieces.
3. Tie each piece of fringe individually with an overhand knot or tie two pieces together using a square knot.
Photo by Van Chau

FunFinder (December 2016) © Girl Guides of Canada - BC Program Committee Page 3
Treasure Hunt in the Snow (S, B, G) Supplies
20 random waterproof items (ex.
Balls, Frisbees)
Bags for girls to gather items in.
Directions
1. Find a large open area covered with fresh snow (yard or field).
2. Toss the 20 items into the snow,
spread around the large area. 3. Divide the girls into two groups. 4. When the leader says “go”, have
the girls quickly run and find as many items as possible in a given period of time (ex. 1-2 minutes).
5. Have the girls place the items that they find in their bag.
6. A t the end of the 1-2 minutes, have two teams show all the items that they found. The team with the most items win.
Footprint Freeze Tag in the Snow (S, B, G)
Directions
1. Choose the boundries for the play area. Pick an open area covered with fresh snow. The girls who are “not-it” must stay within these boundaries.
2. The leaders will run around to set footprints in the fresh snow for the first round.
3. The girls an only step in footprints
No-Sew Hat (G, P, R) Supplies
Fleece
Good pair of scissors
Ruler
Directions
1. Cut a rectangle for the hat. The height should be 13-14 inches. The width should be the circumference of the head plus 2 inches.
2. Fold the rectangle in the half vertically.
3. Cut 3/4 to 1 inch fringe that is 2 inches long from top to bottom on the open side of the double fabric, cutting through both layers at the same time to make the fringe an exact duplicate top and bottom. See figure 1. Either mark the 2 inch line ahead of tie or place a ruler down so all the fringe is exactly two inches deep.
4. When finished, re-hold the fabric so
the fringed ends meeting in the middle. Using square knots, tie the bottom two pieces of fringe together, and continue working your way up until you reach the desired hat height. See figure 2 and 3.
5. Fold the bottom of the hat up twice to form the brim making sure you have the right height for the hat.
6. There should be some remaining height that hasn’t been tied. Cut off the fringes that remain. Using your ruler as a guide, cut down from the top to make 1/2 inch fringing that comes down to just about (1/2 inch) the last knot you tied.
7. Scrunch your hands around the fringed ends and tie the long piece of fleece around it with a knot.
8. To finish, you can trim the fringe at the top and down the hat to a length that you like.
that are already set in the snow. 4. Designate a girl to be “it”. Her goal
is to touch as many girls as possible.
5. When the girls get tagged by “it” girl, these girls cannot move.
6. The only way these “frozen girls” can become unfrozen is if the “unfrozen girls” tag the frozen girls. They can continue to run around in the snow.
7. The game continues until all unfrozen girls are tagged.
Fig. 1
Fig. 2
Fold up
and tie the
last knots
on the
reverse
side.
Fig. 3

FunFinder (December 2016) © Girl Guides of Canada - BC Program Committee Page 4
Snowshoe Hare Chase (B, G, P, R)
Supplies
snowshoes for everyone
Directions
1. Divide the group into 2 teams. 2. Send one group of girls out
snowshoeing first with a leader. This group gets a head start.
3. The second group later tries to follow the trail by using the tracks in the snow left by the first group
(B, G, P, R)
Supplies
snowshoes for everyone
Directions
1. Divide the girls into 2 teams. 2. Have one girl in each team go up in
front of her teammates with her snowshoes on.
3. Have each of the two girls with the snowshoes on draw a simple shape (eg. Heart, box, star, sun, etc.) in the snow with her snowshoes.
4. The first team to guess what the shape is, wins a point for her team.
5. Have a new girl go up for the next round.
6. Continue this game until the team that gets to 10 points first wins, or until everyone has had a turn.
Snowshoe Charades
Winter “Frosty Says” (S, B) This is the winter version of “Simon
Says”.
Directions
1. A girl is chosen to be “Frosty” and all the other girls are players
2. Frosty stands in front of the entire group of girls.
3. Frosty can give the commands in two different ways: a. starting the command with “Frosty Says” b. simply stating the command without saying “Frosty Says”
4. Depending on how the command is phrased, the players can either decide to obey by doing the action, or not.
5. Frosty tells the players what they must do. For example, “Frosty Says to Go Skiing”, “Frosty Says to Throw Snowballs”….
6. The players must only obey commands that begin with “Frosty Says”.If Frosty simply states the command without saying “Frosty Says”, the players should stay still.
7. Players who do the actions incorrectly get eliminated.
Skating Boot Hat Craft
(S, B, G)
Supplies
felt
needle and embroidery thread
large paper clip
scissors
safety pin
Directions
1. Fold a piece of felt in half. Use a pair of scissors to cut out a boot shape that is slightly shorter than the length of a large paper clip.
2. Slip one side of the boot through the large paper clip, lengthwise.
3. Use a needle and some thread to sew around the perimeter of the felt boot.
4. Sew along the bottom of the felt skate (top of the paper clip) so that the skate is held in place to the paper clip.
5. Using another coloured thread, sew the top of the boot together making loops and criss-cross patterns so that they look like laces of a skating boot. Make a nice bow at the top of the skating boot and add a safety pin
(G, P, R) This idea was featured in our last
issue, but we’ve thrown it in again
because it goes well with some of the
other ideas on this page.
Supplies
piece of tan fun foam (1cm x 8cm)
beige string
scissors
safety pin
Directions
1. Hold the two ends of the fun foam strip together so that it looks like a tear drop.
2. Wrap the beige string around the fun foam so that it fastens the two ends together.
3. Continue to wrap the string around the fun foam tightly to create the frame of the snowshoe.
Snow Shoe Hat Craft 4. To make the base of the snowshoe,
wrap the string around the frame and across to the other side so it creates a “net” pattern as seen to below.
Photos on this page by Van Chau

the middle. 6. Add either candle dye or coloured
crayons in small pieces to the melted wax. Stir it in and let the wax cool slightly.
7. Slowly pour the wax into the mold without splashing and pour evenly around the entire mold area.
8. Let the candle cool—when this is done you’ll be able to pour off the water/melted ice.
9. When you remove the candle from the mold, the ice will have left a beautiful pattern of holes on the outside of your candle.
10.If you want a solid candle, you can choose to pour a second colour into the mold after you have drained off the melted ice water. This second colour will fill some of the holes left by the ice cubes.
FunFinder (December 2016) © Girl Guides of Canada - BC Program Committee Page 5
Spa Products
Make spa products using the below recipes and labels. Donate them to a local transition home or women’s shelter for
Christmas or Valentine’s gifts.
Ice Candles (G, P, R) Supplies
wax
candle dye of coloured crayons
candle wick
thermometer
pillar candle molds or straight tin
cans (e.g. small soup cans)
ice cubes of various sizes (ideally
between 1/2 and 3/4 inch)
newspaper
paper towels for messes
Mold putty or paperclip
old cookie sheet or pan
metal spoon or stir stick
utility knife
scissors
double boiler and sauce pan
Directions
1. Cover your work area with newspaper to avoid messes.
2. Put water into double boiler and bring to a boil
3. Cut wax into pieces and put the pieces into the double boiler. Heat wax to approximately 175-185 degrees or until melted. Do not let wax get too hot and be sure to never leave it unattended.
4. Prepare your metal tin or candle mold on top of the old cookie sheet—this is to catch any wax that may leak out. Secure your wick to the bottom of the mold using either mold putty or a paper clip.
5. Fill the mold with icecubes, right to the top of the container. Make sure to hold the wick during this step so the ice doesn’t squish it over to the side of the mold but rather stays in
Citrus Foot Soak Recipe Ingredients
½ cup baking soda 1/3 cup Epsom salt 2 orange tea bags 8 oz mason jar 5 drops of orange essential oil
Instructions Put baking soda, Epsom salt, orange tea bags and
essential oil into a bowl and stir. Put all ingredients into an 8 oz mason jar. Add label and a scoop to the jar by tying it on with
bakers twine or fine ribbon. DIRECTIONS FOR USE
Add 2 tablespoons of the foot soak to a basin of warm water and soak your feet while you relax!
Orange Creamsicle Sugar Scrub Ingredients
¼ cup Coconut oil ¾ cup Sugar 1 tsp vanilla extract 10 drops orange essential oil
Instructions Soften coconut oil in the microwave. Add the vanilla extract and orange essential oil. Stir in sugar (1/4 cup at a time). Put into mason jar. Add a label and instructions.
DIRECTIONS FOR USE Rub gently on your feet to remove dead skin. Rinse with warm water. Result will leave your feet amazingly smooth!
Coconut Body Butter Recipe Ingredients
7.5 oz. jar of Vaseline Cocoa Butter petroleum jelly 24 oz. of lotion (baby lotion or body lotion) 8 oz. of Vitamin E cream
Instructions Put all ingredients into a bowl and whip Fill six 8 oz mason jars with body butter. Attach a label to the front of the jar
DIRECTIONS FOR USE Use cream liberally on your feet allowing it to soak in for a few minutes before patting off the excess with a clean dry cloth.

FunFinder (December 2016) © Girl Guides of Canada - BC Program Committee Page 6
Winter Pictionary (B, G, P, R) Supplies
poster chart paper
markers
cue cards with winter words on
them
large bowl
Directions
1. Divide the girls into teams of approximately 5.
2. Have the girls in each team number off from 1 to 5 (or whatever number of girls in each group).
3. Have each of the “number 1” girls draw a cue card with a winter word on it from a bowl. have the “number 1” girls read the cue card silently and hand the card back ot the leader.
4. The drawers must draw their word on their piece of paper and their teammates must guess the word correctly when the leader says “go”.
5. the first team to guess the word wins.
6. Repeat with “number 2” girls and keep going until a certain score has been reached or each girl has had a chance to draw.
7. To make this more exciting and challenging, have the girls draw while wearing thick winter mittens or snow goggles.
(S, B, G) Supplies
red ornament ball
black felt
hot glue gun
white felt
ribbon
Directions
1. Cut a 1 cm strip of black felt long enough so it goes around the circumference of the ornament ball. Use a glue gun to attach the
black felt around the centre of the ornament ball.
2. Cut a rectangular piece of white felt to represent the buckle for Santa’s belt and attach with the glue gun.
Santa Ornament Craft
Sock Frosty Snowman Craft (S, B, G, P, R) Similar to the snowman on page 1,
with some different stuffings!
Supplies
scissors
glue
needle
thread
2 buttons
white tube sock
scrap fabric
rice
3 sewing pins
Directions
1. Use scissors to cut off the foot part of the sock, a few inches before the heel of the sock. This part will be the body of the snowman.
2. The foot part of the cut sock will be used for the snowman’s hat.
3. Turn the body part of the sock inside out and use a piece of thread to tie the cut end of the sock tightly closed, using a double knot to tie the thread.
4. Turn the sock right side out again. 5. Pour rice into the tube sock. Note:
the more rice you add to the sock, the rounder the snowman will be.
6. Adjust the rice into two sections so that there is a lower part of the body and an upper part.
7. Use a piece of thread to close the top of the body of the snowman off, making sure the knot is tied tight to prevent any rice from falling out. Cut any remaining dangling thread off.
8. Use a piece of thread to tie a knot around the “neck” of the snowman. Make sure to do this several times to separate the head of the snowman from the body.
9. Take a scrap piece of fabric and tie it around the snowman’s next to create a scarf.
10.Take the foot part of the sock and roll it two to three times to make a nice looking toque for the snowman.
11.Glue two buttons on the front belly of the snowman.
12.Use two black pins and stick them into the face of the snowman to make eyes. Use a different coloured sewing pin and stick it into the face to make the snowman’s nose.
Photo by Van Chau
Photo by
Susan
Stephens
FunFinder (December 2016) © Girl Guides of Canada - BC Program Committee Page 7
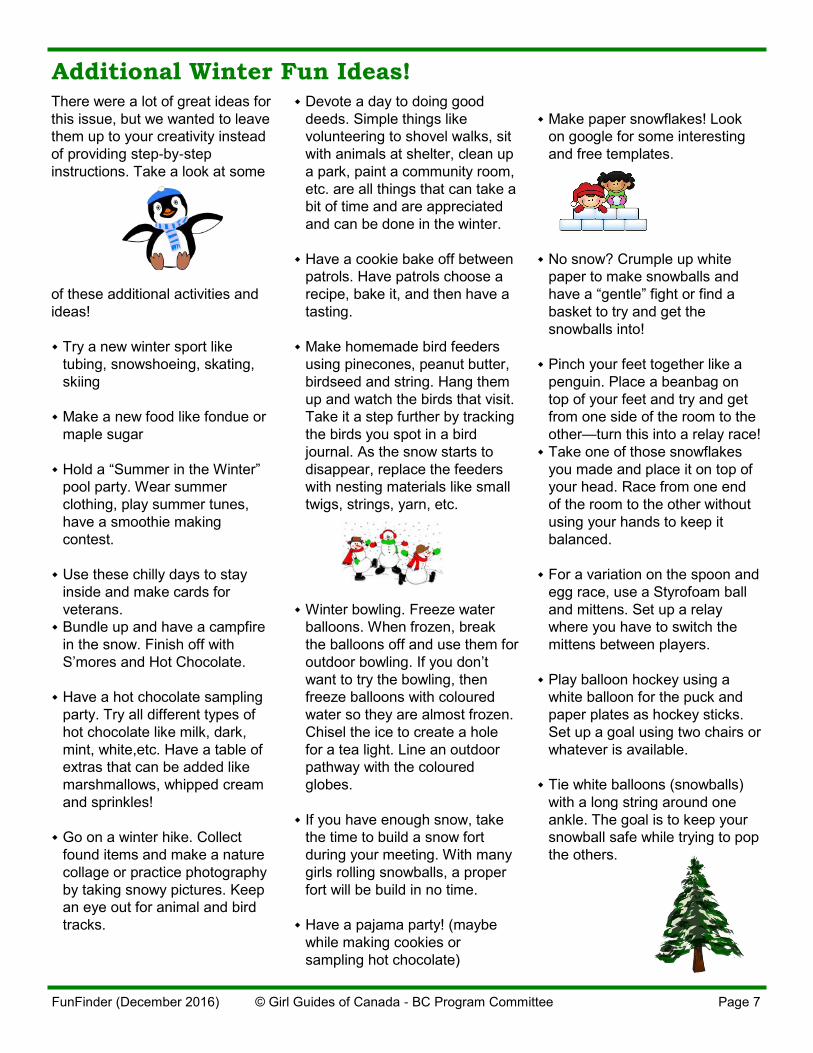
Additional Winter Fun Ideas! There were a lot of great ideas for
this issue, but we wanted to leave
them up to your creativity instead
of providing step-by-step
instructions. Take a look at some
of these additional activities and
ideas!
Try a new winter sport like
tubing, snowshoeing, skating,
skiing
Make a new food like fondue or
maple sugar
Hold a “Summer in the Winter”
pool party. Wear summer
clothing, play summer tunes,
have a smoothie making
contest.
Use these chilly days to stay
inside and make cards for
veterans.
Bundle up and have a campfire
in the snow. Finish off with
S’mores and Hot Chocolate.
Have a hot chocolate sampling
party. Try all different types of
hot chocolate like milk, dark,
mint, white,etc. Have a table of
extras that can be added like
marshmallows, whipped cream
and sprinkles!
Go on a winter hike. Collect
found items and make a nature
collage or practice photography
by taking snowy pictures. Keep
an eye out for animal and bird
tracks.
Devote a day to doing good
deeds. Simple things like
volunteering to shovel walks, sit
with animals at shelter, clean up
a park, paint a community room,
etc. are all things that can take a
bit of time and are appreciated
and can be done in the winter.
Have a cookie bake off between
patrols. Have patrols choose a
recipe, bake it, and then have a
tasting.
Make homemade bird feeders
using pinecones, peanut butter,
birdseed and string. Hang them
up and watch the birds that visit.
Take it a step further by tracking
the birds you spot in a bird
journal. As the snow starts to
disappear, replace the feeders
with nesting materials like small
twigs, strings, yarn, etc.
Winter bowling. Freeze water
balloons. When frozen, break
the balloons off and use them for
outdoor bowling. If you don’t
want to try the bowling, then
freeze balloons with coloured
water so they are almost frozen.
Chisel the ice to create a hole
for a tea light. Line an outdoor
pathway with the coloured
globes.
If you have enough snow, take
the time to build a snow fort
during your meeting. With many
girls rolling snowballs, a proper
fort will be build in no time.
Have a pajama party! (maybe
while making cookies or
sampling hot chocolate)
Make paper snowflakes! Look
on google for some interesting
and free templates.
No snow? Crumple up white
paper to make snowballs and
have a “gentle” fight or find a
basket to try and get the
snowballs into!
Pinch your feet together like a
penguin. Place a beanbag on
top of your feet and try and get
from one side of the room to the
other—turn this into a relay race!
Take one of those snowflakes
you made and place it on top of
your head. Race from one end
of the room to the other without
using your hands to keep it
balanced.
For a variation on the spoon and
egg race, use a Styrofoam ball
and mittens. Set up a relay
where you have to switch the
mittens between players.
Play balloon hockey using a
white balloon for the puck and
paper plates as hockey sticks.
Set up a goal using two chairs or
whatever is available.
Tie white balloons (snowballs)
with a long string around one
ankle. The goal is to keep your
snowball safe while trying to pop
the others.

Sparks
Going Outside: Outside Active Games
Going Outside: Nature Walk
Going Outside: Other Activities!
Going Camping: Additional Activities
Let’s Make Arts and Crafts: Additional
Activities
Guides
Snowshoeing Interest Badge
Discovering You: Discover Your Creativity #6: Activity of
Choice
Discovering You: Stay Fit and Healthy #4: Active Games
Beyond You: Explore the Outdoors and Nature #1 and #6
Creative Craft Interest Badge #8
Hiking: Snow Hike
Pathfinders
Winter Wonderland #5—Sculpt snow
or ice
Winter Wonderland #7—Ice Candles
Winter Wonderland—Additional Activi-
ty
Choosing Your Own Direction # 5—
Service Project
We Are What We Eat #1—Try Some-
thing New
This publication may not be reproduced, in whole or in part, in any form, or by any means, electronic or mechanical,
for use other than for Guiding activities within Canada, without the prior written permission of the BC Program
Committee. [email protected]
FunFinder (December 2016) © Girl Guides of Canada - BC Program Committee Page 8
BC Program Adviser Co-Team Susan Stephen
Colleen McKenna
Communications Liaison Alyssa Robertson
Environment Specialist Van Chau
BC Program Committee
Inclusivity/Diversity Champion Fiona Rogan
Lones Coordinator
Neena Olson
STEM Specialist Christina Noel
Youth Member/ Girl Programs Specialists
Carissa Konesky Elizabeth Hardy
Healthy Lifestyles Specialist
Vacant
Program Connections The following program connections apply to various activities in this issue. Refer to the individual program books for
details. There may be even more program connections you could apply as well!
Brownies
Key to Active Living: Outdoor Action
Winter is Great! Snow figure, Snowshoeing, Taking care of equipment.
Go For it: Active team game
Aboriginal Peoples In Canada—Use snowshoes
Happy Hiking: Snow Hike
Super Craft —Another craft
Key to Camping: Camping Know-How
Outdoor Action: Try a Winter Activity