Release 1.0.4 Bernard Paques - Read the Docs
49
plumbery Documentation Release 1.0.4 Bernard Paques February 05, 2017
Transcript of Release 1.0.4 Bernard Paques - Read the Docs

plumbery DocumentationRelease 1.0.4
Bernard Paques
February 05, 2017


Contents
1 Plumbery 11.1 Features . . . . . . . . . . . . . . . . . . . . . . . . . . . . . . . . . . . . . . . . . . . . . . . . . . 11.2 Contributors . . . . . . . . . . . . . . . . . . . . . . . . . . . . . . . . . . . . . . . . . . . . . . . 21.3 Credits . . . . . . . . . . . . . . . . . . . . . . . . . . . . . . . . . . . . . . . . . . . . . . . . . . 2
2 Why plumbery? 52.1 One day in the life of an ordinary infrastructure manager . . . . . . . . . . . . . . . . . . . . . . . . 52.2 Infrastructure as code . . . . . . . . . . . . . . . . . . . . . . . . . . . . . . . . . . . . . . . . . . 62.3 Infrastructure as code at Dimension Data with Apache Libcloud . . . . . . . . . . . . . . . . . . . . 62.4 What should be described in the fittings plan? . . . . . . . . . . . . . . . . . . . . . . . . . . . . . . 72.5 How to run Plumbery? . . . . . . . . . . . . . . . . . . . . . . . . . . . . . . . . . . . . . . . . . . 7
3 Using plumbery 11
4 How to install plumbery? 134.1 Installing plumbery on Linux and Mac OSX . . . . . . . . . . . . . . . . . . . . . . . . . . . . . . 134.2 Installing plumbery on Microsoft Windows . . . . . . . . . . . . . . . . . . . . . . . . . . . . . . . 15
5 The structure and content of fittings file 195.1 Keywords used by plumbery . . . . . . . . . . . . . . . . . . . . . . . . . . . . . . . . . . . . . . . 195.2 Multiple documents in one fittings file . . . . . . . . . . . . . . . . . . . . . . . . . . . . . . . . . . 195.3 Deploying in multiple geographies . . . . . . . . . . . . . . . . . . . . . . . . . . . . . . . . . . . 205.4 Combining private and public clouds in a deployment . . . . . . . . . . . . . . . . . . . . . . . . . 205.5 Environment variables . . . . . . . . . . . . . . . . . . . . . . . . . . . . . . . . . . . . . . . . . . 205.6 Dynamic variables . . . . . . . . . . . . . . . . . . . . . . . . . . . . . . . . . . . . . . . . . . . . 215.7 Using dynamic variables . . . . . . . . . . . . . . . . . . . . . . . . . . . . . . . . . . . . . . . . . 225.8 Complete example . . . . . . . . . . . . . . . . . . . . . . . . . . . . . . . . . . . . . . . . . . . . 22
6 How to contribute to Plumbery? 256.1 You are not a developer? We are glad that you are involved . . . . . . . . . . . . . . . . . . . . . . . 256.2 Ready to contribute? Here’s how to set up Plumbery for local development . . . . . . . . . . . . . . 266.3 Pull Request Guidelines . . . . . . . . . . . . . . . . . . . . . . . . . . . . . . . . . . . . . . . . . 27
7 History 297.1 1.0.4 (2016-12-20) . . . . . . . . . . . . . . . . . . . . . . . . . . . . . . . . . . . . . . . . . . . . 297.2 1.0.2 (2016-11-6) . . . . . . . . . . . . . . . . . . . . . . . . . . . . . . . . . . . . . . . . . . . . . 297.3 1.0.1 (2016-10-14) . . . . . . . . . . . . . . . . . . . . . . . . . . . . . . . . . . . . . . . . . . . . 307.4 1.0.0 (2016-07-15) . . . . . . . . . . . . . . . . . . . . . . . . . . . . . . . . . . . . . . . . . . . . 307.5 0.9.9 (2016-06-10) . . . . . . . . . . . . . . . . . . . . . . . . . . . . . . . . . . . . . . . . . . . . 30
i

7.6 0.9.8 (2016-06-10) . . . . . . . . . . . . . . . . . . . . . . . . . . . . . . . . . . . . . . . . . . . . 307.7 0.9.7 (2016-06-08) . . . . . . . . . . . . . . . . . . . . . . . . . . . . . . . . . . . . . . . . . . . . 307.8 0.9.6 (2016-06-06) . . . . . . . . . . . . . . . . . . . . . . . . . . . . . . . . . . . . . . . . . . . . 307.9 0.9.5 (2016-05-28) . . . . . . . . . . . . . . . . . . . . . . . . . . . . . . . . . . . . . . . . . . . . 307.10 0.9.4 (2016-05-27) . . . . . . . . . . . . . . . . . . . . . . . . . . . . . . . . . . . . . . . . . . . . 317.11 0.9.3 (2016-05-27) . . . . . . . . . . . . . . . . . . . . . . . . . . . . . . . . . . . . . . . . . . . . 317.12 0.9.2 (2016-05-27) . . . . . . . . . . . . . . . . . . . . . . . . . . . . . . . . . . . . . . . . . . . . 317.13 0.9.1 (2016-05-26) . . . . . . . . . . . . . . . . . . . . . . . . . . . . . . . . . . . . . . . . . . . . 317.14 0.9.0 (2016-05-25) . . . . . . . . . . . . . . . . . . . . . . . . . . . . . . . . . . . . . . . . . . . . 317.15 0.8.1 (2016-05-23) . . . . . . . . . . . . . . . . . . . . . . . . . . . . . . . . . . . . . . . . . . . . 317.16 0.8.0 (2016-04-13) . . . . . . . . . . . . . . . . . . . . . . . . . . . . . . . . . . . . . . . . . . . . 317.17 0.7.0 (2016-04-06) . . . . . . . . . . . . . . . . . . . . . . . . . . . . . . . . . . . . . . . . . . . . 327.18 0.6.0 (2016-03-15) . . . . . . . . . . . . . . . . . . . . . . . . . . . . . . . . . . . . . . . . . . . . 327.19 0.5.0 (2016-03-13) . . . . . . . . . . . . . . . . . . . . . . . . . . . . . . . . . . . . . . . . . . . . 327.20 0.4.3 (2016-02-28) . . . . . . . . . . . . . . . . . . . . . . . . . . . . . . . . . . . . . . . . . . . . 327.21 0.4.2 (2016-02-14) . . . . . . . . . . . . . . . . . . . . . . . . . . . . . . . . . . . . . . . . . . . . 337.22 0.4.1 (2016-01-24) . . . . . . . . . . . . . . . . . . . . . . . . . . . . . . . . . . . . . . . . . . . . 347.23 0.4.0 (2016-01-17) . . . . . . . . . . . . . . . . . . . . . . . . . . . . . . . . . . . . . . . . . . . . 347.24 0.3.4 (2016-01-06) . . . . . . . . . . . . . . . . . . . . . . . . . . . . . . . . . . . . . . . . . . . . 357.25 0.3.3 (2015-12-31) . . . . . . . . . . . . . . . . . . . . . . . . . . . . . . . . . . . . . . . . . . . . 357.26 0.3.2 (2015-12-23) . . . . . . . . . . . . . . . . . . . . . . . . . . . . . . . . . . . . . . . . . . . . 357.27 0.2.4 (2015-12-13) . . . . . . . . . . . . . . . . . . . . . . . . . . . . . . . . . . . . . . . . . . . . 367.28 0.2.3 (2015-12-07) . . . . . . . . . . . . . . . . . . . . . . . . . . . . . . . . . . . . . . . . . . . . 367.29 0.2.2 (2015-12-05) . . . . . . . . . . . . . . . . . . . . . . . . . . . . . . . . . . . . . . . . . . . . 367.30 0.2.1 (2015-12-02) . . . . . . . . . . . . . . . . . . . . . . . . . . . . . . . . . . . . . . . . . . . . 377.31 0.2.0 (2015-11-29) . . . . . . . . . . . . . . . . . . . . . . . . . . . . . . . . . . . . . . . . . . . . 377.32 0.1.2 (2015-11-27) . . . . . . . . . . . . . . . . . . . . . . . . . . . . . . . . . . . . . . . . . . . . 377.33 0.1.0 (2015-11-20) . . . . . . . . . . . . . . . . . . . . . . . . . . . . . . . . . . . . . . . . . . . . 37
8 plumbery package 398.1 Subpackages . . . . . . . . . . . . . . . . . . . . . . . . . . . . . . . . . . . . . . . . . . . . . . . 408.2 Submodules . . . . . . . . . . . . . . . . . . . . . . . . . . . . . . . . . . . . . . . . . . . . . . . 408.3 Module contents . . . . . . . . . . . . . . . . . . . . . . . . . . . . . . . . . . . . . . . . . . . . . 41
Python Module Index 43
ii

CHAPTER 1
Plumbery
Infrastructure as code at Dimension Data with Apache Libcloud
• Documentation: Plumbery at ReadTheDocs
• Python package: Plumbery at PyPi
• Source code: Plumbery at GitHub
• Free software: Apache License (2.0)
1.1 Features
• 50+ tutorials covering popular use cases
• Read fittings plan in YAML
• Load parameters in separate YAMl file
• Use cloud API to create the network infrastructure, and to build nodes
• Bootstrap nodes with cloud-init configuration directives
• Inject actual addresses and on-the-fly secrets to contextualisation
• Create RSA keys and passwords to secure deployments
• Pass environment variables to target nodes
• Preserve random secrets across multiple invocations
• Create network domains and Ethernet networks
• Reserve public IPv4 addresses
• Manage network address translation rules
• Manage firewall rules
• Create load balancers with pools of nodes
• All images in libraries are available to new nodes
• Specify number of CPU, or core per CPU, and CPU speed
• Specify node memory
• Add virtual disks and specify tiers of storage
• Add multiple network interfaces to nodes
1

plumbery Documentation, Release 1.0.4
• Set private IPv4 statically
• Add public IPv4 addresses to nodes
• Add monitoring to nodes
• Add backup to nodes
• Build all blueprints
• Build a blueprint across multiple locations
• Start all nodes
• Start nodes belonging to the same blueprint
• Polish Linux nodes for quick bootstrapping
• Build a full inventory of nodes that have been deployed
• Reflect fittings into a ready-to-use inventory for ansible
• Stop all nodes
• Stop nodes belonging to the same blueprint
• Wipe all nodes
• Wipe nodes belonging to the same blueprint
• Destroy part of the setup, or all blueprints
• You can extend plumbery with your own software, it has been designed for that
• Run from the command line, or as a python library, or as a container
• Accept custom actions from the command line too
• Limit plumbing to some locations if needed
1.2 Contributors
• Bernard Paques [Dimension Data employee] (development lead)
• Anthony Shaw [Dimension Data employee]
• Olivier Grosjeanne [Dimension Data employee]
• Jacques Clément [Dimension Data employee]
• Asim Khawaja [Dimension Data employee]
• Geoffrey Cristallo
1.3 Credits
• Cloud-Init
• Apache Libcloud
• netifaces
• PyYAML
• Cookiecutter
2 Chapter 1. Plumbery

plumbery Documentation, Release 1.0.4
• cookiecutter-pypackage
1.3. Credits 3

plumbery Documentation, Release 1.0.4
4 Chapter 1. Plumbery

CHAPTER 2
Why plumbery?
Plumbery is an open-source project that was initiated by Dimension Data to accelerate the digital transformation ofour clients.
2.1 One day in the life of an ordinary infrastructure manager
This project started in response to a very common issue. How to accelerate the creation, the handling, and the de-struction of up to 60 virtual servers easily? The purpose here is not to supplement Chef, Puppet, and other smartconfiguration management that already exist. The first priority is to industrialise operations on the underlying virtu-alised iron.
The Plumbery toolbox is based on a central description of servers, documented in a text file in YAML. If you do notknow YAML yet, don’t be afraid, this may be the most simple and user-friendly language for infrastructure managers..
Then very simple command is used to act on the infrastructure. For example you can build the entire set of resourcesdescribed in the fittings plan directly from the command line:
5
plumbery Documentation, Release 1.0.4
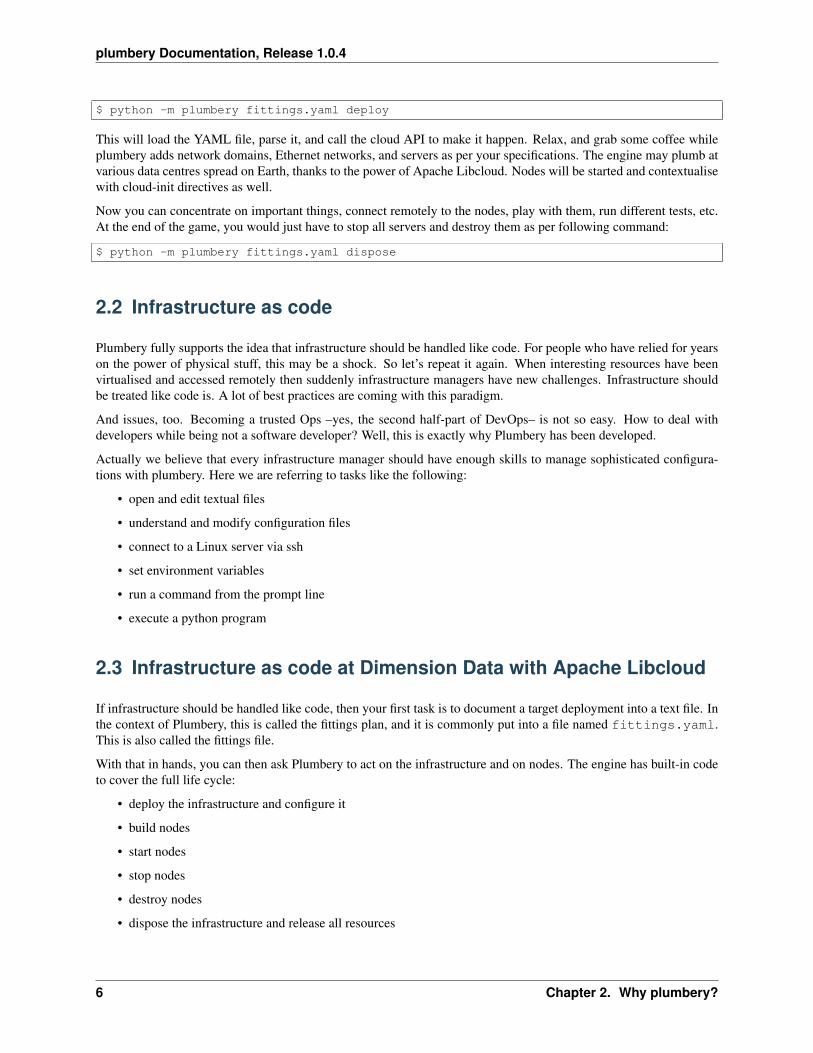
$ python -m plumbery fittings.yaml deploy
This will load the YAML file, parse it, and call the cloud API to make it happen. Relax, and grab some coffee whileplumbery adds network domains, Ethernet networks, and servers as per your specifications. The engine may plumb atvarious data centres spread on Earth, thanks to the power of Apache Libcloud. Nodes will be started and contextualisewith cloud-init directives as well.
Now you can concentrate on important things, connect remotely to the nodes, play with them, run different tests, etc.At the end of the game, you would just have to stop all servers and destroy them as per following command:
$ python -m plumbery fittings.yaml dispose
2.2 Infrastructure as code
Plumbery fully supports the idea that infrastructure should be handled like code. For people who have relied for yearson the power of physical stuff, this may be a shock. So let’s repeat it again. When interesting resources have beenvirtualised and accessed remotely then suddenly infrastructure managers have new challenges. Infrastructure shouldbe treated like code is. A lot of best practices are coming with this paradigm.
And issues, too. Becoming a trusted Ops –yes, the second half-part of DevOps– is not so easy. How to deal withdevelopers while being not a software developer? Well, this is exactly why Plumbery has been developed.
Actually we believe that every infrastructure manager should have enough skills to manage sophisticated configura-tions with plumbery. Here we are referring to tasks like the following:
• open and edit textual files
• understand and modify configuration files
• connect to a Linux server via ssh
• set environment variables
• run a command from the prompt line
• execute a python program
2.3 Infrastructure as code at Dimension Data with Apache Libcloud
If infrastructure should be handled like code, then your first task is to document a target deployment into a text file. Inthe context of Plumbery, this is called the fittings plan, and it is commonly put into a file named fittings.yaml.This is also called the fittings file.
With that in hands, you can then ask Plumbery to act on the infrastructure and on nodes. The engine has built-in codeto cover the full life cycle:
• deploy the infrastructure and configure it
• build nodes
• start nodes
• stop nodes
• destroy nodes
• dispose the infrastructure and release all resources
6 Chapter 2. Why plumbery?

plumbery Documentation, Release 1.0.4
2.4 What should be described in the fittings plan?
Most, if not all, elements of Dimension Data cloud services, can be handled by plumbery. This is covering:
• Network Domains
• Networks
• Private IP addresses
• Public IP addresses
• NAT rules
• Firewall rules
• Cloud Servers
• Load-Balancers
• Monitoring dashboard
• Cloud Backup
Plumbery has been extended so that it can handle external cloud services and act within cloud nodes:
• terraform - orchestrate resources at AWS or ar Microsoft Azure
• cloud-init - configure the operating system, files, and applications
The fittings plan is written in YAML, and it must have multiple documents in it. The first document provides generalconfiguration parameters for the engine. Subsequent documents describe the various locations for the fittings.
An example of a minimum fittings plan:
locationId: EU6regionId: dd-eu
blueprints:
- myBluePrint:domain:
name: myDCethernet:
name: myVLANsubnet: 10.1.10.0
nodes:- myServer
In this example, the plan is to deploy a single node in the data centre at Frankfurt, in Europe. The node myServerwill be placed in a network named myVLAN, and the network will be part of a network domain acting as a virtual datacentre, myDC. The blueprint has a name, myBluePrint, so that it can be handled independently from other blueprints.
To learn more: The structure and content of fittings file
2.5 How to run Plumbery?
2.5.1 Using plumbery from the command-line
Move first to the directory that contains your fittings plan, and then run:
2.4. What should be described in the fittings plan? 7

plumbery Documentation, Release 1.0.4
$ python -m plumbery fittings.yaml deploy
Plumbery will load fittings.yaml, then build all blueprints there.
As you can expect, plumbery can be invoked through the entire life cycle of your fittings:
$ python -m plumbery fittings.yaml build$ python -m plumbery fittings.yaml start$ python -m plumbery fittings.yaml prepare
... nodes are up and running here ...
$ python -m plumbery fittings.yaml stop$ python -m plumbery fittings.yaml destroy
The table below presents succinctly all actions that are supported by plumbery.
Action Descriptiondeploy equivalent to: build + configure + start + preparedispose equivalent to: stop + destroybuild create network domains, networks, and nodesconfigure adds public IP addresses, NAT and firewall rulesstart start nodesprepare contextualise nodes via ssh and cloud-initinformation display information put in fittings planinventory produce an inventory of all assets deployedansible allow ansible to handle nodes and groups deployed by plumberyping check the status of nodes and display network addressesstop stop nodeswipe destroy only nodesdestroy destroy nodes and other resourcespolish apply all polishers configured in fittings plansecrets display secrets such as random passwords, etc.
How do I handle a subset of cloud resources?
You are right to ask. A common use case is the immediate creation of a new group of servers for some developer. Youwould not like this to interfere with existing servers. On the other hand, you may really want to destroy a group ofunused servers that just add to the monthly invoices.
In plumbery the full fittings plan is split in multiple blueprints, and you can handle each of them separately. The mostnatural way to think about this is to conceive services as group of servers. For example, the blueprint docker isactually a cluster of nodes plugged into the same network. Look at the sample fittings.yaml file to get an ideaof what you can put in a blueprint.
Then you can handle a single blueprint independently from the others:
$ python -m plumbery fittings.yaml build docker$ python -m plumbery fittings.yaml build sql
... and then later ...
$ python -m plumbery fittings.yaml destroy sql$ python -m plumbery fittings.yaml build mongodb
8 Chapter 2. Why plumbery?

plumbery Documentation, Release 1.0.4
How to plumb only at a selected location?
By default Plumbery looks at every location mentioned in fittings plan. Sometimes you may want to limit actionsperformed to some locations. For this, mention the name of the target location, prefixed by @. As an example, herewould be the command to build SQL servers only at NA12:
$ python -m plumbery fittings.yaml build sql @NA12
How to get help from the command line?
$ python -m plumbery -h
When you are not sure of directives put in fittings plan, you can ask plumbery for a dry-run. Use the -s swiftch to keepit safe:
$ python -m plumbery <your_various_args> -s
If some strange behaviour occurs, and you cannot understand what is happening, then you can use the debug option toget more information:
$ python -m plumbery <your_various_args> -d
Of course the switches -s and -d can be combined if needed.
2.5.2 Using from Docker
The plumbery Docker image is the simplest and easiest way to use Plumbery, you can process multiple deploymentsat the same time, isolate the processes and there is no requirement to install any additional software. to download theplumbery image simply run:
$ docker pull dimensiondataresearch/plumbery
This will download the latest image from https://hub.docker.com/r/dimensiondataresearch/plumbery/
You can then run the image with the following environment variables:
• MCP_USERNAME - your API username
• MCP_PASSWORD - your API password
• SHARED_SECRET - the password for the deployed servers
• FITTINGS - The URL to some fittings file, this can be a HTTP/HTTPS or a FTP/FTPS address. Look inhttps://github.com/DimensionDataCBUSydney/plumbery-contrib for examples
A fictitious example could be:
$ docker run -e "MCP_USERNAME=bob_smith" -e "MCP_PASSWORD=superPassword!" \-e "SHARED_SECRET=superPassword!" \-e "FITTINGS=https://raw.githubusercontent.com/DimensionDataCBUSydney/plumbery-contrib/master/fittings/example/first/fittings.yaml" \dimensiondataresearch/plumbery
If needed, you have more variables to play with:
• WGET_OPTS can be set for the fetching of the fittings file, the following options are supported: * “–no-check-certificate” to disable SSL certificate validation * “–ftp-user=user –ftp-password=password” for FTPcredentials * “–no-passive-ftp” disable FTP passive transfer mode, for use with proxys * “–http-user=user –http-password=password” for HTTP basic authentication
2.5. How to run Plumbery? 9
plumbery Documentation, Release 1.0.4
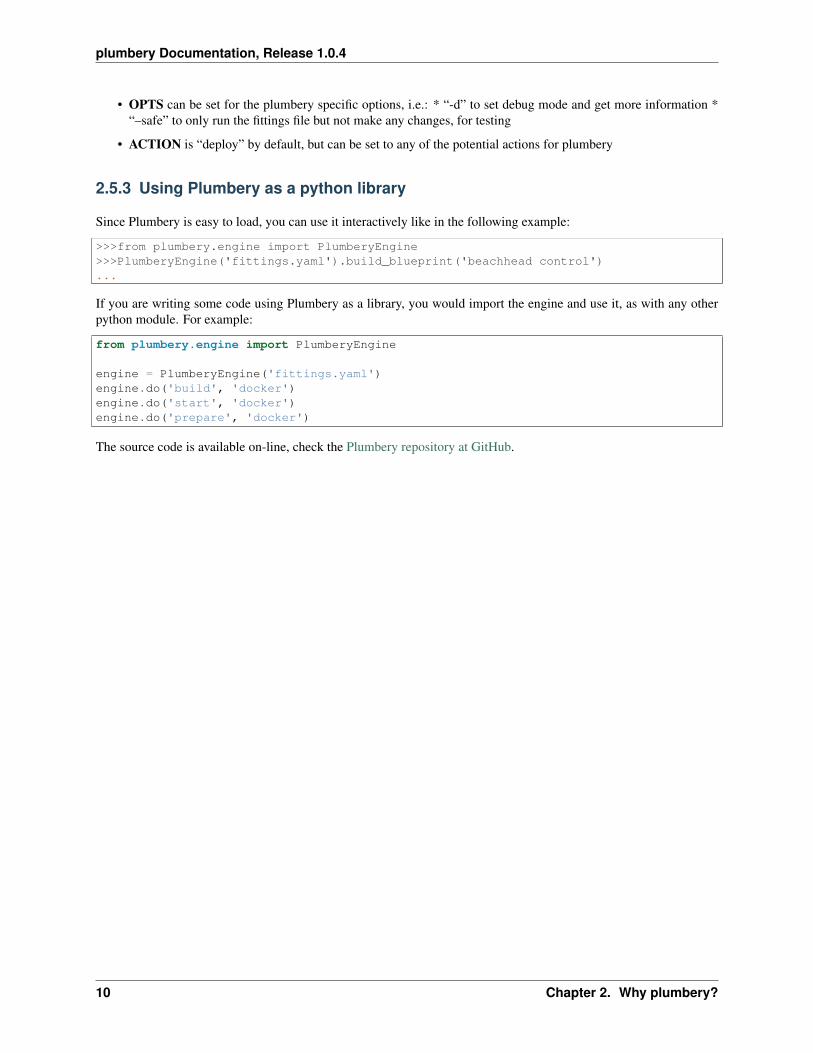
• OPTS can be set for the plumbery specific options, i.e.: * “-d” to set debug mode and get more information *“–safe” to only run the fittings file but not make any changes, for testing
• ACTION is “deploy” by default, but can be set to any of the potential actions for plumbery
2.5.3 Using Plumbery as a python library
Since Plumbery is easy to load, you can use it interactively like in the following example:
>>>from plumbery.engine import PlumberyEngine>>>PlumberyEngine('fittings.yaml').build_blueprint('beachhead control')...
If you are writing some code using Plumbery as a library, you would import the engine and use it, as with any otherpython module. For example:
from plumbery.engine import PlumberyEngine
engine = PlumberyEngine('fittings.yaml')engine.do('build', 'docker')engine.do('start', 'docker')engine.do('prepare', 'docker')
The source code is available on-line, check the Plumbery repository at GitHub.
10 Chapter 2. Why plumbery?

CHAPTER 3
Using plumbery
11

plumbery Documentation, Release 1.0.4
12 Chapter 3. Using plumbery

CHAPTER 4
How to install plumbery?
4.1 Installing plumbery on Linux and Mac OSX
The setup process on these operating systems is really quick. At the end of the process, you will be in a position tocontrol your infrastructure at any Managed Cloud Control (MCP) of Dimension Data.
4.1.1 Check python
It is likely that your system already has python 2.7. Run this in a terminal window:
$ python -v
If the system complains that the directory does not exist, or that it can not find python, then some extra steps areqrequired. Go to the following address to get more support:
http://python.org/download/releases/2.7/
On the other hand, if you get a proper version number, which is very likely, then you can exit the interpreter and moveto the next step:
>>>exit()>
4.1.2 Install pip
You need pip, a package management system, to install modules related to plumbery.
On Ubuntu and Debian systems, run this command:
$ sudo apt-get install python-pip python-dev
On Red Hat and CentOS systems, do:
$ sudo yum install python-pip python-dev
On Mac OSX, install Homebrew first, then use it for the setup of pip:
$ /usr/bin/ruby -e "$(curl -fsSL https://raw.githubusercontent.com/Homebrew/install/master/install)"$ brew install python-pip python-dev
To check pip you can get a full list of packages that have been installed on your workstation:
13

plumbery Documentation, Release 1.0.4
$ pip freeze
4.1.3 Install apache-libcloud
Now that building blocks have put together, we will pull Apache Libcloud and install it locally. Go the directory wherepip executable has been put, and ask it to install Apache Libcloud:
$ pip install apache-libcloud
4.1.4 Install plumbery
Plumbery is a regular python package that has been made available on PyPi. So it is a no-brainer to install it with pip:
$ pip install plumbery
4.1.5 Test your installation
The following command loads plumbery and ask it to display its version number:
$ python -m plumbery -v
4.1.6 Set run-time environment variables
By default Plumbery reads credentials and other secrets from the environment of the computer where it is running.
Following system variables are expected by plumbery:
• MCP_USERNAME - This is the user name that you use to connect to CloudControl
• MCP_PASSWORD - This is the password that you enter in CloudControl
• SHARED_SECRET - This is the admin/root password that is communicated to new servers created over the API.You should select a long and difficult pass phrase.
If you are running Ubuntu or Mac OSX you could do:
$ nano ~/.bash_profile
and type text like the following:
# credentials to access cloud resources from Dimension Dataexport MCP_USERNAME='*** your account name here ***'export MCP_PASSWORD='*** your password here ***'
# password to access nodes remotelyexport SHARED_SECRET='*** password to access nodes ***'
Then close all terminal windows, and re-open one to ensure that environment variables have been updated.
4.1.7 Run first deployment
Open your preferred text editor to create a new file named fittings.yaml. Put the following content in it, savethe file, and close the editor:
14 Chapter 4. How to install plumbery?

plumbery Documentation, Release 1.0.4
locationId: EU6
blueprints:
- myBluePrint:domain:
name: myDCethernet:
name: myVLANsubnet: 10.11.12.0
nodes:- myServer:
appliance: 'Ubuntu'
This is a very limited configuration file, yet it is all you need to deploy a new server in the data centre of Frankfurt inGermany (Europe).
At this stage you are ready to deploy the configuration file. The most straightforward command:
$ python -m plumbery fittings.yaml deploy
This will display a sequence of messages so that you can monitor what is done, and check that all steps are executedcorrectly.
If plumbery complains about some missing variable, then close all command shells and re-open a new one so that itgets updated environment variables.
If you hit an issue that you cannot explain, then make plumbery more verbose with the debug flag:
$ python -m plumbery fittings.yaml deploy -d
In the end, keep in mind that resources deployed by plumbery are costing money to someone! Hopefully, there is asimple way to stop the bill:
$ python -m plumbery fittings.yaml dispose
Congratulations! Plumbery has been installed and tested successfully!
4.2 Installing plumbery on Microsoft Windows
The setup process on Microsoft Windows will take you about 15 minutes in total. At the end of the process, you willbe in a position to control your infrastructure at any Managed Cloud Control (MCP) of Dimension Data. As a firststep you will install python and related stuff, then plumbery itself, then you will configure your MCP credentials andtest the full setup.
4.2.1 Install python 2.7
You will need the latest version of the Python 2.7 language, which you can download from the following address:
http://python.org/download/releases/2.7/
Paste this address in a web browser, download the appropriate package for your machine, and then run it. For the mostcommon case, which is likely the MSI 64 bits installer for Windows, you may want to use following shortcut:
https://www.python.org/ftp/python/2.7/python-2.7.amd64.msi
4.2. Installing plumbery on Microsoft Windows 15

plumbery Documentation, Release 1.0.4
The Windows version is provided as an MSI package. To install it manually, just double-click the file. The MSIpackage format allows Windows administrators to automate installation with their standard tools.
By design, Python installs to a directory with the version number embedded, e.g. Python version 2.7 will install atC:\Python27\, so that you can have multiple versions of Python on the same system without conflicts. Of course,only one interpreter can be the default application for Python file types.
At the end of the process, open a command shell and check the version of python like this:
>cd C:\Python27>python -v
If the system complains that the directory does not exist, or that it can not find python, then something went wrongduring the download or the installation steps. On the other hand, if you get a proper version number, which is verylikely, then you can exit the interpreter and move to the next step:
>>>exit()>
Typing the full path name for a Python interpreter each time quickly gets tedious, so add the directories for your defaultPython version to the PATH. Assuming that your Python installation is in C:\Python27\, add this to your PATH:
C:\Python27\;C:\Python27\Scripts\
The second directory receives command files when certain packages are installed, such as pip and others, so it is avery useful addition.
You can do this by running the following in powershell:
[Environment]::SetEnvironmentVariable("Path", "$env:Path;C:\Python27\;C:\Python27\Scripts\", "User")
Alternatively, open the Configuration Panel and look for System settings. Then append the following to the systemenvironment variable PATH and save your change:
C:\Python27\;C:\Python27\Scripts\
4.2.2 Install pip with get-pip.py
Pip is a manager of python packages. We will use it to install various packages that are useful to plumbery, such asApache Libcloud and others.
Paste the following address in a browser window and save the file locally:
https://bootstrap.pypa.io/get-pip.py
Then in a command shell, ask python to run the downloaded file:
>python <where_file_has_been_downloaded>\get-pip.py
After the installation of pip you can get a full list of packages that have been installed on your workstation:
>pip freeze
4.2.3 Install Microsoft Visual C++ Compiler for Python 2.7
Because some low-level software require local compilation, you will install the Microsoft Visual C++ Compiler forPython 2.7 from following address:
16 Chapter 4. How to install plumbery?

plumbery Documentation, Release 1.0.4
https://www.microsoft.com/en-us/download/confirmation.aspx?id=44266
This will provide you with a MSI file that you have to download and execute on your workstation, like you did forpython itself.
4.2.4 Install apache-libcloud
Now that building blocks have put together, we will pull Apache Libcloud and install it locally. Go the directory wherepip executable has been put, and ask it to install Apache Libcloud:
>pip install apache-libcloud
4.2.5 Install ca-bundles.cert
Since plumbery interacts with virtual servers over SSH, it relies on some certificates that have to be installed locally.As usual with information security, this could be really painful and complicated. But hopefully some smart guys havebundled common certificates into a single file, that will make our life easier.
Download the bundle from following link:
https://raw.githubusercontent.com/bagder/ca-bundle/master/ca-bundle.crt
Save the file on local disk, then double-click on it. Microsoft Windows will check your intention. Confirm that youwant to add the certificates to your system.
Alternatively, you can achieve the same result from PowerShell:
[Environment]::SetEnvironmentVariable("CA_CERTS_PATH", "<location of download of the ca-bundle.crt file>", "Process")
4.2.6 Install plumbery
Plumbery is a regular python package that has been made available on PyPi. So it is a no-brainer to install it with pip:
>pip install plumbery
4.2.7 Test your installation
The following command loads plumbery and ask it to display its version number:
>python -m plumbery -v
4.2.8 Set run-time environment variables
By default Plumbery reads credentials and other secrets from the environment of the computer where it is running.
Following system variables are expected by plumbery:
• MCP_USERNAME - This is the user name that you use to connect to CloudControl
• MCP_PASSWORD - This is the password that you enter in CloudControl
• SHARED_SECRET - This is the admin/root password that is communicated to new servers created over the API.You should select a long and difficult pass phrase.
4.2. Installing plumbery on Microsoft Windows 17

plumbery Documentation, Release 1.0.4
You can do this by running the following in powershell:
[Environment]::SetEnvironmentVariable("MCP_USERNAME", "<your user name here>", "Process")[Environment]::SetEnvironmentVariable("MCP_PASSWORD", "<your password here>", "Process")[Environment]::SetEnvironmentVariable("SHARED_SECRET", "<a long and difficult pass phrase here>", "Process")
Alternatively, open the Configuration Panel and look for System settings. Then add system environment variablesMCP_USERNAME, MCP_PASSWORD and SHARED_SECRET and save your changes.
4.2.9 Run first deployment
Open your preferred text editor to create a new file named fittings.yaml. Put the following content in it, savethe file, and close the editor:
locationId: EU6
blueprints:
- myBluePrint:domain:
name: myDCethernet:
name: myVLANsubnet: 10.11.12.0
nodes:- myServer:
appliance: 'Ubuntu'
This is a very limited configuration file, yet it is all you need to deploy a new server in the data centre of Frankfurt inGermany (Europe).
At this stage you are ready to deploy the configuration file. The most straightforward command:
>python -m plumbery fittings.yaml deploy
This will display a sequence of messages so that you can monitor what is done, and check that all steps are executedcorrectly.
If plumbery complains about some missing variable, then close all command shells and re-open a new one so that itgets updated environment variables.
If you hit an issue that you cannot explain, then make plumbery more verbose with the debug flag:
>python -m plumbery fittings.yaml deploy -d
In the end, keep in mind that resources deployed by plumbery are costing money to someone! Hopefully, there is asimple way to stop the bill:
>python -m plumbery fittings.yaml dispose
Congratulations! Plumbery has been installed and tested successfully!
18 Chapter 4. How to install plumbery?
CHAPTER 5
The structure and content of fittings file
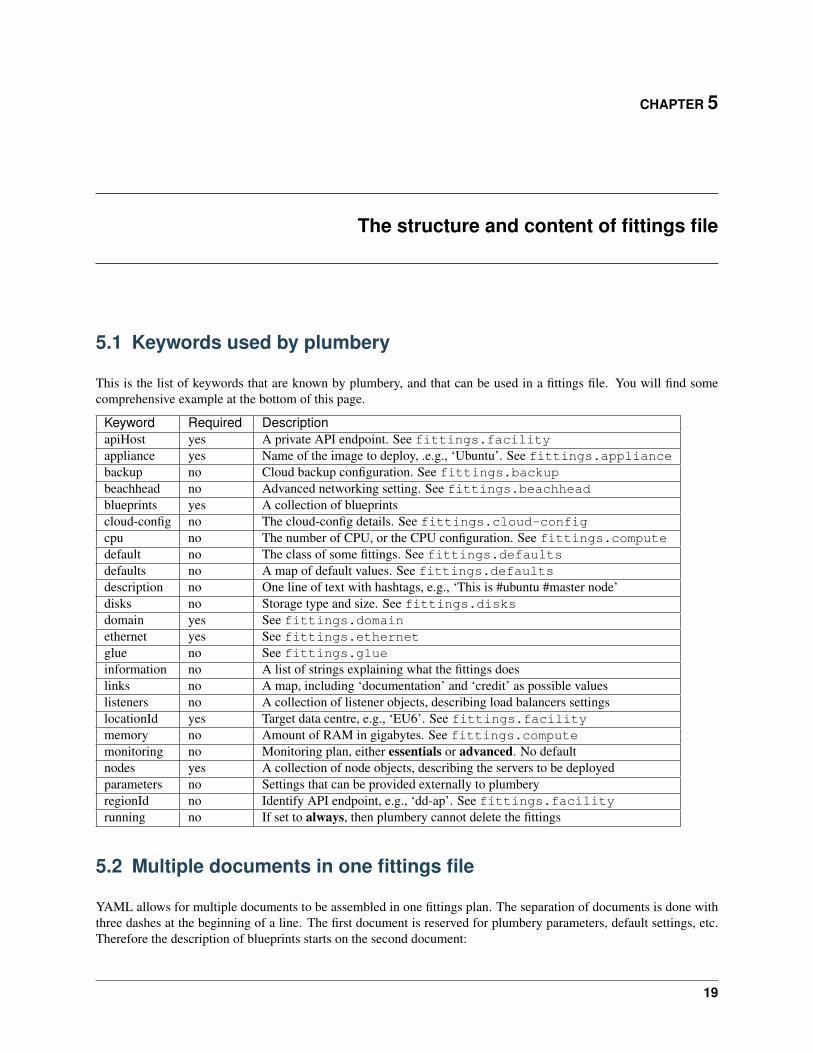
5.1 Keywords used by plumbery
This is the list of keywords that are known by plumbery, and that can be used in a fittings file. You will find somecomprehensive example at the bottom of this page.
Keyword Required DescriptionapiHost yes A private API endpoint. See fittings.facilityappliance yes Name of the image to deploy, .e.g., ‘Ubuntu’. See fittings.appliancebackup no Cloud backup configuration. See fittings.backupbeachhead no Advanced networking setting. See fittings.beachheadblueprints yes A collection of blueprintscloud-config no The cloud-config details. See fittings.cloud-configcpu no The number of CPU, or the CPU configuration. See fittings.computedefault no The class of some fittings. See fittings.defaultsdefaults no A map of default values. See fittings.defaultsdescription no One line of text with hashtags, e.g., ‘This is #ubuntu #master node’disks no Storage type and size. See fittings.disksdomain yes See fittings.domainethernet yes See fittings.ethernetglue no See fittings.glueinformation no A list of strings explaining what the fittings doeslinks no A map, including ‘documentation’ and ‘credit’ as possible valueslisteners no A collection of listener objects, describing load balancers settingslocationId yes Target data centre, e.g., ‘EU6’. See fittings.facilitymemory no Amount of RAM in gigabytes. See fittings.computemonitoring no Monitoring plan, either essentials or advanced. No defaultnodes yes A collection of node objects, describing the servers to be deployedparameters no Settings that can be provided externally to plumberyregionId no Identify API endpoint, e.g., ‘dd-ap’. See fittings.facilityrunning no If set to always, then plumbery cannot delete the fittings
5.2 Multiple documents in one fittings file
YAML allows for multiple documents to be assembled in one fittings plan. The separation of documents is done withthree dashes at the beginning of a line. The first document is reserved for plumbery parameters, default settings, etc.Therefore the description of blueprints starts on the second document:
19

plumbery Documentation, Release 1.0.4
---information:
- "NFS client and server at two different data centres"
---blueprints:
...
5.3 Deploying in multiple geographies
Since Plumbery processes each document independently, it is really easy to configure a deployment that spans multipledata centres, like in the following example:
---information:
- "Multi-Geography deployment example"---regionId: dd-eulocationId: EU6blueprints:
...---regionId: dd-nalocationId: NA9blueprints:
...
5.4 Combining private and public clouds in a deployment
Private MCPs are set using the apiHost parameter, you must also include the datacenter ID of the cloud as the loca-tionId. You can then include another document(s) with the public cloud fittings:
---information:
- "Multi-Geography deployment example"---apiHost: my-private-cloud.comlocationId: MY1blueprints:
...---regionId: dd-nalocationId: NA9blueprints:
...
5.5 Environment variables
Environment variables are those set on the system that is running plumbery. If you mention an environment variablein a fitting plan, it will be transmitted and used on the target nodes. You can think about it as a convenient way toshare configuration across nodes created by plumbery. On the other end, you may take the risk to expose sensitiveinformation outside your computer.
20 Chapter 5. The structure and content of fittings file

plumbery Documentation, Release 1.0.4
For example, let say that you deploy a virtual machine that will talk to the Cisco Spark API. Before this, you registeredto Cisco developer eco-system and got a token that has been saved in CISCO_SPARK_TOKEN, on your workstation.The most straightforward approach would be to just copy this to the target virtual machine. If this new machine willrun Ubuntu, you could say:
write_files:
- path: /etc/profile.d/cisco_spark.shpermissions: "0755"content: |
#!/bin/shexport CISCO_SPARK_TOKEN="{{ environment.CISCO_SPARK_TOKEN }}"
During the processing of the fitting plan, plumbery will replace the variable with the actual value of the token on yourmachine. Therefore the configuration file actually transmitted to the target machine could be like the following:
write_files:
- path: /etc/profile.d/cisco_spark.shpermissions: "0755"content: |
#!/bin/shexport CISCO_SPARK_TOKEN="YWM2OEG4OGItNTQ5YS00MDU2LThkNWEtMJNkODk3ZDZLOGQ0OVGlZWU1NmYtZWyY"
When the target virtual machine will boot, the token will be made available in every user sessions.
Please note that this is probably a very lazy approach, that does induce security risks. In the situation described before,you should get a separate token for the new server, instead of sharing a secret from your own machine. You have beenwarned.
5.6 Dynamic variables
Dynamic variables reflect values assigned by the cloud platform such as network addresses.
Variable Example DescriptionSelf-name {{ node.name }} Name of the current node, e.g., Server1Self privateaddress
{{ node.private}}
Private IPv4 address, e.g., 10.11.2.3
Self publicaddress
{{ node.public}}
Public IPv4 address, e.g., 8.9.10.11 – requires the directive ‘internet’ toassign an address
Self IPv6address
{{ node.ipv6 }} IPv6 address defined for the node
Node privateaddress
{{server1.private}}
Private IPv4 address of server named server1
Node publicaddress
{{server1.public}}
Public IPv4 address – requires the directive ‘internet’ as well
Node IPv6address
{{ host357.ipv6}}
IPv6 address defined for the node named host357
5.6. Dynamic variables 21

plumbery Documentation, Release 1.0.4
5.7 Using dynamic variables
Plumbery will set pre-defined attributes when asked, for example, a private IPv4 address to a node. This is workinggreat, and all you have to do for this is document such attributes in a fittings plan.
However in many situations you will handle information that is either created dynamically, or that is declared outsidea fittings plan.
Some examples:
• IPv6 addresses assigned automatically by the platform
• IPv4 addresses selected dynamically from subnets
• random password used for the setup of a MySQL server
• SSH keys to be created for a specific deployment
This is where you can use templating capabilities of plumbery directly in the fittings plan.
To illustrate the case we will consider a deployment with two nodes deployed in different data centres. The nodes haveto communicate over the IPv6 back-end infrastructure that connects all data centres deployed by Dimension Data. Inother terms, the IPv6 address of node-a has to be given to node-b, and the IPv6 address of node-b has to be given tonode-a.
As you can expect, the most straightforward implementation relies on the file /etc/hosts of both nodes. This is thenatural place where names and addresses can be mapped. In plumbery, we would start with something like thefollowing:
write_files:
# map IPv6 addresses with names#- path: /etc/hosts
content: |{{ node-a.ipv6 }} node-a{{ node-b.ipv6 }} node-b
Before the content of /etc/hosts is actually sent to the nodes, plumbery looks for references to dynamic variables, andreplaces them with actual values. For example:
write_files:
# map IPv6 addresses with names#- path: /etc/hosts
content: |2001:0db8:85a3:0:0:8a2e:370:7334 node-a2001:db8:85a3:8d3:1319:8a2e:370:7348 node-b
5.8 Complete example
---
information:- "Let's Chat server, self-hosted chat for private teams"
parameters:
22 Chapter 5. The structure and content of fittings file

plumbery Documentation, Release 1.0.4
locationId:information:
- "the target data centre for this deployment"type: locations.listdefault: EU6
links:documentation: https://github.com/DimensionDataCBUSydney/plumbery-contrib/tree/master/fittings/collaboration/letschatcredit: https://mborgerson.com/setting-up-lets-chat-on-ubuntu
defaults:
cloud-config:
ssh_keys:rsa_private: |
{{ key.rsa_private }}rsa_public: "{{ key.rsa_public }}"
users:- default
- name: ubuntusudo: 'ALL=(ALL) NOPASSWD:ALL'ssh-authorized-keys:- "{{ key.rsa_public }}"- "{{ local.rsa_public }}"
disable_root: truessh_pwauth: false
---
locationId: "{{ parameter.locationId }}"
blueprints:
- letschat:
domain:name: myDomainipv4: 2
ethernet:name: myNetworksubnet: 10.0.0.0
nodes:- letschat01:
description: "#chat server #ubuntu"
information:- "this is the Let's Chat server for our team"- "browse http://{{ node.public }}:5000/ to enter conversations"
appliance: 'Ubuntu 14'cpu: 8
5.8. Complete example 23

plumbery Documentation, Release 1.0.4
memory: 32
disks:- 1 50 standard
glue:- internet 22 5000
monitoring: essentials
cloud-config:hostname: "{{ node.name }}"
packages:- nodejs- npm- nodejs-legacy- mongodb- mongodb-server- git
runcmd:
- echo "===== Growing LVM with added disk"- pvcreate /dev/sdb- vgextend rootvol00 /dev/sdb- lvextend -l +100%FREE /dev/mapper/rootvol00-rootlvol00- resize2fs /dev/mapper/rootvol00-rootlvol00
- echo "===== Handling ubuntu identity"- cp -n /etc/ssh/ssh_host_rsa_key /home/ubuntu/.ssh/id_rsa- cp -n /etc/ssh/ssh_host_rsa_key.pub /home/ubuntu/.ssh/id_rsa.pub- chown ubuntu:ubuntu /home/ubuntu/.ssh/*
- echo "===== Installing Let's Chat"- cd /home/ubuntu- git clone https://github.com/sdelements/lets-chat.git- cd lets-chat- npm install- cp settings.yml.sample settings.yml- sed -i "/host:/s/'[^']*'/'{{ node.name }}'/" settings.yml
- echo "===== Starting the server"- npm start
24 Chapter 5. The structure and content of fittings file

CHAPTER 6
How to contribute to Plumbery?
Contributions are welcome, and they are greatly appreciated! Every little bit helps, and credit will always be given.
6.1 You are not a developer? We are glad that you are involved
You can contribute in many ways:
• submit feedback
• report bugs
• write documentation
• fix bugs
• implement features
6.1.1 Submit Feedback
The best way to send feedback is to file an issue. The place to go is Plumbery issues at GitHub. There you can checkif your feedback is new, or if you can align with others.
If you are proposing a feature:
• Explain in detail how it would work.
• Keep the scope as narrow as possible, to make it easier to implement.
• Remember that this is a volunteer-driven project, and that contributions are welcome :)
6.1.2 Report Bugs
Have you identified some bug? Thanks to go to Plumbery issues at GitHub. This is the place where issues aredocumented, discussed, and fixed. We really value your time and effort to report bugs.
If you are reporting a bug, please include:
• Your operating system name and version.
• Any details about your local setup that might be helpful in troubleshooting.
• Detailed steps to reproduce the bug.
25

plumbery Documentation, Release 1.0.4
6.1.3 Write Documentation
Plumbery could always use more documentation, whether as part of the official plumbery docs, in docstrings, or evenon the web in blog posts, articles, and such.
6.1.4 Fix Bugs
Look through the GitHub issues for bugs. Anything tagged with “bug” is open to whoever wants to implement it.
6.1.5 Implement Features
Look through the GitHub issues for features. Anything tagged with “feature” is open to whoever wants to implementit.
6.2 Ready to contribute? Here’s how to set up Plumbery for localdevelopment
1. Fork the plumbery repo on GitHub. If you do not have an account there yet, you have to create one, really. Thisis provided for free, and will make you a proud member of a global community that matters. Once you haveauthenticated, visit the Plumbery repository at GitHub and click on the Fork link.
2. Clone your fork locally:
$ git clone [email protected]:your_name_here/plumbery.git
3. Install your local copy into a virtualenv. Assuming you have virtualenvwrapper installed, this is how you set upyour fork for local development:
$ mkvirtualenv plumbery$ cd plumbery/$ python setup.py develop
4. Create a branch for local development:
$ git checkout -b name-of-your-bugfix-or-feature
Now you can make your changes locally.
5. When you’re done making changes, check that your changes pass flake8 and the tests:
$ make lint$ make test$ make coverage
6. Commit your changes and push your branch to GitHub:
$ git add .$ git commit -m "Your detailed description of your changes."$ git push origin name-of-your-bugfix-or-feature
7. Submit a pull request through the GitHub website.
26 Chapter 6. How to contribute to Plumbery?
plumbery Documentation, Release 1.0.4
6.3 Pull Request Guidelines
Before you submit a pull request, check that it meets these guidelines:
1. The pull request should include tests.
2. If the pull request adds functionality, the docs should be updated. Put your new functionality into a functionwith a docstring, and add the feature to the list in README.rst.
3. Check Plumbery continuous integration at Travis CI and make sure that the tests pass there.
6.3. Pull Request Guidelines 27
plumbery Documentation, Release 1.0.4
28 Chapter 6. How to contribute to Plumbery?

CHAPTER 7
History
7.1 1.0.4 (2016-12-20)
• Fix issues #41 and #48 on SSH keys
• Reference and use external SSH keys to facilitate teamwork
• Allow for reservation of private IPv4 addresses on a VLAN
• Complete rewrite of load-balancing code
• Progress on epic topics #36 and #38
• Remove dependency to cryptodome
• Provide comprehensive setup instructions for Windows users
• Add EU9 to the list of available MCP
• Improve inventory files given to ansible
• Pass Travis CI
• 4503 python statements
• Test coverage 59%
7.2 1.0.2 (2016-11-6)
• Improve inventories for ansible
• Add environment variables to templates
• Improve tests of parameters
• Introduce package-level logger
• Make reboot stronger against transient states
• Documentation improvements
• Passing Travis CI
• 4252 python statements
• Test coverage 59%
29

plumbery Documentation, Release 1.0.4
7.3 1.0.1 (2016-10-14)
• Better report on errors
• Add private IP addresses to the inventory prepared for Ansible
• Documentation improvements
7.4 1.0.0 (2016-07-15)
• Use libcloud 1.1.0
• Parameters are now prepended with the keyword parameter instead of appended (Breaking change)
• Documentation improvements
7.5 0.9.9 (2016-06-10)
• Parse Terraform logging correctly (FIX)
7.6 0.9.8 (2016-06-10)
• Added error logs to multi-clouds
7.7 0.9.7 (2016-06-08)
• Support for Python 3
7.8 0.9.6 (2016-06-06)
• Added multicloud support with Hashicorp terraform, supports parameters being passed to TF vars files directly
• Add colored logging
• Multiple code fixes
• Adapt code for python 3 compatibility
• Passing Travis CI for python 2.7, but not yet for python 3
7.9 0.9.5 (2016-05-28)
• 35 reference configurations are now provided in separate plumbery-contrib
• Passing Travis CI
• 3787 python statements
• Test coverage 53%
30 Chapter 7. History

plumbery Documentation, Release 1.0.4
7.10 0.9.4 (2016-05-27)
• Adapt Dockerfile to Windows targets
• Fix various bugs for windows - UAT for windows complete.
7.11 0.9.3 (2016-05-27)
• Added pretty logging
7.12 0.9.2 (2016-05-27)
• Fixed bugs around private MCPs
7.13 0.9.1 (2016-05-26)
• Added validation phase to all post-deploy configuration tasks
7.14 0.9.0 (2016-05-25)
• Added initial windows polisher for command execution
7.15 0.8.1 (2016-05-23)
• Remove windows line endings from unix shell fixtures.
• Accept static IPv4 settings
• Support ICMP, TCP, UDP and IP in firewall definitions
• Add alias ‘primary’ for main NIC network
• Upgrade VMware tools automatically
• Fix calls to API 2.2
• Add the ability to read fittings plan from stdin
• Add entry point to launch plumbery from command line
7.16 0.8.0 (2016-04-13)
• Add the capability to backup nodes
7.10. 0.9.4 (2016-05-27) 31

plumbery Documentation, Release 1.0.4
7.17 0.7.0 (2016-04-06)
• Rename ‘spit’ to ‘configure’
7.18 0.6.0 (2016-03-15)
• Added private MCP support (compute only)
• Updated Dockerfile to support parameters
• Set ‘finalize’ (or ‘finalise’ for the English) as the new phrase for ‘polish’
• Removed coordinate and city lookups (we are adding 40 MCPs this year, I really don’t want to maintain thatlist!)
7.19 0.5.0 (2016-03-13)
• Handover project governance to Dimension Data R&D team
• 26 tutorials are now provided in separate plumbery-contribs project at GitHub
• Introduce deployment parameters (location, domain name, network name, ...)
• Add tutorial on log consolidation (ELK)
• Add tutorial on disk orchestration (standard, high-performance, economy)
• Secure SSH communications in most tutorials (no password, no root access)
• Add virtual storage to many tutorials
• Derive regionId from locationId to streamline fittings plan
• Add action ‘refresh’ to ease iterations in fittings plan
• Add option -p to load parameters from the command line
• Accept web links for fittings plan and for parameters file
• Restructure code to accomodate for more complex data processing
• Fix multiple bugs and errors
• Augment test coverage
• Improve information provided in debug mode
• Passing Travis CI
• 3286 python statements
• Test coverage 53%
7.20 0.4.3 (2016-02-28)
• A total of 24 various tutorials is provided
• Enhance tutorials on Docker and Kubernetes with virtual storage, SSH keys, class-based definition, and updatedtutorial
32 Chapter 7. History

plumbery Documentation, Release 1.0.4
• Add tutorial on iTop, an open source solution for ITIL management
• Add the management of virtual disks, including tiered storage
• Add tutorial showing partitioning, formatting and mounting of virtual disks
• Enhance the usage documentation page
• Accept pseudo-target of blueprints
• Add classes of nodes to streamline large deployments
• Include the library of Customer Images
• Normalize information reported by the ‘inventory’ command
• Expose geolocalisation information to nodes if needed
• Generalize the usage of ‘information:’ to support active documentation of fittings plans
• Put fittings plan in context with the new ‘links:’ directive
• Reduce requirements in fittings plan passed as a Python dictionary
• Add power off as secondary mechanism to stop nodes, when graceful shutdown is not enough
• Allow for CPU and memory dynamic reconfiguration
• Add option -s to run plumbery in safe mode from the command line
• Report on time spent in the cloud while working
• Fix multiple bugs and errors
• Augment test coverage
• Improve information provided in debug mode
• Passing Travis CI
• 3121 python statements
• Test coverage 50%
7.21 0.4.2 (2016-02-14)
• Add tutorials on Docker, Kubernetes, Docker Swarm – DevOps
• Add tutorial to create a Stackstorm server – DevOps too
• Add tutorial to create a swarm of pingers with MQTT and Kibana – IOT is coming
• A total of 23 various tutorials is provided
• Enhance the documentation accordingly
• Enhance the documentation page on cloud-config
• Add help for Windows users
• Add the generation of uuid when needed (ceph cluster)
• Add the capability to assign public IPv4 when needed (automatic mode)
• Expand information reported by the ‘inventory’ command
• Now support settings for a proxy for all interactions with API endpoints
7.21. 0.4.2 (2016-02-14) 33

plumbery Documentation, Release 1.0.4
• Restructure code and improve performance with better cache
• Fix multiple bugs and errors
• Improve information provided in debug mode
• Passing Travis CI
• 2769 python statements
• Test coverage 48%
7.22 0.4.1 (2016-01-24)
• Provision of an advanced tutorial that demonstrates most interesting features
• A total of 18 various tutorials is provided
• Enhance the documentation accordingly
• Leverage cloud-init with global directives shared by all nodes
• Extend dynamic variables to random, on-demand RSA keys
• Enforce password-free communications, and ipv6 communications
• Add actions ‘wipe’ and ‘secrets’
• Restructure code and consolidate functions
• Fix multiple bugs and errors
• Expand information provided in debug mode
• Passing Travis CI
• 2717 python statements
• Test coverage 47%
7.23 0.4.0 (2016-01-17)
• Add cloud-init for node contextualisation
• Inject dynamic variables (e.g., node addresses) to node contextualisation
• Generate and store random secrets for secured node contextualisation
• Enhance usage page in the documentation
• Add a full pack of tutorials in the on-line documentation
• Add actions ‘deploy’ and ‘dispose’ to streamline usage
• Add polishers ‘ping’ and ‘information’
• Restructure code and consolidate functions
• Fix multiple bugs and errors
• Expand information provided in debug mode
• Passing Travis CI
• Test coverage 47%
34 Chapter 7. History

plumbery Documentation, Release 1.0.4
7.24 0.3.4 (2016-01-06)
• Add tutorials to the documentation
• Fix some errors
• Expand information provided in debug mode
• Passing Travis CI
• Test coverage 39%
7.25 0.3.3 (2015-12-31)
• Create load balancers with pools of nodes
• Streamline messages in safe mode
• Options to run in debug or in quiet mode
• Load fittings plan as a string
• Limit plumbing to some locations if needed
• Make flake8 as happy as possible (PEP8 enforcement)
• Add software documentation for polishers ansible, inventory and rub
• Split software documentation in multiple pages
• Add a first documented use case to the on-line documentation
• Restructure code of the core engine
• Passing Travis CI
• Test coverage 39%
7.26 0.3.2 (2015-12-23)
• Run plumbery from the command-line
• Accept custom polisher from the command line too
• Release the first comprehensive on-line documentation at ReadTheDocs
• Illustrate new features in one demonstration fittings plan (the Gigafox project)
• Consolidate sample scripts and python programs for demonstrations
• Allow multiple network interfaces per node
• Reserve and manage pools of public IPv4 addresses
• Add address translation to nodes equipped with public IPv4 addresses
• Add firewall rules for nodes directly visible from the internet
• Wait for nodes to be deployed before polishing them
• Add new strategies to communicate with nodes over the network
• Fix the usage of puppet for Apache nodes
7.24. 0.3.4 (2016-01-06) 35

plumbery Documentation, Release 1.0.4
• Improve reporting messages
• Enhance code documentation
• Fix behaviour on multiple abnormal conditions
• Passing Travis CI
• Test coverage 40%
7.27 0.2.4 (2015-12-13)
• Extend coverage of the Gigafox project
• Add monitoring to nodes created
• Run polisher ‘spit’ right after build to finalise setup of nodes
• Produce inventory with polisher of same name
• Introduce puppet manifests to polisher ‘rub’
• Add file copy to remote nodes
• Introduce basement blueprints
• Improve reporting messages
• Enhance code documentation
• Fix behaviour on abnormal situations
• Passing Travis CI
• Test coverage 46%
7.28 0.2.3 (2015-12-07)
• Introduce Gigafox project, to demonstrate deployment across multiple places
• Create firewall rules to allow traffic between networks
• Cache information to save on API calls and to accelerate the processing
• Improve the state engine
• Passing Travis CI
• Test coverage 48%
7.29 0.2.2 (2015-12-05)
• Use ipv6 when possible to connect to remote nodes
• Manual tests to improve usage on specific conditions, e.g., against MCP 1.0
• Label expansion to facilitate node handling, e.g., mongo[1..20]
• Allow for destruction of networks and of domain networks
• Passing Travis CI
36 Chapter 7. History

plumbery Documentation, Release 1.0.4
• Test coverage 55%
7.30 0.2.1 (2015-12-02)
• Code refactoring into a new module for nodes
• fake8 complains only about long lines and line termination
• Passing Travis CI
• Test coverage 59%
7.31 0.2.0 (2015-11-29)
• Allow for node bootstrapping via SSH
• Push SSH public key
• Update Linux packages
• Install Docker
• Provide an inventory of running nodes
• Build inventory for ansible
• Extension mechanism called polishers
• Add demonstration scripts related to polishers
• A lot of docstring has been added
• fake8 complains only about long lines and line termination
• Passing Travis CI
• Test coverage 59%
7.32 0.1.2 (2015-11-27)
• First pull request fully processed
• Docstring for all modules
• Passing Travis CI
• Test coverage 62%
7.33 0.1.0 (2015-11-20)
• First release on PyPI.
7.30. 0.2.1 (2015-12-02) 37

plumbery Documentation, Release 1.0.4
38 Chapter 7. History

39

plumbery Documentation, Release 1.0.4
CHAPTER 8
plumbery package
8.1 Subpackages
8.1.1 plumbery.actions package
Submodules
Module contents
8.1.2 plumbery.fittings package
Submodules
plumbery.fittings.dummy module
Module contents
8.1.3 plumbery.polishers package
Submodules
plumbery.polishers.ansible module
plumbery.polishers.configure module
plumbery.polishers.information module
plumbery.polishers.inventory module
plumbery.polishers.ping module
plumbery.polishers.prepare module
Module contents
8.2 Submodules
8.2.1 plumbery.action module
8.2.2 plumbery.bootstrap module
plumbery.bootstrap.download_file(url, output_dir)
40 Chapter 8. plumbery package

plumbery Documentation, Release 1.0.4
plumbery.bootstrap.download_manifest(url, output_dir)
plumbery.bootstrap.main(args)
plumbery.bootstrap.parse_args(args)
8.2.3 plumbery.engine module
8.2.4 plumbery.exception module
exception plumbery.exception.ConfigurationError(message)Bases: plumbery.exception.PlumberyException
exception plumbery.exception.PlumberyException(message)Bases: exceptions.Exception
8.2.5 plumbery.facility module
8.2.6 plumbery.fitting module
8.2.7 plumbery.infrastructure module
8.2.8 plumbery.nodes module
8.2.9 plumbery.plogging module
8.2.10 plumbery.polisher module
8.2.11 plumbery.terraform module
8.2.12 plumbery.text module
8.2.13 plumbery.util module
8.3 Module contents
Are you looking for a cloud plumber? We hope this one will be useful to you
• genindex
8.3. Module contents 41

plumbery Documentation, Release 1.0.4
42 Chapter 8. plumbery package

Python Module Index
pplumbery, 41plumbery.actions, 40plumbery.bootstrap, 40plumbery.exception, 41plumbery.fittings, 40plumbery.polishers, 40
43

plumbery Documentation, Release 1.0.4
44 Python Module Index

Index
CConfigurationError, 41
Ddownload_file() (in module plumbery.bootstrap), 40download_manifest() (in module plumbery.bootstrap), 41
Mmain() (in module plumbery.bootstrap), 41
Pparse_args() (in module plumbery.bootstrap), 41plumbery (module), 41plumbery.actions (module), 40plumbery.bootstrap (module), 40plumbery.exception (module), 41plumbery.fittings (module), 40plumbery.polishers (module), 40PlumberyException, 41
45