PumpLab TM Operator’s Manual - University of Utah10 PumpLab TM Operator’s Manual © Copyright...
24
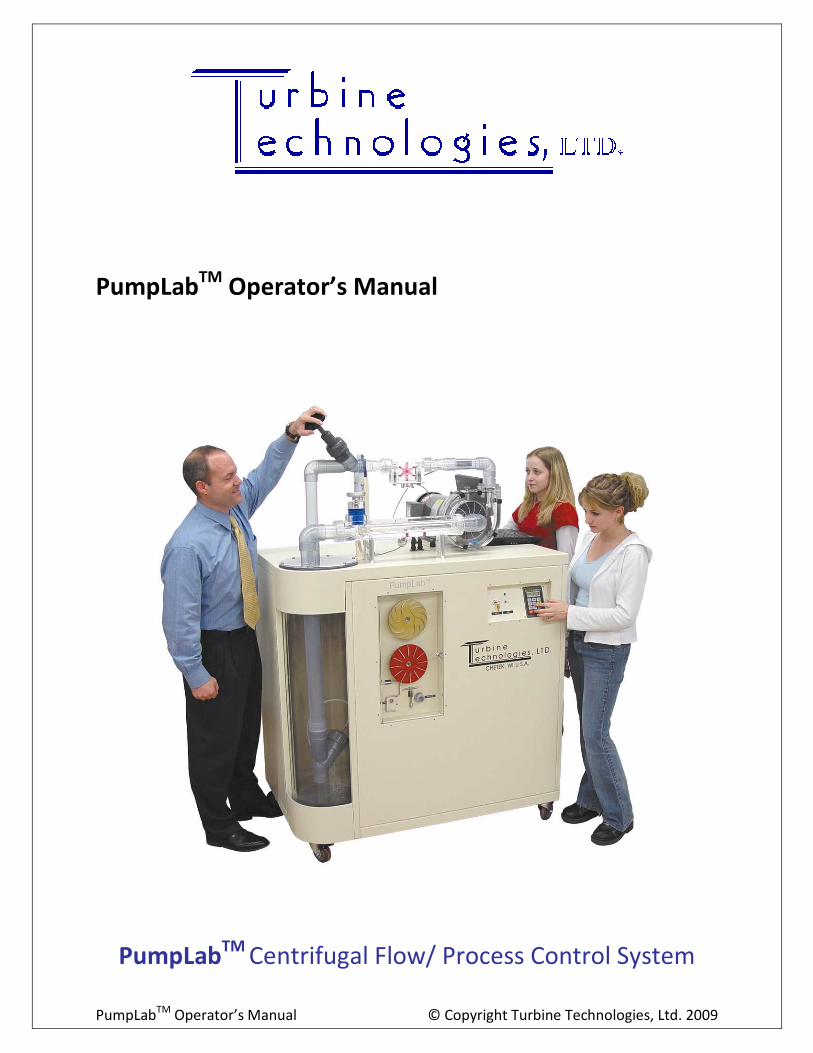
PumpLab TM Operator’s Manual © Copyright Turbine Technologies, Ltd. 2009 PumpLab TM Operator’s Manual PumpLab TM Centrifugal Flow/ Process Control System
Transcript of PumpLab TM Operator’s Manual - University of Utah10 PumpLab TM Operator’s Manual © Copyright...
PumpLabTM
Operator’s Manual © Copyright Turbine Technologies, Ltd. 2009
PumpLabTM
Operator’s Manual
PumpLabTM
Centrifugal Flow/ Process Control System

i
PumpLabTM
Operator’s Manual © Copyright Turbine Technologies, Ltd. 2009
PumpLabTM
Main Features
Inlet Pressure Sensor
Interchangeable Pump Impellers
Master Power Prime Pump On/Off Switch
Control Key
Strobe Light
Data Display/Record
Computer Flow Meter
Drive Motor
Inlet Valve
Outlet Valve
Fluid
Primer Pump
Impeller Spinner Tool
Primer Pump Valve Reservoir Drain
Lockable Casters
Clear View Flow Circuit
Pump Casing (Volute)
Exit Pressure Sensor

ii
PumpLabTM
Operator’s Manual © Copyright Turbine Technologies, Ltd. 2009
Introduction
Thank you…
for displaying confidence in us by selecting the Turbine Technologies, Ltd. PumpLab™ system.
You've just joined an ever-growing list of operators. Turbine Technologies Ltd. has a long history
of strong customer support, resulting in an enviable level of operator satisfaction. We promise
to do our best in assisting you with turning your new PumpLab™ into a true educational
centerpiece.
SAFETY
As with any piece of laboratory equipment, basic lab safety precautions must be taken.
Protective eyewear must be provided for all participants. Equipment familiarization should be
completed prior to any operation.

iii
PumpLabTM
Operator’s Manual © Copyright Turbine Technologies, Ltd. 2009
Notifications
Any trademarks used in this manual are the property of their respective owners.
Copyright © 2009 Turbine Technologies, Ltd.
Copyright © 2009 National Instruments Corporation

iv
PumpLabTM
Operator’s Manual © Copyright Turbine Technologies, Ltd. 2009
Table of Contents
PumpLabTM
Main Features...................................................................................................... i
Introduction .......................................................................................................................... ii
Notifications......................................................................................................................... iii
Table of Contents ................................................................................................................. iv
General Description............................................................................................................... 1
Shipping Information............................................................................................................. 2
Upon Delivery ..................................................................................................................... 2
Production Dimensions....................................................................................................... 2
Electrical Connection ............................................................................................................. 3
Pump Lab Setup .................................................................................................................... 4
Filling the Reservoir Tank.................................................................................................... 4
Priming the Flow Circuit...................................................................................................... 5
Changing Impellers ............................................................................................................. 6
Draining Main Reservoir Tank............................................................................................. 7
Data Acquisition.................................................................................................................... 8
Software Setup and Installation............................................................................................. 9
PumpLab™ Two (2) Year Limited Warranty .......................................................................... 10
Appendix A – Changing Pump Impeller ................................................................................ 11
How to change the pump impeller ................................................................................... 11
Priming the System ........................................................................................................... 15
Appendix B – Software Setup and Installation...................................................................... 16
Installing USB drivers ........................................................................................................ 16
Installing Data Acquisition Software................................................................................. 18

1
PumpLabTM
Operator’s Manual © Copyright Turbine Technologies, Ltd. 2009
General Description
PumpLab™, specifically designed for educational purposes, is a self-contained centrifugal-flow
pump demonstrator. This ready-to-operate, hands-on system offers students a unique new
opportunity - clear visualization of pump performance and operating characteristics.
Changeable impellers and a see-through flow circuit are key educational features. Lab
participants can observe the entire flow path - from point of reservoir pick-up to reservoir
return.
Inlet and outlet valves allow for a full adjustment of system flow for the creation of pump
performance maps. Cavitation can be witnessed in the pump impeller and in the clear view test
section. Additional NPT threaded test ports are installed for possible dye injection, flow
velocity gradient studies and turbulence demonstrations.
EXPERIMENTAL OPPORTUNITIES
• Demonstration of pump characteristics at various speeds
• Development of performance maps, including surge line determination for three
separate impeller designs (straight bladed, rearward swept and forward swept)
• Witness cavitation with electronic verification and data capture
• Record flow rates via the installed flow rotameter (paddle wheel type with clear
housing)
• Determine pump power required, efficiency, volume vs. pressure relations
• Insert student designed impellers for testing and design verification
• Sensor/ software calibration studies

2
PumpLabTM
Operator’s Manual © Copyright Turbine Technologies, Ltd. 2009
Shipping Information
Upon Delivery
PumpLab™ is shipped in a custom built container. This crate is intended for re-use. Therefore,
do not force the shipping box open. Remove the screws marked red along the perimeter of the
front panel. After removing the panel, unscrew the red screws that secure the PumpLab™’s
“hold down” board. Then, unlock the front casters and slide the system out of the crate or
remove the crate walls from around the unit and then unlock casters and move from pallet.
Please assure shipping crate is stored for future use.
Once removed from its shipping container, a general inspection is necessary. Check for obvious
external dents or damage that may have occurred during transit. If shipping damage is noticed,
please notify us by calling 715 924 4876.
Production Dimensions
PumpLabTM
Length: 29 inches
Width: 48 inches
Height: 71 inches
Shipping container dimensions
Length: 33 5/16ths
inches
Width: 55 5/16ths
inches
Height: 81 1/4th
inches

3
PumpLabTM
Operator’s Manual © Copyright Turbine Technologies, Ltd. 2009
Electrical Connection
Electrical connection is simple. However, it is imperative that the power connection be properly
grounded (green wire). The system is pre-wired and is equipped with a 6-foot rubber electrical
cord. The input electrical power required is single phase 220-240 V, 50/60 Hz. It should be
protected by a standard 20 Amp circuit breaker.

4
PumpLabTM
Operator’s Manual © Copyright Turbine Technologies, Ltd. 2009
Pump Lab Setup
Filling the Reservoir Tank
Note: A quarter cup of household bleach may be added to a full reservoir tank. This will help
maintain water clarity.
1. You will need to remove 3 Philip head screws located in the tanks top
cover. This will allow you to remove the left half of the acrylic cover.
2. Insert hose into tank and fill the tank to within 5 inches of the top (to
the base of the grey collar)
3. Re-install tank cover (replace lid and the 3 screws removed in step 1)
If filling system with any other fluid besides water, please contact Turbine Technologies first.

5
PumpLabTM
Operator’s Manual © Copyright Turbine Technologies, Ltd. 2009
Priming the Flow Circuit
1. Remove T-handle from holder (located directly below the stored
impellers)
2. Insert T-handle and turn valve to clockwise stop
3. Open pump housing breather valve (located on top of the clear pump
housing)
4. Turn on prime toggle switch (assure that pump inlet and outlet valves
are open)
5. Close breather valve as water level reaches the top of the clear view
impeller housing. If this is not done, water will spill out through the
breather valve.
6. Turn master power key switch to on position
7. Press red stop button on motor controller key pad
8. Press forward button and adjust motor rpm with up and down keys
9. Turn primer pump switch off
* Inlet and outlet valves can now be adjusted to vary flow parameters

6
PumpLabTM
Operator’s Manual © Copyright Turbine Technologies, Ltd. 2009
Changing Impellers
Note: Assure that master power key switch is turned off
1. Open breather valve to allow water to return to reservoir
2. Attach supplied hose to outlet spigot at bottom of pump housing.
Open valve and drain water into a bucket, sink, or drain
3. Unscrew and remove inlet elbow fitting
4. Remove 8 silver pump housing clamps
5. Carefully remove acrylic pump cover (do not drop)
6. Remove impeller change tool from front storage cabinet
7. Remove spinner by turning spinner counter clockwise with change tool
while holding impeller. Pull impeller off of shaft (Be careful not to lose
shaft key as you pull the pump impeller off of the shaft)
8. Remove desired impeller from storage cabinet and place onto shaft
9. Replace spinner nut and tighten with supplied change tool
10. Replace acrylic cover and 8 hold down clamps
11. Slide inlet elbow in and tighten clear, acrylic union

7
PumpLabTM
Operator’s Manual © Copyright Turbine Technologies, Ltd. 2009
Draining Main Reservoir Tank
1. Drain pump housing as described in “changing impeller section”
2. Take supplied drain hose and attach to grey drain receptacle located in
the front impeller storage cabinet
3. Turn drain valve to counter clockwise stop by using supplied T-handle
4. Turn on prime switch. The prime pump will pump the water through
the hose into your drain/sink
It is imperative for the system to be completely drained and dried prior to storage in below
freezing conditions.

8
PumpLabTM
Operator’s Manual © Copyright Turbine Technologies, Ltd. 2009
Data Acquisition
The PumpLab™ is equipped with a data acquisition system. This USB connected system is fully
integrated and precalibrated. Industrial grade sensors measure system parameters for real
time display on the provided computer. Data can be recorded for playback or follow on
analysis. Data acquisition software is user configurable without programming. The data outputs
are graphically depicted and include the following values:
1. Pump Inlet Pressure
2. Pump Exit Pressure
3. Flow Rate
4. Pump Torque
5. Pump RPM
Two additional ports, located on the inlet and exit side of the pump, are provided for operator
expansion and designed to accept thermocouples, pressure or flow transducers and other
sensors as desires.
The data acquisition software offers Out-of-the-Box functionality for immediate configuration,
display and recording of data without the need for programming. PumpLab™ is delivered with
all software preinstalled and calibrated. Should these settings be accidentally lost or re-set, a
CD-ROM is included with copies of all factory settings.

9
PumpLabTM
Operator’s Manual © Copyright Turbine Technologies, Ltd. 2009
Software Setup and Installation
Data acquisition for the PumpLabTM
centrifugal pump system is achieved with the PumpLabTM
software application. All software is preinstalled and factory verified when purchased with
accompanying computer. For instructions related to manual installation please refer to
Appendix B.
Screenshot of the PumpLabTM
PC application used for data acquisition

10
PumpLabTM
Operator’s Manual © Copyright Turbine Technologies, Ltd. 2009
PumpLab™ Two (2) Year Limited Warranty
Turbine Technologies Ltd. warrants each PumpLab™, of its manufacture, to be free of defects in
materials and workmanship at time of shipment, and to remain in serviceable condition for a
period of 2 years (24 calendar months) following date of shipment.
In the event of malfunction or failure, purchaser may, at its expense, return the PumpLab™ to
Turbine Technologies Ltd. for inspection. If, in its sole discretion, it determines that the
malfunction or failure resulted from a defect in materials or workmanship, Turbine
Technologies Ltd. will repair or replace any defective component(s).
Specific Exceptions
1. This warranty will become void if any person has made any attempt,
except those specifically authorized by Turbine Technologies Ltd. (in
writing), to repair or modify the PumpLab™
2. PumpLab™ is not offered as and shall not be construed by purchaser to
be a "Consumer Product" (within the common definition or definitions
of the Federal Trade Commission).
3. PumpLab™ is represented to be, and is offered as, experimental
technology, subject to the limitations in performance and safety
inherent to equipment so classified.
4. Purchaser shall be solely responsible for determining, prior to purchase,
the suitability for any purpose(s) intended, of equipment offered or
supplied by Turbine Technologies Ltd.
5. This Limited Warranty as written constitutes the entire warranty
offered or intended, expressed or implied and is offered in lieu of all
other warranties.
6. This Limited Warranty does not apply to on board hardware or
software items that are covered by other OEM warranties. Examples
include data acquisition software and computer hardware.

11
PumpLabTM
Operator’s Manual © Copyright Turbine Technologies, Ltd. 2009
Appendix A – Changing Pump Impeller
How to change the pump impeller
Your PumpLabTM
is supplied with 3 impellers with specific vane profiles;
• Black: Forward Swept
• Red: Straight
• Gold: Rearward Swept
Each impeller can be easily changed out to allow testing of the next one.
2. Open Bleeder Port to allow major portion of water in piping to drain back into tank.
3. Drain the volute into a bucket by attaching included drain hose and opening volute drain valve (Bleeder Port still open).
4. Loosen the threaded pipe connection.
1. For safety, turn off power master key.

12
PumpLabTM
Operator’s Manual © Copyright Turbine Technologies, Ltd. 2009
5. Loosen and remove all volute clamps by unscrewing set screws and lifting them from volute.
6. Remove volute face by grasping with two hands and pulling forward. Set carefully on a towel (next picture).
8. Remove impeller spinner using spinner tool (loosen counter-clockwise).
7. Locate Impeller Spinner Tool in Accessory Compartment.
(In the event the spinner is difficult to loosen, use a block of wood to assist with removal).
9. Grasp and pull impeller from motor shaft. Retain key that is in keyway.
10. Remove new impeller from its storage peg and replace it with the pulled impeller.

13
PumpLabTM
Operator’s Manual © Copyright Turbine Technologies, Ltd. 2009
11. Slide new impeller onto shaft, carefully aligning it with shaft key and keyway.
12. Screw on impeller spinner Clockwise.
13. Tighten with impeller tool.
14. Verify O-Ring Seal in volute face is still in place.
15. Position volute face onto volute housing...
16. Align threaded connection and tighten clockwise.
17. Reinsert volute clamps and tighten until snug.
18. Confirm clamps are properly seated.

14
PumpLabTM
Operator’s Manual © Copyright Turbine Technologies, Ltd. 2009
19. Close volute drain valve.
20. Be sure bleeder port plug is open.

15
PumpLabTM
Operator’s Manual © Copyright Turbine Technologies, Ltd. 2009
Priming the System
1. Turn on power master key. 2. Turn on primer pump switch on power panel.
3. As water slowly fills inlet piping and volute, start screwing in bleeder port plug. Time it so plug is completely closed as water reaches bleeder port hole.
4. Turn Prime Pump Switch off.

16
PumpLabTM
Operator’s Manual © Copyright Turbine Technologies, Ltd. 2009
Appendix B – Software Setup and Installation
Installing USB drivers
1. Select the .inf and .sys files and copy them to a folder on your hard
drive. These will be installed next.
2. Be sure the control is powered up
3. Connect the USB cable to the control. Windows should find a new USB
device.
4. Install the USB drivers.
a. Choose “install from a list or specific location” and click Next.

17
PumpLabTM
Operator’s Manual © Copyright Turbine Technologies, Ltd. 2009
b. Choose “Don't search I will choose the driver to install”.
c. Click “Have Disk”. Then enter the location that you stored the inf
and sys files (in step 3) and click Next to install the driver files.

18
PumpLabTM
Operator’s Manual © Copyright Turbine Technologies, Ltd. 2009
Installing Data Acquisition Software
1. To install the data acquisition software, simply double click the file
setup.exe in the PumpLab folder on the included CD. This will launch
the installer.
2. Choose the directory locations for the installed software or use the
default locations.

19
PumpLabTM
Operator’s Manual © Copyright Turbine Technologies, Ltd. 2009
3. Accept the license agreement.
4. Click next until finished.
5. The PumpLab™ program will now be available from the start menu or
from the shortcut icon on the desktop.