Process of creating contents page
10
Process of creating contents page Page numbers Sub- headings Credits Pull out quote
Transcript of Process of creating contents page

Process of creating contents page
Page numbers
Sub-headings
Credits
Pull out quote
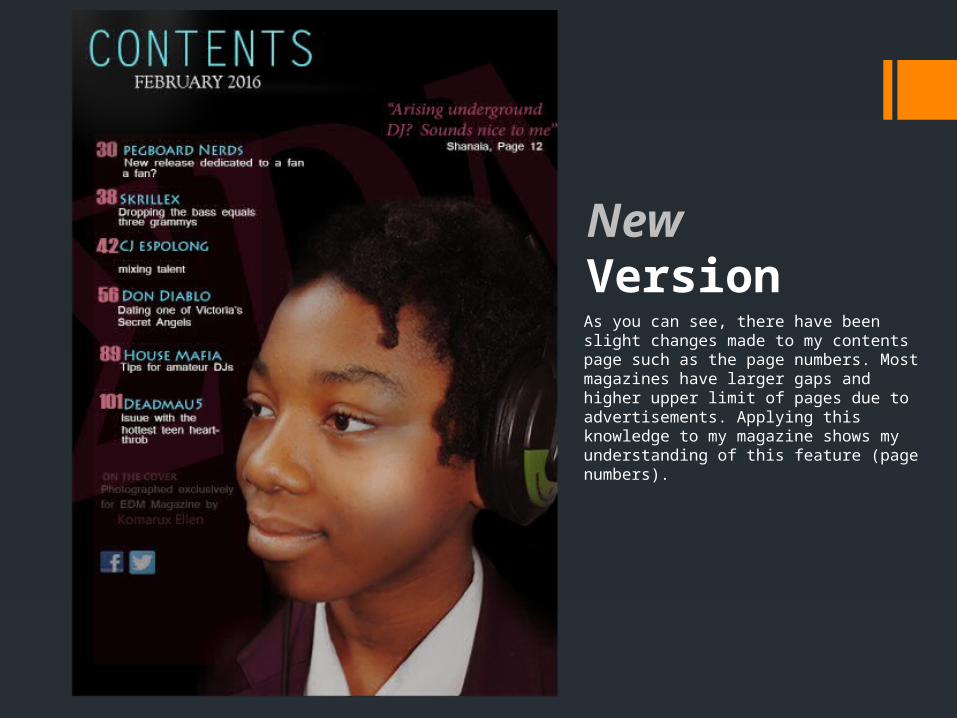
New VersionAs you can see, there have been slight changes made to my contents page such as the page numbers. Most magazines have larger gaps and higher upper limit of pages due to advertisements. Applying this knowledge to my magazine shows my understanding of this feature (page numbers).

Steps Firstly, I chose an image particularly a front cover of a
magazine from Google. This will serve as a base that has the correct size of a magazine front cover.
Drag the image to Photoshop as well as the photo I have taken (2 separate files opened in Photoshop).
Then, I will drag the photo I have taken to the other image

Steps Originally, the image will be massively large when transferred
to the other file. Therefore, in selection of the first image, I clicked on to from the menu bar.
A display box has appeared then I set the image settings to these particular sizes. So when I adjust the image after being transferred, it will be much easier.
(Contents Page was taken with a DSLR camera unlike my Front Cover)

Image Size Adjusted
Non-adjusted Image
Evidently, the second image is time-consuming in terms of resizing using transform controls as the tip of her hair is visible. On the other hand, the first image only takes a few seconds of adjusting my model’s face.

To render the image, click on the brush tool.
Then, set the tool size to 46 or larger in deleting wide background spaces. The mode should also be set to ‘Clear’ as its specific function is for removing the background only.
To make the edges smooth and precise, I changed the tool size to a lower number and zoom in to particularareas of my model’s face.
After that, I use the rectangle tool which is available on the side menu bar (can be changed when right- clicking on the line tool). The image provided will pop up after right-clicking.
I also changed the fill to #000000 (black) …
…then create a dark rectangle by dragging the cursor from the
upper left corner of the file. This will serve as the background.

Here is the result after rendering the original image. I positioned the rendered image to the lower right corner of the file due to texts (‘contents’) that will be added on the near upper left side. The overlap should also be considered as it should not happen, for the purpose of contents page is to inform therefore people would not want complicated designs. They want to focus more on reading the texts which will be provided

Since the original photo does not possess any colour scheme of EDM Magazine, I decided to add filters by clicking on to then experimented different types of colour balances and correctors to achieve the scheme which is very satisfying to my liking.
O

In order to add texts and its miscellaneous features such as colour, font styles, click on the horizontal type tool
Moreover, you can edit the text by highlighting it then select different features from the toolbar.
.png files can offer images with transparent background instead of
white, black or other colours. I have
searched for rendered icons from Google rather than consume time by rendering it. These are indicators where the audience can easily find ‘Shanaia’ in social medias.
Font styles Font size
Font colour
Specific colours, mostly neon were used in my contents page due to the colour scheme which I am following. It is also the same very reason for why I edited or filtered Shanaia’s photo. Credits are also essential in a contents page as it shows gratitude to the photographer. Paginations should have a min. of about 60 pages as a ‘real’ magazine contains lots of advertisement.

FONT:Letter Gothic Std Medium
COLOUR:
FONT:Lithos Pro Regular
COLOUR:
FONT:Haettenschweiler Regular
COLOUR:
FONT:
- Microsoft Tai Le Bold- Mangal Regular- Microsoft PhagsPa Regular
COLOUR: AND #FFFF
FONT:Lithos Pro Regular
COLOUR: #FFF
FONT:Minion Pro Italic
COLOUR:
There have been slight changes regarding the texts. Skrillex has been changed to Skylette in the updated version of my contents page. Moreover, a text is missing in this example: EDM
FONT: Minion Pro Bold Cond and COLOUR: