
Oracle® WebCenter Analytics · Complete the following basic steps to prepare your network and host...
78
Oracle® WebCenter Analytics Installation and Upgrade Guide 10g Release 3 (10.3) November 2008
Transcript of Oracle® WebCenter Analytics · Complete the following basic steps to prepare your network and host...

Oracle® WebCenter AnalyticsInstallation and Upgrade Guide
10g Release 3 (10.3)
November 2008

Oracle WebCenter Analytics Installation and Upgrade Guide, 10g Release 3 (10.3)
Copyright © 2007, 2008, Oracle and/or its affiliates. All rights reserved.
This software and related documentation are provided under a license agreement containing restrictions on use and disclosure and are protected by intellectual property laws. Except as expressly permitted in your license agreement or allowed by law, you may not use, copy, reproduce, translate, broadcast, modify, license, transmit, distribute, exhibit, perform, publish, or display any part, in any form, or by any means. Reverse engineering, disassembly, or decompilation of this software, unless required by law for interoperability, is prohibited.
The information contained herein is subject to change without notice and is not warranted to be error-free. If you find any errors, please report them to us in writing.
If this software or related documentation is delivered to the U.S. Government or anyone licensing it on behalf of the U.S. Government, the following notice is applicable:
U.S. GOVERNMENT RIGHTS Programs, software, databases, and related documentation and technical data delivered to U.S. Government customers are "commercial computer software" or "commercial technical data" pursuant to the applicable Federal Acquisition Regulation and agency-specific supplemental regulations. As such, the use, duplication, disclosure, modification, and adaptation shall be subject to the restrictions and license terms set forth in the applicable Government contract, and, to the extent applicable by the terms of the Government contract, the additional rights set forth in FAR 52.227-19, Commercial Computer Software License (December 2007). Oracle USA, Inc., 500 Oracle Parkway, Redwood City, CA 94065.
This software is developed for general use in a variety of information management applications. It is not developed or intended for use in any inherently dangerous applications, including applications which may create a risk of personal injury. If you use this software in dangerous applications, then you shall be responsible to take all appropriate fail-safe, backup, redundancy, and other measures to ensure the safe use of this software. Oracle Corporation and its affiliates disclaim any liability for any damages caused by use of this software in dangerous applications.
Oracle is a registered trademark of Oracle Corporation and/or its affiliates. Other names may be trademarks of their respective owners.
This software and documentation may provide access to or information on content, products and services from third parties. Oracle Corporation and its affiliates are not responsible for and expressly disclaim all warranties of any kind with respect to third-party content, products, and services. Oracle Corporation and its affiliates will not be responsible for any loss, costs, or damages incurred due to your access to or use of third-party content, products, or services.

Contents
1. Welcome to Oracle WebCenter AnalyticsHow to Use This Book . . . . . . . . . . . . . . . . . . . . . . . . . . . . . . . . . . . . . . . . . . . . . . . . . . 1-1
Audience . . . . . . . . . . . . . . . . . . . . . . . . . . . . . . . . . . . . . . . . . . . . . . . . . . . . . . . . . 1-1
Organization. . . . . . . . . . . . . . . . . . . . . . . . . . . . . . . . . . . . . . . . . . . . . . . . . . . . . . . 1-1
Typographical Conventions . . . . . . . . . . . . . . . . . . . . . . . . . . . . . . . . . . . . . . . . . . . 1-2
Oracle Documentation and Resources . . . . . . . . . . . . . . . . . . . . . . . . . . . . . . . . . . . . . . 1-3
2. Installation PrerequisitesHardware and Software Requirements . . . . . . . . . . . . . . . . . . . . . . . . . . . . . . . . . . . . . . 2-1
Default Ports Used by Oracle WebCenter Analytics . . . . . . . . . . . . . . . . . . . . . . . . . . . 2-3
3. Quickstart OverviewInstallation. . . . . . . . . . . . . . . . . . . . . . . . . . . . . . . . . . . . . . . . . . . . . . . . . . . . . . . . . . . . 3-1
Granting User and Group Access Rights to Oracle Inventory Directories . . . . . . . 3-1
Installing the Analytics Console Component . . . . . . . . . . . . . . . . . . . . . . . . . . . . . 3-3
Configuring the Oracle WebCenter Analytics Database . . . . . . . . . . . . . . . . . . . . . 3-4
Creating the Oracle WebCenter Analytics Database on Microsoft SQL Server . .3-4
Creating the Oracle WebCenter Analytics Database on Oracle . . . . . . . . . . . . 3-5
Configuring the ALUI Security Database . . . . . . . . . . . . . . . . . . . . . . . . . . . . . . . . 3-6
Creating the ALUI Security Database on Microsoft SQL Server . . . . . . . . . . 3-6
Creating the ALUI Security Database on Oracle . . . . . . . . . . . . . . . . . . . . . . . 3-7
Registering Portal Events. . . . . . . . . . . . . . . . . . . . . . . . . . . . . . . . . . . . . . . . . . . . . 3-8
Installation and Upgrade Guide for Oracle WebCenter Analytics 10.3 iii

Registering Oracle WebCenter Collaboration Events. . . . . . . . . . . . . . . . . . . . . . . 3-8
Registering Oracle WebCenter Ensemble Events . . . . . . . . . . . . . . . . . . . . . . . . . . 3-9
Installing the Analytics Collector Component and Clustering the BEA AL Analytics Collector Service . . . . . . . . . . . . . . . . . . . . . . . . . . . . . . . . . . . . . . . . . . . . . . . 3-9
Installing the Analytics Collector Component. . . . . . . . . . . . . . . . . . . . . . . . . 3-9
Clustering the BEA AL Analytics Collector Service . . . . . . . . . . . . . . . . . . 3-10
Configuring Oracle Webcenter Interaction to Send Events to the Cluster3-11
Configuring Nodes in a Cluster . . . . . . . . . . . . . . . . . . . . . . . . . . . . . . . 3-11
Installing the Interaction Analytics Component . . . . . . . . . . . . . . . . . . . . . . . . . . 3-12
Installing the Image Service Component . . . . . . . . . . . . . . . . . . . . . . . . . . . . . . . 3-13
Installing the Analytics Automation Jobs Component . . . . . . . . . . . . . . . . . . . . . 3-13
Starting the BEA AL Analytics and BEA AL Analytics Collector Services . . . . 3-14
Registering Oracle WebCenter Analytics with the Portal . . . . . . . . . . . . . . . . . . . 3-15
Adding Analytics Jobs to the Automation Service . . . . . . . . . . . . . . . . . . . . . . . . 3-15
Upgrade . . . . . . . . . . . . . . . . . . . . . . . . . . . . . . . . . . . . . . . . . . . . . . . . . . . . . . . . . . . . 3-16
Upgrade Paths . . . . . . . . . . . . . . . . . . . . . . . . . . . . . . . . . . . . . . . . . . . . . . . . . . . . 3-16
Upgrading Oracle WebCenter Analytics. . . . . . . . . . . . . . . . . . . . . . . . . . . . . . . . 3-16
Upgrading from AquaLogic Analytics 2.1 to Oracle WebCenter Analytics 10.3 . 3-17
Upgrading from AquaLogic Analytics 2.0 to Oracle WebCenter Analytics 10.3 . 3-19
4. InstallationGranting User and Group Access Rights to Oracle Inventory Directories . . . . . . . . . . 4-2
Installing the Analytics Console Component. . . . . . . . . . . . . . . . . . . . . . . . . . . . . . . . . 4-3
Configuring the Oracle WebCenter Analytics Database . . . . . . . . . . . . . . . . . . . . . . . . 4-6
Creating the Oracle WebCenter Analytics Database on Microsoft SQL Server. . . 4-6
Creating the Oracle WebCenter Analytics Database on Oracle . . . . . . . . . . . . . . . 4-7
iv Installation and Upgrade Guide for Oracle WebCenter Analytics 10.3
Configuring the ALUI Security Database . . . . . . . . . . . . . . . . . . . . . . . . . . . . . . . . . . . 4-9
Creating the ALUI Security Database on Microsoft SQL Server . . . . . . . . . . . . . . 4-9
Creating the ALUI Security Database on Oracle . . . . . . . . . . . . . . . . . . . . . . . . . 4-10
Registering Portal Events . . . . . . . . . . . . . . . . . . . . . . . . . . . . . . . . . . . . . . . . . . . . . . . 4-11
Registering Oracle WebCenter Collaboration Events . . . . . . . . . . . . . . . . . . . . . . . . . 4-11
Registering Oracle WebCenter Ensemble Events . . . . . . . . . . . . . . . . . . . . . . . . . . . . 4-12
Installing the Analytics Collector Component and Clustering the BEA AL Analytics Collector Service . . . . . . . . . . . . . . . . . . . . . . . . . . . . . . . . . . . . . . . . . . . . . . . . . . 4-12
Installing the Analytics Collector Component . . . . . . . . . . . . . . . . . . . . . . . . . . . 4-12
Clustering the BEA AL Analytics Collector Service . . . . . . . . . . . . . . . . . . . . . . 4-14
Configuring Oracle Webcenter Interaction to Send Events to the Cluster. . . 4-15
Configuring Nodes in a Cluster . . . . . . . . . . . . . . . . . . . . . . . . . . . . . . . . . . . 4-15
Installing the Interaction Analytics Component . . . . . . . . . . . . . . . . . . . . . . . . . . . . . . 4-16
Installing the Image Service Component . . . . . . . . . . . . . . . . . . . . . . . . . . . . . . . . . . . 4-19
Installing the Analytics Automation Jobs Component . . . . . . . . . . . . . . . . . . . . . . . . . 4-20
Starting the BEA AL Analytics and BEA AL Analytics Collector Services . . . . . . . . 4-22
Starting the BEA AL Analytics and BEA AL Analytics Collector Services on Windows. . . . . . . . . . . . . . . . . . . . . . . . . . . . . . . . . . . . . . . . . . . . . . . . . . . . . 4-22
Starting the BEA AL Analytics and BEA AL Analytics Collector Services on UNIX and Linux . . . . . . . . . . . . . . . . . . . . . . . . . . . . . . . . . . . . . . . . . . . . . . . . . . . . 4-23
Registering Oracle WebCenter Analytics with the Portal . . . . . . . . . . . . . . . . . . . . . . 4-23
Adding Analytics Jobs to the Automation Service. . . . . . . . . . . . . . . . . . . . . . . . . . . . 4-24
5. UpgradeUpgrade Paths . . . . . . . . . . . . . . . . . . . . . . . . . . . . . . . . . . . . . . . . . . . . . . . . . . . . . . . . . 5-1
Upgrading from AquaLogic Analytics 2.1 to Oracle WebCenter Analytics 10.3 . . . . . 5-2
Upgrading from AquaLogic Analytics 2.0 to Oracle WebCenter Analytics 10.3 . . . . . 5-4
Installation and Upgrade Guide for Oracle WebCenter Analytics 10.3 v

A. TroubleshootingOverview of Installation and Configuration Logs . . . . . . . . . . . . . . . . . . . . . . . . . . . . . A-1
B. Uninstalling Oracle WebCenter AnalyticsUninstalling Oracle WebCenter Analytics on Windows . . . . . . . . . . . . . . . . . . . . . . . . B-1
Uninstalling Oracle WebCenter Analytics on UNIX/Linux . . . . . . . . . . . . . . . . . . . . . B-1
Index
vi Installation and Upgrade Guide for Oracle WebCenter Analytics 10.3

C H A P T E R 1
Welcome to Oracle WebCenter Analytics
This book describes how to install and deploy Oracle WebCenter Analytics 10.3. It also provides instructions for upgrading to Oracle WebCenter Analytics 10.3 from earlier versions.
How to Use This BookThis guide has been designed to be a quick reference for users with installation experience, while also providing detailed instructions for users installing for the first time.
AudienceThis guide is written for the user responsible for installing or upgrading Oracle WebCenter Analytics. This user must have strong knowledge of the platform operating system, database, web and application servers, and any other third-party software required for installation.
OrganizationThis guide includes the following chapters:
This chapter provides information on how to use this guide and describes other resources available to help install, deploy, upgrade, and administer Oracle WebCenter Analytics.
Chapter 2, “Installation Prerequisites,” provides hardware and software requirements, as well as environmental and third-party software prerequisites. You must read this chapter and meet the prerequisites prior to proceeding to the installation or upgrade.
Installation and Upgrade Guide for Oracle WebCenter Analytics 10.3 1-1

Welcome to Orac l e WebCente r Ana l y t ics
Chapter 3, “Quickstart Overview,” provides a high level overview of the Oracle WebCenter Analytics installation and upgrade procedures. Sufficient detail is provided to allow an experienced portal administrator to quickly install or upgrade Oracle WebCenter Analytics. Cross-references link the high level tasks to detailed procedures in other chapters.
Chapter 4, “Installation,” provides detailed instructions for installing and configuring Oracle WebCenter Analytics.
Chapter 5, “Upgrade,” provides detailed instructions for upgrading to Oracle WebCenter Analytics 10.3.
Appendix B, “Uninstall,” provides instructions for uninstalling Oracle WebCenter Analytics.
Typographical ConventionsThis book uses the following typographical conventions.
Table 1-1 Typographical Conventions
Convention Typeface Examples/Notes
• Items you need to take action on (such as files or screen elements)
bold • Upload Procedures.doc to the portal.• To save your changes, click Apply Changes.
• User-defined variables• New terms• Emphasis• Object example names
italic • The migration package file is located in install_dir\serverpackages.
• Portlets are Web tools embedded in your portal.• The URI must be a unique number.• The example Knowledge Directory displayed in
Figure 5 shows the Human Resources folder.
1-2 Installation and Upgrade Guide for Oracle WebCenter Analytics 10.3

Orac le Documentat i on and Resources
Oracle Documentation and ResourcesThis section describes other documentation and resources provided by Oracle.
• Text you enter• Computer generated text
(such as error messages) • Code samples
computer • Type Marketing as the name of your community.• This script may generate the following error:
ORA-00942 table or view does not exist • Example:
<setting name="SSOCookieIsSecure">
<value xsi:type="xsd:integer">0</value>
</setting>
• Environment variables ALL_CAPS • ORACLE_HOME specifies the directory where Oracle products are installed.
Table 1-1 Typographical Conventions
Convention Typeface Examples/Notes
Table 1-2 Oracle Documentation and Resources
Resource Description
Configuration Worksheet
This worksheet allows you to record prerequisite information necessary for installing and configuring Oracle WebCenter Analytics.
It is available on the Oracle Technology Network at http://download.oracle.com/docs/cd/E13158_01/alui/analytics/docs103/index.html.
Release Notes The release notes provide information about new features, issues addressed, and known issues in the release.
They are available on the Oracle Technology Network at http://download.oracle.com/docs/cd/E13158_01/alui/analytics/docs103/index.html.
Administrator Guide This guide describes how to manage, maintain, and troubleshoot Oracle WebCenter Analytics.
It is available on the Oracle Technology Network at http://download.oracle.com/docs/cd/E13158_01/alui/analytics/docs103/index.html.
Installation and Upgrade Guide for Oracle WebCenter Analytics 10.3 1-3

Welcome to Orac l e WebCente r Ana l y t ics
Online Help The online help is written for all levels of Oracle WebCenter Analytics users. It describes the user interface for Oracle WebCenter Analytics and gives detailed instructions for completing tasks in Oracle WebCenter Analytics.
To access online help, click the help icon.
Oracle Technology Network (OTN)
The Oracle Technology Network is the world's largest community of developers, DBAs, and architects using Oracle products and industry-standard technologies. Every day, members collaborate via OTN to share real-world insight, expertise, and best practices on how to build, deploy, manage, and optimize applications.
As a member of the Oracle Technology Network you will enjoy access to software downloads, discussion forums, documentation, wikis, podcasts, blogs, plus much more.
Access the Oracle Technology Network at http://www.oracle.com/technology/index.html.
Oracle Support The Oracle Support site provides access to all Oracle support resources including online support, software and patches, technical articles, and contact numbers.
Access the Oracle Support site at http://www.oracle.com/support/index.html.
Table 1-2 Oracle Documentation and Resources
Resource Description
1-4 Installation and Upgrade Guide for Oracle WebCenter Analytics 10.3

C H A P T E R 2
Installation Prerequisites
Complete the following basic steps to prepare your network and host computers for deployment:
1. Read the product release notes for information on compatibility issues, known problems, and workarounds that might affect how you proceed with your deployment. Release notes are located at http://download.oracle.com/docs/cd/E13158_01/alui/analytics/docs103/index.html .
2. Print the configuration worksheets provided in the Oracle WebCenter Analytics Configuration Worksheets document: Configuration_Worksheets_Oracle_WebCenter_Analytics_v10-3.pdf.
3. Determine the values you have assigned for this deployment, and record these values in the Oracle WebCenter Analytics Configuration Worksheets document.
4. Provision host computers for your deployment and install prerequisite software. For details, see “Hardware and Software Requirements” on page 2-1.
Hardware and Software RequirementsThe following table summarizes the hardware, operating system, and software requirements for Oracle WebCenter Analytics
Caution: IPv6 is not supported. You should verify that IPv6 is not enabled prior to installing Oracle WebCenter Analytics.
Installation and Upgrade Guide for Oracle WebCenter Analytics 10.3 2-1

Ins ta l la t i on P re requ is i tes
Note: For an up-to-date list of supported versions, refer to the Interoperability page in the Support Center.
Table 2-1 Hardware and Software Requirements
Component Requirement
Oracle WebCenter Analytics Host Computer
Hardware• 1.6 GHz^, with 2MB L2 cache• 1 GB memory• 2 GB disk space
Operating System• Windows Server 2003 SP2• Red Hat Enterprise Linux ES 4, Update 3, on x86 or ES 5.2, on x86• SUSE Linux 9 and 10 on x86• AIX 5.3 Technology Level 5300-05 on POWER3, POWER4, POWER5 • Solaris 9 and 10 on SPARC• Oracle Enterprise Linux 5.2
Database Server Host Computer
Hardware• Dual 2.0 GHz^, with 2 MB L2 cache• 2 GB memory^
• Mirrored SCSI drives (either 15K or 10K RPM)ζ• Disk space to accommodate growth of the Oracle WebCenter Analytics
database. Growth is directly correlated to the number of events occurring. Events include such things as page views, portlet views, user logins, and discussion posts. Estimate 100 MB of growth per 1 million events. For example, if your portal receives roughly 1 million events per day, you should anticipate growth of 36.5 GB per year.
Software• Microsoft SQL Server 2005, Microsoft SQL Server 2005 SP2• Oracle 9.0.2.7^ in default or Oracle RAC configuration• Oracle 10.1.0.3^ in default or Oracle RAC configuration• Oracle 10.2.0.x in default or Oracle RAC configuration• Oracle 11.1.0.6^ in default or Oracle RAC configuration
Portal Compatibility Oracle WebCenter Interaction 10.3
2-2 Installation and Upgrade Guide for Oracle WebCenter Analytics 10.3

Defau l t Por ts Used by Orac l e WebCente r Ana l y t i cs
Default Ports Used by Oracle WebCenter AnalyticsThe following table summarizes the default ports that are used by Oracle WebCenter Analytics:
Browser • Microsoft Internet Explorer 6.0 SP1, 6.0 XP SP2, 7.0 XP SP2, 7.0 Vista• Mozilla Firefox 2.0^, 3.0• Safari 3.0
Oracle WebCenter Collaboration
Oracle WebCenter Collaboration 10.3
Publisher • 6.4^, 6.5
Studio • 2.2 MP1
Note: Oracle WebCenter Analytics does not include Studio-specific reports. This requirement is for basic compatibility only.
Table 2-1 Hardware and Software Requirements
Component Requirement
Table 2-2 Default ports used by Oracle WebCenter Analytics
Communication Description
Portal to Oracle WebCenter Analytics port 31314 Used for data collection.
Portal to Oracle WebCenter Analytics port 11944 Used to display reports.
Oracle WebCenter Analytics to Image Service port 80
Used to embed objects stored in the Image Service into Oracle WebCenter Analytics reports.
Oracle WebCenter Analytics to Portal DB and Oracle WebCenter Collaboration DB. Port used depends on database implementation, for example 1433 (SQLServer) or 1521 (Oracle)
Used to synchronize data from portal or Oracle WebCenter Collaboration.
Oracle WebCenter Analytics to API Services machine port 11905
Used to synchronize data from the portal.
Installation and Upgrade Guide for Oracle WebCenter Analytics 10.3 2-3

Ins ta l la t i on P re requ is i tes
2-4 Installation and Upgrade Guide for Oracle WebCenter Analytics 10.3

C H A P T E R 3
Quickstart Overview
This chapter provides brief, high level instructions for the installation and upgrade of Oracle WebCenter Analytics, and is intended to quickly guide experienced administrators through the installation or upgrade procedure.
This chapter is divided into two major sections:
Installation. This section covers installing and configuring the Oracle WebCenter Analytics components, creating and scripting the database, creating the ALUI Security database, and starting and verifying the installation. The organization of this section maps directly to detailed instructions in Chapter 4, “Installation”.
Upgrade. This section covers upgrading version of Oracle WebCenter Analytics to the latest version. The organization of this section maps directly to detailed instructions in Chapter 5, “Upgrade”.
InstallationBefore you install Oracle WebCenter Analytics, ensure that you have completed pre-installation steps. For details, see “Installation Prerequisites” on page 2-1.
Granting User and Group Access Rights to Oracle Inventory Directories(Linux/Unix only) Oracle Inventory contains files that provide the Oracle Universal Installer with the locations of the ORACLE_HOME directories on a particular machine. For Oracle Inventory to function properly, the user that installs Oracle WebCenter Analytics must have
Installation and Upgrade Guide for Oracle WebCenter Analytics 10.3 3-1

Quickstar t Overv i ew
access rights to the directories that contain Oracle Inventory’s files. This section describes how to run the ouais.sh shell script, which sets user and group access rights for these directories.
Note: You do not need to perform this procedure if you are installing Oracle WebCenter Analytics on Windows.
Note: If you are installing Oracle WebCenter Analytics on Linux or UNIX operating systems, you do not need to perform this procedure if, as the same user that is installing Oracle WebCenter Analytics, you have already installed at least one of the following products on the same machine on which you are installing Oracle WebCenter Analytics:
Oracle WebCenter Interaction 10.3
Oracle WebCenter Collaboration 10.3
Oracle WebCenter Ensemble 10.3
Oracle WSRP Consumer 10.3
Oracle WebCenter Interaction Identity Service for LDAP 10.3
Oracle WebCenter Content Service for Documentum 10.3
To grant user and group access rights to Oracle Inventory directories:
1. Log in to the remote server host computer as the root user.
2. Copy the ouais.sh script to the machine onto which you will be installing Oracle WebCenter Analytics.
This script is located in the same location as the Oracle WebCenter Analytics installer file.
3. Change the current directory (cd) to be the directory to which you copied the ouais.sh script.
4. Run the ouais.sh shell script.
As arguments to the script, specify the user and group that will be running the Oracle WebCenter Analytics installer. For example, you would use the following command to run the ouais.sh script from the root shell:
./ouais.sh -u <oracleuser> -g <oraclegroup>
The ouais.sh script creates the Oracle Inventory directory if it did not exist before you ran the script. Additionally, the script grants user and group ownership to the directories that contain the files that are used by Oracle Inventory.
3-2 Installation and Upgrade Guide for Oracle WebCenter Analytics 10.3

Ins ta l la t ion
Installing the Analytics Console ComponentThis section describes how to install the Analytics Console component and the BEA AL Analytics service. For more complete details on performing this task, see “Installing the Analytics Console Component” on page 4-3.
To install the Analytics Console Component:
1. Log in to the remote server host computer as the local administrator (on Windows) or a user with directory write privileges (on UNIX or Linux).
Note: For UNIX and Linux installations, you must run the Oracle WebCenter Analytics installer as the user that you specifed in the procedure “Granting User and Group Access Rights to Oracle Inventory Directories” on page 3-1. You specified the user who will run the product installer as an argument to the ouais.sh script.
2. Copy the installer to the disk location from where you plan to launch it.
3. Launch the Oracle WebCenter Analytics Installer.
– Windows: WebCenterAnalytics_WCI_10.3.0.0.0.exe
– UNIX/Linux: WebCenterAnalytics_WCI_10.3.0.0.0
4. Choose to install the Analytics Console component.
5. Complete all installation wizard pages according to the settings you planned when you completed the Analytics Console Component Installation Worksheet, which is included in the Oracle WebCenter Analytics Configuration Worksheets document
After the installer has copied all files to the installation directory, the Launch Configuration Manager installation wizard page appears.
6. Do not configure Analytics Console settings in Oracle WebCenter Configuration Manager at this time. First, configure the Oracle WebCenter Analytics and ALUI Security databases. For details see Configuring the Oracle WebCenter Analytics Database and Configuring the ALUI Security Database.
7. After configuring the Oracle WebCenter Analytics and ALUI Security databases, configure all settings for all of the Analytics Console application components using the database and connectivity settings that you provisioned when you completed the Oracle WebCenter Analytics Configuration Worksheets document.
Installation and Upgrade Guide for Oracle WebCenter Analytics 10.3 3-3

Quickstar t Overv i ew
Configuring the Oracle WebCenter Analytics DatabasePerform one of the following procedures that is appropriate to your database platform:
Creating the Oracle WebCenter Analytics Database on Microsoft SQL Server
Creating the Oracle WebCenter Analytics Database on Oracle
Creating the Oracle WebCenter Analytics Database on Microsoft SQL ServerFor more complete details on performing this task, see “Creating the Oracle WebCenter Analytics Database on Microsoft SQL Server” on page 4-6.
To set up the Oracle WebCenter Analytics database on Microsoft SQL Server:
1. On the machine to which you installed the Analytics Console component, copy the scripts from install_dir\ptanalytics\10.3.0\sql\mssql to the database host computer.
2. In SQL Server Management Studio, access the database engine’s properties.
3. Configure the database engine to use SQL Server and Windows Authentication mode.
4. Restart the database engine.
5. Create the Oracle WebCenter Analytics database user:
a. Create the Oracle WebCenter Analytics database user with the user name you provisioned when you completed the Configuration Worksheet, which is included in the Oracle WebCenter Analytics Configuration Worksheets document.
b. Configure the Oracle WebCenter Analytics database user to use SQL Server Authentication.
c. Set the Oracle WebCenter Analytics database user password to the password you designated when you completed the Oracle WebCenter Analytics Configuration Worksheets document.
6. Create the Oracle WebCenter Analytics database with the following properties:
– Create a database with the name you provisioned when you completed the Configuration Worksheet, which is included in the Oracle WebCenter Analytics Configuration Worksheets document.
– Configure the size of the database.
– Change the default database for the Oracle WebCenter Analytics database user to the Oracle WebCenter Analytics database.
3-4 Installation and Upgrade Guide for Oracle WebCenter Analytics 10.3

Ins ta l la t ion
7. Grant the Oracle WebCenter Analytics database user the db_owner role for the Oracle WebCenter Analytics database.
8. Create the Oracle WebCenter Analytics database schema. Specify the Oracle WebCenter Analytics database user as the schema owner.
9. Connect to the Oracle WebCenter Analytics database as the Oracle WebCenter Analytics database user, using SQL Server Authentication.
10. Run the setup scripts for the database, located in the install_dir\ptanalytics\10.3.0\sql\mssql\ folder, in the following order (make sure that you are running the scripts on the Oracle WebCenter Analytics database):
a. create_analytics_schema.sql
b. install_analytics_data.sql
Creating the Oracle WebCenter Analytics Database on OracleFor more complete details on performing this task, see “Creating the Oracle WebCenter Analytics Database on Oracle” on page 4-7.
To create and set up an Oracle database:
1. On the machine to which you installed the Analytics Console component, copy the oracle directory from install_dir\ptanalytics\10.3.0\sql to the Oracle WebCenter Analytics database’s host computer.
2. Log on to the host computer for the Oracle WebCenter Analytics database as owner of the Oracle system files.
3. Execute the following steps as the system user in your Oracle database.
a. Determine the name of the SID that you will be using for this installation. If you changed the SID from the default when you installed the portal, you need to update create_analytics_tablespaces.sql to reflect the SID that you used, substituting all occurrences of the default SID name with your SID name. The default SID name is BEAS.
If you are creating a new SID, configure AL32UTF8 as the database character set and AL16UTF16 as the national character set.
b. Run the script create_analytics_tablespaces.sql for your platform.
c. Run the script create_analytics_user.sql.
Installation and Upgrade Guide for Oracle WebCenter Analytics 10.3 3-5

Quickstar t Overv i ew
Note: If you do not want the script to use the defaults when creating the Oracle database user and password, edit the script. The default user is analyticsdbuser; the default password is analyticsdbuser.
d. Add the Oracle database user and password values into the Configuration Worksheet, which is included in the Oracle WebCenter Analytics Configuration Worksheets document (you will enter these values into Oracle WebCenter Configuration Manager when configuring Oracle WebCenter Analytics database settings).
4. Execute the following steps as the analytics user that you just created.
a. Run the script create_analytics_schema.sql.
b. Run the script install_analytics_data.sql.
5. Run your database’s analysis tool on the portal database to the efficiency of the database.
Configuring the ALUI Security Database(Optional) This section describes how to set up the ALUI Security database.
Note: You do not need to perform this procedure if AquaLogic Pathways 1.5 is installed. Installing AquaLogic Pathways 1.5 requires creating the ALUI Security database.
This section contains the following sections:
Creating the ALUI Security Database on Microsoft SQL Server
Creating the ALUI Security Database on Oracle
Creating the ALUI Security Database on Microsoft SQL Server (Optional) For more complete details on performing this task, see “Creating the ALUI Security Database on Microsoft SQL Server” on page 4-9.
Note: You do not need to perform this procedure if AquaLogic Pathways 1.5 is installed. Installing AquaLogic Pathways 1.5 requires creating the ALUI Security database.
To create and set up the ALUI Security database on Microsoft SQL Server:
1. On the machine to which you installed the Analytics Console component, copy the scripts from install_dir\ptanalytics\10.3.0\sql\mssql to the ALUI Security database host computer.
2. In SQL Server Management Studio, access the database engine’s properties.
3. Configure the database engine to use SQL Server and Windows Authentication mode.
3-6 Installation and Upgrade Guide for Oracle WebCenter Analytics 10.3

Ins ta l la t ion
4. Restart the database engine.
5. Create the ALUI Security database user:
a. Create the ALUI Security database user with the user name you provisioned when you completed the Configuration Worksheet, which is included in the Oracle WebCenter Analytics Configuration Worksheets document.
b. Configure the ALUI Security database user to use SQL Server Authentication.
c. Set the ALUI Security database user password to the password you designated when you completed the Oracle WebCenter Analytics Configuration Worksheets document.
6. Create the ALUI Security database with the name you provisioned when you completed the Configuration Worksheet, which is included in the Oracle WebCenter Analytics Configuration Worksheets document.
7. Change the default database for the ALUI Security database user to the ALUI Security database.
8. Grant the ALUI Security database user the db_owner role for the ALUI Security database.
9. Create the ALUI Security database schema. Specify the ALUI Security database user as the schema owner.
10. Connect to the ALUI Security database as the ALUI Security database user, using SQL Server Authentication.
11. Run the create_security_tables.sql script, located in the folder that you copied in Step 1.
Creating the ALUI Security Database on Oracle(Optional) For more complete details on performing this task, see “Creating the ALUI Security Database on Oracle” on page 4-10.
Note: You do not need to perform this procedure if AquaLogic Pathways 1.5 is installed. Installing AquaLogic Pathways 1.5 requires creating the ALUI Security database.
To create and set up the ALUI Security database on Oracle:
1. On the machine to which you installed the Analytics Console component, copy the oracle directory from install_dir\ptanalytics\10.3.0\sql to the ALUI Security database’s host computer.
2. Log on to the host computer for the ALUI Security database as owner of the Oracle system files.
Installation and Upgrade Guide for Oracle WebCenter Analytics 10.3 3-7

Quickstar t Overv i ew
3. Create the ALUI Security database tablespace.
4. Create the ALUI Security database user.
5. Add the ALUI Security database user and password values into the Configuration Worksheet, which is included in the Oracle WebCenter Analytics Configuration Worksheets document (you will enter these values into Oracle WebCenter Configuration Manager when configuring Oracle WebCenter Analytics database settings).
6. Connect to the ALUI Security database as the ALUI Security database user.
7. Run the create_security_tables.sql script, located in the folder that you copied in Step 1.
8. Run your database’s analysis tool on the ALUI Security database to the efficiency of the database.
Registering Portal EventsYou must register portal events if you want Oracle WebCenter Analytics to report on events that occur in the portal. To register portal events, run the following from the command line on the Oracle WebCenter Analytics host machine:
Windows:
– .. PTANALYTICS_HOME\bin\AnalyticsLoadEvents.bat ..\settings\config\analytics-core-event-def.xml
– .. PTANALYTICS_HOME\bin\AnalyticsLoadEvents.bat ..\settings\config\analytics-ali-event-def.xml
UNIX/Linux:
– .. PTANALYTICS_HOME/bin/AnalyticsLoadEvents.sh ../settings/config/analytics-core-event-def.xml
– .. PTANALYTICS_HOME/bin/AnalyticsLoadEvents.sh ../settings/config/analytics-ali-event-def.xml
Registering Oracle WebCenter Collaboration EventsTo register Oracle WebCenter Collaboration events, perform the following:
1. Navigate to the following file on the Oracle WebCenter Analytics host machine: install_dir\ptcollab\4.5\settings\config\analytics-collab-event-def.xml
3-8 Installation and Upgrade Guide for Oracle WebCenter Analytics 10.3

Ins ta l la t ion
2. Copy the analytics-collab-event-def.xml file on the Oracle WebCenter Analytics host machine to the following location on the Analytics host machine:
install_dir\ptanalytics\10.3.0\settings\config\
3. Run the following from the command line on the Oracle WebCenter Analytics host machine:
– .. PTANALYTICS_HOME\bin\AnalyticsLoadEvents.bat ..\settings\config\analytics-collab-event-def.xml (Windows)
– .. PTANALYTICS_HOME/bin/AnalyticsLoadEvents.sh ../settings/config/analytics-collab-event-def.xml (UNIX/Linux)
Registering Oracle WebCenter Ensemble Events(Oracle WebCenter Ensemble integration only) To register Oracle WebCenter Ensemble events, run the following from the command line on the Oracle WebCenter Analytics host machine:
.. PTANALYTICS_HOME\bin\AnalyticsLoadEvents.bat
..\settings\config\analytics-ensemble-event-def.xml (Windows)
.. PTANALYTICS_HOME/bin/AnalyticsLoadEvents.sh
../settings/config/analytics-ensemble-event-def.xml (UNIX/Linux)
Installing the Analytics Collector Component and Clustering the BEA AL Analytics Collector ServiceThis section includes the following topics:
Installing the Analytics Collector Component
Clustering the BEA AL Analytics Collector Service
Installing the Analytics Collector ComponentThis section describes how to install the Analytics Collector component, which includes the BEA AL Analytics Collector service. For more complete details on performing this task, see “Installing the Analytics Collector Component” on page 4-12.
Note: If you want to cluster the BEA AL Analytics Collector service, we recommend that you install each node in the cluster on a separate machine (one installation of the Analytics Collector component is one instance of the BEA AL Analytics Collector service). One instance of the BEA AL Analytics Collector service operates as one node in the cluster).
Installation and Upgrade Guide for Oracle WebCenter Analytics 10.3 3-9

Quickstar t Overv i ew
To install the Analytics Collector component:
1. Log in to the remote server host computer as the local administrator (on Windows) or a user with directory write privileges (on UNIX or Linux).
2. Copy the installer to the disk location from where you plan to launch it.
3. Launch the Oracle WebCenter Analytics Installer.
– Windows: WebCenterAnalytics_WCI_10.3.0.0.0.exe
– UNIX/Linux: WebCenterAnalytics_WCI_10.3.0.0.0
4. Choose to install the Analytics Collector component.
5. Complete all installation wizard pages according to the settings you planned when you completed the Analytics Collector Component Installation Worksheet, which is included in the Oracle WebCenter Analytics Configuration Worksheets document.
6. After the installer has copied all files to the installation directory, the Launch Configuration Manager installation wizard page appears.
7. In Oracle WebCenter Configuration Manager, configure all settings for all of the Analytics Collector application components using the database and connectivity settings that you provisioned when you completed the Oracle WebCenter Analytics Configuration Worksheets document.
Clustering the BEA AL Analytics Collector Service(Optional) A BEA AL Analytics Collector service cluster consists of multiple BEA AL Analytics Collector service nodes running simultaneously and working together to provide increased scalability and reliability. One instance of the BEA AL Analytics Collector service operates as one node in the cluster.
Note: You do not need to perform these steps if you do not want to cluster the BEA AL Analytics Collector service.
For more complete details on performing this task, see “Clustering the BEA AL Analytics Collector Service” on page 4-14.
To cluster the BEA AL Analytics Collector service:
1. Configure Oracle Webcenter Interaction to send events to the BEA AL Analytics Collector service cluster. For details, see Configuring Oracle Webcenter Interaction to Send Events to the Cluster.
3-10 Installation and Upgrade Guide for Oracle WebCenter Analytics 10.3

Ins ta l la t ion
2. Configure the nodes in the BEA AL Analytics Collector service cluster. For details, see “Configuring Nodes in a Cluster” on page 3-11.
Configuring Oracle Webcenter Interaction to Send Events to the ClusterTo configure Oracle Webcenter Interaction to send events to the BEA AL Analytics Collector service cluster:
1. Access Oracle WebCenter Configuration Manager on the machine on which Oracle Webcenter Interaction is installed.
2. Configure the following settings in the Analytics Communication component:
– Confirm that the Enabled check box is selected in the Enable area.
– Click Enabled in the Use Clustering area.
– Configure the following settings in the Cluster Communication area: Cluster name, Cluster node timeout period, Broadcast listening port.
Online help for these settings is available in the Oracle WebCenter Configuration Manager application.
Configuring Nodes in a ClusterThis section discusses how to configure nodes in a BEA AL Analytics Collector service cluster.
If you are configuring nodes of the BEA AL Analytics Collector service to use broadcast mode, IP broadcast packets are not automatically forwarded from one subnet to another. For this reason, you should configure each instance of the BEA AL Analytics Collector service to be in the same subnet as the application from which it receives events. This configuration ensures that the event-generating applications can successfully receive broadcast messages from the Collector service cluster. If you use virtualization software, we recommend that you configure nodes of the BEA AL Analytics Collector service to use broadcast mode.
Note: Perform this procedure for each node in the cluster.
To configure a node in a BEA AL Analytics Collector service cluster:
1. Ensure that you have installed the Analytics Collector component on each machine that will host a node in the cluster.
Note: We recommend that each instance of the BEA AL Analytics Collector service exist on a separate machine.
For installation instructions, see “Installing the Analytics Collector Component” on page 3-9.
Installation and Upgrade Guide for Oracle WebCenter Analytics 10.3 3-11

Quickstar t Overv i ew
2. Access Oracle WebCenter Configuration Manager on the BEA AL Analytics Collector service host.
3. Click the + symbol next to the Analytics Collector application name to view its components.
4. Configure the settings in the Analytics Database component.
5. Configure the settings in the Clustering component.
Note: The value for the Cluster name field should match the value set for the Cluster name field in the Portal Service application, Analytics Communication component of Oracle WebCenter Configuration Manager on the portal host. You configured this setting when you performed the procedure “Configuring Oracle Webcenter Interaction to Send Events to the Cluster” on page 3-11.
6. Configure the settings in the Logging component.
Online help for these settings is available in the Oracle WebCenter Configuration Manager application.
Installing the Interaction Analytics ComponentThe Interaction Analytics component facilitates communication between Oracle WebCenter Analytics and the portal. For more complete details on performing this task, see “Installing the Interaction Analytics Component” on page 4-16.
Note: You must reinstall the Interaction Analytics component after each time you upgrade Oracle Webcenter Interaction.
To install the Interaction Analytics component:
1. Log in to the portal host computer as the same user that installed Oracle Webcenter Interaction.
2. If you are running on Java, shut down the application server.
3. Copy the installer to the disk location from where you plan to launch it. The installer file is one of the following:
– Windows: WebCenterAnalytics_WCI_10.3.0.0.0.exe
– UNIX/Linux: WebCenterAnalytics_WCI_10.3.0.0.0
4. Choose to install the Interaction Analytics Component.
3-12 Installation and Upgrade Guide for Oracle WebCenter Analytics 10.3

Ins ta l la t ion
5. Complete all installation wizard pages according to the settings you planned when you completed the Interaction Analytics Component Installation Worksheet, which is included in the Oracle WebCenter Analytics Configuration Worksheets document.
6. After the installer has copied all files to the installation directory, the Launch Configuration Manager installation wizard page appears.
7. In Oracle WebCenter Configuration Manager, configure all settings for all of the Analytics Communication application components using the database and connectivity settings that you provisioned when you completed the Oracle WebCenter Analytics Configuration Worksheets document.
8. After the installation is complete, perform one of the following:
– If you are running on Java, restart the application server. Then redeploy your portal.war or portal.ear file to your portal application server.
– If you are running on IIS, restart the application server. For instructions, see your application server’s documentation.
Installing the Image Service ComponentFor more complete details on performing this task, see “Installing the Image Service Component” on page 4-19.
To install the Image Service component:
1. Log in to the Image Service host computer as the local administrator or the Oracle WebCenter Interaction user created during installation of Oracle WebCenter Interaction.
2. Copy the installer to the disk location from where you plan to launch it.
3. Launch the Oracle WebCenter Analytics Installer.
– Windows: WebCenterAnalytics_WCI_10.3.0.0.0.exe
– UNIX/Linux: WebCenterAnalytics_WCI_10.3.0.0.0
4. Choose to install the Image Service Component.
Installing the Analytics Automation Jobs ComponentFor more complete details on performing this task, see “Installing the Analytics Automation Jobs Component” on page 4-20
To install the Analytics Automation Jobs component:
Installation and Upgrade Guide for Oracle WebCenter Analytics 10.3 3-13

Quickstar t Overv i ew
1. Log in to the Automation Service host computer as the local administrator or the Oracle WebCenter Interaction user created during the installation of Oracle WebCenter Interaction.
2. Copy the installer to the disk location from where you plan to launch it.
3. Launch the Oracle WebCenter Analytics Installer.
– Windows: WebCenterAnalytics_WCI_10.3.0.0.0.exe
– UNIX/Linux: WebCenterAnalytics_WCI_10.3.0.0.0
Note: Ensure that you copy the installer for the same platform that the Automation Service runs on. For example, if the Automation Service runs on Solaris, copy the Solaris installer.
4. Choose to install the Analytics Automation Jobs component.
5. Complete all installation wizard pages according to the settings you planned when you completed the Analytics Automation Jobs Component Installation Worksheet, which is included in the Oracle WebCenter Analytics Configuration Worksheets document.
6. After the installer has copied all files to the installation directory, the Launch Configuration Manager installation wizard page appears.
7. In Oracle WebCenter Configuration Manager, configure all settings for all of the Analytics Jobs application components using the database and connectivity settings that you provisioned when you completed the Oracle WebCenter Analytics Configuration Worksheets document.
Starting the BEA AL Analytics and BEA AL Analytics Collector ServicesFor more complete details on performing this task, see “Starting the BEA AL Analytics and BEA AL Analytics Collector Services” on page 4-22.
To start the BEA AL Analytics and BEA AL Analytics Collector services, perform one of the following:
On Windows, ensure the BEA AL Analytics service has been started in Windows NT Services. Then ensure the BEA AL Analytics Collector service has been started.
On UNIX and Linux, ensure the BEA AL Analytics service has been started by using the following command: install_dir/ptanalytics/10.3.0/bin/analyticsd.sh start
Then ensure the BEA AL Analytics Collector service has been started by using the following comment: install_dir/ptanalytics/10.3.0/bin/collectord.sh start
3-14 Installation and Upgrade Guide for Oracle WebCenter Analytics 10.3

Ins ta l la t ion
You can also start and stop these services using Oracle WebCenter Configuration Manager. Log in to Oracle WebCenter Configuration Manager using the user name Administrator and the password you specified during installation. Follow the instructions in Oracle WebCenter Configuration Manager to start the Analytics Console and Analytics Collector applications.
Registering Oracle WebCenter Analytics with the PortalThis section describes how to register the Analytics Console, remote server, web service, and portlet objects. For more complete details on performing this task, see “Registering Oracle WebCenter Analytics with the Portal” on page 4-23.
To register the Oracle WebCenter Analytics application, remote server, web services, and portlets with the portal, use the migration utility to import the migration package analytics.pte.
Adding Analytics Jobs to the Automation ServiceThis section describes how to add all Analytics jobs to the Automation Service. Once Analytics jobs are added to the Automation Service, the Automation Service runs them automatically. For more complete details on performing this task, see “Adding Analytics Jobs to the Automation Service” on page 4-24.
To add Analytics jobs to the Automation Service:
1. Log into the portal as a user with administrative privileges.
2. In Administration, choose Automation Service.
3. Ensure that the Automation Service is online.
4. Under Edit Automation Services, click the name of the computer on which the Analytics Jobs component is installed.
The Register Folders window appears.
5. Click Add Folder.
The Add Job Folder window appears.
6. Expand the Analytics folder.
7. Select the Analytics Jobs folder.
8. Click OK to close the Register Folders window.
9. Click Finish.
Installation and Upgrade Guide for Oracle WebCenter Analytics 10.3 3-15

Quickstar t Overv i ew
The Automation Service runs the Analytics jobs. If other Automation Service jobs were in queue or running when you added the Analytics jobs to the Automation Service, the Automation Service runs the Analytics jobs after these other jobs have completed.
10. At an appropriate time, ensure that the Analytics jobs have completed successfully. If any Analytics jobs failed, schedule these jobs to run again.
Upgrade
Upgrade PathsThe following table summarizes the supported database upgrade paths for Oracle WebCenter Analytics.
Note: We do not support upgrades from AquaLogic Analytics 1.x to Oracle WebCenter Analytics 10.3. To do so, you must first upgrade AquaLogic Analytics 1.0/1.1 to either 2.0 or 2.1, then perform the appropriate upgrade to Oracle WebCenter Analytics 10.3.
Upgrading Oracle WebCenter AnalyticsThis section discusses:
Upgrading from AquaLogic Analytics 2.1 to Oracle WebCenter Analytics 10.3
Upgrading from AquaLogic Analytics 2.0 to Oracle WebCenter Analytics 10.3
Table 3-1 Upgrade Paths
Upgrade Path Upgrade References
AquaLogic Analytics 2.1 to Oracle WebCenter Analytics 10.3.
Follow the procedures in this chapter.
AquaLogic Analytics 2.0 to Oracle WebCenter Analytics 10.3.
Follow the procedures in this chapter.
3-16 Installation and Upgrade Guide for Oracle WebCenter Analytics 10.3
Upgrade
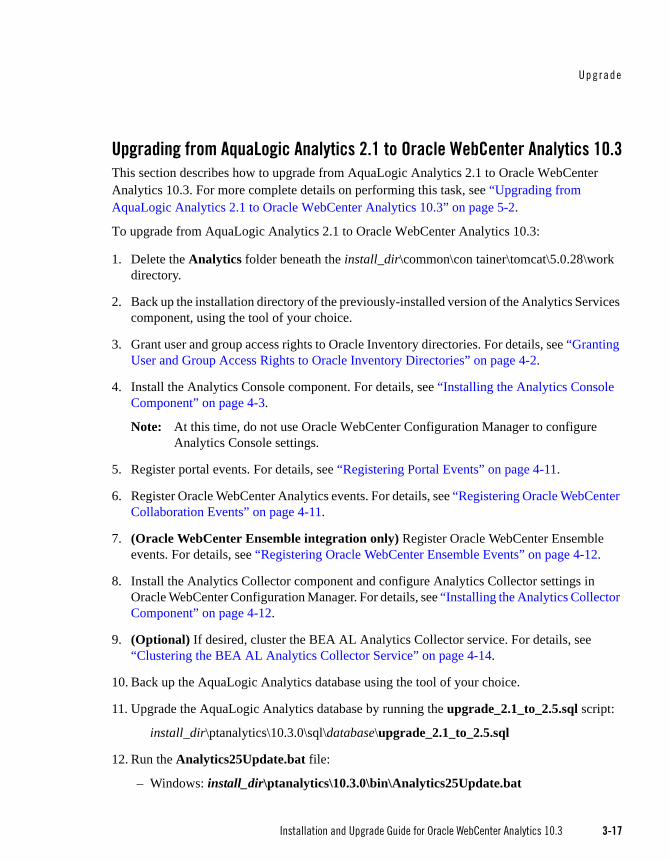
Upgrading from AquaLogic Analytics 2.1 to Oracle WebCenter Analytics 10.3This section describes how to upgrade from AquaLogic Analytics 2.1 to Oracle WebCenter Analytics 10.3. For more complete details on performing this task, see “Upgrading from AquaLogic Analytics 2.1 to Oracle WebCenter Analytics 10.3” on page 5-2.
To upgrade from AquaLogic Analytics 2.1 to Oracle WebCenter Analytics 10.3:
1. Delete the Analytics folder beneath the install_dir\common\con tainer\tomcat\5.0.28\work directory.
2. Back up the installation directory of the previously-installed version of the Analytics Services component, using the tool of your choice.
3. Grant user and group access rights to Oracle Inventory directories. For details, see “Granting User and Group Access Rights to Oracle Inventory Directories” on page 4-2.
4. Install the Analytics Console component. For details, see “Installing the Analytics Console Component” on page 4-3.
Note: At this time, do not use Oracle WebCenter Configuration Manager to configure Analytics Console settings.
5. Register portal events. For details, see “Registering Portal Events” on page 4-11.
6. Register Oracle WebCenter Analytics events. For details, see “Registering Oracle WebCenter Collaboration Events” on page 4-11.
7. (Oracle WebCenter Ensemble integration only) Register Oracle WebCenter Ensemble events. For details, see “Registering Oracle WebCenter Ensemble Events” on page 4-12.
8. Install the Analytics Collector component and configure Analytics Collector settings in Oracle WebCenter Configuration Manager. For details, see “Installing the Analytics Collector Component” on page 4-12.
9. (Optional) If desired, cluster the BEA AL Analytics Collector service. For details, see “Clustering the BEA AL Analytics Collector Service” on page 4-14.
10. Back up the AquaLogic Analytics database using the tool of your choice.
11. Upgrade the AquaLogic Analytics database by running the upgrade_2.1_to_2.5.sql script:
install_dir\ptanalytics\10.3.0\sql\database\upgrade_2.1_to_2.5.sql
12. Run the Analytics25Update.bat file:
– Windows: install_dir\ptanalytics\10.3.0\bin\Analytics25Update.bat
Installation and Upgrade Guide for Oracle WebCenter Analytics 10.3 3-17

Quickstar t Overv i ew
– UNIX/Linux: install_dir/ptanalytics/10.3.0/bin/Analytics25Update.sh
13. On the machine on which you installed the Analytics Console component, use Oracle WebCenter Configuration Manager to configure all settings for all Analytics Console application components.
14. (Oracle only) Run your database’s analysis tool on both the Oracle WebCenter Analytics and portal databases to increase the efficiency of the databases.
15. Back up the installation directory of the previously-installed version of the Interaction Analytics component, using the tool of your choice.
16. Install the Interaction Analytics component and configure Analytics Communication settings in Oracle WebCenter Configuration Manager. For details, see “Installing the Interaction Analytics Component” on page 4-16.
17. Install the Image Service component. For details, “Installing the Image Service Component” on page 4-19.
18. Stop and restart the BEA AL Analytics and BEA AL Analytics Collector services. For details, see “Starting the BEA AL Analytics and BEA AL Analytics Collector Services” on page 4-22.
19. Install the Analytics Automation Jobs component and configure Analytics Jobs settings in Oracle WebCenter Configuration Manager. For details, see “Installing the Analytics Automation Jobs Component” on page 4-20.
20. Add Analytics jobs to the Automation Service. For details, see “Adding Analytics Jobs to the Automation Service” on page 4-24.
21. (Optional) Create and set up the ALUI Security database and migrate data from the portal database’s security tables to the ALUI Security database.
Note: You do not need to perform these steps if either AquaLogic Pathways 1.5 or the Remote Portlets component of Oracle WebCenter Interaction 10.3 is installed. Performing a clean (non-upgrade) install of AquaLogic Pathways 1.5 or installing the Remote Portlets component requires creating the ALUI Security database. Additionally, upgrading from AquaLogic Pathways 1.0 to AquaLogic Pathways 1.5 requires creating the ALUI Security database and migrating data from the portal database’s security tables to the ALUI Security database.
a. Create and set up the ALUI Security database. For details, see “Configuring the ALUI Security Database” on page 4-9.
3-18 Installation and Upgrade Guide for Oracle WebCenter Analytics 10.3

Upgrade
b. On the machine on which the previous version of the BEA AL Analytics service is installed, run the security-upgradetool.bat or security-upgradetool.sh file, located in install_dir\ptanalytics\10.3.0\bin .
Upgrading from AquaLogic Analytics 2.0 to Oracle WebCenter Analytics 10.3To upgrade from AquaLogic Analytics 2.0 to Oracle WebCenter Analytics 10.3:
1. Delete the Analytics folder beneath the install_dir\common\container\tomcat\5.0.28\work directory.
2. Back up the installation directory of the previously-installed version of Analytics Services, using the tool of your choice.
3. Grant user and group access rights to Oracle Inventory directories. For details, see “Granting User and Group Access Rights to Oracle Inventory Directories” on page 4-2.
4. Install the Analytics Console component. For details, see “Installing the Analytics Console Component” on page 4-3.
Note: At this time, do not use Oracle WebCenter Configuration Manager to configure Analytics Console settings.
5. Register portal events. For details, see “Registering Portal Events” on page 4-11.
6. Register Oracle WebCenter Analytics events. For details, see “Registering Oracle WebCenter Collaboration Events” on page 4-11.
7. (Oracle WebCenter Ensemble integration only) Register Oracle WebCenter Ensemble events. For details, see “Registering Oracle WebCenter Ensemble Events” on page 4-12.
8. Install the Analytics Collector component and configure Analytics Collector settings in Oracle WebCenter Configuration Manager. For details, see “Installing the Analytics Collector Component” on page 4-12.
9. (Optional) If desired, cluster the BEA AL Analytics Collector service. For details, see “Clustering the BEA AL Analytics Collector Service” on page 4-14.
10. Back up the AquaLogic Analytics database using the tool of your choice.
11. Upgrade the AquaLogic Analytics database by running the upgrade_2.0_to_2.1.sql script:
– Windows: install_dir\ptanalytics\10.3.0\sql\database\upgrade_2.0_to_2.1.sql
– UNIX/Linux: install_dir/ptanalytics/10.3.0/sql\database/upgrade_2.0_to_2.1.sql
12. Upgrade the AquaLogic Analytics database by running the upgrade_2.1_to_2.5.sql script:
Installation and Upgrade Guide for Oracle WebCenter Analytics 10.3 3-19

Quickstar t Overv i ew
– Windows: install_dir\ptanalytics\10.3.0\sql\database\upgrade_2.1_to_2.5.sql
– UNIX/Linux: install_dir/ptanalytics/10.3.0/sql\database/upgrade_2.1_to_2.5.sql
13. Run the Analytics25Update.bat file:
– Windows: install_dir\ptanalytics\10.3.0\bin\Analytics25Update.bat
– UNIX/Linux: install_dir/ptanalytics/10.3.0/bin/Analytics25Update.sh
14. On the machine on which you installed the Analytics Console component, configure all Analytics Console settings in Oracle WebCenter Configuration Manager.
15. (Oracle only) Run your database’s analysis tool on both the Oracle WebCenter Analytics and portal databases to increase the efficiency of the databases.
16. Back up the installation directory of the previously-installed version of the Interaction Analytics component, using the tool of your choice.
17. Install the Interaction Analytics component and configure Analytics Communication settings in Oracle WebCenter Configuration Manager. For details, see “Installing the Interaction Analytics Component” on page 4-16
18. Install the Image Service component. For details, “Installing the Image Service Component” on page 4-19
19. Stop and restart the BEA AL Analytics and BEA AL Analytics Collector services. For details, see “Starting the BEA AL Analytics and BEA AL Analytics Collector Services” on page 4-22.
20. Register the Oracle WebCenter Analytics application, remote server, Web services, and portlets with the portal by importing the migration package. For details, see “Registering Oracle WebCenter Analytics with the Portal” on page 4-23.
21. Install the Analytics Automation Jobs component and configure Analytics Jobs settings in Oracle WebCenter Configuration Manager. For details, see “Installing the Analytics Automation Jobs Component” on page 4-20
22. Add Analytics jobs to the Automation Service. For details, see “Adding Analytics Jobs to the Automation Service” on page 4-24.
23. (Optional) Create and set up the ALUI Security database and migrate data from the portal database’s security tables to the ALUI Security database.
Note: You do not need to perform these steps if either AquaLogic Pathways 1.5 or the Remote Portlets component of Oracle Webcenter interaction 10.3 is installed.
3-20 Installation and Upgrade Guide for Oracle WebCenter Analytics 10.3

Upgrade
Performing a clean (non-upgrade) install of AquaLogic Pathways 1.5 or installing the Remote Portlets component requires creating the ALUI Security database. Additionally, upgrading from AquaLogic Pathways 1.0 to AquaLogic Pathways 1.5 requires creating the ALUI Security database and migrating data from the portal database’s security tables to the ALUI Security database.
a. Create and set up the ALUI Security database. For details, see “Configuring the ALUI Security Database” on page 4-9.
b. On the machine on which the previous version of the BEA AL Analytics service is installed, run the security-upgrade.bat or security-upgrade.sh file, located in install_dir\ptanalytics\10.3.0\bin .
Installation and Upgrade Guide for Oracle WebCenter Analytics 10.3 3-21

Quickstar t Overv i ew
3-22 Installation and Upgrade Guide for Oracle WebCenter Analytics 10.3

C H A P T E R 4
Installation
This chapter describes the steps you take to install Oracle WebCenter Analytics and its components:
1. Ensure you have completed pre-installation steps. For details, see “Installation Prerequisites” on page 2-1.
2. Grant user and group access rights to Oracle Inventory directories. For details, see “Granting User and Group Access Rights to Oracle Inventory Directories” on page 4-2.
3. Install the Analytics Console component on the remote server host computer. For details, see “Installing the Analytics Console Component” on page 4-3.
4. Configure the Oracle WebCenter Analytics database. For details, see “Configuring the Oracle WebCenter Analytics Database” on page 4-6.
5. Configure the ALUI Security database. For details, see “Configuring the ALUI Security Database” on page 4-9.
6. Register portal events. For details, see “Registering Portal Events” on page 4-11.
7. Register Oracle WebCenter Collaboration events. For details, see “Registering Oracle WebCenter Collaboration Events” on page 4-11.
8. (Oracle WebCenter Ensemble integration only) Register Oracle WebCenter Ensemble events. For details, see “Registering Oracle WebCenter Ensemble Events” on page 4-12.
9. Install the Analytics Collector component and cluster the BEA AL Analytics Collector service. For details, see “Installing the Analytics Collector Component and Clustering the BEA AL Analytics Collector Service” on page 4-12.
Installation and Upgrade Guide for Oracle WebCenter Analytics 10.3 4-1

Ins ta l la t i on
Note: Installing the Analytics Collector component is required. However, clustering the BEA AL Analytics Collector service is optional.
10. Install the Interaction Analytics component on all portal servers. For details, see “Installing the Interaction Analytics Component” on page 4-16.
11. Install the Image Service component on your Image Service host. For details, see “Installing the Image Service Component” on page 4-19.
12. Install the Analytics Automation Jobs component on your Automation Service host. For details, see “Installing the Analytics Automation Jobs Component” on page 4-20.
13. Start Oracle WebCenter Analytics and portal services. For details, see “Starting the BEA AL Analytics and BEA AL Analytics Collector Services” on page 4-22.
14. Register the Oracle WebCenter Analytics application, remote server, web services, and portlets with the portal. For details, see “Registering Oracle WebCenter Analytics with the Portal” on page 4-23.
15. Add Analytics jobs to the Automation Service. For details, see “Adding Analytics Jobs to the Automation Service” on page 4-24.
Granting User and Group Access Rights to Oracle Inventory Directories
(Linux/UNIX only) Oracle Inventory contains files that provide the Oracle Universal Installer with the locations of the ORACLE_HOME directories on a particular machine. For Oracle Inventory to function properly, the user that installs Oracle WebCenter Analytics must have access rights to the directories that contain Oracle Inventory’s files. This section describes how to run the ouais.sh shell script, which sets user and group access rights for these directories.
Note: You do not need to perform this procedure if you are installing Oracle WebCenter Analytics on Windows.
Note: If you are installing Oracle WebCenter Analytics on Linux or UNIX operating systems, you do not need to perform this procedure if, as the same user that is installing Oracle WebCenter Analytics, you have already installed at least one of the following products on the same machine on which you are installing Oracle WebCenter Analytics:
Oracle WebCenter Interaction 10.3
Oracle WebCenter Collaboration 10.3
Oracle WebCenter Ensemble 10.3
4-2 Installation and Upgrade Guide for Oracle WebCenter Analytics 10.3

Ins ta l l ing the Ana l y t i cs Conso le Component
Oracle WSRP Consumer 10.3
Oracle WebCenter Interaction Identity Service for LDAP 10.3
Oracle WebCenter Content Service for Documentum 10.3
To grant user and group access rights to Oracle Inventory directories:
1. Log in to the remote server host computer as the root user.
2. Copy the ouais.sh script to the machine onto which you will be installing Oracle WebCenter Analytics.
This script is located in the same location as the Oracle WebCenter Analytics installer file.
3. Change the current directory (cd) to be the directory to which you copied the ouais.sh script.
4. Run the ouais.sh shell script.
As arguments to the script, specify the user and group that will be running the Oracle WebCenter Analytics installer. For example, you would use the following command to run the ouais.sh script from the root shell:
./ouais.sh -u <oracleuser> -g <oraclegroup>
The ouais.sh script creates the Oracle Inventory directory if it did not exist before you ran the script. Additionally, the script grants user and group ownership to the directories that contain the files that are used by Oracle Inventory.
Installing the Analytics Console ComponentThis section describes how to install the Analytics Console component, which includes the Analytics user interface and the BEA AL Analytics service. The instructions are the same for installing on a Windows, UNIX, or Linux host, with slight exceptions as noted. To install the Analytics Console component:
1. Log in to the remote server host computer as the local administrator (on Windows) or a user with directory write privileges (on UNIX or Linux).
Note: For UNIX and Linux installations, you must run the Oracle WebCenter Analytics installer as the user that you specifed in the procedure “Granting User and Group Access Rights to Oracle Inventory Directories” on page 4-2. You specified the user who will run the product installer as an argument to the ouais.sh script.
2. Copy the installer to the disk location from where you plan to launch it. The installer file is one of the following:
Installation and Upgrade Guide for Oracle WebCenter Analytics 10.3 4-3

Ins ta l la t i on
– Windows: WebCenterAnalytics_WCI_10.3.0.0.0.exe
– UNIX/Linux: WebCenterAnalytics_WCI_10.3.0.0.0
3. Close all unnecessary applications.
4. Execute the installer file.
5. Complete the installation wizard pages as described in the following table and according to the settings you planned when you completed the BEA AL Analytics Service Installation Worksheet, which is included in the Oracle WebCenter Analytics Configuration Worksheets document.
Table 4-1 Installation Wizard Pages - Analytics Console Component
Wizard Page Description
Choose Components Choose Analytics Console.
Analytics Console - Installation Directory
The default is:• install_dir\ptanalytics (Windows)• install_dir/ptanalytics (UNIX and Linux)
Note: By default, install_dir is C:\bea\alui (Windows) and /opt/bea/alui (UNIX/Linux)
Configuration Manager - Update
This page is displayed if an existing installation of Oracle WebCenter Configuration Manager is detected. Select if you want to update the password or port information for Oracle WebCenter Configuration Manager or use the existing settings.
Configuration Manager - Port and Password
This page is displayed if you chose to update Oracle WebCenter Configuration Manager’s password and port information or if you are installing Oracle WebCenter Configuration Manager for the first time.
Type the port number on which you want Oracle WebCenter Configuration Manager to service requests.
By default, the port number is 12345. After running the installer, you will be able to access Oracle WebCenter Configuration Manager by using the following URL: https://localhost:port_number.
Also type and confirm the Administrator password that you will use to log into Oracle WebCenter Configuration Manager. The password is case-sensitive.
In Windows, the Oracle WebCenter Configuration Manager runs as the BEA AL Configuration Manager(port_number) service.
4-4 Installation and Upgrade Guide for Oracle WebCenter Analytics 10.3

Ins ta l l ing the Ana l y t i cs Conso le Component
Pre-Installation Summary Click Install to begin the installation. The installer copies the BEA AL Analytics service and core application files to the installation directory.
Note: The installer writes a log file to the directory where it is installed (for example: C:\bea\alui\installlogs). If you encounter problems during installation, examine the error messages in the log file.
Launch Configuration Manager
This installation wizard page lets you access Oracle WebCenter Configuration Manager to configure settings for the core Oracle WebCenter Analytics application. It is important that you perform these steps in the following order:1. Before launching Oracle WebCenter Configuration Manager, you must
configure the Oracle WebCenter Analytics and ALUI Security databases, described in: – “Configuring the Oracle WebCenter Analytics Database” on
page 4-6.– “Configuring the ALUI Security Database” on page 4-9.
2. Click the link on this installation wizard page to access Oracle WebCenter Configuration Manager. The default username for logging into Oracle WebCenter Configuration Manager is administrator. Use the password that you typed into the Configuration Manager - Port and Password installation wizard page.
3. In Oracle WebCenter Configuration Manager, click the + symbol next to the Analytics Console application name to view its components.
4. Configure all settings for all of the Analytics Console components using the database and connectivity settings that you provisioned when you completed the Oracle WebCenter Analytics Configuration Worksheets document.Online Help for these settings is available in the Oracle WebCenter Configuration Manager application.
Note: We recommend that you sync the clocks on the servers that run Oracle WebCenter Analytics and the portal before proceeding with configuration. If the clocks are not aligned, some events and sync jobs behave incorrectly.
5. (Optional) Click LOGOUT in Oracle WebCenter Configuration Manager.
Table 4-1 Installation Wizard Pages - Analytics Console Component
Wizard Page Description
Installation and Upgrade Guide for Oracle WebCenter Analytics 10.3 4-5

Ins ta l la t i on
Configuring the Oracle WebCenter Analytics DatabaseThis section describes how to set up the Oracle WebCenter Analytics database. It contains the following sections:
Creating the Oracle WebCenter Analytics Database on Microsoft SQL Server
Creating the Oracle WebCenter Analytics Database on Oracle
Creating the Oracle WebCenter Analytics Database on Microsoft SQL ServerTo create and set up the Oracle WebCenter Analytics database on Microsoft SQL Server:
1. On the machine to which you installed the Analytics Console component, copy the scripts from install_dir\ptanalytics\10.3.0\sql\mssql to the database host computer.
2. In SQL Server Management Studio, access database engine’s properties.
3. Configure the database engine to use SQL Server and Windows Authentication mode.
4. Restart the database engine.
5. Create the Oracle WebCenter Analytics database user:
a. Create the Oracle WebCenter Analytics database user with the user name you provisioned when you completed the Configuration Worksheet, which is included in the Oracle WebCenter Analytics Configuration Worksheets document.
Application Settings Confirmation
Select Yes if you have completed configuration of the Oracle WebCenter Analytics settings.
Select No, configure later to complete the installer without configuring the Oracle WebCenter Analytics settings. You must run the Oracle WebCenter Configuration Manager and configure Oracle WebCenter Analytics settings before starting Oracle WebCenter Analytics.
Install Complete Click Done to complete the Analytics Console component installation.
Table 4-1 Installation Wizard Pages - Analytics Console Component
Wizard Page Description
4-6 Installation and Upgrade Guide for Oracle WebCenter Analytics 10.3
Conf igur ing the Orac le WebCente r Ana ly t ics Database
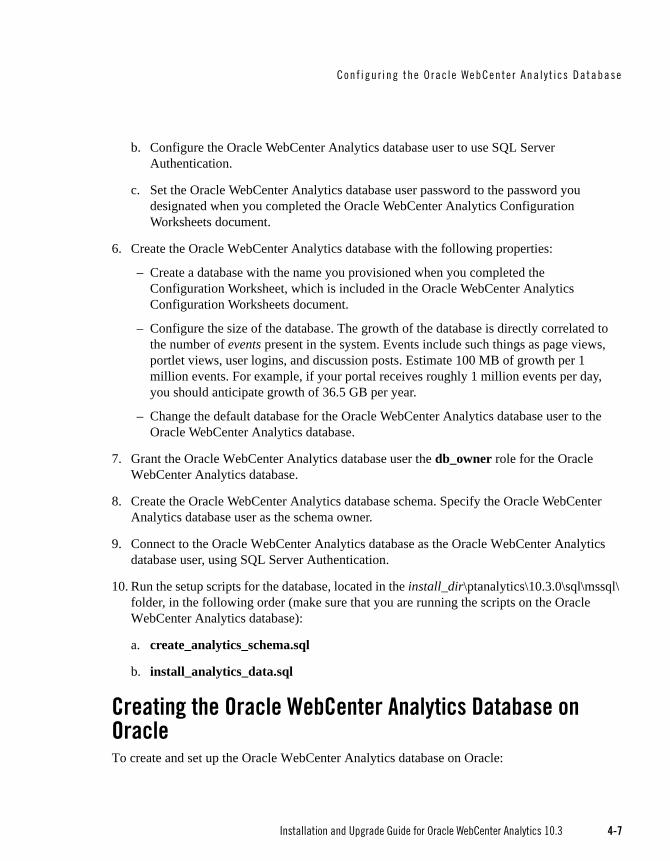
b. Configure the Oracle WebCenter Analytics database user to use SQL Server Authentication.
c. Set the Oracle WebCenter Analytics database user password to the password you designated when you completed the Oracle WebCenter Analytics Configuration Worksheets document.
6. Create the Oracle WebCenter Analytics database with the following properties:
– Create a database with the name you provisioned when you completed the Configuration Worksheet, which is included in the Oracle WebCenter Analytics Configuration Worksheets document.
– Configure the size of the database. The growth of the database is directly correlated to the number of events present in the system. Events include such things as page views, portlet views, user logins, and discussion posts. Estimate 100 MB of growth per 1 million events. For example, if your portal receives roughly 1 million events per day, you should anticipate growth of 36.5 GB per year.
– Change the default database for the Oracle WebCenter Analytics database user to the Oracle WebCenter Analytics database.
7. Grant the Oracle WebCenter Analytics database user the db_owner role for the Oracle WebCenter Analytics database.
8. Create the Oracle WebCenter Analytics database schema. Specify the Oracle WebCenter Analytics database user as the schema owner.
9. Connect to the Oracle WebCenter Analytics database as the Oracle WebCenter Analytics database user, using SQL Server Authentication.
10. Run the setup scripts for the database, located in the install_dir\ptanalytics\10.3.0\sql\mssql\ folder, in the following order (make sure that you are running the scripts on the Oracle WebCenter Analytics database):
a. create_analytics_schema.sql
b. install_analytics_data.sql
Creating the Oracle WebCenter Analytics Database on OracleTo create and set up the Oracle WebCenter Analytics database on Oracle:
Installation and Upgrade Guide for Oracle WebCenter Analytics 10.3 4-7

Ins ta l la t i on
1. On the machine to which you installed the Analytics Console component, copy the oracle directory from install_dir\ptanalytics\10.3.0\sql to the Oracle WebCenter Analytics database’s host computer. This folder contains the scripts that you will use to set up and configure the Oracle WebCenter Analytics Oracle database.
2. Log on to the host computer for the Oracle WebCenter Analytics database as owner of the Oracle system files.
3. Execute the following steps as the system user in your Oracle database.
a. Determine the name of the SID that you will be using for this installation. If you changed the SID from the default when you installed the portal, you need to update create_analytics_tablespaces.sql to reflect the SID that you used, substituting all occurrences of the default SID name with your SID name. The default SID name is BEAS.
If you are creating a new SID, configure AL32UTF8 as the database character set and AL16UTF16 as the national character set.
b. Run the script create_analytics_tablespaces.sql for your platform. This file is located in a platform specific subdirectory within the oracle directory that you copied in Step 1.
c. Run the script create_analytics_user.sql.
Note: If you do not want the script to use the defaults when creating the Oracle database user and password, edit the script. The default user is analyticsdbuser; the default password is analyticsdbuser. The create_analytics_user.sql script is located in the oracle directory that you copied in Step 1.
d. Add the Oracle database user and password values into the Configuration Worksheet, which is included in the Oracle WebCenter Analytics Configuration Worksheets document (you will enter these values into Oracle WebCenter Configuration Manager when configuring Oracle WebCenter Analytics database settings).
4. Execute the following steps as the analytics user that you just created.
a. Run the script create_analytics_schema.sql. This script creates all of the tables and indexes that are necessary to run Oracle WebCenter Analytics. The create_analytics_schema.sql script is located in the oracle directory that you copied in Step 1.
b. Run the script install_analytics_data.sql. This script adds all of the initial seed data that are necessary to run the Oracle WebCenter Analytics product. The install_analytics_data.sql script is located in the oracle directory that you copied in Step 1.
5. Run your database’s analysis tool on the portal database to the efficiency of the database.
4-8 Installation and Upgrade Guide for Oracle WebCenter Analytics 10.3

Conf igur ing the ALU I Secur i t y Database
Configuring the ALUI Security Database(Optional) This section describes how to set up the ALUI Security database.
Note: You do not need to perform this procedure if AquaLogic Pathways 1.5 is installed. Installing AquaLogic Pathways 1.5 requires creating the ALUI Security database.
This section contains the following sections:
Creating the ALUI Security Database on Microsoft SQL Server
Creating the ALUI Security Database on Oracle
Creating the ALUI Security Database on Microsoft SQL Server(Optional) This section describes how to set up the ALUI Security database on Microsoft SQL Server.
Note: You do not need to perform this procedure if AquaLogic Pathways 1.5 is installed. Installing AquaLogic Pathways 1.5 requires creating the ALUI Security database.
To create and set up the ALUI Security database on Microsoft SQL Server:
1. On the machine to which you installed the Analytics Console component, copy the scripts from install_dir\ptanalytics\10.3.0\sql\mssql to the ALUI Security database host computer.
This folder contains the script that you will use to configure the ALUI Security database.
2. In SQL Server Management Studio, access the database engine’s properties.
3. Configure the database engine to use SQL Server and Windows Authentication mode.
4. Restart the database engine.
5. Create the ALUI Security database user:
a. Create the ALUI Security database user with the user name you provisioned when you completed the Configuration Worksheet, which is included in the Oracle WebCenter Analytics Configuration Worksheets document.
b. Configure the ALUI Security database user to use SQL Server Authentication.
c. Set the ALUI Security database user password to the password you designated when you completed the Oracle WebCenter Analytics Configuration Worksheets document.
Installation and Upgrade Guide for Oracle WebCenter Analytics 10.3 4-9

Ins ta l la t i on
6. Create the ALUI Security database with the name you provisioned when you completed the Configuration Worksheet, which is included in the Oracle WebCenter Analytics Configuration Worksheets document.
7. Change the default database for the ALUI Security database user to the ALUI Security database.
8. Grant the ALUI Security database user the db_owner role for the ALUI Security database.
9. Create the ALUI Security database schema. Specify the ALUI Security database user as the schema owner.
10. Connect to the ALUI Security database as the ALUI Security database user, using SQL Server Authentication.
11. Run the create_security_tables.sql script, located in the folder that you copied in Step 1.
Creating the ALUI Security Database on Oracle(Optional) This section describes how to set up the ALUI Security database on Oracle.
Note: You do not need to perform this procedure if AquaLogic Pathways 1.5 is installed. Installing AquaLogic Pathways 1.5 requires creating the ALUI Security database.
To create and set up the ALUI Security database on Oracle:
1. On the machine to which you installed the Analytics Console component, copy the oracle directory from install_dir\ptanalytics\10.3.0\sql to the ALUI Security database’s host computer.
This folder contains the script that you will use to configure the ALUI Security database.
2. Log on to the host computer for the ALUI Security database as owner of the Oracle system files.
3. Create the ALUI Security database tablespace.
4. Create the ALUI Security database user.
5. Add the ALUI Security database user and password values into the Configuration Worksheet, which is included in the Oracle WebCenter Analytics Configuration Worksheets document (you will enter these values into Oracle WebCenter Configuration Manager when configuring Oracle WebCenter Analytics database settings).
6. Connect to the ALUI Security database as the ALUI Security database user.
4-10 Installation and Upgrade Guide for Oracle WebCenter Analytics 10.3

Reg is te r ing Por ta l Events
7. Run the create_security_tables.sql script, located in the folder that you copied in Step 1.
8. Run your database’s analysis tool on the ALUI Security database to the efficiency of the database.
Registering Portal EventsYou must register portal events if you want Oracle WebCenter Analytics to report on events that occur in the portal. To register portal events, run the following from the command line on the Oracle WebCenter Analytics host machine:
Windows:
– .. PTANALYTICS_HOME\bin\AnalyticsLoadEvents.bat ..\settings\config\analytics-core-event-def.xml
– .. PTANALYTICS_HOME\bin\AnalyticsLoadEvents.bat ..\settings\config\analytics-ali-event-def.xml
UNIX/Linux:
– .. PTANALYTICS_HOME/bin/AnalyticsLoadEvents.sh ../settings/config/analytics-core-event-def.xml
– .. PTANALYTICS_HOME/bin/AnalyticsLoadEvents.sh ../settings/config/analytics-ali-event-def.xml
Registering Oracle WebCenter Collaboration EventsTo register Oracle WebCenter Collaboration events, perform the following:
1. Navigate to the following file on the Oracle WebCenter Collaboration host machine: install_dir\ptcollab\4.5\settings\config\analytics-collab-event-def.xml
2. Copy the analytics-collab-event-def.xml file on the Oracle WebCenter Collaboration host machine to the following location on the Analytics host machine: install_dir\ptanalytics\10.3.0\settings\config\
3. Run the following from the command line on the Oracle WebCenter Analytics host machine:
– .. PTANALYTICS_HOME\bin\AnalyticsLoadEvents.bat ..\settings\config\analytics-collab-event-def.xml (Windows)
– .. PTANALYTICS_HOME/bin/AnalyticsLoadEvents.sh ../settings/config/analytics-collab-event-def.xml (UNIX/Linux)
Installation and Upgrade Guide for Oracle WebCenter Analytics 10.3 4-11

Ins ta l la t i on
Registering Oracle WebCenter Ensemble Events(Oracle WebCenter Ensemble integration only) To register Oracle WebCenter Ensemble events, run the following from the command line on the Oracle WebCenter Analytics host machine:
.. PTANALYTICS_HOME\bin\AnalyticsLoadEvents.bat
..\settings\config\analytics-ensemble-event-def.xml (Windows)
.. PTANALYTICS_HOME/bin/AnalyticsLoadEvents.sh
../settings/config/analytics-ensemble-event-def.xml (UNIX/Linux)
Installing the Analytics Collector Component and Clustering the BEA AL Analytics Collector Service
This section includes the following topics:
Installing the Analytics Collector Component
Clustering the BEA AL Analytics Collector Service
Installing the Analytics Collector ComponentThis section describes how to install the Analytics Collector component, which includes the BEA AL Analytics Collector service. The instructions are the same for installing on a Windows, UNIX, or Linux host, with slight exceptions as noted.
Note: If you want to cluster the BEA AL Analytics Collector service, we recommend that you install each node in the cluster on a separate machine (one installation of the Analytics Collector component is one instance of the BEA AL Analytics Collector service. One instance of the BEA AL Analytics Collector service operates as one node in the cluster). For details on clustering the BEA AL Analytics Collector service, see “Clustering the BEA AL Analytics Collector Service” on page 4-14.
To install the Analytics Collector component:
1. Log in to the remote server host computer as the local administrator (on Windows) or a user with directory write privileges (on UNIX or Linux).
2. Copy the installer to the disk location from where you plan to launch it. The installer file is one of the following:
– Windows: WebCenterAnalytics_WCI_10.3.0.0.0.exe
4-12 Installation and Upgrade Guide for Oracle WebCenter Analytics 10.3

Ins ta l l ing the Ana l y t i cs Co l l ec to r Component and C lus te r ing the BEA AL Ana l y t i cs Co l l ec to r Se rv ice
– UNIX/Linux: WebCenterAnalytics_WCI_10.3.0.0.0
3. Close all unnecessary applications.
4. Execute the installer file.
5. Complete the installation wizard pages as described in the following table and according to the settings you planned when you completed the Analytics Collector Component Installation Worksheet, which is included in the Oracle WebCenter Analytics Configuration Worksheets document.
Table 4-2 Installation Wizard Pages - Analytics Collector Component
Wizard Page Description
Choose Components Choose Analytics Collector.
Analytics Collector - Installation Directory
The default is:• install_dir\ptcollector (Windows)• install_dir/ptcollector (UNIX and Linux)
Note: By default, install_dir is C:\bea\alui (Windows) and /opt/bea/alui (UNIX/Linux)
Configuration Manager - Update
This page is displayed if an existing installation of Oracle WebCenter Configuration Manager is detected. Select if you want to update the password or port information for Oracle WebCenter Configuration Manager or use the existing settings.
Configuration Manager - Port and Password
This page is displayed if you chose to update Oracle WebCenter Configuration Manager’s password and port information.
Type the port number on which you want Oracle WebCenter Configuration Manager to service requests.
By default, the port number is 12345. After running the installer, you will be able to access Oracle WebCenter Configuration Manager by using the following URL: https://localhost:port_number.
Also type and confirm the Administrator password that you will use to log into Oracle WebCenter Configuration Manager. The password is case-sensitive.
Pre-Installation Summary Click Install to begin the installation. The installer copies BEA AL Analytics Collector service files to the installation directory.
Note: The installer writes a log file to the directory where it is installed (for example: C:\bea\alui\installlogs). If you encounter problems during installation, examine the error messages in the log file.
Installation and Upgrade Guide for Oracle WebCenter Analytics 10.3 4-13

Ins ta l la t i on
Clustering the BEA AL Analytics Collector Service(Optional) A Collector service cluster consists of multiple BEA AL Analytics Collector service nodes running simultaneously and working together to provide increased scalability and reliability. One instance of the BEA AL Analytics Collector service operates as one node in the cluster.
Note: You do not need to perform these steps if you do not want to cluster the BEA AL Analytics Collector service.
To cluster the BEA AL Analytics Collector service:
1. Configure Oracle Webcenter Interaction to send events to the Oracle WebCenter Analytics Collector cluster. For details, see Configuring Oracle Webcenter Interaction to Send Events to the Cluster.
Launch Configuration Manager
Click the link to access Oracle WebCenter Configuration Manager. The default username for logging into Oracle WebCenter Configuration Manager is administrator. Use the password that you typed into the Configuration Manager - Port and Password installation wizard page.
In Oracle WebCenter Configuration Manager:1. Click the + symbol next to the Analytics Collector application name to
view its components.2. Configure all settings for all of the s.
Online Help for these settings is available in the Oracle WebCenter Configuration Manager application.Use the database and connectivity settings that you provisioned when you completed the Oracle WebCenter Analytics Configuration Worksheets document.
Application Settings Confirmation
Select Yes if you have completed configuration of the Oracle WebCenter Analytics Collector settings.
Select No, configure later to complete the installer without configuring the Oracle WebCenter Analytics Collector settings. You must run Oracle WebCenter Configuration Manager and configure Oracle WebCenter Analytics Collector settings before starting Oracle WebCenter Analytics.
Install Complete Click Done to complete the installation.
Table 4-2 Installation Wizard Pages - Analytics Collector Component
Wizard Page Description
4-14 Installation and Upgrade Guide for Oracle WebCenter Analytics 10.3

Ins ta l l ing the Ana l y t i cs Co l l ec to r Component and C lus te r ing the BEA AL Ana l y t i cs Co l l ec to r Se rv ice
2. Configure the nodes in the BEA AL Analytics Collector service cluster. For details, see “Configuring Nodes in a Cluster” on page 4-15.
Configuring Oracle Webcenter Interaction to Send Events to the ClusterTo configure Oracle Webcenter Interaction to send events to the BEA AL Analytics Collector service cluster:
1. Access Oracle WebCenter Configuration Manager on the machine on which Oracle Webcenter Interaction is installed.
2. Click the + symbol next to the Portal Service application name to view its components.
3. Configure the following settings in the Analytics Communication component:
– Confirm that the Enabled check box is selected in the Enable area.
– Click Enabled in the Use Clustering area.
– Configure the following settings in the Cluster Communication area: Cluster name, Cluster node timeout period, Broadcast listening port.
Online help for these settings is available in the Oracle WebCenter Configuration Manager application.
Configuring Nodes in a ClusterThis section discusses how to configure nodes in a BEA AL Analytics Collector service cluster.
If you are configuring nodes of the BEA AL Analytics Collector service to use broadcast mode, IP broadcast packets are not automatically forwarded from one subnet to another. For this reason, you should configure each instance of the BEA AL Analytics Collector service to be in the same subnet as the application from which it receives events. This configuration ensures that the event-generating applications can successfully receive broadcast messages from the Collector service cluster. If you use virtualization software, we recommend that you configure nodes of the BEA AL Analytics Collector service to use broadcast mode.
Perform this procedure for each node in the cluster.
To configure a node in a BEA AL Analytics Collector service cluster:
1. Ensure that you have installed the BEA AL Analytics Collector service on each machine that will host a node in the cluster.
Note: We recommend that each instance of the BEA AL Analytics Collector service exist on a separate machine.
Installation and Upgrade Guide for Oracle WebCenter Analytics 10.3 4-15

Ins ta l la t i on
For installation instructions, see “Installing the Analytics Collector Component” on page 4-12.
2. Access Oracle WebCenter Configuration Manager on the BEA AL Analytics Collector service host.
3. Click the + symbol next to the Analytics Collector application name to view its components.
4. Configure the settings in the Analytics Database component.
5. Configure the settings in the Clustering component.
Note: The value for the Cluster name field should match the value set for the Cluster name field in the Portal Service application, Analytics Communication component of Oracle WebCenter Configuration Manager on the portal host. You configured this setting when you performed the procedure “Configuring Oracle Webcenter Interaction to Send Events to the Cluster” on page 4-15.
6. Configure the settings in the Logging component.
Online help for these settings is available in the Oracle WebCenter Configuration Manager application.
Installing the Interaction Analytics ComponentThis section describes how to install the Interaction Analytics component. The Interaction Analytics component facilitates communication between Oracle WebCenter Analytics and the portal. The installation instructions are the same for Windows, UNIX, and Linux hosts, with slight exceptions as noted.
Note: You must reinstall the Interaction Analytics component after each time you upgrade Oracle Webcenter Interaction.
To install the Interaction Analytics component:
1. Log in to the portal host computer as the same user that installed Oracle Webcenter Interaction.
2. If you are running on Java, shut down the application server.
3. Copy the installer to the disk location from where you plan to launch it. The installer file is one of the following:
– Windows: WebCenterAnalytics_WCI_10.3.0.0.0.exe
– UNIX/Linux: WebCenterAnalytics_WCI_10.3.0.0.0
4-16 Installation and Upgrade Guide for Oracle WebCenter Analytics 10.3

Ins ta l l ing the In te ract ion Ana l y t i cs Component
4. Close all unnecessary applications and windows.
5. Perform one of the following:
– If you are installing on Windows, double-click the installer file.
– If you are installing on UNIX/Linux, run the installer file.
6. Complete the installation wizard pages as described in the following table and according to the settings you planned when you completed the Interaction Analytics Component Installation Worksheet, which is included in the Oracle WebCenter Analytics Configuration Worksheets document.
Table 4-3 Installation Wizard Pages - Interaction Analytics Component
Wizard Page Description
Choose Components Choose Interaction Analytics Component.
Configuration Manager - Update
This page is displayed if an existing installation of Oracle WebCenter Configuration Manager is detected. Select if you want to update the password or port information for Configuration Manager or use the existing settings.
Configuration Manager - Port and Password
This page is displayed if you chose to update Oracle WebCenter Configuration Manager’s password and port information.
Type the port number on which you want Oracle WebCenter Configuration Manager to service requests.
By default, the port number is 12345. After running the installer, you will be able to access Oracle WebCenter Configuration Manager by using the following URL: https://localhost:port_number.
Also type and confirm the Administrator password that you will use to log into Oracle WebCenter Configuration Manager. The password is case-sensitive.
Portal Installation Directory
Browse and select the location of the portal server installation, for example: install_dir\ptportal\6.5
Note: The Interaction Analytics and Analytics Automation Jobs components require installation into the same directory. For this reason, you use the same wizard page for both installations.
Pre-Installation Summary Click Install to begin the installation. The installer copies Interaction Analytics component files to the installation directory.
The installer writes a log file to the directory where it is installed (for example: C:\bea\alui\installlogs). If you encounter problems during installation, examine the error messages in the log file.
Installation and Upgrade Guide for Oracle WebCenter Analytics 10.3 4-17

Ins ta l la t i on
7. After the installation is complete, perform one of the following:
– If you are running on Java, restart the application server. Then redeploy your portal.war or portal.ear file to your portal application server.
Launch Configuration Manager
Click the link to access Oracle WebCenter Configuration Manager. The default username for logging into Oracle WebCenter Configuration Manager is administrator. Use the password that you typed into the Configuration Manager - Port and Password installation wizard page.
In Oracle WebCenter Configuration Manager:1. Click the + symbol next to Portal Service application name to view its
components.2. Click the Analytics Communication component.3. Click the Enabled check box, which appears in the Enable Analytics
Communication area.Additional configuration options appear.
4. Configure the following settings:– Enable unicast– Collector hostname– Collector portOnline Help for these settings is available in the Oracle WebCenter Configuration Manager application.Use the settings that you provisioned when you completed the Oracle WebCenter Analytics Configuration Worksheets document.
Application Settings Confirmation
Select Yes if you have completed configuration of the Oracle WebCenter Analytics settings.
Select No, configure later to complete the installer without configuring the Oracle WebCenter Analytics settings. You must run Oracle WebCenter Configuration Manager and configure Analytics Communication settings before starting Oracle WebCenter Analytics.
Install Complete Click Done to complete the Interaction Analytics Component installation.
Table 4-3 Installation Wizard Pages - Interaction Analytics Component
Wizard Page Description
4-18 Installation and Upgrade Guide for Oracle WebCenter Analytics 10.3

Ins ta l l ing the Image Serv ice Component
– If you are running on IIS, restart the application server. For instructions, see your application server’s documentation.
Note: The installer writes a log file in the directory where it is installed (for example: C:\bea\alui\installlogs). If you encounter problems during installation, examine the error messages in the log file.
Installing the Image Service ComponentThis section describes how to install the Image Service component. The instructions are the same for installing on a Windows, UNIX, or Linux host, with minor differences as noted. To install the Image Service component:
1. Log in to the Image Service host computer as the local administrator or the Oracle WebCenter Interaction user created during installation of Oracle WebCenter Interaction.
2. Copy the installer to the disk location from where you plan to launch it. The installer file is one of the following:
– Windows: WebCenterAnalytics_WCI_10.3.0.0.0.exe
– UNIX/Linux: WebCenterAnalytics_WCI_10.3.0.0.0
3. Close all unnecessary applications and windows.
4. Double-click the installer file.
5. Complete the installation wizard pages as described in the following table and according to the settings you planned when you completed the Image Service Component Installation Worksheet, which is included in the Oracle WebCenter Analytics Configuration Worksheets document.
Table 4-4 Installation Wizard Pages - Image Service Component
Wizard Page Description
Choose Components Choose Image Service Component.
Image Service Component - Image Service Installation Directory
Browse and select the location where the Image Service files are installed, for example: install_dir\ptimages.
Installation and Upgrade Guide for Oracle WebCenter Analytics 10.3 4-19

Ins ta l la t i on
Installing the Analytics Automation Jobs ComponentThis section describes how to install the Analytics Automation Jobs component. The instructions are the same for installing on a Windows, UNIX, or Linux host, with minor differences as noted.
To install the Analytics Automation Jobs component:
1. Log in to the Automation Service host computer as the local administrator or the Oracle WebCenter Interaction user created during the installation of Oracle WebCenter Interaction.
2. Copy the installer to the disk location from where you plan to launch it. The installer file is one of the following:
– Windows: WebCenterAnalytics_WCI_10.3.0.0.0.exe
– UNIX/Linux: WebCenterAnalytics_WCI_10.3.0.0.0
Note: Ensure that you copy the installer for the same platform that the Automation Service runs on. For example, if the Automation Service runs on Solaris, copy the Solaris installer.
3. Close all unnecessary applications and windows.
4. Double-click the installer file.
5. Complete the installation wizard pages as described in the following table and according to the settings you planned when you completed the Analytics Automation Jobs Component
Pre-Installation Summary Click Install to begin the installation. The installer copies Image Service component files to the installation directory.
The installer writes a log file to the directory where it is installed (for example: C:\bea\alui\installlogs). If you encounter problems during installation, examine the error messages in the log file.
Install Complete Click Done to complete the Image Service component installation.
Table 4-4 Installation Wizard Pages - Image Service Component
Wizard Page Description
4-20 Installation and Upgrade Guide for Oracle WebCenter Analytics 10.3

Ins ta l l i ng the Ana l y t i cs Automat ion Jobs Component
Installation Worksheet, which is included in the Oracle WebCenter Analytics Configuration Worksheets document.
Table 4-5 Installation Wizard Pages - Analytics Automation Jobs Component
Wizard Page Description
Choose Components Choose Analytics Automation Jobs.
Configuration Manager - Update
This page is displayed if an existing installation of Oracle WebCenter Configuration Manager is detected. Select if you want to update the password or port information for Oracle WebCenter Configuration Manager or use the existing settings.
Configuration Manager - Port and Password
This page is displayed if you chose to update Oracle WebCenter Configuration Manager’s password and port information.
Type the port number on which you want Oracle WebCenter Configuration Manager to service requests.
By default, the port number is 12345. After running the installer, you will be able to access Oracle WebCenter Configuration Manager by using the following URL: https://localhost:port_number.
Also type and confirm the Administrator password that you will use to log into Oracle WebCenter Configuration Manager. The password is case-sensitive.
Portal Installation Directory
Browse and select the location of the portal server installation, for example: install_dir\ptportal\6.5.
Note: The Analytics Automation Jobs and Interaction Analytics components require installation into the same directory. For this reason, you use the same wizard page for both installations.
Pre-Installation Summary Click Install to begin the installation. The installer copies Analytics jobs to the installation directory.
The installer writes a log file to the directory where it is installed (for example: C:\bea\alui\installlogs). If you encounter problems during installation, examine the error messages in the log file.
Installation and Upgrade Guide for Oracle WebCenter Analytics 10.3 4-21

Ins ta l la t i on
Starting the BEA AL Analytics and BEA AL Analytics Collector Services
This section provides information on starting the BEA AL Analytics and BEA AL Analytics Collector services. Perform the procedure that is appropriate to your operating system.
Starting the BEA AL Analytics and BEA AL Analytics Collector Services on WindowsAfter you have installed all Analytics components:
Launch Configuration Manager
Click the link to access Oracle WebCenter Configuration Manager. The default username for logging into Oracle WebCenter Configuration Manager is administrator. Use the password that you typed into the Configuration Manager - Port and Password installation wizard page.
In Oracle WebCenter Configuration Manager:1. Click the + symbol next to the Analytics Jobs application name to view
its components.2. Configure all settings for all of the Analytics Jobs components.
Online Help for these settings is available in the Oracle WebCenter Configuration Manager application.Use the database and connectivity settings that you provisioned when you completed the Oracle WebCenter Analytics Configuration Worksheets document.
Application Settings Confirmation
Select Yes if you have completed configuration of the Analytics Jobs settings.
Select No, configure later to complete the installer without configuring the Analytics Jobs settings. You must run the Oracle WebCenter Configuration Manager and configure Analytics Jobs settings before starting Oracle WebCenter Analytics.
Install Complete Click Done to complete the Analytics Automation Jobs component installation.
Table 4-5 Installation Wizard Pages - Analytics Automation Jobs Component
Wizard Page Description
4-22 Installation and Upgrade Guide for Oracle WebCenter Analytics 10.3

Reg is te r ing Orac le WebCente r Ana l y t i cs w i th the Po r ta l
Ensure that the BEA AL Analytics service has been started. From Windows NT Services, click Administrative Tools | Services; if the BEA AL Analytics service has not started, right-click it and choose Start.
Ensure that the BEA AL Analytics Collector service has been started. From Windows NT Services, click Administrative Tools | Services; if the Collector service has not started, right-click it and choose Start.
You can also start and stop these services using Oracle WebCenter Configuration Manager. Log in to Oracle WebCenter Configuration Manager using the user name Administrator and the password you specified during installation. Follow the instructions in Oracle WebCenter Configuration Manager to start the Analytics Console and Analytics Collector applications.
Starting the BEA AL Analytics and BEA AL Analytics Collector Services on UNIX and LinuxAfter you have installed all Analytics components:
Ensure the BEA AL Analytics service has been started: install_dir/ptanalytics/10.3.0/bin/analyticsd.sh start
Ensure the BEA AL Analytics Collector service has been started: install_dir/ptcollector/10.3.0/bin/collectord.sh start
Registering Oracle WebCenter Analytics with the PortalThis section describes how to register the Analytics Console, remote server, web service, and portlet objects.
To register the Oracle WebCenter Analytics objects with the portal:
1. Log into the portal as a user with administrative privileges.
2. Click Administration.
3. From the Select Utility drop-down choose Migration - Import.
4. Browse to select the location of the migration package. If you accepted installation defaults, the location on the Oracle WebCenter Analytics host is: install_dir\ptanalytics\10.3.0\serverpackages\analytics.pte
5. Click Load Package.
6. Perform one of the following:
Installation and Upgrade Guide for Oracle WebCenter Analytics 10.3 4-23

Ins ta l la t i on
– If you are importing the migration package for the first time, keep the default selections under Import Settings. The default selections are Import ACLs and Remember Dependency Settings.
– If you have previously imported the migration package and you are importing it again, keep the default selections and check the box next to Overwrite Remote Servers.
7. Click Portal Resources on the left hand side of the Migration editor.
8. Select the objects that you want to import.
9. Click Finish.
Adding Analytics Jobs to the Automation ServiceThis section describes how to add all Analytics jobs to the Automation Service. Once these jobs are added, the Automation Service runs them automatically. To add Analytics jobs to the Automation Service:
1. Log into the portal as an administrator.
2. Click Administration.
3. From the Select Utility drop-down, choose Automation Service.
The Automation Service Manager appears.
4. Ensure that the Automation Service is online.
5. Under Edit Automation Services, click the name of the computer on which the Analytics Jobs component is installed.
The Register Folders window appears.
6. Click Add Folder.
The Add Job Folder window appears.
7. Expand the Analytics folder.
8. Select the Analytics Jobs folder.
9. Click OK to close the Register Folders window.
10. Click Finish.
4-24 Installation and Upgrade Guide for Oracle WebCenter Analytics 10.3

Add ing Ana l y t i cs Jobs to the Automat i on Serv ice
The Automation Service runs the Analytics jobs. If other Automation Service jobs were in queue or running when you added the Analytics jobs to the Automation Service, the Automation Service runs the Analytics jobs after these other jobs have completed.
11. At an appropriate time, ensure that the Analytics jobs have completed successfully. If any Analytics jobs failed, schedule these jobs to run again.
Installation and Upgrade Guide for Oracle WebCenter Analytics 10.3 4-25

Ins ta l la t i on
4-26 Installation and Upgrade Guide for Oracle WebCenter Analytics 10.3

C H A P T E R 5
Upgrade
This chapter includes information on how to upgrade Oracle WebCenter Analytics. It includes the following sections:
Upgrade Paths
Upgrading from AquaLogic Analytics 2.1 to Oracle WebCenter Analytics 10.3
Upgrading from AquaLogic Analytics 2.0 to Oracle WebCenter Analytics 10.3
Upgrade PathsThe following table summarizes the supported database upgrade paths for Oracle WebCenter Analytics.
Table 5-1 Upgrade Paths
Upgrade Path Upgrade References
AquaLogic Analytics 2.1 to Oracle WebCenter Analytics 10.3
Follow the procedures in this chapter.
AquaLogic Analytics 2.0 to Oracle WebCenter Analytics 10.3
Follow the procedures in this chapter.
Installation and Upgrade Guide for Oracle WebCenter Analytics 10.3 5-1

Upgrade
Note: We do not support upgrades from AquaLogic Analytics 1.x to Oracle WebCenter Analytics 10.3. To do so, you must first upgrade AquaLogic Analytics 1.0/1.1 to either 2.0 or 2.1, then perform the appropriate upgrade to Oracle WebCenter Analytics 10.3.
Upgrading from AquaLogic Analytics 2.1 to Oracle WebCenter Analytics 10.3
To upgrade from AquaLogic Analytics 2.1 to Oracle WebCenter Analytics 10.3:
1. Delete the Analytics folder beneath the install_dir\common\container\tomcat\5.0.28\work directory.
2. Back up the installation directory of the previously-installed version of the Analytics Services component, using the tool of your choice.
Note: In AquaLogic Analytics 2.1, the Analytics Services component installation consisted of the BEA AL Analytics service, the core Analytics application files, and the BEA AL Analytics Collector service. The default installation directory for Analytics Services was install_dir\ptanalytics (Windows) and install_dir/ptanalytics (UNIX and Linux).
In 10.3, installing the Analytics Console component installs only the BEA AL Analytics service and the core Oracle WebCenter Analytics application files. Installing the Analytics Collector component installs only the BEA AL Analytics Collector service.
3. (Linux/UNIX only) Grant user and group access rights to Oracle Inventory directories. For details, see “Granting User and Group Access Rights to Oracle Inventory Directories” on page 4-2.
4. Install the Analytics Console component. For details, see “Installing the Analytics Console Component” on page 4-3.
If you are choosing the same location as the existing software, accept the default installation directory location when prompted.
Note: At this time, do not use Oracle WebCenter Configuration Manager to configure Analytics Console settings.
5. Configure the Analytics database. For details, see “Configuring the Oracle WebCenter Analytics Database” on page 4-6.
6. Register portal events. For details, see “Registering Portal Events” on page 4-11.
5-2 Installation and Upgrade Guide for Oracle WebCenter Analytics 10.3

Upgrad ing f r om AquaLog ic Ana ly t i cs 2 .1 t o Orac l e WebCente r Ana l y t ics 10 .3
7. Register Oracle WebCenter Collaboration events. For details, see “Registering Oracle WebCenter Collaboration Events” on page 4-11.
8. (Oracle WebCenter Ensemble integration only) Register Oracle WebCenter Ensemble events. For details, see “Registering Oracle WebCenter Ensemble Events” on page 4-12.
9. Install the Analytics Collector component and configure Analytics Collector settings in Oracle WebCenter Configuration Manager. For details, see “Installing the Analytics Collector Component” on page 4-12.
10. (Optional) If desired, cluster the BEA AL Analytics Collector service. For details, see “Clustering the BEA AL Analytics Collector Service” on page 4-14.
11. Back up the Oracle WebCenter Analytics database using the tool of your choice.
12. Upgrade the Oracle WebCenter Analytics database by running the upgrade_2.1_to_2.5.sql script:
– Windows: install_dir\ptanalytics\10.3.0\sql\database\upgrade_2.1_to_2.5.sql
– UNIX/Linux: install_dir/ptanalytics/10.3.0/sql\database/upgrade_2.1_to_2.5.sql
13. Run the Analytics25Update.bat file:
– Windows: install_dir\ptanalytics\10.3.0\bin\Analytics25Update.bat
– UNIX/Linux: install_dir/ptanalytics/10.3.0/bin/Analytics25Update.sh
14. On the machine on which you installed the Analytics Console component:
a. Access Oracle WebCenter Configuration Manager.
b. Click the + symbol next to the Analytics Console application name to view its components.
c. Configure all Analytics Console settings.
15. (Oracle only) Run your database’s analyisis tool on both the Oracle WebCenter Analytics and portal databases to increase the efficiency of the databases.
16. Back up the installation directory of the previously-installed version of the Interaction Analytics component, using the tool of your choice.
17. Install the Interaction Analytics component and configure Analytics Communication settings in Oracle WebCenter Configuration Manager. For details, see “Installing the Interaction Analytics Component” on page 4-16
Installation and Upgrade Guide for Oracle WebCenter Analytics 10.3 5-3

Upgrade
18. Install the Image Service component. For details, “Installing the Image Service Component” on page 4-19
19. Stop and restart BEA AL Analytics and BEA AL Analytics Collector services. For details, see “Starting the BEA AL Analytics and BEA AL Analytics Collector Services” on page 4-22.
20. Install the Analytics Automation Jobs component and configure Analytics Jobs settings in Oracle WebCenter Configuration Manager. For details, see “Installing the Analytics Automation Jobs Component” on page 4-20
21. Add Analytics jobs to the Automation Service. For details, see “Adding Analytics Jobs to the Automation Service” on page 4-24.
22. (Optional) Create and set up the ALUI Security database and migrate data from the portal database’s security tables to the ALUI Security database.
Note: You do not need to perform these steps if AquaLogic Pathways 1.5 is installed. Performing a clean (non-upgrade) install of AquaLogic Pathways 1.5 requires creating the ALUI Security database. Upgrading from AquaLogic Pathways 1.0 to AquaLogic Pathways 1.5 requires creating the ALUI Security database and migrating data from the portal database’s security tables to the ALUI Security database.
a. Create and set up the ALUI Security database. For details, see “Configuring the ALUI Security Database” on page 4-9.
b. On the machine on which the previous version of the BEA AL Analytics service is installed, run the security-upgradetool.bat or security-upgradetool.sh file, located in install_dir\ptanalytics\10.3.0\bin .
Performing this step migrates data from the portal database’s security tables to the ALUI Security database.
Upgrading from AquaLogic Analytics 2.0 to Oracle WebCenter Analytics 10.3
To upgrade from AquaLogic Analytics 2.0 to Oracle WebCenter Analytics 10.3.
1. Delete the Analytics folder beneath the install_dir\common\container\tomcat\5.0.28\work directory.
2. Back up the installation directory of the previously-installed version of the BEA AL Analytics services component, using the tool of your choice.
5-4 Installation and Upgrade Guide for Oracle WebCenter Analytics 10.3

Upgrad ing f r om AquaLog ic Ana ly t i cs 2 .0 t o Orac l e WebCente r Ana l y t ics 10 .3
Note: In AquaLogic Analytics 2.0, the Analytics Services component installation consisted of the BEA AL Analytics service, the core Analytics application files, and the BEA AL Analytics Collector service. The default installation directory for Analytics Services was install_dir\ptanalytics (Windows) and install_dir/ptanalytics (UNIX and Linux).
In Oracle WebCenter Analytics 10.3, installing the Analytics Console component installs only the BEA AL Analytics service and the core Oracle WebCenter Analytics application files. Installing the Analytics Collector component installs only the BEA AL Analytics Collector service.
3. (Linux/UNIX only) Grant user and group access rights to Oracle Inventory directories. For details, see “Granting User and Group Access Rights to Oracle Inventory Directories” on page 4-2.
4. Install the Analytics Console component. For details, see “Installing the Analytics Console Component” on page 4-3.
If you are choosing the same location as the existing software, accept the default installation directory location when prompted.
Note: At this time, do not use Oracle WebCenter Configuration Manager to configure Analytics Console settings.
5. Configure the Analytics database. For details, see “Configuring the Oracle WebCenter Analytics Database” on page 4-6.
6. Register portal events. For details, see “Registering Portal Events” on page 4-11.
7. Register Oracle WebCenter Collaboration events. For details, see “Registering Oracle WebCenter Collaboration Events” on page 4-11.
8. (Oracle WebCenter Ensemble integration only) Register Oracle WebCenter Ensemble events. For details, see “Registering Oracle WebCenter Ensemble Events” on page 4-12.
9. Install the Analytics Collector component and configure Analytics Collector settings in Oracle WebCenter Configuration Manager. For details, see “Installing the Analytics Collector Component” on page 4-12.
10. (Optional) If desired, cluster the BEA AL Analytics Collector service. For details, see “Clustering the BEA AL Analytics Collector Service” on page 4-14.
11. Back up the Oracle WebCenter Analytics database using the tool of your choice.
12. Upgrade the AquaLogic Analytics database by running the upgrade_2.0_to_2.1.sql script:
Installation and Upgrade Guide for Oracle WebCenter Analytics 10.3 5-5

Upgrade
– Windows: install_dir\ptanalytics\10.3.0\sql\database\upgrade_2.0_to_2.1.sql
– UNIX/Linux: install_dir/ptanalytics/10.3.0/sql\database/upgrade_2.0_to_2.1.sql
13. Upgrade the AquaLogic Analytics database by running the upgrade_2.1_to_2.5.sql script:
– Windows: install_dir\ptanalytics\10.3.0\sql\database\upgrade_2.1_to_2.5.sql
– UNIX/Linux: install_dir/ptanalytics/10.3.0/sql\database/upgrade_2.1_to_2.5.sql
14. Run the Analytics25Update.bat file:
– Windows: install_dir\ptanalytics\10.3.0\bin\Analytics25Update.bat
– UNIX/Linux: install_dir/ptanalytics/10.3.0/bin/Analytics25Update.sh
15. On the machine on which you installed the Analytics Console component:
a. Access Oracle WebCenter Configuration Manager.
b. Click the + symbol next to the Analytics Console application name to view its components.
c. Configure all Analytics Console settings in Oracle WebCenter Configuration Manager.
16. (Oracle only) Run your database’s analyisis tool on both the Oracle WebCenter Analytics and portal databases to increase the efficiency of the databases.
17. Back up the installation directory of the previously-installed version of the Interaction Analytics component, using the tool of your choice.
18. Install the Interaction Analytics component and configure Analytics Communication settings in Oracle WebCenter Configuration Manager. For details, see “Installing the Interaction Analytics Component” on page 4-16
19. Install the Image Service component. For details, “Installing the Image Service Component” on page 4-19
20. Stop and restart BEA AL Analytics and BEA AL Analytics Collector services. For details, see “Starting the BEA AL Analytics and BEA AL Analytics Collector Services” on page 4-22.
21. Register the Oracle WebCenter Analytics application, remote server, Web services, and portlets with the portal by importing the migration package. For details, see “Registering Oracle WebCenter Analytics with the Portal” on page 4-23.
5-6 Installation and Upgrade Guide for Oracle WebCenter Analytics 10.3

Upgrad ing f r om AquaLog ic Ana ly t i cs 2 .0 t o Orac l e WebCente r Ana l y t ics 10 .3
22. Install the Analytics Automation Jobs component and configure Analytics Jobs settings in Oracle WebCenter Configuration Manager. For details, see “Installing the Analytics Automation Jobs Component” on page 4-20
23. Add Analytics jobs to the Automation Service. For details, see “Adding Analytics Jobs to the Automation Service” on page 4-24.
24. (Optional) Create and set up the ALUI Security database and migrate data from the portal database’s security tables to the ALUI Security database.
Note: You do not need to perform these steps if AquaLogic Pathways 1.5 is installed. Performing a clean (non-upgrade) install of AquaLogic Pathways 1.5 requires creating the ALUI Security database. Upgrading from AquaLogic Pathways 1.0 to AquaLogic Pathways 1.5 requires creating the ALUI Security database and migrating data from the portal database’s security tables to the ALUI Security database.
a. Create and set up the ALUI Security database. For details, see “Configuring the ALUI Security Database” on page 4-9.
b. On the machine on which the previous version of the BEA AL Analytics service is installed, run the security-upgrade.bat or security-upgrade.sh file, located in install_dir\ptanalytics\10.3.0\bin .
Performing this step migrates data from the portal database’s security tables to the ALUI Security database.
Installation and Upgrade Guide for Oracle WebCenter Analytics 10.3 5-7

Upgrade
5-8 Installation and Upgrade Guide for Oracle WebCenter Analytics 10.3
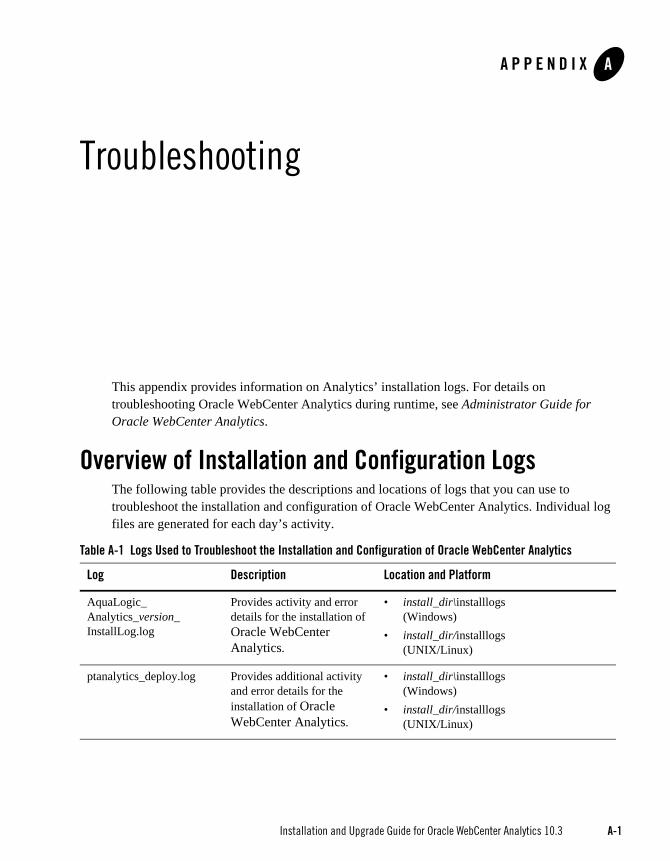
A P P E N D I X A
Troubleshooting
This appendix provides information on Analytics’ installation logs. For details on troubleshooting Oracle WebCenter Analytics during runtime, see Administrator Guide for Oracle WebCenter Analytics.
Overview of Installation and Configuration LogsThe following table provides the descriptions and locations of logs that you can use to troubleshoot the installation and configuration of Oracle WebCenter Analytics. Individual log files are generated for each day’s activity.
Table A-1 Logs Used to Troubleshoot the Installation and Configuration of Oracle WebCenter Analytics
Log Description Location and Platform
AquaLogic_ Analytics_version_ InstallLog.log
Provides activity and error details for the installation of Oracle WebCenter Analytics.
• install_dir\installlogs (Windows)
• install_dir/installlogs (UNIX/Linux)
ptanalytics_deploy.log Provides additional activity and error details for the installation of Oracle WebCenter Analytics.
• install_dir\installlogs (Windows)
• install_dir/installlogs (UNIX/Linux)
Installation and Upgrade Guide for Oracle WebCenter Analytics 10.3 A-1

Troub leshoot ing
A-2 Installation and Upgrade Guide for Oracle WebCenter Analytics 10.3

A P P E N D I X B
Uninstalling Oracle WebCenter Analytics
This appendix discusses how to uninstall Oracle WebCenter Analytics.
Uninstalling Oracle WebCenter Analytics on WindowsTo uninstall Oracle WebCenter Analytics on Windows:
1. Stop the following services:
– BEA AL Analytics service
– BEA AL Analytics Collector service
2. Use the Windows Control Panel Add/Remove Program utility to launch the Oracle WebCenter Analytics uninstall wizard.
Note: The Logging Utilities uninstall wizard also appears. We recommend that you do not uninstall Logging Utilities if other components or products that use Logging Utilities are installed on the same server as Oracle WebCenter Analytics.
3. Follow the directions in the Oracle WebCenter Analytics uninstall wizard to uninstall Oracle WebCenter Analytics.
Uninstalling Oracle WebCenter Analytics on UNIX/LinuxTo uninstall Oracle WebCenter Analytics on UNIX and Linux, launch the uninstaller for Oracle WebCenter Analytics 10.3. by running: /opt/bea/userinteraction/uninstall/ptanalytics/version/ Uninstall WebCenter Analytics
Installation and Upgrade Guide for Oracle WebCenter Analytics 10.3 B-1

Uninsta l l ing Orac le WebCente r Ana l y t i cs
B-2 Installation and Upgrade Guide for Oracle WebCenter Analytics 10.3

Index
AAnalytics Automation Jobs component
installing 4-20Analytics Console component
installing 4-3Analytics jobs
adding 4-24adding to Automation Service 4-24
analytics.pte 4-23Automation Service
adding Analytics jobs 4-24
BBEA AL Analytics Collector service
clustering 3-10, 4-14installing 4-12
broadcast mode 4-15
CCollector Service component
installing 4-12Collector service. See BEA AL Analytics Collector service
Ddatabase
ALUI Security (Oracle) 4-9, 4-10ALUI Security (SQL Server) 4-9Oracle WebCenter Analytics (Oracle) 4-7Oracle WebCenter Analytics (SQL Server)
4-6
Security (SQL Server) 4-9default installation directories
Analytics Collector component 4-13Analytics Console component 4-4
defaultsinstall_dir 4-4
Eevents
registering for Oracle WebCenter Collaboration 4-11
registering for Oracle WebCenter Ensemble 4-12
registering for portal 4-11
Hhardware requirements 2-1
IImage Service component
installing 4-19install_dir
default location 4-4installation logs A-1installer file names 4-3, 4-12Interaction Analytics component
installing 4-16IPv6 support 2-1
Installation and Upgrade Guide for Oracle WebCenter Analytics 10.3 Index-1

Jjobs
adding to Automation Service 4-24
Llogs A-1
Mmigration package 4-23
OOracle Configuration Manager
Windows service 4-4Oracle database
ALUI Security 4-9, 4-10Oracle WebCenter Analytics 4-7
Oracle Inventory directoriesgranting access 4-2
Oracle WebCenter Analyticsadding jobs to Automation Service 4-24compatibility with portal 2-2registering with the portal 4-23synching clocks with portal 4-5upgrade paths 5-1
Oracle WebCenter Analytics databasecreating 4-6host computer requirements 2-2
Oracle WebCenter Collaborationcompatibility requirements 2-3registering events 4-11
Oracle WebCenter Ensembleregistering events 4-12
ouais.sh script 4-2
Pportal
compatibility with Oracle WebCenter Analytics 2-2
registering events 4-11registering Oracle WebCenter Analytics
4-23synching clocks with Oracle WebCenter
Analytics 4-5ptanalytics_deploy.log A-1Publisher
compatibility requirements 2-3
Rrequirements for installation 2-1
SSecurity database
creating 4-9services
BEA AL Analytics 4-12BEA AL Analytics Collector 4-12BEA AL Configuration
Manager(port_number) 4-4software requirements 2-1SQL Server
Oracle WebCenter Analytics database 4-6Security database 4-9
SQL Server databaseALUI Security 4-9
UUNIX
starting BEA AL Analytics services 4-23
Vvirtualization software
configuration 4-15
WWindows
Index-2 Installation and Upgrade Guide for Oracle WebCenter Analytics 10.3

starting Analytics services 4-22
Installation and Upgrade Guide for Oracle WebCenter Analytics 10.3 Index-3

Index-4 Installation and Upgrade Guide for Oracle WebCenter Analytics 10.3