Onkyo HTX-22HD Manual (English)
76
En Digital Surround System HTX-22HD Instruction Manual Thank you for purchasing this Onkyo product. Please read this manual thoroughly before making any con- nections or plugging in your new Onkyo product. Following the instructions in this manual will enable you to obtain optimum performance and listening enjoyment from your new Onkyo product. Please retain this manual for future reference. Contents Introduction.............................................. 2 Connections ........................................... 16 Turning On & First Time Setup ............. 30 Basic Operation Playing your AV components .................. 39 Using the Listening Modes ................... 42 Advanced Setup..................................... 56 Troubleshooting..................................... 71
-
Upload
matt-sephton -
Category
Documents
-
view
1.685 -
download
4
description
Onkyo HTX-22HD Digital Surround System manual (English)
Transcript of Onkyo HTX-22HD Manual (English)

En
Digital Surround System
HTX-22HD
Instruction Manual
Thank you for purchasing this Onkyo product. Please read this manual thoroughly before making any con-nections or plugging in your new Onkyo product.Following the instructions in this manual will enable you to obtain optimum performance and listening enjoyment from your new Onkyo product.Please retain this manual for future reference.
Contents
Introduction.............................................. 2
Connections........................................... 16
Turning On & First Time Setup ............. 30
Basic Operation
Playing your AV components .................. 39
Using the Listening Modes................... 42
Advanced Setup..................................... 56
Troubleshooting..................................... 71
HTX-22HD_En.book Page 1 Monday, April 7, 2008 2:03 PM

2
HTX-22HD_En.book Page 2 Monday, April 7, 2008 2:03 PM
Important Safety Instructions1. Read these instructions.2. Keep these instructions.3. Heed all warnings.4. Follow all instructions.5. Do not use this apparatus near water.6. Clean only with dry cloth.7. Do not block any ventilation openings. Install in
accordance with the manufacturer’s instructions.8. Do not install near any heat sources such as radia-
tors, heat registers, stoves, or other apparatus(including amplifiers) that produce heat.
9. Do not defeat the safety purpose of the polarizedor grounding-type plug. A polarized plug has twoblades with one wider than the other. A groundingtype plug has two blades and a third groundingprong. The wide blade or the third prong are pro-vided for your safety. If the provided plug doesnot fit into your outlet, consult an electrician forreplacement of the obsolete outlet.
10. Protect the power cord from being walked on orpinched particularly at plugs, convenience recep-tacles, and the point where they exit from theapparatus.
11. Only use attachments/accessories specified by themanufacturer.
12. Use only with the cart, stand, tri-pod, bracket, or table specifiedby the manufacturer, or soldwith the apparatus. When a cartis used, use caution when mov-ing the cart/apparatus combina-tion to avoid injury from tip-over.
13. Unplug this apparatus during lightning storms orwhen unused for long periods of time.
14. Refer all servicing to qualified service personnel.Servicing is required when the apparatus has beendamaged in any way, such as power-supply cordor plug is damaged, liquid has been spilled orobjects have fallen into the apparatus, the appara-tus has been exposed to rain or moisture, does notoperate normally, or has been dropped.
15. Damage Requiring ServiceUnplug the apparatus from the wall outlet and refer servicing to qualified service personnel under the following conditions:A. When the power-supply cord or plug is dam-
aged,B. If liquid has been spilled, or objects have
fallen into the apparatus,C. If the apparatus has been exposed to rain or
water,D. If the apparatus does not operate normally by
following the operating instructions. Adjustonly those controls that are covered by theoperating instructions as an improper adjust-ment of other controls may result in damageand will often require extensive work by aqualified technician to restore the apparatus toits normal operation,
E. If the apparatus has been dropped or damagedin any way, and
F. When the apparatus exhibits a distinct changein performance this indicates a need for ser-vice.
16. Object and Liquid EntryNever push objects of any kind into the apparatus through openings as they may touch dangerous voltage points or short-out parts that could result in a fire or electric shock.The apparatus shall not be exposed to dripping or splashing and no objects filled with liquids, such as vases shall be placed on the apparatus.Don’t put candles or other burning objects on top of this unit.
17. BatteriesAlways consider the environmental issues and fol-low local regulations when disposing of batteries.
18. If you install the apparatus in a built-in installa-tion, such as a bookcase or rack, ensure that thereis adequate ventilation.Leave 20 cm (8") of free space at the top and sides and 10 cm (4") at the rear. The rear edge of the shelf or board above the apparatus shall be set 10 cm (4") away from the rear panel or wall, creating a flue-like gap for warm air to escape.
WARNING:TO REDUCE THE RISK OF FIRE OR ELECTRIC SHOCK, DO NOT EXPOSE THIS APPARATUS TO RAIN OR MOISTURE.
CAUTION:TO REDUCE THE RISK OF ELECTRIC SHOCK, DO NOT REMOVE COVER (OR BACK). NO USER-SERVICEABLE PARTS INSIDE. REFER SERVICING TO QUALIFIED SERVICE PERSONNEL.
The lightning flash with arrowhead symbol, within an equilateral triangle, is intended to alert the user to the presence of uninsulated “dangerous voltage” within the product’s enclosure that may be of sufficient magnitude to constitute a risk of electric shock to persons.
The exclamation point within an equilateral triangle is intended to alert the user to the presence of important operating and maintenance (servicing) instructions in the literature accompanying the appliance.
WARNINGRISK OF ELECTRIC SHOCK
DO NOT OPENRISQUE DE CHOC ELECTRIQUE
NE PAS OUVRIR
AVIS
PORTABLE CART WARNING
S3125A

HTX-22HD_En.book Page 3 Monday, April 7, 2008 2:03 PM
Precautions
1. Recording Copyright—Unless it’s for personal use only, recording copyrighted material is illegal without the permission of the copyright holder.
2. AC Fuse—The AC fuse inside the unit is not user-serviceable. If you cannot turn on the unit, contact your Onkyo dealer.
3. Care—Occasionally you should dust the unit all over with a soft cloth. For stubborn stains, use a soft cloth dampened with a weak solution of mild detergent and water. Dry the unit immediately afterwards with a clean cloth. Don’t use abrasive cloths, thinners, alcohol, or other chemical sol-vents, because they may damage the finish or remove the panel lettering.
4. PowerWARNINGBEFORE PLUGGING IN THE UNIT FOR THEFIRST TIME, READ THE FOLLOWING SEC-TION CAREFULLY.AC outlet voltages vary from country to country. Make sure that the voltage in your area meets the voltage requirements printed on the unit’s rear panel (e.g., AC 230 V, 50 Hz or AC 120 V, 60 Hz).
The power cord plug is used to disconnect this unit from the AC power source. Make sure that the plug is readily operable (easily accessible) at all times.
Pressing the [ON/STANDBY] button to select Standby mode does not fully shutdown the unit. If you do not intend to use the unit for an extended period, remove the power cord from the AC outlet.
5. Never Touch this Unit with Wet Hands—Never handle this unit or its power cord while your hands are wet or damp. If water or any other liq-uid gets inside this unit, have it checked by your Onkyo dealer.
6. Handling Notes• If you need to transport this unit, use the origi-
nal packaging to pack it how it was when you originally bought it.
• Do not leave rubber or plastic items on this unit for a long time, because they may leave marks on the case.
• This unit’s top and rear panels may get warm after prolonged use. This is normal.
• If you do not use this unit for a long time, it may not work properly the next time you turn it on, so be sure to use it occasionally.
3

4
HTX-22HD_En.book Page 4 Monday, April 7, 2008 2:03 PM
Precautions—Continued
For British modelsReplacement and mounting of an AC plug on the power supply cord of this unit should be performed only by qualified service personnel.
IMPORTANTThe wires in the mains lead are coloured in accordance with the following code:
Blue: NeutralBrown: Live
As the colours of the wires in the mains lead of this apparatus may not correspond with the coloured mark-ings identifying the terminals in your plug, proceed as follows:The wire which is coloured blue must be connected to the terminal which is marked with the letter N or coloured black.The wire which is coloured brown must be connected to the terminal which is marked with the letter L or coloured red.
IMPORTANTThe plug is fitted with an appropriate fuse. If the fuse needs to be replaced, the replacement fuse must be approved by ASTA or BSI to BS1362 and have the same ampere rating as that indicated on the plug. Check for the ASTA mark or the BSI mark on the body of the fuse.If the power cord’s plug is not suitable for your socket outlets, cut it off and fit a suitable plug. Fit a suitable fuse in the plug.
For European Models
Declaration of Conformity
We, ONKYO EUROPEELECTRONICS GmbHLIEGNITZERSTRASSE 6, 82194 GROEBENZELL, GERMANY
GROEBENZELL, GERMANY
ONKYO EUROPE ELECTRONICS GmbHK. MIYAGI
declare in own responsibility, that the ONKYO product described in this instruction manual is in compliance with the corresponding technical standards such as EN60065, EN55013, EN55020 and EN61000-3-2, -3-3.

HTX-22HD_En.book Page 5 Monday, April 7, 2008 2:03 PM
Speaker Precautions
Placement
• The subwoofer cabinet is made out of wood and is therefore sensitive to extreme tem-peratures and humidity, do not put it in loca-tions subject to direct sunlight or in humid places, such as near an air conditioner, humidifier, bathroom, or kitchen.
• Do not put water or other liquids close to the speakers. If liquid is spilled over the speak-ers, the drive units may be damaged.
• Speakers should only be placed on sturdy, flat surfaces that are free from vibration. Putting them on uneven or unstable sur-faces, where they may fall and cause dam-age, will affect the sound quality.
• Subwoofer is designed to be used in the upright vertical position only. Do not use it in the horizontal or tilted position.
• If the unit is used near a turntable, CD player or DVD player, howling or slipping of sound may occur. To prevent this, move the unit away from the turntable, CD player or DVD player, otherwise lower the unit’s output level.
Using Close to a TV or Computer
TVs and computer monitors are magnetically sensitive devices and as such are likely to suf-fer discoloration or picture distortion when conventional speakers are placed nearby. To prevent this, the HTX-22HDST features internal magnetic shielding. In some situa-tions, however, discoloration may still be an issue, in which case you should turn off your TV or monitor, wait 15 to 30 minutes, and then turn it back on again. This normally acti-vates the degaussing function, which neutral-izes the magnetic field, thereby removing any discoloration effects. If discoloration prob-lems persist, try moving the speakers away from your TV or monitor. Note that discolor-ation can also be caused by a magnet or demagnetizing tool that’s too close to your TV or monitor.
Input Signal Warning
The speakers can handle the specified input power when used for normal music reproduc-tion. If any of the following signals are fed to them, even if the input power is within the specified rating, excessive current may flow in the speaker coils, causing burning or wire breakage:1. Interstation noise from an untuned FM
radio.2. Sound from fast-forwarding a cassette
tape.3. High-pitched sounds generated by an
oscillator, electronic musical instrument, and so on.
4. Amplifier oscillation.5. Special test tones from audio test CDs
and so on.6. Thumps and clicks caused by connecting
or disconnecting audio cables (Always turn off your amplifier before connecting or disconnecting cables.)
7. Microphone feedback.
5

6
HTX-22HD_En.book Page 6 Monday, April 7, 2008 2:03 PM
Supplied Accessories
Make sure you have the following accessories:
* In catalogs and on packaging, the letter at the end of the product name indicates the color. Specifications and operation are the same regardless of color.
HTX-22HDPAW Amp/Subwoofer
HTX-22HDST Front Speakers
Remote controller and two batteries (AA/R6)
Speaker setup microphone
Red and white cables for front speakers (11.5 ft., 3.5 m)
Power cord(Use the power cord that matches your wall outlet.)
or
Optical digital audio cable (5 ft., 1.5 m)
Cork spacers for the Amp/Subwoofer (x4)
Cork spacers for the front speakers (x8)

7
Contents
Important Safety Instructions .....................2
Precautions...................................................3
Speaker Precautions....................................5
Supplied Accessories ..................................6
Features ........................................................8
Getting to Know the HTX-22HD.................10
Front Panel ...............................................10Display......................................................11Rear Panel................................................12
Remote Controller ......................................14
Installing the Batteries ..............................14Aiming the Remote Controller ..................14Using the Remote Controller ....................15
Connecting the Speakers ..........................16
Enjoying Home Theater............................16Affixing the Cork Spacers .........................17Speaker Connection Precautions .............18Making the Connections ...........................18Connecting only the Front Speakers ........19Connecting 5.1 Speakers .........................19Connecting Surround Back Speakers ......20
Connecting AV Components.....................21
About AV Connections .............................21Connecting Components
with Digital Outputs ................................22Connecting Components
with Analog Outputs...............................23Connecting Components with HDMI ........24Making HDMI Connections.......................25Connecting Onkyo Components .......26
Turning On the HTX-22HD .........................30
Connecting the Power Cord .....................30Turning On and Standby ..........................31
First Time Setup .........................................32
Automatic Speaker Setup (Audyssey 2EQ).....................................32
Audio Input Setup .....................................36HDMI Input Setup .....................................37Changing the Input Display ......................38
Playing Your Components ........................39
Basic HTX-22HD Operation .....................39Setting the Display Brightness..................40Muting the HTX-22HD ..............................40Using the Sleep Timer ..............................40Displaying Source Information..................41
Using the Listening Modes .......................42
Selecting the Listening Modes .................42Listening Modes Available
for Each Source Format.........................43About the Listening Modes.......................49Using the Audio Adjust Settings...............52Late Night Function ..................................55Adjusting Speaker Levels.........................55
Advanced Setup.........................................56
Manual Speaker Setup.............................56Source Setup ...........................................64Volume Setup...........................................66HDMI Setup..............................................67Specifying the Digital Signal Format ........70
Troubleshooting.........................................71
Specifications.............................................74
* To reset the HTX-22HD to its factory defaults, turn it on and, while holding down the [LISTENING MODE] button, press the [ON/STANDBY] button (see page 71).
HTX-22HD_En.book Page 7 Monday, April 7, 2008 2:03 PM

8
HTX-22HD_En.book Page 8 Monday, April 7, 2008 2:03 PM
Features
HTX-22HDPAW: 5.1-channel Amp/Subwoofer
5.1-channel power amplifier with built-in subwoofer
• 2 HDMI*1 inputs, 1 output (with support for up to 1080p, Deep Color, x.v.Color, Lip Sync, DTS-HD Master Audio*2, DTS-HD High Resolution Audio, Dolby TrueHD*3, Dolby Digital Plus, SACD, and multichannel PCM)
• 2 optical inputs, 1 coaxial input• 2 analog inputs• Pre out for surround backs speakers• Onkyo RIHD system control over HDMI• VLSC (Vector Linear Shaping Circuitry)• Audyssey 2EQ*4 room correction• Audyssey Dynamic EQ*4 for loudness correction• Theater-Dimensional*5 and DTS Surround Sensation virtual surround sound• RI-compatible remote controller• Compatible with RI Dock for iPod• 16 cm A-OMF diaphragm woofer• Aero Acoustic Drive for powerful and natural sound• Music Optimizer
HTX-22HDST: 2-way Speaker System
2-way acoustic suspension speaker system
• 8 cm A-OMF diaphragm woofer• 2 cm balanced dome tweeter• 70 Hz–50 kHz frequency response• 40 W maximum power• Rounded wooden cabinet
Designed especially for use with the HTX-22HD, the optional Onkyo SKS-11 speaker pack-age consists of a center speaker and two surround speakers that can be connected directly to the HTX-22HD.

HTX-22HD_En.book Page 9 Monday, April 7, 2008 2:03 PM
Features—Continued
*1
HDMI, the HDMI logo and High Definition Multimedia Interface are trademarks or registered trademarks of HDMI Licensing, LLC.
*2.
Manufactured under license under U.S. Patent #’s: 5,451,942; 5,956,674; 5,974,380; 5,978,762; 6,226,616; 6,487,535 & other U.S. and worldwide patents issued & pending. DTS is a registered trademark and the DTS logos, Symbol, DTS-HD and DTS-HD Master Audio are trademarks of DTS, Inc. © 1996-2007 DTS, Inc. All Rights Reserved.
Manufactured under license under U.S. Patent #’s: 5,451,942; 5,956,674; 5,974,380; 5,978,762; 6,226,616; 6,487,535 & other U.S. and worldwide patents issued & pending.DTS is a registered trademark and the DTS logos, Symbol, DTS-HD, DTS-HD Master Audio and DTS Sur-round Sensation are trademarks of DTS, Inc. © 1996-2008 DTS, Inc. All Rights Reserved.
*3.
Manufactured under license from Dolby Laboratories. Dolby, Pro Logic, and the double-D symbol are trade-marks of Dolby Laboratories.
*4
Manufactured under license from Audyssey Laboratories. U.S. and foreign patents pending. Audyssey 2EQ and Dynamic EQ are trademarks of Audyssey Laboratories.
*5
Theater-Dimensional is a trademark of Onkyo Corporation.
* Apple and iPod are trademarks of Apple Computer, Inc., registered in the U.S. and other countries.* “x.v.Color” is a trademark of Sony Corporation.
9

1
HTX-22HD_En.book Page 10 Monday, April 7, 2008 2:03 PM
Getting to Know the HTX-22HD
A DisplaySee “Display” on page 11.
B STANDBY indicatorLights up when the HTX-22HD is on Standby and flashes while a signal is being received from the remote controller.
C ON/STANDBY buttonSets the HTX-22HD to On or Standby.
To operate this button, push it down from the top.
D Remote-control sensorReceives control signals from the remote controller.
E MASTER VOLUME controlSets the volume of the HTX-22HD.
F INPUT buttonSelects the input source.
G LISTENING MODE buttonSelects the listening modes.
Front Panel
1 4
5
6
7
2
3
0

HTX-22HD_En.book Page 11 Monday, April 7, 2008 2:03 PM
Getting to Know the HTX-22HD—Continued
1 Listening mode and format indicatorsShow the selected listening mode and audio input signal format.
2 AUDYSSEY indicatorFlashes during automatic speaker setup. Stays on all the time once the automatic speaker setup has been run.
3 SLEEP indicatorLights up when the Sleep function has been set.
4 MUTING indicatorFlashes while the HTX-22HD is muted.
5 Message areaDisplays various information.
Display
1
5
2 3 4
Indicator Listening mode/input format
PCM PCM
D Dolby Digital
DTS
D+ Dolby Digital Plus
HD Dolby TrueHD
EXP DTS Express Audio
HD HR DTS-HD High Resolution Audio
HD MSTR DTS-HD Master Audio
DTS Direct Stream Digital
T-D Theater-Dimensional
11

1
HTX-22HD_En.book Page 12 Monday, April 7, 2008 2:03 PM
Getting to Know the HTX-22HD—Continued
A HDMI IN 1, 2, and OUTHDMI (High Definition Multimedia Interface) connections carry digital audio and digital video.
The HDMI inputs are for connecting components with an HDMI output, such as a DVD player, DVD recorder, or DVR (digital video recorder). They’re assign-able, which means you can assign each one to an input selector to suit your setup. See “HDMI Input Setup” on page 37.
The HDMI OUT is for connecting a TV or projector with an HDMI input.
B SETUP MICOnly used with the Audyssey 2EQ auto-matic speaker setup. The automatic speaker setup microphone connects here. Connect only the supplied microphone.
C COAXIAL DIGITAL INThis coaxial digital audio input is for con-necting a component with a coaxial digi-tal audio output, such as a CD player or DVD player.
D OPTICAL DIGITAL IN 1 and 2These optical digital audio inputs are for connecting components with an optical digital audio output, such as a CD player or DVD player.
E REMOTE CONTROLThis (Remote Interactive) jack can be connected to the jack on another
-capable Onkyo component for remote and system control.
To use , you must make an analog audio connection (RCA) between the HTX-22HD and the other component, even if they are connected digitally.
Rear Panel
1
2
3
4
5
6
7
8
9
J
2

HTX-22HD_En.book Page 13 Monday, April 7, 2008 2:03 PM
Getting to Know the HTX-22HD—Continued
F AC INLETThe supplied power cord is connected here. The other end of the power cord should be connected to a suitable wall outlet.
G FRONT SPEAKERS, CENTER SPEAKER, and SURROUND SPEAKERSThese push terminals are for connecting the included front speakers and the optional SKS-11 center speaker and sur-round speakers.
H Cooling fanThis cooling fan operates when the inter-nal temperature of the HTX-22HD reaches a certain level.
I SURROUND BACK PRE OUTThis analog audio output can be con-nected to another power amplifier and surround back speakers for 7.1-channel surround sound.
J LINE 1 and LINE 2 INPUTThese analog audio inputs are for con-necting components with an analog audio output, such as a VCR, TV, or Onkyo RI Dock.
See pages 16–26 for hookup information.
13

1
HTX-22HD_En.book Page 14 Monday, April 7, 2008 2:03 PM
Remote Controller
Notes:• If the remote controller doesn’t work reli-
ably, try replacing the batteries.• Don’t mix new and old batteries or differ-
ent types of batteries.• If you intend not to use the remote control-
ler for a long time, remove the batteries to prevent damage from leakage or corrosion.
• Expired batteries should be removed as soon as possible to prevent damage from leakage or corrosion.
When using the remote controller, point it toward the HTX-22HD’s remote control sen-sor, as shown below.
Notes:• The remote controller may not work reli-
ably if the HTX-22HD is subjected to bright light, such as direct sunlight or inverter-type fluorescent lights. Keep this in mind when installing.
• If another remote controller of the same type is used in the same room, or the HTX-22HD is installed close to equipment that uses infrared rays, the remote controller may not work reliably.
• Don’t put anything on top of the remote controller, such as a book or magazine, because a button may be pressed continu-ously, thereby draining the batteries.
• The remote controller may not work reli-ably if the HTX-22HD is installed in a rack behind colored glass doors. Keep this in mind when installing.
• The remote controller will not work if there’s an obstacle between it and the HTX-22HD’s remote control sensor.
Installing the Batteries
1 Open the battery compartment, as shown.
2 Insert the two supplied batteries (AA/R6) in accordance with the polarity diagram inside the battery compart-ment.
3 Close the battery compartment.
Aiming the Remote Controller
30˚30˚
Approx. 16 ft. (5 m)
Remote control sensor
STANDBY indicator
HTX-22HDPAW
4

HTX-22HD_En.book Page 15 Monday, April 7, 2008 2:03 PM
Remote Controller—Continued
These buttons are used to control the HTX-22HD.
A SLEEP buttonUsed with the Sleep function.
B ON/STANDBY buttonSets the HTX-22HD to On or Standby.
C SETUP buttonUsed to change settings. Press and hold down for 3 seconds when specifying the digital signal format.
D CH SEL buttonUsed to select each speaker when adjust-ing individual speaker levels.
E Arrow [ ]/[ ]/[ ]/[ ] and ENTER buttonsUsed to select and adjust settings.
F VOLUME [ ]/[ ] buttonsAdjust the volume of the HTX-22HD.
G LISTENING MODE buttonsUsed to select the listening modes.
H DIMMER buttonAdjusts the display brightness.
I TEST TONE buttonUsed with the Test Tone function.
J DISPLAY buttonDisplays various information on the HTX-22HD’s display. Can be used to confirm the input signal type or listening mode.
K L NIGHT buttonTurns the Late Night function on or off.
L MUTING buttonMutes or unmutes the HTX-22HD.
M RETURN buttonGoes back one level when changing set-tings.
N INPUT SELECTOR buttonsSelects the input sources.
Using the Remote Controller
8
J
9
K
L
M
N
2
3
4
6
5
7
1
Buttons that are not explained here are intended for use with an Onkyo DVD player or RI Dock with iPod (see pages 28 and 29).
15

1
HTX-22HD_En.book Page 16 Monday, April 7, 2008 2:03 PM
Connecting the Speakers
Thanks to the HTX-22HD’s superb capabilities, you can enjoy surround sound with a real sense of movement in your own home—just like being in a movie theater or concert hall. You can enjoy DVDs featuring Dolby Digital or DTS. With analog or digital TV, you can enjoy Dolby Pro Logic IIx, DTS Neo:6, or Onkyo’s original DSP listening modes.
Speaker positions for a 7.1-channel system are shown below.
Enjoying Home Theater
Corner position
1/3 of wall position
Surround back left and right speakers (not supplied with the HTX-22HD)These speakers are necessary to enjoy Dolby Digital EX, DTS-ES Matrix, DTS-ES Discrete, etc. They enhance the realism of surround sound and improve sound localiza-tion behind the listener. Position them behind the listener about 2–3 feet (60–100 cm) above ear level.(*power amp and speakers required)
Front left and right speakers (HTX-22HDST)These output the main sound. Their role in a home the-ater is to provide a solid anchor for the sound image. They should be positioned facing the listener at about ear level, and equally spaced from the TV. Angle them inward slightly so as to create a triangle, with the listener at the apex.
Notes:The HTX-22HD Digital Surround System consists of an Amp/Subwoofer and two front speakers.Designed especially for use with the HTX-22HD, the optional Onkyo SKS-11 speaker package consists of a center speaker and two surround speakers that can be connected directly to the HTX-22HD.For 7.1-channel surround, you’ll need a pair of surround back speakers and a power amp to drive them, which can be connected to the HTX-22HD’s SURROUND BACK PRE OUT jacks (see page 20).
Center speaker (optional SKS-11)This speaker enhances the front left and right speakers, making sound move-ments distinct and providing a full sound image. For movies it’s used mainly for dialog.Position it close to your TV (preferably on top) facing forward at about ear level, or at the same height as the front left and right speakers.
Surround left and right speakers (optional SKS-11)These speakers are used for precise sound positioning and to add realistic ambience.Position them at the sides of the listener, or slightly behind, about 2–3 feet (60–100 cm) above ear level. Ideally they should be equally spaced from the listener.
Subwoofer (HTX-22HDPAW Amp/Subwoofer)The subwoofer handles the bass sounds of the LFE (Low-Frequency Effects) channel. The volume and quality of the bass output from your subwoofer will depend on its posi-tion, the shape of your listening room, and your listening position. In general, a good bass sound can be obtained by installing the subwoofer in a front corner, or at one-third the way along the front wall, as shown.Tip: To find the best position for your sub-woofer, while playing a movie or some music with good bass, experiment by placing your subwoofer at various positions within the room and choose the one that provides the most satisfying results.
6

HTX-22HD_En.book Page 17 Monday, April 7, 2008 2:03 PM
Connecting the Speakers—Continued
You can improve the sound quality by affixing the included cork spacers to raise the speakers off the mounting surface thereby reducing the contact area. The spacers also make the speakers stable and prevent them from moving around.
Cork Spacers for the Amp/Subwoofer
Cork Spacers for the Front Speakers
Note:• Before you wall-mount the front speakers, check the strength of the wall. The supporting
strength of the screws depends on the wall material and the position of the studs. Use screwsas thick and long as possible, with a head diameter of 10 mm or less and a thread diameter of4 mm or less. (We recommend that you consult a professional home electronics installer.)
Affixing the Cork Spacers
HTX-22HDPAW Cork spacer
Bottom
Side
Cork spacer
HTX-22HDST bottom
HTX-22HDST top
Keyhole mounting slot
If you intend to wall-mount the front speakers using their keyhole slots, affix two cork spacers to the rear of each speaker for a added stability.
Cork spacer
17

1
HTX-22HD_En.book Page 18 Monday, April 7, 2008 2:03 PM
Connecting the Speakers—Continued
Read the following before connecting your speakers:• Disconnect the power cord from the wall
outlet before making any connections.• Connect only speakers with an impedance
of 6 ohms or higher.• Read the instructions supplied with your
speakers.• Pay close attention to speaker wiring polar-
ity. Connect positive (+) terminals to only positive (+) terminals, and negative (–) ter-minals to only negative (–) terminals. If you get them the wrong way around, the sound will be out of phase and will sound unnatural.
• Unnecessarily long or very thin speaker cables may affect the sound quality and should be avoided.
• Be careful not to short the positive and nega-tive wires. Doing so may damage the HTX-22HD.
• Don’t connect more than one cable to each speaker terminal. Doing so may damage the HTX-22HD.
• Don’t connect a speaker to several termi-nals.
Maker sure that the speaker terminals are gripping the bare wires, not the insulation.
Speaker Connection Precautions Making the Connections
1 Remove the pre-cut insulation from the ends of the speaker cables, and twist the bare wires tightly.
2 Push the lever to open the hole, insert the bare wire into the hole, and then release the lever.
8

HTX-22HD_En.book Page 19 Monday, April 7, 2008 2:03 PM
Connecting the Speakers—Continued
The following hookup diagram shows how to connect the included front speakers for 2.1-channel operation.
The following hookup diagram shows how to connect the included front speakers, a center speaker, and surround speakers for 5.1-channel surround sound. To connect a pair of surround back speakers for 7.1-channel surround sound, see page 20.
Connecting only the Front Speakers
Front left speakerFront right speaker
Red terminal
Red line
White terminal
White line
Red lineWhite line
Supplied speaker cable
Supplied speaker cable
Connecting 5.1 Speakers
Surround right speaker
Front left speakerFront right speaker Center speaker
Surround left speaker
19

2
HTX-22HD_En.book Page 20 Monday, April 7, 2008 2:03 PM
Connecting the Speakers—Continued
For 7.1-channel surround sound, in addition to the 5.1 speakers shown in the hookup diagram on page 19, you’ll need a pair of surround back speakers and a power amp to drive them. Using an RCA audio cable, connect the HTX-22HD’s SURROUND BACK PRE OUT jacks to the audio input on the power amp, as shown below.
Note:• If you’re using only one surround back speaker, connect it to the SURROUND BACK PRE
OUT L jack.
Connecting Surround Back Speakers
AUDIO INPUT
Surround back right speaker
Surround back left speaker
Power amp
0

HTX-22HD_En.book Page 21 Monday, April 7, 2008 2:03 PM
Connecting AV Components
• Before making any AV connections, read the manuals supplied with your other AV compo-nents.
• Don’t connect the power cord until you’ve completed and double-checked all AV connec-tions.
Optical Digital Jacks
The HTX-22HD’s optical digital jacks have shutter-type covers that open when an optical plug is inserted and close when it’s removed. Push plugs in all the way.Caution: To prevent shutter damage, hold the optical plug straight when inserting and removing.
RCA Connection Color Coding
RCA connections are usually color coded: red and white. Use red plugs to connect right-channel audio inputs and outputs (typically labeled “R”). Use white plugs to connect left-channel audio inputs and outputs (typically labeled “L”).
• Push plugs in all the way to make good connections (loose connections can cause noise ormalfunctions).
• To prevent interference, keep audio and video cables away from power cords and speakercables.
About AV Connections
Left (white) Analog audio Left (white)
Right (red) Right (red)
Right!
Wrong!
21

2
HTX-22HD_En.book Page 22 Monday, April 7, 2008 2:03 PM
Connecting AV Components—Continued
You can connect components with digital audio outputs to the HTX-22HD’s COAXIAL IN, OPTICAL IN 1, and IN 2 inputs. Choose a digital input (coaxial or optical) that matches the digital audio output on your source component. To enjoy Dolby Digital and DTS, you must connect your DVD player with an optical or coaxial digital audio cable. If your DVD player supports HDMI, you can use an HDMI connection instead (see page 24).
Notes:• After you connect a component to an input jack, you must assign that input jack to an input
selector. See “Audio Input Setup” on page 36.• On some source components, Dolby Digital and DTS output may be turned off by default, in
which case you’ll need to turn it on.• If one of your source components is noticeably louder or quieter than your others, use the
IntelliVolume function to adjust its input level (see page 64).
Connecting Components with Digital Outputs
CD player, etc.
DVD player,Set-top box, etc.
Games console, TV, Computer, etc.
Coaxial digital audio cable (not supplied)
Optical digital audio cable (supplied)
2

HTX-22HD_En.book Page 23 Monday, April 7, 2008 2:03 PM
Connecting AV Components—Continued
You can connect components with analog audio outputs to the HTX-22HD’s LINE 1 and LINE 2 inputs and enjoy surround sound with Dolby Pro Logic IIx, DTS Neo:6, and Onkyo’s original DSP listening modes.
Notes:• After you connect a component to an input jack, you must assign that input jack to an input
selector. See “Audio Input Setup” on page 36.• When listening to compressed music files, such as MP3, you can use the HTX-22HD’s Music
Optimizer function to enhance the sound quality.
If your TV has no audio outputs, connect an audio output from your VCR or set-top box to the HTX-22HD and use its tuner to listen to TV programs through the HTX-22HD.
Connecting Components with Analog Outputs
Tuner, TV, etc.
Cassette, MD recorder, Onkyo RI Dock (iPod), etc.
RCA audio cable
Analog audio outputs
RCA audio cable
Hint!
23

2
HTX-22HD_En.book Page 24 Monday, April 7, 2008 2:03 PM
Connecting AV Components—Continued
About HDMI
Designed to meet the increased demands of digital TV, HDMI (High Definition Multimedia Interface) is a new digital interface standard for connecting TVs, projectors, DVD players, set-top boxes, and other video components. Until now, several separate video and audio cables have been required to connect AV components. With HDMI, a single cable can carry control signals, digital video, and up to eight channels of digital audio (2-channel PCM, multichannel digital audio, or multichannel PCM).The HDMI video stream (i.e., video signal) is compatible with DVI (Digital Visual Interface),*1 so TVs and displays with a DVI input can be connected by using an HDMI-to-DVI adapter cable. (This may not work with some TVs and displays, resulting in no picture.)The HTX-22HD uses HDCP (High-bandwidth Digital Content Protection), so only HDCP-com-patible components will display a picture.
Supported Audio Formats
• 2-channel linear PCM (16/20/24 bit/32–192 kHz)• Multichannel linear PCM (7.1 ch, 32–192 kHz)• Bitstream (Dolby Digital, Dolby Digital Plus, DTS, DTS-HD Master Audio, DTS-HD High
Resolution Audio, Dolby TrueHD, DSD)Your DVD player must be able to output these formats from its HDMI OUT.
About Copyright Protection
The HTX-22HD supports HDCP (High-bandwidth Digital Content Protection),*2 a copy-protec-tion system for digital video signals. Other devices connected to the HTX-22HD via HDMI must also support HDCP.Use a commercially available HDMI cable (supplied with some components) to connect the HTX-22HD’s HDMI OUT to the HDMI input on your TV or projector.
*1 DVI (Digital Visual Interface): The digital display interface standard set by the DDWG*3 in 1999.
*2 HDCP (High-bandwidth Digital Content Protection): The video encryption technology developed by Intel for HDMI/DVI. It’s designed to protect video content and requires a HDCP-compatible device to display the encrypted video.
*3 DDWG (Digital Display Working Group): Led by Intel, Compaq, Fujitsu, Hewlett Packard, IBM, NEC, and Silicon Image, this open industry group’s objective is to address the indus-try's requirements for a digital connectivity specification for high-performance PCs and dig-ital displays.
Connecting Components with HDMI
The HTX-22HD’s HDMI interface is based on the following standard:Repeater System, Deep Color, Lip Sync, DTS-HD Master Audio, DTS-HD High Reso-lution Audio, Dolby TrueHD, Dolby Digital Plus, SA-CD and Multichannel PCM
4

HTX-22HD_En.book Page 25 Monday, April 7, 2008 2:03 PM
Connecting AV Components—Continued
You can connect components with HDMI outputs to the HTX-22HD’s HDMI IN 1 and IN 2 inputs and connect your HDMI TV to the HTX-22HD’s HDMI OUT. You need HDMI cables to make HDMI connections.
Note:• By default, the HDMI1 and HDMI2 inputs are assigned to the VCR/DVR and CBL/SAT
input selectors. To change these assignments, see “HDMI Input Setup” on page 37.
Video SignalsDigital video signals received by the HDMI IN jacks are output by the HDMI OUT for display on your TV.
Audio SignalsDigital audio signals received by the HDMI IN jacks are output by the speakers connected to the HTX-22HD. Normally, they are not output by the HDMI OUT.
To listen to audio received by the HDMI IN jacks through your TV’s speakers, set the Audio TV Out setting to On (see page 68), and set your DVD player’s HDMI audio output setting to PCM.
Notes:• Set the output resolution of your DVD player so that it matches the resolution of your TV
before starting playback.• The HDMI video stream is compatible with DVI (Digital Visual Interface), so TVs and dis-
plays with a DVI input can be connected by using an HDMI-to-DVI adapter cable. (Note thatDVI connections only carry video, so you’ll need to make a separate connection for audio.)However, reliable operation with such an adapter is not guaranteed. In addition, video signalsfrom a PC are not supported.
• To listen to an HDMI source component through the HTX-22HD, you must configure yoursystem so that video from the HDMI source component can be displayed on your TV (i.e., onyour TV, select the HDMI input that’s connected to the HTX-22HD’s HDMI OUT). This isnecessary because a component identification check has to be performed on your TV beforean HDMI source component can output any signals. If your TV is off or set to a differentinput source, the HTX-22HD may produce no sound or the sound may be distorted.
• The HDMI audio signal (sampling rate, bit length, etc.) may be restricted by the connectedsource component. If the picture is poor or there’s no sound from a component connected viaHDMI, check its setup. Refer to the connected component’s instruction manual for details.
Making HDMI Connections
Hint!
HDMIHDMI
IN 1HDMI
INHDMIOUT
DVD player TV
: Signal frow
25

2
HTX-22HD_En.book Page 26 Monday, April 7, 2008 2:03 PM
Connecting AV Components—Continued
Connecting an Onkyo DVD player or RI Dock with iPod to the HTX-22HD with an cable and RCA audio cable will alow you to use the following system control functions. An cable is a special cable for use with Onkyo’s (Remote Interactive) control system.Auto Power On/StandbyIf you turn on or start playback on the Onkyo DVD player or RI Dock with iPod, the HTX-22HD will automatically turn on and select the DVD player or iPod as the input source. Similarly, when the HTX-22HD is tuned on or set to Standby, the DVD player and iPod will also turn on or go on Standby.
Direct ChangeWhen playback is started on the Onkyo DVD player or RI Dock with iPod, the HTX-22HD automatically selects the DVD player or iPod as the input source.
Remote Controller OperationIn addition to controlling the HTX-22HD, you can also use the HTX-22HD’s remote controller to control an Onkyo DVD player or RI Dock with iPod. When doing so, remember to point the remote controller at the HTX-22HD and not at the DVD player or RI Dock. Hookup information is shown below. The remote controller buttons that you can use to control an Onkyo DVD player or RI Dock with iPod are explained on pages 28 and 29.
HookupThe following diagram shows how to connect an Onkyo DVD player and RI Dock with iPod to the HTX-22HD for operation. Use the cables supplied with the DVD player and RI Dock. An cable is not supplied with the HTX-22HD.
Notes:• To use functionality with your Onkyo DVD player, you must assign the HTX-22HD
LINE 1 or LINE 2 input to which the DVD player is connected to the DVD input selector (seepage 36). The DVD player must be connected to LINE 1 or LINE 2 even if it’s already con-nected to a digital audio input.
Connecting Onkyo Components
DISPLAY
STANDBY/ ON
STANDBY
REPEAT
SUPER AUDIO CD & DVD AUDIO /VIDEO PLAYER
VIDEO OFFPROGRESSIVESURROUND
IN1
DIGITAL
OPTICAL
IN2
cable
DVD player RI Dock
L/R audio out
RCA audio cable
cable
L/R audioout
RCA audio cable
6

HTX-22HD_En.book Page 27 Monday, April 7, 2008 2:03 PM
Connecting AV Components—Continued
• To use functionality with your Onkyo MiniDisc recorder, CD recorder, or RI Dock, con-nect it to the LINE 1 or LINE 2 input, and assign that input to the TAPE input selector. Then,change the Input Display to MD, CDR, or DOCK as appropriate (see page 38).
• Use only cables for connections. cables are supplied with Onkyo players (DVD,CD, etc.).
• Some components have two jacks. You can connect either one to the HTX-22HD. Theother jack is for connecting additional -capable components.
• Connect only Onkyo components to jacks. Connecting other manufacturer’s componentsmay cause a malfunction.
• Some components may not support all functions. Refer to the manuals supplied withyour other Onkyo components.
27

2
HTX-22HD_En.book Page 28 Monday, April 7, 2008 2:03 PM
Connecting AV Components—Continued
Controlling an Onkyo DVD Player
The following buttons can be used to control an Onkyo DVD player that’s connected with
. See page 26 for hookup and setting information.
A TOP MENU button*Displays a DVD’s top menu or a DVD’s title.
B Arrow [ ]/[ ]/[ ]/[ ] and ENTER buttons*Used to navigate menus and select items.
C DVD SETUP button*Used to access the DVD player’s settings.
D Play [ ] buttonStarts playback.
E Stop [ ] buttonStops playback.
F Pause [ ] buttonPauses playback.
G Next [ ] buttonSelects the next chapter.
H Previous [ ] buttonRestarts the current chapter. Press it twice to select the previous chapter.
I Rewind [ ] buttonPress and hold to rewind.
J Fast Forward [ ] buttonPress and hold to fast forward.
K MENU button*Displays a DVD’s menu.
L DISPLAY buttonPress and hold down for 3 seconds to switch to DVD display. Displays informa-tion about the current disc, title, chapter, or track, including elapsed time, remain-ing time, total time, and so on.
M RETURN button*Exits the DVD player’s setup menu or returns to the previous menu.
N SHUFFLE MODE buttonUsed with the random function.
O REPEAT buttonUsed with the repeat playback function.
Note:• To use functionality with your Onkyo
DVD player, you must assign the HTX-22HD LINE 1 or LINE 2 input to which the DVD player is connected to the DVD input selector (see page 36). The DVD player must be connected with an RCA audio cable even if it’s already connected with a digital audio cable (see page 26).
* When changing settings, adjusting the lev-els of individual speakers, or outputting the test tone, the Arrow, [ENTER], and [RETURN] buttons operate the HTX-22HD, and the [TOP MENU], [MENU], and [DVD SETUP] buttons are disabled.
K
L
O
N
M3
1
9
8
2
45
7
6
J
8

HTX-22HD_En.book Page 29 Monday, April 7, 2008 2:03 PM
Connecting AV Components—Continued
Controlling an RI Dock (iPod)
The following buttons can be used to control an Onkyo RI Dock with iPod that’s connected with . See page 26 for hookup and setting information.
A Arrow [ ]/[ ] and ENTER buttons*Used to navigate menus and select items.
B Play [ / ] buttonStarts playback. If the iPod is off, it will turn on automatically. (With 3rd genera-tion iPod models, this button works as a Play/Pause button.)
C Next [ ] buttonSelects the next song.
D Previous [ ] buttonRestarts the current song. Press it twice to select the previous song.
E Fast Forward [ ] buttonPress and hold to fast forward.
F Rewind [ ] buttonPress and hold to rewind.
G PLAYLIST [ ]/[ ] buttons*Selects the previous or next iPod playlist.
H MENU button*Displays a menu.
I DISPLAY button*Press and hold down for 3 seconds to switch to iPod display. Turns on the back-light.
J SHUFFLE MODE button*Used with the shuffle function.
K REPEAT button*Used with the repeat function.
L ALBUM [ ]/[ ] button*Selects the next or previous iPod album.
Notes:• Buttons marked with an asterisk (*) are not
supported by 3rd generation iPod models.• To use functionality with your RI
Dock with iPod, connect it to the LINE 1 or LINE 2 input, and assign that input to the TAPE input selector. Then, change the Input Display to DOCK (see page 38).
• Set the RI Dock’s RI MODE switch to HDD or HDD/DOCK.
• See the RI Dock’s instruction manual for more details.
7
8
9
K
J
L
4
1
23
56
29

3
HTX-22HD_En.book Page 30 Monday, April 7, 2008 2:03 PM
Turning On the HTX-22HD
Before connecting the power cord, connect all of your speakers and other components.
Notes:• Turning on the HTX-22HD may cause a momentary power surge that might interfere with
other electrical equipment on the same circuit. If this is a problem, plug the HTX-22HD into a different branch circuit.
• Do not use a power cord other than the one supplied with the HTX-22HD. The supplied power cord is designed exclusively for use with the HTX-22HD and should not be used with any other equipment.
• Never disconnect the power cord from the HTX-22HD while the other end is still plugged into a wall outlet. Doing so may cause an electric shock. Always disconnect the power cord from the wall outlet first, and then the HTX-22HD.
Connecting the Power Cord
1 Connect the supplied power cord to the HTX-22HD’s AC INLET.
2 Plug the other end of the power cord into a suitable wall outlet.The STANDBY indicator lights up.
Power cord varies from country to country
To wall outlet
Supplied power cord
0

HTX-22HD_En.book Page 31 Monday, April 7, 2008 2:03 PM
Turning On the HTX-22HD—Continued
Turning On and Standby
On the HTX-22HD, press the [ON/STANDBY] button.
On the remote controller, press the [ON/STANDBY] button.The HTX-22HD comes on, the display lights up, and the STANDBY indicator goes off.
To turn off the HTX-22HD, press the [ON/STANDBY] button, or press the remote controller’s [ON/STANDBY] button. The HTX-22HD will enter Standby mode. To prevent any loud sur-prises the next time you turn on the HTX-22HD, turn down the volume before you turn it off.
ON/STANDBY
ON/STANDBY
STANDBY indicator
RemotecontrollerHTX-22HD
or
What’s Next?
If you’re using the HTX-22HD for the very first time, here’s a few settings that you need to make. These settings only need to be made once.
Do the automatic speaker setup—this is essential!See “Automatic Speaker Setup (Audyssey 2EQ)” on page 32.
Assign input jacks to input selectorsSee “Audio Input Setup” on page 36.
Did you connect any HDMI components?If you did, see “HDMI Input Setup” on page 37.
Did you connect an -capable Onkyo MiniDisc recorder, CD recorder, or RI Dock to the LINE 1 or LINE 2 input?If you did, see “Audio Input Setup” on page 36 and “Changing the Input Display” on page 38.
31

3
HTX-22HD_En.book Page 32 Monday, April 7, 2008 2:03 PM
First Time Setup
This section explains the settings that you need to make before using the HTX-22HD for the very first time.
With the supplied calibrated microphone, Audyssey 2EQ automatically determines the number of speakers connected, their size for purposes of bass management, optimum crossover frequen-cies to the subwoofer (if present), and distances from the primary listening position. Audyssey 2EQ then removes the distortion caused by room acoustics by capturing room acoustical prob-lems over the listening area in both the frequency and time domain. The result is clear, well-balanced sound for everyone. Enabling Audyssey 2EQ allows you to also use Dynamic EQ, which maintains the proper octave-to-octave balance at any volume level (see page 54).
Measurement Positions
To create a listening environment in which several people can enjoy your home theater simulta-neously, Audyssey 2EQ takes measurements at three positions within the listening area.
A First measurement pointThis is the center point of the listening area, or the listening position.
B Second measurement pointThe right side of the listening area.
C Third measurement pointThe left side of the listening area.
The distances between points 1 and 2 and points 1 and 3 must be at least 1 meter.From the examples below, choose the listening area that best matches yours and place the micro-phone accordingly when prompted.
Automatic Speaker Setup (Audyssey 2EQ)
TV TV TV
TV TV TV
TV TVTV
:
:
Listening area
Listening position
2

HTX-22HD_En.book Page 33 Monday, April 7, 2008 2:03 PM
First Time Setup—Continued
Using Audyssey 2EQ
1
2, 6
3–5
1
1 Turn on the HTX-22HD.
2 Put the speaker setup microphone at measurement point 1 (page 32), and connect it to the SETUP MIC jack.
Notes:• For all measurements, the micro-
phone capsule should point directly at the ceiling.
• If there’s an obstacle between the microphone and any speaker, the automatic setup will not work cor-rectly. Set up the room as you would when enjoying a DVD.
• Positioning the microphone close to where your ears would normally be will provide better results. You can adjust the height of the microphone by using a tripod or level table.
• Do not attempt to hold the micro-phone in your hand during measure-ments as this will produce incorrect results.
Notes:• If the HTX-22HD is muted, it will be
unmuted automatically when the auto-matic speaker setup starts.
• It takes about 10 minutes to complete the automatic speaker setup for three positions. Total measurement time var-ies depending on the speakers.
• Do not connect or disconnect any speakers during the automatic speaker setup.
33

3
HTX-22HD_En.book Page 34 Monday, April 7, 2008 2:03 PM
First Time Setup—Continued
Notes:• When the automatic speaker setup is com-
plete, the Equalizer Settings (page 62) will be set to Audyssey.
• The AUDYSSEY indicator stays on all the time once the automatic speaker setup has been run.
3 Press [ENTER].
Once you’ve pressed [ENTER], stand by a wall or in a corner so that your body doesn’t interfere with the test sig-nals.The automatic speaker setup starts.You can cancel the automatic speaker setup at any point in this procedure sim-ply by disconnecting the setup micro-phone.
A test tone is output by each speaker in turn, as the Audyssey 2EQ function determines which speakers are con-nected. This takes a few minutes.
Note:• Quiet the room as much as possible.
Background noise can disrupt the room measurements. Close windows, silence cell phones, televisions, radios, air conditioners, fluorescent lights, home appliances, light dim-mers, or other devices, and refrain from talking.
4 When the following display appears, move the speaker setup microphone to measurement point 2 (page 32), and then press [ENTER].
Audyssey 2EQ performs more mea-surements.This takes a few minutes.
5 When the following display appears, move the speaker setup microphone to measurement point 3 (page 32), and then press [ENTER].
Audyssey 2EQ performs more mea-surements.This takes a few minutes.
When the measurements are complete, the results are calculated and saved automatically.
6 When the automatic speaker setup is complete, disconnect the speaker setup microphone.
4

HTX-22HD_En.book Page 35 Monday, April 7, 2008 2:03 PM
First Time Setup—Continued
Error Messages
While the automatic speaker setup is in progress, one of the following error messages may appear:
Ambient noise is too high
This message appears if there’s too much background noise and the measurements can-not be performed properly. Remove the source of the noise and try again.
Speaker Detect Errors
This message appears if one of the speaker-related errors below occurs.• One of the front speakers has not been
detected.• One of the surround speakers has not been
detected.• The surround back speakers have been
detected but the surround speakers haven’t.• The right surround back speaker has been
detected but the left surround back speaker hasn’t.
There is a problem with a speaker. One of the speakers is damaged, or the subwoofer is out-putting sound at the upper end of its range that is too loud.
Mismatch Error
• The number of speakers detected on the second or third measurement was different to the number detected on the first mea-surement.
This message appears if a speaker that was detected during the 1st measurement is not detected during the 2nd or 3rd measurements. If this message appears, check your speaker connections, and then try again.
Write Error
This message appears if saving fails.
Changing the Speaker Settings Manually
You can change the settings manually if nec-essary (see pages 56–62).
To Retry the Automatic Speaker Setup
Press the [ENTER] button.Make sure speakers that cannot be detected are con-nected properly.
35

3
HTX-22HD_En.book Page 36 Monday, April 7, 2008 2:03 PM
First Time Setup—Continued
When you connect a component to an analog or digital input, you must assign that input to an input selector. For example, if you connect your DVD player to OPTICAL IN 1, you must assign OPTICAL IN 1 to the DVD input selector.
Here are the default assignments.
Audio Input Setup
Input selector Audio input
DVD OPT1
VCR/DVR HDMI1
CBL/SAT HDMI2
GAME/TV OPT2
TAPE LINE1
TUNER LINE2
CD COAX
1 Press the [SETUP] button.
ENTER
SETUP
2 Use the Up and Down [ ]/[ ] buttons to select “1.Input Assign,” and then press [ENTER].
3 Use the Up and Down [ ]/[ ] buttons to select “Audio Input,” and then press [ENTER].
4 Use the Up and Down [ ]/[ ] buttons to select an input selector, and then use the Left and Right [ ]/[ ] buttons to select:COAX:Select if the component
is connected to the COAXIAL DIGITAL IN.
OPT1:Select if the component is connected to the OPTICAL DIGITAL IN 1.
OPT2:Select if the component is connected to the OPTICAL DIGITAL IN 2.
LINE1:Select if the component is connected to the LINE 1 INPUT.
LINE2:Select if the component is connected to the LINE 2 INPUT.
- - - - -:Select if you’re not using the input selector.
6

HTX-22HD_En.book Page 37 Monday, April 7, 2008 2:03 PM
First Time Setup—Continued
Notes:• When an HDMI IN is assigned to an input
selector in “HDMI Input Setup” on page 37, this input assignment is automati-cally set to the same HDMI IN, and in addition to the COAX, OPT1, OPT2, etc., inputs here, you will also be able to select the HDMI inputs.
• To enjoy Dolby Digital and DTS, you must connect your DVD player with a digital audio connection.
If you connect a video component to an HDMI input, you must assign that input to an input selector. For example, if you connect your DVD player to HDMI IN 1, you must assign HDMI IN 1 to the DVD input selector. (You must change the default VCR/DVR input selector assignment from HDMI1 to “- - - - -” first.)
Here are the default assignments.
5 Press the [SETUP] button.Setup closes.
HDMI Input Setup
Input selector Audio input
DVD - - - - -
VCR/DVR HDMI1
CBL/SAT HDMI2
GAME/TV - - - - -
TAPE - - - - -
TUNER - - - - -
CD - - - - -
1 Press the [SETUP] button.
2 Use the Up and Down [ ]/[ ] buttons to select “1.Input Assign,” and then press [ENTER].
3 Use the Up and Down [ ]/[ ] buttons to select “HDMI Input,” and then press [ENTER].
37

3
HTX-22HD_En.book Page 38 Monday, April 7, 2008 2:03 PM
First Time Setup—Continued
Notes:• Each HDMI IN can be assigned to only one
input selector. Before you assign an HDMI IN to an input selector, you must change the default HDMI1 or HDMI2 assignment to “- - - - -” first.
• When an HDMI IN is assigned to an input selector as explained here, the audio input for that input selector is automatically set to the same HDMI IN. See “Audio Input Setup” on page 36.
If you connect an -capable Onkyo Mini-Disc recorder, CD recorder, or RI Dock to the HTX-22HD’s LINE 1 or LINE 2 input, for
to work properly, you must change this setting.
4 Use the Up and Down [ ]/[ ] buttons to select an input selector, and use the Left and Right [ ]/[ ] buttons to select:
HDMI1:Select if the component is connected to HDMI IN 1.
HDMI2:Select if the component is connected to HDMI IN 2.
- - - - -:Select if you’re not using the HDMI OUT.
5 Press the [SETUP] button.Setup closes.
Changing the Input Display
1 Use HTX-22HD’s [INPUT] but-ton to select the TAPE input selector so that “TAPE” appears on the display.
2 Press and hold down the [INPUT] button (about 3 sec-onds) to change the setting.Repeat this step to select MD, CDR, or DOCK.From TAPE, the setting changes in the following order:
INPUT
8

HTX-22HD_En.book Page 39 Monday, April 7, 2008 2:03 PM
Playing Your Components
Basic HTX-22HD Operation
3
1
3
1
1 Press the HTX-22HD’s [INPUT] button repeatedly to select an input source.
To select an input source with the remote controller, use its [INPUT SELECTOR] buttons.
Depending on which input selectors you have assigned to input jacks (page 36), you can select the following input selectors: DVD, VCR/DVR, CBL/SAT, GAME/TV, TAPE, TUNER, CD.
2 Start playback on the source component.To watch a video source that’s connected to an HDMI IN, on your TV, select the video input that’s connected to the HTX-22HD’s HDMI OUT.On some DVD players, you may need to change the digital or HDMI audio output settings.
3 To adjust the volume, use the HTX-22HD’s MASTER VOLUME control, or the remote controller’s [VOLUME] buttons.Since the HTX-22HD is designed for home theaters, it has a wide volume range for precise adjustment. The volume can be adjusted from Min, 1 through 79, or Max.
You can limit the maximum volume with the MaxVolume setting (see page 67).
4 Select a listening mode and enjoy!See “Using the Listening Modes” on page 42.
Remotecontroller
HTX-22HD
Remotecontroller
HTX-22HD
39
4
HTX-22HD_En.book Page 40 Monday, April 7, 2008 2:03 PM
Playing Your Components—Continued
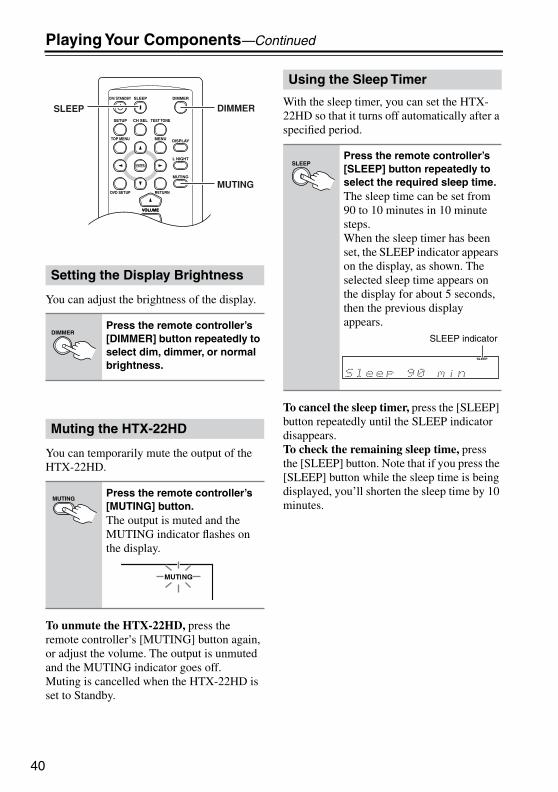
You can adjust the brightness of the display.
You can temporarily mute the output of the HTX-22HD.
To unmute the HTX-22HD, press the remote controller’s [MUTING] button again, or adjust the volume. The output is unmuted and the MUTING indicator goes off.Muting is cancelled when the HTX-22HD is set to Standby.
With the sleep timer, you can set the HTX-22HD so that it turns off automatically after a specified period.
To cancel the sleep timer, press the [SLEEP] button repeatedly until the SLEEP indicator disappears.To check the remaining sleep time, press the [SLEEP] button. Note that if you press the [SLEEP] button while the sleep time is being displayed, you’ll shorten the sleep time by 10 minutes.
Setting the Display Brightness
Press the remote controller’s [DIMMER] button repeatedly to select dim, dimmer, or normal brightness.
Muting the HTX-22HD
Press the remote controller’s [MUTING] button.The output is muted and the MUTING indicator flashes on the display.
DIMMERSLEEP
MUTING
Using the Sleep Timer
Press the remote controller’s [SLEEP] button repeatedly to select the required sleep time.The sleep time can be set from 90 to 10 minutes in 10 minute steps.When the sleep timer has been set, the SLEEP indicator appears on the display, as shown. The selected sleep time appears on the display for about 5 seconds, then the previous display appears.
SLEEP indicator
0

HTX-22HD_En.book Page 41 Monday, April 7, 2008 2:03 PM
Playing Your Components—Continued
You can display various information about the current input source as follows.
The following information can typically be displayed:
*1 If the input signal is analog, no format information is displayed. If the input sig-nal is PCM, the sampling frequency is displayed. If the input signal is digital but not PCM, the signal format is displayed. Information is displayed for about 3 sec-onds, then the previous display reappears.
Displaying Source Information
Press the remote controller’s [DISPLAY] button repeatedly to cycle through the available information.
DISPLAY
Input source & volume
Signal format*1 or sampling frequency
Input source & listening mode
41

4
HTX-22HD_En.book Page 42 Monday, April 7, 2008 2:03 PM
Using the Listening Modes
For a description of each listening mode, see “About the Listening Modes” on page 49.
Selecting the Listening Modes
• The Dolby Digital and DTS listening modes can only be selected if your DVD player is connected to the HTX-22HD with a digital audio connection (coaxial, opti-cal, or HDMI).
• The listening modes that you can select depends on the format of the input signal. To check the format, see “Displaying Source Information” on page 41.
LISTENINGMODE
LISTENINGMODE
To select the listening modes, repeatedly press the [LISTEN-ING MODE] buttons on the HTX-22HD or remote controller.
The name of the selected listen-ing mode is shown on the dis-play.
HTX-22HD
Remotecontroller
2

HTX-22HD_En.book Page 43 Monday, April 7, 2008 2:03 PM
Using the Listening Modes—Continued
Analog and PCM Sources
Requires 6.1/7.1 speakers.
Requires 7.1 speakers.
Listening Modes Available for Each Source Format
Source format
PCMMulti
channel Analog
Multichannel PCM
32–96kHz*1
1. 32/44.1/48/88.2/96 kHz
176.4/192
kHz*2
32–96 kHz*1 176.4/192 kHz*2
2. Multichannel 176.4/192 kHz PCM is output only via HDMI.
Multi-channel 2ch Mono/
MultiplexMulti-
channel 2ch Mono/Multiplex
Media
Listening ModeCD, TV, radio DVD DVD, Blu-ray disc DVD, Blu-ray disc
Direct
Stereo
Mono
Multichannel
Dolby PLII Movie/Dolby PLIIx Movie*3
3. If there are no surround back speakers, Dolby Pro Logic II is used.
*4
4. Available only when using surround speakers.
Dolby PLII Music/Dolby PLIIx Music*3 *4
Dolby PLII Game/Dolby PLIIx Game*3
DolbyEX *4
Neo:6 *4
Neo:6 Cinema
Neo:6 Music
MonoMovie*5 *6
5. PCM at 88.2 kHz and 96 kHz is processed at 44.1 kHz and 48 kHz respectively.
6. Cannot be selected with some source formats.
Orchestra*5 *6
Unplugged*5 *6
Studio-Mix*5 *6
TV Logic*5 *6
AllChStereo
FullMono
T-D *6
Surround Sensation*7
7. Surround Sensation does not support 32 kHz input signals.
43

4
HTX-22HD_En.book Page 44 Monday, April 7, 2008 2:03 PM
Using the Listening Modes—Continued
Dolby Digital and Dolby Digital Plus Sources
Requires 6.1/7.1 speakers.
Requires 7.1 speakers.
Note:• With some HD DVD and Blu-ray discs, a noise may be heard during playback. This may
occur when the audio format changes during playback. It is not a malfunction.
Source formatDolby Digital Dolby Digital Plus
Multichannel 2ch Mono/Multiplex Multichannel 2ch Mono/
Multiplex
Media
Listening ModeDVD, DTV, etc. Blu-ray, HD DVD
Direct
Stereo
Mono
DolbyDigital
DolbyDigital Plus *1
1. If there are no surround back speakers, depending on the input signal, Dolby Digital may be used.
Neo:6 *3
Dolby PLII Movie/Dolby PLIIx Movie*2
2. If there are no surround back speakers, Dolby Pro Logic II is used.
*3
3. Cannot be selected with some source formats.
Dolby PLII Music/Dolby PLIIx Music*2 *3
Dolby PLII Game/Dolby PLIIx Game*2
DolbyEX *3
Neo:6 Cinema
Neo:6 Music
MonoMovie*4
4. Available only when using surround speakers.
Orchestra*4
Unplugged*4
Studio-Mix*4
TV Logic*4
AllChStereo
FullMono
T-D
Surround Sensation
4

HTX-22HD_En.book Page 45 Monday, April 7, 2008 2:03 PM
Using the Listening Modes—Continued
DTS Sources
Requires 6.1/7.1 speakers.
Requires 7.1 speakers.
Source formatDTS, DTS 96/24 DTS
Discrete/MatrixMultichannel 2ch Mono
Media
Listening ModeDVD, CD, etc. DVD, CD, etc.
Direct
Stereo
Mono
DTS, DTS 96/24
DTS-ES Discrete/Matrix *1
1. If there are no surround back speakers, DTS is used.
Neo:6 *3
Dolby PLII Movie/Dolby PLIIx Movie*2
2. If there are no surround back speakers, Dolby Pro Logic II is used.
*3
3. Cannot be selected with some source formats.
Dolby PLII Music/Dolby PLIIx Music*2 *3
Dolby PLII Game/Dolby PLIIx Game*2
DolbyEX *3
Neo:6 Cinema
Neo:6 Music
MonoMovie*4 *5
4. Available only when using surround speakers.
5. DTS 96/24 is processed as DTS.
Orchestra*4 *5
Unplugged*4 *5
Studio-Mix*4 *5
TV Logic*4 *5
AllChStereo
FullMono
T-D*5
Surround Sensation*5
45

4
HTX-22HD_En.book Page 46 Monday, April 7, 2008 2:03 PM
Using the Listening Modes—Continued
TrueHD Sources
Requires 6.1/7.1 speakers.
Requires 7.1 speakers.
Note:• With some HD DVD and Blu-ray discs, a noise may be heard during playback. This may
occur when the audio format changes during playback. It is not a malfunction.
Source formatTrueHD TrueHD 192 kHz
Multichannel 2ch Mono/Multiplex Multichannel 2ch Mono/
Multiplex
Media
Listening ModeBlu-ray, HD DVD Blu-ray, HD DVD
Direct
Stereo
Mono
TrueHD
Neo:6 *2
Dolby PLII Movie/Dolby PLIIx Movie*1
1. If there are no surround back speakers, Dolby Pro Logic II is used.
*2
2. Cannot be selected with some source formats.
Dolby PLII Music/Dolby PLIIx Music*1 *2
Dolby PLII Game/Dolby PLIIx Game*1
DolbyEX *2
Neo:6 Cinema
Neo:6 Music
AllChStereo
FullMono
T-D
Surround Sensation
6

HTX-22HD_En.book Page 47 Monday, April 7, 2008 2:03 PM
Using the Listening Modes—Continued
DTS-HD Sources
Requires 6.1/7.1 speakers.
Requires 7.1 speakers.
Note:• With some HD DVD and Blu-ray discs, a noise may be heard during playback. This may
occur when the audio format changes during playback. It is not a malfunction.
Source formatDTS-HD High Resolution DTS-HD Master Audio
Multichannel 2ch Mono Multichannel 2ch Mono
Media
Listening ModeBlu-ray, HD DVD Blu-ray, HD DVD
Direct
Stereo
Mono
DTS-HD High Resolution
DTS-HD Master Audio
Neo:6 *2 *2
Dolby PLII Movie/Dolby PLIIx Movie*1
1. If there are no surround back speakers, Dolby Pro Logic II is used.
*2
2. Cannot be selected with some source formats.
*2
Dolby PLII Music/Dolby PLIIx Music*1 *2 *2
Dolby PLII Game/Dolby PLIIx Game*1
DolbyEX *2 *2
Neo:6 Cinema
Neo:6 Music
AllChStereo
FullMono
T-D
Surround Sensation
47

4
HTX-22HD_En.book Page 48 Monday, April 7, 2008 2:03 PM
Using the Listening Modes—Continued
DTS Express and DSD Sources
Requires 6.1/7.1 speakers.
Requires 7.1 speakers.
If you can select PCM or DSD output on your SACD player, in some cases, selecting PCM will provide the best sound quality.
Note:• With some HD DVD and Blu-ray discs, a noise may be heard during playback. This may
occur when the audio format changes during playback. It is not a malfunction.
Source formatDTS Express DSD*1
1. DSD signals are processed after conversion to PCM.
Multichannel 2ch Mono Multichannel(5.1) 2ch
Media
Listening ModeBlu-ray, HD DVD SACD
Direct
Stereo
Mono
DTS-HD Express
DSD
Neo:6 *3
Dolby PLII Movie/Dolby PLIIx Movie*2
2. If there are no surround back speakers, Dolby Pro Logic II is used.
*3
3. Cannot be selected with some source formats.
Dolby PLII Music/Dolby PLIIx Music*2 *3
Dolby PLII Game/Dolby PLIIx Game*2
DolbyEX *3
Neo:6 Cinema
Neo:6 Music
MonoMovie*4
4. Available only when using surround speakers.
Orchestra*4
Unplugged*4
Studio-Mix*4
TV Logic*4
AllChStereo
FullMono
T-D
Surround Sensation
Hint!
8

HTX-22HD_En.book Page 49 Monday, April 7, 2008 2:03 PM
Using the Listening Modes—Continued
The HTX-22HD’s listening modes can trans-form your listening room into a movie theater or concert hall, with high fidelity and stun-ning surround sound.
DirectIn this mode, audio from the input source is output directly with minimal processing, pro-viding high-fidelity reproduction. All of the source’s audio channels are output as they are.
Note:• Direct mode is only available when the
Subwoofer setting in the Speaker Configu-ration is set to No.
Stereo
Sound is output by the front left and right speakers and subwoofer.
Mono
Use this mode when watching an old movie with a mono soundtrack, or use it with the foreign language soundtracks recorded in the left and right channels of some movies. It can also be used with DVDs or other sources con-taining multiplexed audio, such as karaoke DVDs.
Dolby Pro Logic IIx
Dolby Pro Logic II
Dolby Pro Logic IIx expands any 2-channel source for 7.1-channel playback. It provides a very natural and seamless surround-sound experience that fully envelops the listener. As well as music and movies, video games can
also benefit from the dramatic spatial effects and vivid imaging. If you’re not using any surround back speakers, Dolby Pro Logic II will be used instead of Dolby Pro Logic IIx.• Dolby PLIIx Movie
Use this mode with any stereo or Dolby Surround (Pro Logic) movie (e.g., TV, DVD, VHS).
• Dolby PLIIx MusicUse this mode with any stereo or Dolby Surround (Pro Logic) music source (e.g., CD, radio, cassette, TV, VHS, DVD).
• Dolby PLIIx GameUse this mode with video games, espe-cially those that bear the Dolby Pro Logic II logo.
Dolby Digital
Use this mode with DVDs that bear the Dolby Digital logo, and Dolby Digital TV broad-casts. This is the most common digital sur-round-sound format, and it’ll put you right in the middle of the action, just like being in a movie theater or concert hall.
5.1-channel source + Dolby EX
These modes expand 5.1-channel sources for 6.1/7.1-channel playback. They’re especially suited to Dolby EX soundtracks that include a matrix-encoded surround back channel. The additional channel adds an extra dimension and provides an enveloping surround sound experience, perfect for rotating and fly-by sound effects.5.1-channel source + Dolby PLIIx MusicThese modes use the Dolby Pro Logic IIx Music mode to expand 5.1-channel sources for 6.1/7.1-channel playback.5.1-channel source + Dolby PLIIx MovieThese modes use the Dolby Pro Logic IIx Movie mode to expand 5.1-channel sources for 7.1-channel playback.
About the Listening Modes
This illustration shows which speakers are active in each listening mode with 7.1-channel speakers.
Front left Center Front right
Subwoofer
Surround rightSurround back left/right
Surround left
49

5
HTX-22HD_En.book Page 50 Monday, April 7, 2008 2:03 PM
Using the Listening Modes—Continued
Dolby Digital Plus
Developed for use with HDTV, including the new video disc formats Blu-ray and HD DVD, this is the latest multichannel audio format from Dolby. It supports up to 7.1 channels with 48 kHz sampling rate.
Dolby TrueHD
Designed to take full advantage of the addi-tional storage space offered by the new Blu-ray and HD DVD disc formats, this new Dolby format offers up to 7.1 discrete chan-nels of digital audio with 48/96 kHz, up to 5.1-channels with 192 kHz sampling rate.For the signals supported by the HTX-22HD, see page 46.
DTS
The DTS digital surround-sound format sup-ports up to 5.1 discrete channels and uses less compression for high-fidelity reproduction. Use it with DVDs and CDs that bear the DTS logo.
DTS 96/24
This mode is for use with DTS 96/24 sources. This is high-resolution DTS with a 96 kHz sampling rate and 24-bit resolution, providing superior fidelity. Use it with DVDs that bear the DTS 96/24 logo.
DTS-ES Discrete
This mode is for use with DTS-ES Discrete soundtracks, that use a discrete surround back channel for true 6.1/7.1-channel playback. The seven totally separate audio channels provide better spatial imaging and 360-degree sound localization, perfect for sounds that pan across the surround channels. Use it with DVDs that bear the DTS-ES logo, especially those with a DTS-ES Discrete soundtrack.
DTS-ES Matrix
This mode is for use with DTS-ES Matrix soundtracks, that use a matrix-encoded back-channel for 6.1/7.1-channel playback. Use it with DVDs that bear the DTS-ES logo, espe-cially those with a DTS-ES Matrix soundtrack.
DTS Neo:6
This mode expands any 2-channel source for 7.1-channel playback. It uses seven full-band-width channels of matrix decoding for matrix-encoded material, providing a very natural and seamless surround sound experi-ence that fully envelops the listener.• Neo:6 Cinema
Use this mode with any stereo movie (e.g., TV, DVD, VHS).
• Neo:6 MusicUse this mode with any stereo music source (e.g., CD, radio, cassette, TV, VHS, DVD).
5.1-channel source + Neo:6
This mode uses Neo:6 to expand 5.1-channel sources for 6.1/7.1-channel playback.
DTS-HD High Resolution Audio
Developed for use with HDTV, including the new video disc formats Blu-ray and HD DVD, this is the latest multichannel audio format from DTS. It supports up to 7.1 chan-nels with 96 kHz sampling rate.
DTS-HD Master Audio
Designed to take full advantage of the addi-tional storage space offered by the new Blu-ray and HD DVD disc formats, this new DTS format offers up to 7.1 discrete channels of digital audio with 48/96 kHz, up to 5.1-chan-nels with 192 kHz sampling rate.For the signals supported by the HTX-22HD, see page 47.
DTS Express
This format supports up to 5.1 channels and a lower sampling rate of 48 kHz. Applications include interactive audio and commentary encoding for HD DVD Sub Audio and Blu-ray Secondary Audio. Also broadcast and media servers.
DTS Surround Sensation
With this mode, you can enjoy a virtual 5.1 surround sound even with only two speakers. It provides natural- surround sound experi-ence with movies and music.
0

HTX-22HD_En.book Page 51 Monday, April 7, 2008 2:03 PM
Using the Listening Modes—Continued
Multich
This mode is for use with HDMI multichan-nel sources.
DSD
DSD stands for Direct Stream Digital and is the format used to store digital audio on Super Audio CDs (SACD).This mode can be used with SACDs that fea-ture multichannel audio.
Onkyo Original DSP Modes
Mono Movie
This mode is suitable for old movies and other mono sources. The center speaker out-puts the sound as it is, while reverb is applied to the sound output by the other speakers, giv-ing presence to even mono material.
Orchestra
Suitable for classical or operatic music, this mode emphasizes the surround channels in order to widen the stereo image and simulates the natural reverberation of a large hall.
Unplugged
Suitable for acoustic instruments, vocals, and jazz, this mode emphasizes the front stereo image, giving the impression of being right in front of the stage.
Studio-Mix
Suitable for rock or pop music, listening to music in this mode creates a lively sound field with a powerful acoustic image, like being at a club or rock concert.
TV Logic
This mode adds realistic acoustics to TV shows produced in a TV studio, surround effects to the entire sound, and clarity to voices.
All Ch Stereo
Ideal for background music, this mode fills the entire listening area with stereo sound from the front, surround, and surround back speakers.
Full Mono
In this mode, all speakers output the same sound in mono, so the sound you hear is the same regardless of where you are within the listening room.
T-D (Theater-Dimensional)
With this mode, you can enjoy a virtual 5.1 surround sound even with only two or three speakers. This works by controlling how sounds reach the listener’s left and right ears. Good results may not be possible if there’s too much reverb, so we recommend that you use this mode in an environment with little or no natural reverb.
51

5
HTX-22HD_En.book Page 52 Monday, April 7, 2008 2:03 PM
Using the Listening Modes—Continued
With the Audio Adjust settings, you can adjust the sound and listening modes as you like.
Multiplex/Mono
Multiplex
Input (Mux)This setting determines which channel of a stereo multiplex source is output. Use it to select audio channels or languages with mul-tiplex sources, multilingual TV broadcasts, and so on.Main: The main channel is output (default).
Sub: The sub channel is output.M/S: Both the main and sub channels are
output.Mono
Input (Mono)This setting determines which channel is out-put when the Mono listening mode is used with a stereo source. L+R: Both the left and right channels are
output (default).L: Only the left channel is output.R: Only the right channel is output.
Using the Audio Adjust Settings
1 Press the [SETUP] button.
2 Use the Up and Down [ ]/[ ] buttons to select “3. Audio Adjust,” and then press [ENTER].
3 Use the Up and Down [ ]/[ ] buttons to select an item, and then press [ENTER].
ENTER
SETUP
4 Use the Up and Down [ ]/[ ] buttons to select an option, and use the Left and Right [ ]/[ ] buttons to change it.The Audio Adjust menu items are explained below.
5 When you’ve finished, press the [SETUP] button.Setup closes.
2

HTX-22HD_En.book Page 53 Monday, April 7, 2008 2:03 PM
Using the Listening Modes—Continued
PLIIx/Neo:6
PLIIx Music (2 ch Input)These settings apply to only 2-channel stereo sources.If you’re not using any surround back speak-ers, these settings apply to Dolby Pro Logic II, not Dolby Pro Logic IIx.
PanoramaWith this setting, you can broaden the width of the front stereo image when using the Dolby Pro Logic IIx Music listening mode.
On: Panorama function on.Off: Panorama function off (default).
DimensionWith this setting, you can move the sound field forward or backward when using the Dolby Pro Logic IIx Music listening mode. It can be adjusted from –3 to +3. The default value is 0. Higher settings move the sound field backward. Lower settings move it for-ward.If the stereo image feels too wide, or there’s too much surround sound, move the sound field forward to improve the balance. Con-versely, if the stereo image feels like it’s in mono, or there’s not enough surround sound, move it backward.
Center WidthWith this setting, you can adjust the width of the sound from the center speaker when using the Dolby Pro Logic IIx Music listening mode. Normally, if you’re using a center speaker, the center channel sound is output by only the center speaker. (If you’re not using a center speaker, the center channel sound will be distributed to the front left and right speak-ers to create a phantom center). This setting controls the front left, right, and center mix, allowing you to adjust the weight of the cen-ter channel sound. It can be adjusted from 0 to 7. The default value is 3.
Neo:6 Music
Center ImageThe DTS Neo:6 Music listening mode creates 6-channel surround sound from 2-channel stereo sources. With this setting, you can specify by how much the front left and right channel output is attenuated in order to create the center channel. It can be adjusted from 0 to 5. The default value is 2. When set to 0, the front left and right channel output is attenuated by half (–6 dB), giving the impression that the sound is located cen-trally. This setting works well when your lis-tening position is considerably off center. When set to 5, the front left and right chan-nels are not attenuated, maintaining the origi-nal stereo balance.
Dolby EX
Dolby EXThis setting determines how Dolby EX sig-nals are handled.
Auto: When the source is Dolby EX, you can select the Dolby EX lis-tening mode.
Manual: When the source is Dolby EX, you can select any of the listening modes compatible with this for-mat (e.g., Dolby EX, Dolby Pro Logic IIx, etc.).
53

5
HTX-22HD_En.book Page 54 Monday, April 7, 2008 2:03 PM
Using the Listening Modes—Continued
T-D (Theater-Dimensional)
LstnAngl (Listening Angle)With this setting, you can optimize the The-ater-Dimensional listening mode by specify-ing the angle of the front left and right speakers relative to your listening position. Ideally, the front left and right speakers should be equidistant from your listening position and at an angle close to one of the two available settings.
Narrow: Select if the listening angle is 20 degrees.
Middle: Select if the listening angle is 30 degrees.
Wide: Select if the listening angle is 40 degrees (default).
Front 5.1chWith this setting, you can specify how your five surround speakers (front L/R, center, and surround L/R) are arranged to get the best effect from the Theater-Dimensional listening mode.
Yes: Select this if you’ve arranged your five speakers so that they are all at the front.
No: Select this if you’re using the normal arrangement for five surround sound speakers.
Note:• This setting is available only when the
Speaker Configuration is set to 5.1ch (see page 56).
Dynamic EQ
Dynamic EQWith Dynamic EQ, you can enjoy great sound even when listening at low volume levels.Dynamic EQ solves the problem of deterio-rating sound quality as volume is decreased by taking into account human perception and room acoustics.It does so by selecting the correct frequency response and surround volume levels moment-by-moment so that the content sounds the way it was created at any volume level—not just at reference level.
Off: Dynamic EQ off.On: Dynamic EQ on.
Note:• Dynamic EQ can be set only when the
Equalizer Settings on page 62 are set to Audyssey.
20˚/40˚
Front leftspeaker
Front right speaker
4

HTX-22HD_En.book Page 55 Monday, April 7, 2008 2:03 PM
Using the Listening Modes—Continued
With the Late Night function, you can reduce the dynamic range of Dolby Digital material so that you can still hear quiet parts even when listening at low volume levels—ideal for watching movies late at night when you don’t want to disturb anyone.
Notes:• The Late Night function can be used only
when the input source is Dolby Digital, Dolby Digital Plus, or Dolby TrueHD.
• The effect of the Late Night function depends on the material that you are play-ing and the intention of the original sound designer, and with some material there will be little or no effect when you select the different options.
• The Late Night function is set to Off when the HTX-22HD is set to Standby.
You can adjust the volume of each speaker while listening to an input source. These tem-porary adjustments are cancelled when the HTX-22HD is set to Standby.
Notes:• To save these adjustments, press the [TEST
TONE] button.• You cannot use this function while the
HTX-22HD is muted.
Late Night Function
Press the remote controller’s [L NIGHT] button repeatedly to select the following options:For Dolby Digital and Dolby Digital Plus sources, the options are:
Off: Late Night function off (default).
Low: Small reduction in dynamic range.
High: Large reduction in dynamic range.
For Dolby TrueHD sources, the options are:Auto: The Late Night function
is set to On or Off auto-matically (default).
Off: Late Night function off.On: Late Night function on.
CH SEL
L NIGHT
Adjusting Speaker Levels
Use the remote controller’s [CH SEL] button to select each speaker, and use the Left and Right [ ]/[ ] buttons to adjust the volume.You can adjust the volume of each speaker from –12 dB to +12 dB (–15 dB to +12 dB for the subwoofer).
55

5
HTX-22HD_En.book Page 56 Monday, April 7, 2008 2:03 PM
Advanced Setup
This section explains how to set the speaker settings manually. This can be useful for checking the speaker setting or making changes if you add additional speakers to your system after running the automatic speaker setup.Some of the speaker settings are set automati-cally by the Automatic Speaker Setup func-tion (see page 32).
Speaker Configuration
With the Speaker Configuration, you can specify how may speakers you’re using.
Note:• Before you change this setting, turn down
the volume.
Manual Speaker Setup
This setting is set automatically by the Automatic Speaker Setup function (see page 32).
ENTER
SETUP
Cone diameter
1 Press the [SETUP] button.
2 Use the Up and Down [ ]/[ ] buttons to select “2. Speaker Setup,” and then press [ENTER].“Speaker Config” appears on the display.
3 Press [ENTER] and “Sub-woofer” appears on the dis-play. Use the Left and Right [ ]/[ ] buttons to select:
Yes: Select if a subwoofer is used.
No: Select if no subwoofer is used.
4 Press the Down [ ] button to select “Front,” and then use the Left and Right [ ]/[ ] but-tons to select:Small: Select if the front speak-
ers are small.Large: Select if the front speak-
ers are large.
Note:• If the Subwoofer setting in
step 3 is set to No, this setting is fixed at Large and does not appear.
6

HTX-22HD_En.book Page 57 Monday, April 7, 2008 2:03 PM
Advanced Setup—Continued
5 Press the Down [ ] button to select “Cntr” (Center), and then use the Left and Right [ ]/[ ] buttons to select:Small: Select if the center
speaker is small.Large: Select if the center
speaker is large.None: Select if no center
speaker is connected.
Note:• If the Front setting in step 4 is
set to Small, the Large option cannot be selected.
6 Press the Down [ ] button to select “Surr” (Surround), and then use the Left and Right [ ]/[ ] buttons to select:Small: Select if the surround
speakers are small.Large: Select if the surround
speakers are large.None: Select if no surround
speakers are connected.
Note:• If the Front setting in step 4 is
set to Small, the Large option cannot be selected.
7 Press the Down [ ] button to select “Surr B” (Surround Back) and use the Left and Right [ ]/[ ] buttons to select:Small: Select if the surround
back speakers are small.Large: Select if the surround
back speakers are large.None: Select if no surround
back speakers are con-nected.
Notes:• If the Surround setting in step
6 is set to None this setting does not appear.
• If the Surround setting in step 6 is set to Small, the Large option cannot be selected.
8 Press the Down [ ] button to select “SurrBack Ch” (Sur-round Back Channel) and use the Left and Right [ ]/[ ] but-tons to select:
2ch: Select if two (left and right) surround back speakers are connected.
1ch: Select if one surround back speaker is con-nected.
Notes:• If the Surround or SurrBack
settings in step 6 or step 7 are set to None, this setting does not appear.
• If you’re using only one sur-round back speaker, connect it to the SURROUND BACK PRE OUT L jack.
Continue with step 9 of the “Crossover Frequency” setting.
57

5
HTX-22HD_En.book Page 58 Monday, April 7, 2008 2:03 PM
Advanced Setup—Continued
Crossover Frequency
This setting only applies to the speakers that you specified as Small in the “Speaker Con-figuration” on page 56.To get the best bass performance from your speaker system, you need to set the crossover frequency according to the size and frequency response of your speakers
Notes:• For a more accurate setting, look up the
frequency response in the manuals supplied with your speakers and set accordingly.
• Choose a higher crossover frequency if you want more sound from your subwoofer.
9 Press the Down [ ] button to select “Xover” (Crossover) and then use the Left and Right [ ]/[ ] buttons to select a crossover frequency.Use the diameter of the smallest speaker in your system when choosing the crossover fre-quency.
ENTER
SETUP
This setting is set automatically by the Automatic Speaker Setup function (see page 32).
* Choose the setting suitable for the speaker.
Continue with step 10 of the “Double Bass” setting on the next page.
Speaker cone diameter
Crossover frequency
Over 8 in.(20 cm)
40/50/60Hz*
6-1/2 to 8 in.(16–20 cm)
80Hz
5-1/4 to 6-1/2 in.(13–16 cm)
100Hz
3-1/2 to 5-1/4 in.(9–13 cm)
120Hz
Under 3-1/2 in.(9 cm)
150Hz (default)/200Hz*
8

HTX-22HD_En.book Page 59 Monday, April 7, 2008 2:03 PM
Advanced Setup—Continued
Double Bass
With the Double Bass function, you can boost bass output by feeding bass sounds from the front left, right, and center channels to the subwoofer.
Note:• To return to the previous menu, press the
[RETURN] button.
Speaker Distances
With the Speaker Distance settings, you can specify the distances from the speakers to your listening position.
10 Press the Down [ ] button to select “D. Bass” (Double Bass) and then use the Left and Right [ ]/[ ] buttons to select:
On: Double Bass function on. Bass from the front left and right channels is also fed to the sub-woofer (default).
Off: Double Bass function off.
Note:• If the Subwoofer setting in
step 3 is set to No, or the Front setting in step 4 is set to Small, this setting does not appear.
11 Press the [SETUP] button.Setup closes.
This setting is not set automatically by the Automatic Speaker Setup function (see page 32).
1 Measure and make a note of the distance from each speaker to your listening position.
2 Press the [SETUP] button.
3 Use the Up and Down [ ]/[ ] buttons to select “2. Speaker Setup,” and then press [ENTER].
4 Use the Up and Down [ ]/[ ] buttons to select “SpeakerDis-tance,” and then press [ENTER].
These settings are set automatically by the Automatic Speaker Setup function (see page 32).
59

6
HTX-22HD_En.book Page 60 Monday, April 7, 2008 2:03 PM
Advanced Setup—Continued
Notes:• To return to the previous menu, press the
[RETURN] button.• The Center and Subwoofer distances can
be set up to 5 ft. (1.5 m) more or less than the Front distance. For example, if the Front distance is set to 20 ft. (6 m), the Center and Subwoofer distances can be set between 15 and 25 ft. (4.5 and 7.5 m).
• The Surround and Surround Back distances can be set up to 5 ft. (1.5 m) more or 15 ft. (4.5 m) less than the Front distance. For example, if the Front distance is set to 20 ft. (6 m), the Surround and Surround Back distances can be set between 5 and 25 ft. (1.5 and 7.5 m), and if the Front distance is set to 10 ft. (3 m), they can be set between 1 and 15 ft. (1 and 4.5 m).
Speaker Levels
With the Level Calibration settings, you can adjust the volume of each speaker so that all speakers can be heard equally at your listen-ing position.
5 While “Unit” is displayed, use the Left and Right [ ]/[ ] but-tons to select “feet” or “meters,” and then press [ENTER].
feet: Distances can be set in feet. Range: 1 to 30 feet in 1-foot steps.
meters:Distances can be set in meters. Range: 0.3 to 9 meters in 0.3-meter steps.
6 Use the Up and Down [ ]/[ ] buttons to select the speakers, and use the Left and Right [ ]/[ ] buttons to specify their distance from your listen-ing position.You can adjust the levels for the following speakers:
Left: Front left speaker.Center: Center speaker.
Right: Front right speaker.Surr R: Surround right
speaker.Surr BkR: Surround back right
speaker.Surr BkL: Surround back left
speaker.Surr L: Surround left speaker.
Subwfr: This subwoofer.
Speakers that you set to No or None in the “Speaker Configura-tion” on page 56 cannot be selected.
7 Repeat step 6 for each speaker.
8 Press the [SETUP] button.Setup closes.
1 Press the [SETUP] button.
ENTER
SETUP
These settings are set automatically by the Automatic Speaker Setup function (see page 32).
0

HTX-22HD_En.book Page 61 Monday, April 7, 2008 2:03 PM
Advanced Setup—Continued
Note:• To return to the previous menu, press the
[RETURN] button.• These levels can also be adjusted by using
the [TEST TONE] button on the remote controller. Press the [TEST TONE] button to output the test tone. Use the [CH SEL] button to select each speaker, and use the Left and Right [ ]/[ ] buttons to adjust the level.
2 Use the Up and Down [ ]/[ ] buttons to select “2. Speaker Setup,” and then press [ENTER].
3 Use the Up and Down [ ]/[ ] buttons to select “Level Cal,” and then press [ENTER].A pink noise test tone is output by the front left speaker.
4 Turn up the volume so that you can hear the test tone suffi-ciently.The name of the speaker cur-rently outputting the test tone is shown on the display.
5 Use the Left and Right [ ]/[ ] buttons to adjust the speaker level, and use the Down [ ] button to select the next speaker.The levels can be adjusted from –12 to +12 dB in 1 dB steps (–15 to +12 dB for the sub-woofer).You can adjust the levels for the following speakers:
Left: Front left speaker.Center: Center speaker.
Right: Front right speaker.Surr R: Surround right
speaker.Surr BkR: Surround back right
speaker.
Surr BkL: Surround back left speaker.
Surr L: Surround left speaker.
Subwfr: This subwoofer.
Notes:• Speakers that you set to No or
None in the “Speaker Config-uration” on page 56 cannot be selected.
• When you play source mate-rial that contains no informa-tion in the LFE (Low Frequency Effects) channel, the subwoofer will produce no sound.
6 Repeat step 5 so that the level of the test tone coming from each speaker is the same.
7 Press the [SETUP] button.Setup closes.Don’t forget to turn down the volume if you turned it up while setting the levels.
61

6
HTX-22HD_En.book Page 62 Monday, April 7, 2008 2:03 PM
Advanced Setup—Continued
Equalizer Settings
With the Equalizer settings, you can adjust the tone of each speaker.
1 Press the [SETUP] button.
2 Use the Up and Down [ ]/[ ] buttons to select “2. Speaker Setup,” and then press [ENTER].
3 Use the Up and Down [ ]/[ ] buttons to select “Equalizer,” and then press [ENTER].
ENTER
SETUP
These settings are set automatically by the Automatic Speaker Setup function (see page 32).
4 Use the Left and Right [ ]/[ ] buttons to select:
Off: Tone off, response flat.Audyssey: The tone for each
speaker is set automatically by the Automatic Speaker Setup function. Be sure to select this setting after hav-ing performed the Automatic Speaker Setup. This option is available only if the Auto-matic Speaker Setup func-tion has been run.
Manual: You can adjust the equalizer for each speaker manually.
If you selected Manual, continue with this procedure. If you selected Off or Audyssey, pro-ceed to step 8.
5 Press the Down [ ] button, and then use the Left and Right [ ]/[ ] buttons to select a speaker.You can adjust the EQ for the following speakers:
Front: Front left and right speakers.
Center: Center speaker.Surround: Surround left and
right speakers.SurrBack: Surround back left
and right speakers.Subwoofer: This subwoofer.
Speakers that you set to No or None in the “Speaker Configura-tion” on page 56 cannot be selected.
2

HTX-22HD_En.book Page 63 Monday, April 7, 2008 2:03 PM
Advanced Setup—Continued
Notes:• To return to the previous menu, press the
[RETURN] button.• The front, center, surround, and surround
back speakers can be adjusted at 63 Hz, 250 Hz, 1000 Hz, 4000 Hz, and 16000 Hz. The subwoofer can be adjusted at 25 Hz, 40 Hz, 63 Hz, 100 Hz, and 160 Hz.
• While the Direct listening mode is selected, the equalizer settings have no effect.
6 Use the Up and Down [ ]/[ ] buttons to select a frequency. Use the Left and Right [ ]/[ ] buttons to adjust the level at that frequency.The volume at each frequency can be adjusted from –6 to +6 dB in 1 dB steps.
Tip: Low frequencies (e.g., 63Hz) affect bass sounds; high frequencies (e.g., 16000Hz) affect treble sounds.
7 Press the Up [ ] button to select “Ch” (Channel), and then use the Left and Right [ ]/[ ] buttons to select another speaker.Repeat steps 5 and 6 for each speaker.
8 Press the [SETUP] button.The setup menu closes.
63

6
HTX-22HD_En.book Page 64 Monday, April 7, 2008 2:03 PM
Advanced Setup—Continued
This section explains items on the Source Setup menu. Items can be set individually for each input selector.
IntelliVolume
With IntelliVolume, you can set the input level for each input selector individually. This is useful if one of your source components is louder or quieter than the others.Use the Left and Right [ ]/[ ] buttons to set the level.If a component is noticeably louder than the others, use the Left [ ] button to reduce its input level. If it’s noticeably quieter, use the Right [ ] button to increase its input level. The input level can be adjusted from –12 dB to +12 dB in 1 dB steps.
Source Setup
1 Press the input selector but-tons to select an input source, and then press the [SETUP] button.
2 Use the Up and Down [ ]/[ ] buttons to select “4. Source Setup,” and then press [ENTER].
ENTER
SETUP
INPUTSELECTOR
3 Use the Up and Down [ ]/[ ] buttons to select an item, and then press [ENTER].
4 Use the Left and Right [ ]/[ ] buttons to change it.The Source Setup menu items are explained below.
5 When you’ve finished, press the [SETUP] button.Setup closes.
4

HTX-22HD_En.book Page 65 Monday, April 7, 2008 2:03 PM
Advanced Setup—Continued
A/V Sync
When using your DVD player’s progressive scanning function, you may find that the pic-ture and sound are out of sync. With the A/V Sync setting, you can correct this by applying a delay to the audio signal. The delay can be set from 0 to 100 milliseconds (msec) in 10 millisecond steps.Use the Left and Right [ ]/[ ] buttons to set the delay.To view the TV picture while setting the delay, press [ENTER].If HDMI Lip Sync is enabled (see page 68), and your TV or display supports HDMI Lip Sync, the displayed delay time will be the A/V Sync delay time. The HDMI Lip Sync delay time is displayed underneath in paren-theses.
Note:• A/V Sync is disabled when the Direct lis-
tening mode is used with an analog input source.
Music Optimizer
The Music Optimizer function enhances the sound quality of compressed music files. Use it with music files that use “lossy” compres-sion, such as MP3.
Off: Music Optimizer off (default).On: Music Optimizer on.
Note:• The Music Optimizer function only works
with PCM digital audio input signals with a sampling rate below 48 kHz and analog audio input signals. The Music Optimizer is disabled when the Direct listening mode is selected.
Name Edit
You can enter a custom name of up to 10 characters for each input selector. When an input selector with a custom name is selected, the custom name will be displayed instead of the default name.
1 Select the input selector to which you want to give a cus-tom name.
2 Press the [SETUP] button.
3 Use the Up and Down [ ]/[ ] buttons to select “4. Source Setup,” and then press [ENTER].
4 Use the Up and Down [ ]/[ ] buttons to select “Name Edit,” and then press [ENTER].
5 Use the Up and Down [ ]/[ ] buttons to select a character, and then press [ENTER].The character is set and the cur-sor moves one place to the right.
65

6
HTX-22HD_En.book Page 66 Monday, April 7, 2008 2:03 PM
Advanced Setup—Continued
Notes:• Once a custom name has been entered, it
will be displayed instead of the default name when the input selector is selected.
• To use the default name again, delete all of the characters in the custom name.
Available Characters
This section explains items on the Volume Setup menu.
6 Repeat step 5 to enter up to 10 characters.To move the cursor to the left or right, press the Left or Right [ ]/[ ] button respectively.To delete the character at the current cursor position, press the [MUTING] button. The charac-ter will be deleted and any char-acters to the right of it will be moved one place to the left.To change a character in a name, use the Left and Right [ ]/[ ] buttons to select it, use the Up and Down [ ]/[ ] buttons to change the character, and then press [ENTER].
7 Press the [SETUP] button.Setup closes.
A B C D E F G H I J K L M N O P Q R S T U V W X Y Za b c d e f g h i j k l m n o p q r s t u v w x y z0 1 2 3 4 5 6 7 8 9
— . ' ( ) + * = / , : ; ! ? _
Volume Setup
1 Press the [SETUP] button.
2 Use the Up and Down [ ]/[ ] buttons to select “5. Volume Setup,” and then press [ENTER].
3 Use the Up and Down [ ]/[ ] buttons to select an item, and then press [ENTER].
ENTER
SETUP
6

HTX-22HD_En.book Page 67 Monday, April 7, 2008 2:03 PM
Advanced Setup—Continued
MaxVolume
With this setting, you can limit the maximum volume.The Maximum Volume range is Off, 79 to 30.
PowOn Vol
This setting determines what the volume will be each time the HTX-22HD is turned on.The range is Last, Min, 1 to 79, Max.To use the same volume level as when the HTX-22HD was last turned off, select Last.
Note:• The Power On Volume setting cannot be set
higher than the Maximum Volume setting.
This section explains items on the HDMI Setup menu.
4 Use the Up and Down [ ]/[ ] buttons to select an item, and use the Left and Right [ ]/[ ] buttons to change it.The items are explained below.
5 When you’ve finished, press the [SETUP] button.Setup closes.
HDMI Setup
1 Press the [SETUP] button.
2 Use the Up and Down [ ]/[ ] buttons to select “6. HDMI Setup,” and then press [ENTER].
3 Use the Up and Down [ ]/[ ] buttons to select an item, and then press [ENTER].
4 Use the Up and Down [ ]/[ ] buttons to select an item, and use the Left and Right [ ]/[ ] buttons to change it.The items are explained below.
5 When you’ve finished, press the [SETUP] button.Setup closes.
67

6
HTX-22HD_En.book Page 68 Monday, April 7, 2008 2:03 PM
Advanced Setup—Continued
Audio TV Out
This setting determines whether audio received by an HDMI input is output by the HDMI OUT. You may want to change this setting to On if your TV is connected to the HDMI OUT and you want to listen to audio from an HDMI component through your TV’s speakers instead of the HTX-22HD’s speak-ers. Normally, this should be set to Off.
Off: HDMI audio is not output (default).On: HDMI audio is output.
Notes:• If On is selected and the signal can be out-
put by the TV, the HTX-22HD’s speakers will output no sound.
• When TV Control is enabled, this setting is set to Auto.
• With some TVs and input signals, no sound may be output even if On is selected.
• When the Audio TV Out setting is set to On, or TV Control is set to Enable and you’re listening through your TV’s speak-ers (see page 25), if you turn up the HTX-22HD’s volume control, the sound will be output by the HTX-22HD’s speakers. To stop the HTX-22HD’s speakers producing sound, change the settings, change your TV’s settings, or turn down the HTX-22HD’s volume.
Lip Sync
The Lip Sync function can automatically syn-chronize HDMI audio and video that’s gotten out of sync due to the complex digital video processing being performed by your HDMI-compatible TV. With HDMI Lip Sync, the audio delay required to synchronize the audio and video is calculated and applied automati-cally by the HTX-22HD.
Disable: HDMI lip sync disabled.Enable: HDMI lip sync enabled.
Notes:• This function works only if your HDMI-
compatible TV supports HDMI Lip Sync.• You can check the amount of delay being
applied by the HDMI Lip Sync function on the A/V Sync screen (see page 65).
x.v.Color
With this setting you can enable or disable x.v.Color. To use x.v.Color, the HDMI source and HDMI TV must both support x.v.Color.
Disable: x.v.Color disabled.Enable: x.v.Color enabled.
Control
This function allows RIHD-compatible com-ponents connected via HDMI to be controlled with the HTX-22HD.
Disable: RIHD disabled.Enable: RIHD enabled.
Notes:• RIHD, which stands for Remote Interactive
over HDMI, is the name of the system con-trol function found on certain Onkyo com-ponents. The HTX-22HD can be used with CEC (Consumer Electronics Control), which allows system control over HDMI and is part of the HDMI standard. CEC provides interoperability between various components, however, operation with com-ponents other than RIHD-compatible com-ponents and recommended components cannot be guaranteed.
8

HTX-22HD_En.book Page 69 Monday, April 7, 2008 2:03 PM
Advanced Setup—Continued
• Select Disable if a connected component is incompatible or you’re not sure about its compatibility.
• If operation is unreliable when set to Enable, select Disable instead.
• When the Audio TV Out setting is set to On, or TV Control is set to Enable and you’re listening through your TV’s speak-ers (see page 24), if you turn up the HTX-22HD’s volume control, the sound will be output by the HTX-22HD’s speakers. To stop the HTX-22HD’s speakers producing sound, change the settings, change your TV’s settings, or turn down the HTX-22HD’s volume.
PowCtrl (Power Control)
To link the power functions of RIHD-compat-ible components connected via HDMI, select Enable.
Disable: Power Control disabled.Enable: Power Control enabled.
Notes:• The Power Control setting can be set only
when the above Control setting is set to Enable.
• HDMI power control only works with RIHD-compatible components that support it and may not work properly with some components due to their settings or com-patibility.
• When set to Enable, the HTX-22HD con-sumes more power when on Standby.
• When set to Enable, the HTX-22HD enters Ready mode when set to Standby, and the STANDBY indicator lights up.
• When set to Enable, regardless of whether the HTX-22HD is On or on Standby, video received by an HDMI input will be output by the HDMI OUT for playback on the TV or other component that’s connected to the HDMI OUT. If the Audio TV Out setting is set to On, then HDMI audio will also be output by the HDMI OUT.
TV Ctrl (Control)
Select Enable to control the HTX-22HD from an RIHD-compatible TV connected via HDMI.
Disable: TV Control disabled.Enable: TV Control enabled.
Notes:• Select Disable if your TV is incompatible
or you’re not sure about its compatibility.• The TV Control setting can be set only
when the above Control and Power Control settings are both set to Enable.
• When the Audio TV Out setting is set to On, and the Power Control setting is set to Enable, regardless of whether the HTX-22HD is On or on Standby, both audio and video received by an HDMI input will be output by the HDMI OUT for playback on your TV or other component that’s con-nected to the HDMI OUT.
Note:• After changing the Control, Power
Control, or TV Control setting, be sure to turn all of your components off and then back on again. Refer to the instruction manuals for your other components.
69

7
HTX-22HD_En.book Page 70 Monday, April 7, 2008 2:03 PM
Advanced Setup—Continued
Normally, the HTX-22HD detects the format of digital input signals automatically. How-ever, if you experience either of the following issues when playing PCM or DTS sources, you can specify the signal format manually.• If the beginnings of tracks from a PCM
source are cut off, try the PCM setting.• If noise is produced when fast forwarding
or rewinding a DTS CD, try the DTS set-ting.
Note:• The digital signal format can only be set for
digital inputs that are assigned to an input selector (see page 36).
Specifying the Digital Signal For-mat
1 With a PCM or DTS input source selected, press and hold the [SETUP] button for 3 seconds until “Auto” appears on the display.
2 While “Auto” is displayed (about 3 seconds), press Left or Right [ ]/[ ] button repeatedly to select: PCM, DTS, or Auto.PCM: Only 2-channel PCM
format input signals will be heard. If the input signal is not PCM, the PCM indicator will flash and there will be no sound.
ENTER
SETUP
3 DTS: Only DTS format input signals (excluding DTS-HD) will be heard. If the input signal is not DTS, the DTS indicator will flash and there will be no sound.
Auto (default): The format is detected automatically. If no digital input signal is present, the corre-sponding analog input will be used instead.
0
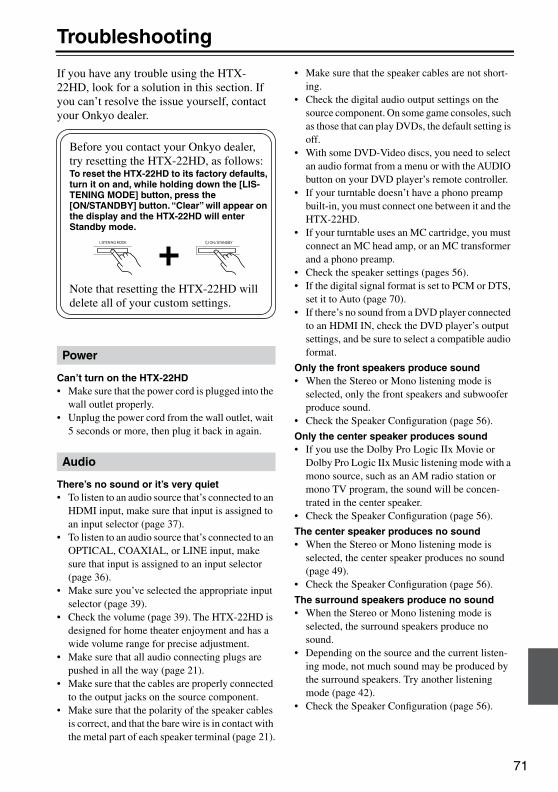
HTX-22HD_En.book Page 71 Monday, April 7, 2008 2:03 PM
Troubleshooting
If you have any trouble using the HTX-22HD, look for a solution in this section. If you can’t resolve the issue yourself, contact your Onkyo dealer.
Can’t turn on the HTX-22HD• Make sure that the power cord is plugged into the
wall outlet properly.• Unplug the power cord from the wall outlet, wait
5 seconds or more, then plug it back in again.
There’s no sound or it’s very quiet• To listen to an audio source that’s connected to an
HDMI input, make sure that input is assigned to an input selector (page 37).
• To listen to an audio source that’s connected to an OPTICAL, COAXIAL, or LINE input, make sure that input is assigned to an input selector (page 36).
• Make sure you’ve selected the appropriate input selector (page 39).
• Check the volume (page 39). The HTX-22HD is designed for home theater enjoyment and has a wide volume range for precise adjustment.
• Make sure that all audio connecting plugs are pushed in all the way (page 21).
• Make sure that the cables are properly connected to the output jacks on the source component.
• Make sure that the polarity of the speaker cables is correct, and that the bare wire is in contact with the metal part of each speaker terminal (page 21).
• Make sure that the speaker cables are not short-ing.
• Check the digital audio output settings on the source component. On some game consoles, such as those that can play DVDs, the default setting is off.
• With some DVD-Video discs, you need to select an audio format from a menu or with the AUDIO button on your DVD player’s remote controller.
• If your turntable doesn’t have a phono preamp built-in, you must connect one between it and the HTX-22HD.
• If your turntable uses an MC cartridge, you must connect an MC head amp, or an MC transformer and a phono preamp.
• Check the speaker settings (pages 56).• If the digital signal format is set to PCM or DTS,
set it to Auto (page 70).• If there’s no sound from a DVD player connected
to an HDMI IN, check the DVD player’s output settings, and be sure to select a compatible audio format.
Only the front speakers produce sound• When the Stereo or Mono listening mode is
selected, only the front speakers and subwoofer produce sound.
• Check the Speaker Configuration (page 56).
Only the center speaker produces sound• If you use the Dolby Pro Logic IIx Movie or
Dolby Pro Logic IIx Music listening mode with a mono source, such as an AM radio station or mono TV program, the sound will be concen-trated in the center speaker.
• Check the Speaker Configuration (page 56).
The center speaker produces no sound• When the Stereo or Mono listening mode is
selected, the center speaker produces no sound (page 49).
• Check the Speaker Configuration (page 56).
The surround speakers produce no sound• When the Stereo or Mono listening mode is
selected, the surround speakers produce no sound.
• Depending on the source and the current listen-ing mode, not much sound may be produced by the surround speakers. Try another listening mode (page 42).
• Check the Speaker Configuration (page 56).
Power
Audio
Before you contact your Onkyo dealer, try resetting the HTX-22HD, as follows:To reset the HTX-22HD to its factory defaults, turn it on and, while holding down the [LIS-TENING MODE] button, press the [ON/STANDBY] button. “Clear” will appear on the display and the HTX-22HD will enter Standby mode.
Note that resetting the HTX-22HD will delete all of your custom settings.
71

7
HTX-22HD_En.book Page 72 Monday, April 7, 2008 2:03 PM
Troubleshooting—Continued
The surround back speakers produce no sound• The surround back speakers are not used with all
listening modes. Try another listening mode (page 42).
• Not much sound may be produced by the sur-round back speakers with some sources.
• Check the Speaker Configuration (page 56).
The subwoofer produces no sound• If the source material contains no audio in the
LFE channel, the subwoofer produces no sound.• Check the Speaker Configuration (page 56).
There’s no sound with a certain signal format• Check the digital audio output setting on the
source component. On some game consoles, such as those that can play DVDs, the default setting is off.
• With some DVD-Video discs, you need to select an audio format from a menu or with the AUDIO button on your DVD player’s remote controller.
The volume cannot be set to 79 (99)• Check to see if a maximum volume has been set
(page 67).• After the Automatic Speaker Setup function has
been run, or the volume level of each individual speaker has been adjusted (pages 32 and 60), the maximum volume may be reduced.
• When the levels of each speaker have been adjusted (page 60), the maximum possible vol-ume may be reduced.
• When the Equalizer Settings (page 62) is set to Audyssey, the maximum possible volume is reduced by 6 dB.
Noise can be heard• Using cable ties to bundle audio cables with
power cords, speaker cables, and so on can degrade audio performance, so don’t use them.
• An audio cable may be picking up interference. Try repositioning your cables.
The Late Night function doesn’t work• Make sure that the source is Dolby Digital or
Dolby TrueHD (page 55).
About DTS signals• When playing DTS program material, using the
pause, fast forward, or fast reverse function on your player may produce a short audible noise. This is not a malfunction.
• When DTS program material ends and the DTS bitstream stops, the HTX-22HD remains in DTS listening mode and the DTS indicator remains
on. This is to prevent noise when you use the pause, fast forward, or fast reverse function on your player. If you switch your player from DTS to PCM, as the HTX-22HD does not switch for-mats immediately, you may not hear anything, in which case you should stop your player for about 3 seconds, and then resume playback.
• With some CD players, you won’t be able to playback DTS material properly even though your player is connected to a digital input on the HTX-22HD. This is usually because the DTS bit-stream has been processed (e.g., output level, sampling rate, or frequency response changed) and the HTX-22HD doesn’t recognize it as a gen-uine DTS signal. In such cases, you may hear noise.
The beginning of audio received by an HDMI IN can’t be heard• Since it takes longer to identify the format of an
HDMI signal than it does for other digital audio signals, sound may not be output immediately.
The remote controller doesn’t work• Make sure that the batteries are installed with the
correct polarity (page 14).• Make sure that the remote controller is not too far
away from the HTX-22HD and there’s no obstruction between the remote controller and the HTX-22HD’s remote control sensor (page 14).
Can’t control other components• Make sure you’ve selected the correct remote
controller mode.• To control an Onkyo DVD player or RI Dock
with iPod that’s connected with , remember to point the remote controller at the HTX-22HD and not at the DVD player or RI Dock.
How do I change the language of a multiplex source?• On the Audio Adjust menu, change the Input Ch
setting to Main or Sub (page 52).
The functions don’t work• To use , you must make an connection
and an analog audio connection (RCA) between the component and HTX-22HD, even if they are connected digitally (page 26).
Remote Controller
Others
2

HTX-22HD_En.book Page 73 Monday, April 7, 2008 2:03 PM
Troubleshooting—Continued
The HTX-22HD contains a microcomputer for sig-nal processing and control functions. In very rare situations, severe interference, noise from an external source, or static electricity may cause it to lockup. In the unlikely event that this happens, unplug the power cord from the wall outlet, wait at least 5 seconds, and then plug it back in again.
Onkyo is not responsible for damages (such as CD rental fees) due to unsuccessful recordings caused by this unit’s malfunction. Before you record impor-tant data, make sure that the material will be recorded correctly.
Before disconnecting the power cord from the wall outlet, set the HTX-22HD to Standby.
73

7
HTX-22HD_En.book Page 74 Monday, April 7, 2008 2:03 PM
Specifications
Subwoofer system with built-in amplifier (HTX-22HDPAW)
Digital Audio Inputs/Outputs
Analog Audio Inputs/Outputs
Front Speaker (HTX-22HDST)
Specifications and features are subject to change without notice.
Type: Bass-reflex with built-in amplifierRated Output Power (IEC): 5 ch (FL/FR/C/SL/SR) × 25 W at 6 ohms, 1 kHz, 1ch driven, THD 1%
1 ch (SW) × 50 W at 3 ohms, 100 Hz, 1ch driven, THD 1%Subwoofer Frequency Response: 35 Hz–200 HzAmp Frequency Response: FL/FR: 10 Hz–100 kHz (Direct mode)
FL/FR/C/SL/SR: 150 Hz–20 kHz, +1 dB–3dBSW: 20 Hz–150 Hz, +1 dB–3dB (Crossover at 150 Hz)
Input Sensitivity and Impedance: 150 mV/ 47 kΩ (FL/FR)Signal to Noise Ratio: 105 dB (LINE1/LINE2, Direct mode, IHF-A)Cabinet capacity: 7 LPower Supply: AC 230 V, 50 HzPower Consumption: 130 WDimensions (W × H × D): 207 × 325 × 327 mm (incl. grille and projection)Weight: 10.6 kg Drivers unit: 16 cm A-OMF coneOther: Magnetic shielding
Inputs: 3 (OPT1, OPT2, Coaxial)Video/Audio inputs: 2 (HDMI1, HDMI2)Video/Audio output: 1 (HDMI)
Inputs: 2 (LINE1, LINE2)Output: 1 (PREOUT SBL/SBR)
Type: 2 WayInput Sensitivity/Impedance: 6 ΩMaximum input power: 40 WOutput sound pressure level: 80 dB/W/mFrequency response: 70 Hz–50 kHzCrossover frequency: 9 kHzCabinet capacity: 1.1 LDimensions (W × H × D): 101 × 175 × 111 mm (incl. grille and projection)Weight: 0.8 kgDrivers unit: 8 cm A-OMF cone woofer
2 cm balanced-dome tweeterTerminal: Spring typeOther: Magnetic shielding
4

HTX-22HD_En.book Page 75 Monday, April 7, 2008 2:03 PM
Memo
75

7
4-1
m/
HTX-22HD_En.book Page 76 Monday, April 7, 2008 2:03 PM
SN 29344714
I080
Sales & Product Planning Div. : 2-1, Nisshin-cho, Neyagawa-shi, OSAKA 572-8540, JAPANTel: 072-831-8023 Fax: 072-831-8163ONKYO U.S.A. CORPORATION18 Park Way, Upper Saddle River, N.J. 07458, U.S.A.Tel: 201-785-2600 Fax: 201-785-2650 http://www.us.onkyo.com/
ONKYO EUROPE ELECTRONICS GmbHLiegnitzerstrasse 6, 82194 Groebenzell, GERMANYTel: +49-8142-4401-0 Fax: +49-8142-4401-555 http://www.eu.onkyo.com/
ONKYO EUROPE UK OfficeSuite 1, Gregories Court, Gregories Road, Beaconsfield, Buckinghamshire, HP9 1HQ UNITED KINGDOM Tel: +44-(0)1494-681515 Fax: +44(0)-1494-680452
ONKYO CHINA LIMITEDUnit 1&12, 9/F, Ever Gain PlazaTower 1, 88, Container Port Road, Kwai Chung,N.T., HONG KONG Tel: 852-2429-3118 Fax: 852-2428-9039http://www.ch.onkyo.com/
(C) Copyright 2008 ONKYO CORPORATION Japan. All rights reserved.
http://www.onkyo.coHOMEPAGE
6 * 2 9 3 4 4 7 1 4 *