Farhan Mohamed Ali (W2-1) Jigar Vora (W2-2) Sonali Kapoor (W2-3) Avni Jhunjhunwala (W2-4)
Upload
zhuhai-witson-industrial-co-ltdCategory
view
231download
2description
1
Dear Users:
Firstly, thank you very much to use our company’s Car DVD Player!
● Before use, please read the manual and operate according to the safety
instruction below;
● The unit is designed for 12V power (negative ground), please don't be
installed in 24V power , or might damage the machine;
● Driver is not allowed to operate the unit and entertainment while driving,
in order to avoid violating traffic regulations (in some countries and
regions, may also break the law);
● Please ask the special technician for this unit to install and match wire
for special technician and experience, please be accredited to sales agent
to install and match wire to ensure safety;
● Do not use this product in damp environment and water, in order to avoid
electronic shock, damage and fire caused by short circuit,
● The unit adopts precision electronic display, do not be allowed to knocked
at the TFT LCD by hand, lest injure on damage product;
● Back-draft surveillance function only is a regarded as auxiliary
function while backing car , if accidents happened while backing car, it
has nothing to do with our company.
● Do not directly expose the unit to damp, dust, steam, lampblack, direct
sunlight or related environment.
● Do not use thinner or other chemical cleaner, only use soft cloth to remove
2
dust, dirt;
● The unit should be far away from too hot or cold place. The storage
temperature of the unit is - 30 degrees and + 80 degrees, operating
temperature is - 20 degrees and + 70 degrees.
The company shall not be liable for personal data loss , damage and indirect
damage caused by the wrong operation of the hardware and software, maintenance,
replacement or other unexpected situation
The company cannot control the misunderstanding of user on the manual,
therefore, we shall not be liable for unexpected loss while using the manual , and
not be reliable for the third party claim arising while using the manual.
The information of he manual is subjected to the unit, we will continue to provide
new functions, relevant information updates will have no notice.
The manual information is protected by copyright, any portion of copy and
duplicate is not allowed without the prior written permission of our company.
The explaination right of the manual is belonged to our company.
(Remark: We sincerely hope you could understand if any mistake and omissions
is existed in the manual . We also will be appreciated for your criticism and
testified!)
Thanks once again to use our company’s products. Please pay atthention to the
other products of our company!
3
CONTENTS
1. Product function features ....................................................................5
2、Quickstart Guide .....................................................................................8
2. 1 Power source on/off ...................................................................8 2. 2 Source display .............................................................................8 2.3 Start navigation ...........................................................................9
3、Functional operation explanation ...................................................11
3.1 Navigation operation .................................................................11 3.2 Bluetooth Function .....................................................................11 3.3 DVD -T .............................................................................................19 3.4 DVD ...................................................................................................20 3.5 AV IN ...............................................................................................22 3.6 Entertainment ...............................................................................23 3.7 Setup System .................................................................................30 3.7.1 GPS Path .....................................................................................30 3.7.2 Volumn .......................................................................................30 3.7.3 AV-IN ...........................................................................................31 3.7.4 Brightness .................................................................................31 3.7.5 Language .....................................................................................32 3.7.6 Video ...........................................................................................32 3.7.7 System .........................................................................................33 3.8 Video Rearview .............................................................................35 3.9 Original informaiton display .................................................35 3.9.1 air-conditional information ...............................................35 3.9.2 CD informaiton .....................................................................36 3.9.3 FM/AM information ....................................................................37 3.9.4 stereo regulating information display.............................37

4
4、 Upgrade ...................................................................................................37
5、Trouble shooting ...................................................................................38
6、Specification appendix .......................................................................40

5
1. Product function features
accurate navigation:built-in high sensitivity GPS module,
match built-out antenna, strong capturing ability of satellite
signal can quickly and accurately orient and navigate.
Bluetooth: Built-in bluetooth can be used for Hands-free
receiver of bluetooth mobile. You can use the function to dial
and answer telephone, and communicate by built-in loudspeaker
or microphone.
DVD Function: Built-out DVD, can support many kinds of formats
of DVD play
Movie appreciation : play main formats of document:
p4|3gp|3g2|mpeg|mpg|divx|wmv|avi|rmvb|flv
Music appreciation: play music. Support p3|wma|ogg|wav
mp2|mpa,etc.
Music playback function: support all kinds of audio files
format.
Picture appreciation: support the picture browsers of many
formats, such as bmp、jpg、png、gif
Personal stacks; support text reading ;
Excellent sound quality: double audio systems, the audio of
entertainment is output from amplifier of the original car,
the audio of navigation and bluetooth is output from the
6
loudspeaker of the unit, the Volume can be controlled at any
time. The audio of navigation and entertainment is output at
the same time. The entertainment audio can not be break in by
the navigation audio.
Picture in picture: Double video system, the other video file
can be narrowed and stacked up in any interface while related
video files is playing
The original information: the information of the original car
(such as air conditional FM radio, sound, etc) can be displayed
on colourful screen by CAN BUS CONTROL function.
Backing and rearview: The unit is defined a group of AV-IN
(video input) interface, the function can help the driver watch
and understand the status of backing a car
AV-IN:support a external video and audio equipment。
AV-OUT:The video file can be output from the headrest by the
interface of AV-Out
Humanized Settings:
1)Day/Night Mode can avoid too dazzling light while driving at
night.
2)The play or not of the video file can be decided by the driver
in order to driving safety.
◆ Software upgrading: Supporting software upgrading of SD card.

7
◆ Double card: Double SD card slot. Navigation software and
entertainment file can be set in different slots.
◆ HD screen: 7” TFT HD screen. The resolution is 800*480
Simple operation: intelligent type touch screen。Sensitive
reaction to your touch.
Dazzle and colour interface:The unit adopt 3D effectiveness
and classical collocation of blue and black.
8
2、 Quick start guide
2. 1 Power source on/off
Power On: when you inserts the key of the car,turn on the
power of ACC in the car, Logo and process bar will be
displayed on the screen;
Power Off: When you take down the key of the car, turn off
the power of ACC in the car, the unit will be power off
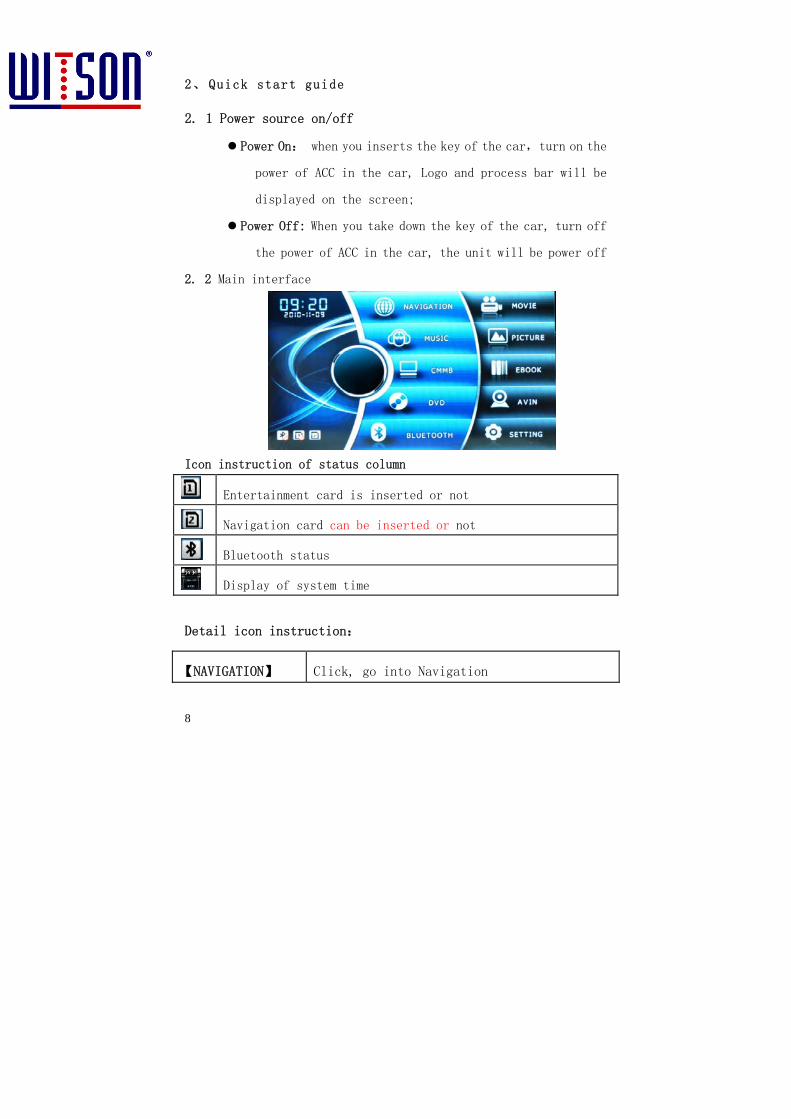
2. 2 Main interface
Icon instruction of status column
Entertainment card is inserted or not
Navigation card can be inserted or not
Bluetooth status
Display of system time
Detail icon instruction:
【NAVIGATION】 Click, go into Navigation

9
【MUSIC】 Click, go into entertainment
【DVB-T】 Click, go into DVB-T
【DVD】 Click, go into DVD
【BLUETOOTH】 Click, go into Bluetooth
【AV-in】 Click, go into AV-in
【SETTING】 Click, go into System setup
2.3 NAVIGATION
Navigation is key function of the unit. Before start the navigation. Navigation
path need be set at first.
1) Click【set up】on the main interface , and go into setup interface of GPS path.
2) Click seek the path of GPS software, go into the selection interface of
document folder
10
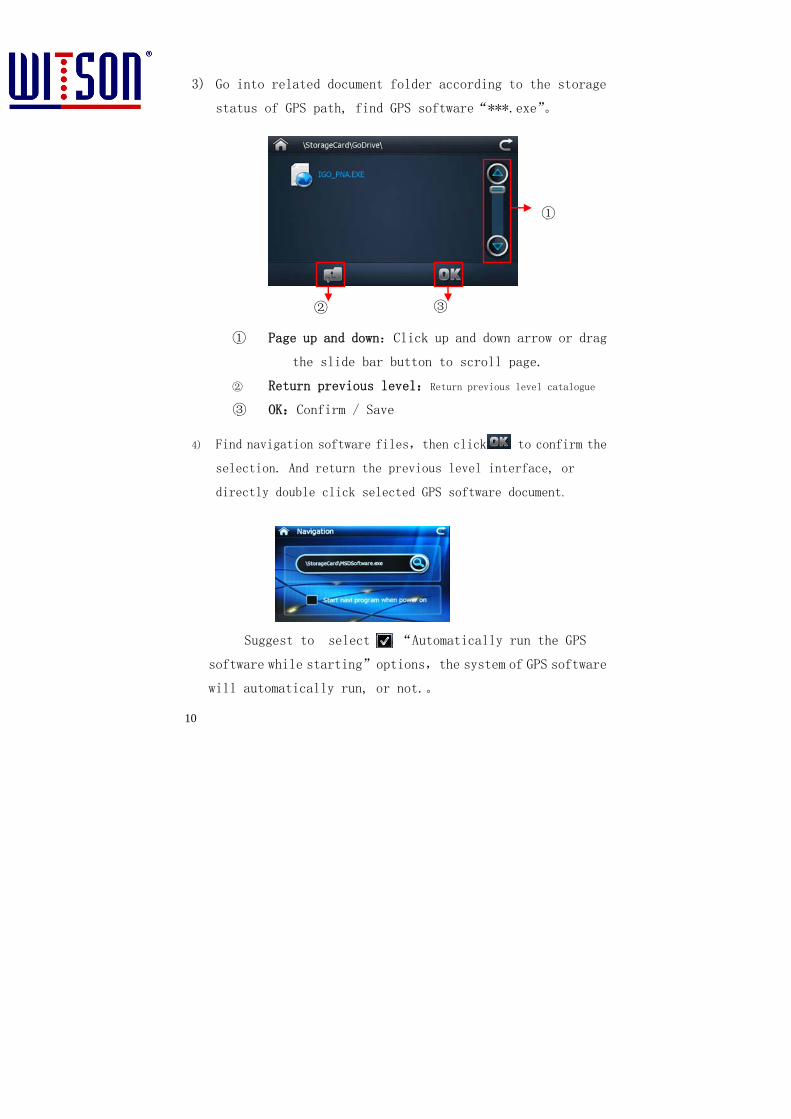
3) Go into related document folder according to the storage
status of GPS path, find GPS software“***.exe”。
① Page up and down:Click up and down arrow or drag
the slide bar button to scroll page.
② Return previous level:Return previous level catalogue
③ OK:Confirm / Save
4) Find navigation software files,then click to confirm the
selection. And return the previous level interface, or
directly double click selected GPS software document.
Suggest to select “Automatically run the GPS
software while starting”options,the system of GPS software
will automatically run, or not.。
①
② ③

11
After the finish the setting of GPS path, click
【MAVIGATION】on the main interface, then start the navigation.
【Remark】As the GPS software is provided by the third party,
different GPS software has different operating mode.
Regarding to the detail instruction, please read the
instruction of GPS software for reference. The above
information is only for your reference.
3、Functional operation explanation
3.1 Navigation operation(please check navigation map operation
manual)
3.2 Bluetooth operation
3.2.1 Bluetooth Introduction:
Bluetooth is radio technology equipment what supports a
short distance communication (typically 10m), can exchange
information between mobile phone, PDA, wireless headset,
notebook computers, and other associated peripherals equipment.
The use standard of the bluetooth is the IEEE802.15, working
frequency is 2.4 GHz, bandwidth is 1 Mb/s.
The unit supports bluetooth function below:
Hands-free Profile(HFP)
The unit can be used as Hands-free of bluetooth mobile. You
can dial and answer the telephone directly by telephone
equipment, communicate by the built-in microphone and speakers.
【Remark】
12
not all bluetooth devices support all bluetooth
function. Please refer to the instruction about the
bluetooth devices and check the supporting functions.
At the default state, the bluetooth will work at the same
time when the unit is powered on. If necessary, you can
turn off the bluetooth devices of the unit. (please see
thr bluetooth Settings section below),
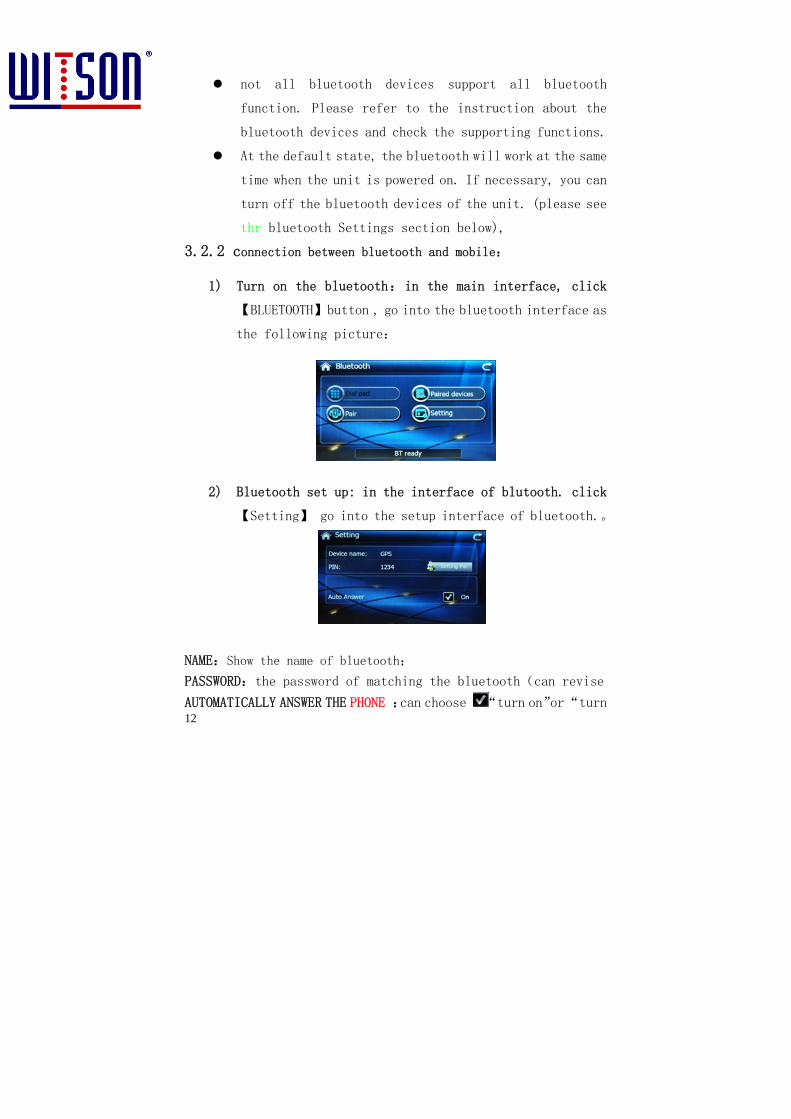
3.2.2 connection between bluetooth and mobile:
1) Turn on the bluetooth:in the main interface, click
【BLUETOOTH】button , go into the bluetooth interface as
the following picture:
2) Bluetooth set up: in the interface of blutooth. click
【Setting】 go into the setup interface of bluetooth.。
NAME:Show the name of bluetooth;
PASSWORD:the password of matching the bluetooth(can revise
AUTOMATICALLY ANSWER THE PHONE :can choose “turn on”or “turn
13
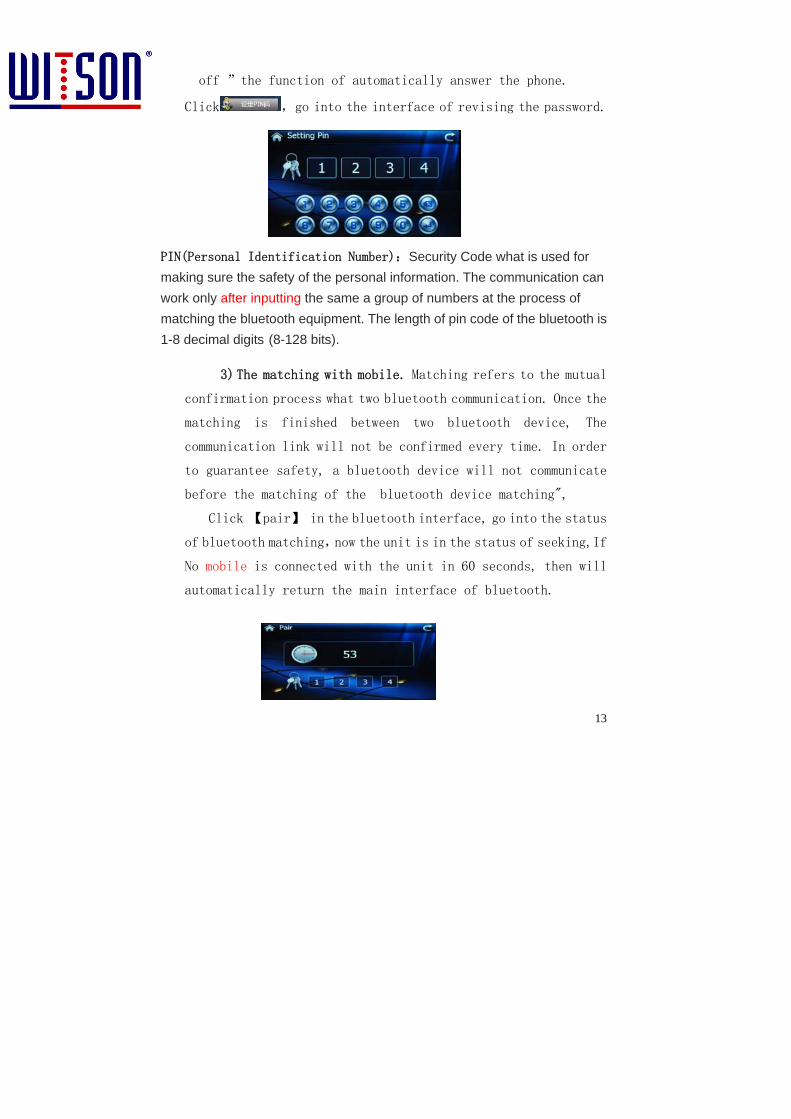
off ”the function of automatically answer the phone.
Click ,go into the interface of revising the password.
PIN(Personal Identification Number):Security Code what is used for making sure the safety of the personal information. The communication can work only after inputting the same a group of numbers at the process of matching the bluetooth equipment. The length of pin code of the bluetooth is 1-8 decimal digits (8-128 bits).
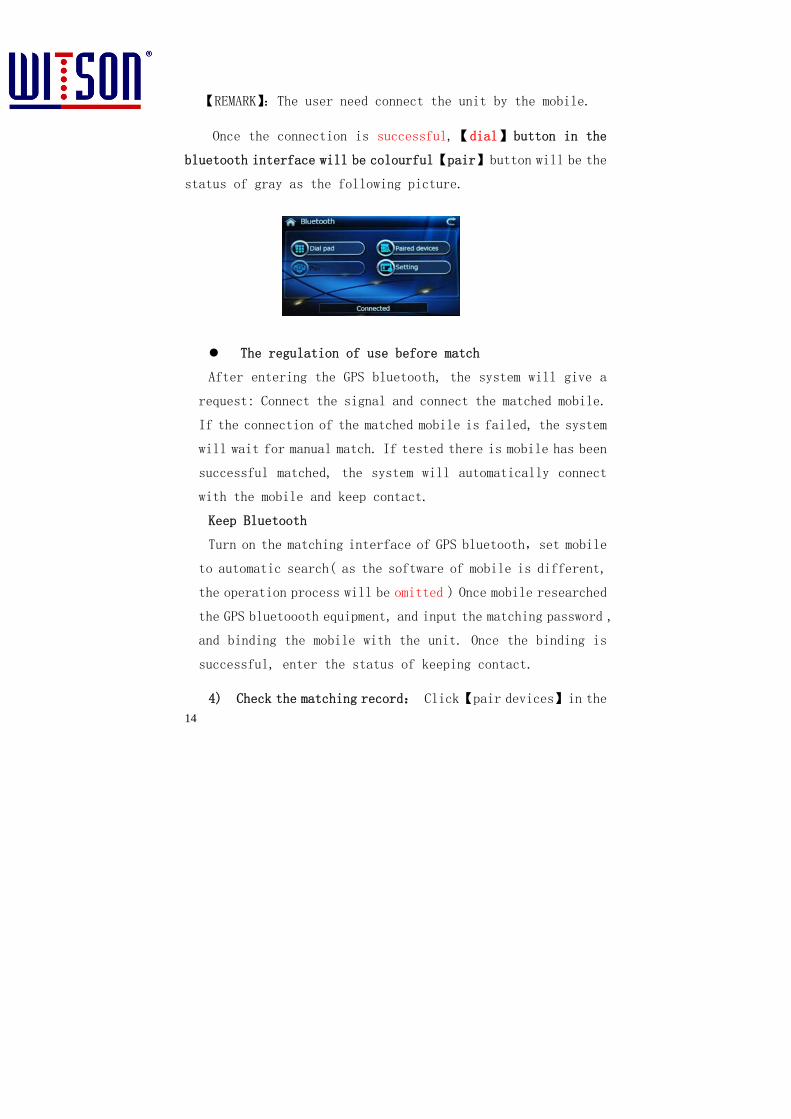
3) The matching with mobile. Matching refers to the mutual confirmation process what two bluetooth communication. Once the
matching is finished between two bluetooth device, The
communication link will not be confirmed every time. In order
to guarantee safety, a bluetooth device will not communicate
before the matching of the bluetooth device matching",
Click 【pair】 in the bluetooth interface, go into the status
of bluetooth matching,now the unit is in the status of seeking,If
No mobile is connected with the unit in 60 seconds, then will
automatically return the main interface of bluetooth.
14
【REMARK】:The user need connect the unit by the mobile.
Once the connection is successful,【dial】button in the
bluetooth interface will be colourful【pair】button will be the
status of gray as the following picture.
The regulation of use before match
After entering the GPS bluetooth, the system will give a
request: Connect the signal and connect the matched mobile.
If the connection of the matched mobile is failed, the system
will wait for manual match. If tested there is mobile has been
successful matched, the system will automatically connect
with the mobile and keep contact.
Keep Bluetooth
Turn on the matching interface of GPS bluetooth,set mobile
to automatic search( as the software of mobile is different,
the operation process will be omitted ) Once mobile researched
the GPS bluetoooth equipment, and input the matching password ,
and binding the mobile with the unit. Once the binding is
successful, enter the status of keeping contact.
4) Check the matching record: Click【pair devices】in the

15
interface of Bluetooth , enter and check the match record,
can see the other mobile equipment what has ever matched
with the same unit.。
【Remark】:The mobile can not connect until the bluetooth is
turned on.
Once there is connection between bluetooth equipment and the
unit, there is a blue button at the back of bluetooth
equipment ; or the buttonh will be grey.
If there is no connection between any bluetooth equipment and
the unit, there is no blue hook-like button in the back of
mobile model ; will be colourful,
Select the mobile equipment, click the button, and start the
connection.
3.2.3 telephone operation:
1) Realising calling function by the bluetooth:
In the interface of Bluetooth, when the match of the unit
and other mobile is successful, Dialing button will be the
Model number of
bluetooth equipment Has connected
Select other equiment,
click the icon and
connect Click and stop the
connection
Cancel matched record
16
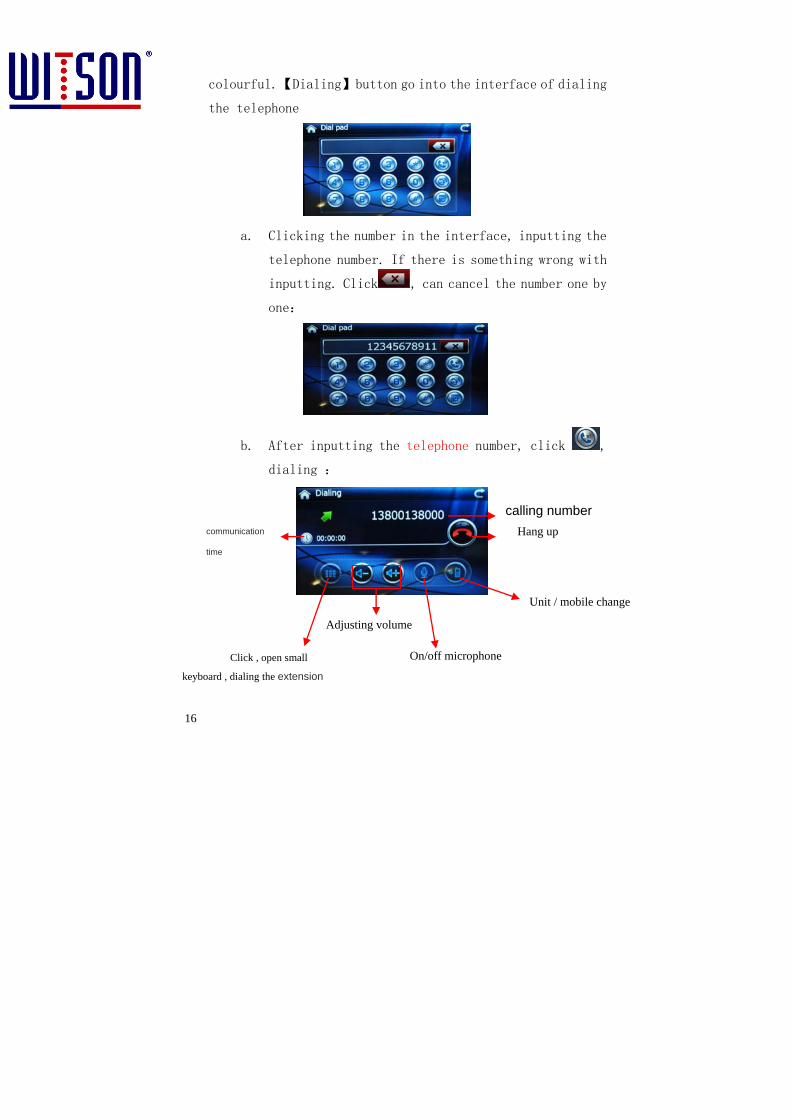
colourful. 【Dialing】 button go into the interface of dialing
the telephone
a. Clicking the number in the interface, inputting the
telephone number. If there is something wrong with
inputting. Click , can cancel the number one by
one:
b. After inputting the telephone number, click ,
dialing :
Adjusting volume
Click , open small
keyboard , dialing the extension
On/off microphone
calling number communication
time Hang up
Unit / mobile change
17
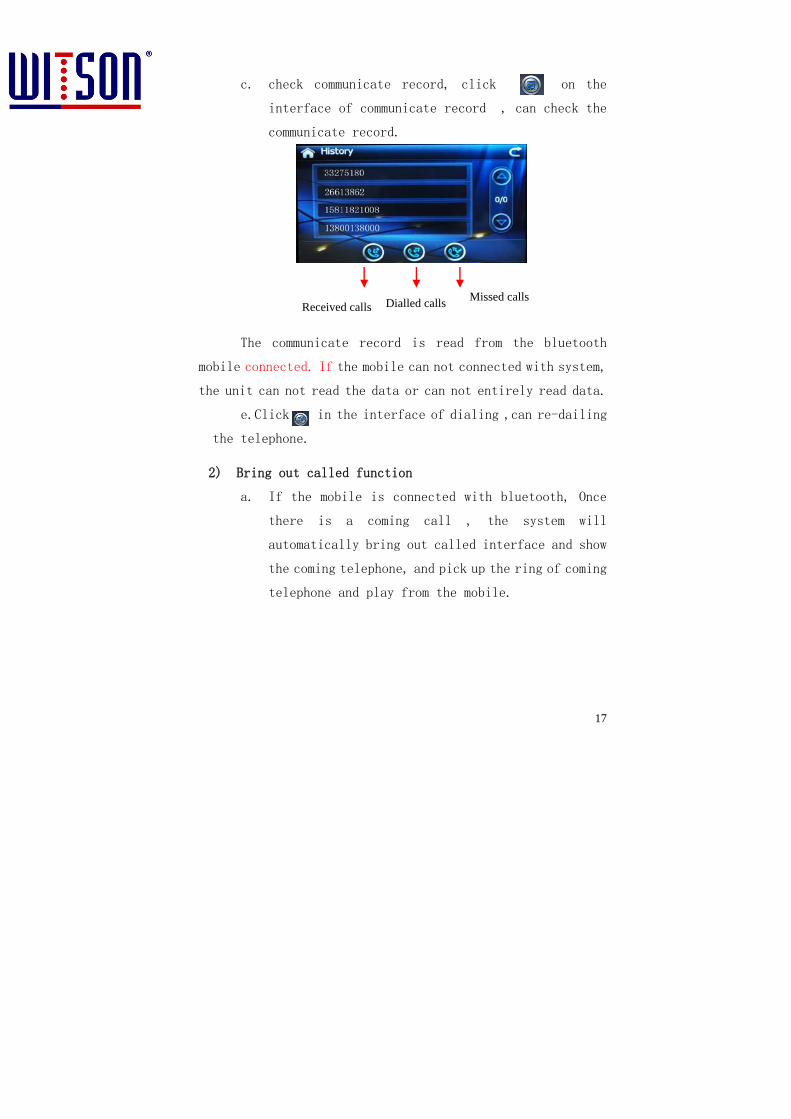
c. check communicate record, click on the
interface of communicate record , can check the
communicate record.
The communicate record is read from the bluetooth
mobile connected. If the mobile can not connected with system,
the unit can not read the data or can not entirely read data.
e.Click in the interface of dialing ,can re-dailing
the telephone.
2) Bring out called function
a. If the mobile is connected with bluetooth, Once
there is a coming call , the system will
automatically bring out called interface and show
the coming telephone, and pick up the ring of coming
telephone and play from the mobile.
Received calls Dialled calls Missed calls
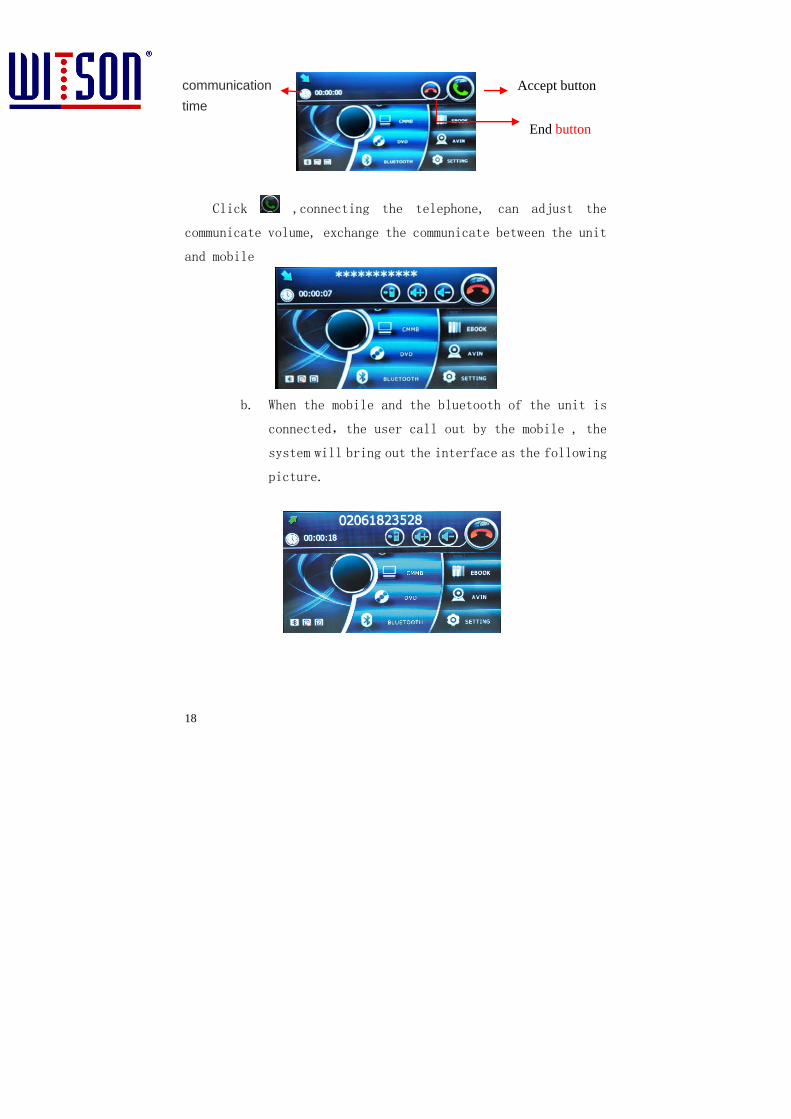
18
Click ,connecting the telephone, can adjust the
communicate volume, exchange the communicate between the unit
and mobile
b. When the mobile and the bluetooth of the unit is
connected,the user call out by the mobile , the
system will bring out the interface as the following
picture.
communication time
End button
Accept button
19
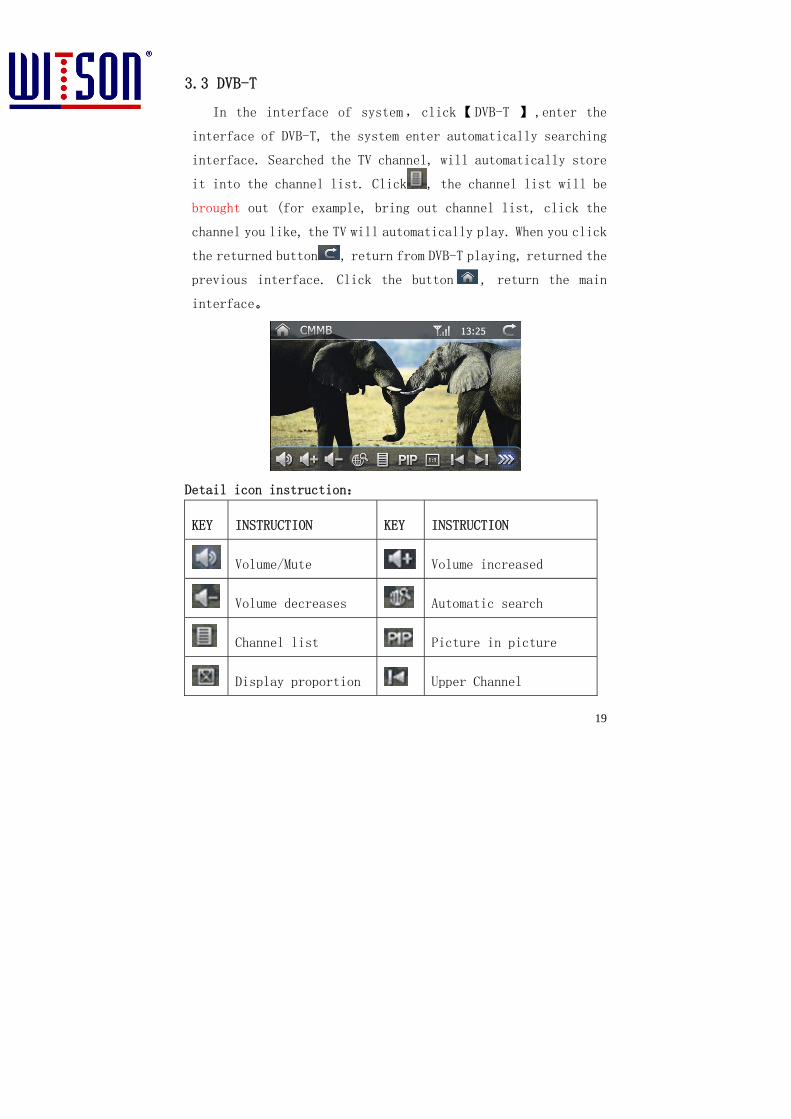
3.3 DVB-T
In the interface of system,click【DVB-T 】,enter the
interface of DVB-T, the system enter automatically searching
interface. Searched the TV channel, will automatically store
it into the channel list. Click , the channel list will be
brought out (for example, bring out channel list, click the
channel you like, the TV will automatically play. When you click
the returned button , return from DVB-T playing, returned the
previous interface. Click the button , return the main
interface。
Detail icon instruction:
KEY INSTRUCTION KEY INSTRUCTION
Volume/Mute Volume increased
Volume decreases Automatic search
Channel list Picture in picture
Display proportion Upper Channel
20
Next channel Next page of button
Manual search Program guide
About DVB Last page of button
Return main interface Return previous level
interface
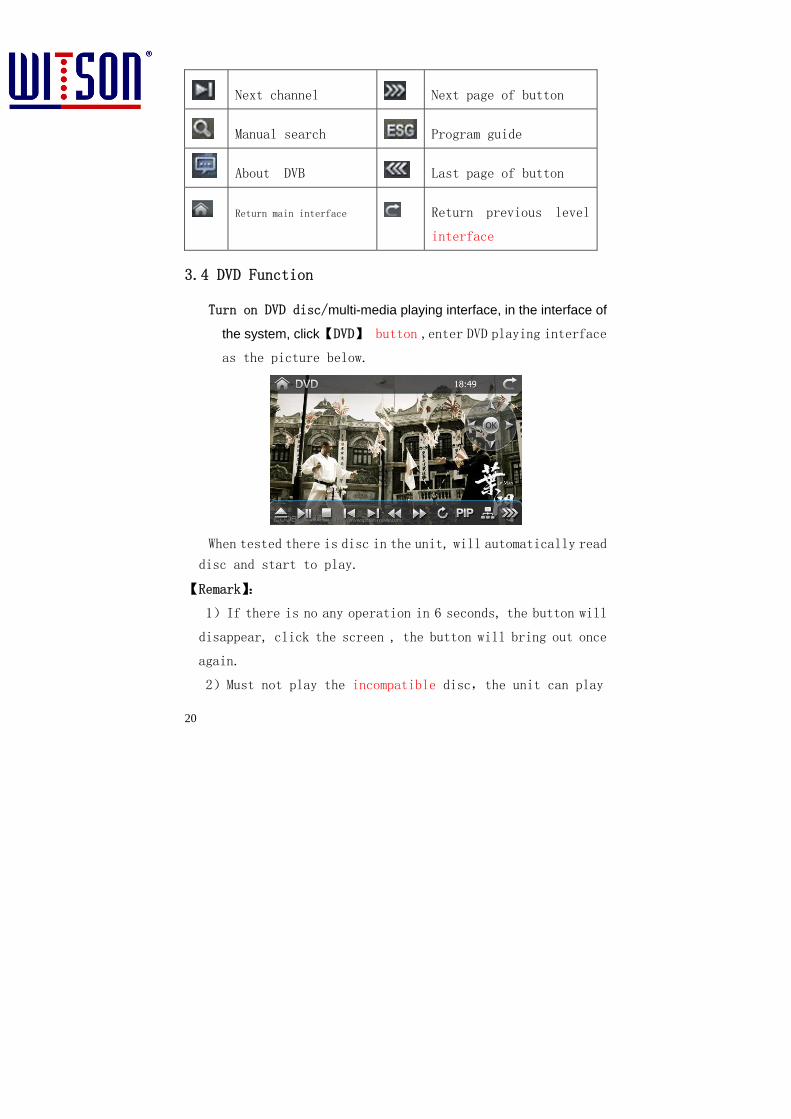
3.4 DVD Function
Turn on DVD disc/multi-media playing interface, in the interface of
the system, click【DVD】 button ,enter DVD playing interface
as the picture below.
When tested there is disc in the unit, will automatically read
disc and start to play.
【Remark】:
1)If there is no any operation in 6 seconds, the button will
disappear, click the screen , the button will bring out once
again.
2)Must not play the incompatible disc,the unit can play

21
DVD/VCD/MP3/MP4/CD。
3.4.1. PIP Function
When DVD is playing, click 【PIP】 button, narrow and
overlying DVD picture in the main interface, the GPS, bluetooth,
set up can be operated at the same time , ( besides AVIN、backing
and rearview、ipod、DVB-T、entertainment);as the following
picture
In the PIP mode, Click the zone of PIP, can enlarge the display zone,
double click, can return the normal interface.
Detailed instructions: operating key
Key Instructions Key Instructions
Exit key: up
Play/pause down
Stop to play left
Fast forward play right
Fast backward play confirm
Upper program DVD/setup
Next program DVD/
Picture in picture DVD/Disc
information
Mute DVD/ Display the
22
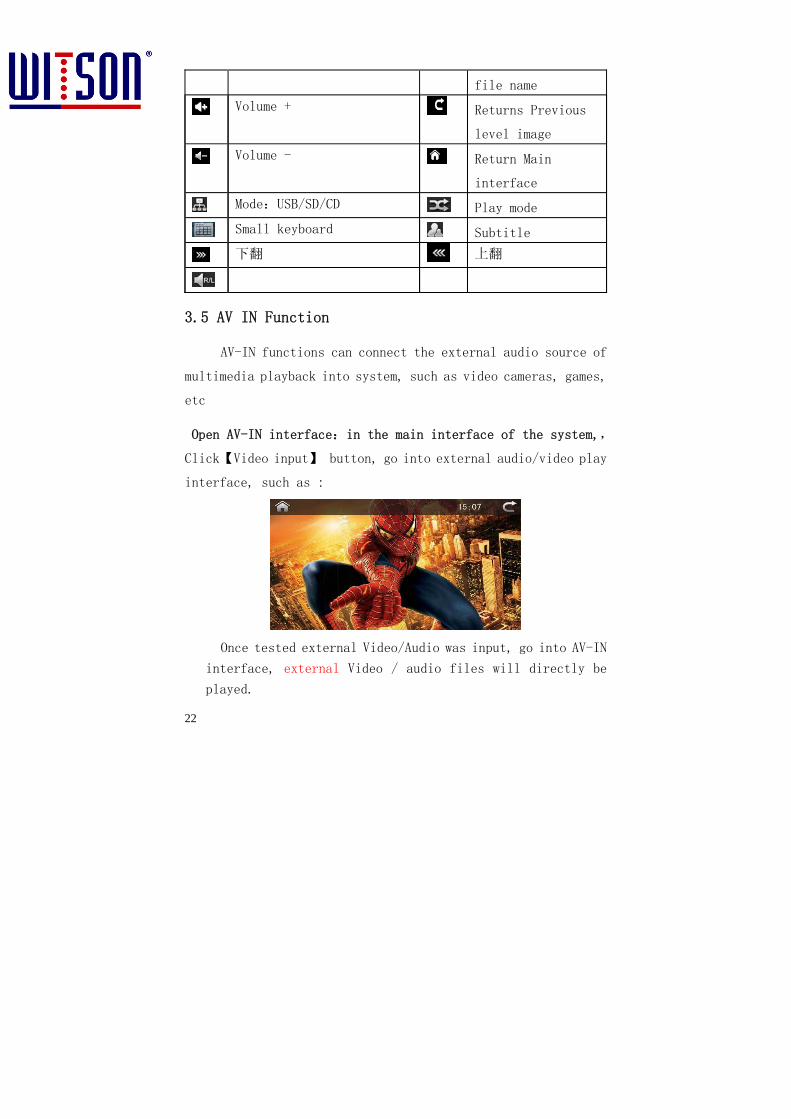
3.5 AV IN Function
AV-IN functions can connect the external audio source of
multimedia playback into system, such as video cameras, games,
etc
Open AV-IN interface:in the main interface of the system,,
Click【Video input】 button, go into external audio/video play
interface, such as :
Once tested external Video/Audio was input, go into AV-IN
interface, external Video / audio files will directly be
played.
file name
Volume + Returns Previous
level image
Volume - Return Main
interface
Mode:USB/SD/CD Play mode
Small keyboard Subtitle
下翻 上翻
23
Icon Instruction::
Shortcut button of returning main interface
Button of returning the previous interface.
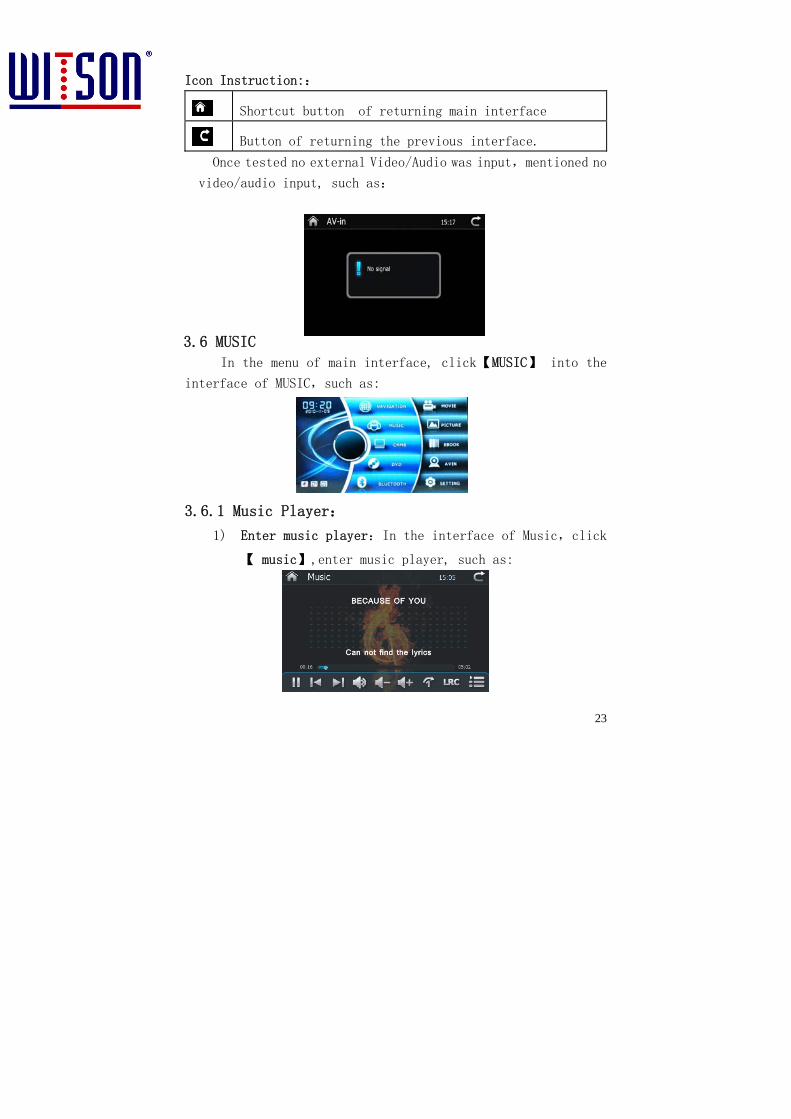
Once tested no external Video/Audio was input,mentioned no
video/audio input, such as:
3.6 MUSIC
In the menu of main interface, click【MUSIC】 into the
interface of MUSIC,such as:
3.6.1 Music Player:
1) Enter music player:In the interface of Music,click
【 music】,enter music player, such as:
24
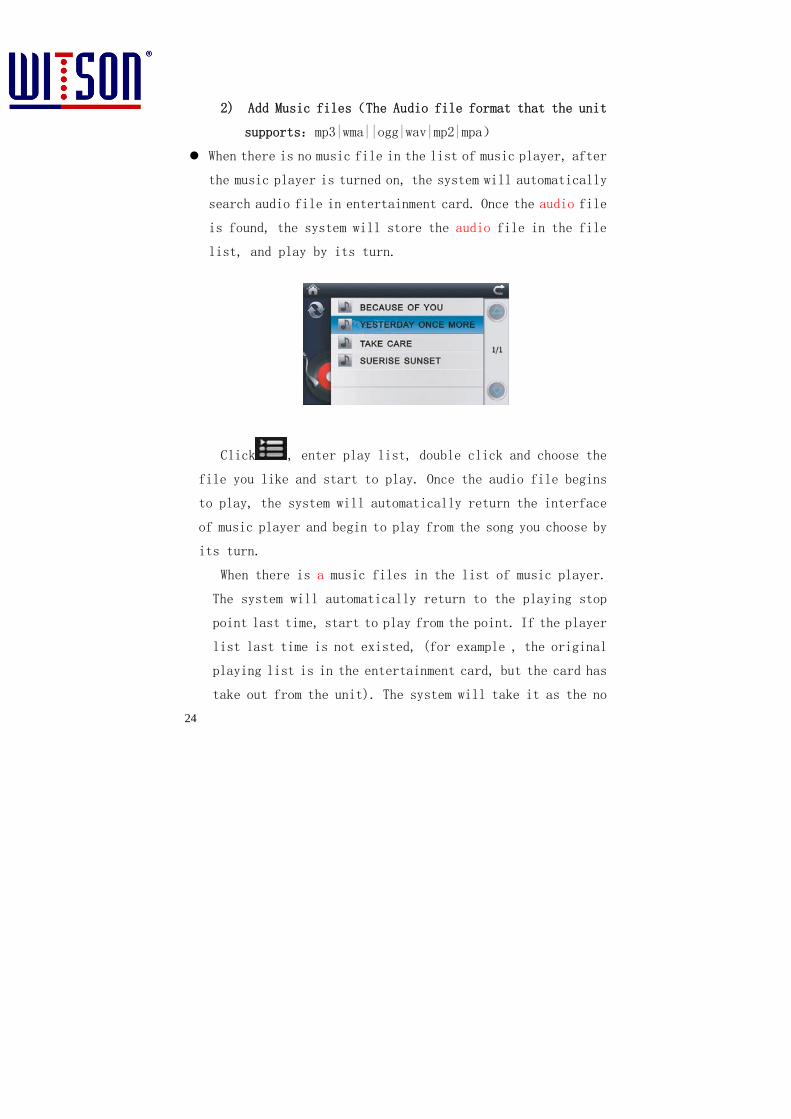
2) Add Music files(The Audio file format that the unit
supports:mp3|wma||ogg|wav|mp2|mpa)
When there is no music file in the list of music player, after
the music player is turned on, the system will automatically
search audio file in entertainment card. Once the audio file
is found, the system will store the audio file in the file
list, and play by its turn.
Click , enter play list, double click and choose the
file you like and start to play. Once the audio file begins
to play, the system will automatically return the interface
of music player and begin to play from the song you choose by
its turn.
When there is a music files in the list of music player.
The system will automatically return to the playing stop
point last time, start to play from the point. If the player
list last time is not existed, (for example , the original
playing list is in the entertainment card, but the card has
take out from the unit). The system will take it as the no

25
music files, will seek the audio files once again.
When the location of playing list is exist, but the file
has been cancelled, the system will skip the file what has
been cancelled, play according to the current turn.。
3) Changes of the Play Mode
Once returned the interface of music player.
click ,can change the playing mode. The unit can set
three kinds of audio playing mode: single repeat; all
repeat, and random, the icon instruction will be as the
following picture.
Detail icon instruction
Icon Instruction Icon Instruction
Single Repeat Cycle Repeats
Random
4) The display change of lyrics /spectrum
In the interface of music player, click ,can display
the lyrics and spectrum information. When the interface
show , the system will show lyrics in the
interface.,when the interface show ,the system will
show lyrics in the interface. Such as:
5)In the interface of Music player, click ,enter the
26
playing list of music player, can check up and choose the music
file;
6)drag playing progress bar,
, can adjust the
progress of playing.
Detail icon instruction
【Remark】:If there is no any operation in 6 seconds , the
operation button will disappear, click the screen , the
operation button will appear once again.
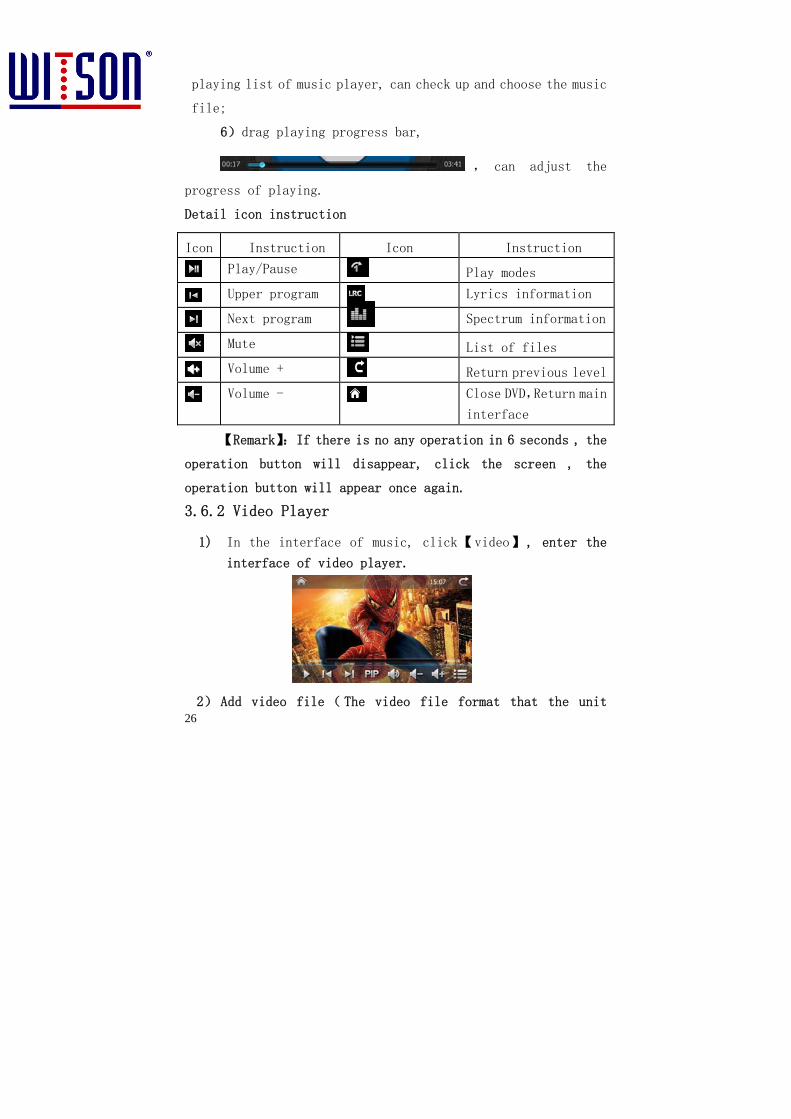
3.6.2 Video Player
1) In the interface of music, click【video】, enter the
interface of video player.
2) Add video file( The video file format that the unit
Icon Instruction Icon Instruction
Play/Pause Play modes
Upper program Lyrics information
Next program Spectrum information
Mute List of files
Volume + Return previous level
Volume - Close DVD,Return main
interface
27
supports::mp4|3gp|3g2|mpeg|mpg|divx|wmv|avi|rmvb|flv)
When there is no video file in the list of video
player ,after the video player is turned on, the system will
automatically search video file in entertainment card. Once
the video file is found, the system will store the video file
in the file list, and play by its turn.
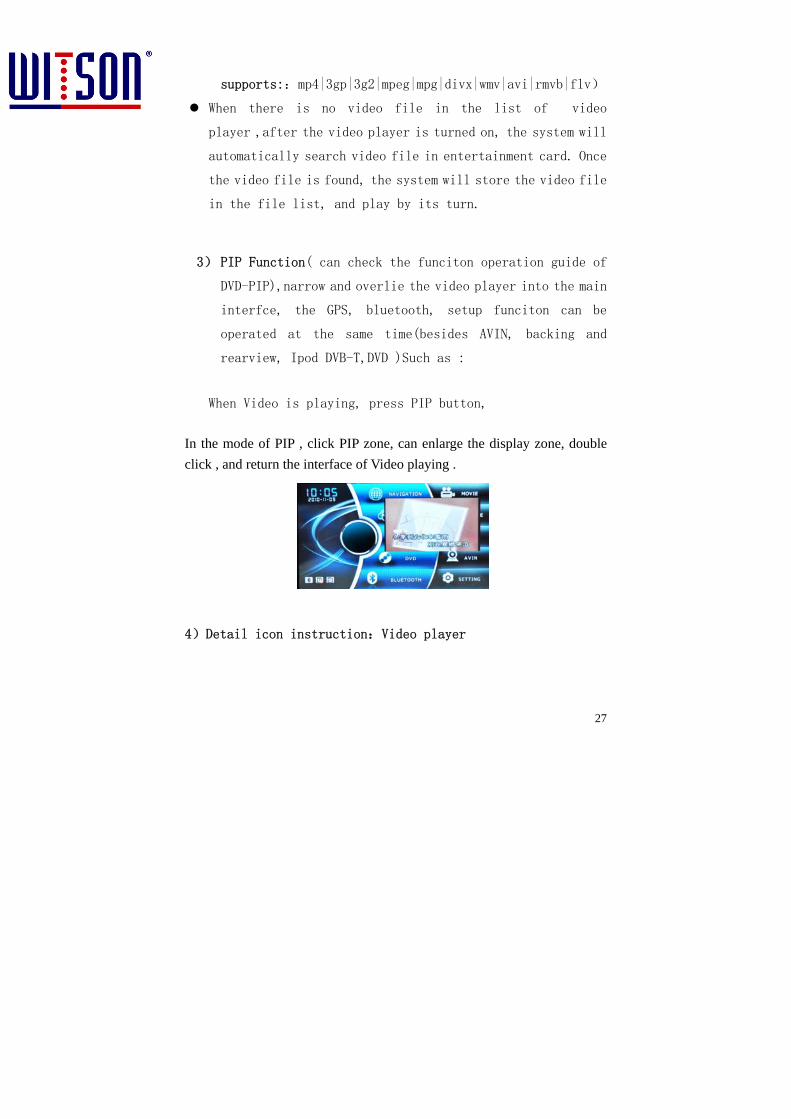
3) PIP Function( can check the funciton operation guide of DVD-PIP),narrow and overlie the video player into the main
interfce, the GPS, bluetooth, setup funciton can be
operated at the same time(besides AVIN, backing and
rearview, Ipod DVB-T,DVD )Such as :
When Video is playing, press PIP button,
In the mode of PIP , click PIP zone, can enlarge the display zone, double click , and return the interface of Video playing .
4)Detail icon instruction:Video player
28
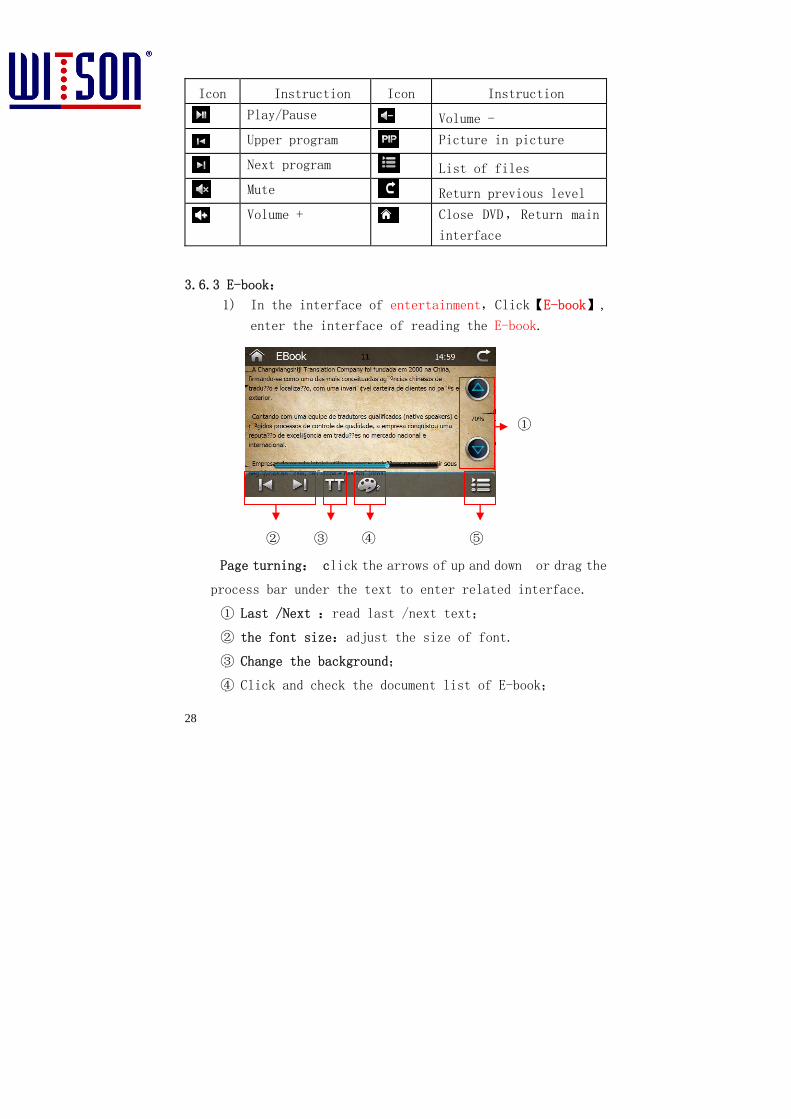
3.6.3 E-book:
1) In the interface of entertainment,Click【E-book】,
enter the interface of reading the E-book.
Page turning: click the arrows of up and down or drag the
process bar under the text to enter related interface.
① Last /Next :read last /next text;
② the font size:adjust the size of font.
③ Change the background;
④ Click and check the document list of E-book;
Icon Instruction Icon Instruction
Play/Pause Volume -
Upper program Picture in picture
Next program List of files
Mute Return previous level
Volume + Close DVD,Return main
interface
①
② ⑤③ ④
29
2) Add text file(the unit supports the format of .txt)
when there is no files in the list of e-book, the
system will automatically jump to choose
interface of the folder document.
According to your file storage conditions, open
the folder, find the corresponding text file, and
add。(You can check how to add music file for your
detail reference.
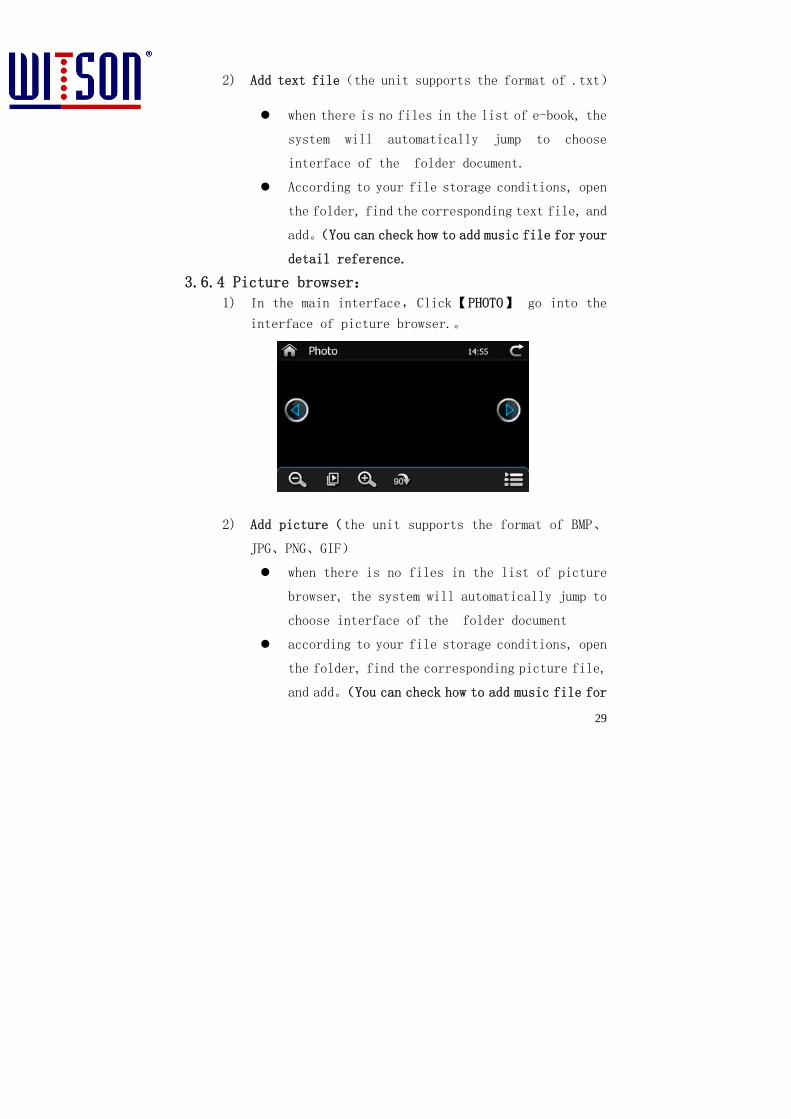
3.6.4 Picture browser:
1) In the main interface,Click【PHOTO】 go into the
interface of picture browser.。
2) Add picture(the unit supports the format of BMP、
JPG、PNG、GIF)
when there is no files in the list of picture
browser, the system will automatically jump to
choose interface of the folder document
according to your file storage conditions, open
the folder, find the corresponding picture file,
and add。(You can check how to add music file for

30
your detail reference.Detail icon instruction:
Picture browser:
Icon Instruction Icon Instruction
Browse last picture Image Zoom
Browse next picture Reduce image
rotating 90 degrees Enter slides browse
mode
Picture / file browse Exit photo browser
Return main interface
3.7 SETUP
Click【setting】in the main interface, go into the setup
interface.
3.7.1 GPS path setup
Please kindly check the detail in 2.3.
3.7.2 Volume setup
In the interface of setting,click【SOUND】, go into the
interface of volume setup。

31
Touch tone: choose “on ”or “ off”to confirm
the Volume
Volume:According to your requirement, click “+” or
“-”button to adjust the Volume.
Click confirm the setup and return the previous
level interface.
3.7.3 AV-IN set up
In the interface of setup,click【VIDEO IN】 go into the
interface of setting of video in.
According to your requirement , choose related video
input display mode, click confirm the setup and
return the previous level interface.
3.7.4 Brightness Setup
In the interface of setup,click【Brightness】, go into the
interface of brightness setup.

32
According to your requirement , choose the relevant
brightness information, click confirm the setup
and return the previous level interface.。
The adjustment range is from DAY Mode to NIGHT Mode
The unit can judge the Day or night according to the status of the
testing car light, and automatically adjust the brightness of the
unit. 3.7.5 Language Setup
In the interface of setup , Click【Language】, go into the
interface of language setup.:
The unit supports three kinds of language. You can choose the
language according to your requirement. Click the language kind 。
click confirm the setup and return the previous level
interface
33
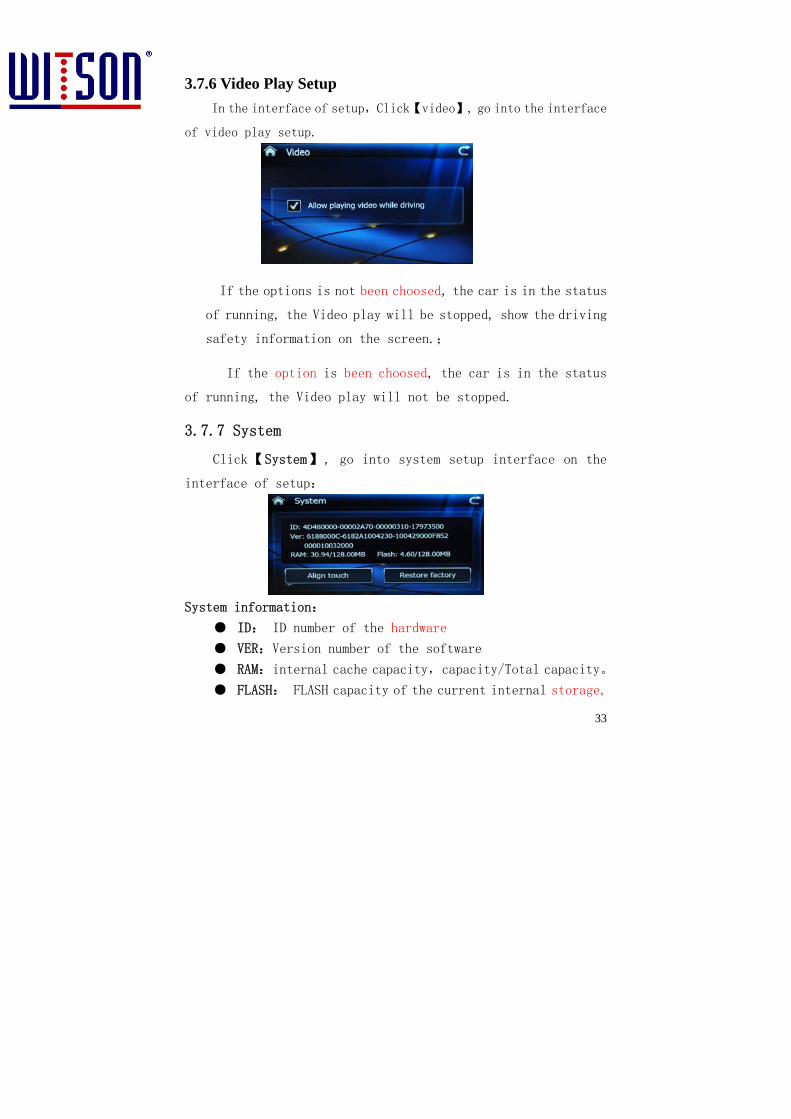
3.7.6 Video Play Setup In the interface of setup,Click【video】, go into the interface
of video play setup.
If the options is not been choosed, the car is in the status
of running, the Video play will be stopped, show the driving
safety information on the screen.;
If the option is been choosed, the car is in the status
of running, the Video play will not be stopped.
3.7.7 System
Click【System】, go into system setup interface on the
interface of setup:
System information:
● ID: ID number of the hardware
● VER:Version number of the software
● RAM:internal cache capacity,capacity/Total capacity。
● FLASH: FLASH capacity of the current internal storage,
34
capacity/Total capacity。
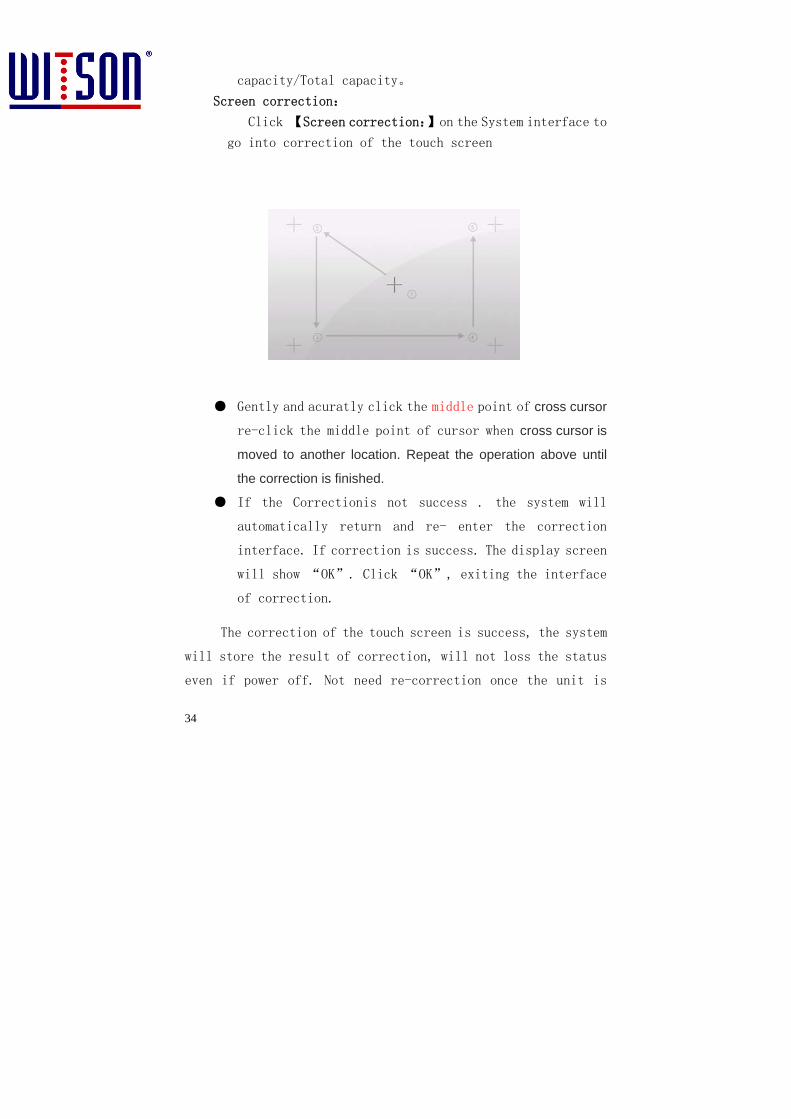
Screen correction:
Click 【Screen correction:】on the System interface to
go into correction of the touch screen
● Gently and acuratly click the middle point of cross cursor
re-click the middle point of cursor when cross cursor is
moved to another location. Repeat the operation above until
the correction is finished.
● If the Correctionis not success . the system will
automatically return and re- enter the correction
interface. If correction is success. The display screen
will show “OK”. Click “OK”, exiting the interface
of correction.
The correction of the touch screen is success, the system
will store the result of correction, will not loss the status
even if power off. Not need re-correction once the unit is

35
powered on once time.
Restore original Settings : Click 【 Restore original
Settings】in the system interface, can restore the Related
parameters
3.8 Backing and rearview
When the unit is powered on and the logo is displayed
on the screen, the backing video will be displayed
on the screen when the unit receives the backing
signal. Once backing car is stopped , the screen will
return the logo picture;
As long as the unit is powered on , the backing video
will be displayed on the screen when the unit
receives the backing signal. Once backing car is
stopped , the screen will return the original
status.
Once the backing car is running, the system has
incoming bluetooth telephone, the information will
be mentioned, the user can answer or hang up.
3.9 the information display of the original car
3.9.1 the air conditional information
The air conditional information can be displayed when you
adjust the button of the air-conditional control button as long
as the car is started. The information will be dissapear in 6
seconds if the content is same. The picture below is for
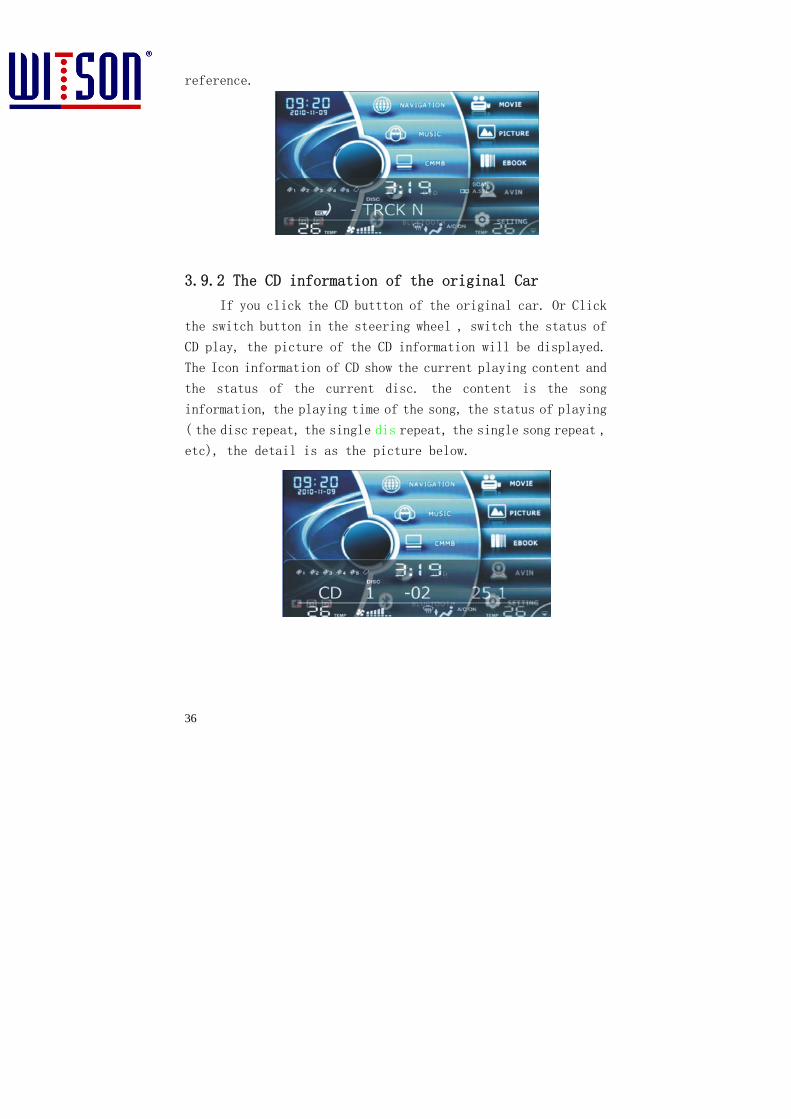
36
reference.
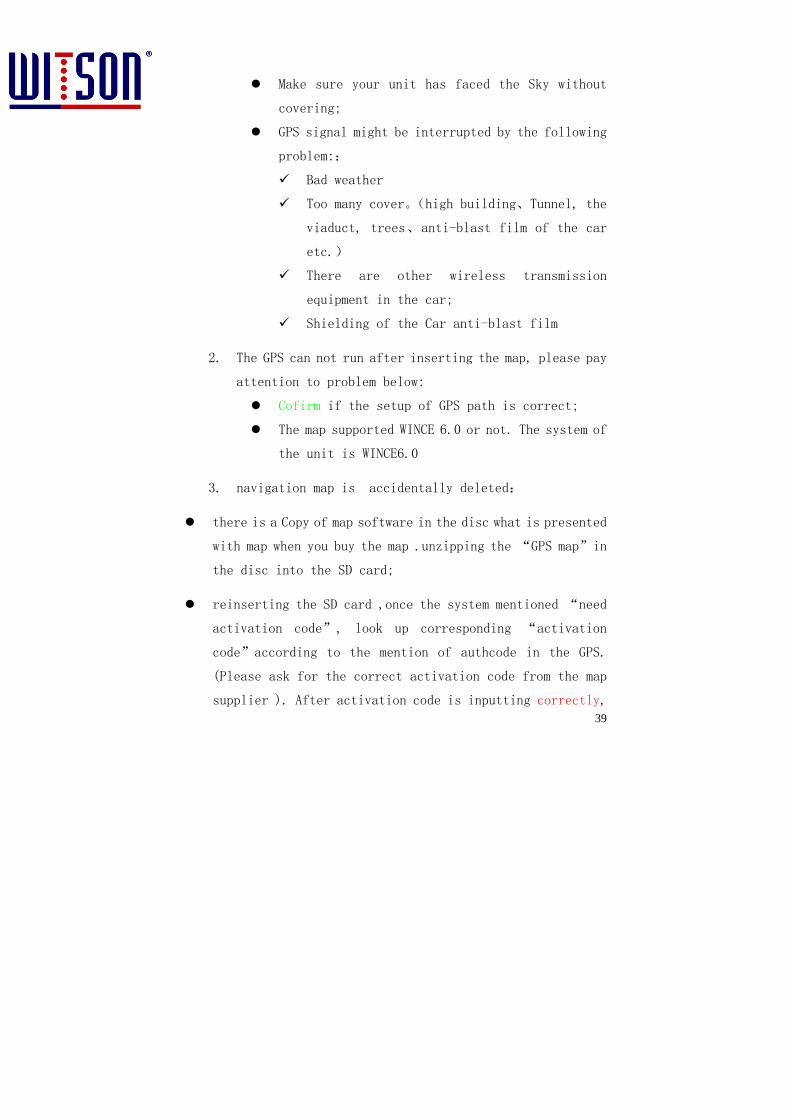
3.9.2 The CD information of the original Car
If you click the CD buttton of the original car. Or Click
the switch button in the steering wheel , switch the status of
CD play, the picture of the CD information will be displayed.
The Icon information of CD show the current playing content and
the status of the current disc. the content is the song
information, the playing time of the song, the status of playing
( the disc repeat, the single dis repeat, the single song repeat ,
etc), the detail is as the picture below.

37
3.9.3 FM/AM information of the original car
While clicking FM/AM button of the original car, the
interface shows the current information of FM/AM as the picture
below.
The display content include: the current frequency point,
presetting 6 radio messages, the information list of FM1/FM2/AM.
Display the corresponding frequency information according the
actual status.
3.9.4 stereo regulating information display
The Volume can be controlled by adjusting the “VOL”button in
the Car or the “+、-”on the steering wheel. the information
can be displayed at the same time. information will be disappear
in 6 seconds if the content is same. The picture below is for
reference.
4、Software Upgrading
1. Before upgrading
1) Building the catalogue “Update Kit” in the root
catalogue of SD Card. If “there are update kit”in
the root of catalogue, please empty the contents.
2) Copy upgrading file(msk) into the catalogue
“Update Kit”;

38
3) Insert SD card into the unit;
2. Upgrading
Reset the unit, wait for the automatic upgrading.。
3. Attention
1. Ugrading process will last 5 minutes. Do not power off
during the upgrading;
2. There is only one (msk)in the catalogue “Update Kit”of
SD card;
3. Msk need include the information OS and APP at the same
time in the catalogue “Update Kit”of SD card, and the type
of OS and CPU must be as same as CPU in the unit;
4. System will not update the upgrading bag has been
successful update;
5. The unit need restart after the upgrading.
Attention:Don’t power off and reset before restarting
the unit. The upgrading is not success until to go into the main
interface. If powering off during the process, the user need
repeat the upgrading operation by hand.
5、Common problems
【Remark】If the problem can not be solved , you can contact
the service center.
1. GPS
GPS signal can not be well received, please pay attention
to the following problem:
39
Make sure your unit has faced the Sky without
covering;
GPS signal might be interrupted by the following
problem::
Bad weather
Too many cover。(high building、Tunnel, the
viaduct, trees、anti-blast film of the car
etc.)
There are other wireless transmission
equipment in the car;
Shielding of the Car anti-blast film
2. The GPS can not run after inserting the map, please pay
attention to problem below:
Cofirm if the setup of GPS path is correct;
The map supported WINCE 6.0 or not. The system of
the unit is WINCE6.0
3. navigation map is accidentally deleted:
there is a Copy of map software in the disc what is presented
with map when you buy the map .unzipping the “GPS map”in
the disc into the SD card;
reinserting the SD card ,once the system mentioned “need
activation code”, look up corresponding “activation
code”according to the mention of authcode in the GPS.
(Please ask for the correct activation code from the map
supplier ). After activation code is inputting correctly,
40
re-activate the GPS system.
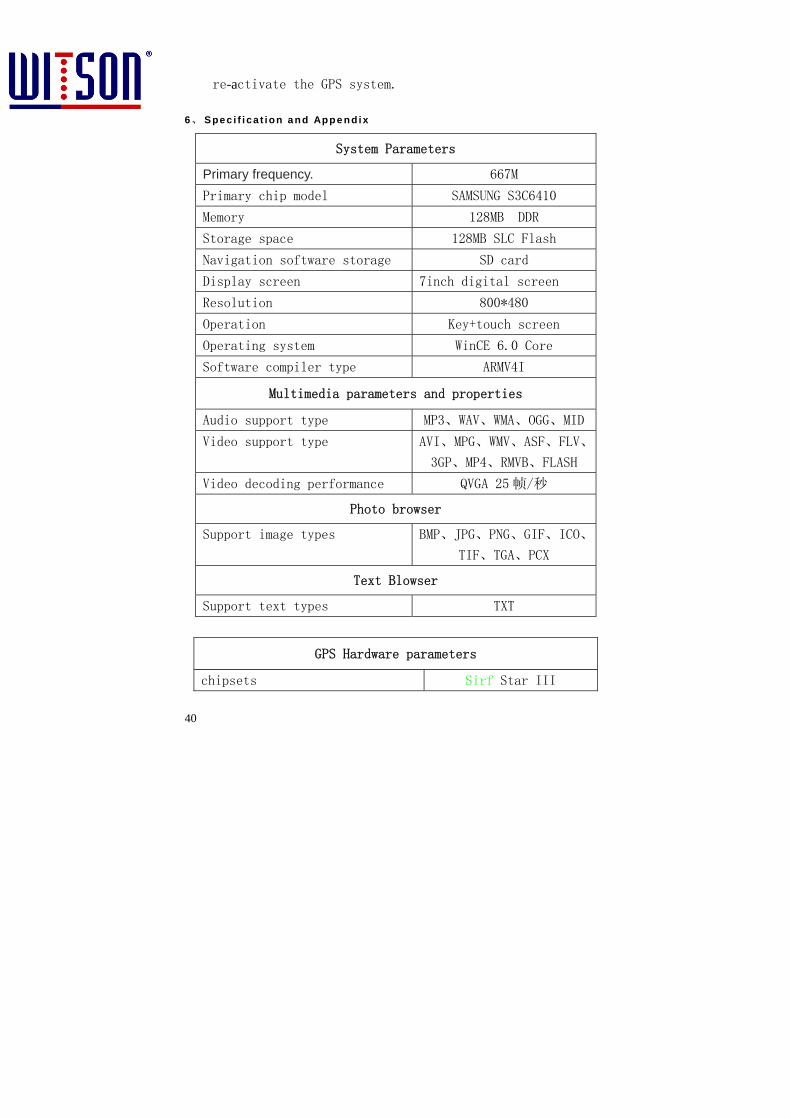
6、 Spec i f i ca t ion a nd Appe nd ix
System Parameters
Primary frequency. 667M
Primary chip model SAMSUNG S3C6410
Memory 128MB DDR
Storage space 128MB SLC Flash
Navigation software storage SD card
Display screen 7inch digital screen
Resolution 800*480
Operation Key+touch screen
Operating system WinCE 6.0 Core
Software compiler type ARMV4I
Multimedia parameters and properties
Audio support type MP3、WAV、WMA、OGG、MID
Video support type AVI、MPG、WMV、ASF、FLV、
3GP、MP4、RMVB、FLASH
Video decoding performance QVGA 25 帧/秒
Photo browser
Support image types BMP、JPG、PNG、GIF、ICO、
TIF、TGA、PCX
Text Blowser
Support text types TXT
GPS Hardware parameters
chipsets Sirf Star III
41
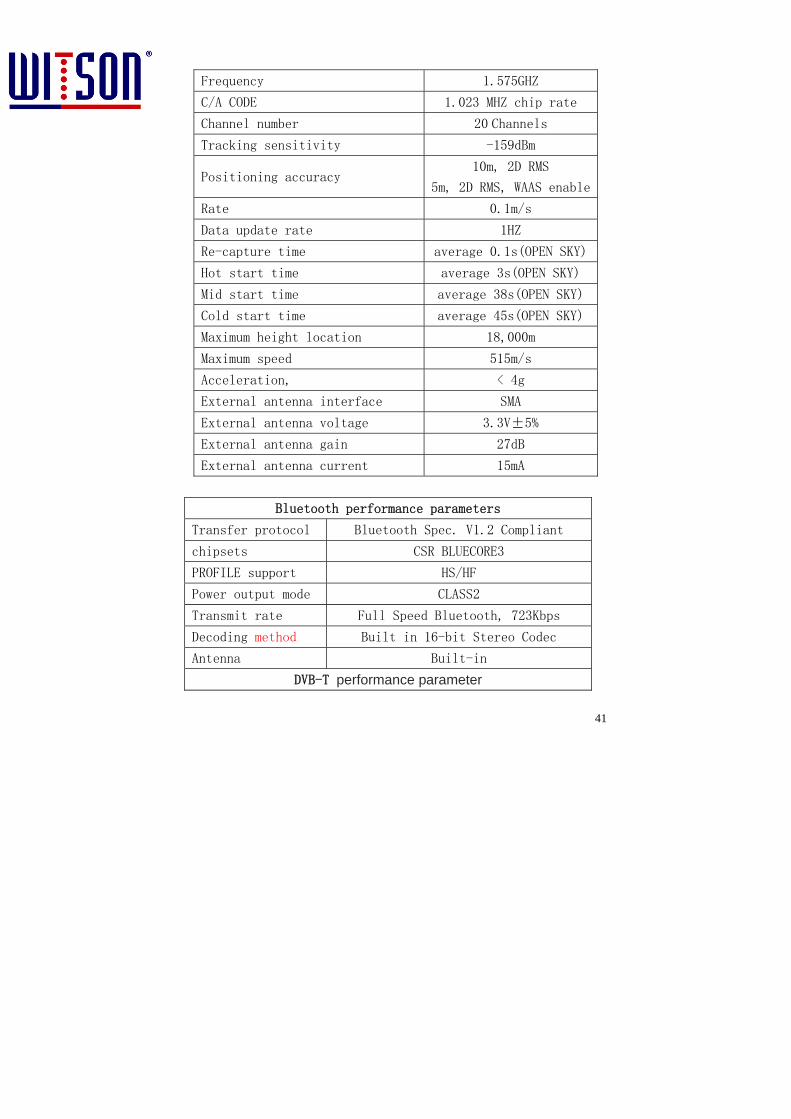
Frequency 1.575GHZ
C/A CODE 1.023 MHZ chip rate
Channel number 20 Channels Tracking sensitivity -159dBm
Positioning accuracy 10m, 2D RMS
5m, 2D RMS, WAAS enable
Rate 0.1m/s
Data update rate 1HZ
Re-capture time average 0.1s(OPEN SKY)
Hot start time average 3s(OPEN SKY)
Mid start time average 38s(OPEN SKY)
Cold start time average 45s(OPEN SKY)
Maximum height location 18,000m
Maximum speed 515m/s
Acceleration, < 4g
External antenna interface SMA
External antenna voltage 3.3V±5%
External antenna gain 27dB
External antenna current 15mA
Bluetooth performance parameters
Transfer protocol Bluetooth Spec. V1.2 Compliant
chipsets CSR BLUECORE3
PROFILE support HS/HF
Power output mode CLASS2
Transmit rate Full Speed Bluetooth, 723Kbps
Decoding method Built in 16-bit Stereo Codec
Antenna Built-in
DVB-T performance parameter

42
Files Support DVB-T
Frequency Range 474MHZ ~ 794MHZ
InputImpedance@ Antenna 50ohm
Antenna Built-out
INTERFACE
Power input BATTERY +12V
ACC testing YES
Headlight testing YES
Backing testing YES
Handbrake testing YES
Built-out amplifier control YES
Video/audio input or output YES
USB HOST 1.1
USB DEVICE 2.0(reserve)
SD socket SDHC 2.0 support
Appendix:DVD disc /SD card instruction:
Disk /SD card knowledge
Type Disc remark content Disc
diameter
The longest playing time
About 133 minutes(single side and single layer)
About 242 minutes (single side and double layer About 266 minutes(double side and double layer)
DVD
Video+ Audio
(dynamic screen)
12CM
About 484 minutes(double side and double layer)

43
VCD
Video+ Audio
( dynamic screen)
12CM
About 74 minutes
MP3 Video 12CM About 600 minutes
SD
card
Supporting the normal SD
card
Video+ Audio ( dynamic screen)
Confirm by video content
◇ The operation method of Some VCD disc in the market is limited by the
software maker, please refer to the comes with disc instruction
◇ The unit can play CD、SVCD,MP3 and picture (JPEG format) what is burned
by CD-R or CD-RW. But as the differences between features of CD-R and
CD-RW and Recording condition , can not playing is possible.
Disc Protect
Don’t touch the playing side of disc(data side), don’t stick the
paper and lable in the disc, either.
Disc Storage
Don’t put the disc next to hot supplier and under the sun, do not
put the disc in the dusty and humid place.
Disc cleaness
Finger print and dusty in the disc can affect the quality of video
and audio playing. Please clean the disc by the soft cloth from the disc
center to the outside
How to choose Disc
◇ DVD disc and DVD player had Zone code,,DVD player can play the same
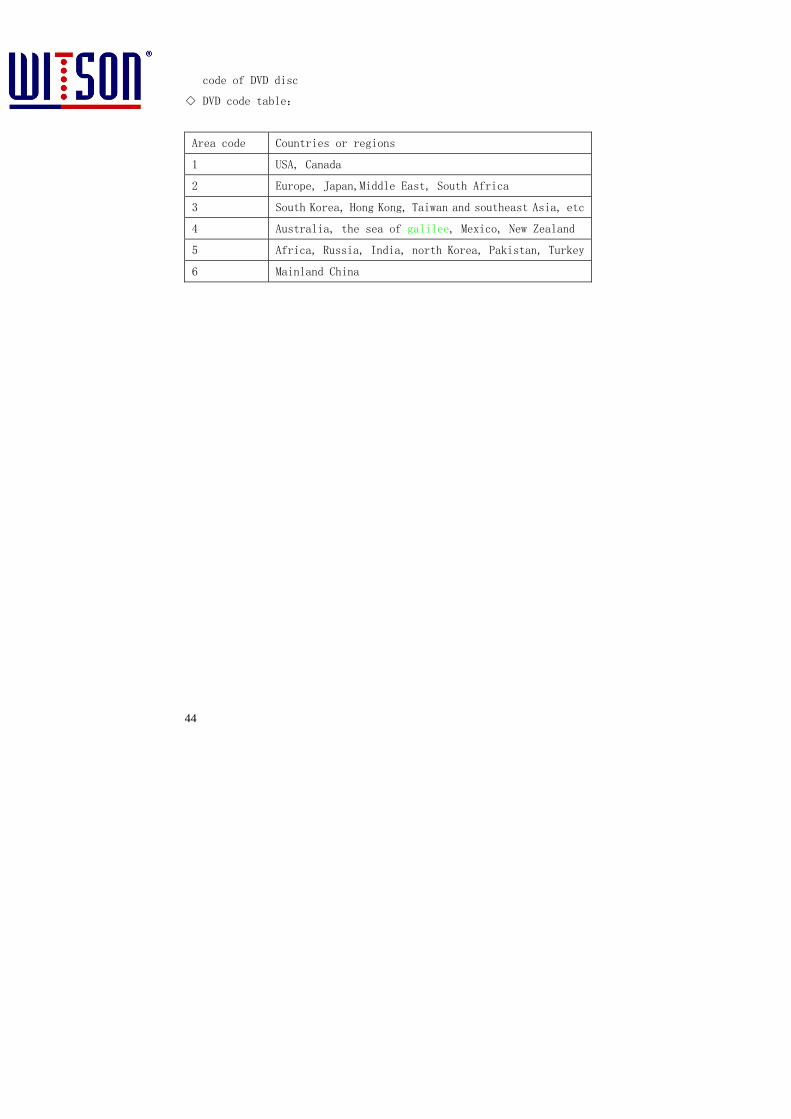
44
code of DVD disc
◇ DVD code table:
Area code Countries or regions
1 USA, Canada
2 Europe, Japan,Middle East, South Africa
3 South Korea, Hong Kong, Taiwan and southeast Asia, etc
4 Australia, the sea of galilee, Mexico, New Zealand
5 Africa, Russia, India, north Korea, Pakistan, Turkey
6 Mainland China


![· 178 w2~uz− 179 w2~− 182 w2¶a 183 w2,v0 185 w2fl 186 w2,´‡ 187 w2,^M 188 w2,â 190 w2,˛− 195 w2,ðg− 196 w2,ðg! 198 w2,ð¾ 200 w2,ð−a 201 w2,ðgG Ž ]* Z˜ ß9ü](https://static.fdocuments.in/doc/165x107/5ec4169f9cf111271f3cdc4b/178-w2uza-179-w2a-182-w2a-183-w2v0-185-w2i-186-w2a-187-w2m-188.jpg)