LT autobio project.ppt - California University of Pennsylvania · Click Create Document. ... front...
18
Project: Autobiography Autobiography
Transcript of LT autobio project.ppt - California University of Pennsylvania · Click Create Document. ... front...

Project: AutobiographyAutobiography
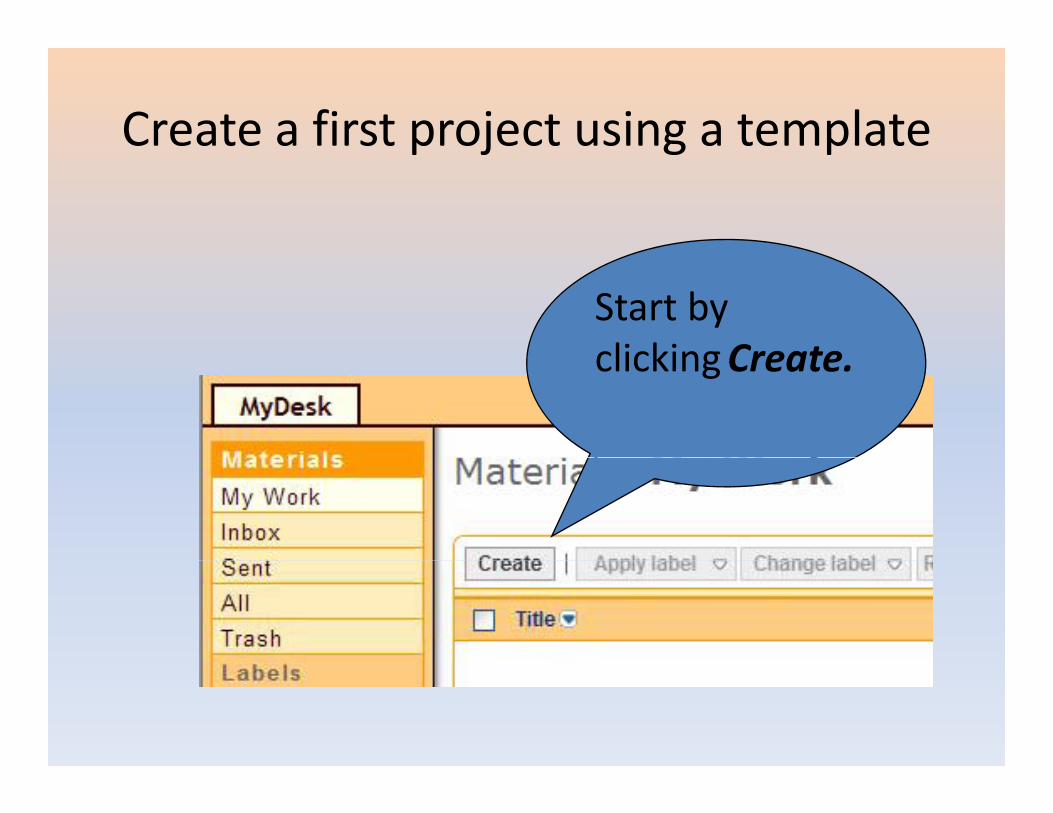
Create a first project using a template p j g p
Start by clickingCreateclickingCreate.
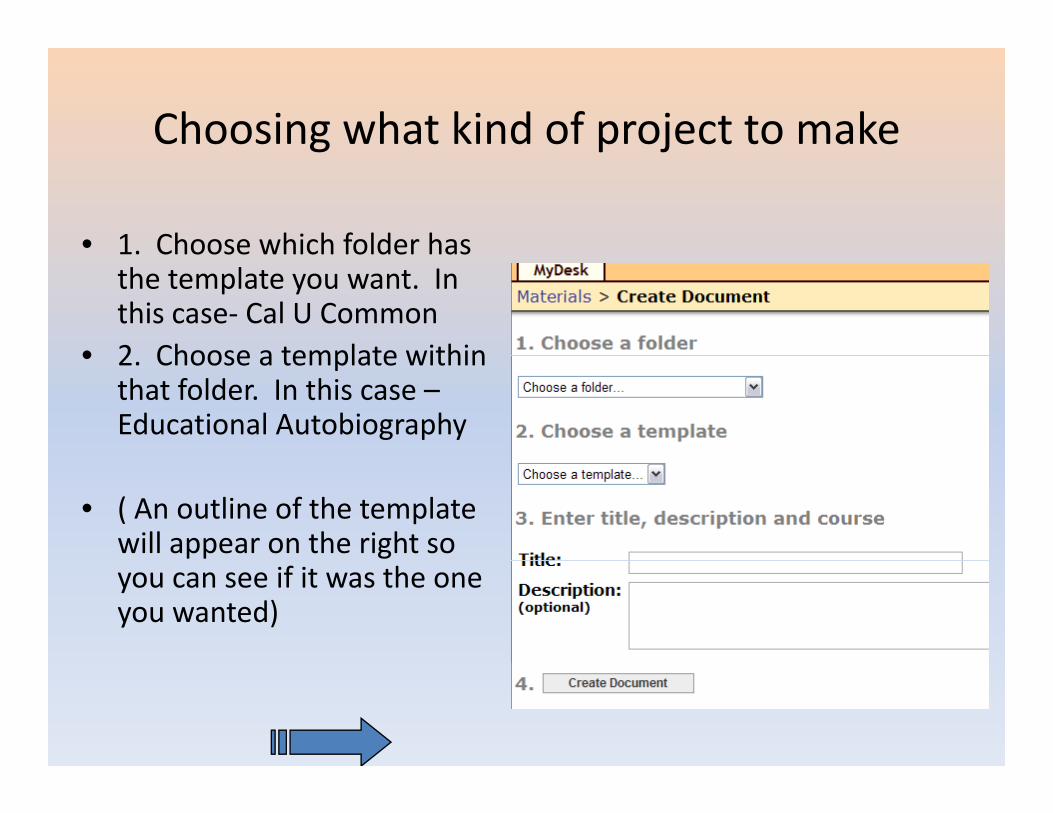
Choosing what kind of project to makeg p j
• 1. Choose which folder has1. Choose which folder has the template you want. In this case‐ Cal U Common
• 2 Choose a template within• 2. Choose a template within that folder. In this case –Educational Autobiography
• ( An outline of the template will appear on the right so you can see if it was the one you wanted)

Outline
3. Give the project a name and a description to help you find the right one laterfind the right one later.
4. Click Create Document

The project has been created for you to start making your ownmaking your own…
The basic outline of this project has already been created as a template. This is the front page of this project (portfolio). The table of contents down the left shows the other areas You can now edit it to add your own materialother areas. You can now edit it to add your own material.
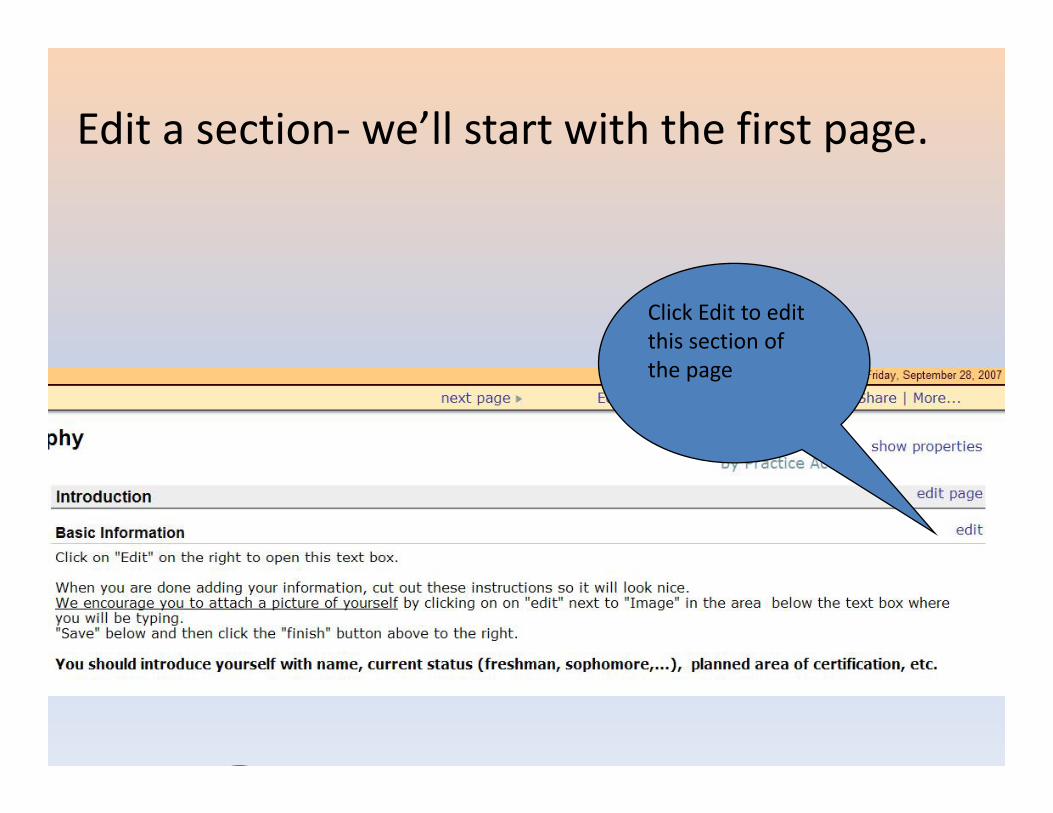
Edit a section‐ we’ll start with the first page.p g
Click Edit to edit this section of the page
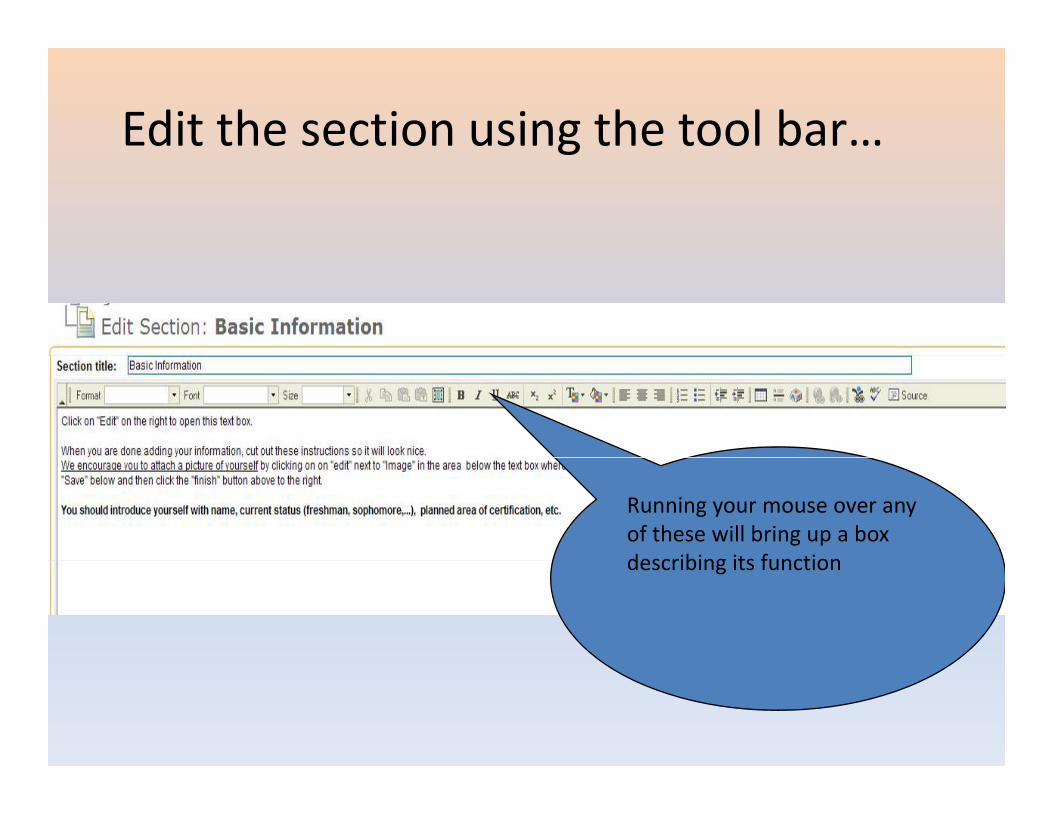
Edit the section using the tool bar… g
Running your mouse over any of these will bring up a box describing its functiondescribing its function
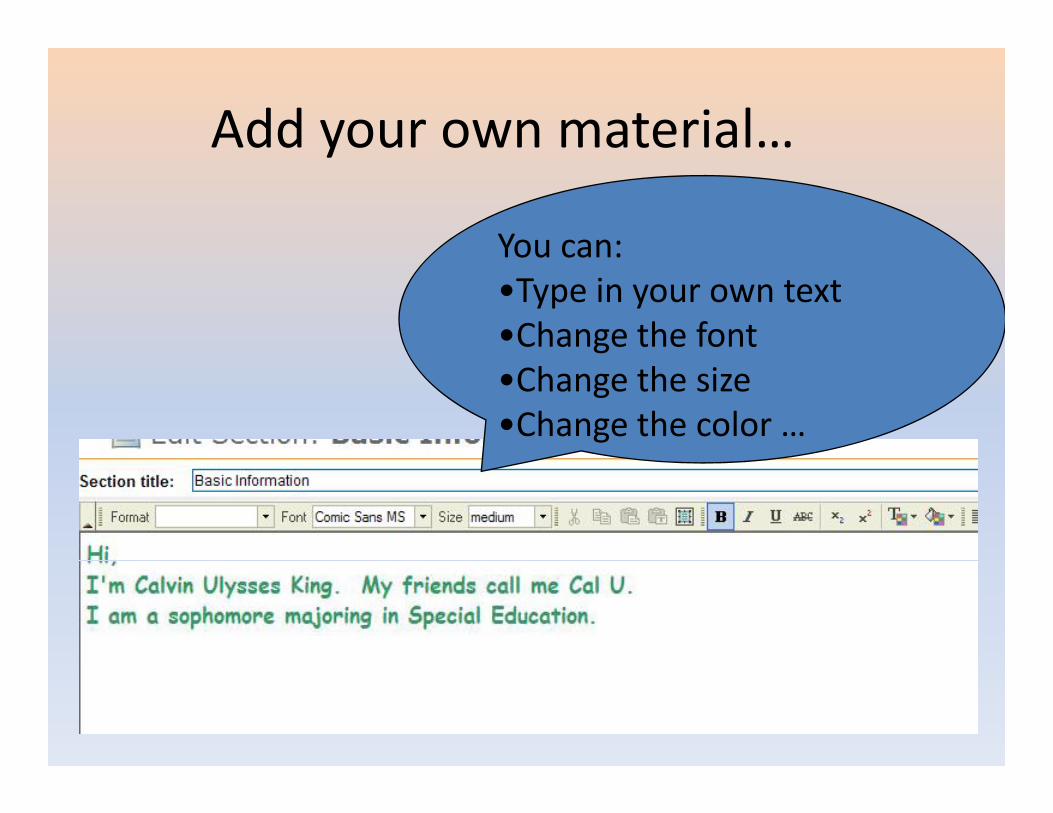
Add your own material…y
You can:You can:•Type in your own text •Change the font•Change the size•Change the color …

To add a photo or attachment…p
Below the text editing box, there is a spot to add an image or attach files. g
We’ll click edit to add an image
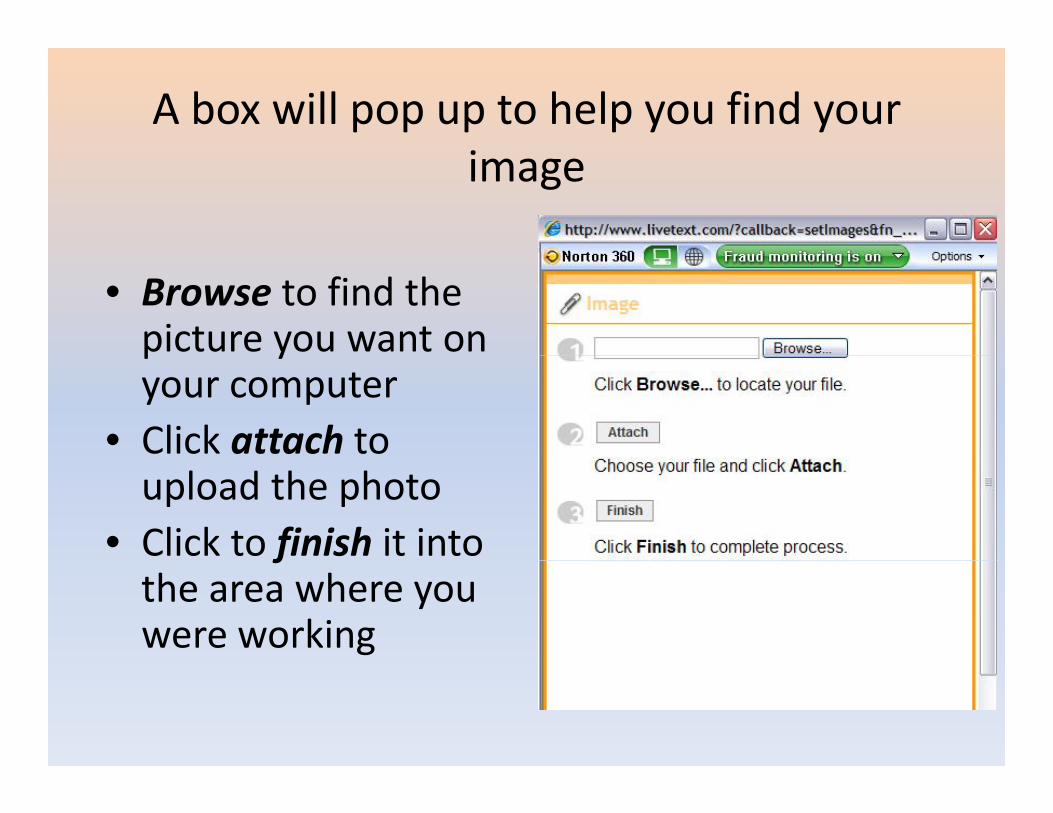
A box will pop up to help you find your iimage
•• Browse to find the picture you want on p yyour computer
• Click attach to upload the photo
• Click to finish it into fthe area where you were working

Choose how you want it to appeary pp
We can change the size of the image‐ this was a big file…
We can choose where the image willWe can choose where the image will appear in relation to the text
We can save our progress when we wish

Finish off the work we just didj
Clicking Finish will complete the changes
d (we made (text and image) into ourinto our project ending our editing of gthis section
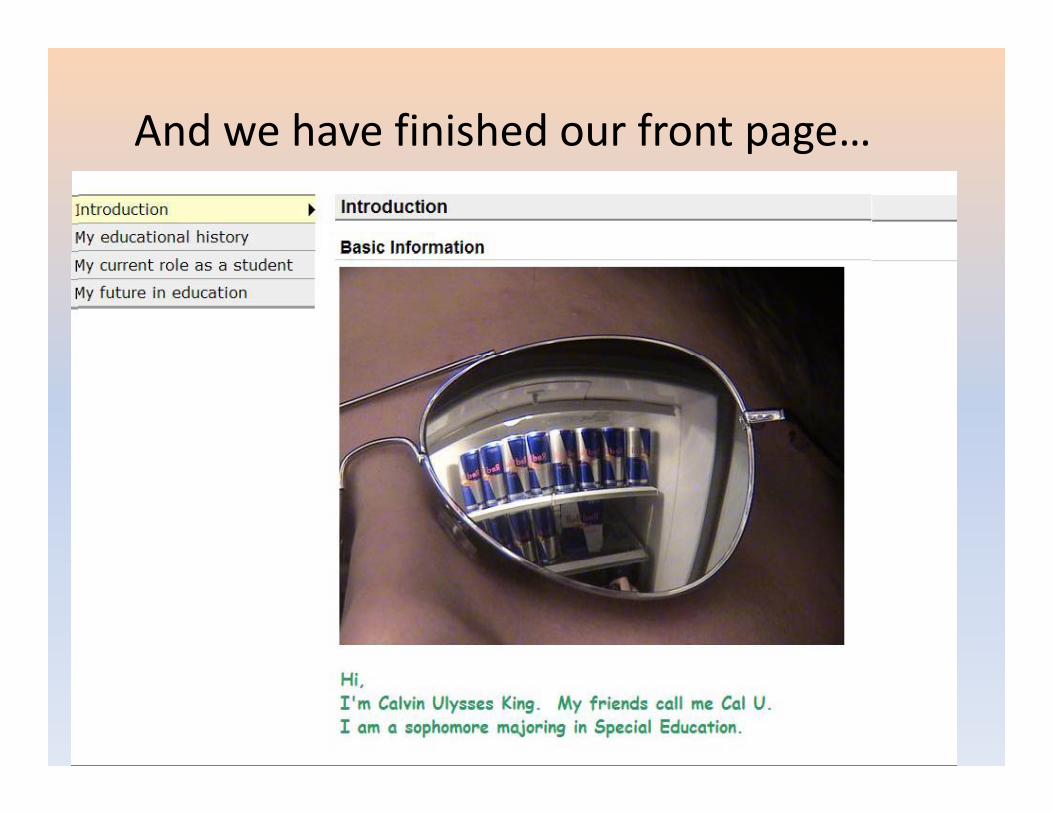
And we have finished our front page…p g
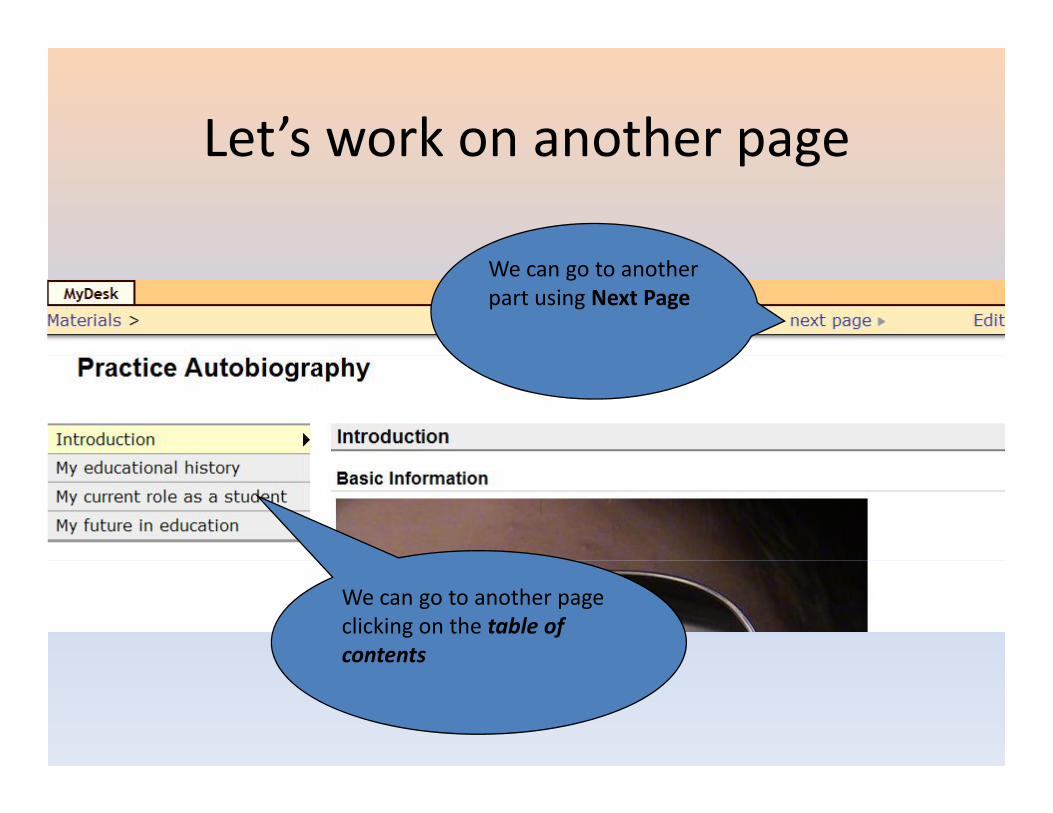
Let’s work on another pageLet s work on another page
We can go to another part using Next Page
We can go to another page clicking on the table of contents
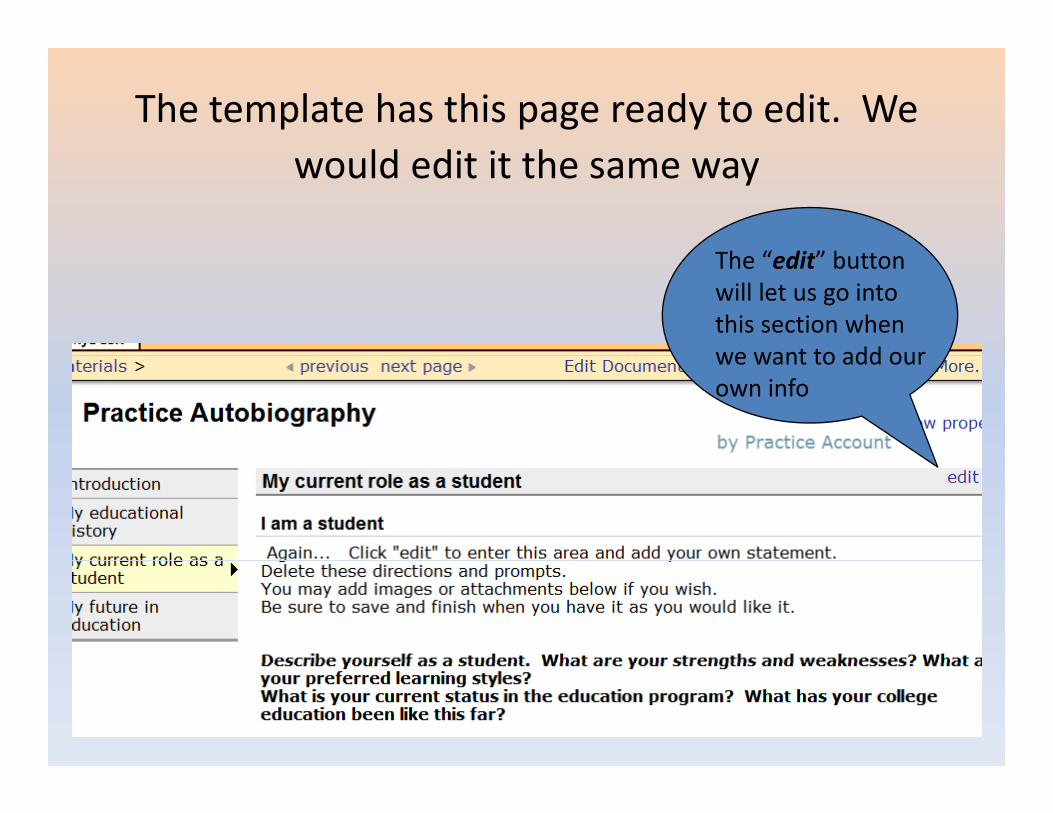
The template has this page ready to edit. We ld d hwould edit it the same way
Th “ di ” bThe “edit” buttonwill let us go into this section whenwe want to add ourwe want to add our own info

We can share our work with friendsWe can share our work with friends
• At the top right (while
Share with “Viewers” who can see your work. If you share with someone as “Editors” they can p g (
we are in the document)‐ click share.
f l
modify your work.
• Type in a few letters and it will start suggesting possiblesuggesting possible recipients for you to choose from.
• Click “share” and watch for it to go through.

We can submit our work to be reviewed
We can also submitWe can also submit our work to a instructor (orinstructor (or someone else) for “review” so they canreview so they can provide comments and/or score it using aand/or score it using a rubric
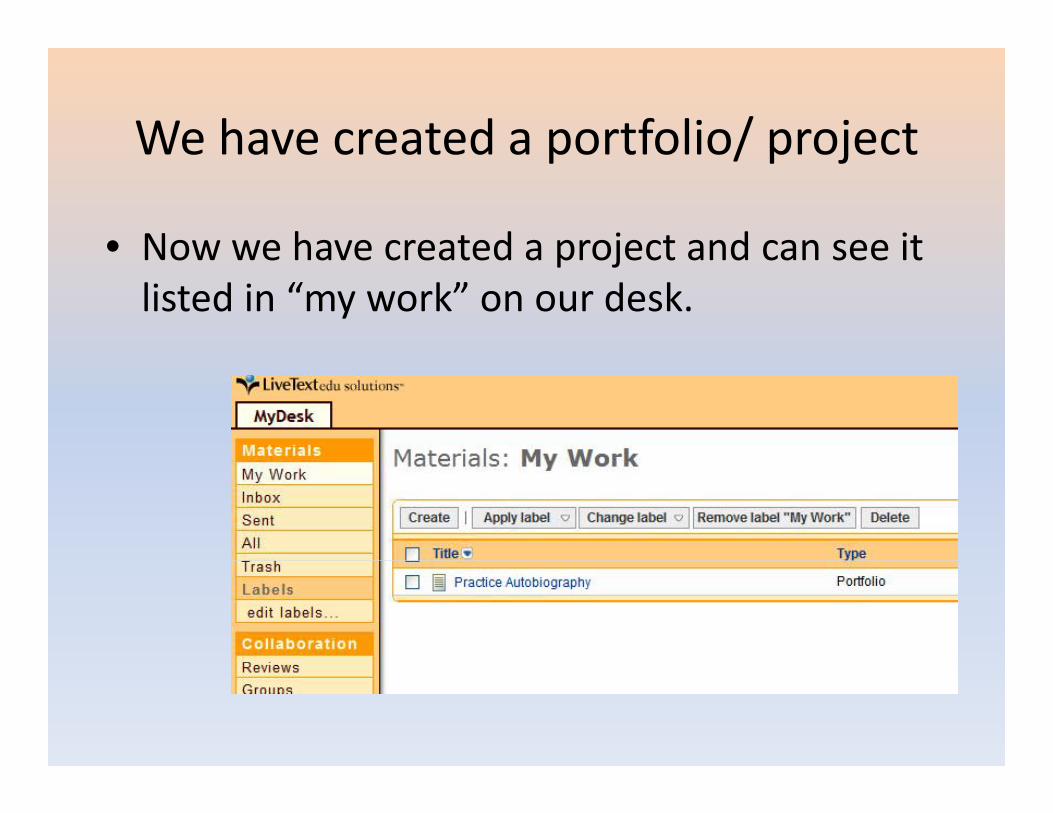
We have created a portfolio/ projectWe have created a portfolio/ project
• Now we have created a project and can see itNow we have created a project and can see it listed in “my work” on our desk.