JIRA Integration with Bomgar Remote Support · JIRA Integration with Bomgar Remote Support Author:...
15
JIRA Integration Guide © 2018 Bomgar Corporation. All rights reserved worldwide. BOMGAR and the BOMGAR logo are trademarks of Bomgar Corporation; other trademarks shown are the property of their respective owners. TC:5/11/2018
Transcript of JIRA Integration with Bomgar Remote Support · JIRA Integration with Bomgar Remote Support Author:...
JIRA Integration Guide
© 2018 Bomgar Corporation. All rights reserved worldwide. BOMGAR and the BOMGAR logo are trademarks of Bomgar Corporation; other trademarks shown are the property of their respective owners. TC:5/11/2018
JIRA INTEGRATION GUIDE
Table of Contents
Bomgar Remote Support Integration with JIRA Service Desk 3
Prerequisites 4
Applicable Versions 4
Configure JIRA Service Desk for Integration with Bomgar Remote Support 5
Configure Bomgar Remote Support for Integration with JIRA Service Desk 7
Verify the API is Enabled 7
Create an API Service Account - Bomgar 16.1 and Earlier 7
Create an API Service Account - Bomgar 16.2 and Later 8
Add an Outbound Event URL 8
Create a Custom Link 9
Configure the JIRA Service Desk Plugin for Integration with Bomgar Remote Support 10
Bomgar Appliance 10
JIRA Service Desk Server Instance 11
Report Templates 12
JIRA Service Desk and Bomgar Remote Support Use Cases 13
Generate Session Key 13
Import Bomgar Session Date into an Issue 13
Jump to Configuration Item 13
User-Initiated Session on Existing Issue in Customer Portal 14
Access an Issue from the Representative Console 14
Auto-Issue Creation 15
CONTACT BOMGAR [email protected] | 866.205.3650 (US) | +44 (0) 1628 480 210 (UK/EMEA) BOMGAR.COM 2© 2018 Bomgar Corporation. All rights reserved worldwide. BOMGAR and the BOMGAR logo are trademarks of Bomgar Corporation; other trademarks shown are the property of their respective owners. TC: 5/11/2018
Bomgar Remote Support Integration with JIRA Service Desk
IMPORTANT!
You must purchase this integration separately from both your Bomgar software and your JIRA Service Desk solution. For moreinformation, contact Bomgar sales.
This document describes the installation and configuration of the Bomgar Remote Support and JIRA Service Desk Serverintegration. The integration consists of two main parts:
l Middleware: This receives event notifications from the Bomgar Appliance and pushes data into JIRA Service Desk.l Service Desk add-on: This modifies the JIRA Service Desk user interface with Bomgar components.
The JIRA Service Desk integration with Bomgar Remote Support provides the following functionality:
l A Bomgar session key can be generated from within a JIRA Service Desk issue.l When the Bomgar session ends, session data is pushed into JIRA Service Desk and can be viewed from within the issue.Also, when the session ends, a work log entry can be created.
l An agent can type a machine name into a field on the screen and Jump to the device using Bomgar Jump technology.l While in a Bomgar session, the representative can edit the external key and can associate the session with a particular JIRAService Desk issue.
l Customers can request help on an existing issue via the JIRA Service Desk Customer Portal.l Customers can request help outside of an existing issue via the JIRA Service Desk Customer Portal. When the sessionstarts, an issue is created automatically in JIRA Service Desk.
l A custom link in the Bomgar representative console can be used to open an issue in JIRA Service Desk.
CONTACT BOMGAR [email protected] | 866.205.3650 (US) | +44 (0) 1628 480 210 (UK/EMEA) BOMGAR.COM 3© 2018 Bomgar Corporation. All rights reserved worldwide. BOMGAR and the BOMGAR logo are trademarks of Bomgar Corporation; other trademarks shown are the property of their respective owners. TC: 5/11/2018
JIRA INTEGRATION GUIDE
PrerequisitesTo complete this integration, please verify that you have the necessary software installed and configured as indicated in this guide,accounting for any network considerations.
Applicable Versions
l Bomgar Remote Support: 15.x and laterl JIRA Service Desk Server: 3.2 and later
Network Considerations
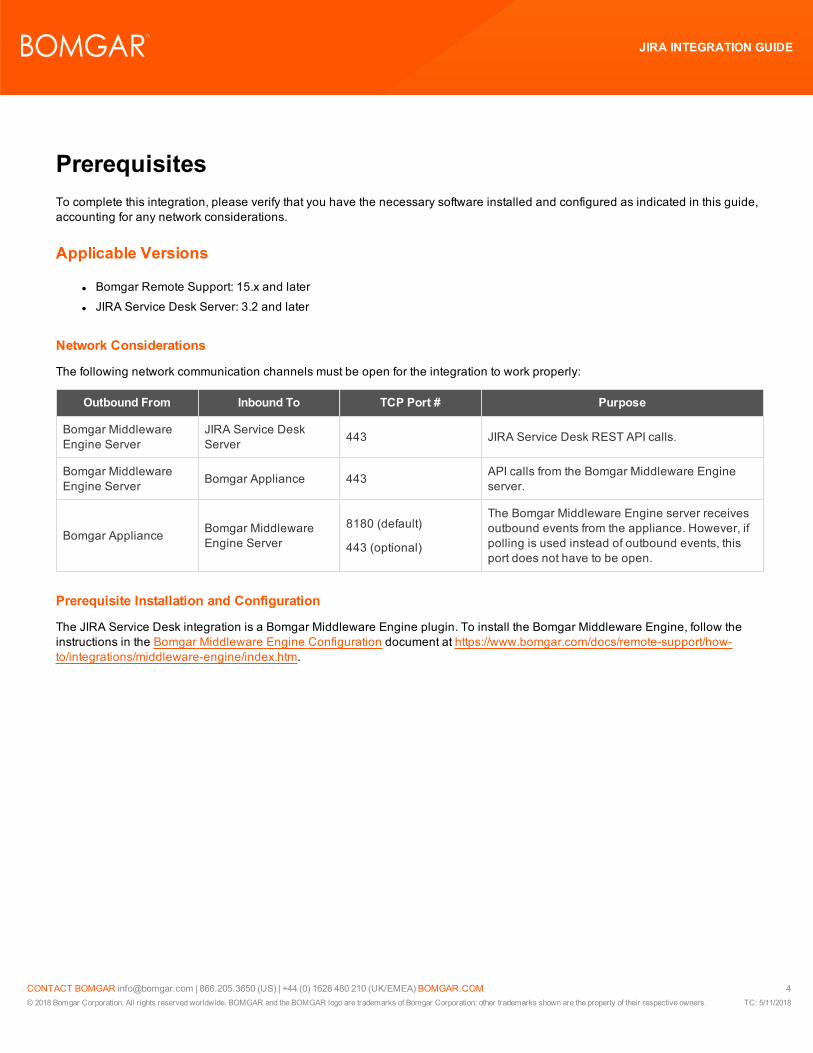
The following network communication channels must be open for the integration to work properly:
Outbound From Inbound To TCP Port # Purpose
Bomgar MiddlewareEngine Server
JIRA Service DeskServer 443 JIRA Service Desk REST API calls.
Bomgar MiddlewareEngine Server Bomgar Appliance 443 API calls from the Bomgar Middleware Engine
server.
Bomgar Appliance Bomgar MiddlewareEngine Server
8180 (default)
443 (optional)
The Bomgar Middleware Engine server receivesoutbound events from the appliance. However, ifpolling is used instead of outbound events, thisport does not have to be open.
Prerequisite Installation and Configuration
The JIRA Service Desk integration is a Bomgar Middleware Engine plugin. To install the Bomgar Middleware Engine, follow theinstructions in the Bomgar Middleware Engine Configuration document at https://www.bomgar.com/docs/remote-support/how-to/integrations/middleware-engine/index.htm.
CONTACT BOMGAR [email protected] | 866.205.3650 (US) | +44 (0) 1628 480 210 (UK/EMEA) BOMGAR.COM 4© 2018 Bomgar Corporation. All rights reserved worldwide. BOMGAR and the BOMGAR logo are trademarks of Bomgar Corporation; other trademarks shown are the property of their respective owners. TC: 5/11/2018
JIRA INTEGRATION GUIDE
Configure JIRA Service Desk for Integration with BomgarRemote SupportConfiguration of JIRA Service Desk for the integration with Bomgar Remote Support consists of installing the add-on and using theadd-on's configuration screen to customize the behavior.
To install the add-on:
1. Log into JIRA Service Desk as an administrator.2. Under the JIRA Administrationmenu, choose Add-ons.3. Click Manage add-ons.4. Click Upload add-on.5. Browse to and select the provided add-on .jar file.
To configure the add-on:
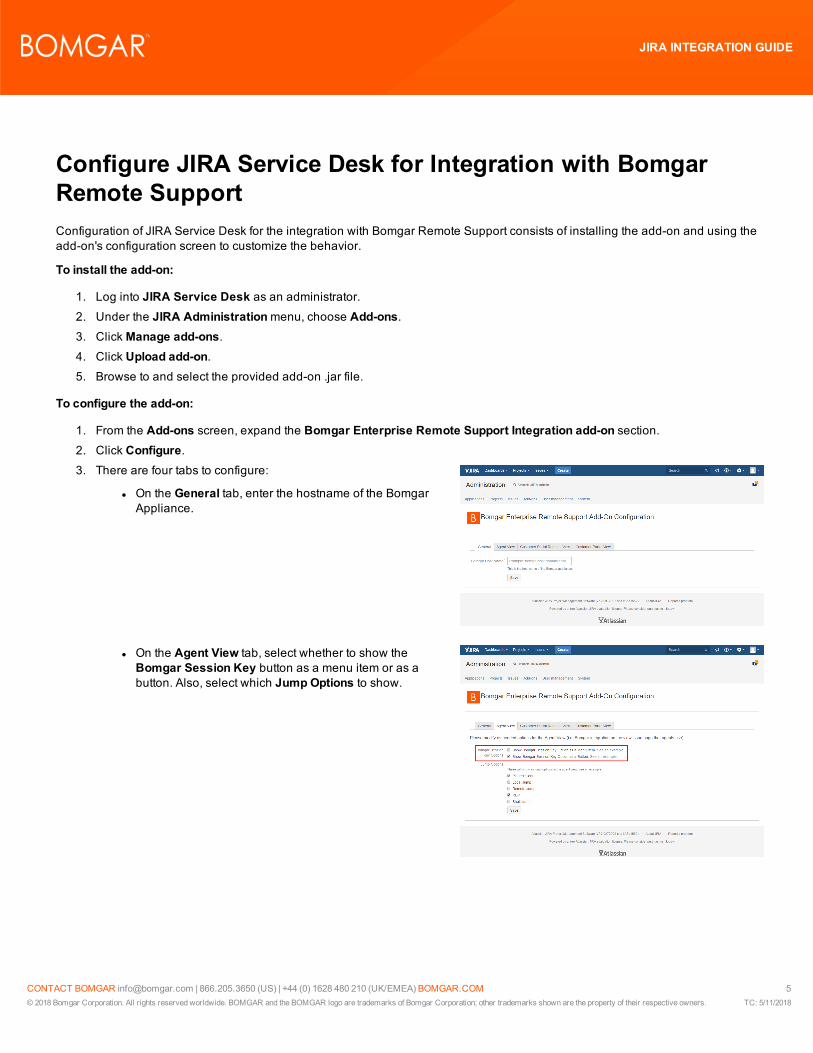
1. From the Add-ons screen, expand the Bomgar Enterprise Remote Support Integration add-on section.2. Click Configure.3. There are four tabs to configure:
l On the General tab, enter the hostname of the BomgarAppliance.
l On the Agent View tab, select whether to show theBomgar Session Key button as a menu item or as abutton. Also, select which Jump Options to show.
CONTACT BOMGAR [email protected] | 866.205.3650 (US) | +44 (0) 1628 480 210 (UK/EMEA) BOMGAR.COM 5© 2018 Bomgar Corporation. All rights reserved worldwide. BOMGAR and the BOMGAR logo are trademarks of Bomgar Corporation; other trademarks shown are the property of their respective owners. TC: 5/11/2018
JIRA INTEGRATION GUIDE
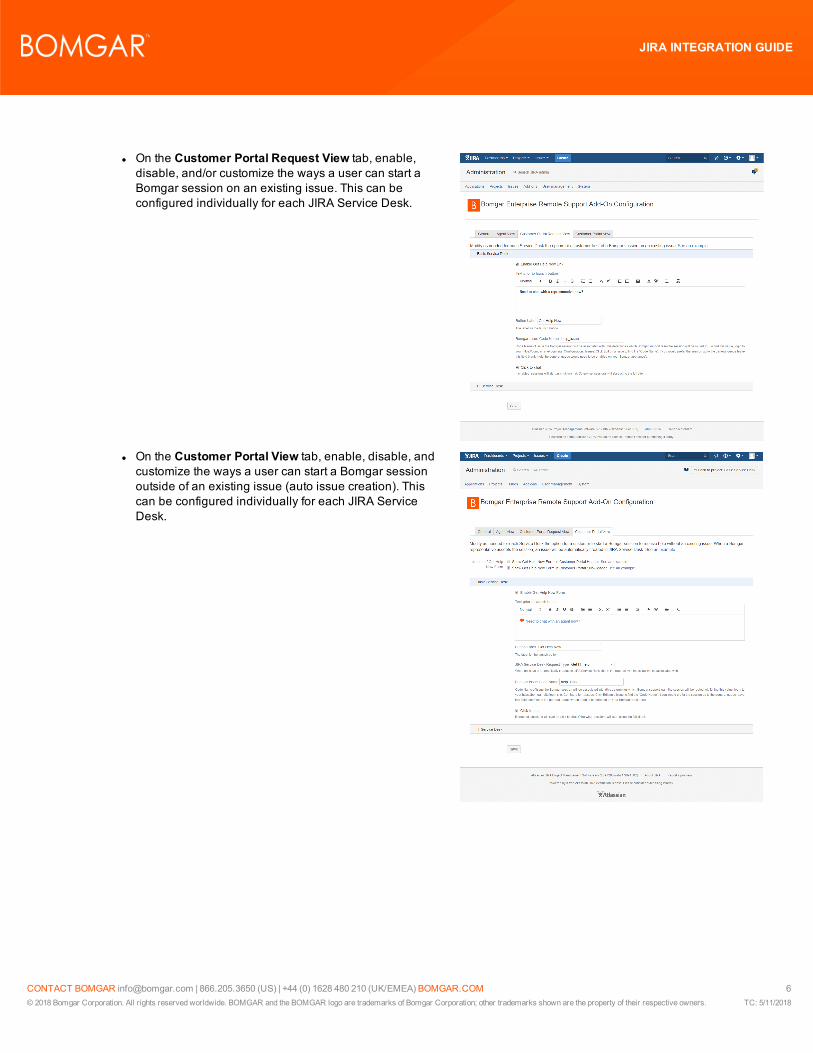
l On the Customer Portal Request View tab, enable,disable, and/or customize the ways a user can start aBomgar session on an existing issue. This can beconfigured individually for each JIRA Service Desk.
l On the Customer Portal View tab, enable, disable, andcustomize the ways a user can start a Bomgar sessionoutside of an existing issue (auto issue creation). Thiscan be configured individually for each JIRA ServiceDesk.
CONTACT BOMGAR [email protected] | 866.205.3650 (US) | +44 (0) 1628 480 210 (UK/EMEA) BOMGAR.COM 6© 2018 Bomgar Corporation. All rights reserved worldwide. BOMGAR and the BOMGAR logo are trademarks of Bomgar Corporation; other trademarks shown are the property of their respective owners. TC: 5/11/2018
JIRA INTEGRATION GUIDE
Configure Bomgar Remote Support for Integration with JIRAService DeskSeveral configuration changes are necessary on the Bomgar Appliance.
All of the steps in this section take place in the Bomgar /login administrative interface. Access your Bomgar interface by going to thehostname of your Bomgar Appliance followed by /login (e.g., https://support.example.com/login).
Verify the API is Enabled
The Bomgar Integration requires the Bomgar XML API to be enabled. This feature is used from within the integrating software tocommunicate with the Bomgar APIs.
Go to /login > Management > API Configuration and verify that Enable XML API is checked.
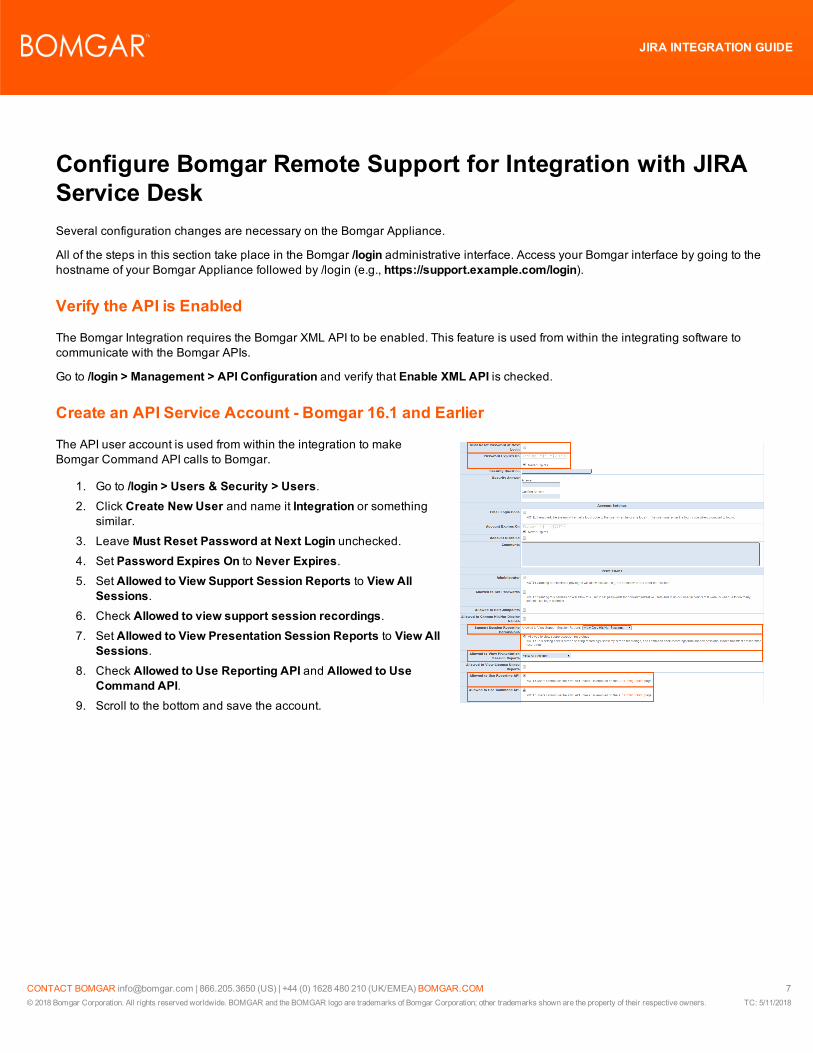
Create an API Service Account - Bomgar 16.1 and Earlier
The API user account is used from within the integration to makeBomgar Command API calls to Bomgar.
1. Go to /login > Users & Security > Users.2. Click Create New User and name it Integration or something
similar.3. Leave Must Reset Password at Next Login unchecked.4. Set Password Expires On to Never Expires.5. Set Allowed to View Support Session Reports to View All
Sessions.6. Check Allowed to view support session recordings.7. Set Allowed to View Presentation Session Reports to View All
Sessions.8. Check Allowed to Use Reporting API and Allowed to Use
Command API.9. Scroll to the bottom and save the account.
CONTACT BOMGAR [email protected] | 866.205.3650 (US) | +44 (0) 1628 480 210 (UK/EMEA) BOMGAR.COM 7© 2018 Bomgar Corporation. All rights reserved worldwide. BOMGAR and the BOMGAR logo are trademarks of Bomgar Corporation; other trademarks shown are the property of their respective owners. TC: 5/11/2018
JIRA INTEGRATION GUIDE
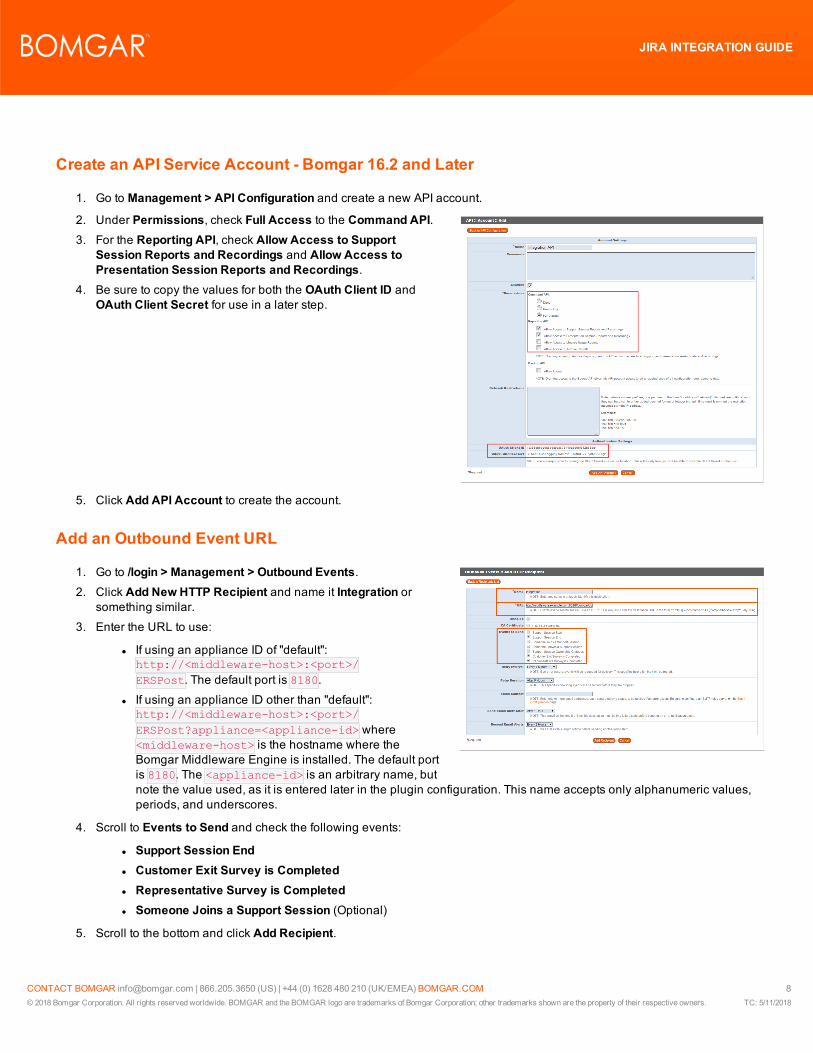
Create an API Service Account - Bomgar 16.2 and Later
1. Go to Management > API Configuration and create a new API account.
2. Under Permissions, check Full Access to the Command API.3. For the Reporting API, check Allow Access to Support
Session Reports and Recordings and Allow Access toPresentation Session Reports and Recordings.
4. Be sure to copy the values for both the OAuth Client ID andOAuth Client Secret for use in a later step.
5. Click Add API Account to create the account.
Add an Outbound Event URL
1. Go to /login > Management > Outbound Events.2. Click Add New HTTP Recipient and name it Integration or
something similar.3. Enter the URL to use:
l If using an appliance ID of "default":http://<middleware-host>:<port>/ERSPost. The default port is 8180.
l If using an appliance ID other than "default":http://<middleware-host>:<port>/ERSPost?appliance=<appliance-id> where<middleware-host> is the hostname where theBomgar Middleware Engine is installed. The default portis 8180. The <appliance-id> is an arbitrary name, butnote the value used, as it is entered later in the plugin configuration. This name accepts only alphanumeric values,periods, and underscores.
4. Scroll to Events to Send and check the following events:
l Support Session Endl Customer Exit Survey is Completedl Representative Survey is Completedl Someone Joins a Support Session (Optional)
5. Scroll to the bottom and click Add Recipient.
CONTACT BOMGAR [email protected] | 866.205.3650 (US) | +44 (0) 1628 480 210 (UK/EMEA) BOMGAR.COM 8© 2018 Bomgar Corporation. All rights reserved worldwide. BOMGAR and the BOMGAR logo are trademarks of Bomgar Corporation; other trademarks shown are the property of their respective owners. TC: 5/11/2018
JIRA INTEGRATION GUIDE
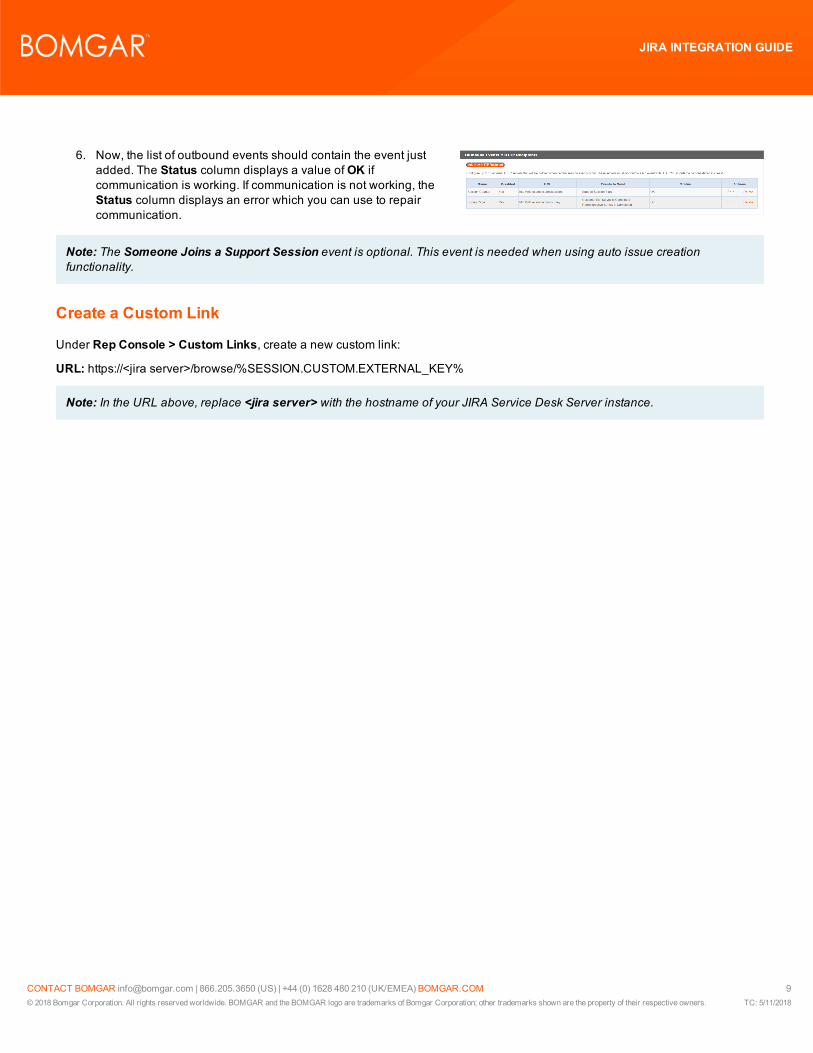
6. Now, the list of outbound events should contain the event justadded. The Status column displays a value ofOK ifcommunication is working. If communication is not working, theStatus column displays an error which you can use to repaircommunication.
Note: The Someone Joins a Support Session event is optional. This event is needed when using auto issue creationfunctionality.
Create a Custom Link
Under Rep Console > Custom Links, create a new custom link:
URL: https://<jira server>/browse/%SESSION.CUSTOM.EXTERNAL_KEY%
Note: In the URL above, replace <jira server> with the hostname of your JIRA Service Desk Server instance.
CONTACT BOMGAR [email protected] | 866.205.3650 (US) | +44 (0) 1628 480 210 (UK/EMEA) BOMGAR.COM 9© 2018 Bomgar Corporation. All rights reserved worldwide. BOMGAR and the BOMGAR logo are trademarks of Bomgar Corporation; other trademarks shown are the property of their respective owners. TC: 5/11/2018
JIRA INTEGRATION GUIDE
Configure the JIRA Service Desk Plugin for Integration withBomgar Remote SupportNow that you have configured JIRA Service Desk and the Bomgar Appliance, deploy and configure the JIRA Service Desk plugin.For additional information about working with the Bomgar Middleware Engine, please see the Bomgar Middleware EngineConfiguration document.
1. Copy the provided plugin zip file to the server hosting the Bomgar Middleware Engine.2. Unzip the plugin zip file to the Plugins folder in the directory where the Bomgar Middleware Engine is installed.3. Restart the Bomgar Middleware Engine Windows service.4. From the server, launch the middleware administration tool. The default URL is http://127.0.0.1:53231.5. The JIRA Service Desk Plugin shows in the list of plugins. Click the clipboard icon to add a new configuration.
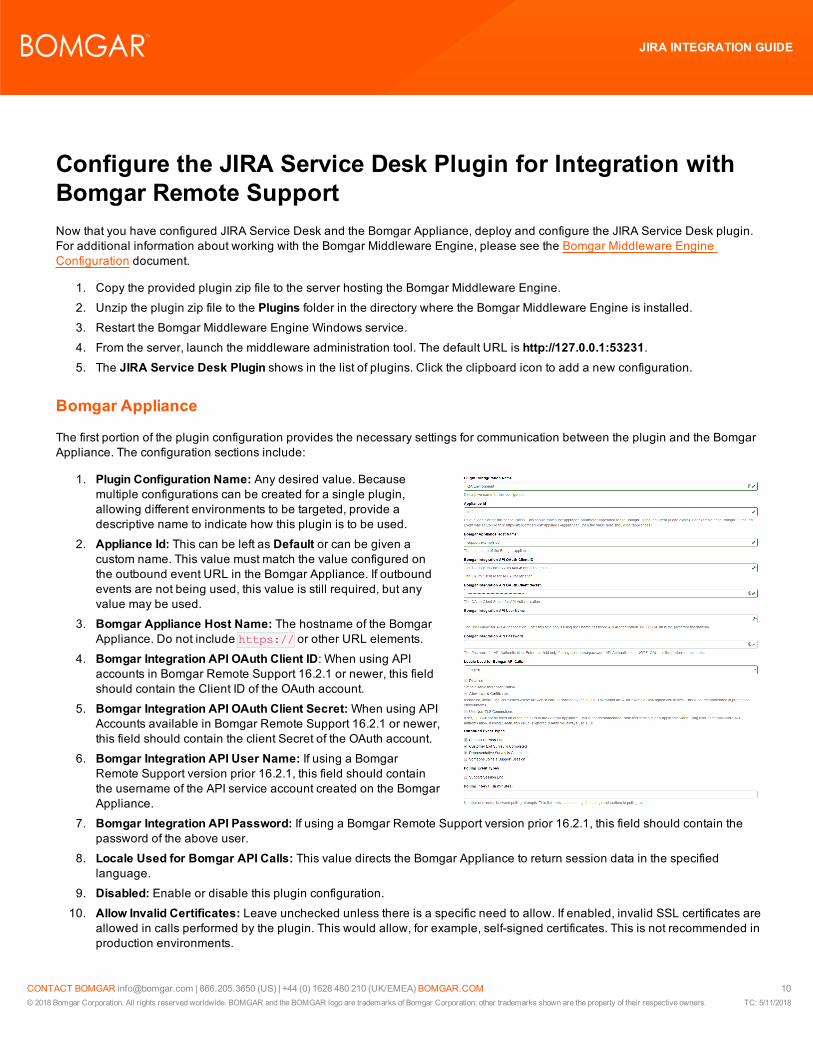
Bomgar Appliance
The first portion of the plugin configuration provides the necessary settings for communication between the plugin and the BomgarAppliance. The configuration sections include:
1. Plugin Configuration Name: Any desired value. Becausemultiple configurations can be created for a single plugin,allowing different environments to be targeted, provide adescriptive name to indicate how this plugin is to be used.
2. Appliance Id: This can be left as Default or can be given acustom name. This value must match the value configured onthe outbound event URL in the Bomgar Appliance. If outboundevents are not being used, this value is still required, but anyvalue may be used.
3. Bomgar Appliance Host Name: The hostname of the BomgarAppliance. Do not include https:// or other URL elements.
4. Bomgar Integration API OAuth Client ID: When using APIaccounts in Bomgar Remote Support 16.2.1 or newer, this fieldshould contain the Client ID of the OAuth account.
5. Bomgar Integration API OAuth Client Secret:When using APIAccounts available in Bomgar Remote Support 16.2.1 or newer,this field should contain the client Secret of the OAuth account.
6. Bomgar Integration API User Name: If using a BomgarRemote Support version prior 16.2.1, this field should containthe username of the API service account created on the BomgarAppliance.
7. Bomgar Integration API Password: If using a Bomgar Remote Support version prior 16.2.1, this field should contain thepassword of the above user.
8. Locale Used for Bomgar API Calls: This value directs the Bomgar Appliance to return session data in the specifiedlanguage.
9. Disabled: Enable or disable this plugin configuration.10. Allow Invalid Certificates: Leave unchecked unless there is a specific need to allow. If enabled, invalid SSL certificates are
allowed in calls performed by the plugin. This would allow, for example, self-signed certificates. This is not recommended inproduction environments.
CONTACT BOMGAR [email protected] | 866.205.3650 (US) | +44 (0) 1628 480 210 (UK/EMEA) BOMGAR.COM 10© 2018 Bomgar Corporation. All rights reserved worldwide. BOMGAR and the BOMGAR logo are trademarks of Bomgar Corporation; other trademarks shown are the property of their respective owners. TC: 5/11/2018
JIRA INTEGRATION GUIDE
11. Use Non-TLS Connections: Leave unchecked unless it is the specific goal to use non-secure connections to the BomgarAppliance. If checked, TLS communication is disabled altogether. If non-TLS connections are allowed, HTTP access mustbe enabled on the Bomgar /login > Management > API Configuration page. Using non-secure connections is discouraged.
Note: When using OAuth authentication, TLS cannot be disabled.
12. Outbound Events Types: Specify which events the plugin processes when received by the middleware engine. Keep inmind that any event types selected here must also be configured to be sent in Bomgar. The middleware engine receives anyevents configured to be sent in Bomgar but passes them off to the plugin only if the corresponding event type is selected inthis section.
a. Support Session Endb. Customer Exit Survey is Completedc. Representative Survey is Completed
13. Polling Event Types: If network constraints limit connectivity between the Bomgar Appliance and the middleware enginesuch that outbound events cannot be used, an alternative is to use polling. The middleware engine regularly polls theBomgar Appliance for any sessions that have ended since the last session was processed. At this time, only the SupportSession End event type is supported.
Note: One caveat to polling behavior versus the use of outbound events is that if a session has ended but the customerexit survey has not yet been submitted within the same polling interval, the customer exit survey is not processed. Thisdoes not apply to representative surveys since the session is not considered to be complete if a representative survey isstill pending.
14. Polling Interval: Enter only if polling is used. This determines how often the middleware engine polls the Bomgar Appliancefor sessions that have ended.
15. Retry Attempt Limit: Enter the number of retries that can be attempted if the plugin fails to process an event.16. Retry Outbound Event Types: Specify which outbound events the plugin retries if it fails to process the event.17. Retry Polling Event Types: Specify which polling events the plugin retries if it fails to process the event.
Note: If using polling, this integration is not able to push customer exit survey data into Service Desk.
JIRA Service Desk Server Instance
The remainder of the plugin configuration provides the necessary settings for communication between the plugin and the JIRAService Desk instance. The configuration settings include:
l JIRA Service Desk URL: The services URL for the JIRA Service Desk instance (e.g., https://myjiraserver.domain.net/(include the trailing) "/"). If the JIRA Service Desk instance has a context path, please include it (e.g.,https://myjiraserver.domain.net/jira/ ).
l JIRA Service Desk Username - User that can connect to JIRA Service Desk. This user needs to be an administrator of theservice desk(s).
l JIRA Service Desk Password - Password for above user.l Update Work Log - If enabled, a work log entry is created at the end of the support session in the associated JIRA ServiceDesk issue.
CONTACT BOMGAR [email protected] | 866.205.3650 (US) | +44 (0) 1628 480 210 (UK/EMEA) BOMGAR.COM 11© 2018 Bomgar Corporation. All rights reserved worldwide. BOMGAR and the BOMGAR logo are trademarks of Bomgar Corporation; other trademarks shown are the property of their respective owners. TC: 5/11/2018
JIRA INTEGRATION GUIDE
l Bomgar rep field used to map to JIRA Service Desk user - This is used for auto issue creation. The integration takes thisvalue and attempts to find a corresponding JIRA Service Desk user. This value must match a JIRA username, display name,or email address.
l Assign Issue to Rep on Issue Creation - If enabled, when an issue is auto-created, it is assigned to the representativeworking the session.
Report Templates
On the Bomgar Middleware Engine server, in the <install dir>\Plugins\<integration>\Templates folder, there are multiple filesending with *.hbs. The templates can be edited to suit the needs of each client. Please note that the JIRA Service Desk integrationonly uses theWorkLog.hbs file from the distribution.
Note: If changes need to be made to a template, it is a good idea to first back up the original in case the changes ever need tobe reverted.
For additional information on Handlebars templates, see handlebarsjs.com.
CONTACT BOMGAR [email protected] | 866.205.3650 (US) | +44 (0) 1628 480 210 (UK/EMEA) BOMGAR.COM 12© 2018 Bomgar Corporation. All rights reserved worldwide. BOMGAR and the BOMGAR logo are trademarks of Bomgar Corporation; other trademarks shown are the property of their respective owners. TC: 5/11/2018
JIRA INTEGRATION GUIDE
JIRA Service Desk and Bomgar Remote Support Use Cases
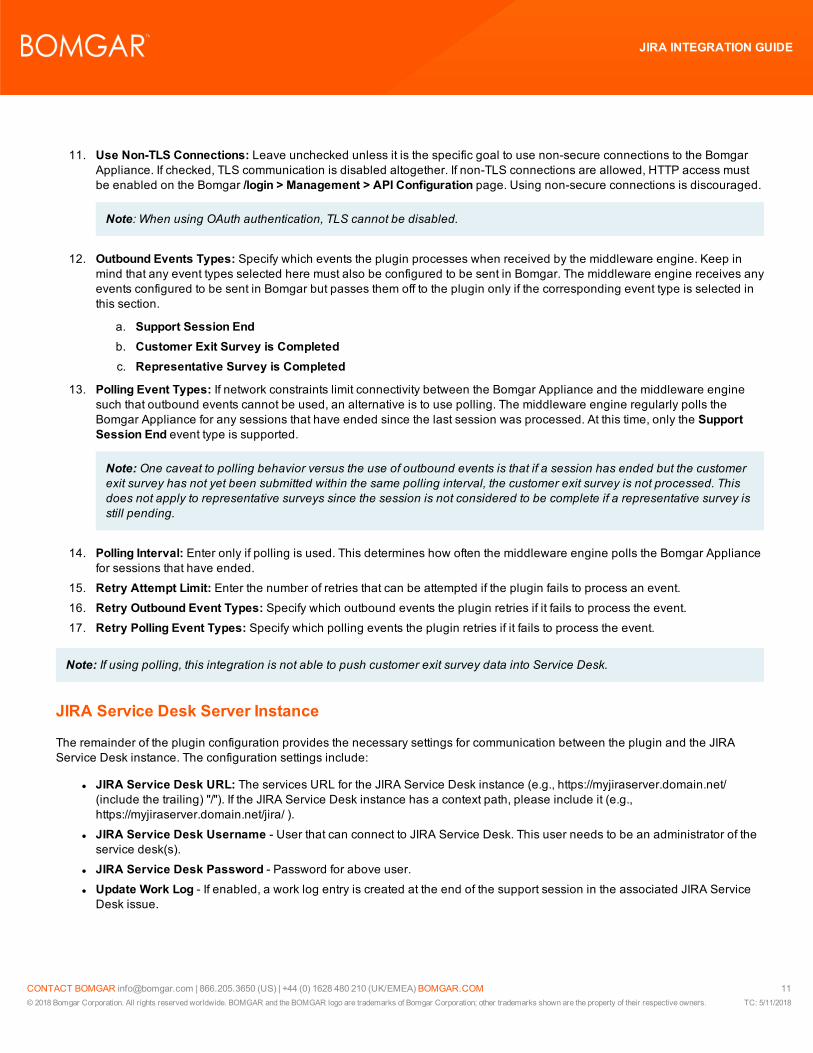
Generate Session Key
Support staff can generate a session key that can be given to the enduser over the phone or via email to initiate a support session that isautomatically associated with the selected issue.
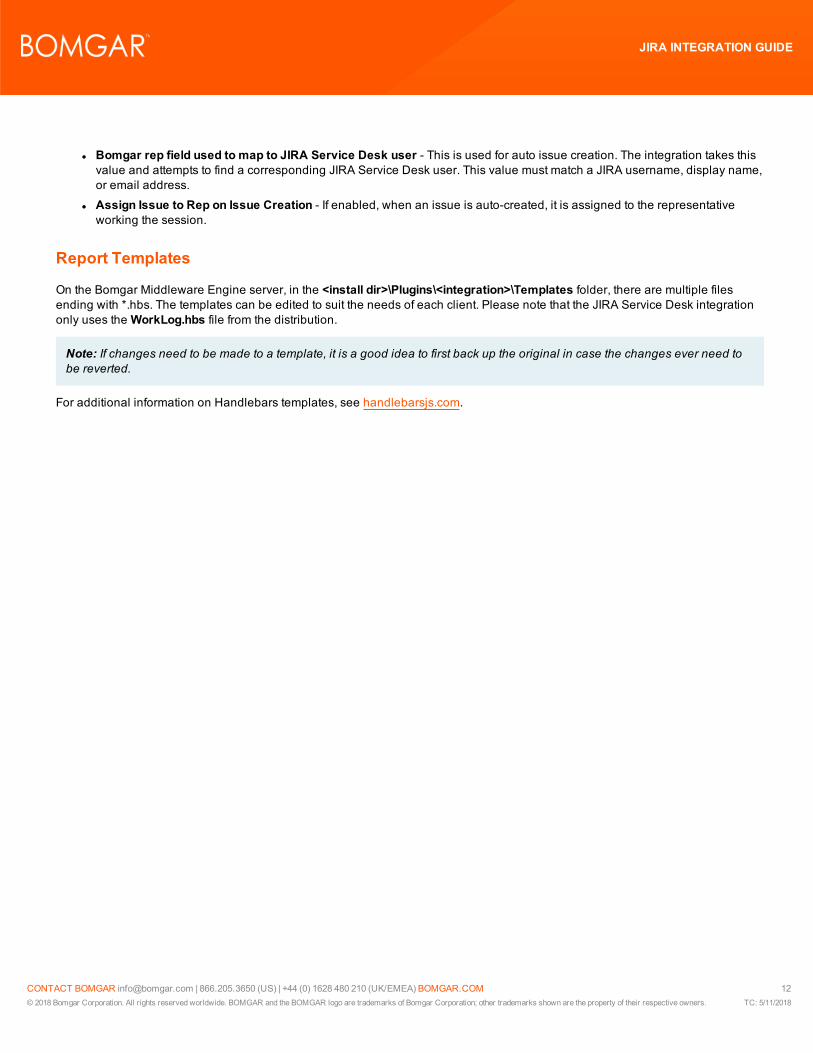
Import Bomgar Session Date into an Issue
On the support session ends, the issue is automatically updated withinformation gathered during the session.
l Summaryl Customerl Rep(s)l Chatl File Transfersl Session Notesl Recording Linksl Exit Surveys (Customer and Rep)
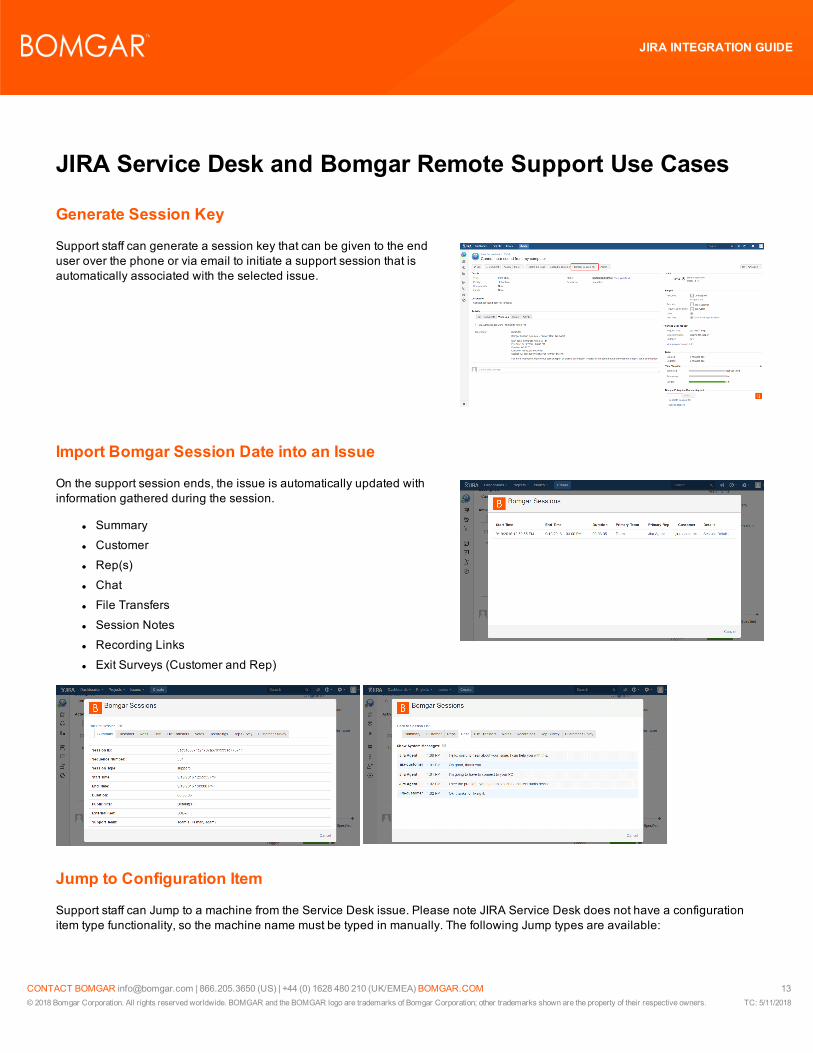
Jump to Configuration Item
Support staff can Jump to a machine from the Service Desk issue. Please note JIRA Service Desk does not have a configurationitem type functionality, so the machine name must be typed in manually. The following Jump types are available:
CONTACT BOMGAR [email protected] | 866.205.3650 (US) | +44 (0) 1628 480 210 (UK/EMEA) BOMGAR.COM 13© 2018 Bomgar Corporation. All rights reserved worldwide. BOMGAR and the BOMGAR logo are trademarks of Bomgar Corporation; other trademarks shown are the property of their respective owners. TC: 5/11/2018
JIRA INTEGRATION GUIDE
l Pinned Jump Clientl Local Jumpl Remote Jumpl RDPl Shell Jump
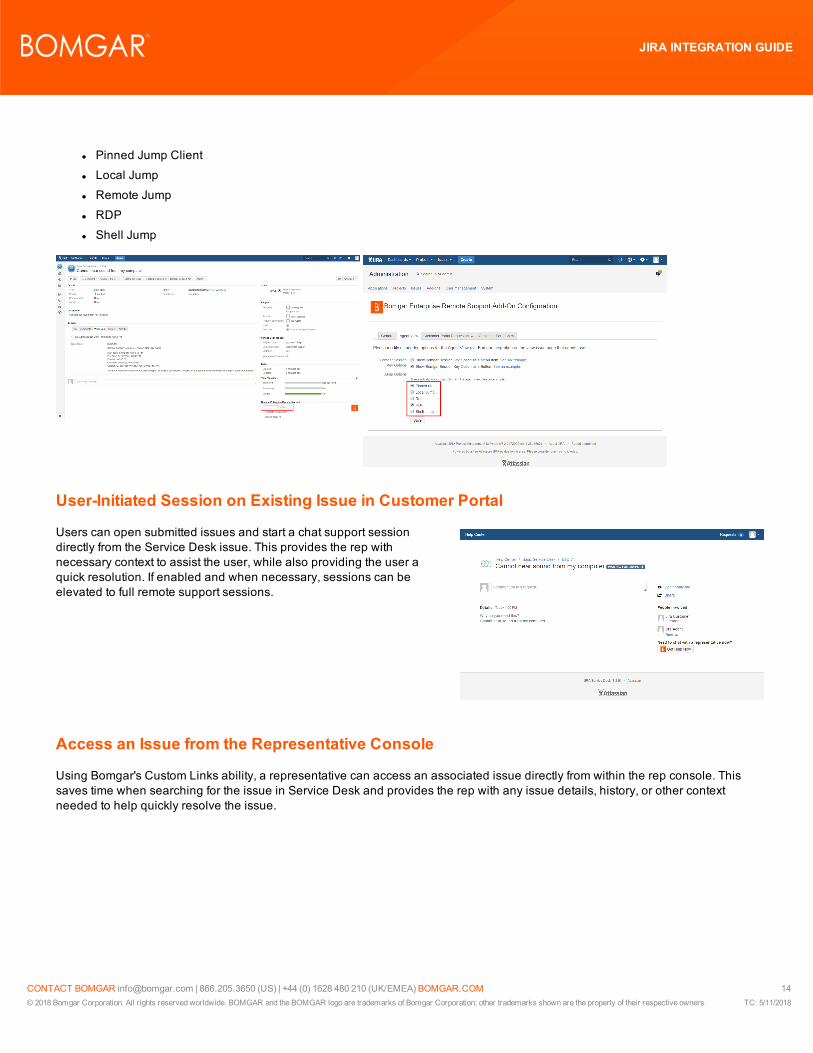
User-Initiated Session on Existing Issue in Customer Portal
Users can open submitted issues and start a chat support sessiondirectly from the Service Desk issue. This provides the rep withnecessary context to assist the user, while also providing the user aquick resolution. If enabled and when necessary, sessions can beelevated to full remote support sessions.
Access an Issue from the Representative Console
Using Bomgar's Custom Links ability, a representative can access an associated issue directly from within the rep console. Thissaves time when searching for the issue in Service Desk and provides the rep with any issue details, history, or other contextneeded to help quickly resolve the issue.
CONTACT BOMGAR [email protected] | 866.205.3650 (US) | +44 (0) 1628 480 210 (UK/EMEA) BOMGAR.COM 14© 2018 Bomgar Corporation. All rights reserved worldwide. BOMGAR and the BOMGAR logo are trademarks of Bomgar Corporation; other trademarks shown are the property of their respective owners. TC: 5/11/2018
JIRA INTEGRATION GUIDE
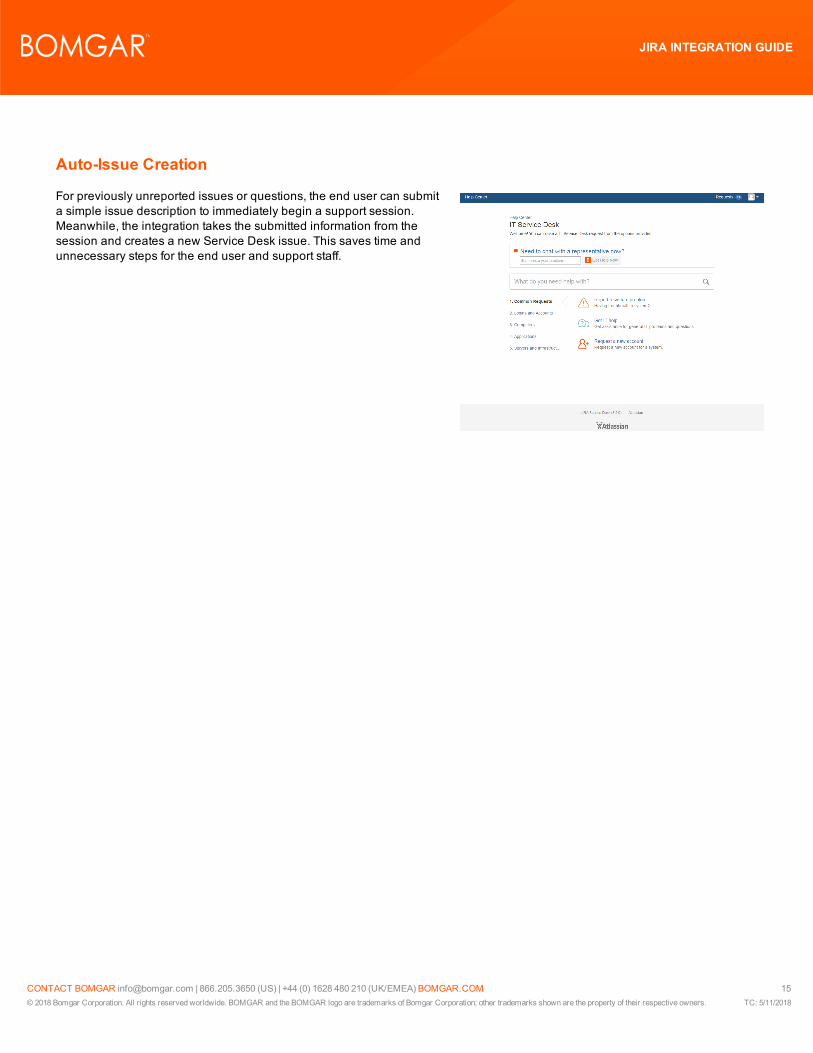
Auto-Issue Creation
For previously unreported issues or questions, the end user can submita simple issue description to immediately begin a support session.Meanwhile, the integration takes the submitted information from thesession and creates a new Service Desk issue. This saves time andunnecessary steps for the end user and support staff.
CONTACT BOMGAR [email protected] | 866.205.3650 (US) | +44 (0) 1628 480 210 (UK/EMEA) BOMGAR.COM 15© 2018 Bomgar Corporation. All rights reserved worldwide. BOMGAR and the BOMGAR logo are trademarks of Bomgar Corporation; other trademarks shown are the property of their respective owners. TC: 5/11/2018
JIRA INTEGRATION GUIDE