Introduction to MS Visual C/C++ - Computer Science · 23/03/10 Introduction to MS Visual C/C++ see...
16
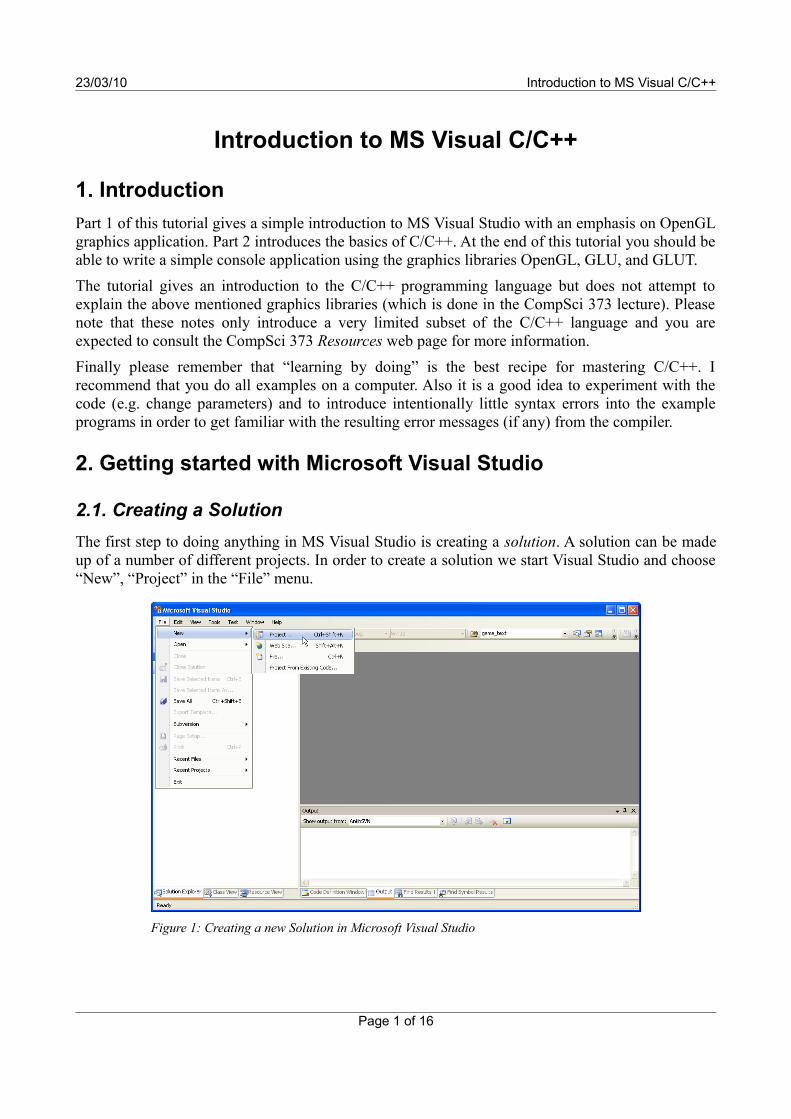
23/03/10 Introduction to MS Visual C/C++ Introduction to MS Visual C/C++ 1. Introduction Part 1 of this tutorial gives a simple introduction to MS Visual Studio with an emphasis on OpenGL graphics application. Part 2 introduces the basics of C/C++. At the end of this tutorial you should be able to write a simple console application using the graphics libraries OpenGL, GLU, and GLUT. The tutorial gives an introduction to the C/C++ programming language but does not attempt to explain the above mentioned graphics libraries (which is done in the CompSci 373 lecture). Please note that these notes only introduce a very limited subset of the C/C++ language and you are expected to consult the CompSci 373 Resources web page for more information. Finally please remember that “learning by doing” is the best recipe for mastering C/C++. I recommend that you do all examples on a computer. Also it is a good idea to experiment with the code (e.g. change parameters) and to introduce intentionally little syntax errors into the example programs in order to get familiar with the resulting error messages (if any) from the compiler. 2. Getting started with Microsoft Visual Studio 2.1. Creating a Solution The first step to doing anything in MS Visual Studio is creating a solution. A solution can be made up of a number of different projects. In order to create a solution we start Visual Studio and choose “New”, “Project” in the “File” menu. Page 1 of 16 Figure 1: Creating a new Solution in Microsoft Visual Studio
Transcript of Introduction to MS Visual C/C++ - Computer Science · 23/03/10 Introduction to MS Visual C/C++ see...
23/03/10 Introduction to MS Visual C/C++
Introduction to MS Visual C/C++
1. IntroductionPart 1 of this tutorial gives a simple introduction to MS Visual Studio with an emphasis on OpenGL graphics application. Part 2 introduces the basics of C/C++. At the end of this tutorial you should be able to write a simple console application using the graphics libraries OpenGL, GLU, and GLUT. The tutorial gives an introduction to the C/C++ programming language but does not attempt to explain the above mentioned graphics libraries (which is done in the CompSci 373 lecture). Please note that these notes only introduce a very limited subset of the C/C++ language and you are expected to consult the CompSci 373 Resources web page for more information.Finally please remember that “learning by doing” is the best recipe for mastering C/C++. I recommend that you do all examples on a computer. Also it is a good idea to experiment with the code (e.g. change parameters) and to introduce intentionally little syntax errors into the example programs in order to get familiar with the resulting error messages (if any) from the compiler.
2. Getting started with Microsoft Visual Studio
2.1. Creating a SolutionThe first step to doing anything in MS Visual Studio is creating a solution. A solution can be made up of a number of different projects. In order to create a solution we start Visual Studio and choose “New”, “Project” in the “File” menu.
Page 1 of 16
Figure 1: Creating a new Solution in Microsoft Visual Studio
23/03/10 Introduction to MS Visual C/C++
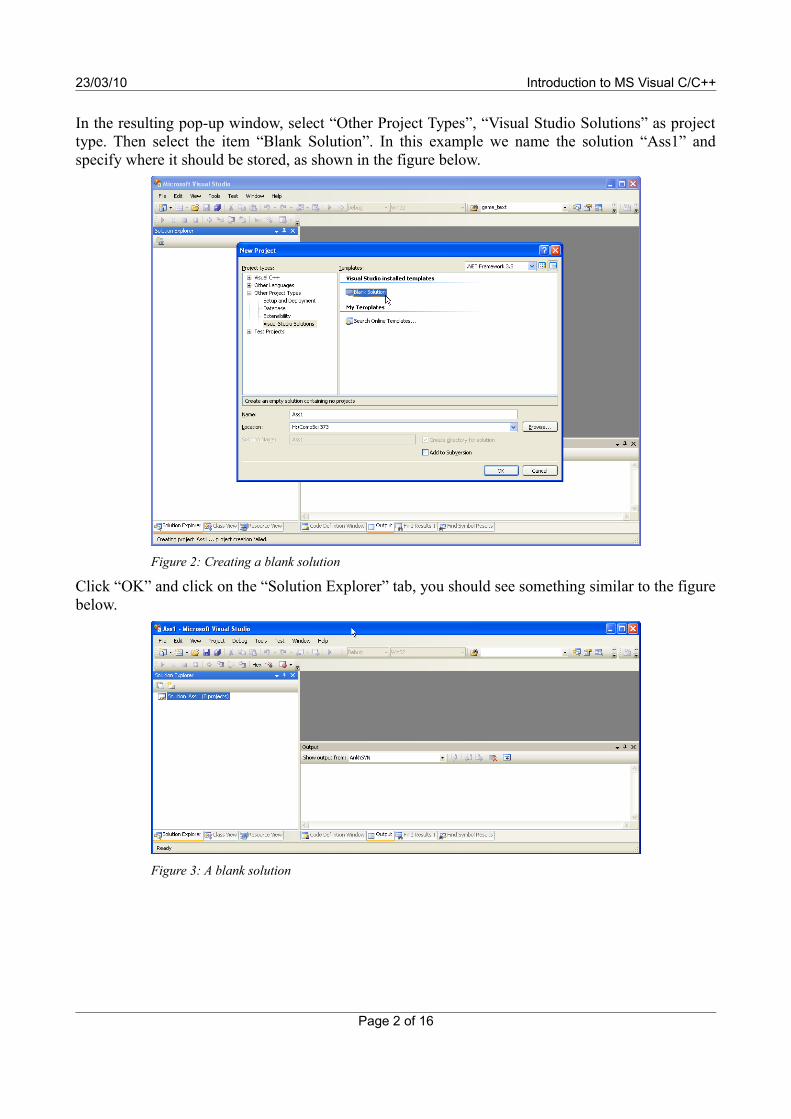
In the resulting pop-up window, select “Other Project Types”, “Visual Studio Solutions” as project type. Then select the item “Blank Solution”. In this example we name the solution “Ass1” and specify where it should be stored, as shown in the figure below.
Click “OK” and click on the “Solution Explorer” tab, you should see something similar to the figure below.
Page 2 of 16
Figure 2: Creating a blank solution
Figure 3: A blank solution
23/03/10 Introduction to MS Visual C/C++
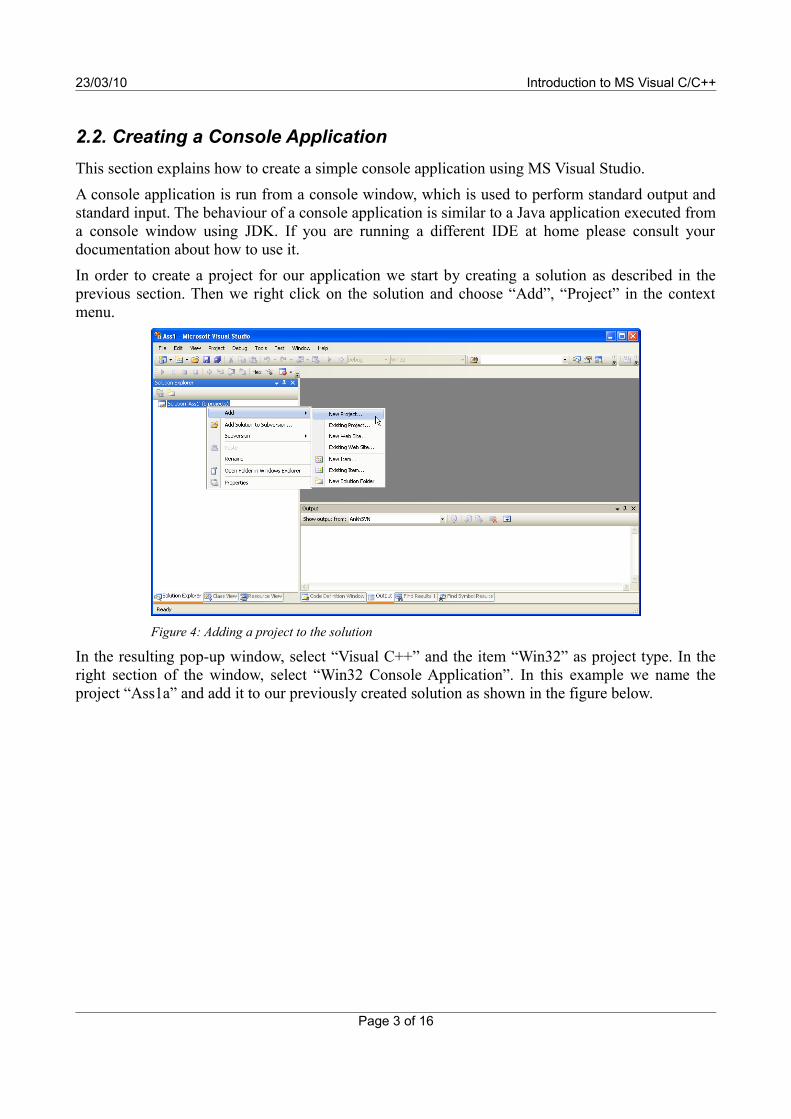
2.2. Creating a Console ApplicationThis section explains how to create a simple console application using MS Visual Studio.A console application is run from a console window, which is used to perform standard output and standard input. The behaviour of a console application is similar to a Java application executed from a console window using JDK. If you are running a different IDE at home please consult your documentation about how to use it.In order to create a project for our application we start by creating a solution as described in the previous section. Then we right click on the solution and choose “Add”, “Project” in the context menu.
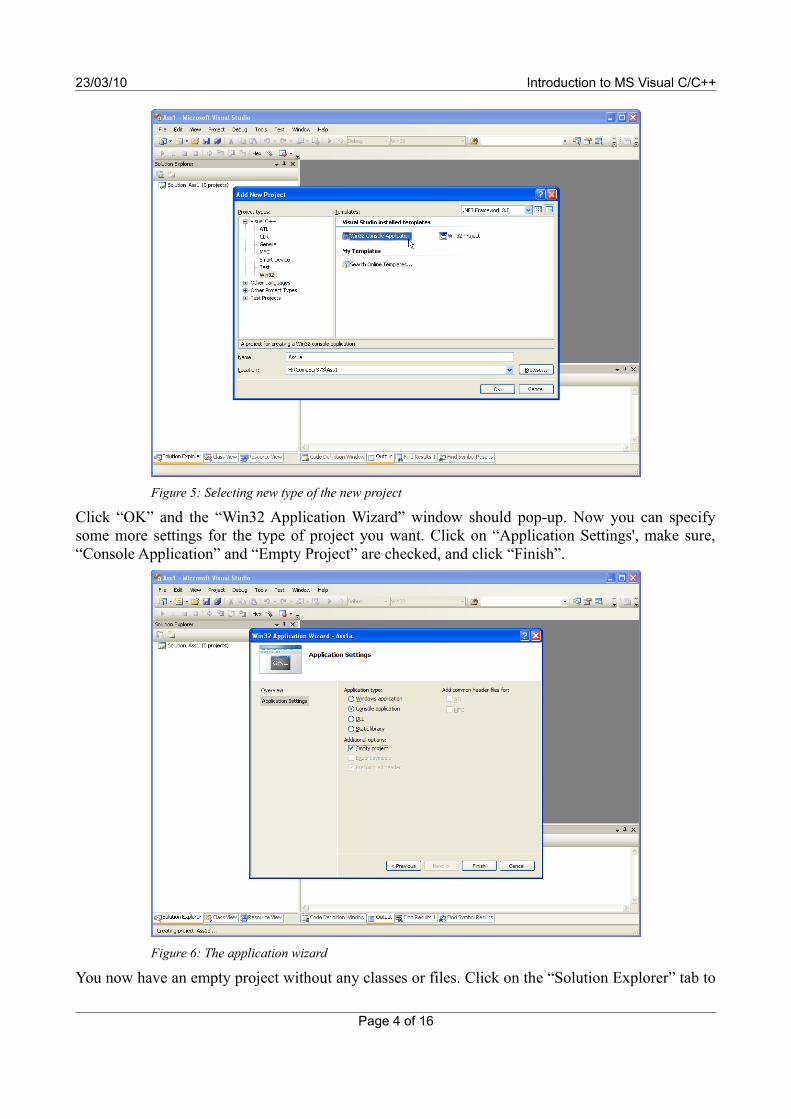
In the resulting pop-up window, select “Visual C++” and the item “Win32” as project type. In the right section of the window, select “Win32 Console Application”. In this example we name the project “Ass1a” and add it to our previously created solution as shown in the figure below.
Page 3 of 16
Figure 4: Adding a project to the solution
23/03/10 Introduction to MS Visual C/C++
Click “OK” and the “Win32 Application Wizard” window should pop-up. Now you can specify some more settings for the type of project you want. Click on “Application Settings', make sure, “Console Application” and “Empty Project” are checked, and click “Finish”.
You now have an empty project without any classes or files. Click on the “Solution Explorer” tab to
Page 4 of 16
Figure 5: Selecting new type of the new project
Figure 6: The application wizard
23/03/10 Introduction to MS Visual C/C++
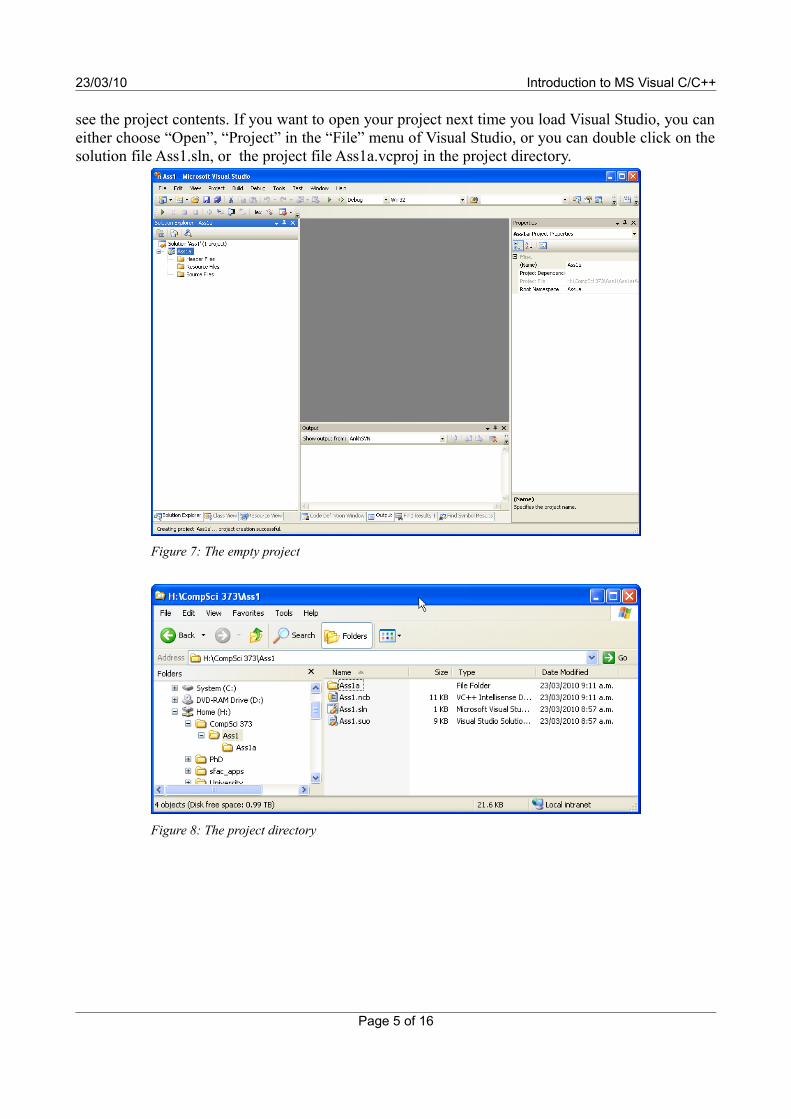
see the project contents. If you want to open your project next time you load Visual Studio, you can either choose “Open”, “Project” in the “File” menu of Visual Studio, or you can double click on the solution file Ass1.sln, or the project file Ass1a.vcproj in the project directory.
Page 5 of 16
Figure 7: The empty project
Figure 8: The project directory

23/03/10 Introduction to MS Visual C/C++
Next, we want to create a file containing the main program. In order to do this, right click on “Ass1a” in the “Solution Explorer” tab, and select “Add”, “Add New Item”.
In the resulting pop-up window click the “Visual C++” folder and select “C++ File”. In the text box titled “Name:” input the name of the file, in this example “ass1a.cpp”, then click “Open”.
Page 6 of 16
Figure 9: Adding a new source file

23/03/10 Introduction to MS Visual C/C++
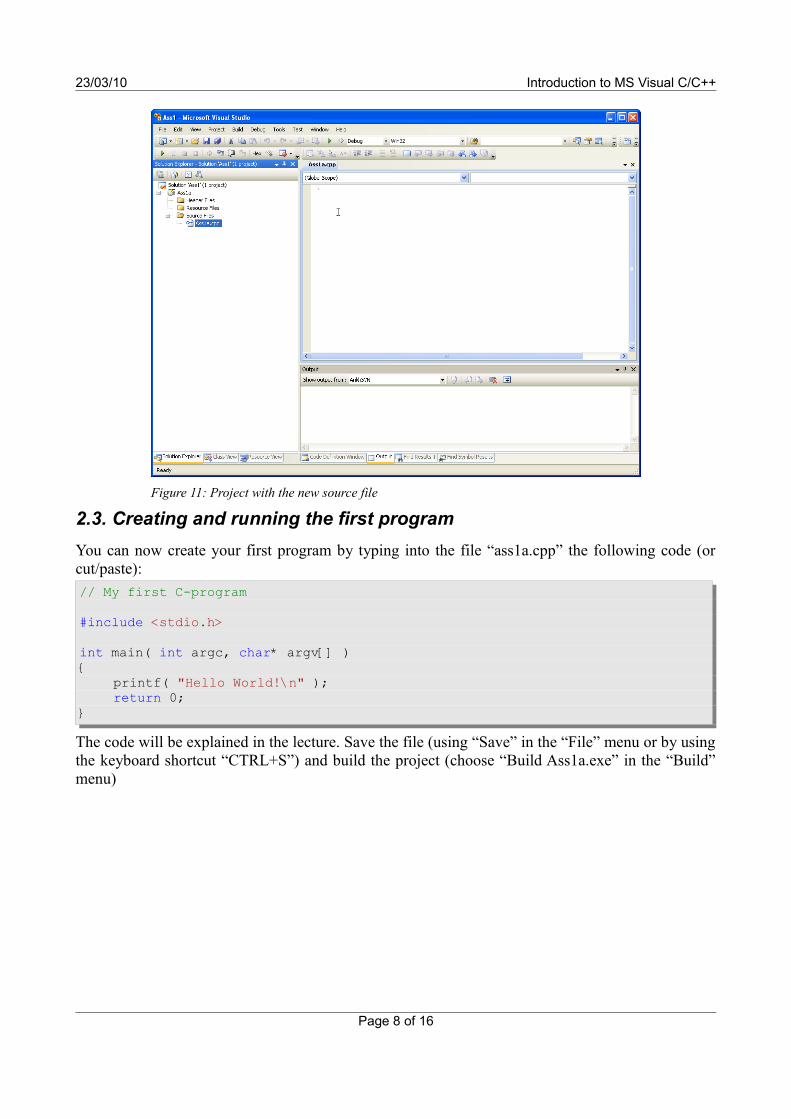
Notice that your project now contains the ass1.cpp file.We now have a project without classes and with one source file. If the source file (ass1a.cpp) is not shown in the main window choose the “Solution Explorer” tab in the left hand frame. Expand first the folder “Ass1a” and then the folder “Source Files” by clicking on the box next to it. If the folder is expanded the plus sign inside the box changes to a minus sign. Open the file “ass1a.cpp” by double clicking on it. Your workspace should now look similar to the figure below.
Page 7 of 16
Figure 10: Creating a new source file
23/03/10 Introduction to MS Visual C/C++
2.3. Creating and running the first programYou can now create your first program by typing into the file “ass1a.cpp” the following code (or cut/paste):// My first C-program
#include <stdio.h>
int main( int argc, char* argv[] ){
printf( "Hello World!\n" );return 0;
}
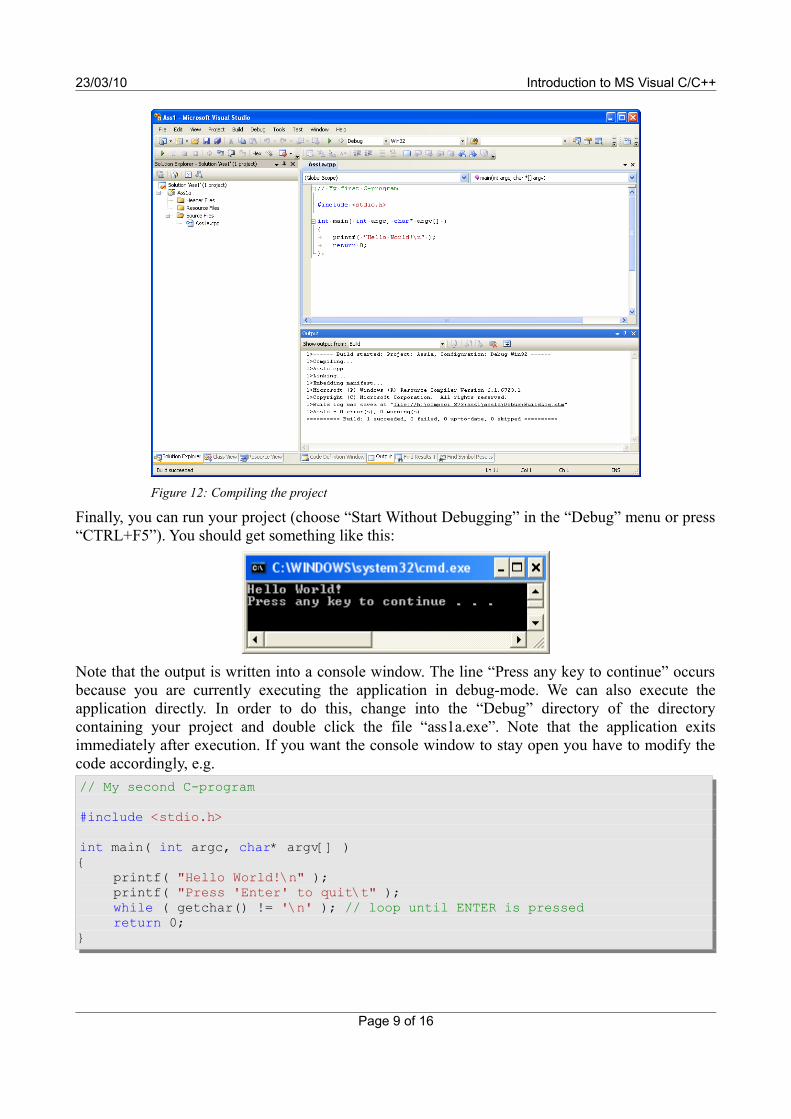
The code will be explained in the lecture. Save the file (using “Save” in the “File” menu or by using the keyboard shortcut “CTRL+S”) and build the project (choose “Build Ass1a.exe” in the “Build” menu)
Page 8 of 16
Figure 11: Project with the new source file
23/03/10 Introduction to MS Visual C/C++
Finally, you can run your project (choose “Start Without Debugging” in the “Debug” menu or press “CTRL+F5”). You should get something like this:
Note that the output is written into a console window. The line “Press any key to continue” occurs because you are currently executing the application in debug-mode. We can also execute the application directly. In order to do this, change into the “Debug” directory of the directory containing your project and double click the file “ass1a.exe”. Note that the application exits immediately after execution. If you want the console window to stay open you have to modify the code accordingly, e.g.// My second C-program
#include <stdio.h>
int main( int argc, char* argv[] ){
printf( "Hello World!\n" );printf( "Press 'Enter' to quit\t" );while ( getchar() != '\n' ); // loop until ENTER is pressedreturn 0;
}
Page 9 of 16
Figure 12: Compiling the project
23/03/10 Introduction to MS Visual C/C++
3. Using OpenGLFor many programming tasks it is convenient to use a software interface to the hardware or the underlying operating system that offers high-level functionality. Such a software interface is called an application programming interface (API). The arguably most common graphics API in use today is OpenGL. OpenGL was originally introduced by SGI (Silicon Graphics) and is now available for most platforms. Even though the OpenGL commands are standardized different implementations of the OpenGL library may exist for the same platform. The two main versions of the OpenGL library for the Windows operating system are from Microsoft and from SGI. In this lecture we use the Microsoft version, which consists of the files gl.h, opengl32.lib and opengl32.dll. The SGI version consists of the files gl.h, opengl.lib and opengl.dll and is not used in this lecture.
The file gl.h contains function prototypes and constants whereas the file opengl32.lib contains the precompiled object code with the implementations of the function. Therefore, when writing an OpenGL program, we have to include gl.h at the beginning of each file, which uses OpenGL commands. In addition we have to link the project with the library opengl32.lib. Further explanation of this topic is found in section 3.1.4..Nowadays many windows applications (e.g. computer games) use OpenGL. Rather than including the complete OpenGL object code with each application it is more convenient to have the OpenGL library code stored in one place on your machine and to use it for all OpenGL applications. This is achieved by using dynamic link libraries. The Microsoft OpenGL dynamic link library is called opengl32.dll and comes by default with all recent versions of the Windows operating system. Note that some applications might require the SGI version. In this case you have to download the file opengl.dll from the web and put it into the “system32” folder.
On top of OpenGL we use two utility libraries called GLU and GLUT. The corresponding files are glu.h, glu32.lib, glu32.dll, and glut.h, glut32.lib, glut32.dll, respectively. They are used analogously to the corresponding OpenGL files. The files glu.lib, glu.dll, glut.lib, and glut.dll are the SGI versions and are not used in this lecture.
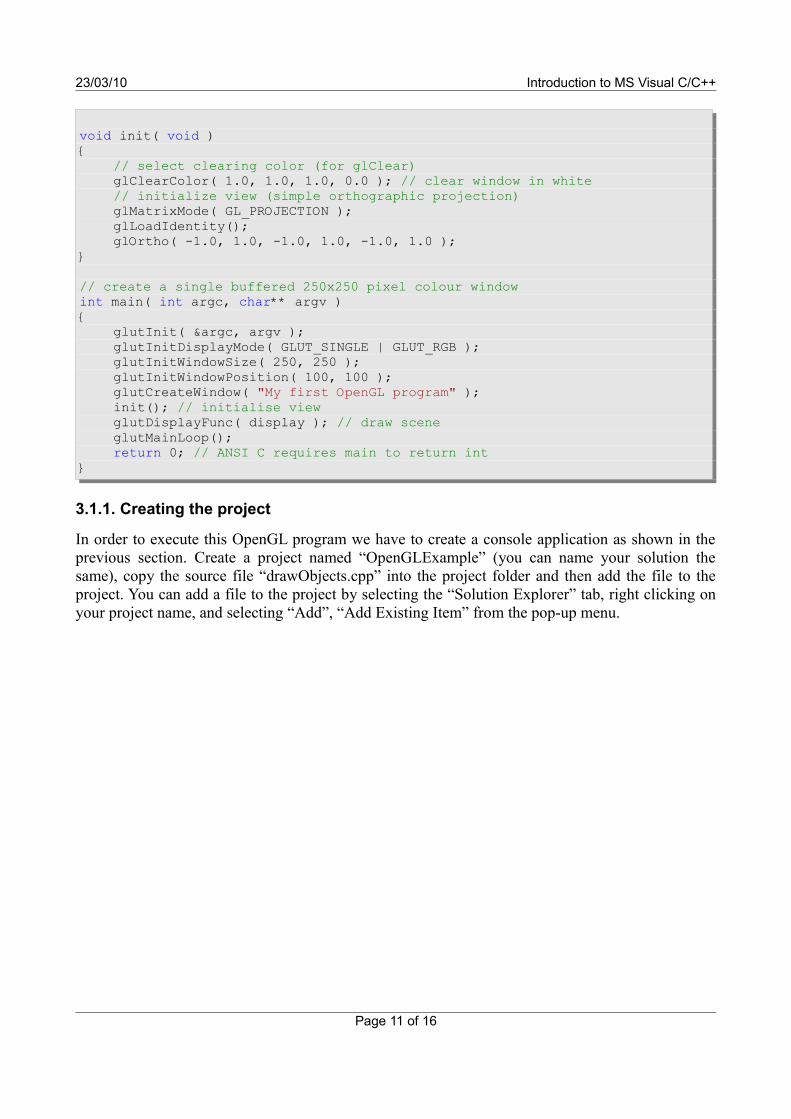
3.1. An OpenGL Example:The program below draws a red teapot (as a wireframe) into a 250x250 pixel window with white background.#include <windows.h>#include <gl/gl.h>#include <gl/glu.h> // not used in this program#include <gl/glut.h>
void display( void ){
// clear all pixels in frame bufferglClear( GL_COLOR_BUFFER_BIT );// draw a red wireframe teapotglColor3f( 1.0, 0.0, 0.0 ); // (red,green,blue) colour componentsglutWireTeapot( 0.6 );// start processing buffered OpenGL routinesglFlush();
}
Page 10 of 16
23/03/10 Introduction to MS Visual C/C++
void init( void ){
// select clearing color (for glClear)glClearColor( 1.0, 1.0, 1.0, 0.0 ); // clear window in white// initialize view (simple orthographic projection)glMatrixMode( GL_PROJECTION );glLoadIdentity();glOrtho( -1.0, 1.0, -1.0, 1.0, -1.0, 1.0 );
}
// create a single buffered 250x250 pixel colour windowint main( int argc, char** argv ){
glutInit( &argc, argv );glutInitDisplayMode( GLUT_SINGLE | GLUT_RGB );glutInitWindowSize( 250, 250 );glutInitWindowPosition( 100, 100 );glutCreateWindow( "My first OpenGL program" );init(); // initialise viewglutDisplayFunc( display ); // draw sceneglutMainLoop();return 0; // ANSI C requires main to return int
}
3.1.1. Creating the project
In order to execute this OpenGL program we have to create a console application as shown in the previous section. Create a project named “OpenGLExample” (you can name your solution the same), copy the source file “drawObjects.cpp” into the project folder and then add the file to the project. You can add a file to the project by selecting the “Solution Explorer” tab, right clicking on your project name, and selecting “Add”, “Add Existing Item” from the pop-up menu.
Page 11 of 16

23/03/10 Introduction to MS Visual C/C++
Alternatively you can download the complete solution with the project from the CompSci 373 Resources page: unzip the file “OpenGLExample.zip”, double click the solution “OpenGLExample.sln”.
3.1.2. Building the project
When building an application the following two steps are performed:1. Compilation: First all include statements are replaced with the corresponding header files.
As a result your program knows all constants and functions defined in the header files. Next your source files are compiled and any syntax errors are reported. If the compilation was successful object files (suffix “.obj”) are created for each of your source files.
2. Linking: This step combines (links) your object code with any external libraries (such as opengl32.lib).
3.1.3. Including the OpenGL/GLU/GLUT header files
Since our OpenGl program makes use of OpenGL and GLUT commands, we have to tell our application about these functions. This is achieved by first including the corresponding header files (suffix “.h”), which contain constant definitions and function prototypes. In a subsequent step we have to link our program with the libraries containing the actual implementations of the function prototypes.The file drawObjects.cpp contains four include files:#include <windows.h>#include <gl/gl.h>#include <gl/glu.h>
Page 12 of 16
Figure 13: Adding an existing source file

23/03/10 Introduction to MS Visual C/C++
#include <gl/glut.h>
The header file windows.h contains constants and function prototypes of the Graphic Device Interface (GDI), which is at the core of all Windows graphics. Since the include file gl.h makes use of some of the GDI types and functions we have to include windows.h before gl.h. The angle brackets (< and >) around the header’s name indicate the header file is to be looked for on the system disk. When using MS Visual Studio, then most of the predefined header files are stored in the directory “Program Files/Microsoft SDK/v6.0A/include” (or somewhere around there).If the header file is written in double quotes, e.g. "gl.h" then it is assumed it is stored in the current working directory. In our example this assumes that gl.h, glu.h and glut.h are stored in a subdirectory “gl” in the MS Visual Studio SDK directories.
3.1.4. Including the OpenGL/GLU/GLUT libraries
Note: The steps in this section are not necessary any more, as glut.h includes linker directives that automatise the inclusion of the OpenGL/GLU/GLUT libraries:/* To enable automatic SGI OpenGL for Windows library usage for GLUT, define GLUT_USE_SGI_OPENGL in your compile preprocessor options. */# ifdef GLUT_USE_SGI_OPENGL # pragma comment (lib, "opengl.lib") /* link with SGI OpenGL for Windows lib */ # pragma comment (lib, "glu.lib") /* link with SGI OpenGL Utility lib */ # pragma comment (lib, "glut.lib") /* link with Win32 GLUT for SGI OpenGL lib */# else # pragma comment (lib, "opengl32.lib") /* link with Microsoft OpenGL lib */ # pragma comment (lib, "glu32.lib") /* link with Microsoft OpenGL Utility lib */ # pragma comment (lib, "glut32.lib") /* link with Win32 GLUT lib */# endif
It remains to specify the libraries the project is using. To do this, right click on the project name in the “Solution Explorer” tab, and select “Properties”.
Page 13 of 16
23/03/10 Introduction to MS Visual C/C++
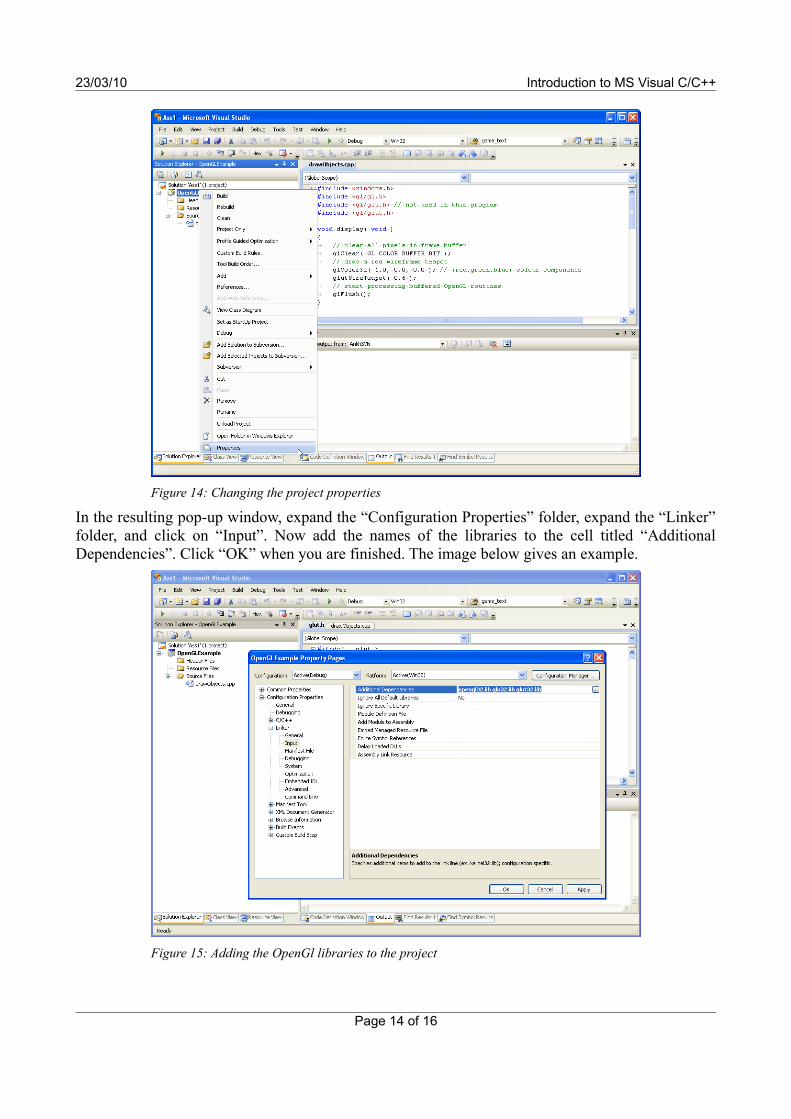
In the resulting pop-up window, expand the “Configuration Properties” folder, expand the “Linker” folder, and click on “Input”. Now add the names of the libraries to the cell titled “Additional Dependencies”. Click “OK” when you are finished. The image below gives an example.
Page 14 of 16
Figure 14: Changing the project properties
Figure 15: Adding the OpenGl libraries to the project
23/03/10 Introduction to MS Visual C/C++
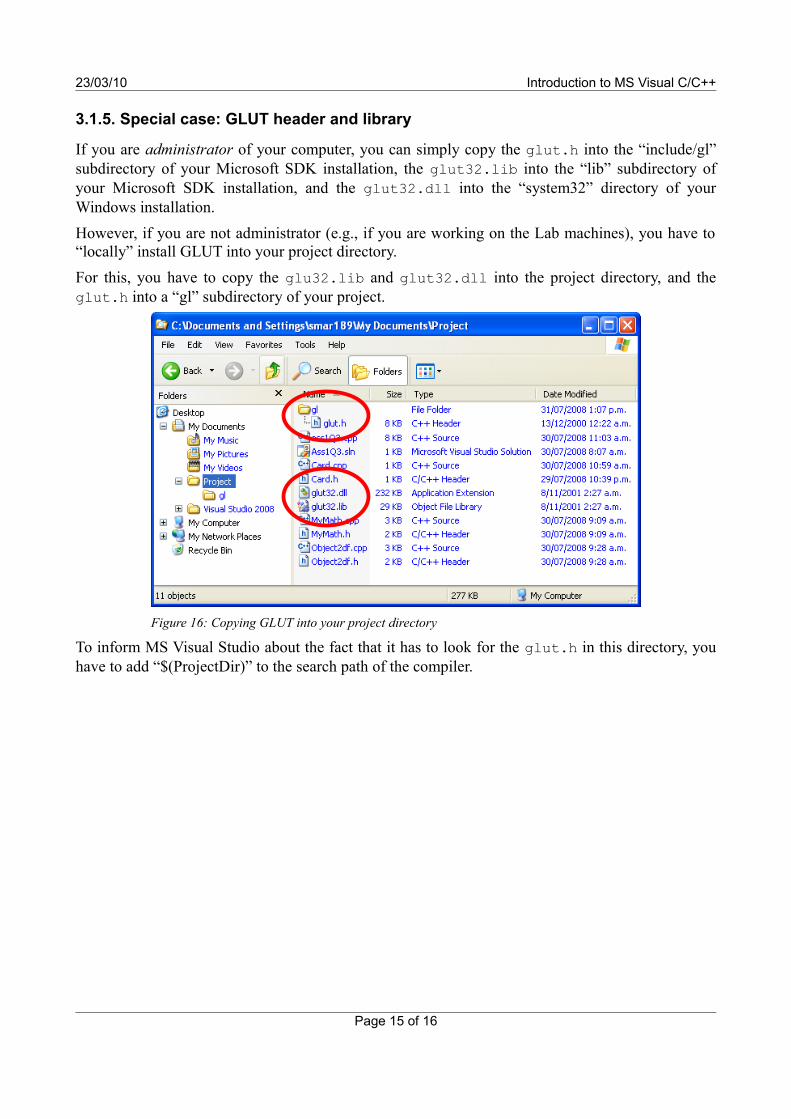
3.1.5. Special case: GLUT header and library
If you are administrator of your computer, you can simply copy the glut.h into the “include/gl” subdirectory of your Microsoft SDK installation, the glut32.lib into the “lib” subdirectory of your Microsoft SDK installation, and the glut32.dll into the “system32” directory of your Windows installation.However, if you are not administrator (e.g., if you are working on the Lab machines), you have to “locally” install GLUT into your project directory.For this, you have to copy the glu32.lib and glut32.dll into the project directory, and the glut.h into a “gl” subdirectory of your project.
To inform MS Visual Studio about the fact that it has to look for the glut.h in this directory, you have to add “$(ProjectDir)” to the search path of the compiler.
Page 15 of 16
Figure 16: Copying GLUT into your project directory

23/03/10 Introduction to MS Visual C/C++
3.1.6. Running your OpenGl program
You can now build your project (i.e. compile and link it) by selecting the corresponding menu item (see section 2.3.). Execute your application (CTRL+F5) and you will get as output a window displaying a red wireframe teapot as shown below.
Page 16 of 16
Figure 17: Adding a local search path to the compiler
Figure 18: Your first OpenGl program running