Introduction to flash cs4
14
Introduction to Adobe Flash CS4 By Vishal Raja
-
Upload
vishal-raja -
Category
Education
-
view
83 -
download
0
Transcript of Introduction to flash cs4
Introduction to Adobe Flash CS4
By Vishal Raja
This is an introduction presentation on Adobe Flash CS4 where we look at the Welcome Screen, Default settings,
Properties, Layouts, Tools.
This version of Flash is a huge improvement from CS3.
Please load the software which is located by logging onto your computer and following these steps:
Start > All Programs > Multimedia > Adobe CS4 > Adobe Flash CS4 Professional.
When the software loads, you will get a screen as follows:
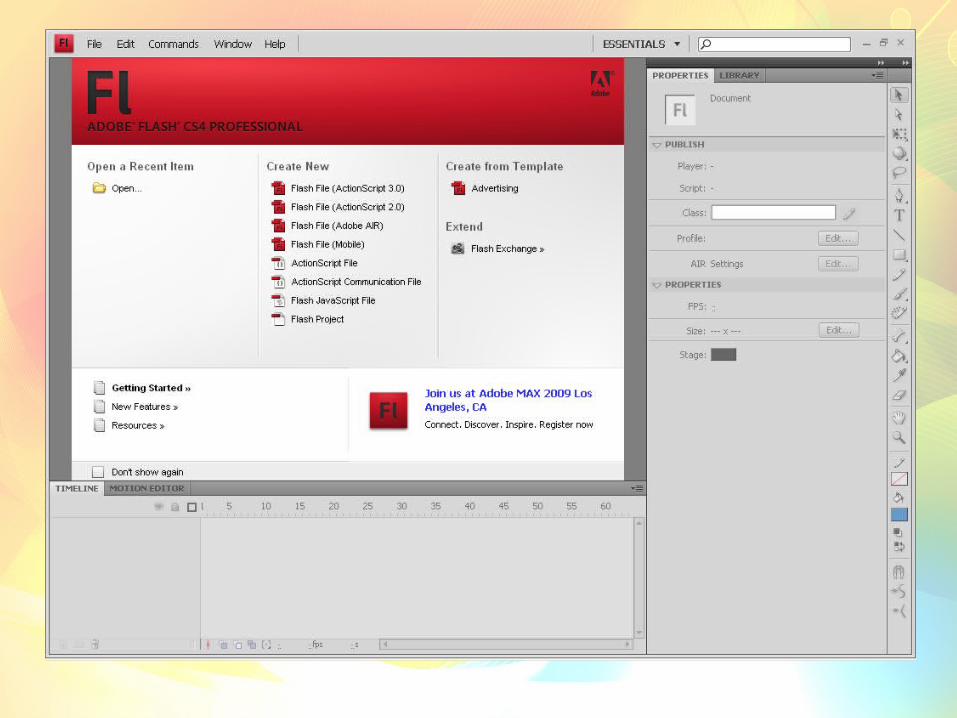
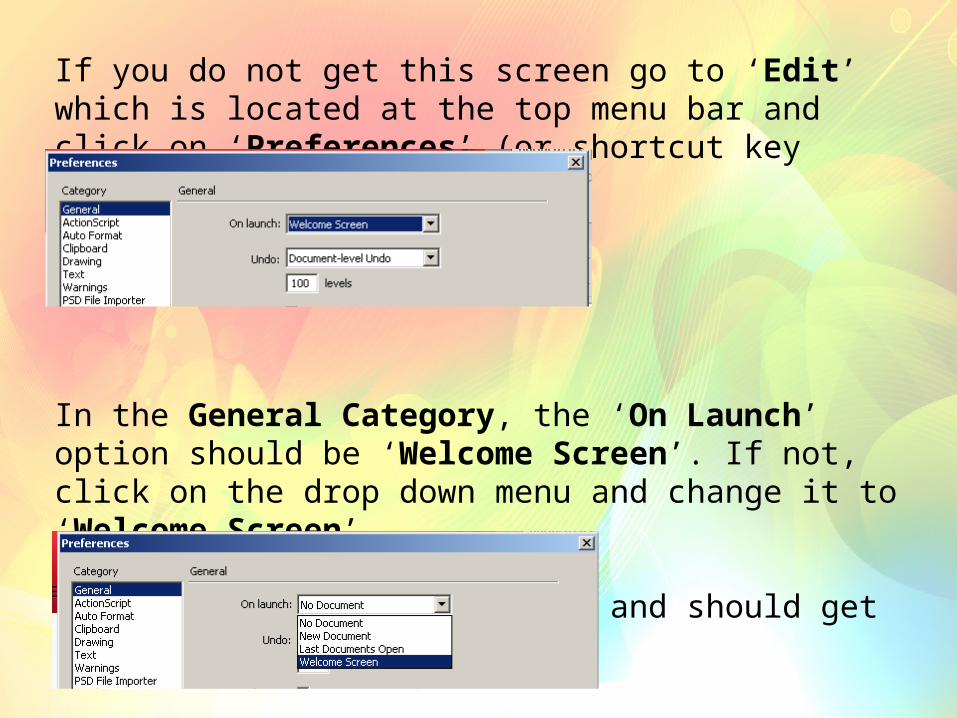
If you do not get this screen go to ‘Edit’ which is located at the top menu bar and click on ‘Preferences’ (or shortcut key CTRL+L).
In the General Category, the ‘On Launch’ option should be ‘Welcome Screen’. If not, click on the drop down menu and change it to ‘Welcome Screen’.
Click ‘OK’ once that is done and should get the welcome screen.

One of new features of Flash CS4 is the layout.
The ‘Properties’, ‘Tools’ & ‘Library’ panels are now on the right side of your screen.
The panels do have a different setup to previous versions but we will go through it in detail.

At the bottom of your screen is the ‘Timeline’ and a new function called ‘Motion Editor’.
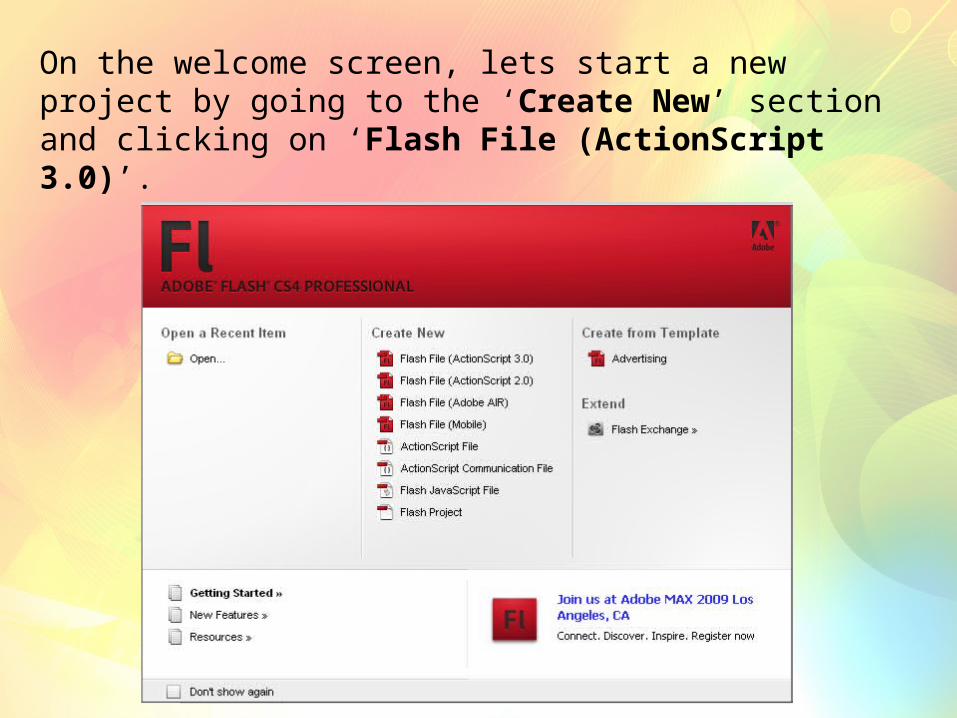
On the welcome screen, lets start a new project by going to the ‘Create New’ section and clicking on ‘Flash File (ActionScript 3.0)’.
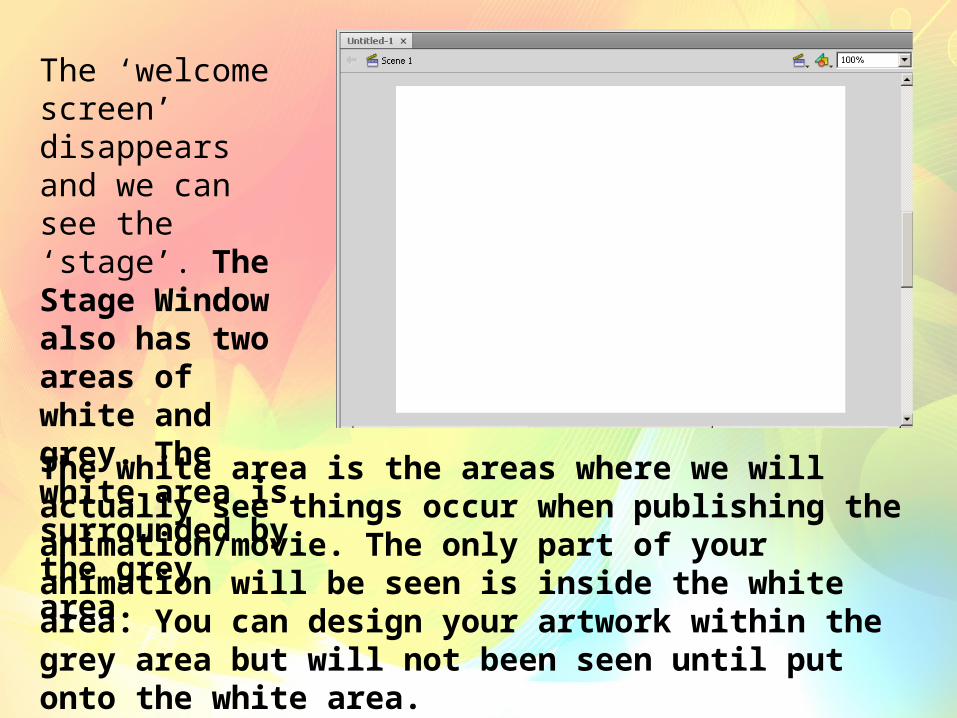
The white area is the areas where we will actually see things occur when publishing the animation/movie. The only part of your animation will be seen is inside the white area. You can design your artwork within the grey area but will not been seen until put onto the white area.
The ‘welcome screen’ disappears and we can see the ‘stage’. The Stage Window also has two areas of white and grey. The white area is surrounded by the grey area.

As mentioned, the ‘Properties’ has relocated to the right.
The Properties panel will have options available for you to use depending on the tool you are using.
For Example, if you click on the ‘Text Tool’, you will get Text options in the Properties Panel. If you click on the ‘Rectangle Tool’, you will get options that relate to that tool.
Click back onto the ‘Selection Tool (black arrow)’.
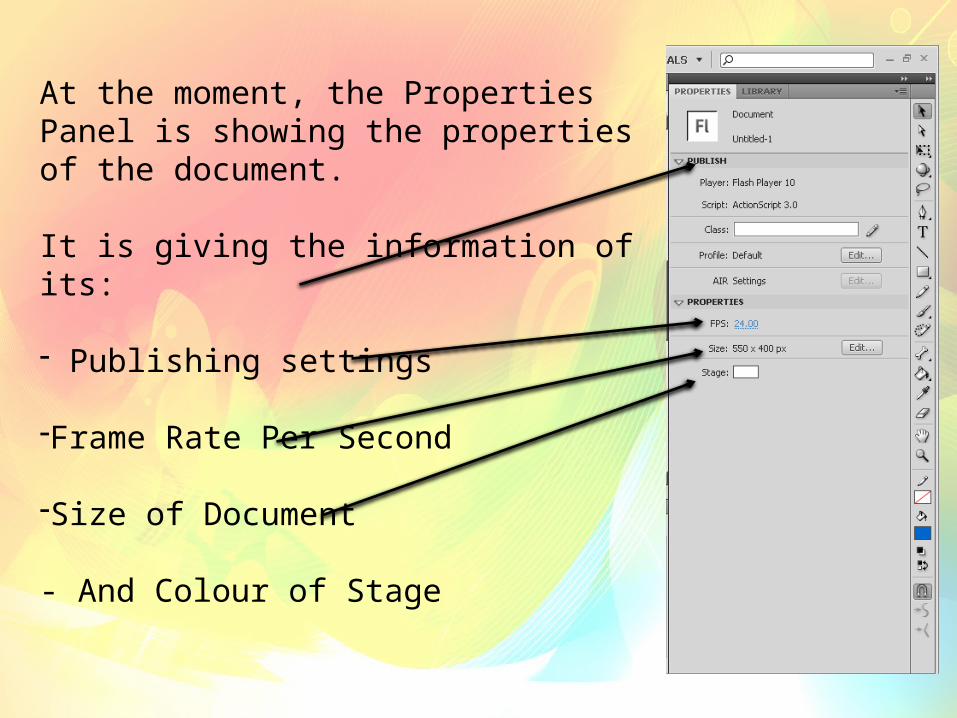
At the moment, the Properties Panel is showing the properties of the document.
It is giving the information of its:
- Publishing settings
-Frame Rate Per Second
-Size of Document
- And Colour of Stage
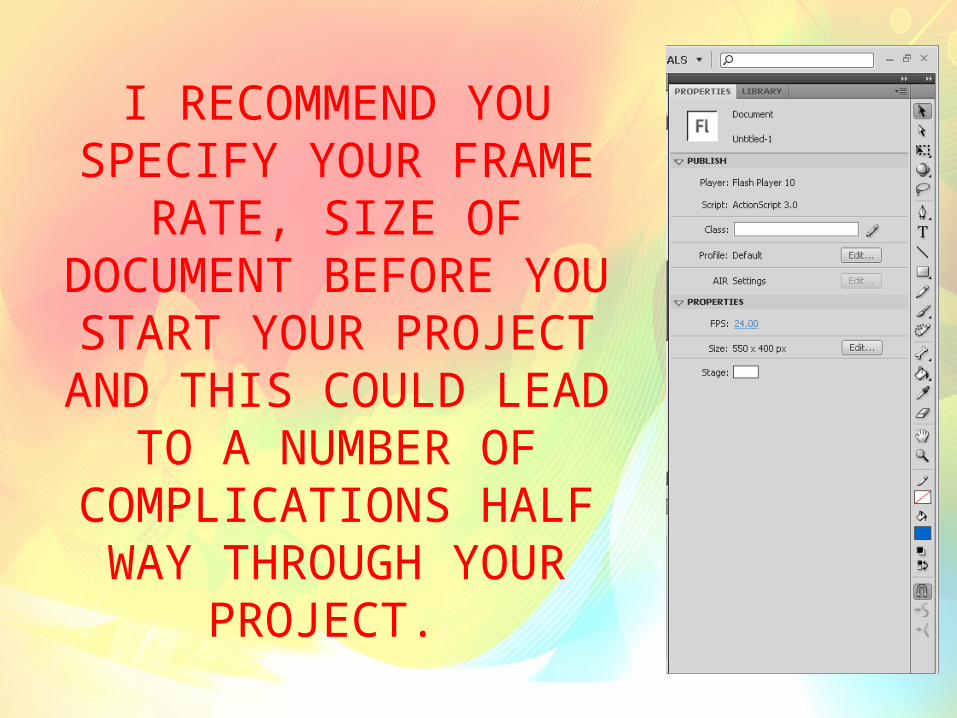
I RECOMMEND YOU SPECIFY YOUR FRAME RATE, SIZE OF DOCUMENT BEFORE YOU
START YOUR PROJECT AND THIS COULD LEAD TO A
NUMBER OF COMPLICATIONS HALF WAY THROUGH YOUR
PROJECT.
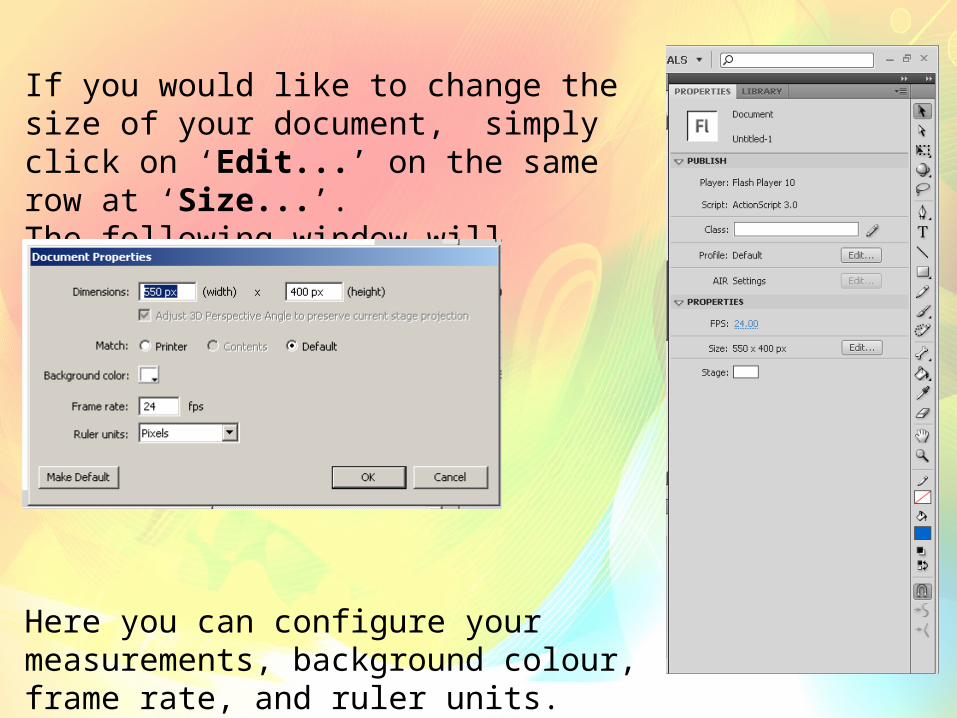
If you would like to change the size of your document, simply click on ‘Edit...’ on the same row at ‘Size...’.The following window will appear:
Here you can configure your measurements, background colour, frame rate, and ruler units.
Click ‘OK’ once have done this.
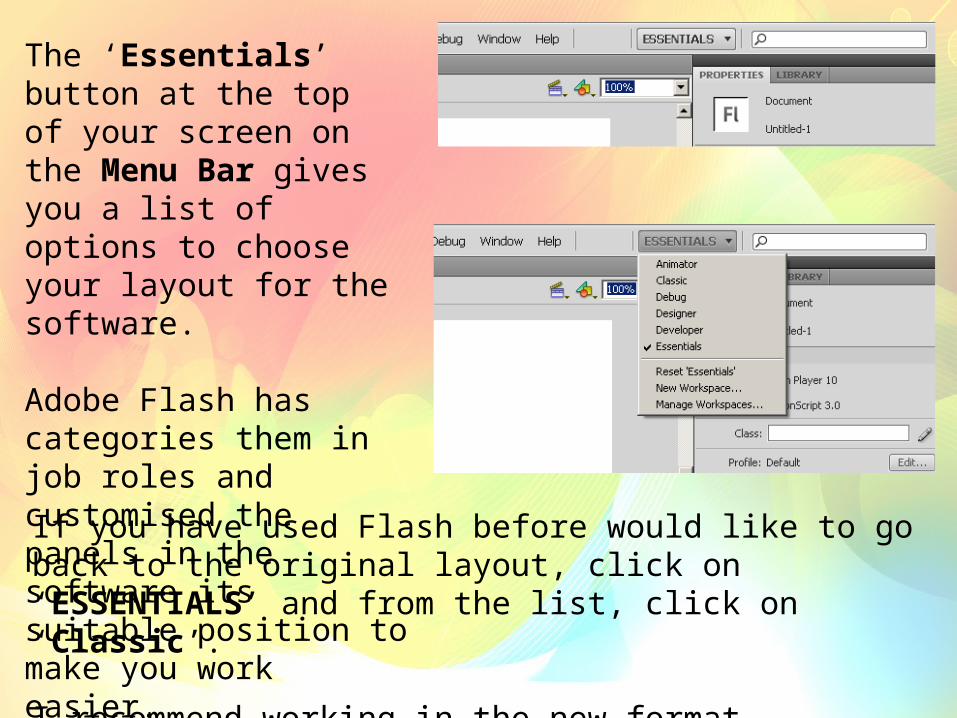
The ‘Essentials’ button at the top of your screen on the Menu Bar gives you a list of options to choose your layout for the software.
Adobe Flash has categories them in job roles and customised the panels in the software its suitable position to make you work easier.
If you have used Flash before would like to go back to the original layout, click on ‘ESSENTIALS’ and from the list, click on ‘Classic’.
I recommend working in the new format ‘Essentials’ as it places all tools in one area rather than around the stage.
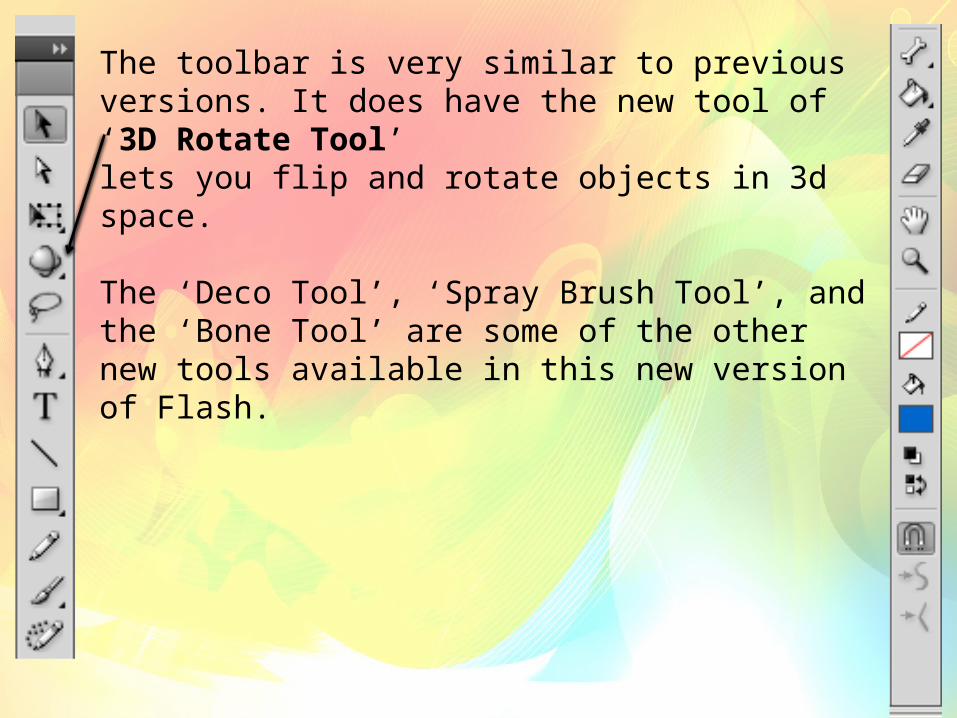
The toolbar is very similar to previous versions. It does have the new tool of ‘3D Rotate Tool’ lets you flip and rotate objects in 3d space.
The ‘Deco Tool’, ‘Spray Brush Tool’, and the ‘Bone Tool’ are some of the other new tools available in this new version of Flash.