
INSTALLATION HANDBOOK - discounthomeautomation.com · The Kisi Reader is an optional addition to...
9
For Integrators, Installers, and Administrators INSTALLATION HANDBOOK EVERYTHING ON HOW TO GET KISI UP AND RUNNING
Transcript of INSTALLATION HANDBOOK - discounthomeautomation.com · The Kisi Reader is an optional addition to...

For Integrators, Installers, and Administrators
INSTALLATION HANDBOOKEVERYTHING ON HOW TO GET KISI UP AND RUNNING
3
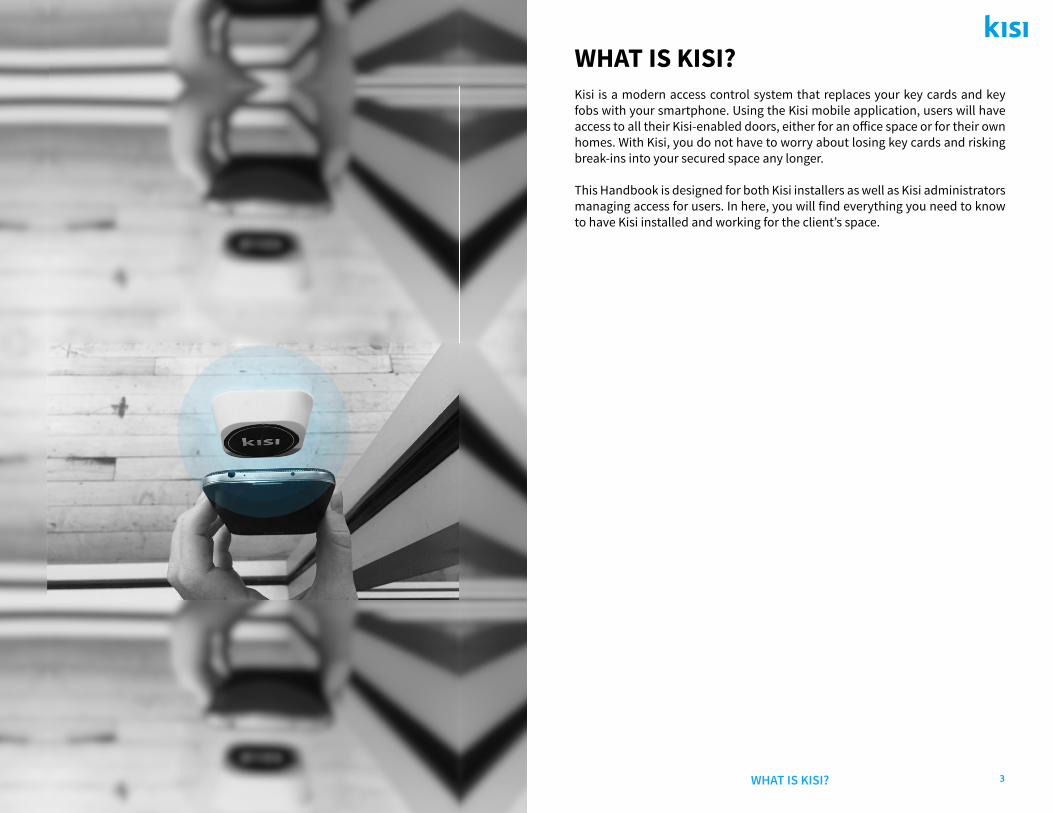
WHAT IS KISI?Kisi is a modern access control system that replaces your key cards and key fobs with your smartphone. Using the Kisi mobile application, users will have access to all their Kisi-enabled doors, either for an office space or for their own homes. With Kisi, you do not have to worry about losing key cards and risking break-ins into your secured space any longer.
This Handbook is designed for both Kisi installers as well as Kisi administrators managing access for users. In here, you will find everything you need to know to have Kisi installed and working for the client’s space.
WHAT IS KISI?

4
What happens if my phone runs out of battery?
We always recommend installing a backup option to enter your space (such as a keypad). Alternatively, you can install a universal wall charger at the front of your door.
Can Kisi work without an internet connection?
No; Kisi relies on active internet connecitvity. If you have problems connecting Kisi to your local network, we can supply a 4G hotspot so that Kisi is independent of your local internet.
FROM SMARTPHONE TO UNLOCKHow can the Kisi mobile app unlock a physical door?
Before we dive into that question, there are two components of the Kisi system that connects the mobile app to the door:
1) The Kisi Gateway - the access control board that is wired to the doors;
2) The Kisi Cloud server - stores all the access permissions for users on the internet.
The 4 Stage guide on the following page will show you how the unlock instructions are sent from a phone to the door:
When you open up the Kisi mobile app on your smartphone, you will see a big round button with the name of your door on it. This is your key. Hold the button (or swipe it for Android users) to begin unlocking your door.
An unlock command is sent to the Kisi Cloud. The Cloud will then verify if you have the right permissions to enter the door you are trying to access.
A - If yes, the Cloud will forward the unlock command to the Kisi Gateway.
B - If no, then Kisi Cloud will send an error message to your phone showing you that access was denied.
The Kisi Gateway receives the instructions from the Kisi Cloud via an Electric Imp computer chip. This chip allows the Kisi Gateway to be connected to the wifi network of the space that has been installed with Kisi.
Once the Kisi Gateway receives the unlock command from the Cloud, it triggers the dry-contact relay on the circuit board. This is will send current to (or remove current from) the electric lock, which will momentarily unlock the door for 3 seconds and allow users to enter the space.
Q&AWhat should I do when I receive an error message?
You will be sent an automated message by the Kisi support team on how to troubleshoot your error. Alternatively, you can reach us at [email protected].
HOW KISI WORKS

6 7
PROGRAMMING THE KISI GATEWAYBefore you come in to install Kisi on a Door, the client will start programming the Kisi Gateway, which they can be completed once they have received the shipment.
Here is a 4 Step guide on how to hook up Kisi to a Door. The client will program the Gateway as shown from Steps 1 to 3. As the installer, you come in to complete Step 4 by wiring the client’s door to Kisi.
Login
Create Account
STEP 1 Creating the Admin account
Download the Kisi App from the Apple Store or Google Play Store.
Setup a new Admin Account. Fill in the admin information, then select “Accept Terms & Create Account”.
Open the Kisi App and log into the account using the admin email address and newly created password.
Registration is successful! The admin will confirm his or her account via email.
2. 3.
4. 5.
To ensure seamless access, users should enable location services on the iOS or Android Phone, and have bluetooth turned on.
Forgot passwordLog In
Forgot password
Create Account
1.
STEP 2 Connect the Kisi Gateway to WiFi
Connecting the gateway to the client’s WiFi network requires them to blink up the Kisi Gateway. Head over to the link below for a step-by-step guide.
LINK : How To Connect The KISI Device To WiFi (Blinking Up)
STEP 3Software Setup: Create a Place and Door
A Place and Door should be created in the Kisi System prior to installation. It allows the client to test Kisi before the Installer arrives on site to compete Step 4. Head over to the link below for instructions.
LINK : How to Create a Place and Door
STEP 4Installation Takes Place
Now that the client has programmed the Kisi system, it is your turn to hook up the Kisi Gateway. The installation will be coordinated by a Kisi Onboarding Specialist.
Can KISI work on any type of smartphone?
KISI works on iPhones with iOS 8 and above, as well as Android OS 5 and above. Windows phones are not supported.
What are the WiFi settings required for Kisi?
Kisi works with a 2.4 GHz network. Head over to support.getkisi.com for the full list of wifi settings.
Q&ACan a client coordinate their own installation?
Yup, though this is rarely the case. If the client has an in-house technician, they may be able to install Kisi on top of their existing access control system.
PROGRAMMING KISI PROGRAMMING KISI

8
WIRING THE KISI GATEWAYThe Kisi system works on DC circuits and is compatible with any type of electronic lock, though most electronic locks work on 12 or 24V.
There are 4 ways to wire the Kisi Gateway to the door:
1 - Installing Kisi as a Stand-alone System to a Fail-Secure Electronic Lock2 - Installing Kisi as a Stand-alone System to a Fail-Safe Electronic Lock3 - Wiring Kisi to an Existing Access Control for a Fail-Secure Electronic Lock4 - Wiring Kisi to an Existing Access Control for a Fail-Safe Electronic Lock
The following pages will guide you through these 4 types of door set-ups. We’ll also cover how you can wire Kisi so that a door can remain open indefinitely.
But before that, let’s take a closer look at the Kisi Gateway device.
What is the blinking LED light in the box for?
The blinking light is for the wifi computer chip inside the Gateway. It should be blinking green after the user has programmed the Kisi system.
Does Kisi have its own power supply for the door?
No, you will have to provide one for the electronic lock.
Q&AWhat type of electronic locks is compatible with Kisi?
All electronic locks that works on 12-24V DC. This includes electric strikes, maglocks, eletrified panic bars, mortise locks etc.
What is the USB cable running into the Gateway?
The USB cable is used to power the Electric Imp, which is the white chip that connects the Gateway to the wifi. It works on 5V DC.
How many doors can be wired to the Kisi Gateway?
4 Doors! Each door will be wired to one dry contact relay inside the Gateway.
What is the maximum voltage that the Kisi Gateway can handle?
Each relay can handle up to 250V.
INSTALLATION INSTALLATION
Understanding the Kisi Gateway
The latest version of the Kisi Gateway comes with 4 dry-contact relays, 1 bi-stable relay, and 1 Electric Imp. It is most commonly installed in the IT closet where the WiFi router is stored.
We will briefly describe how each part of the Gateway works:
Dry-contact Relays
These relays do not provide power to the door; they only serve as outputs to the electronic locks for the door to unlock. Our relays typically work with 12-24V DC locks, though it can withstand up to 250V.
The ports can be found at the bottom of each relay, going left to right from Normally Open, Common, and Normally Closed.
Bi-stable Relay
This special relay works in conjunction with the regular relays to its left. It allows a door to remain open for an indefinite amount of time.
More details can be found on page 14.
Electric Imp
This is a computer chip that connects each door to the internet. It serves as an input that sends an electrical signal to a relay every time a door is unlocked from the smartphone.
The Imp is powered by its own 5V DC power supply, separate from the electronic locks. Power is plugged into the USB mini port.
What type of wires should I use to install Kisi?
We recommend Cat 5 or 6 low voltage wiring.

10 11
Installing Kisi as a Stand-alone Systemto a Fail-Safe Electronic Lock
A Fail-Safe Electronic Lock usually refers to a magnetic lock, or an electric strike with a fail-safe configuration.
You will have to install wires that run from the door lock to a power supply. You will then have to run wires from both the power supply and the electric lock to the Common and Normally Closed ports on the dry contact relay, as shown in the diagram above. This way, power will be removed from the lock when an unlock is triggered.
For a fail-safe lock, Kisi will require the installer to also put in an external pinpad, and an internal push to exit button. Clients have the option to install an internal motion sensor and a Uninterupted Power Source (UPS i.e. backup battery).
These additional components should be wired in-line with the Kisi system as well.
INSTALLATIONINSTALLATION
Installing Kisi as a Stand-alone Systemto a Fail-Secure Electronic Lock
A Fail-Secure Electronic Lock usually refers to an electric strike or an electrified mortise lock.
You will have to install wires that run from the door strike to a power supply. Afterwhich, run wires from both the power supply and the electric lock to the Common and Normally Open ports on the dry contact relay, as shown in the diagram above. That way, power will be sent to the lock when an unlock is triggered.

12 13
Wiring to Existing Access Controlwith a Fail-Safe Electronic Lock
If there is an existing access control system in place, you will need to wire Kisi into the existing circuit in a series configuration, as shown in the diagram above.
You will have to run wires from the existing circuit into the Normally Closed and Common ports on the Kisi system. With this, power will be removed from the lock via either access control boards, depending on which system triggers the unlock.
Wiring to Existing Access Controlwith a Fail-Secure Electronic Lock
Kisi should be installed in parellel to the existing access control system. The red wires in the diagram above run from the Normally Open and Common ports on the Kisi Gateway into the same ports on the existing system. This way, power will be sent to the lock through either access control boards, depending on which system triggers the unlock.
Alternatively, you can run the red wires into the REX inputs on the existing access control board. Similarly, wires should run from the Normally Open and Common ports into the REX. However, some systems have a security alarm programmed to trigger if there too many REX wired unto the board.
INSTALLATION INSTALLATION
14
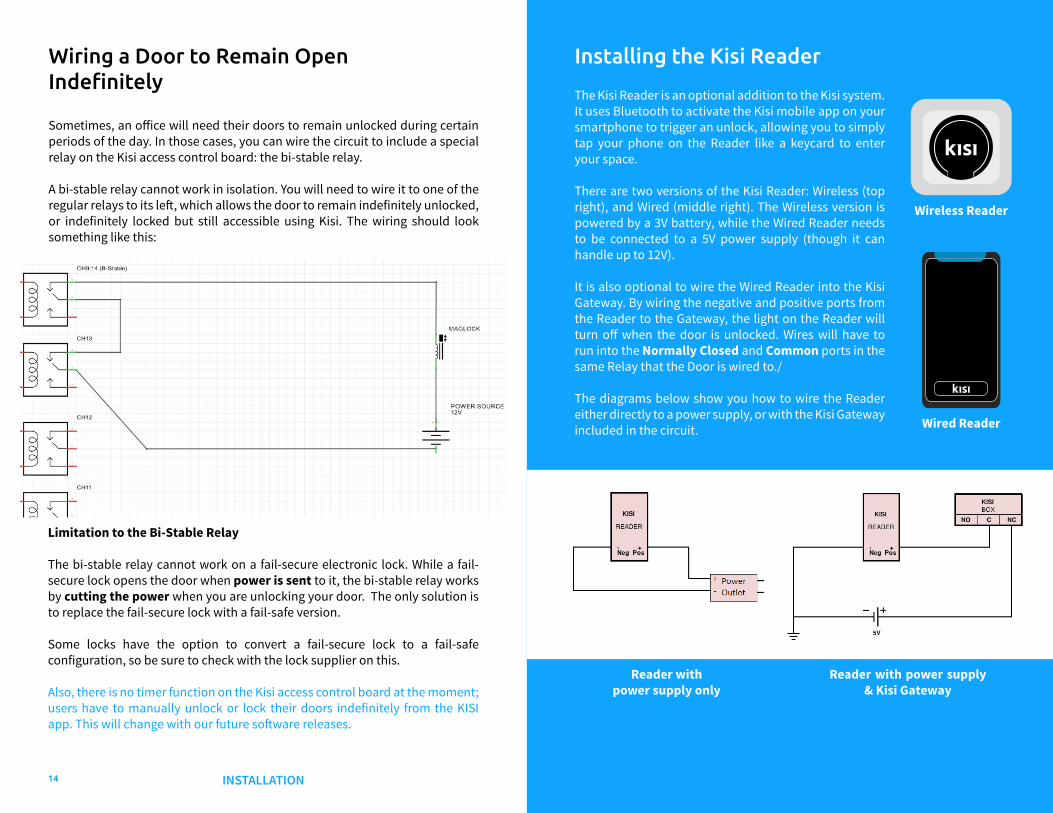
The Kisi Reader is an optional addition to the Kisi system. It uses Bluetooth to activate the Kisi mobile app on your smartphone to trigger an unlock, allowing you to simply tap your phone on the Reader like a keycard to enter your space.
There are two versions of the Kisi Reader: Wireless (top right), and Wired (middle right). The Wireless version is powered by a 3V battery, while the Wired Reader needs to be connected to a 5V power supply (though it can handle up to 12V).
It is also optional to wire the Wired Reader into the Kisi Gateway. By wiring the negative and positive ports from the Reader to the Gateway, the light on the Reader will turn off when the door is unlocked. Wires will have to run into the Normally Closed and Common ports in the same Relay that the Door is wired to./
The diagrams below show you how to wire the Reader either directly to a power supply, or with the Kisi Gateway included in the circuit. Wired Reader
Wireless Reader
Reader with power supply only
Reader with power supply & Kisi Gateway
Wiring a Door to Remain Open Indefinitely
Sometimes, an office will need their doors to remain unlocked during certain periods of the day. In those cases, you can wire the circuit to include a special relay on the Kisi access control board: the bi-stable relay.
A bi-stable relay cannot work in isolation. You will need to wire it to one of the regular relays to its left, which allows the door to remain indefinitely unlocked, or indefinitely locked but still accessible using Kisi. The wiring should look something like this:
Limitation to the Bi-Stable Relay
The bi-stable relay cannot work on a fail-secure electronic lock. While a fail-secure lock opens the door when power is sent to it, the bi-stable relay works by cutting the power when you are unlocking your door. The only solution is to replace the fail-secure lock with a fail-safe version.
Some locks have the option to convert a fail-secure lock to a fail-safe configuration, so be sure to check with the lock supplier on this.
Also, there is no timer function on the Kisi access control board at the moment; users have to manually unlock or lock their doors indefinitely from the KISI app. This will change with our future software releases.
Installing the Kisi Reader
INSTALLATION INSTALLATION

16
FOR ASSISTANCE
Customer Support, Installation, and Integrations [email protected]
Sales / [email protected]
Call - 646.663.4880
getkisi.com