
Installation guide for Medit i500 - CAD-Ray.com€¦ · Installation guide for Medit i500 February...
16
Installation guide for Medit i500 February 23 rd , 2018 SQA of Medit Co., Ltd.
Transcript of Installation guide for Medit i500 - CAD-Ray.com€¦ · Installation guide for Medit i500 February...
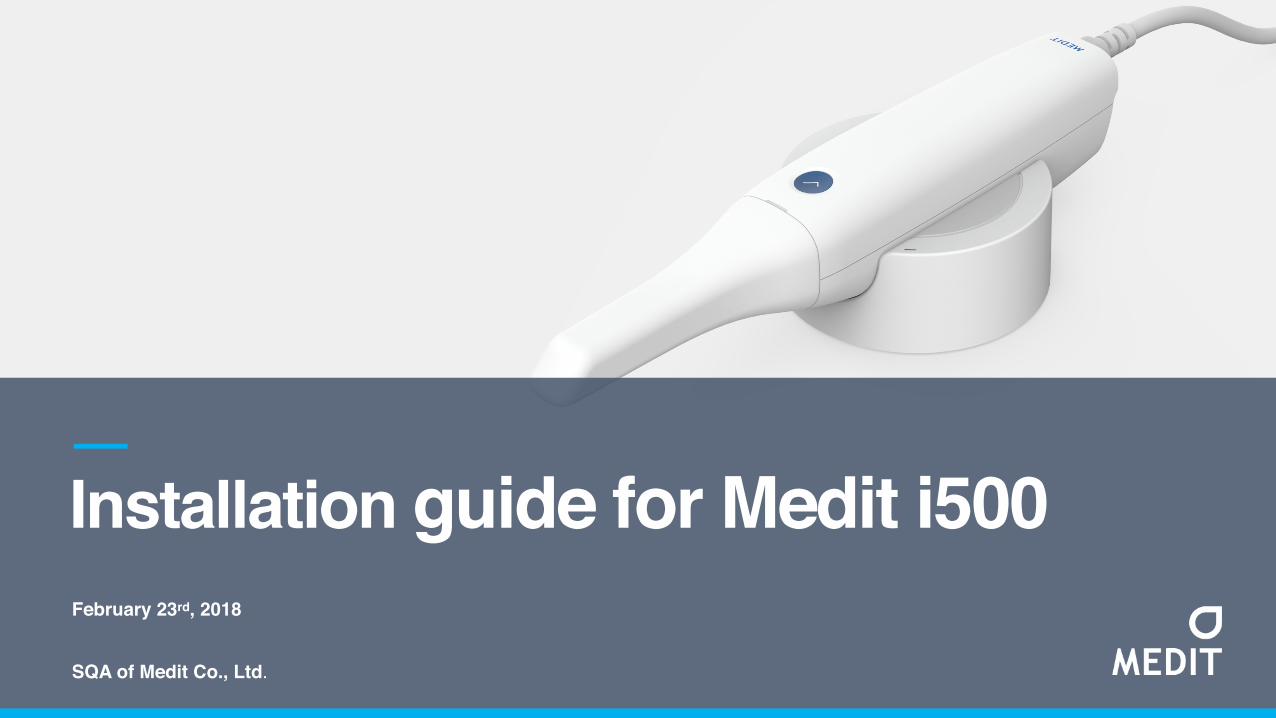
Installation guide for Medit i500 February 23rd, 2018
SQA of Medit Co., Ltd.
ContentsProduct Package & Components
Product Installation
1) Preparing Console PC
2) Software Installation
3) Hardware Installation
4) UI & Device Status
5) Product Registration
Tip Treatment
Calibration2
Chapter 1
Chapter 2
Chapter 3
Chapter 4
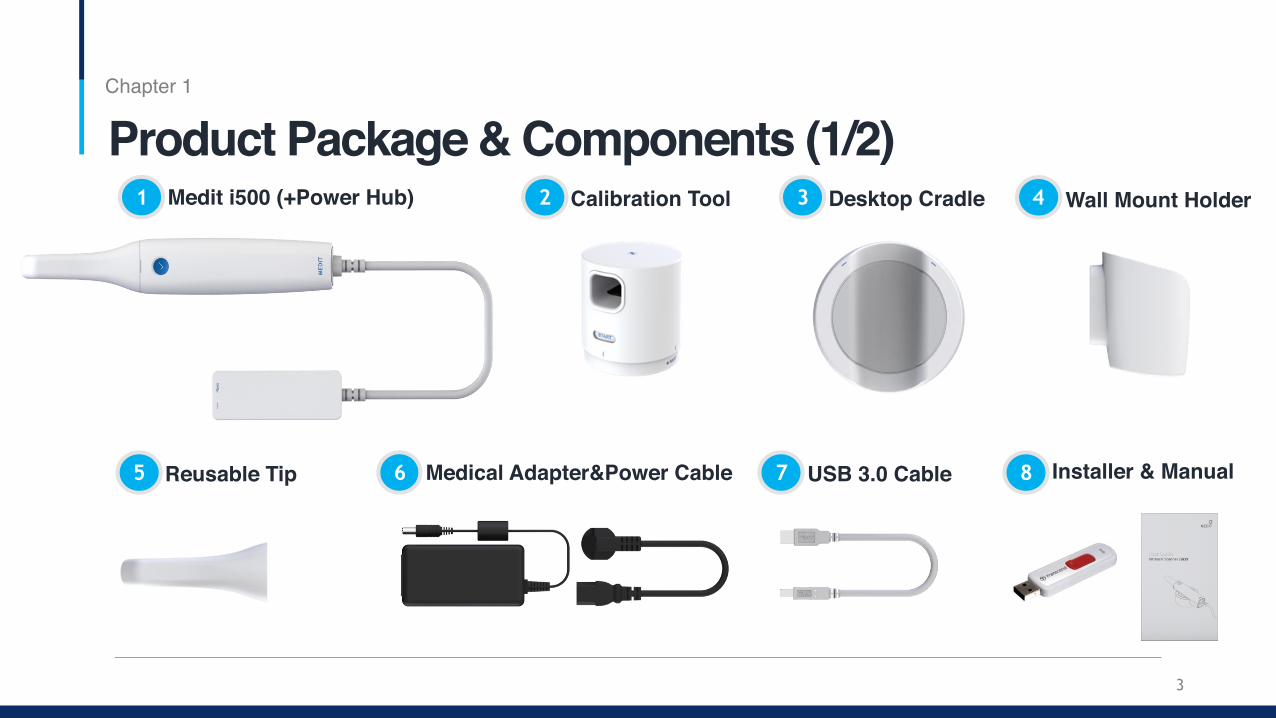
Product Package & Components (1/2)
3
1 Medit i500 (+Power Hub) 2 Calibration Tool 3 Desktop Cradle
5 Reusable Tip
4 Wall Mount Holder
6 Medical Adapter&Power Cable 7 USB 3.0 Cable 8 Installer & Manual
Chapter 1
Product Package & Components (2/2)
4
Chapter 1
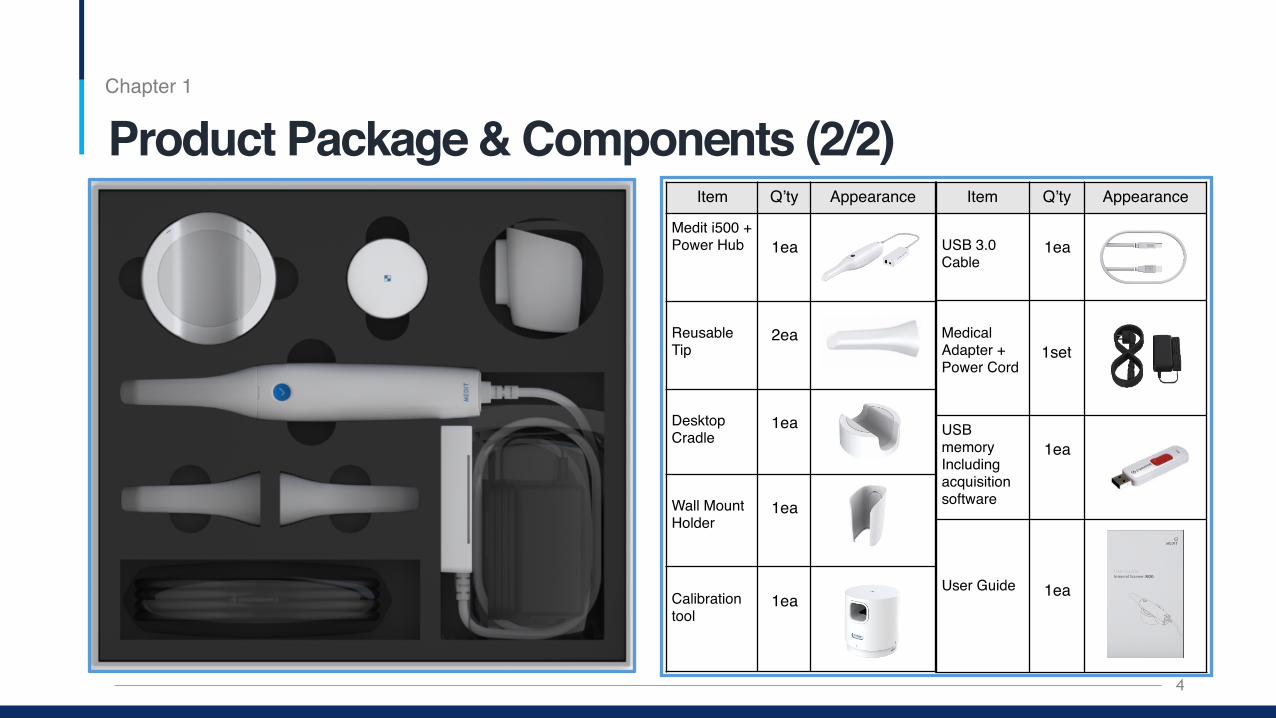
Item Q’ty Appearance
Medit i500 + Power Hub 1ea
Reusable Tip
2ea
Desktop Cradle
1ea
Wall Mount Holder
1ea
Calibration tool
1ea
Item Q’ty Appearance
USB 3.0 Cable
1ea
Medical Adapter + Power Cord
1set
USB memory Including acquisition software
1ea
User Guide 1ea
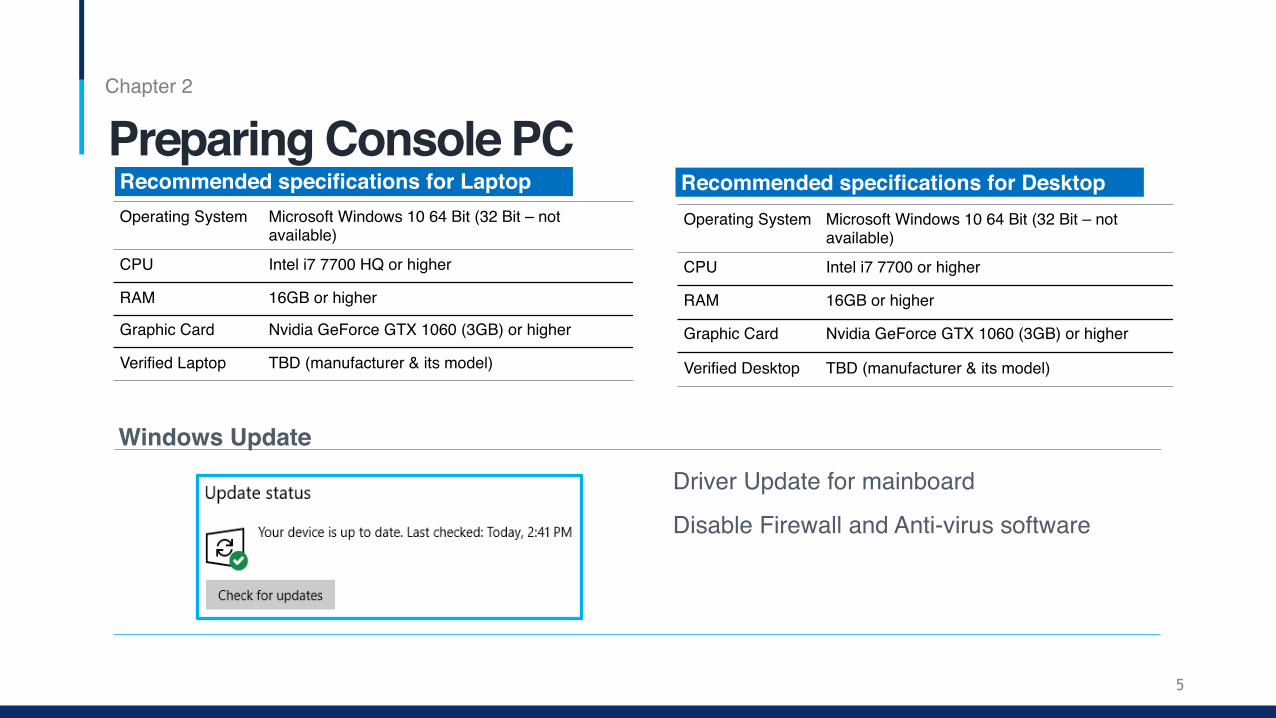
Preparing Console PCChapter 2
Image
5
Operating System Microsoft Windows 10 64 Bit (32 Bit – not available)
CPU Intel i7 7700 HQ or higher
RAM 16GB or higher
Graphic Card Nvidia GeForce GTX 1060 (3GB) or higher
Verified Laptop TBD (manufacturer & its model)
Operating System Microsoft Windows 10 64 Bit (32 Bit – not available)
CPU Intel i7 7700 or higher
RAM 16GB or higher
Graphic Card Nvidia GeForce GTX 1060 (3GB) or higher
Verified Desktop TBD (manufacturer & its model)
Recommended specifications for Laptop Recommended specifications for Desktop
Driver Update for mainboard
Disable Firewall and Anti-virus software
Windows Update
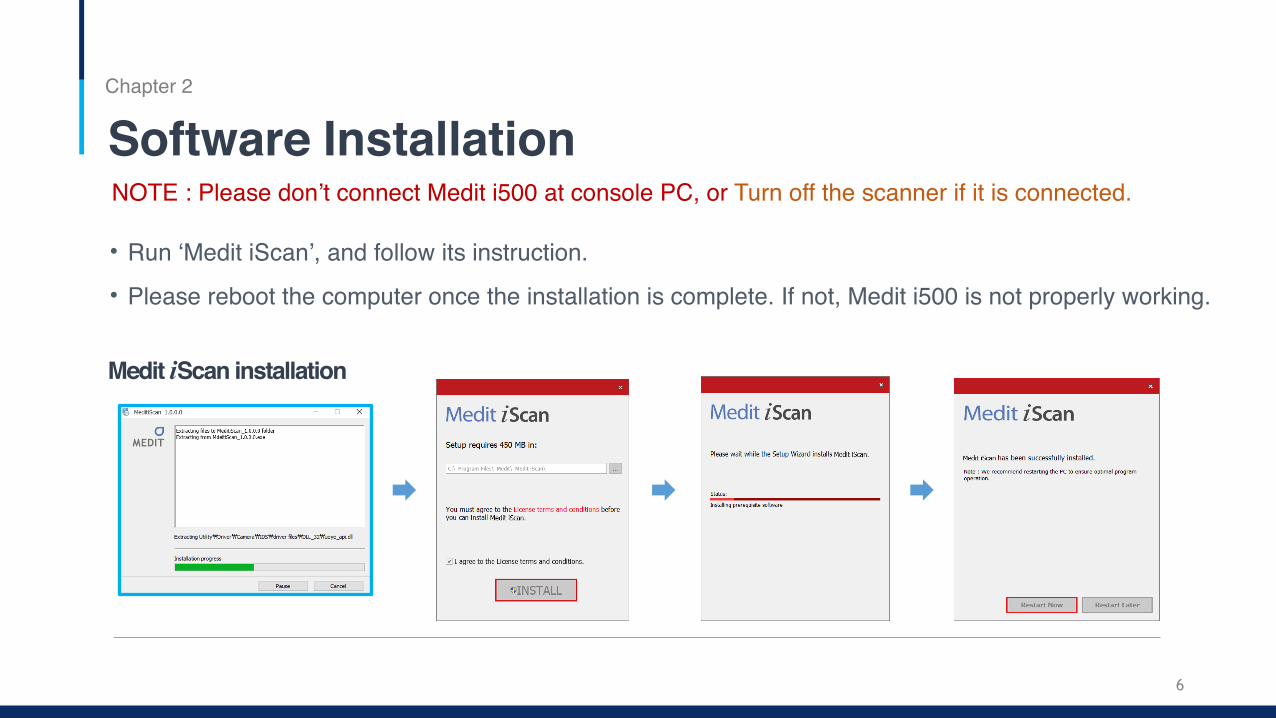
Software InstallationChapter 2
• Run ‘Medit iScan’, and follow its instruction.• Please reboot the computer once the installation is complete. If not, Medit i500 is not properly working.
Medit i Scan installation
Image
6
NOTE : Please don’t connect Medit i500 at console PC, or Turn off the scanner if it is connected.
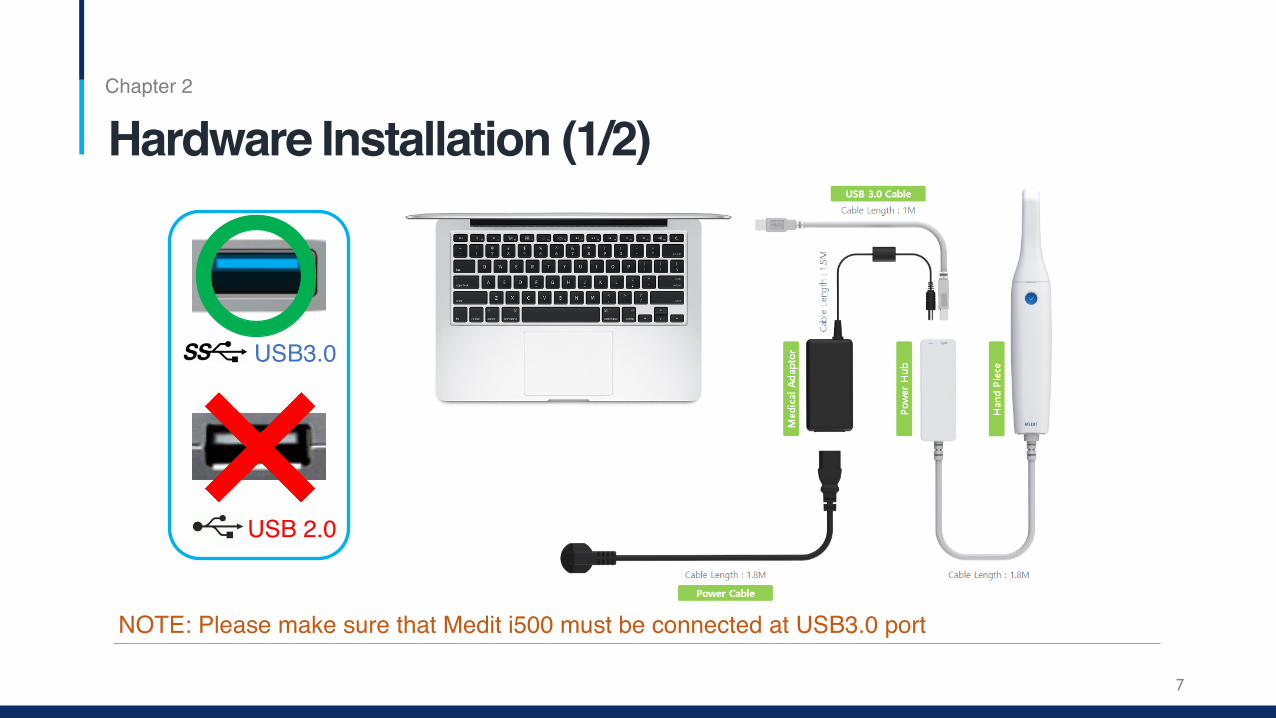
Hardware Installation (1/2)Chapter 2
Image
7
USB 2.0
USB3.0
NOTE: Please make sure that Medit i500 must be connected at USB3.0 port
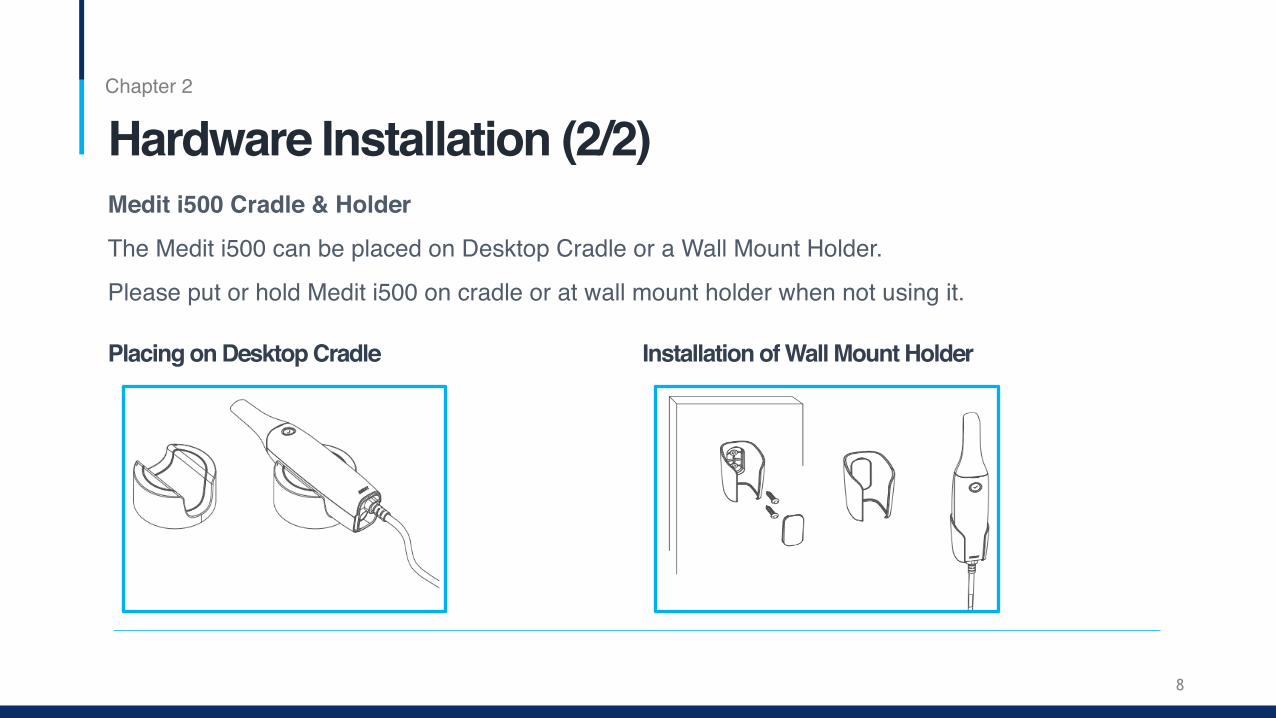
Hardware Installation (2/2)Chapter 2
Image
8
Medit i500 Cradle & Holder
The Medit i500 can be placed on Desktop Cradle or a Wall Mount Holder.
Please put or hold Medit i500 on cradle or at wall mount holder when not using it.
Placing on Desktop Cradle Installation of Wall Mount Holder
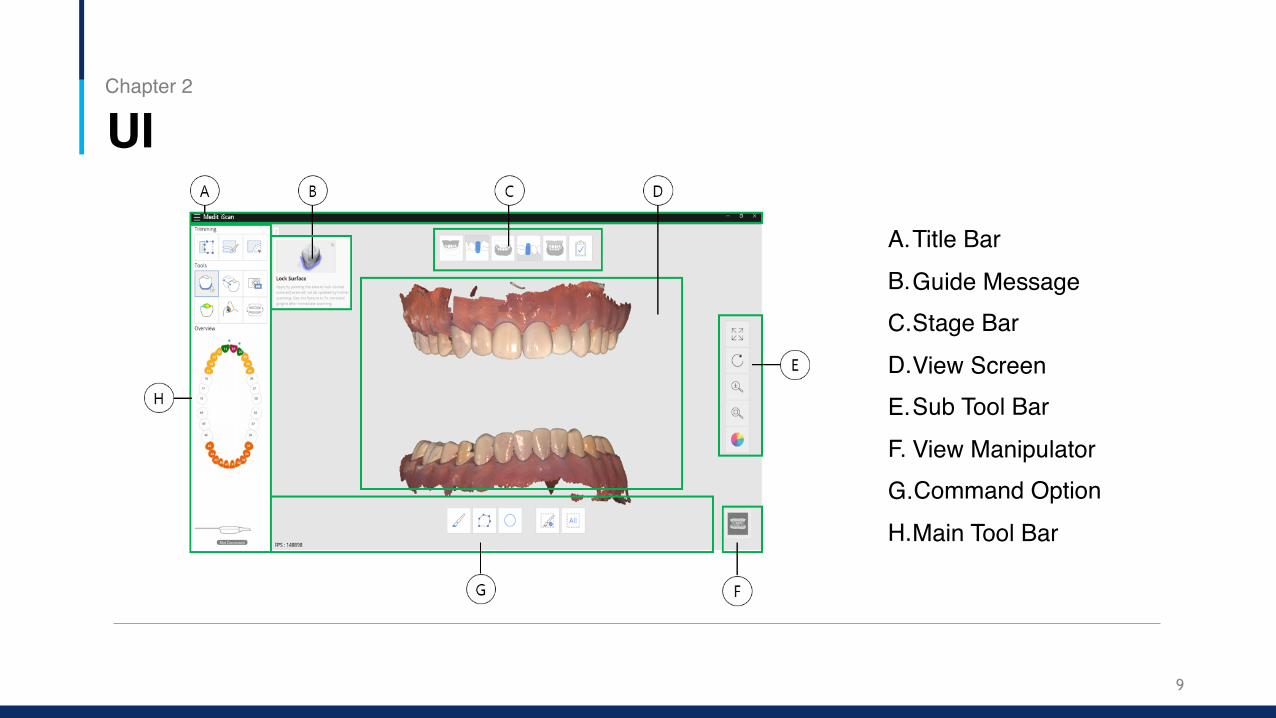
UIChapter 2
9
A.Title Bar B.Guide MessageC.Stage Bar D.View ScreenE.Sub Tool Bar F. View Manipulator G.Command OptionH.Main Tool Bar
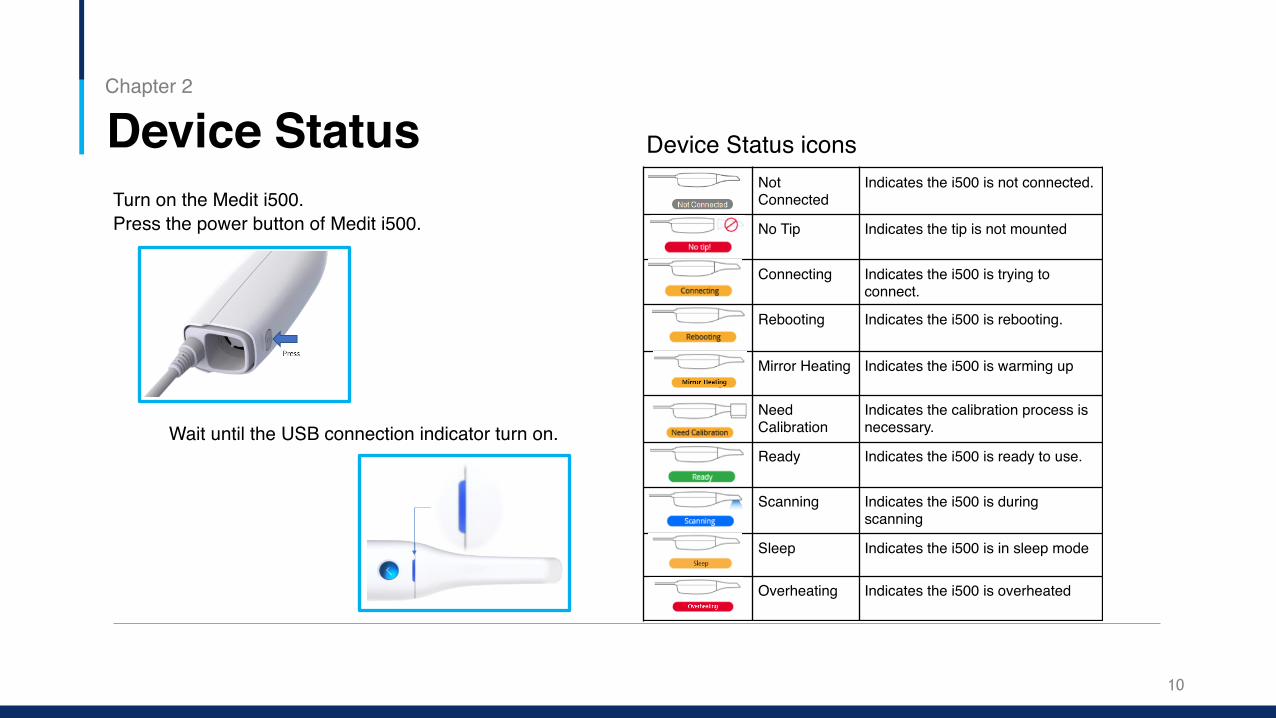
Device StatusChapter 2
10
Not Connected
Indicates the i500 is not connected.
No Tip Indicates the tip is not mounted
Connecting Indicates the i500 is trying to connect.
Rebooting Indicates the i500 is rebooting.
Mirror Heating Indicates the i500 is warming up
Need Calibration
Indicates the calibration process is necessary.
Ready Indicates the i500 is ready to use.
Scanning Indicates the i500 is during scanning
Sleep Indicates the i500 is in sleep mode
Overheating Indicates the i500 is overheated
Turn on the Medit i500. Press the power button of Medit i500.
Wait until the USB connection indicator turn on.
Device Status icons
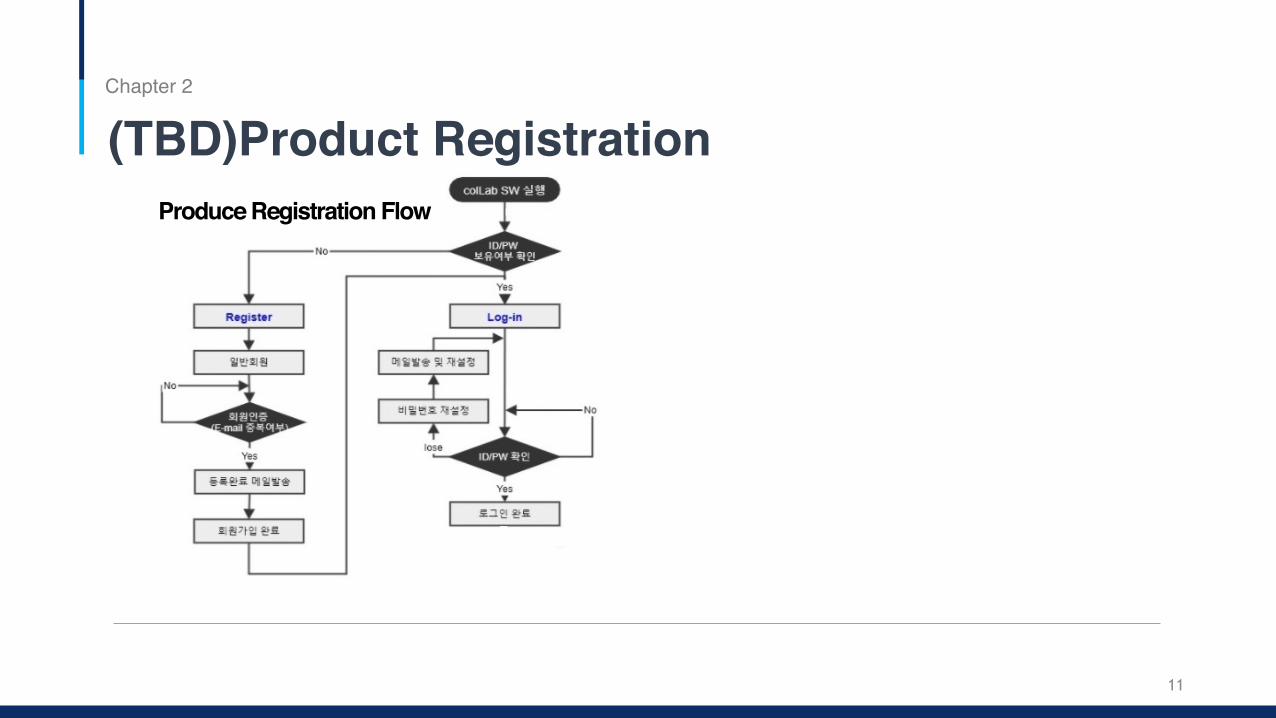
(TBD)Product Registration Chapter 2
Image
11
Produce Registration Flow
Chapter 3
Image
12
Reusable tip The i500 reusable tip is the part of the scanner that inserted into the patient’s mouth during scanning. The tip can be reused a limited number of times, but it must be cleaned and sterilized to avoid cross contamination among patients.
Tip Treatment (1/2)
Cleaning and sterilization procedure
➢ Clean the tip manually using soap water with the brush, and inspect the mirror of the tip after cleaning. If the mirror appears with stains, smudged or with a milky haze, please repeat cleaning. Dry the mirror carefully with a paper towel.
➢ Put the tip in a paper sterilization pouch. The pouch should be sealed airtight. Use either a self-adhesive pouch or heat-sealed pouch.
➢ Sterilize the wrapped tip in an autoclave with below condition
■ At 121℃/249.8℉ for minimum 30 minutes.
NOTE: Please completely dry it before putting inside the autoclave.
Chapter 3
Image
13
CAUTION
• Both its cleaning and undamaged surface are important for the scan quality. • The mirror should be handled with care. Do not scratch it. Be careful not to smudge it before scanning a patient.
• New tips must be cleaned and sterilized / autoclaved before using them for the first time • The scanner tip can be re-sterilized up to 20 times.
Tip Treatment (2/2)
Calibration (1/2)Chapter 4
Image
14
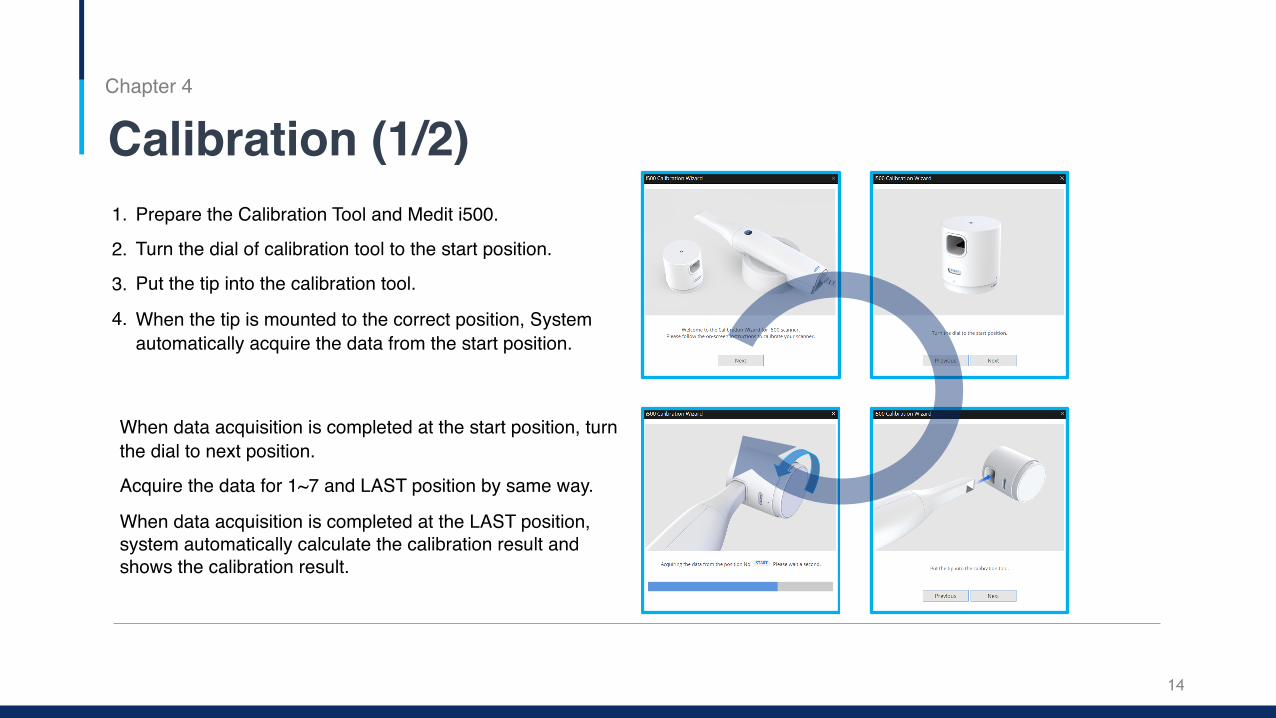
1. Prepare the Calibration Tool and Medit i500.
2. Turn the dial of calibration tool to the start position.
3. Put the tip into the calibration tool.
4. When the tip is mounted to the correct position, System automatically acquire the data from the start position.
When data acquisition is completed at the start position, turn the dial to next position.
Acquire the data for 1~7 and LAST position by same way.
When data acquisition is completed at the LAST position, system automatically calculate the calibration result and shows the calibration result.

Calibration (2/2)Chapter 4
15
You can set the calibration period from File Menu >Setting
> Calibration Period(Days). The default value of calibration period is 14 days.
Turn on the i500 and connect the device to software.
Run Calibration Wizard from File Menu > Setting > Calibration.