InDesign CS3
12
InDesign CS3 Lesson 3 Working with Frames
-
Upload
candice-delgado -
Category
Documents
-
view
81 -
download
5
description
InDesign CS3. Lesson 3 Working with Frames. Using Frames. Frames are containers in which you place graphics or text. Frames can also be used as graphic shapes. There are three types of frames you can create: - PowerPoint PPT Presentation
Transcript of InDesign CS3
InDesign CS3
Lesson 3Working
with Frames
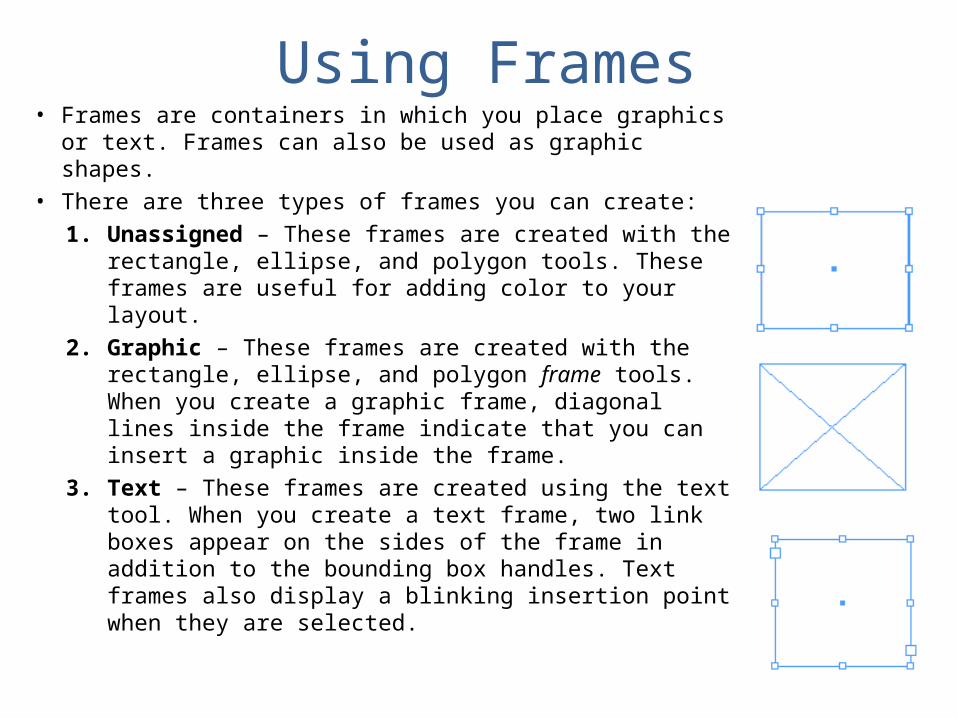
Using Frames• Frames are containers in which you place graphics or text.
Frames can also be used as graphic shapes.• There are three types of frames you can create:
1. Unassigned – These frames are created with the rectangle, ellipse, and polygon tools. These frames are useful for adding color to your layout.
2. Graphic – These frames are created with the rectangle, ellipse, and polygon frame tools. When you create a graphic frame, diagonal lines inside the frame indicate that you can insert a graphic inside the frame.
3. Text – These frames are created using the text tool. When you create a text frame, two link boxes appear on the sides of the frame in addition to the bounding box handles. Text frames also display a blinking insertion point when they are selected.
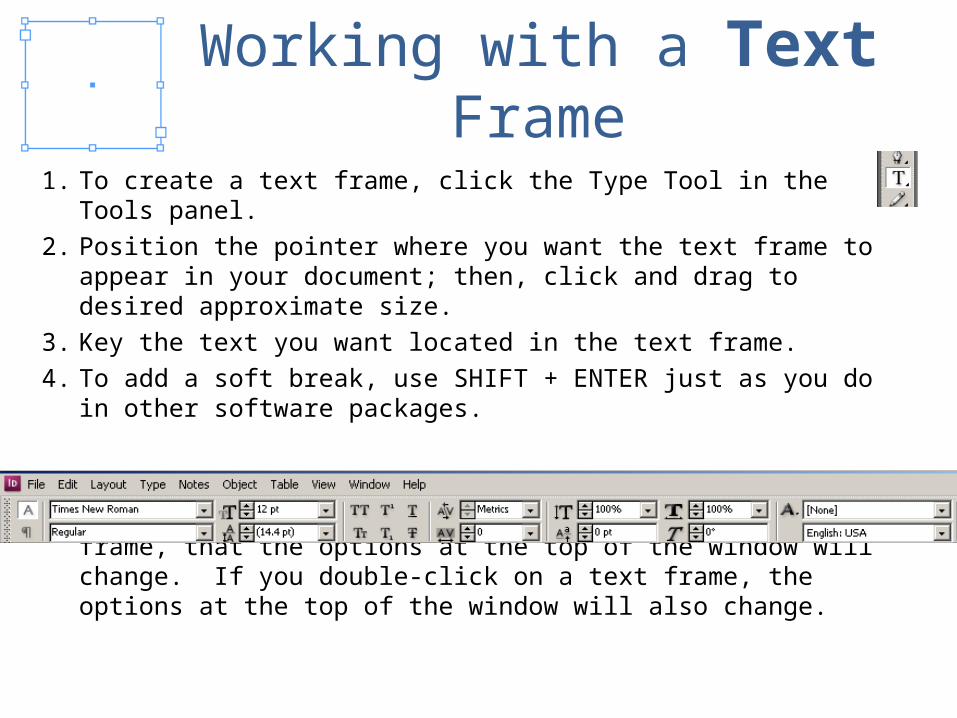
Working with a Text Frame
1. To create a text frame, click the Type Tool in the Tools panel.2. Position the pointer where you want the text frame to appear in
your document; then, click and drag to desired approximate size.3. Key the text you want located in the text frame. 4. To add a soft break, use SHIFT + ENTER just as you do in other
software packages.
Note that once you clicked the text tool to add a text frame, that the options at the top of the window will change. If you double-click on a text frame, the options at the top of the window will also change.

Changing the Size of a Text Frame
• To manually change the size of the text frame, click on one of the sizing handles and drag.
• To adjust the text frame to fit the text vertically, double-click the top or bottom center handle.
• To adjust the text frame to fit the text horizontally, double-click one of the side handles.
NOTE: Do not click either of the two larger boxes located on the sides of the frame. They have a different purpose.
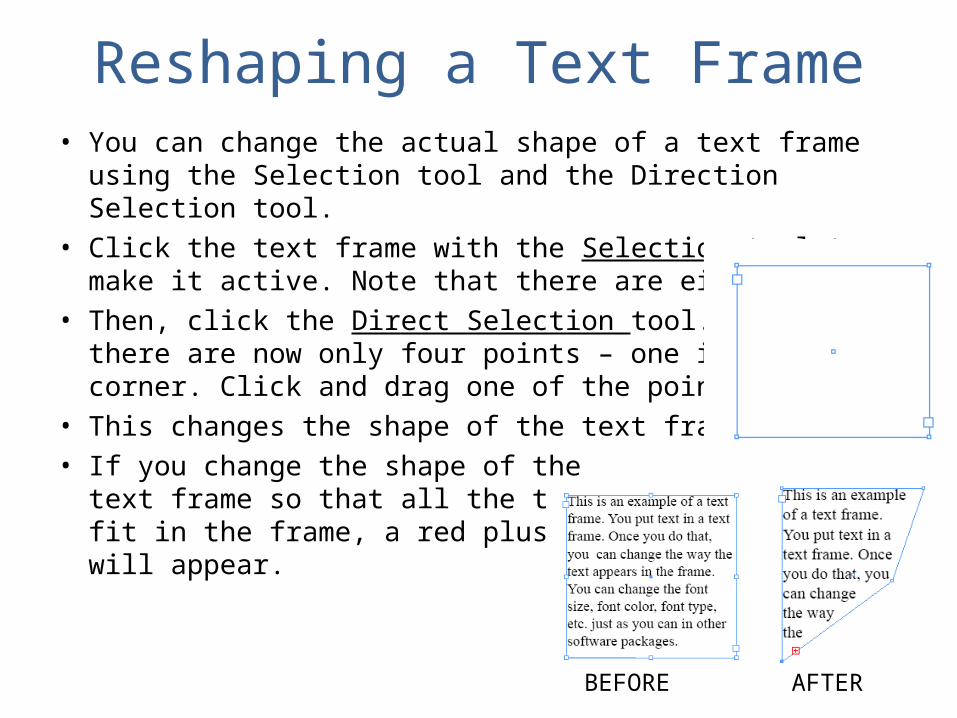
Reshaping a Text Frame• You can change the actual shape of a text frame using the
Selection tool and the Direction Selection tool.• Click the text frame with the Selection tool to make it active.
Note that there are eight points.• Then, click the Direct Selection tool. Note that
there are now only four points – one in eachcorner. Click and drag one of the points.
• This changes the shape of the text frame.• If you change the shape of the
text frame so that all the text won’tfit in the frame, a red plus signwill appear.
BEFORE AFTER
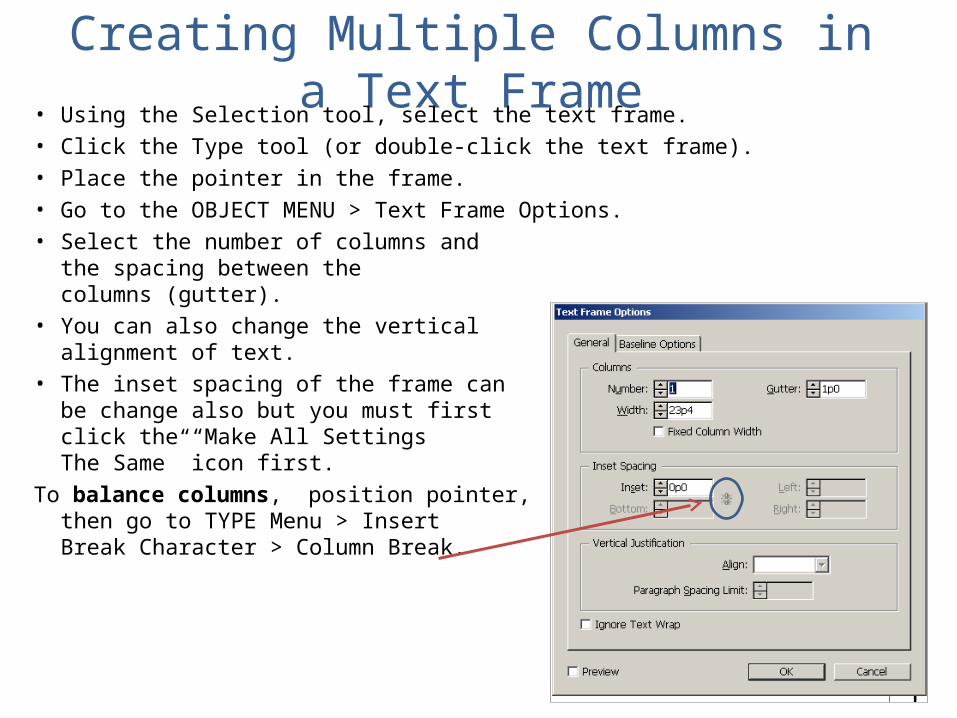
Creating Multiple Columns in a Text Frame• Using the Selection tool, select the text frame.• Click the Type tool (or double-click the text frame). • Place the pointer in the frame.• Go to the OBJECT MENU > Text Frame Options.• Select the number of columns and
the spacing between thecolumns (gutter).
• You can also change the verticalalignment of text.
• The inset spacing of the frame canbe change also but you must firstclick the “Make All SettingsThe Same” icon first.
To balance columns, position pointer, then go to TYPE Menu > InsertBreak Character > Column Break.

Working with Graphics Frame
To create a graphic frame, click the Rectangle Frame tool.(not the rectangle tool)• Click and drag to the desired size.•Click the Selection tool and make sure thegraphics frame is still selected.•Go to the FILE Menu > Place option.•Locate and double-click the graphic image you want to place inside your graphic frame. •Note that you will need to resize just the imageso that it fills the designated area.
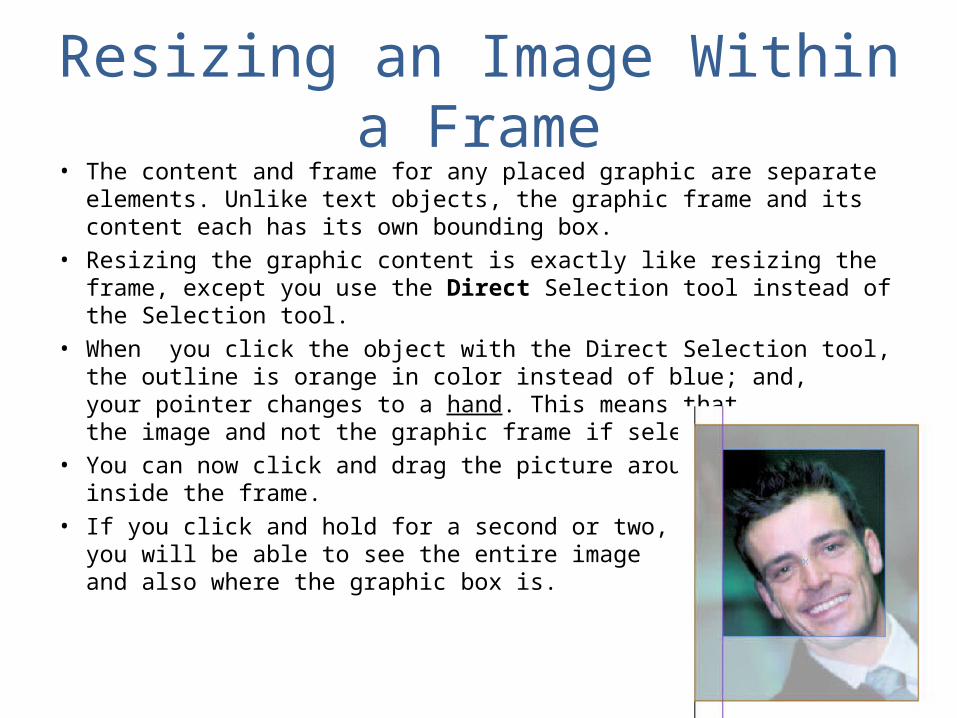
Resizing an Image Within a Frame• The content and frame for any placed graphic are separate elements.
Unlike text objects, the graphic frame and its content each has its own bounding box.
• Resizing the graphic content is exactly like resizing the frame, except you use the Direct Selection tool instead of the Selection tool.
• When you click the object with the Direct Selection tool, the outline is orange in color instead of blue; and, your pointer changes to a hand. This means thatthe image and not the graphic frame if selected.
• You can now click and drag the picture aroundinside the frame.
• If you click and hold for a second or two, you will be able to see the entire imageand also where the graphic box is.

Replacing the Contents of Graphics Frames• If you already have an image in a graphics frame, but you want to
change it, use the Selection tool to select the image. • Go to FILE Menu > Place and double-click on the desired new image.• The new image is inserted.
Adjusting the Image Within the Graphic Frame AutomaticallyOnce you have placed an image in a graphic frame, you can automatically make some adjustments by going to the OBJECT Menu > Fitting option.
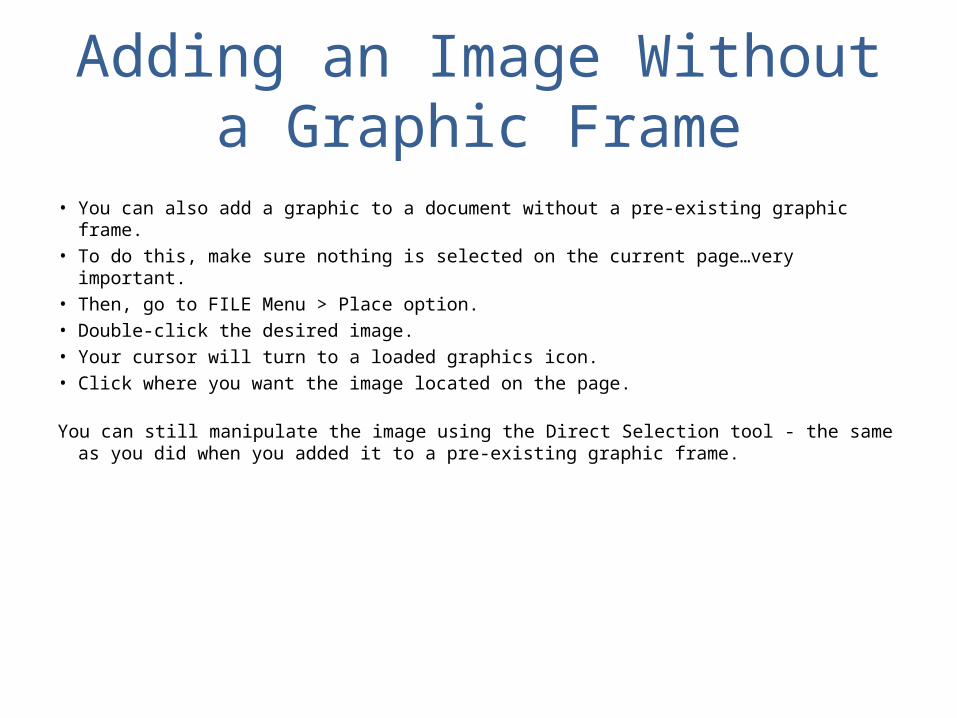
Adding an Image Without a Graphic Frame
• You can also add a graphic to a document without a pre-existing graphic frame.• To do this, make sure nothing is selected on the current page…very important.• Then, go to FILE Menu > Place option.• Double-click the desired image.• Your cursor will turn to a loaded graphics icon.• Click where you want the image located on the page.
You can still manipulate the image using the Direct Selection tool - the same as you did when you added it to a pre-existing graphic frame.
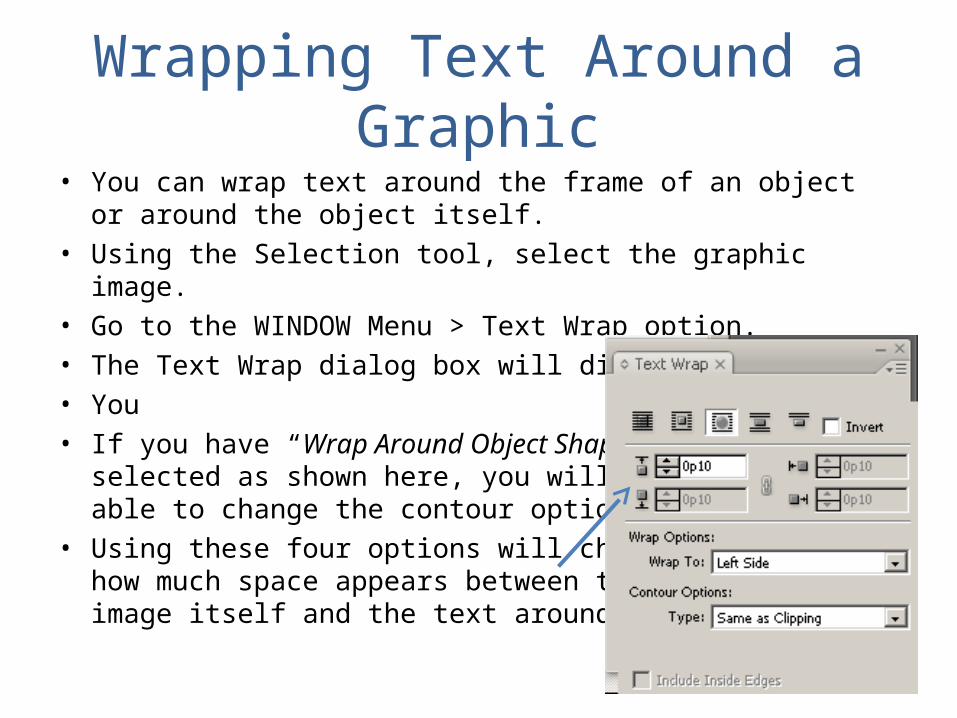
Wrapping Text Around a Graphic• You can wrap text around the frame of an object or around the
object itself. • Using the Selection tool, select the graphic image.• Go to the WINDOW Menu > Text Wrap option.• The Text Wrap dialog box will display.• You • If you have “Wrap Around Object Shape”
selected as shown here, you will then beable to change the contour options.
• Using these four options will changehow much space appears between theimage itself and the text around it.
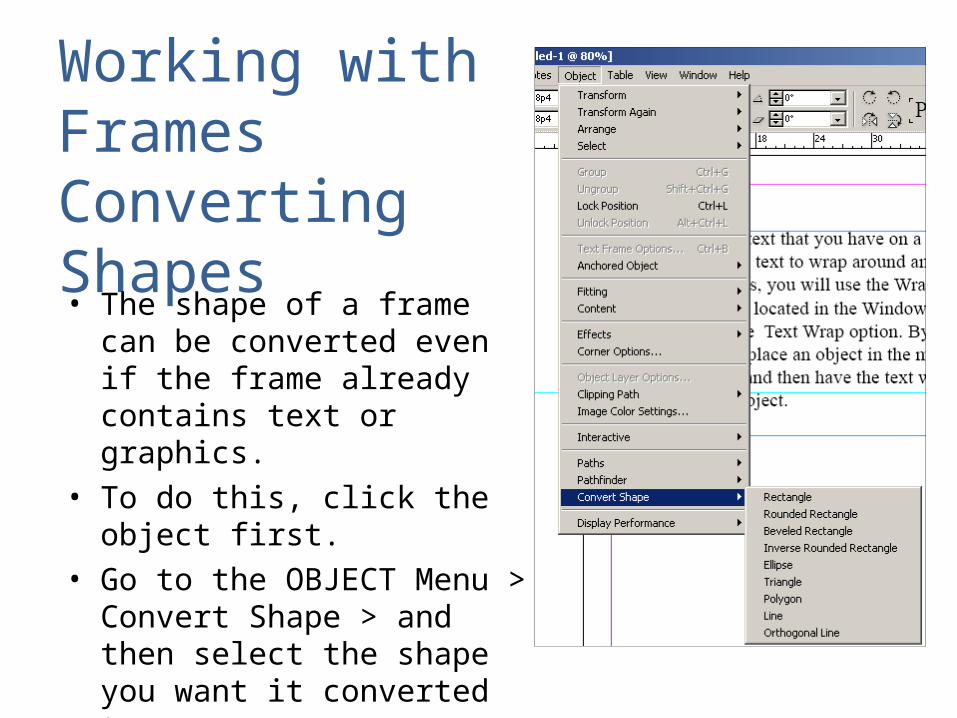
Working with FramesConverting Shapes• The shape of a frame can be
converted even if the frame already contains text or graphics.
• To do this, click the object first.• Go to the OBJECT Menu >
Convert Shape > and then select the shape you want it converted to.