ICONS for MapInfo BUTTONS - GeoRezo · 2009-07-08 · Custom icons for MapInfo ButtonPads MapInfo...
28
ICONS for MapInfo BUTTONS for the Windows 32-bit platform only =+=+=+=+=+=+=+=+=+=+= a collective contribution interpreted and presented by Jacques PARIS [email protected] may 2001 updated March 2002
Transcript of ICONS for MapInfo BUTTONS - GeoRezo · 2009-07-08 · Custom icons for MapInfo ButtonPads MapInfo...
ICONS for MapInfo BUTTONS
for the Windows 32-bit platform only
=+=+=+=+=+=+=+=+=+=+=
a collective contribution interpreted and presented by
Jacques PARIS
may 2001 updated March 2002


I want to give my special thanks to some fellows who have contributed greatly to my interest in that topic. Here they are by chronology of their “contributions”, not necessarily in order of importance. Lars Nielsen who offered years back his DLLIcons package. Everything was there already to make a dll of your favorite icons, and also to view the results with the most useful application (because allowing you to bathe in the beauty of your creation) DLLIcons.MBX. Karim Jarbia who gave me in French the simplest, clearest way to proceed for creating a dll with VisualBasic (my luck to have only a French VB at home, if I had tried to “translate” English instructions referring to menu items, I would have been still trying to figure it out!) even though its contribution is not included in the document present version. Ethan Hohneck who in early May 2001 offered MapInfo-L the result of their search on the subject and pointed to new, very interesting tools and support material. Then in 2002, Jakob Lanstorp and Peter Møller both of Kampsax, Dk for the improved IconPicker.dll and its implementation And that does not include the half-dozen or so who have contributed to the improvement of this "topic" by testing the validity of the document and contributing by their experiments at its broadening. Denmark, Swizerland, New Zealand .. and Canada , and several hidden in France. That is really my global village, the beauty of mapinfo-l + mapinfo_fr. Jacques Paris


Table of contents Background 1 Custom icons for MapInfo ButtonPads Image specifications Resource file specifications Programming insight Preparing images 4 New “button” icons Existing “button” icons Existing icons Preparing for DLLs 6 Color issue BMP format issue Location of dll issue Making a DLL 8 Software issue 8 A free tool kit for managing MI “button” icon DLL’s 9 Preparing images Developing a DLL Replacing existing bitmaps with “Resource Hacker” 10 Adding to the existing bitmaps with “Resource Hacker” 11
Deleting existing bitmaps with “Resource Hacker” 13 Checking the results with DLLIcons.mbx 14 Script processing with Resource Hacker 15
What about a ___.DEF file 17 Changing the MI “native” icons 18 Using new_icons.dll file 19 More compact DLLs 21 Links and related products 22

1
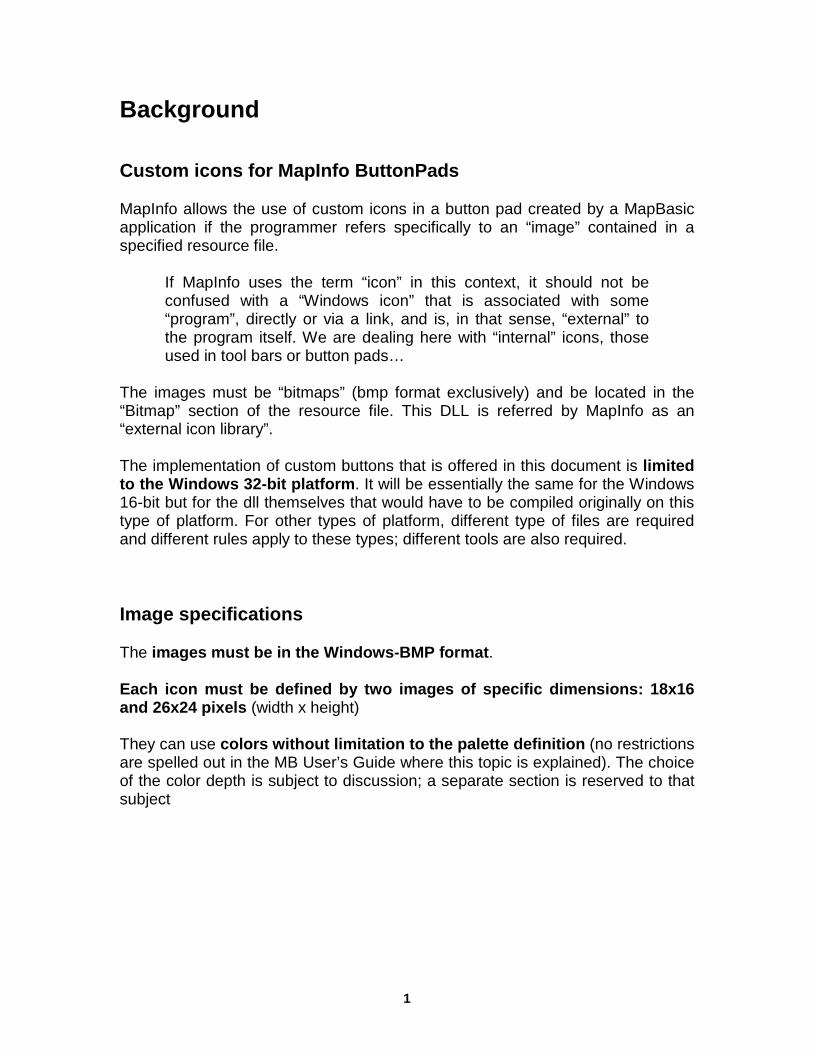
Background Custom icons for MapInfo ButtonPads MapInfo allows the use of custom icons in a button pad created by a MapBasic application if the programmer refers specifically to an “image” contained in a specified resource file.
If MapInfo uses the term “icon” in this context, it should not be confused with a “Windows icon” that is associated with some “program”, directly or via a link, and is, in that sense, “external” to the program itself. We are dealing here with “internal” icons, those used in tool bars or button pads…
The images must be “bitmaps” (bmp format exclusively) and be located in the “Bitmap” section of the resource file. This DLL is referred by MapInfo as an “external icon library”. The implementation of custom buttons that is offered in this document is limited to the Windows 32-bit platform. It will be essentially the same for the Windows 16-bit but for the dll themselves that would have to be compiled originally on this type of platform. For other types of platform, different type of files are required and different rules apply to these types; different tools are also required. Image specifications The images must be in the Windows-BMP format. Each icon must be defined by two images of specific dimensions: 18x16 and 26x24 pixels (width x height) They can use colors without limitation to the palette definition (no restrictions are spelled out in the MB User’s Guide where this topic is explained). The choice of the color depth is subject to discussion; a separate section is reserved to that subject
2
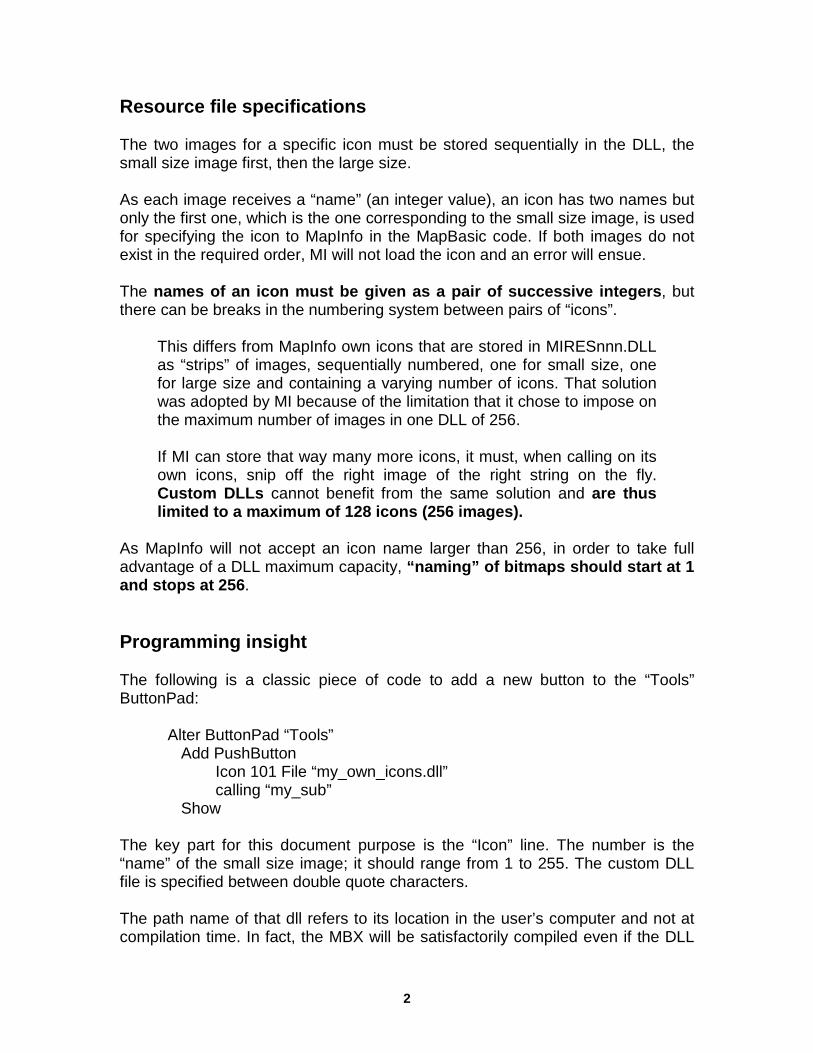
Resource file specifications The two images for a specific icon must be stored sequentially in the DLL, the small size image first, then the large size. As each image receives a “name” (an integer value), an icon has two names but only the first one, which is the one corresponding to the small size image, is used for specifying the icon to MapInfo in the MapBasic code. If both images do not exist in the required order, MI will not load the icon and an error will ensue. The names of an icon must be given as a pair of successive integers, but there can be breaks in the numbering system between pairs of “icons”.
This differs from MapInfo own icons that are stored in MIRESnnn.DLL as “strips” of images, sequentially numbered, one for small size, one for large size and containing a varying number of icons. That solution was adopted by MI because of the limitation that it chose to impose on the maximum number of images in one DLL of 256. If MI can store that way many more icons, it must, when calling on its own icons, snip off the right image of the right string on the fly. Custom DLLs cannot benefit from the same solution and are thus limited to a maximum of 128 icons (256 images).
As MapInfo will not accept an icon name larger than 256, in order to take full advantage of a DLL maximum capacity, “naming” of bitmaps should start at 1 and stops at 256. Programming insight The following is a classic piece of code to add a new button to the “Tools” ButtonPad:
Alter ButtonPad “Tools” Add PushButton Icon 101 File “my_own_icons.dll” calling “my_sub” Show
The key part for this document purpose is the “Icon” line. The number is the “name” of the small size image; it should range from 1 to 255. The custom DLL file is specified between double quote characters. The path name of that dll refers to its location in the user’s computer and not at compilation time. In fact, the MBX will be satisfactorily compiled even if the DLL
3
does not exist on the programmer’s computer, or is not in the expected location. Path specification must thus take into account what is known about the user’s configuration. Full path does not have to be specified if the DLL is be located - in the directory where the MBX is placed, - in the user’s Windows directory (the MapInfoW.exe directory), - in the system directory within the Windows directory, - anywhere along the user’s search path. The choice of the location of icons DLL is an issue that is open for discussion later in this document. Errors resulting from a wrong path or for “wrong” bitmap definitions will only appear at run time, never during compilation. If the dll cannot be found, the first part of the message (error # 1334) reads “Unable to load library ____.dll” and the second part seems to come from error #983 “Unable to load external icon library.” If the icon is not properly stored in the dll, more specifically if the size of the image is not what MI expects, the error message that is generated reads:
Bad height for bitmap id icon#. Unable to load external icon resource. This is error number 1272 (followed again by the same text as error #983); 1274 will be for width. Besides, 1273 and 1275 deal with file# rather than icon#.
4
Preparing images New “button” icons To create new icons, any “paint” program that allows for the control of size (width, height) and of color depth, for resizing the image (to be able to change from 18X16 to 26x24 or vice versa) and for saving the image in an acceptable BMP format will do the job. As two images must be created and as the conversion between the two sizes is not a direct one, the results of a change in size are not always satisfactory. Adjustments have often to be made. What is the best order of creation? Small or large size first? Experience shows that if a small image is enlarged, the new image may look “blocky” but going from a larger image to a smaller may result in some loss of detail. Is it easier to thin out “extra” pixels than to try to rebuild a blurred pattern? I personally recommend starting with the small size because it is the most demanding situation for getting a good readability of the image. A “good” small size image when blown to the large size will more than often still be “good” (the overall pattern will be visible even if some adjustments may be needed), but the reverse is not always true: a “good” large size image may loose all its impact, mainly pattern readability, when reduced to a small image, to the point that it may have to be reworked entirely. Hence the following sequence of operations: 1 – create a small size image
Use one of the templates provided by Ethan (template18x16.bmp). Make sure of the color palette you are using when creating it. See below discussion on the subject.
2 – save the small image
As an example, save it as “IconA_18.bmp” I prefer using an ending to the file name that will sort the names as pairs in the order small-large. S for small, L for large do not do the trick. _18, _26 or _a, _b will work.
3 – save it again as a basis to larger size Save as “IconA_26.bmp” 4 – change the size of the image
Working with the new file, change its size to 26X24 5 – make the required adjustments
5
Clean the automatic results of the size conversion 6 – save the large size image A simple save is enough. Existing “button” icons You may want to regroup in the same dll icons that are in several files. That would require that you first “extract” those images from where they are. Any “resource manager” will be able to do the job. The general steps are simple: 1 – open the Bitmap section of the DLL 2 – choose the images you want (there must be two for each icon, but you may be able to work on one at the time only) 3 – extract (or export) them Be careful when specifying the directory where the extracted files will be placed. Make it easy on you and think about the next step, preparing the DLL, by putting all the required images together, and preferably by having only them in the directory. It could be a tedious job because each image must be individually extracted, at least with all the programs I have tested. Existing icons We are opening here the range of “extraction” to any kind of icon that exist in formats other than the specified BMP in its two sizes, for example as ICO. In a DLL, these icons are found in the “Icon” section and can be saved as .ico files (some “extractors” may offer saving in a different format, may be directly in BMP, that would simplify the next step). The next step will involve a change of format and of size. I do not know of a program that will read the ICO format that is not an “icon editor”. It is not a good solution to have a program just to do that operation and, furthermore, the exportation in BMP format is not possible with all these programs. Among those I have explored, only “AX Icons” by Axialis does it. (see reference in “Links and related Products”). As the shape (all are square) and the dimensions (valid Windows sizes are 16x16, 32x32 and 48x48) of these Windows Icons are noticeably different from what we are looking for, some adjustments will be required in any case. We can

6
expect that a 16x16 being the closest to the “small image” size will generate the fewer adjustments but it may be that the resizing of a 48x48 will allow for more freedom in the redefinition of the pixels. Preparing for DLLs Color issue The choice of color depth (2=”monochrome”, 16, 256 or 24-bit color) seems to be free of technical limitations, beyond some palette constraints that we will discuss later. The search for most appropriate solution can thus be centered on two dimensions, the quality of the image and its size. It is an art to design quality buttons. They must be easy to “read” in their small size version and must carry some useful “message” (symbolized design or universal sign). Color can be an asset to increase their readability (better contrast) and their meaning (different background colors for different context of application). Size is simply a factor of the color depth as the number of pixels is a constant for each size. The higher is the color definition, the larger the size. In an example the small size icon went from 310 bytes with a 16 color palette to 950 in true color; the corresponding large size, from 502 to 1974. As this factor of 3 applies to small number of bytes, it could be dismissed as irrelevant, but if there are 60 pairs of icons, the increase the dll could be from a (very crudely) estimated 48K to 175K. I know that size is not really a factor, but it always ends up by costing something. One should also evaluate how the quality of the image could be enhanced by using a wider color palette. The lowest definition is perhaps limitative because the 16-col palette MUST BE THE WINDOWS DEFAULT PALETTE. But at the other end, a true color palette may be a huge overkill for such small objects. I would personally only use 256-color palette in practically all occasions, excepted in very simple designs (single letter/digit) where 16 colors will be more than enough. BMP format issue Not all “paint” programs generate BMP files that have a format universally recognized. I cannot explain what is the exact problem but some files I have
7
made using LviewPro could not be recognized by some applications, either some other “paint” program or Resource Hacker. It seems that there are BMP formats that are not strictly “Windows” compliant. If such is the case with the program you use, the only alternative is to use another program and if you want to keep those you have already done, simply open them in the “other” program, and save them again. It is generally sufficient. But you know it only when trying to build you DLL. You should then make a full test on a pair of icons before going into production. More will be said later on that subject in the procedure given as example. DLL location issue We have seen that MI looks systematically in some repertories if no path is specified for the icon library, and the ideal for the programmer is not to have to specify a path for the icon file. If the DLL is left with the application itself, there will be some problems if the same file is called by another application that may not be in the directory. Short of requiring that all the applications be placed in the same directory, it does not seem to be the most effective way. The Windows directory could be another solution, perfectly acceptable. It is central and can be found from anywhere. It is however a little bit crowded and for that only reason I will recommend that the DLLs be always placed in the MapInfo directory. It should become an automatism for the developers to ask the user to load there the new DLLs or if some setup software is used to install the application, to make sure that they are placed there. They will be central to all applications and relatively easy to locate. However, these considerations may be challenged by network administrators and some guidelines should be designed to help software designers in this area.
8
Making a DLL The software issue There are two main avenues open for generating DLLs. One requires having access to some language complier (C++, Delphi, VB…), solution that may be costly if such software is used only for that reason. The alternative is to rely on a “resource editor”, some of which being free. The preparation of the images is identical in both cases, so that there is no need to change anything that has already been explained, and the choice of the program is completely independent from that preparation. For those having access to a compiler, they should no difficulty in finding the necessary explanations on how to make a DLL. As I do not want to favor one or the other available program and as I am in no position to give the complete information for each one, I will concentrate on the “resource editor” approach. When selecting a resource editor, I will look certainly at the price. If there is one free, I will start with it. Then, I will find out if it is able to “replace, delete and add” or only to “replace”. Most of those I have located fall in the ”only replace” category. Short of having in stock DLLs of various sizes, one is stuck with a fixed file capacity, the DLL being most of the time not well adapted to the needs; if it is too large, the damage is limited, but there is no remedy if it is too small. As I am very finicky about space use, I will try to find out also if the program will accept a DLL formed with a unique section “Bitmap”. DLL that are generated with compilers contain generally several unnecessary sections and there is no reason to pad the file with unwanted data.
9
A FREE Tool Kit for managing MI “button” icons DLL. Preparing images I will leave the choice of the paint program to the user with some limited recommendations: 1 – Make sure that the images are saved in the acceptable Windows-BMP format 2 – Designing can be facilitated if the program can display a pixel grid (easier to locate specific pixels) To help in getting started, the kit contains 4 pairs of “white” icons, a pair for each standard palette depth (2, 16, 256 and “true”), in Blank_BMP.zip. Building a DLL I will recommend using “Resource Hacker” that is free, allows for addition and deletion as well as replacement, and accepts minimalist DLLs. If interested, you should download it directly from the author’s site. One basic Button_Template.dll is in the kit. Provided originally by Ethan Hohneck, I have fine tuned it. It contains a single Bitmap section and the two images of a blank icon with a 256-color palette. Operations for replacing or adding bitmaps are identical to what is described in the “Brush Patterns” document. Deletion is quite straightforward. (see below) “R.H.” can also be launched with a script file. It makes mass creation or replacement much easier, preparing the script file taking much less time to build by multiple lines copy/paste + small corrections than going through all the moves required by the requesters for each image. A commented example is in the kit.
The behavior of R.H. has changed slightly with version 3.3 or about. It will not display at all bitmaps that it does not recognize rather than showing an empty image holder and if the resource is tested, it will answer by the message “The file has a non-standard resource layout. It has probably been compressed by an EXE compressor”. It will happen with some bmp files produced by LView but it does not describe the situation properly. It is certain that the bmp format of these images is not standard and that fools R.H. into believing that the entire dll file is affected. It is a good way to test if you are using an acceptable BMP format.
10
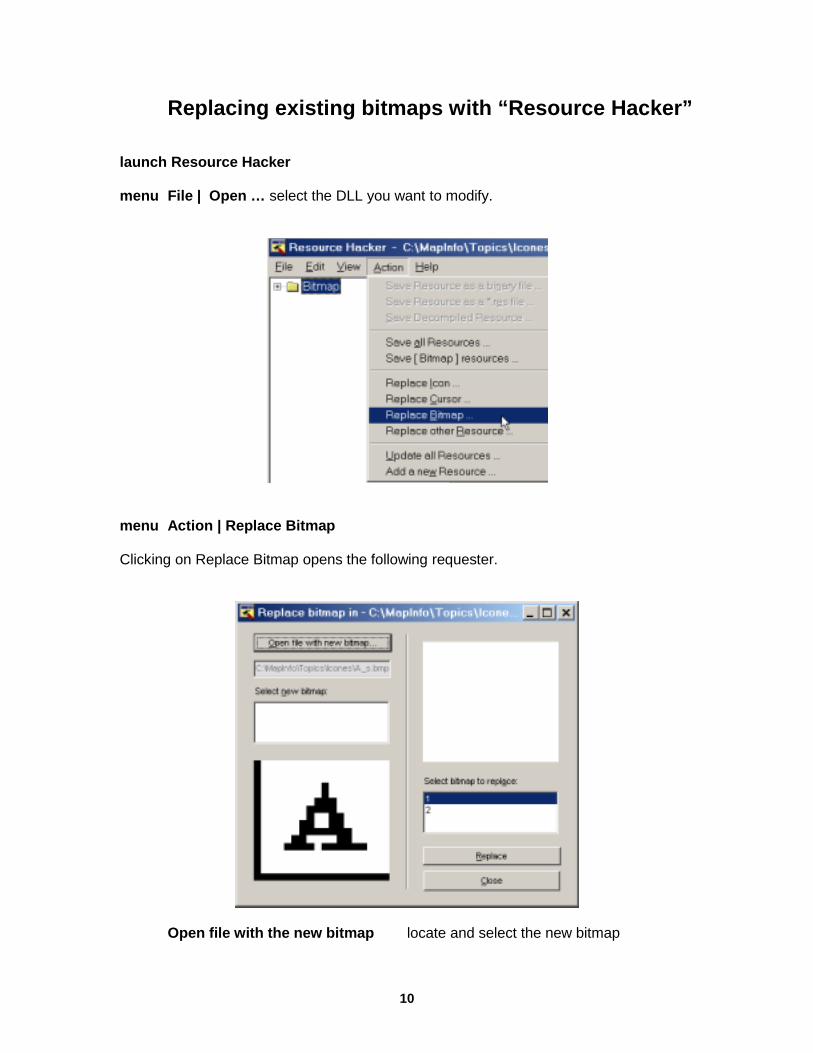
Replacing existing bitmaps with “Resource Hacker” launch Resource Hacker menu File | Open … select the DLL you want to modify.
menu Action | Replace Bitmap Clicking on Replace Bitmap opens the following requester.
Open file with the new bitmap locate and select the new bitmap

11
the new image is displayed in the bottom left part of the requester Select bitmap to replace select the existing bitmap (name) number
in the list the existing image is displayed in the top right part of the requester
Replace or close repeat procedure for each bitmap to be changed, or Close
When all the changes are done menu File | Save
Adding to the existing bitmaps with “Resource Hacker” launch Resource Hacker menu File | Open … select the DLL you need
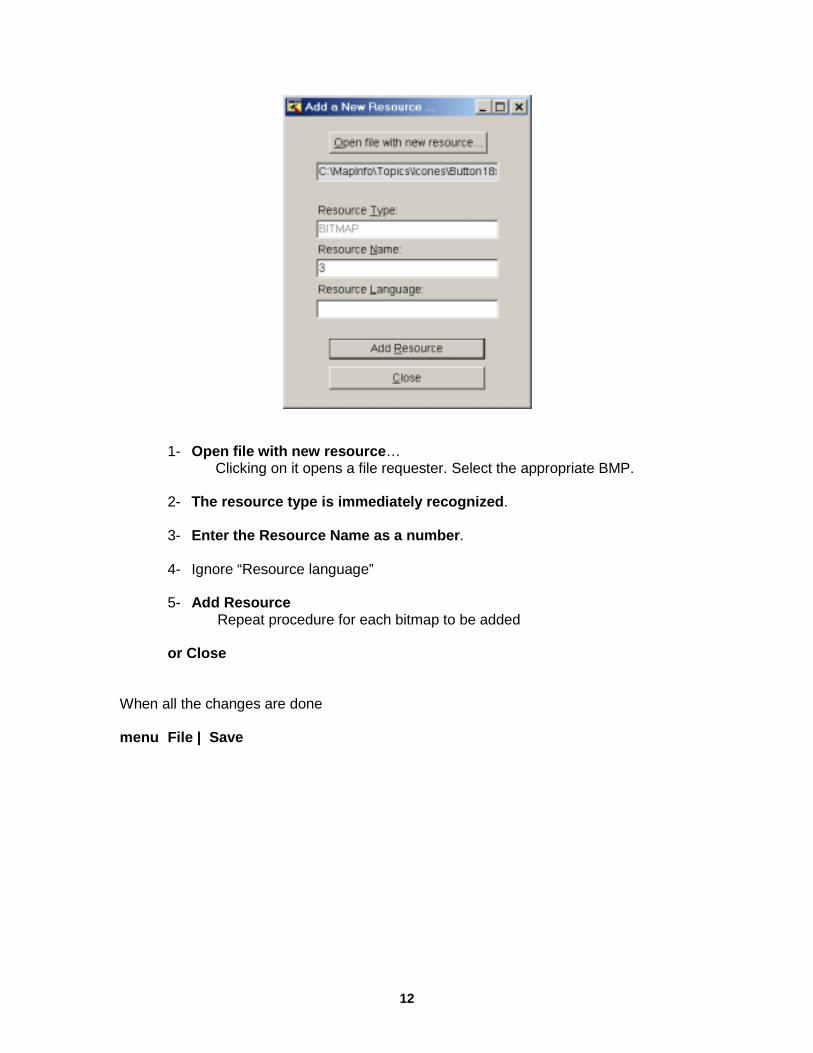
menu Action | Add a new Resource Clicking on “Add a new Resource” opens the following requester.
12
1- Open file with new resource… Clicking on it opens a file requester. Select the appropriate BMP.
2- The resource type is immediately recognized. 3- Enter the Resource Name as a number.
4- Ignore “Resource language” 5- Add Resource
Repeat procedure for each bitmap to be added
or Close When all the changes are done menu File | Save
13
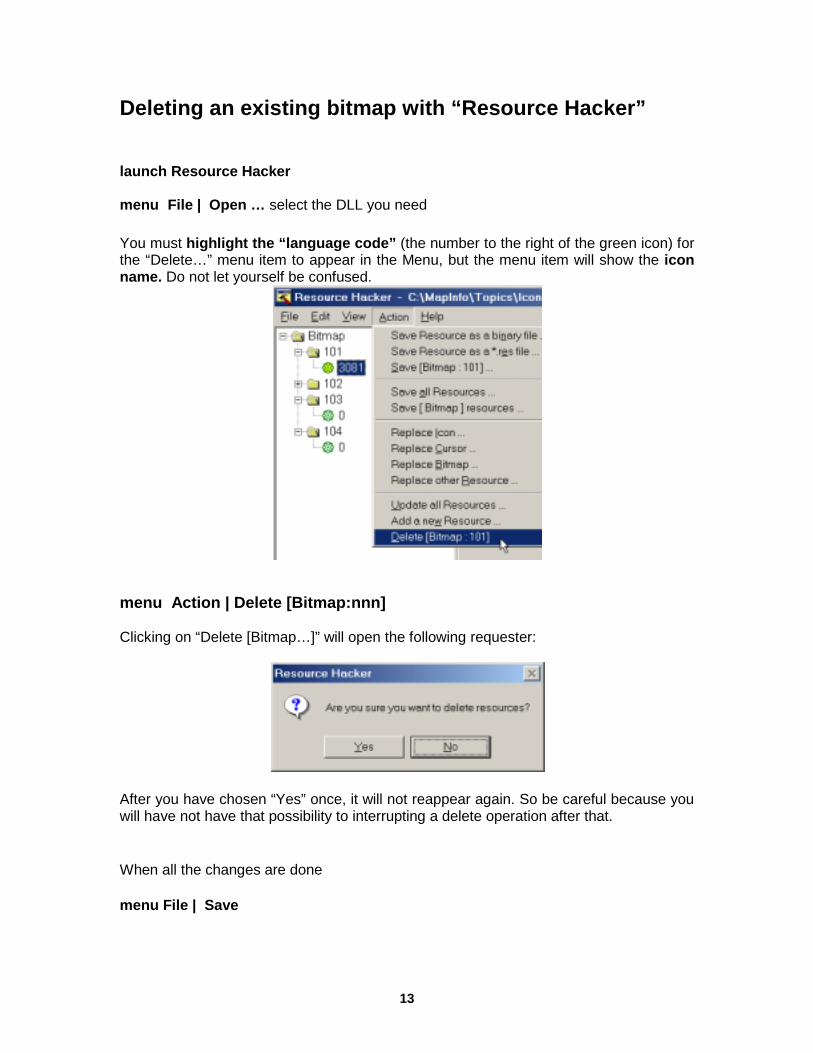
Deleting an existing bitmap with “Resource Hacker” launch Resource Hacker menu File | Open … select the DLL you need You must highlight the “language code” (the number to the right of the green icon) for the “Delete…” menu item to appear in the Menu, but the menu item will show the icon name. Do not let yourself be confused.
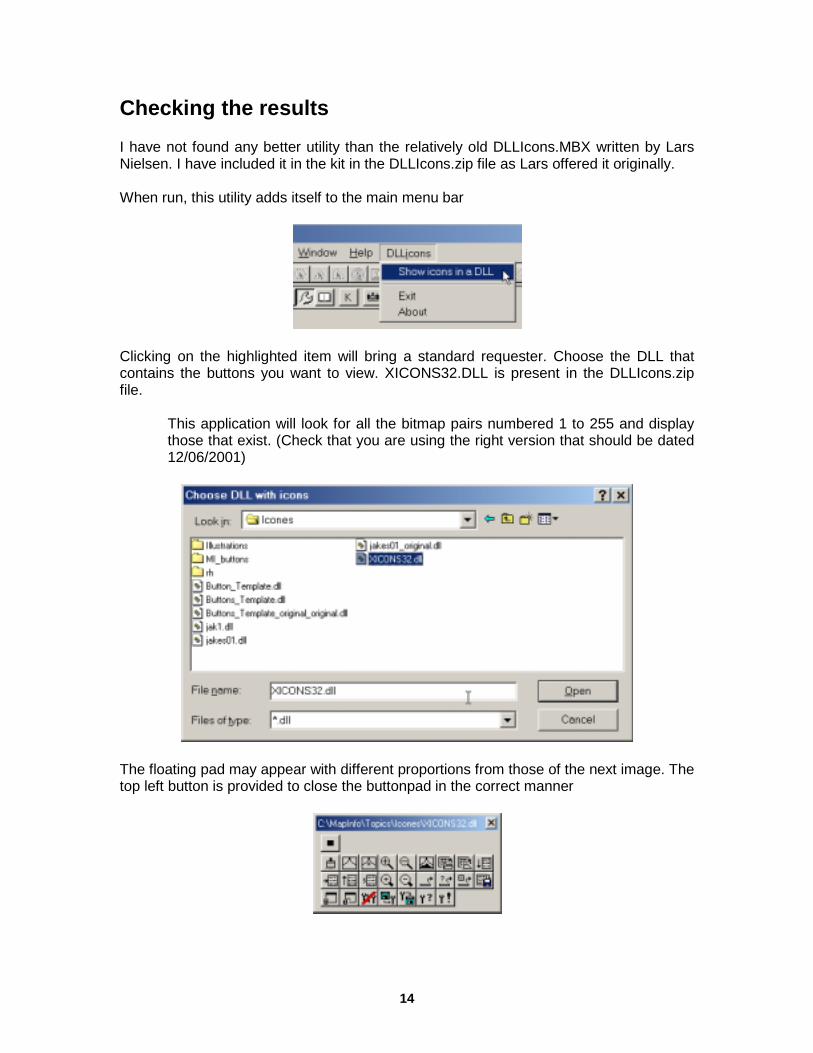
menu Action | Delete [Bitmap:nnn] Clicking on “Delete [Bitmap…]” will open the following requester:
After you have chosen “Yes” once, it will not reappear again. So be careful because you will have not have that possibility to interrupting a delete operation after that.
When all the changes are done
menu File | Save
14
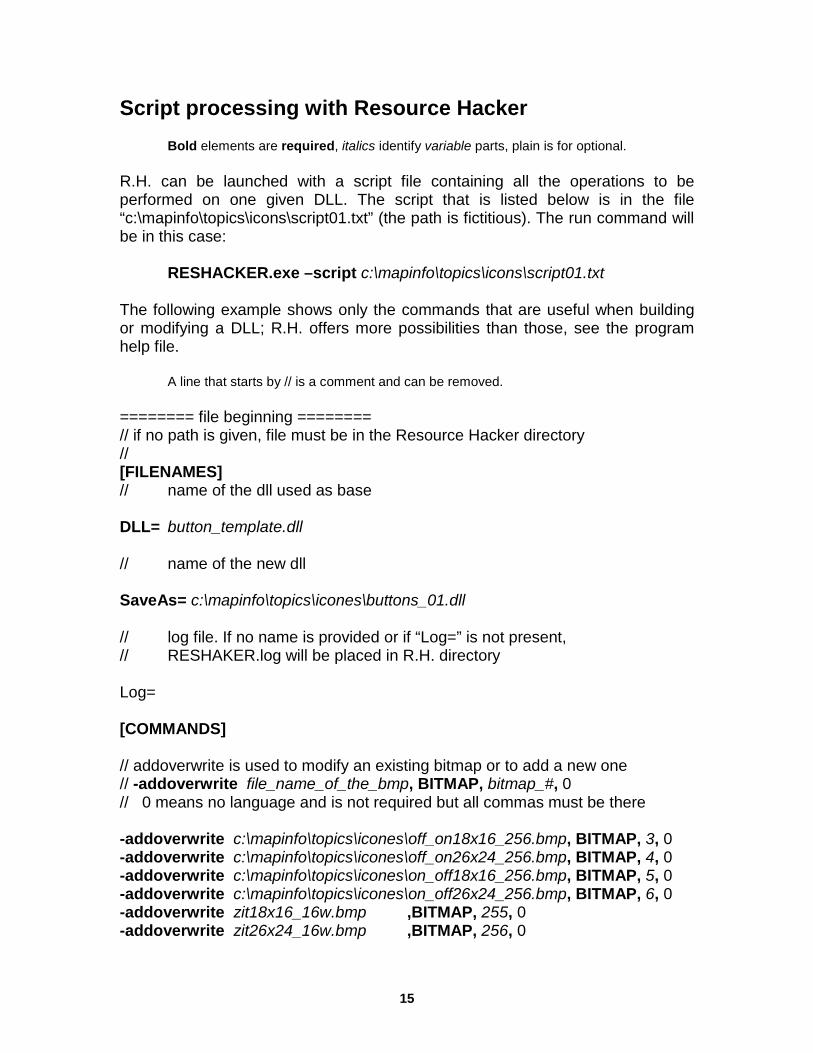
Checking the results I have not found any better utility than the relatively old DLLIcons.MBX written by Lars Nielsen. I have included it in the kit in the DLLIcons.zip file as Lars offered it originally. When run, this utility adds itself to the main menu bar
Clicking on the highlighted item will bring a standard requester. Choose the DLL that contains the buttons you want to view. XICONS32.DLL is present in the DLLIcons.zip file.
This application will look for all the bitmap pairs numbered 1 to 255 and display those that exist. (Check that you are using the right version that should be dated 12/06/2001)
The floating pad may appear with different proportions from those of the next image. The top left button is provided to close the buttonpad in the correct manner
15
Script processing with Resource Hacker Bold elements are required, italics identify variable parts, plain is for optional.
R.H. can be launched with a script file containing all the operations to be performed on one given DLL. The script that is listed below is in the file “c:\mapinfo\topics\icons\script01.txt” (the path is fictitious). The run command will be in this case:
RESHACKER.exe –script c:\mapinfo\topics\icons\script01.txt The following example shows only the commands that are useful when building or modifying a DLL; R.H. offers more possibilities than those, see the program help file.
A line that starts by // is a comment and can be removed.
======== file beginning ======== // if no path is given, file must be in the Resource Hacker directory // [FILENAMES] // name of the dll used as base DLL= button_template.dll // name of the new dll SaveAs= c:\mapinfo\topics\icones\buttons_01.dll // log file. If no name is provided or if “Log=” is not present, // RESHAKER.log will be placed in R.H. directory Log= [COMMANDS] // addoverwrite is used to modify an existing bitmap or to add a new one // -addoverwrite file_name_of_the_bmp, BITMAP, bitmap_#, 0 // 0 means no language and is not required but all commas must be there -addoverwrite c:\mapinfo\topics\icones\off_on18x16_256.bmp, BITMAP, 3, 0 -addoverwrite c:\mapinfo\topics\icones\off_on26x24_256.bmp, BITMAP, 4, 0 -addoverwrite c:\mapinfo\topics\icones\on_off18x16_256.bmp, BITMAP, 5, 0 -addoverwrite c:\mapinfo\topics\icones\on_off26x24_256.bmp, BITMAP, 6, 0 -addoverwrite zit18x16_16w.bmp ,BITMAP, 255, 0 -addoverwrite zit26x24_16w.bmp ,BITMAP, 256, 0

16
// to delete a bitmap. The last 0 is not required but all commas must be there. // -delete BITMAP, bitmap_#, 0 -delete BITMAP, 1, 0 -delete BITMAP, 2, 0 ======== file end ========
17
What about a ___.DEF file? A .def file is a simple text file that holds literal definitions for some specific parameters that MI uses only as numerical codes. A programmer can use the defined terms in its program instead of numeric codes as long as he adds a “include ___.def” in his program. The MapBasic “compiler” can read such a file and will replace the definitions present in the MB file by their corresponding codes in the resulting MBO or MBX file. Even though there is no link made between the .def and the .dll files at compilation time, it is of good practice to give them the same name. The typical line of such a file is very simple: the statement “Define”, the literal definition and its numeric value define MI_ICON_SEARCH_POLYGON 332 define MI_ICON_UNSELECT_ALL 333 define MI_ICON_GRAPH_SELECT 334 define MI_ICON_ODBC_DISCONNECT 335
Comments following a ‘ are allowed as a full line or after the complete definition. This is most useful to record the origin, etc. of the file or of part of it.
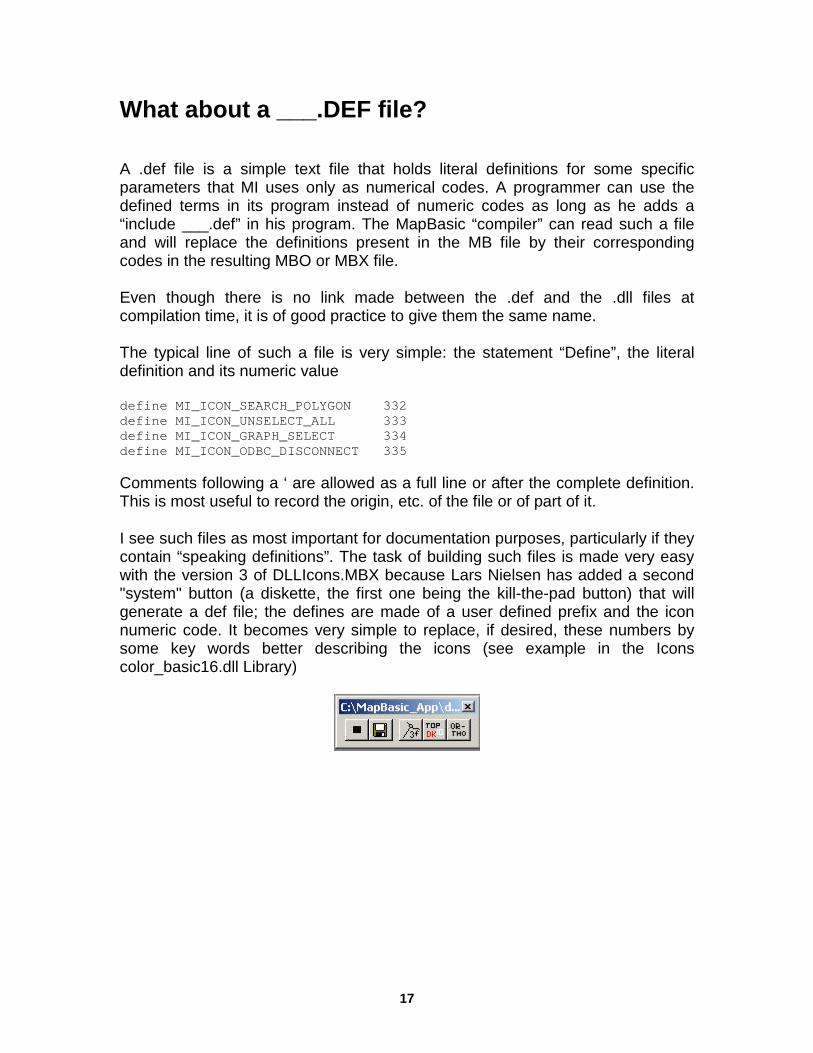
I see such files as most important for documentation purposes, particularly if they contain “speaking definitions”. The task of building such files is made very easy with the version 3 of DLLIcons.MBX because Lars Nielsen has added a second "system" button (a diskette, the first one being the kill-the-pad button) that will generate a def file; the defines are made of a user defined prefix and the icon numeric code. It becomes very simple to replace, if desired, these numbers by some key words better describing the icons (see example in the Icons color_basic16.dll Library)

18
Changing the “native” MI icons Before dealing with the question of changing “native” MI icons, we must understand how they are stored and used. These icons are found in the bitmap section of the MIRESnnn.dll file. They are structured in blocks that are images regrouping several icons existing in the two sizes. “MI Icons for MapBasic.PDF” is the best way to understand that organization. This document was prepared by Lars Nielsen. I have added to it the bitmap numbers used in the dll and some definitions for the latest icons. Besides this block organization, the numbering system is also different: There is only one number per icon. The numbers are thus continuous from 1 to 337, in version 6.5. That solution enables MI to hold and manage many more icons than is available in an external dll but necessitates special handling (converting the icon # to a “group” icon, then finding its position in the group, then extracting that image). That limits what can be done when trying to change those icons. Changes will have to respect the group structure and the “group” (as a bitmap resource) and icon numbering schemes. Changes could be made to individual “designs” as part of a group, and must be reflected in the images for both sizes. The width of a group should not be changed (it is always the number of “designs” multiplied by 18 or 26 according to the size). Given these constraints, any modification can be done following the same procedures as outlined for individual icons.
19
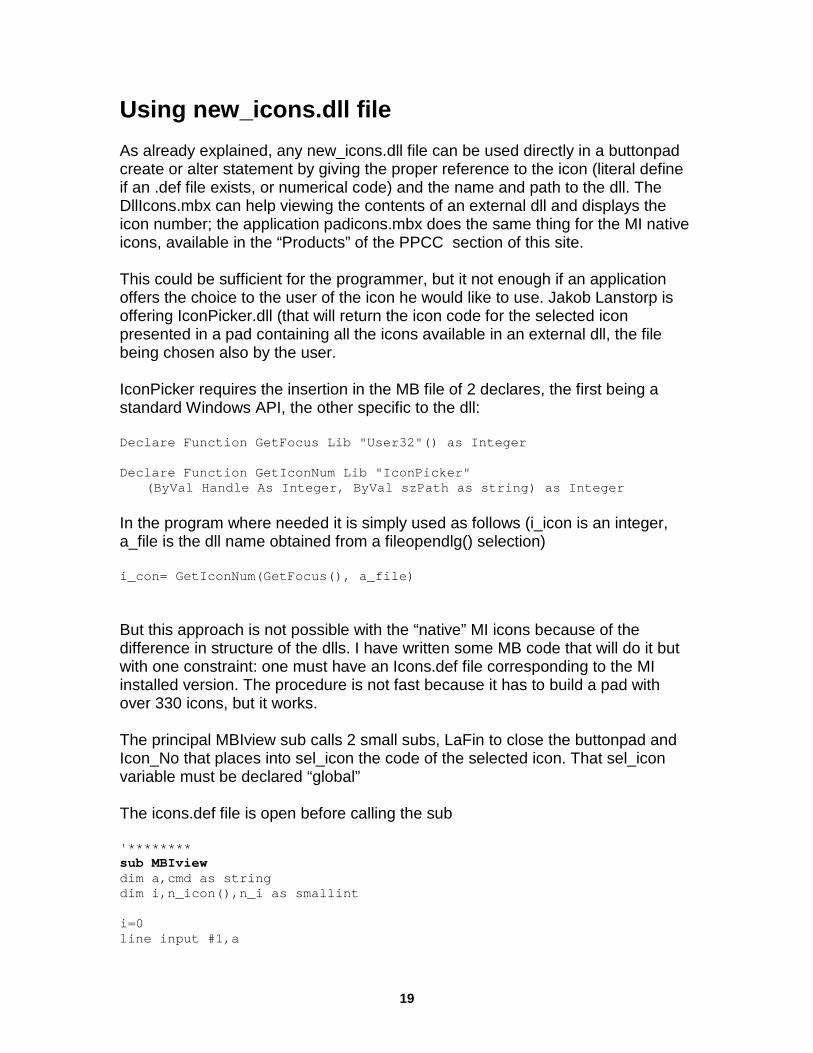
Using new_icons.dll file As already explained, any new_icons.dll file can be used directly in a buttonpad create or alter statement by giving the proper reference to the icon (literal define if an .def file exists, or numerical code) and the name and path to the dll. The DllIcons.mbx can help viewing the contents of an external dll and displays the icon number; the application padicons.mbx does the same thing for the MI native icons, available in the “Products” of the PPCC section of this site. This could be sufficient for the programmer, but it not enough if an application offers the choice to the user of the icon he would like to use. Jakob Lanstorp is offering IconPicker.dll (that will return the icon code for the selected icon presented in a pad containing all the icons available in an external dll, the file being chosen also by the user. IconPicker requires the insertion in the MB file of 2 declares, the first being a standard Windows API, the other specific to the dll: Declare Function GetFocus Lib "User32"() as Integer Declare Function GetIconNum Lib "IconPicker" (ByVal Handle As Integer, ByVal szPath as string) as Integer
In the program where needed it is simply used as follows (i_icon is an integer, a_file is the dll name obtained from a fileopendlg() selection) i_con= GetIconNum(GetFocus(), a_file) But this approach is not possible with the “native” MI icons because of the difference in structure of the dlls. I have written some MB code that will do it but with one constraint: one must have an Icons.def file corresponding to the MI installed version. The procedure is not fast because it has to build a pad with over 330 icons, but it works. The principal MBIview sub calls 2 small subs, LaFin to close the buttonpad and Icon_No that places into sel_icon the code of the selected icon. That sel_icon variable must be declared “global” The icons.def file is open before calling the sub '******** sub MBIview dim a,cmd as string dim i,n_icon(),n_i as smallint i=0 line input #1,a
20
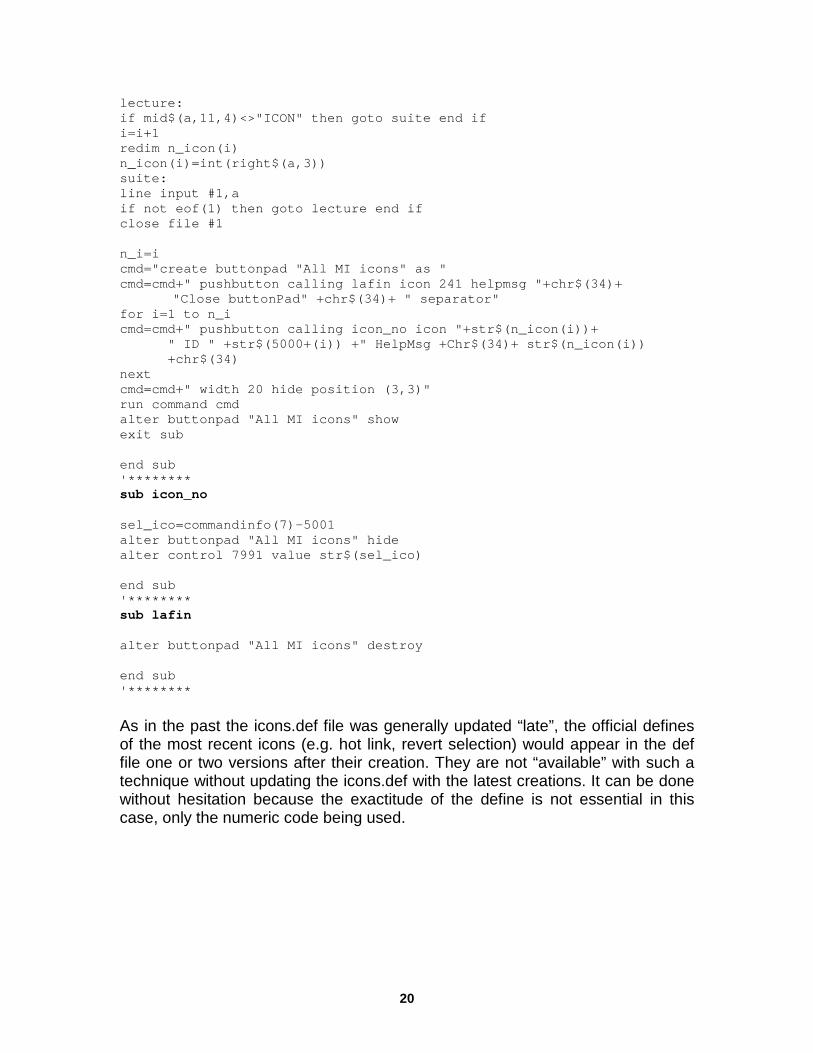
lecture: if mid$(a,11,4)<>"ICON" then goto suite end if i=i+1 redim n_icon(i) n_icon(i)=int(right$(a,3)) suite: line input #1,a if not eof(1) then goto lecture end if close file #1 n_i=i cmd="create buttonpad "All MI icons" as " cmd=cmd+" pushbutton calling lafin icon 241 helpmsg "+chr$(34)+ "Close buttonPad" +chr$(34)+ " separator" for i=1 to n_i cmd=cmd+" pushbutton calling icon_no icon "+str$(n_icon(i))+
" ID " +str$(5000+(i)) +" HelpMsg +Chr$(34)+ str$(n_icon(i)) +chr$(34)
next cmd=cmd+" width 20 hide position (3,3)" run command cmd alter buttonpad "All MI icons" show exit sub end sub '******** sub icon_no sel_ico=commandinfo(7)-5001 alter buttonpad "All MI icons" hide alter control 7991 value str$(sel_ico) end sub '******** sub lafin alter buttonpad "All MI icons" destroy end sub '******** As in the past the icons.def file was generally updated “late”, the official defines of the most recent icons (e.g. hot link, revert selection) would appear in the def file one or two versions after their creation. They are not “available” with such a technique without updating the icons.def with the latest creations. It can be done without hesitation because the exactitude of the define is not essential in this case, only the numeric code being used.
21
More compact DLLs The presence of several dlls used only for storing images may occupy space that would be better used most of the time. There exist several tools that will compact executables (exe or dll). Among them, one that was pointed to me is a free tool that does its job remarkably well. The essential characteristic of such tool is to save space without loosing any functionality. But it is not without any consequence, particularly for this topic. One cannot display the bitmaps of a DLL that has been “squeezed” in particular using Resource Hacker. The full meaning of the message already quoted on page 9 “The file has a non-standard resource layout. It has probably been compressed by an EXE compressor” takes now its full meaning. But, luckily, what has been compressed can be uncompressed and once the dll has been reprocessed “backwards”, it regains its original qualities. If someone uses such a tool, a simple operation before modifying a dll is not much to ask. If someone who does not own such a tool wants to hack your compressed dll, he will not be able to do it until he finds the proper tool. It could be a bonus in the search for safety in the distribution of external dlls. I have been using UPX.exe. The Mires600.dll went down from 1264 kb to 286 kb without showing any slowdown. A simple dll containing 22 icons went from 74 kb to 35, a compression of 57.5%, a less dramatic result but still a pleasant one. One draw back is that it is a dos program and the specification of the paths and the options may become bothersome. Some nice Windows interface will be more than welcome.
22
Links and related Products AX Icons by Axialis www.axialis.com.
A shareware version exists Resource Hacker by Angus Johnson http://rpi.net.au/~ajohnson/resourcehacker/ Free program DLLIcons by Lars Nielsen The zip file in the Icons_ToolKit.zip archive is also available on
www.directionsmag.com/tools/ Check for file date; it should be 12/06/2001 or later IconPicker.dll by Jakob Lanstorp. Available on his personal site (best to get latest version)
http://www.lanstorp.com/download/PickAnResourceIcon.zip and on www.directionsmag.com/tools/ UPX.exe http://upx.sourceforge.net/ Compresses-decompresses executables (exe, dll)