HUMIDIFIRST O&M manual - MIST FREE 2-16-08 · Maintaining a specific relative humidity level in a...
22
HUMIDIFIRST HUMIDIFIRST ULTRASONIC HUMIDIFIERS OWNER’S MANUAL FOR RETURN AIR IN HUMIDIFIED AIR OUT MIST-FREE SERIES 2-16-08 ULTRASONIC HUMIDIFIERS
Transcript of HUMIDIFIRST O&M manual - MIST FREE 2-16-08 · Maintaining a specific relative humidity level in a...

HUMIDIFIRST
HUMIDIFIRST
ULTRASONIC HUMIDIFIERS
OWNER’S MANUAL
FOR
RETURN AIR IN
HUMIDIFIED AIR OUT
MIST-FREE SERIES 2-16-08
ULTRASONIC HUMIDIFIERS

2
HUMIDIFIRST
TABLE OF CONTENTS
Page Introduction 3 Understanding humidification 3 Principles of ultrasonic humidification 4 Where to position your humidifier 4 Humidifirst load calculation sheet 5 Physical data of humidifiers 6 Physical component layout 7 Specification of the humidifier and controls 8 Assembly requirements of the humidifier 9 Installation requirements 9 Piping details 10 Installation Parameters & Guidelines 11 Before you start your humidifier for the first time 12 Starting your humidifier for the first time 13 Trouble shooting at start-up time 14, 15, 16 Trouble shooting after start-up 17 Recommended Maintenance a. Basic maintenance 18 b. Transducer maintenance 18 c. End of humidifier season shutdown 19 d. Humidistat cleaning 19 Warranty 19 Manual Disclaimer 19 Start-up form 20, 21
3
HUMIDIFIRST
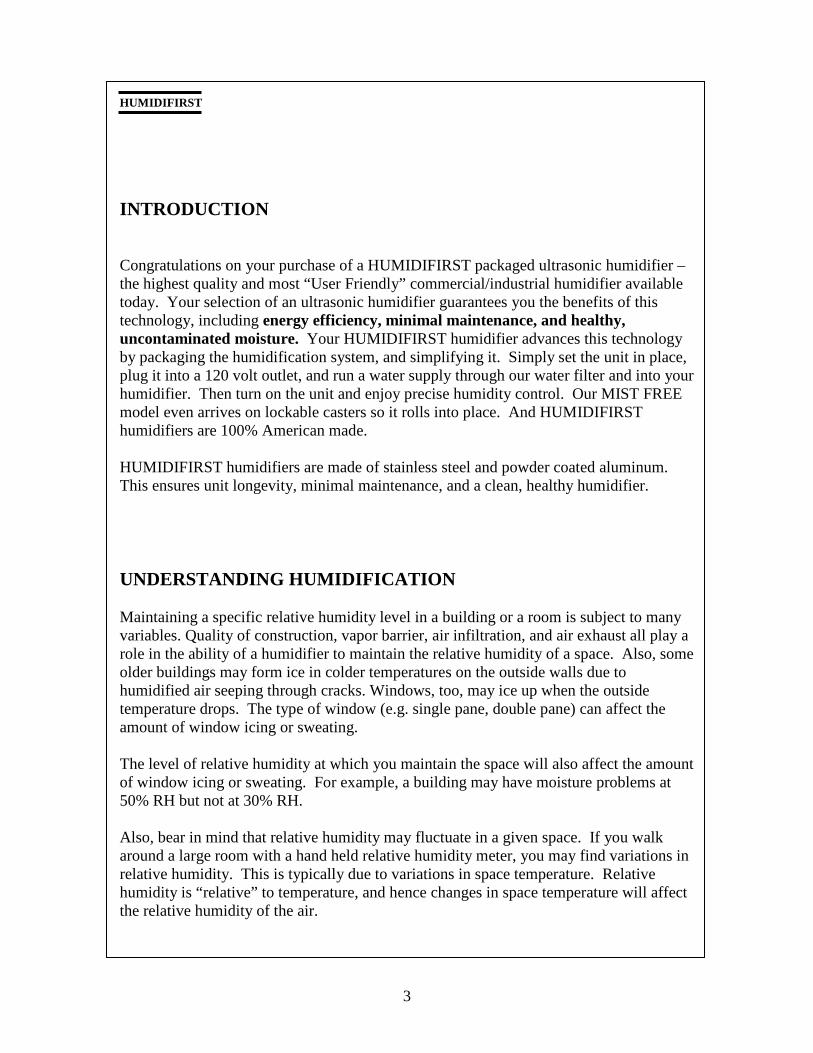
INTRODUCTION Congratulations on your purchase of a HUMIDIFIRST packaged ultrasonic humidifier – the highest quality and most “User Friendly” commercial/industrial humidifier available today. Your selection of an ultrasonic humidifier guarantees you the benefits of this technology, including energy efficiency, minimal maintenance, and healthy, uncontaminated moisture. Your HUMIDIFIRST humidifier advances this technology by packaging the humidification system, and simplifying it. Simply set the unit in place, plug it into a 120 volt outlet, and run a water supply through our water filter and into your humidifier. Then turn on the unit and enjoy precise humidity control. Our MIST FREE model even arrives on lockable casters so it rolls into place. And HUMIDIFIRST humidifiers are 100% American made. HUMIDIFIRST humidifiers are made of stainless steel and powder coated aluminum. This ensures unit longevity, minimal maintenance, and a clean, healthy humidifier. UNDERSTANDING HUMIDIFICATION Maintaining a specific relative humidity level in a building or a room is subject to many variables. Quality of construction, vapor barrier, air infiltration, and air exhaust all play a role in the ability of a humidifier to maintain the relative humidity of a space. Also, some older buildings may form ice in colder temperatures on the outside walls due to humidified air seeping through cracks. Windows, too, may ice up when the outside temperature drops. The type of window (e.g. single pane, double pane) can affect the amount of window icing or sweating. The level of relative humidity at which you maintain the space will also affect the amount of window icing or sweating. For example, a building may have moisture problems at 50% RH but not at 30% RH. Also, bear in mind that relative humidity may fluctuate in a given space. If you walk around a large room with a hand held relative humidity meter, you may find variations in relative humidity. This is typically due to variations in space temperature. Relative humidity is “relative” to temperature, and hence changes in space temperature will affect the relative humidity of the air.

4
HUMIDIFIRST
PRINCIPLES OF ULTRASONIC HUMIDIFIERS Ultrasonic humidifiers vibrate a water mist into the air by using piezoelectric crystals (transducers). The transducers are mounted in a basin of water approximately 1.5 inches deep. Each transducer is approximately the size of a nickel and vibrates at approximately 1.6 megahertz, a speed so fast that the water above the crystal cannot follow the speed of the transducer, causing the water to cavitate. This process emits very small water droplets into the air, approximately one micron in diameter (similar in size to steam droplets). The water droplets are so small that they evaporate almost immediately. The water feeding an ultrasonic humidifier must be pure so that minerals and other contaminants are not vibrated into the air. Such purity is achieved with de-ionized (DI) water filters to remove all minerals and foreign matter from the water. DI water offers additional benefits. It assures a pure, clean mist for those breathing the air, and it significantly reduces the amount of maintenance required for the humidifier, i.e. no scaling or sludge to be removed from the humidifier pan. WHERE TO POSITION YOUR HUMIDIFIER This unit will operate without emitting a mist in relative humidity levels of approximately 40% or less. The unit is reasonably quiet (64 db at 10 feet), although if noise is a concern, the unit can be located behind furniture, partitions, or build-outs to reduce fan noise. A 120 volt outlet and pure water source is required. An overflow safety drain line is recommended in case of water overflow and should be a minimum of ¾” diameter. Dalton’s law of partial pressurization says that the mist will evaporate and distribute evenly throughout the space (in an ideal environment). Although your environment is most likely not “ideal”, the relative humidity will be fairly equal throughout; however, air patterns, variations in space temperature, air infiltration, etc., will all affect the consistency of the relative humidity throughout your space.

5
HUMIDIFIRST
HUMIDIFIRST humidifier sizing calculations When calculating the humidification loads of a space we will generalize and assume that the majority of the humidification load will come from two areas: 1. Ventilation, Exhaust, or Infiltration of air: Most buildings have air exchanges with
the outside because of one or more of these three items.
A. Ventilation is a result of air conditioning systems bringing outside air in to provide fresh air to the inhabitants.
B. Exhaust is the mechanical removal of air from a space when processes inside of the building require the removal of dirty, hot or unwanted air.
C. Infiltration occurs when air comes into a space from outside. Air may come in through small openings around doors, windows, ceilings, etc. Also, infiltration often occurs from frequent opening of doors.
For each Cubic Foot per M inute (CFM) of outside air that is brought into the space, moisture must be added to achieve your relative humidity requirements.
2. Air conditioning: When an air conditioner runs, it removes moisture from the air.
This is known as Latent cooling. If the air conditioner will be running during your humidification season, you must take this dehumidification process into account. The cooling ability of an air conditioner is normally rated by the manufacturer and is stated in Sensible and Total cooling capacity in btu’s per hour. Subtract the Sensible cooling capacity from the Total cooling capacity to get the Latent cooling capacity. For every 1000 btu’s/hour of Latent cooling capacity you will need to add one pound of moisture.
Please note that there are other factors that can add to your humidification requirements, such as moisture absorption of items in your space. These factors generally can be ignored because most often they play only a minor part of your humidification requirements. Contact Humidifirst if you think you have unique requirements.

6
HUMIDIFIRST
PHYSICAL DATA OF HUMIDIFIERS Humidifier Capacity Power Weight Dimensions Number of Fan model (#/hr) used (lbs.) WxDxH (in.) Transducers CFM MF-10 10 360 va 130 23 x 18 x 84 8 320 MF-20 20 660 va 225 36 x 25 x 84 16 640
LEFT SIDE VIEW FRONT VIEW
ROOM AIR INTAKE
HUMIDIFIED AIR OUT
HUMIDISTAT
FIELD INTERFACE:
1. 6', 120 VOLT POWER CORD2. 1/4" OD PLASTIC TUBE WATER INLET3. 3/4" FEMALE, NPT, OVERFLOW DRAIN (OPTIONAL CONNECTION)4. 3/4" FEMALE, NPT, DRAIN (OPTIONAL CONNECTION)
1. POWER ON/OFF SWITCH2. TRANSDUCER ROW A SWITCH3. TRANSDUCER ROW B SWITCH
CASTORS
EVAPORATION CHUTE
FAN COVER
TRANSDUCERS &WATER PAN

7
HUMIDIFIRST
MIST FREE ASSEMBLY
LEFT SIDE VIEW FRONT VIEW
STAINLESS STEEL FRAME
SOLENOID VALVE
BLOWER(S)
CIRCUIT BREAKERS ANDINTERFACE BOARD
TRANSDUCERS(ACCESSED BY REMOVINGTHE BOTTOM CASTER PLATE )
THE EVAPORATION CHUTE SETSIN THE WATER PAN AND ATTACHESTO THE VERTICAL STAINLESS STEELFRAME USING THESE BOLTS
HUMIDISTAT(THREE WIRES CONNECTFROM THE HUMIDISTAT TO THE INTERFACE BOARD)
WATER PAN
REMOVE SIDE NUTS (6)BEFORE SLIDING FANCOVER OFF FAN COVER
ON / OFF SWITCHES(ACCESSED BY REMOVINGTHE BOTTOM CASTER PLATE )

8
HUMIDIFIRST
MIST-FREE ULTRASONIC HUMIDIFIER SPECIFICATION The humidifier shall be a packaged, self-contained ultrasonic humidifier using the principle of ultrasonic nebulization. Each humidifier shall use a multiple of ultrasonic transducers that vibrate at approximately 1.6 megahertz, producing a droplet size of approximately 1 micron. Each transducer circuit shall use the “thickness vibration method” of humidification via a piezoelectric converter. The ultrasonic transducers shall convert the electric energy into mechanical energy, causing the water to cavitate, resulting in the production on one micron sized water particles. The design of the humidifier housing shall prevent larger droplets from leaving the humidifier assembly. The humidifier shall consume no more than 33 watts per pound of humidification generated. The ultrasonic humidifier shall not produce any unacceptable noise. The sound level shall not exceed 64 db at 10 feet from the humidifier module. The ultrasonic humidifier shall not require a flush cycle. The humidifier basin and structure shall be made of stainless steel and powder coated aluminum. Evaporation of the mist shall occur inside of the humidifier when the relative humidity of the space is 40% or less. A ¼” tube water quick-disconnect shall be provided for connecting water to the humidifier. A 6 foot, 120 volt power cord with receptacle shall be provided to plug the unit into a standard wall outlet. Each humidifier shall have the following components:
• Solenoid valve to control water flow into the humidifier • Float switch to control water level • Float switch to provide for low water shutdown • Piezoelectric crystals (transducers) • On/off electronic humidistat

9
HUMIDIFIRST
ASSEMBLY REQUIREMENTS HUMIDIFIRST humidifiers are packaged humidifiers. The standard unit requires no field power or control wiring. A quick-connect water connection kit is provided. It inserts (pushes) into the bulkhead water fitting located on the left side of the humidifier near the power cord. Also, the humidifier is provided with a 6 foot power cord. A humidistat is mounted on the front of the unit. INSTALLATION REQUIREMENTS The unit should be mounted so that it is level from side to side and from front to back. See the “Piping details” on page 10. See the “Installation Parameters & Guidelines” on page 11. See start-up instructions on pages 12 and 13.

10
HUMIDIFIRST
Piping details
1. Attach the water tube kit (kit includes tube, inline strainer, male and female water
quick disconnect fittings, and union fitting). Push the tube end into insert fitting on side of the humidifier until it bottoms out (approx. ½”) – see below.
2. Make sure that the side drain is plugged. Only remove the plug when draining the humidifier for service, maintenance, or when moving the humidifier.
3. The humidifier must be mounted on a level surface or transducer failure may occur. 4. Read the complete owner’s manual before operating the humidifier.
INSERT IN HUMIDIFIER
WATER SUPPLY FITTING UNION WATER DISCONNECTS ORIFICE
OVERFLOW SAFETY DRAIN
DRAIN / PLUG
ELECTRIC CORD
MIST FREE BASE SIDE VIEW Indicates field inserted
11
HUMIDIFIRST
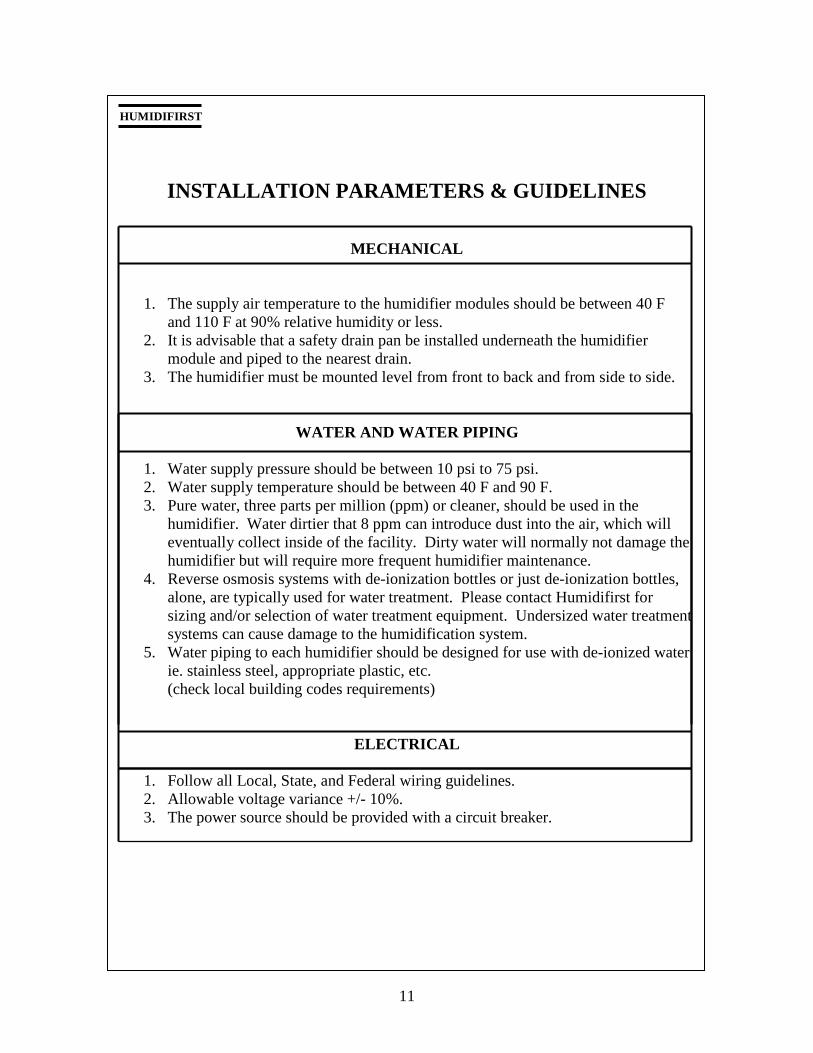
INSTALLATION PARAMETERS & GUIDELINES
MECHANICAL
1. The supply air temperature to the humidifier modules should be between 40 F and 110 F at 90% relative humidity or less. 2. It is advisable that a safety drain pan be installed underneath the humidifier
module and piped to the nearest drain. 3. The humidifier must be mounted level from front to back and from side to side.
WATER AND WATER PIPING
1. Water supply pressure should be between 10 psi to 75 psi. 2. Water supply temperature should be between 40 F and 90 F. 3. Pure water, three parts per million (ppm) or cleaner, should be used in the
humidifier. Water dirtier that 8 ppm can introduce dust into the air, which will eventually collect inside of the facility. Dirty water will normally not damage the humidifier but will require more frequent humidifier maintenance.
4. Reverse osmosis systems with de-ionization bottles or just de-ionization bottles, alone, are typically used for water treatment. Please contact Humidifirst for sizing and/or selection of water treatment equipment. Undersized water treatment systems can cause damage to the humidification system.
5. Water piping to each humidifier should be designed for use with de-ionized water ie. stainless steel, appropriate plastic, etc. (check local building codes requirements)
ELECTRICAL
1. Follow all Local, State, and Federal wiring guidelines. 2. Allowable voltage variance +/- 10%. 3. The power source should be provided with a circuit breaker.

12
HUMIDIFIRST
BEFORE STARTING THE HUMIDIFICATION SYSTEM
CAUTION !!
1. With the Mist Free power cord disconnected, make sure that all wire connections are
tight. Excessive vibration during the shipping process can cause terminals to become loose. Removal of the front fan cover is required. Note that there are other wire connections that require the removal of the caster base to inspect but we suggest that this only be done if problems appear.
2. Make sure that the side drain is plugged. Only remove the plug when draining the humidifier for service, maintenance, or when moving the humidifier.
3. Always make sure the humidifier is mounted on a flat surface so that water equally covers the transducers. Use a level to assure that the humidifier is mounted correctly.
4. The initial fill time may take up to 5-45 minutes, depending on type of water treatment system. The humidifier fan and transducers will not operate until there is approximately 1” of water in the pan.
5. Always have at least 10 PSI of water pressure connected to the humidifier module.
Caution:
I. When water purification systems are used, pressure drops may be substantial and may reduce water flow to the humidifier.
II. Never operate the humidifier by “hand pouring” water into the humidifier. Running the humidifier for extended periods of time without 1.5” of water above the transducers will cause the transducers to fail. (The low water safety switch that is integral to the humidifier control is only used to prevent the humidifier from running dry. Also, not having water run through the water solenoid valve may cause it to overheat and fail.)
6. Never service the humidifier with the power connected.

13
HUMIDIFIRST
STARTING UP YOUR SYSTEM FOR THE FIRST TIME First, make sure the system is ready for starting. This means that the humidifier is on a level surface, and that all of the water connections are in place, and that supply water is available, and that a power outlet is available for plugging in the humidifier.
1. Before the Humidifirst humidification system is started, the water supply lines that supply water to the humidifier module should be flushed for 5 minutes to ensure that any small particles do not plug the inline water filter (located in the Humidifirst supplied water tube connection kit). If you are using a Reverse Osmosis system to purify your water, it may take as long as 45 minutes for water to start to flow. Even at peak flow, the Reverse Osmosis unit may only produce a trickle of water. (One Mist-Free 20 uses about 2 gallons per hour) If you are using a De-Ionization bottle for water treatment, the water will start to flow in 5 to 15 minutes.
2. Plug the power cord into the 120 volt wall receptacle. Make sure the system is ready to be started and that all water and electrical connections are correct.
3. Turn the “On/Off” switch (located on the front of the unit) to the “On” position. 4. Adjust the humidistat to the desired set point. It may take 5-45 minutes for the
water level in the basin to rise to the required level (approximately 1.5”) before the mist will start. If the mist does not start when the water level is reached, try adjusting the humidistat to a higher set point - the room relative humidity set point may already be satisfied.
CAUTION: OPERATING THE TRANSDUCERS WITHOUT WATER COVERING THEM BY MANUALLY LIFTING THE FLOAT SWITCH WILL CAUSE THEIR IMMEDIATE FAILURE.
5. Make sure that the lower side “drain” is plugged. Only remove the plug when
draining the humidifier for service, maintenance, or when moving the humidifier. 6. The side “safety overflow” outlet can be piped to drain. 7. Once the humidifier water depth in the humidifier basin reaches 1 inch, the “low
water safety” relay should switch to the “on” position and the humidifier should start operating. The solenoid valve will stop filling when there is approximately 1.5” of water in the basin.

14
HUMIDIFIRST
TROUBLE SHOOTING IMPORTANT !!! NEVER WORK ON THE INSIDE OF THE HUMI DIFIER WHEN THE UNIT IS PLUGGED INTO THE WALL OUTLET Symptom: 1. The humidifier does not power up
a. If you want the humidification system to operate and it will not, first make sure that there is a call for humidification and that the humidistat set-point is higher than the relative humidity in the space.
b. Make sure the on/off switch is in the “on” position. c. Make sure that transducers “Row A” and “Row B” are in the “on” position. d. There are circuit breakers or fuses behind the humidifier fan cover-one for the
main input power and each one for 24 vac and 48 vac power. It is possible that a circuit breaker is tripped or a fuse is blown.
2. If water does not flow into the humidifier body:
Check that there is power to the humidifier first and make sure that there is a call for the humidifier operation – turn the humidistat to the highest set-point.
a. Check water source to confirm that the water is turned on. b. Make sure that all water connections are made. c. Check the orifice to make sure that it is not plugged. See page 9 for the orifice
location. d. Check the circuit breakers that are located in the Master Panel on the terminal
strip. e. Check the float switch in the humidifier body to ensure that it moves freely. f. Check the relays to ensure that they are pushed in firmly. g. Check all internal wiring connections and make sure that none are loose. h. Using a volt-meter, and referring to the wiring diagram, check to see that 24 volt
power is going to the solenoid valve. A wiring diagram is attached to the inside of the humidifier and one is shipped with the Owner’s documents.
i. If the above are checked and water does not flow to the humidifier basin, then it should be assumed that the solenoid valve has failed and should be replaced.

15
HUMIDIFIRST
3. The water solenoid valve does not shut off (read this page completely before starting
to troubleshoot:
If the solenoid valve continues to allow water to pass when the humidifier power is shut off, then there may be dirt in the solenoid valve, preventing it from seating. If the solenoid valve stops water flow when the humidifier power is shut off then it is most likely an electrical problem incorrectly holding the solenoid valve open (ie. float switch or relay). Please note that the reed switches in a float switch may stick at times, causing a temporary problem. Lighting strikes or bad power may cause this. If the float is found to “stick”, the float switch should be replaced. a. If an electrical problem is keeping the solenoid valve open: (Warning – only qualified technicians should do this test as the Humidifirst Master Panel must be energized while making electrical measurements) Call the factory to discuss the best way to test your humidifier. Depending on the model of the humidifier, the solenoid control relay may be wired Normally Open (NO) or Normally Closed (NC).
b. If the solenoid valve does not shut off when the humidifier power is turned “off”, dirt may be preventing the solenoid valve plunger from seating. This permits water to leak through it, causing the humidifier to overflow.
To inspect the valve for debris: 1) Remove the nut that holds the coil in place. 2) Slide the coil housing off of the shaft. 3) Grip the end of the shaft that is nearest to the threads with a set of pliers
and turn counter-clockwise until the shaft is loose. Then continue turning the shaft by hand until it unthreads from the valve housing. A spring-loaded plunger will come out of the end of the shaft. Confirm that there is no dirt on it or in the valve housing. Blow through the housing to clear any dirt that may have accumulated.
4) Reassemble the valve. 5) To test the valve, connect water to the unit and see if water drips from the water hose on the “discharge” side of the valve.
c. Confirm that the humidifier has not been deprived of water. This can cause the
solenoid valve to overheat and fail open. Reverse osmosis water treatment systems can sometimes reduce water flow to the humidifiers and cause this to happen. Reduced water flow can occur when the water temperature drops or if the reverse osmosis membrane fails. If this is the case, replace the valve.

16
HUMIDIFIRST
4. If the transducers are not making a mist:
(Please note that after a call for humidification, it may take up to 45 minutes for the humidifier basin to fill with water, depending on the type of water treatment system you are using. The transducers will not operate until the low water safety switch is satisfied.) a. Turn the humidistat dial fully on to make sure the humidistat is calling for the
humidifier to run. b. Check that there is power to the humidifier. The power-on switch should be lit.
c. Check to ensure that there is adequate water in the humidifier body (approximately 1 to 1.5 inches).
d. Check the control relays to ensure that they are pushed firmly in place. e. Using a volt-meter, and referring to the wiring diagram, check to see that 24 volt
power is going to the solenoid valve. f. Using a volt-meter, and referring to the wiring diagram, check to see that 48 volt
power is going to the transducer. g. Check wire connections and make sure that they are tight.

17
HUMIDIFIRST
TROUBLE SHOOTING (after the humidifier has operated for a period of time)
1. The transducers are so covered with deposits that they do not work properly
and the finger that is generated is very small and puts out little mist. The transducer must be kept clean. The time period between cleanings will be dependent upon the cleanliness of the air and water. Drain the humidifier module, and clean it with a mild vinegar and water solution. Sometimes the transducers may get coated with an oily substance, typically coming from new PVC or stainless steel pipe. If this is the case, try washing the basin and transducer with a mild dishwasher liquid solution.
2. Some of the transducers run and some do not: How long has the humidifier module been in operation? The average life span of the transducer is 10,000 to 15,000 hours. If some of them operate and some do not, it indicates that some of the transducers may have run their lifespan and need replacement. Peeling, surface bubbling and cracking are an indication of this. If the transducers are discolored it means that overheating has depolarized the transducer material and destroyed them.
3. The transducers have power to them but they do not operate: The thermal protection device(s) may be defective. They are located inline in the wiring in the area of the transducers.
18
HUMIDIFIRST
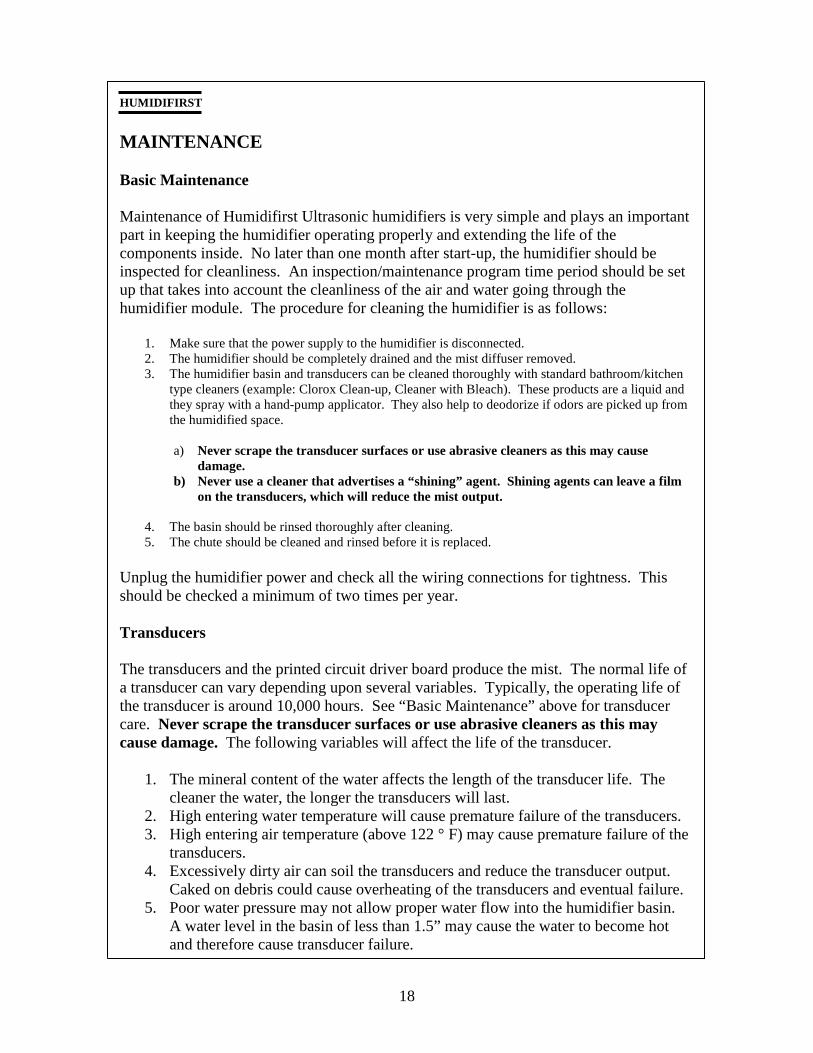
MAINTENANCE Basic Maintenance Maintenance of Humidifirst Ultrasonic humidifiers is very simple and plays an important part in keeping the humidifier operating properly and extending the life of the components inside. No later than one month after start-up, the humidifier should be inspected for cleanliness. An inspection/maintenance program time period should be set up that takes into account the cleanliness of the air and water going through the humidifier module. The procedure for cleaning the humidifier is as follows:
1. Make sure that the power supply to the humidifier is disconnected. 2. The humidifier should be completely drained and the mist diffuser removed. 3. The humidifier basin and transducers can be cleaned thoroughly with standard bathroom/kitchen
type cleaners (example: Clorox Clean-up, Cleaner with Bleach). These products are a liquid and they spray with a hand-pump applicator. They also help to deodorize if odors are picked up from the humidified space.
a) Never scrape the transducer surfaces or use abrasive cleaners as this may cause
damage. b) Never use a cleaner that advertises a “shining” agent. Shining agents can leave a film
on the transducers, which will reduce the mist output.
4. The basin should be rinsed thoroughly after cleaning. 5. The chute should be cleaned and rinsed before it is replaced.
Unplug the humidifier power and check all the wiring connections for tightness. This should be checked a minimum of two times per year. Transducers The transducers and the printed circuit driver board produce the mist. The normal life of a transducer can vary depending upon several variables. Typically, the operating life of the transducer is around 10,000 hours. See “Basic Maintenance” above for transducer care. Never scrape the transducer surfaces or use abrasive cleaners as this may cause damage. The following variables will affect the life of the transducer.
1. The mineral content of the water affects the length of the transducer life. The cleaner the water, the longer the transducers will last.
2. High entering water temperature will cause premature failure of the transducers. 3. High entering air temperature (above 122 ° F) may cause premature failure of the
transducers. 4. Excessively dirty air can soil the transducers and reduce the transducer output.
Caked on debris could cause overheating of the transducers and eventual failure. 5. Poor water pressure may not allow proper water flow into the humidifier basin.
A water level in the basin of less than 1.5” may cause the water to become hot and therefore cause transducer failure.

19
HUMIDIFIRST
MAINTENANCE (continued) End of humidifying season shutdown The humidifier should be unplugged when the humidification system will not be required for long periods of time. This will stop heat gain from the transformer. This will also reduce wear on the electrical components that may occur during summer storms. Also, drain the water from the humidifier basin. Humidistat The humidistat is calibrated and tested before it is shipped. If you feel the humidistat is out of calibration you can field adjust it. If it is considerably out of calibration, a new one may be required. Wipe any dust or dirt from the sensing element to help to achieve proper readings. Please contact Humidifirst for calibration directions. When field calibration is called for, attempt to calibrate it in an environment that is close to the desired set point of the space being humidified. Calibration should only be done with a sling psychrometer. To calibrate, set the humidifier humidistat indicator to read the same as the independent measuring device. Remove the humidistat cover. Locate the adjustment screw at the top of the humidistat and turn it until you hear a soft click. The humidistat is now calibrated. Warranty The warranty for the humidifier is for one year from the date of start-up or 18 months from shipment, whichever comes first. Please find and complete the “HUMIDIFIRST MIST FREE START-UP FORM”. There will be no warranty of the equipment without the form being completed and returned to Humidifirst. This warranty does not include labor. The warranty is for parts only. Spare parts are under warranty for 60 days from the date of shipment. Owner’s Manual Disclaimer Humidifirst has made every effort to ensure accuracy in the manual, and assumes no responsibility and disclaims all liability for damages resulting from the use of this information or for any errors or omissions.

20
HUMIDIFIRST page 1 of 2
HUMIDIFIRST MIST FREE START-UP FORM Important – Read the complete Owner’s Manual before starting your Humidifirst Ultrasonic Humidification system. Failure to read and understand the Owner’s Manual may result in incorrect wiring, installation, and operation of the system and could cause immediate harm to YOU and/or the humidification system. Please complete the following checklist and return it to Humidifirst. There will be no warranty of the equipment without both pages of the form being completed and returned in a timely manner. The End User/Owner of the Humidification System: Company name: Company location: City: State:
Serial number of the humidifier: For Zone:
Installer of the humidification System: Company name: Company phone number: Start-up of the system is being completed by: Name: Company name: Phone number: Signature* : Date of Start-up: By signing the above you are representing that the following information is accurate to the best of your knowledge.
21
HUMIDIFIRST page 2 of 2
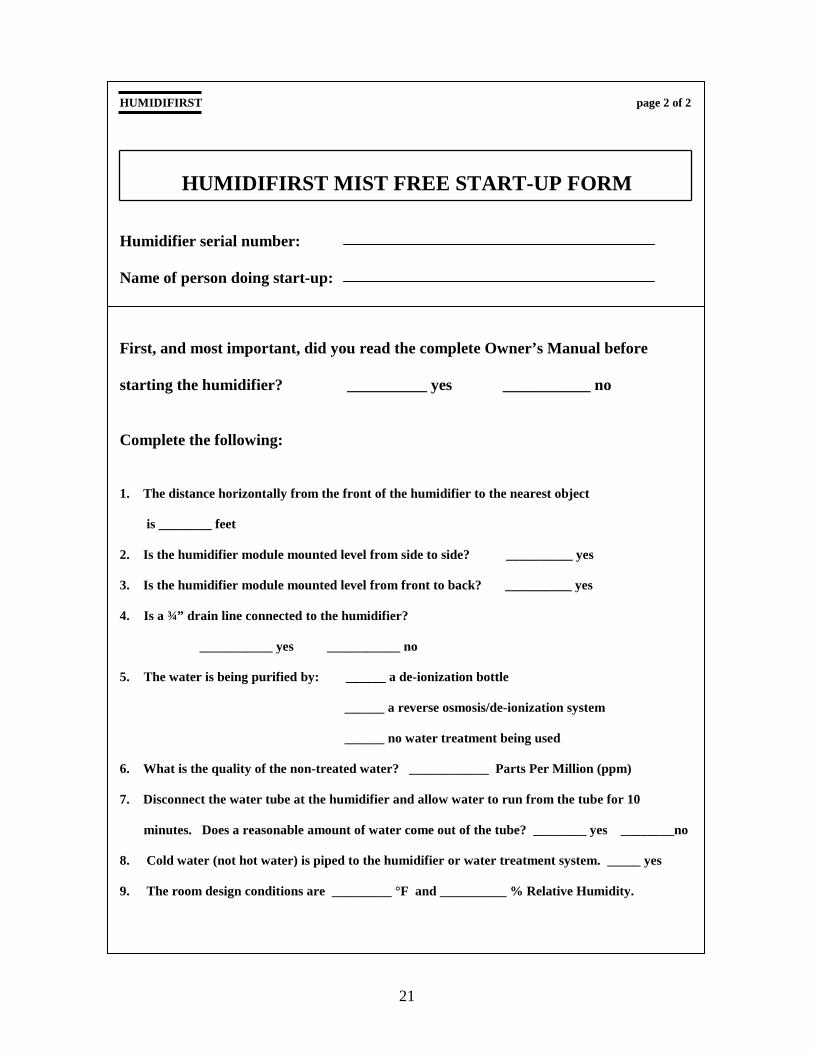
HUMIDIFIRST MIST FREE START-UP FORM Humidifier serial number: Name of person doing start-up: First, and most important, did you read the complete Owner’s Manual before starting the humidifier? __________ yes ___________ no Complete the following: 1. The distance horizontally from the front of the humidifier to the nearest object is ________ feet 2. Is the humidifier module mounted level from side to side? __________ yes 3. Is the humidifier module mounted level from front to back? __________ yes 4. Is a ¾” drain line connected to the humidifier? ___________ yes ___________ no 5. The water is being purified by: ______ a de-ionization bottle
______ a reverse osmosis/de-ionization system ______ no water treatment being used
6. What is the quality of the non-treated water? ____________ Parts Per Million (ppm) 7. Disconnect the water tube at the humidifier and allow water to run from the tube for 10
minutes. Does a reasonable amount of water come out of the tube? ________ yes ________no 8. Cold water (not hot water) is piped to the humidifier or water treatment system. _____ yes 9. The room design conditions are _________ °F and __________ % Relative Humidity.

22
HUMIDIFIRST
ULTRASONIC HUMIDIFIERS
1520 Neptune Dr., Suite A, Boynton Beach, FL 33426
(561) 752-1936 FAX (801) 760-2777 www.humidifirst.com