Gymnastics - Amazon S3s3.amazonaws.com/SDA-HPERA/documents/Gymnastics_Safety_Ma… · GYMNASTICS...
53
A guide and a resource to coaches and administrators in our Seventh-day Adventist Schools for the safety and wellbeing of their gymnasts Gymnastics SAFETY MANUAL 2016-2017 NORTH AMERICAN DIVISION DEPARTMENT OF EDUCATION
Transcript of Gymnastics - Amazon S3s3.amazonaws.com/SDA-HPERA/documents/Gymnastics_Safety_Ma… · GYMNASTICS...

A guide and a resource to coaches
and administrators in our Seventh-day
Adventist Schools for the safety and
wellbeing of their gymnasts
GymnasticsSAFETY MANUAL
2016-2017
NORTH AMERICAN DIVISION DEPARTMENT OF EDUCATION

GYMNASTICS SAFETY MANUAL
OVERSIGHT
Arne Nielsen Director of Secondary Education, North American Division
GYMNASTIC TASKFORCE COMMITTEE MEMBERS
Robert C. Benge PhD Chair, Southern Adventist University
Roger McFarland La Sierra University
Eric Paddoch Andrews University
Ryan Perry Union College
Richard Schwarz Southern Adventist University
Tedd Webster Great Lakes Adventist Academy
EDITORS
Arinne Goff
Andrea Herra
Adeline Protrowski
Desiree Bryant
Acknowledgments
GYMNASTICS SAFETY MANUAL
Purpose, Mission, Goals for Coaches . . . . . . . . . . . . . . . . . . . . . . . . . . . . . . . . 1
Objectives for Coaches, Points to Ponder . . . . . . . . . . . . . . . . . . . . . . . . . . 2
Safety and Medical . . . . . . . . . . . . . . . . . . . . . . . . . . . . . . . . . . . . . . . . . . . . . . . . 3Robert Benge
Artistic Gymnastics . . . . . . . . . . . . . . . . . . . . . . . . . . . . . . . . . . . . . . . . . . . . . . . . 11Roger McFarland
Preparedness . . . . . . . . . . . . . . . . . . . . . . . . . . . . . . . . . . . . . . . . . . . . . . . . . . . . . . 16Richard Schwarz
Safety Guidelines for Floor Tumbling . . . . . . . . . . . . . . . . . . . . . . . . . . . . . . . 17Richard Schwarz
Safety Guidelines for Mini-Trampoline/Springboards . . . . . . . . . . . . . . . . 19Richard Schwarz
Safety Guidelines for Silk . . . . . . . . . . . . . . . . . . . . . . . . . . . . . . . . . . . . . . . . . . . 21Richard Schwarz
Safety Guidelines for Teeterboard . . . . . . . . . . . . . . . . . . . . . . . . . . . . . . . . . . 22Richard Schwarz
Safety Guidelines for Trampoline . . . . . . . . . . . . . . . . . . . . . . . . . . . . . . . . . . . 25Richard Schwarz
Handstand Balancing and Balancing Equipment . . . . . . . . . . . . . . . . . . . 27Tedd Webster
Rigging for Overhead Spotting and Aerial Acts . . . . . . . . . . . . . . . . . . . . 28Ryan Perry
Cheerleading/ Acrobatic Activities . . . . . . . . . . . . . . . . . . . . . . . . . . . . . . . . . 34Eric Paddock
Tumbling Floors . . . . . . . . . . . . . . . . . . . . . . . . . . . . . . . . . . . . . . . . . . . . . . . . . . . 39Eric Paddock
Appendix A . . . . . . . . . . . . . . . . . . . . . . . . . . . . . . . . . . . . . . . . . . . . . . . . . . . . . . . 41Extracting an Injured Athlete from a Foam Pit
Appendix B. . . . . . . . . . . . . . . . . . . . . . . . . . . . . . . . . . . . . . . . . . . . . . . . . . . . . . . . 42Parental Consent / Child Assent Form and Medical Consent with Liability
Appendix C . . . . . . . . . . . . . . . . . . . . . . . . . . . . . . . . . . . . . . . . . . . . . . . . . . . . . . . 45Sample Facility Inspection Form
Appendix D . . . . . . . . . . . . . . . . . . . . . . . . . . . . . . . . . . . . . . . . . . . . . . . . . . . . . . . 48Gymnastic Equipment Suppliers
Appendix E . . . . . . . . . . . . . . . . . . . . . . . . . . . . . . . . . . . . . . . . . . . . . . . . . . . . . . . . 49Simply Circus
TABLE OF CONTENTS

GYMNASTICS SAFETY MANUAL 1
PURPOSE
The purpose of this manual is to provide a guide and a resource to coaches and administrators
in our Seventh-day Adventist Schools for the safety and wellbeing of their gymnasts. It is not all
inclusive but a benchmark to run gymnastic programs safely while having the most impact on the
gymnasts. This manual, when followed, will enable gymnasts to progress safely in their gymnastic
development. Gymnasts that transfer to other schools can continue their gymnastics in a safe manner.
MISSION STATEMENT FOR SEVENTH-DAY ADVENTIST GYMNASTICS
Gymnastics teams in Seventh-day Adventist institutions are dedicated to enhancing and enriching the lives of young people physically, mentally, spiritually and socially in a safe, positive and nurturing environment. This is accomplished by focusing on dependence on God, respect for oneself and others, time management skills, self-discipline, dedication to a team, strong work habits, goal setting ability, love of exercise and an overall sense of accomplishment in one’s endeavors. Safety is paramount in importance! Allowing hard work, dedication, and talent to be the apparatus of our witness we are missionaries disguised as gymnasts.
GOALS FOR COACHES
1. Provide a medium for reaching out to young people with the expectation of drawing them closer to Christ.
2. Teach young people the value of hard work and the reward of success through quality fitness and gymnastics instruction.
3. Provide a safe and secure environment in practice and in performance within the skill level of the athletes by following recommended guidelines and precautions.
4. To teach gymnastic skills through progressions and proper spotting techniques.
5. Follow industry standards for a well-organized gym in the proper set up and use of equipment, landing pads, spotting rigs and belts, training aids, and safety cushions.
6. Receive and maintain training, keep current proper credentials, and attend continuing education workshops on an annual or bi-annual basis.
INTRODUCTION

GYMNASTICS SAFETY MANUAL 2
OBJECTIVES FOR COACHES
1. Emulate the life of Christ in supporting young people in their decision to follow Christ.
2. Reduce the risk of accidents and injuries through skill progression and regular inspection and maintenance of equipment.
3. Use equipment that has been constructed by reputable companies or approved by lawyer or insurance company.
4. Continual improvement of the gymnasts in physical fitness and skill acquisition.
5. Be current with ones USA Gymnastic safety certification.
6. Hold current certification in First aid and CPR/AED and successfully complete an introductory course in Athletic Training.
POINTS TO PONDER
• Members are charged with the responsibility for contributing to an environment which makes participation in the sport a positive and rewarding experience.
• Any qualified individual should be able to participate in activities of member schools.
• It is the responsibility of coaches to follow proper procedures for the safe participation of their students as set forth in the guidelines by the NAD. It is the responsibility of the athletes to follow proper procedures in the safe use of equipment, proper dress, use of spotting by coaches, or other procedures that ensure a safe experience.
• It is the duty of the athlete to inform a coach of health issues, injuries, or concerns that would assist a coach in keeping the athlete safe. It is important that a coach communicates well with all members of their team in a fair and honest way.
• This sport is conducted in an environment free of drugs and alcohol abuse. Any athlete found partaking or providing to another will be suspended or expelled from the program.
• Sexual harassment or inappropriate behavior toward an athlete by a coach or team member is not allowed and perpetrator could be held criminally liable.
• It is the duty of all coaches to strive to increase their level of proficiency and skill. They should not attempt to instruct or promote skills that are above their knowledge of or expertise in spotting.
INTRODUCTION

GYMNASTICS SAFETY MANUAL 3
EMERGENCY ACTION PLAN (EAP)
Introduction
Emergency situations in gymnastics have the potential
to occur at any time, whether they are during training or
performance events. Due to the inherent risks associated
with gymnastic participation, injuries are likely to occur.
With proper preparation through an Emergency Action
Plan, the medical emergency situations can be managed
effectively and appropriately. In order to provide adequate
emergency medical care during such situation, flow of
proper communication and emergency medical equipment
must be addressed through the Emergency Action Plan.
The purpose of the EAP is to ensure the proper medical
coverage of gymnastics through the correct maintenance
of appropriate emergency medical equipment and
interventions of medical personnel. The plan will outline
the proper chain of command for on-site sports medicine
personnel, location of emergency medical equipment
(i.e. AED first aid kits), communication, and tragedy
management. This document will also list important
telephone numbers and appropriate locations for
emergency medical services (EMS) ambulance access.
EAP CHAIN OF COMMAND
Health Services Physician
Staff Certified Athletic Trainer (ATC)
Coach certified in First aid, CPR/AED
First Responders/EMS will work in conjunction with the physician and athletic trainer when on-site.
When not present work with the coach or designated person rendering immediate care. Risk Management will be notified of the emergency after care has been rendered.
SAFETY AND MEDICAL BY ROBERT C. BENGE

GYMNASTICS SAFETY MANUAL 4
On-Site Emergency Medical Care
During training and performance, the first responder to an emergency situation
is typically a member of the coaching staff. There are three basic roles within
an EAP that should be adhered to by personnel in emergency situations:
1. Immediate emergency medical care of the injured athlete.
• In the absence of a physician or ATC this will be a coach or immediate supervisor who is responsible for properly activating the EAP.
• In life or limb-threatening scenarios the most qualified individual with the highest level of appropriate training is responsible for stabilizing/sustaining the injured person while EMS is activated immediately.
• Care providers, including first responders, shall only perform appropriate skills for which they have been specifically trained.
2. Emergency medical equipment acquisition.
This will be performed by personnel most familiar with the appropriate type and location of specific emergency medical equipment required for specific activities. Usually this will be a staff member. However, in certain circumstances, this responsibility may fall upon coordinators of facilities equipment managers or coaches.
3. Emergency Medical Services (EMS) activation
When necessary, EMS must be activated in a prompt manner and the injured person should be transported to the nearest appropriate emergency medical facility. Activation of EMS shall be the responsibility of any personnel upon the coaching staff by calling 9-1-1. Personnel performing this task must be familiar with the address and location of where the person is injured. In such a circumstance the following information must be provided to EMS (contact should not be delayed to obtain missing information):
i. Name, title, site address and telephone number
ii. Number of individuals involved
iii. Type and nature of injury sustained
iv. Condition of the person (s)
v. Type of first aid initiated
vi. Level of EMS response required
vii. Specific directions to the scene/venue
viii. Signed medical release for minors (have copy on hand)
The person with the highest level of medical training should remain with the injured person at all times until arrival of EMS. A person should be sent to assist in directing EMS to the scene.
SAFETY AND MEDICAL
TRANSPORTATION
When possible, an ambulance is preferred on-site during performance events. In a situation in which an ambulance is on-site, a designated location with rapid access for entering and exiting the venue will be determined. If transportation is deemed necessary, the injured person should be transported via ambulance. Proper attention must be given to ensure that areas are properly supervised, per the EAP chain of command, should the health care provider leave the site in transportation.

GYMNASTICS SAFETY MANUAL 5
Post-injury steps
Follow the direction of your legal counsel and insurance company regarding how to preserve information about an accident. Rely upon your counsel and insurance company because they are professionals in this field. In the case of minor injuries, consult with your legal counsel and insurance company. The use of an incident report form may be completed and kept on file at the school for documentation. Notify parents/guardians, school administration, and insurance carrier. The school administrator or his/her designee should call the parents or guardians and inform them of the injury and arrange transportation to the appropriate medical facility. The coach should have appropriate telephone numbers to contact the participant’s parents or guardians. Do not provide details or assign blame. The issue of blame is a matter for your legal counsel and insurance company who are professionals in that field. Your purpose is to inform the parents or guardians that an injury has occurred and to arrange rapidly for transportation to the medical facility.
A serious injury is usually devastating to the entire community. Appropriate administrators should be contacted immediately to ensure that the entire situation is appropriately handled with sensitivity, courtesy, and caring.
Designate a spokesperson. When an injury occurs there is often a great deal of media interest. Designate a single spokesperson to communicate with the media.
All staff should meet together following the injury to discuss the accident and anything else that relates to the injury. This way, they can create a plan to reduce the possibility of similar occurrences. Participants may need professional counseling following a serious injury or fatality. Participants, other professionals, instructors, and parents should refrain from making comments to the media or other interested people. They should be encouraged to refer those interested in the injury to the designated spokesperson.
Communicate and regularly practice the emergency action plan. Personnel and participants should know and practice emergency responses. When an injury occurs, those professionals who are present should provide aid to the injured participant. Others not directly involved with servicing the injury, including staff and other participants, should understand and practice their role in an emergency. All personnel should know how to activate the emergency plan. Staff should know the location of fire alarms and telephones. When contacting emergency services, 9-1-1 should be called first. Information to direct emergency services to the facility and the injured party should be known to all professionals and/or displayed prominently next to the telephone. All parties should know the location of emergency equipment and be able to summon or provide first responder first aid assistance to the injured participant.
SAFETY AND MEDICAL
S.T.O.P. PROCEDURE
The typical protocol in an
emergency situation is to
initiate the STOP procedure:
S: Stop all activity around the section
T: Talk to the injured athlete
O: Observe the injured athlete for breathing, movement, etc.
P: Prevent further injury.
Proceed carefully based on
perceived need. It is important to
remember to not touch or move
the patient unless absolutely
necessary. Don’t panic, don’t
just do something, stand there.
Assess the situation and then
CHECK - CALL - CARE.

GYMNASTICS SAFETY MANUAL 6
Preparing for a Non-Catastrophic Injury
Non-catastrophic injuries are those that are not life- or limb-threatening. These injuries typically do not
require immediate emergency medical intervention. Non catastrophic injuries include bruises, scrapes,
small cuts, strains, and sprains. Non catastrophic injuries will likely occur in gymnastic activities. The
professional should be prepared to deal with these types of injuries. Basic first aid training provides
the primary preparation for non-catastrophic injuries. While most seemingly basic first aid and wound
management can handle minor injuries. Competent management of minor injuries requires basic
first aid equipment. Every program should have a first aid kit. First aid kits should be maintained and
inspected regularly. If participants have access to the first aid kit, then no medications should be placed
in the kit. Medications should not be given to minors without parental or medical direction.
Rendering first aid and using a first aid kit properly requires training. Training for the majority of first
aid procedures is beyond the goals of this manual, but professionals should be trained in first aid. It
is recommended that at least one first aid trained professional be present during all activities.
SAFETY AND MEDICAL
One of the first aid procedures that professionals can deliver is so universal that it has been encoded in the acronym R.I.C.E. which stands for Rest, Ice, Compression, and Elevation.
The R.I.C.E. first aid procedure is most commonly used for minor injuries such as strains, sprains, bruises, and other traumas that do not result in a major injury or life-threatening injury. An acute injury that requires ice usually requires medical assessment. Accurate diagnosis is imperative for proper care and rehabilitation of an injury. An injured participant should be referred to appropriate medical care.
R - REST. Rest an injury by limiting movement. All acute orthopedic-type injuries should be rested. If a fracture is severe, it should be immobilized where it lies, and emergency medical services should be contacted to treat the injury further. If a fracture is compound (the broken bone has broken through the skin), then this is a medical emergency and emergency medical personnel should undertake treatment as soon as possible. Do not try to reduce dislocations or fractures. In some cases, immobilization simply means leaving the limb alone.
I - ICE. Ice reduces inflammation and pain caused by injuries. Most orthopedic injuries, during the initial stages, should have ice applied immediately. Obvious exceptions include compound fractures (when a broken bone protrudes through the skin), eye injuries, and other injuries that include open wounds that may become infected. Ice should be applied for 20 minutes or less and is most effective when applied immediately and during the initial stage of the injury. Gauze or cloth should be used as a barrier between the ice and skin to prevent cold burns or skin damage. Chemical-type ice packs can reach temperatures that result in cold injury. Ice packs should not be taped to a limb and left for extended periods.
C - COMPRESSION. Compression refers to the use of snug bandages which reduce swelling, bleeding, and can provide support. Compression should be applied evenly across the swelling area. Compression is not the same as a tourniquet. A tourniquet is used to cut off all blood supply to an area; compression should not result in cutting off the blood supply to the limb.
E - ELEVATION. Gravity has considerable influence on the accumulation of swelling. If the injured limb is left below the body, gravity assists in helping the area swell with fluid. Elevating the injured limb, ideally above the heart, helps reduce the magnitude of swelling. Elevation should not be used when the act of raising the limb aggravates the existing injury.

GYMNASTICS SAFETY MANUAL 7
Preparing for Catastrophic Injuries
Catastrophic injuries are those severe injuries that are
serious threats to life and health. Catastrophic injuries
include spine, heart, lung, head, and neck injuries. The most
important aspect of dealing with a catastrophic injury is
activating and engaging the emergency medical action
plan. Catastrophic injuries are extremely time-sensitive.
The quicker the injured participant can enter the medical
system, the better the prognosis. In light of this, the most
important piece of emergency equipment in the facility
is the telephone - to contact emergency services.
SAFETY AND MEDICAL
“ABC” is an acronym that stands for: Airway, Breathing, and Circulation. The ABC acronym is a handy memory prompt for this standard first aid procedure used when faced with a serious injury. First and foremost, the injured participant must have an open airway from which to breathe. An obstructed airway is usually due to an object. A professional should be trained in CPR and first aid procedures for removal of an airway obstruction. Once an airway is established, the participant must be able to breathe. Chest movements and breath sounds, indicating breathing, should be present. Simply taking the injured participant’s pulse can check circulation.
The presence of a pulse indicates that the heart and circulation are functioning. The pulse can be determined most commonly at the neck (carotid pulse) or at the wrist. If breathing is absent, but the injured participant has a pulse, provide rescue breaths. If both breathing and pulse are not present, cardiopulmonary resuscitation (CPR) should begin immediately. Due to the nature of gymnastic type injuries, CPR rescuers should usually assume that a neck injury is present. When warranted, severely injured participants should be treated for shock.
Head and neck injuries are rare, but the potential dire consequences of head and neck injuries require special consideration. Professionals should always take precautions to prevent head and neck injuries. When a participant is suspected of having a head or neck injury, the professional should assume a serious injury and engage the emergency action plan.
TELEPHONE PREPARATION
• Ambulance, police, fire, telephone numbers (usually 911) should be placed prominently at each telephone.
• Post the name of the facility, address, location of the telephone (e.g., what floor or room), and the nearest cross street prominently near each telephone.
• Post the name, address, and telephone number of the nearest hospital emergency room.
• Post the name, address, and telephone numbers (cell, home, etc.) of the owner.
• Post the telephone number for local poison control.
If a participant suffers a blow to the head, the participant should not be allowed to continue any active participation without medical assessment. Some head injuries appear deceptively mild. A physician should therefore, evaluate a participant who suffers a head injury as soon as possible. If a participant is rendered unconscious due to a head or neck injury, one should assume that a serious injury has occurred and the emergency medical system should be activated. If the participant is conscious following a head injury, the following symptoms usually indicate that the injury requires immediate medical attention:
• Headache• Confusion• Amnesia• Dizziness• Nausea or vomiting• Sleepiness• Slurred speech• Clumsiness• Blurred vision
GYMNASTICS SAFETY MANUAL 8
SAFETY AND MEDICAL
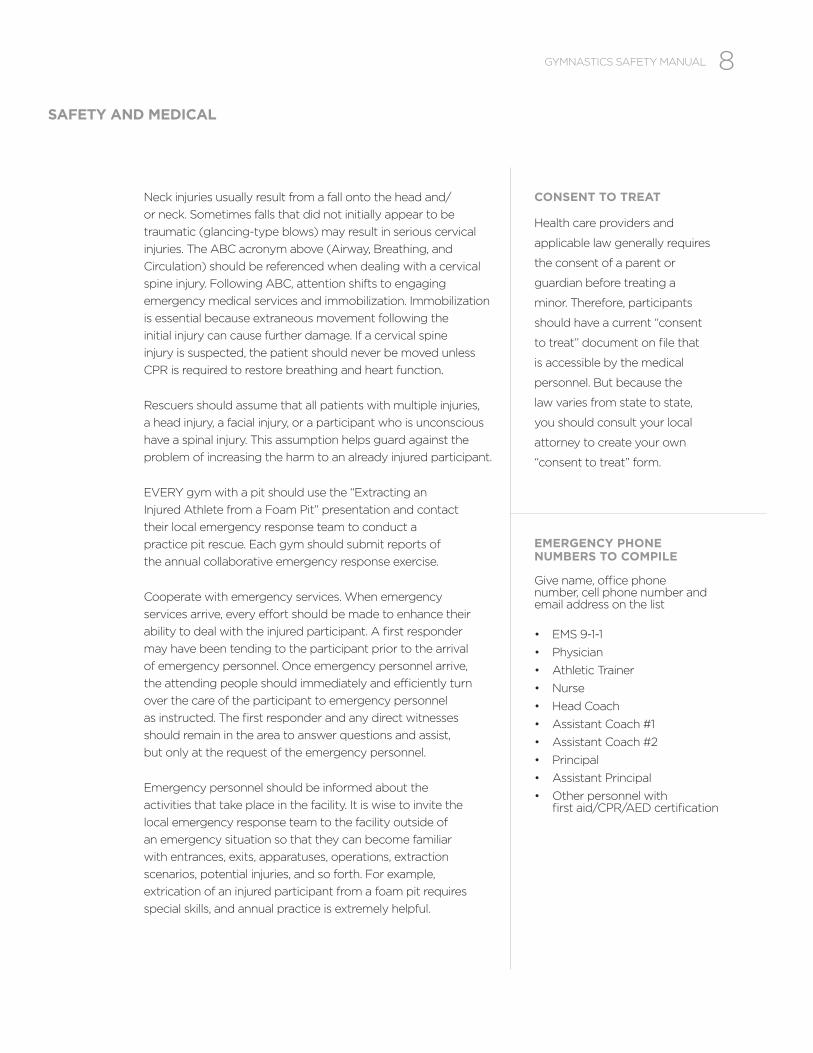
Neck injuries usually result from a fall onto the head and/
or neck. Sometimes falls that did not initially appear to be
traumatic (glancing-type blows) may result in serious cervical
injuries. The ABC acronym above (Airway, Breathing, and
Circulation) should be referenced when dealing with a cervical
spine injury. Following ABC, attention shifts to engaging
emergency medical services and immobilization. Immobilization
is essential because extraneous movement following the
initial injury can cause further damage. If a cervical spine
injury is suspected, the patient should never be moved unless
CPR is required to restore breathing and heart function.
Rescuers should assume that all patients with multiple injuries,
a head injury, a facial injury, or a participant who is unconscious
have a spinal injury. This assumption helps guard against the
problem of increasing the harm to an already injured participant.
EVERY gym with a pit should use the “Extracting an
Injured Athlete from a Foam Pit” presentation and contact
their local emergency response team to conduct a
practice pit rescue. Each gym should submit reports of
the annual collaborative emergency response exercise.
Cooperate with emergency services. When emergency
services arrive, every effort should be made to enhance their
ability to deal with the injured participant. A first responder
may have been tending to the participant prior to the arrival
of emergency personnel. Once emergency personnel arrive,
the attending people should immediately and efficiently turn
over the care of the participant to emergency personnel
as instructed. The first responder and any direct witnesses
should remain in the area to answer questions and assist,
but only at the request of the emergency personnel.
Emergency personnel should be informed about the
activities that take place in the facility. It is wise to invite the
local emergency response team to the facility outside of
an emergency situation so that they can become familiar
with entrances, exits, apparatuses, operations, extraction
scenarios, potential injuries, and so forth. For example,
extrication of an injured participant from a foam pit requires
special skills, and annual practice is extremely helpful.
CONSENT TO TREAT
Health care providers and
applicable law generally requires
the consent of a parent or
guardian before treating a
minor. Therefore, participants
should have a current “consent
to treat” document on file that
is accessible by the medical
personnel. But because the
law varies from state to state,
you should consult your local
attorney to create your own
“consent to treat” form.
EMERGENCY PHONE NUMBERS TO COMPILE
Give name, office phone number, cell phone number and email address on the list
• EMS 9-1-1
• Physician
• Athletic Trainer
• Nurse
• Head Coach
• Assistant Coach #1
• Assistant Coach #2
• Principal
• Assistant Principal
• Other personnel with first aid/CPR/AED certification

GYMNASTICS SAFETY MANUAL 9
SAFETY AND MEDICAL
SAMPLE EMS CALL
My name is (your name) and
I am calling from the gym at .
We have (number of injured)
athlete(s) who need immediate
medical attention.
The athlete is (condition of athlete) .
Our athletic trainers are on the scene
and have provided (first aid care) .
The athlete(s) is located in the
(Main Gym/PE Gym) .
Please enter the school using
(main entrance) on the
(south) side of the building.
Emergency Action Plan Phone Script
ACTIVATION OF EMERGENCY MEDICAL SERVICES
Call 911. You must provide:
a. Your name, brief summary of the situation
b. Location of injured athlete
• The Gym is located at 5900 Walnut Grove Rd. between I-240 and N Humphreys Blvd. Indicate whether the athlete is in the main gym or PE gym. (Give exact location)
• Instruct EMS to use the main entrance to the school.
c. Number of individuals injured.
d. Condition of injured athlete(s)
• Conscious or unconscious?
• Is he/she breathing normally?
• Does he/she have severe bleeding?
• Is he/she in shock?
• Does he/she have any heat illness?
e. First aid treatment provided
• Splinting?
• Wound care?
• CPR/AED?
• Ice tube?
f. Any other information requested by dispatcher.

GYMNASTICS SAFETY MANUAL 10
Safety Policies for Gymnastics
SAFETY AND MEDICAL
CERTIFICATIONS FOR COACHES
1. Red Cross Adult, Child and Pediatric First Aid, CPR/AED course
2. Red Cross O2 Administration course
MEMBERSHIP IN USA GYMNASTICS
1. Require Background check and do updated background checks
2. Require the course U101 Safety and Risk Management
VOLUNTEER COACHES
1. Require background checks through the National Center for Safety Initiatives: www.ncsisafe.com Cost $21.25.
2. Shield the Vulnerable: www.shieldthevulnerable.org
EMERGENCY EQUIPMENT
1. Spine Board with straps and head immobilizer
2. AED with pediatric pads
3. First aid kit with supplies necessary to treat athletes injured in gymnastics
4. O2 equipment
5. Emergency Phone
6. Head Coach supplied with cell phone
7. Gloves and protective equipment for used when administering first aid.
8. Biohazards waste disposal trash can with bags
9. Biohazard clean up kit
10. Accident Report Forms
MEDICAL COVERAGE AT HOME SHOWS
Have at least one of the following:
1. Physician with expertise in sports medicine on site
2. EMS personnel on site
3. Athletic Trainer Certified on site

GYMNASTICS SAFETY MANUAL 11
UNEVEN BARS
ARTISTIC GYMNASTICS
Events
WOMEN’S
1. Balance Beam2. Uneven Bars3. Vault4. Floor Exercise
MEN’S
1. Pommel Horse2. Still Rings3. Parallel Bars4. Horizontal Bar5. Vault6. Floor Exercise
Equipment
The equipment used should meet the standards recommended by
Federation of International Gymnastics (FIG) for design and set up.
The Mat configuration for around each piece of equipment used
should meet the standards required by FIG and USA Gymnastics.
The Safety Guidelines for use of equipment by gymnast should follow
the guidelines as published in the Gymnastics Risk Management
“Safety Course Handbook” published by USA Gymnastics.
ARTISTIC GYMNASTICS BY ROGER MCFARLAND
PARALLEL BARS
VAULT
BALANCE BEAM
HORIZONTAL BAR
POMMEL HORSE
RINGS

GYMNASTICS SAFETY MANUAL 12
HORIZONTAL BAR
ARTISTIC GYMNASTICS
RINGS
PARALLEL BARS UNEVEN BARS

GYMNASTICS SAFETY MANUAL 13
POMMEL HORSEBALANCE BEAM
ARTISTIC GYMNASTICS
VAULT GYMNASTICS FLOORS

GYMNASTICS SAFETY MANUAL 14
Facility Requirements for Artistic Gymnastics
1. Essential is a gymnasium or open building with a minimum of 19-24
feet of ceiling height depending on the activities pursued.
2. The placement of equipment should provide safety lanes for moving from
one piece of equipment to another without crossing another persons landing
zone. Equipment should be separated sufficiently so that a fall from one
piece of equipment doesn’t result in a landing on another piece of equipment,
or uneven landing surfaces. This is also true of distances from a wall.
3. If an in-ground pit is being constructed, it must meet the safety
requirement of size, safety padding, use of foam blocks, and
suspension system required by USA Gymnastics.
4. Floor plates for anchoring equipment must be secured into the concrete
below a wood floor to withstand the stress of swinging on the apparatus.
5. The landing zones and matting under and around a piece of equipment
must meet the standards required by FIG. (See attached sheet)
6. Spotting belts and harnesses must meet the standards found in the USA
Gymnastics Safety Handbook. The best rope is a rock climbing rope tied onto a
locking carabiner with a figure eight knot rethreaded. Ceiling clamps designed for
support of heavy weight, should be used that are designed for your ceiling type
(steel, concrete, wood, or pipe). The best harnesses on the market are secured
with a parachute clip and have leg supports to keep the harness from sliding up.
(eg. Norbert’s) The pulleys used for supporting the rope should be heavy duty
and designed so that the failure of the center pin would not result in the rope
falling. Rock climbing pulleys are the best. The design for an overhead pulley
system and distances the pulleys are apart are found in the attachments.
7. The area should be well ventilated for circulation of air and heat.
8. The area should have sufficient security lighting that comes
on if there is a power shortage and the lights go out. This is
especially essential if an area has no window lighting.
9. Areas next to tumble tracks, should be padded to protect a
tumbler who goes crooked and falls off the floor.
10. Of careful consideration should be those gyms that have to set-up and
takedown equipment and mats for every practice. If there are other
activities in the gym, protecting a gymnast from rolling balls or people
running across your mats should be prevented by the use of barriers.
ARTISTIC GYMNASTICS

GYMNASTICS SAFETY MANUAL 15
Supervision and Spotting of Artistic Gymnastics
1. PROGRESSIONS: It is important for safety and efficiency that coaches use
a proper progression for teaching skill and technique. Until an athlete learns
and master’s lead-up skills can they go on too more advanced skills.
2. BODY AWARENESS and LANDING: Early training should be
done in correct landing technique and body awareness activities
and continually reinforced throughout a gymnasts life.
3. SUPERVISION: A coach must place him/herself in in a position where
they can keep an eye on what is going on throughout the practice
area. No horseplay should be allowed at anytime. No student should be
required to participate in an activity for which they are not physically or
psychologically prepared. Proper progressions should be enforced.
4. COMMUNICATION: A coach should use correct terminology consistently
when speaking with a student. Make sure that instructions are clear and
understood between the coach and athlete. Make sure an athlete understands
the risks they are taking, and what you are doing to insure they will be safe.
No athlete who gets dropped, comes back for you to do it again.
5. Make sure you follow general rules and guidelines and enforce them with
your athletes. eg. No jewelry to be worn, no gum chewing, proper dress.
6. Matting used for a skill should be sufficient so as to protect an athlete from
an injury. The minimum thickness for floor mats is 2" and of a foam that
does not permit someone from depressing it to the floor. Landing mats that
have the foam breaking down, should be pulled from use and replaced.
7. TRAINING AIDS: The use of skill builder mats and training aids should be
used when possible. The boulder for back handsprings, decline mats for rolls,
foldup mats for cartwheels, handstand blocks, pits, and spotting belts can
assist the athlete in gaining confidence and mastery in performing a skill.
8. INSPECTION: Always inspect equipment and mats for separation, support
settings, and condition before allowing and athlete to be present.
9. All skills should be mastered at a low level before it is taken to a greater height.
Strength and flexibility are essential elements to a safe mastery of skills.
ARTISTIC GYMNASTICS

GYMNASTICS SAFETY MANUAL 16
PREPAREDNESS
It is prudent when running a gymnastic program
that the coach or coaches have basic certifications
in gymnastics. The United States of America
Gymnastics (USAG) is the representative
authority in gymnastics in the United States of
America. Their certifications have the most weight
and should be sought out and obtained.
USAG’s website address is usagym.org.
Another organization that has a great education
program is the National Federation of High School
Sports (NFHS). Though some of these certifications
have a substantial cost, many are free. Remember there
is no cost too high for the safety of your gymnasts.
NFHS’s website is: nfhslearn.com.
OTHER VALUABLE RESOURCES FOR TEACHING CIRCUS AND AERIAL ROUTINES
The Circus arts Institute – The first recognized Aerial instructor for Aerial instructors in USA.circusartsinstitute.com/teacher-certifications
The Aerial Circus Training and Safety Manual – Resource book by Carrie Heller
REQUIRED USAG CERTIFICATIONS
• U100: Fundamentals of Gymnastic Instruction
• U101: Safety and Risk Management
• U102: First Aid
RECOMMENDED USAG CERTIFICATIONS
• U103: USA Gymnastic Fitness
RECOMMENDED NFHS CERTIFICATIONS
• AACCA Spirit Safety Certification ($75)
• Coaching Cheer and Dance ($75)
• Concussion in Sports (free)
• Creating a Safe and Respectful Environment (free)
• Engaging Effectively with Parents (free)
• First Aid, Health and Safety for Coaches (cost depends on your state of residence)
• Fundamentals of Coaching (cost depends on your state of residence)
• Sportsmanship (free)
• Sports Nutrition (free)
• Strength and Conditioning ($50)
• Teaching and Modeling Behavior ($20)
• Teaching Sport Skills ($50)
RESOURCES FOR LEARNING AND SAFETY
Simply Circus: www.simplycircus.com
Federation of Professional Circus Schools Manuals: www.fedec.eu/en/ressources
The Hybrid Perspective – linking gymnastics and movement science: www.hybridperspective.com
PREPAREDNESS BY RICHARD SCHWARZ

GYMNASTICS SAFETY MANUAL 17
SAFETY GUIDELINES FOR FLOOR TUMBLING
FACILITY REQUIREMENTS
• Enough height for jumping and flipping—minimum height 12 feet.
• Enough floor space to place panel or roll mats down that will be a minimum of 40 feet long and 6 feet wide.
• Tumbling lane should be 6 feet wide and not change in height.
SUPERVISION AND SPOTTING
• When learning floor tumbling, it is best done under the supervision of a coach.
• Use hand spotting when the student is starting to rotate over their head as in forward, backward rolls, handstand forward rolls, etc.
SAFETY GUIDELINES FOR FLOOR TUMBLING BY RICHARD SCHWARZ
Performer Conditioning and Prerequisite Skills
PHYSICAL PREPAREDNESS
• Tumblers should have arm, leg and core strength for self-protection when they are supporting themselves in tumbling moves and landings.
• Tumblers should be taught the importance of being under control as they do their skills so the body develops needed strength and endurance.
• Tumblers should learn and be able to demonstrate the following positions: Tuck, pike, straddle, hallow and arched.
• Young to older tumblers develop strength and coordination by performing exercises that resemble parts of tumbling skills. Candle sticks to stand (2 or 1 leg), Hollow and arched rockers, swimmers, Pistol squats, handstand wall runs, handstand shoulder taps, bunny hops, high skips, long jumps, handstand for time, etc.
KINESTHETIC PREPAREDNESS
• Tumblers should daily practice controlled landings without rotation to develop the body’s kinesthetic sense. First from their own jump then jumping off of a raised service.
• Daily Performing 10 to 15 one-leg quarter squats will strengthen the proprioceptors of the ankle.
ROTATION SKILLS
• Tumblers should have a good understanding of the mechanics of rotation before attempting rotational skills. Hand spotting, belt spotting and the use of progression should be used to learn rotational skills.
• The use of an overhead-spotting rig/in ground foam pit or above ground resi-pit if available are great ways to safely teach rotational skills.
• The person who is running the overhead belt must understand the principles of overhead belt spotting and also understand the technique of the skill being performed. Not knowing when something is going bad is a sure way of injuring the jumper.
SUGGESTED PROGRESSIONS FOR TUMBLING
Looking for mastery of basic skills – then only move on to next skill.

GYMNASTICS SAFETY MANUAL 18
SAFETY GUIDELINES FOR FLOOR TUMBLING
BASIC ROLLING TUMBLING• Candlestick stand up• Forward roll• Forward pike tuck roll• Backward roll• Forward straddle roll• Backward straddle roll• Backward pike roll• Backward roll to push-up• Back extension roll• Dive roll• Front pike roll
INTERMEDIATE TUMBLING• Handstand forward roll• Cartwheel• Back bend down – up• Front limber to knees• Back kick over• Front limber• Back walkover• Front Walkover• Round-off• Front handspring• Back handspring
ADVANCED TUMBLING• Front flip • Back flip• Back handspring out of round-off• Back flip out of back handspring• Back Pike• Front Pike• Back Layout• Back layout with a Half twist• Front tuck step-out• Barani• Front handspring front flip• Front full twist• Rudi• Back layout full twist• Back layout double twist
FLIPPING TECHNIQUE
• Don’t throw the head for rotation – head neutral. Remember that the upper body give direction to the flip and the lower body give rotation.
• Every skill leads to the next so if you want to learn allot of flipping skills perfect the basic ones.
Twisting and multiple flips are best learned in an overhead belt system on a trampoline enabling for many repetitions and the learning of the skill before trying to put it on the floor.
• Only after the basic flips of tuck, pike are perfected should twisting and double rotations be learned.
• Twisting is learned best with head held neutral – or looking under the armpit of the direction twisting never over the shoulder.
• Twisting should be done well after you have started to flip. Twisting is better learned late than early in the flip.
• Remember the act of twisting will aid in rotation so it is easy to over rotate twists.
On all flips land with feet together – never try and save a flip by putting one leg back on landing. Better to land and roll out than try and save a landing and injure yourself.
EQUIPMENT SPECIFICATIONS
• Tumbling should be performed should be done on 2” foam matting. Tumbling on spring surface, rod floor or trampoline is good for increasing repetitions safely.
SAFETY EQUIPMENT
• The use of an overhead spotting system is a great way learning rotating skills and should be done by an experienced coach.
• The overhead spotting system should be checked regularly for wear and tear of the rope, pulleys and attachment points.
• Stacking landing mats onto a resi-pit is another technique to teach safe rotation skills.
GYMNASTICS SAFETY MANUAL 19
SAFETY GUIDELINES FOR MINI-TRAMPOLINE/SPRINGBOARDS
FACILITY REQUIREMENTS
• Enough height for jumping—minimum height 15 feet.
• Enough matted space around the mini-trampoline/spring board to ensure the safety of the jumper. Minimum of 6 feet.
• Run up space should be matted and not change in height.
• Overhead spotting system, in ground foam pit and/or resi-pit
SUPERVISION AND SPOTTING
• The use of the mini-trampoline/springboard should be under the supervision of a coach at all times. Jumpers should have a good kinesthetic sense and a good understanding of rotation and landing skills.
• The use of hand spotting, in ground foam pit, resi-pit and/or an overhead spotting system is recommended when teaching and learning rotational skills.
SAFETY GUIDELINES FOR MINI-TRAMPOLINE/SPRINGBOARDS BY RICHARD SCHWARZ
Performer Conditioning and Prerequisite Skills
PHYSICAL PREPAREDNESS
• Jumpers should have the leg and core strength to withstand jumping and landings.
• Jumpers should be taught the importance of jumping under control so the body develops needed strength and endurance.
• Jumpers should learn and be able to perform the following air positions off of the min-trampoline/springboard. Straight, Tuck, Pike, Straddle and Star.
KINESTHETIC PREPAREDNESS
• Jumpers should daily practice high controlled jumps without rotation to develop the body’s kinesthetic sense.
• The use of mat stacks on a resi-pit allows the jumper to develop height in their rotation skills without the chance of excessive over rotation.
ROTATION SKILLS
• Jumpers should have a good understanding of the mechanics of rotation before attempting rotational skills. Spotting, progression and the use of stack mats is the best way to learn rotational skills.
• The use of an overhead-spotting rig/in ground foam pit or above ground resi-pit when learning rotation skills is suggested.
• The person who is running the overhead belt must understand the principles of overhead belt spotting and also understand the technique of the skill being performed. Not knowing when something is going bad is a sure way of injuring the jumper.
• The more difficult a skill the more time in an overhead belt is needed. In counting repetitions it is more important to get numbers over time and not just in one day. (10 a day over 5 days is much better than 50 in one day).
SUGGESTED PROGRESSIONS FOR MINI-TRAMPOLINE/SPRINGBOARD
Looking for mastery of takeoff, flight and landing – then only move on to next skill.

GYMNASTICS SAFETY MANUAL 20
SAFETY GUIDELINES FOR MINI-TRAMPOLINE/SPRINGBOARDS
JUMPING
• Straight – emphasize proper use of arms and landing position on mat
• Tuck – Arms up then perform the tuck at top of jump.
• Star/Straddle
• Pike
LANDINGS
• Stick landings out of all jump positions
• Land forward roll out
ROTATION
• Dive roll
• Arched dive roll
• Front flip to seat on stack mat
• Front flip
• Front Pike
• Front tuck and pike kick outs
• Front tuck (pike) kick out – 1/2 tuck
• Front layout
• Barani straight
• Front full twist
• Rudi
• Front double twist
• Front 1 1/2
• Double front
FLIPPING TECHNIQUE
• Don’t throw the head for rotation – head neutral. Remember that the upper body give direction to the flip and the lower body give rotation.
• Open as close to twelve o’clock on tucks and pikes this enables safety of landings and prepares the athlete to twist easier.
• Every skill leads to the next so if you want to learn allot of flipping skills perfect the basic ones.
Twisting and multiple flips – should be learned in an overhead belt system, in ground foam pit or a stack of mats.
• Only after the basic flips of tuck, pike are perfected should twisting and double rotations be learned.
• Twisting is learned best with head held neutral – or looking under the armpit of the direction twisting never over the shoulder.
• Twisting should be done well after you leave the mini-trampoline.
• Remember the act of twisting will aid in rotation so it is easy to over rotate twists.
On all flips land with feet parallel – never try and save a flip by putting one leg back on landing. Better to land and roll out than try and save a landing and injure yourself.
EQUIPMENT SPECIFICATIONS
• Mini-trampolines and springboards should be used as they are designed to be used. You should never use an exercise trampoline as a mini-trampoline or springboard. Stacking mats under the front legs of a mini-trampoline is discouraged.
SAFETY EQUIPMENT
• The use of an overhead spotting system is a great way learning rotating skills and should be done by an experienced coach.
• The overhead spotting system should be checked regularly for wear and tear of the rope, pulleys and attachment points.
• For mini-trampoline and springboards a cable overhead spotting system is easier to work but few have this luxury.
• In ground foam pit is a great safety tool in learning rotations off of the mini Trampoline/springboard. If you have access to this the pit should be at least 10' x 20' x 4'.
• Stacking landing mats onto a resi-pit is another technique to teach safe rotation skills.
LANDING MAT GUIDELINES
• It is recommended to have the landing mat be 6' x 12' x 8" to 6' x 12' x 12". This should be the minimum.
GYMNASTICS SAFETY MANUAL 21
SAFETY GUIDELINES FOR SILK
FACILITY REQUIREMENTS
• Enough height for hanging the silk minimum height 12-15 feet.
• Enough matted space around the Silk to ensure the safety of the performer. Minimum of 6 feet radius.
• It is recommended to have a 6'x12'x8" mat on the floor under the silk.
• Attachment of the silk should follow rigging guidelines.
SUPERVISION AND SPOTTING
• The use of the Aerial Silk should be under the supervision of a coach at all times. Performers should have a good physical strength and flexibility.
• Because of the nature of this discipline it is very difficult to hand spot the athlete. This requires learning the wraps and holds close to the ground or on the ground before performing it at height.
SAFETY GUIDELINES FOR SILK BY RICHARD SCHWARZ
Performer Conditioning and Prerequisite Skills
PHYSICAL PREPAREDNESS
• Performers of the aerial silk should have superior grip, upper body and core strength to withstand prolonged periods of time on the apparatus.
• After warm-up performers should condition by performing repetitions of basic aerial silk skills. Climbing, hold foot-resting position, and inverting on the silk with straight legs.
KINESTHETIC PREPAREDNESS
• Good overall body control is very important for safe performances on the aerial silk. Development of the core while hanging from the silk not only develops core strength but also grip strength.
• Through repetitions the performer will be able to do the wraps and position with more ease. This saves the performers strength and makes for a more flowing routine.
BASIC SKILLS
• Hanging for time• Climbing to the top x 3• Basic rest position
10 seconds x 3• Foot lock• Double foot lock• Crochet
• Hip-key• Double wrap split• Crucifix• Lean out• Free Arm• Arabesque
EQUIPMENT SPECIFICATIONS
When purchasing silk hardware do it from a dealer who specializes in this. You will need one swivel, one polished Aluminum figure 8, and two steel screw gate carabineers.
SAFETY EQUIPMENT
• 6' x 12' x 8" to 6 x 12" x 12" landing pad under the aerial silk.
• If possible hang your silk over a foam block pit.
• Mats should be in good repair and not overly worn or too soft.
• Strength to weight ratio is one of the most important safety considerations.
ADDITIONAL RESOURCES:
• The Circus arts Institute – The first recognized Aerial instructor for Aerial instructors in USA: circusartsinstitute.com/ teacher-certifications
• The Aerial Circus Training and Safety Manual, resource book by Carrie Heller
• Beginning Aerial Fabric Instruction Manual, book by Rachel Leach
• Liz Cooper Aerial Fabric

GYMNASTICS SAFETY MANUAL 22
SAFETY GUIDELINES FOR TEETERBOARD
FACILITY REQUIREMENTS
• Enough height for flying – minimum height 20 feet.
• The teeterboard should be placed on 1 1/4" - 2" mat and extend well past the landing pad.
• Enough space in around the teeterboard and landing areas to ensure the safety of the flyer. Minimum of 10 feet.
• Overhead spotting system.
SUPERVISION AND SPOTTING
• The use of the teeterboard should be under the supervision of a coach at all times. Acrobats should have a good kinesthetic sense and a good understanding of rotation and landing skills.
• The use of hand spotting on takeoffs is recommended when learning take offs and landing. This enables the coach to direct the flyer in the proper angle of takeoff.
SAFETY GUIDELINES FOR TEETERBOARD BY RICHARD SCHWARZ
Performer Conditioning and Prerequisite Skills
PHYSICAL PREPAREDNESS
• Flyers should have the leg and core strength to withstand landings with rotation. They should be able to push into their landings on the surface they are landing on. At no time should the flyers legs bend excessively and never past a 90-degree angle.
• Flyers should be taught how to handle over and under rotated landings. Flyers should be able to show skill in how to protect their legs, arms and most importantly their head during an over or under rotated skill.
• Backward falling drills – candlestick roll backs (arms over head) should be progressed from floor, from jump of panel mat to multiple panel mats.
• Forward falling drills – forward rollouts and crash rolls (over one shoulder to opposite hip).
KINESTHETIC PREPAREDNESS
• Flyers should demonstrate good timing and body awareness when leaving the teeterboard (backwards, back on, forwards and to the side) before rotation is introduced.
• Teetering is a good way to improve timing. The higher the fulcrum the harder it is to teeter. Also if possible have an experienced flyer work with a beginning flyer (this speeds learning and reduces injuries) Progress from one or two hits to three then four etc. An important word to use when teetering is “break”. This is a signal from one flyer to the other they cannot continue teetering and other flyer must stop their teetering by absorbing their landing or the landing of the other flyer.
• Pushers should be able to control their hit in degree of experience of the flyer. It's should never be just about how "hard" I can hit someone, control and consistency is more important.
• Pushers should be able to do the following types of hits consistently: run up side hit, run up double side hit, Single hit off platform and double hit off platform.

GYMNASTICS SAFETY MANUAL 23
SAFETY GUIDELINES FOR TEETERBOARD
ROTATION SKILLS
• Flyers should have a good understanding of rotation of skills and be able to demonstrate this on the ground, tossing group or trampoline before attempting rotating off of the teeterboard.
• When rotating off of the teeterboard it should be noted that leaving early will increase rotation and leaving late will decrease rotation.
• The use of an overhead-spotting rig when learning rotation skills is mandatory.
• The person who is running the overhead belt must understand the principles of overhead belt spotting and also understand the technique of the skill being performed. Not knowing when something is going bad is a sure way of injuring the flyer.
• Flyers should be able to control their take off so they land consistently in the center of the landing mat before they are taken out of the overhead belt. Being able to do a skill is not the same as mastering a skill. Mastery must be demonstrated in the overhead belt before it is taken out and performed!
• The more difficult a skill the more time in an overhead belt is needed. In counting repetitions it is more important to get numbers over time and not just in one day. (10 a day over 5 days is much better than 50 in one day)
• If a flyer continually over rotates or under rotates a skill or they have it then lose it they need to go back a progression where they can have success. Success breeds success and failure breeds' failure. They may feel they are ready to move on but if there is not continued improvement they are not ready and must perfect the skill leading up to the harder one.
SUGGESTED PROGRESSIONS FOR FLYING
Looking for mastery of takeoff, flight and landing – then only move on to next skill.
Learning to take a hit
All done to at least a 12" mat
• From single run up hit
• Jump to beside board – Straight, tuck, straddle, pike
• Back off the board – straight
• Back onto the board – straight – from teeter start first
• Back off board (Flips) – tuck, delay tuck, pike, layout (in overhead belt)
FROM DOUBLE RUN UP HIT
• Fly over the board – straight
• Back flip – tuck, delayed tuck, pike, layout (in overhead belt)
FROM SINGLE PLATFORM HIT
• Back off board – straight
• Back off boards (flips) - tuck, delayed tuck, pike, layout (in overhead belt)
• Back onto board – Straight, tuck (in overhead belt)
• Flyover board – straight, gainer tuck, gainer layout, front flip tuck (in overhead belt)
FLIPPING TECHNIQUE
• Don't throw the head for rotation – keep eyes on pusher
• Open as close to twelve o'clock on tucks and pikes – this enables early sight of landings
• Learn to “see” while flipping not just feel (on single flips this is mainly the landing)
• Every skill leads to the next so if you want to learn a lot of flying skills perfect the basic ones
• Twisting and multiple flips – should be learned in an overhead belt system
• Only after the basic flips of tuck, pike and layout are perfected should twisting and double rotations be learned
• Twisting is learned best with head held neutral – or looking under the armpit of the direction twisting never over the shoulder
• Twisting should be done well after you leave the board
• Remember the board and the act of twisting will aid in rotation so it is easy to over rotate twists

GYMNASTICS SAFETY MANUAL 24
SAFETY GUIDELINES FOR TEETERBOARD
DOUBLE FLIPS
• Learn to "see" both rotations. In double flips you should be done with 1 1/2 rotation at the top of your flight – don't ride to the top then try and start your rotation. Rotation starts after you leave the board.
On all flips land with feet together – never try and save a flip by putting one leg back on landing. Better to land and roll out than try and save a landing and injure yourself.
EQUIPMENT SPECIFICATIONS
• Class one lever system with board above the fulcrum.
• Made with clear ash or hickory. 3 to 5 boards wide. Can be made with one board.
• Length – between 8' – 10'.
• Fulcrum height – 12" – 25". The higher the fulcrum the higher the flyer will go.
LANDING AND LANDING MAT GUIDELINES
• The landing area - minimum of a 6' x 12' x 12" mat. A Resi-pit is acceptable but harder to consistently stand up landings.
• Mats should be in good repair and not overly worn or too soft.
• Spotting on landings is highly recommended for underage flyers.
• Spotting landings must be practiced from easy to harder skills.
Safety Equipment
OVERHEAD SPOTTING SYSTEM
• The use of an overhead spotting system is mandatory when learning rotating skills and should be done by an experienced coach.
• The overhead spotting system should be checked regularly for wear and tear of the rope, pulleys and attachment points.
LANDING AND LANDING MAT GUIDELINES
• The landing area should be at the minimum a 6' x 12' x 12" mat. A Resi pit is acceptable but harder to consistently stand up landings.
• Mats should be in good repair and not overly worn or too soft.
• Spotters on landings is highly recommended for underage flyers.
• Spotting landings must be practiced from easy to harder skills.

GYMNASTICS SAFETY MANUAL 25
SAFETY GUIDELINES FOR TRAMPOLINE
FACILITY REQUIREMENTS
• Enough height for flying – minimum height 20 feet.
• Enough matted space around the trampoline to ensure the safety of the jumper. Minimum of 6 feet.
• It is recommended to have a 5’ x 10’ x 8” mat on the floor at the ends of the trampoline’s end decks.
• Overhead spotting system.
SUPERVISION AND SPOTTING
• The use of the trampoline should be under the supervision of a coach at all times. Jumpers should have a good kinesthetic sense and a good understanding of rotation and landing skills.
• The use of hand spotting and/or an overhead spotting system is recommended when teaching and learning rotational skills.
SAFETY GUIDELINES FOR TRAMPOLINE BY RICHARD SCHWARZ
Performer Conditioning and Pre-requisite skills
PHYSICAL PREPAREDNESS
• Jumpers should have the leg and core strength to withstand jumping for prolonged periods of time.
• Jumpers should be taught the importance of jumping under control so the body develops needed strength and endurance.
• Jumpers should learn and be able to perform in repetitions and in sequence the following air positions on the trampoline. Straight, Tuck, pike, Straddle and Star.
• Jumpers must become proficient in the basic landing positions on the trampoline before rotation is started. Seat, Back, and Belly.
KINESTHETIC PREPAREDNESS
• Jumpers should be able to perform with ease a 1/2 twist into and out of all landing position. This demonstrates body awareness and will improve their air sense.
• Jumpers should daily practice high controlled jumping to develop the body’s kinesthetic sense.
ROTATION SKILLS
• Jumpers should have a good understanding of the mechanics of rotation before attempting rotational skills. Spotting, progression and the use of throw mats is the best way to learn rotational skills.
• The use of an overhead-spotting rig when learning rotation skills is recommended.
• The person who is running the overhead belt must understand the principles of overhead belt spotting and also understand the technique of the skill being performed. Not knowing when something is going bad is a sure way of injuring the jumper.
• The more difficult a skill the more time in an overhead belt is needed. In counting repetitions it is more important to get numbers over time and not just in one day. (10 a day over 5 days is much better than 50 in one day)
SUGGESTED PROGRESSIONS FOR TRAMPOLINE
Look for mastery of takeoff, flight and landing – then only move on to next skill.

GYMNASTICS SAFETY MANUAL 26
SAFETY GUIDELINES FOR TRAMPOLINE
JUMPING
• Straight – emphasize proper use of arms and landing position on mat
• Tuck – Arms up then perform the tuck at top of jump
• Star/Straddle
• Pike
• Heal and toe drive drills
LANDINGS
• Seat
• Back
• Belly
• 1/2 twist into landings
• 1/2 twist out of landings
ROTATION
• Back roll over
• Porpoise
• Knee front flip to seat then to feet
• Front flip to seat then to feet
• Back flip
• Front and back pikes
• Front tuck kick out – 1/2 turn out
• Back layout
• Back layout 1/2 twist
• Back layout full twist
• Back tuck to seat
• Back tuck to back
• Back tuck to back to back pullover
• Front tuck to stomach
• Double back
FLIPPING TECHNIQUE
• Proper set for flips.
• Don’t throw the head for rotation – head neutral.
• Open as close to twelve o’clock on tucks and pikes – this enables early sight of landings.
• Learn to “see” while flipping not just feel (on single flips this is mainly the landing).
• Every skill leads to the next so if you want to learn a lot of flipping skills perfect the basic ones.
• Twisting and multiple flips – if possible should be learned in an overhead belt system.
• Only after the basic flips of tuck, pike and layout are perfected should twisting and double rotations be learned.
Twisting is learned best with head held neutral – or looking under the armpit of the direction twisting never over the shoulder.
• Twisting should be done well after you leave the trampoline.
• Remember the act of twisting will aid in rotation so it is easy to over rotate twists.
DOUBLE FLIPS
• Learn to “see” both rotations. In double flips you should be done with 1 1/2 rotation at the top of your flight – don’t ride to the top then try and start your rotation. Rotation starts shortly after you leave the trampoline.
On all flips land with feet beside each other – never try and save a flip by putting one leg back on landing. Better to land and roll out than try and save a landing and injure yourself.
EQUIPMENT SPECIFICATIONS
• Refer to the USA gymnastics specifications for trampoline for level 5-10: usagym.org/docs/T&T/Equipment/equipment-specs-tr.pdf
Safety Equipment
OVERHEAD SPOTTING SYSTEM
• The use of an overhead spotting system is mandatory when learning rotating skills and should be done by an experienced coach.
• The overhead spotting system should be checked regularly for wear and tear of the rope, pulleys and attachment points.
• Trampoline end decks are strongly recommended for above ground trampolines.
LANDING MAT GUIDELINES
• End deck mats should be 6’ x 10’ x 8”.
• A 5'x10'x8" mat should be placed on the floor behind the end decks.
• A 4 x 6 x 4" or a 5' x 10' x 4" throw mat should be available when learning new skills.
• Mats should be in good repair and not overly warn or to soft.
• Additional resources: Greg Roe a Canadian trampoline competitor and instructor has some good trampoline learning guides on YouTube.
GYMNASTICS SAFETY MANUAL 27
HANDSTAND BALANCING AND BALANCING EQUIPMENT
FACILITY REQUIREMENTS
• Ceiling height for handstands, 10 feet. For hand balancing equipment (blocks, pedestals, chairs) height is needed for the act plus height of participant.
• Balancing equipment, matted space, 2 inch thick mats, and 12 feet of matted space surrounding the act.
• Academy teams, 2 mats that are 5' x 10' x 8" landing mats placed in front and back of mats the act is performing on.
• College teams, discretion of the coach.
• Overhead spotting system.
• Balancing equipment built to industry standards.
SUPERVISION AND SPOTTING
• Handstand balancing should be under supervision of a coach at all times.
• The use of hand spotting is recommended for teaching new skill progression.
• Overhead spotting system is recommended for learning new skills on balancing equipment involving height.
HANDSTAND BALANCING AND BALANCING EQUIPMENT BY TEDD WEBSTER
Performer Conditioning and Prerequisite Skills
• Performers should have upper body, core, and lower extremity strength to do repetitive handstands and be able to hold a handstand for long periods of time.
• Preparation for handstands should include: · Posture training · Body tension exercises · Developing correct tuck-extension technique
• Progression of handstands should include: · Frog stands · Tip ups · Headstands (tuck, pike, wide arms, drag up) · Elbow stands · Assisted lift to handstand · Handstands facing wall
• Progression of pedestals should include: · Tuck up · Tuck up to handstand · Change handstand position (straight, straddle, split, stag, etc.)
• Progression of blocks should include: · Tuck up · Tuck up to handstand · Change handstand position, (straight, straddle, split, stag, etc.)
• Progression of chairs should include: · One chair: L sit · One chair: shoulder stand · One chair: staggered hand stand · One chair: L sit to press handstand · Multiple chair: handstands (straight & parallel) · Controlled dismounts from all skills
EQUIPMENT SPECIFICATION
• Pedestals: Base 12" x 12", upright, 6"- 12", handgrip, fit hands of tops
• Blocks: Base 38" x 38", upright, 24" – 36", blocks 4" x 4" x 8"
• Chairs: Chairs should be the same in all dimensions, upright and square. The height from the base of the chair to the seat should be the same as from the seat to the top of the chair.
• Chairs can be various sizes, but a recommended size would be 18" x 18" x 36".
• 2" floor mats
• Minimum 5' x 10' x 8" landing mats
RESOURCES AND MANUALS
• Simply Circus: community.simplycircus.com
• Federation of Professional Circus Schools: www.fedec.eu/ en/ressources/manuels/

GYMNASTICS SAFETY MANUAL 28
RIGGING FOR OVERHEAD SPOTTING AND AERIAL ACTS
FACILITY REQUIREMENTS
• Gymnasium or open building with minimum of 19-24 feet of ceiling height
• Minimum of 2 inch foam mats under all spotting systems
• Mat coverage under Silks/lyra should be 12 ft. x 12 ft. centered under the apparatus. Minimum 8 inches thick.
RIGGING FOR OVERHEAD SPOTTING AND AERIAL ACTS BY RYAN PERRY
Overhead Rig Inspection
• Rigging should be inspected according to a three tier system:
1. All components should be regularly inspected by the coaching staff before every use; these routine inspections should consist of a quick but meaningful check of all parts which will be checked more thoroughly on a monthly and annual basis. The inspector is looking for defects, weak points and any other sign of danger due to overstressed or broken components.
2. Secondly, all rigging involving ropes with attached connectors, swivels or carabiners will be inspected by coaches more rigorously once per month, following the general directions below, and just as before, coaches should look for defects or dangerous conditions that present a risk to athletes.
3. In addition, a more thorough inspection should occur annually.
· The rig and its respective rope and metal connector pieces should be disassembled on an annual basis.
· Any pulleys or other equipment that are part of the rigging system shall be inspected at this time.
• Rigging should be marked with or labeled with the date it was put into service for identification and to keep track of age.
• All rigging should have a logbook where the inspection log sheets and all manufacturing information, recommendations and procedures are kept. Notes regarding the number of cycles the equipment has experienced and information about the equipment’s order, replacement and condition will also be stored there. One logbook will be maintained for all rigging and will contain divided sections for each individual rig. The General Gym Equipment Inspection log should be used for notes during all inspections.
• Security of other parts within rigging systems
· Coaches should check the security of the ropes and attachments, condition of the elastics and attachments of bungee rings. All components should be inspected for cracks, damages, signs of wear or loose parts.
· Any defects posing a safety risk should be addressed immediately and the equipment should be removed from service until the issue can be fixed.
• Swivels and Pulleys
· Swivels and Pulleys should have unhindered operation.
· Swivels and Pulleys should be inspected annually.
· Swivels should have a minimum breaking strength of 22 kN, as labeled by the manufacturer.

GYMNASTICS SAFETY MANUAL 29
RIGGING FOR OVERHEAD SPOTTING AND AERIAL ACTS
Spotting Belt Inspection
• Spotting belts should be inspected according to a three tier system:
· The soft and hard components should be regularly inspected by the coaching staff before every use; these routine inspections should consist of a quick but meaningful check of all parts which will be checked more thoroughly on a monthly and annual basis. The inspector is looking for defects, weak points and any other sign of danger due to overstressed or broken components.
· Secondly, coaches will be required to inspect the spotting belt more rigorously once per month, following the general directions below, and just as before, coaches should look for defects or dangerous conditions that present a risk to athletes.
· In addition, a more thorough inspection should occur annually.
• Spotting belts should be marked or labeled with the date they were put into service for identification and to keep track of age. They can be labeled much in the same way as ropes and other soft equipment is labeled.
· All spotting belts should have a logbook where the inspection log sheets and all manufacturing information, recommendations and procedures are kept. Notes regarding the number of use cycles the equipment has experienced and information about the equipment’s order, replacement and condition will also be stored there. One logbook will be maintained for all spotting belts and will contain divided sections for each individual teeterboard. The General Gym Equipment Inspection log should be used for notes during all inspections.
· Bend the webbing (fabric straps portion) into a U shape looking for damaged fibers or cuts, frayed edges, pulled stiches, burns or chemical damage.
· Check all D-rings that are part of the spotting belt for cracks, breaks and rough or sharp edges.
· Inspect any buckle for unusual wear, and broken or frayed stitching of the buckle attachments.
· All buckle tongues and grommets should be free of distortion and should not have sharp or rough edges. Webbing should not have additional punched holes and the grommets should not be loose. Any of this damage is enough for retirement.
· Quick-connect buckles should be checked for distortion and all outer and center support bars should be straight and not bent from extreme pressure. Dual tab release mechanisms should be free of debris and engage properly.
· Harness fall arrest indicators should not be “activated”, meaning they should show no signs of being stretched or broken.
· If any of the above defaults are found, the equipment should be retired.
· Industry standard allows for replacement of all soft equipment every 5 years.

GYMNASTICS SAFETY MANUAL 30
RIGGING FOR OVERHEAD SPOTTING AND AERIAL ACTS
Standards for Ropes and Carabineers• General use rope and carabineers shall have strength of 40
kN (8992lbf). Recommended carabineer manufacturers should be obtained from the reputable dealer.
• Ropes and straps used in lanyards, lifelines and strength components must have a static or low stretch design, Kernmantle construction, be made from synthetic fibers and measure at least 10mm. They must all have a manufacturer labeled minimum breaking strength of 22 kN (4945lbf). Natural fiber, manila or cotton ropes are not to be used.
• General use carabineers should be manufacturer labeled as having a major axis breaking strength of at least 40 kN (8992lbf).
• All metal hardware should be made out of a corrosion resistant metal.
• Lanyards and vertical lines shall be manufacturer labeled with a minimum breaking strength of 5000 pounds (22.2 kN).
• The industry standard and general recommendation is to require a minimum 10:1 safety factor for all ropes and rigging. Thus, the maximum working load should be approximately 1/10th, or 10% of the quoted spliced rope breaking strength. This factor helps to provide greater safety and extends the service life of the equipment.
ROPE CARE PROCEDURE
• Prevent stepping on ropes.
• Protect rope from chafing and running over sharp corners or edges.
• Protect rope from exposure to chemicals, petroleum products, battery acids and vapors.
• Protect rope from mechanical or heat damage.
• Avoid rubbing nylon ropes against other nylon or synthetic ropes.
• Keep nylon rope away from heat.
• Keep rope dry, they lose strength when wet.
ROPE STORAGE
• Rope should be flake laid (arranged in a figure-eight pattern designed to allow rope to be pulled rapidly without twisting or knotting) and stored in a rope bag in a cool dry area.
• Damage to rope can be caused by exposure to these factors during storage:
· petroleum products, chemical or fumes;
· battery acid, vapors or residue;
· bleach or bleach vapors;
· Storage on concrete floors, as the moisture in concrete will produce mild acid and vapor;
· Stored when contaminated with dirt or grit;
· Stored with knots left in the rope.
ROPE REMOVAL CRITERIA
• Rope should be retired and destroyed if:
• It exhibits obvious fault or damage.
• Worn out from excessive use or age.
• More than half of outer sheath yarns are broken.
· When the rope has been exposed to an observable shock load.
• Or was stressed by a load beyond what it was designed to support.
• Contaminated by chemicals.
• Usage that cannot be accounted for.
• Even one use can necessitate rope retirement, after a severe shock load or drop fall.
· 5 years is the required routine cycle for retirement and replacement of all soft equipment.
• Once designated for removal the reason for removal should be logged and reported and the rope itself should be destroyed or cut into pieces to be used for small utility jobs.
HARD EQUIPMENT STANDARDS
• Auto-lock carabineers are required.
• Snaplink and carabineer gates should be self-closing and locking design.
• The strength requirement for carabineers is 5,000 lbs., (22 kN), as labeled by the manufacturer.
• Swivels should have a MBS of 22KN.
• Connectors shall be drop forged, pressed or formed steel, or made of equivalent material.
• Connectors should have corrosion resistant finish and all surfaces and edges should be smooth.
• Dee-rings and snaphooks purchased from a manufacturer should be labeled with a minimum tensile strength of 5,000 pounds (22.2 kN).
• Dee-rings and snaphooks purchased from the manufacturer should have a minimum tensile load of 3,600 pounds (16 kN).
• Only locking type snaphooks can be used.
• All carabineers and other metal connectors or components be retired and replaced at least every 5 years.

GYMNASTICS SAFETY MANUAL 31
RIGGING FOR OVERHEAD SPOTTING AND AERIAL ACTS
Aerial Fabric Procedures• Widths of 75", 90" or 108" are generally recommended
for teens and adults. As long as the width is 75" or above, the choice is based on personal or artistic preference.
• All fabric must be cut to the proper length, depending on the height it is mounted to.
• The aerial fabric should be polyester, either PET (or polyethylene terephthalate) or PCDT (or poly-1, 4-cyclohexylene-dimethylene terephthalate) can be used.
• All yarn should be rated at 75 and 80 cN/tex.
• A single leg of fabric should not tear after any less than a 2000 lb., approx. 1 ton pull test, as labeled by the manufacturer.
• An athlete should never be allowed to use his or her own equipment, only school supplied materials, including silks, can be used for practices and performances
• Industry standard allows for replacement of all soft equipment every 5 years.
• Silks should be hung by a coach using a mechanical scissor lift with safety railings.
AERIAL FABRIC (SILKS) INSPECTION
Silks should be inspected according to a three tier system:
1. Silks should be regularly inspected by the coaching staff before every use; these routine inspections should consist of a quick but meaningful check of all fabric and hanging mechanisms which will be checked more thoroughly on a monthly and annual basis. Fixed installations may instead be checked weekly. The inspector is looking for defects, weak points and any other sign of danger due to overstressed or frayed fabric.
2. Secondly, coaches will be required to inspect the silks in more depth every month, following the general directions below, and just as before, should look for defects or dangerous conditions that present risk to athletes.
3. In addition, a more thorough inspection should occur annually. The coaching staff should also deep clean the silks at this time.
· Silks should be marked with or labeled with the date they were put into service for identification and to keep track of age.
· All silks should have a logbook where the inspection log sheets and all manufacturing information can be kept. Notes regarding the number of use cycles the equipment has been through and information about order, replacement and condition will also be stored therein. One logbook will be maintained for all silks and will contain divided sections for each individual silks set. The Aerial Fabric (Silks) Inspection log should be used for notes during all inspections.
OVERVIEW INSPECTIONS
• Remove apparatus from the rig.
• Remove fabric from the fabric hanger.
• Check the body of the fabric according to the manufacturer’s instructions.
• Look for tears in the fabric or signs of excessive wear.
· Fabric with tears or excessive wear should be replaced immediately.
· Smell the fabric
· If the odor is strong, perform a full inspection
• Check the rigging components for signs of excess wear.
· If any components show signs of wear they should be replaced.
FULL INSPECTION
• Remove the apparatus from the rigging.
• Remove the fabric from the fabric hanger.
• Check the body of the fabric according to the manufacturer’s instructions.
· Check the fabric for tears or excessive wear.
· If the fabric has tears or excessive wear it should be immediately replaced.
• Clean the fabric according to the manufacturer’s instructions.
• Check the rigging components for signs of excess wear.
· If the rig shows excess wear, replace it.
• Recheck the body of the fabric according to the manufacturer’s instructions.
· If excessive wear or tears are found, replace the fabric.
• Remember that using a slip-knot, or using the fabric as a sling is harder on the material, and the inspection schedule should be adjusted accordingly.
GYMNASTICS SAFETY MANUAL 32
RIGGING FOR OVERHEAD SPOTTING AND AERIAL ACTS
Aerial Hoops (Lyra) Use, Maintenance, and Inspection Procedure
The proper sized Lyra should be selected for the individual athlete based on his/her flexibility and height, generally:
• 34" Lyra is generally best for a performer under 5' 6"
• 35" Lyra is generally best for a performer under 5' 8"
• 36" Lyra is generally best for a performer under 6' (But consult the manufacturer to get the best recommendation for the proper Lyra for the athlete.)
• Be aware that Lyra come with different numbers of “tabs” and should be selected based on the desired spinning or swinging characteristics.
• Lyra also come in solid or hollow compositions, and will spin differently based on this characteristic. Some manufactures offer a Lyra with a crossbar, if a crossbar is ordered the hoop should not be used without it or modified for another use.
• Lyra should not be modified or changed in structure once purchased from the manufacturer.
• Lyra should be labeled with the date they were put in service and serial number or other distinct identification number for proper tracking in the appropriate logbook.
• Logbooks should be kept for the Lyra with inspection logs and manufacturer’s information.
• An overview inspection should be made by the coach every time the apparatus is put up, or for fixed installations on about a weekly basis and a full inspection done at least once annually.
• While the industry standard allows for replacement of all hard equipment every 10 years.
• Lyra should be hung by a coach using a mechanical scissor lift with safety railings.
INSPECTION PROCEDURES
Lyra should be inspected according to a three tier system:
1. Lyra should be regularly inspected by the coaching staff every time they are hung. Inspections may be done on a weekly basis for permanently installed pieces. These routine inspections should consist of a quick but meaningful check of all the hard and soft components that will be checked more thoroughly on an annual basis. The inspector is looking for defects, weak points and any other sign of danger due to overstressed or broken components.
2. Secondly, coaches will be required to inspect the Lyra in more depth every month, following the general directions below, and just as before, coaches should look for defects or dangerous conditions that present a risk to athletes.
3. In addition, a more thorough inspection should occur annually.
· Lyra should be marked or labeled with the date they were put into service for identification and to keep track of age.
· All Lyra should have a logbook where the inspection log sheets and all manufacturing information can be kept. Notes regarding the number of use cycles the equipment has experienced and information about the equipment’s order, replacement and condition will also be stored there. One logbook will be maintained for all Lyra and will contain divided sections for each individual Lyra. The Aerial Hoop (Lyra) inspection log should be used for notes during all inspections.
OVERVIEW INSPECTION
• Remove the apparatus from the rigging.
• Check the body of the apparatus according to the manufacturer’s instructions, for any signs of rust.
• If there is rust on the body of the apparatus, rub the area with steel wool to remove the rust.
• If you find rust over a large portion of the unit, or going into an area covered by padding/fabric, perform a full inspection on the unit.
• Check the welds according to the manufacturer’s instructions.
• Look for any surface flaws of imperfections in the weld.
• Using hand pressure, try to pull and twist the weld.
• If the weld comes loose or looks less than secure the lyra fails the inspection.
• If the welded joint fails this inspection, immediately take the unit out of service and consult the manufacturer.
• Inspect any attached ropes or cables according to the manufacturer’s instructions.
• If the ropes or cables show any imperfections or signs of excess wear, perform a full inspection on the unit.
• Check the rigging components for signs of excess wear.
• If any rigging component shows signs of excess wear, replace the component.
GYMNASTICS SAFETY MANUAL 33
RIGGING FOR OVERHEAD SPOTTING AND AERIAL ACTS
FULL INSPECTION
• Remove the apparatus from the rigging.
• Disassemble the unit according to the manufacturer’s instructions.
· Remove and rigging components (shackles, etc.) and ropes or wires from the unit.
· Remove any grip aids (tape, etc.) from the unit.
· Remove any fabric coverings and padding from the unit per the manufacturer’s instructions.
· Clean the unit according to the manufacturer’s instructions.
· Most metal items can be cleaned using denatured alcohol and rags.
· Make sure to get all grip aid residue off.
• Check the body of the apparatus for any signs of rust, according to the manufacturer’s instructions.
• If there is rust on the apparatus, rub the area with steel wool to remove the rust.
• Check the welds according to the manufacturer’s instructions.
· Look for any surface flaws of imperfections in the weld.
· Using hand pressure, try to pull and twist the weld.
· If the welded joint fails this inspection, immediately take the unit out of service and consult the manufacturer.
· Inspect any attached ropes or cables according to the manufacturer’s instructions.
· If the ropes or cables show any imperfections or signs of excess wear, replace the ropes or cables.
· Inspect any rigging components according to the manufacturer’s instructions.
· If the rigging components show any imperfections or signs of excess wear, replace the components.
· Inspect the padding and fabric covers according to the manufacturer’s instructions.
· If the padding or fabric shows any signs of excess wear, replace the padding and/or fabric.
· Check the rigging components for signs of excess wear.
· If any rigging component shows signs of excess wear, replace the component.
· Reassemble the unit according to the manufacturer’s instructions. This is generally done in the reverse order of how you disassembled it.
· Re-tape the unit.
HOMEMADE EQUIPMENT
While it is always best to buy equipment through a reputable dealer, any homemade equipment should be approved by the schools President/Principal or Adventist Risk Management.

GYMNASTICS SAFETY MANUAL 34
ACROBATICS, ELEVATORS, STUNTING, PYRAMIDS, BASKET TOSSING
FACILITY REQUIREMENT
• 2" mat with enough clear space to allow for the move to be performed and possibly fail without the athletes leaving the performance surface.
• Ceiling height should exceed the maximum height of the skill by no less than two feet.
· This height includes any flight that is part of the skill.
· For basket tossing ceiling height should be a minimum of 21'
• Overhead spotting equipment should be used when teaching new skills that are higher than 2 athletes in height, and when the skill involves an inverted body position when they cannot be hand-spotted.
SUPERVISION AND SPOTTING
• Before the first attempt at a skill, the skill should be examined. The areas of the skill where the move is most likely to fail, as well as any portion of the skill that leaves the athlete vulnerable to injury should be considered. A plan should be in place for these variables and include mental preparation for unforeseen danger and failure.
· The primary spotter should cover the area of the move where the most danger exists.
· Secondary spotters should be assigned areas of the skill to cover.
• Athletes should understand the dangers of the skill and know the steps to complete the skill successfully.
• Coaches and supervisors should be students of the skill being taught. Understanding each dynamic that is part of the skill, including the progressions leading to that skill.
CHEERLEADING/ACROBATIC ACTIVITIES BY ERIC PADDOCK
Performer Conditioning and Prerequisite Skills
• Prior to being allowed to perform any skill holding an athlete off the floor any base and spotter must be able to demonstrate a proper catching technique in performing a solo toss and catch in the cradle position.
• Coaches need to be aware of the mental and physical maturity of their athletes to determine their ability to perform skills of increasing difficulty
• Athletes need to be mentally and physically prepared for any foreseeable outcome during the performance of the skill.
• Skills should only be removed from overhead spotting belt when they have been mastered by all athletes.
• Base should be able to sustain their posture throughout the performance of the skill
• Back, leg and abdominal strength
• When performing rotating skills the athlete should perform progressions common to the type of rotation that they are performing (forward, backward, side, twisting).
• The athlete/s responsible for the safe dismount of a skill need to demonstrate understanding of the catch or assistance that they are giving including an ideal dismount as well as failed attempts to complete the skill and dismount the skill.
• Athletes should demonstrate ability to perform basic catches before being responsible for more dynamic catches.
• Simple cradle before catching a twist into cradle.
• Each skill should be taught from its most simple form until mastery then progress to the next most simple form.
• Bases should have the strength to catch their top by themselves
• Top should have the leg strength to land from a two-high level and withstand the impact.

GYMNASTICS SAFETY MANUAL 35
CHEERLEADING/ACROBATIC ACTIVITIES
Column Progressions
TWO-HIGH
• Teach hand grip
• Sitting two-high
• Base sits in a straddle position on the floor, top stands on the shoulder.
· Spotting-One spotter behind base.
· Hands on the hips until deemed safe to perform without assistance.
• Two-high sitting
· Base kneeling or in straddle position. Top sits on shoulders.
• Two-high sitting stand up
· Base stands in sumo-squat. Top crawls up to sit on shoulders. Base grabs thigh of top. Top hooks feet around bases torso.
• Crawl-up two-high
· One spotter behind the skill, and one spotter covering the front of the skill.
· Back-spot begins by assisting with hands on hips. Leaves hands on the top as high as he can reach on the back of the thighs.
· As skill is mastered assistance can be tapered off until skill is safe to perform with no assistance.
• Pop-mount two high
· One spotter behind the skill, and one spotter covering the front of the skill.
· Back-spot begins by assisting with hands on hips. Leaves hands on the top as high as he can reach on the back of the thighs.
· As skill is mastered assistance can be tapered off until skill is safe to perform with no assistance.
• Front-mount two-high
· One spotter on each side of the skill.
• Two-and-half-high
THREE-HIGH
• Both the base and middle, and middle and top should have excellent form in two-high. Shoulders and hips of both athletes should be in a straight line. Front of the shins should be in contact with the back of the bases head.
• Middle, top and assist should be able to perform a mount from the tops feet being on the floor to landing on the middle’s shoulder with the middle not moving from their start position.
• First attempts at this skill should involve an overhead spotting belt, as well as two spotters on either side of the base to protect the middle from injury.
• Once the skill is deemed safe to remove from belt spotting, spotters should be assigned. Two spotters should cover the front of the column and a minimum of two spotters should be covering the back of the column. All of these spotters should also be aware that they cover their respective sides of the skill as well.
· The front spot can be removed by placing landing pads in front of the skill to protect failure to the front. This mat should be a minimum of 16 inches, recommended to have a 32 inch landing pit for this form of spotting.
· An extra spotter can also be placed in charge of the middle position at the beginning of skill acquisition, but by the time the skill is acquired the middle should become fully responsible for their dismount from the skill.
· Preparation for this should include teaching of proper technique to land from shoulder height.
· Progression for this should begin at a height of roughly 6 inches. Top should land with feet no wider than shoulder width apart and allow their momentum to carry them into a forward roll to lessen the impact on their legs.
• Front spotters can be removed as skill is mastered but a minimum of two spotters is recommended for any three-high column.
• The dismount for the three high must be decided prior to the skill being attempted.
• Whatever form of dismount insure that catchers for the top understand their role.
FOUR-HIGH
• All attempts to complete a four-high column should only come after complete mastery of the three highs of both the bottom three positions and the top three positions.
· This mastery should include performing said three highs for a minimum of 30 seconds, walking with the primary three high, and spinning the primary three high.
• Each position should have at least two spotters in the front of the column and two in the back of the column.
• The first attempts of a four-high column should be performed with the use of an overhead spotting belt.
• No skill higher than four athletes is advised.

GYMNASTICS SAFETY MANUAL 36
CHEERLEADING/ACROBATIC ACTIVITIES
FOOT-TO-HAND PROGRESSIONS
• To achieve a hand-to-foot the athlete must begin by learning to balance a top with their hands (base) and/or for a top to learn to be balanced by a base. Example progression:
• Low angel with top on base’s feet
· Spotter has hands under tops stomach/chest, and thighs
• Low bird with base’s back on the floor in hands
· Same spotting technique, though a spot should not be required.
• Teach hand-to-foot hold
· The palm of the base’s hand should be as close to the top’s toes as allows with the index finger still on the back of the tops heel. Attempting to have the balls of the foot on the palm of the base’s hand.
· Pinky and thumb should grip around the foot.
· Top’s toes should be lower than the heel.
• Box (foot-to-hand with base on back with a foot for support)
· Spotter should be behind the top with hands on the hips.
· Spotter should always help the top down safely
• Foot-to-hand with base on back no support
· Spotter should be behind the top with hands on the hips.
· Spotter should always help the top down safely
• 180 mount base kneeling
· Spotter should stand beside the top with hands on hips.
· Extra spotter can be placed on the opposite side of the skill.
• 180 mount
· Start with timers where the base lifts top so the top’s feet reach eye level and then lower the top back to the floor
· Spotter should stand beside the top with hands on hips.
· Extra spotter should be placed beside the base to the left side of the base.
· The primary spotter should slide to the left side to help spot side, back, and front.
· Assistance can be tapered away until skill is mastered
• Hand-to-foot extension
· Experienced spotter behind the base with hands on the wrist of the base.
· Once the base and top can reach extension without assistance move to having one spotter on each side of the base.
• 180 mount to high
· Spotter on each side of the base
HAND-TO-HAND PROGRESSIONS
• Top must perform the hollow-body handstand position
• Top must be able to hold their own body weight with straight arms.
• Teach top to tuck-up to handstand
• Teach top to twist out of handstand (pedestals work well to teach this)
• Teach hand-to-hand grip
• Teach base to twist the top out of hand-to-hand.
• Have top tuck up to handstand in bases hands with bases back and elbows on the floor
• Top and base need to be able to perform a two-high
HAND-TO-HAND
• First attempts should be performed with a spotter on each side of the skill.
· Each spot should hold wrist and shoulder of the top. The hand that is further from the skill should be on shoulder of the top. The spotters should be able to completely control the decent of the top so that they dismount feet first, and under control.
· Place stack of mats, or resi-pit in front of base for safer dismount of skill. 8" mat can be placed behind the base to allow a softer landing surface as well
• Hand-to-hand push to extension
· Bumps: Base bounces lightly up and down in hand-to-hand
· Half push: Base pushes half way to extension then returns to high-low position.
· Spotters should be beside the skill. Spotters can hold wrist of top to assist the beginning of the skill.
· The spotter should help slow the decent of the top.
GYMNASTICS SAFETY MANUAL 37
CHEERLEADING/ACROBATIC ACTIVITIES
ELEVATOR PROGRESSIONS
• Elevator group positions should be determined by height, reach, strength, and skill.
· Bases should have similar height and reach
· Back spot should have a taller reach then the bases
· Bases and back spot should have the strength and skill to catch the top by themselves.
• Prior to being able to perform an elevator the base and top must show that they can complete a catch safely.
• Catch progressions
· Teach top cradle position
· Arms around bases shoulders
· Body piked to roughly 135 degrees
· Legs, torso, arms and neck all tight
· Teach base catching position
· One arm directly above hips
· One arm directly below hips
· Hands level with or above chest and pulling top to the body
· Chest should stay up
· Legs bend
· Two bases cradle with top and squat
· Elbows should touch the top of the knee
· You can do these in sets
· One base cradles the top and squats
· Elbows should touch the top of the knees
· Do these in sets as well
· Top falls back to cradle from a platform (trust fall)
· Introduce a back spot in the catch
· Back spot catches with hand open and thumb against the palm
· Back spot should catch top’s armpits between the wrist and elbow
· Two bases toss top from cradle then catch
· Start with very small tosses and make bases sink until elbows touch the knees
· Increase height of the toss
· One base tosses top from cradle and catches
· Start with small tosses and increase as skill grows.
• Teach the load position
· Top should be able to support themselves in a tuck position between the shoulders of the bases.
• Elevator
· There should be a spot on each side of the group that cover the front, back, and side of the skill.
• Elevator to low push to extension
• Elevator to extension
• Single leg balance
• Single leg balance position should be taught in this order
· Standing on the floor
· Standing on a pedestal
· Base with back on floor
· Hold at low elevator
· Hold at extension
• Dismounts
· Twisting dismounts should be taught starting with the top jumping from the ground
· Flipping dismounts should be placed in the belt prior to allowing the skill to be attempted out of the belt
As athletes progress and learn new skills each skill needs to be evaluated and learned through use of progression
• Elevator tossing
· Show-and-go
· Straight toss catch cradle
· Start at a low height and increase height incrementally as skill is gained
• Basket Tossing
· Teach bases and back spot basket grip and position
· Teach load position
· Trophy
· Start at chest level
· Increase height until bases reach full extension
• Flight
· Begin by tossing the top a few inches and catching in cradle
· As toss, flight and catch become consistent increase the height until a full flight can be achieved.

GYMNASTICS SAFETY MANUAL 38
CHEERLEADING/ACROBATIC ACTIVITIES
• Flying skills
All new skills should be attempted and mastered in an overhead spotting belt.
· Non-rotation skills
· Flare
· Bottle rocket
· Pike
· Single twisting skills
· Full
· Kick full
· Single Rotation Skills
· Back Tuck
· Back Pike
· Back Layout
· Front Tuck
· Front Pike
· Front Layout
· Stationary Bird
· Single rotation skills with additional skill
· Tuck open
· Pike open
· Pike split
· X-out
· Split-leg layout
· Full-twisting layout
· Double rotation skills
· Double back tuck
· Front 1 3/4 tuck
· Single rotation skills with two additional skills
· X-out full twist
· Double full-twisting layout
· Pike-split full
· Double rotation skills with an additional skill
· Full in back out
· Triple rotations are not recommended.
PYRAMIDS
• Building pyramids must be learned from the most basic form of the skill to the desired level of performance.
• The base level of a skill should be mastered first
• Second-level skills should be mastered second.
• Skills that are performed off the ground should be learned with the middles and tops starting on the ground.
• Skills involving flips should be placed in the belt for skill acquisition
• Each new pyramid should be broken down into basic parts that can be taught in individual progressions
• NC State or Wolf wall must start by teaching the center group to base an elevator. This is then followed by teaching the outside groups to base the hitches. This is then followed by teaching the middles to hold the tops on the ground, and the mounters to place the top into their position. After these skills are learned each side can practice their move individually with the center group. The move can then be completed with all of the parts going together.
• When learning skills spotting mats can be placed in strategic areas around the pyramid. The thickness of these mats should correspond to the difficulty of the skill, and space allowed.
EQUIPMENT SPECIFICATION
• Mats should be on even ground and clear.
• When multiple mats are used there should be no gaps between the mats.
• All landing mats need to be consistent in density.
SAFETY EQUIPMENT
• Landing pits can be used to aid in skill acquisition and safety.
• When using a pit during a column the pit should be placed in front of the column.
• Spotting belts need to be inspected regularly for wear and tear, and/or signs of equipment failure.

GYMNASTICS SAFETY MANUAL 39
TUMBLING FLOORS
FACILITY REQUIREMENT
Tumbling should only be performed where a safe tumbling surface is provided.
• Tumbling surfaces should be sufficiently shock absorbent so as to reduce the risk of injury.
• Tumbling surfaces should be level and well lit.
• The track should be well away from walls or other obstructions.
• Ceiling should be a minimum of 16 feet high for rod floor
• Ceiling should be no closer than 16 feet to the top of a tumble track
SUPERVISION AND SPOTTING
• Rings, hair decorations, and jewelry should not be worn when spotting or performing tumbling skills.
• Most spring floors are designed to be shock absorbing and not to increase height.
• Athletes should be aware of safety rules and their own limitations.
• Both the athlete and the coach should agree on what pass is being performed.
• Skills should be learned in progressions.
• When spotting skills the spotter should spot both the takeoff and landing of the skill protecting the athlete’s head and neck primarily as well as the body as a whole.
• Back-handspring · Spot the lower back and thigh · Rotation can be assisted with the hand on the thigh. · Height can be assisted by the hand on the back · Pay attention to the position of the hands to insure the athlete protects their own head
· Follow the skill to protect the athlete from over-rotation
• Back Flip · Spot on lower back and thigh · Rotation can be assisted with the hand on the thigh. · Height can be assisted by the hand on the back · Follow the skill to protect the athlete from over-rotation
• Front flip · Place near hand on the stomach of the athlete and the far hand on the back of the athlete.
· Aid rotation and landing until the skill is acquired.
• Front-handspring · Near hand on athletes shoulder and far hand on athlete’s lower back.
TUMBLING FLOORS BY ERIC PADDOCK
Performer conditioning and pre-requisite skills
• Tumbling conditioning should include these muscle groups:
· Abs (In hollow position is preferred)
· Shoulders
· Quads
· Hamstrings
· Lower back
· Upper back
· Lats
• A warm-up routine should be performed prior to performance of skills.
· This should include dynamic stretching.
• Anytime the athlete performs skills they should be in good physical and mental condition, and not influenced by drugs or alcohol.
• Athletes should be able to perform a hollow-body handstand
· A minimum requirement of being able to support themselves in handstand is a necessity.
• Necessary skills
· Bunny hops
· Hurtle
· Rebound hops
· 180 Cartwheel
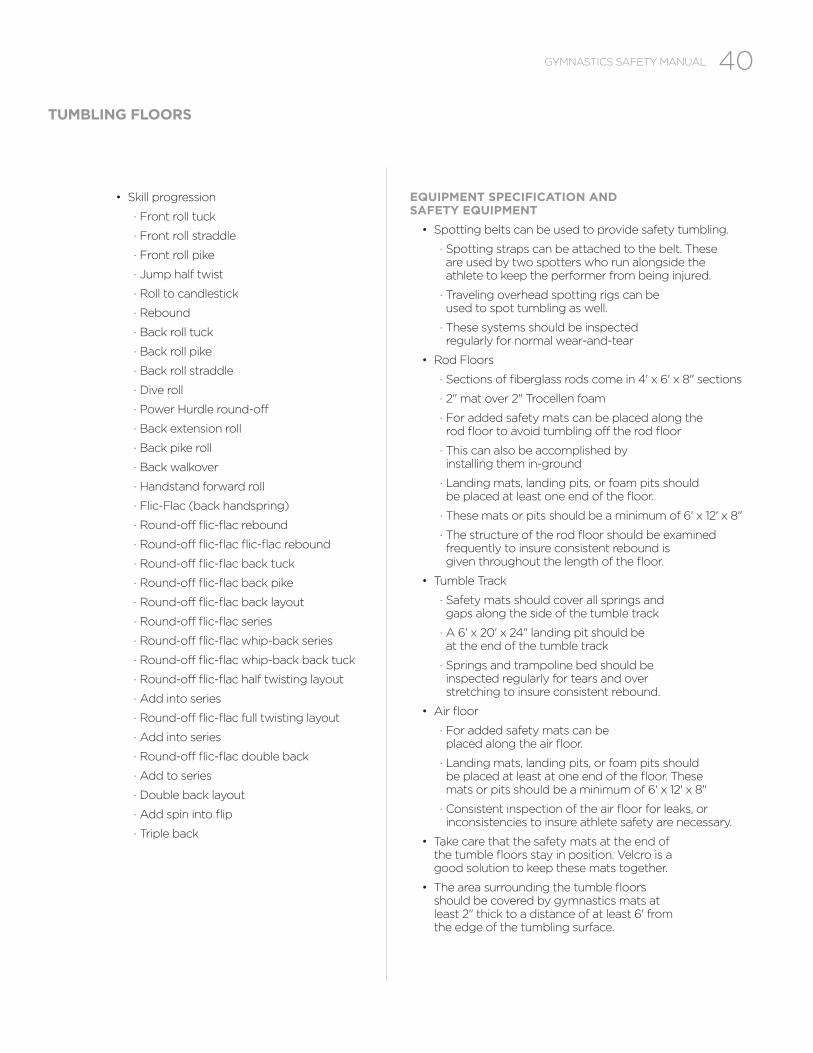
GYMNASTICS SAFETY MANUAL 40
TUMBLING FLOORS
• Skill progression
· Front roll tuck
· Front roll straddle
· Front roll pike
· Jump half twist
· Roll to candlestick
· Rebound
· Back roll tuck
· Back roll pike
· Back roll straddle
· Dive roll
· Power Hurdle round-off
· Back extension roll
· Back pike roll
· Back walkover
· Handstand forward roll
· Flic-Flac (back handspring)
· Round-off flic-flac rebound
· Round-off flic-flac flic-flac rebound
· Round-off flic-flac back tuck
· Round-off flic-flac back pike
· Round-off flic-flac back layout
· Round-off flic-flac series
· Round-off flic-flac whip-back series
· Round-off flic-flac whip-back back tuck
· Round-off flic-flac half twisting layout
· Add into series
· Round-off flic-flac full twisting layout
· Add into series
· Round-off flic-flac double back
· Add to series
· Double back layout
· Add spin into flip
· Triple back
EQUIPMENT SPECIFICATION AND SAFETY EQUIPMENT
• Spotting belts can be used to provide safety tumbling.
· Spotting straps can be attached to the belt. These are used by two spotters who run alongside the athlete to keep the performer from being injured.
· Traveling overhead spotting rigs can be used to spot tumbling as well.
· These systems should be inspected regularly for normal wear-and-tear
• Rod Floors
· Sections of fiberglass rods come in 4' x 6' x 8" sections
· 2" mat over 2" Trocellen foam
· For added safety mats can be placed along the rod floor to avoid tumbling off the rod floor
· This can also be accomplished by installing them in-ground
· Landing mats, landing pits, or foam pits should be placed at least one end of the floor.
· These mats or pits should be a minimum of 6' x 12' x 8"
· The structure of the rod floor should be examined frequently to insure consistent rebound is given throughout the length of the floor.
• Tumble Track
· Safety mats should cover all springs and gaps along the side of the tumble track
· A 6' x 20' x 24" landing pit should be at the end of the tumble track
· Springs and trampoline bed should be inspected regularly for tears and over stretching to insure consistent rebound.
• Air floor
· For added safety mats can be placed along the air floor.
· Landing mats, landing pits, or foam pits should be placed at least at one end of the floor. These mats or pits should be a minimum of 6' x 12' x 8"
· Consistent inspection of the air floor for leaks, or inconsistencies to insure athlete safety are necessary.
• Take care that the safety mats at the end of the tumble floors stay in position. Velcro is a good solution to keep these mats together.
• The area surrounding the tumble floors should be covered by gymnastics mats at least 2" thick to a distance of at least 6' from the edge of the tumbling surface.

EXTRACTING AN INJURED ATHLETE FROM A FOAM PIT
Disclaimer: The information is intended
for educational and conceptual use only.
Facilities with Foam Pits should notify
local EMS of such and schedule a practice
session with EMS for extracting an injured
athlete. Local medical guidance should be
consulted so local protocols are followed.
Special Note: The extraction methods presented here
assume that the patient does not have any immediate
airway, respiratory or cardiac compromise. In case
of need of life saving interventions (i.e., CPR) then
rapid extrication by staff on hand while maintaining
alignment as best as possible is recommended. The jaw
thrust is preferred for opening the airway in trauma.
PIT EXTRACTION STEPS
1. S.T.O.P.
S - Stop all activity around the section
T – Talk to the injured athlete
0 – Observe the injured athlete from outside the pit for breathing, movement, etc.
P – Prevent further injury. Proceed carefully into the pit based on perceived need
2. Patient Access – Three Methods
a. Direct Entry
· Take off Shoes
· Move Slowly
b. Ladder Access
· Use a standard roof ladder (16 feet) to span the pit
· The ladder is placed just above the patients head
· Provides a stable platform for assessment and securing a C spine
· May be the easiest to do
c. Mat Access
· Uses a standard 4” gymnastics mat to access the patient
· The mat distributes the weight of the person across the pit
· Must spider crawl
· Always available
3. Pit Entry/Patient Access-Foam Removal Considerations
· Often the patient is buried by the foam
· Foam is moved only when it covers the patient or interferes with the ABC’s
· The foam beneath the patient provides the support for the patient
· Removing foam beneath the patient will cause the patient to sink lower in the pit
4. Patient Immobilization Considerations
· The patient is often found in a pseudo seating position when supine
· However patient may be prone, sideways or even head lowest
· It may take 4-5 people to safely immobilize and remove the patient from the pit.
· 1 on C-Spine, 2 on each side of the Patient
· The backboard seems to work best
5. Pit Removal Considerations
· Once the patient is packaged, the ladder is easiest
· The mat works well
· Wading through the debris, lifting over the head is pretty hazardous
GYMNASTICS SAFETY MANUAL P41 | APPENDIX A
APPENDIX A

GYMNASTICParental Consent / Child Assent And Medical Consent with Liability Release
Child‘s name:
Date of birth:
Address:
City: State: Zip:
Phone:
The undersigned(s), being the lawful parent(s) and/or guardian(s) of the above child, (the "Child"),
hereby consents to the participation by the Child in Gymnastics and Circus activity conducted
by (Name of Organizer), and to the participation of
the Child in all events relating to the Activity beginning / / through ON GOING.
MEDICAL CONSENT
The undersigned hereby further authorizes any of the staff, employees, agents, and representatives of
Organizer to provide for, approve and authorize any health care at any hospital, emergency room, doctor‘s
office or other institution; employ any physicians, dentists, nurses or other person whose services may
be needed for such health care form required by medical, dental or other health authorities incident to
the provision of medical, surgical or dental care to the child. Health care should include the provision of
medical, surgical or dental care to the child. Health care shall include but not be limited to, administration
of anesthesia, X-ray examination, performance or operations, diagnostic and other procedures.
If there is no medical emergency, the staff will first use reasonable efforts to contact the parent(s) and/
or guardian(s) before administering or authorizing any treatment. Notwithstanding other provisions in the
Consent Form, Organizer shall not have the authority to withhold or withdraw life-sustaining procedures for
the Child. I hereby release, discharge, and covenant not to sue (Name of School and Conference) its respective
administrators, directors, agents, officers, volunteers, and employees, other participants, any sponsors, advertisers,
and if applicable, owners and lessors of premises on which the Activity takes place, (each considered one
of the "Releases:" herein) from all liability, claims, demands, losses or damages, on my account caused or
alleged to be caused in whole or in part by the negligence of the "releases" or otherwise, including negligent
rescue operation and further agree that if, despite this release, waiver of liability, and assumption of risk I, or
anyone on my behalf, makes a claim against any of the Releases, I will indemnify, save and hold harmless each
the Releases from any loss, liability, damage, or cost, which any may incur as the result of such claim.
GYMNASTICS SAFETY MANUAL P42 | APPENDIX B P1 OF 3
CHILDS ASSENT
In consideration of participating in a Gymnastic and Circus Activity or special event, I represent that
I understand the nature of this Activity and that I am qualified in good health, and in proper physical
condition to participate in that Activity. I fully understand that this Activity involves risks of serious
bodily injury, including permanent disability, paralysis, and death, which may be caused by my own
actions, or inactions, those of others participating in the activity, the conditions which the activity takes
place, or the negligence of the "releases" names below; and that there may be other risks either not
known to me or not readily foreseeable at this time: and I fully accept and assume all such risks and
all responsibility for losses, cost, and damages I incur as a result of my participation in this Activity.
PARENTAL CONSENT
AND I, the minor‘s parent and/or legal guardian, understand the nature of the above referenced
activity and the Minor‘s experience and capabilities and believe the minor to be qualified to participate
in such activity, assume(s) all risk of injury or harm to the Child associated with participation in the
Activity. I hereby Release, discharge, covenant not to sue and AGREE TO INDEMNIFY AND SAVE
AND HOLD HARMLESS each of the Releases from all liability, claims, demands, losses or damages on
the minor‘s account caused or alleged to have been caused in whole or in part by the negligence of
the Releases or otherwise, including negligent rescue operations and further agree that if, despite this
release, I the minor, or anyone on the minor‘s behalf makes a claim against any of the above Releases,
I WILL INDEMNIFY, SAVE AND HOLD HARMLESS each of the Releases from any litigation expenses,
attorney fees, loss liability, damage, or cost any Release may incur as the result of any such claim, how
so ever caused, arising or to arise by reason of or during the Child‘s participation in the Activity.
Date:
(PRINTED NAME OF PARENT AND/OR LEGAL GUARDIAN)
Date:
(SIGNATURE OF PARENT AND/OR LEGAL GUARDIAN)
GYMNASTICS SAFETY MANUAL P43 | APPENDIX B P2 OF 3

Child’s Care Information & Instructions
Child’s Name
Child’s Nickname
Child’s Age
PARENT(S) & OTHER CONTACTS
Mother’s Name
Mother’s Address
Home Phone
Work Phone
Cell Phone
Father’s Name
Father’s Address
Home Phone
Work Phone
Cell Phone
Other Contact
Relationship
Phone Number
MEDICAL/HEALTH INSURANCE CARE INFORMATION
Child’s Doctor’s Name
Office Phone #
After Hours Phone #
Health Insurance Company
Group or Policy #
Phone #
Medications
Allergies
Immunizations
Special Conditions
GYMNASTICS SAFETY MANUAL P44 | APPENDIX B P3 OF 3

GYMNASTICS SAFETY MANUAL P45 | APPENDIX C P1 OF 3
SAMPLE FACILITY INSPECTION FORM
APPENDIX C
GYMNASTICS SAFETY MANUAL P46 | APPENDIX C P2 OF 3
SAMPLE FACILITY INSPECTION FORM

GYMNASTICS SAFETY MANUAL P47 | APPENDIX C P3 OF 3
SAMPLE FACILITY INSPECTION FORM

GYMNASTIC EQUIPMENT SUPPLIERS
UCS
511 Hoffman Road
Lincolnton, N.C. 28092
1-800-526-4856
www.ucsspirit.com
AMERICAN ATHLETIC, INC.
Jefferson, Iowa
1-800-247-3978
www.americanathletic.com
NORBERTS
P.O. Box
San Pedro, CA 90733
or
431 Figueroa Street
Wilmington, CA 90744
800-779-1904
www.norberts.net
GIBSON GYMNASTIC SUPPLY
2618 Raritan Circle
Englewood, CO 80110
303-937-1012
13333 E. 37th Avenue,
Denver, CO 80239
www.gibsonathletic.com
MIDWEST GYM SUPPLY
775 Scott Court
Madison, Indiana 47250
1-800-876-3194
midwestgymsupply.com
ROSS ATHLETIC SUPPLY
4407 South 16th Street
Fort Smith, AR 72901
1-888-600-7677
www.rossathletic.com
GYMNASTICS SAFETY MANUAL P48 | APPENDIX D
APPENDIX D
SIMPLY CIRCUS
1. General Rigging Resources
2. Aerial Fabrics
3. Hoop Diving
4. Hand Balancing Equipment
5. Wheel Gymnastics
6. Bungee Harness
7. Chinese Poles, Aerial Poles, etc.
8. Hula Hoops
9. Juggling
10. Pyramid Chairs
11. Rola Bola
12. Stilts
13. Unicycles
And much more, including release
forms used by this organization.
GYMNASTICS SAFETY MANUAL P49 | APPENDIX E
APPENDIX E
86 Los Angeles Street
Newton, Maine 02458
617-527-0667
www.SimplyCircus.com
This is a great reference source for anyone working with, constructing equipment,
or developing a skills program for any of the circus acts listed below.

North American Division Office of Education12501 Old Columbia Pike Silver Spring, MD 20904-6600(301) 680-6440