Grade 4: What’s Under My Feet? - The Inquiry … Grade 4 Implementation Workshop Grade 4: What’s...
38
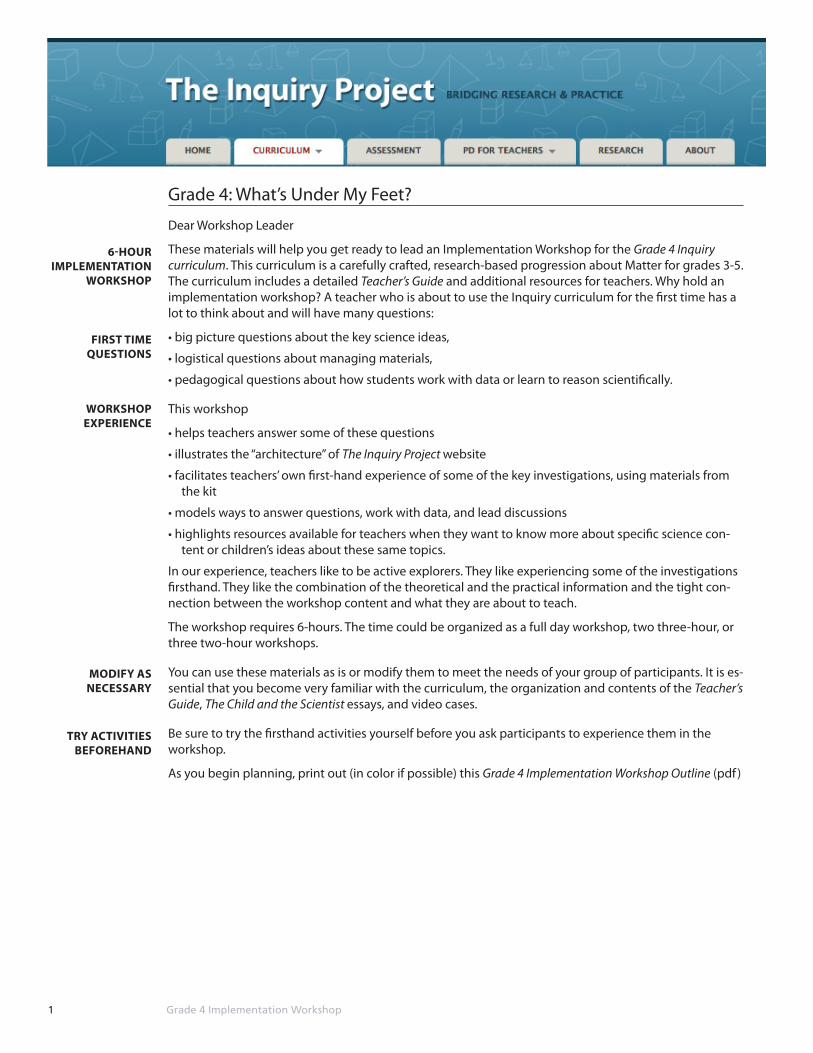
1 Grade 4 Implementation Workshop Grade 4: What’s Under My Feet? Dear Workshop Leader These materials will help you get ready to lead an Implementation Workshop for the Grade 4 Inquiry curriculum. This curriculum is a carefully crafted, research-based progression about Matter for grades 3-5. The curriculum includes a detailed Teacher’s Guide and additional resources for teachers. Why hold an implementation workshop? A teacher who is about to use the Inquiry curriculum for the first time has a lot to think about and will have many questions: • big picture questions about the key science ideas, • logistical questions about managing materials, • pedagogical questions about how students work with data or learn to reason scientifically. This workshop • helps teachers answer some of these questions • illustrates the “architecture” of The Inquiry Project website • facilitates teachers’ own first-hand experience of some of the key investigations, using materials from the kit • models ways to answer questions, work with data, and lead discussions • highlights resources available for teachers when they want to know more about specific science con- tent or children’s ideas about these same topics. In our experience, teachers like to be active explorers. They like experiencing some of the investigations firsthand. They like the combination of the theoretical and the practical information and the tight con- nection between the workshop content and what they are about to teach. The workshop requires 6-hours. The time could be organized as a full day workshop, two three-hour, or three two-hour workshops. You can use these materials as is or modify them to meet the needs of your group of participants. It is es- sential that you become very familiar with the curriculum, the organization and contents of the Teacher’s Guide, The Child and the Scientist essays, and video cases. Be sure to try the firsthand activities yourself before you ask participants to experience them in the workshop. As you begin planning, print out (in color if possible) this Grade 4 Implementation Workshop Outline (pdf ) 6-HOUR IMPLEMENTATION WORKSHOP MODIFY AS NECESSARY TRY ACTIVITIES BEFOREHAND FIRST TIME QUESTIONS WORKSHOP EXPERIENCE
Transcript of Grade 4: What’s Under My Feet? - The Inquiry … Grade 4 Implementation Workshop Grade 4: What’s...
1 Grade 4 Implementation Workshop
Grade 4: What’s Under My Feet?
Dear Workshop Leader
These materials will help you get ready to lead an Implementation Workshop for the Grade 4 Inquiry curriculum. This curriculum is a carefully crafted, research-based progression about Matter for grades 3-5. The curriculum includes a detailed Teacher’s Guide and additional resources for teachers. Why hold an implementation workshop? A teacher who is about to use the Inquiry curriculum for the first time has a lot to think about and will have many questions:
• big picture questions about the key science ideas,
• logistical questions about managing materials,
• pedagogical questions about how students work with data or learn to reason scientifically.
This workshop
• helps teachers answer some of these questions
• illustrates the “architecture” of The Inquiry Project website
• facilitates teachers’ own first-hand experience of some of the key investigations, using materials from the kit
• models ways to answer questions, work with data, and lead discussions
• highlights resources available for teachers when they want to know more about specific science con-tent or children’s ideas about these same topics.
In our experience, teachers like to be active explorers. They like experiencing some of the investigations firsthand. They like the combination of the theoretical and the practical information and the tight con-nection between the workshop content and what they are about to teach.
The workshop requires 6-hours. The time could be organized as a full day workshop, two three-hour, or three two-hour workshops.
You can use these materials as is or modify them to meet the needs of your group of participants. It is es-sential that you become very familiar with the curriculum, the organization and contents of the Teacher’s Guide, The Child and the Scientist essays, and video cases.
Be sure to try the firsthand activities yourself before you ask participants to experience them in the workshop.
As you begin planning, print out (in color if possible) this Grade 4 Implementation Workshop Outline (pdf )
6-HOUR IMPLEMENTATION
WORKSHOP
MODIFY AS NECESSARY
TRY ACTIVITIES BEFOREHAND
FIRST TIME QUESTIONS
WORKSHOP EXPERIENCE
2 Grade 4 Implementation Workshop
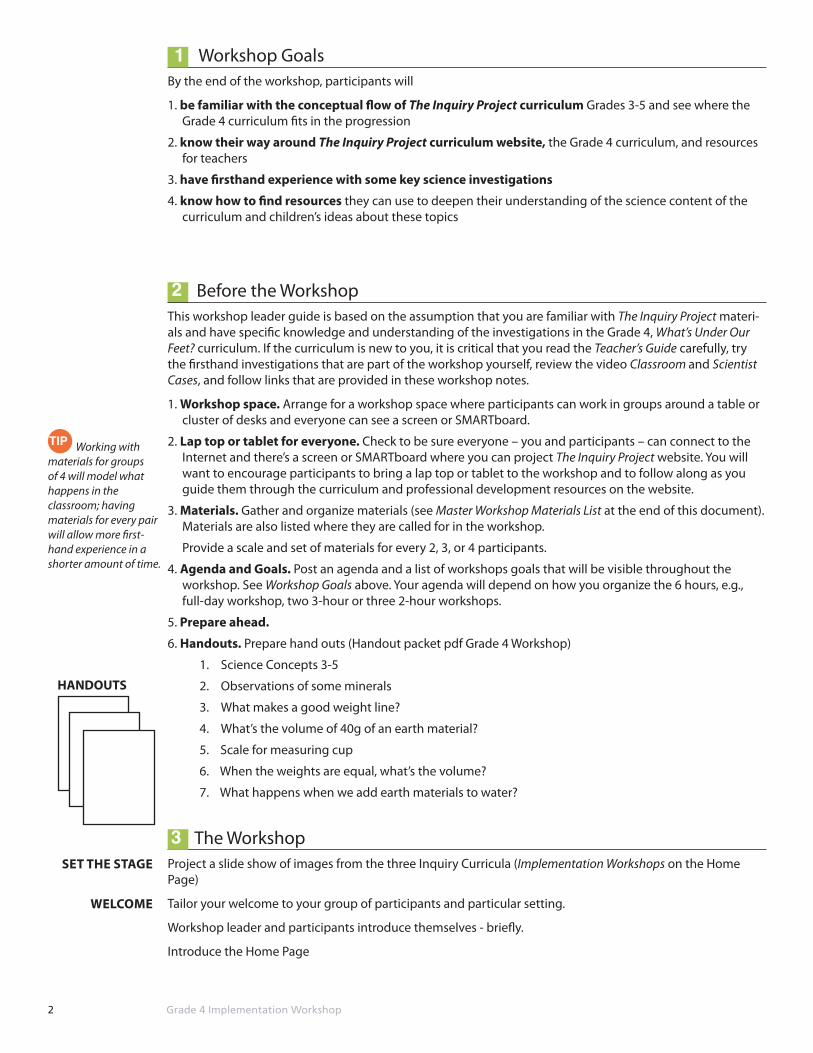
Workshop GoalsBy the end of the workshop, participants will
1. be familiar with the conceptual flow of The Inquiry Project curriculum Grades 3-5 and see where the Grade 4 curriculum fits in the progression
2. know their way around The Inquiry Project curriculum website, the Grade 4 curriculum, and resources for teachers
3. have firsthand experience with some key science investigations
4. know how to find resources they can use to deepen their understanding of the science content of the curriculum and children’s ideas about these topics
Before the WorkshopThis workshop leader guide is based on the assumption that you are familiar with The Inquiry Project materi-als and have specific knowledge and understanding of the investigations in the Grade 4, What’s Under Our Feet? curriculum. If the curriculum is new to you, it is critical that you read the Teacher’s Guide carefully, try the firsthand investigations that are part of the workshop yourself, review the video Classroom and Scientist Cases, and follow links that are provided in these workshop notes.
1. Workshop space. Arrange for a workshop space where participants can work in groups around a table or cluster of desks and everyone can see a screen or SMARTboard.
2. Lap top or tablet for everyone. Check to be sure everyone – you and participants – can connect to the Internet and there’s a screen or SMARTboard where you can project The Inquiry Project website. You will want to encourage participants to bring a lap top or tablet to the workshop and to follow along as you guide them through the curriculum and professional development resources on the website.
3. Materials. Gather and organize materials (see Master Workshop Materials List at the end of this document). Materials are also listed where they are called for in the workshop.
Provide a scale and set of materials for every 2, 3, or 4 participants.
4. Agenda and Goals. Post an agenda and a list of workshops goals that will be visible throughout the workshop. See Workshop Goals above. Your agenda will depend on how you organize the 6 hours, e.g., full-day workshop, two 3-hour or three 2-hour workshops.
5. Prepare ahead.
6. Handouts. Prepare hand outs (Handout packet pdf Grade 4 Workshop)
1. Science Concepts 3-5
2. Observations of some minerals
3. What makes a good weight line?
4. What’s the volume of 40g of an earth material?
5. Scale for measuring cup
6. When the weights are equal, what’s the volume?
7. What happens when we add earth materials to water?
HANDOUTS
1
2
Working with materials for groups of 4 will model what happens in the classroom; having materials for every pair will allow more first-hand experience in a shorter amount of time.
TIP
The WorkshopProject a slide show of images from the three Inquiry Curricula (Implementation Workshops on the Home Page)
Tailor your welcome to your group of participants and particular setting.
Workshop leader and participants introduce themselves - briefly.
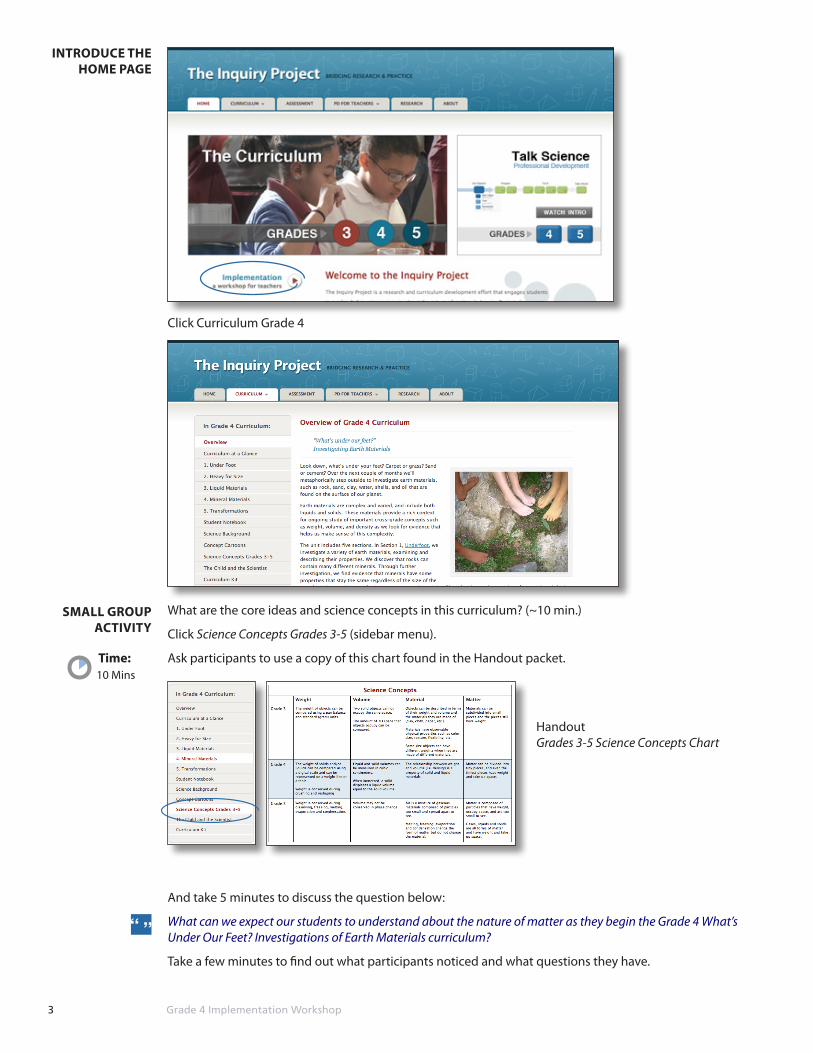
Introduce the Home Page
WELCOME
3 SET THE STAGE
3 Grade 4 Implementation Workshop
SMALL GROUP ACTIVITY
Click Curriculum Grade 4
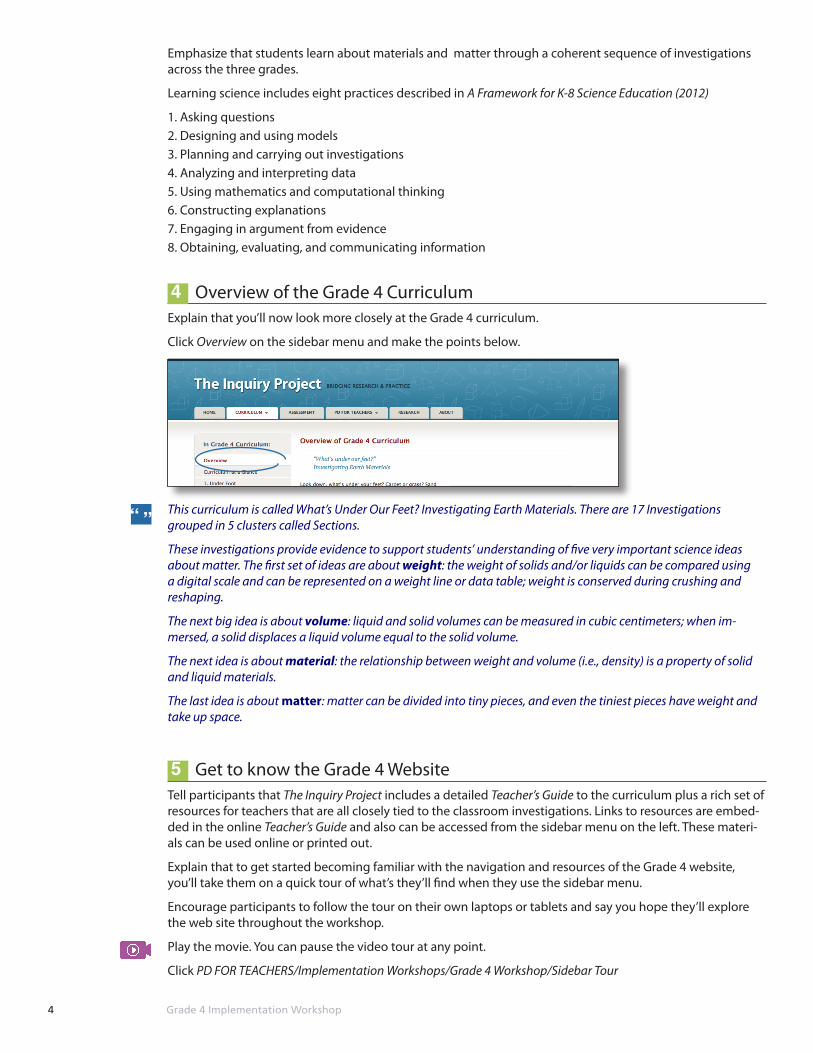
What are the core ideas and science concepts in this curriculum? (~10 min.)
Click Science Concepts Grades 3-5 (sidebar menu).
Ask participants to use a copy of this chart found in the Handout packet.
And take 5 minutes to discuss the question below:
What can we expect our students to understand about the nature of matter as they begin the Grade 4 What’s Under Our Feet? Investigations of Earth Materials curriculum?
Take a few minutes to find out what participants noticed and what questions they have.
“ ”
10 MinsTime:
INTRODUCE THE HOME PAGE
Handout Grades 3-5 Science Concepts Chart
4 Grade 4 Implementation Workshop
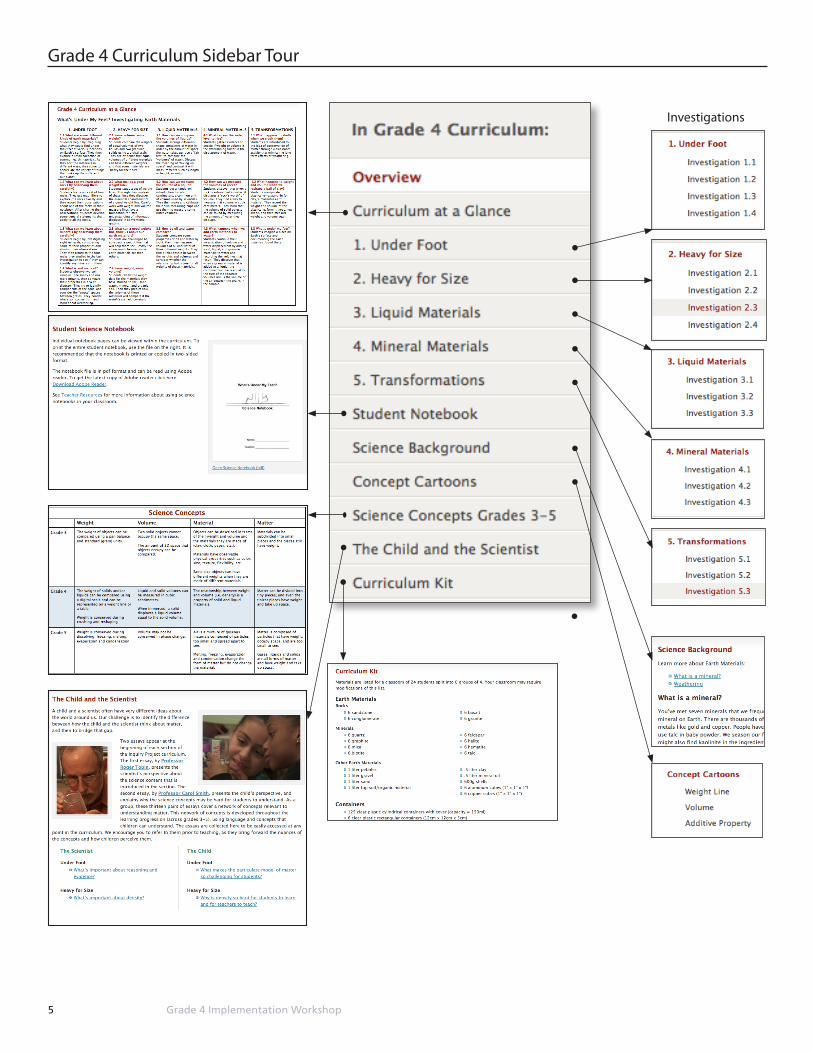
Overview of the Grade 4 CurriculumExplain that you’ll now look more closely at the Grade 4 curriculum.
Click Overview on the sidebar menu and make the points below.
This curriculum is called What’s Under Our Feet? Investigating Earth Materials. There are 17 Investigations grouped in 5 clusters called Sections.
These investigations provide evidence to support students’ understanding of five very important science ideas about matter. The first set of ideas are about weight: the weight of solids and/or liquids can be compared using a digital scale and can be represented on a weight line or data table; weight is conserved during crushing and reshaping.
The next big idea is about volume: liquid and solid volumes can be measured in cubic centimeters; when im-mersed, a solid displaces a liquid volume equal to the solid volume.
The next idea is about material: the relationship between weight and volume (i.e., density) is a property of solid and liquid materials.
The last idea is about matter: matter can be divided into tiny pieces, and even the tiniest pieces have weight and take up space.
Get to know the Grade 4 Website Tell participants that The Inquiry Project includes a detailed Teacher’s Guide to the curriculum plus a rich set of resources for teachers that are all closely tied to the classroom investigations. Links to resources are embed-ded in the online Teacher’s Guide and also can be accessed from the sidebar menu on the left. These materi-als can be used online or printed out.
Explain that to get started becoming familiar with the navigation and resources of the Grade 4 website, you’ll take them on a quick tour of what’s they’ll find when they use the sidebar menu.
Encourage participants to follow the tour on their own laptops or tablets and say you hope they’ll explore the web site throughout the workshop.
Play the movie. You can pause the video tour at any point.
Click PD FOR TEACHERS/Implementation Workshops/Grade 4 Workshop/Sidebar Tour
4
5
“ ”
Emphasize that students learn about materials and matter through a coherent sequence of investigations across the three grades.
Learning science includes eight practices described in A Framework for K-8 Science Education (2012)
1. Asking questions2. Designing and using models3. Planning and carrying out investigations4. Analyzing and interpreting data5. Using mathematics and computational thinking6. Constructing explanations7. Engaging in argument from evidence8. Obtaining, evaluating, and communicating information
5 Grade 4 Implementation Workshop
Grade 4 Curriculum Sidebar Tour
Investigations
6 Grade 4 Implementation Workshop
I: To the Workshop Leader
Introducing Investigations 1.1-1.4This workshop looks at the Inquiry curriculum through two lenses: the overarching organization and goals or big picture on the one hand, and step-by-step details on the other. Teachers need both perspectives, how learning experiences connect and contribute to understanding core science ideas, concepts, and scientific practices and the specifics of how to carry out investigations.
The unit begins with a question, What’s an earth material? As participants experience the investigations that follow, they become familiar with organization of lessons in this curriculum and the emphasis on starting with a question and using evidence to answer questions and make claims about materials, matter, weight, and volume.
Materials and Preparation for this part of the Workshop
A critical part of the workshop is the opportunity for participants to experience student investigations first-hand and raise questions about materials management and logistics. In addition to a materials list for each Section of the curriculum, a Master Materials List can be found at the end of this document,.
Investigation 1.1
For each tray (one tray for each group of 4 participants):
• 1 plate of earth materials containing approximately 20cc each of gravel, sand, clay, organic soil, pebbles, and shells, arranged in piles
• 1 capped 150cc container with exactly 40cc of fresh water**
• 1 capped 150cc container with exactly 40cc of mineral oil**
• 4 magnifying glasses
• 4 plates
**These will be used in Section 2.
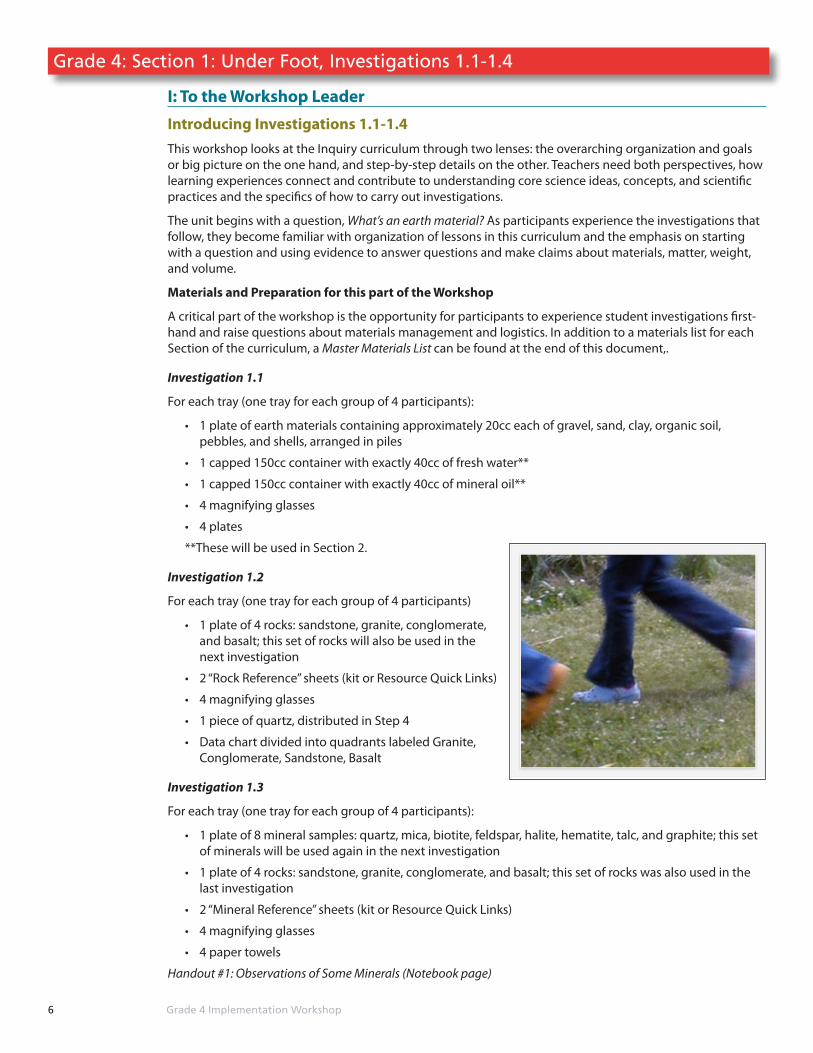
Investigation 1.2
For each tray (one tray for each group of 4 participants)
• 1 plate of 4 rocks: sandstone, granite, conglomerate, and basalt; this set of rocks will also be used in the next investigation
• 2 “Rock Reference” sheets (kit or Resource Quick Links)
• 4 magnifying glasses
• 1 piece of quartz, distributed in Step 4
• Data chart divided into quadrants labeled Granite, Conglomerate, Sandstone, Basalt
Investigation 1.3
For each tray (one tray for each group of 4 participants):
• 1 plate of 8 mineral samples: quartz, mica, biotite, feldspar, halite, hematite, talc, and graphite; this set of minerals will be used again in the next investigation
• 1 plate of 4 rocks: sandstone, granite, conglomerate, and basalt; this set of rocks was also used in the last investigation
• 2 “Mineral Reference” sheets (kit or Resource Quick Links)
• 4 magnifying glasses
• 4 paper towels
Handout #1: Observations of Some Minerals (Notebook page)
Grade 4: Section 1: Under Foot, Investigations 1.1-1.4
7 Grade 4 Implementation Workshop
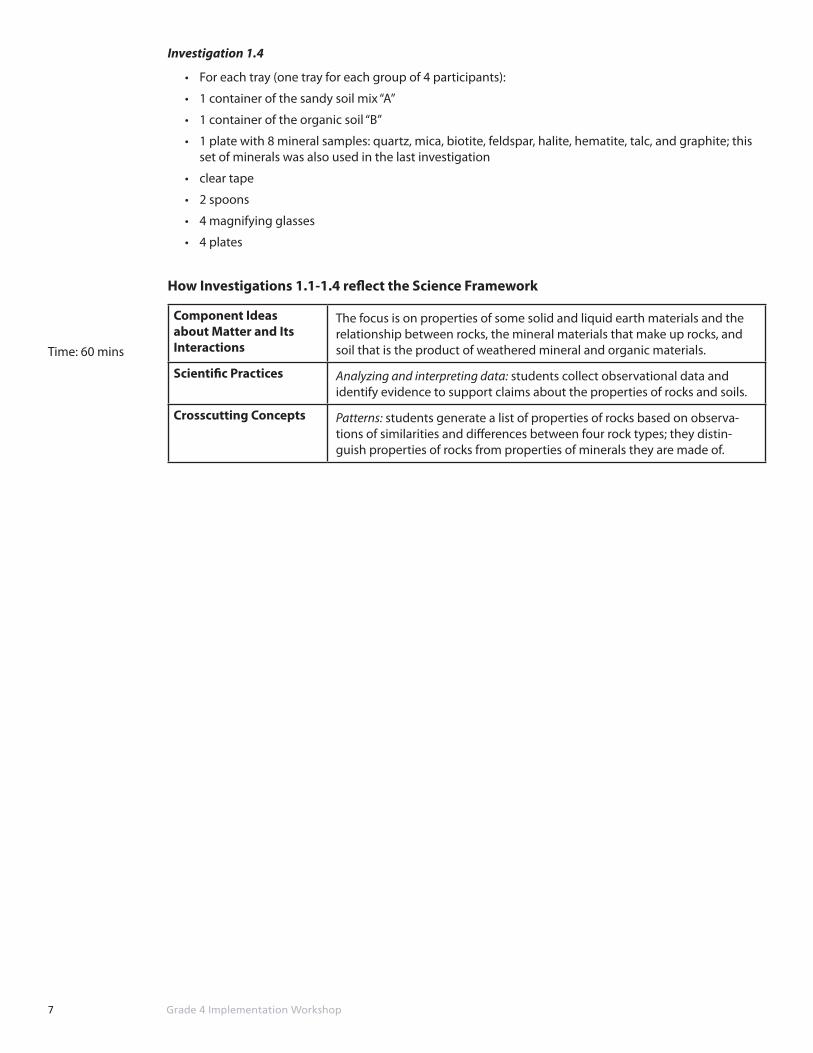
Investigation 1.4
• For each tray (one tray for each group of 4 participants):
• 1 container of the sandy soil mix “A”
• 1 container of the organic soil “B”
• 1 plate with 8 mineral samples: quartz, mica, biotite, feldspar, halite, hematite, talc, and graphite; this set of minerals was also used in the last investigation
• clear tape
• 2 spoons
• 4 magnifying glasses
• 4 plates
How Investigations 1.1-1.4 reflect the Science Framework
Component Ideas about Matter and Its Interactions
The focus is on properties of some solid and liquid earth materials and the relationship between rocks, the mineral materials that make up rocks, and soil that is the product of weathered mineral and organic materials.
Scientific Practices Analyzing and interpreting data: students collect observational data and identify evidence to support claims about the properties of rocks and soils.
Crosscutting Concepts Patterns: students generate a list of properties of rocks based on observa-tions of similarities and differences between four rock types; they distin-guish properties of rocks from properties of minerals they are made of.
Time: 60 mins
8 Grade 4 Implementation Workshop
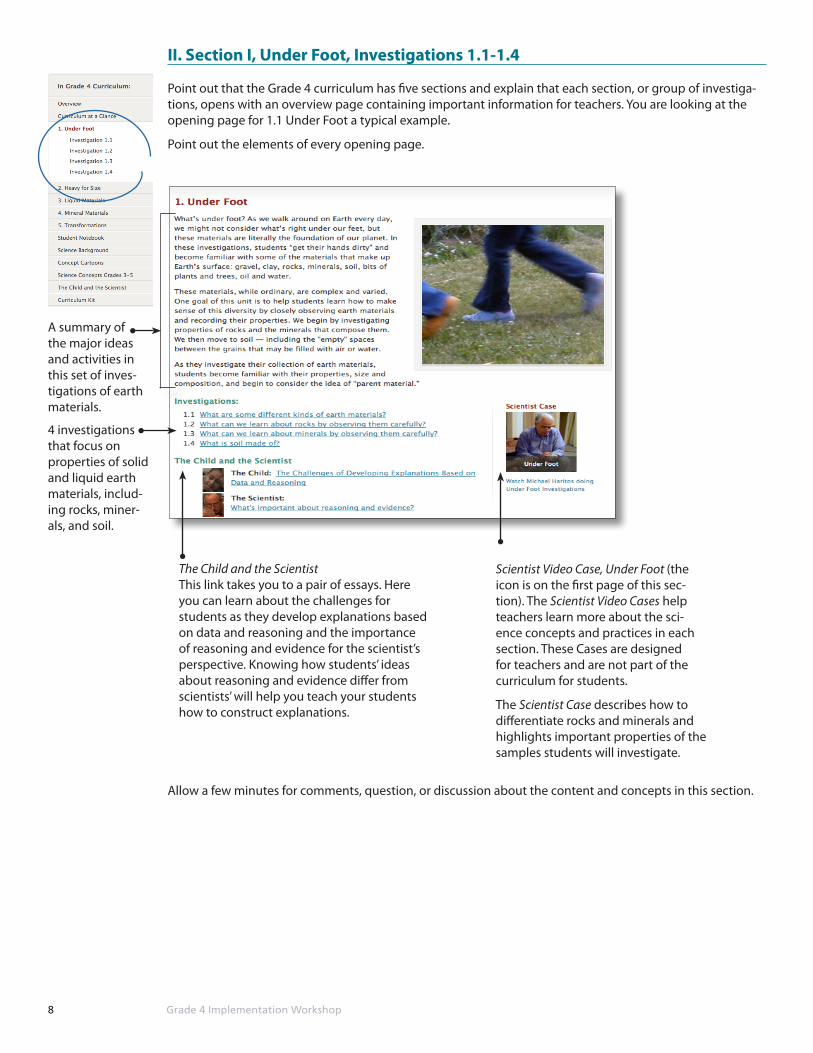
II. Section I, Under Foot, Investigations 1.1-1.4
Point out that the Grade 4 curriculum has five sections and explain that each section, or group of investiga-tions, opens with an overview page containing important information for teachers. You are looking at the opening page for 1.1 Under Foot a typical example.
Point out the elements of every opening page.
Allow a few minutes for comments, question, or discussion about the content and concepts in this section.
4 investigations that focus on properties of solid and liquid earth materials, includ-ing rocks, miner-als, and soil.
The Child and the Scientist This link takes you to a pair of essays. Here you can learn about the challenges for students as they develop explanations based on data and reasoning and the importance of reasoning and evidence for the scientist’s perspective. Knowing how students’ ideas about reasoning and evidence differ from scientists’ will help you teach your students how to construct explanations.
Scientist Video Case, Under Foot (the icon is on the first page of this sec-tion). The Scientist Video Cases help teachers learn more about the sci-ence concepts and practices in each section. These Cases are designed for teachers and are not part of the curriculum for students.
The Scientist Case describes how to differentiate rocks and minerals and highlights important properties of the samples students will investigate.
A summary of the major ideas and activities in this set of inves-tigations of earth materials.
9 Grade 4 Implementation Workshop
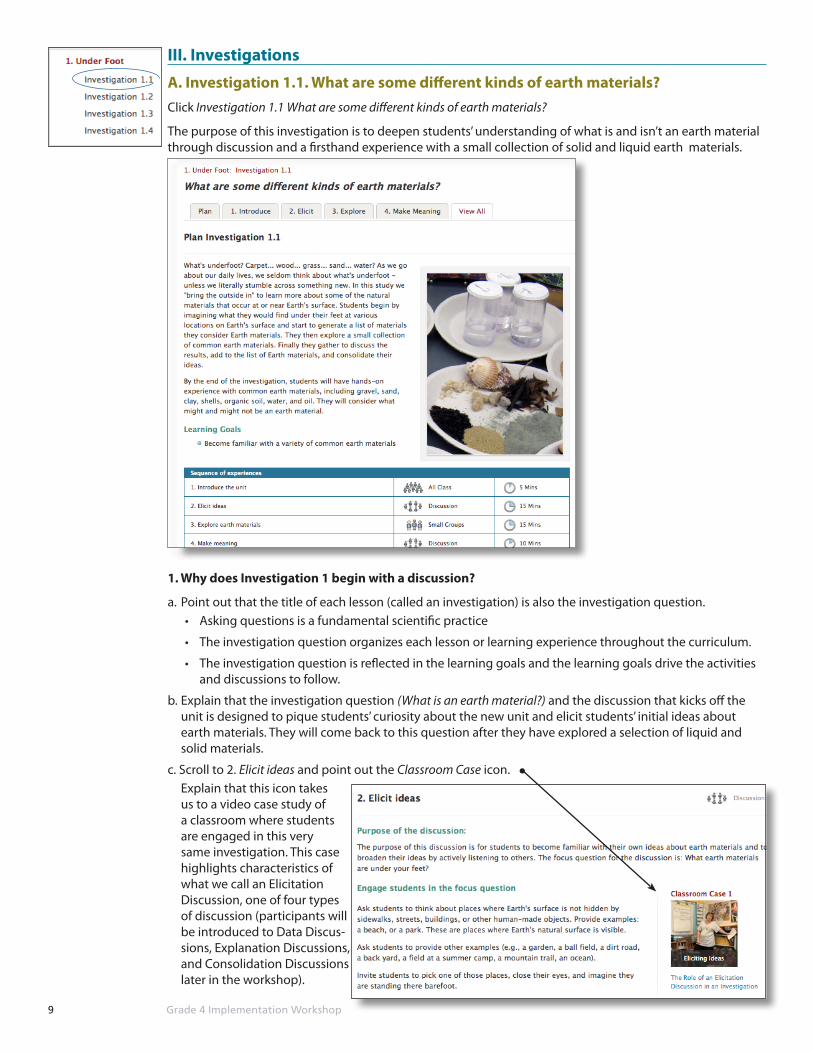
III. Investigations
A. Investigation 1.1. What are some different kinds of earth materials?Click Investigation 1.1 What are some different kinds of earth materials?
The purpose of this investigation is to deepen students’ understanding of what is and isn’t an earth material through discussion and a firsthand experience with a small collection of solid and liquid earth materials.
1. Why does Investigation 1 begin with a discussion?
a. Point out that the title of each lesson (called an investigation) is also the investigation question. • Asking questions is a fundamental scientific practice
• The investigation question organizes each lesson or learning experience throughout the curriculum.
• The investigation question is reflected in the learning goals and the learning goals drive the activities and discussions to follow.
b. Explain that the investigation question (What is an earth material?) and the discussion that kicks off the unit is designed to pique students’ curiosity about the new unit and elicit students’ initial ideas about earth materials. They will come back to this question after they have explored a selection of liquid and solid materials.
c. Scroll to 2. Elicit ideas and point out the Classroom Case icon. Explain that this icon takes
us to a video case study of a classroom where students are engaged in this very same investigation. This case highlights characteristics of what we call an Elicitation Discussion, one of four types of discussion (participants will be introduced to Data Discus-sions, Explanation Discussions, and Consolidation Discussions later in the workshop).
10 Grade 4 Implementation Workshop
Play clip 1 Setting the Stage for New Learning (1:59 min)
Play clip 2, Eliciting Initial Ideas (2:06 min)
Suggest that participants look for two characteristics of elicitation discussions: (1) the teacher encourages full participation and (2) she listens carefully and does not teach.
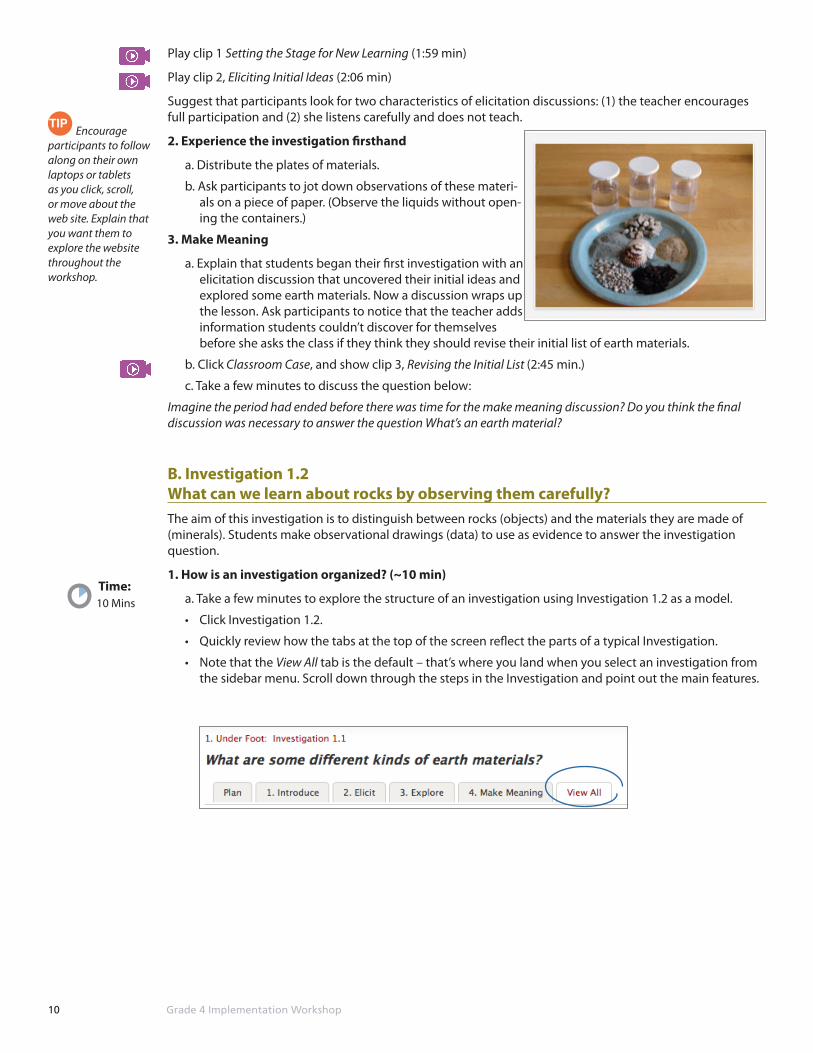
2. Experience the investigation firsthand
a. Distribute the plates of materials.
b. Ask participants to jot down observations of these materi-als on a piece of paper. (Observe the liquids without open-ing the containers.)
3. Make Meaning
a. Explain that students began their first investigation with an elicitation discussion that uncovered their initial ideas and explored some earth materials. Now a discussion wraps up the lesson. Ask participants to notice that the teacher adds information students couldn’t discover for themselves before she asks the class if they think they should revise their initial list of earth materials.
b. Click Classroom Case, and show clip 3, Revising the Initial List (2:45 min.)
c. Take a few minutes to discuss the question below:
Imagine the period had ended before there was time for the make meaning discussion? Do you think the final discussion was necessary to answer the question What’s an earth material?
B. Investigation 1.2 What can we learn about rocks by observing them carefully?The aim of this investigation is to distinguish between rocks (objects) and the materials they are made of (minerals). Students make observational drawings (data) to use as evidence to answer the investigation question.
1. How is an investigation organized? (~10 min)
a. Take a few minutes to explore the structure of an investigation using Investigation 1.2 as a model.
• Click Investigation 1.2.
• Quickly review how the tabs at the top of the screen reflect the parts of a typical Investigation.
• Note that the View All tab is the default – that’s where you land when you select an investigation from the sidebar menu. Scroll down through the steps in the Investigation and point out the main features.
Encourage participants to follow along on their own laptops or tablets as you click, scroll, or move about the web site. Explain that you want them to explore the website throughout the workshop.
TIP
10 MinsTime:
11 Grade 4 Implementation Workshop
TIP
TIP
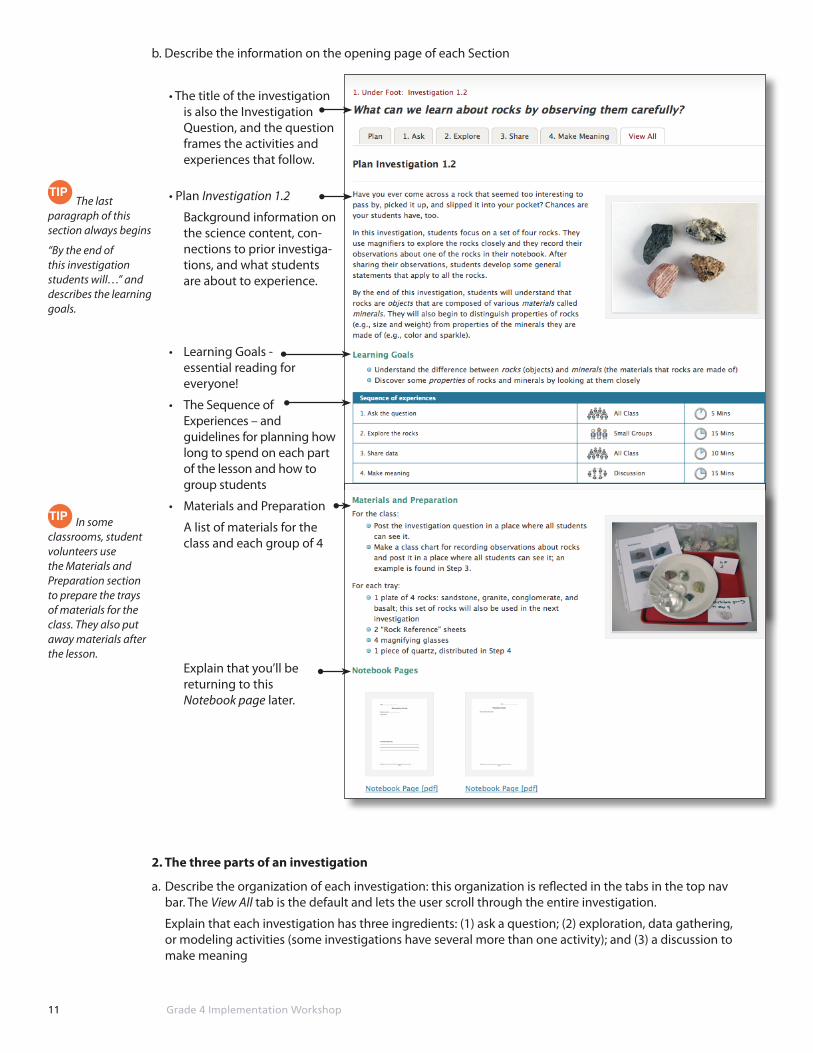
b. Describe the information on the opening page of each Section
• The title of the investigation is also the Investigation Question, and the question frames the activities and experiences that follow.
• Plan Investigation 1.2
Background information on the science content, con-nections to prior investiga-tions, and what students are about to experience.
• Learning Goals - essential reading for everyone!
• The Sequence of Experiences – and guidelines for planning how long to spend on each part of the lesson and how to group students
• Materials and Preparation
A list of materials for the class and each group of 4
Explain that you’ll be returning to this Notebook page later.
2. The three parts of an investigation
a. Describe the organization of each investigation: this organization is reflected in the tabs in the top nav bar. The View All tab is the default and lets the user scroll through the entire investigation.
Explain that each investigation has three ingredients: (1) ask a question; (2) exploration, data gathering, or modeling activities (some investigations have several more than one activity); and (3) a discussion to make meaning
The last paragraph of this section always begins
“By the end of this investigation students will…” and describes the learning goals.
In some classrooms, student volunteers use the Materials and Preparation section to prepare the trays of materials for the class. They also put away materials after the lesson.
12 Grade 4 Implementation Workshop
TIP
TIP
TIP
b. Ask a question
Explain that the “Ask” section of the Teacher’s Guide helps
• set the stage and focus for today’s work
• connect today’s investigation to previous ones experiences
• introduce the Investigation Question so that students understand that this is the organizing theme for the day’s learning and that they will return to it throughout the lesson.
c. Exploration, data gathering, modeling experiences
Explain that investigations include firsthand experiences with phenomena; for example, in this investiga-tion students differentiate between objects and materials they are made of by observing and drawing four kinds of rocks. The students’ observational drawings in their Notebooks are data that they will use as evidence to answer to the investigation question.
In other investigations students collect measurement data, have time to explore materials, practice mea-suring, or model data with measure lines or graphs.
Common classroom experiences anchor science discussions and contribute to equitable classrooms - ev-eryone has relevant experiences to draw upon.
d. Make meaning discussions
Explain that talking about their work helps students make sense of their science experiences. These dis-cussions enable students to pull their ideas together and are essential for learning.
The Make Meaning section includes guidelines and suggestions for teachers as they get ready to lead a discussion. The four Classroom Cases (they have just viewed one of them, Elicitation Discussions) are resources for teachers preparing to lead discussions.
3. Experience observing and drawing rocks
a. Distribute a set of materials to each group of 4 participants. • Ask the group to spend a minute or two looking at all 4 rocks (granite, conglomerate, sedimentary,
basalt).
• Ask each person to make a careful drawing of one rock on blank sheet of paper, and label the drawing.
• Point out that observational drawings are a kind of data.
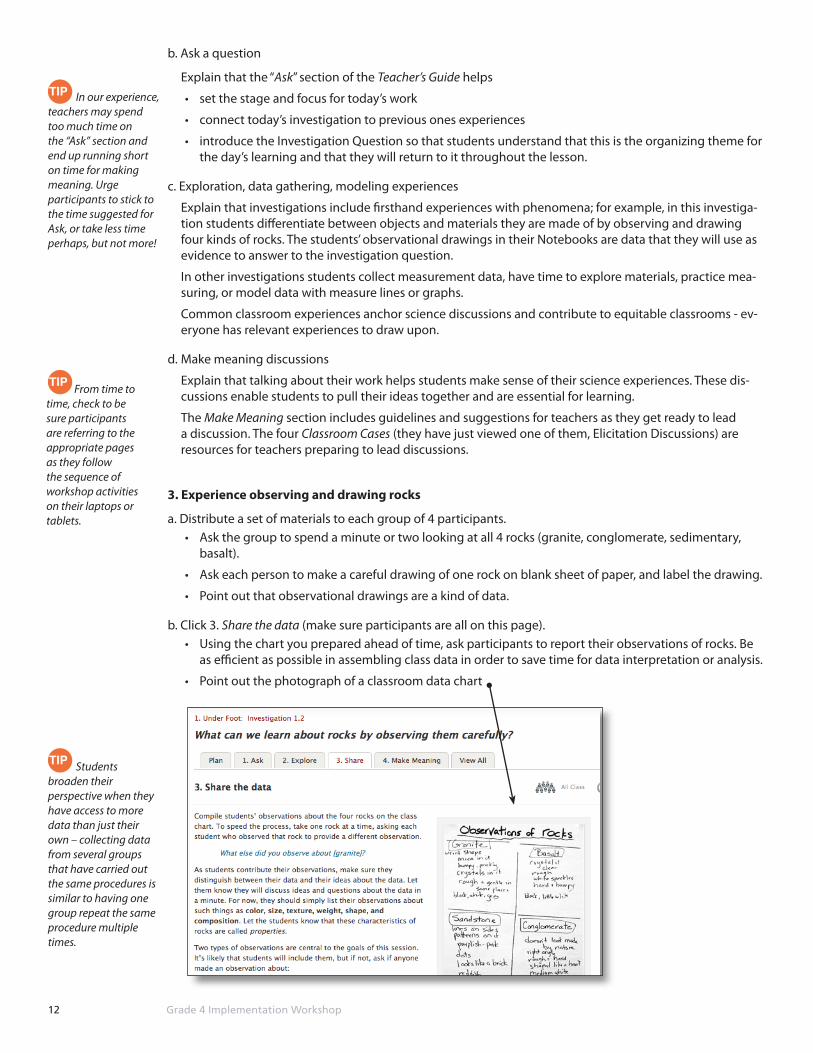
b. Click 3. Share the data (make sure participants are all on this page).• Using the chart you prepared ahead of time, ask participants to report their observations of rocks. Be
as efficient as possible in assembling class data in order to save time for data interpretation or analysis.
• Point out the photograph of a classroom data chart
From time to time, check to be sure participants are referring to the appropriate pages as they follow the sequence of workshop activities on their laptops or tablets.
In our experience, teachers may spend too much time on the “Ask” section and end up running short on time for making meaning. Urge participants to stick to the time suggested for Ask, or take less time perhaps, but not more!
Students broaden their perspective when they have access to more data than just their own – collecting data from several groups that have carried out the same procedures is similar to having one group repeat the same procedure multiple times.
13 Grade 4 Implementation Workshop
c. Make claims and provide supporting evidence
• Remind the group of the investigation question (What can we learn about rocks by observing them carefully?)
• Explain that the challenge is to use this class data set (the observations of rocks chart) to support claims about properties of all rocks.
Example: Claim: rocks are solids; Evidence: granite rocks are solid and so are sandstone, conglomerate and basalt.
• Ask participants to come up with 3-4 claims about rocks based on their data.
• Explain that participants have just engaged in a scientific practice, “analyzing and interpreting data.” They have also used the data as evidence to argue that even rocks that look quite different share some properties.
d. Rocks are made of minerals
Explain that students typically notice that “their” rock is made of more than one thing or is composed of grains or tiny pieces that are not all alike. The Teacher’s Guide encourages the teacher to provide essential information students can’t discover for themselves, for example, materials that make up rocks are called minerals.
C. Investigation 1.3 What can we learn about minerals by observing them carefully?Having learned that rocks are made of materials called minerals, in this investigation, students explore the properties of a small set of common minerals.
1. What do we learn about matter by observing rocks and minerals?
Explain that students investigate rocks and minerals to learn more about material, a core science concept that contributes to understanding matter.
In Grade 3 students learn to differentiate objects and the materials they are made of. In this study of earth materials, rocks are the objects and minerals are the materials rocks are made of.
Explain that Investigation 1.3 emphasizes properties of mineral material that distinguishes one mineral from another. These properties are the same whether you are looking at a large or small sample of the mineral. These properties are used to identify the minerals that make up rocks.
2. Meet the minerals
Distribute mineral samples, identification sheets, and Handout 2 , Observations of Some Minerals. Provide 5-10 minutes for participants to explore the minerals.
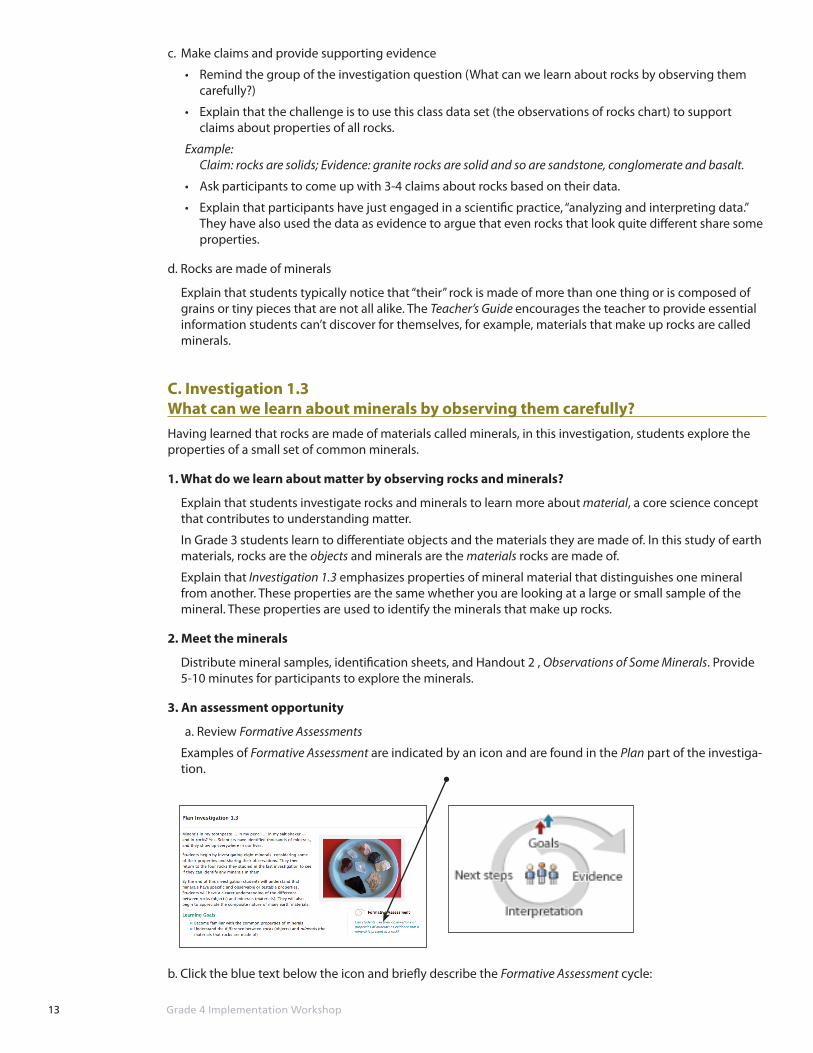
3. An assessment opportunity
a. Review Formative Assessments
Examples of Formative Assessment are indicated by an icon and are found in the Plan part of the investiga-tion.
b. Click the blue text below the icon and briefly describe the Formative Assessment cycle:

14 Grade 4 Implementation Workshop
Encourage participants to keep an eye out for these embedded Formative Assessment examples throughout the unit.
D. Investigation 1.4 What is soil made of?Explain that the final investigation in this section makes the connection between rocks, minerals and soil. The aim of this investigation is to find evidence to answer the question What is soil made of?
1. Explore two soil samples• Distribute soil samples A and B and hand lenses and a plate of the mineral samples from Investigation
1.3.
• Ask participants to scroll to 2. Explore the soil samples and find the challenge question:
You have two kinds of soil on your plate. How is one different from the other? What are their properties? What kinds of materials are they made of?
• Provide 4-5 minutes for participants observe the soils and record their observations.
2. Represent the data two ways Explain that there are many effective ways to represent data to reveal similarities and differences. Examples
of common data representations are illustrated in the back pages of the student notebook. Teachers will explore two formats for comparing soils A and B.
• a Venn diagram
• a “box and T” chart
Ask participants to work in pairs or small groups. Half the participants will represent the two soils using a Venn diagram and the other half will use a “box and T” chart. (3-4 minutes)
Assessment begins with a learning goal that is expressed as a question. Can stu-dents use their observations of properties of minerals as evidence that a mineral is present in a rock?
A teacher can find evidence in students’ writing, talking, or their hands-on practices. In this example, the teacher listens to what students say in their Make Meaning discussion.
She uses criteria to interpret the evidence. Do they refer to the properties of minerals they observed to make claims about what minerals they see in a rock?
Based on this interpretation, the teacher decides on next steps that will move stu-dents toward the learning goal.
15 Grade 4 Implementation Workshop
After 4-5 minutes, ask participants to compare the two representations and discuss the pluses and minuses of each.
The Notebook page, Observing Soil Samples provides three guiding questions for students. Students should write responses to these questions before the discussion.
3. What is soil made of?
Explain that analyzing and interpreting data is a scientific practice.
• The purpose of this discussion is use evidence from the investigation to answer the investigation question.
• Emphasize the difference between using evidence from investigations and telling students what soil is made of.
Explain that typically students recognize both soils are made or mineral material, organic or plant matter (twigs, bits of dead leaves, etc.) The question What’s between grains or mineral or plant matter? may well stump them.
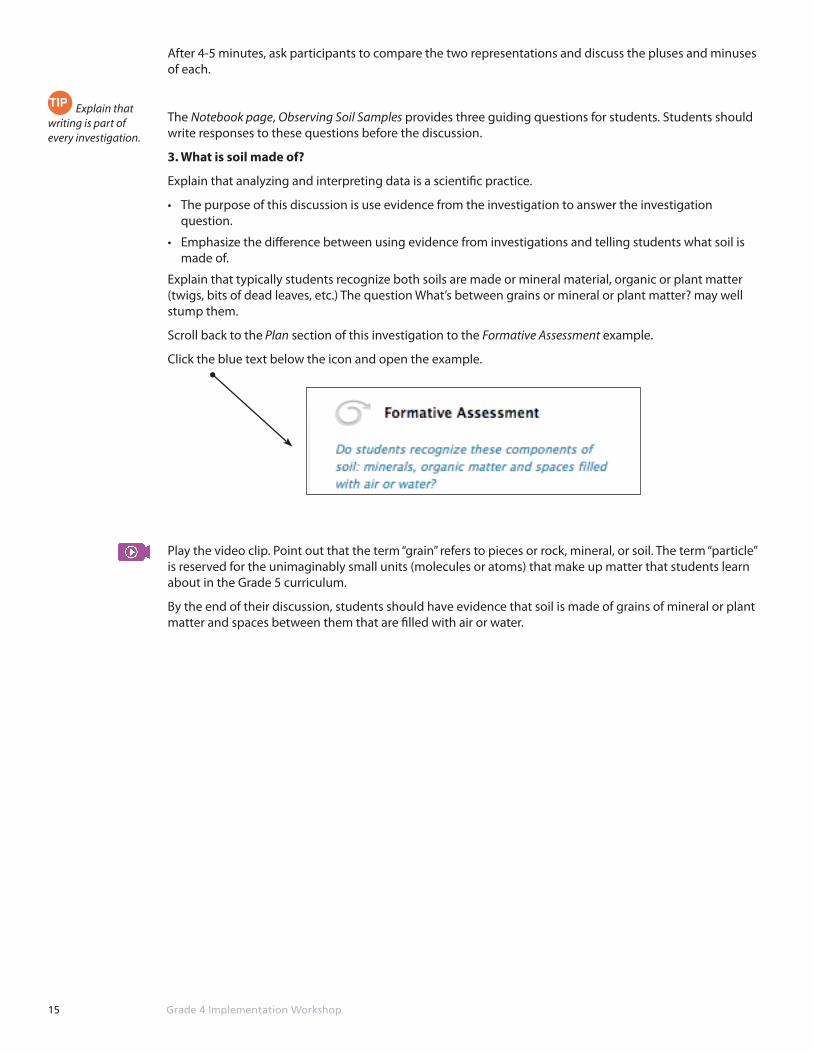
Scroll back to the Plan section of this investigation to the Formative Assessment example.
Click the blue text below the icon and open the example.
Play the video clip. Point out that the term “grain” refers to pieces or rock, mineral, or soil. The term “particle” is reserved for the unimaginably small units (molecules or atoms) that make up matter that students learn about in the Grade 5 curriculum.
By the end of their discussion, students should have evidence that soil is made of grains of mineral or plant matter and spaces between them that are filled with air or water.
Explain that writing is part of every investigation.
TIP
16 Grade 4 Implementation Workshop
Grade 4: Section 2: Heavy for Size, Investigations 2.1-2.4
I. To the Workshop Leader
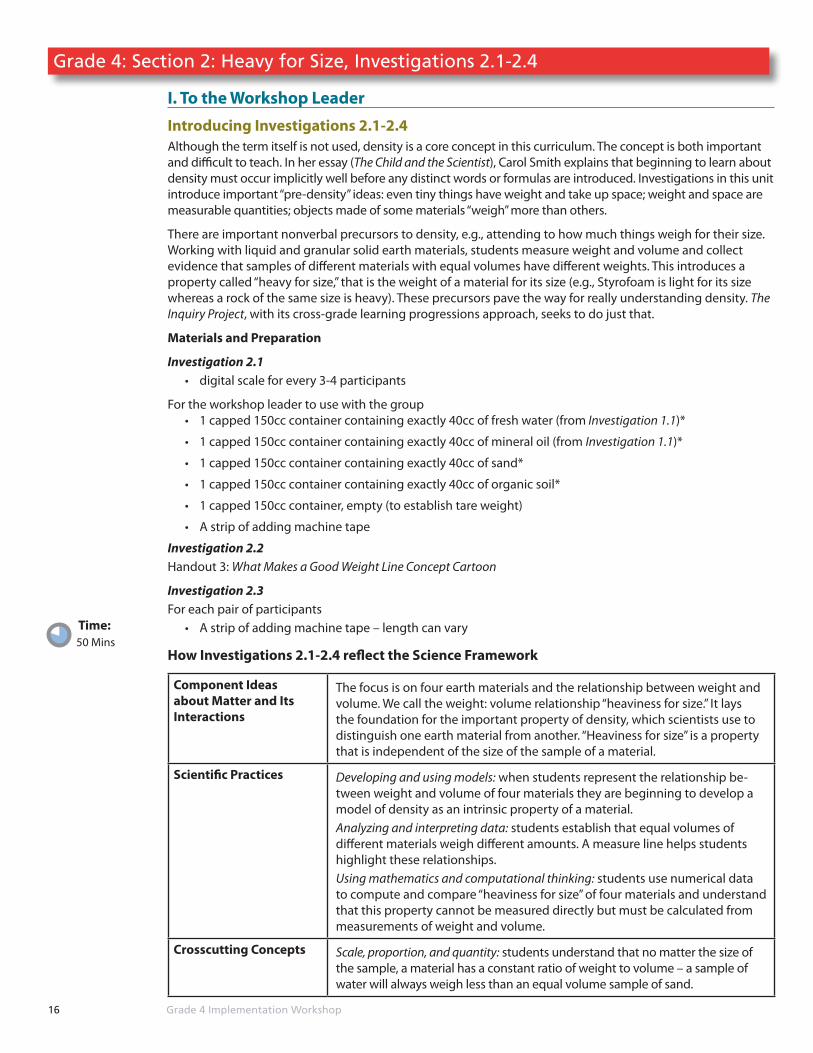
Introducing Investigations 2.1-2.4Although the term itself is not used, density is a core concept in this curriculum. The concept is both important and difficult to teach. In her essay (The Child and the Scientist), Carol Smith explains that beginning to learn about density must occur implicitly well before any distinct words or formulas are introduced. Investigations in this unit introduce important “pre-density” ideas: even tiny things have weight and take up space; weight and space are measurable quantities; objects made of some materials “weigh” more than others.
There are important nonverbal precursors to density, e.g., attending to how much things weigh for their size. Working with liquid and granular solid earth materials, students measure weight and volume and collect evidence that samples of different materials with equal volumes have different weights. This introduces a property called “heavy for size,” that is the weight of a material for its size (e.g., Styrofoam is light for its size whereas a rock of the same size is heavy). These precursors pave the way for really understanding density. The Inquiry Project, with its cross-grade learning progressions approach, seeks to do just that.
Materials and Preparation
Investigation 2.1 • digital scale for every 3-4 participants
For the workshop leader to use with the group• 1 capped 150cc container containing exactly 40cc of fresh water (from Investigation 1.1)*
• 1 capped 150cc container containing exactly 40cc of mineral oil (from Investigation 1.1)*
• 1 capped 150cc container containing exactly 40cc of sand*
• 1 capped 150cc container containing exactly 40cc of organic soil*
• 1 capped 150cc container, empty (to establish tare weight)
• A strip of adding machine tape
Investigation 2.2Handout 3: What Makes a Good Weight Line Concept Cartoon
Investigation 2.3 For each pair of participants
• A strip of adding machine tape – length can vary
How Investigations 2.1-2.4 reflect the Science Framework
Component Ideas about Matter and Its Interactions
The focus is on four earth materials and the relationship between weight and volume. We call the weight: volume relationship “heaviness for size.” It lays the foundation for the important property of density, which scientists use to distinguish one earth material from another. “Heaviness for size” is a property that is independent of the size of the sample of a material.
Scientific Practices Developing and using models: when students represent the relationship be-tween weight and volume of four materials they are beginning to develop a model of density as an intrinsic property of a material. Analyzing and interpreting data: students establish that equal volumes of different materials weigh different amounts. A measure line helps students highlight these relationships. Using mathematics and computational thinking: students use numerical data to compute and compare “heaviness for size” of four materials and understand that this property cannot be measured directly but must be calculated from measurements of weight and volume.
Crosscutting Concepts Scale, proportion, and quantity: students understand that no matter the size of the sample, a material has a constant ratio of weight to volume – a sample of water will always weigh less than an equal volume sample of sand.
50 MinsTime:

17 Grade 4 Implementation Workshop
II. Section 2, Heavy for Size, Investigations 2.1-2.4In Grade 3 students became adept using a double pan balance to weigh objects in grams. Now they will use a digital scale to measure weight. In Grade 3 students were introduced to centimeter cubes as a stan-dard unit of volume. Now they will measure the height of a sample in uniform 150cc containers to compare volumes.
Click the Scientist Case and view clip 1, The Eyes of a Scientist (01:49 min).
III. Investigations
A. Investigation 2.1 Same volume, same weight?This question starts students thinking about whether some materials weigh more for the size of the sample than others. As long as the volumes are equal, will sand weigh more or less than water?
1. Explain that the investigation begins with a review of the concept of volume. Volume is hard – don’t underestimate the difficulty!
a. Point out that teachers will find detailed suggestions for reviewing the concept of volume with their students in 1. Ask the question.
There are 4 investigations in this section.
The Child and Scientist essays are required reading for teaching and learning about density and important precursor ideas.
The Scientist Case provides an overview of the content addressed in the 4 investigations in this section and specifics of each one.

18 Grade 4 Implementation Workshop
TIP
b. Refer to the Grade 3 Child and the Scientist essay Why is Volume Important? Carol Smith makes these impor-tant points
• The challenges in learning about volume are more daunting than learning about weight.
• Children enter the class with an intuitive concept of weight but they do not have an intuitive concept of volume
• Children have no way to accurately judge the volume of an object independent of its shape without having some system of formal measurement.
• The very construction of a concept of volume goes hand in hand with learning to measure it.
2. Introduce the scales and their limitations
a. Distribute the digital scales. Explain that these are the same scales students will use in the classroom. Review how to use the scale and its limitations. • Before weighing, make sure to “zero” the scale and be sure it is reading grams (not ounces)• Scales weigh to the nearest whole gram (they do not measure parts or fractions of grams) • Each measured weight can differ from the actual weight by plus or minus half a gram.• Emphasize the importance of understanding the limitations of these scales: this is something teachers
need to tell students.
b. Describe the steps in this investigation
• Point out that the investigation question is also the title of Investigation 2.1. The question drives the experiences that follow.
• Show participants your sample set of containers with equal vol-umes (40cc) of 4 earth materials, two liquids (water and oil) and two granular solids (sand and organic soil).
• Explain that in their classrooms, each group of 4 students will have a set of containers. Point out that these materials take time to prepare. However, they are saved and used again - with the exception of the water as the snap on caps allow some water to evaporate over time.
• Explain that, in groups, students weigh the 40cc samples and the results are recorded on a class data table. Distribute the 4 containers from your demonstration set and ask participants to weigh them. Have someone weigh the empty container and cap.
• Introduce “tare” weight and use an example.
Explain the importance of checking out the quality and accuracy of any measuring tool before students use them. For example, we have found that graduated cylinders used to measure volume are sometimes not calibrated accurately.

19 Grade 4 Implementation Workshop
TIP
How much did the container with 40cc of water weigh?
How would you figure out the weight of just the 40cc of water – the water without the container and cap?
• Project the first Notebook page (click Notebook page [pdf ] below the left-hand image)
Explain that students usually collect weight data quickly but may need time to complete the arithmetic (subtracting the tare weight).
• Before discussing these measurements, students write answers to the Reflections on Weights and Volumes questions in second Notebook page.
c. Focus on the organization of a data table
Use the example of a class data table (see below).
Model how to help students learn to “read” the data table.
A data table is organized in rows and columns. Each row is a “case” and each column provides in-formation for every case. In this example, there are four cases (rows) and in each case we know what material it is, the volume, the weight of a sample and the class agreement on the weight of 40cc.
Put the information found in a
Notebook writing is part of every lesson in this curriculum. A useful habit to establish is to begin each class by having students open their Notebooks to the appropriate page.
row into a sentence.
The first material is water, a liquid, the volume is 40cc, and there are 6 weights recorded, we don’t have a class agreement yet.
Put the information in column 2 into words.
The volume of all four materi-als is 40cc.
Work with one row (or column) of data at a time.
Based on our data, can we agree on the weight of 40cc of water?
d. Introduce Data Discussions
Explain that a second type of discussion in this curriculum is called a Data Discussion (they have been introduced to Elicitation Discussions earlier).
• Data discussions enable students to make sense of their findings. Teachers will find that each discus-sion includes a description of the purpose of the discussion and a focus question to begin the class discussion.

20 Grade 4 Implementation Workshop
TIP
• The Teacher’s Guide lists some strategies for facilitating this particular data discussion.
Click the Classroom Case, the Role of a Data Discussion
Play Clip 3: Grappling with Variation in Class Data (3:02 min.)
Provide a few minutes for participants to comment on what they have just seen.
Remind participants that a learning goal for this investigation is to understand what is meant by “heavy for size” as a property of a material. A container holding 40cc of sand will be heavier than a container holding 40cc of water, so sand is “heavy for size” compared to water. Is there evidence in the video that students are beginning to understand this concept?
Play Clip 5: Explaining the Findings (3:38 min.)
Provide a few minutes for participants’ comments and questions.
B. Investigation 2.2 What makes a good weight line?1. How much heavier?
In Grade 3, students used measure lines to compare weights and volumes. Now they use a weight line to highlight the differences in weight between equal volumes of 4 materials. The weight line is a visual repre-sentation of “heavy for size,” an idea that is a precursor to the concept of density.
a. Model the introduction to this investigation
• Roll out a strip of unmarked adding machine tape.
• Ask a participant to order the four 40cc samples from heaviest to lightest.
• Ask someone to spread the containers along the line – to space then out– to show how much heavier (or lighter) one is than another.
b. Refer to Handout 3, What Makes a Good Weight Line Concept Cartoon, and ask participants to complete the cartoon in groups. (~ 5 min.)
What Makes a Good Weight Line Concept Cartoon
Click Concept Cartoons on the sidebar menu to learn more these assessments, what they assess, and what to look for in student responses.

21 Grade 4 Implementation Workshop
TIP
10 MinsTime:
c. Scroll down to 3. Develop rules for good weight lines. Explain that in their wrap up discussion, students bring together their experience and ideas about the characteristics of good weight lines. The focus question of the discussion is What makes a good weight line? Can we come up with a list of “rules”
for good weight lines?
Explain that the Teacher’s Guide provides examples of a set of rules and that the list that’s generated in the classroom will be used in the next investigation.
C. Investigation 2.3 What can a weight line show us about earth materials?Students have used a weight line, explored properties of “good” weight lines, and now they consolidate their learning by making their own weight lines.
1. Making a weight line Explain that in this investigation students make their own weight lines that they can use to represent the
weights of their 40cc samples of water, oil, sand, and organic soil.
Ask participants to make a weight line they can use to represent weight data below. (~10 min.)
Material Volume (cc) Weight (g)
Water 40cc 40g
Mineral Oil 40cc 32g
Sand 40cc 77g
Organic soil 40cc 16g
The Teacher’s Guide provides three strategies that students may use.
Ask for a volunteer to place his or her weight line where everyone can see it and place the four containers of earth materials in the appropriate spots.
Provide time for participants to discuss challenges this activity might present for their students and ideas for helpful strategies.
Refer to the learning goals for this investigation• Recognize that data tables and weight lines can both display weight data
• Seethataweightlineisagoodwaytoshowhowmuchmoreonethingweighsthananother
2. Formative Assessments Explain that
• Formative Assessment, also called assessment for learning, is central to this curriculum. These assess-ments identify and chart the development of students’ ideas and understandings and identify ob-stacles they encounter in their learning. Assessment provides ongoing information about students’ learning and informs next steps in the learning.
• there are many sources of Formative Assessment data in this curriculum, concept cartoons, embed-ded formative assessment examples; and students’ note-book entries. Teachers gains insight into students’ learn-ing by listening to them talk about their work in full-class or small-group discussions.
Call attention to a Formative Assess-ment embedded in this investiga-tion: Ask participants to look for the formative assessment icon in the Plan part of the investigation.
Click the blue text below the icon and briefly describe the Formative Assessment cycle:
At the end of the Student Notebook, you (and your students) will find illustrations of different ways to represent data.
22 Grade 4 Implementation Workshop
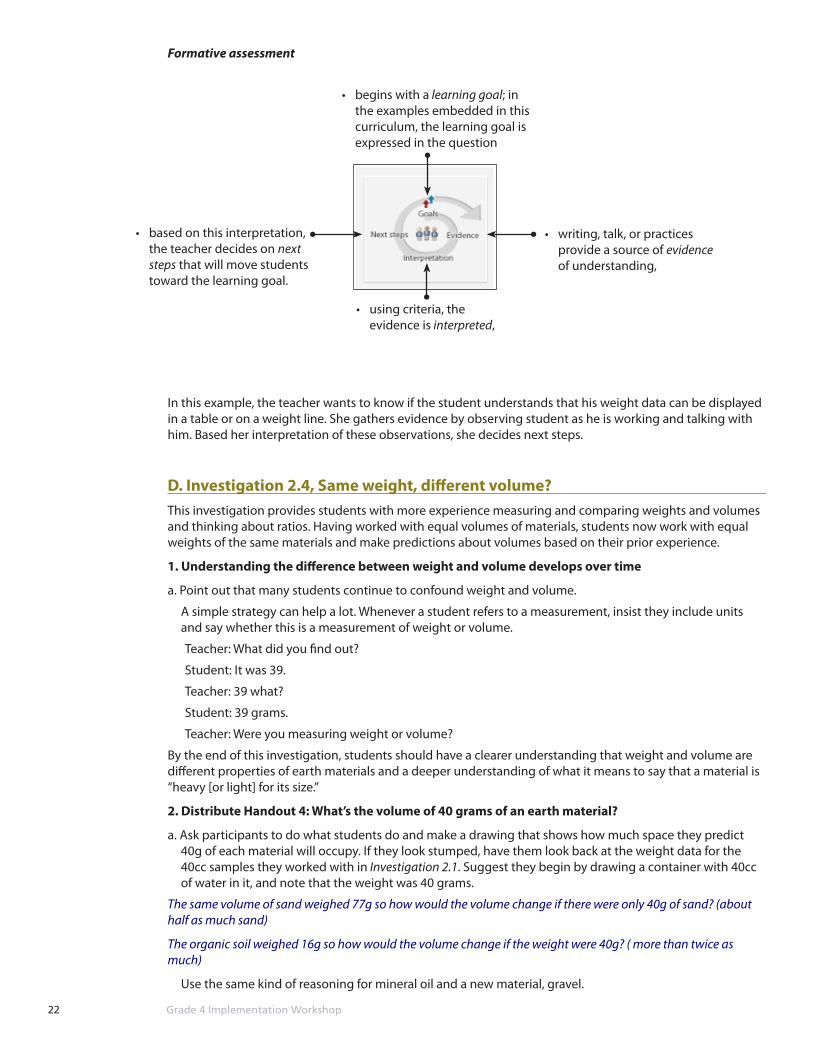
Formative assessment
• begins with a learning goal; in the examples embedded in this curriculum, the learning goal is expressed in the question
• writing, talk, or practices provide a source of evidence of understanding,
• using criteria, the evidence is interpreted,
• based on this interpretation, the teacher decides on next steps that will move students toward the learning goal.
In this example, the teacher wants to know if the student understands that his weight data can be displayed in a table or on a weight line. She gathers evidence by observing student as he is working and talking with him. Based her interpretation of these observations, she decides next steps.
D. Investigation 2.4, Same weight, different volume? This investigation provides students with more experience measuring and comparing weights and volumes and thinking about ratios. Having worked with equal volumes of materials, students now work with equal weights of the same materials and make predictions about volumes based on their prior experience.
1. Understanding the difference between weight and volume develops over time
a. Point out that many students continue to confound weight and volume.
A simple strategy can help a lot. Whenever a student refers to a measurement, insist they include units and say whether this is a measurement of weight or volume.
Teacher: What did you find out?
Student: It was 39.
Teacher: 39 what?
Student: 39 grams.
Teacher: Were you measuring weight or volume?
By the end of this investigation, students should have a clearer understanding that weight and volume are different properties of earth materials and a deeper understanding of what it means to say that a material is “heavy [or light] for its size.”
2. Distribute Handout 4: What’s the volume of 40 grams of an earth material?
a. Ask participants to do what students do and make a drawing that shows how much space they predict 40g of each material will occupy. If they look stumped, have them look back at the weight data for the 40cc samples they worked with in Investigation 2.1. Suggest they begin by drawing a container with 40cc of water in it, and note that the weight was 40 grams.
The same volume of sand weighed 77g so how would the volume change if there were only 40g of sand? (about half as much sand)
The organic soil weighed 16g so how would the volume change if the weight were 40g? ( more than twice as much)
Use the same kind of reasoning for mineral oil and a new material, gravel.

23 Grade 4 Implementation Workshop
b. Ask participants to weigh out 40g of these materials.
Provide a container with 40g of mineral oil that you have prepared. Explain that mineral oil is messy and hard to work with so the teacher prepares any mineral oil samples ahead of time.
Note that the containers should be tightly capped and taped down. They can be saved and used from year to year, making this a one-time preparation!
Have participants measure 40g of either sand, organic soil, or water so they have a chance to experience the activity.
c. Take a few minutes to see if participants have questions or comments.
24 Grade 4 Implementation Workshop
Grade 4: Section 3: Liquid Materials, Investigations 3.1-3.3
I. To the Workshop Leader
Introducing Investigations 3.1-3.3Unless they are in identical containers, it can be very difficult to compare the volumes of liquids. In this section, students figure out how to measure and compare liquids. They learn to use centimeter cubes - our standard unit of volume - to calibrate their own containers for measuring liquid volumes. Putting their mea-suring equipment to use, they compare “heaviness for size” of oil and water. Teachers will approach these investigations with far greater confidence having had first-hand experience. And time to talk with colleagues about the ideas behind the procedures.
Materials and Preparation
Investigation 3.1
For the workshop leader Prepare a class data table for recording participants’ predicted volume orders; an example is found in Step
2, Predict the volume order
For every 3-4 participants
• 1 set of 3 containers, each filled with 250cc of blue–tinted water
• 1 wide, shallow rectangular container, marked “A”
• 1 narrow, tall rectangular container, marked “B”
• 1 20oz cup, marked “C”
• 2 additional 20oz cups, empty (if the group asks for these)
Investigation 3.2
For the workshop leader• 1 capped 150cc container approximately 1/2 full of water
• 1 capped 150cc container approximately 3/4 full of water
For every 4 participants (materials to make a “measuring cup”)
• 2 empty 150cc containers with a vertical strip of masking tape applied to the outside *
• 2 small rectangular plastic containers
• 2 pipettes
• 2 20oz cups approximately 1/2 full of water
• 1 fine tip permanent marker
• 1 cup holding approximately 75 centimeter cubes (these cubes will be handed out separately, before the rest of the tray)
*Student-made graduated cylinders will be used again Investigation 4.3.
Investigation 3.3
The number of sets of materials you prepare will depend on the number of workshop participants. You need to prepare the containers of mineral oil and provide materials for participants to prepare the containers of water. For 12 or fewer participants, prepare materials as outlined below. Increase the number of set ups ac-cording the size of your group!
It’s helpful to use trays to set up and distribute materials.

25 Grade 4 Implementation Workshop
For group 1• 1 capped 150cc container containing exactly 20g of mineral oil
• 1 digital scale
• 1 empty 150cc container with cap
• A supply of water tinted blue with blue food coloring
• 1 pipettes
• 1 fine tip permanent marker
• index card “20 grams”
• pair of scissors
For group 2• 1 capped 150cc container containing exactly 40g of mineral oil
• 1 digital scale
• 1 empty 150cc container with cap
• A supply of water tinted blue with blue food coloring
• 1 pipettes
• 1 fine tip permanent marker
• index card “40 grams”
• pair of scissors
For group 3• 1 capped 150cc container containing exactly 80g of mineral oil
• 1 digital scale
• 1 empty 150cc container with cap
• A supply of water tinted blue with blue food coloring
• 1 pipettes
• 1 fine tip permanent marker
• index card “80 grams”
• pair of scissors
Handouts 5 and 6 (to use with Investigation 3.3)
The second and third Notebook pages in Investigation 3.3 Plan
50 MinsTime:
26 Grade 4 Implementation Workshop
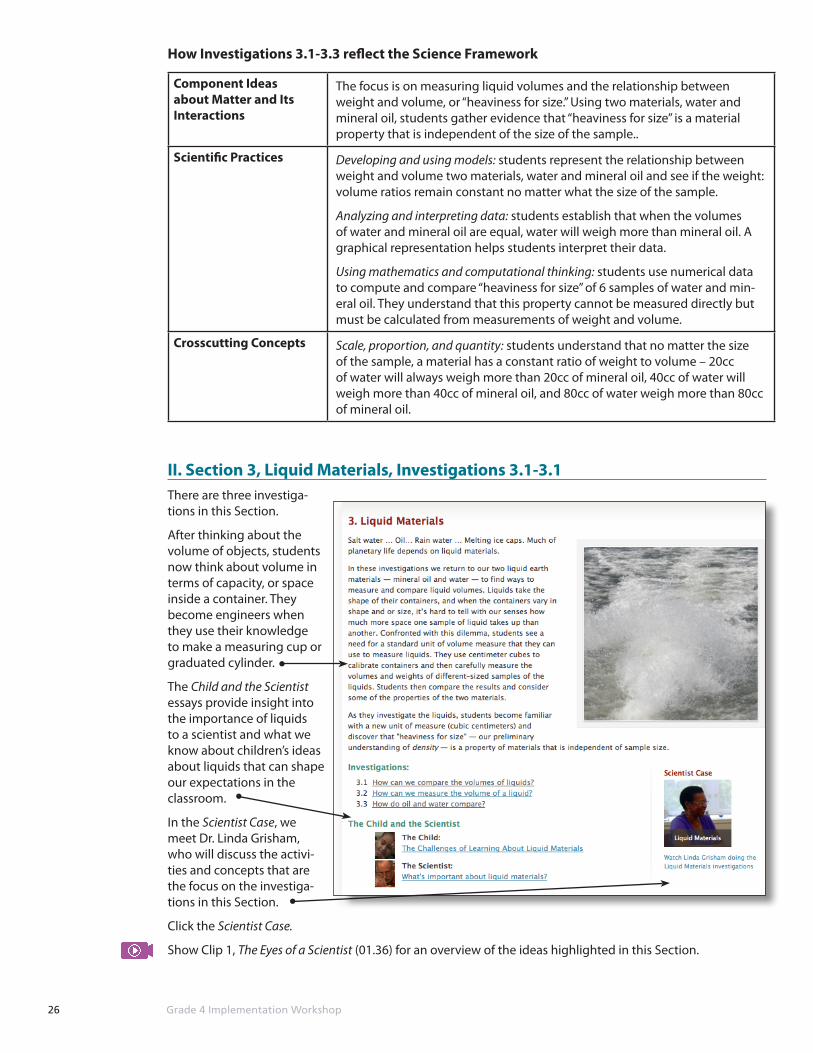
II. Section 3, Liquid Materials, Investigations 3.1-3.1There are three investiga-tions in this Section.
After thinking about the volume of objects, students now think about volume in terms of capacity, or space inside a container. They become engineers when they use their knowledge to make a measuring cup or graduated cylinder.
The Child and the Scientist essays provide insight into the importance of liquids to a scientist and what we know about children’s ideas about liquids that can shape our expectations in the classroom.
In the Scientist Case, we meet Dr. Linda Grisham, who will discuss the activi-ties and concepts that are the focus on the investiga-tions in this Section.
Click the Scientist Case.
Show Clip 1, The Eyes of a Scientist (01.36) for an overview of the ideas highlighted in this Section.
How Investigations 3.1-3.3 reflect the Science Framework
Component Ideas about Matter and Its Interactions
The focus is on measuring liquid volumes and the relationship between weight and volume, or “heaviness for size.” Using two materials, water and mineral oil, students gather evidence that “heaviness for size” is a material property that is independent of the size of the sample..
Scientific Practices Developing and using models: students represent the relationship between weight and volume two materials, water and mineral oil and see if the weight: volume ratios remain constant no matter what the size of the sample.
Analyzing and interpreting data: students establish that when the volumes of water and mineral oil are equal, water will weigh more than mineral oil. A graphical representation helps students interpret their data.
Using mathematics and computational thinking: students use numerical data to compute and compare “heaviness for size” of 6 samples of water and min-eral oil. They understand that this property cannot be measured directly but must be calculated from measurements of weight and volume.
Crosscutting Concepts Scale, proportion, and quantity: students understand that no matter the size of the sample, a material has a constant ratio of weight to volume – 20cc of water will always weigh more than 20cc of mineral oil, 40cc of water will weigh more than 40cc of mineral oil, and 80cc of water weigh more than 80cc of mineral oil.
27 Grade 4 Implementation Workshop
III. Investigations
A. Investigation 3.1 How can we compare the volumes of liquids?This investigation brings home the difficulty of comparing volumes of liquids that are held in containers of different shapes and sizes and makes the case for using the same container or identical ones to compare liquids.
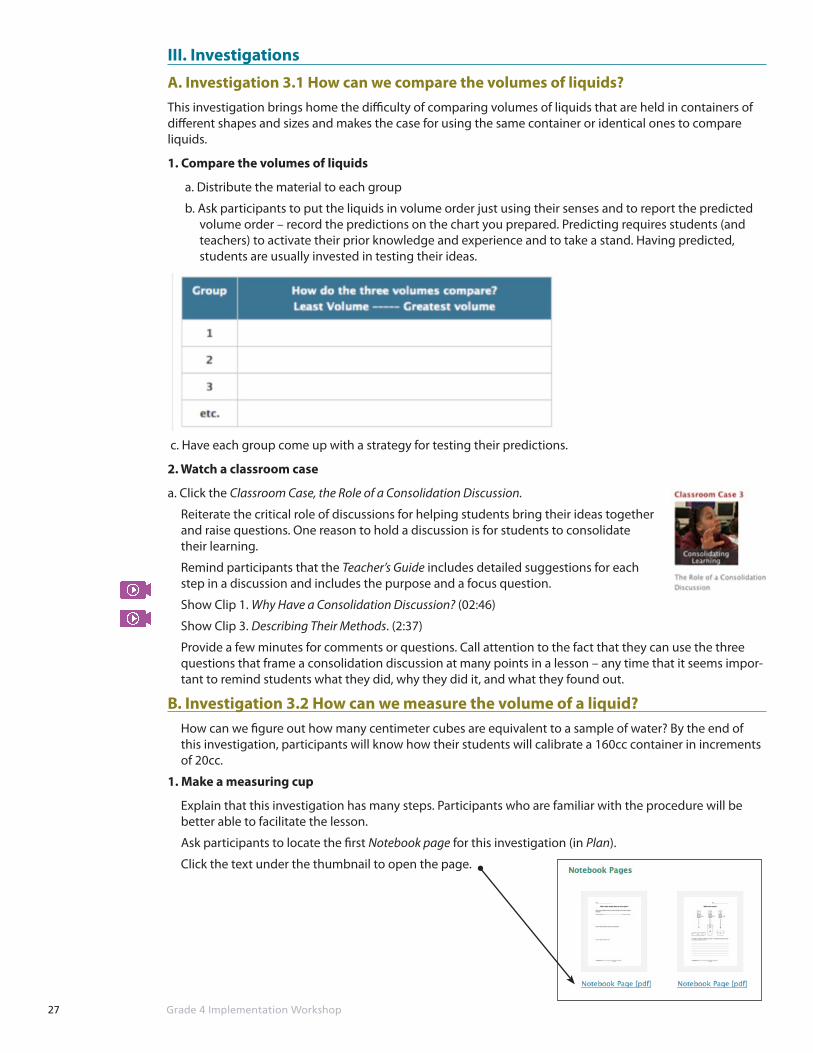
1. Compare the volumes of liquids
a. Distribute the material to each group
b. Ask participants to put the liquids in volume order just using their senses and to report the predicted volume order – record the predictions on the chart you prepared. Predicting requires students (and teachers) to activate their prior knowledge and experience and to take a stand. Having predicted, students are usually invested in testing their ideas.
c. Have each group come up with a strategy for testing their predictions.
2. Watch a classroom case
a. Click the Classroom Case, the Role of a Consolidation Discussion.
Reiterate the critical role of discussions for helping students bring their ideas together and raise questions. One reason to hold a discussion is for students to consolidate their learning.
Remind participants that the Teacher’s Guide includes detailed suggestions for each step in a discussion and includes the purpose and a focus question.
Show Clip 1. Why Have a Consolidation Discussion? (02:46)
Show Clip 3. Describing Their Methods. (2:37)
Provide a few minutes for comments or questions. Call attention to the fact that they can use the three questions that frame a consolidation discussion at many points in a lesson – any time that it seems impor-tant to remind students what they did, why they did it, and what they found out.
B. Investigation 3.2 How can we measure the volume of a liquid? How can we figure out how many centimeter cubes are equivalent to a sample of water? By the end of
this investigation, participants will know how their students will calibrate a 160cc container in increments of 20cc.
1. Make a measuring cup
Explain that this investigation has many steps. Participants who are familiar with the procedure will be better able to facilitate the lesson.
Ask participants to locate the first Notebook page for this investigation (in Plan).
Click the text under the thumbnail to open the page.
28 Grade 4 Implementation Workshop
Distribute materials to each group (Materials List) and ask participants to follow the directions from the Note-book page.
2. Use the measuring cup to compare volumes
Ask participants to find the volume of the water in the capped containers you provide.
C. Investigation 3.3. How do oil and water compare?1. Prepare the containers of oil and water
a. Explain that in Investigation 2.1 Same volume different weights? students are often puzzled when they find that 40cc of mineral oil weigh less than 40cc of water. They explain that oil looks thick and moves slowly so it looks as though it would be heavier for size.
b. Reiterate that teachers prepare the containers of oil. Students measure any samples of water. The water is colored blue with a drop or two of blue food coloring to make it easy to distinguish the oil and water.
c. Distribute the three sets of materials and ask participants to prepare a sample of water that has the same weight as the sample of oil you provided.
2. Compare the volumes
a. Ask participants to order the samples by weight.
What do they notice?
b. Point to the measuring strips in Handout 5. Ask participants to cut out one or two strips and use them to measure the volumes of the oil and water.
c. Return to the investigation question, How do oil and water compare?
d. Ask participants if they think the data (the containers) provides evidence to answer this question.
Can they make claims about how oil and water compare and describe the evidence to back up the claim?
d. Represent the findings
Refer to Handout 6 and ask participants to use their data to complete the graph. Explain that in some classes teachers use an overhead, document camera, or Smartboard and the class helps her complete the graph.
e. Look back at the Learning Goals (Plan)
Ask participants if they think this activity will enable their students to reach the 2nd and 3rd Learning Goals.
Provide time (5 min) for participants to turn to a partner and review 4. Make meaning together. Have them discuss responses to the Focus Question and supporting questions.
The cc scale “measuring strip” which students cut out of their notebooks (Investigation 3.3) to measure liquid volume is very specific to the 150cc containers in the kit. It can’t be used as a general measure - using it on a container with a different diameter would result in invalid measurements. That’s why the scales on measuring cups or cylinders come “attached” to their containers.
TIP
29 Grade 4 Implementation Workshop
Grade 4: Section 4: Mineral Materials, Investigations 4.1-4.3
I. To the Workshop Leader
Introducing Investigations 4.1-4.3It’s one thing to measure the volume of a cube or a brick. But what about an object that’s bumpy, rough, and oddly shaped? Workshop participants stand in their students’ shoes as they measure volume by displace-ment of water and tangle with a question that arises after observing a big rock and a smaller one sink in containers of water. Is it because the big rock takes up more space or because it weighs more that the water level rises higher?
Further exploration measurement of volume by displacement produces some surprises when a granular material is added to water. Surprises pique curiosity and motivate new learning!
Materials and Preparation for this part of the workshop
Investigation 4.1
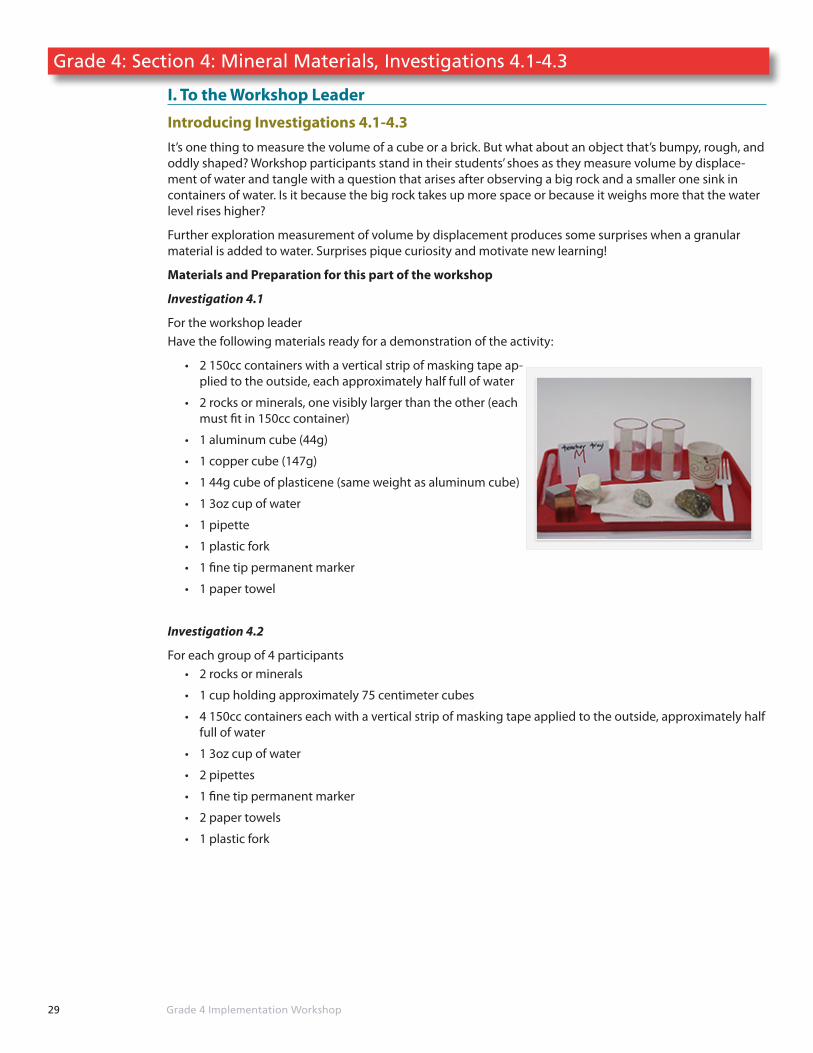
For the workshop leaderHave the following materials ready for a demonstration of the activity:
• 2 150cc containers with a vertical strip of masking tape ap-plied to the outside, each approximately half full of water
• 2 rocks or minerals, one visibly larger than the other (each must fit in 150cc container)
• 1 aluminum cube (44g)
• 1 copper cube (147g)
• 1 44g cube of plasticene (same weight as aluminum cube)
• 1 3oz cup of water
• 1 pipette
• 1 plastic fork
• 1 fine tip permanent marker
• 1 paper towel
Investigation 4.2
For each group of 4 participants• 2 rocks or minerals
• 1 cup holding approximately 75 centimeter cubes
• 4 150cc containers each with a vertical strip of masking tape applied to the outside, approximately half full of water
• 1 3oz cup of water
• 2 pipettes
• 1 fine tip permanent marker
• 2 paper towels
• 1 plastic fork

30 Grade 4 Implementation Workshop
Investigation 4.3
Handout xxx Does 40cc plus 40cc equal 80cc?
For the workshop leader• 1 strainer (for clean-up)
• 1 50cc graduated cylinder filled with 40cc of sand
• 1 100cc graduated cylinder filled with 40cc of water
• 10 centimeter cubes
For each group of 4 participants
• 1 cup holding at least 40 centimeter cubes
• 1 20oz cup for use as a “waste bucket”
• 2 plastic forks
• 2 pipettes
• 2 3oz cups approximately two-thirds full of bulk gravel
• 2 20oz cups approximately half full of water
• 2 50cc graduated cylinders
• 2 140cc graduated cylinders - student-made measuring cups, from Investigation 3.2
• 2 rocks or minerals that will fit in the cylinders; sandstone or granite works well
• 4 paper towels
How Investigations 4.1-4.3 reflect the Science Framework
Component Ideas about Matter and Its Interactions
The focus is on volume and measuring volume by displacement of water.
Scientific Practices Using mathematics and computational thinking: students learn to use calibrat-ed cylinders to measure liquid volumes and to use displacement of water to measure the volume of irregularly shaped objects or granular materials.
Crosscutting Concepts Scale, proportion, and quantity: students use centimeter cubes to estimate the volume of a rock by building a “replica,” and use displacement of water to check the accuracy of their estimate..
50 MinsTime:
31 Grade 4 Implementation Workshop
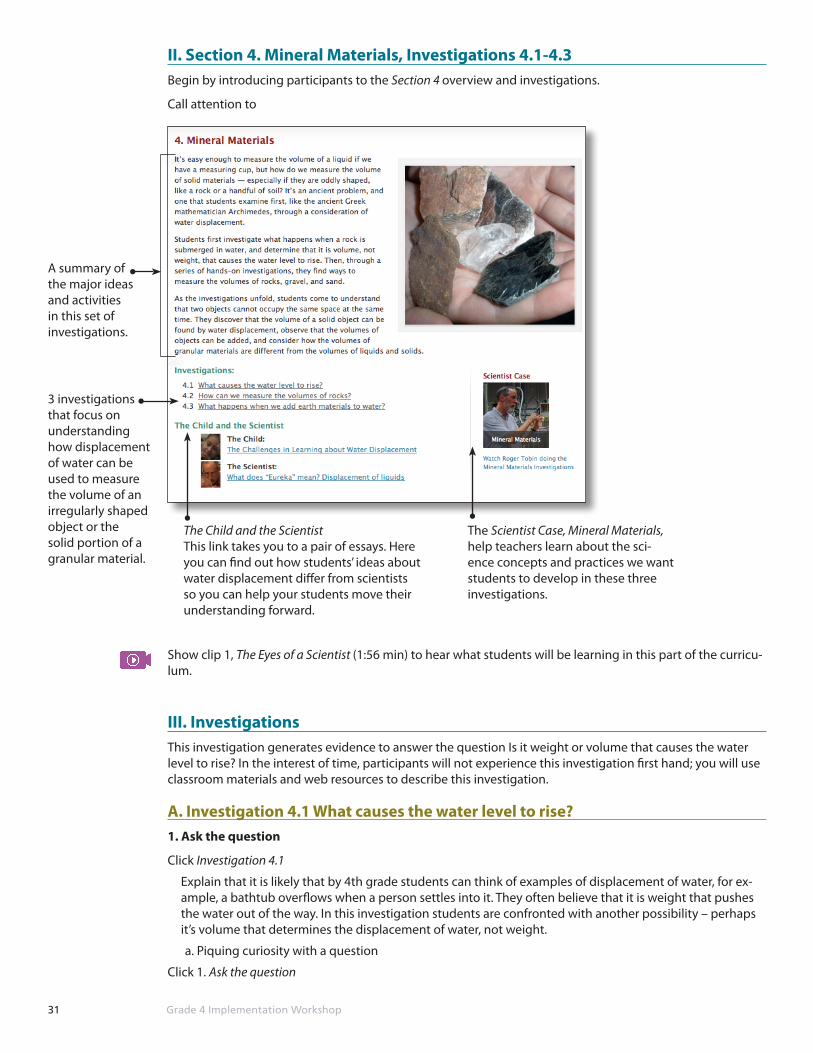
II. Section 4. Mineral Materials, Investigations 4.1-4.3Begin by introducing participants to the Section 4 overview and investigations.
Call attention to
Show clip 1, The Eyes of a Scientist (1:56 min) to hear what students will be learning in this part of the curricu-lum.
III. InvestigationsThis investigation generates evidence to answer the question Is it weight or volume that causes the water level to rise? In the interest of time, participants will not experience this investigation first hand; you will use classroom materials and web resources to describe this investigation.
A. Investigation 4.1 What causes the water level to rise?1. Ask the question
Click Investigation 4.1
Explain that it is likely that by 4th grade students can think of examples of displacement of water, for ex-ample, a bathtub overflows when a person settles into it. They often believe that it is weight that pushes the water out of the way. In this investigation students are confronted with another possibility – perhaps it’s volume that determines the displacement of water, not weight.
a. Piquing curiosity with a question
Click 1. Ask the question
3 investigations that focus on understanding how displacement of water can be used to measure the volume of an irregularly shaped object or the solid portion of a granular material.
The Child and the Scientist This link takes you to a pair of essays. Here you can find out how students’ ideas about water displacement differ from scientists so you can help your students move their understanding forward.
The Scientist Case, Mineral Materials, help teachers learn about the sci-ence concepts and practices we want students to develop in these three investigations.
A summary of the major ideas and activities in this set of investigations.
32 Grade 4 Implementation Workshop
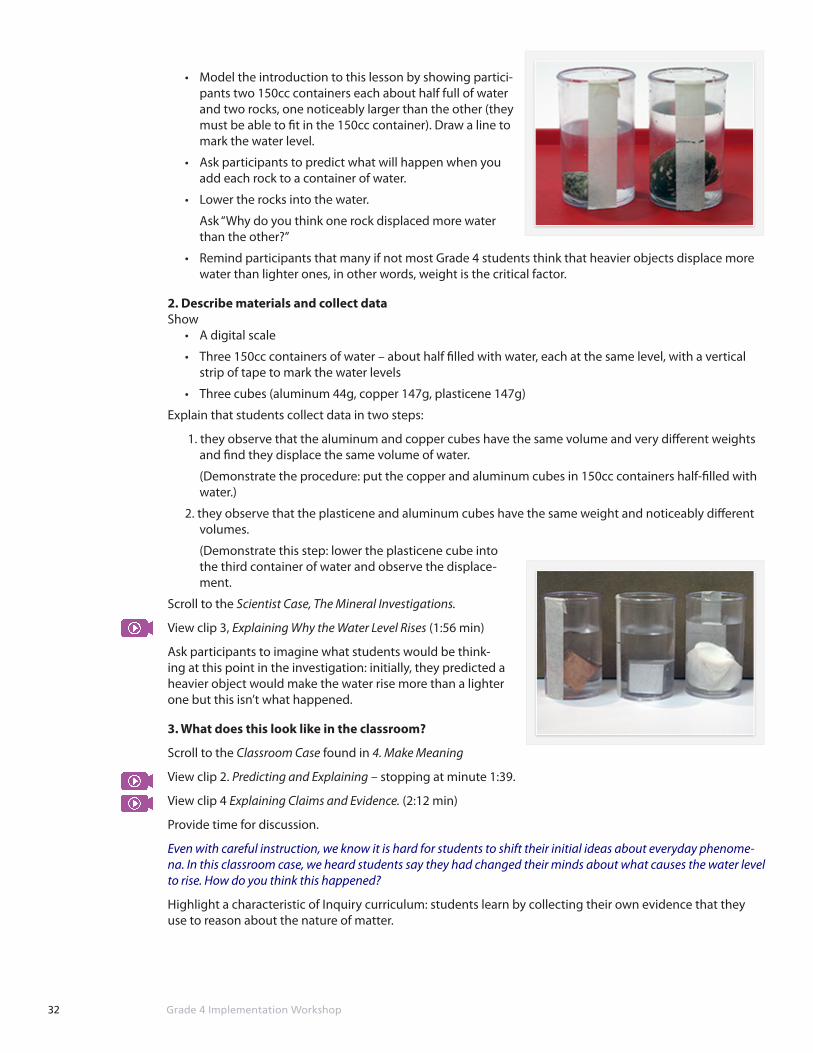
• Model the introduction to this lesson by showing partici-pants two 150cc containers each about half full of water and two rocks, one noticeably larger than the other (they must be able to fit in the 150cc container). Draw a line to mark the water level.
• Ask participants to predict what will happen when you add each rock to a container of water.
• Lower the rocks into the water.
Ask “Why do you think one rock displaced more water than the other?”
• Remind participants that many if not most Grade 4 students think that heavier objects displace more water than lighter ones, in other words, weight is the critical factor.
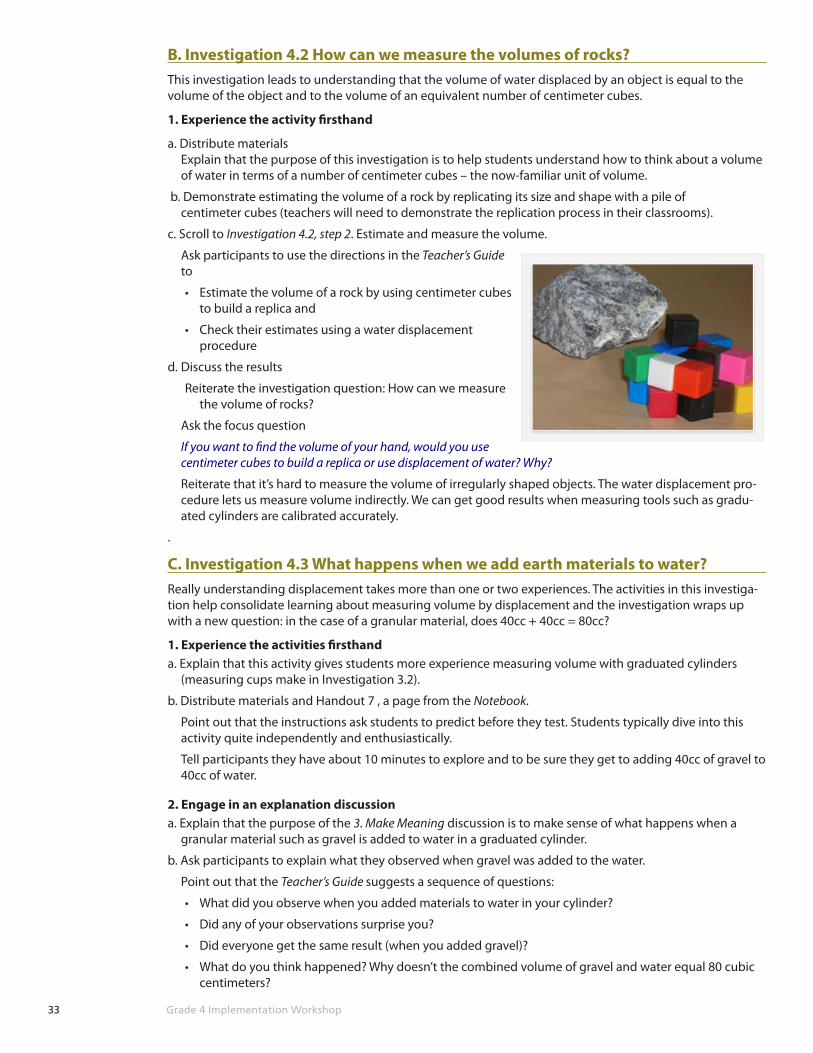
2. Describe materials and collect dataShow
• A digital scale
• Three 150cc containers of water – about half filled with water, each at the same level, with a vertical strip of tape to mark the water levels
• Three cubes (aluminum 44g, copper 147g, plasticene 147g)
Explain that students collect data in two steps:
1. they observe that the aluminum and copper cubes have the same volume and very different weights and find they displace the same volume of water.
(Demonstrate the procedure: put the copper and aluminum cubes in 150cc containers half-filled with water.)
2. they observe that the plasticene and aluminum cubes have the same weight and noticeably different volumes.
(Demonstrate this step: lower the plasticene cube into the third container of water and observe the displace-ment.
Scroll to the Scientist Case, The Mineral Investigations.
View clip 3, Explaining Why the Water Level Rises (1:56 min)
Ask participants to imagine what students would be think-ing at this point in the investigation: initially, they predicted a heavier object would make the water rise more than a lighter one but this isn’t what happened.
3. What does this look like in the classroom?
Scroll to the Classroom Case found in 4. Make Meaning
View clip 2. Predicting and Explaining – stopping at minute 1:39.
View clip 4 Explaining Claims and Evidence. (2:12 min)
Provide time for discussion.
Even with careful instruction, we know it is hard for students to shift their initial ideas about everyday phenome-na. In this classroom case, we heard students say they had changed their minds about what causes the water level to rise. How do you think this happened?
Highlight a characteristic of Inquiry curriculum: students learn by collecting their own evidence that they use to reason about the nature of matter.
33 Grade 4 Implementation Workshop
B. Investigation 4.2 How can we measure the volumes of rocks?This investigation leads to understanding that the volume of water displaced by an object is equal to the volume of the object and to the volume of an equivalent number of centimeter cubes.
1. Experience the activity firsthand
a. Distribute materials Explain that the purpose of this investigation is to help students understand how to think about a volume
of water in terms of a number of centimeter cubes – the now-familiar unit of volume.
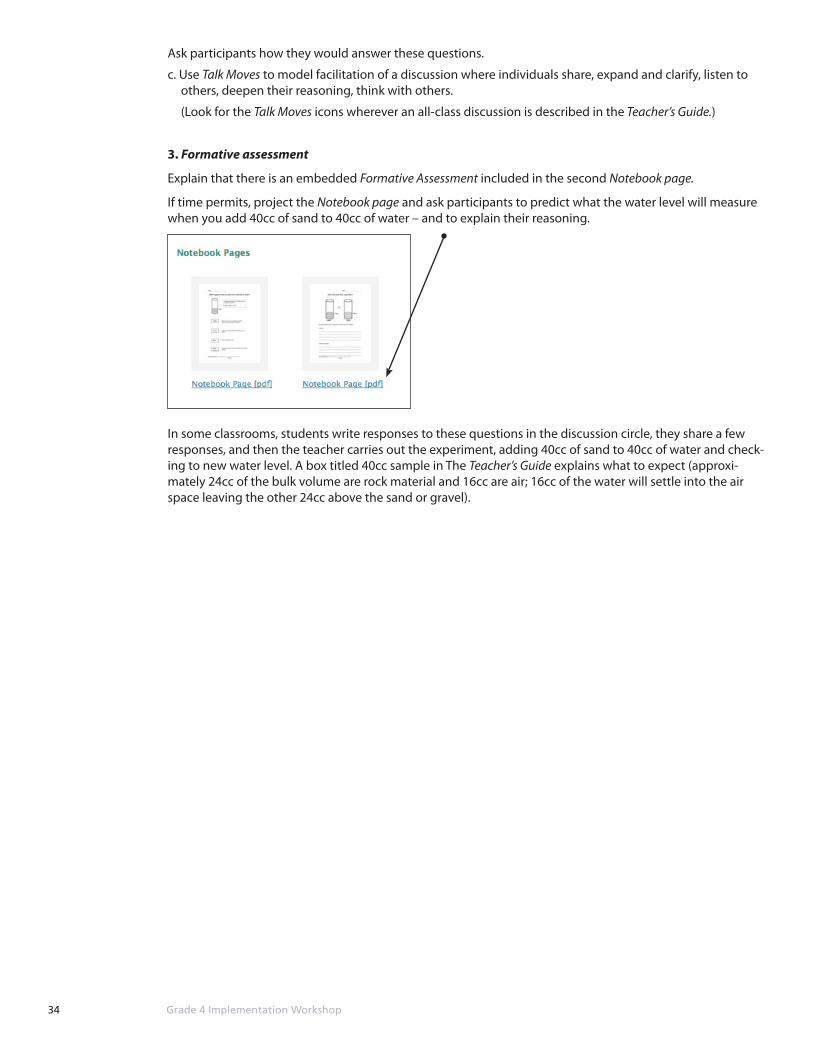
b. Demonstrate estimating the volume of a rock by replicating its size and shape with a pile of centimeter cubes (teachers will need to demonstrate the replication process in their classrooms).
c. Scroll to Investigation 4.2, step 2. Estimate and measure the volume.
Ask participants to use the directions in the Teacher’s Guide to
• Estimate the volume of a rock by using centimeter cubes to build a replica and
• Check their estimates using a water displacement procedure
d. Discuss the results
Reiterate the investigation question: How can we measure the volume of rocks?
Ask the focus question
If you want to find the volume of your hand, would you use centimeter cubes to build a replica or use displacement of water? Why?
Reiterate that it’s hard to measure the volume of irregularly shaped objects. The water displacement pro-cedure lets us measure volume indirectly. We can get good results when measuring tools such as gradu-ated cylinders are calibrated accurately.
.
C. Investigation 4.3 What happens when we add earth materials to water?Really understanding displacement takes more than one or two experiences. The activities in this investiga-tion help consolidate learning about measuring volume by displacement and the investigation wraps up with a new question: in the case of a granular material, does 40cc + 40cc = 80cc?
1. Experience the activities firsthanda. Explain that this activity gives students more experience measuring volume with graduated cylinders
(measuring cups make in Investigation 3.2).
b. Distribute materials and Handout 7 , a page from the Notebook.
Point out that the instructions ask students to predict before they test. Students typically dive into this activity quite independently and enthusiastically.
Tell participants they have about 10 minutes to explore and to be sure they get to adding 40cc of gravel to 40cc of water.
2. Engage in an explanation discussiona. Explain that the purpose of the 3. Make Meaning discussion is to make sense of what happens when a
granular material such as gravel is added to water in a graduated cylinder.
b. Ask participants to explain what they observed when gravel was added to the water.
Point out that the Teacher’s Guide suggests a sequence of questions:
• What did you observe when you added materials to water in your cylinder?
• Did any of your observations surprise you?
• Did everyone get the same result (when you added gravel)?
• What do you think happened? Why doesn’t the combined volume of gravel and water equal 80 cubic centimeters?
34 Grade 4 Implementation Workshop
Ask participants how they would answer these questions.
c. Use Talk Moves to model facilitation of a discussion where individuals share, expand and clarify, listen to others, deepen their reasoning, think with others.
(Look for the Talk Moves icons wherever an all-class discussion is described in the Teacher’s Guide.)
3. Formative assessment
Explain that there is an embedded Formative Assessment included in the second Notebook page.
If time permits, project the Notebook page and ask participants to predict what the water level will measure when you add 40cc of sand to 40cc of water – and to explain their reasoning.
In some classrooms, students write responses to these questions in the discussion circle, they share a few responses, and then the teacher carries out the experiment, adding 40cc of sand to 40cc of water and check-ing to new water level. A box titled 40cc sample in The Teacher’s Guide explains what to expect (approxi-mately 24cc of the bulk volume are rock material and 16cc are air; 16cc of the water will settle into the air space leaving the other 24cc above the sand or gravel).

35 Grade 4 Implementation Workshop
Grade 4: Section 5: Transformations, Investigations 5.1-5.3
I. To the Workshop Leader
Introducing Investigations 5.1-5.3What will happen to weight and volume if we twist and squeeze a lump of plasticene until it looks like a rabbit? Or crush some shells? The changes are what grab our attention but what doesn’t change? This sec-tion is called Transformations and participants will learn how these investigations pull together ideas about matter, material, weight, volume. Finding that a heap of shell fragments has the same weight and displaces the same volume of water as the original shells sets the stage for thinking about transformations at other scales. Once we understanding that weight is a measure of the amount of matter, weight becomes a tool for explaining transformations.
Transformations on smaller and larger scales occur all around us every day. Rain and wind carry soil from one place to another and human activity reshapes the land. Is the new sand bar on the side the river the same stuff as the material up stream? Are the wood chips on the playground and the trees they came from kind of like the crushed and uncrushed shells? What changes and what stays the same? How can we tell?
Materials and Preparation for this part of the workshop
Investigation 5.1
For each group of 4 participants:• 1 sandwich bags, each filled with approximately 50 grams of shells
• 2 additional sandwich bags
• 1 20oz cup approximately half full of water
• 1 3oz cup of water
• 1 fine-tip permanent marker
• 1 digital scale
• 1 pipette
• 4 paper towels
Investigation 5.2
For each group of 4 of participants:• 1 fine-tip permanent marker
• 1 digital scale
• 1 3oz cup of water
• 2 20oz cups approximately half full of water
• 2 forks
• 2 pipettes
• 4 balls of plasticene, approximately 30g each
• 4 paper towels
50 MinsTime:
36 Grade 4 Implementation Workshop
How Investigations 5.1-5.3 reflect the Science Framework
Component Ideas about Matter and Its Interactions
When materials are cut, crushed, ground, or molded into different shapes, among the things that don’t change under these sorts of transformations are the total weight and total volume of the material.
Scientific Practices Analyzing and interpreting data: students use data to make claims about what changes and what stays the same when shells are crushed and a ball of plas-ticene is reshaped.
Crosscutting Concepts Energy and Matter: flows, cycles, and conservation
Scale, proportion, and quantity: students use weight and volume measure-ments to compare the amount of matter objects that have been transformed by crushing or reshaping.
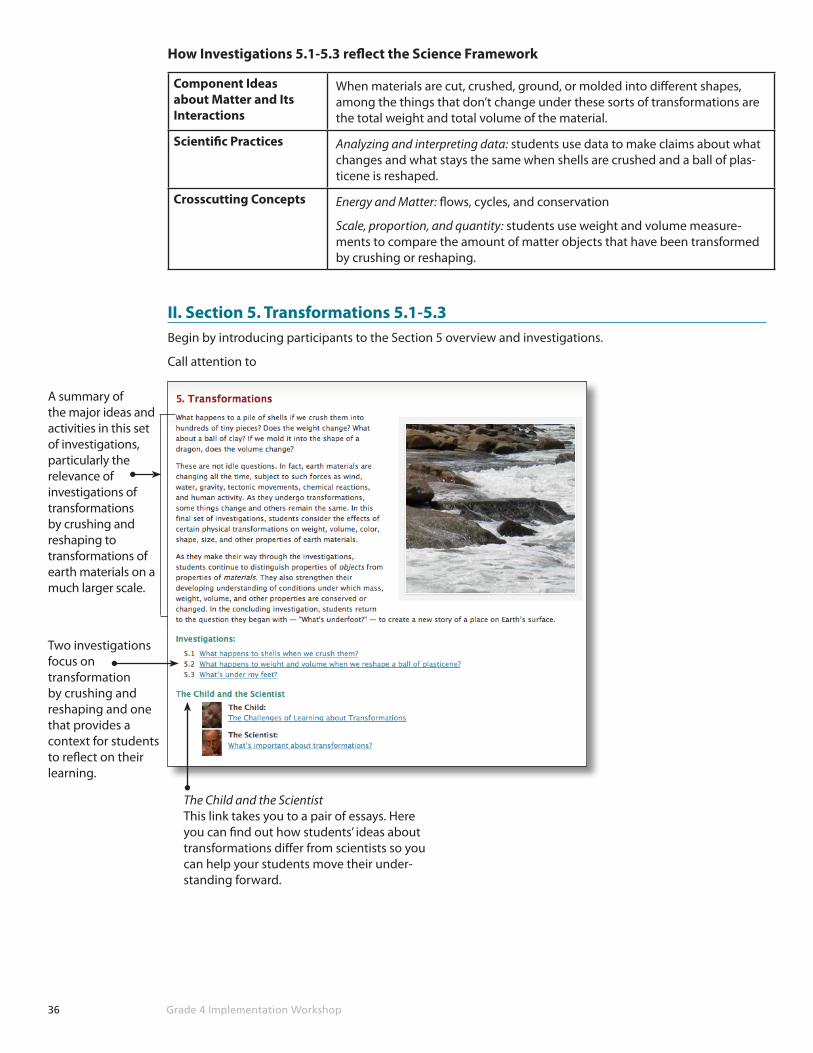
II. Section 5. Transformations 5.1-5.3Begin by introducing participants to the Section 5 overview and investigations.
Call attention to
Two investigations focus on transformation by crushing and reshaping and one that provides a context for students to reflect on their learning.
The Child and the Scientist This link takes you to a pair of essays. Here you can find out how students’ ideas about transformations differ from scientists so you can help your students move their under-standing forward.
A summary of the major ideas and activities in this set of investigations, particularly the relevance of investigations of transformations by crushing and reshaping to transformations of earth materials on a much larger scale.

37 Grade 4 Implementation Workshop
III. Investigations
A. Investigation 5.1 What happens to shells when we crush them?The purpose of this investigation is to link real world, large scale, long term natural processes or transforma-tions of matter on Earth’s surface and the “desk top” investigation that follows.
1. Experience the activity firsthand
a. Do a thought experiment
Click 1. Ask the question
Choose one of the two scenarios and read it out loud.
b. Predict and collect weight and volume data
Click 2. Predict what will happen
Distribute materials.
Ask participants to write down what they predict will change and what will stay the same when they crush a bag of shells (by stepping on them).
Make sure they consider what will happen to weight and volume.
Have participants test their predictions ( ~5-10 min)
Ask participants to use the digital scale to collect weight data and use displacement of water in a cup to collect volume data.
You might make these suggestions • weigh the shells in the bag first • mark the original water line, empty the shells into the cup of water and mark the new water line • dry the shells before putting them back in the bag for crushing
c. Make meaning
Explain that this is an explanation discussion.
Ask participants to report what happened to the weight and volume of the shells when they crushed them.
Note: In the classroom, students typically find that weight and volume stay the same and what’s changed is the size of the pieces of shell material – the pieces are smaller but there are more of them. This is an idea that will be picked up again in Grade 5 when students observe what happens to salt when you crush it. )
Ask participants to explain the findings. [It’s the same amount of matter - no matter was added and no matter was taken away.] Make sure participants can differentiate between the
• Claim and evidence: When shells are crushed, our data show that weight and volume stay the same
• Explanation: no matter was added and no matter was taken away
Ask the question suggested in the Teacher’s Guide and take a few minutes to share ideas.
How would you connect today’s findings to weathering in the natural world?
38 Grade 4 Implementation Workshop
B. Investigation 5.2 What happens to weight and volume when we reshape a ball of clay? We know from research that children believe that when an object changes shape, it’s volume changes. In this investigation students collect evidence to support the idea that as long as no matter is added or taken away, when an object is reshaped, its weight and volume stay the same.
Explain that this investigation involves another transformation only this time a ball of clay is reshaped. While some students are ready to reason that as long as no matter is added or taken away, the object will weigh the same and take up the same amount of space, others may need more time and more evidence for this idea to take hold.
Click the Formative Assessment example.
In this example, students use labeled drawings (in their Notebooks) to show the results of their investigations.
If time permits, participants can explore the description of this investigation in the Teacher’s Guide and do the investigation.
C. Investigation 5.3 What’s under my feet?This investigation brings students full circle to a place under their feet where they began and the question that kicked off the unit, What’s under my feet?
Click the text under the Notebook page icon.
Explain that this time students make a drawing of the place they selected and write responses to a few prompts that ask them to think about some possible transformations of the earth materials under their feet.
The final discussion consolidates learning from across the unit with a focus on transformations of objects and materials, weight, and volume.