Go to Choose No Machine ...
12
Go to https://www.nomachine.com/download Choose No Machine Client for your OS and download to your system
Transcript of Go to Choose No Machine ...
Go to https://www.nomachine.com/download Choose No Machine Client for your OS and download to your system

Run the Installer

After Install is complete, you are ready to run No Machine and connect to the NX-Lab via nx.cs.virginia.edu
When you start No Machine Client you might see a list of NX Systems… You need to Click on “New” to setup your connection to nxfront.cs.virginia.edu

Setup connection to nx.cs.virginia.edu Port 4000 Use UDP
Choose NX protocol

Choose Default Password
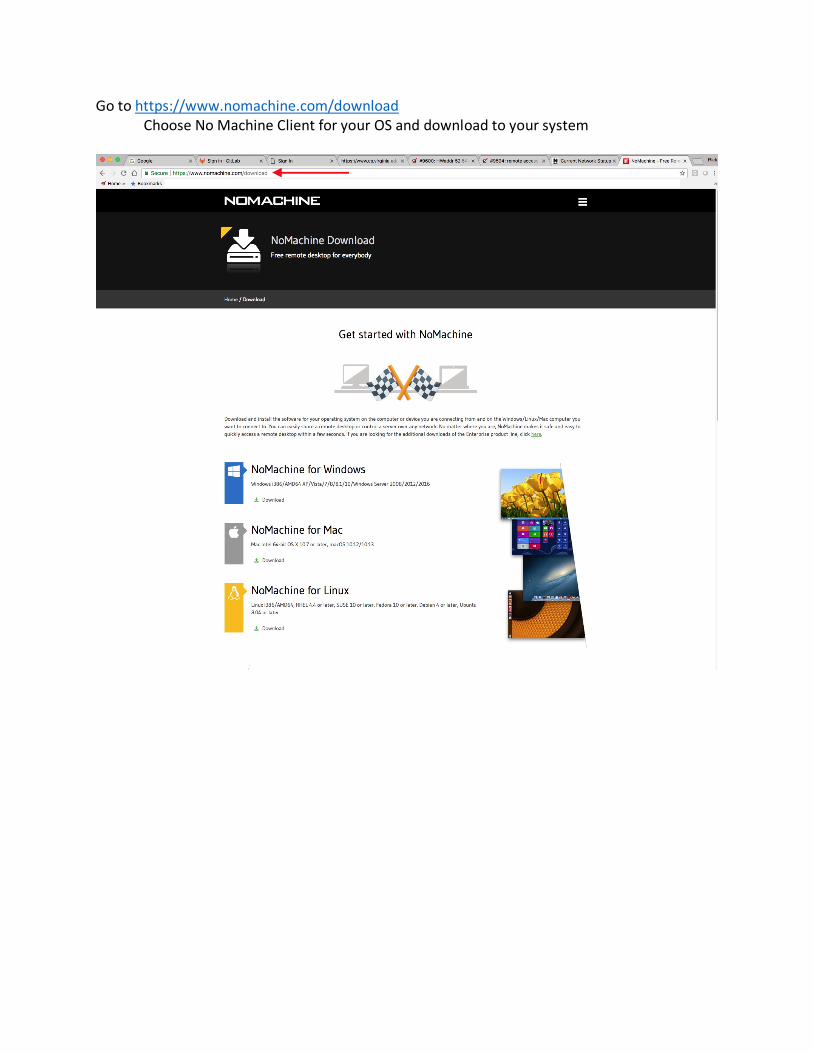
Choose Default Don’t use Proxy
Accept Host Authenticity

Label Connection (You could even use your UID in Place of “My Connection” Up to You if you want a Desktop link or not.
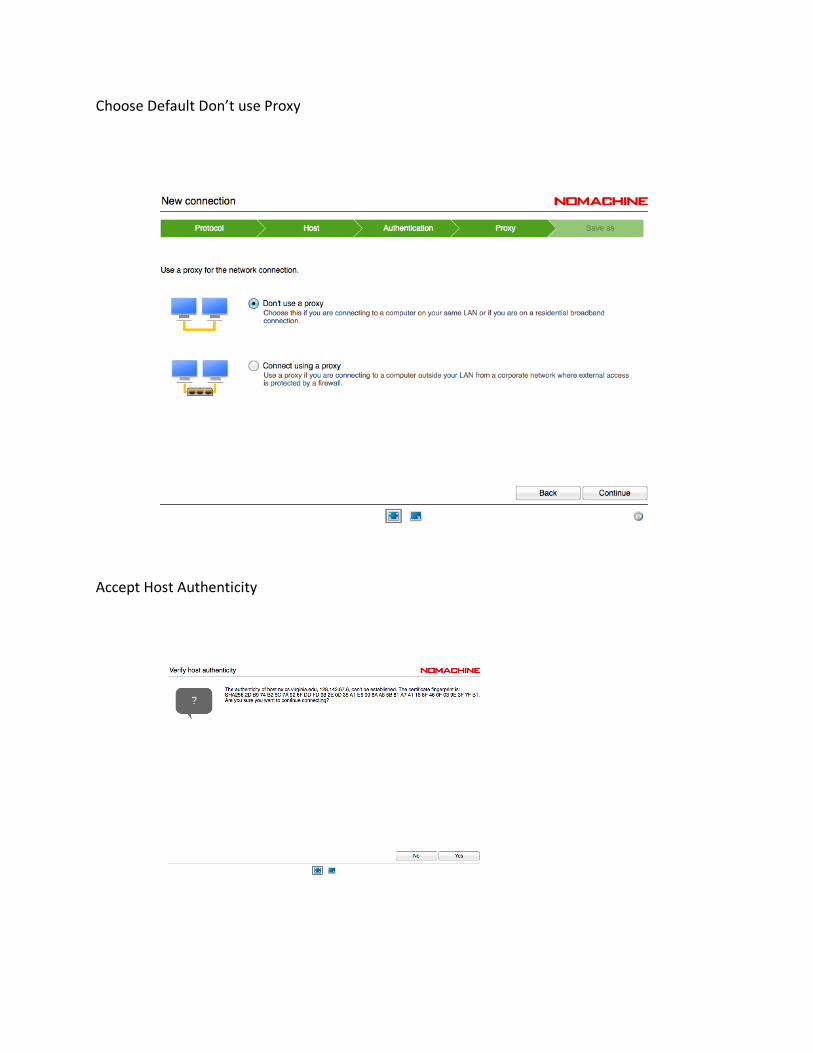
You are now ready to make connection to nxfront.cs.virginia.edu You may see one of two screens

Use the Username/Password you received in E-mail from the CS Dept. Not your UVA NetBadge Password.
The system will not allow you to continue without resetting your password.

Hopefully you have now connected to the nx.cs.virginia.edu Now you can create a desktop session. Click on “Create a new virtual desktop”

Choose default Display Menu
Suggested you use “Fit to Window”

At this point you should be placed on a Desktop of one of the five backend CentOS lab servers
You can click on “activities” to open terminal or browser