Multi-Capsule 5 in 1 Espresso Machine - Sunbeam Australia · Multi-Capsule 5 in 1 Espresso Machine...
12
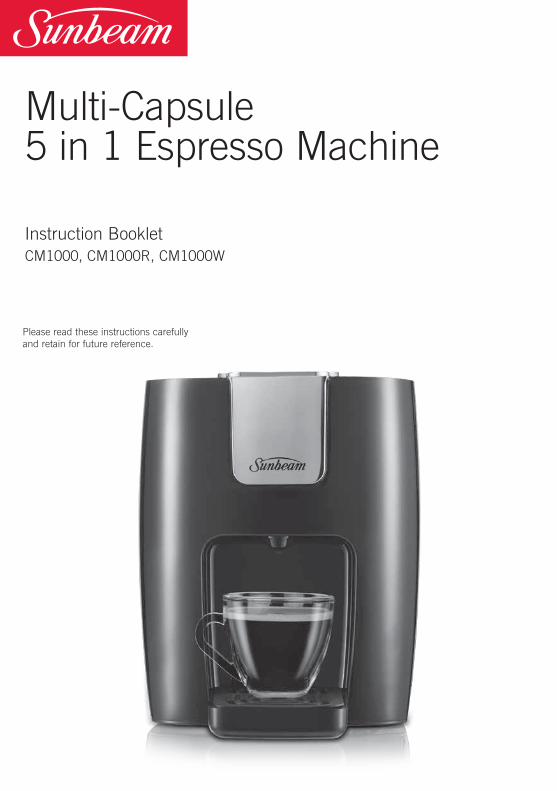
Multi-Capsule 5 in 1 Espresso Machine Instruction Booklet CM1000, CM1000R, CM1000W Please read these instructions carefully and retain for future reference.
Transcript of Multi-Capsule 5 in 1 Espresso Machine - Sunbeam Australia · Multi-Capsule 5 in 1 Espresso Machine...
Multi-Capsule 5 in 1 Espresso Machine
Instruction Booklet CM1000, CM1000R, CM1000W
Please read these instructions carefully and retain for future reference.

Contents
Important instructions – retain for future use.
Sunbeam’s Safety Precautions 1
Features of your Sunbeam Espresso Machine 2
Setting up your espresso machine 4
Using your espresso machine 5
The Multi-Espresso System 6
Care and cleaning 7
Troubleshooting 8

1
Sunbeam’s Safety Precautions
SAFETY PRECAUTIONS FOR YOUR SUNBEAM ESPRESSO MACHINE
• Never leave an appliance unattended while in use.
• Always place the unit on a flat, level surface.• Do not operate without water in the water tank.• Disconnect the plug from the power outlet if
there is any problem during the coffee making process or prior to cleaning your appliance.
• Do not allow the power cord to come into contact with the hot parts of the appliance.
• Only use the appliance with the drip tray inserted correctly.
• Only lift the appliance by the body, do not lift by the handle.
• The heating system of the espresso machine is subject to residual heat after use.
• This espresso machine may cause potential injury from misuse.
If you have any concerns regarding the performance and use of your appliance, please visit www.sunbeam.com.au or contact the Sunbeam Consumer Service Line.
Ensure the above safety precautions are understood.
Sunbeam is very safety conscious when designing and manufacturing consumer products, but it is essential that the product user also exercise care when using an electrical appliance. Listed below are precautions which are essential for the safe use of an electrical appliance:
• Read carefully and save all the instructions provided with an appliance.
• Always turn the power off at the power outlet before you insert or remove a plug. Remove by grasping the plug - do not pull on the cord.
• Turn the power off and remove the plug when the appliance is not in use and before cleaning.
• Do not use your appliance with an extension cord unless this cord has been checked and tested by a qualified technician or service person.
• Always use your appliance from a power outlet of the voltage (A.C. only) marked on the appliance.
• This appliance is not intended for use by persons (including children) with reduced physical, sensory or mental capabilities, or lack of experience and knowledge, unless they have been given supervision or instruction concerning use of the appliance by a person responsible for their safety.
• Children should be supervised to ensure that they do not play with the appliance.
• The temperature of accessible surfaces may be high when the appliance is operating.
• Never leave an appliance unattended while in use.
• Do not use an appliance for any purpose other than its intended use.
• Do not place an appliance on or near a hot gas flame, electric element or on a heated oven.
• Do not place on top of any other appliance.• Do not let the power cord of an appliance hang
over the edge of a table or bench top or touch any hot surface.
• Do not operate any electrical appliance with a damaged cord or after the appliance has been damaged in any manner. If damage is suspected, return the appliance to the nearest Sunbeam Appointed Service Centre for examination, repair or adjustment.
• For additional protection, Sunbeam recommend the use of a residual current device (RCD) with a tripping current not exceeding 30mA in the electrical circuit supplying power to your appliances.
• Do not immerse the appliance in water or any other liquid unless recommended.
• Appliances are not intended to be operated by means of an external timer or separate remote control system.
• This appliance is intended to be used in household and similar applications such as: staff kitchen areas in shops, offices and other working environments; farm houses; by clients in hotels, motels and other residential type environments; bed and breakfast type environments.

2
Choose the coffee you want - 5 in 1 espresso machineYou can now use ground coffee and capsules on the one machine. Not only that, multi-capsule compatibility means you can choose from Nespresso®,Caffitaly®, L’Or Espresso®
and Dolce Gusto®.The ultimate freedom to choose your coffee.
Simple illuminated controlsJust press the extraction button to start the espresso shot and again to stop - it’s that easy.
15 BAR pumpCreates the ideal pressure for the perfect extraction giving you a great espresso shot every time.
Removable drip tray with non-slip mat
Features of the CM1000 Multi-Capsule 5 in 1 Espresso Machine
* Trade Marks Disclaimer:Nespresso® is a registered trade mark of Societé Des Produits Nestle SACaffitaly® is a registered trade mark of Caffitaly System S.p.A.L’Or Espresso® is a registered trade mark of KoninklijkeDouweEgberts B.V.Dolce Gusto® is a registered trade mark of Societé des Produits Nestle S.A.Coffee products carrying these trade marks have no connection with Sunbeam Corporation Limited.None of these trade mark owners have endorsed this Sunbeam machine, or its accessories, for use with their coffee capsules.

3
Fast heat up time with Thermoblock technologyThe thermoblock rapidly heats water meaning fresh hot coffee in quick time.
Removable water tank
Removable coffee holdersSimple to use coffee holders give you the freedom to create the coffee you want.
Features of the CM1000 Multi-Capsule 5 in 1 Espresso Machine
L’Or Espresso®* Caffitaly®*
Nespresso®* Dolce Gusto®*
Ground coffee

4
Setting up your Capsule Machine
1. Attach drip tray by inserting into the machine. See figure 1.
2. Remove water tank by lifting the cover up and pulling the water tank out using the water tank handle. Fill with water. See figure 2.
3.Insert the water tank back into the machine and press firmly into place. See figure 3.
Note: Do not fill the water tank while it is in the machine.
4. Plug in the power cord and press the power button on the machine. See figure 4.
Note: Power button will illuminate red. Once machine is ready for use, the extraction button will illuminate.
Figure 1
Figure 2
Figure 3
Figure 4

5
Using Your Capsule Machine
1. Open the lid by firstly lifting the handle up and then lifting the entire lid. See figure 1.
2. Choose your coffee holder. See “The Multi-Espresso System” section.
3. Place holder inside the machine.4. Close the lid by firstly pushing down the
lid and then push down the handle to lock into position. See figure 2.
5. Place cup on the drip tray.6. Press the extraction button to start the
extraction process - coffee will start dispensing from the machine into the cup. See figure 3.
7. Stop the extraction once the desired amount of coffee has been reached by pressing the extraction button again. See figure 4.
After each use8. Open the lid by firstly lifting the handle up
and then lifting the entire lid. See figure 5.
9. Remove the coffee holder by lifting out. Allow the coffee or capsule to cool, open the holder, knock coffee out of holder and rinse in water to clean. See figure 6.
Figure 1
Figure 2
Figure 3
Figure 4
Figure 5
Figure 6

6
The Multi-Espresso System
Using the Capsule System1. Select the capsule holder that matches the
required capsule.2. Open the capsule holder and insert the
capsule into the capsule holder. See figure 1.
3. Close the capsule holder cover. See figure 2.
4. Insert holder into machine.5. Close lid and prepare your coffee by
following the instructions in the “Using your Espresso Machine” section.
Using Ground Coffee1. Either use freshly ground coffee beans
(ground using an espresso setting) or pre-ground coffee suitable for espresso machines.
2. Select the ground coffee holder and filter basket. See figure 1.
3. Insert filter basket into ground coffee holder. See figure 1.
4. Fill the filter basket with ground coffee and wipe clean the edges of the basket to enable the holder to close correctly.
5. Close the ground capsule holder and insert into the machine.
6. Close lid and prepare your coffee by following the instructions in the “Using your Espresso Machine” section.
Figure 1
Figure 2
Figure 1
Figure 2

7
Care and Cleaning
After each us it is recommended1. Turn the machine off and always remove
the power cord from the power outlet before cleaning.
2. Remove the drip tray, empty and rinse drip tray and non-slip mat.
3. Wash holders under running water to remove any left over coffee.
4. To wash the body of the machine use a soft, damp cloth and a non-abrasive, gentle dish soap.
Important: coffee holders are not dishwasher safe.
DescalingIt is recommended to have a monthly descaling routine to produce the best extraction.1. Select a descaling solution or tablet that is
designed for espresso machines.2. Fill the water tank with a descaling
solution following the instructions on the descaling solution or tablets. See figure 1.
3. Open lid, insert coffee holder that you use the most often and close lid.
4. Place container on the drip tray and press the extraction button. Wait until no more water is coming through and press the extraction button again to stop. See figure 2.
5. Refill water tank with fresh water and repeat step 4 above. See figure 3.
6. Once completed, turn the machine off and remove the power cord from the power outlet.
WATER
DESCALER
Figure 1
Figure 2
WATER
Figure 3
8
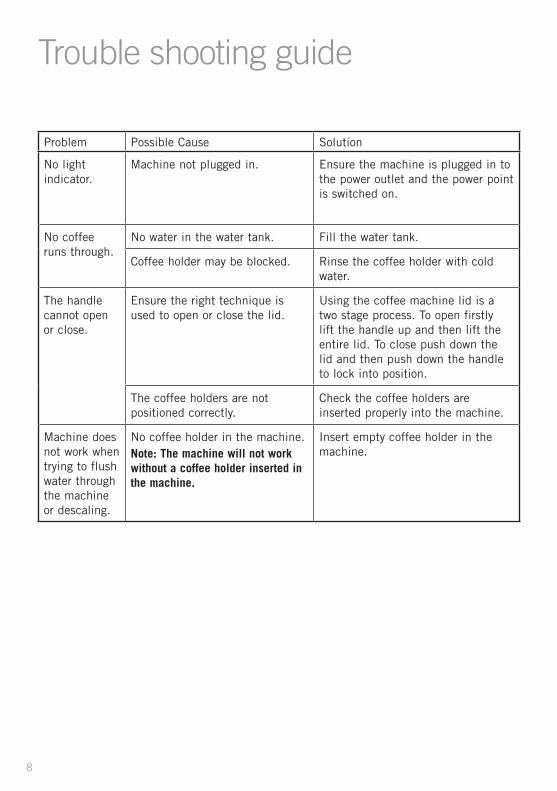
Trouble shooting guide
Problem Possible Cause Solution
No light indicator.
Machine not plugged in. Ensure the machine is plugged in to the power outlet and the power point is switched on.
No coffee runs through.
No water in the water tank. Fill the water tank.
Coffee holder may be blocked. Rinse the coffee holder with cold water.
The handle cannot open or close.
Ensure the right technique is used to open or close the lid.
Using the coffee machine lid is a two stage process. To open firstly lift the handle up and then lift the entire lid. To close push down the lid and then push down the handle to lock into position.
The coffee holders are not positioned correctly.
Check the coffee holders are inserted properly into the machine.
Machine does not work when trying to flush water through the machine or descaling.
No coffee holder in the machine.Note: The machine will not work without a coffee holder inserted in the machine.
Insert empty coffee holder in the machine.
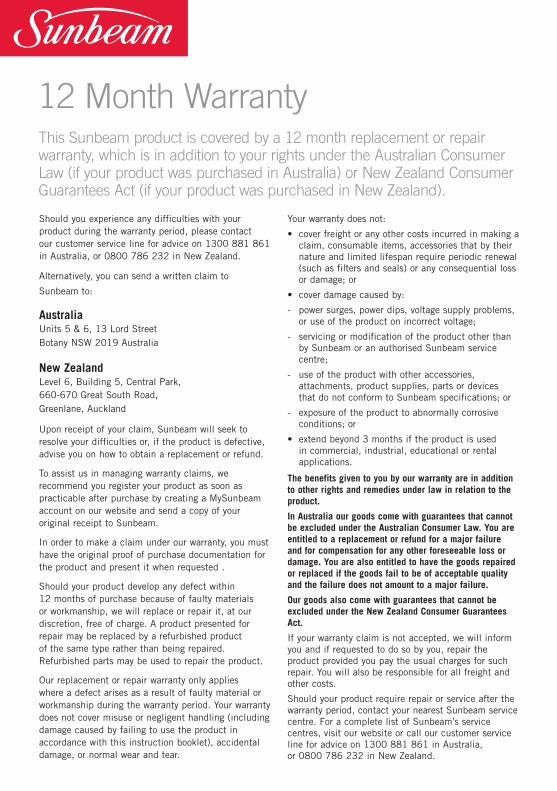
Should you experience any difficulties with your product during the warranty period, please contact our customer service line for advice on 1300 881 861 in Australia, or 0800 786 232 in New Zealand.
Alternatively, you can send a written claim to
Sunbeam to:
AustraliaUnits 5 & 6, 13 Lord Street Botany NSW 2019 Australia
New ZealandLevel 6, Building 5, Central Park, 660-670 Great South Road, Greenlane, Auckland
Upon receipt of your claim, Sunbeam will seek to resolve your difficulties or, if the product is defective, advise you on how to obtain a replacement or refund.
To assist us in managing warranty claims, we recommend you register your product as soon as practicable after purchase by creating a MySunbeam account on our website and send a copy of your original receipt to Sunbeam.
In order to make a claim under our warranty, you must have the original proof of purchase documentation for the product and present it when requested .
Should your product develop any defect within 12 months of purchase because of faulty materials or workmanship, we will replace or repair it, at our discretion, free of charge. A product presented for repair may be replaced by a refurbished product of the same type rather than being repaired. Refurbished parts may be used to repair the product.
Our replacement or repair warranty only applies where a defect arises as a result of faulty material or workmanship during the warranty period. Your warranty does not cover misuse or negligent handling (including damage caused by failing to use the product in accordance with this instruction booklet), accidental damage, or normal wear and tear.
Your warranty does not:
• cover freight or any other costs incurred in making a claim, consumable items, accessories that by their nature and limited lifespan require periodic renewal (such as filters and seals) or any consequential loss or damage; or
• cover damage caused by:
- power surges, power dips, voltage supply problems, or use of the product on incorrect voltage;
- servicing or modification of the product other than by Sunbeam or an authorised Sunbeam service centre;
- use of the product with other accessories, attachments, product supplies, parts or devices that do not conform to Sunbeam specifications; or
- exposure of the product to abnormally corrosive conditions; or
• extend beyond 3 months if the product is used in commercial, industrial, educational or rental applications.
The benefits given to you by our warranty are in addition to other rights and remedies under law in relation to the product.
In Australia our goods come with guarantees that cannot be excluded under the Australian Consumer Law. You are entitled to a replacement or refund for a major failure and for compensation for any other foreseeable loss or damage. You are also entitled to have the goods repaired or replaced if the goods fail to be of acceptable quality and the failure does not amount to a major failure.
Our goods also come with guarantees that cannot be excluded under the New Zealand Consumer Guarantees Act.
If your warranty claim is not accepted, we will inform you and if requested to do so by you, repair the product provided you pay the usual charges for such repair. You will also be responsible for all freight and other costs.
Should your product require repair or service after the warranty period, contact your nearest Sunbeam service centre. For a complete list of Sunbeam’s service centres, visit our website or call our customer service line for advice on 1300 881 861 in Australia, or 0800 786 232 in New Zealand.
This Sunbeam product is covered by a 12 month replacement or repair warranty, which is in addition to your rights under the Australian Consumer Law (if your product was purchased in Australia) or New Zealand Consumer Guarantees Act (if your product was purchased in New Zealand).
12 Month Warranty

Need help with your appliance?Contact our customer service team or visit our website for information and tips on getting the most from your appliance.
In Australia
Visit www.sunbeam.com.au
Or call 1300 881 861
In New Zealand
Visit www.sunbeam.co.nz
Or call 0800 786 232
TM MULTI-CAPSULE is a trade mark of Sunbeam Corporation Limited.Made in China. Due to minor changes in design or otherwise, the product may differ from the one shown in this leaflet. © Copyright. Sunbeam Corporation Limited 2015.ABN 45 000 006 771
Units 5 & 6, 13 Lord Street Botany NSW 2019 AustraliaLevel 6, Building 5, Central Park 660-670 Great South Road Greenlane, Auckland New Zealand Sunbeam Corporation is a division of GUD Holdings Ltd. 03/15
is a registered mark of Sunbeam Corporation Limited.