
General Accounting Policy and Procedures Manual and...
90
Author: Mary Ann Wallner General Accounting Policy and Procedures Manual and QuickBooks Information December 2013
Transcript of General Accounting Policy and Procedures Manual and...

Author: Mary Ann Wallner
General Accounting Policy and Procedures Manual
and QuickBooks Information
December 2013

Table of Contents
GENERAL ACCOUNTING INFORMATON SECTION
Understanding Financial Statements ..................................................................... 8
Understand What Normal Balance Means .......................................................... 12
Understanding the Importance of the Chart of Accounts ................................. 14
Types of Accounts in the Chart of Accounts .......................................................................................... 14
Balance Sheet Accounts ...................................................................................................................... 14
Income and Expense Accounts ........................................................................................................... 16
Prior Month Adjustment Procedure .................................................................... 17
Overpayment / Higher Merge Report ..................................................................................................... 17
Underpayment / Lower Merge Report .................................................................................................... 17
Current Period Adjustment Procedure ............................................................... 18
Accounts Receivable Collection Procedure ......................................................... 19
Accounts Payable Procedure ................................................................................ 20
QUICKBOOKS INSTRUCTIONAL SECTION
Bank Account Reconciliation ................................................................................ 22
Performing Account Reconciliation ........................................................................................................ 23
Online Banking Tips .............................................................................................. 27
Transferring Funds ................................................................................................ 29
Transfer Funds between Accounts .......................................................................................................... 29
Memorizing Transactions ..................................................................................... 30
Instructions for Memorizing All Types of Transactions ......................................................................... 31
How to use a Memorized Transaction .................................................................................................... 31
Instructions for Adding an Account to the Chart of Accounts ......................... 32
Instructions for Delete, Edit, or make an Account Inactive: ............................. 34
Instructions for Adding a New Item .................................................................... 36
To do this task ......................................................................................................................................... 36
Instructions for Adding a New Customer/Job .................................................... 38
Additional Information Tab .................................................................................................................... 39

Payment Info tab ..................................................................................................................................... 40
Job Info tab (Optional) ............................................................................................................................ 40
Instructions for Creating Invoices ........................................................................ 41
To do this task ......................................................................................................................................... 41
Instructions for Creating Statements ................................................................... 43
To do this task ......................................................................................................................................... 43
Instructions for Recording a Payment toward an Invoice ................................. 44
Terms ...................................................................................................................................................... 44
Receiving a Payment ............................................................................................................................... 44
Where this Payment Goes in the Program .............................................................................................. 45
Applying a Discount for Early Customer Payment................................................................................. 46
Using a Customer Credit as Payment ..................................................................................................... 47
Instructions for Adding a New Vendor ............................................................... 48
From The Address Tab You Should Add: .............................................................................................. 49
On The Additional Info Tab You Can Add: ........................................................................................... 49
On The Account Prefill Tab: ................................................................................................................... 49
Understand Bill Paying Process ............................................................................ 51
Terms ...................................................................................................................................................... 51
Understanding Payment Terms ............................................................................................................... 51
Instructions for Paying Bills ................................................................................. 52
Terms ...................................................................................................................................................... 52
Understanding Payment Terms ............................................................................................................... 52
From the Vendors Center ........................................................................................................................ 52
Instructions for Appling Discounts or Credits to Bills You Pay ....................... 54
Applying a discount to a bill payment .................................................................................................... 54
Applying credits to a bill payment .......................................................................................................... 54
Using Prepaid Accounts ........................................................................................ 55
Create the Prepaid Account .................................................................................................................... 55
Record Next Month’s Insurance Expense ............................................................................................... 56
Memorize the Transaction ...................................................................................................................... 56
Using Loan Manager ............................................................................................. 58
Set-Up Loan Manager ............................................................................................................................. 58
Setting Up and Dealing with Long Term Liabilities .......................................... 60
Create the Long Term Liability Account ................................................................................................ 60
Enter the Funds for the Loan .................................................................................................................. 60
Writing Off Bad Debt ............................................................................................ 61
Treating Bad Debt as a Discount ............................................................................................................ 61
Using a Credit Memo to Write Off a Bad Debt ...................................................................................... 61
How to create the Bad Debt Item ............................................................................................................ 62
Creating the Credit Memo ...................................................................................................................... 62
Accounting for Assets ............................................................................................ 64
Purpose .................................................................................................................................................... 64
Division of Duties ................................................................................................................................... 64
Responsibilities for the Property Custodians are: ................................................................................... 64
Individual employees are responsible for: .............................................................................................. 64
Asset Categorization ............................................................................................................................... 65
Capitalization Policy ............................................................................................................................... 65
Portable Assets ........................................................................................................................................ 65
Valuation Accounts ................................................................................................................................. 65
Depreciation ............................................................................................................................................ 66
Asset Valuation ....................................................................................................................................... 66
Setting Up and Dealing with Fixed Assets and Depreciation ............................ 68
Create the Fixed Asset Account .............................................................................................................. 68
Create a Fixed Asset Item List ................................................................................................................ 68
Record a Depreciation Transaction ......................................................................................................... 69
REPORT SECTION
How to Create the Balance Sheet Report ............................................................ 71
To Create this report ............................................................................................................................... 71
What this report tells you ........................................................................................................................ 71
How to Create the Profit and Loss Standard Report ......................................... 72
To Create this report ............................................................................................................................... 72
What this report tells you ........................................................................................................................ 72
Date range ............................................................................................................................................... 72
How to Create the Cash Flow Report .................................................................. 73
To Create this report ............................................................................................................................... 73
What this report tells you ........................................................................................................................ 73
Date range ............................................................................................................................................... 73
How to Create the Accounts Receivable Aging Summary Report .................... 74
To Create this report ............................................................................................................................... 74
What this report tells you ........................................................................................................................ 74
How to Create the Open Invoices Report ............................................................ 76
To Create this report ............................................................................................................................... 76
What this report tells you ........................................................................................................................ 76
Date range ............................................................................................................................................... 76
How to Create the Accounts Payable Aging Summary Report ........................ 77
To Create this report ............................................................................................................................... 77
What this report tells you ........................................................................................................................ 77
How to Create the Unpaid Bills Detail Report .................................................... 79
To Create this report ............................................................................................................................... 79
What this report tells you ........................................................................................................................ 79
How to Create the Open Invoices Report ............................................................ 80
To Create this report ............................................................................................................................... 80
What this report tells you ........................................................................................................................ 80
QUICKBOOKS GENERAL INFORMATION SECTION
QuickBooks Keyboard Shortcuts ......................................................................... 82
QuickBooks Resources .......................................................................................... 85
Intuit provides the following types of support: ....................................................................................... 85
Finally, don’t forget, in the QuickBooks Program you have the following tools: .................................. 86
Creating Portable Company Files and Backup File ........................................... 87
What is a Portable File ............................................................................................................................ 87

Procedure for creating a Portable Company File .................................................................................... 87
What is a Backup File ............................................................................................................................. 87
Procedure for creating a Backup Company File ..................................................................................... 87
How to Restore a Backup Company file ................................................................................................. 89

Infocore, Inc.

Understanding Financial Statements
Financial statements (or financial report) are records of the financial activities of a business.
"The purpose for these financial statements is to provide information about the financial
position, performance and changes in financial position of an enterprise that is useful to a wide
range of users in making economic decisions. The financial goal for your business is to yield
high rate of return for your money but in order to maintain this control all companies must start
with a comprehensive record-keeping system (in your case QuickBooks) that produces thorough
accounting records.
For a business, all the relevant financial information, presented in a structured manner and in a
form easy to understand, are called the financial statements. They typically include three basic
financial statements:
1. The Profit & Loss (Income Statement)
2. The Balance Sheet
3. Statement of Cash-Flows

*Profit and Loss Statement which is also referred to as Income Statement provides
information on the company's income, expenses, and profits over a period of time usually one
quarter or one year. The accounts which feed the Profit and Loss Statement provide information
on the operation of the business and measures economic performance.
Profit & Loss
accounts
Income
Sales
Delivery Fees
Interest
Expense
Supplies
Rent
Utilities

*Balance Sheet provides information regarding the company’s financial condition and reports
on a company's assets, liabilities, and ownership equity at a given point in time. The accounts
which feed the Balance Sheet gives the business owner (s) a snapshot of their businesses
financial position and tracks accumulated net wealth.
Balance Sheet
Accounts
Assets
Bank account
Accounts receivable
Equipment
Liability
Accounts payable
Credit Cards
Sales tax payable
Loans
Equity
Capital Investment
Retained Earnings

*Statement of Cash Flows reports on a company's actual flow of cash through your business
and summarizes the operating, investing, and financial activities as they relate to the inflow
and outflow of cash. The Statement of Cash Flow charts a business’ performance over a
specific accounting period of time.
17%
33%
50%
Cash Flows from Financial Activities
Increase (decrease) in cash
Beginning Cash Balance
Net Cash Balance

Understand What Normal Balance Means
Normal balance is the accounting classification of an account. It is part of Double-entry
bookkeeping technique.
Every account has either credit or debit Normal Balance. Therefore in order to:
Increase the value of an account with Normal Balance of credit, one would credit the
account
Increase the value of an account with Normal Balance of debit, one would likewise debit
the account
Using this accounting principle – if someone invests cash into a business, the business records
the financial transaction as a:
Debit to Cash (an increase to cash)
and
Credit to Capital (an increase to capital)
The fundamental accounting equation is the following:
Asset = Liability + Equity
The account on left side (Asset) of this equation has a Normal Balance of debit. The accounts
on right side (Liability + Equity) of this equation have a Normal Balance of credit. The Normal
Balance of all other accounts is derived from their relationship with these three accounts.
Normal Balance of common accounts:
Asset: Debit
Liability: Credit
Shareholder Equity: Credit
Revenue: Credit
Expense: Debit
Retained Earnings : Credit
Dividend: Debit
The double-entry bookkeeping system refers to a set of rules to record financial information. In
our modern accounting system this “double-entry system” is done using debits and credits, and
serves as a kind of error-detection system: if, at any point, the sum of debits does not equal the
corresponding sum of credits, then an error has occurred.
For the accounts to remain in balance, a change in one account must be matched with a change in
another account. These changes are made by debits and credits to the accounts and since the

accounts must always balance, for each transaction there will be a debit made to one or several
accounts and a credit made to one or several accounts. The sum of all debits made in any
transaction must equal the sum of all credits made.
In other words, after posting a series of transactions, the sum of all the accounts with a debit
balance will equal the sum of all the accounts with a credit balance.

Understanding the Importance of the Chart
of Accounts The Chart of Accounts contains a complete list of your business's accounts and their balances.
It is used to track:
How much money your company has;
How much money it owes;
How much money is coming in;
How much is going out.
They include assets like bank accounts, buildings, and money that people owe you; they also
include liabilities like credit cards or loans from banks.
Another category of Balance Sheet Accounts is Equity Accounts. These represent the worth of
your business including any investments the owners have made in the company. Your
company's equity is all of your assets (what you own) minus your liabilities (what you owe).
This is sometimes called the "net worth" of your company.
Types of Accounts in the Chart of Accounts
There are two main types of accounts in the QBs Chart of Accounts:
Balance Sheet Accounts
Income and Expense Accounts
Balance Sheet Accounts
QuickBooks provides ten types of Balance Sheet Accounts to choose from as you create and
add to your chart of accounts. The following table describes each type of Balance Sheet
Account and the transactions you can use it for.
The Balance Sheet Accounts have a register which contains the information. To open any
Balance Sheet Account (except Retained Earnings) Double-Click on it.
Account Type Used to Track
Bank Checking, savings, and money market accounts. Add one bank account for
every account your company has at a bank or other financial institution.
(You can also use this type for petty cash.)
Accounts Transactions related to the customers that owe you money, including

Receivable
(A/R)
invoices, payments, deposits of payments, refunds, credit memos, and
statements. Most companies have only one A/R account.
Other current
asset
Assets that is likely to be converted to cash or used up within one year,
such as petty cash, notes receivable due within a year, prepaid expenses,
and security deposits.
Fixed asset Depreciable assets your company owns that aren't likely to be converted
into cash within a year, such as equipment or furniture.
Other asset Any asset that is neither a current asset nor a fixed asset, such as long-term
notes receivable.
Accounts
payable (A/P)
Transactions related to money you owe, including bills, bill payments, and
any credit you have with vendors. See also current and long-term liability
accounts.
Credit card Credit card purchases, bills, and payments.
Current liability Liabilities that are scheduled to be paid within one year, such as sales tax,
payroll taxes, accrued or deferred salaries, and short-term loans.
Long-term
liability
Liabilities such as loans or mortgages scheduled to be paid over periods
longer than one year.
Equity Owner's equity, including capital investment, drawings, and retained
earnings.
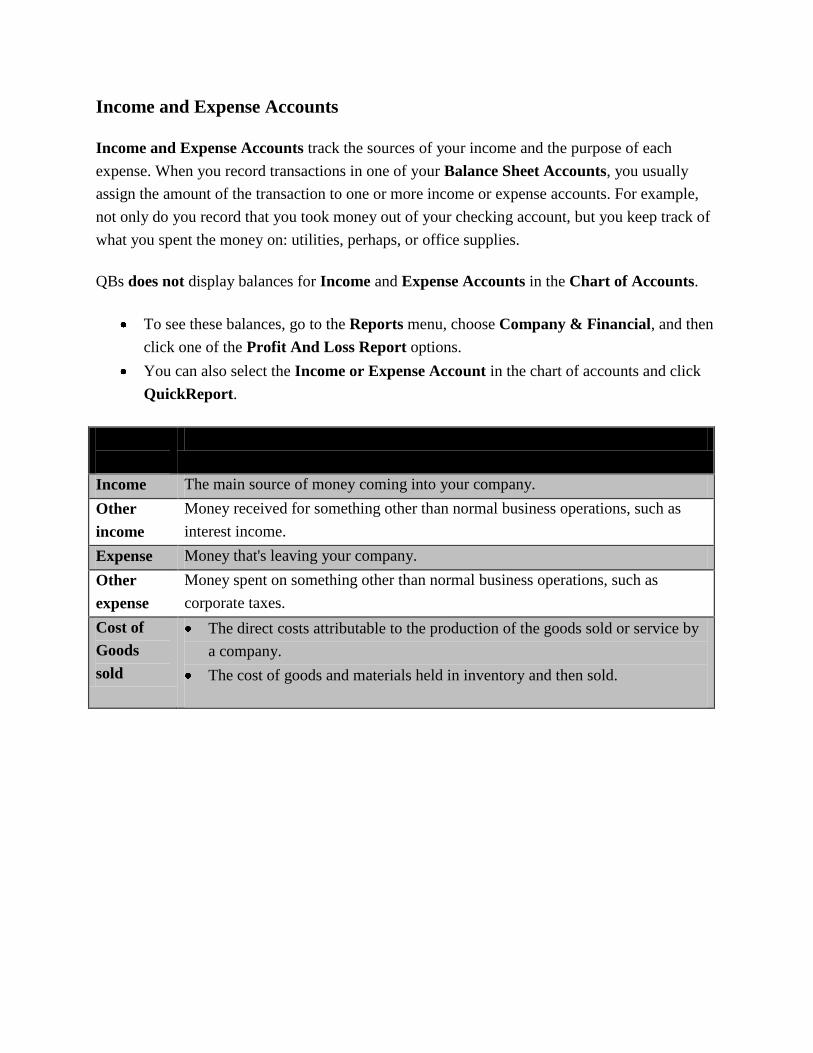
Income and Expense Accounts
Income and Expense Accounts track the sources of your income and the purpose of each
expense. When you record transactions in one of your Balance Sheet Accounts, you usually
assign the amount of the transaction to one or more income or expense accounts. For example,
not only do you record that you took money out of your checking account, but you keep track of
what you spent the money on: utilities, perhaps, or office supplies.
QBs does not display balances for Income and Expense Accounts in the Chart of Accounts.
To see these balances, go to the Reports menu, choose Company & Financial, and then
click one of the Profit And Loss Report options.
You can also select the Income or Expense Account in the chart of accounts and click
QuickReport.
Use this
account
Used to Track
Income The main source of money coming into your company.
Other
income
Money received for something other than normal business operations, such as
interest income.
Expense Money that's leaving your company.
Other
expense
Money spent on something other than normal business operations, such as
corporate taxes.
Cost of
Goods
sold
The direct costs attributable to the production of the goods sold or service by
a company.
The cost of goods and materials held in inventory and then sold.

Prior Month Adjustment Procedure
Use when you need to change an invoice or a bill from a prior month.
Overpayment / Higher Merge Report
Update order in Order Entry System
Create an Invoice in QBs
Use today’s date
Use the original order number as the Invoice number
Use Item “A/R Brokerage Adjustment” or “A/R Mgmt Adjustment” depending on
if it is a brokerage or management order
Be sure to describe what happened in the description field
Create a New Bill in QBs
Use today’s date
Use the original order number as the Ref number
Use expense account 5020 or 5021 depending on if it is a brokerage or management
order
Be sure to describe what happened in the description field
Receive Payment with the new adjusted invoice(s)
Underpayment / Lower Merge Report
Update Order in Order Entry System
Create a Credit Memo in QBs
Use today’s date
Use the original order number as the credit memo number
Use Item “A/R Brokerage Adjustment” or “A/R Mgmt Adjustment” depending on if
it is a brokerage or management order
Be sure to describe what happened in the description field
Apply the credit to the appropriate invoice
Create a Vendor Credit in QBs
Use today’s date
Use the original order number as the Ref number
Use expense account 5020 or 5021 depending on if it is a brokerage or management
order
Be sure to describe what happened in the description field

Receive Payment with the new adjusted invoice(s)
Current Period Adjustment Procedure
Use when you need to change an invoice from the current period.
Update Order in Order Entry System
Edit existing Invoice in QBs
Be sure to describe what happened in the description field
Edit existing Bill in QBs
Be sure to describe what happened in the description field
Receive Payment with the new adjusted invoice(s)

Accounts Receivable Collection Procedure

Accounts Payable Procedure

Infocore, Inc.

Bank Account Reconciliation
In QBs each Bank Account (checking, savings, etc.) contains a record of the all transactions
such as; checks written, receipts from customers, etc. At the same time the bank or financial
institution also creates a record of the company's account when it processes these transactions.
Soon after each month’s closing date the bank usually mails a bank statement which lists the
activity in the bank account during the recent month as well as the balance in the bank account.
When you receive this statement, it must be verified that the amounts on the bank statement are
consistent with the amounts in the QBs Bank Account and vice versa. This process of
confirming the amounts is referred to as reconciling the bank statement. The benefit of
reconciling the bank statement is knowing that the amount of Cash reported in QBs by the
company is consistent with the amount of cash shown in the bank's records.
Therefore, reconciling your account means “matching” the balances for your paper statement
and QBs account.
Important reconciliation features in QuickBooks
Saved reports are created in PDF (Portable Document Format) so that they can be emailed
and viewed easily
Each time you reconcile a new statement it replaces the prior report (depending on the
version of QBs).
When your Accounts Do Not Match
It is important to take the time when performing reconciliations to ensure there are no errors. As
you clear each transaction, make sure the amounts are exactly the same.
Once you have cleared transactions through the reconciliation process, it is
IMPORTANT TO NOT CHANGE THEM. Changes may alter your starting balance
for the next reconciliation. If you find yourself in such a situation, you can run a
Reconciliation Discrepancy report to find the problem(s)
Problem Resolution Process
Looks for a transaction that is exactly the same amount as the difference and ensure
whether it should be cleared
Determine whether you are missing a deposit or payment by looking at the difference and
ensure whether it should be cleared
Determine Whether you are missing a deposit or payment by looking at the totals of each
on the bank statements and the QB reconciliation window

Compare the number of transactions on the bank statement to the number of cleared
transactions in QBs
Verify the individual amount of each transaction on the bank statement and compare it to
the amounts you have in QBs
Determine whether it is a bank error (the bank may have recorded a transaction for the
wrong amount)
It is a bank error, you can have QB create an adjustment transaction, notify the bank, and
then reverse the adjustment transaction after the bank corrects the error.
Run a Reconciliation Discrepancy report to see if any changes were made to previously
cleared transactions.
Performing Account Reconciliation
1. Go to the Banking menu and click Reconcile to open the Begin Reconciliation window.
2. In the Account field, enter or select the account you want to reconcile.
3. In the Statement Date field, enter the date of the bank statement you are trying to reconcile.
4. Compare the opening balance amount shown on your statement to the amount shown in the
Beginning Balance field.
5. Find the ending balance on your statement and enter it in the Ending Balance field.
6. Enter any Service Charges (choose Bank Service Charges for account) or Interest Earned
(choose Interest Income for account) in the fields provided.
7. Click Continue to open the Reconcile window for the account you've chosen.
Click in the “Hide Transactions after the statement’s ending date” box
8. When you find a transaction in the Reconcile window that matches a transaction on the
statement, click the transaction to mark it as cleared.

For each transaction you select, verify that the amount in the Reconcile window
matches the amount shown on your statement.
9. When you've finished selecting the transactions, look at the DIFFERENCE LINE to see if it
is zero which is located in the bottom right corner of the Reconcile window:
If the amount is 0.00. Click Reconcile Now. You've reconciled the account with
the statement. At this point, you can have QBs print a reconciliation report.
If the amount is not zero. Your account does not balance for the period of time
covered by the statement, and you need to correct the difference
If there is a difference, look to see if there is a transaction listed above for the
same amount, and Click once to remove the checkmark to the left of the date
and return to the register to correct this transaction. (see below for ways to
resolve amounts which do not match)
10. After a successful reconcile clicking the Reconciliation Now button.
The Select Reconciliation Report window is displayed, select
the Both option
Then click Print to print the report and staple it to the bank
statement
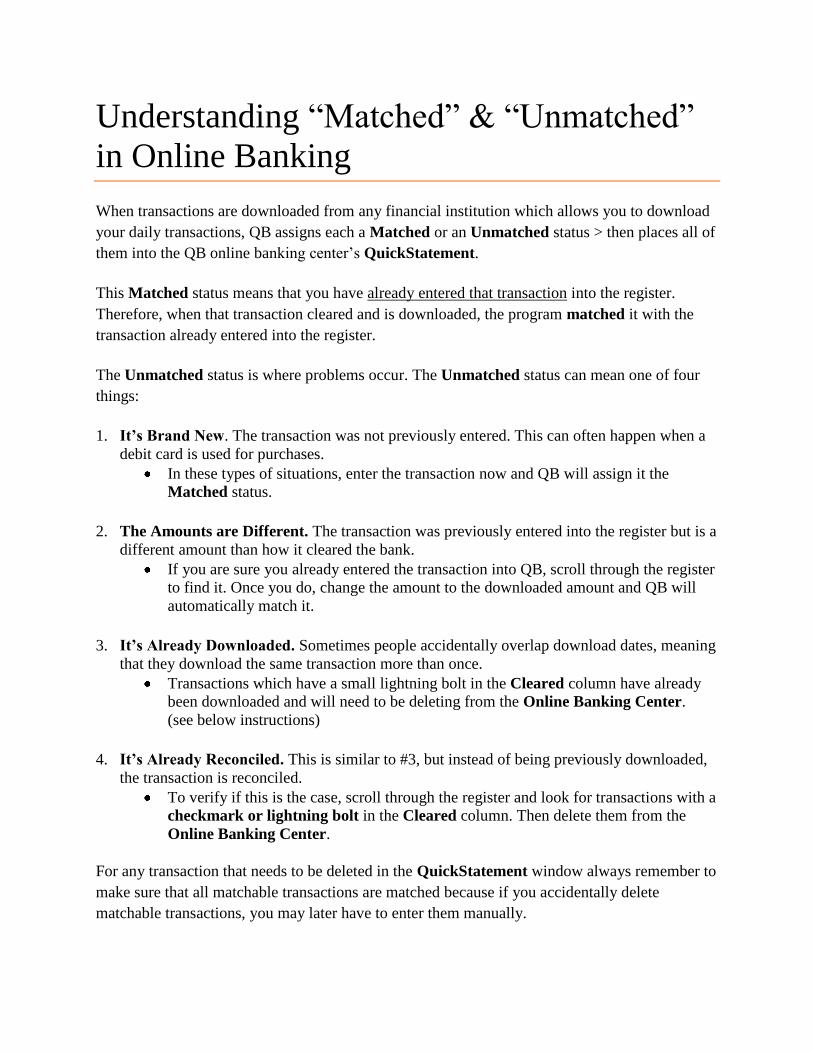
Understanding “Matched” & “Unmatched”
in Online Banking
When transactions are downloaded from any financial institution which allows you to download
your daily transactions, QB assigns each a Matched or an Unmatched status > then places all of
them into the QB online banking center’s QuickStatement.
This Matched status means that you have already entered that transaction into the register.
Therefore, when that transaction cleared and is downloaded, the program matched it with the
transaction already entered into the register.
The Unmatched status is where problems occur. The Unmatched status can mean one of four
things:
1. It’s Brand New. The transaction was not previously entered. This can often happen when a
debit card is used for purchases.
In these types of situations, enter the transaction now and QB will assign it the
Matched status.
2. The Amounts are Different. The transaction was previously entered into the register but is a
different amount than how it cleared the bank.
If you are sure you already entered the transaction into QB, scroll through the register
to find it. Once you do, change the amount to the downloaded amount and QB will
automatically match it.
3. It’s Already Downloaded. Sometimes people accidentally overlap download dates, meaning
that they download the same transaction more than once.
Transactions which have a small lightning bolt in the Cleared column have already
been downloaded and will need to be deleting from the Online Banking Center.
(see below instructions)
4. It’s Already Reconciled. This is similar to #3, but instead of being previously downloaded,
the transaction is reconciled.
To verify if this is the case, scroll through the register and look for transactions with a
checkmark or lightning bolt in the Cleared column. Then delete them from the
Online Banking Center.
For any transaction that needs to be deleted in the QuickStatement window always remember to
make sure that all matchable transactions are matched because if you accidentally delete
matchable transactions, you may later have to enter them manually.

5. Once all matchable transactions are matched, click Done.
6. QBs will prompt you with the Not Finished Matching window. Click Yes. You are now at
the Online Banking Center main page.
7. To delete the QuickStatement click the Delete button located near the lower right corner.

Online Banking Tips
The following tips will help you use QBs Online Banking feature more efficiency.
1. Backup Before downloading. While it may not happen a great deal, sometimes when you
bring over the transactions from your institution (banking/credit card company) not
everything goes as planned. Then if something were you happen, you can simply restore the
backup company and the file will be as it was before you downloaded.
2. Download New Transactions before Reconciling. QBs is set up to only download
transactions that have not been reconciled, even if it is the same transactions.
Only have one (1) QBs Online Banking Window Open. Unfortunately, QBs will allow
more than one banking window open at the same time which can make it very confusing
when you add any new transactions. To view what is open access the Open Window
List. To open this list:
Go to View > then Open Window List
The list of open windows will then be visible on the left side of the Home
window
Select each window and click on the black “X” to close
3. Understand Your Connections. In QBs there are two (2) ways to download transactions:
The first way is through a “Web-connect.” When using this type of connection the
internal QB web browser opens and takes you to the financial institution’s website. Once
there > sign into your account, and navigate to the place where you can download
transactions.
The second way is a Direct Connection. (typically your financial institution will charge
for this service) In this way QB asks for your password, then downloads transaction
directly, without opening the WB web browser.
4. Correct Dates for Download. Sometimes your financial institution may not keep track of
the last date you downloaded. If yours doesn’t you will have to try to remember the last time
you downloaded. Always double check that you do not accidentally overlap dates or you
will be downloading transactions twice.

5. Be Careful about Deleting the QuickStatement. “QuickStatement” refers to the
transactions that have been downloaded but not yet entered into QB. Sometimes, the
QuickStatement gets filled with unmatchable transactions and you can simply delete it.
However, before deleting it, make sure that every transaction that can be matched, is
matched. If matchable transaction remain on the deleted QuickStatement you will have to
enter them manually since many times your financial institution will not download them a
second time.

Transferring Funds
Most people have transferred money between their bank accounts. QuickBooks has a feature
that allows you to record this transfer seamlessly between accounts.
Since you are transferring funds between two asset accounts, you want to debit the account that
is increasing and credit the account that is decreasing. Such as transferring funds from the
Savings is a debit and into Checking is a credit.
Transfer Funds between Accounts
1. Choose Banking then Transfer Funds from the menu bar
2. Select the date current in the field and Enter correct date
3. Choose the Account you are transferring the account from
4. Choose the Account you are transferring the account to
5. Tab TAB key and enter the amount
6. Click Save & Close to record the transfer and close the window.

Memorizing Transactions
Set-up recurring transactions to record at regular intervals over a period of time reduces errors,
increases efficiency, and accuracy. This process is achieved by having QBs remind you or just
add the transaction to a list and it’s ready for entry with one mouse click at any time. This
recurring transaction that has been set-up in QBs is called a memorized transaction.
Here are examples of recurring transactions that will save you time to set up as memorized transactions in QB:
Recurring outgoing cash flows
Loan or lease payments Recurring bills Recurring checks All monthly bills Monthly electronic withdrawals from checking such as internet access payments or
business insurance installment payments Rent
Recurring sales
Recurring sales transactions Rent collections Monthly installments payments due from customers
Recurring purchases orders
Purchase Orders that are repeated with many of the same items
Recurring journal entries
Recurring Monthly depreciation journal entries Allocation of overhead to other departments

Instructions for Memorizing All Types of Transactions
1. Click within the transaction you wish to memorize.
2. Choose Edit then Memorize the type transaction you have chosen from the menu drop-
down.
3. Enter the information regarding how you want QBs to deal with the memorized transaction.
4. Click OK.
How to use a Memorized Transaction
1. Click Edit from the menu bar then Memorized List
2. Click on the memorized transactions from the list menu
3. Change transaction date, number, etc. (such as Check #) and click Save and Close button
Transactions which cannot be memorized include payroll checks, time records, bill payments,
deposits of payments.

Instructions for Adding an Account to the
Chart of Accounts
1. From the Home window in the Company center click Chart of Accounts icon.
2. Click Account at the bottom of the list and click New.
3. Click the radio button for the type of account you want to add. Information about the
account type displays in the right side of the window.
4. When you are ready to add the new account, click Continue.

5. In the Account Name field, enter the Name of the account.
6. If you use account numbers, enter the account's number in the Number field.
(Optional) Enter a short description of the account in the Description field.
7. Click Next to save the account and enter another one. Or Click OK to save the account and
close the window.
For Bank or Credit Card Accounts it is a good idea to enter the number for this
account.
If this account is a Subaccount, select the Subaccount of checkbox and then click the
drop-down arrow to select the account under which this account will be added.
For Bank Accounts you will want to enter the opening balance.
Click the Enter Opening Balance button and enter the amount for the account.
For Balance Sheet Accounts it is best that you enter an opening balance based on the
account's balance as of your QBs start date. If you're not sure of the balance, you can leave
the field blank and enter the information later.
If you are working with a CPA or Tax Accountant you may want to fill out the Tax line.
How?
Click the Tax Line drop-down list and choose the appropriate tax line.

Instructions for Delete, Edit, or make an
Account Inactive:
1. Select Account
2. Click Account at the bottom of the list and click desired option. Delete, Edit or Make
Account Inactive

About Item Types
In QuickBooks, an item is anything that your company buys, sells, or resells in the course of
business, such as products, shipping and handling charges, discounts, and sales tax. You can
think of an item as something that shows up as a line on an invoice or other sales form.
Items help you fill out the line item area of a sales or purchase form quickly. When you choose
an item from your Item List, QuickBooks fills in a description of the line item and calculates its
amount for you.
QuickBooks provides 11 different types of items. Some—such as the service item or the
inventory part item—help you record the services and products your business sells. Others—
such as the subtotal item or discount item—are used to perform calculations on the amounts in a
sale.

Instructions for Adding a New Item
To do this task
1. Go to the Company center and click Item & Services icon.
2. Click Item at the bottom of the list and click New.
3. In the New Item window, click the Type drop-down arrow and then click Service.
You cannot change a service item to another item type.
4. Enter an item name or number.
What you enter here appears on the drop-down list of items when you are filling out an
invoice, sales form or purchase order. Enter a name or number that will help you
distinguish this item from all the others on the list.
If this item is a subitem of an existing service item, select the Subitem of checkbox and specify
the parent item's name.
5. Click TAB until you move into the Description area and enter in a SHORT description
of the service.
This description will display on the sales and purchase forms. If the description varies,
you can leave this field blank, set up a separate item for each possible description, or
enter the most common description and change it on the sales or purchase forms as
necessary.
6. Enter a rate for the service.

7. If it is a TAXABLE Service, use the drop-down arrow to choose between the following
terms:
8. Then ACCOUNT section and choose the appropriate INCOME ACCOUNT where the
revenue will be posted CHART OF ACCOUNTS.
Items handle the behind-the-scenes accounting. When you create an item for a service or
product you sell, you associate it with an income account. When the item is used on a form or
register, it posts an entry to that income account and another entry to Accounts Receivable or
another appropriate account.

Instructions for Adding a New Customer/Job
In QBs, the term "customer" means anyone who pays you for your services or products.
You can add new customers to the list at any time. QB uses the list to hold information about
the people and companies to whom you sell your products and services.
1. From the Customer Center click on Customers button
2. Then click on the New Customer & Jobs button as seen below:
3. This screen is used to:
Add new customers to your Customer: Job list
To change information about customers who are already on the list.
While most of the fields should be obvious you need to make
sure the information entered is correct and complete.
4. Use the Customer Name box to give the customer a
name that you will recognize when recording
transactions making sure to:
Correctly spell their name
Put last name first unless you want to identify them
by their company’s name
Capitalize the first letter

It is best to ignore the Opening Balance and As Of boxes.
If you do this, you are essentially setting up the debit part of an entry without the
corresponding credit part and will have to perform several journal entries in order to fix
your incomplete bookkeeping.
Additional Information Tab
It is best to supply as much additional information you can about your customers. If you
click the Additional Info tab, QB displays several other
boxes that you can use to collect and store customer
information.
Type drop-down list box to categorize a customer as fitting
into a particular "customer type".
Once you have assigned a customer type to each customer,
you can create reports that provide useful information about
the customers you serve. For example, if you have
categorized your customers by market segment, you can create a separate sales report for each
segment such as residential, commercial, industrial, etc.
Terms drop-down list box to identify the customer's default payment terms such as Due Upon
Receipt or Net 30.
Rep drop-down list box identifies the customer's default sales representatives.
Preferred Send Method is used to preset how you want to send invoices, statements, or
estimates to this customer, including e-mail or Fax.
Resale Number is entered indicating that you don't charge sales tax on items that a customer
buys for resale. However, be cautioned that this field is for information only; you will still need
to suppress sales taxes in the ordering process.
You can also specify a default price level, and even click the Define Fields button to specify
additional fields that you want to collect and report for the customer.
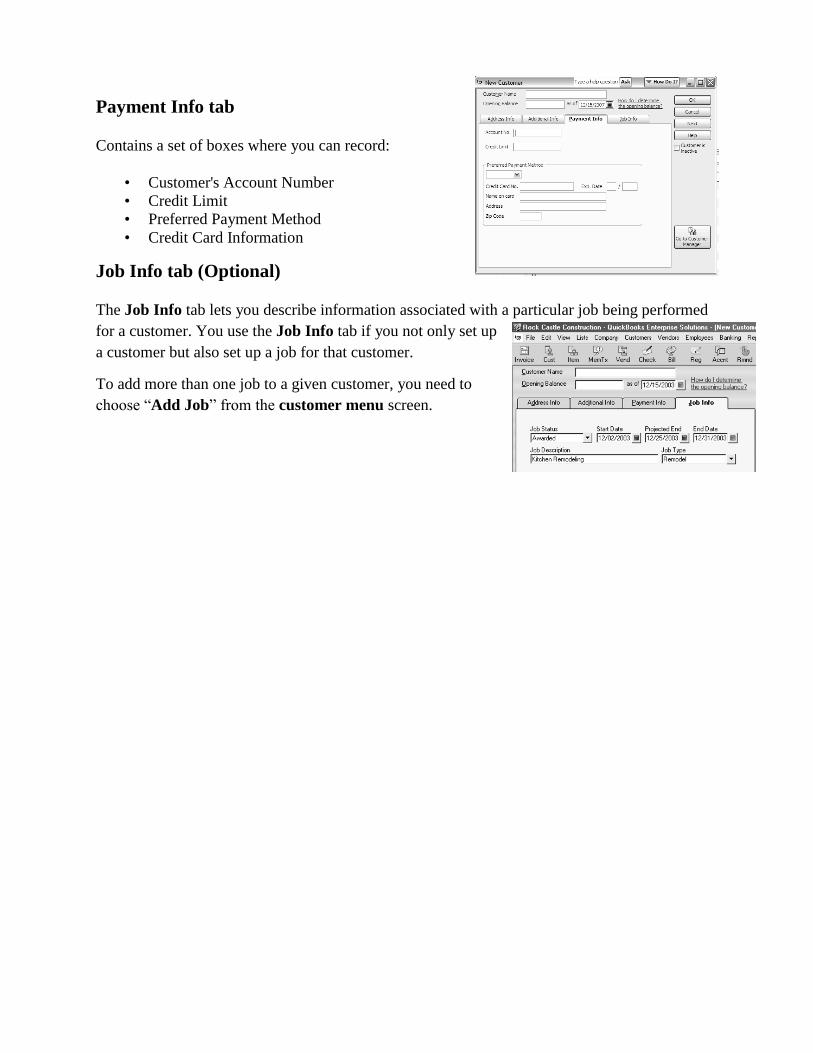
Payment Info tab
Contains a set of boxes where you can record:
• Customer's Account Number
• Credit Limit
• Preferred Payment Method
• Credit Card Information
Job Info tab (Optional)
The Job Info tab lets you describe information associated with a particular job being performed
for a customer. You use the Job Info tab if you not only set up
a customer but also set up a job for that customer.
To add more than one job to a given customer, you need to
choose “Add Job” from the customer menu screen.

Instructions for Creating Invoices
To do this task
1. Go to the Customer center and click Invoices icon.
2. Click the drop-down arrow at the top of the invoice from and choose client’s
name from your Customer & Job List. Then, tap Tab 3 times to move to the
date field.
Notice that the customer’s address and terms fill in for you from the underlying list.
3. Choose the correct date (reconfirm terms).
When you type in a date you do not need to include the slash marks, QBs will
format the date properly for you once you tab to the next field.
4. Fill in the item(s) name for which you wish to bill your customer.
5. Type the quantity for each item entered.
6. Choose or type a customer message, if desired.
7. Then decide how you want to print each invoice such as one-at-a-time for in batches from
File menu, click Print Forms, and then click the type of form you want to print.
8. In the Select (forms) to Print window, select the items you want to print.
9. Click OK
10. Review your print options, and make any necessary changes to them.
11. Click Print.

Be sure to remove
the “To be
printed” option if
you are printing
invoice one-at-a-
time

Instructions for Creating Statements
To do this task
1. Choose > Create Statements from the menu bar or from the
Customer Center click on the Statements icon.
2. Choose the date range for which you wish to create statements.
3. Choose the customer(s) for whom you wish to create statements.
4. Choose any additional options, such as a custom template and
whether to create statements with zero balances.
5. Click Preview to view the statement(s) to double check they are
correct.
6. Click Print or Email to deliver the statement(s) to the
customer(s).
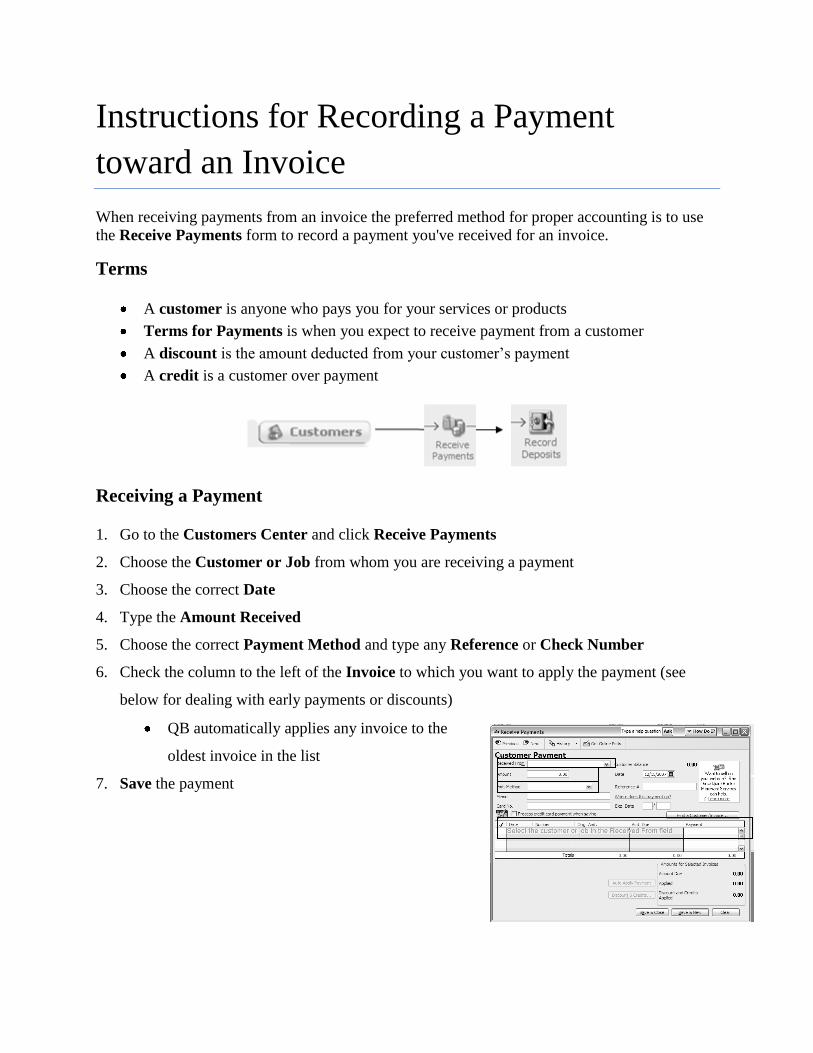
Instructions for Recording a Payment
toward an Invoice
When receiving payments from an invoice the preferred method for proper accounting is to use
the Receive Payments form to record a payment you've received for an invoice.
Terms
A customer is anyone who pays you for your services or products
Terms for Payments is when you expect to receive payment from a customer
A discount is the amount deducted from your customer’s payment
A credit is a customer over payment
Receiving a Payment
1. Go to the Customers Center and click Receive Payments
2. Choose the Customer or Job from whom you are receiving a payment
3. Choose the correct Date
4. Type the Amount Received
5. Choose the correct Payment Method and type any Reference or Check Number
6. Check the column to the left of the Invoice to which you want to apply the payment (see
below for dealing with early payments or discounts)
QB automatically applies any invoice to the
oldest invoice in the list
7. Save the payment

Where this Payment Goes in the Program
When you receive a payment they are automatically grouped together in the Record Deposits
account so that they are available to be deposited later. (sometimes known as Undeposited
Funds)
1. To make a Deposit
2. Go to the Recording Deposits icon in the Banking Center
3. In the Payment to Deposit window
Select the payment(s) that you want to deposit
Verify the date and the list of payments to deposit
4. Click OK button
Double check the correct Bank account to which you deposited the funds from the
Deposit To drop-down list
BE SURE TO ALWAYS GROUP THE PAYMENTS TOGETHER AS YOU
HAVE DEPOSITED THEM IN YOUR BANK!!

Applying a Discount for Early Customer Payment
Sometimes in order to speed-up payments a business will offer a discount to customers on
payments that are received on or before the payment due date. In addition, if payments are
received after the specified discount date, you may choose to accept the discounted amount or
ask the customer to pay the full amount.
A discount is a shorthand way of expressing when you expect to receive payment from a
customer. Terms show the number of days (or date) by which payment is due and can include a
discount for early payment.
Example: 1% 10 Net 30 means payment due in 30 days, 1% discount if paid within 10 days.
1. From the Receive Payment window click Discount & Credits button to apply a discount
for early payment for customers whose payment terms include a discount for payment
before the due date
QBs automatically calculates a discount amount based on your payment terms with the
customer and the payment date however, the amount of the discount cannot be higher
than the original invoice
2. Enter the Name of the Expense Account you use to track discounts such as Discount
Expense account then click Done to record the discount and Save the payment (can also
be tracked in an Income Account)

Using a Customer Credit as Payment
From a previously created a Credit Memo for a customer, you can apply the amount of the
credit memo to the unpaid invoices and billing statements for that customer. QBs holds any
credit amount in accounts receivable until you apply it to an invoice or issue a refund check.
1. From the Receive Payment you will notice on the left side of this window that the
customer has a credit available. Then click Discount & Credits button to apply the credit
toward the amount due.
The credit window will appear as shown in the Discount and Credits window below
2. Click Done which saves the credit

Instructions for Adding a New Vendor
In QBs New Vendors can be added at any time. When you add a vendor to QB there are two
ways to add vendors.
1. First, you can do so by selecting Add New when entering a bill or entering a payment
directly into your check register
2. Second, you can do so from the Vendor Center by clicking on New
Vendor button
Either way, it is important that you enter in as much information as possible so that you can
save time when entering the bills as well as manage your Accounts Payable properly. This
information includes some of the following:
Name
Address
Telephone Number
Payment Terms
Vendor Type
Account Number

Instructions for Completing the New Vendor
Window
From The Address Tab You Should Add:
The Vendor Name in the New Vendor window
makes sure to correctly spell their name.
o It is best to leave the Opening Balance
blank because it will not allow you to
have any of the historical information
related to the amount in QB.
Then tap the TAB key to move forward and fill
out the Company Name, First/Last Name,
Address, Contact, Phone Number information.
On The Additional Info Tab You Can Add:
Account Number
Billing Rate Level (use this if you will bill the expenses
associated with this vendor back to your customers)
Vendor Type (use this if you want to categorize your
vendors in a way that is meaningful to you - such as be
geographic location or industry)
Payment Terms (A shorthand way of expressing when a
vendor expects to receive payment from you. Terms
show the number of days (or date) by which payment is
due and can include a discount for early payment)
Credit limit (set by the vendor)
Tax ID (If the vendor is eligible for a 1099, then it is important to check the "vendor
eligible for 1099" box and to fill out their Tax ID and complete address information)
On The Account Prefill Tab:
You can prefill the expense accounts for payments to vendors,
making it quicker and easier to accurately track expenses.
For each vendor, you can choose up to three expense
accounts that you typically use when you pay that
vendor. Plus, any pre-filled information can always be
overridden at the time of payment if the need arises.

When you have finished entering information, click Next to add another Vendor or
OK finish.
Finally, you can always edit vendors in QBs. Therefore, if you don't have all the information you
want to add in front of you (such as the Tax ID for a vendor eligible for a 1099), add the vendor
anyway and make a note to yourself to add the additional info later.

Understand Bill Paying Process
With QBs, you can pay your vendors by check, credit card, electronic funds transfer, or in cash
through a Petty Cash Account.
In order to track your bills and bill payments (preferred method for proper accounting) it is
paramount that you to use the Pay Bills process. The pay bills process is as follows:
Terms
A vendor is anyone you pay to run your business
Payment Terms is the date payments are due
Account is the expense account on the Chart of Accounts
A discount is an amount deducted from your bill by a vendor
A credit (or bill credit) is money due to you from a vendor for overpayment of a
previous bill, return of items, or any other reason
Understanding Payment Terms
In QBs you can specify Payment Terms when you set up the vendor's
record in order to properly pay your vendors. QB uses the terms to
determine:
Bill due date
Date you must pay by, to receive a discount for early payment
Example: 2% 10 Net 30 means "2% discount if paid within 10 days, with the net (or total) amount due in 30 days"
if the terms are standard terms, or "2% discount if paid by the 10th of the month, with the net amount due by the
30th of the month" if the terms are date-driven terms.

Instructions for Paying Bills
In order to track your bills and bill payments (preferred method for proper accounting) it is
paramount that you to use the Pay Bills process. The pay bills process is as follows:
Terms
A vendor is anyone you pay to run your business
Payment Terms is the date payments are due
Account is the expense account on the Chart of Accounts
A discount is an amount deducted from your bill by a vendor
A credit (or bill credit) is money due to you from a vendor for overpayment of a
previous bill, return of items, or any other reason
Understanding Payment Terms
In QB you can specify Payment Terms when you set up the vendor's record
in order to properly pay your vendors. QB uses the terms to determine:
Bill due date
Date you must pay by, to receive a discount for early payment
Example: 2% 10 Net 30 means "2% discount if paid within 10 days, with the net (or total) amount due in 30 days" if the terms are standard
terms, or "2% discount if paid by the 10th of the month, with the net amount due by the 30th of the month" if the terms are date-driven terms.
From the Vendors Center
Enter the Bill—using the Enter Bills form type all pertinent information related to the
vendor
o Select a Vendor
o Enter the Amount of the bill
o Ensure that the Payment Terms are correct per bill or vendor (should be set-up at
the time you create a new vendor or anytime you pay a bill)
o Expense the bill, making sure to select the correct account(s) on the Expense tab
o If desired, select a Customer: Job to whom you wish to pass the expense
o Click OK

Pay a Bill—Open the Pay Bills window
o Select the bill (s) waiting to be paid
o Be sure to double check the Payment Account and Payment Method for type of
payment (checks, credit cards, Electronic Funds Transfer)
Finally, if the Payment Account/Method is Checking go to File > Print Forms >
Checks
Important technical information: If you enter a bill in the Enter Bills window, always use
Pay Bills window to pay it.
If you're sure you don't need to track your bills and bill payments, you can use the:
Write Checks or
Enter Credit Card Charges window
Just make sure to not mix your methods for a given bill
Be sure to double-
check that the Check #
is correct!!

Instructions for Appling Discounts or
Credits to Bills You Pay
Applying a discount to a bill payment
Enter the bill as normal and complete the payment information but don't record the
payment yet
Select and highlight the bill for which you want to apply a discount
Click the Set Discount button
From the Discount and Credits window choose the Discount Account where you
track income from discounts
Click the Done button.
Click the Pay Selected Bills button
Applying credits to a bill payment
Enter the bill as normal and complete the payment information but don't record the
payment yet
Select and highlight the bill to which you want to apply a credit
Click the Set Credits button
In the Credits pane, select each credit waiting to be used for this bill
Click the Done button
Finish paying the bill in the Pay Bills window

Using Prepaid Accounts
A type of asset that arises on a Balance Sheet as a result of business making payments for goods
and services to be received in the near future. While prepaid expenses are initially recorded as
assets, their value is expensed over time as the benefit is received onto the Profit and Loss,
because unlike conventional expenses, the business will receive something of value in the near
future.
Create the Prepaid Account
1. Click the Chart of Account task icon in the Company Center
2. Click the Account menu button and choose New
3. Click the radio button and select Other Current Asset for the type of account
4. Click Continue.
5. Click Save and Close to record the new account
6. Close the Chart of Accounts window
7. Then, enter Bill > pay the Bill > and Write Check (or use Credit Card) and pay total amount
due
Typically when you write the check the Accounts are split between the Prepaid and
Expense Accounts (as see below)

8. Save and close
Record Next Month’s Insurance Expense
9. Choose Chart of Account from Company Center
10. Double-click account Prepaid Insurance (to open register)
11. From this Register enter in:
Next Month’s Date
Monthly Amount Due
Insurance Expense for the account
12. From this Register enter in:
13. Click Record at the bottom right of this register window
Memorize the Transaction
14. Click anywhere within the two lines of the transaction you just recorded
15. Choose Edit > Memorize General Journal form the menu bar
16. Enter name of memorized transaction
17. Choose radio button for:
How you want to be reminded
Frequency
Next Date, etc.

Click OK to record the memorized transaction
Then, close the Prepaid Insurance account register

Using Loan Manager
In order to track long-term liability or current liability accounts it is best to use the Loan
Manager which tracks principle and interest payments with in QBs.
Set-Up Loan Manager
18. Choose Bank then Loan Manager from the menu bar
19. Click the Add a Loan Button
20. In the Account Name area, choose the correct Account
21. Tap TAB and choose the Lender from the Vendor List
22. Tap TAB and type the Origination Date
23. Tap TAB and type in the Terms of the loan
24. Click the Next button
25. Type in the Due Date of Next Payment
26. Tap TAB and in the Payment Account area enter in payment amount
27. Click the Next button
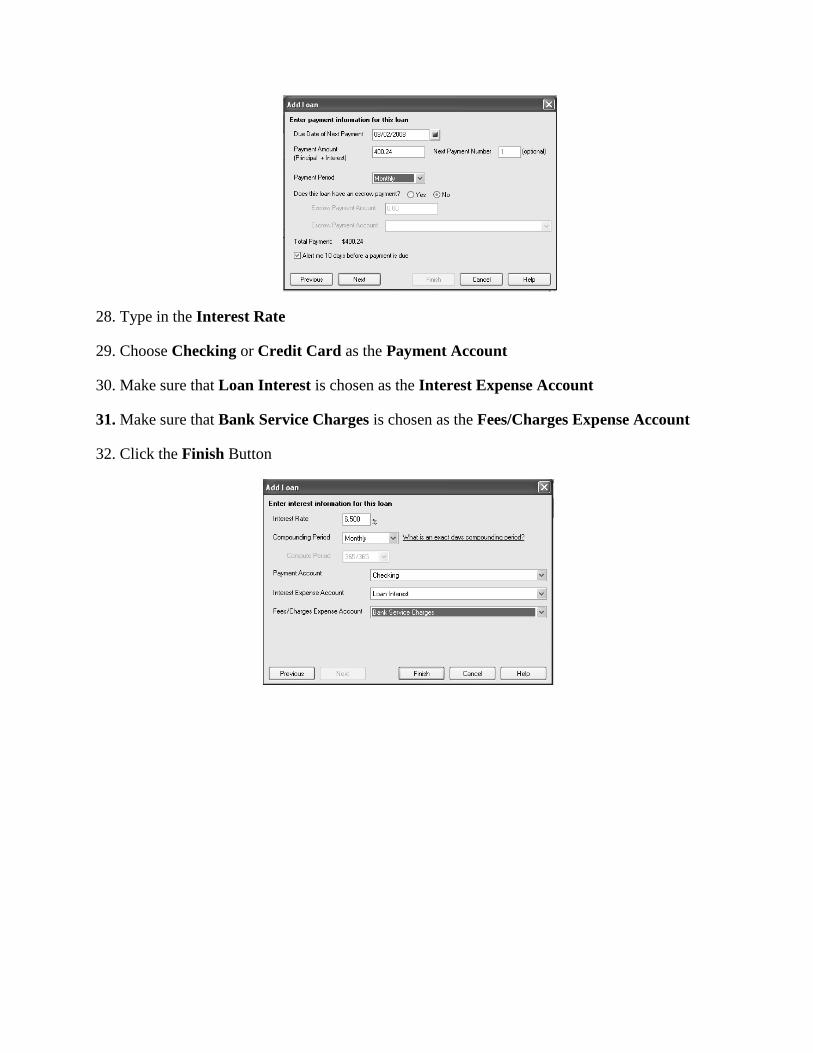
28. Type in the Interest Rate
29. Choose Checking or Credit Card as the Payment Account
30. Make sure that Loan Interest is chosen as the Interest Expense Account
31. Make sure that Bank Service Charges is chosen as the Fees/Charges Expense Account
32. Click the Finish Button

Setting Up and Dealing with Long Term
Liabilities
Create the Long Term Liability Account
1. Choose Chart of Accounts from Company Center
2. Click the Account menu button and choose New
3. Choose Other Account Types option
4. Choose Long Term Liability from the drop-down list
5. Click Continue
6. Type the Account number and the name of the new account
7. Click Save & Close
Enter the Funds for the Loan
1. Choose Chart of Accounts from Company Center
2. Double-click the Long Term Liability account for which you wish to enter the funds
3. Enter the Date for the transaction
4. Enter the Amount of the funds
5. Choose the Original Costs subaccount of the Fixed Asset as the account to debit
6. Click Record

Writing Off Bad Debt In QuickBooks, you can deal with writing off money owed as bad
debt in either of two ways:
1. You can treat it as a discount (your sales tax liability will not be affected)
2. You can also use a credit memo (your sales tax liability will be affected). This is the
recommended procedure unless the business has ready paid the Board of Equalization).
Regardless of the method, you will need to create an expense account in which to direct
the bad debt.
Treating Bad Debt as a Discount
In order to treat bad debt as a discount, you would enter it as a discount in the Receive Payment
window. Make sure, though, that you use the proper expense account for the bad debt (i.e., Bad
Debt Expense). If you receive a partial payment from a customer, you can also choose to “Write
Off the extra amount” in the Receive payments window if you do not expect to ever receive the
remaining balance.
Using a Credit Memo to Write Off a Bad Debt
In this method, you will create a credit memo in order to write off a bad debt. When you choose
this method, you will use an “OTHER CHARGE” item to “route” the bad debt to the appropriate
expense account (which will be debited), and Accounts Receivable will be credited. You can
include both taxable and non-taxable bad debts on a single credit memo. You will finish the
procedure by applying the credit memo to the original invoice.

Create New Expense Account in Chart of Accounts
1. Click on Chart of Accounts icon from Company Center
2. Click on Account button on bottom left
3. Choose Expense as the account type, and then click Continue
4. Tap TAB 2X – and type Bad Debt Expense
5. Click Save & Close
How to create the Bad Debt Item
1. Click the Items & Services Link in the Company Center of the Home Window
2. Click the Item Menu icon and choose NEW
3. Choose Other Charge as the type
4. Tap TAB and then type Bad Debt
5. Tap TAB and type amount of Bad Debt or leave it blank so you can in exact amount due by
Customer
6. Tap TAB and then type “n” to choose Non as the Tax Code
7. Choose Bad Debt Expense as the account
8. Click OK
Creating the Credit Memo
1. Click the Refunds & Credits link in the Customers area of the Home window
2. Choose the correct customer from the Customer: Job field

3. Tap TAB, and type “BD1” as the Credit No.
4. Click to remove the checkmark from the “To Be Printed Option”
5. Click in the Item column, type “b” to choose Bad Debt, and then tap TAB
QuickBooks displays a warning that the Bad Debt Write-Off Item is directed to an expense
account. In this case it is appropriate because a bad debt is an expense.
6. Click OK to dismiss the warning.
7. Click Save & Close
8. Choose the APPLY TO AN INVOICE option to apply the credit to an invoice as shown
below, and then click OK
9. Click done to apply the credit to all the selected invoices.

Accounting for Assets
Purpose
This policy establishes the fundamental guidelines and practices for properly accounting and
reporting assets on the Infocore’s or “Company” Balance Sheet. An asset is an element of the
financial statements constituting economic resources as of a certain date, and expected to benefit
future operations i.e. land, buildings, work-in-process, and receivables.
Assets are recorded on the Company’s Balance Sheet using the accrual basis of accounting.
Increases in Assets are recorded as debits.
Assets represent items of value that the Company owns or controls. Assets have three primary
characteristics:
They are an economic resource expected to provide future benefits to the Business.
The Company will obtain that benefit and maintain control over the asset.
The event giving rise to the Company’s right to control of the asset has already occurred.
It is important for the Company to maintain a series of internal control which will help protect
their investment. This control can be in many forms such as an internal control checklists which
can be review on a regular basis.
Division of Duties
In most companies, the person responsible for recording fixed assets does not make general
ledger entries. This person should on a regular basis:
Reconciliation of the Fixed Asset detail accounts with the fixed asset control accounts and
making entries as needed
Will assign a Property Custodian to be responsible for tagging fixed assets
o Including locating any missing fixed assets
Will be the only person authorized to make capital asset purchases
Authorized to dispose of any fixed asset
Responsibilities for the Property Custodians are:
To notifying the President whenever fixed assets are acquired lost, destroyed, stolen or
disposed of
Identify and report to the President any property which is useable but not needed, or
which should be disposed of
Assist in taking physical inventories
Individual employees are responsible for:
The proper use, care and protection of company property ensuring that company property
is used only for the conduct of official company business
Reporting any suspected fraud, theft, or embezzlement

Asset Categorization
Assets are classified into three groups:
Fixed Assets cannot be converted into cash easily in fact you typically, you do not want
to convert them into cash unless you no longer need them, replace them with better
equipment or larger building. Examples of Fixed Assets are buildings, computers, an
automobile or truck that is used for the business, furniture & fixtures
Other Current Assets are anything that can be converted into cash within a 12 month
period such as cash in checking account, Accounts Receivable and prepaid expenses
(insurance)
Long Term Assets consists of other items that are not classified as a current/fixed asset
which are considered long-term investments and therefore not intended to be converted to
cash in a short-term
It is suggested that any asset belong to the Company be organized on the Company’s Balance
Sheet in descending order of liquidity.
Capitalization Policy
The Company will capitalize assets which have an expected useful life of more than one year and
a value of $1,000.00 or more. Exceptions to this include certain office equipment.
Expenditures on assets must be capitalized (amounts added to the carrying amount of the asset)
when it improves the condition of the asset beyond its originally assessed standard of
performance or capacity. This can occur through an increase in the annual service potential
provided by the asset or increasing the useful life of the asset.
Expenditures that do not meet the above criteria or merely restore the asset to its original
function must be expensed as repairs and maintenance as incurred.
Portable Assets
Certain assets like personal computers, which do not meet the capitalization threshold shall be
assigned and tracked in order to prevent theft and loss.
Valuation Accounts
A contra account is an account which partially or wholly offsets another account. Contra
accounts are used to change the carrying amount of an asset. The contra account accumulates
amounts that are typically subtracted from the original asset balance, such as depreciation.
Asset Contra accounts have a credit balance, which is the offset against the asset
account.
Examples of valuation and contra accounts include:
Allowance for doubtful accounts (contra valuation account to Accounts Receivable)
Accumulated depreciation (contra valuation account Equipment)
Unrealized gain or loss on investments (contra valuation account to Long-term
investments)

For financial reporting purposes, the Company may report assets net of their respective valuation
or contra accounts.
Depreciation
A Fixed Asset is used to produce income over a period of time and depreciation allows the
company to record the appropriate expense for the same period. Therefore, Depreciation
provides a business with a way to match income to expenses. Depreciation is an income tax
deduction that allows a taxpayer to recover the cost or other basis of certain property. It is an
annual allowance for the wear and tear, deterioration, or obsolescence of the property.
Some assets will be made up of a number of different components with differing useful lives.
The company shall depreciate these components separately over their useful lives, if not doing so
would have a material impact on the total reported depreciation expense.
Asset Valuation
Assets are reported on the Balance Sheet using the following valuation methods:
Original cost—is the amount actually paid for the asset, as evidenced by checks and
other documents. This is ordinarily adjusted over time for amortization, such as
depreciation.
Current Book Value—is the value of that asset listed in the Balance Sheet (original cost
minus Accumulated Depreciation)
Fair Market Value—is the price that property would sell for on the open market. It is
the price that would be agreed on between a willing buyer and a willing seller
Accumulated Depreciation— is the total decrease in the value of an asset on the balance
sheet of a business, over time. An asset which is new will have no accumulated
depreciation. Therefore, as the asset ages, Accumulated Depreciation increases.
The value of assets on the Balance Sheet is expressed as:
Cost of asset
Less accumulated depreciation
Equals book value of that asset.
Accurate depreciation methods and estimated useful life is critical in correctly
determining company financial performance. Estimated useful lives shall be as accurate
as possible and take into account physical wear and tear, technical obsolescence and
commercial obsolescence, and conform to any government regulations.

The following table lists the asset categories, description, and suggested valuation method.
Asset Category Description Valuation
Cash Cash deposited in accounts with less than 120
days maturity Replacement
Marketable Securities Stocks, Bonds and Other Liquid Assets Replacement
Prepaid Expenses Unused or unexpired prepaid economic benefits Replacement
Accounts Receivable Funds earned but not yet received from
customers
Net Realizable
Value
Equipment Amount paid for capital equipment Historical Cost
Equipment –
Accumulated
Depreciation
Contra account used to offset the depreciation
charge. Accumulated depreciation is the
reduction of the carrying amount of the assets
on the balance sheet to reflect the loss of value
due to wear, tear, and usage.
Allowance, created
by a charge against
earnings, to provide
for changes in the
value of a
company's assets.

Setting Up and Dealing with Fixed Assets
and Depreciation
Create the Fixed Asset Account
1. Choose Chart of Accounts from Company Center
2. Click the Account menu button and choose New from the menu
3. Choose Fixed Asset as the account type
4. Click Continue
5. Type the name and account number of the new Fixed Asset
6. Click the Save and New button
7. Create a Fixed Asset subaccount called Accumulated Depreciation
8. Click the Save and New button
9. Create another Fixed Asset subaccount called Original Cost
Create a Fixed Asset Item List
Allows you to track; Purchase information, Sales information, Corresponding asset account,
Serial number, Warranty information, and any Notes and descriptions.
1. Choose Lists then Fixed Asset Item List from the menu bar
2. Click the Item menu button and choose New from the menu

3. Enter purchase information:
a. Purchase Description—Enter a brief description of the purchase of your fixed
asset
b. New/Used—Select whether your asset is new or used
c. Date—Enter the date you purchased your fixed asset, or click the pop-up calendar
icon to the right of the field and select one (today's date is selected by default)
d. Cost—Enter the cost of your fixed asset
e. Vendor/Payee—Enter a brief description of your fixed asset.
The Vendor/Payee name is not saved to your Vendor list when you save this transaction.
Click Vendor Center and add the vendor there if necessary.
4. (Optional) Enter asset information
a. Asset Description—Enter a brief description of your fixed asset.
b. Location—Enter a location; for example, if your asset is real estate, enter an
address.
c. PO Number—Enter the number of the purchase order you used to purchase your
asset, if applicable.
d. Serial Number—Enter the serial number of your asset.
e. Warranty Expires—Enter the date the warranty for your asset expires.
f. Notes—Enter any notes concerning your asset that you want to track.
5. Leave the sales information blank
6. Click OK
Record a Depreciation Transaction
1. Choose Chart of Accounts from the Company Center
2. Double-Click the Accumulated Depreciation Account for which you wish to record the
transaction
3. Enter the Date for the transaction
4. Enter the Amount of depreciation to record I the decrease column (be sure to work with your
CPA regarding this process)
5. Choose Depreciation Expense as the account to debit
6. Click Record
7. Then Memorize the Depreciation Transaction

Infocore, Inc.

How to Create the Balance Sheet Report
To Create this report
What this report tells you
The Balance Sheet Report summarizes the financial
position of a business. A balance sheet shows the
value of your company's assets, liabilities, and equity
as of a particular day. It is called a balance sheet
because the value of the assets is always exactly
equal to the combined value of the liabilities and
equity.
QBs offers four different preset balance sheet reports.
You'll find these reports under Company & Financial
on the Report Center or Reports menu.

How to Create the Profit and Loss Standard
Report
To Create this report
What this report tells you
This report is also known as an income
statement. It summarizes your income and
expenses for the month, so you can tell
whether you're operating at a profit or a
loss. The report shows subtotals for each
income or expense account in your chart of
accounts. The last line shows your net
income (or loss) for the month.
To see a list of the transactions that make
up an amount, double-click the amount.
Date range
The default date range is for the current
month to date. You can show profit and
loss for a different date range by choosing
another date range from the Dates drop-
down list.

How to Create the Cash Flow Report
To Create this report
What this report tells you
A Cash Flow Statement shows changes of cash over time rather than absolute dollar amounts at
a point in time. It shows the amount of cash earned from profit, where you received additional
cash, and where your cash was spent. Basically, a Cash Flow Statement can tell you whether
the company generated cash.
The report shows how much cash was provided or used by:
Operating Activities
Investing Activities
Financing Activities
To see a list of the transactions that make up an amount, double-click the amount.
Date range
The report shows your cash flow for the fiscal
year to date, but you can change the reporting
period by choosing a different date range from
the Dates drop-down list.
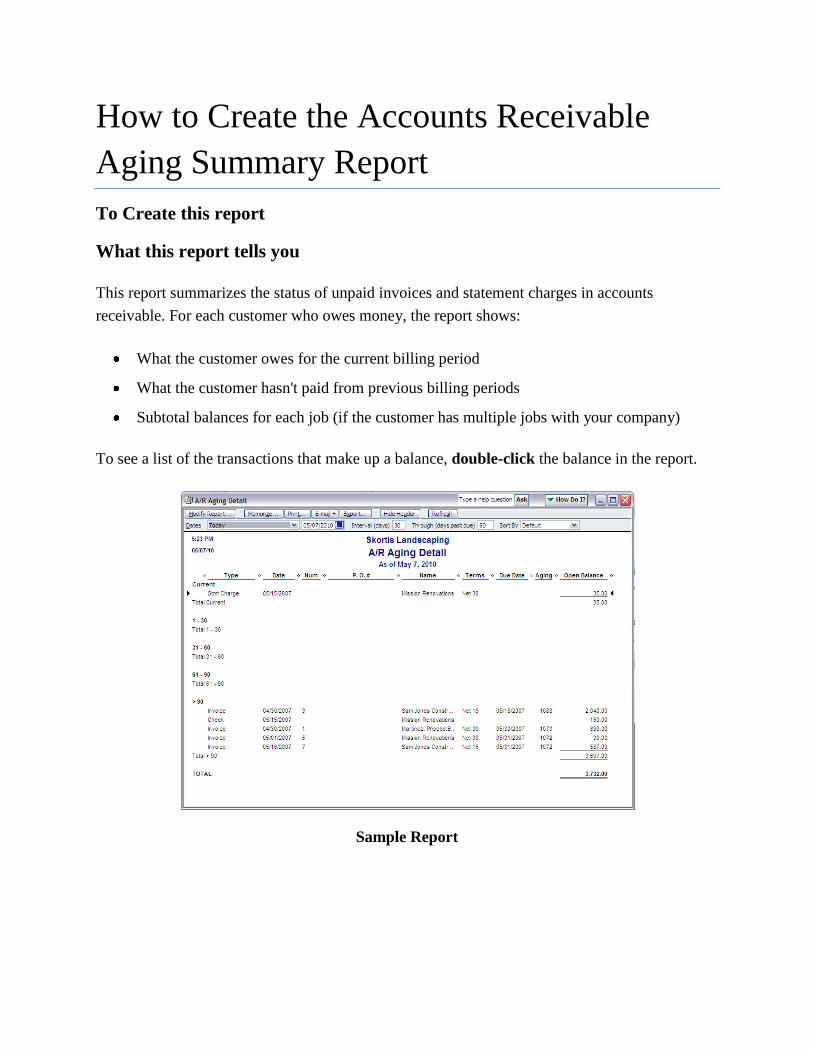
How to Create the Accounts Receivable
Aging Summary Report
To Create this report
What this report tells you
This report summarizes the status of unpaid invoices and statement charges in accounts
receivable. For each customer who owes money, the report shows:
What the customer owes for the current billing period
What the customer hasn't paid from previous billing periods
Subtotal balances for each job (if the customer has multiple jobs with your company)
To see a list of the transactions that make up a balance, double-click the balance in the report.
Sample Report

Date range
The 1-30, 31-60, 61-90, and >90 columns show overdue balances from previous billing periods.
For example, an amount in the 31-60 columns is between 31 and 60 days overdue.
Changing the date range of a report
All reports have a preset or "default" date range. You can change the date range to cover a
different period of time.
To change the date range for a report
1. Open the report you want to modify.
2. Define the date range to use:
Click the Dates drop-down list at the top of the report and choose a different date
range.
What do the different date ranges mean?
To change to a period of time not specified by one of the preset ranges, click the calendars to
change the dates shown in the From and To fields. When the calendar appears, click the
arrows to display the month you want, then click the day of the month.

How to Create the Open Invoices Report
To Create this report
What this report tells you
This report lists unpaid invoices and statement charges, grouped and subtotaled by customer and
job. To see the detailed information for any transaction in this report, double-click on the
transaction.
Note: You can also display the open invoices for all customers on the Transactions tab of the
Customer Center.
Date range
The report shows all open invoices as of the current date.
Sample Report

How to Create the Accounts Payable Aging
Summary Report
To Create this report
What this report tells you
It summarizes the status of unpaid bills in accounts payable, showing what you owe, who you
owe it to, and how much is overdue.
For each vendor to whom your company owes money, the report shows how much your
company owes for the current and previous billing periods, and it shows the total amount. The
report also shows the total amount owed to all vendors.
Sample Report

Date range
Starting with today, and looking back for 90 days. The 1-30, 31-60, 61-90, and >90 columns
show overdue balances from previous billing periods. For example, an amount in the 31-60
columns is between 31 and 60 days overdue.
See the above information for other changes to this report such as:
Changing the Date Range
What do different date ranges mean

How to Create the Unpaid Bills Detail
Report
To Create this report
What this report tells you
This report shows all the bills and payments related to each vendor. The totals shown in the
Balance column are your company's unpaid balances. If a bill is overdue, the Aging column
shows the number of days past due.
Sample Report

How to Create the Open Invoices Report
To Create this report
What this report tells you
This report shows all the bills and payments related to each vendor. The totals shown in the
Balance column are your company's unpaid balances. If a bill is overdue, the Aging column
shows the number of days past due.

Infocore, Inc.

QuickBooks Keyboard Shortcuts
Activity Key Account List, display Ctrl + A
Check, write Ctrl + W
Customer: Job list, display Ctrl + J
Delete Check, invoice, transaction, or items from list Ctrl + D
Edit Lists or Registers Ctrl + E
QuickFill and Recall (type few letters of name and
press tab, name fills in)
Abcxzy Tab
Find Transaction Ctrl + F
Go to register of transfer account Ctrl + G
Help in context, display F1
History of A/R or A/P Transaction Ctrl + H
Invoice, Create Ctrl + I
List (for current field, display Ctrl + L
Memorize transaction or report Ctrl + M
Memorized transaction list, display Ctrl + T
New invoice, bill, check, or list item Ctrl + N
Paste copied transaction in register Ctrl + V
Print Ctrl + P
QuickZoom on report Enter
QuickReport on transaction or list item Ctrl + Q
Register, display Ctrl _ R
Use list item Ctrl + U
Transaction Journal, display Ctrl + Y

Moving Around A Window Key
Next Field Tab
Previous Field Shift + Key
Report Column to the right Right arrow
Report Column to the left Left arrow
Beginning of current field or report row Home
End of current field or report row End
Line below in detail area or on report Down arrow
Line above in detail area or on report Up arrow
Down one screen Page Down
Up one Screen Page up
Next word in field Ctrl + Right Arrow
Previous word in field Ctrl + Left Arrow
First item on list or previous month in register Ctrl + Page Up
List item on list or next month in register Ctrl + Page Down
Close active window Escape or Ctrl + F4
Move to Message area in Invoices Alt + M
Dates Key
Next day + (plus key)
Previous day - (minus key)
Today T
First Day of the Week W
Last Day of the Week K
Last Day of the Month H
First Day of the Year Y
Last Day of the Year R
Date calendar Alt + down arrow

Editing Key
Edit transaction in selected register Ctrl + E
Delete charter to right of insertion point Del
Delete charter to left of insert point Backspace
Delete line from detail area Ctrl + Delete key
Insert line in detail area Ctrl + Insert key
Cut selected characters Ctrl + X
Copy selected characters Ctrl + C
Paste cut or copied characters Ctrl + V
Increase check or other form number by one + (plus Key)
Decrease check or other form number by one - (minus Key)
Undo changes made in field Ctrl Z
Access Menu buttons Key
Banking Alt + B
Company Alt + C
Edit Alt + E
File Alt + F
Help Alt + H
Lists Alt + L
Moves Cursor to the Message area in an invoice Alt + M
Vendor Alt + O
Reports Alt + R
Customer Alt + U
View Alt + V
Employee Alt + Y

QuickBooks Resources
I of course also use Intuit as a major resource for solving very difficult problems.
What is nice about Intuit is that they also have a blog on their site which helps
users manage your company because the bloggers are the end users of this program
and the answers come from other business owners or people who actually perform
the work.
Intuit provides the following types of support:
Small Business Forums
Starting & Growing Your
Business The Future of Small
Business
Women Entrepreneurs Google
Marketing Tools
Small Business Experts
Expert Assistance
Educator's Corner Accountants Bookkeeping IT Consultants Small Business Experts
QuickBooks Experts
QuickBooks Tasks - Pro & Premier
Banking Customizing Forms
Fixed Assets Manager
Importing & Exporting Data
Installation, Update &
Conversion Center Installation,
Update & Conversion Forums
Inventory Journal Entries &
Accounting Tasks Paying Bills
& Vendor Management
Payroll Center Payroll Forums
Performance Issues & Program
Errors
Printing Receiving Money &
Managing Customers Reports
Shipping Manager Working
with the Data File
Sign Up for their Newsletter at
http://accountant.intuit.com/member_programs/proconnection/newsletter.aspx?lid=
leftnav

Finally, don’t forget, in the QuickBooks Program you have the following
tools:
1. “Help” button (located on the menu bar)
Help is used to search for specific topics.
2. Videos
Before you get started, trying watching all the videos. It will help
build your confidence with the program.
3. Sample Companies
Intuit has provided the ‘perfect’ company as one of your resources.
With them (service/product) you can see how to correct use the
program.
One of the sources I use to solve the problems in QuickBooks is CPA911. This organization
provides solutions to very difficult and obscure problems in a way that even beginning users of
QuickBooks can understand and implement. Tricks and Tips for QuickBooks
Archived Newsletter Tips
from 2005 and 2006
Accountant's Copy Rules
for QuickBooks 2008
Aliases for Downloaded
Transactions
Apply Excess Credits for
One Job to Another Job
Applying Additional
Credits to a Vendor Bill
Cost of Goods Accounts
for Vendor Payments,
Customer
Reimbursements, and
1099s
Creating a Test Company
for Testing and Training
Doing Payroll Manually
Entering Payroll as a
Journal Entry
Fixing Vendor Bills Paid
with Direct
Disbursements
Franchise Purchase
Credits
Group Items
Handling Checks with
Two Payees
Import Sales Tax Changes
to Customer List
Inter-company
Transactions
Inventory Additional
Costs
Inventory Freebies
Invoice Report – Just the
Basics
Invoicing and Tracking
Reimbursed Costs
Managing Retainers
Managing Sales Tax
Discounts
Moving an Applied Credit
to a Different Invoice
Payroll Deductions for
Employee Purchases
Prepaid Fees and
Commissions
Prepayments for Purchase
Orders
Purchasing and Selling in
Different Lot Sizes
Reconciling the Payroll
Account
Reimbursable Internal
Costs
Reminders (that are really
sales pitches) - How to
Get Rid of Them
Sales Tax Rates that
Differ By Item Type
Tracking Referrals
Understanding Sales Tax
in QuickBooks
Unprinted Documents
Piling Up?
Upgrading QuickBooks to
a New Version
Using a Hidden Account
Using the power of the
Classes feature
effectively.
Sign Up for their Newsletter at www.CPA911.com

Creating Portable Company Files and
Backup File
What is a Portable File
A portable company file is a compact version of your company file containing only financial
data, and is small enough to be sent by e-mail or saved to portable media. You can use a portable
company file whenever you need to move your company financial data to another location or
send it to another person.
Procedure for creating a Portable Company File
1. Choose File > Save Copy or Backup from the menu bar
2. Choose Portable company file, and then click Next
3. Choose the location in which to store the portable company file, and then click Save
4. Click OK to Allow QBs to close and reopen your file
5. Click OK to acknowledge the portable company file creation
What is a Backup File
A backup file is a compressed file containing everything you need to recreate your company
file and QBs environment. Use a backup file to safeguard your QBs files against accidental data
loss.
The backup file is saved with a .QBB extension.
To keep your company file operating correct the Internal QBs backup procedure must be used
periodically. These internal processes that take place during the Backup Process which MUST
be performed or the company file will begin to run more and more slowly.
Procedure for creating a Backup Company File
1. Choose File > Save Copy or Backup from the menu bar
2. Choose Backup copy company file, and then click Next
3. Choose the location in which to store the backup company file either Local backup or
Online Backup
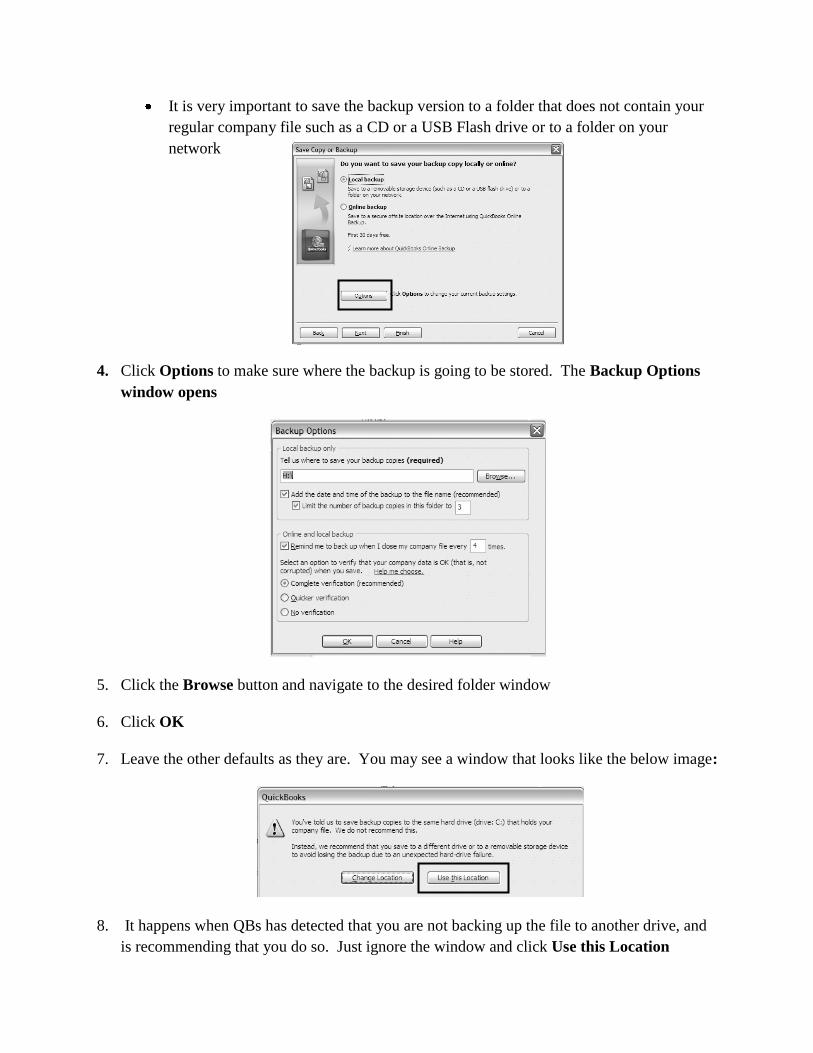
It is very important to save the backup version to a folder that does not contain your
regular company file such as a CD or a USB Flash drive or to a folder on your
network
4. Click Options to make sure where the backup is going to be stored. The Backup Options
window opens
5. Click the Browse button and navigate to the desired folder window
6. Click OK
7. Leave the other defaults as they are. You may see a window that looks like the below image:
8. It happens when QBs has detected that you are not backing up the file to another drive, and
is recommending that you do so. Just ignore the window and click Use this Location

9. Click Next, choose Save it now, and click Next again
10. Choose Save it now. Click Next. QB wants to verify your backup location.
11. It should show you the location in the Save in box since that is what you selected previously.
Click Save.
QKs will now verify your data integrity
Assuming the data is stable, you will receive a confirmation message that the backup has
been saved
12. Click OK
How to Restore a Backup Company file
If your backup file is not on your hard disk or in a network folder, insert the CD, USB flash
drive, or other storage device in the appropriate drive.

1. Go to the File menu and click Open or Restore Company to open the restore wizard.
2. Click Restore a backup copy (.qbb) and then click Next.
3. Click Local backup and then click Next. The Open Backup Copy window opens.
4. If needed, click the Look in drop-down arrow and navigate to the location where you
saved the backup file, which has a .qbb file extension (for example,
mycompanyname.qbb).
5. Select the backup file and click Open.
6. Click Next.
7. If needed, click the Save in drop-down arrow and navigate to the location where you
want to restore the backup file.
8. Select the backup file, click Save, and respond to any messages QBs may display.
The company file is converted to a regular company file, with a .qbw extension (or a .qba
extension if the backup was made from an Accountant's Copy). The company file and all
of its related files are stored in this location.
Important Information about Backing up
The backup process is cumulative, from the beginning
date of when you started using QKs up until the time the
backup was created