GENE TAG CONSTRUCTION (GTC) MODULE …faculty.jsd.claremont.edu/ewiley/compiled_GTC_labs.pdf ·...
48
GENE TAG CONSTRUCTION (GTC) MODULE OVERVIEW This module is designed for one 4-hour lab period each week, for 13 weeks Week 1: Start at the beginning 1) Molecular laboratory calculations 2) Micropipeting practice Week 2: Bioinformatics/Molecular computation tools (Module I) 1) Identify gene to tag; collect sequences 2) Determine putative function of selected gene 3) Design primers to produce an in-frame fusion with the tag of choice Week 3: (GTC LAB 1) Genomic DNA isolation 1) Purify Tetrahymena genomic DNA (gDNA) to use as a template for PCR 2) Determine the concentration of isolated gDNA 3) Design PCR reactions to set up following week Week 4: (GTC LAB 2) PCR; prepare product for cloning 1) PCR amplify gene of interest for fusion with tag sequence 2) Analyze PCR reactions by agarose gel electrophoresis 3) Purify and quantify the PCR products Week 5: (GTC LAB 3) TOPO cloning; E. coli transformation 1) “TOPO clone” successful PCR products into pENTR/D-TOPO vector 2) Transform E. coli with cloning reaction; plate on selective medium Week 6: (GTC LAB 4) Plasmid isolation; restriction analysis; ATT recombination; DNA sequencing 1) Pick transformed colonies from plates, grow overnight cultures (done day before) 2) Isolate plasmids from transformants 3) Analyze cloned plasmids by restriction enzyme digestion 4) Set up ATT recombination reaction to fuse gene sequence with tag 5) Set up sequencing reaction Week 7: (GTC LAB 5) E. coli electroporation 1) Transform recombinant plasmids into E. coli by electroporation. 2) Plate transformation on selective medium Week 8: (GTC LAB 6) Plasmid isolation, restriction digest 1) Grow transformants overnight (start day before lab). 2) Isolate plasmid DNA, set up restriction enzyme digests. Week 9: (GTC LAB 7) Continue restriction analysis; Southern transfer 1) Analyze restriction digests by agarose gel electrophoresis. 2) Transfer DNA from gel to nylon membrane (Southern blot).
Transcript of GENE TAG CONSTRUCTION (GTC) MODULE …faculty.jsd.claremont.edu/ewiley/compiled_GTC_labs.pdf ·...

GENE TAG CONSTRUCTION (GTC) MODULE
OVERVIEW
This module is designed for one 4-hour lab period each week, for 13 weeks
Week 1: Start at the beginning
1) Molecular laboratory calculations
2) Micropipeting practice
Week 2: Bioinformatics/Molecular computation tools (Module I)
1) Identify gene to tag; collect sequences
2) Determine putative function of selected gene
3) Design primers to produce an in-frame fusion with the tag of choice
Week 3: (GTC LAB 1) Genomic DNA isolation
1) Purify Tetrahymena genomic DNA (gDNA) to use as a template for PCR
2) Determine the concentration of isolated gDNA
3) Design PCR reactions to set up following week
Week 4: (GTC LAB 2) PCR; prepare product for cloning
1) PCR amplify gene of interest for fusion with tag sequence
2) Analyze PCR reactions by agarose gel electrophoresis
3) Purify and quantify the PCR products
Week 5: (GTC LAB 3) TOPO cloning; E. coli transformation
1) “TOPO clone” successful PCR products into pENTR/D-TOPO vector
2) Transform E. coli with cloning reaction; plate on selective medium
Week 6: (GTC LAB 4) Plasmid isolation; restriction analysis; ATT recombination;
DNA sequencing
1) Pick transformed colonies from plates, grow overnight cultures (done day before)
2) Isolate plasmids from transformants
3) Analyze cloned plasmids by restriction enzyme digestion
4) Set up ATT recombination reaction to fuse gene sequence with tag
5) Set up sequencing reaction
Week 7: (GTC LAB 5) E. coli electroporation
1) Transform recombinant plasmids into E. coli by electroporation.
2) Plate transformation on selective medium
Week 8: (GTC LAB 6) Plasmid isolation, restriction digest
1) Grow transformants overnight (start day before lab).
2) Isolate plasmid DNA, set up restriction enzyme digests.
Week 9: (GTC LAB 7) Continue restriction analysis; Southern transfer
1) Analyze restriction digests by agarose gel electrophoresis.
2) Transfer DNA from gel to nylon membrane (Southern blot).

Week 10: (GTC LAB 8) Prep DNA for transforming Tetrahymena; transform Tet;
Southern blot probe labeling
1) Label DNA probe with digoxygenin for Southern hybridization.
2) Isolate and clean up DNA for transfomation.
3) Transform Tetrahymena.
Week 11: (GTC LAB 9) Protein induction and analysis
1) Induce production of tagged fusion protein with cadmium.
2) Test expression by fluorescence microscopy or Western blot
3) Develop Southern blot.
Week 12: (GTC LAB 9) Tagged protein analysis (continued)
Week 13: Tagged protein analysis; make figures; upload results/figures to database

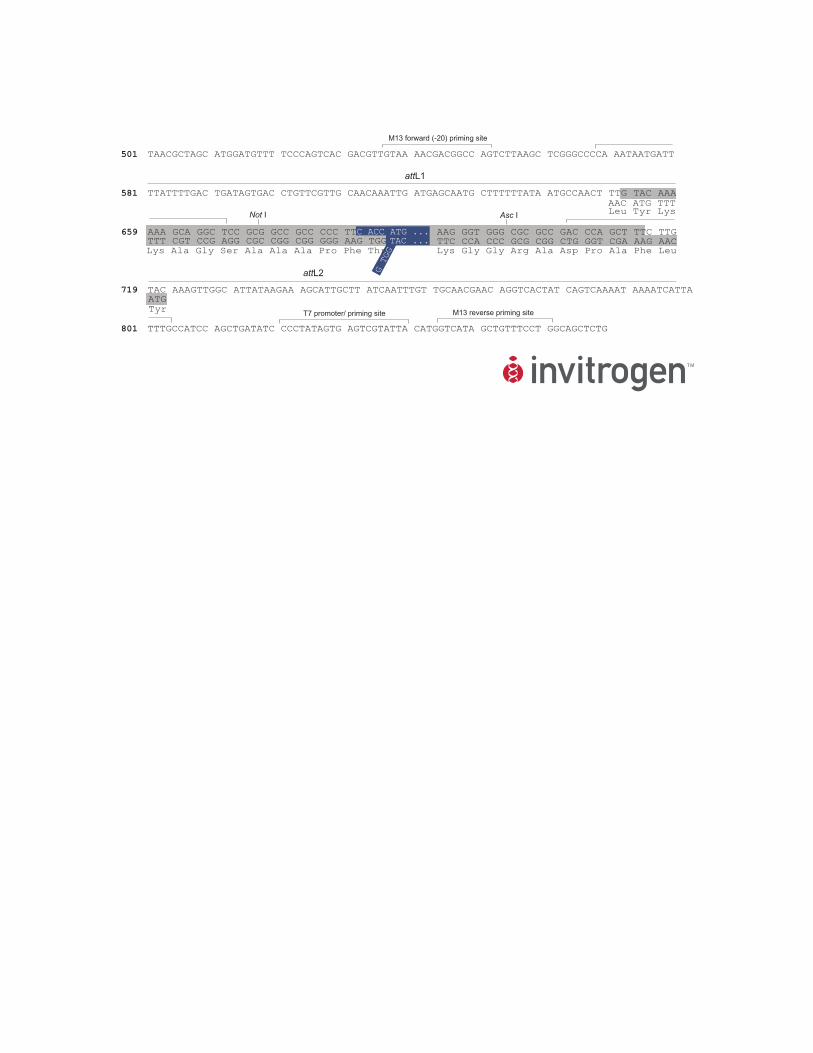
BamHI
XhoI PspOMI
pIGF-GTW BamHI BamHI MTT promoter GFP BamHI
BamHI
Ampicillin resistance gene
Mtt
2.5 kbp pmr-rRNA
Gateway
Gene X

!"##$%&'()"*(+,-./.0123.4546
789:(%;<=$"&>?$'
!!"!"#$"%&'()*&+,%+-("%.&/+('%+-(").01.(*.2"3').)"$456$78!!"!"#9"%&'()*&+,%+-("%.&/+('%+-(").01.(*.2"3').)":$;6:;<=9>"?-&@'&A"B6$<C",&+/+(D")+%.2"3').)"8>;688$#$$E92"3').)"8476445"B*C#FGFH"&.*-D(+%+-(")+%."92"3').)"45<645:FI.&J'(D2"3').)"4586455#FGFH"&.*-D(+%+-(")+%."$2"3').)"457647>#$$E$2"3').)";<865<:#;"G&-/-%.&K,&+/+(D")+%.2"3').)"5$965:<"B*C=9>"&.I.&).",&+/+(D")+%.2"3').)"5:86549L'('/M*+("&.)+)%'(*."D.(.2"3').)"7;:69;5>,NO"-&+D+(2"3').)"97<:6$8;;
B*C"P"*-/,Q./.(%'&M").01.(*.
!"#
!"
$%&
!"
!"#"
!!"#""$$$%#%%!
%%%#$$
!"#"
"""#!!"#$""
+,-./.0123.4546
789:(@+
#$$E$
#$%$&'()%
*+,
-.)
#$$E9
%&%'
!!
!
!!
!""#$#!"$#%"!$$"!$!!!%!###"$!#"#%$"#$!!$!""%""#$"#$$##%"$!#!!""$#%!#$$$####"%""!""!$"!!
!!"!!!!$"#%!$"!"$!$"#%#!$!!#$!!$%#""#"""!!$%"!$"$#""!$%#!!!!!!"!"%"!$##""#!%!!$%!"#%"""
"""%$#"%$$#%!##%$#$%$##%$##%###%!!%%%%%%%%%%%%%""$%$$!%$$$%#$#%$##%$"#%##"%$#!%!!#%!!$
!"#%"""$!!$$#%"!!"!""$""%"$#"!!$#!!%"!#""!!!$!%!$#""#$""#%"$$!#"#!"!%#"$!#""""!%""""!#"!!"
!!!$##"!##%"$#!$"!"!#%###!"!"$!$%"$!#$!"!!"%#"!$$!#"!"%$#!$!!!##!%$$#"$#!#!$
!"#
!$#
%!&
'#&
$"#
!!!%#$!%##$%"$$%#$#%#$$%#$$%$$$%""$%!$$
!""!"
!""!#
!"#%&&&#%"##%"!$%&&&
$%!$
$ '()%$*(%$*(%"+,%"*-%").%/+0%"*-%/12%'23!!#%##"%###%$#$%#$$%#!$%$$!%#$"%""$%""#
""#%"!$%!!!
'()%"*-%$*(%42+%"*-%"*-%"*-%/+0%/12%!1+
"!$!(+
'23%!(+%'()#$"%$ &'(%$
%"&'()*+,*-'./#01'2*34356'7389
%"&'*9:9*79'2*34356'7389;<'2*)4)89*='2*34356'7389
!!
!

GTC Lab 1
1
GTC LAB 1: Tetrahymena Genomic DNA Isolation
In this lab you will isolate Tetrahymena genomic DNA to use as template in your PCR reactions
to amplify the genes you wish to GFP-tag. Following isolation, you will quantify the amount of
DNA isolated and determine its purity.
One genomic DNA preparation per lab pair is sufficient.
Procedure:
1. Pipet ~1.4 mL of Tetrahymena culture into a microcentrifuge tube.
Swirl the Tetrahymena culture in the flask a few times before transferring.
You may use a plastic transfer pipette (fill tube almost to top), or pipet using a P-1000.
2. Collect the cells by centrifugation for 1 minute at 10,000 rpm in a microcentrifuge.
Do not walk away – you will need to take your sample from the centrifuge as soon as it
stops spinning.
3. Quickly pour off the supernatant into the a waste beaker (these cells will swim out of their
pellet). Give the tube a quick shake to get most of the residual media off.
4. Flick the cell pellet to loosen it in the residual media. Add 0.7 mL of Urea Lysis Buffer. Pipet
up and down several times to mix and completely resuspend the cells, then gently invert the
tube until the suspension clears and looks more viscous, (not longer than 5 minutes).
If the cell pellet is difficult to resuspend, try pipeting gently up and down a few more
times with a P-1000.
5. Phenol-extract the lysate. To do this, add 0.6 mL of phenol:chloroform:isoamyl alcohol
mixture in the hood. Note: Be sure you take the phenol-chloroform mix from below the top
buffer layer. Mix by inverting the tube or shaking gently by hand for several seconds (no
vortexing). The phenol should be mixed throughout the entire sample.
*Phenol can cause severe burns. WEAR GLOVES when handling, and use in hood to
prevent inhalation. Discard pipet tips with phenol into the appropriate waste in the hood.
6. Centrifuge the mixture for 5 minutes at maximum speed in a microcentrifuge.
7. After centrifuging, transfer the top (aqueous) layer to a fresh microcentrifuge tube using a
P-1000.
It may be difficult to remove this layer without pulling up some of the thick interphase
layer (white). Don’t worry - this will be removed in the next extraction.
8. Repeat the phenol extraction one more time (steps 5-6).
9. Add 0.15 mL of 5M NaCl to the extracted lysate (the addition of salt helps to reduce the
carbohydrate content of the final precipitate).

GTC Lab 1
2
10. Precipitate the DNA by adding an equal volume (0.7 mL) of isopropyl alcohol to the lysate,
inverting the lysate-alcohol mixture 10 times, and allowing the mix to stand at room
temperature for 10 minutes.
11. Collect the precipitate by centrifuging the mixture at maximum speed for 10 minutes.
12. Decant the supernatant into a collection beaker, and add 0.5 mL of 70% ethanol. Flick or
vortex the tube briefly to loosen the pellet from the bottom of the tube.
Do not try to resuspend your pellet – it is not soluble in 70% ethanol! This step is used to
solubilize salts and remove them from your DNA pellet. If your pellet does not loosen from the wall of the tube, allow it to stand for two minutes
before proceeding.
13. Collect the precipitate by centrifuging for 3 minutes at maximum speed. Remove the
supernatant with a pipet and discard it into a collection beaker.
If you cannot see a pellet, pour off the supernatant instead. Then use a P-20 to gently
remove excess ethanol from the sides and bottom of the tube. Ask an instructor for help.
14. Allow the pellet to air dry (check with a lab instructor to see if it is dry), and then add
50 µL of Tris-EDTA (TE) buffer. After letting it sit for a few minutes, resuspend the pellet in
the TE buffer by gently pipetting up and down with a P-200 dialed to 40 !L. Try to prevent
introducing air bubbles into your sample. Once resuspended, keep your sample on ice.
It is very important that there is no ethanol left on your DNA pellet before adding TE.
Residual ethanol will inhibit subsequent reactions.
15. Add 1 uL of RNase A (10mg/mL stock) and incubate at 37˚C for 10 minutes.
16. Label your tube of genomic DNA with your initials and “gDNA” on the cap of the tube.
SOLUTIONS
Lysis Buffer: 0.35 M NaCl, 0.01 M Tris pH 7.4, 0.01 M EDTA, 1% SDS, 42% urea
TE (pH 8): 10 mM Tris-Cl (pH 8), 1 mM Na2EDTA
RNase A stock solution: 10 mg/mL in 50 mM potassium acetate (pH 5.5)

GTC Lab 1
3
Quantification of genomic DNA
To quantify the amount of DNA in solution, spectrophotometric readings are taken
at wavelengths of 260nm and 280nm. The Absorbance reading at 260nm allows
calculation of the concentration of nucleic acid in the sample. An Absorbance
reading of 1 corresponds to ~50 !g/mL of double-stranded DNA, and 40 µg/mL of
single-stranded DNA and RNA. The ratio between the readings at 260nm and
280nm provides an estimate of the purity of the nucleic acid. Pure preparations of
DNA have A260:A280 values of 1.8.
1. Prepare dilutions of DNA in microcentrifuge tubes. The final volume of each should be at
least 0.1 mL, but the dilution ratio should vary from 1:100 to 1:400. Try 1:100 and 1:200
dilutions to start with.
Different dilutions are often necessary to get an Absorbance (A260) reading that is within
the linear range of 0.05 – 0.2. The cuvettes you will use hold 0.1 mL of solution.
2. Turn on the spectrophotometer (and the UV source) for at least 15 minutes to allow it to warm
up. When the machine is ready (check with an instructor), select the nucleic acid quantitation
program.
3. You will need to use the quartz cuvettes for all of your measurements. These are very
expensive so please be careful with them. The cuvettes hold 0.1 mL.
Blank the spectrophotometer with the water used to make your sample dilutions.
4. Record the A260 and the A260:A280 for all samples.
5. Using the A260 reading, calculate the concentration of your original (stock) genomic DNA
solution. Write the concentration on the side of the tube.
6. Clean the cuvettes with distilled water and ethanol as shown by an instructor.
BEFORE LEAVING
• Give your labeled tube of gDNA to the instructor.
• Put all tubes with phenol-chloroform waste into the collection beaker in the hood.
• Throw away all other microcentrifuge tubes (dilutions, etc.).
• Make your bench look the same way that you found it – nice and neat, please. • Check the calculations for your PCR reactions with an instructor.

GTC Lab 1
4
Design PCR Amplification Reactions
Determine the amount of each component that you will add to make PCR reaction mixes to
amplify the two genes you wish to clone and express. PCR is sensitive to a number of variables
including MgCl2 concentration, annealing temperature, amount of template, type of template, and
type of polymerase (standard or proofreading). Initially, we will vary temperature and the source
of template. If your reaction fails to produce product, you may set up additional reactions
varying some of the other reaction components.
You will make up 4 reactions for each gene: 2 with genomic template and 2 with cDNA
template. You will select two primer annealing temperatures and run two of the reactions (one
genomic and one cDNA template) at one of the selected temperatures, and the other two at the
second selected temperature. Temperature #1 will be the average of the two Tms that you
calculated for your forward and reverse primers. Temperature #2 will be the highest Tm
predicted by the oligonucleotide synthesis company, which you will know the next lab period. Rxn #
1) genomic template; primer annealing temperature #1 _________ 2) genomic template; primer annealing temperature #2 _________ 3) cDNA template; primer annealing temperature #1 _________ (same as rxn 1) 4) cDNA template; primer annealing temperature #2 _________ (same as rxn 2)
Use the following worksheet to calculate what you will add to your PCR reactions. Either cut
and paste or rewrite your calculations in your notebook.
Final concentration Stock concentration Master Mix
1.0 !g (total) genomic DNA ____ !L _________ (calculated) ____ !L
0.2 µM sense primer ____ µL 10 µM ____ !L
0.2 µM antisense primer ____ µL 10 µM ____ !L
1 unit (U) Phusion polymerase ____ µL 2 U/µL ____ !L
1X HF or GC buffer (1.5mM MgCl2) ____ µL 5X concentrated ____ !L
0.2 mM dNTPs ____ µL 10 mM
Sterile distilled water ____µL
____________________________________________
FINAL VOLUME: 50 µL
*You will need to do a similar calculation to set up the reactions with cDNA template.
cDNA will be provided at a concentration of 120 ng/µL. You will use 100 ng/reaction.

GTC Lab 1
5
GTC LAB 1 – INSTRUCTOR’S GUIDE
Prerequisite information: Some prior discussion about the ability of bases to absorb
light at 260nm is helpful.
Students will gain:
• understanding and practice applying molecular /biochemical principles underlying nucleic
acid isolation
• practice application of the above principles
• understanding and practice with methods for quantifying nucleic acid concentration
Time: Approx. 3 hours, depending on the number of available spectrophotometers
Materials:
• Tetrahymena cell culture, density at least 5 x 10⁵ cells/mL and enough for 2 mLs/ student
(this will give you more that twice what you need, but allows for spills, etc.)
• microcentrifuge tubes (6 per lab pair)
• microcentrifuges (at least two)
• Urea Lysis Buffer (see solution recipes)
• phenol:chloroform:isoamyl alcohol (25:24:1)
• 5M NaCl
• isopropyl alcohol
• 70% ethanol
• TE buffer (see solution recipes)
• RNase A (10mg/mL stock) (see solution recipes)
• 37º water bath or dry bath incubator
• UV spectrophotometers
• ice and ice buckets (one per pair)
• waste beakers placed near microcentrifuges
Solution Recipes:
Lysis Buffer: 0.35M NaCl, 10mM Tris pH 7.4, 10mMM EDTA, 1% SDS, 42% urea
Add urea fresh before each use.
TE (pH 8): 10mM Tris-Cl (pH 8), 1mM Na2EDTA
RNase A stock solution: 10 mg/mL in 50 mM potassium acetate (pH 5.5)

GTC Lab 1
6
General guidelines:
gDNA isolation
Each student can do his/her own prep, but one prep per student pair will yield more than enough
material. The longest wait is to use the spectrophotometers to quantify DNA concentration. It
takes about 5 minutes to quantify each preparation, so the number of spectrophotometers
available for use may determine the number of preps that you ask the class do.
Step 1: The starting Tetrahymena culture can be in stationary phase.
Step 3: Emphasize the importance of immediately pouring off their supernatant from the
Tetrahymena cells after centrifugation. They cannot be too fast. After pouring the supernatant,
they should give the tube one shake to get most of the residual media off the cell pellet.
Step 4: Sometimes students do not fully resuspend their cell pellets in Urea Lysis Buffer. It is
recommended that you check each preparation to ensure that there is no cell pellet left on the
bottom of the tube.
Step 5: Stress the importance of working with phenol solution in the hood (except for
centrifuging) and wearing gloves to protect from burns.
Step 12: It should be OK to proceed even if the pellet does not loosen from the wall of the tube.
Remind them to SAVE their gDNA stocks. Dilutions used for quantitation can be thrown out.
*Collect all DNA preps in one ice bucket before students leave. Double check that they have
initialed their preps on the lid.
gDNA quantification
Students usually need a lot of help with the spectrophotometer and with calculating the
concentration of their gDNA stock. Teaching assistants are valuable here.
To calculate concentration: (Absorbance reading) (50 !g/mL) (dilution factor) = X !g/mL
Converting this concentration to !g/!L may be more useful when calculating the amount to add to
PCR reactions.

GTC LAB 2: PCR PRELAB (A)
1. Consider all of the variables in a PCR reaction. Pick the top three that you think could
be varied with the most success to optimize a PCR reaction (list them below). Be able to
explain your choice if asked.
2. Your primers will arrive in a dried down form (lyophilized). The first thing you will
do is to resuspend them in the appropriate volume of ddH2O to make a final
concentration of 25 µM. Figure out how you will make this calculation assuming that the
company will send you between 20-30 nMoles of each primer. (Set the equation up so
that all you need to do is plug in the actual number of nMoles.)
3. Review the PCR reaction. By what cycle will the specific product (defined by the
primers) be generated?

GTC LAB 2 PRELAB (B)
I. Analyze your PCR results
A. Did you get the expected product size from cDNA and/or genomic template?
Expected size from cDNA:____________ Approx. size obtained____________
Expected size from genomic:__________ Approx. size obtained____________
B. If one of the templates did not work, propose some reasons why:
C. If both genomic and cDNA templates worked, was there a difference in size?
What was the difference (in bps)? ________________
What accounts for this difference? ______________________________
What difference did you expect based on computational predictions?
____________________________
D. Which temperature worked best for your primers? _________________
II. Decide your next steps:
1. Repeat PCR – you will do this if your PCR was not successful enough for
cloning (non-specific PCR products or no product)
2. Clean primer-dimers from PCR reaction – pick the reaction with most product,
fewest dimers. The ratio of product:dimer should be very high. Some
reactions (with few primer-dimers) will not need to be cleaned.
3. Quantify PCR product
See TOPO cloning reaction, last page of vector packet (handout) to see how
sensitive the reaction is to amount of PCR product.
4. TOPO clone PCR product into pENTR/D-TOPO vector
5. Transform TOPO reaction (containing vector plus PCR product) into E. coli

GTC Lab 2
1
GTC LAB 2: PCR
In this lab you will carry out PCR using the primers that you designed in the bioinformatics
lab, and the genomic DNA that you isolated in the previous lab period (GTC 1) as template.
Part I. Prepare the primers
The primers that you designed will be given to you in a lyophilized (dehydrated) form.
They must be resuspended in sterile ddH2O to a final concentration of 25!M.
1. Calculate the amount of sterile ddH2O to add to each primer tube. The Moles of lyophilized
primer is provided on the tube label. Each tube has a different amount. Check your
calculations with an instructor before proceeding. 2. Before adding the calculated amount of water to each tube, centrifuge the tubes briefly
before opening the cap to collect any sample that was dislodged during shipping. 3. Add the appropriate amount of sterile water to the tubes and allow them to stand on ice.
Proceed to Part II. 4. Vortex the primers for 30 seconds before adding them to your reaction mix.
For Notebook: Calculations for amount of water added to primer tubes.
Part II. Set up your PCR reactions according to the calculations you made during the
previous lab. You will be setting up 4 reactions, and the only variable in the reaction will be
template: either gDNA or cDNA. You will make two reactions with gDNA and two with
cDNA.
It is easiest to make a “master mix” for 5 reactions (to allow for pipeting error) with all
reaction components except template. Then pipet the appropriate amount of reaction mix into
four PCR tubes, leaving room to add the calculated amount of template, to make a total
volume of 50 !L per tube. Add the appropriate amount of template separately to each tube.
Remember to:
• vortex your primers before adding them to the master mix. • always add enzyme (polymerase) last to the master mix.
• be careful not to introduce air bubbles into the PCR tubes. Try tapping or
flicking the tube gently if air bubbles persist, or remove them directly with a P-
20 pipet.
• label each PCR reaction on the side and top of the tube with initials and a letter
or number designating which reaction it is.
• keep reactions on ice until the instructor asks you to load them in the
thermocycler

GTC Lab 2
2
The thermocycler will be programmed to do the following:
1. Heat reactions for 1 minute at 98°C to denature genomic DNA.
2. 34 cycles of:
• 20 seconds at 98˚C (denaturation)
• 25 seconds at primer annealing temp (calculate).
• 1.5 minute polymerase extension at 72°C
3. 10 minutes at 72°C
4. Hold at 4°C
We will be running an annealing temperature gradient, so you should be able to find spots in
the thermocycler block of the appropriate temperature. This will be worked out in class.
For Notebook: Include your calculations and worksheets for setting up the PCR
reactions. Make sure you record the annealing temperatures tested.
Part III. Analyze your PCR products by gel electrophoresis.
*One gel with 10 lanes per two students is sufficient.
1. Decide on an appropriate percentage agarose gel to use for your PCR analysis. Dissolve an
appropriate amount of agarose in 1X TAE (50 mLs total); allow the gel to cool on your
bench for 5 minutes, and then add 0.5 µL of EtBr to the gel mixture before pouring.
*IMPT: EtBr is a mutagen. You must wear gloves when handling anything that
has been exposed to EtBr.
2. Load 15 µL of each PCR reaction (with 2 µL of gel loading buffer).
For this step, it is easiest to remove 15 !L of each sample and spot onto a strip of
parafilm, add 2 !L of dye, and then load all 17 !L.
3. In one lane, load 5 µL of 1 kb ladder.
4. Run at 100 V for ~30 minutes.
5. Visualize the gel on the UV transilluminator and photograph gel.
For Notebook:
a. Include the photograph of the gel with labeled lanes.
Conclusions:
b. Include a brief analysis of what the PCR gel revealed - which template yielded better
results? Which temperature yielded better results?
c. Which reaction yielded product that you will clone, and why did you choose this one?
d. Provide possible explanations for any "extra" bands on the gel, and for failure of any
reactions to yield product.
*e. If both cDNA and gDNA templates yielded results, what is the difference in the
sizes of their products? Is this difference (determined by your experiment)
consistent with the predicted sizes of introns in your gene displayed on the
Tetrahymena Genome Database? You have this information from bioinformatics.

GTC Lab 2
3
Part IV. PCR Clean-up (may be optional)
Select one reaction that produced the ‘cleanest’ product of the correct size (no background
bands) and with the smallest amount of primer dimer. This is the one you will try to clone. To clone your PCR product, primer dimer products must first be removed. This can be
achieved with a column that will specifically bind only very small products, the size of primer
dimers.
PCR reactions contain in addition to the PCR products, salts associated with the PCR buffer,
excess dNTPs, and oligonucleotide primers that can interfere with downstream applications.
Thus, it may be necessary to remove these. We will use Montage PCR centrifugal filter
devices for this purpose. These are disposable, single-use centrifugal devices for processing
aqueous biological solutions in the 0.1 to 0.5 mL volume range. They are used in fixed angle
micro-centrifuge rotors that accommodate 1.5 mL microcentrifuge tubes. Used for PCR
product purification, Montage PCR devices allow for up to 500 µL sample clean up of salts
and primers with a concentration factor of 5X to 10X in 15 minutes, with no solvents or
chemicals required. The Montage PCR device consists of a filtrate collection vial with
attached cap and a sample reservoir. The sample is spun to “virtual” dryness in a 15-minute
spin time, followed by sample reconstitution, and an invert spin transfer into a clean vial for
subsequent analysis and/or storage.
Diagram of Montage PCR Centrifugal Filter Device
BASIC STEPS
1. Load PCR sample and distilled water 2. Spin for 15 minutes at 1000 x g 3. Add 20 !L TE-buffer, invert, spin for 2 min

GTC Lab 2
4
How to Use the Montage PCR Device
1. Insert the Montage PCR sample reservoir into one of the two vials provided.
2. Pipette 375 µL distilled water into sample reservoir (0.5 mL
maximum volume), without touching the membrane with the
pipette tip. Add 30 µL to 50 µL of PCR reaction to the
reservoir. Seal with attached cap.
NOTE: Smaller volumes of PCR product may be used, but the
volume in the sample reservoir should always be adjusted to a
final volume of 400 µL
3. Place assembly in a compatible centrifuge and counterbalance with a similar device. NOTE: When placing the assembled device into the centrifuge rotor, align the cap strap toward the center of the rotor.
4. Spin the Montage PCR unit at 1000 X g for 15 minutes. NOTE: For optimal performance in recovery, do not centrifuge longer than 15 minutes or at greater than 1000 x g as yield loss may occur due to overdrying of the sample.
5. Remove assembly from centrifuge. Separate vial
from sample reservoir. Save filtrate until sample has
been analyzed.
To recover the purified DNA:
6. Place sample reservoir upright into a clean vial and add 20 µL distilled water or TE
buffer carefully to the purple end of the reservoir.
(Avoid touching the membrane surface).
7. Invert the reservoir into a clean vial and spin at
1000 x g for 2 minutes.
8. The Clean PCR product is ready for analysis.
(Go to Part V.)

GTC Lab 2
5
Part V. Quantify the PCR product to clone
Run 2 !L of cleaned PCR product on a gel prepared by the instructor. Run 5 !L of 1 kb
ladder alongside. Running this amount of ladder will allow you to quantify your product.
Based on comparison of band intensity with the quantitative ladder (the 1 kb ladder), estimate the
concentration of your PCR product. Refer to the 1kb ladder figure to see the amount of DNA in
each ladder band.
*If you did not clean your PCR product, quantify your product using the ladder on the original
gel as described above. If you had very high amounts of product on the original gel, more
accurate quantitation of product in the PCR reaction will be achieved using spectrophotometry
(A260).
For Notebook:
Record the results from quantitation of PCR product and the method used.

GTC Lab 2
6
GTC LAB 2 – INSTRUCTOR’S GUIDE
Prerequisite information: Knowledge of PCR reaction (denaturation, primer annealing,
polymerase extension); temperature cycling.
Students will gain:
• understanding and practice applying principles of gene amplification using PCR
• practice with methods for purifying and quantifying PCR products
Time: Approximately 4 hours
Materials:
• lyophilized primers purchased from oligonucleotide synthesis company
*These should be ordered at least one week in advance.
[Integrated DNA Technologies (IDT) – online ordering]
• PCR reaction components
Phusion polymerase (New England Biolabs)
5X HF and GC buffer (provided with polymerase)
10mM dNTPs (see solution recipes)
• genomic DNA preps (from GTC Lab 1)
• cDNA of known concentration from growing Tetrahymena (this can be synthesized
or provided by the CGC coordinator
• sterile ddH2O, one per pair
• sterile PCR tubes
• agarose (molecular biology grade)
• TAE agarose gel running buffer (Tris-acetate EDTA; see solution recipes)
TBE may also be used
• EtBr solution (10 mg/mL in ddH2O, aliquoted into microcentrifuge tubes)
• gel trays and electrophoresis units
• thermocyclers (2-3, depending on number of PCR samples and annealing temperatures)
with temperature gradient capabilities.
• microcentrifuge
• UV spectrophotometer
• ice and ice buckets (one per pair)
• microcentrifuge tube racks
• racks to hold PCR tubes (tip boxes work well)
• permanent, waterproof marking pens (at least one per 2 students)
• parafilm strips (one per student)
• Montage PCR clean-up kit
Solutions: 10 mM dNTPs (see ‘Recipes and Reagents’) 1X TAE (diluted from 10X stock; see ‘Recipes and Reagents’)
GTC Lab 2
7
General Guidelines
Part I. Preparing primers
Check each student’s calculations for how much water to add to primer tubes to make a
25!M solution. The amount of primer is usually provided by the company in nmoles.
# nmoles/(x)L = (25nmoles/L) * 1000
It is highly recommended that an aliquot of diluted primers be removed from the main
stock to be used as the ‘working stock’. This prevents contamination and degradation of
the main stock.
Part II. Setting up PCR reactions.
Ask students to determine the two annealing temperatures that they will be using for their
PCR reactions early in the lab period. One will be the average of the Tms for the forward
and reverse primers that they calculated during the bioinformatics module. The other will
be the higher of the two Tms provided by the synthesis company. Most primer sets will
work in the range of 52º-60ºC. If students come up with a Tm much over 60, try 60-62
instead. Likewise, if they propose a temperature less than 50, try 50 instead. For each primer set, a negative control with no template can be set up with the remaining
master mix provided there are enough lanes on the gels. A 10-well gel shared by two
students will have only one extra lane. Ask students to write their two Tms down so that the appropriate temperature ranges can
be programmed in the thermocyclers. Try to make it such that approximately half of the
reactions will go into each thermocycler. Two thermocyclers is usually sufficient. One
can be programmed for a temperature gradient at the lower end of the desired range, the
other for the upper end. This way, most students will be able to find a set of temperatures
that meets their needs (or at least comes close). If the exact temperature is not available,
run the reactions at the next highest temperature available. It is very useful to have a chart showing annealing temperatures for each row in each
thermocycler so that students can easily place their reactions in the appropriate spots.
Reactions should be held on ice until the majority of the class is ready.
To expedite setting up the reactions, have several aliquots of dNTPs, buffer, cDNA, and
polymerase available on ice. To ensure that students take the correct amount of
polymerase, consider having only one tube of it available, and watch closely as they
remove their aliquot.
Make sure each student has:
• Firmly closed the lids on the reaction tubes • eliminated air bubbles in the reactions. If air bubbles are present, tapping
the bottom of the tube lightly against the surface of the bench may help.
Removing directly with a P-20 pipet may be necessary. Centrifuging
helps, but this must be done with adaptors to fit the size of PCR tubes.
GTC Lab 2
8
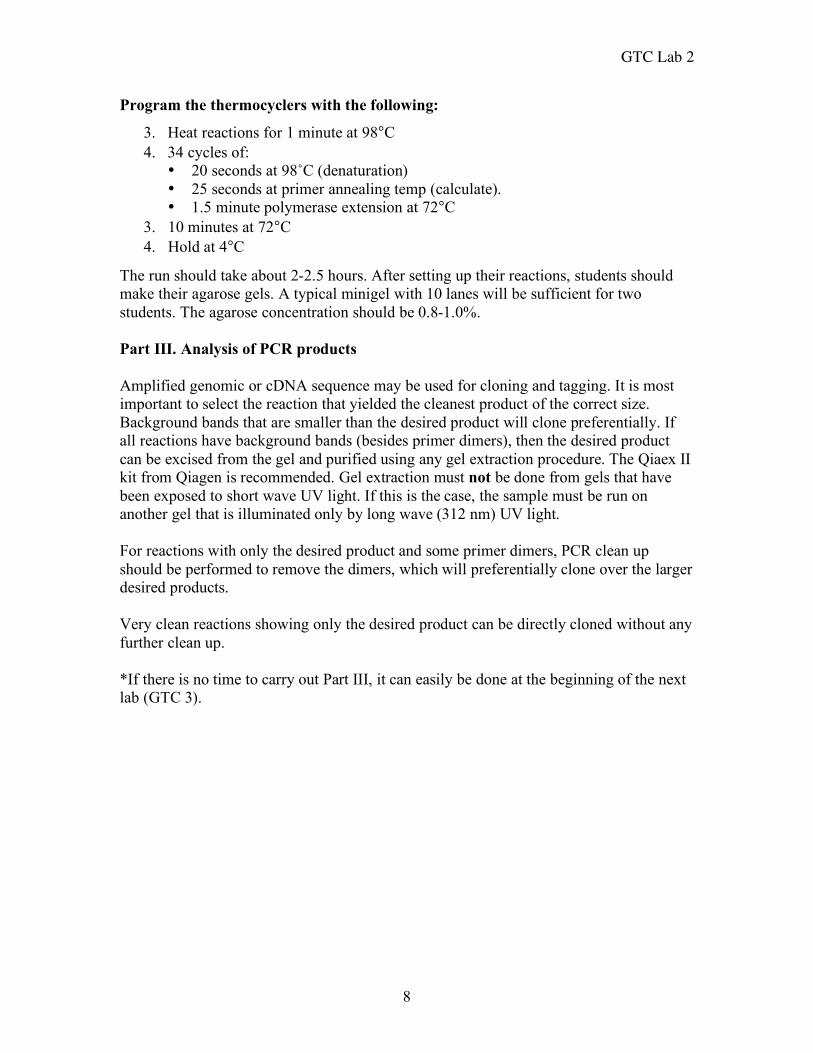
Program the thermocyclers with the following:
3. Heat reactions for 1 minute at 98°C
4. 34 cycles of:
• 20 seconds at 98˚C (denaturation)
• 25 seconds at primer annealing temp (calculate).
• 1.5 minute polymerase extension at 72°C
3. 10 minutes at 72°C
4. Hold at 4°C
The run should take about 2-2.5 hours. After setting up their reactions, students should
make their agarose gels. A typical minigel with 10 lanes will be sufficient for two
students. The agarose concentration should be 0.8-1.0%.
Part III. Analysis of PCR products
Amplified genomic or cDNA sequence may be used for cloning and tagging. It is most
important to select the reaction that yielded the cleanest product of the correct size.
Background bands that are smaller than the desired product will clone preferentially. If
all reactions have background bands (besides primer dimers), then the desired product
can be excised from the gel and purified using any gel extraction procedure. The Qiaex II
kit from Qiagen is recommended. Gel extraction must not be done from gels that have
been exposed to short wave UV light. If this is the case, the sample must be run on
another gel that is illuminated only by long wave (312 nm) UV light.
For reactions with only the desired product and some primer dimers, PCR clean up
should be performed to remove the dimers, which will preferentially clone over the larger
desired products.
Very clean reactions showing only the desired product can be directly cloned without any
further clean up.
*If there is no time to carry out Part III, it can easily be done at the beginning of the next
lab (GTC 3).

GTC Lab 3
1
GTC LAB 3: TOPO Cloning and E. coli Transformation
In this lab you will clone your PCR-amplified gene sequence into the pENTR/D-TOPO vector
(see map of the vector included with this lab).
Part I. Set up the TOPO cloning reactions
1. Add the reaction components listed below:
Table 1.
Component Volume/reaction
PCR product 0.5 to 4 µL (5-10 ng total)
Salt solution 1 µL
Sterile water add to a final volume of 5 µL
TOPO vector 1 µL
______________________________________________________________
Total volume 6 µL
2. Mix the reaction gently by pipeting up and down, and incubate for at least 10 minutes
at room temperature (22-23˚C).
Part II. Transformation of E. coli
1. Ask your lab instructor for a vial of chemically competent E. coli. Thaw the cells on
ice for about 5 minutes.
2. Add 2 µL of the TOPO cloning reaction into a vial of chemically competent E. coli
and mix gently by stirring with the pipet tip. Do not pipet up and down.
3. Incubate on ice for 10 minutes.
4. Heat-shock the cells for 30 seconds at 42˚C without shaking.
5. Immediately transfer the tubes to ice.
6. Add 250 µL of room temperature SOC Medium.
7. Cap the tube tightly and shake the tube horizontally (200 rpm) at 37˚C for 1 hour in a
shaking incubator.
8. Spread 200 µL from each transformation on a pre-warmed plate containing 50 µg/mL
kanamycin using sterile glass beads. Incubate the plate overnight in a 37ºC incubator.

GTC Lab 3
2
GTC LAB 3 – INSTRUCTOR’S GUIDE
Prerequisite information: Basic background on topoisomerase action, vectors, cloning
into bacteria, and bacterial transformation is necessary.
Students will gain:
• practice setting up reactions based on previous DNA quantification
• practice applying E. coli transformation techniques
Time: Approximately 2 hours, including a one hour wait period
Materials:
• pENTR/D-TOPO vector (Invitrogen) and cloning reagents (salt solution, water)
• TOP10 chemically competent E. coli cells (Invitrogen)
• LB + 50 !g/mL kanamycin agar plates
• sterile glass beads for plating
• used bead collection container
• 0.5 mL microcentrifuge tubes (one per TOPO reaction)
• 42ºC water bath
• 37ºC shaking incubator
• ice and ice buckets (one per pair)
• cleaned and quantified PCR product from previous lab
General Guidelines *PCR clean up and quantitation can be done in the beginning of this lab. Part I: TOPO Cloning
It is very important that the correct amount of PCR product be mixed with the vector.
More or less than 5-10 ng will greatly decrease the chances of successful cloning. The reaction should incubate at room temperature for a MINIMUM of 10 minutes.
After 10 minutes students can be provided with frozen competent cells to thaw on ice. Someone in the class (or an instructor) should do a negative control with vector alone,
and a positive control with the control DNA supplied in the kit.
Part II: E. coli Transformation
The cells must stay very cold (constantly on ice) until the moment they are heat shocked.
Emphasize this point with the students.
The duration of heat shock must be EXACTLY 30 seconds. This is another point that
warrants emphasis with the students.

GTC Lab 4
1
GTC LAB 4: Plasmid Isolation
To analyze the DNA that you have cloned onto the pENTR vector, it is necessary to first
extract the plasmids from the E. coli cells. The plasmids may then be analyzed by restriction
enzyme digest. Many methods have been developed to purify plasmids from bacteria. All
methods involve three steps:
1. growth of the bacterial culture,
2. harvesting and lysis of the bacteria,
3. purification of the plasmid DNA
Growth of the Bacterial Culture
Plasmids should be purified from bacterial cultures that have been inoculated with a single
transformed colony picked from an agar plate. At all times, the transformed bacteria should be
grown in selective conditions, i.e., in the presence of appropriate antibiotic.
Harvesting and Lysis of the Bacteria
Bacteria are recovered by centrifugation and lysed by a number of methods, including heat,
alkali, and detergents, and some other gentler means. The choice of methods is decided based
on the strain of E. coli, the size of the plasmid, and the techniques used to purify the plasmid.
Smaller plasmids (<15 kb) are fairly durable, and can withstand more severe methods of lysis
such as those listed above. Treatment of bacterial suspensions with detergent or heat disrupts
the base pairing and causes the linear stretches of sheared chromosomal DNA of the host to
denature and fall away from each other. The strands of the plasmid DNA, however, are unable
to separate from each other because they are topologically intertwined! Returning the
conditions back to normal then allows the two strands to fall perfectly back into alignment and
renature into superhelical plasmid molecules.
In this lab, you will lyse the cells with base combined with the anionic detergent sodium
dodecyl sulfate (SDS). This combination has been used for more than 20 years for plasmid
isolation. Exposure of bacterial suspensions to the strongly anionic detergent at high pH opens
the cell wall, denatures chromosomal DNA and proteins, and releases plasmid DNA into the
supernatant. During lysis, the “cell debris” (broken cell walls, proteins, and denatured
chromosomal DNA) forms large complexes that are coated with SDS. These complexes fall
out of solution (precipitate) when sodium ions are replaced by potassium ions.
Purification of the Plasmid DNA
All methods of lysing bacteria will yield plasmid solutions contaminated with chromosomal
DNA and RNA. Centrifugation removes the vast majority of chromosomal DNA (it will form
a pellet, while plasmid DNA remains soluble), and treatment with RNase will eliminate
contaminating RNA.

GTC Lab 4
2
Procedure: There are three parts to this lab:
1) plasmid purification
2) plasmid analysis by restriction enzyme digestion
3) recombination of a correct clone into the GFP vector Part 1: Recombinant plasmid purification
Day before lab:
A. Grow overnight cultures of transformants.
1. The day before lab, pick 4 transformants from each ligation with separate sterile
toothpicks, and inoculate separate culture tubes containing liquid medium (LB+Kan).
2. Grow overnight with shaking at 37ºC.
Day of lab:
B. Harvest and lyse bacteria.
1. Transfer 1.4 mL of bacterial cultures to a sterile microcentrifuge tubes.
Mix each culture well before taking the cells. Many cells will have sunk to the
bottom of the tube.
2. Centrifuge for 30 seconds at maximum speed.
3. Pour off the supernatant into a waste beaker by the centrifuge.
4. Resuspend the pelleted bacterial cells in 250 µL of Buffer P1.
No cell clumps should be visible after resuspension of the pellet. This is a
glucose solution that adjusts the osmolarity of the cell suspension to
facilitate cell lysis. This buffer also contains RNase.
5. Add 250 µL of Buffer P2. This is the alkaline SDS solution for cell lysis.
Invert the tube immediately (and gently) 10 times. DO NOT VORTEX!
The solution should become viscous and slightly clear. Invert the tube a
few more times if necessary to achieve this. WORK QUICKLY: Do not
allow the lysis reaction to go for more than 5 minutes or plasmid DNA
will be irreparably damaged (nicked!).
6. Add 350 µL of Buffer N3 and mix by inverting several times.
This is a potassium acetate buffer that will cause precipitation of cell debris
including chromosomal DNA. You should see the solution immediately turn
cloudy. This may sit on ice until you are ready to centrifuge (next step).
C. Purify the plasmid DNA.
7. Centrifuge for 10 minutes at max speed. A white pellet will form.
8. Apply the supernatant to a plasmid prep column by decanting, or using a pipet.
Your plasmid DNA will be retained on the silica-gel membrane inside due
to the high salt conditions of the supernatant. The silica-gel binds only
dsDNA, while RNA and proteins are not retained, and instead come off in
the flow-through.

GTC Lab 4
3
9. Centrifuge for 30 – 60s. Discard the flow-through.
10. Wash the bound plasmid DNA by adding 0.75 mL of Buffer PE and
centrifuging for 30 – 60 s.
This step is necessary to remove salts from the plasmid DNA. Salts can inhibit
restriction endonuclease digestions.
11. Discard the flow-through, and centrifuge for an additional 1 min to remove
residual wash buffer.
Buffer PE contains ethanol. Thus, it is very important to remove any residual
buffer as ethanol will inhibit subsequent enzymatic reactions.
12. Place the column in a clean microcentrifuge tube. To elute DNA, add 50 µL
Elution Buffer (“EB”) or water to the center of each column, let it stand
for 1 min, and then centrifuge for 1 min.
DNA is released from the silica-gel membrane by its low salt content. This
buffer is 10 mM Tris, pH 8.5.
Part 2: Recombinant plasmid analysis by restriction enzyme digestion
1. Set up your analytical restriction enzyme digestions for each plasmid.
• Use ~1 µg of DNA in each reaction. Assume the concentration of plasmid DNA in
your purifications is ~0.2 µg/µL. • Using the buffer chart, determine which NEBuffer to use.
• Make a master mix for 5 reactions of all components except plasmid. Pipet the
appropriate amount into 4 microcentrifuge tubes leaving room to add plasmid.
Restriction enzyme digest for ONE sample: x 5 rxns:
___ µL of plasmid prep DNA ___ µL
___ µL of 10X digestion buffer (from New England Biolabs, NEBuffer) ___ µL
___ µL of 10X BSA (some enzymes do not require this – see buffer chart) ___ µL
0.5 µL of enzyme (of each enzyme if you are doing a double digest with two enzyme) 2.5 µL
___ µL sterile distilled MilliQ water (to 20 µL total reaction volume) ___ µL
20 µL total volume 100 µL
2. Incubate the reactions at 37ºC for two hours. Add 2 µL of 10X loading buffer to the digest
and load 20 µL onto a 0.8% agarose gel containing EtBr (0.5 µL). Electrophorese at 100 V for
45 minutes. Load 5 !L of 1 kb ladder in one lane.

GTC Lab 4
4
Part 3: Recombination into GFP vector
The L-R recombination reaction
The LR Clonase enzyme is a purified form of phage Lambda recombinase. It will remove the
coding sequence from the pENTR/D-TOPO vector and replace the gateway cassette in the new
pIGF-GTW vector for transformation into Tetrahymena. Recombining your cloned gene into
this new vector will create an in-frame fusion of your gene with GFP. Its expression will be
under the control of the MTT promoter, which is inducible with divalent metals such as
cadmium.
Setting up the L-R recombination reaction
LR Clonase™ II enzyme mix is supplied as a 5X solution.
1. Add the following components to a 1.5 ml microcentrifuge tube at room temperature and mix:
1-3 !l of pENTR plasmid clone (50-150 ng total)
1 !l of pIGF-GTW destination vector (400 ng/!l)
H2O to 4 !l
2. To each reaction above, add 1 !l of LR Clonase™II enzyme and mix well by pipeting up
and down being careful not to introduce air bubbles.
3. Incubate reactions at room temperature overnight.
Your instructor will store them at -20ºC the next day.

GTC Lab 4
5
GTC LAB 4 – INSTRUCTOR’S GUIDE
Prerequisite information: Restriction enzymes; enzyme recognition sites
Students will gain:
• understanding and practice applying molecular /biochemical principles underlying nucleic
acid isolation
• practice setting up basic molecular enzymatic reactions
Time: Approximately 4 hrs
Materials:
• Qiagen plasmid miniprep kit
• NotI restriction enzyme plus an additional variety of other restriction enzymes
• restriction enzyme buffers
• Clonase enzyme kit (Invitrogen)
• 400 ng/!L prep of destination vector
• 37ºC water bath and tube floaters
• agarose (molecular biology grade)
• 1X TAE running buffer
• EtBr (10mg/mL solution)
• microcentrifuge tubes
• gel running apparatuses
• power supplies
• UV light board and digital camera
General
Part 1: Plasmid isolation
• Aliquot the plasmid isolation buffers from the kit so that there are 3-4 sets available for
students to use.
• Encourage students to mix their bacterial cultures well before taking 1.4 mLs. Many cells
will have settled to the bottom of the culture tubes.
Part 2: Restriction Digestion
• It saves time if students come to lab prepared with knowing which enzymes they will
use for restriction digestion. The enzymes they use should cut once (or twice) in the
vector and once (or twice) in their cloned piece of DNA such that it will yield a banding
pattern allowing them to distinguish whether their gene was cloned, and in which
direction it was inserted. This is a good prelab assignment for them to figure out. A
restriction map of the pENTR vector is included. This may be copied and given to
students in advance. They should already have restriction sites mapped on their gene
from the bioinformatics module.
GTC Lab 4
6
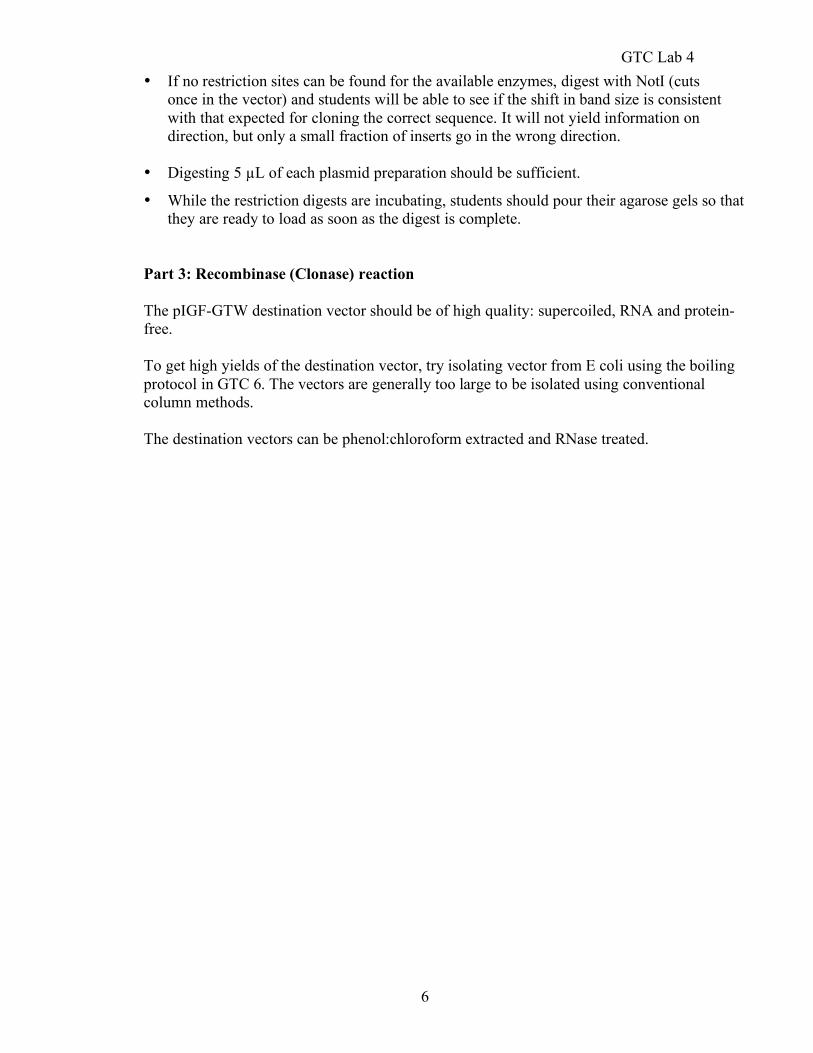
• If no restriction sites can be found for the available enzymes, digest with NotI (cuts
once in the vector) and students will be able to see if the shift in band size is consistent
with that expected for cloning the correct sequence. It will not yield information on
direction, but only a small fraction of inserts go in the wrong direction. • Digesting 5 !L of each plasmid preparation should be sufficient. • While the restriction digests are incubating, students should pour their agarose gels so that
they are ready to load as soon as the digest is complete.
Part 3: Recombinase (Clonase) reaction
The pIGF-GTW destination vector should be of high quality: supercoiled, RNA and protein-
free.
To get high yields of the destination vector, try isolating vector from E coli using the boiling
protocol in GTC 6. The vectors are generally too large to be isolated using conventional
column methods.
The destination vectors can be phenol:chloroform extracted and RNase treated.

GTC Lab 5
1
GTC LAB 5: Electroporation Transformation of E. coli
In this lab you will be transforming the recombinant vector produced by the recombinase
reaction that was set up last laboratory period.
1. Add 0.5 !l of Proteinase K solution to each reaction. This will terminate the reaction.
Mix by pipeting gently up and down several times. Incubate samples at 37°C for 10
minutes.
2. Thaw a tube of electrocompetent E. coli cells on ice (about 5 minutes). Chill a
microcentrifuge tube on ice.
3. Transfer 50 µL of the E. coli cells to the pre-chilled microcentrifuge tube.
4. Add 1 µL of your L-R recombination reaction.
5. Pipet cells carefully into pre-cooled cuvette as demonstrated by the instructor. Tap
gently on bench to eliminate bubbles
6. Shock cells in the electroporater. The settings should be as follows:
Voltage 1650 HV
Resistance 200 ohms
Capacitance 25 !F
Record the time on the electroporater. If all went well, it should be between
3-4 milliseconds.
7. Add 0.5 mL SOC medium to the cells in the cuvette.
8. Remove cells from the cuvette with a sterile Pasteur pipet or P-200 pipet, and transfer
them to a sterile microcentrifuge tube.
9. Incubate cells for 1 hour at 37˚C with shaking.
10. Plate 100 µL of cells onto one plate of LB + 100 µg /mL ampicillin. Plate using
sterile glass beads or a spreader dipped in ethanol and flamed, as demonstrated by
your instructor.
11. Place the plates in the 37˚C incubator overnight (16-18 hours). They will be taken out
of the incubator for you the next day.

GTC Lab 5
2
GTC LAB 5 – INSTRUCTOR’S GUIDE
Prerequisite information: None
Students will gain:
• Practice with a different method of cell transformation.
Time: Approximately 1.5 hours
Materials:
• electrocompetent E. coli cells (purchase or make)
• electroporation cuvettes; 2mm gap
• microcentrifuge tubes
• LB+100 !g/mL Ampicillin plates (one per transformation)
• SOC medium (see Solution Recipes)
• electroporater
• sterile glass beads OR glass spreader in ethanol (requires burner)
• 37ºC incubator
• ice and ice buckets (one per pair)
Solution Recipes:
SOC
General:
• Electrocompetent E. coli may be purchased (see Resources) or made. The GTC
LAB 5 protocol is written for the homemade variety. To make your own
electrocompetent cells refer to “Supporting Material” for a protocol.
• To pipet cells into electroporation cuvettes, first, ensure that no air bubbles were
drawn into the pipet tip. It is better to leave some cells behind than to suck up air.
Air bubbles in the cell slurry inside the cuvette is the most common cause of
“arching” during electroporation. To prevent introduction of air when expelling,
put the tip down between the two metal plates in the cuvette and against one wall
of the cuvette. Depress plunger slowly and smoothly to make the cell slurry run
down one side of the cuvette into the chamber between the plates. At the end of
delivery, do no push the plunger to the second stop as this will push air into the
sample. Instead, do not worry about emptying the last few microliters of cells.
• Gently tapping the cuvette will make any trapped air bubbles rise to the surface.
• SOC medium may be purchased or made. It should be stored frozen at -20ºC. For
the recipe, see ‘Recipes and Reagents’.

GTC Lab 5
3
• Plating cells may be done in a variety of ways, generally by spreading with a
sterile glass spreader or by shaking sterile glass beads through the transformation
mix.
• It is important that these transformant plates incubate for only 16-18 hours. This is
because many satellite colonies will grow around the larger colonies and in some
cases may begin to mask the true transformants with longer incubation times.
Remove the plate from the incubator after 18 hours even if the transformant
colonies appear very small.

GTC Lab 6
GTC LAB 6: Plasmid Isolation and Restriction Digest Analysis
This method produces an abundance of plasmid, but it is not as “clean” as other preps.
However, it is fast and clean enough for restriction enzyme digests.
Day before:
1. Inoculate four 2 mL cultures of LB liquid media tubes (containing 100 µg/mL
ampicillin) with four transformant colonies from the ATT recombination reaction.
There may be many “satellite” colonies, small pinprick sized colonies that grow
around the larger (true transformant) colonies. Try to avoid picking these if
possible.
2. Shake overnight at 37˚C in a shaking incubator.
Day of lab:
3. Mix cultures well, and transfer 1.4 mL of each culture into microcentrifuge tubes using
a plastic transfer pipet or P-1000 pipet. Centrifuge on maximum speed for 1 minute.
4. Decant the supernatant into a collection beaker – try to remove as much as possible.
Dab upside down on a paper towel to help remove (your instructor can demonstrate if
necessary).
5. Add 350 µL of Sucrose Lysis Buffer. Thoroughly resuspend pellet by pipeting up and
down.
6. Add 25 µL of lysozyme solution (10 mg/mL in TE) and mix by inverting rapidly
several times.
7. Incubate on your bench at room temperature for 5 minutes.
8. Heat at 99˚C for 1 minute in a heat block or boiling water bath. Either open the caps or
poke a hole in the caps with a needle to relieve pressure.
9. Centrifuge for 15 minutes, maximum speed, in a microcentrifuge.
10. Remove the pellet with a toothpick and discard it (save the supernatant!).
11. Precipitate DNA from the supernatant by adding 40 µL of 3M NaOAc and 220 µL of
isopropanol to the supernatant. Mix very well by inverting the tube for 15 seconds.
12. Incubate at room temperature for 5 minutes.
13. Centrifuge for 10 minutes, maximum speed.

GTC Lab 6
14. Pour off the supernatant and discard. Wash the plasmid pellet in 500 !L of 70%
ethanol.
If you do not see a pellet at the bottom of the tube, it is often spread along one
side of the tube. To “wash” means to vortex until the pellet becomes loosened from the side. If it
does not loosen within 15seconds of vortexing, let the tube stand for 2 minutes,
then proceed.
15. Centrifuge for 2 minutes at maximum speed. Remove the supernatant and dry the
pellet by standing the tube upside down, lid open, on a paper towel.
It is very important that all ethanol is removed. Check with an instructor to make
sure your pellet is dry enough before resuspending in TE (next step).
16. Resuspend the pellet in 50 µL Tris-EDTA (TE) buffer.
Add TE to the pellet, and allow it to sit for 3 minutes at room temperature. Then
using a P-200 dialed to 30 !L, pipet up and down to resuspend. This may take
some patience. *Be sure to push beads of TE down the sides of the tube to
resuspend plasmid that dried there too.
Restriction Analysis of Clones
1. Set up 20 !L restriction enzyme digests as you did previously (GTC LAB 4) using
BamHI for the enzyme. Make sure you are using the correct enzyme buffer (refer to the
restriction enzyme chart).
2. Incubate the reactions for two hours in a 37ºC water bath. The lab instructor may
remove the reactions from the water bath for you at the appropriate time.
3. Store the remainder of the plasmid preps on ice. Mark the tops with your initials and
“ATT #__”. Give to instructor before leaving lab.


GTC Lab 6
GTC LAB 6 – INSTRUCTOR’S GUIDE
Prerequisite information: None
Students will gain:
• practice isolating plasmid DNA using a different method
• practice setting up basic cloning enzymatic reactions
Time: Approximately 1.5 – 2 hours
Materials:
• lysozyme (10 mg/mL solution)
• microcentrifuge tubes
• plastic transfer pipets
• microcentrifuges (at least two)
• Sucrose Lysis Buffer (see solution recipes)
• liquid LB + 100 !g/mL ampicillin – 3 mL aliquots into culture tubes
• isopropyl alcohol
• 70% ethanol
• TE buffer (see solution recipes)
• 37º water bath
• UV spectrophotometers
• ice and ice buckets (one per pair)
Solution Recipes:
Sucrose Lysis Buffer: 8% sucrose, 0.5% Triton-X-100, 50 mM EDTA, 10 mM Tris pH 8.0
See “Recipes and Reagents” for more details.
Lysozyme solution: 10 mg/mL in TE. See “Recipes and Reagents” for detailed instructions.
General:
Usually 3-5 !L of the resulting plasmid preps are enough to digest. To be safe, 5 !L is
recommended. The yield can be variable, and it is better to have too much than too little.
Be sure to collect all of the plasmid preps before the students leave. Directions for
marking the preps are provided in the protocol (last step).

GTC Lab 7
1
GTC LAB 7: Restriction Analysis, Southern Transfer, and
Probe Labeling
In this lab you will analyze the restriction digests of your ATT recombinant clones from
the previous laboratory period by agarose gel electrophoresis. As a second part of the
analysis, you will perform Southern hybridization (a Southern “blot”) on the resolved
fragments to detect a shift in size of the appropriate vector band, which will indicate that
the gene was cloned into the correct position.
Southern hybridization
Southern transfer and hybridization was a technique developed in 1975 by
Edward Southern. The technique has several applications, but primarily is used to study
how genes are organized within chromosomal DNA. It may also be used to analyze
cloned sequences. You will be using this technique to determine whether you have
cloned the gene into the correct site.
In general, your plasmid DNA is first digested with one or more restriction enzymes and
the resulting fragments are resolved by agarose gel electrophoresis. The DNA in the gel
is then denatured and transferred from the gel to a solid support (a nylon or nitrocellulose
membrane). The DNA binds strongly to the membrane and is thus immobilized in the
exact positions that it was following gel electrophoresis. The DNA attached to the
membrane is hybridized to a labeled nucleic acid probe (DNA or RNA) and the bands
complementary to the probe are identified by procedures that will detect the label on the
probe (for example, fluorescence detection if the label is a fluorescent molecule).
Southern blot steps: 1. Separate DNA by agarose gel electrophoresis.
2. Denature DNA in gel, and blot (transfer) DNA fragments to a membrane.
3. Hybridize immobilized ssDNA with a single-stranded probe complementary to the
sequence of interest.
• The probe must be “labeled” with a marker for detection.
4. Wash off excess, unhybridized probe.
5. Detect (visualize) the probe (where it has hybridized).
Procedure:
I. Run your digests of ATT recombinants from the previous lab on a 0.8% agarose gel.
• Make up 50 mL of agarose gel solution with 0.5 !L EtBr; pour your gel.
• Add 2 µL of loading buffer + RNase to each digest, load 20 !L of each, and run
the gel at 100V for ~45 minutes.
• Photograph the gel. Include a ruler in the picture to measure the distance from the
wells to the bands. This will be used later to interpret the results of your Southern
blot. Cut off one corner of the gel for orientation.

GTC Lab 7
2
II. Southern Transfer
You will be transferring your DNA under alkaline conditions to a nylon membrane. This
will result in covalent crosslinking of the DNA to the positively charged nylon.
1. Transfer the gel to a small plastic tray. Using a razor blade, cut off the top portion of
the gel from immediately below the wells. Cut one corner of the gel for orientation.
2. Soak the gel for 15 minutes at room temperature in several volumes (this means
several volumes of your total gel volume) of alkaline transfer buffer. This step
denatures the DNA in the gel.
• Wear gloves when handling the denaturing solution.
3. Change the solution and continue to soak the gel for another 15 minutes (minimum).
4. Cut a piece of nylon membrane exactly the size of the gel. Wear gloves to prevent
transferring greasy fingerprints to the membrane. Cut a corner of the membrane that
corresponds to the cut corner of your gel. Float the membrane on the surface of some
deionized water in a plastic weighboat until it wets completely. You will be able to see
a change in the membrane color from white to more translucent.
5. While the DNA is denaturing, set up your transfer apparatus. Place a piece of blotting
paper on a glass plate supported on the edges of a plastic transfer dish. This will be
demonstrated in class. The ends of the blotting paper should drape over the edges of
the plate. Fill the dish with transfer buffer until the level of the liquid reaches almost to
the top of the support (glass plate). When the blotting paper on the top of the support
is wetted, roll a glass pipet over the surface to eliminate the air bubbles.
6. Take the gel from the solution in step 3, flip it upside down so that the underside is
now on top, and center it on top of the blotting paper on the support. Run a gloved
finger or roll a glass pipet over the surface to ensure that there are not bubbles trapped
between the gel and the support.
7. Surround the gel with strips of parafilm.
8. Place the wet membrane on top of the gel. Chase out any bubbles between the gel and
the membrane using a gloved finger or by rolling a glass tube over the top.
9. Cut two pieces of blotting paper the exact size of the gel. Wet them in transfer buffer,
then place them on top of the wet membrane.
10. Cut a stack of paper towels the exact size of the gel. The stack should be at least 6 cm
high. Place the stack on top of the blotting paper.
11. Put a glass plate on top of the stack and weigh it down with a small flask.
12. Allow the transfer to proceed by capillary action overnight.

GTC Lab 7
3
The next day:
13. Disassemble the transfer “sandwich”, and soak the membrane in neutralization buffer
for 15 minutes at room temperature. This removes any pieces of agarose sticking to
the membrane and neutralizes the membrane.
14. Place the membrane on a paper towel to dry. Make sure the DNA side (the side
facing down on the gel) is UP. It will be retrieved from your bench and stored by a
lab instructor at the end of the day.
Part III: Probe labeling
The probe for the Southern blot will be labeled with digoxigenin (DIG), which is a steroid
hapten. DIG is conjugated to dUTP, which will be incorporated into your probe by polymerase
activity. DIG-dUTP incorporated into the probe is then detected by an antibody (anti-
digoxigenin) that is covalently bound to the enzyme alkaline phosphatase. The alkaline
phosphatase substrate CSPD is then put on the membrane. Enzymatic dephosphorylation of
CSPD by alkaline phosphatase leads to a light emission at a maximum of 477 nm, which is
detected by exposure to X-ray film for ~30 minutes. Thus, the light will be emitted only where
the antibody has bound to the DIG.
Making the probe - overview:
DIG-dUTP will be incorporated into the probe by the random prime method. In this technique,
the probe DNA to be labeled is first denatured into single strands. Then random hexamers (6-
nucleotide single-stranded primers in all random combinations of nucleotide sequence) are
annealed to the single-strand probe template. dNTPs (including the labeled dNTP, in this case
DIG-dUTP, are added along with Klenow enzyme in a reaction buffer, and the primer is
extended by polymerase activity, which also incorporates the labeled nucleotide into the growing
chain.
Procedure:
1. You will start with 100 ng of DNA label. The concentration of the stock will be provided
in class. Add sterile water to a final volume of 16 µL in a microcentrifuge tube.
2. Denature the DNA by heating in a 100˚C heat block for 10 min and quickly chilling in an
ice bath.
• Note: Complete denaturation is essential for efficient labeling.
3. Add 4 µL of the labeling mix to the denatured DNA, mix, and centrifuge briefly.
4. Incubate the reaction overnight in a 37˚C waterbath.
5. Your lab instructor will stop the reaction by heating the reaction to 65˚C for 10
min. This denatures and inactivates the Klenow enzyme. Your probe will be stored
at -20˚C until you are ready to probe your blot (next week).

GTC Lab 7
4
Completion of Southern blot: hybridization, washing, and developing
1. Insert your dry blot into a hybridization tube, DNA side facing inward. Add 7 mL
of hybridization solution to the tube. Seal the tube, and incubate for 30 minutes in the
hybridization oven. This is the “prehybridization” step. It prevents nonspecific
binding of the probe to the membrane.
2. Denature the DIG-labeled DNA probe in the heat block (95-100˚C) for 5 minutes.
Rapidly cool in an ice bath.
3. Add 2 !L of the denatured probe to 1 mL of hybridization buffer, mix briefly, and add
the entire mix to the hybridization tube. Incubate in the hybridization oven at 42˚C
overnight.
4. The next day, wash your blot 2 x 5 min in 100 mL Blot Wash 1 (2X SSC, 0.1% SDS)
at room temperature with periodic gentle agitation by hand.
5. Wash 2 x 15 min in 100 mL preheated Blot Wash 2 (0.5 x SSC, 0.1% SDS) at 68˚C.
6. Rinse the membrane for 1 minute in 20 mL Washing buffer.
7. Incubate for 20 min in 100 mL Blocking solution.
8. Incubate for 30 min in 20 mL Antibody solution.
9. Wash 2 x 15 min in 100 mL Washing buffer.
10. Equilibrate 2 min in 20 mL Detection buffer.
11. Place membrane with DNA side facing up on a piece of Saran wrap. Apply 800 µL
of CSPD substrate (from the brown bottle). Spread evenly over the membrane
surface. Incubate for 5 min at room temperature.
Rock back and forth periodically to ensure even coating across the surface of the
membrane.
12. Drain excess substrate solution from the surface of the blot. Place on a fresh piece
of Saran wrap. Cover the top with Saran.
13. Expose to X-ray film for 5 min at room temperature.
14. Develop the film in the darkroom as shown by an instructor.

GTC Lab 7
5
GTC LAB 7 – INSTRUCTOR’S GUIDE
Prerequisite information: Some prior discussion about Southern blotting technique.
Students will gain:
Practice applying Southern blotting technique
Time: Approximately 4 hours
Materials:
• microcentrifuge tubes
• microcentrifuge
• denaturation solution (0.4 N NaOH) ~200 mLs per gel to transfer
• neutralization buffer
• 37º water bath
• ice and ice buckets (one per pair)
• Whatman paper or thick blotting paper
• small plastic or glass dishes for gel denaturation and transfer
• agarose
• UV visible ruler (for photographing gel)
• 1 kb ladder
• 10X sample loading buffer with RNase
• 1 X TAE running buffer
• nylon transfer membrane
• large weighboats or other containers to moisten nylon membrane
• paper towels
• razor blades (or small scissors to cut corner of membrane)
• DNA for probe (100 ng should be enough for 10-12 blots)
• heat block
• hybridization oven
• DIG random prime labeling kit (Amersham)
• Blot wash 1 (2X SSC; 0.1% SDS)
• Blot wash 2 (0.5X SSC; 0.1% SDS)
• 68ºC water bath
• Washing buffer (see manufacturer’s protocol)
• Blocking solution (see manufacturer’s protocol)
• Detection buffer (manufacturer’s protocol)
• CSPD developing solution
• Saran wrap
• X-ray (autoradiography) film
• film cassette
• film developing solutions (D-19 developer and fixer) or automatic film developer
Solution Recipes:
Alkaline transfer buffer: 0.4 N NaOH; 1 M NaCl
Neutralization buffer: 0.5 M Tris-Cl (pH 7.2); 1 M NaCl

GTC Lab 7
6
20x SSC: 3 M NaCl, 0.3 M sodium citrate, adjust pH to 7.0
Washing buffer: Maleic acid, sodium chloride, Tween 20 (detergent), as per
manufacturer’s protocol
Blocking solution: 5% dried milk dissolved in maleic acid buffer (manufacturer’s
protocol)
Antibody solution: 1:1000 dilution of anti-Dig antibody in blocking solution
Detection buffer: Tris and sodium chloride buffer solution at pH 9.5 (manufacturer’s
protocol)
General:
• The Southern blot is an extra exercise – it is not required to identify correct ATT
recombinants. Correct recombinants can be identified according to their banding
pattern on the gel following BamHI digestion. A key to show the expected
banding of a correct recombinant is provided in the supplementary material for
this lab.
• DNA for making the probe: Digest 4-5 !g of pIGF-gtw with BamHI, resolve
bands on an agarose gel, and excise the 1.3 kb band and purify from the gel using
any standard gel extraction technique or kit. This contains the ATT recombination
sites. Some of this DNA will be retained in the recombinant molecule, so this
fragment can be used effectively as a probe.
• After hybridization it is important that the blot not dry out as this will lead to high
background signal.
• Students might complete their blots at different times. It may be easiest to wait for
several to finish before exposing blots to film. The signal will slowly increase for
about two hours, and then slowly begin to decrease, so the blots should be OK to
stand for a short time before exposure. Typically a 5 minute exposure to film is
long enough to see bands. After developing the 5 minute exposure, you can
decide how much longer to expose the next film.
• If multiple bands appear on the blot, students should try to identify the darkest
staining band and assume that this is the target band.
• Expected results: The 1.3 kb band should be hybridized on the lane of vector
alone digested with BamHI. In other lanes, a slower migrating band should
hybridize.

GTC Lab 8
GTC LAB 8: Tetrahymena Transformation by Electroporation
The pIGF-gtw plasmid contains the necessary DNA sequences both to replicate and be
selected in E. coli and Tetrahymena. This rDNA-based vector can replicate as a linear
mini-chromosome if it is introduced into Tetrahymena during conjugation, just prior to
the time that DNA rearrangement in the developing macronucleus occurs. The circular
plasmid is then cleaved at breakage sequences flanking the E. coli vector sequences and
is converted to a palindromic linear chromosome. We can select transformants based on
the virtue that the 17S rRNA allele in the plasmid confers cellular resistance to the drug
paromomycin. Drug selection of the transformants will need to be done the day after we
perform the electroporation.
Part I. Preparation of cells
Tetrahymena cells must be transformed during a narrow window of
development, 8.5 to 9.5 hours after initiating conjugation. To prepare the
cells for this, the follow has been performed outside of class time.
Day 1
Inoculate 100 mLs with 2 mLs of CU428 of 1 x SPP (+1x penicillin/streptomycin and
fungizone), incubate overnight at 30oC in 1 liter flasks. Repeat with CU427.
Day 2
Pour 50 mLs of grown culture into each of two 50 ml conical tubes to harvest cells.
Centrifuge in swinging bucket rotor @ 2500 rpm for 3 min.
Wash cells with 40 mLs of 10 mM Tris-HCl (pH 7.5)
Harvest cells again by centrifuging in a swinging bucket rotor @ 2500 rpm for 3 min.
resuspend each tube of cells in 40 mLs of 10 mM Tris-HCL. Pour into 150 mm Petri
dish. Allow cells to starve at least 8 hours at 30oC.
P G F P
p I G F - 1
P G F P

GTC Lab 8
Approximately 9 hours prior to electroporation (Part III below), mix equal numbers
of pre-starved Tetrahymena of complementary mating types. Allow cells to pair for
conjugation at 30oC, no shaking.
Day 3 – Electroporation
Part II. Preparation of DNA
1. Using the “boiling lysis” method of isolating plasmids (GTC LAB 6), isolate plasmid
from 5 mLs of E. coli containing the correct clone. This can be done in two
microcentrifuge tubes by first centrifuging 1.4 mL of cells in each, discarding the
supernatant, then adding another 1mL of cell culture and repeating. 2. Resuspend the final pellets in 100 !L of TE buffer, each. Add 1 !L of RNase A
(10mg/mL stock) and incubate at 37ºC for 15 minutes. 3. Extract the preparations once with 100 !L phenol:chloroform:isoamyl alcohol
(25:24:1). 4. Add 10 !L of 3M NaOAc and 300 !L of isopropanol. Let mixtures chill on ice for 15
minutes. 5. Collect the DNA precipitates by centrifuging at maximum speed for 15 minutes. 6. Dry the pellets and resuspend each in 25 !L of sterile 10 mM HEPES buffer.
Part III. Electroporation
1. Transfer 40 mLs of conjugating cells to 50 ml sterile conical centrifuge tubes (using
25- mL pipettes) and spin down for 3 minutes at 2500 RPM in a swinging bucket rotor
if possible. Decant supernatant quickly.
Note: It is important to decant medium as soon as centrifuge stops as the
Tetrahymena will try to rapidly swim out of the pellet. *This volume of cells will be enough for two transformations
2. After pouring off supernatant and gently resuspending in the remaining liquid (by
taping tube with finger), add 40 mLs of 10 mM HEPES buffer. Incubate at room
temperature for 5 minutes.
4. Harvest the 40 mLs of cells again by centrifuging @ 2500 rpm for 3 min.
Resuspend cells in 400 !l HEPES buffer and proceed with electroporation.
5. Turn on the electroporater (BTX) and set up with capacitance=275!F ,
resistance=25", Voltage = 250V. Double-check all settings.

GTC Lab 8
Procedure: For EACH sample of mating cells to be electroporated:
1. Combine the transforming DNA from both tubes into one sterile tube.
2. Using a P-1000, add 200 !l of the mating cells to the DNA in the microcentrifuge tube.
3. Mix gently by pipeting up and down.
4. Gently pipet the DNA+cell mixture from the microcentrifuge tube into a 4mm gap
cuvette.
5. Put the cuvette in the electroporation chamber and push the pulse button. Note time.
Record peak voltage and duration (msec.)
6. Remove the cuvette from the chamber. Press the reset button.
7. Wait one minute after electroporation, then wash the cells out of the cuvette by adding
0.5 mL of growth medium and pipeting cells with a Pasteur pipette (or P-200 pipet)
into a tube containing 5 mL of growth medium (1XSPP + 1X pen/strep + 1X
fungizone).
Repeat the above for all samples. Flush the cuvette with water and 70% ETOH to sterilize.
Plating of Cells:
1. Make 30 mLs of a 1:10 dilution of electroporated cells by mixing 27 mLs of SPP (+ 1x
pen/strep, 1x fungizone) and 3 mLs of electroporated cells.
2. Pour cell mixture into a media tray.
3. Plate each sample into 3 separate 96 well plates, aliquoting 100 µl/well using
multichannel pipettors.
Incubate plates at 30ºC for 16 hours before adding drug to select transformants.
Drug will be added to your transformation plates the next day. Make the necessary
arrangements with your lab instructor.
Next day (Selecting Tetrahymena electroporation transformants)
1. Take 30 mLs of media containing 200 !g/mL paromomycin from the prepared stock.
2. Pour media into a media reservoir.
3. Aliquot 100 µl/well to each of the three 96 well plates containing cells. Use a
multichannel pipettor.
4. Incubate at 30ºC for at least 3 days before checking for transformants.

GTC Lab 8
Part IV: Maintaining transformants
Overview of steps
1. Score the number of total transformants
2. Select 6-12 transformants from each shot for future experimentation
For each construct that was electroporated into Tetrahymena, identify wells
containing paromomycin resistant transformants. Select a reasonable number (six
to twelve, if you have this many) to propagate for further experiments.
1. Pipet 1.5 mLs of 1x SPP medium + 100 g/mL paromomycin + 1 x pen/strep into each
well of a 24-well plate that will be used to grow transformants.
2. Select the drug resistant transformants for each construct that you will transfer.
3. For each selected transformant, aliquot 30 µl of each to the new well with media in the
24-well plate. Label each well.
4. Incubate plates in Tupperware boxes at 30oC for 1-2 days to allow transformant
populations to grow.

GTC Lab 9
1
GTC LAB 9: Induction and GFP Localization
I. Before Starting: Determine what your experimental samples will be. Importantly, what are the controls
(positive and negative) that you will need?
II. Day Before Induction Inoculate 2 mLs of 2% PPYS medium containing 100 µg/mL of paromomycin and
antimicrobial/antimycotic drugs with 200 µL of your transformant cultures. The medium
will be made up for you in advance.
III. Induction Add enough CdCl2 from a stock solution of 1mg/mL (in the hood) to make a final
concentration of 1 µg/mL in your overnight culture. You will need to allow 1-2 hours for
maximal protein expression.
CAUTION: CdCl2 is extremely toxic. Wear gloves and dispose of tips in the waste
container in the hood.
IV. GFP Localization
1. After the cultures have induced for the appropriate amount of time, transfer 1 mL of each culture
into a microcentrifuge tube and centrifuge for 2 minutes at 4,000 rpm.
2. Quickly remove as much supernatant as possible, leaving a few microliters of
concentrated cells at the bottom of the tube.
3. Add 1 µL of DAPI solution (20 µg/mL) and incubate at room temperature for 3 minutes. CAUTION: DAPI is a mutagen. Wear gloves when handling
4. Place a 5-µL spot of 2% methylcellulose on a slide.
5. Add 2 µL of concentrated cells to the methylcellulose spot. Place a coverslip over the cells.
6. Visualize and photograph fluorescence localization on the fluorescence microscope.
After finding the cells under white light with the 10X objective, switch to the 40X
objective and the GFP filter. Switch to the DAPI filter. Collect digital images of cells
with each filter. If cells are moving too much, try pressing the coverslip down.

GTC Lab 9
2
GTC LAB 9 – INSTRUCTOR’S GUIDE
Prerequisite information: Concept of inducible promoter; steps and processes involved
in gene expression and protein production.
Students will gain:
• practice applying concepts in the central dogma of molecular biology.
• experience with fluorescence microscopy
Time: Approximately 4 hours, depends on number of samples
Materials:
• 2% methylcellulose in water
• microcentrifuge tubes
• microcentrifuge
• glass slides
• small square coverslips
• 1 mg/mL solution of CdCl2 – make only a few mLs.
• DAPI solution (20 !g/mL)
• Fluorescence microscope with DAPI and GFP filters
General:
• Allow 20-30 minutes per sample on the microscope. It may work best to divide this
over two laboratory periods and ask students to schedule times on the microscope.
• For first time users on the microscope will require the assistance of an instructor.
• It is critical that students remove as much supernatant as possible from the induced
Tetrahymena cells to keep them highly concentrated.
• Work with CdCl2 in a small, confined area, if possible. A hood works well. It is
extremely toxic and should not be spread throughout the laboratory.