Fundamentals of Horticulturejnkvv.org/PDF/13122019145533Horti Manual-CSP 2019.pdf · The field of...
72
Transcript of Fundamentals of Horticulturejnkvv.org/PDF/13122019145533Horti Manual-CSP 2019.pdf · The field of...

Fundamentals of Horticulture(Practical Manual)
S.K. PandeyC.S. Pandey
Department of HorticultureCollege of Agriculture
Jawaharlal Nehru Krishi Vishwa VidyalayaJabalpur 482004 (MP)
2018

Pub. No.: DFA/JNKVV/PM/Horti./2018/05-1
Citation:Pandey SK, Pandey CS, 2018. Practical Manual on ‘Fundamentals of Horticulture’.Department of Horticulture, College of Agriculture, Jawaharlal Nehru Krishi VishwaVidyalaya, Jabalpur, MP.
Technical Support:Dr. P.K. BisenHon’ble Vice ChancellorJNKVV, Jabalpur
Dr P.K. MishraDean Faculty of AgricultureJNKVV, Jabalpur
Dr. (Mrs.) Om GuptaDean, College of AgricultureJNKVV, Jabalpur
Prepared by:Dr. S.K. PandeyProfessor& Head (Horticulture)Dr. C.S. PandeyScientist (Horticulture)
Published by:Dean, College of Agriculture, JabalpurJawaharlal Nehru Krishi Vishwa VidyalayaJabalpur, Madhya Pradesh 482004Tele-fax: 0761-2681236; web: www.jnkvv.org
Publication assistance: ICAR Development Grant
No part of this publication may be translated or reproduced in any form without written permission ofthe Dean, College of Agriculture, JNKVV, Jabalpur (MP).

FOREWORD
Horticulture continues to play a major significant role in the overall development of the
country. Horticulture dealing with fruits, vegetables, flowers, its post harvest management and
allied branches is the core to Indian Agriculture and would continue to hold the belief that it is
an important sector to make farmers and entrepreneurs to realize higher income and
prosperity.The practical manual ‘Fundamentals of Horticulture’ is prepared according to
syllabus of 5th Dean’s Committee is a very timely and relevant initiative towards improving
practical skills of undergraduate students. I am confident that the practical skills acquired by the
students would be helpful to them in their professional career.
I hope that the manual would be of great help not only to the students but also to all those
dealing with the field/laboratory exercises in horticulture. I congratulate the authors for their
making efforts in preparation of this manual.
Jabalpur (P.K. Bisen)
Date: 31.03.2018

PREFACE
The practical manual on ‘Fundamentals of Horticulture’ is of immense importance for
the students because the required information is compiled in detail and consequently more time
can be diverted for practical purpose. The practical of horticultural fields are always fascinating
as they provide an opportunity to the students to apply the art and scientific principles in few
horticultural operations such as propagation of plants for quality planting material, potting and
repotting, layout of the orchards and training and pruning of plant along with knowledge about
garden tools. These practical skills acquired by the students would be helpful to them in their
professional career. The Practical manual contains elaborated information on the field exercises.
The exercises included in this manual are framed as per the prescribed syllabus.
I am sure that the manual will be helpful to the students, researchers, extension workers
and nurserymen dealing with the field exercises of horticultural crops.
Date: 31.03.2018
(P.K. Mishra)
PREFACE
The field of horticulture is like an ocean, which includes fruits, vegetables, ornamentals,
plantation crops, spices and condiments, roots and tuber crops, Mushrooms etc. It has emerged
as one of the most important sectors for the diversification of agriculture. The course
‘Fundamentals of Horticulture’ is taught to undergraduate students in almost all agricultural
universities. However a practical manual covering the whole syllabus is limited, and if available,
these not contain latest information in a simple and easy to understandable language.
Considering the fact, practical manual ‘Fundamentals of Horticulture’ has been prepared as perthe prescribed syllabus of 5th Dean’s Committee in simple and easy to understand manner. These
practical skills acquired by the students would be helpful to them in their professional career.
I hope that the manual would be of great help not only to the students, but also to all
those dealing with the field/laboratory exercises in horticulture.
Date: 31.03.2018 (Om Gupta)

Department of HorticultureCollege of Agriculture, Jabalpur
Jawaharlal Nehru Krishi Vishwa Vidyalaya, Jabalpur, MP
PREFACE
The field of horticulture dealing with three main branches viz. pomology, olericulture
and floriculture is helping mankind not only to diversify diet and to improve nutritional security
due to richness in mineral & vitamins and providing aesthetic sense but also economic security,
income and employment generation. The pomology is the study of different aspect of fruit
growing; olericulture deals with vegetable growing and floriculture with all aspects related to
flowering and ornamental plants. In the production of these horticultural crops, basic knowledge
and skill of garden tools, proper identification of crop/plant, nursery bed preparation,
propagation, training and pruning, methods of manures and fertilizer application etc. is
necessary. This practical manual has been prepared to cover the practical aspects of
‘Fundamentals of Horticulture’ to undergraduate students in almost all agricultural universities
containing latest information in a simple and easy to understandable language. The different
aspects covered in the manual will be an asset to understand and improve the practical skills
about production of horticultural crops. Besides, this manual would be of great help to all those
dealing with the field exercises in horticulture.
The financial assistance received from the ICAR Development Grant for bringing out
this manual is gratefully acknowledged.
Date: 31.03.2018S.K. PandeyC.S. Pandey

Contents
Exercise No. Objective Page Nos.
Exercise - 1 Study about garden tools and implements 1-7
Exercise - 2 Identification of horticultural crops 8-9
Exercise- 3 Preparation of seed bed/ nursery bed 10-14
Exercise - 4 Study of pots, potting, depotting and repotting 15-16
Exercise - 5 Study of orchard layout 17-18
Exercise - 6 Study about system of planting 19-22
Exercise - 7 Propagation through specialized vegetative structures 23-24
Exercise - 8 Study on propagation by cutting 25-28
Exercise - 9 Study on propagation by layering 29-31
Exercise - 10 Study on propagation by grafting 32-38
Exercise - 11 Study on propagation by budding 39-41
Exercise - 12 Study about micro propagation 42-48
Exercise - 13 Study about training and pruning 49-55
Exercise-14 Study of manures and fertilizers application 56-61
Practical Manual on Fundamentals of Horticulture
College of Agriculture, JNKVV, Jabalpur (MP) 1
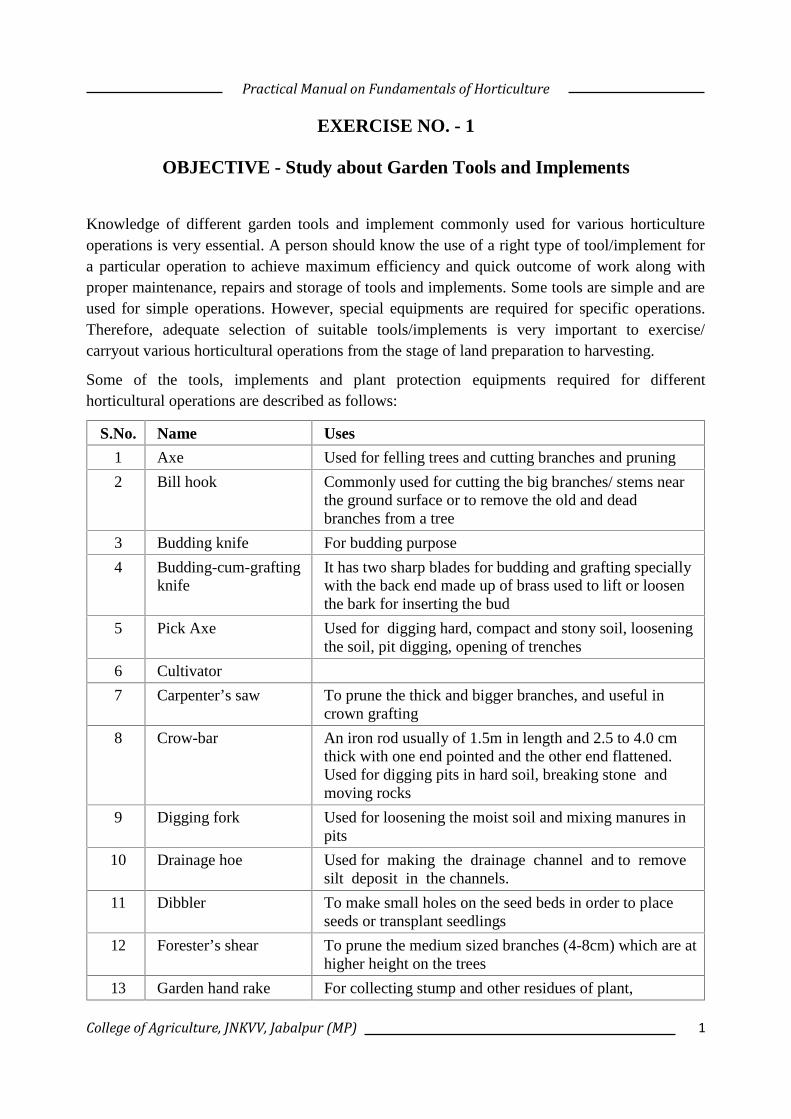
EXERCISE NO. - 1
OBJECTIVE - Study about Garden Tools and Implements
Knowledge of different garden tools and implement commonly used for various horticultureoperations is very essential. A person should know the use of a right type of tool/implement fora particular operation to achieve maximum efficiency and quick outcome of work along withproper maintenance, repairs and storage of tools and implements. Some tools are simple and areused for simple operations. However, special equipments are required for specific operations.Therefore, adequate selection of suitable tools/implements is very important to exercise/carryout various horticultural operations from the stage of land preparation to harvesting.
Some of the tools, implements and plant protection equipments required for differenthorticultural operations are described as follows:
S.No. Name Uses
1 Axe Used for felling trees and cutting branches and pruning
2 Bill hook Commonly used for cutting the big branches/ stems nearthe ground surface or to remove the old and deadbranches from a tree
3 Budding knife For budding purpose
4 Budding-cum-graftingknife
It has two sharp blades for budding and grafting speciallywith the back end made up of brass used to lift or loosenthe bark for inserting the bud
5 Pick Axe Used for digging hard, compact and stony soil, looseningthe soil, pit digging, opening of trenches
6 Cultivator
7 Carpenter’s saw To prune the thick and bigger branches, and useful incrown grafting
8 Crow-bar An iron rod usually of 1.5m in length and 2.5 to 4.0 cmthick with one end pointed and the other end flattened.Used for digging pits in hard soil, breaking stone andmoving rocks
9 Digging fork Used for loosening the moist soil and mixing manures inpits
10 Drainage hoe Used for making the drainage channel and to removesilt deposit in the channels.
11 Dibbler To make small holes on the seed beds in order to placeseeds or transplant seedlings
12 Forester’s shear To prune the medium sized branches (4-8cm) which are athigher height on the trees
13 Garden hand rake For collecting stump and other residues of plant,

Practical Manual on Fundamentals of Horticulture
College of Agriculture, JNKVV, Jabalpur (MP) 2
S.No. Name Usesremoving stubbles, small stones, leveling of nursery bedsand breaking clods, formation of small beds
14 Garden trowel For lifting more number of seedlings
15 Grass shear To cut the out growth of grasses planted in posts, carpetbeds
16 Hand fork Used for hoeing, compost handling and to break the clods.
17 Hand cultivator To loosen the soil, remove clods, pebbles in nursery bedsand mixing of manures and fertilizers.
18 Hand leveller Used in small bed and nursery for levelling land andcovering the seed after sowing.
19 Hatchet To remove or cut down the bigger stems and brokenstems
20 Hedge shear To prune the tender parts of garden shear the plants, it isespecially useful for trimming hedges, borders, topiarywork
21 Hose pipe To irrigate flower beds, lawns etc.
22 Kurpi-Varvari For weeding and stirring the soil in the pots and beds.
22 Lawn mower To cut the grass uniformly in the lawn. It is having aroller behind to pad the grass to have cushion.
23 Lawn sprinkler For irrigating lawns.
24 Pruning saw To prune the thicker branches (4-6cm girth) of anacute crotch (angle)
25 Pruning knife For pruning of thicker branches and it has curved knife.
26 Pruning shear For cutting small sized branches.
27 Rotary weeder For cutting of grasses in lawn, carpet beds, edges etc.
28 Secature To prune the branches, twigs, water suckers etc. of smallplants.
29 Sickle For cutting grasses, vegetables etc.
30 Scythe (Dabba) For cutting lawn grasses, vegetables etc.
31 Spade To loosen the soil, prepare irrigation channels, collect thesoil in heaps and facilitate filling up of soil, manure etc. inthe baskets.
32 Transplanting trowel To lift the young seedlings along with a boll of earth fortransplanting.
33 Tree pruner To cut down the smaller branches of the trees withoutclimbing.
34 Trenching hoe For light collection of soil, irrigation purposes andopening of trenches.
35 Tree calipers To measure the girth of trees trunks.

Practical Manual on Fundamentals of Horticulture
College of Agriculture, JNKVV, Jabalpur (MP) 3
Axe Budding knife Bill Hook
Budding cum grafting knife Pick axe Carpenter’s saw
Digging fork Hand Hoes Drainage hoe
Forester’ shear Cultivator

Practical Manual on Fundamentals of Horticulture
College of Agriculture, JNKVV, Jabalpur (MP) 4
Crow-bar Garden hand rake
Garden trowel Grass shear
Hand fork Hand cultivator Hand laveller

Practical Manual on Fundamentals of Horticulture
College of Agriculture, JNKVV, Jabalpur (MP) 5
Hose pipe Kurpi-varvari
Lawn mower Lawn Sprinkler
Pruning knife Pruning shear Pruning Saw

Practical Manual on Fundamentals of Horticulture
College of Agriculture, JNKVV, Jabalpur (MP) 6
Rotary weeder Secateur Sickle
Spade Tree pruner Tree Calipers

Practical Manual on Fundamentals of Horticulture
College of Agriculture, JNKVV, Jabalpur (MP) 7
S.No. Name Uses
36 Water can with rosehead
To water the young seedling in seed beds, potted plantsetc. the rose head facilitates with fine spray of waterwhich prevents the washing down of soil.
37 Weed cutters Special kinds of weed cutter have a serrated double edgedsteel blade and handle about 60 cm long. It is used withswinging strokes in two directions.
38 Wheel barrow To transport manures, soil, seedlings, garden waste etc.
Plant Protection equipments
39 Aspee back paksprayer
For spraying of soluble fertilizers / plant protectionchemicals on nursery beds, flower beds, potted plants etc.
40 Aspee Bolo-powersprayer
For spraying of soluble fertilizers /plant protectionchemicals on large areas.
41 Aspee knapsacksprayer
For spraying nursery beds, flower beds, potted plants etc.
42 Automizer For spraying growth hormone/ micronutrient solution onnursery beds, potted plants etc.
43 Hand Rotary Duster For dusting the powdery chemicals on plants.
44 Hand sprayer For spraying growth hormone/ micronutrient solution onpotted plants
45 Rocker sprayer For spraying plant protection chemicalsparticularly in plantations/orchards
46 Foot Sprayer For spraying of soluble fertilizers/plant protectionchemicals on nursery beds, flowerbeds, potted plants etc.It requires two labourers for operation.

Practical Manual on Fundamentals of Horticulture
College of Agriculture, JNKVV, Jabalpur (MP) 8
EXERCISE No. - 2
OBJECTIVE - Identification of Horticultural Crops
Horticultural crops are classified in different times for various purposes where each of theclassifications have definite objective and grouped under botanical, horticultural and commercialheads.
Branches of horticulture
Pomology- production and marketing of fruit crops.
Olericulure- production and marketing of vegetable crops.
Floriculture and landscaping- production and marketing of flower/ornamental crops,beautification through design and alteration of land using planting material etc.
Fruit & Vegetable Preservation: - applied branch for protection and processing ofhorticulture produce to increase shelf life as well as preparation of value added products.
Plantation Crops- cultivation and marketing of commercial crops on extensive scalelike coconut, tea, coffee, Cashew nut etc.
Spices & Aromatic Crops - cultivation and marketing of crops having aroma, taste andflavor value.
Medicinal and aromatic Plants- cultivation and marketing of crops having potentialsource of drugs.
Roots and Tuber crops- cultivation and marketing of root crops like radish, carrot,turnip, sugar beet and tuber crops like potato etc.
It is very important to familiar with botanical and horticultural features of plants foridentification. Plant identification depends to a large extent on what criteria and whose system isused. Plant identification implies comparisons of certain characteristics and then assigning aparticular plant to a known taxonomic group, ultimately arising at a species and variety inbinomial classification system. Taxonomy the branch of botany deals with plant identification,nomenclature and classification.
Classification is a system of placing an individual or a number in various groups or to categorizethem according to a particular plan or sequence. Basically, the horticultural crops/ fruit treeshave been classified on the basis of their botany comprising taxonomical ancestry,morphological features, physiological functions, adaptability etc or on the basis of Agriculturaland horticultural requirements. Identification of horticultural/fruit crops include the knowledge/discussion of horticultural/ fruit species in the following manner:
1- Common name, botanical name and family of horticultural plant species.

Practical Manual on Fundamentals of Horticulture
College of Agriculture, JNKVV, Jabalpur (MP) 9
2- Identification/Categorization of plant species on the basis of major and minor fruits,cotyledons (monocot, dicot), life cycle (annual, biennial and perennial), Stemmorphology (Tree, Shrubs, Climber, ramblers) Soil and climatic requirements, toleranceto salinity, drought, water logging and frost etc
3- Familiarization with details of root, leaf, inflorescence, flower, fruit and seed.
4- Identification/ Categorization of plant species on the basis of flowering & fruitingbehavior, ripening behavior, edible portion, specific nutritional importance andcommercial methods of propagation, etc

Practical Manual on Fundamentals of Horticulture
College of Agriculture, JNKVV, Jabalpur (MP) 10
EXERCISE No. - 3
OBJECTIVE - Preparation of Nursery Bed /Seed Bed
Nursery
Nursery is a place, where seedlings, saplings, trees, shrubs and other plant material are grownand maintained until they are placed in permanent place. Seedlings at early stages deservespecial attention which is only possible in nursery. Setting up of a horticultural nursery is a longterm venture and requires careful planning and expertise. Establishment, management andmarketing are major considerations of nursery.
Establishment of nursery
The nursery should be established in such an area where cultivation of fruit crops is on sizeablearea and there is need for a nursery, having demand for saplings. In such area/region, followingconsiderations need to be observed for selecting an appropriate location.
1. Nursery should be established in the important production areas.
2. Nursery soil should be deep, fertile, well drained and free from pathogens.
3. The site should be well connected by different means of communication and must beeasily accessible.
4. The area should be well protected.
5. Soil and micro-climatic conditions should be appropriate.
6. Availability of irrigation and power supply should be ensured.
7. Sufficient labour and skilled person should be available to handle different operation..
8. Availability of progeny/mother stock (bud wood source tree) and root stocks should beensured.
9. Availability of propagating/growing structure, hardening chamber etc.
10. Availability of working shed, pot and packaging yard and sale unit etc.
11. Availability of office building, staff quarters etc.
Purpose - One of the important operation for horticulture crop is raising of seedlings (fruit trees,vegetables, shrubs and flowering annuals). In many plants, the seeds are first sown in seed bedsand after sometimes seedlings are either directly transplanted in the actual field as in case ofsome vegetables, flowering annuals, shrubs, and trees or may used as root stock as in case offruit trees like mango, guava, aonla etc. For healthy and good stand of seedlings properpreparation of nursery bed is essential. Since large number of seedlings are raised in small area,due consideration of adequate moisture and nutrients, protection from pest & diseases, strongsunlight and wind is very important. These factors will vary if seedlings are raised in protectedstructure.

Practical Manual on Fundamentals of Horticulture
College of Agriculture, JNKVV, Jabalpur (MP) 11
Materials required- Spade, khurpi, rake, rope, pegs, measuring tape, water cane, plastic sheet,manures and fertilizer insecticide, pesticide, fungicide etc.
Procedure- Select the proper area for preparing nursery bed having well drained fertile loamysoil rich in organic matter and sunny situation. Mark out the area required for nursery. Dig thesoil about 25-30 cm deep with the help of a spade or kudali. Remove weeds, weed roots andstones etc. Level the land with the help of rake. If the soil is heavy clay or silt then mix sand atthe rate of 4-5 kg per sq. metre. After this spread well decomposed FYM (Farm Yard Manure) atthe rate of 5-6 kg per sq. metre. Fertilizers like urea, single super phosphate and potassiumchloride at the rate of 200-250 g per sq. metre.
Preparation of Nursery bed- Nursery beds of 1- 1.20 m wide and convenient length 5-6 m areconsidered ideal. In between two parallel beds a space of 50-60 cm should be provide forcultural operations. The height of bed should be 15-20 cm particularly during rainy season and10-15 cm during winter season from the soil surface.
Type of Nursery bed
1- Raised Nursery bed- During rainy season, it avoids losses through water stagnation byfacilitating proper drainage of excess water.
2- Flat Nursery bed-During winter and spring season, seedlings is raised in flat bed. In thiscase, cost of preparation is less.
3- Sunken Nursery bed- During summer, seedlings should be raised in sunken type ofnursery bed. It protects the plants from hot dry winds.
Soil treatment/ Sterilization of Nursery beds- Several times, soil contains certain harmfulpathogens, which interferes with growth and development of seedlings. These harmful insectscan be eliminated by pasteurization, solarization, changing the sight of nursery or by chemicaltreatment.
Solarization- It is simple and effective method for soil sterilization. For this, soil mulching isdone with black polythene of 200-300 gauge during the period of high temperature and solarradiation. The edges of polythene sheet should be pressed in the soil to minimize the aircirculation. Soil should be kept moist before mulching to increase the latent heat and thermalsensitivity for resting he soil borne pathogen, harmful insects and weeds which can be reducedto a sustainable level.
Chemical treatment
Seed bed treatment-
1- Formaldehyde (Formalin) 1% can also be used for soil treatment. 5 litre of this solutionis sprayed uniformly on soil surface per sq. meter. After spraying the beds should becovered with black polythene. The edges of the polythene need to be sealed with wet soilto make air tight. Polythene should be removed only after 10-12 days. The seed shouldbe sown only after 6-7 days after removing the polythene.

Practical Manual on Fundamentals of Horticulture
College of Agriculture, JNKVV, Jabalpur (MP) 12
2- Spray the bavistin 0.1% - 0.3% on the moist bed or Sevin dust 20-25 gm/sq.m area andleave the bed for 2-3 days.
3- 1% solution of Trichoderma virdi also can be used for seed bed treatment.
Seed treatment-Before sowing the seeds in the sterilized bed, seed should be treated with 0.3%suitable fungicide eg. ceresan, bavistin, thiram.
Sowing of seed- In well prepared beds, the seed should be sown in miniature furrows. The depthof furrows will depend upon the seed size. For bolder seeds of furrow should be kept 5-6cm keptand for smaller and fine seed depth should be kept 1-3 cm. The furrows should be covered witha mixture of leaf mould and sand (3:1).
Care and handling of Seedling- The protection should be against strong sun and rain, frost etc.Covering the beds with agro-net/ mosquito net at a height of a meter will protect the seedlingsagainst strong sunshine and wind. Spraying with fungicide and insecticide as and when requiredproves very useful to the seedling health.
Components of modern nursery
A number of structures may be necessary for raising a nursery. To establish the nursery, thefollowing structures need to be constructed:
1. Fencing: It is required to protect a nursery particularly from stray animals.
2. Progeny block (bud wood source tree)
In progeny block, true to type mother plant are maintained in the nursery. Suitable planttypes with existing superior cultivars/varieties should be collected and maintained in theprogeny block. The mother plants should be true to type, healthy, heavy bearer withstandard quality fruit having tolerance to biotic and abiotic stresses. Care should be takento label the plants properly.
3. Rootstocks and seed gardens-After establishment of scion bank, next priority should begiven for the establishment of the rootstocks or seed garden. Seed propagation is themost usual way for mass production of rootstocks.
4. Growing structures:
There should be provision of modern propagation structure like greenhouse/polyhouse,mist chamber etc. these structure provide optimum growing conditions for seedgermination, rooting of cutting, hardening of seedlings. Now a day’s green house hasbecome a prerequisite of Hi-Tech nursery. Shade nets are useful not only for reducingheat injury to young plants, but their use also reduces transpiration. Shade nets areavailable in different colours and densities.
5. High Humidity Chamber:
This technique resolves the common problem of grafts or cuttings dying due todesiccation (drying up) when planted in the soil for rooting, by ensuring a humidatmosphere around the cuttings, thus preventing excessive evaporation.

Practical Manual on Fundamentals of Horticulture
College of Agriculture, JNKVV, Jabalpur (MP) 13
6. Use of Supplementary Light:
Several plants go into winter dormancy when the day length gets short. Additional lightfrom tube lights, given after sunset, creates long-day condition that prevents the plantsfrom going into winter dormancy.
7. Drought Hardening:
Plants that are raised under high atmospheric humidity and shade often die due totransplanting shock when shifted to the fields. To prevent this, the plants are hardened byallowing external dry air to enter the chamber gradually.
After having established the above infrastructure, the nursery establishment and planninginvolve division of the nursery into different units, viz., propagation unit, production unit,packaging unit and sale unit.
1. Propagation unit
Propagation unit is the major unit of nursery work and includes:
(i) Actual propagation structures such as green house, hot beds, cold frames and misthouse.
(ii) Service structures such as head house.
(iii) The alley house connecting to the hot beds and cold frames with head house. Itprovide a passage for the transport of plants, propagation media, soil and fertilizersfrom head house to propagation structures, and must be sufficient wide to permiteasy and quick movement.
(i) Primary nursery (Seedbeds)
Seed beds near to water source and to office so that they can be kept under vigilantcontrol. The raised seedbeds of 6-8 cm height, 1 meter width and of convenient length,free from stones should be prepared with upper 2.5-5cm of the bed filled with sand. Soilcan be prepared to fine tilth, add sufficient quantity of rotted FYM, vermin-manure orpig manure at least 10-15 days earlier of seed sowing. The bed may be treated with 1%Bordeaux or 0.1% Bavistin before sowing of seeds.
(ii) Nursery beds
Seedlings from seed beds are removed and transplanted in the nursery beds. Nurserybeds should be located in an open area near to water source. Nursery beds should beprepared by adding sufficient organic manures and fertilizers. Nursery beds should bedivided into section as per crop and varieties. The nursery beds should be laid out in sucha way that there is an access to all the beds through roads or paths.
(iii)Pot yard
The pot yard should be in shade because the tender plants require shade as compared tohardy plants. This section should be near to water source. Trenches can be provided forkeeping potted plants closely packed together.

Practical Manual on Fundamentals of Horticulture
College of Agriculture, JNKVV, Jabalpur (MP) 14
2. Production Unit
The object of this unit is to rear the new plants from seedling to marketable stage. Thisunit is divided into different blocks, each block being meant for only one kind of plant orspecies. This helps on sorting of plants, easy record keeping and doing the operation asper the need of a plant species.
3. Packaging Unit:
The packing yard is used for packing the plants before sale or dispatch to out stations.The yard can be combined with working shed. It is near to sale counter.
4. Sale Unit:
The objective of the sale unit is to market the nursery plants effectively. The design andlayout of this unit should be attractive to the customers. This should be usually locatedon a well travelled way and may be by the side of production unit. The sale unit isusually divided into three different parts such as display unit, sale and packing, andparking unit.
Practical Manual on Fundamentals of Horticulture
College of Agriculture, JNKVV, Jabalpur (MP) 15
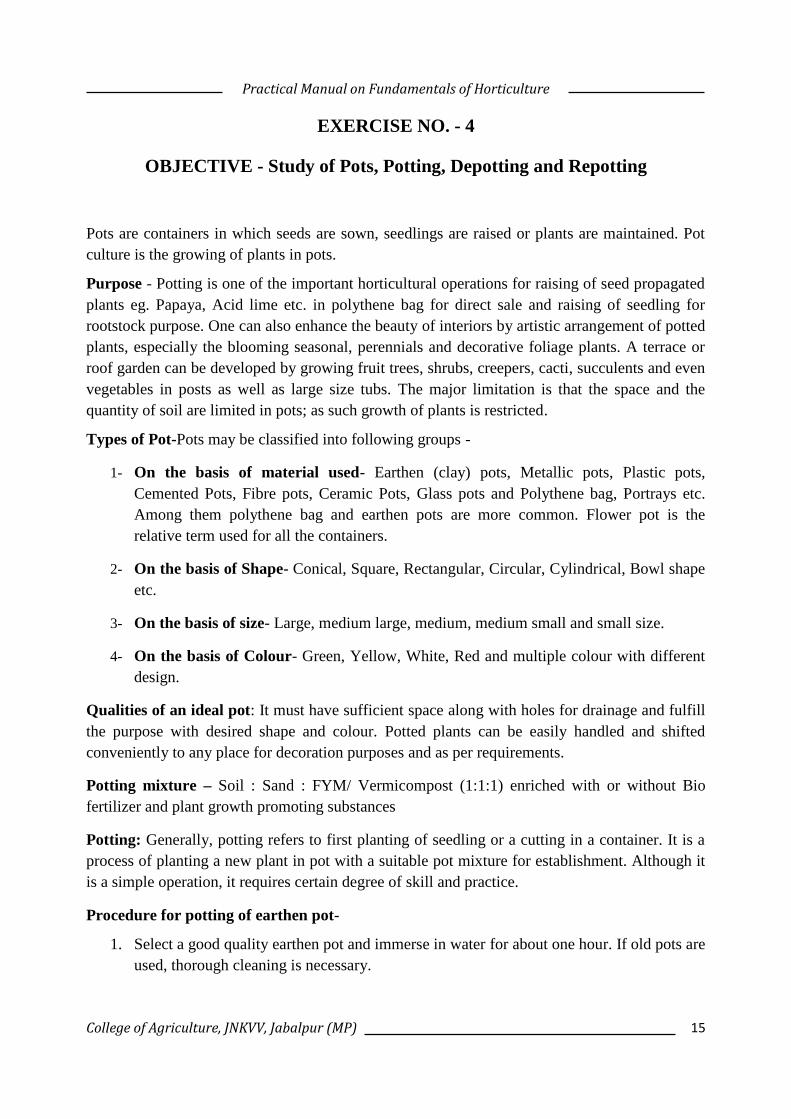
EXERCISE NO. - 4
OBJECTIVE - Study of Pots, Potting, Depotting and Repotting
Pots are containers in which seeds are sown, seedlings are raised or plants are maintained. Potculture is the growing of plants in pots.
Purpose - Potting is one of the important horticultural operations for raising of seed propagatedplants eg. Papaya, Acid lime etc. in polythene bag for direct sale and raising of seedling forrootstock purpose. One can also enhance the beauty of interiors by artistic arrangement of pottedplants, especially the blooming seasonal, perennials and decorative foliage plants. A terrace orroof garden can be developed by growing fruit trees, shrubs, creepers, cacti, succulents and evenvegetables in posts as well as large size tubs. The major limitation is that the space and thequantity of soil are limited in pots; as such growth of plants is restricted.
Types of Pot-Pots may be classified into following groups -
1- On the basis of material used- Earthen (clay) pots, Metallic pots, Plastic pots,Cemented Pots, Fibre pots, Ceramic Pots, Glass pots and Polythene bag, Portrays etc.Among them polythene bag and earthen pots are more common. Flower pot is therelative term used for all the containers.
2- On the basis of Shape- Conical, Square, Rectangular, Circular, Cylindrical, Bowl shapeetc.
3- On the basis of size- Large, medium large, medium, medium small and small size.
4- On the basis of Colour- Green, Yellow, White, Red and multiple colour with differentdesign.
Qualities of an ideal pot: It must have sufficient space along with holes for drainage and fulfillthe purpose with desired shape and colour. Potted plants can be easily handled and shiftedconveniently to any place for decoration purposes and as per requirements.
Potting mixture – Soil : Sand : FYM/ Vermicompost (1:1:1) enriched with or without Biofertilizer and plant growth promoting substances
Potting: Generally, potting refers to first planting of seedling or a cutting in a container. It is aprocess of planting a new plant in pot with a suitable pot mixture for establishment. Although itis a simple operation, it requires certain degree of skill and practice.
Procedure for potting of earthen pot-
1. Select a good quality earthen pot and immerse in water for about one hour. If old pots areused, thorough cleaning is necessary.

Practical Manual on Fundamentals of Horticulture
College of Agriculture, JNKVV, Jabalpur (MP) 16
2. Place a good crock on the drainage hole with its concave side facing the hole. Over this alarge number of pot pieces are put (4-5 cm thick). On these crocks a layer of coarse sandor gravel or coconut fibre or sphagnum moss is spread to ensure adequate drainage andprevent clogging of drainage hole.
3. Remaining space in the pot is filled with suitable pot mixture leaving a head space of2.5-5.0 cm.
4. The pot mixture should be sufficiently moist at the time of planting.
5. The plant is placed at the centre by scooping out the required amount of pot mixture, sothat it accommodate the root system and held in position by packing the soil mixturewith hand gently.
6. Water the pots immediately after planting.
Depotting:
It is a simple technique of taking the established plant out of the original container. A systematicapproach is necessary for removing the plant intact from the pot. The pot is lifted by one hand,the palm spread over the top of the soil holding the stem between the fingers (Fore finger andmiddle finger) and then the pot is inverted. A gentle tapping of the rim portion of the invertedpot is inverted pot against a hard surface or edge of the bund is necessary so that the entire ballof earth with its entwining roots will slip out as one piece. If soil is too dry water the pots 1-2 hrbefore depotting.
Repotting:
It is generally referred to the transfer of a plant from one pot to another and replacing the soilmixture with the fresh one. The first step in repotting is the depotting. After depotting the plantwith compact roots, with mother soil removed from it is placed in the centre of the new pot andthen the sides are packed with the new garden mixture.
Repotting is necessary when, nutrients are exhausted, pots are broken due to wind or mechanicaldamage, the soil turns sourest due to continuous watering, under pot bound conditions, insectand disease infestation and for exhibition purpose.

Practical Manual on Fundamentals of Horticulture
College of Agriculture, JNKVV, Jabalpur (MP) 17
EXERCISE No. - 5
OBJECTIVE - Study of Orchard Layout
Layout is done to locate the actual position of the trees, roads & sub-road, irrigation &drainagechannels, store and buildings etc in the orchard. The mistakes committed in the initial stage oforchard establishment can cause loss throughout the life of an orchard, and it is very difficult oreven impossible to correct them later. It is, therefore, essential that the layout of an orchardshould be carefully planned and executed to facilitate proper care of the orchard.
Principles- A well considered layout plan should be followed for planting an orchard. The planshould provide optimum number of trees per unit area with sufficient space for the properdevelopment of each tree and convenience in various orchard operations such as inter-culture,spray and harvesting etc.
Materials required- Rope, poles, pegs, Carpenters triangle or cross staff, measuring tape andplanting board are required for laying out an orchard.
Procedure for layout
Steps:
1. First and foremost step in orchard layout is to draw the base line parallel to the road orfence or the boundary of the orchard. This should be drawn at a distance of half thespacing that is to be followed, for example, if the spacing is 10 metre the base line shouldbe drawn at a distance of 5 metre from the periphery of the plot.
2. Towards the end of the base line, leave again a space equal to half the spacing from theboundary or road or fence etc. and put the peg on one end of the base line. From this peg,measure the planting distance and put the second peg on the base line. Thus, continueplacing pegs at each of the planting distances till the total length of the base line iscovered. The distance from the last peg to the boundary should also be half of thespacing given.
3. From the first peg and the last peg on the base line, draw perpendicular lines to the baseline. The perpendicular lines may be drawn by adopting any of the following methods.
A. Pythagoras theorem or Carpenters triangle: In this case, by adopting a right angledtriangle with the sides and hypotenuse in the proportions of 3:4:5, a perpendicular linecan be drawn.
Pythagoras principle-In a right angle triangle
(Length of Hypotenuse)2 = (Length of base)2 + (Length of Perpendicular)2
(5)2 = (3)2 + (4)2
25 = 9+16
Practical Manual on Fundamentals of Horticulture
College of Agriculture, JNKVV, Jabalpur (MP) 18
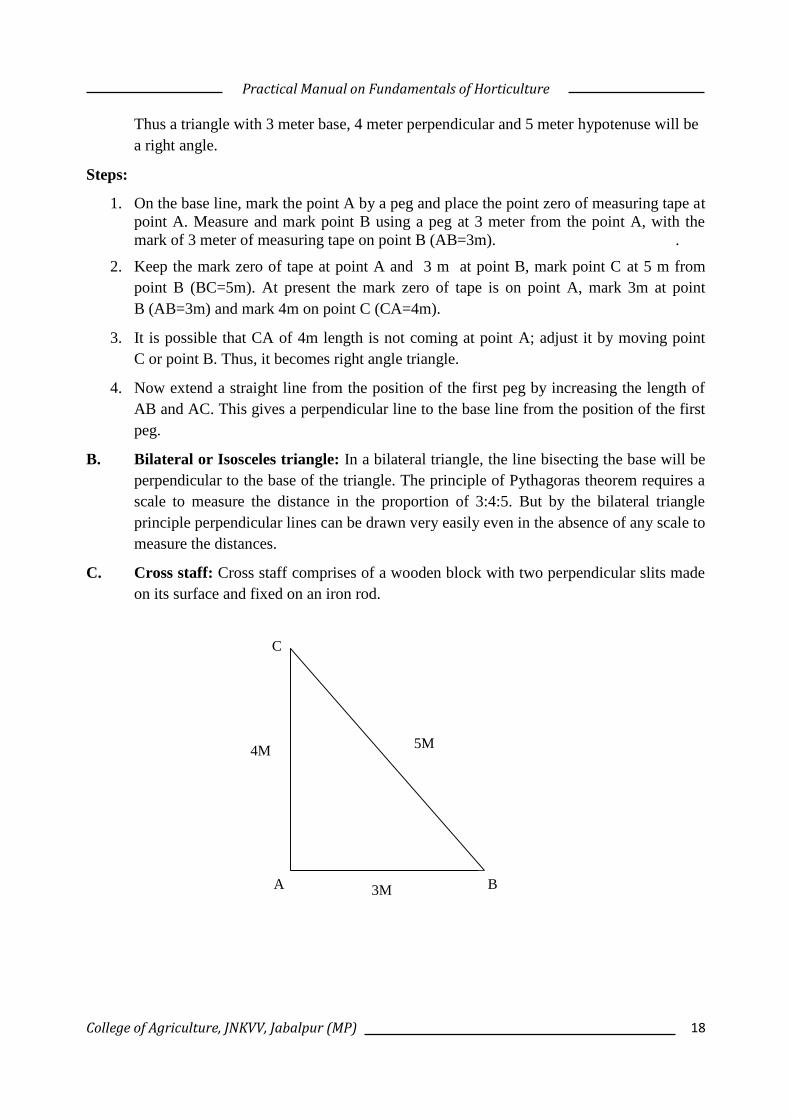
Thus a triangle with 3 meter base, 4 meter perpendicular and 5 meter hypotenuse will bea right angle.
Steps:
1. On the base line, mark the point A by a peg and place the point zero of measuring tape atpoint A. Measure and mark point B using a peg at 3 meter from the point A, with themark of 3 meter of measuring tape on point B (AB=3m). .
2. Keep the mark zero of tape at point A and 3 m at point B, mark point C at 5 m frompoint B (BC=5m). At present the mark zero of tape is on point A, mark 3m at pointB (AB=3m) and mark 4m on point C (CA=4m).
3. It is possible that CA of 4m length is not coming at point A; adjust it by moving pointC or point B. Thus, it becomes right angle triangle.
4. Now extend a straight line from the position of the first peg by increasing the length ofAB and AC. This gives a perpendicular line to the base line from the position of the firstpeg.
B. Bilateral or Isosceles triangle: In a bilateral triangle, the line bisecting the base will beperpendicular to the base of the triangle. The principle of Pythagoras theorem requires ascale to measure the distance in the proportion of 3:4:5. But by the bilateral triangleprinciple perpendicular lines can be drawn very easily even in the absence of any scale tomeasure the distances.
C. Cross staff: Cross staff comprises of a wooden block with two perpendicular slits madeon its surface and fixed on an iron rod.
A B
C
5M4M
3M

Practical Manual on Fundamentals of Horticulture
College of Agriculture, JNKVV, Jabalpur (MP) 19
EXERCISE No. - 6
OBJECTIVE – Study about System of Planting
System or methods of plant layout- The plan showing the arrangement of plant in an orchardis known as plant layout. Although several systems of planting are followed, but selection of asuitable system, depending on soil, climate, plant type, system of training and pruning is veryimportant. Adoption of improper system results in over lapping of plant parts and competitionfor water, light, nutrient and unequal distribution of water etc
There are several planting plans or systems which can be adopted for planting an orchard. Thedifferent system of planting is as follows:
1- Square System
2- Rectangular System
3- Triangular System
4- Quincunx System
5- Hexagonal System
6- Contour/ Terrace System
7- Hedge System
I. Square system:
This is the simplest of all systems. In this system of planting the plants are planted instraight rows running at right angle. The distance between plants and between rowsremains same. Plants are planted at the corners of a square. Better watching and thepossibility of cultural operations in two directions is the greatest advantage of this system.The major disadvantage of this system is that a lot of space is wasted in between thesquares.
II. Rectangular system:
This system is similar to that of the square system in its layout except for the differencethat the spacing between the rows and between the plants in a row is not equal. In thissystem, trees are planted on each corner of a rectangle. The wider alley spaces availablebetween rows trees permit easy intercultural operations and even the use of mechanicaloperations. The major disadvantage in this system is that two way inter cultivation is notpossible.
III. Triangular System:
This system is similar to the square system of planting except that in every alternate rowthe plants are planted in midway of two plants of the previous row. Thus, tree plants makea triangle where only two arms are of equal length.

Practical Manual on Fundamentals of Horticulture
College of Agriculture, JNKVV, Jabalpur (MP) 20
IV. Quincunx system:
This is also known as filler or diagonal system. This system is essentially the squaresystem except for an additional tree in the centre of each square. Thus the number of treesare nearly double than the square system, but does not provide equal spacing. Center(filler) trees may be short lived. This is difficult layout on ground and can be adopted whenspacing for permanent tree is more than 10m. This is not satisfactory as a permanent plantbut is satisfactory for putting temporary trees in the centre of squares. Filler should beremoved after a few years when main trees come to bearing.
V. Hexagonal system:
This system is also known as equilateral triangle system of planting. This system is alsocalled septuplet because seventh tree is put in the centre of the hexagon. The plant in thissystem is planted at the corners of the equilateral triangle with one tree in the centre. Thus,six trees make a hexagon with an additional tree in the centre of the hexagon. Theperpendicular distance between any two adjacent rows is equal to the product of 0.866 xthe distance between any two trees. As the perpendicular distance between any two rows isless than unity this system allows 15% more plants than the square system. The limitationof this system is that it is difficult to lay out and the inter cultivation is not so easily doneas in the square system. Besides, the watch and ward also becomes difficult as one cannotsee in all the directions from a point.
VI. Contour system:
This system of planting is usually followed on hills with high slopes. The layout is startedfrom the lowest level and the tree rows are planted along a uniform slope, at right angles tothe slope, with a view to reduce loss of top soil due to erosion. This is necessary for rollingtopography. Trees can be planted on terraces or along contours. Terraced fields rise insteps one above the other and help to bring more area into productive use and also toprevent soil erosion. In South India, tea is planted in contours either in single hedge systemor in double hedge system. Double hedge contour planting system accommodates nearly22% higher population than single hedge system.
VII. Hedge system:
The layout is exactly same as rectangular system except that very wider spacing ismaintained between rows and a very narrow spacing is followed between plants. Thissystem permits easy movement of men, material and machinery and also effective culturaloperations due to wider spacing. Therefore, this system is especially suitable wheremachines are employed for various farm operations.

Practical Manual on Fundamentals of Horticulture
College of Agriculture, JNKVV, Jabalpur (MP) 21
Square Rectangular
Diagonal/Quincunx Triangular System
DIAGONAL/
Hexagonal Terrace System

Practical Manual on Fundamentals of Horticulture
College of Agriculture, JNKVV, Jabalpur (MP) 22
Calculation of Number of Plants in different Systems of Planting.
The number of plants that can be accommodated by each of the systems in a unit area should becalculated by the formula shown against each system as under:
1. Square System = A_LXP
A= Field AreaL= Row to Row spacingP= Plant to Plant spacingExample- Area is 10000 sq. metre and planting distance is 10x10 (m) then
2. Rectangular System = ALxP
A= Field AreaL= Row to Row spacingP= Plant to Plant spacing
Example- Area is 10000 sq. metre and planting distance is 10x 8 (m) then-Number of plants=10,000/10 × 8 = 125 Plants
3. Quincunx System-
As the plants are planted additionally in the centre of the square, hence first the numberof plants is calculated for square system of planting which is-
No of Plants= Area in square metre/Planting distance in metre square=10,000/10 X 10 =100 Plants.
Additional plants = (No. of rows length wise - 1) × (No. of rows width wise -1 )
In 100 × 100 sq. metre field if planting distance is10 × 10 m. then number of rows lengthwise and width wise will be 10
Hence, No of additional plants (10-1) × (10-1) = 9 × 9 = 81
Total number of plants = Pants planted in Square system of planting + additionallyplanted plants in the centre of square ie. 100 + 81 = 181
4. Hexagonal system = Area x 115Spacing 100
5-Triangular system = __ S______D2x0.8666
S= unit surfaceD = Length of the triangle side
Number ofplants=
10,000 = 100Plants10× 10

Practical Manual on Fundamentals of Horticulture
College of Agriculture, JNKVV, Jabalpur (MP) 23
EXERCISE No. - 7
OBJECTIVE - Propagation through specialized Vegetative Structures
Propagation-The multiplication of plant through seed or vegetative means is known aspropagation. There are two methods of producing new plants-
1. Sexual method- The multiplication of plant through seed is known as sexual method ofpropagation.
2. Asexual or vegetative method- The multiplication of plant through vegetative meansis known as asexual method of propagation. It may be through division orseparation/division, cutting, layering, budding and grafting.
There are certain plant modifications which are used for vegetative propagation ofplants. These modified plant parts may be stem, root, or leaves and are usuallyspecialized for food storage. Two principal methods are used for propagation of plantsby using these modifications.
A- Separation: naturally detachable structures, such as bulbs or corms are separatedand planted individually and
B- Division: The plants modification such as rhizomes, tubers etc., are cut intosections to obtain new plants from each section.
1- Bulbs: Bulbs are produced by monocotyledonous plants in which the stem ismodified for storage and reproduction. Bulb is a specialized underground organconsisting of a short freshly, usually vertical stem axis bearing at tip apex or growingpoints and enclosed by thick freshly scales. Bulb scales morphologically are thecontinuous sheathing leaf base. Growing points develop in the axils of these scales toproduce miniature bulbs known as bulbets/ daughter bulbs. These daughter bulbscane separated from the mother plant at the end of growing season and used aspropagating material.
Ex: Tulip, Daffodils, Tuberose, Onion, Garlic (cloves)
2- Tubers: A tuber is the short terminal portion of an underground stem which hasbecome thickened because of accumulation of preserved food material eg: Potato.Propagation by tuber can be carried out either by planting the whole tuber or bycutting into sections each containing bud or eyes.
3- Tuberous roots: Certain herbaceous perennials produce thickened roots whichcontain large amount of stored food. The tuberous roots differ from the tubers in thatthey lack nodes and internodes. Adventitious buds are present only at stem end orproximal end; fibrous roots are produced towards the distal end. These fleshy rootsare separated and used for propagation. For example- Sweet potato, Dhahlia. Tapioca(Cassava).

Practical Manual on Fundamentals of Horticulture
College of Agriculture, JNKVV, Jabalpur (MP) 24
4- Rhizomes: The horizontal, thick and fleshy or slender and elongated stem growingunderground are known as rhizomes. Rhizomes have nodes and internodes andreadily produce adventitious roots. The rhizomes are cut into pieces, each containingvegetative bud and transplanted. Eg: Banana, Ginger, Ferns, Turmeric, andCardamom.
5- Corms: A corm is solid underground base of a stem having nodes and internodesand is enclosed by a dry scale like leaves. After flowering one or more corms maydevelop just above the old one, which disintegrates. In addition several new cormscalled caramels develop below each new corm. These may be separated and grownfor 1-2 years to reach flowering stage. Eg: Gladiolus, Amor phophallus.
6- Runners: Runners are specialized arial stems (stolons) arising in the leaf axils ofplant having rosette crowns. New plants arise from nodes at interval along theserunners. From these runners more new runners may arise thus developing naturalclonal multiplication methods. The typical runner producing plant is straw berrywhich is photo sensitive with regard to its runner production. Long days favourrunner production where as short days prevent runner formation.Eg: Strawberry.
7- Suckers: Adventitious shoot from the underground portion of the stem or fromtheir horizontal root systems are known as suckers and when these strike roots, theymay be utilized as propagation materials. Well developed suckers are dugout andseparated from the mother plant and planted in the nursery for further growth.Suckers are usually treated like rooted layers.Eg: Pineapple, Chrysanthemum, Curryleaf, Banana.
8- Offsets/ offshoots: An offset is a shoot or thick stem of rosette like appearancearising from the base of the main stem of certain plant such as date palm, pineappleetc., Date palm cultivars are propagated vegetatively by separating away theoffshoots and replanting them. However these are girdled and layered for about ayear prior to separation, because offshoots do not root easily when directly separatedfrom the mother plant and planted in the field.
Practical Manual on Fundamentals of Horticulture
College of Agriculture, JNKVV, Jabalpur (MP) 25
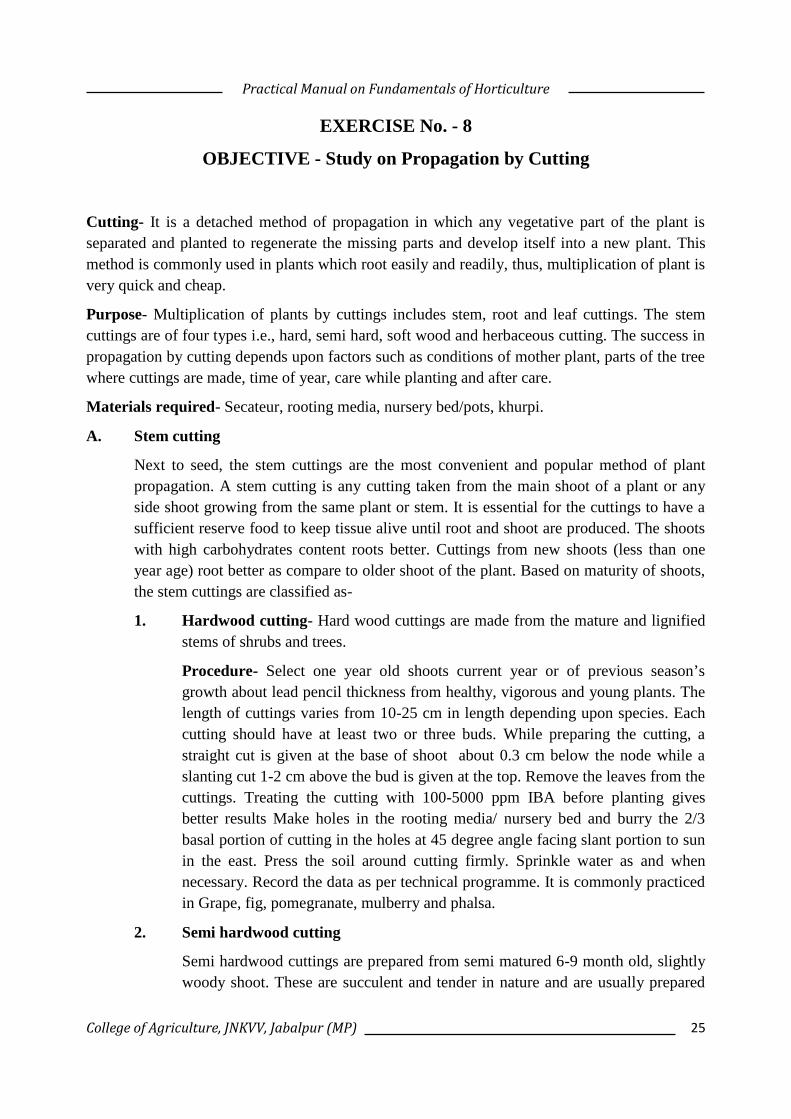
EXERCISE No. - 8
OBJECTIVE - Study on Propagation by Cutting
Cutting- It is a detached method of propagation in which any vegetative part of the plant isseparated and planted to regenerate the missing parts and develop itself into a new plant. Thismethod is commonly used in plants which root easily and readily, thus, multiplication of plant isvery quick and cheap.
Purpose- Multiplication of plants by cuttings includes stem, root and leaf cuttings. The stemcuttings are of four types i.e., hard, semi hard, soft wood and herbaceous cutting. The success inpropagation by cutting depends upon factors such as conditions of mother plant, parts of the treewhere cuttings are made, time of year, care while planting and after care.
Materials required- Secateur, rooting media, nursery bed/pots, khurpi.
A. Stem cutting
Next to seed, the stem cuttings are the most convenient and popular method of plantpropagation. A stem cutting is any cutting taken from the main shoot of a plant or anyside shoot growing from the same plant or stem. It is essential for the cuttings to have asufficient reserve food to keep tissue alive until root and shoot are produced. The shootswith high carbohydrates content roots better. Cuttings from new shoots (less than oneyear age) root better as compare to older shoot of the plant. Based on maturity of shoots,the stem cuttings are classified as-
1. Hardwood cutting- Hard wood cuttings are made from the mature and lignifiedstems of shrubs and trees.
Procedure- Select one year old shoots current year or of previous season’sgrowth about lead pencil thickness from healthy, vigorous and young plants. Thelength of cuttings varies from 10-25 cm in length depending upon species. Eachcutting should have at least two or three buds. While preparing the cutting, astraight cut is given at the base of shoot about 0.3 cm below the node while aslanting cut 1-2 cm above the bud is given at the top. Remove the leaves from thecuttings. Treating the cutting with 100-5000 ppm IBA before planting givesbetter results Make holes in the rooting media/ nursery bed and burry the 2/3basal portion of cutting in the holes at 45 degree angle facing slant portion to sunin the east. Press the soil around cutting firmly. Sprinkle water as and whennecessary. Record the data as per technical programme. It is commonly practicedin Grape, fig, pomegranate, mulberry and phalsa.
2. Semi hardwood cutting
Semi hardwood cuttings are prepared from semi matured 6-9 month old, slightlywoody shoot. These are succulent and tender in nature and are usually prepared

Practical Manual on Fundamentals of Horticulture
College of Agriculture, JNKVV, Jabalpur (MP) 26
from growing wood of current season’s growth. The length of cutting varies from10-20 cm. The cuttings are prepared by trimming the cutting with straight cutbelow a node. However, it is better to retain two to four leaves on the top ofcuttings. Treating the cutting with IBA before planting gives better results inguava, lemon etc.
3. Soft wood/ Green wood cutting
Softwood cutting is prepared from soft, succulent and non-lignified 3-6 monthold shoots which have not become hard or woody. Usually the cutting size is 5-15cm but it varies from species to species. Usually few leaves are retained andbefore planting, treatment with auxin (IBA) is beneficial. This is commonly usedfor root stocks of apple, peach, plum and cherry in mist condition.
4. Herbaceous cutting- The cuttings are prepared from terminal soft, succulent andtender portion of 1-3 month old shoots of current growth under mist conditionensuring warm and humid condition. This is commonly used in ornamentalplants.
B. Leaf/Leaf bud cutting
Leaf cutting should preferably be prepared during growing season because buds if interin dormancy may be difficult to force to active stage. A leaf bud cutting consists of a leafblade, petiole and shoot piece of stem with attached axillary bud of active growingleaves. In this cutting, 1-1.5 cm stem portion is used when propagating material is small.Leaf bud cutting are best made from material having well developed bud and healthyactively growing leaves. High humid condition is essential for better success in leafcutting.eg. black berry, lemon, rasp berry.
C. Root cutting- This is commonly used in apple, pear, cherry, guava, black berry, fig, raspberry, wood apple etc. The root cuttings should be taken from root pieces of young stockplants in late winter or early spring when the roots are well supplied with stored foodsbut before new growth starts. It is important with root cuttings to maintain correctpolarity when planting as the new shoots develop from the proximal end ie. from the partclose to the crown. The proximal end of the root piece should always be up.
D. Others- Some different kind of cuttings are also used by propagators like Basal cuttings,Heel cuttings, Bud cuttings, Eye cuttings, Inter nodal and nodal cuttings, Irishmam’scuttings and Piping cuttings.

Practical Manual on Fundamentals of Horticulture
College of Agriculture, JNKVV, Jabalpur (MP) 27
Herbaceous Cutting
Soft Wood Cutting

Practical Manual on Fundamentals of Horticulture
College of Agriculture, JNKVV, Jabalpur (MP) 28
Semi Hard Wood Cutting Hard Wood Cutting
Root Cutting Leaf Cutting with petiole Leaf cutting without petiole

Practical Manual on Fundamentals of Horticulture
College of Agriculture, JNKVV, Jabalpur (MP) 29
EXERCISE No. – 9
OBJECTIVE - Study on Propagation by Layering
Layering- The layering is the development of roots on a stem, while it is still attached to theparent plant. The rooted stem is then detached to become a new plant growing independently onits roots.
Purpose- Layering is the oldest technique used by nurserymen to propagate many horticulturalplants. Plant multiplication through layering includes several forms of ground and aerial layering(Goottie).When branches running parallel to the ground are utilized, then the method is knownas ground layering. When rooting is encouraged on the aerial part of the plant after girdling, thenthe method is called as air layering or goottie or marcottage.
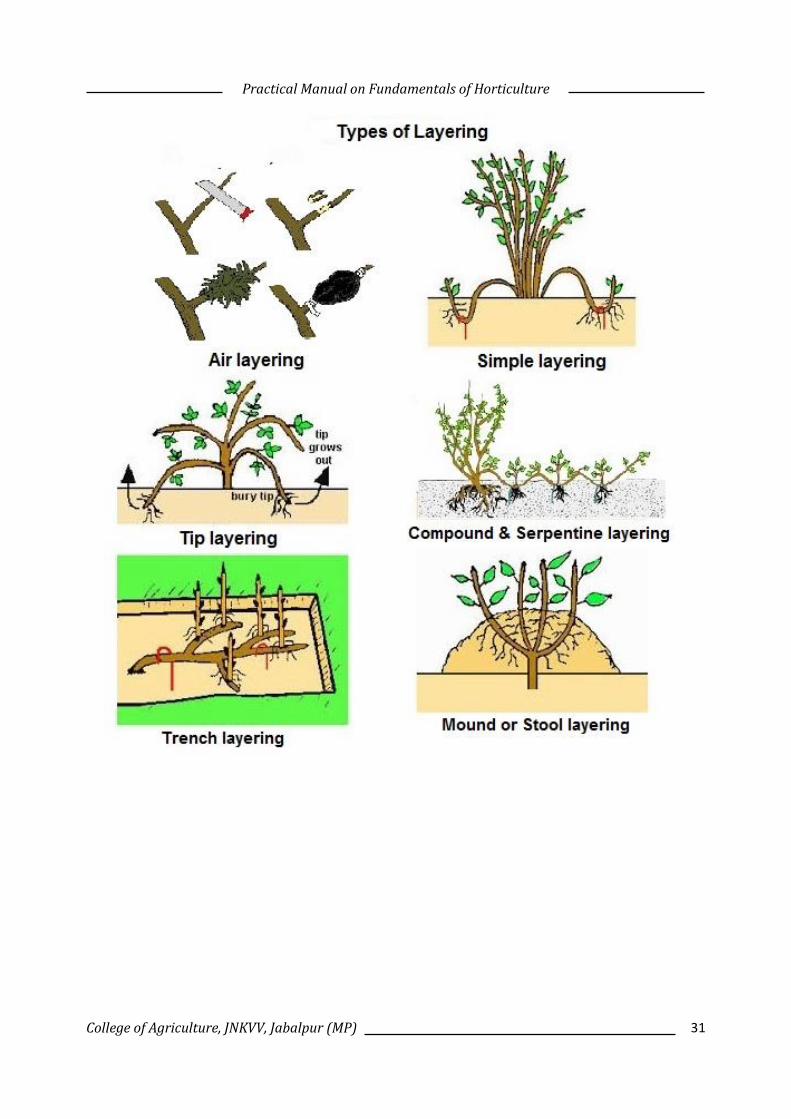
Classification of layering-
A. Ground layering
1. Tip layering
2. Simple layering
3. Compound or serpentine layering
4. Trench layering
5. Mound or Serpentine layering
B. Air layering (goottie or marcottage)
Materials required- Secateur, budding knife, rooting media, nursery bed/pots, khurpi,sphagnum mass, polythene strip, sutali etc.
Propagation by layering
1. Tip layering
In tip layering, the tip of shoots is bend to the ground and the rooting takes place near the tipof current season’s shoot. The tips of shoot buried 5-6 cm deep in the soil. Keep the soil wetwhere cane is buried for developing the roots. Rooting in the buried shoots takes placewithin a month. The new plants may be detached and transplanted in the nursery duringspring. eg. Black berry, raspberry and gooseberry.
2. Simple layering
In simple layering, the flexible shoots of a plant are bent downwards over to ground in earlyspring or in rainy season. Remove a ring of bark or make a notch at a distance of 20-25 cmaway from the tip to encourage rooting. The girdled portion is buried up to 7-10cm depthand covered with soil leaving the terminal end of the branch open. It is necessary to hold thecane/shoot in place with wire or wood stakes. Keep the soil wet where cane is buried fordeveloping the roots. Rooting in the buried shoots takes place within a month. Eg. Grape,lemon etc.

Practical Manual on Fundamentals of Horticulture
College of Agriculture, JNKVV, Jabalpur (MP) 30
3. Trench layering
In this method it is important to establish a permanent row of plants to be propagated. Themother plants are planted at the base of a trench at a angle of 45 0 in rows. The long andflexible stems of these plants are pegged down on the ground to form a continuous line oflayered plants. The young shoots that arise from these plants are gradually mounded up to adepth of 15-20 cm in autumn, winter or end of the season, depending upon the species. egApple rootstocks (M16 and M25), cherry, plum
4. Compound or Serpentine layering
It is suitable for plant producing long, slender, and flexible shoots. It is modification ofsimple layering in which one year old branch is alternatively covered and exposed along itslength. The stem is girdled at different point in the underground. However, the exposedportion of the stem should have at least one bud to develop a new shoot. After rooting, thesection are cut and planted in the field eg. Jasmine, American grapes etc.
5. Air layering
Generally one to two years old, healthy and vigorous shoots having pencil thickness are usedfor air layering. First the leaves are removed near the basal – inter nodal portion which isaway from 35 to 45 cm from apex of the selected shoots then the stem is given a notch or isgirdled by removing a ring of bark about 2-3 cm wide. Application of root promotinghormones at the distal end at time of layering helps to get profuse rooting within a shorttime. Root promoting substances may be applied as powder or in lanolin or as a solution.IBA or a combination of IBA + NAA, both at the rate of 500ppm may be applied for betterresults. After application of hormones, ringed or girdled portion is covered with moist mossgrass or handful of moist clay soil. This ball of earth may be again covered with sphagnummoss and wrapped with a 200 gauge polythene sheet. Air layering should be done either inspring or in monsoon. The rooted layers are either planted in pots or in the nursery beds in ashady place until they are fully established. Litchi, guava and pomegranate, lemon and Limecan be propagated by air layering.
6. Stooling/mound layering
In this method the mother plants are headed back to 10-15 cm above ground level duringdormant season. The new sprout will arise within two months. These sprouts are then girdledand rooting hormone made in lanolin paste is applied to the upper portion of the ring. Theconcentration of rooting hormones are varies from plant to plant but in general 3000 to 5000ppm is most commonly used. These shoots are left for two days for proper absorption ofhormone before they are covered with soil. Care must be taken to keep the soil moist alltimes. The roots from shoots may emerge within 20-30 days depending on species. Theserooted stools should be separated from the mother plant only after 60-70 days and thenplanted in the nursery beds. Eg. Guava, Apple rootstocks, quince, currants, raspberry etc.
Practical Manual on Fundamentals of Horticulture
College of Agriculture, JNKVV, Jabalpur (MP) 31
Practical Manual on Fundamentals of Horticulture
College of Agriculture, JNKVV, Jabalpur (MP) 32
EXERCISE No. - 10
OBJECTIVE - Study on Propagation by Grafting
Grafting
Many horticultural plants are propagated by grafting. In grafting, the desired cultivar can beraised on other plants (rootstocks) for achieving the desired benefits.
Grafting is an art of joining the stock and scion in close contact with each other in such a waythat they will unite and continue to grow as single individual/composite plant. The upper part ofthe composite plant is termed as ‘scion’ and the part which forms the root is termed as‘rootstock’. Sometimes, when scion and rootstocks are not compatible with each other, anotherpiece of wood is used in between the stock and scion, which is compatible with both; this iscalled as ‘interstock’.
Principles of Grafting- The principal steps involved in healing process and formation of thegraft union are-
i. Establishment of direct contact between the cambial region of both stock and scion.
ii. Production and interlocking of parenchymatous cells.
iii. Production of new cambial cell.
iv. Formation of new vascular tissues.
Different methods of grafting-
A- Attached method of grafting- Inarching, bridge grafting
B- Detached method of grafting – Whip, tongue, cleft, veneer, soft wood, epicotyl grafting.
1. Inarching
It is generally used for repairing or replacing damaged root system and hence also called asrepair grafting. Selection of parent tree for taking the scion is an important factor for itssuccess. The scion plant should be healthy, vigorous and high yielding. The stock isbrought close to the scion. A thin slice of bark (6-8 cm long and about 1/3 inch inthickness at height) at about 20 cm above the ground level is removed from the stock witha sharp knife. A similar cut is made in the scion. Thus the cambium layers of both stockand scion are exposed. These cuts are brought together and tied firmly with the help ofpolythene strip. After successful union, stock above and scion below the graft union arelooped of gradually. It is done soon after rainy season provided that temperature of thelocalities does not fall below the 15 0C. eg Mango, sapota, guava,litchi.
2. Veneer grafting
It is simple method of propagation and can be used in one year old rootstock seedlingshaving a diameter of 1.0-1.5 cm. For veneer grafting, 3-6 months old scion shoots are
Practical Manual on Fundamentals of Horticulture
College of Agriculture, JNKVV, Jabalpur (MP) 33
selected. Usually, the terminal and next to terminal shoots are most ideal. The shoots aredefoliated 5-10 days prior the grafting leaving the petiole attached. The rootstock isprepared by making a slating cut (5cm long) and an oblique cut is made at the base of firstcut so that a piece of wood along with bark is removed. The base of the scion wood is thenfitted into the rootstock in such a manner that the cut surface including the cambium layersof scion and rootstock face each other. The rootstock and scion are tied together withpolythene tape. When scion growth begins the shoot of rootstock is removed above thegraft union. Eg. Mango.
There are some other methods of grafting used for propagation of fruit plants.
3. Whip grafting
It is simple and popular method of grafting. In this method of grafting, it is essential thatboth stock and scion should be of equal diameter1-1.5 cm. About one year old rootstock isheaded back at a height of 20-25 cm from the soil and a diagonal cut is made at the distalend of the rootstock. A similar slanting cut of 2-4 cm is made on the proximal end of thescion. The cut surface of both rootstock and scion are bound together and tied firmly withpolythene tape or banana fibre. Many fruit plant are propagated by whip grafting eg.appleand pear etc.
4. Tongue grafting- This method is practiced as whip grafting except one additional reversecut is made on both scion and rootstock, so that cambial contact will be more with moresuccess percentage.
5. Cleft grafting
It is particularly suitable in rootstock having diameter greater than the scion. Rootstockwith 5-7 cm or more girth is selected for this purpose. The rootstock is cleft grafted afterdecapitating the stock 20-40 cm above the ground level. The beheaded rootstock is split toabout 5cm deep through the center of stem. After that a hard wooden wedge is inserted tokeep open for the subsequent insertion of scion. The scion of 15-20 cm size is taken from aterminal shoot, which is more than three month old and then it is wedge securely (6-7 cm).The cleft of the scion then slipped into the split of the stock. In thicker rootstock more thanone scion should be inserted. The graft should be thoroughly waxed to prevent wilting. egAvocado, apple, pear, plum, mango.
6. Bark grafting
It should be done in spring when bark of the stock slips easily. It is important that scionused in bark grafting should be dormant. The stock is first sawed off at a point, where barkis smooth. Bark is split downward, about 5 cm from the top. Scion of 10-12 cm long,containing 2- 3 buds are collected from the dormant wood and are preparing by givingslating cut (5cm) downward along one side of the base. The prepared scion then insertedin the center of split between the bark and wood of the stock. The scion is kept firmly byusing adhesive tape. eg Many fruit plant.

Practical Manual on Fundamentals of Horticulture
College of Agriculture, JNKVV, Jabalpur (MP) 34
Special Grafting Techniques
7. Epicotyl /Stone grafting- This method is commonly practiced in mango. It is simplemethod of wedge grafting where the current season’s scion shoot of the desired variety isinserted into the tender part of the stem of the sprouted stone (15-30 days old seedling) andtied with polythene sheet
8. Top working- This is commonly practiced to convert an old/ unproductive orchard ofinferior variety in to productive one by grafting with desirable variety after head back ofunproductive plant eg. Mango, ber, cashew nut, mulberry
9. Soft wood grafting- This technique is commercially used for raising Cashew nut, Mango,Jamun, Tamarind, Custard apple through wedge grafting. In this technique, grafting isdone with mature, procured scion on the emerging soft, coppery red shoot of the rootstock,which is 60-70 days old.
10. Bridge grafting- Bridge grafting is done with objective of repairing of damaged fruitplant. The scions are prepared by giving slanting cuts on one side of the top and base.These scions are inserted above and below the injury of the plant and tied properly.
11. Double working- Double working is a specialized technique of grafting in which thecomposite plant has three different components, the root stock, interstock and the scion i.e.the desired variety or cultivar. Thus the double worked plants have graft joints, onebetween the rootstock and interstock and other between the interstock and scion. It is doneto overcome the incompatibility between the desired cultivar and stock.
12. Micrografting- The grafting of tiny plant parts under asceptic and controlledenvironmental condition is called micrografting. Micrografting has been mostly used incitrus, apple and plum to produce virus free plants.

Practical Manual on Fundamentals of Horticulture
College of Agriculture, JNKVV, Jabalpur (MP) 35
Inarching
Veneer Grafting

Practical Manual on Fundamentals of Horticulture
College of Agriculture, JNKVV, Jabalpur (MP) 36
Cleft/ Wedge Grafting
Saddle Grafting Inarching
Stock
Scion
Cut Scion andStock to match
Place Scion onthe Stock
Bind tightly withpolythene strip

Practical Manual on Fundamentals of Horticulture
College of Agriculture, JNKVV, Jabalpur (MP) 37
Whip Grafting
Tongue Grafting

Practical Manual on Fundamentals of Horticulture
College of Agriculture, JNKVV, Jabalpur (MP) 38
Epicotyl Grafting
Bridge grafting to repair damage

Practical Manual on Fundamentals of Horticulture
College of Agriculture, JNKVV, Jabalpur (MP) 39
EXERCISE No. - 11
OBJECTIVE - Study on Propagation by Budding
Budding- Budding is also a method of grafting, wherein only a single bud with a piece of barkwith or without wood is used as a scion material, which develops into plant after successfulunion of the stock and bud. Budding is generally done when the stock plant is in active growthand more cambial activity.
Bud Union- Like graft union, a series of changes takes place in the formation of successful budunion also. In general, four stages viz. pre- callus, callus, formation of cambial bridge andhealing process etc. takes place for the formation of successful bud union.
Nurserymen employ various method of budding but according to convenience in performing theoperations and percentage of success, the following methods are the commercially advocated inpropagating various horticultural crops.
1. Shield or T-budding
A ‘T’ shaped cut is made on the selected portion of the stock with the help of sharpbudding knife on one–year-old rootstock seedling having 2-2.5 cm thickness at 15-20 cmheight. The bark of seedling should slip easily. The two flaps of bark are then loosenedslightly with the help of budding knife. From the bud wood, which is selected from ahealthy shoot of a current season’s growth, the buds of middle portion are selected. Theseare removed from the bud wood by cutting shallowly about 5-6 mm below and 2-3 cmabove the bud. This shield piece containing a bud is inserted carefully in ‘T’ shapedincision made on the stock. This bud then presses firmly and tied with polythene strip.After the bud has sprouted, the stock is cut to about 10-15 cm above the bud. eg citrus,aonla, custard apple, jamun, bael , plum, peach, cherry, ber, rose etc.
2. Inverted ‘T’ budding- As the name indicates, the cut is to be given on the root stock isreverse to that of ‘T’ i.e. inverted ‘T’ cut is given on the stock. This is widely used in highrainfall areas.
3. Patch budding
A rectangular patch of bark is removed completely from the one year old seedling stockand replace with a similar patch of bark containing a bud of desired variety. It issuccessfully used in species having thick bark such as aonla, bael, jamun, guava, walnut,pecan nut.
4. Ring budding
In ring budding, a complete ring of bark is removed from the stock and it is completelygirdled. A similar ring of bark containing a bud is removed from the bud stick and isinserted on to the rootstock. In this budding both scion and stock should be of same size. Itis utilized in peach, plum, ber, mulberry etc.

Practical Manual on Fundamentals of Horticulture
College of Agriculture, JNKVV, Jabalpur (MP) 40
5. Modified ring budding.
In modified ring budding, complete ring of bark from the both scion and stock is removedby making one vertical cut on the opposite side of the bud, so that bud can be removedeasily, eg. aonla, ber etc.
6. Chip budding
Chip budding is successful method of budding when the bark of the stock does not slipeasily. A chip of bark and wood is removed from the smooth surface between the nodes ofthe stock. A chip of similar shape and size is then removed from the bud wood of desiredcultivar. For which, a 2-3 cm long down ward cut is made through the bark and slightly into the wood of the stock. Then a second cut of about 2.5 cm is made so that it bisects thefirst cut at an angle of 30-45 0.in this way the chip of wood is removed from the stock. Thebud chip then slipped in the place of rootstock from where chip has been removed. eggrape.
6. Flute budding
In flute budding a patch of bark (Flute) encircling the stock is removed leaving a narrowstrip thereon. A similar patch of bark containing the bud is taken from the scion plant andplaced on the cut surface of the rootstock followed by tying as usual when the bud exhibitsthe signs of growth, the top of the stock is cut back.
7. Forkert method of budding
It is modified method of patch budding, in which the bark flap of the patch is not removedfrom the stock plant but used to cover the bud on the stock plant. The bud is inserted in tothe flap. It is covered with flap of bark on the stock plant and tied firmly with alkathenestrip. Example- Aonla, ber bael and guava.

Practical Manual on Fundamentals of Horticulture
College of Agriculture, JNKVV, Jabalpur (MP) 41

Practical Manual on Fundamentals of Horticulture
College of Agriculture, JNKVV, Jabalpur (MP) 42
Exercise No. - 12
OBJECTIVE - Study about Micro propagation
Micro propagation refers to the production of plants from very small plant parts, tissue or cellsgrown aseptically in a test tube or containers under controlled nutritional, environmental andaseptic conditions. Tissue culture or in vitro culture is two broadly used term for micropropagation. Micro propagation is an advanced vegetative propagation technology for rapidlymultiplying a large number of genetically superior and pathogen-free plants or geneticallymodified plants in a limited time and space throughout year.
Basic requirements for micro propagation-
1- A well equipped laboratory
2- Aseptic condition
3- Culture Medium (Nutrient media)
4- Controlled culture environment
5- Acclimatization/Hardening chamber
Principle- All the biological principle of micro-propagation technique are based on thephenomenon of totipotency of a cell, which is the capacity of a plant cell to regenerate in to acomplete plant having different organ. German Plant physiologist, Haberlandt (1902) is knownas the father of plant tissue culture technique, who for the first time coined the term totipotency.
Process-The process of tissue culture consists of five important steps: Initiation, Multiplication,Shooting & rooting, Primary Hardening in green houses and Secondary Hardening in shadehouses. Strict adherence to aseptic standards and micro-climatic conditions and care during thehardening process alone can ensure success.
Stages of micro propagation
A) Stage-1 Establishment- It includes selection of an elite mother plant- Explant- Surfacesterilization and washing- Inoculation in culture medium.
B) Stage-2 Proliferation- Transfer in proliferation medium – shoot and embryoidformation
C) Stage-3 Rooting and Hardening- Transfer of shoots to rooting medium and afterrooting transfer in artificial medium or sterilized soil by gradual weaning process
Banana propagation through tissue culture
Purpose-The main method of vegetative propagation in banana is by means of daughter suckersformed at the base of the pseudo stem (5 to 10 in number depending on the variety).Traditionally, sword suckers with narrow leaves, weighing approximately 500-1000 gm are thepreferred planting material for vegetative propagation. The major constraint for conventionallypropagating banana is the lack of ready availability of large quantities of sword suckers at anygiven time. The problem is felt more acutely in non-availability of sword suckers consistently.
Practical Manual on Fundamentals of Horticulture
College of Agriculture, JNKVV, Jabalpur (MP) 43
Besides, suckers generally may be infected with some pathogens and nematodes. Similarly, dueto the variation in age and size of sucker, the crop is not uniform, harvesting is prolonged andmanagement becomes difficult. Therefore, in vitro clonal propagation i.e. tissue culture plants(properly hardened secondary seedlings) are recommended for planting as they are healthy,disease free, uniform and authentic. The sterile operational nature of tissue culture proceduresexcludes fungal, bacteria, viral and pests from the production system. Banana plants producedfrom tissue culture are free from diseases at the time of supply. Since they are produced undercontrolled laboratory conditions using selected nutrients, they usually give yields one or twomonth earlier than conventionally propagated plants.
Advantages of Tissue Culture in banana:
1. Initiation and establishment of rapidly multiplying aseptic shoot cultures can eliminatethe problem of low sucker multiplication rates effectively and economically.
2. Large number of uniform propagules can be generated in a relatively short period oftime.
3. Variability encountered in size and propagules density can be minimized.
4. It could allow for rapid bulking of novel clones when used in concert with breedingprograms.
5. It would facilitate transcontinental exchange of disease diagnosed planting material.
6. With refinement in preservation techniques, in vitro culture of bananas can be ofimmense value in germplasm conservation.
7. Pest and disease free seedlings. Round the year planting possible as seedlings aremade available throughout the year.
8. Uniform growth, early maturity of crop - maximum land use is possible in low landholding country like India.
9. Two successive ratoons are possible in a short duration which minimizes cost ofcultivation increases yield
10. 95% - 98% plants bear bunches. No staggered harvesting, higher yield.
11. New varieties can be introduced and multiplied in a short duration.
Process involved in Micro-propagation of Banana
The tissue culture process involves the micro-propagation of a sucker growing point understerile conditions. A sucker is detached from the nursery parent plant and brought to a laboratorywhere the outside tissue is pared away until only the growing point remains inside a plug of 10mm³. This is placed in a jar on agar containing a nutrient solution in a sterile environment andunder controlled conditions of temperature and light. The growing point subdivides into severalshoots, which are subdivided and re-established on fresh agar. This process, called sub-culturing. The sub culturing, continues about five or eight times (one month per sub-culture)until approximately 1000 plants are produced from one original growing point These plants arethen transferred to a rooting medium and when fully rooted, they are transferred from in vitroconditions (sterile under glass) to in vivo conditions (seedling trays in a greenhouseenvironment). After 6 to 8 weeks, the 5 cm plants are relocated from the greenhouse trays tonursery bags in a netted shade house. After another 6 to 8 weeks, the 20 cm plants are ready for

Practical Manual on Fundamentals of Horticulture
College of Agriculture, JNKVV, Jabalpur (MP) 44
planting out in the field. The entire process from excavating the original sucker to planting out200 mm plants in the field takes about 10 months.
Media details:
1. Initiation and multiple shoot induction: MS+ BAP 5 mg/L
2. Shoot Elongation: MS+ BAP 2 mg/L + IAA 0.5 mg/L
3. Rooting: ½ MS + IBA 0.5 mg /L + NAA 0.5 mg /L + 0.05% activated charcoal
4. Hardening: Ex-agar plants in mist chamber in coco peat and then in shade house forsecondary hardening with sand: Red soil: FYM 1:2:1 ratio for 15-45 days.
STAGES:
Establishment (Explants Preparation, Disinfection, Inoculation and Incubation):
Sword suckers are carefully removed from field grown fruiting banana plants and traces of soilparticles adhering over are removed by repeated washing thoroughly in tap water and in asolution of the diluted detergent teepol. The extraneous rhizome tissues are carefully choppedwith a stainless steel knife. Trimmed suckers are now soaked in a solution of Bavistin (0.5%) –afungicide and streptocycline antibiotic for six to eight hours.
To prevent the oxidation of phenolic compounds, the trimmed buds are stored in antioxidantsolution (100 mg Ascorbic acid + 150 mg Citric acid per litre of sterile water.) till the buds aretaken to laminar flow chamber for inoculation.
Shoot tips containing rhizome tissue and measuring 2.5 to 3.5 cm in length are isolated, surfacesterilized using 70% ethanol for 1 min and then with mercuric chloride. Two differentconcentrations of mercuric chloride were used. First the sucker was sterilized using 0.12%mercuric chloride for 2 min. After that, the mercuric chloride was removed and the sucker waswashed using sterile distilled water. At first, the sterile distilled water was added and the bottlewas shaken for 1min., then the water was removed and fresh sterile distilled water was added,shaken for another one min and then the water was removed with the following timings 1 min, 2min, 3 min, 5 min and 12 min.
After the first sterilization, a layer of the sucker is removed carefully. The suckers are againsterilized with 0.1% mercuric chloride for 5 min. After that they were washed with steriledistilled water following the timings 1min,1min, 2 min,3 min,5 min and 12 minute. Finishingthe above process, another layer of the sucker was removed. The sterilized shoot tip explants arehandled using sterilized stainless steel scalpels.
Cut surfaces of the rhizomatous tissue and leaf bases are further trimmed so that shoot tipsfinally contain at least six to eight overlapping leaf bases enclosing auxiliary buds. A vertical cutis given (to arrest the apical dominance) and the buds are inoculated in the semi-solid preparedfor multiple shoot induction. The explants are now ready for inoculation and measures 1 to 2cm. The optimum size of the explants depends on the purpose. For rapid multiplication,relatively larger explants (3-10 mm) are desirable despite its higher susceptibility to blackeningand contamination.
When virus or bacteria elimination is needed, meristem tip culture is the preferred option. Theexplants are further reduced in size (0.5-1 mm length) leaving a meristematic dome with one or

Practical Manual on Fundamentals of Horticulture
College of Agriculture, JNKVV, Jabalpur (MP) 45
two leaf initials. Meristem cultures have the disadvantage that they may have a higher mortalityrate and poor initial establishment.
For banana micro propagation, MS based media are widely adopted. Generally they aresupplemented with sucrose as a carbon source at a concentration of 30-40 g/L. Usually twotypes of growth regulators used, a cytokinin and an auxin, are added to the banana growthmedium. Their concentration and ratio determines the growth and morphogenesis of the bananatissue. In most banana micro propagation systems, semisolid media are used. As a gelling agent,agar (5-8g/L) is frequently added to the culture medium. Media are poured in a glass bottlewhere suckers are propagated.
Cultures should be incubated in the basal nutrient media supplemented with plant growthregulators. Thereupon the healthy, contamination free explants should be taken for nextmultiplication stage.
Banana shoot tip cultures are incubated at an optimal temperature of 26±2⁰C in a light cycle of12-16 h with a photosynthetic photon flux(PPF) of 60µE/m2s.After 2 weeks, the suckers willbecome greenish in colour and the multiple shoots will arise from the base of the suckers. Theshoots are cut at the base, separated and placed in a fresh medium. In each bottle, three-fiveshoots were inoculated. After 2-3 weeks, multiple shoots arise from the inoculated shoot. Againthey are separated and placed in afresh medium. The sub culturing is done until the requiredquantity of plants is needed. The shoots are every day checked for contamination and thecontaminated shoots are transferred to a fresh medium. Meanwhile a set of well grown healthyshoots are taken for rooting.
Mass Multiplication
Contamination free explants are further cultured on multiplication media supplemented withplant growth hormones (cytokinins) which help in proliferation of auxiliary buds into multipleshoots.
Rooting:
Plantlets from shooting media are separated and single plantlets are transferred to mediacontaining charcoal and auxins or medium without any growth regulators. It will take 2-3 weeksfor rooting and fresh roots arise at the base of the shoot. In this stage, roots will develop andplants will be ready for dispatch from laboratory.
Agar Weaning of Plants
Well developed single plantlets need to be removed from the culture incubation room andexposed to ambient conditions in the culture vessel for four to five days. The plantlets are thencarefully removed and the roots washed in running tap water. The plants after being removedfrom nutrient media should preferably be transplanted within 72 hours.
Primary hardening will take at least 4 weeks depending upon the climatic conditions. In finalweek, these trays are gradually exposed to 50% shade by removing plastic sheets. Theseplantlets are sprayed with fungicides, bactericide, and water soluble fertilizers as per schedule.

Practical Manual on Fundamentals of Horticulture
College of Agriculture, JNKVV, Jabalpur (MP) 46
Secondary Hardening
Primary hardened plants after 4 to 5 weeks are transferred to Poly bags (Nursery Bags) ofsuitable size. Soil mixture is prepared by mixing sand, soil and farm yard manual into 1:2:1ratio. The plants are kept in these Poly bags for 6 to 8 weeks under 50% shades. Humidity ismaintained around 60% to 70% and regular foliar sprays of plant protection chemicals and watersoluble fertilizers are given regularly. Any possible variation if observed is discarded at thisstage. The plant ready for sale will be having 5 to 6 opened leaves and almost 1 feet in height.The plantlets after acclimatization should be transported to the required place. Normaltransportation is done where the plants are placed and grown in plastic bags. Well grown plantsare removed to provide space in green house for the next cycle of plants and also to lower thecost of storage. Polybags is separated from the plant without disturbing the root ball of the plantand then plants are planted in the pits keeping the pseudo-stem 2 cm below the ground level.Soil around the plant is gently pressed. Deep planting should be avoided.
Problem of Banana Micro Propagation
Banana tissues often suffer from excessive blackening caused by oxidation of ployphenoliccompounds released from wounded tissues. Therefore, during first 4-6 weeks, fresh shoot tipsare transferred to new medium every 1-2 weeks. Alternatively, freshly initiated cultures can bekept in complete darkness for one week. Anti oxidants such as ascorbic acid or citric acid inconcentrations ranging from 10-150 mg/L, are added to the growth medium to reduceblackening or the explants are dipped in anti oxidant solution (Cysteine 50 mg/L) prior to theirtransfer to culture medium.

Practical Manual on Fundamentals of Horticulture
College of Agriculture, JNKVV, Jabalpur (MP) 47
Banana Vegetative Propagation
Trimming Explant For Propagation
Initiation Of Banana Micropropagation

Practical Manual on Fundamentals of Horticulture
College of Agriculture, JNKVV, Jabalpur (MP) 48
Multiplication Shoot Elongation
Invitro rooting Weaning of Agar
Banana Hardening

Practical Manual on Fundamentals of Horticulture
College of Agriculture, JNKVV, Jabalpur (MP) 49
EXERCISE No. - 13
OBJECTIVE - Study about Training and Pruning
Training and pruning are an important activity in fruit crops to have better frame work andoptimum fruiting area. Training refers to giving a desired shape to the plants by tying or stakingor supporting over a structure and or selective pruning for a good strong frame work. Pruningrefers to cutting of certain portion of plants for maintenance of fruitfulness and quality besidesvigour of the trees or vines. Pruning affects the functions of the plants and assists in betterfruiting and in getting more quality fruits. It is one of the most crucial operations and requiressome scientific knowledge regarding bearing behavior of the plants.
Objectives of Training
The major objectives of training are
i. To give a strong frame work to the tree for supporting good cropping.
ii. Provide good exposure of light and air to branches and leaves.
iii. To maintain tree growth in such a way that that various cultural operations, such asspraying, annual pruning, harvesting etc can be done at the lowest cost.
iv. To protect the tree from sun burn and damage.
v. To secure a balanced distribution of fruit bearing parts on them in limbs of the tree.
vi. Maintain the vitality of trees over a long period of time.
Methods of Training
There are three most commonly used training methods are followed in fruit crops based on thegrowth habit of the fruit tree. These are
1. Open CentreIn this system of training, the main stem is allowed to grow only upto a certain height,thereafter it (leader or main stem) is headed back to encourage lateral branching (scaffoldbranches). This system is also known as Vase-shaped system. This system allows betterdistribution of sunshine and to reach it to branches of trees and also facilitate culturaloperations like spraying, thinning, harvesting etc.
2. Central LeaderIn this system of training, main stem (leader) is not headed back and is allowed to grow Iits natural ways extending from surface level to the top of the tree. This results in robustclose centre and tall tree and branches are more fruitful near the top as compared to lowerbranches. This system of training is also known as closed centere done.
3. Modified leaderIt is intermediate between the open centre and central leader training system. In this systemmain stem is allowed to grow unhampered for the first four or five years, thereafter it isheaded back and lateral branches are allowed to grow as in the open centre system.Modified leader system produces fairly strong and moderately spreading trees.
Trees are trained to different forms with or without the support of certain structures.

Practical Manual on Fundamentals of Horticulture
College of Agriculture, JNKVV, Jabalpur (MP) 50
ESPALLIER SYSTEM/CORDON SYSTEM
TELEPHONE SYSTEM
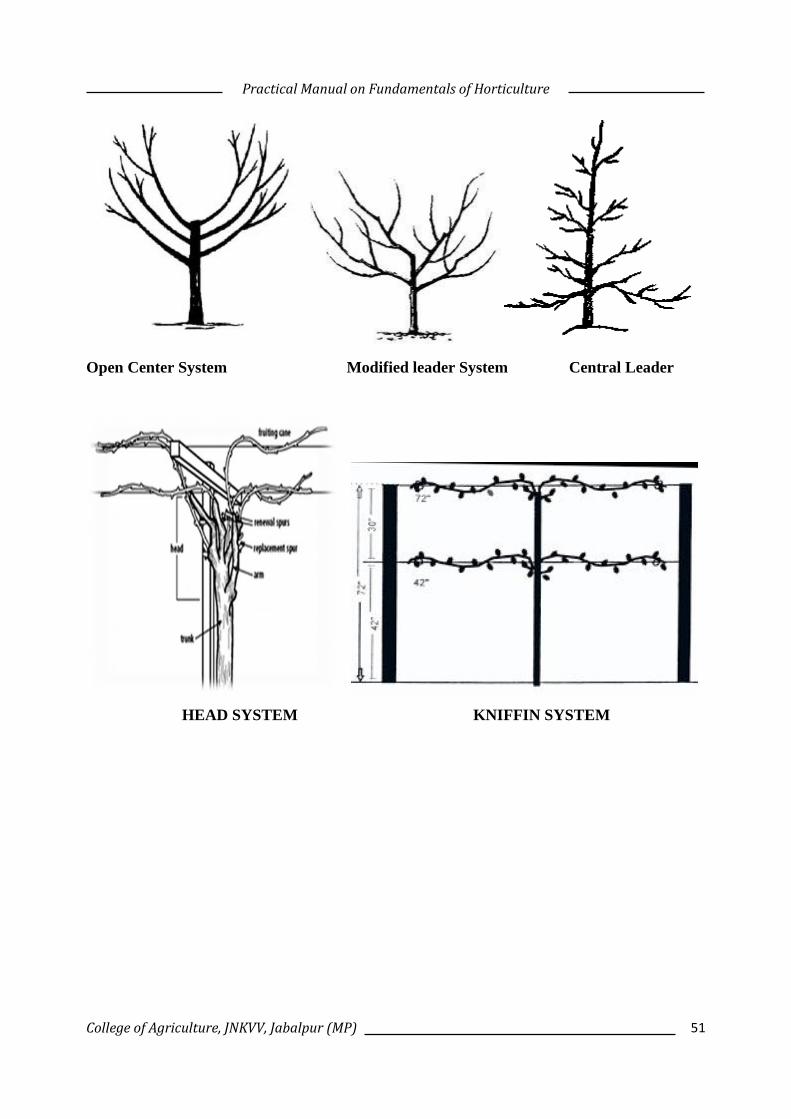
Practical Manual on Fundamentals of Horticulture
College of Agriculture, JNKVV, Jabalpur (MP) 51
Open Center System Modified leader System Central Leader
HEAD SYSTEM KNIFFIN SYSTEM

Practical Manual on Fundamentals of Horticulture
College of Agriculture, JNKVV, Jabalpur (MP) 52
BOWER SYSTEM
Special methods of training-
Bower system
It is also called as ‘Pandal’ or ‘Pergola’ system. It is generally practiced in grapes and othercucurbitaceous vegetables like snake gourd, ribbed gourd, bitter gourd etc. In this system, thevines are spread over a criss cross net work of wires, usually at 2.1 to 2.4m above ground,supported by concrete or stone pillars or live support like Commiphera sp. The vine is allowedto grow single shoot till it reaches the wire net and is usually supported by bamboo sticks tiedwith jute thread. When the vine reaches the wires, its growing point is pinched off to facilitatethe production of side shoots.
Kniffin system
In this system, two trellis of wire are strongly supported by vertical posts. The vines such asgrape when trained in this system has four canes one along each wire and the bearing shoothangs freely with no tying being necessary.
Telephone system
This system consists of 3 or 4 wires usually kept at 45-60 cm apart fixed to the cross-angle armssupported by vertical pillars or posts. Vines are allowed to grow up to a height of 1.5 to 2.0 mand then trained on this system. Moderately vigorous cultivars with apical dominance are besttrained on such system.
Head System
It is mostly used for spur bearing grape cultivars. In this system, vines are trained like a smallbush. Vines are allowed to, grow up to 1.2 meters, and then headed back to produce laterals.Four laterals- one in each direction is allowed to grow and rest are thinned out. In next dormantseason, these laterals are cut back to 2 buds and further two arms of 20-30 cm are allowed on

Practical Manual on Fundamentals of Horticulture
College of Agriculture, JNKVV, Jabalpur (MP) 53
each secondary arm. After 3-4 years these vines will give a dwarf bush like appearance andrequires no staking. Other training systems which require no staking are Palmette, Spindle bush,Dwarf pyramid and Head and spread systems.
Cordon and Espalier system
Plants are trained to grow flat on trellis or on horizontal wires by training the branchesperpendicularly to the main stem on both the sides, and trained horizontally on the wires. Plantstrained in this system are called 'espaliers'. An espalier with one shoot or two shoots growing inopposite or parallel directions are called a ‘cordon'.
Tatura trellis
In this system, trees are trained to a multi-layered wire trellis. The trellis isV-shaped, supported by two long, stout poles embedded into the soil angles of 600 from thehorizontal. Five wires at 60cm intervals are fastened to these poles. This system is being nowfollowed for pome fruits, nut fruits and grapes. The trees are grown as double leader. Trees witheach leader inclined at an angle of 600 from the horizontal.
Pruning
Commonly, trees are pruned annually in two ways. A few shoots or branches that are consideredundesirable are removed entirely without leaving any stub. This operation is known as ’thinningout’. The other method which involves removal of terminal portion of the shoots, branches orlimb, leaving its basal portion intact, is called ‘heading back’. Thinning out involving largelimbs as in old and diseased trees is called ‘bulk pruning’. Pruning is done with the followingspecific objectives.
i) To remove surplus branches,
ii) To open the trees so that the fruits will colour more satisfactorily
iii) To train it to some desired form
iv) To remove the dead and diseased limbs
v) To remove the water sprouts and
vi) To improve fruiting wood and to regulate production of floral buds.
Season of Pruning
The pome fruits such as apple, plum, pears and peaches are pruned every year in December -January. Under North Indian conditions, the grapes are pruned in first fortnight of January.Under South Indian conditions, old non bearing mango trees are pruned during August –September. Jasmines are pruned to 45cm height from the ground level during the last week ofNovember.

Practical Manual on Fundamentals of Horticulture
College of Agriculture, JNKVV, Jabalpur (MP) 54
SPECIAL PRUNING TECHNIQUES
1. Root Pruning
A circular trench of 45cm away from the stem is dug out annually and the roots are cut- offevery year with a sharp knife. After pruning, the trench is filled with manures liberally. Thetree is thus fed and watered artificially in a restricted area. Each year prune 4 to 5 cm of thestumps of the previous year growth. This helps to increase the production of mass fibrousroots, dwarf the trees and bears abundantly. This practice is not advocated every year to thefruit trees.
2. Ringing
It is one of the known practices to increase fruit bud formation in certain fruit crops. Theoperation consists of removal of a complete ring of bark from a branch or the trunk. Ringinginterrupts the downward passage of carbohydrates through the phloem and thus causes themto accumulate in the part of the tree above the ring. Ringing is practiced on Mango to forceflowering in over vegetative trees which do not normally bear a satisfactory crop. Thispractice cannot be recommended for all fruit crops and it is found beneficial in promotingfruit set in certain vigorously growing grape varieties and they often result in large sizefruits.
3. Notching
Notching is a partial ringing of a branch above a dormant lateral bud. eg. Fig, Apple etc.
4. Smudging
It refers to the practice of smoking the trees like mango, commonly employed in Philippinesto produce off-season crop. Smudging of Mango trees in India has not been found to induceearly blossom.
5. Bending
Bending of branches is widely practiced in the Deccan for increasing fruit production inguava, especially in the erect growing varieties.
6. Coppicing
This refers to the practice of complete removal of the trunk in trees like Eucalyptus andCinchona leaving 30-35cm stump alone.The coppiced stump starts producing many vigorousshoots in about 6 months time. Only 2-3 shoots are retained per stump and the rest ones arecompletely thinned out. These left out shoots attain coppicing stage in about 10 yearsdepending upon the locations and other factors.
7. Pollarding
This refers to the practice of removing the growing point in shade trees especially in silveroak in order to encourage side branches.

Practical Manual on Fundamentals of Horticulture
College of Agriculture, JNKVV, Jabalpur (MP) 55
8. Lopping
This refers to the practice of reducing the canopy cover in shade trees in order to permitmore light.
9. Pinching
This refers to reduce the plant height and to promote auxiliary branching for exampleCarnation, chrysanthemum
10. Disbudding
The practice of removing unwanted flower buds in a cluster so as to encourage the remainingbuds to develop into a large, showy, quality bloom is called disbudding. This practice iscommonly done in cut flowers like carnation, chrysanthemum, dahlia, marigold and zinniaetc.
Thinning
Fruit thinning is an exhaustive process to the tree especially if the crop is heavy. The otherobjectives of fruit thinning are the following:
1. To increase the annual yield of marketable fruit.
2. To improve the fruit size.
3. To improve the colour of the fruit.
4. To improve the quality of fruit(T.S.S.)
5. It reduces the limb breakage.
6. It promotes tree vigor and ensures more regular cropping.
7. It permits more thorough spraying and dusting of fruits during the late seasonapplication.
8. It ensures uniform ripening.
Methods of thinning
1. Hand thinning
2. Chemical thinning
1- NAA at 100 ppm reduces the fruit setting from 67% to 50% in Anab-e-Shahi variety ofGrapes.
2- In mandarin, NAA 600 ppm on marble sized stage is recommended to thin the over bearingfruits so as to increase the size and quality of fruit.
Time of thinning- At blossom time, at pea and marble stage of fruit, soon after the natural fruitdrop of young fruits has started.

Practical Manual on Fundamentals of Horticulture
College of Agriculture, JNKVV, Jabalpur (MP) 56
EXERCISE No. - 14
OBJECTIVE - Study of Manures and Fertilizers Application
In a general way, manures and fertilizers are the substance containing plant nutrients, which isapplied to the soil for increasing crop production.
Manures -
Manures are plant and animal wastes that are used as source of plant nutrients. They releasenutrients after their decomposition. Manures can be grouped into bulky organic manures andconcentrated organic manures.
a. Bulky organic manures - Farm Yard Manure (FYM), compost from organic waste, nightsoil, sludge, sewage, green manures.
b. Concentrated organic manures - oilcakes (edible, non-edible), blood meal, fishmeal andbone meal.
Fertilizers-Fertilizers are industrially manufactured chemical containing plant nutrients.Nutrient content is higher in fertilizers than organic manures and nutrients are released almostimmediately. The fertilizers have three groups;
Straight fertilizers – supplies single nutrient Ex: Urea, Muriate of Potash
Complex fertilizers - supplies two or more nutrient Ex: 17:17:17 NPK complex
Mixed fertilizers- supplies two or more nutrient Ex: Groundnut mixture.
Bio- fertilizers: Biofertilizer is an organic product containing a specificmicroorganism which has ability to convert unavailable nutrients in to available formthrough biological process eg. Rhizobium, Azotobacter, Azospirillum, Blue GreenAlgae, PSB,
Role of manures and fertilizers-
1. Organic manures bind the sandy soil and improve its water holding capacity.
2. Organic manures open the clayey soil and help in aeration for better root growth.
3. Organic manures add plant nutrients in small percentage and also add micronutrients,which are essential for plant growth.
4. Manures increase the microbial activity which helps in releasing plant nutrients toavailable form.
5. Organic manures should be incorporated before the sowing or planting because of slowrelease of nutrients.
6. Fertilizers play an important role in crop production as they supply large quantities ofessential nutrient to crops

Practical Manual on Fundamentals of Horticulture
College of Agriculture, JNKVV, Jabalpur (MP) 57
7. Fertilizers are manufactured in forms that are readily utilized by plants directly or afterrapid transformation.
8. Fertilizers dose can be adjusted to suit the requirement as determined by soil testing.
9. Balanced application of nutrient based on crop requirement is possible by appropriatemixing of fertilizers.
10. Fertilizers applied as straight fertilizers (providing single nutrient) or complex and mixedfertilizers (supplies two or more nutrients) based on crop requirement.
Enhancing fertilizer use efficiency-The following are the agronomic measures to improve theFertilizer use efficiency (FUE).
1. Using best fertilizer source
2. Using adequate rate & diagnostic techniques
3. Use of balanced fertilization
4. Integrated nutrient management
5. Utilization of residual nutrients
Nutrient assessment in Fruit crops-
Management system adopted for fruit trees are quite different, especially with regard to nutrientthan that adopted for field crops. The shift in management system could be commenced 3-4years after planting depending on the tree size. Nutrients are required for flowering and fruitingwhile at the same time trees are allowed to grow and maintain sufficient vigour for producinghigh yields in following years. To maintain productivity of trees in long run and maintain thesustainability of tree production capacity, application of nutrient should be based on actualrequirement and availability of nutrient in the soil. Application of plant nutrients economicallyat correct time with right amounts in a way that nutrients could be taken up by plants efficientlywith minimum losses. The purpose of assessment of nutrient requirement of fruit trees is to keepmineral nutrient levels in the tree with in the desired range to have the growth and developmenteffects and fruiting of trees as desired.
The most important thing in nutrient management for bearing trees is to analyze the importanceof timing of nutrient application in relation to tree phenology or growth cycle.
Factors influencing nutrient content of the soil
Type of vegetation cover; e.g. with legume cover there could be higher N, etc.,
Application of manures and fertilizers.
Application of soil amendments.
Inherent status of soil

Practical Manual on Fundamentals of Horticulture
College of Agriculture, JNKVV, Jabalpur (MP) 58
Factor affecting nutrients content of the leaf
Fertilizers input
Type of vegetation cover; e.g. with legume cover there could be higher N, etc.,
Factors inherent in the tree; genetic make-up, age of crop, time of sampling; yearly(seasonal) variation, age of leaves, position of leaves, yield of crop.
Leaf Samples
Leaf analysis is an important tool to estimate nutritional requirement of fruit trees. Leaf nutrientcontent can be obtained by analyzing leaf tissues at proper growth stage. Thereafter, nutrientrequirement of fruit trees can be calculated based on optimum norms of tissue nutrient indifferent fruit crops.
Application of manures and fertilizers: It depends mainly on basic principles of what to apply,how much to apply, how to apply, when to apply and where to apply.
Methods of application of solid manures and fertilizer-
Fertilizer recovery is greatly influenced by method of its application. Method of applicationvaries according to the spacing of crop, type of fertilizer material, time of application. Variousmethods of application of fertilizers are in vogue and following are few important practiceswidely adopted.
A - Broadcasting – It refers to spreading fertilizers uniformly all over the field on entire area orin basins. It is of two types-
i. Basal dressing- Spreading of fertilizers before sowing or planting of the crops andmixing them by cultivating the soil during seed bed preparation is termed as basalapplication through broadcasting.
ii. Top dressing and side dressing- Spreading of fertilizer in standing crops withoutconsidering the crop rows is termed as top dressing. But when the crop rows are takeninto account and the material is dropped on the ground surface near the crop rows then itis called as side dressing.
B. Placement-This refers to applying fertilizers into the soil from where the crop roots can takethem easily. Placement could be done in following ways:
i. Plough sole placement-When the fertilizers are applied in open furrows at plough solelevel while ploughing then it is termed as plough sole placement. Such furrows arecovered immediately during the next run of the plough.
ii. Deep placement-The method is adopted in dry land condition where the fertilizers areplaced deeper than plough sole level then it is called as deep placement.

Practical Manual on Fundamentals of Horticulture
College of Agriculture, JNKVV, Jabalpur (MP) 59
iii. Sub-soil placement-When fertilizers are placed still deeper than the seeding orplanting depth and also deeper than the previous two methods the method is termed assub-soil placement.
C. Localized placement
There is distinction between placement and localized placement. The former refers to applyingfertilizer into the soil without special reference to the location of seed or plant while the latterimplies the application of fertilizer into the soil close to the seed or plant. The method could beadopted in following ways:
a. Contact placement/combine drilling-When fertilizer is placed along with seed thenit is called as contact placement. This is done by using seed-cum-fertilizer drill.Sometimes fertilizer is drilled by implement and seed is sown in the same furrow.
b. Band placement-This is a localized placement of fertilizers by the side of plants orseeds (about 5 cm apart). This may be of two types as the bands may be continuousor discontinuous:
i. Hill placement (discontinuous band)-In the hill for widely spaced plants likecucurbits, and castor etc fertilizers are placed on either of both sides of plantsalong or across the row but not along the entire row. This method is also termedas discontinuous band application.
ii. Row placement (continuous band)-Along the entire rows of closely spacedcrops like vegetables-potato and flowers fertilizers are applied continuously at 2-2.5 cm depth. This method has a definite relationship of fertilizers withseedlings or seed as the fertilizer is placed to the side of seedlings or seeds somedistance away from them or at the level of the seed, above or below or by theside of the seed level. When the soil surface is dry, this method gives verypromising results.
iii. Ring placement (continuous band)-Fertilizer is applied in a circle aroundindividual plant or hill base at a depth of about 2.5-5 cm. It is most commonmethod in fruit crops.
c. Pocket/spot placement-
When fertilizers are placed at a fixed spot by the help of a bamboo peg having a holeat the bottom in case of very widely spaced crops then the method is termed aspocket/spot placement method. Fertilizers are placed deeper into the pocket (dibble)and seeds are sown in the same pocket about 5 cm above the fertilizers.
Practical Manual on Fundamentals of Horticulture
College of Agriculture, JNKVV, Jabalpur (MP) 60
d. Pellet placement
This method is adopted specially in case of deep water( rice cultivation) where it isdifficult to apply fertilizers in normal methods as the fertilizer granules get dissolvedin water before reaching to the ground level. In this method fertilizers (especiallynitrogenous ones) are mixed with clay soil in the ratio of one part of fertilizer into 10-15 parts of soil. The fertilizer is well mixed with soil after slight moistening then filledin gunny bags and stored for two-three days. Now small mud bolls are prepared andthese boll or pellets are dropped near the crop rows under deep water conditions.
Method of application of liquid fertilizers
Use of liquid fertilizers is not very common practice but in advanced countries, this is the mostcommon method. It is the most suitable method under dry land agriculture and in the areaswhich are prone to erosion problems. Liquid fertilizers may be applied in following ways:
1. Starter solution- As the name indicates, this type of fertilizer application helps the plantin starting the growth quickly after plant establishment. Starter solutions usually contain N,P, K in 1: 2: 1 or 1: 1: 2. This method is used for transplanted crops where in place ofirrigation water this solution is applied just to wet the field.
2. Fertigation-The required quantity of fertilizer material is dissolved in irrigation water andcan be used in surface, sprinkler or drip irrigation systems. This method has got popularityafter advent of drip irrigation.
3. Nutrient injection method - In USA and some other countries anhydrous ammonia isinjected into the soil at a depth of about 20-25 cm and at a pressure of about 200 pound persquare inch. Injecting hormonal solution and some micro nutrient solutions in the phloemregion of the fruit trees is also becoming a distinct possibility in correcting the nutrientdeficiency.
4. Foliar spray of nutrient solutions-In this method of fertilizer application urea, micronutrients and other required materials are dissolved in water, filtered and sprayed over thecrop foliage by the help of a suitable sprayer.
5. Aerial application-In areas where ground application is not practicable, the fertilizersolutions are applied by aircraft particularly in hilly areas, in forest lands, in grass lands orin sugarcane fields etc.
Time of application: Depending upon crop, annual, biennial or perennial or variety, stage ofcrop growth etc, the time of application varies. The time of application also varies according totype of nutrient one would like to supply. Usually FYM/compost is applied at the time of landpreparation at least 15 days before sowing or planting in respect of annuals or short durationcrops. However, in the case of perennials, they are applied to pits at the time of planting and tobasins during subsequent years. Similarly, if a green manure crop is grown it will be ploughed

Practical Manual on Fundamentals of Horticulture
College of Agriculture, JNKVV, Jabalpur (MP) 61
back to the soil before flowering and well before the crop is sown/planted to ensure properdecomposition and availability of nutrients for early growth and development. The P & K areapplied basally at the time of sowing or planting. But nitrogen is applied in varying number ofsplits depending on the crop and its duration. In any case fertilizers should be made available atright time in right quantity.
Calculation of quantity of fertilizers based on nutrient requirement
Quantity of fertilizer = (quantity nutrient required x 100) ÷ nutrient present in fertilizer
Q = (N1 x100) ÷N2
Where,
Q = Quantity of fertilizer
N1 = quantity nutrient required
N2 = nutrient present in fertilizer
Or
Q = quantity of nutrient required x factor
Calculation of quantity of complex fertilizers
First find out the quantity of fertilizer required for supplying of whole quantity of major nutrientpresent in the particular fertilizer. Thereafter, calculate the amount of second nutrient suppliedthrough the calculated quantity of fertilizer. Then subtract calculated amount of nutrient fromthe whole amount of second nutrient. Calculate the quantity of another source of fertilizers forbalance nutrient quantity of second nutrient.
Calculation of quantity of chemicals for spray solution
V1= (C2 x V2) x C1
Where,
V1 = quantity of chemical or commercial product
V2 = volume of spray solution to be prepared
C1 = nutrient content in chemical or commercial product
C2 = concentration of spray solution
OrQty. of spray solution required X Concentration of solution
Desired quantity of Chemical = -------------------------------------------------------------------------% of actual ingredient of nutrient in chemical

Practical Manual on Fundamentals of Horticulture
College of Agriculture, JNKVV, Jabalpur (MP) 62
Factor for calculating quantity of different fertilizers:
Fertilizers Factor
Nitrogenous fertilizers
Urea 2.17
Calcium Ammonium Nitrate 3.85
Ammonium Nitrate 2.94
Ammonium Chloride 4.00
Calcium Nitrate 6.45
Ammonium Sulphate 4.84
Phosphatic fertilizers
Single Super Phosphate 6.25
Rock Phosphate 5.56
Bone Meal 5.00
Potassic fertilizers
Potassium Sulphate 1.92
Potassium Chloride 1.66
Potassium Magnesium Sulphate 4.55
*******

Practical Manual on Fundamentals of Horticulture
College of Agriculture, JNKVV, Jabalpur (MP) 63
3/4/5/6
35/36/37/38
27/28, 47/48
31/32, 41/42, 49/50, 51/52