ENGINEERING A MED-V V2 SOLUTION Samesh Singh Principal Consultant Microsoft SESSION CODE: CLI305 (c)...
42
-
Upload
eleanor-stevens -
Category
Documents
-
view
213 -
download
0
Transcript of ENGINEERING A MED-V V2 SOLUTION Samesh Singh Principal Consultant Microsoft SESSION CODE: CLI305 (c)...


(c) 2011 Microsoft. All rights reserved.
ENGINEERING A MED-V V2 SOLUTION
Samesh SinghPrincipal ConsultantMicrosoft
SESSION CODE: CLI305
(c) 2011 Microsoft. All rights reserved.
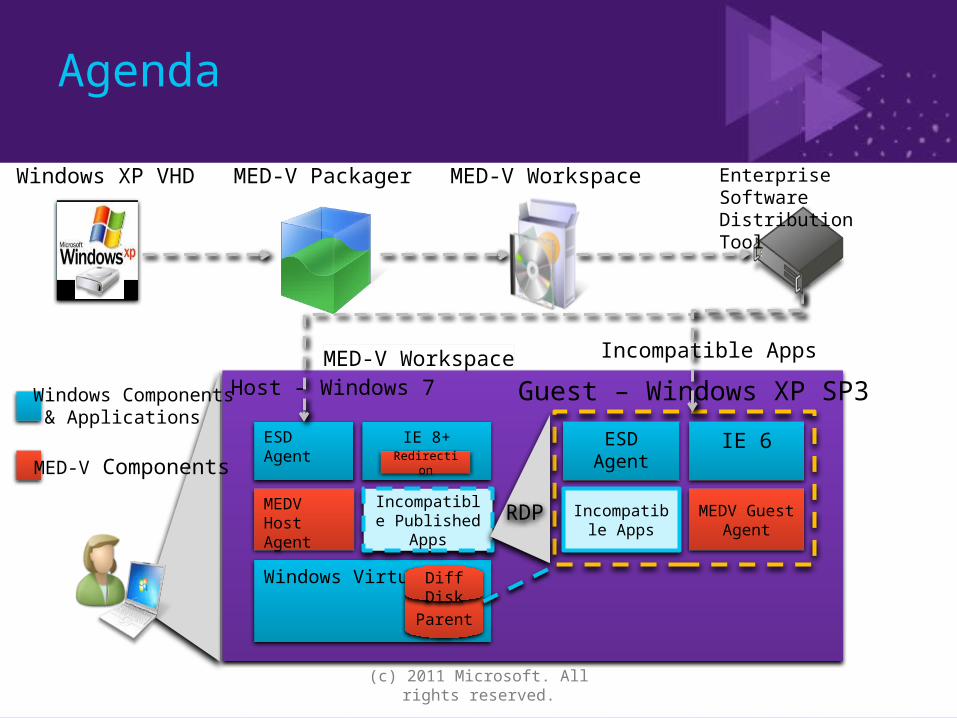
Agenda
IE 8+
Host – Windows 7
ESD Agent
Windows Virtual PC
MED-V Packager
MED-V Workspace
MEDV Guest Agent
ESD Agent IE 6
Guest – Windows XP SP3
MEDV Host Agent
Parent
Diff Disk
Redirection
Incompatible Apps
Incompatible Published Apps
RDP
Incompatible Apps
MED-V WorkspaceWindows XP VHD Enterprise Software Distribution Tool
Windows Components & Applications
MED-V Components

Session Objectives and Takeaways
► Objectives– Describe the difference between the MED-V v1 and V2
architectural models– Describe the process to engineer a MED-V v2 solution– Describe the basics of how MED-V v2 components can be
deployed with CM
► Takeaways– MED-V v2 scales along with its deployment mechanism– Scalable deployment and management platform for MED-V v2– MED-V is another desktop in your environment

The Evolution of MED-V
MED-V v1• Client/Server
architecture• Limited scalability• Management, database
and image servers required for deployment
MED-V v2• Application architecture• Unlimited scalability• Deployed as any other
application
(c) 2011 Microsoft. All rights reserved.
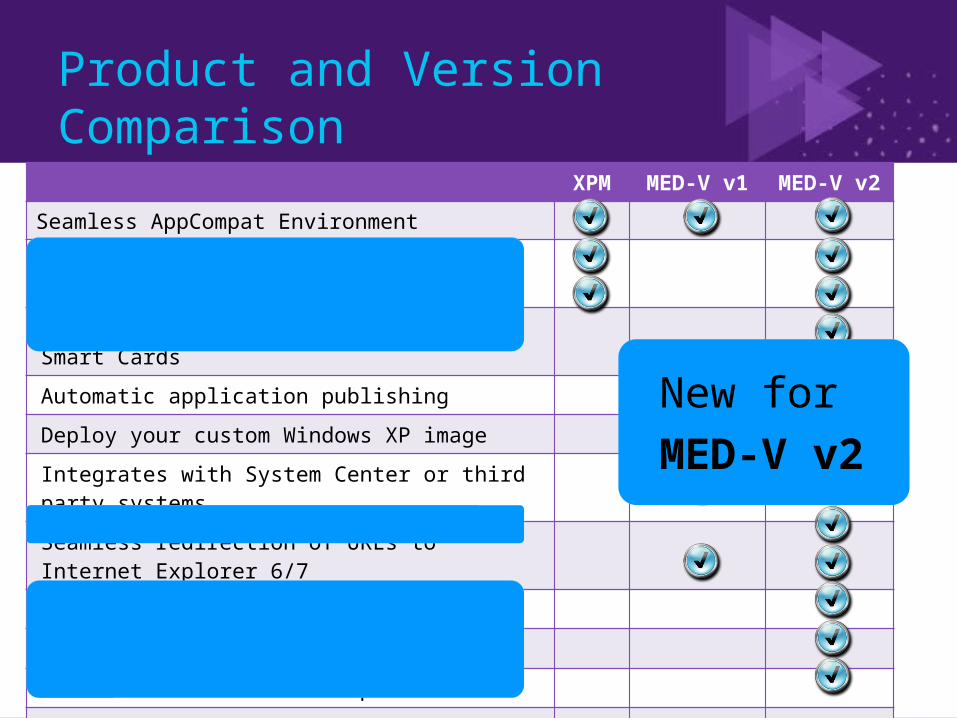
Product and Version ComparisonXPM MED-V v1 MED-V v2
Seamless AppCompat Environment
Seamless access to documents and data files
Support for USB devices – including Smart Cards
Automatic application publishing
Deploy your custom Windows XP image
Integrates with System Center or third party systems
Seamless redirection of URLs to Internet Explorer 6/7
Shared environment support
Wake-to-patch the virtual environment
Automated first-time setup
Easy-to-use packaging and configuration wizard
WMI monitoring interface
Automatically synchronise host network printers
New for MED-V v2

MED-V 2.0 Host Requirements
Windows 7 Professional, Enterprise or Ultimate
X86 or x64 RTM or SP1
Minimum 2 GB RAM
10 GB disk space recommended
Windows Virtual PC with non-HAV patch (KB977206)
Included in SP1
Internet Explorer 8 or 9 (Host)
Internet Explorer 6 or 7 (Guest)

MED-V 2.0 Workflow
An administrator creates a WindowsXP virtual machine image withWindows Virtual PC
She installs any applications, and systemmanagement/security agents, and sealsthe virtual machine with Sysprep
(c) 2011 Microsoft. All rights reserved.
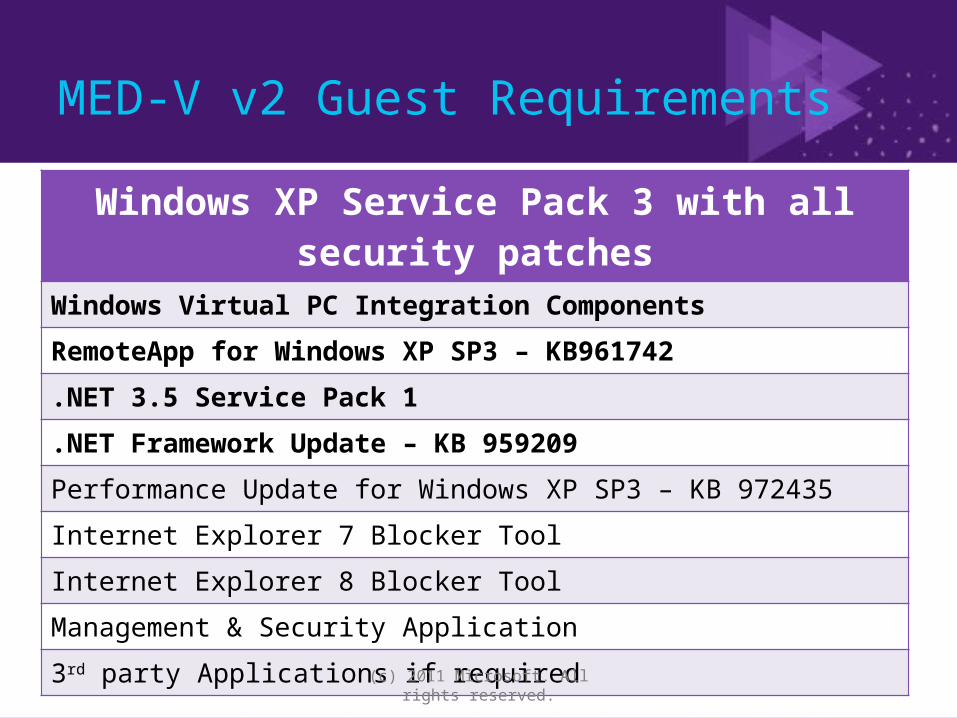
Windows XP Service Pack 3 with all security patchesWindows Virtual PC Integration ComponentsRemoteApp for Windows XP SP3 – KB961742.NET 3.5 Service Pack 1.NET Framework Update – KB 959209Performance Update for Windows XP SP3 – KB 972435Internet Explorer 7 Blocker ToolInternet Explorer 8 Blocker ToolManagement & Security Application3rd party Applications if required
MED-V v2 Guest Requirements

(c) 2011 Microsoft. All rights reserved.
MED-V Image Best Practice
► Assess your corporate image for resourcefulness and not functionality
► MED-V is the usability engine – don’t configure usability in the virtualised system
► Empty recycle bin► Disable system restore points► Defragment and compact the virtual hard
disk
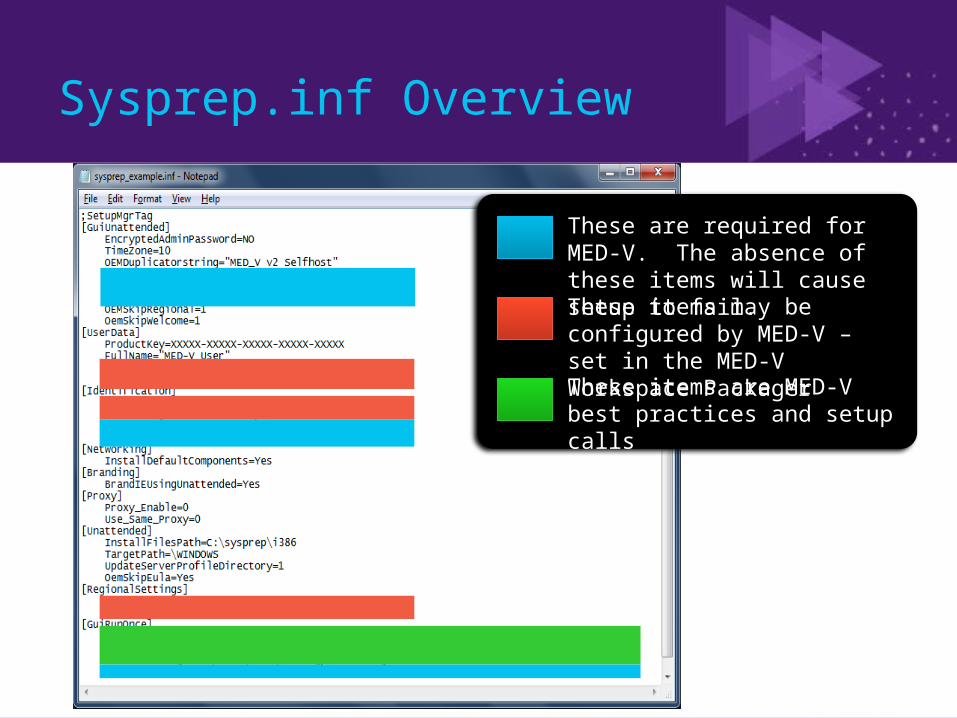
Sysprep.inf Overview
These are required for MED-V. The absence of these items will cause setup to fail.
These items are MED-V best practices and setup calls
These items may be configured by MED-V – set in the MED-V Workspace Packager
MED-V image creation with MDT
demo

MED-V 2.0 Workflow
The administrator builds a MED-Vworkspace installation package using theMED-V Workspace Packager and thevirtual machine’s sealed VHD
MED-V Workspace Packager
demo

MED-V on a Shared Computer
A Unique Workspace for Each User
► Overview– Recommended for knowledge-
worker and single-user machines
– Single parent VHD, unique differencing disk per user
– MED-V data and settings located in user space
– MED-V end-user setup run for each unique user
► Details– Each user is added as a
member of the remote desktop users group
– Could create multiple workspaces on a single machine
A Workspace that all users will share
► Overview– Recommended for task-
workers and multi-user machines
– Single parent VHD, one differencing disk for all users
– MED-V data and settings located in global location
– MED-V end-user setup only run once per machine
► Details– All authenticated users are
added to the remote desktop users group
– Guarantees a single workspace per machine
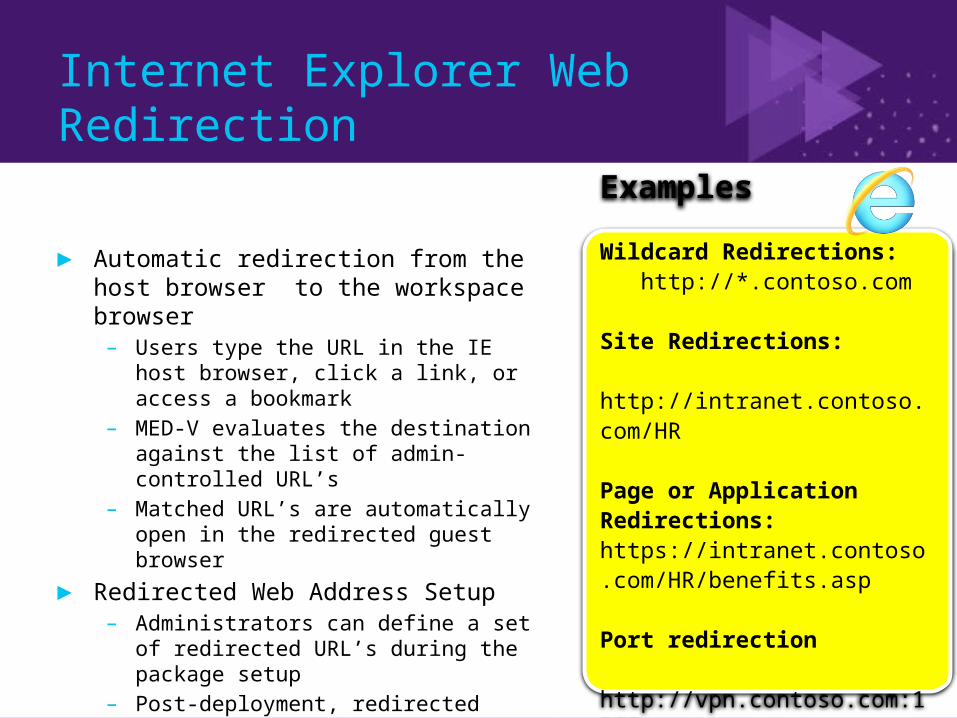
Internet Explorer Web Redirection
► Automatic redirection from the host browser to the workspace browser– Users type the URL in the IE host
browser, click a link, or access a bookmark
– MED-V evaluates the destination against the list of admin-controlled URL’s
– Matched URL’s are automatically open in the redirected guest browser
► Redirected Web Address Setup– Administrators can define a set of
redirected URL’s during the package setup
– Post-deployment, redirected URL’s can be easily removed and added by deploying a registry update
Examples
Wildcard Redirections: http://*.contoso.com
Site Redirections: http://intranet.contoso.com/HR
Page or Application Redirections: https://intranet.contoso.com/HR/benefits.asp
Port redirection http://vpn.contoso.com:1025

MED-V 2.0 Workflow
Now, our administrator deploys the MED-Vcomponents to client PCs:

MED-V 2.0 Deployment Options
Manual installation
Windows 7 image Deployment
Electronic Software Distribution

MED-V 2.0 Deployment Options
Manual installation
End user or support engineer installscomponents from a network share orremovable media
► Windows Virtual PC► Windows Virtual PC QFE KB
977206 – Windows 7 RTM only► MED-V Host Agent► Internet Explorer should be
closed► MED-V workspace package
MED-V 2.0 Deployment Options
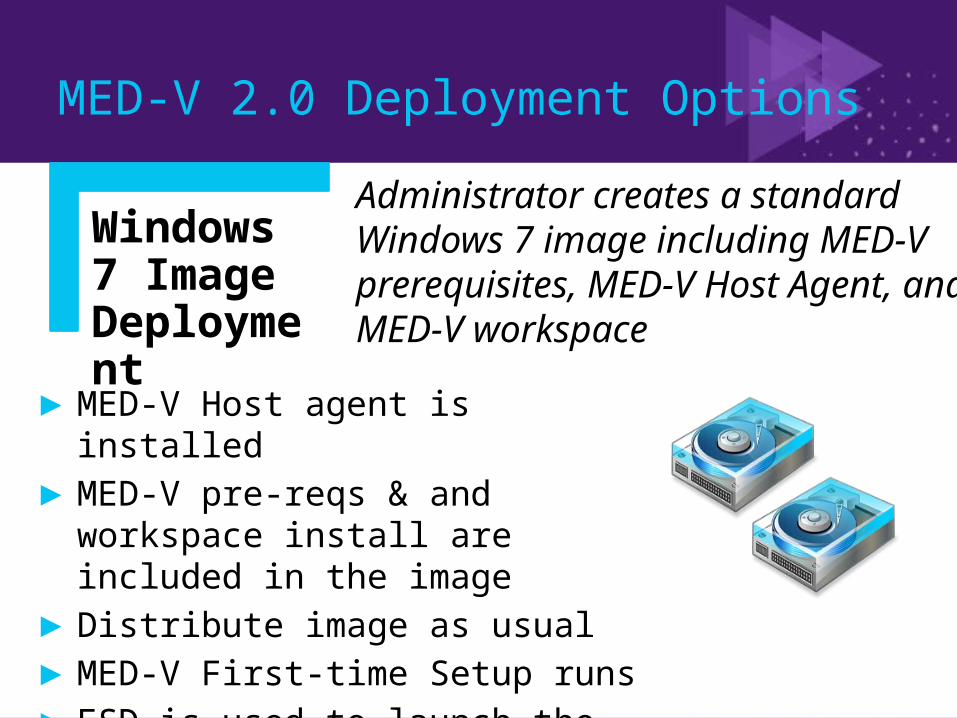
Windows 7 Image Deployment
Administrator creates a standard Windows 7 image including MED-Vprerequisites, MED-V Host Agent, andMED-V workspace
► MED-V Host agent is installed► MED-V pre-reqs & and workspace
install are included in the image► Distribute image as usual► MED-V First-time Setup runs► ESD is used to launch the install
MED-V 2.0 Deployment Options
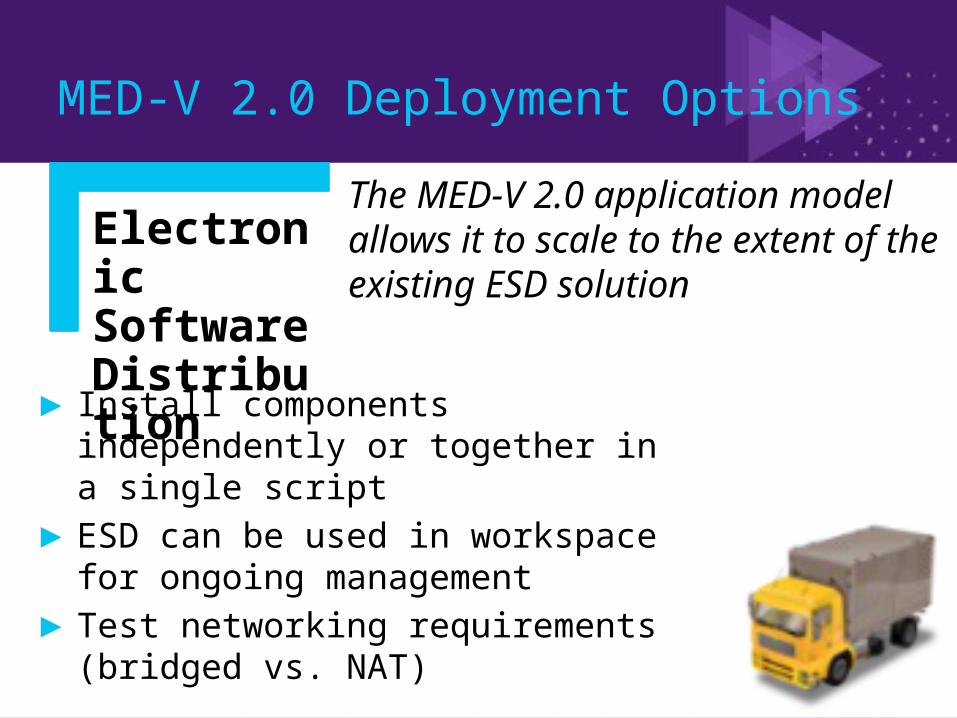
Electronic Software Distribution
The MED-V 2.0 application modelallows it to scale to the extent of theexisting ESD solution
► Install components independently or together in a single script
► ESD can be used in workspace for ongoing management
► Test networking requirements (bridged vs. NAT)
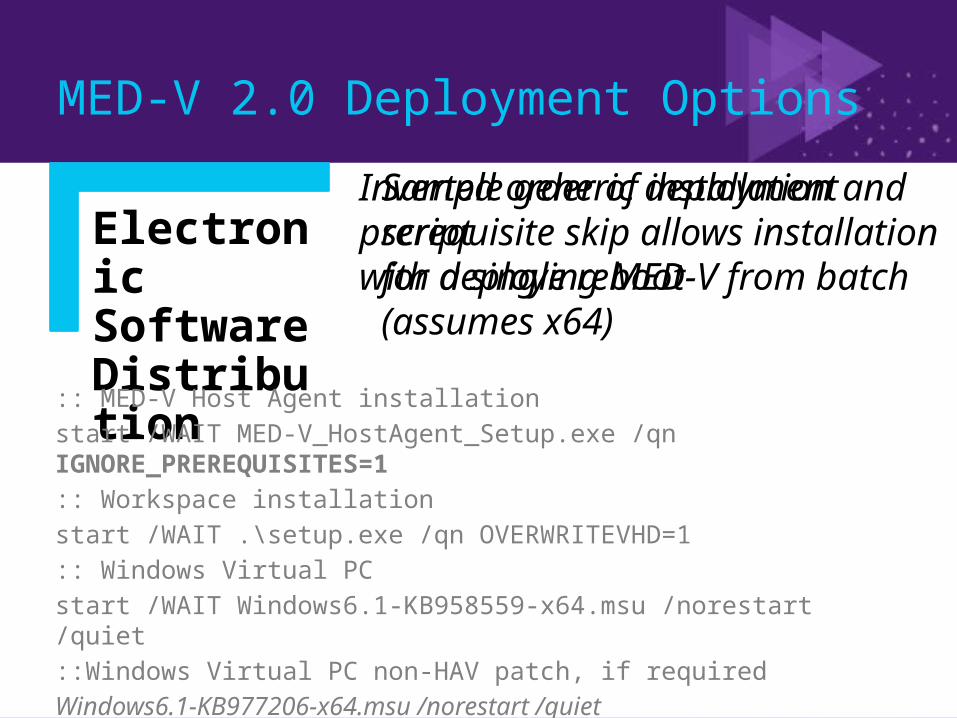
Inverted order of installation andprerequisite skip allows installationwith a single reboot
Sample generic deployment scriptfor deploying MED-V from batch(assumes x64)
MED-V 2.0 Deployment Options
Electronic Software Distribution
:: MED-V Host Agent installationstart /WAIT MED-V_HostAgent_Setup.exe /qn IGNORE_PREREQUISITES=1 :: Workspace installationstart /WAIT .\setup.exe /qn OVERWRITEVHD=1 :: Windows Virtual PCstart /WAIT Windows6.1-KB958559-x64.msu /norestart /quiet ::Windows Virtual PC non-HAV patch, if requiredWindows6.1-KB977206-x64.msu /norestart /quiet

Distribution can be validated againsttechnical and logistical requirementsTask Sequences can assure order andIntegrity of component installs
MED-V 2.0 Deployment with CM
Target collections based on:
► Business and logistical needs► Operating system version► Disk space requirements
(c) 2011 Microsoft. All rights reserved.
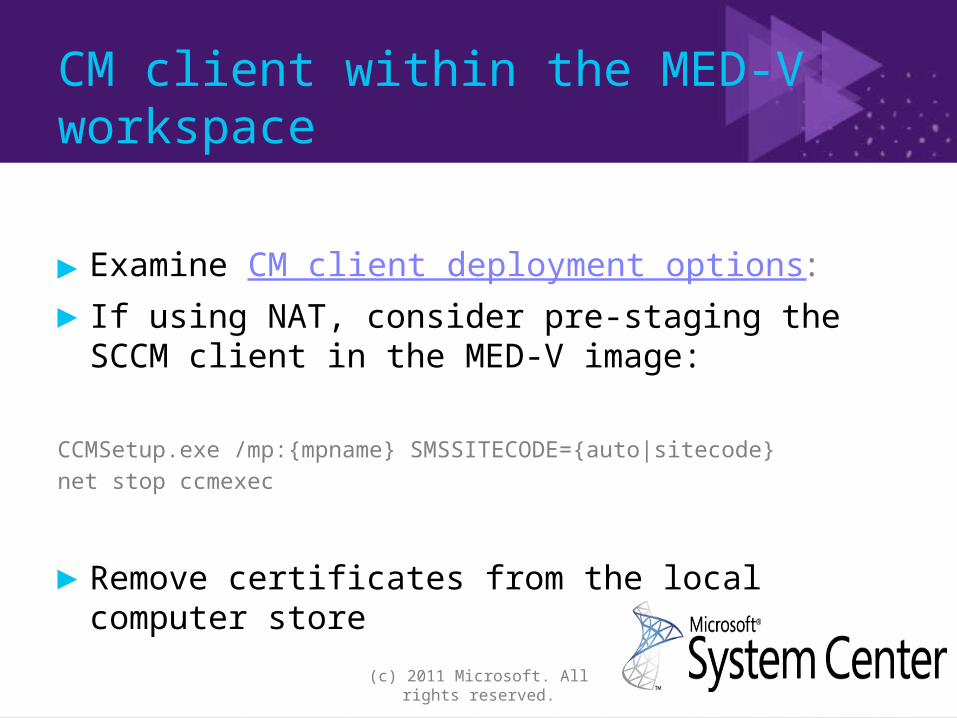
CM client within the MED-V workspace
► Examine CM client deployment options:► If using NAT, consider pre-staging the SCCM
client in the MED-V image:
CCMSetup.exe /mp:{mpname} SMSSITECODE={auto|sitecode}net stop ccmexec
► Remove certificates from the local computer store
(c) 2011 Microsoft. All rights reserved.
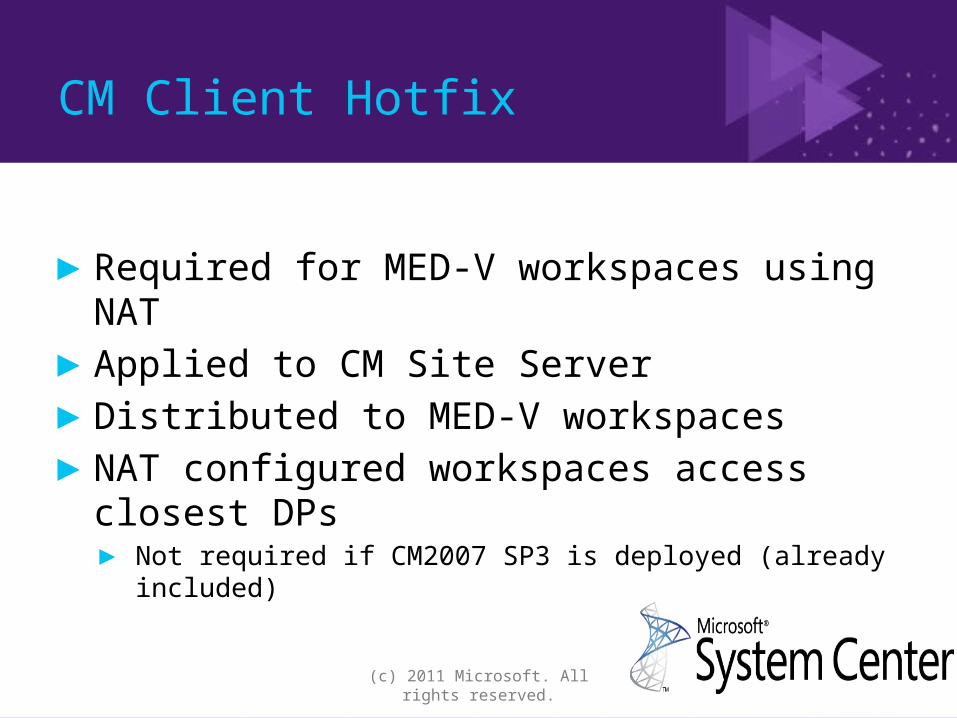
CM Client Hotfix
► Required for MED-V workspaces using NAT► Applied to CM Site Server► Distributed to MED-V workspaces► NAT configured workspaces access closest
DPs► Not required if CM2007 SP3 is deployed (already
included)
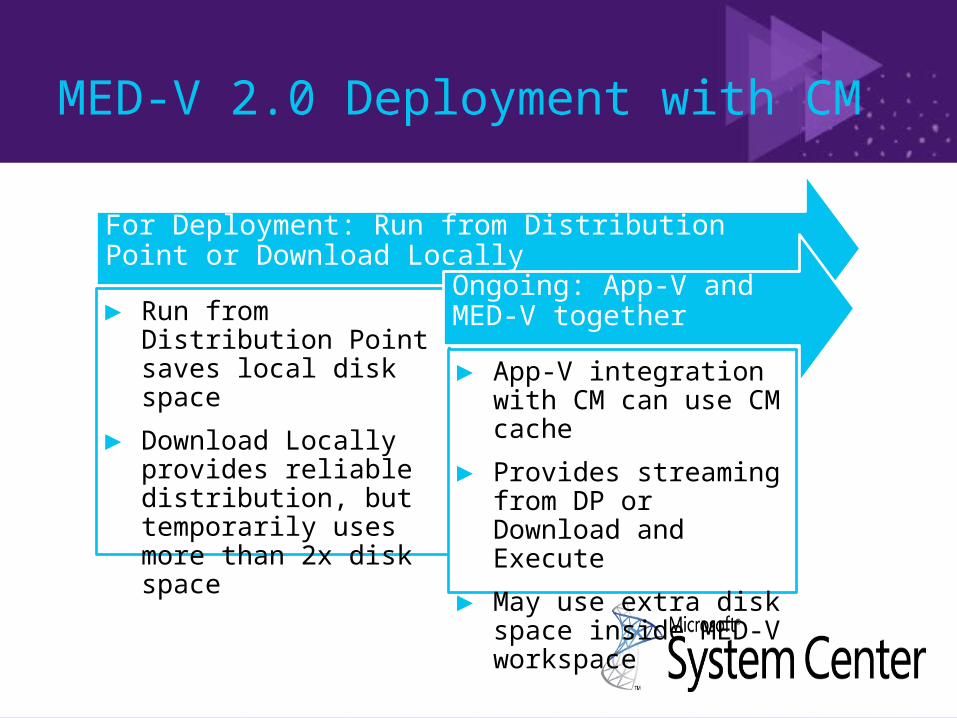
MED-V 2.0 Deployment with CM
For Deployment: Run from Distribution Point or Download Locally
► Run from Distribution Point saves local disk space
► Download Locally provides reliable distribution, but temporarily uses more than 2x disk space
Ongoing: App-V and MED-V together
► App-V integration with CM can use CM cache
► Provides streaming from DP or Download and Execute
► May use extra disk space inside MED-V workspace

(c) 2011 Microsoft. All rights reserved.
Key Points when deploying MED-V with CM
► Create Packages, Task Sequences, & Advertisements► Utilise the “Run command line” for installs► A single reboot will require that you re-order the
installs► Suppress the reboots of the individual components► Include success codes & continue on error as required► Consider the client requirements x86 & 64bit
– The pre-requisites are specific to the architecture and may require either multiple task sequences or more complex steps

Task sequence, reboot and first time setup

First Time Setup
► Configuration is done as part of MED-V First Time Setup (FTS)– The Workspace Setup publishes to the registry HKLM RUN key –
MedvHost.exe– When the MED-V client is launched it validates whether FTS has run been
for that user or workstation
► What happens during FTS– User prompted for domain credentials– Differencing Disk is created for the Workspace and launched– Mini-Setup is run w/ MED-V overrides (if applied)– FTScompletion.exe is run – Workspace is Started
• Applications are published• Web Apps are ready to be redirected

Live deployment
demo
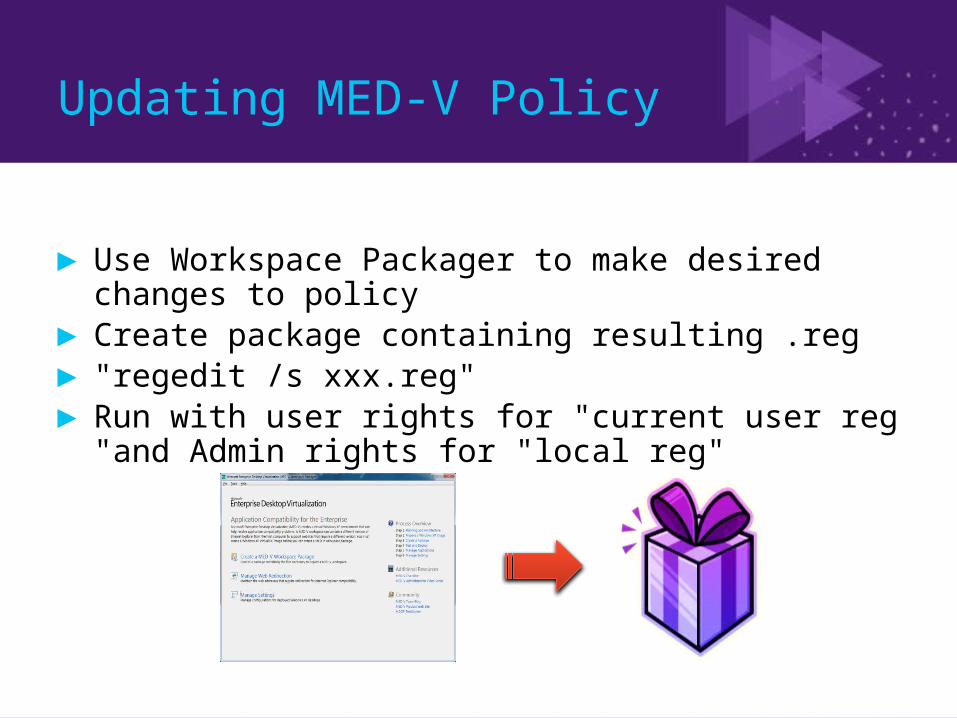
Updating MED-V Policy
► Use Workspace Packager to make desired changes to policy
► Create package containing resulting .reg► "regedit /s xxx.reg"► Run with user rights for "current user reg "and
Admin rights for "local reg"

Patching – MED-V Wake to Patch
► Fast Start► VM is always available as the host is available – patching
happens normally► Normal Start
► VM runs only as needed► Wake to Patch starts the VM for patching
► Default is midnight to 4am► Changes can only be made with PowerShell not the GUI► Note: The machine must be on with the user logged-in► PowerShell Example for Wake to Patch
New-MedvConfiguration –VmGuestUpdateTime 01:00 –VmGuestUpdateDuration 480 | Export-MedvConfiguration –Path c:\medv\MEDVUPDTime.reg

Desired Configuration Management (DCM)
► This MED-V Configuration Pack tracks the successes and failures of FTS using the Desired Configuration Manager in Configuration Manager 2007
► Monitors First Time Setup success of deployed workspaces
► Build collections of successful deployments► Download URL:
http://www.microsoft.com/download/en/details.aspx?displaylang=en&id=26219
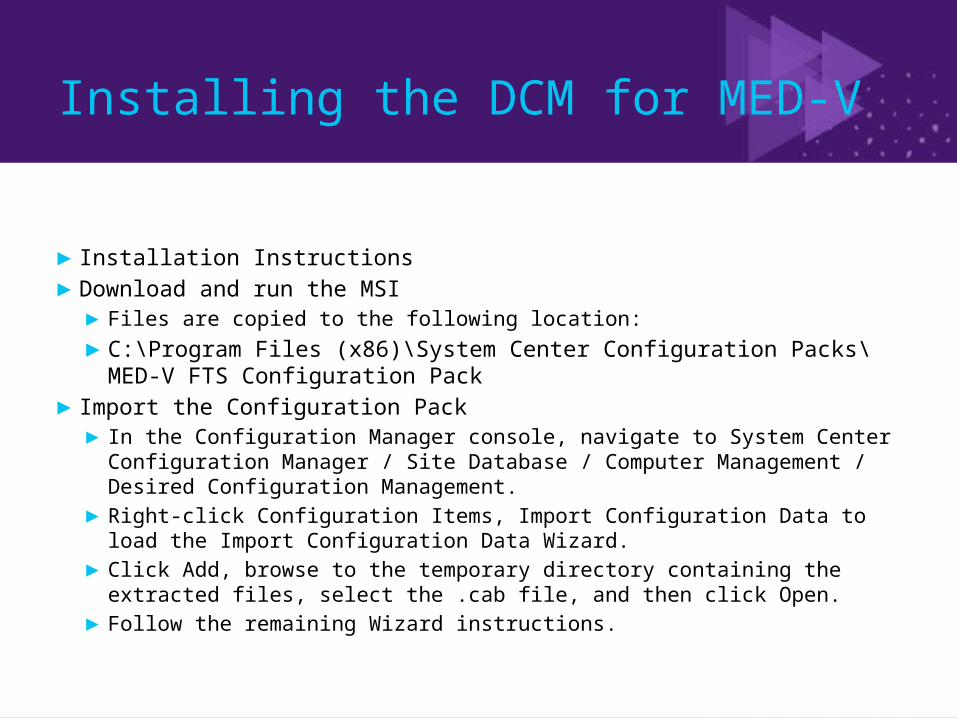
Installing the DCM for MED-V
► Installation Instructions► Download and run the MSI
► Files are copied to the following location:► C:\Program Files (x86)\System Center Configuration Packs\MED-V
FTS Configuration Pack► Import the Configuration Pack
► In the Configuration Manager console, navigate to System Center Configuration Manager / Site Database / Computer Management / Desired Configuration Management.
► Right-click Configuration Items, Import Configuration Data to load the Import Configuration Data Wizard.
► Click Add, browse to the temporary directory containing the extracted files, select the .cab file, and then click Open.
► Follow the remaining Wizard instructions.

What is a successful configuration of MED-V?
► This MED-V Configuration Pack tracks the success and failures of FTS.
► During FTS MED-V does the following:1. The virtual hard disk is configured. Mini-Setup runs and expands the Windows XP
image. 2. Commands for additional configuration are run - such as installing ESD software
or configuring the image. 3. Ftscompletion.exe is run.
This adds the user to the RDP group, can add the user to local admin group, copies logs, signals MED-V that the MED-V workspace is ready.
4. The workspace is then restarted by ftscompletion.exe and the end user is logged on or prompted to log on.
5. The MED-V workspace is then started and configured for the user – this includes applying Group Policy.
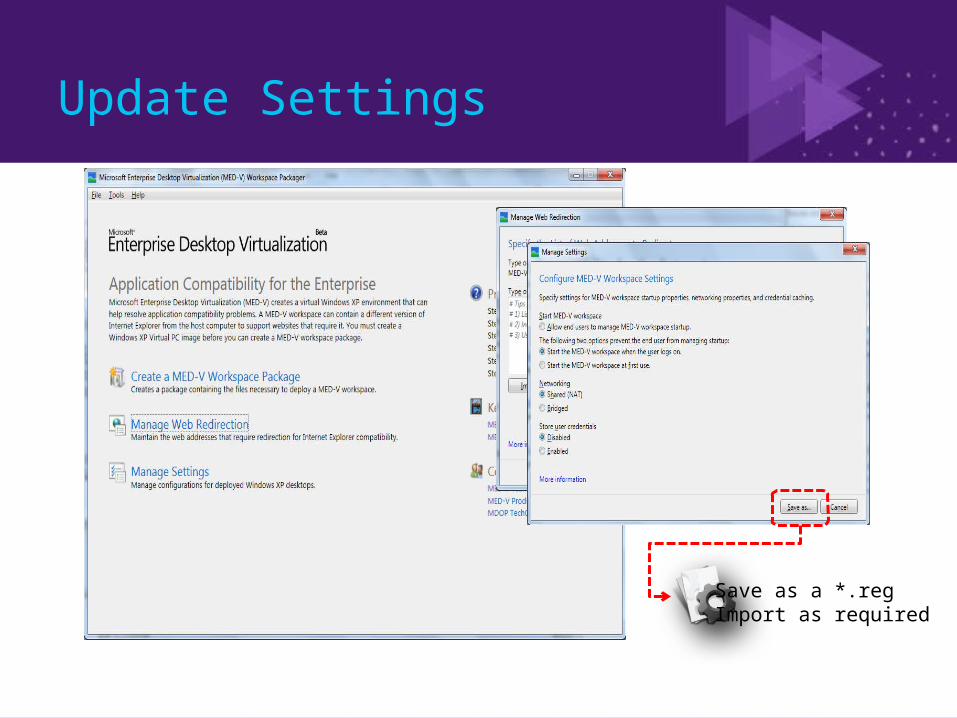
Update Settings
Save as a *.regImport as required

MED-V Admin Toolkit
C:\Program Files\Microsoft Enterprise Desktop Virtualization\medvhost.exe /toolkit
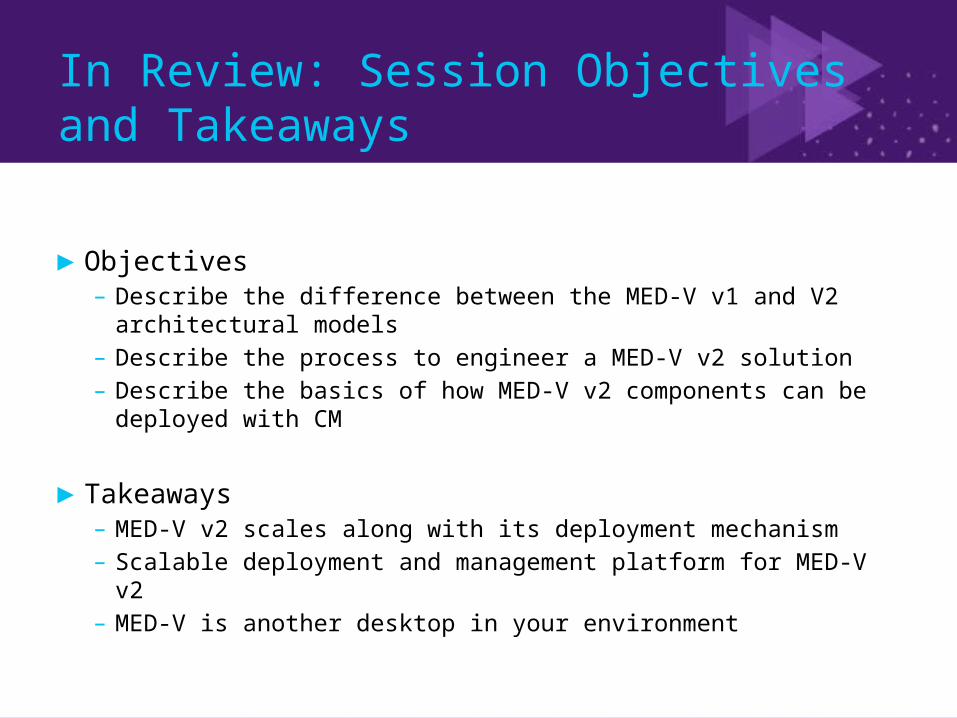
In Review: Session Objectives and Takeaways
► Objectives– Describe the difference between the MED-V v1 and V2
architectural models– Describe the process to engineer a MED-V v2 solution– Describe the basics of how MED-V v2 components can be
deployed with CM
► Takeaways– MED-V v2 scales along with its deployment mechanism– Scalable deployment and management platform for MED-V v2– MED-V is another desktop in your environment
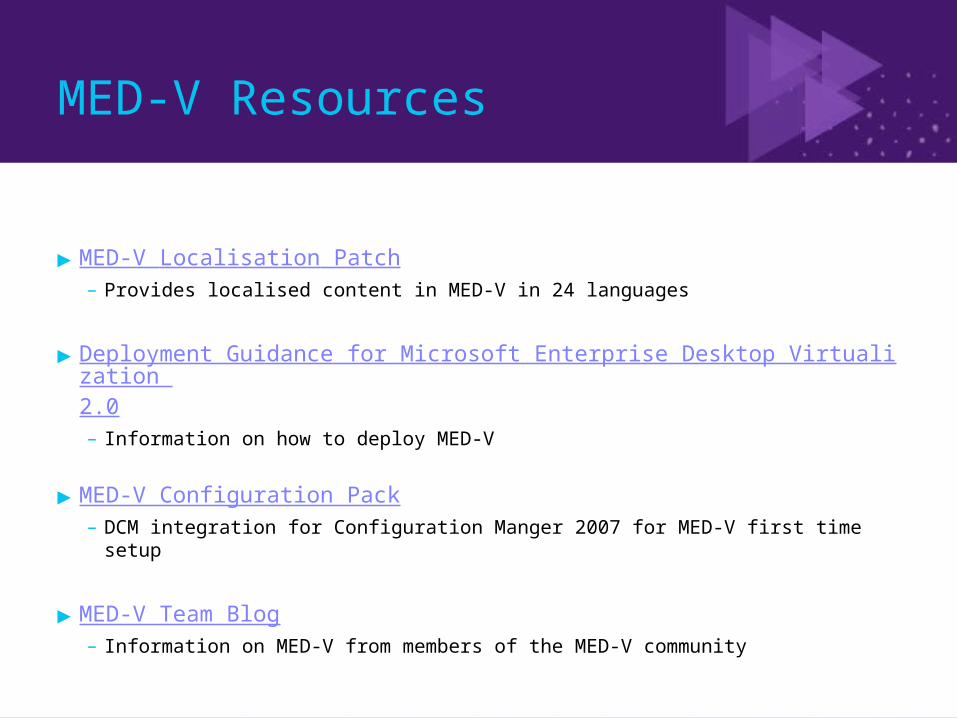
MED-V Resources
► MED-V Localisation Patch– Provides localised content in MED-V in 24 languages
► Deployment Guidance for Microsoft Enterprise Desktop Virtualization 2.0– Information on how to deploy MED-V
► MED-V Configuration Pack– DCM integration for Configuration Manger 2007 for MED-V first time
setup
► MED-V Team Blog– Information on MED-V from members of the MED-V community
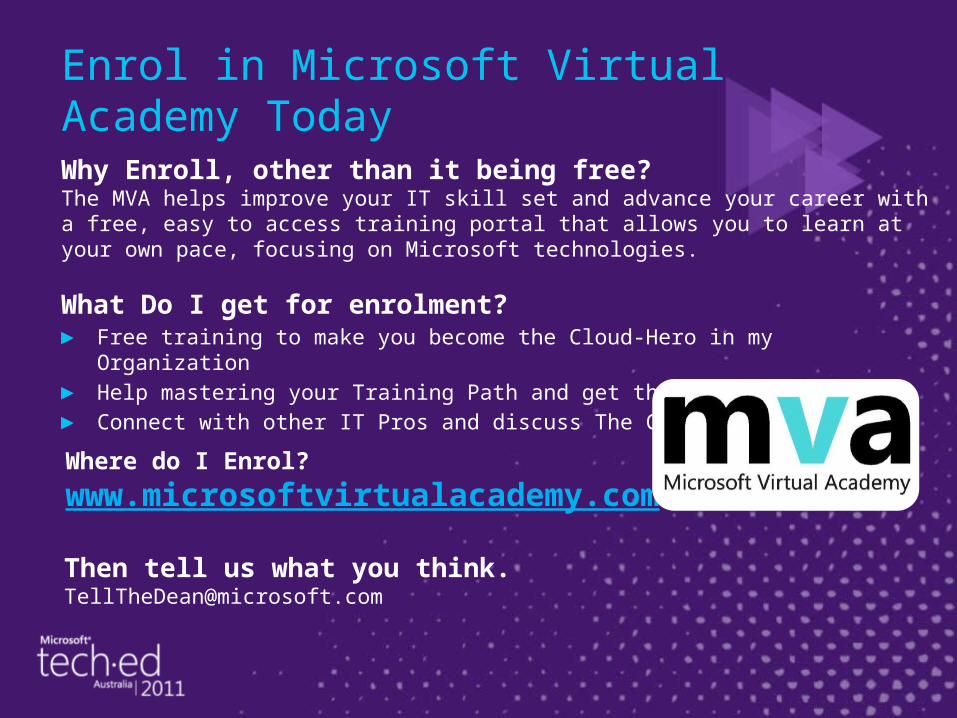
Enrol in Microsoft Virtual Academy TodayWhy Enroll, other than it being free?The MVA helps improve your IT skill set and advance your career with a free, easy to access training portal that allows you to learn at your own pace, focusing on Microsoft technologies.
What Do I get for enrolment?► Free training to make you become the Cloud-Hero in my Organization► Help mastering your Training Path and get the recognition► Connect with other IT Pros and discuss The Cloud
Where do I Enrol?
www.microsoftvirtualacademy.com
Then tell us what you think. [email protected]

(c) 2011 Microsoft. All rights reserved.
© 2010 Microsoft Corporation. All rights reserved. Microsoft, Windows, Windows Vista and other product names are or may be registered trademarks and/or trademarks in the U.S. and/or other countries.
The information herein is for informational purposes only and represents the current view of Microsoft Corporation as of the date of this presentation. Because Microsoft must respond to changing market conditions, it should not be interpreted to be a commitment on the part of Microsoft, and Microsoft cannot guarantee the accuracy of any information provided after the date of this
presentation. MICROSOFT MAKES NO WARRANTIES, EXPRESS, IMPLIED OR STATUTORY, AS TO THE INFORMATION IN THIS PRESENTATION.

(c) 2011 Microsoft. All rights reserved.
www.msteched.com/Australia
Sessions On-Demand & Community
http:// technet.microsoft.com/en-au
Resources for IT Professionals
http://msdn.microsoft.com/en-au
Resources for Developers
www.microsoft.com/australia/learning
Microsoft Certification & Training Resources
Resources