Ec6301 Oops & Ds Notes
178
EC6301 / OOPS AND DS BE (ECE) III Sem / II Year Page 1 UNIT I DATA ABSTRACTION AND OVERLOADING Syllabus: Overview of C++ – Structures – Class Scope and Accessing Class Members – Reference Variables – Initialization – Constructors – Destructors – Member Functions and Classes – Friend Function – Dynamic Memory Allocation – Static Class Members – Container Classes and Integrators – Proxy Classes – Overloading: Function overloading and Operator Overloading. 1.1 OVERVIEW OF C++ Basic Concepts of Object Oriented Programming Before starting to learn C++ it is essential that one must have a basic knowledge of the concepts of Object oriented programming. Some of the important object oriented features are namely: 1. Objects 2. Classes 3. Inheritance 4. Data Abstraction 5. Data Encapsulation 6. Polymorphism 7. Overloading 8. Reusability In order to understand the basic concepts in C++, the programmer must have a command of the basic terminology in object-oriented programming. Below is a brief outline of the concepts of Object-oriented programming languages: Objects Object is the basic unit of object-oriented programming. Objects are identified by its unique name. An object represents a particular instance of a class. There can be more than one instance of an object. Each instance of an object can hold its own relevant data.
-
Upload
rameshkumar -
Category
Documents
-
view
87 -
download
6
description
EC6301, OOPS & DS
Transcript of Ec6301 Oops & Ds Notes
EC6301 / OOPS AND DS BE (ECE) III Sem / II Year
Page 1
UNIT I
DATA ABSTRACTION AND OVERLOADING
Syllabus: Overview of C++ – Structures – Class Scope and Accessing Class Members –
Reference Variables – Initialization – Constructors – Destructors – Member Functions and
Classes – Friend Function – Dynamic Memory Allocation – Static Class Members – Container
Classes and Integrators – Proxy Classes – Overloading: Function overloading and Operator
Overloading.
1.1 OVERVIEW OF C++
Basic Concepts of Object Oriented Programming
Before starting to learn C++ it is essential that one must have a basic knowledge of the
concepts of Object oriented programming. Some of the important object oriented features are
namely:
1. Objects
2. Classes
3. Inheritance
4. Data Abstraction
5. Data Encapsulation
6. Polymorphism
7. Overloading
8. Reusability
In order to understand the basic concepts in C++, the programmer must have a command
of the basic terminology in object-oriented programming. Below is a brief outline of the concepts
of Object-oriented programming languages:
Objects
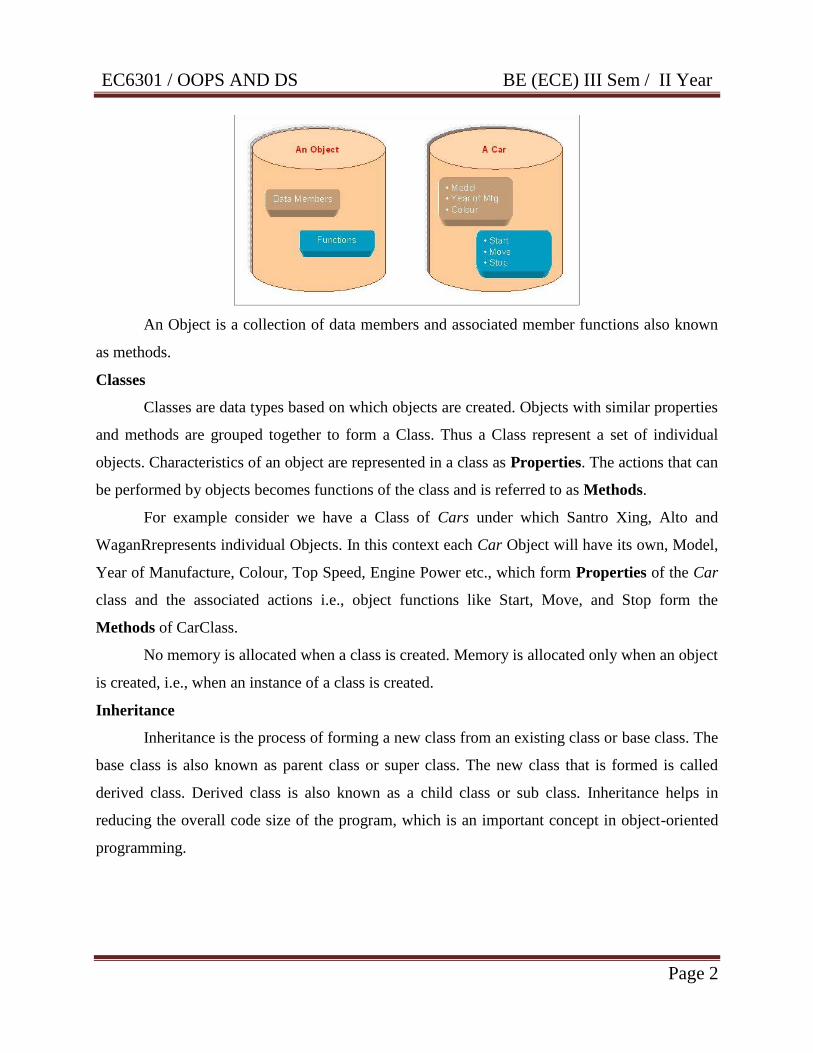
Object is the basic unit of object-oriented programming. Objects are identified by its
unique name. An object represents a particular instance of a class. There can be more than one
instance of an object. Each instance of an object can hold its own relevant data.
EC6301 / OOPS AND DS BE (ECE) III Sem / II Year
Page 2
An Object is a collection of data members and associated member functions also known
as methods.
Classes
Classes are data types based on which objects are created. Objects with similar properties
and methods are grouped together to form a Class. Thus a Class represent a set of individual
objects. Characteristics of an object are represented in a class as Properties. The actions that can
be performed by objects becomes functions of the class and is referred to as Methods.
For example consider we have a Class of Cars under which Santro Xing, Alto and
WaganRrepresents individual Objects. In this context each Car Object will have its own, Model,
Year of Manufacture, Colour, Top Speed, Engine Power etc., which form Properties of the Car
class and the associated actions i.e., object functions like Start, Move, and Stop form the
Methods of CarClass.
No memory is allocated when a class is created. Memory is allocated only when an object
is created, i.e., when an instance of a class is created.
Inheritance
Inheritance is the process of forming a new class from an existing class or base class. The
base class is also known as parent class or super class. The new class that is formed is called
derived class. Derived class is also known as a child class or sub class. Inheritance helps in
reducing the overall code size of the program, which is an important concept in object-oriented
programming.
EC6301 / OOPS AND DS BE (ECE) III Sem / II Year
Page 3
Data Abstraction
Data abstraction refers to, providing only essential information to the outside world and
hiding their background details, i.e., to represent the needed information in program without
presenting the details.
Data abstraction is a programming (and design) technique that relies on the separation of
interface and implementation.
Data Encapsulation
Data Encapsulation combines data and functions into a single unit called class. When
using Data Encapsulation, data is not accessed directly; it is only accessible through the
functions present inside the class. Data Encapsulation enables the important concept of data
hiding possible.
Polymorphism
Polymorphism allows routines to use variables of different types at different times. An
operator or function can be given different meanings or functions. Polymorphism refers to a
single function or multi-functioning operator performing in different ways.
Overloading
Overloading is one type of Polymorphism. It allows an object to have different meanings,
depending on its context. When an existing operator or function begins to operate on new data
type, or class, it is understood to be overloaded.
Reusability
This term refers to the ability for multiple programmers to use the same written and
debugged existing class of data. This is a time saving device and adds code efficiency to the
language. Additionally, the programmer can incorporate new features to the existing class,
further developing the application and allowing users to achieve increased performance. This
time saving feature optimizes code, helps in gaining secured applications and facilitates easier
maintenance.
Dynamic Binding
Binding refers to the linking of a procedure call to the code. Dynamic binding means that
the code associated with a given procedure call.

EC6301 / OOPS AND DS BE (ECE) III Sem / II Year
Page 4
Message Passing
An object oriented program consists of a set of objects that communicate with each other.
Employee.salary (name)
Object Message information
1.2 STRUCTURES
Structure is the collection of variables of different types under a single name for better
visualization of problem. Arrays is also collection of data but arrays can hold data of only one
type whereas structure can hold data of one or more types.
Defining a structure in C++ programming
The struct keyword defines a structure type followed by an identifier (name of the
structure). Then inside the curly braces, you can declare one or more members (declare variables
inside curly braces) of that structure. For example:
struct person {
char name[50];
int age;
float salary;
};
Here a structure person is defined which has three members: name, age and salary.
When a structure is created, no memory is allocated. The structure definition is only the
blueprint for the creating of variables. You can imagine it as a datatype. When you define an
integer as below:
int foo;
The int specifies that, variable foo can hold integer element only. Similarly, structure
definition only specifies that, what property a structure variable holds when it is defined.
Defining a structure variable
Once you declare a structure person as above. You can define a structure variable as:
person bill;

EC6301 / OOPS AND DS BE (ECE) III Sem / II Year
Page 5
Here, a structure variable bill is defined which is of type structure person. When structure
variable is defined, then only the required memory is allocated by the compiler. Considering you
have either 32-bit or 64-bit system, the memory of float is 4 bytes, memory of int is 4 bytes and
memory of char is 1 byte. Hence, 58 bytes of memory is allocated for structure variable bill.
Accessing members of a structure
The members of structure variable are accessed using dot operator. Suppose, you want to
access age of structure variable bill and assign it 50 to it. You can perform this task by using
following code below:
bill.age = 50;
C++ Program to assign data to members of a structure variable and display it
#include <iostream.h>
struct person
{
char name[50];
int age;
float salary;
};
void main()
{
person p1;
cout << "Enter Full name: ";
cin.get(p1.name, 50);
cout << "Enter age: ";
cin >> p1.age;
cout << "Enter salary: ";
cin >> p1.salary;
cout << "\nDisplaying Information." << endl;
cout << "Name: " << p1.name << endl;
cout <<"Age: " << p1.age << endl;
cout << "Salary: " << p1.salary;
EC6301 / OOPS AND DS BE (ECE) III Sem / II Year
Page 6
}
1.3 REFERENCE VARIABLES
A reference variable provides an alias (alternative name) for a previously defined
variable. For example:
float total=100;
float &sum = total;
It means both total and sum are the same variables.
cout<< total;
cout << sum;
Both are going to give the same value, 100. Here the & operator is not the address operator; float
& means a reference to float.
C++ references differ from pointers in several essential ways:
A pointer can be re-assigned any number of times while a reference cannot be reassigned
after binding.
Pointers can point nowhere (NULL), whereas reference always refer to an object.
You can't take the address of a reference like you can with pointers.
1.4 CLASSES AND MEMBER FUNCTIONS
Class
A class is a way to bind the data and its associated functions together. It allows the data
to be hidden, if necessary, from external use. Generally, a class specification has two parts:
1. Class declaration
2. Class function definitions
The class declaration describes the type and scope of its members. The class function
definitions describe how the class functions are implemented.
The general form of a class declaration is:
class class_name
{
private :
Variable declarations;
EC6301 / OOPS AND DS BE (ECE) III Sem / II Year
Page 7
Function declarations;
public :
Variable declarations;
Function declarations;
};
Example
class student
{
int rno;
int age;
public :
void get(int a,int b);
void put();
};
Creating Objects
Once a class has been declared, we can create variables of that type by using the class
name.
student s;
We may also declare more than one object in one statement.
student s1,s2,s3;
Accessing Class members
The private data of a class can be accessed only through the member functions of that
class.
objectname.functionname(actual arguments);
For example,
The function call statement
s.get(100,12);
s.put();

EC6301 / OOPS AND DS BE (ECE) III Sem / II Year
Page 8
Defining Member Functions
Member functions can be defined in two places.
1. Outside the class definition
2. Inside the class definition
Outside the class definition
Member functions that are declared inside a class have to be defined separately outside
the class. The general form of a member function definition is:
returntype classname :: functionname( argument declaration )
{
Function body
}
void student :: get(inta,int b)
{
rno = a;
age = b;
}
void student :: put()
{
cout<< “RNO = “ <<rno;
cout<< “AGE = “ << age;
}
Inside the Class definition
Another method of defining a member function is to replace the function declaration by
the actual function definition inside the class.
class student
{
int rno;
int age;
public :
EC6301 / OOPS AND DS BE (ECE) III Sem / II Year
Page 9
void get(int a,int b)
{
rno = a;
age = b;
}
void put()
{
cout<< “RNO = “ <<rno;
cout<< “AGE = “ << age;
}
};
void main()
{
student s;
clrscr();
s.get(100,5);
s.put();
}
1.5 CLASS SCOPE AND ACCESSING CLASS MEMBERS
By the scope of an identifier we mean the code in which the identifier is known (or
accessible). For example, in a C program with structure
int x;
int f(int n) {
int z;
...
{ /* block A */
int m;
...
}
EC6301 / OOPS AND DS BE (ECE) III Sem / II Year
Page 10
}
void main()
{
int y;
...
}
variable x is accessible throughout the program, n and z are accessible throughout
function f (but not within function main), and variable m is accessible within block A (but not
accessible anywhere outside block A). Variable y is accessible only within function main. Thus
the scope of variable y is the block for function main, the scope of variable m is block A, and the
scope of variable x is the entire program.
Global and Local Scope
In general, global scope applies to an entire program and local scope is restricted to a
component, such as a function or block, of a program.
Thus x is global in the above code, while n and z are local to function f and m is local to
block A.
Some of the terms that are used for access privileges to identifiers defined in a class
definition are:
public: the identifier is accessible to any code anywhere
protected: the identifier is accessible only within the methods of the class in which it is defined
and in the methods of every subclass
private: the identifier is accessible only within the methods of the class in which it is defined.
The scope levels, in general, within a method of a class are
variables defined in the current block (if any);
variables defined in the enclosing block, if there is an enclosing block; (This is repeated
until the outer block of the method body is reached.)
parameters;
instance variables and class variables;
global variables (if allowed in the language).
For example, in the class definition
EC6301 / OOPS AND DS BE (ECE) III Sem / II Year
Page 11
class foo {
int x, m;
int bar(int x, int n) {
int y, z;
...
{int x, y; // Block A
...
}
}
...
}
Within the code for Block A, x and y refer to the local variables declared in the block, z
refers to the variable declared in method bar, n refers to the parameter, and m refers to the
instance variable.
It is possible to access instance variables (and class variables) by using this or the name
of the class, even if the instance/class variable name is redefined locally. For example, in
method bar, the code
this.x = x;
would set the value of instance variable x (left side of the assignment) to the value of parameter x
except within Block A, where it would set the value of instance variable x to that of local
variable x.
1.6 INITIALIZATION - CONSTRUCTORS
Constructors are special class functions which performs initialization of every object. The
Compiler calls the Constructor whenever an object is created. Constructors initialize values to
object members after storage is allocated to the object.
class A
{
int x;

EC6301 / OOPS AND DS BE (ECE) III Sem / II Year
Page 12
public:
A(); //Constructor
};
While defining a constructor you must remember that the name of constructor will be
same as the name of the class, and constructors never have return type.
Constructors can be defined either inside the class definition or outside the class
definition using class name and scope resolution :: operator.
class A
{
int i;
public:
A(); //Constructor declared
};
A::A() //Constructor definition
{
i=1;
}
The constructor functions have some special characteristics:
They should be declared in public section.
They are invoked automatically when the objects are created.
They do not have return types, and they cannot return values.
It has the same name as that of the class to which it belongs.
Types of Constructors
1. Default Constructor
2. Parameterized Constructor
3. Copy Constructor
4. Dynamic Constructor
1. Default Constructor
Default constructor is the constructor which doesn't take any argument. It has no
parameter.
EC6301 / OOPS AND DS BE (ECE) III Sem / II Year
Page 13
Syntax :
class_name ()
{ Constructor Definition }
Example :
class Cube
{
int side;
public:
Cube()
{
side=10;
}
};
void main()
{
Cube c;
cout << c.side;
}
Output : 10
In this case, as soon as the object is created the constructor is called which initializes its
data members.
A default constructor is so important for initialization of object members, that even if we
do not define a constructor explicitly, the compiler will provide a default constructor implicitly.
2. Parameterized Constructor
These are the constructors with parameter. Using this Constructor you can provide
different values to data members of different objects, by passing the appropriate values as
argument.
Example:
class Cube
{

EC6301 / OOPS AND DS BE (ECE) III Sem / II Year
Page 14
int side;
public:
Cube(int x)
{
side=x;
}
};
void main()
{
Cube c1(10);
Cube c2(20);
Cube c3(30);
cout << c1.side;
cout << c2.side;
cout << c3.side;
}
Output : 10 20 30
By using parameterized constructor in above case, we have initialized 3 objects with user
defined values. We can have any number of parameters in a constructor.
3. Copy Constructor
These are special type of Constructors which takes an object as argument, and is used to
copy values of data members of one object into other object.
Example:
class Cube
{
int side;
public:
Cube()
{
side=10;

EC6301 / OOPS AND DS BE (ECE) III Sem / II Year
Page 15
}
};
void main()
{
Cube c;
Cube c1(c);
cout << c.side;
cout<<c1.side;
}
Output: 10 10
4. Dynamic Constructor
This constructor is used to allocate the memory to the objects at the run time.The memory
allocation to objects is allocated with the help of 'new' operator.By using this constructor, we can
dynamically initialize the objects.
Example :
#include <iostream.h>
#include <conio.h>
class Account
{
private:
int account_no;
int balance;
public :
Account(int a,int b)
{
account_no=a;
balance=b;
}
void display()
{
EC6301 / OOPS AND DS BE (ECE) III Sem / II Year
Page 16
cout<< "\nAccount number is : "<< account_no;
cout<< "\nBalance is : " << balance;
}
};
void main()
{
clrscr();
int an,bal;
cout<< "Enter account no : ";
cin >> an;
cout<< "\nEnter balance : ";
cin >> bal;
Account *acc=new Account(an,bal); //dynamic constructor
acc->display(); //'->' operator is used to access the method
}
Output:
Enter account no:1000
Enter balance:200
Account number is:1000
Balance is:200
1.7 DESTRUCTORS
Destructor is a special class function which destroys the object as soon as the scope of
object ends. The destructor is called automatically by the compiler when the object goes out of
scope.
The syntax for destructor is same as that for the constructor, the class name is used for the name
of destructor, with a tilde ~ sign as prefix to it. Destructors will never have any arguments.
Syntax:
class A
{

EC6301 / OOPS AND DS BE (ECE) III Sem / II Year
Page 17
public:
~A();
};
Example:
class A
{
A()
{
cout << "Constructor called";
}
~A()
{
cout << "Destructor called";
}
};
void main()
{
A obj1; // Constructor Called
int x=1;
if(x)
{
A obj2; // Constructor Called
} // Destructor Called for obj2
} // Destructor called for obj1
Output:
Constructor called
Constructor called
Destructor called
Destructor called
EC6301 / OOPS AND DS BE (ECE) III Sem / II Year
Page 18
1.8 FRIEND FUNCTION
A friend function of a class is defined outside that class scope but it has the right to
access all private and protected members of the class. Even though the prototypes for friend
functions appear in the class definition, friends are not member functions.
A friend can be a function, function template, or member function, or a class or class
template, in which case the entire class and all of its members are friends.
To declare a function as a friend of a class, precede the function prototype in the class
definition with keyword friend as follows:
class Box
{
double width;
public:
double length;
friend void printWidth( Box box );
void setWidth( double wid );
};
To declare all member functions of class ClassTwo as friends of class ClassOne, place a
following declaration in the definition of class ClassOne:
friend class ClassTwo;
Consider the following program:
#include <iostream.h>
class Box
{
double width;
public:
friend void printWidth( Box box );
void setWidth( double wid );
};
void Box::setWidth( double wid )
{

EC6301 / OOPS AND DS BE (ECE) III Sem / II Year
Page 19
width = wid;
}
// Note: printWidth() is not a member function of any class.
void printWidth( Box box )
{
/* Because printWidth() is a friend of Box, it can directly access any member of this class */
cout << "Width of box : " << box.width <<endl;
}
void main( )
{
Box box;
box.setWidth(10.0);
// Use friend function to print the width.
printWidth( box );
}
When the above code is compiled and executed, it produces the following result:
Width of box : 10
1.9 DYNAMIC MEMORY ALLOCATION
We can dynamically allocate storage space while the program is running. For this reason,
dynamic allocation requires two steps:
Creating the dynamic space.
Storing its address in a pointer (so that the space can be accessed)
To dynamically allocate memory in C++, we use the new operator.
Allocating space with new
To allocate space dynamically, use the unary operator new, followed by the type being
allocated.
new int; // dynamically allocates an int
new double; // dynamically allocates a double
EC6301 / OOPS AND DS BE (ECE) III Sem / II Year
Page 20
If creating an array dynamically, use the same form, but put brackets with a size after the
type:
new int[40]; // dynamically allocates an array of 40 ints
new double[size]; // dynamically allocates an array of size doubles
// note that the size can be a variable
These statements above are not very useful by themselves, because the allocated spaces
have no names! BUT, the new operator returns the starting address of the allocated space, and
this address can be stored in a pointer:
int * p; // declare a pointer p
p = new int; // dynamically allocate an int and load address into p
De-allocation
Deallocation is the "clean-up" of space being used for variables or other data storage.
Compile time variables are automatically deallocated based on their known extent (this is the
same as scope for "automatic" variables). It is the programmer's job to deallocate dynamically
created space
To de-allocate dynamic memory, we use the delete operator
int * ptr = new int; // dynamically created int
delete ptr; // deletes the space that ptr points to
Example
#include <iostream.h>
void main()
{
double * pvalue = NULL; // Pointer initialized with null
pvalue = new double; // Request memory for the variable
*pvalue = 29494.99; // Store value at allocated address
cout<< "Value of pvalue : " << *pvalue<<endl;
delete pvalue; // free up the memory.
}
EC6301 / OOPS AND DS BE (ECE) III Sem / II Year
Page 21
1.10 STATIC CLASS MEMBERS
Static Data Members
A data member of a class can be qualified as static. A static member variable has certain
special characteristics. These are:
It is initialized to zero when the first object of its class is created.
Only one copy of that member is created for the entire class and is shared by all the
objects of that class, no matter how many objects are created.
It is visible only within the class, but its lifetime is the entire program.
Static Member Functions
Like static member variable, we can also have static member functions. A member
function that is declared static has the following properties:
A static function can have access to only other static members declared in the same class.
A static member function can be called using the class name as follows:
o classname :: functionname;
Example
#include<iostream.h>
class test
{
int code;
static int count;
public :
void setcode()
{
code = ++count;
}
void showcode()
{
cout<< “object number : “ << code;
}
static void showcount()

EC6301 / OOPS AND DS BE (ECE) III Sem / II Year
Page 22
{
cout<< “Count : “ << count;
}
};
void main()
{
test t1,t2,t3;
t1.setcode();
t2.setcode();
test :: showcount();
test t3;
t3.setcode();
test :: showcount();
t1.showcode();
t2.showcode();
t3.showcode();
}
Ouput
Count : 2
Count : 3
Object number : 1
Object number : 2
Object number : 3
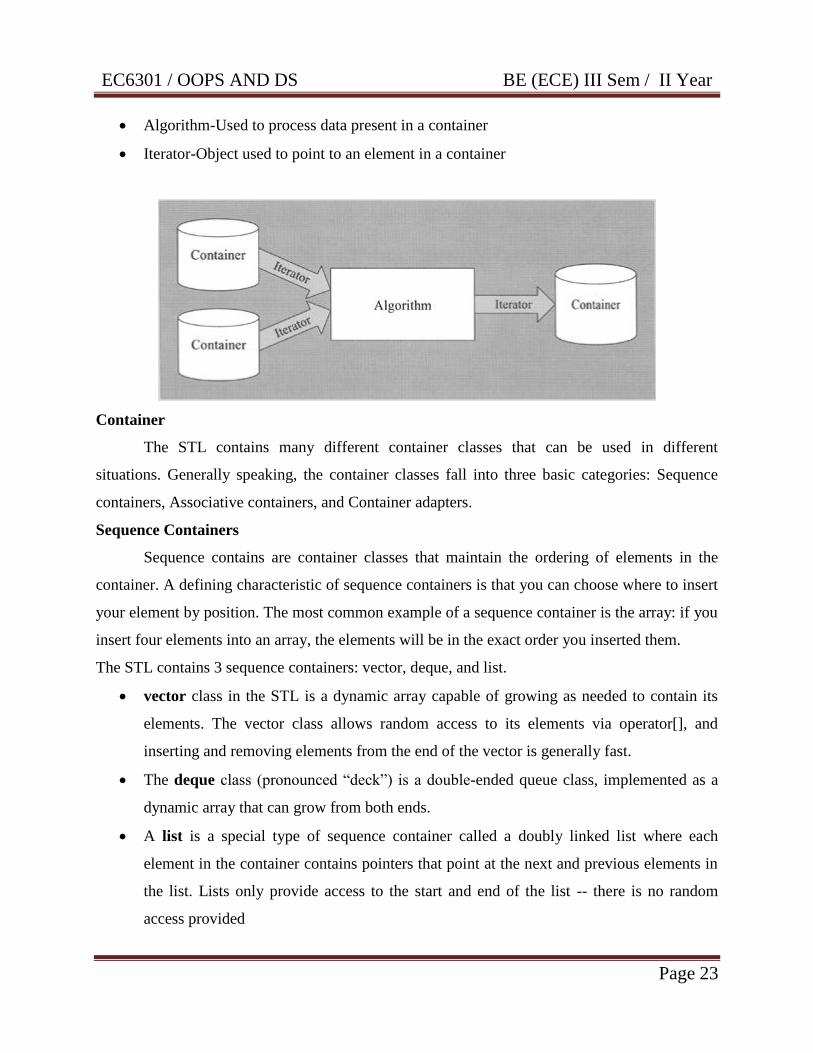
1.11 CONTAINER CLASSES AND ITERATORS
Collection of general purpose templatized classes and functions that could be used as a
standard approach for storing and processing of data is called as Standard Template
Library(STL).
Components of STL
Container-Object that stores data in a organized way in memory
EC6301 / OOPS AND DS BE (ECE) III Sem / II Year
Page 23
Algorithm-Used to process data present in a container
Iterator-Object used to point to an element in a container
Container
The STL contains many different container classes that can be used in different
situations. Generally speaking, the container classes fall into three basic categories: Sequence
containers, Associative containers, and Container adapters.
Sequence Containers
Sequence contains are container classes that maintain the ordering of elements in the
container. A defining characteristic of sequence containers is that you can choose where to insert
your element by position. The most common example of a sequence container is the array: if you
insert four elements into an array, the elements will be in the exact order you inserted them.
The STL contains 3 sequence containers: vector, deque, and list.
vector class in the STL is a dynamic array capable of growing as needed to contain its
elements. The vector class allows random access to its elements via operator[], and
inserting and removing elements from the end of the vector is generally fast.
The deque class (pronounced “deck”) is a double-ended queue class, implemented as a
dynamic array that can grow from both ends.
A list is a special type of sequence container called a doubly linked list where each
element in the container contains pointers that point at the next and previous elements in
the list. Lists only provide access to the start and end of the list -- there is no random
access provided
EC6301 / OOPS AND DS BE (ECE) III Sem / II Year
Page 24
The following program inserts 6 numbers into a vector and uses the overloaded [] operator to
access them in order to print them.
Example
#include <vector.h>
#include <iostream.h>
void main()
{
vector<int>vect;
for (int nCount=0; nCount< 6; nCount++)
vect.push_back(10 - nCount); // insert at end of array
for (int nIndex=0; nIndex<vect.size(); nIndex++)
cout<<vect[nIndex] << " ";
}
Output
10 9 8 7 6 5
Associative Containers
Associative contains are containers that automatically sort their inputs when those inputs
are inserted into the container. By default, associative containers compare elements using
operator<. A set is a container that stores unique elements, with duplicate elements disallowed.
The elements are sorted according to their values.
A multiset is a set where duplicate elements are allowed.
A map (also called an associative array) is a set where each element is a pair, called a
key/value pair. The key is used for sorting and indexing the data, and must be unique.
The value is the actual data.
A multimap (also called a dictionary) is a map that allows duplicate keys. Real-life
dictionaries are multimaps: the key is the word, and the value is the meaning of the word.
All the keys are sorted in ascending order, and you can look up the value by key. Some
words can have multiple meanings, which is why the dictionary is a multimap rather than
a map.
EC6301 / OOPS AND DS BE (ECE) III Sem / II Year
Page 25
Container Adapters
Container adapters are special predefined containers that are adapted to specific uses. The
interesting part about container adapters is that you can choose which sequence container you
want them to use.
A stack is a container where elements operate in a LIFO (Last In, First Out) context,
where elements are inserted (pushed) and removed (popped) from the end of the
container. Stacks default to using deque as their default sequence container (which seems
odd, since vector seems like a more natural fit), but can use vector or list as well.
A queue is a container where elements operate in a FIFO (First In, First Out) context,
where elements are inserted (pushed) to the back of the container and removed (popped)
from the front. Queues default to using deque, but can also use list.
A priority queue is a type of queue where the elements are kept sorted (via operator<).
When elements are pushed, the element is sorted in the queue. Removing an element
from the front returns the highest priority item in the priority queue.
Iterator
An Iterator is an object that can traverse (iterate over) a container class without the user
having to know how the container is implemented. With many classes (particularly lists and the
associative classes), iterators are the primary way elements of these classes are accessed.
An iterator is best visualized as a pointer to a given element in the container, with a set of
overloaded operators to provide a set of well-defined functions:
* Dereferencing the iterator returns the element that the iterator is currently pointing
at.
++ Moves the iterator to the next element in the container. Most iterators also
provide Operator-- to move to the previous element.
= Assign the iterator to a new position (typically the start or end of the container‟s
elements). To assign the value of the element the iterator is point at, deference the iterator first,
then use the assign operator.
== and != Basic comparison operators to determine if two iterators point to the same
element. To compare the values that two iterators are pointing at, deference the iterators first, and
then use a comparison operator.
EC6301 / OOPS AND DS BE (ECE) III Sem / II Year
Page 26
Each container includes four basic member functions for use with Operator=:
begin() returns an iterator representing the beginning of the elements in the container.
end() returns an iterator representing the element just past the end of the elements.
cbegin() returns a const (read-only) iterator representing the beginning of the elements in
the container.
cend() returns a const (read-only) iterator representing the element just past the end of the
elements.
Finally, all containers provide (at least) two types of iterators:
container::iterator - provides a read/write iterator
container::const_iterator- provides a read-only iterator
//Iterating through a vector
#include <iostream.h>
#include <vector.h>
void main()
{
vector<int>vect;
for (intnCount=0; nCount< 6; nCount++)
vect.push_back(nCount);
vector<int>::const_iterator it; // declare an read-only iterator
it = vect.begin(); // assign it to the start of the vector
while (it != vect.end()) // while it hasn't reach the end
{
cout<< *it << " "; // print the value of the element it points to
it++; // and iterate to the next element
}
cout<<endl;
}
Output
0 1 2 3 4 5
EC6301 / OOPS AND DS BE (ECE) III Sem / II Year
Page 27
1.12 PROXY CLASSES
A proxy class is a class that acts on behalf of another class.
Proxy classes are used to simplify a complex object's interface, by hiding details that are
of no relevance within the object's current context.
Accessing an already existing class by a proxy class offers efficiency.
Reference counting mechanisms is one of the example of proxy classes.
When working with a large and complex object, it is often undesirable to copy the object,
but there may be a need to have several references to it. A
Proxy class ensures that there is only ever one instance of the object, and multiple
references are handled by multiple instances of the lightweight proxy, thus reducing the
memory footprint.
When all instances of the proxy fall from scope, the object itself falls from scope.
Note: Proxy classes do not derive from the classes they represent. They simply maintain a
pointer to the object and expose a limited (or simplified) interface to the object.
Example
class RealImage
{
int m_id;
public:
RealImage(int i)
{
m_id = i;
cout << " $$ ctor: " << m_id << '\n';
}
~RealImage()
{
cout << " dtor: " << m_id << '\n';
}
void draw()
{
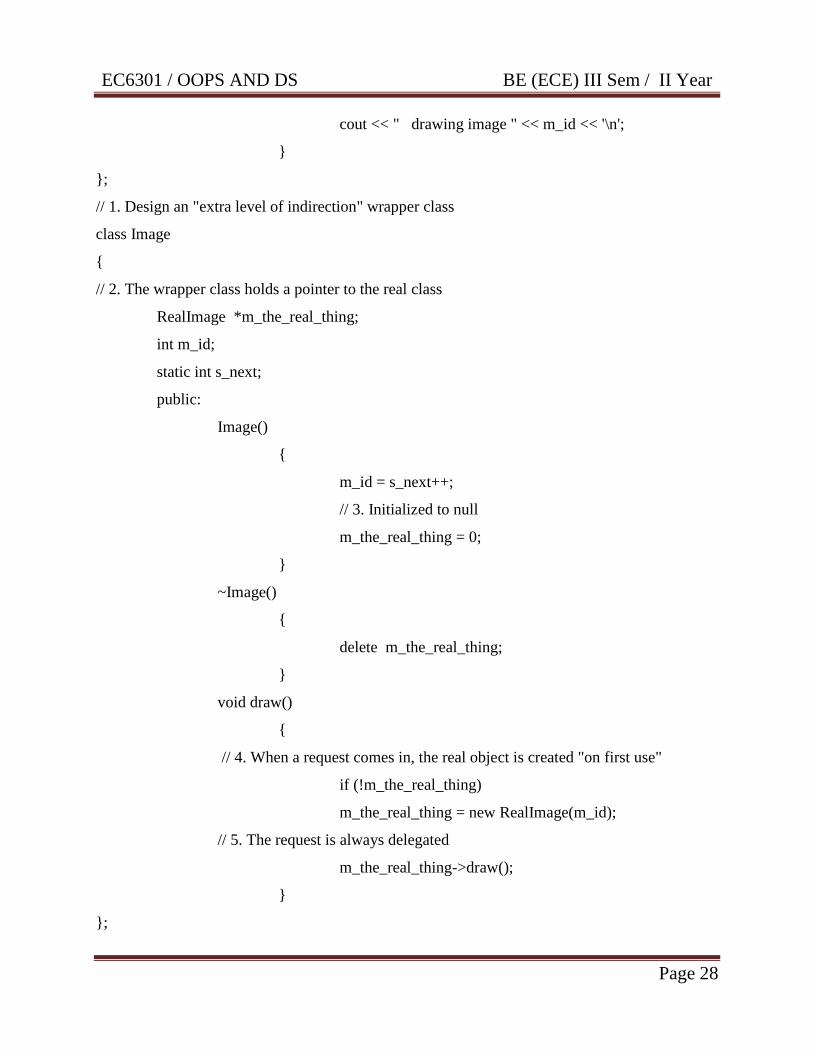
EC6301 / OOPS AND DS BE (ECE) III Sem / II Year
Page 28
cout << " drawing image " << m_id << '\n';
}
};
// 1. Design an "extra level of indirection" wrapper class
class Image
{
// 2. The wrapper class holds a pointer to the real class
RealImage *m_the_real_thing;
int m_id;
static int s_next;
public:
Image()
{
m_id = s_next++;
// 3. Initialized to null
m_the_real_thing = 0;
}
~Image()
{
delete m_the_real_thing;
}
void draw()
{
// 4. When a request comes in, the real object is created "on first use"
if (!m_the_real_thing)
m_the_real_thing = new RealImage(m_id);
// 5. The request is always delegated
m_the_real_thing->draw();
}
};
EC6301 / OOPS AND DS BE (ECE) III Sem / II Year
Page 29
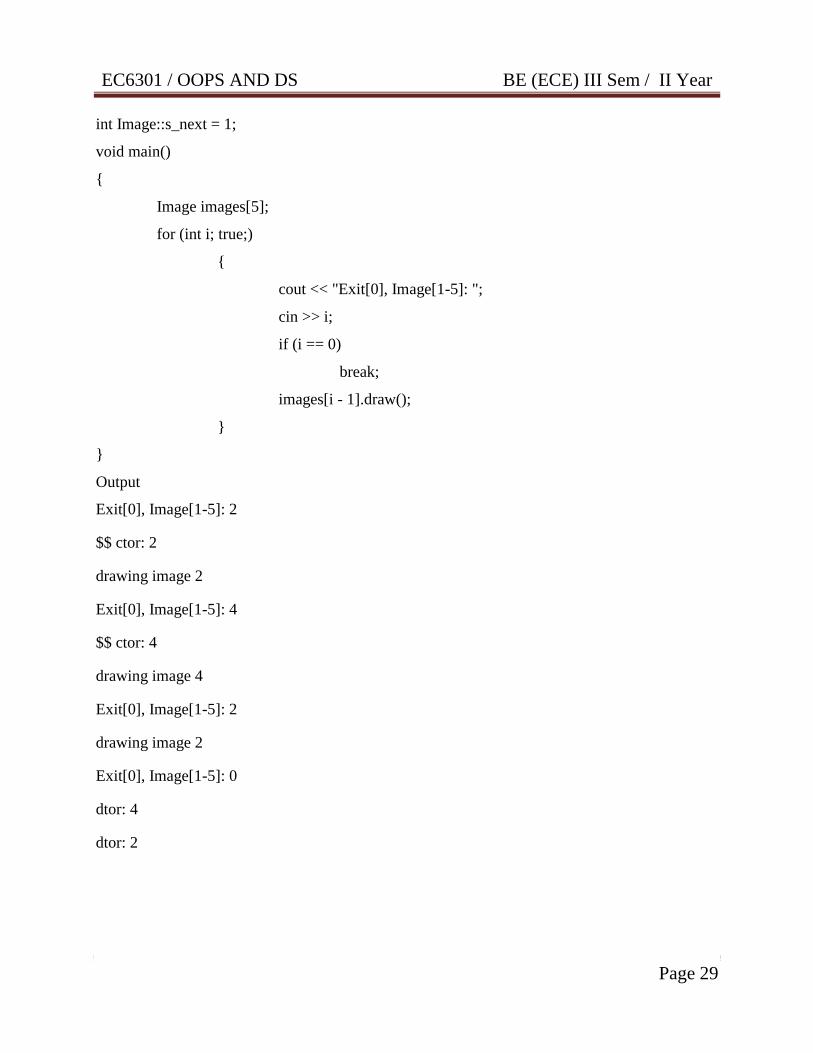
int Image::s_next = 1;
void main()
{
Image images[5];
for (int i; true;)
{
cout << "Exit[0], Image[1-5]: ";
cin >> i;
if (i == 0)
break;
images[i - 1].draw();
}
}
Output
Exit[0], Image[1-5]: 2
$$ ctor: 2
drawing image 2
Exit[0], Image[1-5]: 4
$$ ctor: 4
drawing image 4
Exit[0], Image[1-5]: 2
drawing image 2
Exit[0], Image[1-5]: 0
dtor: 4
dtor: 2
EC6301 / OOPS AND DS BE (ECE) III Sem / II Year
Page 30
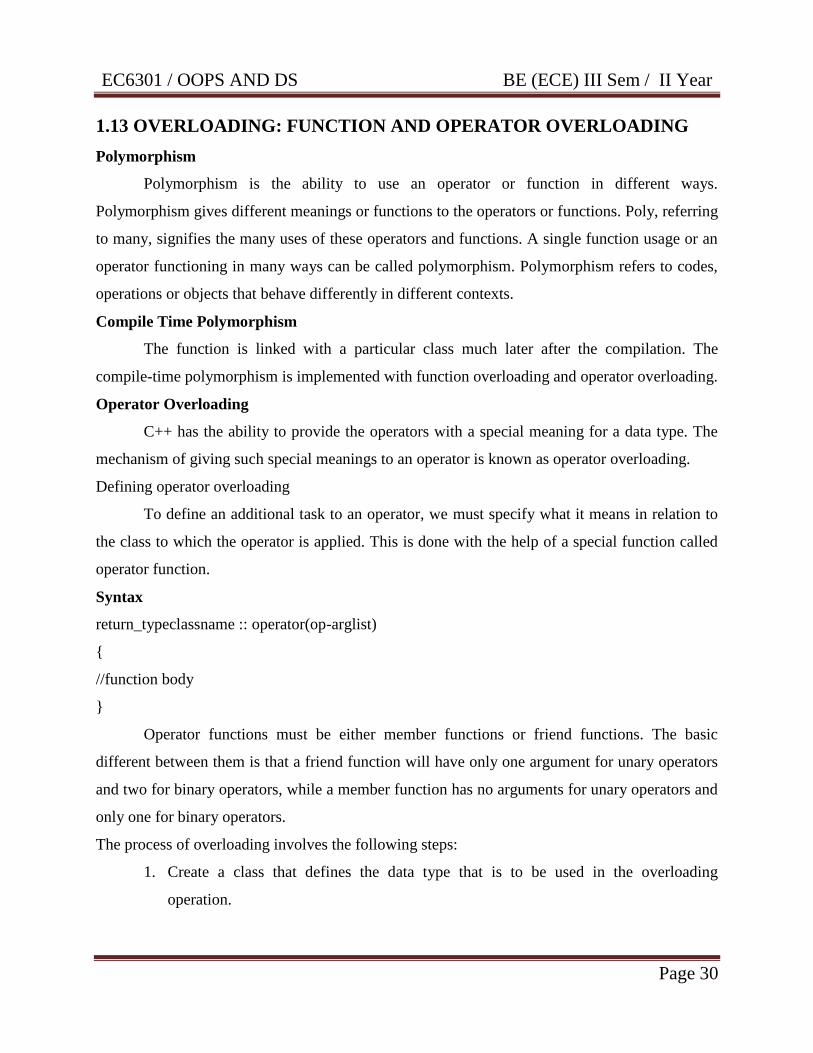
1.13 OVERLOADING: FUNCTION AND OPERATOR OVERLOADING
Polymorphism
Polymorphism is the ability to use an operator or function in different ways.
Polymorphism gives different meanings or functions to the operators or functions. Poly, referring
to many, signifies the many uses of these operators and functions. A single function usage or an
operator functioning in many ways can be called polymorphism. Polymorphism refers to codes,
operations or objects that behave differently in different contexts.
Compile Time Polymorphism
The function is linked with a particular class much later after the compilation. The
compile-time polymorphism is implemented with function overloading and operator overloading.
Operator Overloading
C++ has the ability to provide the operators with a special meaning for a data type. The
mechanism of giving such special meanings to an operator is known as operator overloading.
Defining operator overloading
To define an additional task to an operator, we must specify what it means in relation to
the class to which the operator is applied. This is done with the help of a special function called
operator function.
Syntax
return_typeclassname :: operator(op-arglist)
{
//function body
}
Operator functions must be either member functions or friend functions. The basic
different between them is that a friend function will have only one argument for unary operators
and two for binary operators, while a member function has no arguments for unary operators and
only one for binary operators.
The process of overloading involves the following steps:
1. Create a class that defines the data type that is to be used in the overloading
operation.
EC6301 / OOPS AND DS BE (ECE) III Sem / II Year
Page 31
2. Declare the operator function operator op() in the public part of the class. It may be
either a member function or a friend function.
3. Define the operator function to implement the required operations.
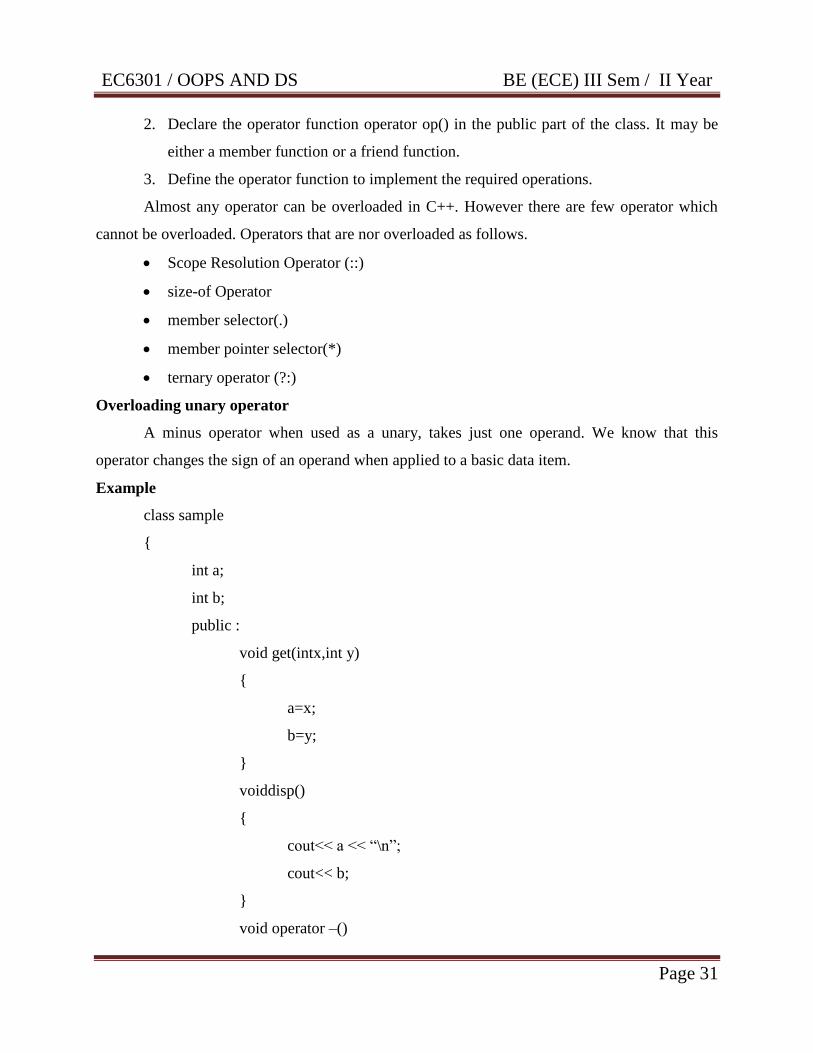
Almost any operator can be overloaded in C++. However there are few operator which
cannot be overloaded. Operators that are nor overloaded as follows.
Scope Resolution Operator (::)
size-of Operator
member selector(.)
member pointer selector(*)
ternary operator (?:)
Overloading unary operator
A minus operator when used as a unary, takes just one operand. We know that this
operator changes the sign of an operand when applied to a basic data item.
Example
class sample
{
int a;
int b;
public :
void get(intx,int y)
{
a=x;
b=y;
}
voiddisp()
{
cout<< a << “\n”;
cout<< b;
}
void operator –()
EC6301 / OOPS AND DS BE (ECE) III Sem / II Year
Page 32
{
a = -a;
b = -b;
}
};
void main()
{
sample s;
s.get(10,20);
s.disp();
-s;
s.disp();
}
Output
10 20
-10 -20
Overloading binary operator
The same mechanism of unary operator is used to overload a binary operator.
Example
class sample
{
int a;
int b;
public :
sample()
{ }
sample(intx,int y)
{
a=x;
b=y;
EC6301 / OOPS AND DS BE (ECE) III Sem / II Year
Page 33
}
sample operator +(sample s)
{
sample t;
t.a=a+s.a;
t.b=b+s.b;
return(t);
}
voiddisp()
{
cout<< a << “\t” << b;
}
};
void main()
{
sample s1,s2,s3;
s1=sample(10,10);
s2=sample(10,10);
s3=s1+s2;
cout<< s1.disp();
cout<< s2.disp();
cout<< s3.disp();
}
Output
10 10
10 10
20 20
Function Overloading
Function overloading allows you to use the same name for different functions, to
perform, either same or different functions in the same class.
EC6301 / OOPS AND DS BE (ECE) III Sem / II Year
Page 34
Function overloading is usually used to enhance the readability of the program. If you
have to perform one single operation but with different number or types of arguments then you
can simply overload the function.
Example
#include<iostream.h>
int sum(int x,int y)
{
return x+y;
}
int sum(int x,int y, int z)
{
return x+y+z;
}
void main()
{
int a=sum(3,4);
cout<< a;
int b=sum(3,4,5);
cout<< b;
}
Output
7
12
EC6301 / OOPS AND DS BE (ECE) III Sem / II Year
Page 35
UNIT II
INHERITANCE AND POLYMORPHISM
Syllabus: Base Classes and Derived Classes – Protected Members – Casting Class pointers and
Member Functions – Overriding – Public, Protected and Private Inheritance – Constructors and
Destructors in derived Classes – Implicit Derived – Class Object To Base – Class Object
Conversion – Composition Vs. Inheritance – Virtual functions – This Pointer – Abstract Base
Classes and Concrete Classes – Virtual Destructors – Dynamic Binding.
2.1 BASE CLASSES AND DERIVED CLASSES
Inheritance is the process by which new classes called derived classes are created from
existing classes called base classes. The derived classes have all the features of the base class
and the programmer can choose to add new features specific to the newly created derived class.
Advantages of Inheritance
Reusability
Inheritance helps the code to be reused in many situations. The base class is defined and
once it is compiled, it need not be reworked. Using the concept of inheritance, the programmer
can create as many derived classes from the base class as needed while adding specific features
to each derived class as needed.
Saves Time and Effort
The above concept of reusability achieved by inheritance saves the programmer time and
effort. Since the main code written can be reused in various situations as needed.
Defining derived class
The general form of defining a derived class is :
class derived_classname : visibility_mode base_classname
{
……..
……..
};

EC6301 / OOPS AND DS BE (ECE) III Sem / II Year
Page 36
Single Inheritance
A derived class with only one base class, is called single inheritance.
Example
#include<iostream.h>
#include<conio.h>
class A
{
public:
int a;
int b;
public:
void get()
{
cout<< “Enter the value of a and b”;
cin>> a >> b;
}
};
class B: public A
{
public:
int c;
public:
void add()
{
c = a + b;
cout<< “Sum=” << c;
}
};
void main()
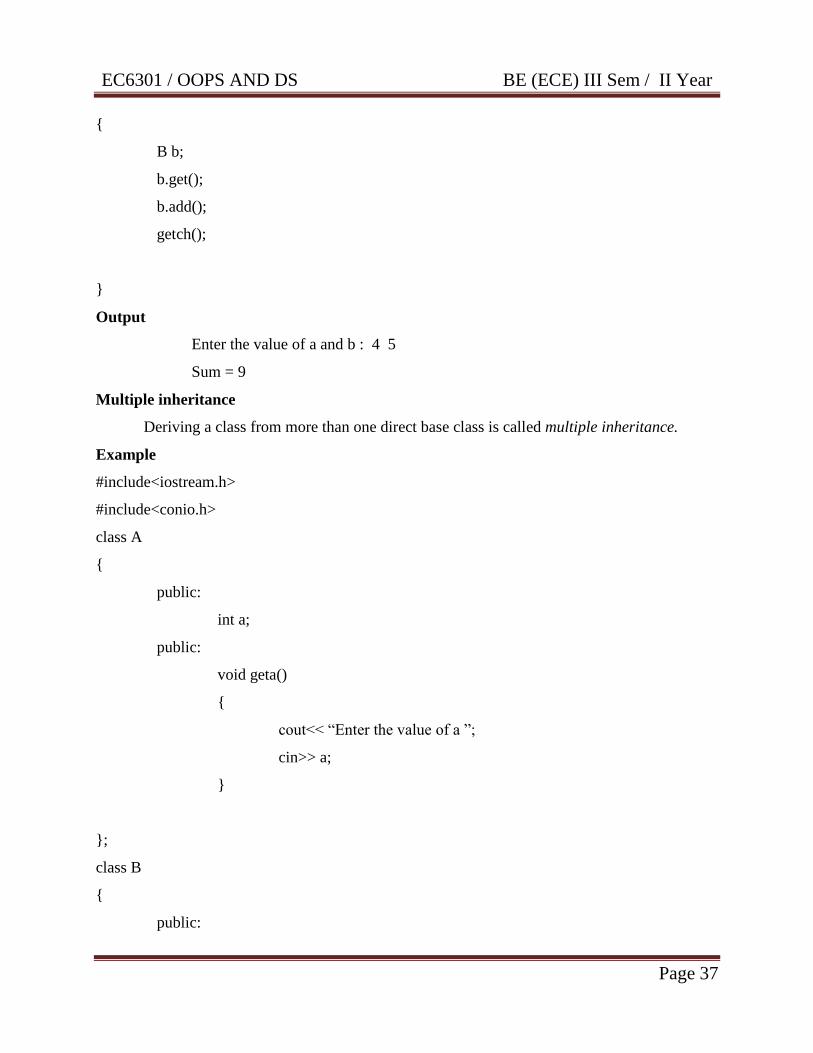
EC6301 / OOPS AND DS BE (ECE) III Sem / II Year
Page 37
{
B b;
b.get();
b.add();
getch();
}
Output
Enter the value of a and b : 4 5
Sum = 9
Multiple inheritance
Deriving a class from more than one direct base class is called multiple inheritance.
Example
#include<iostream.h>
#include<conio.h>
class A
{
public:
int a;
public:
void geta()
{
cout<< “Enter the value of a ”;
cin>> a;
}
};
class B
{
public:
EC6301 / OOPS AND DS BE (ECE) III Sem / II Year
Page 38
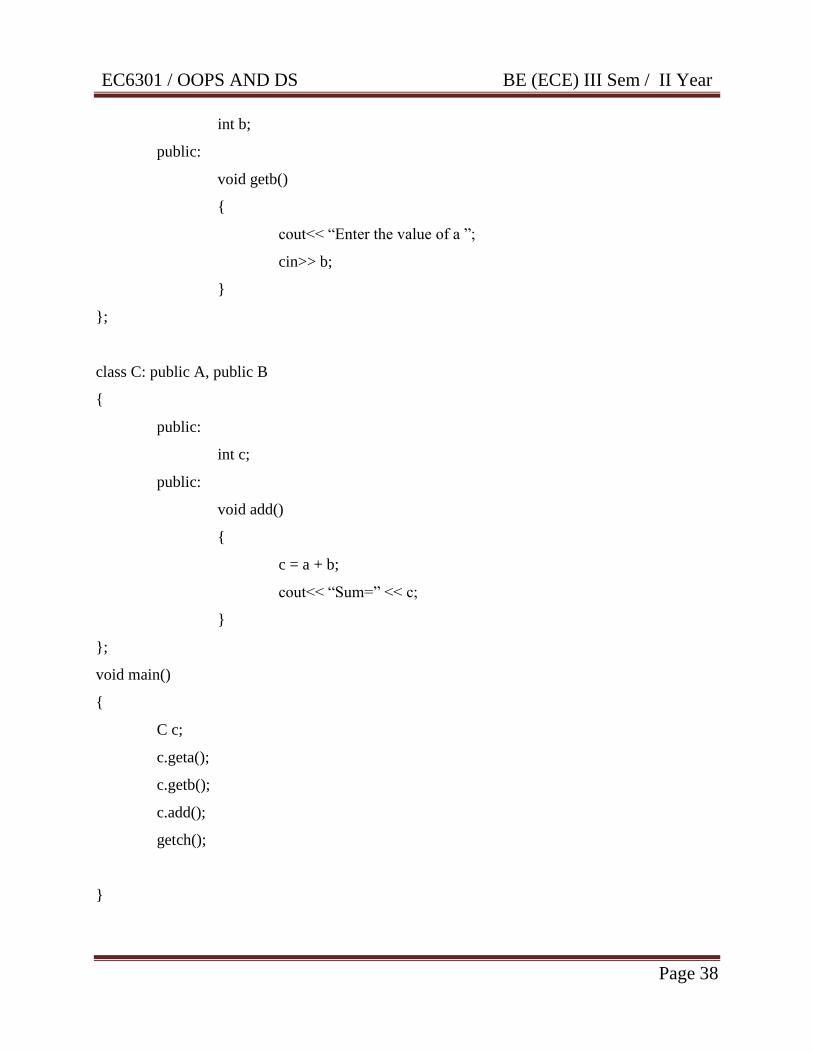
int b;
public:
void getb()
{
cout<< “Enter the value of a ”;
cin>> b;
}
};
class C: public A, public B
{
public:
int c;
public:
void add()
{
c = a + b;
cout<< “Sum=” << c;
}
};
void main()
{
C c;
c.geta();
c.getb();
c.add();
getch();
}

EC6301 / OOPS AND DS BE (ECE) III Sem / II Year
Page 39
Output
Enter the value of a : 4
Enter the value of b : 5
Sum = 9
Multilevel Inheritance
Deriving a class from another derived class is known as multilevel inheritance.
Example
#include<iostream.h>
#include<conio.h>
class A
{
public:
int a;
public:
void geta()
{
cout<< “Enter the value of a ”;
cin>> a;
}
};
class B : public A
{
public:
int b;
public:
void getb()
{
cout<< “Enter the value of a ”;
cin>> b;

EC6301 / OOPS AND DS BE (ECE) III Sem / II Year
Page 40
}
};
class C: public B
{
public:
int c;
public:
void add()
{
c = a + b;
cout<< “Sum=” << c;
}
};
void main()
{
C c;
c.geta();
c.getb();
c.add();
getch();
}
Output
Enter the value of a : 4
Enter the value of b : 5
Sum = 9
Hierarchical inheritance
Hierarchical inheritance is the process of deriving two or more classes from only one
base class.

EC6301 / OOPS AND DS BE (ECE) III Sem / II Year
Page 41
Example
#include<iostream.h>
#include<conio.h>
class A //Base Class
{
public:
int a,b;
void getnumber()
{
cout<<"\n\nEnter Number :::\t";
cin>>a;
}
};
class B : public A //Derived Class 1
{
public:
void square()
{
getnumber(); //Call Base class property
cout<<"\n\n\tSquare of the number :::\t"<<(a*a);
cout<<"\n\n\t----------------------------------------------------";
}
};
class C :public A //Derived Class 2
{
public:
void cube()
{
getnumber(); //Call Base class property
cout<<"\n\n\tCube of the number :::\t"<<(a*a*a);

EC6301 / OOPS AND DS BE (ECE) III Sem / II Year
Page 42
}
};
void main()
{
B b1; //b1 is object of Derived class 1
b1.square(); //call member function of class B
C c1; //c1 is object of Derived class 2
c1.cube(); //call member function of class C
getch();
}
Output
Enter Number ::: 2
Square of the number :::4
Enter Number ::: 3
Cube of the number :::9
Hybrid Inheritance
Hybrid Inheritance is a method where one or more types of inheritance are combined
together.
Example
#include<iostream.h>
class student
{
char name[10];
intrno;
public:
void getdata()
{
cout<<"\n Enter the name : ";
cin>> name;
cout<<" Enter rollno : ";
EC6301 / OOPS AND DS BE (ECE) III Sem / II Year
Page 43
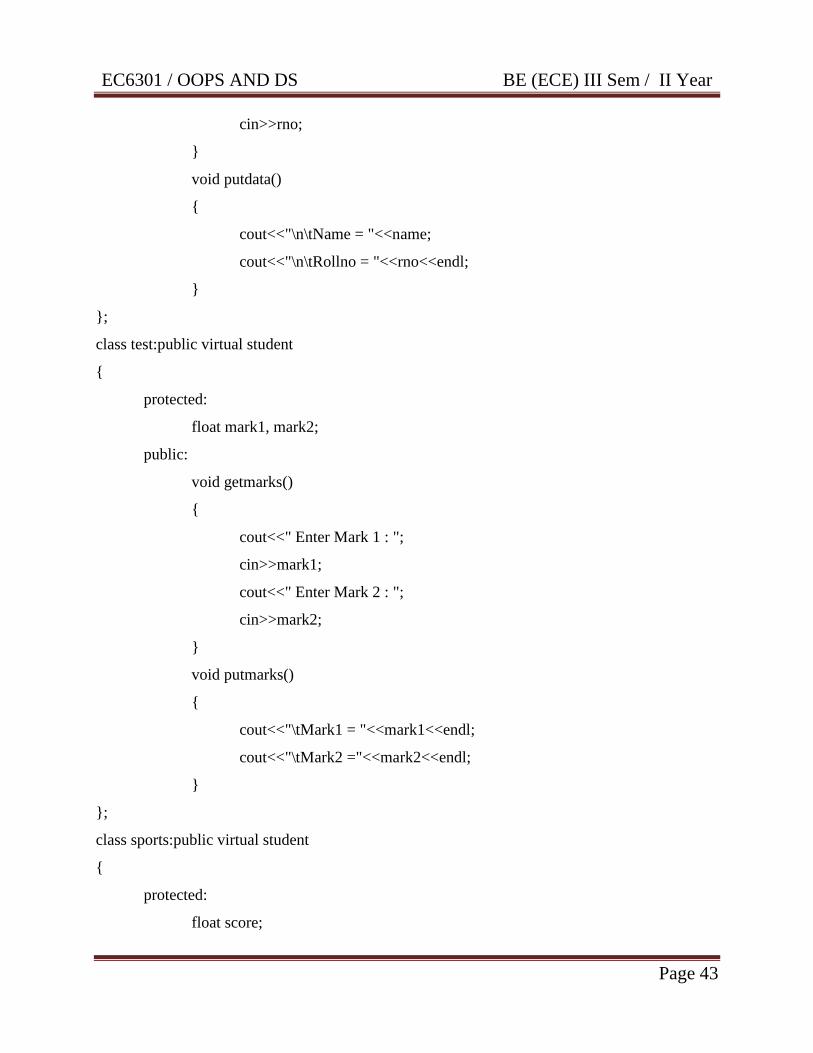
cin>>rno;
}
void putdata()
{
cout<<"\n\tName = "<<name;
cout<<"\n\tRollno = "<<rno<<endl;
}
};
class test:public virtual student
{
protected:
float mark1, mark2;
public:
void getmarks()
{
cout<<" Enter Mark 1 : ";
cin>>mark1;
cout<<" Enter Mark 2 : ";
cin>>mark2;
}
void putmarks()
{
cout<<"\tMark1 = "<<mark1<<endl;
cout<<"\tMark2 ="<<mark2<<endl;
}
};
class sports:public virtual student
{
protected:
float score;
EC6301 / OOPS AND DS BE (ECE) III Sem / II Year
Page 44
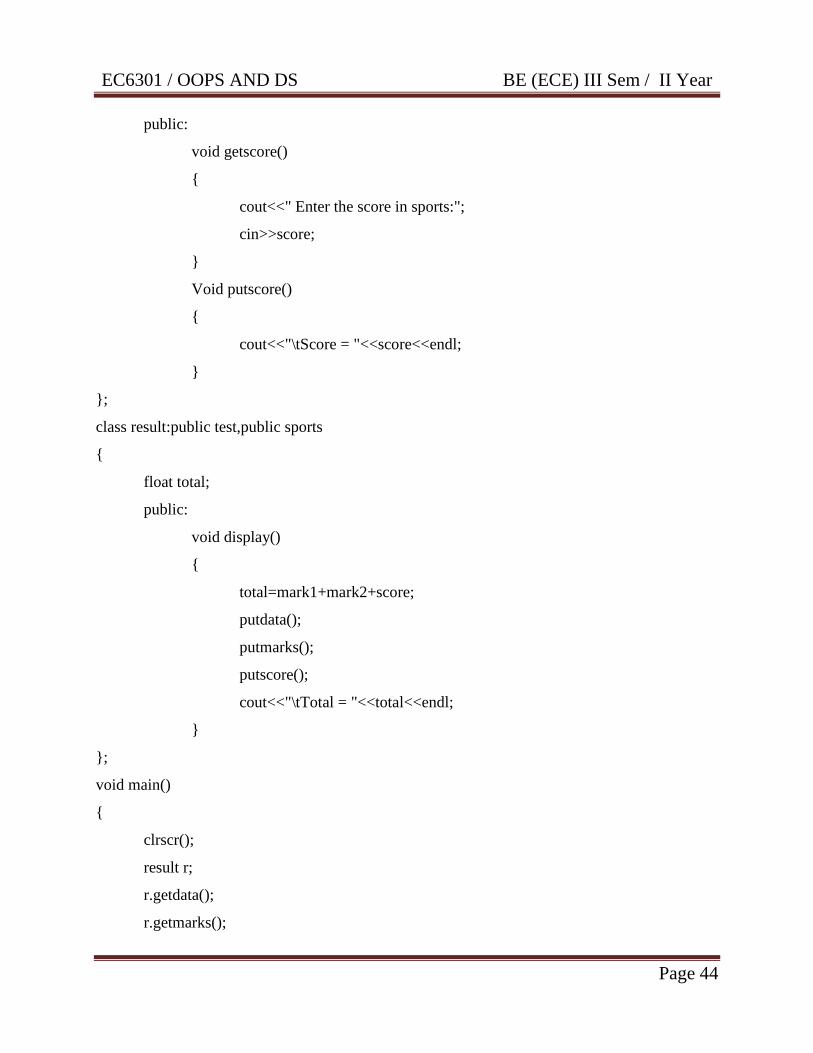
public:
void getscore()
{
cout<<" Enter the score in sports:";
cin>>score;
}
Void putscore()
{
cout<<"\tScore = "<<score<<endl;
}
};
class result:public test,public sports
{
float total;
public:
void display()
{
total=mark1+mark2+score;
putdata();
putmarks();
putscore();
cout<<"\tTotal = "<<total<<endl;
}
};
void main()
{
clrscr();
result r;
r.getdata();
r.getmarks();

EC6301 / OOPS AND DS BE (ECE) III Sem / II Year
Page 45
r.getscore();
cout<<"\n\t\t Result ";
r.display();
getch();
}
Output
Enter the name : Sam
Enter rollno : 36
Enter Mark 1 : 92
Enter Mark 2 : 93
Enter the score in sports: 99
Result
Name = Sam
Rollno = 36
Mark1 = 92
Mark2 = 93
Score = 99
Total = 284
Virtual Base Class
Grandparent
Parent 2
Parent 1
Child
EC6301 / OOPS AND DS BE (ECE) III Sem / II Year
Page 46
Inheritance by the child might pose some problems. All the public and protected
members of „grandparent‟ are inherited into „child‟ twice, first via „parent1‟ again via „parent2‟.
This means child would have duplicate sets of the members inherited from „grandparent‟. This
introduces ambiguity and should be avoided.
The duplication of inherited members due to these multiple paths can be avoided by
making the common base class as virtual base class while declaring the direct or intermediate
base classes which is shown as follow:
class A //grandparent
{
………….
………….
………….
};
class B1 : virtual public A //parent1
{
………….
………….
………….
};
class B2 : virtual public A //parent2
{
………….
………….
………….
};
class C : public B1,public B2 //child
{
…………. // only one copy of A
…………. // will be inherited
………….

EC6301 / OOPS AND DS BE (ECE) III Sem / II Year
Page 47
};
When a class is made a virtual base class, C++ takes necessary care to see that only one
copy of that class is inherited, regardless of how many inheritance path exist between the virtual
base class and a derived class.
2.2 PROTECTED MEMBERS
Data hiding is one of the important features of Object Oriented Programming which
allows preventing the functions of a program to access directly the internal representation of a
class type. The access restriction to the class members is specified by the labeled public,
private, and protected sections within the class body. The keywords public, private, and
protected are called access specifiers.
A class can have multiple public, protected, or private labeled sections. Each section
remains in effect until either another section label or the closing right brace of the class body is
seen. The default access for members and classes is private.
class Base {
public:
// public members go here
protected:
// protected members go here
private:
// private members go here
};
The public members
A public member is accessible from anywhere outside the class but within a program.
You can set and get the value of public variables without any member function as shown in the
following example:
#include <iostream.h>
class Line
{
public:
double length;

EC6301 / OOPS AND DS BE (ECE) III Sem / II Year
Page 48
void setLength( double len );
double getLength( void );
};
// Member functions definitions
double Line::getLength(void)
{
return length ;
}
void Line::setLength( double len )
{
length = len;
}
// Main function for the program
void main( )
{
Line line;
// set line length
line.setLength(6.0);
cout << "Length of line : " << line.getLength() <<endl;
// set line length without member function
line.length = 10.0; // OK: because length is public
cout << "Length of line : " << line.length <<endl;
}
When the above code is compiled and executed, it produces the following result:
Length of line : 6
Length of line : 10
The private members
A private member variable or function cannot be accessed, or even viewed from outside
the class. Only the class and friend functions can access private members.

EC6301 / OOPS AND DS BE (ECE) III Sem / II Year
Page 49
By default all the members of a class would be private, for example in the following class
width is a private member, which means until you label a member, it will be assumed a private
member:
class Box
{
double width;
public:
double length;
void setWidth( double wid );
double getWidth( void );
};
Practically, we define data in private section and related functions in public section so
that they can be called from outside of the class as shown in the following program.
#include <iostream.h>
class Box
{
public:
double length;
void setWidth( double wid );
double getWidth( void );
private:
double width;
};
// Member functions definitions
double Box::getWidth(void)
{
return width ;
}
void Box::setWidth( double wid )
{
EC6301 / OOPS AND DS BE (ECE) III Sem / II Year
Page 50
width = wid;
}
// Main function for the program
void main( )
{
Box box;
// set box length without member function
box.length = 10.0; // OK: because length is public
cout << "Length of box : " << box.length <<endl;
// set box width without member function
// box.width = 10.0; // Error: because width is private
box.setWidth(10.0); // Use member function to set it.
cout << "Width of box : " << box.getWidth() <<endl;
}
When the above code is compiled and executed, it produces the following result:
Length of box : 10
Width of box : 10
The protected members
A protected member variable or function is very similar to a private member but it
provided one additional benefit that they can be accessed in child classes which are called
derived classes.
Following example is similar to above example and here width member will be accessible by any
member function of its derived class SmallBox.
#include <iostream.h>
class Box
{
protected:
double width;
};
class SmallBox:Box // SmallBox is the derived class.

EC6301 / OOPS AND DS BE (ECE) III Sem / II Year
Page 51
{
public:
void setSmallWidth( double wid );
double getSmallWidth( void );
};
// Member functions of child class
double SmallBox::getSmallWidth(void)
{
return width ;
}
void SmallBox::setSmallWidth( double wid )
{
width = wid;
}
// Main function for the program
void main( )
{
SmallBox box;
// set box width using member function
box.setSmallWidth(5.0);
cout << "Width of box : "<< box.getSmallWidth() << endl;
}
When the above code is compiled and executed, it produces the following result:
Width of box : 5
EC6301 / OOPS AND DS BE (ECE) III Sem / II Year
Page 52
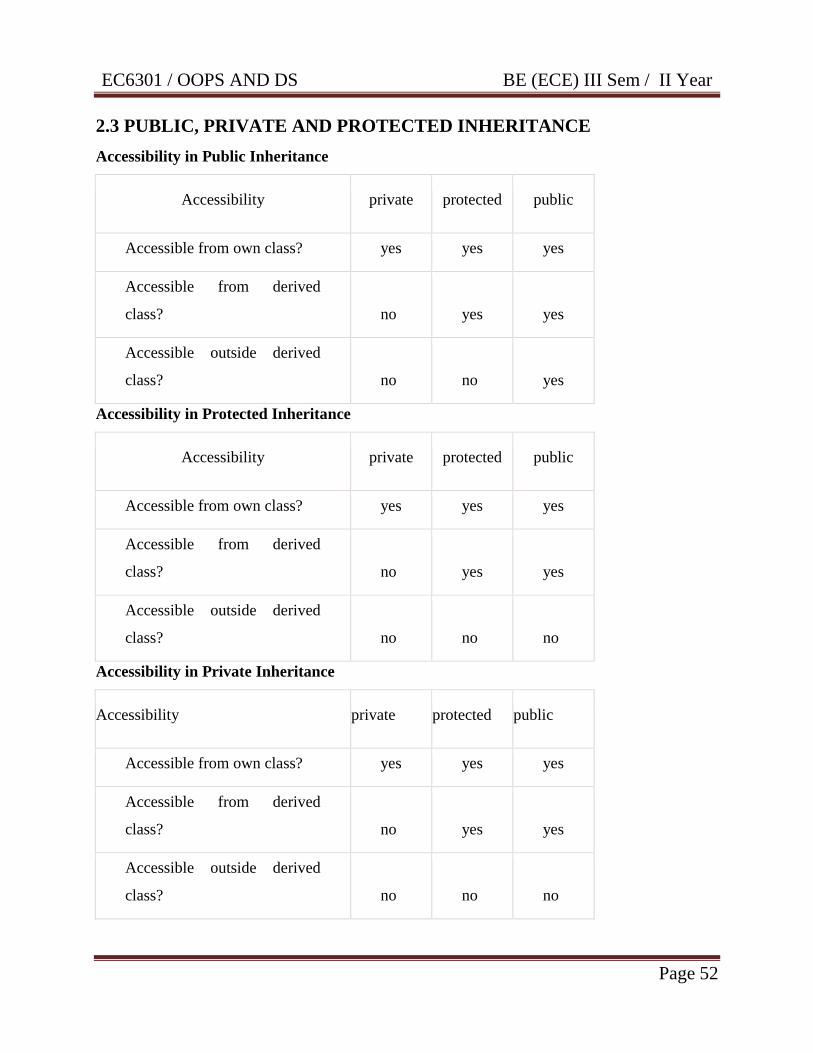
2.3 PUBLIC, PRIVATE AND PROTECTED INHERITANCE
Accessibility in Public Inheritance
Accessibility private protected public
Accessible from own class? yes yes yes
Accessible from derived
class? no yes yes
Accessible outside derived
class? no no yes
Accessibility in Protected Inheritance
Accessibility private protected public
Accessible from own class? yes yes yes
Accessible from derived
class? no yes yes
Accessible outside derived
class? no no no
Accessibility in Private Inheritance
Accessibility private protected public
Accessible from own class? yes yes yes
Accessible from derived
class? no yes yes
Accessible outside derived
class? no no no

EC6301 / OOPS AND DS BE (ECE) III Sem / II Year
Page 53
Public Inheritance
#include<iostream.h>
#include<conio.h>
class A
{
public:
int a;
int b;
public:
void get()
{
cout<< “Enter the value of a and b”;
cin>> a >> b;
}
};
class B: public A
{
public:
int c;
public:
void add()
{
c = a + b;
cout<< “Sum=” << c;
}
};
void main()
{
B b;
b.get();
EC6301 / OOPS AND DS BE (ECE) III Sem / II Year
Page 54
b.add();
getch();
}
Output
Enter the value of a and b : 4 5
Sum = 9
Private Inheritance
#include<iostream.h>
#include<conio.h>
class A
{
public:
int a;
int b;
public:
void get()
{
cout<< “Enter the value of a and b”;
cin>> a >> b;
}
};
class B: private A
{
public:
int c;
public:
void add()
{
c = a + b;
cout<< “Sum=” << c;

EC6301 / OOPS AND DS BE (ECE) III Sem / II Year
Page 55
}
};
void main()
{
B b;
b.get();
b.add();
getch();
}
Output
Enter the value of a and b : 4 5
Sum = 9
Protected Inheritance
#include<iostream.h>
#include<conio.h>
class A
{
public:
int a;
int b;
public:
void get()
{
cout<< “Enter the value of a and b”;
cin>> a >> b;
}
};
class B: protected A
{
public:

EC6301 / OOPS AND DS BE (ECE) III Sem / II Year
Page 56
int c;
public:
void add()
{
c = a + b;
cout<< “Sum=” << c;
}
};
void main()
{
B b;
b.get();
b.add();
getch();
}
Output
Enter the value of a and b : 4 5
Sum = 9
2.4 OVERRIDING
If base class and derived class have member functions with same name and arguments
or if you create an object of derived class and write code to access that member function then,
the member function in derived class is only invoked, i.e., the member function of derived class
overrides the member function of base class. This feature in C++ programming is known as
function overriding.

EC6301 / OOPS AND DS BE (ECE) III Sem / II Year
Page 57
Accessing the Overridden Function in Base Class From Derived Class
To access the overridden function of base class from derived class, scope resolution
operator ::. For example: If you want to access get_data() function of base class from derived
class in above example then, the following statement is used in derived class.
A::get_data; // Calling get_data() of class A.
It is because, if the name of class is not specified, the compiler thinks get_data() function is
calling itself.

EC6301 / OOPS AND DS BE (ECE) III Sem / II Year
Page 58
2.5 THIS POINTER
The this pointer is used as a pointer to the class object instance by the member function.
The address of the class instance is passed as an implicit parameter to the member functions. this
pointer stores the address of the class instance, to enable pointer access of the members to the
member functions of the class .this pointer is not counted for calculating the size of the object.
this pointers are not accessible for static member functions. this pointers are not modifiable.
Example
#include<iostream.h>
#include<conio.h>
class sample
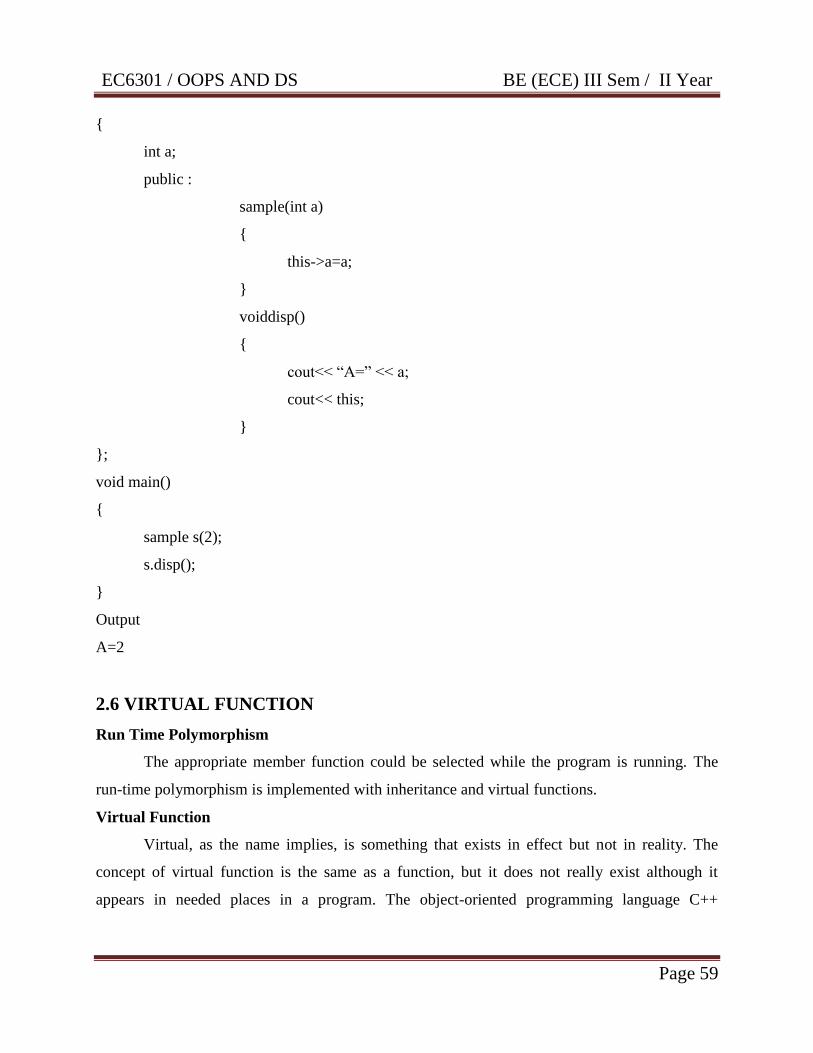
EC6301 / OOPS AND DS BE (ECE) III Sem / II Year
Page 59
{
int a;
public :
sample(int a)
{
this->a=a;
}
voiddisp()
{
cout<< “A=” << a;
cout<< this;
}
};
void main()
{
sample s(2);
s.disp();
}
Output
A=2
2.6 VIRTUAL FUNCTION
Run Time Polymorphism
The appropriate member function could be selected while the program is running. The
run-time polymorphism is implemented with inheritance and virtual functions.
Virtual Function
Virtual, as the name implies, is something that exists in effect but not in reality. The
concept of virtual function is the same as a function, but it does not really exist although it
appears in needed places in a program. The object-oriented programming language C++

EC6301 / OOPS AND DS BE (ECE) III Sem / II Year
Page 60
implements the concept of virtual function as a simple member function, like all member
functions of the class.
Properties of Virtual Functions
Virtual Functions are resolved during run-time or dynamic binding. Virtual functions are
also simple member functions. The main difference between a non-virtual C++ member function
and a virtual member function is in the way they are both resolved. A non-virtual C++ member
function is resolved during compile time or static binding. Virtual Functions are resolved during
run-time or dynamic binding. Virtual functions are member functions of a class. Virtual
functions are declared with the keyword virtual. Virtual function takes a different functionality in
the derived class.
Example
#include<iostream.h>
#include<conio.h>
class base
{
public:
virtual void show()
{
cout<<"\n Base class show:";
}
void display()
{
cout<<"\n Base class display:" ;
}
};
class drive : public base
{
public:
void display()
{
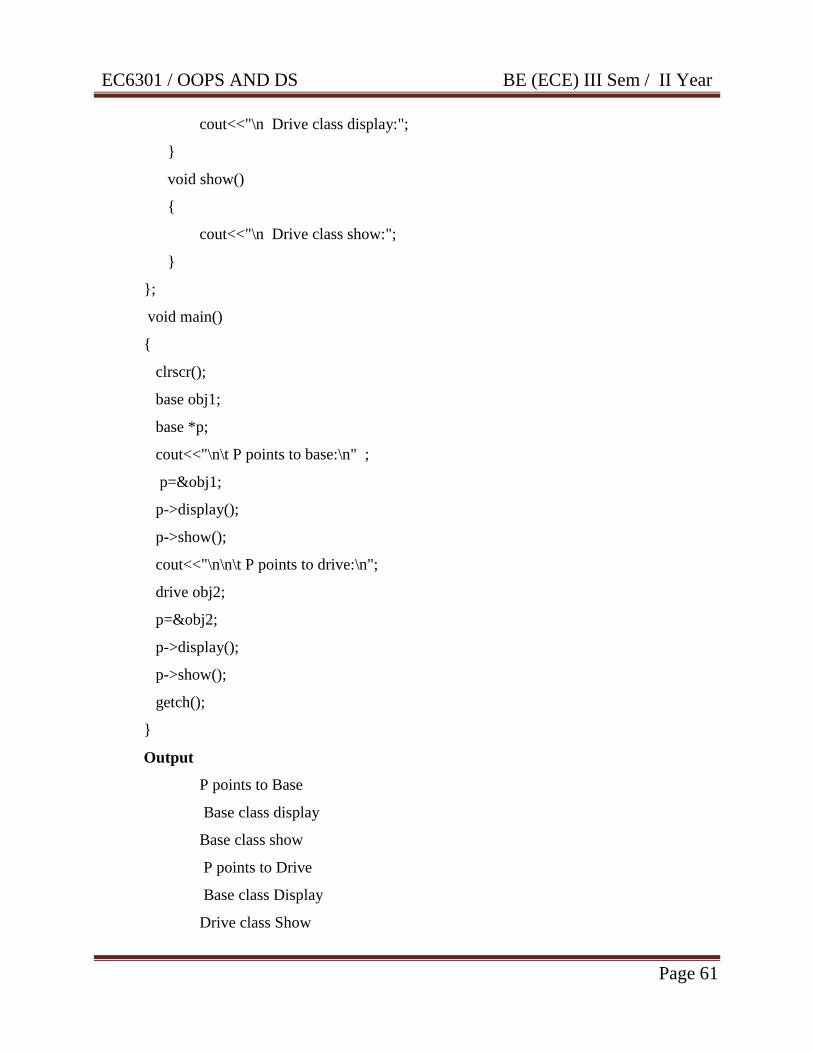
EC6301 / OOPS AND DS BE (ECE) III Sem / II Year
Page 61
cout<<"\n Drive class display:";
}
void show()
{
cout<<"\n Drive class show:";
}
};
void main()
{
clrscr();
base obj1;
base *p;
cout<<"\n\t P points to base:\n" ;
p=&obj1;
p->display();
p->show();
cout<<"\n\n\t P points to drive:\n";
drive obj2;
p=&obj2;
p->display();
p->show();
getch();
}
Output
P points to Base
Base class display
Base class show
P points to Drive
Base class Display
Drive class Show

EC6301 / OOPS AND DS BE (ECE) III Sem / II Year
Page 62
Pure Virtual Function
To declare a function virtual inside the base class and redefine it in the derived classes.
The function inside the base class is seldom used for performing any task. It only serves as a
placeholder. For example, the function display() in the base class has been defined empty. Such
functions are called “do-nothing” functions.
A “do-nothing” function may be defined as follows:
virtual void display() = 0
Such functions are called pure virtual functions. A pure virtual function is a function
declared in a base class that has no definition relative to the base class.
2.7 ABSTRACT BASE CLASSES AND CONCRETE CLASSES
An interface describes the behavior or capabilities of a C++ class without committing to a
particular implementation of that class. The C++ interfaces are implemented using abstract
classes and these abstract classes should not be confused with data abstraction which is a concept
of keeping implementation details separate from associated data.
A class is made abstract by declaring at least one of its functions as pure virtual function.
A pure virtual function is specified by placing "= 0" in its declaration as follows:
class Box
{
public:
// pure virtual function
virtual double getVolume() = 0;
private:
double length; // Length of a box
double breadth; // Breadth of a box
double height; // Height of a box
};
The purpose of an abstract class (often referred to as an ABC) is to provide an
appropriate base class from which other classes can inherit. Abstract classes cannot be used to

EC6301 / OOPS AND DS BE (ECE) III Sem / II Year
Page 63
instantiate objects and serves only as an interface. Attempting to instantiate an object of an
abstract class causes a compilation error.
Thus, if a subclass of an ABC needs to be instantiated, it has to implement each of the
virtual functions, which means that it supports the interface declared by the ABC. Failure to
override a pure virtual function in a derived class, then attempting to instantiate objects of that
class, is a compilation error.
Classes that can be used to instantiate objects are called concrete classes.
Abstract Class Example:
Consider the following example where parent class provides an interface to the base class
to implement a function called getArea():
#include <iostream.h>
// Base class
class Shape
{
public:
// pure virtual function providing interface framework.
virtual int getArea() = 0;
void setWidth(int w)
{
width = w;
}
void setHeight(int h)
{
height = h;
}
protected:
int width;
int height;
};
// Derived classes
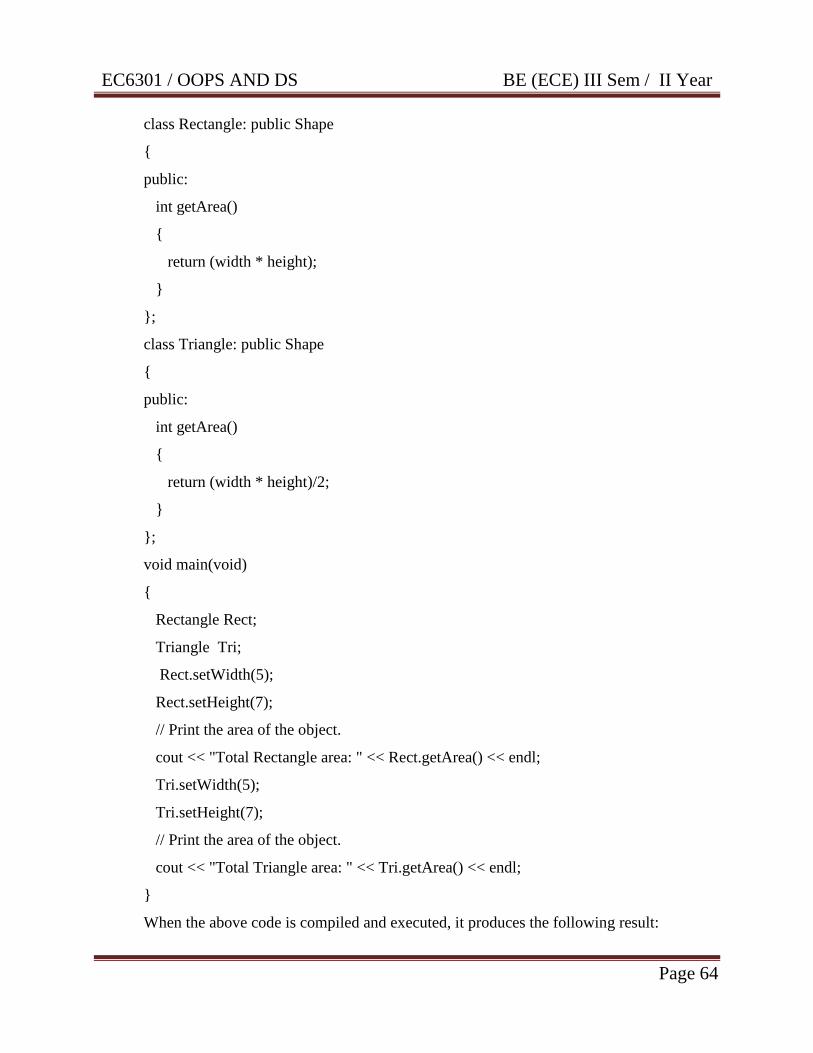
EC6301 / OOPS AND DS BE (ECE) III Sem / II Year
Page 64
class Rectangle: public Shape
{
public:
int getArea()
{
return (width * height);
}
};
class Triangle: public Shape
{
public:
int getArea()
{
return (width * height)/2;
}
};
void main(void)
{
Rectangle Rect;
Triangle Tri;
Rect.setWidth(5);
Rect.setHeight(7);
// Print the area of the object.
cout << "Total Rectangle area: " << Rect.getArea() << endl;
Tri.setWidth(5);
Tri.setHeight(7);
// Print the area of the object.
cout << "Total Triangle area: " << Tri.getArea() << endl;
}
When the above code is compiled and executed, it produces the following result:

EC6301 / OOPS AND DS BE (ECE) III Sem / II Year
Page 65
Total Rectangle area: 35
Total Triangle area: 17
All the other classes with no pure virtual functions are known as concrete classes.
C++ Program to Differentiate Between Concrete Class and Abstract Class
This C++ program differentiates between the concrete and abstract class. An abstract
class is meant to be used as a base class where some or all functions are declared purely virtual
and hence cannot be instantiated. A concrete class is an ordinary class which has no purely
virtual functions and hence can be instantiated. The following C++ program differentiates
between the concrete and abstract class.
#include <iostream.h>
#include <string.h>
class Abstract {
private:
string info;
public:
virtual void printContent() = 0;
};
class Concrete {
private:
string info;
public:
Concrete(string s) : info(s) { }
void printContent() {
cout << "Concrete Object Information\n" << info << endl;
}
};
void main()
{
string s;
s = "Object Creation Date : 23:26 PM 15 Dec 2013";
EC6301 / OOPS AND DS BE (ECE) III Sem / II Year
Page 66
Concrete c(s);
c. printContent();
}
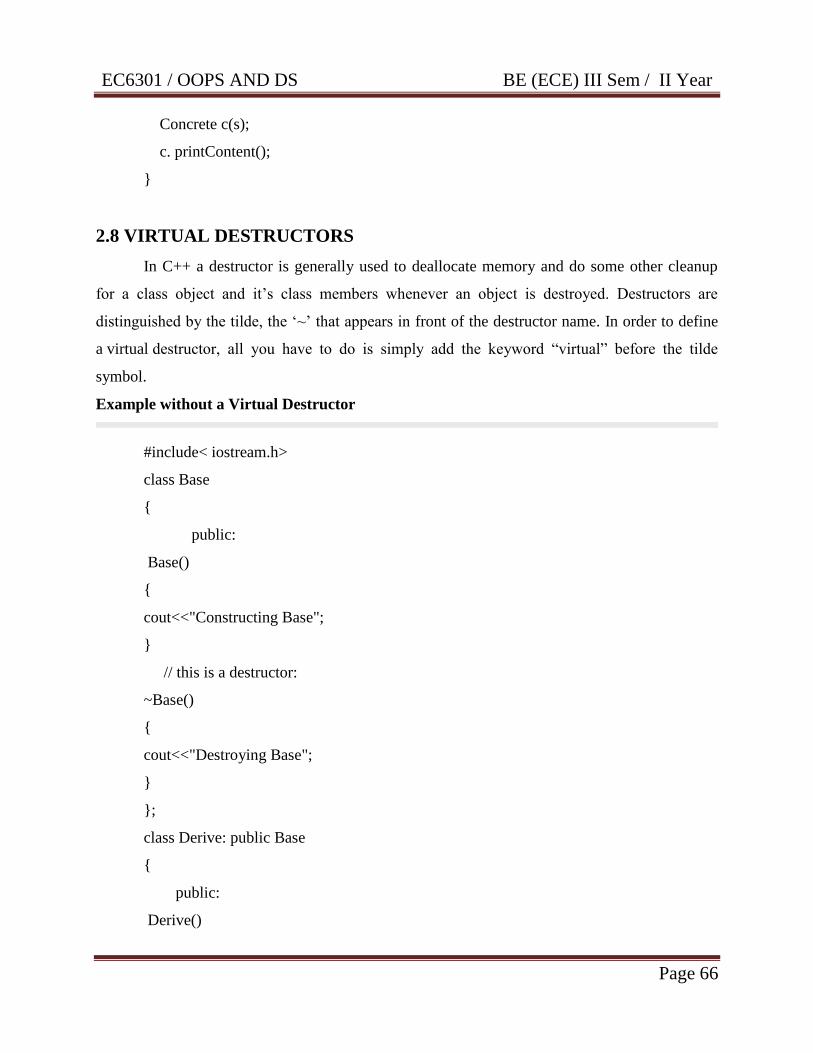
2.8 VIRTUAL DESTRUCTORS
In C++ a destructor is generally used to deallocate memory and do some other cleanup
for a class object and it‟s class members whenever an object is destroyed. Destructors are
distinguished by the tilde, the „~‟ that appears in front of the destructor name. In order to define
a virtual destructor, all you have to do is simply add the keyword “virtual” before the tilde
symbol.
Example without a Virtual Destructor
#include< iostream.h>
class Base
{
public:
Base()
{
cout<<"Constructing Base";
}
// this is a destructor:
~Base()
{
cout<<"Destroying Base";
}
};
class Derive: public Base
{
public:
Derive()
EC6301 / OOPS AND DS BE (ECE) III Sem / II Year
Page 67
{
cout<<"Constructing Derive";
}
~Derive(){ cout<<"Destroying Derive";}
};
void main()
{
Base *basePtr = new Derive();
delete basePtr;
}
The output after running the code above would be:
Constructing Base
Constructing Derive
Destroying Base
Based on the output above, we can see that the constructors get called in the appropriate
order when we create the Derive class object pointer in the main function. But there is a major
problem with the code above: the destructor for the "Derive" class does not get called at all when
we delete „basePtr‟.
So, how can we fix this problem? we can make the base class destructor virtual, and that
will ensure that the destructor for any class that derives from Base (in our case, its the "Derive"
class) will be called.
]
Example with a Virtual Destructor
So, the only thing we will need to change is the destructor in the Base class and here‟s
what it will look like:
class Base
{

EC6301 / OOPS AND DS BE (ECE) III Sem / II Year
Page 68
public:
Base(){ cout<<"Constructing Base";}
// this is a virtual destructor:
virtual ~Base(){ cout<<"Destroying Base";}
};
Now, with that change, the output after running the code above will be:
Constructing Base
Constructing Derive
Destroying Derive
Destroying Base
Note that the derived class destructor will be called before the base class. One important
design paradigm of class design is that if a class has one or more virtual functions, then that class
should also have a virtual destructor.
2.9 CONSTRUCTORS AND DESTRUCTORS IN DERIVED CLASSES
During inheritance, base class may also contain constructor and destructor. In this case if
you create an instance for the derived class then base class constructor will also be invoked and
when derived instance is destroyed then base destructor will also be invoked and the order of
execution of constructors will be in the same order as their derivation and order of execution of
destructors will be in reverse order of their derivation in the derived class.
Example
#include<iostream.h>
class Base
{
public:
Base ( )
{

EC6301 / OOPS AND DS BE (ECE) III Sem / II Year
Page 69
cout << "Inside Base constructor" << endl;
}
~Base ( )
{
cout << "Inside Base destructor" << endl;
}
};
class Derived : public Base
{
public:
Derived ( )
{
cout << "Inside Derived constructor" << endl;
}
~Derived ( )
{
cout << "Inside Derived destructor" << endl;
}
};
void main( )
{
Derived x;
}
In the code above, when the object "x" is created, first the Base class constructor is
called, and after that the Derived class constructor is called. Because the Derived class inherits
from the Base class, both the Base class and Derived class constructors will be called when a
Derived class object is created.
When the main function is finished running, the object x's destructor will get called first,
and after that the Base class destructor will be called. So, here is what the output of the code
above would look like:
EC6301 / OOPS AND DS BE (ECE) III Sem / II Year
Page 70
Inside Base constructor
Inside Derived constructor
Inside Derived destructor
Inside Base destructor
2.10 COMPOSITION vs INHERITANCE
One of the fundamental activities of an object-oriented design is establishing
relationships between classes. Two fundamental ways to relate classes are inheritance and
composition.
In real-life, complex objects are often built from smaller, simpler objects. For example, a
car is built using a metal frame, an engine, some tires, a transmission, a steering wheel, and a
large number of other parts. A personal computer is built from a CPU, a motherboard, some
memory, etc… Even you are built from smaller parts: you have a head, a body, some legs, arms,
and so on. This process of building complex objects from simpler ones is called
composition (also known as object composition).
More specifically, composition is used for objects that have a has-a relationship to each
other. A car has-a metal frame, has-an engine, and has-a transmission. A personal computer has-
a CPU, a motherboard, and other components. You have-a head, a body, some limbs.
#include<iostream.h>
class Engine {
public:
void start() const {}
void rev() const {}
void stop() const {}
};
class Wheel {
public:
void inflate(int psi) const {}
};
class Window {
EC6301 / OOPS AND DS BE (ECE) III Sem / II Year
Page 71
public:
void rollup() const {}
void rolldown() const {}
};
class Door {
public:
Window window;
void open() const {}
void close() const {}
};
class Car {
public:
Engine engine;
Wheel wheel[4];
Door left, right; // 2-door
};
void main() {
Car car;
car.left.window.rollup();
car.wheel[0].inflate(72);
}
Inheritance is a way to form new classes (instances of which are called objects) using
classes that have already been defined. One class can use features from another class to extend
its functionality (an “Is a” relationship) i.e., a Car is a Automobile.
2.11 DYNAMIC BINDING
In some programs, it is not possible to know which function will be called until runtime
(when the program is run). This is known as late binding (or dynamic binding). In C++, one way
to get late binding is to use function pointers. To review function pointers briefly, a function
EC6301 / OOPS AND DS BE (ECE) III Sem / II Year
Page 72
pointer is a type of pointer that points to a function instead of a variable. The function that a
function pointer points to can be called by using the function call operator (()) on the pointer.
For example, the following code calls the Add() function:
1
2
3
4
5
6
7
8
9
1
1
1
1
#include<iostream.h>
#include<conio.h>
int Add(int nX, int nY)
{
return nX + nY;
}
int main()
{
clrscr();
// Create a function pointer and make it point to the Add function
int (*pFcn)(int, int) = Add;
cout << pFcn(5, 3) << endl; // add 5 + 3
return 0;
}
Calling a function via a function pointer is also known as an indirect function call. The
following calculator program is functionally identical to the calculator example above, except it
uses a function pointer instead of a direct function call:
#include <iostream.h>
#include<conio.h>
int Add(int nX, int nY)
{
return nX + nY;
}
int Subtract(int nX, int nY)
{
return nX - nY;
}
EC6301 / OOPS AND DS BE (ECE) III Sem / II Year
Page 73
int Multiply(int nX, int nY)
{
return nX * nY;
}
int main()
{
int nX;
cout << "Enter a number: ";
cin >> nX;
int nY;
cout << "Enter another number: ";
cin >> nY;
int nOperation;
do
{
cout << "Enter an operation (0=add, 1=subtract, 2=multiply): ";
cin >> nOperation;
} while (nOperation < 0 || nOperation > 2);
// Create a function pointer named pFcn (yes, the syntax is ugly)
int (*pFcn)(int, int);
// Set pFcn to point to the function the user chose
switch (nOperation)
{
case 0: pFcn = Add; break;
case 1: pFcn = Subtract; break;
case 2: pFcn = Multiply; break;
}
// Call the function that pFcn is pointing to with nX and nY as parameters
cout << "The answer is: " << pFcn(nX, nY) << endl;
return 0;

EC6301 / OOPS AND DS BE (ECE) III Sem / II Year
Page 74
}
In this example, instead of calling the Add(), Subtract(), or Multiply() function directly,
we‟ve instead set pFcn to point at the function we wish to call. Then we call the function through
the pointer. The compiler is unable to use early binding to resolve the function call pFcn(nX,
nY) because it cannot tell which function pFcn will be pointing to at compile time!
2.12 CASTING CLASS POINTERS AND MEMBER FUNCTIONS
Upcasting
Upcasting is converting a derived-class reference or pointer to a base-class. In other
words, upcasting allows us to treat a derived type as though it were its base type. It is always
allowed for public inheritance, without an explicit type cast. This is a result of the is-
a relationship between the base and derived classes.
Here is the code dealing with shapes. We created Shape class, and derived Circle, Square,
and Triangle classes from the Shape class. Then, we made a member function that talks to the
base class:
void play(Shape& s)
{
s.draw();
s.move();
s.shrink();
....
}
The function speaks to any Shape, so it is independent of the specific type of object that
it's drawing, moving, and shrinking. If in some other part of the program we use the play(
) function like below:
Circle c;
Triangle t;
Square sq;
play(c);
play(t);

EC6301 / OOPS AND DS BE (ECE) III Sem / II Year
Page 75
play(sq);
Upcasting allows us to treat a derived type as though it were its base type. Here the
assumption is "You're a Shape, I know you can move(), draw(), and shrink( ) yourself, do it, and
take care of the details correctly." Thus, the objects of all the classes are passed to the function
shape.
class Parent {
public:
void sleep() {}
};
class Child: public Parent {
public:
void gotoSchool(){}
};
int main( )
{
Parent parent;
Child child;
// upcast - implicit type cast allowed
Parent *pParent = &child;
// downcast - explicit type case required
Child *pChild = (Child *) &parent;
pParent -> sleep();
pChild -> gotoSchool();
return 0;
}
A Child object is a Parent object in that it inherits all the data members and member
functions of a Parent object. So, anything that we can do to a Parent object, we can do to
a Child object. Therefore, a function designed to handle a Parent pointer (reference) can perform
the same acts on a Child object without any problems. The same idea applies if we pass a pointer

EC6301 / OOPS AND DS BE (ECE) III Sem / II Year
Page 76
to an object as a function argument. Upcasting is transitive: if we derive a Child class
from Parent, then Parent pointer (reference) can refer to aParent or a Child object.
Upcasting can cause object slicing when a derived class object is passed by value as a
base class object, as in foo(Base derived_obj).
Downcasting
The opposite process, converting a base-class pointer (reference) to a derived-class
pointer (reference) is called downcasting. Downcasting is not allowed without an explicit type
cast. The reason for this restriction is that the is-a relationship is not, in most of the cases,
symmetric. A derived class could add new data members, and the class member functions that
used these data members wouldn't apply to the base class.
As in the example, we derived Child class from a Parent class, adding a member
function, gotoSchool(). It wouldn't make sense to apply the gotoSchool() method to
a Parent object. However, if implicit downcasting were allowed, we could accidentally assign the
address of a Parent object to a pointer-to-Child
Child *pChild = &parent; // actually this won't compile
// error: cannot convert from 'Parent *' to 'Child *'
and use the pointer to invoke the gotoSchool() method as in the following line.
pChild -> gotoSchool();
Because a Parent isn't a Child (a Parent need not have a gotoSchool() method), the
downcasting in the above line can lead to an unsafe operation.
C++ provides a special explicit cast called dynamic_cast that performs this conversion.
Downcasting is the opposite of the basic object-oriented rule, which states objects of a derived
class, can always be assigned to variables of a base class.
Because implicit upcasting makes it possible for a base-class pointer (reference) to refer
to a base-class object or a derived-class object, there is the need for dynamic binding. That's why
we have virtual member functions.
2.13 IMPLICIT DERIVED-CLASS OBJECT TO BASE-CLASS OBJECT
CONVERSION
1. Assigning base class object to base class pointer is possible.

EC6301 / OOPS AND DS BE (ECE) III Sem / II Year
Page 77
2. Assigning derived class object to derived class pointer is possible.
3. Assigning derived class object to base class pointer is possible.
4. Assigning base class object to derived class pointer is not possible.
EC6301 / OOPS AND DS BE (ECE) III Sem / II Year
Page 78
UNIT III
LINEAR DATA STRUCTURES
Syllabus: Abstract Data Types (ADTs) – List ADT – array-based implementation – linked list
implementation –– singly linked lists –Polynomial Manipulation - Stack ADT – Queue ADT -
Evaluating arithmetic expressions.
3.1 DATA STRUCTURES
A data structure defines a way of organizing all data items that consider not only the
elements stored but also stores the relationship between the elements.
A data structure represents the logical relationship that exists between the individual elements of
data to carry out certain tasks. A data structure is a physical representation of an ADT. It
indicates the data type and also suggest how these could be stored on the computer system
memory.
For example, an integer as a data structure can be defined as a integer data type stored on
consecutive memory bytes. An Abstract Data Type (ADT) is a data type in which the members
of the data type are unknown to users of the type.
If a data structure is created using static memory allocation ( data structure formed when
the number of data items are known in advance) it is known as Static Data structure ( or) Fixed
size data structure.
Ex: Arrays , Structures
If a data structure is created using dynamic memory allocation ( data structure formed
when the number of data items are not known in advance) it is known as Dynamic Data structure
( or) Variable size data structure.
Ex: Arrays , Structures
Dynamic data structure can be classified into two types such as linear and non linear data
structure.
Linear data structures have a linear relationship between its adjacent elements.
Ex : Linked List
A linked list is a linear dynamic data structure that can grow and shrink during its
execution time.
EC6301 / OOPS AND DS BE (ECE) III Sem / II Year
Page 79
Non Linear Data structure don‟t have a linear relationship between its adjacent elements.
Each node may point to several nodes. But in linear data structure, each node has a link which
points to another node.
Ex : Tree , Graph
Abstract Data Type (ADT)
A data type that is defined entirely by a set of operations is referred to as an ADT. An
ADT is a combination of interface and implementation. The interface defines the logical
properties of an ADT and especially the signature of its operations.
The implementation defines the representation of the data structure and the algorithm that
implements the operations.
Linear Data Structures
There are two methods by which we can construct a linear data structure. They are,
Method 1: By using a sequence of memory locations. These are implemented using arrays.
Method 2: By using pointers or links. These are implemented using linked lists.
The different types of linear data structures are:
Lists
The list can be implemented using arrays and pointers.
Stacks
The stacks can be implemented using arrays and linked lists.
Queues
The queue can be implemented using arrays and linked lists.
Non-Linear Data Structures
Non-linear data structure don‟t have a linear relationship between its adjacent elements.
Each node may point to several nodes. But in linear data structure ,each node has a link which
points to another node.
Example
Tree, Graph.
Tree
A tree is a non-linear data structure that may point to one (or) more nodes at a time.
EC6301 / OOPS AND DS BE (ECE) III Sem / II Year
Page 80
Graph
A graph is similar to tree except that it has no hierarchical relationship between its adjacent
elements.
3.2 LIST ADT
Linear List
A Linear list is a data object whose instances are of the form ( e1, e2, …en), where n is a
finite natural number.
ei Element of the list.
n length of the list.
s size of the element.
For example,
a list of names, list of marks, etc.
Operations of List ADT
The following operations that are performed on a linear list are,
Create a list.
Delete a list.
Determine whether the list is empty.
Determine the length of the list.
Find the kth element.
Search for a given element.
Delete the kth element.
Insert a new element.
Display all elements.
Implementation of LIST
List can be implemented in two ways. They are:
Using arrays
Using linked list
Array based implementation
C program to implement various operations of linear list using arrays:
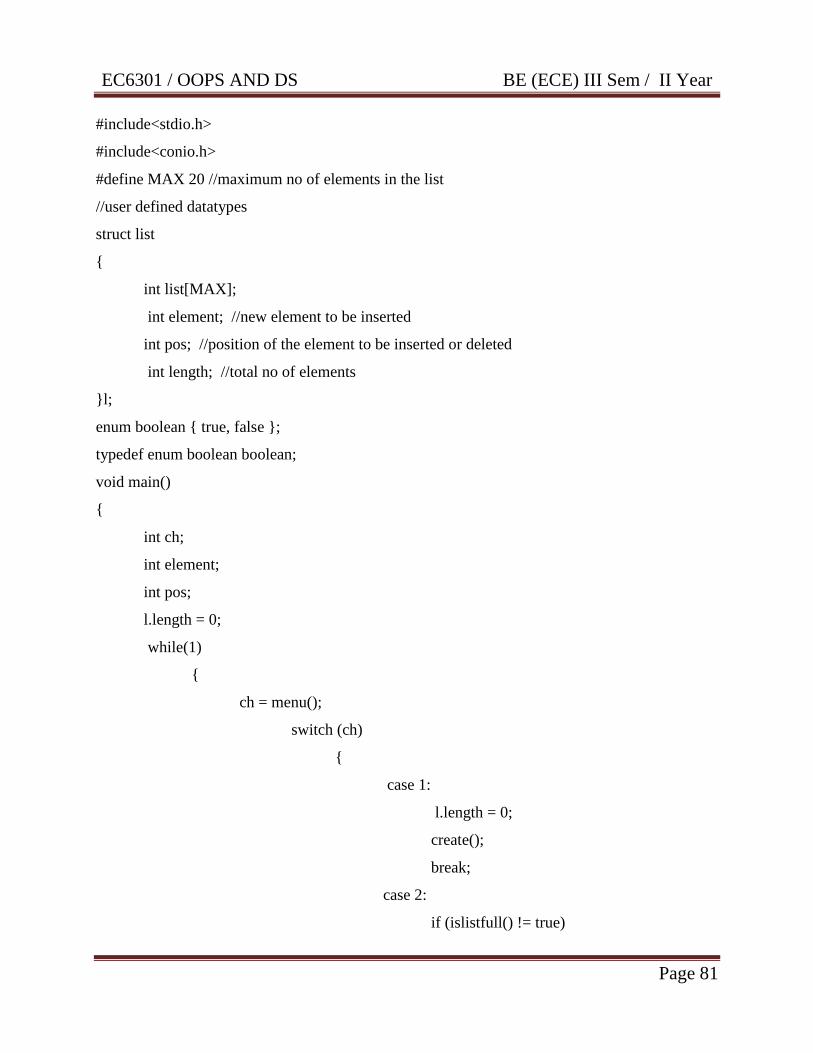
EC6301 / OOPS AND DS BE (ECE) III Sem / II Year
Page 81
#include<stdio.h>
#include<conio.h>
#define MAX 20 //maximum no of elements in the list
//user defined datatypes
struct list
{
int list[MAX];
int element; //new element to be inserted
int pos; //position of the element to be inserted or deleted
int length; //total no of elements
}l;
enum boolean { true, false };
typedef enum boolean boolean;
void main()
{
int ch;
int element;
int pos;
l.length = 0;
while(1)
{
ch = menu();
switch (ch)
{
case 1:
l.length = 0;
create();
break;
case 2:
if (islistfull() != true)
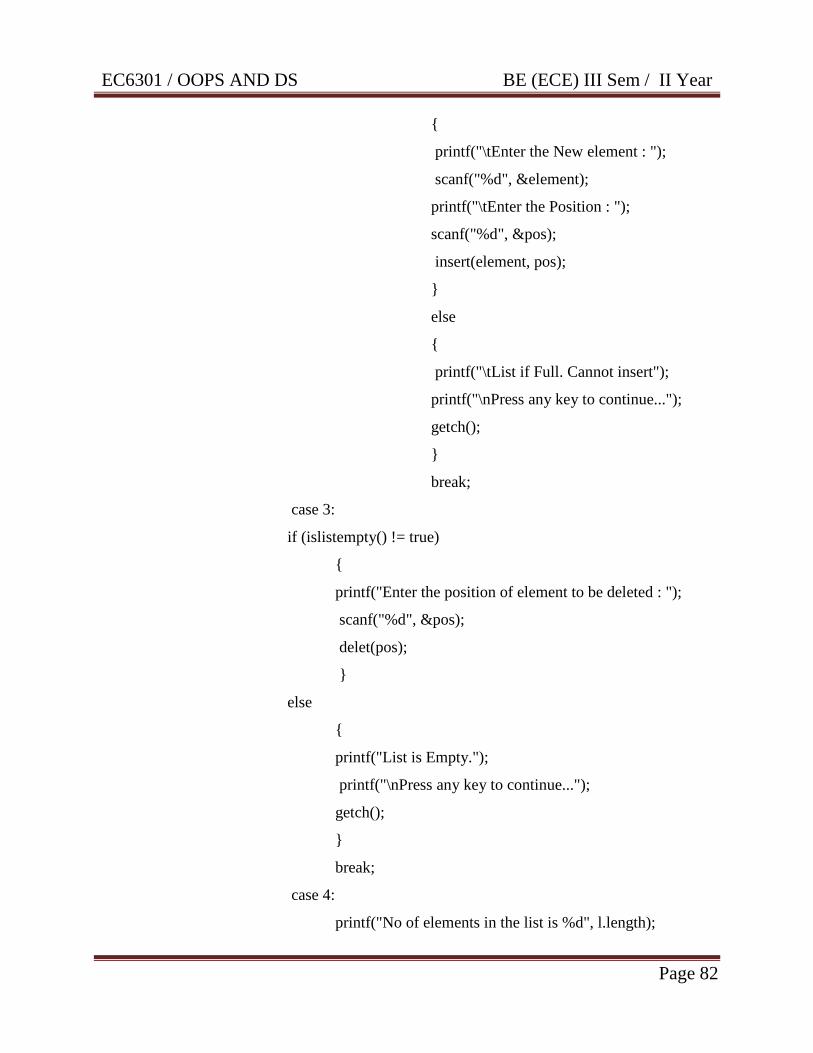
EC6301 / OOPS AND DS BE (ECE) III Sem / II Year
Page 82
{
printf("\tEnter the New element : ");
scanf("%d", &element);
printf("\tEnter the Position : ");
scanf("%d", &pos);
insert(element, pos);
}
else
{
printf("\tList if Full. Cannot insert");
printf("\nPress any key to continue...");
getch();
}
break;
case 3:
if (islistempty() != true)
{
printf("Enter the position of element to be deleted : ");
scanf("%d", &pos);
delet(pos);
}
else
{
printf("List is Empty.");
printf("\nPress any key to continue...");
getch();
}
break;
case 4:
printf("No of elements in the list is %d", l.length);

EC6301 / OOPS AND DS BE (ECE) III Sem / II Year
Page 83
printf("\nPress any key to continue...");
getch();
break;
case 5:
printf("Enter the element to be searched : ");
scanf("%d", &element);
find(element);
break;
case 6:
display();
break;
case 7:
exit(0);
break;
default:
printf("Invalid Choice");
printf("\nPress any key to continue...");
getch();
}
}
}
/* function to display the list of elements */
int menu()
{
int ch;
clrscr();
printf("\n\t\t********************************************\n");
printf("\t\t******LIST Implementation Using Arrays******\n");
printf("\t\t********************************************\n\n");
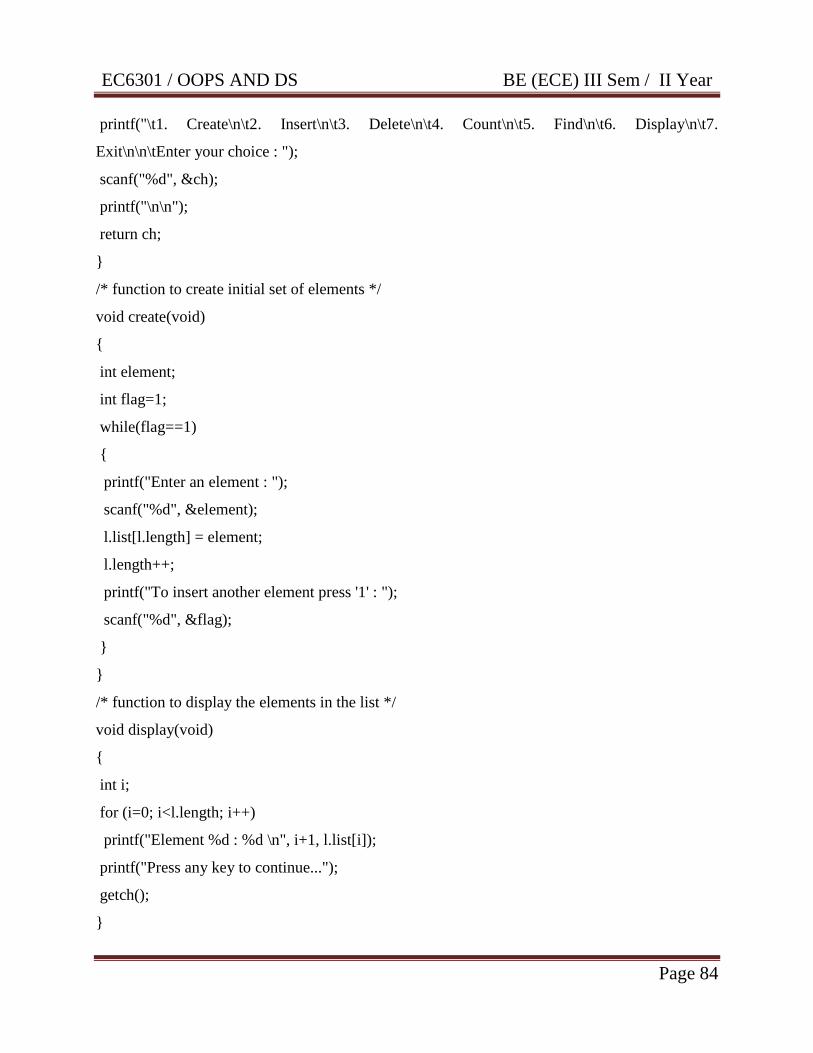
EC6301 / OOPS AND DS BE (ECE) III Sem / II Year
Page 84
printf("\t1. Create\n\t2. Insert\n\t3. Delete\n\t4. Count\n\t5. Find\n\t6. Display\n\t7.
Exit\n\n\tEnter your choice : ");
scanf("%d", &ch);
printf("\n\n");
return ch;
}
/* function to create initial set of elements */
void create(void)
{
int element;
int flag=1;
while(flag==1)
{
printf("Enter an element : ");
scanf("%d", &element);
l.list[l.length] = element;
l.length++;
printf("To insert another element press '1' : ");
scanf("%d", &flag);
}
}
/* function to display the elements in the list */
void display(void)
{
int i;
for (i=0; i<l.length; i++)
printf("Element %d : %d \n", i+1, l.list[i]);
printf("Press any key to continue...");
getch();
}
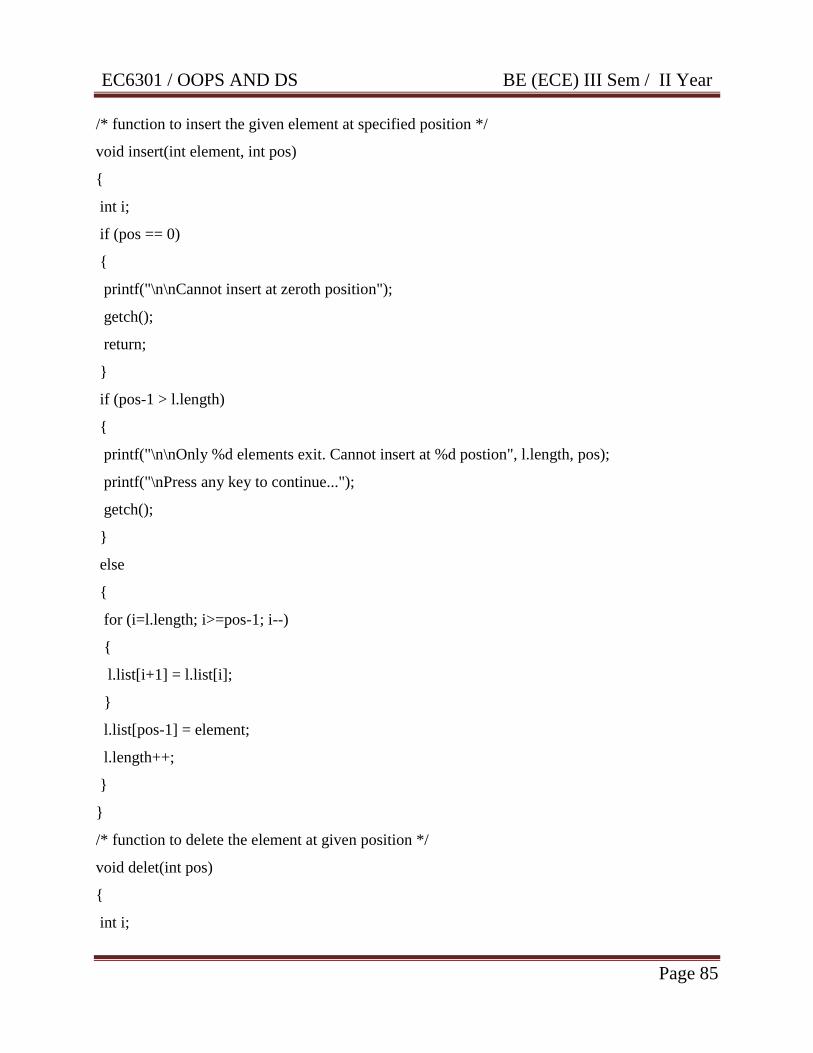
EC6301 / OOPS AND DS BE (ECE) III Sem / II Year
Page 85
/* function to insert the given element at specified position */
void insert(int element, int pos)
{
int i;
if (pos == 0)
{
printf("\n\nCannot insert at zeroth position");
getch();
return;
}
if (pos-1 > l.length)
{
printf("\n\nOnly %d elements exit. Cannot insert at %d postion", l.length, pos);
printf("\nPress any key to continue...");
getch();
}
else
{
for (i=l.length; i>=pos-1; i--)
{
l.list[i+1] = l.list[i];
}
l.list[pos-1] = element;
l.length++;
}
}
/* function to delete the element at given position */
void delet(int pos)
{
int i;

EC6301 / OOPS AND DS BE (ECE) III Sem / II Year
Page 86
if(pos == 0)
{
printf("\n\nCannot delete at zeroth position");
getch();
return;
}
if (pos > l.length)
{
printf("\n\nOnly %d elements exit. Cannot delete", l.length, pos);
printf("\nPress any key to continue...");
getch();
return;
}
for (i=pos-1; i<l.length; i++)
{
l.list[i] = l.list[i+1];
}
l.length--;
}
/* function to find the position of the given element, if exists */
void find(int element)
{
int i;
int flag = 1;
for (i=0; i<l.length; i++)
{
if(l.list[i] == element)
{
printf ("%d exists at %d position",element, i+1);
flag = 0;
EC6301 / OOPS AND DS BE (ECE) III Sem / II Year
Page 87
printf("\nPress any key to continue...");
getch();
break;
}
}
if(flag == 1)
{
printf("Element not found.\nPress any key to continue...");
getch();
}
}
/* function to check whether the list is full or not */
boolean islistfull(void)
{
if (l.length == MAX)
return true;
else
return false;
}
/* function to check whether the list is empty or not */
boolean islistempty(void)
{
if (l.length == 0)
return true;
else
return false;
}
Linked List Implementation
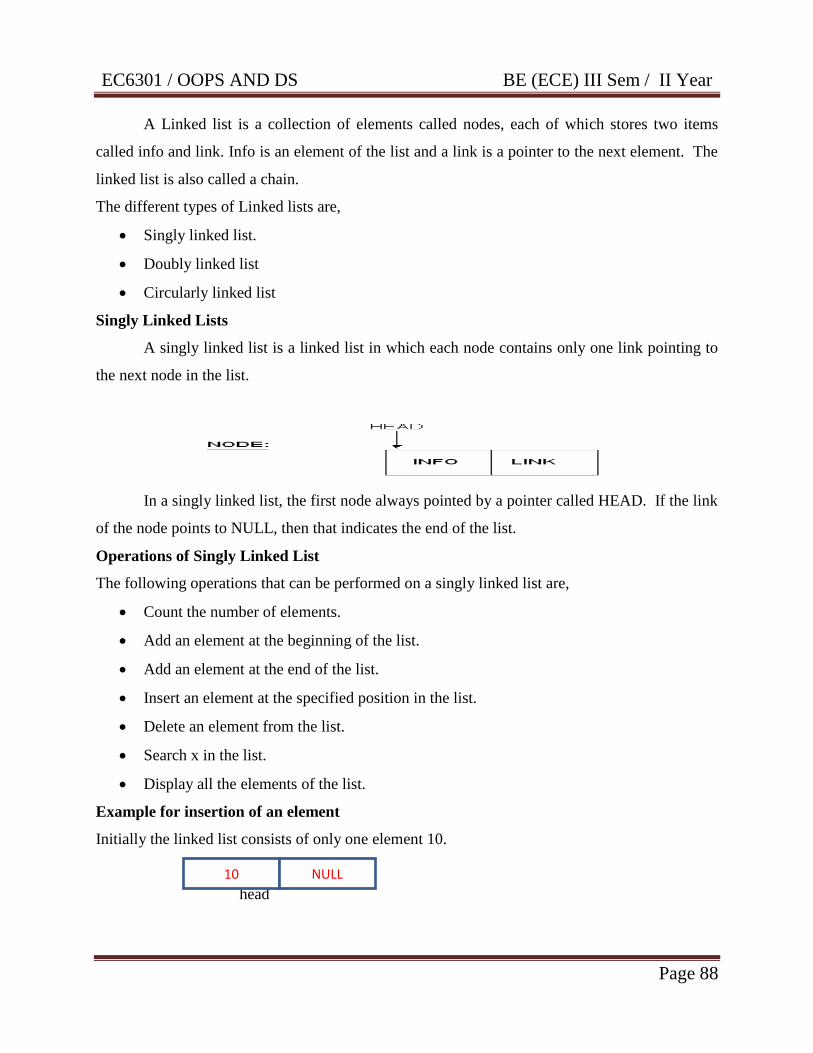
EC6301 / OOPS AND DS BE (ECE) III Sem / II Year
Page 88
A Linked list is a collection of elements called nodes, each of which stores two items
called info and link. Info is an element of the list and a link is a pointer to the next element. The
linked list is also called a chain.
The different types of Linked lists are,
Singly linked list.
Doubly linked list
Circularly linked list
Singly Linked Lists
A singly linked list is a linked list in which each node contains only one link pointing to
the next node in the list.
In a singly linked list, the first node always pointed by a pointer called HEAD. If the link
of the node points to NULL, then that indicates the end of the list.
Operations of Singly Linked List
The following operations that can be performed on a singly linked list are,
Count the number of elements.
Add an element at the beginning of the list.
Add an element at the end of the list.
Insert an element at the specified position in the list.
Delete an element from the list.
Search x in the list.
Display all the elements of the list.
Example for insertion of an element
Initially the linked list consists of only one element 10.
head
10
NULL
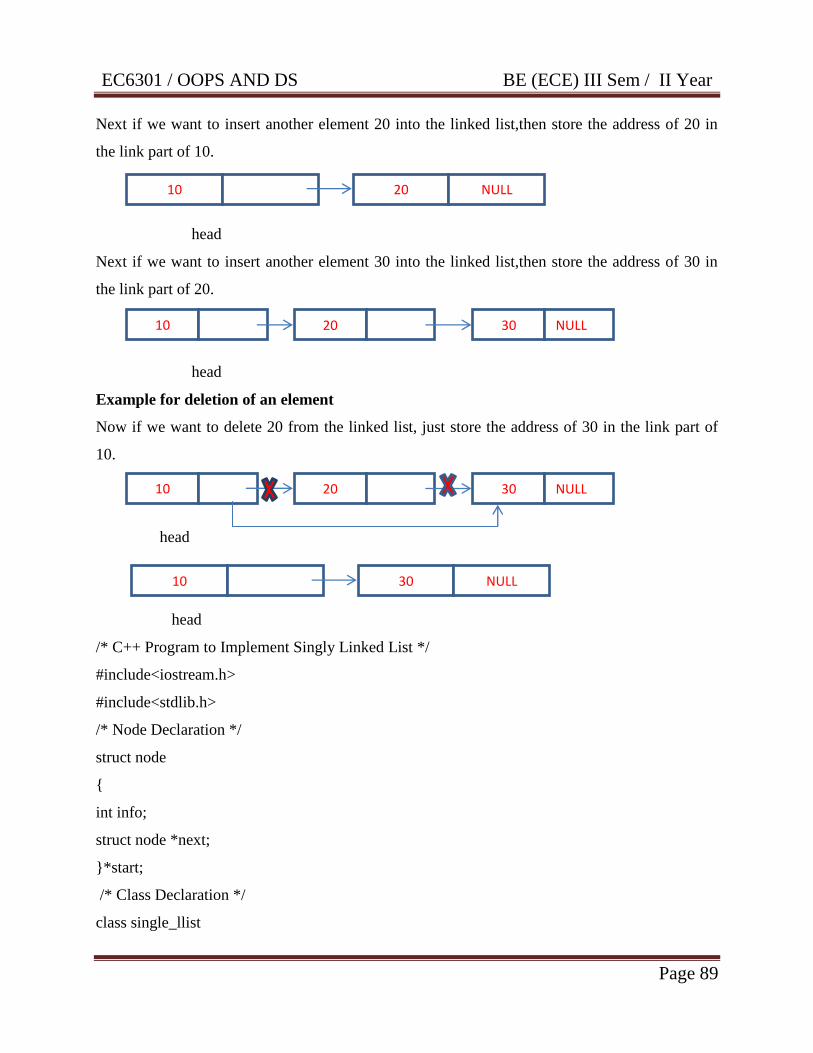
EC6301 / OOPS AND DS BE (ECE) III Sem / II Year
Page 89
Next if we want to insert another element 20 into the linked list,then store the address of 20 in
the link part of 10.
head
Next if we want to insert another element 30 into the linked list,then store the address of 30 in
the link part of 20.
head
Example for deletion of an element
Now if we want to delete 20 from the linked list, just store the address of 30 in the link part of
10.
head
head
/* C++ Program to Implement Singly Linked List */
#include<iostream.h>
#include<stdlib.h>
/* Node Declaration */
struct node
{
int info;
struct node *next;
}*start;
/* Class Declaration */
class single_llist
10 20 NULL
10 20 30 NULL
10 20 30 NULL
10 30 NULL

EC6301 / OOPS AND DS BE (ECE) III Sem / II Year
Page 90
{
public:
node* create_node(int);
void insert_begin();
void insert_pos();
void insert_last();
void delete_pos();
void sort();
void search();
void update();
void reverse();
void display();
single_llist()
{
start =NULL;
}
};
/* Main :contains menu */
void main()
{
int choice, nodes, element, position, i;
single_llist sl;
start =NULL;
while(1)
{
cout<<endl<<"---------------------------------"<<endl;
cout<<endl<<"Operations on singly linked list"<<endl;
cout<<endl<<"---------------------------------"<<endl;
cout<<"1.Insert Node at beginning"<<endl;
cout<<"2.Insert node at last"<<endl;

EC6301 / OOPS AND DS BE (ECE) III Sem / II Year
Page 91
cout<<"3.Insert node at position"<<endl;
cout<<"4.Sort Link List"<<endl;
cout<<"5.Delete a Particular Node"<<endl;
cout<<"6.Update Node Value"<<endl;
cout<<"7.Search Element"<<endl;
cout<<"8.Display Linked List"<<endl;
cout<<"9.Reverse Linked List "<<endl;
cout<<"10.Exit "<<endl;
cout<<"Enter your choice : ";
cin>>choice;
switch(choice)
{
case1:
cout<<"Inserting Node at Beginning: "<<endl;
sl.insert_begin();
cout<<endl;
break;
case2:
cout<<"Inserting Node at Last: "<<endl;
sl.insert_last();
cout<<endl;
break;
case3:
cout<<"Inserting Node at a given position:"<<endl;
sl.insert_pos();
cout<<endl;
break;
case4:
cout<<"Sort Link List: "<<endl;
sl.sort();
EC6301 / OOPS AND DS BE (ECE) III Sem / II Year
Page 92
cout<<endl;
break;
case5:
cout<<"Delete a particular node: "<<endl;
sl.delete_pos();
break;
case6:
cout<<"Update Node Value:"<<endl;
sl.update();
cout<<endl;
break;
case7:
cout<<"Search element in Link List: "<<endl;
sl.search();
cout<<endl;
break;
case8:
cout<<"Display elements of link list"<<endl;
sl.display();
cout<<endl;
break;
case9:
cout<<"Reverse elements of Link List"<<endl;
sl.reverse();
cout<<endl;
break;
case10:
cout<<"Exiting..."<<endl;
exit(1);
break;
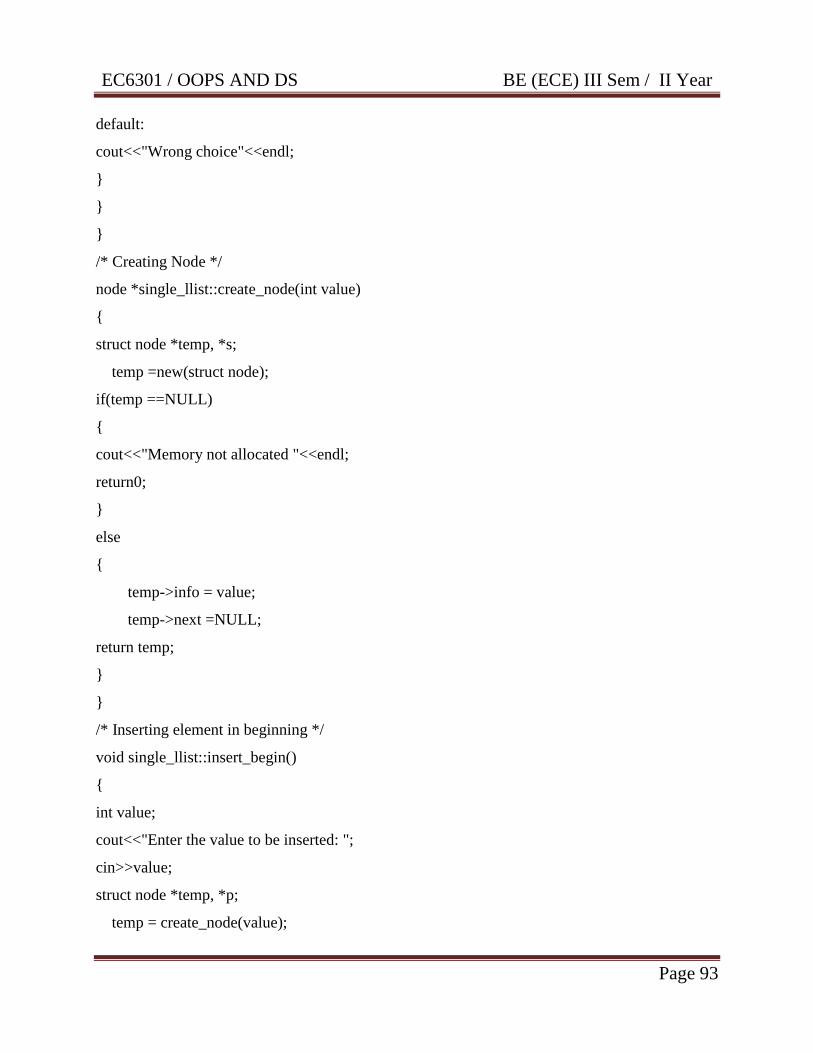
EC6301 / OOPS AND DS BE (ECE) III Sem / II Year
Page 93
default:
cout<<"Wrong choice"<<endl;
}
}
}
/* Creating Node */
node *single_llist::create_node(int value)
{
struct node *temp, *s;
temp =new(struct node);
if(temp ==NULL)
{
cout<<"Memory not allocated "<<endl;
return0;
}
else
{
temp->info = value;
temp->next =NULL;
return temp;
}
}
/* Inserting element in beginning */
void single_llist::insert_begin()
{
int value;
cout<<"Enter the value to be inserted: ";
cin>>value;
struct node *temp, *p;
temp = create_node(value);
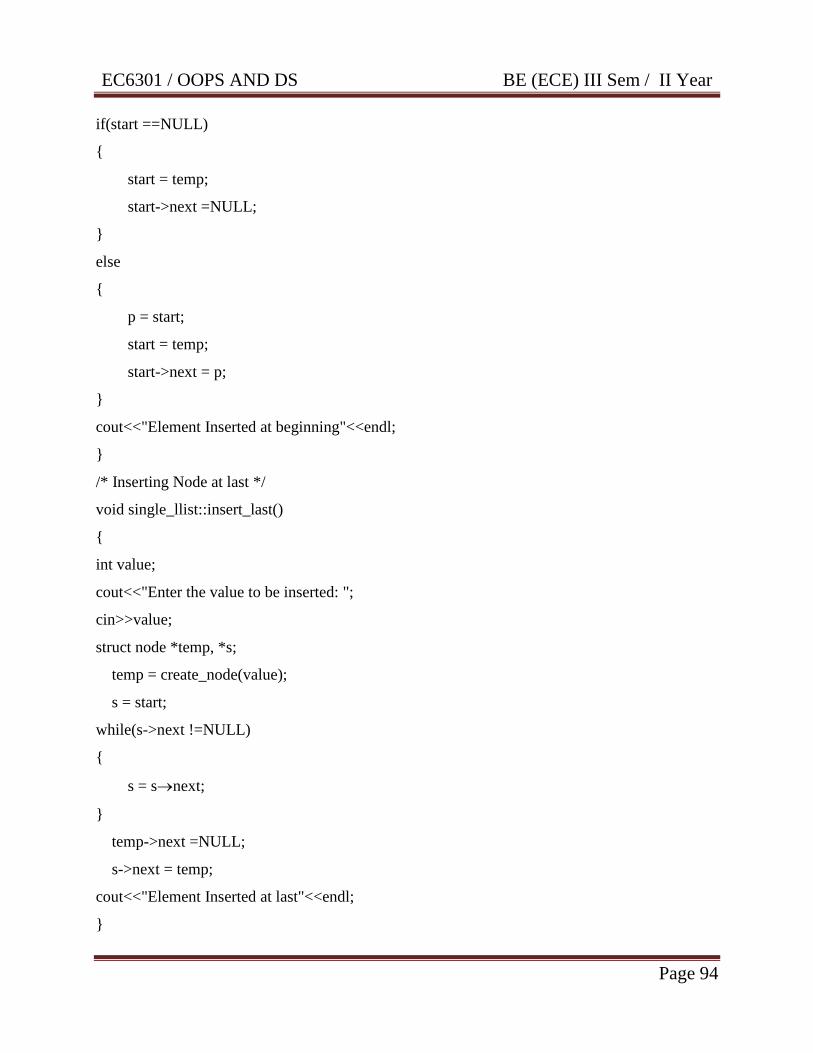
EC6301 / OOPS AND DS BE (ECE) III Sem / II Year
Page 94
if(start ==NULL)
{
start = temp;
start->next =NULL;
}
else
{
p = start;
start = temp;
start->next = p;
}
cout<<"Element Inserted at beginning"<<endl;
}
/* Inserting Node at last */
void single_llist::insert_last()
{
int value;
cout<<"Enter the value to be inserted: ";
cin>>value;
struct node *temp, *s;
temp = create_node(value);
s = start;
while(s->next !=NULL)
{
s = snext;
}
temp->next =NULL;
s->next = temp;
cout<<"Element Inserted at last"<<endl;
}
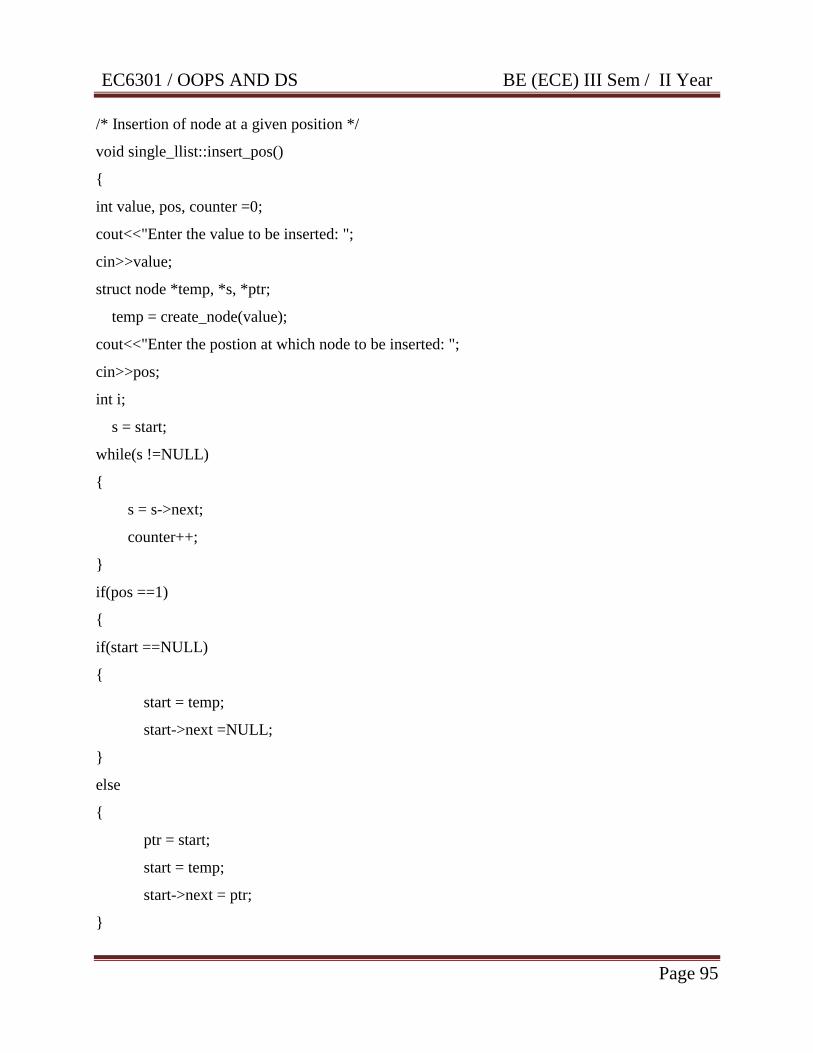
EC6301 / OOPS AND DS BE (ECE) III Sem / II Year
Page 95
/* Insertion of node at a given position */
void single_llist::insert_pos()
{
int value, pos, counter =0;
cout<<"Enter the value to be inserted: ";
cin>>value;
struct node *temp, *s, *ptr;
temp = create_node(value);
cout<<"Enter the postion at which node to be inserted: ";
cin>>pos;
int i;
s = start;
while(s !=NULL)
{
s = s->next;
counter++;
}
if(pos ==1)
{
if(start ==NULL)
{
start = temp;
start->next =NULL;
}
else
{
ptr = start;
start = temp;
start->next = ptr;
}
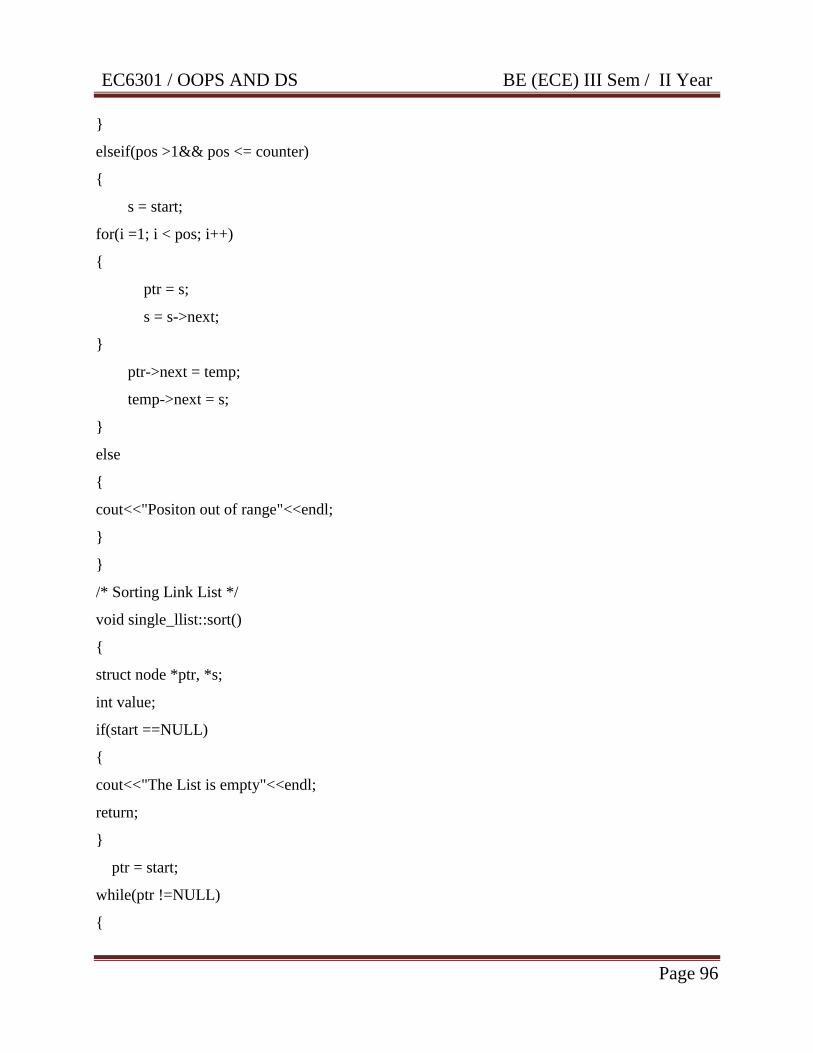
EC6301 / OOPS AND DS BE (ECE) III Sem / II Year
Page 96
}
elseif(pos >1&& pos <= counter)
{
s = start;
for(i =1; i < pos; i++)
{
ptr = s;
s = s->next;
}
ptr->next = temp;
temp->next = s;
}
else
{
cout<<"Positon out of range"<<endl;
}
}
/* Sorting Link List */
void single_llist::sort()
{
struct node *ptr, *s;
int value;
if(start ==NULL)
{
cout<<"The List is empty"<<endl;
return;
}
ptr = start;
while(ptr !=NULL)
{
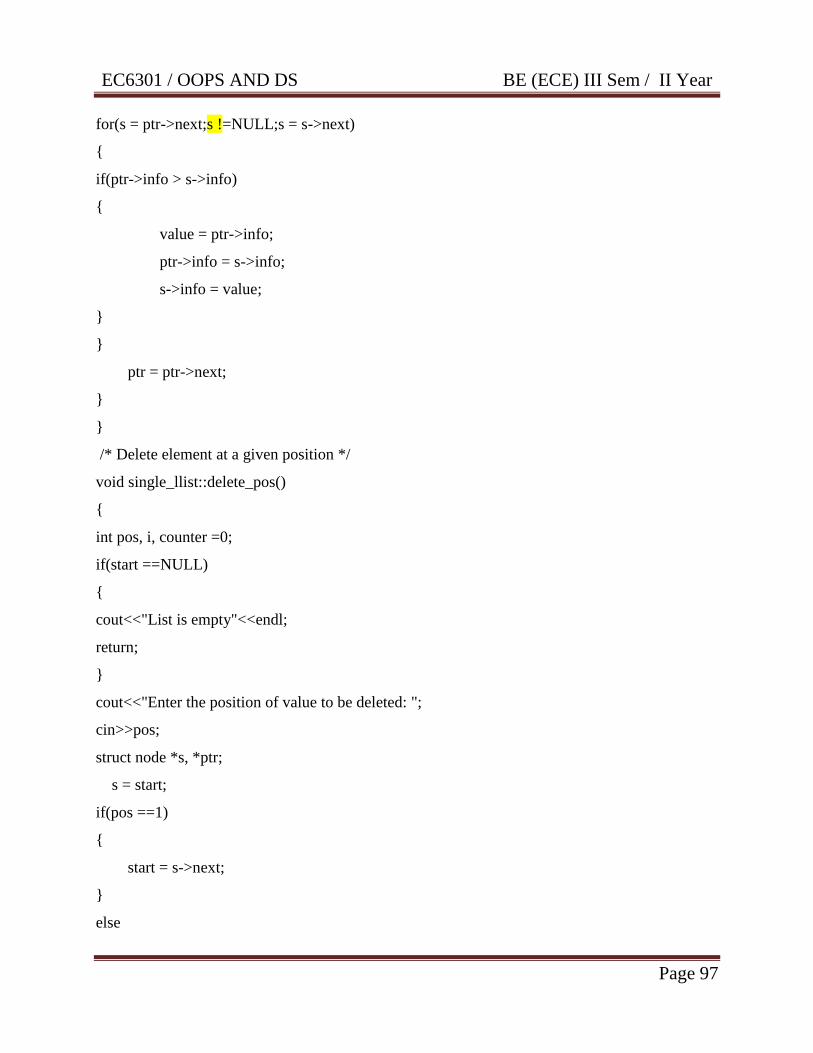
EC6301 / OOPS AND DS BE (ECE) III Sem / II Year
Page 97
for(s = ptr->next;s !=NULL;s = s->next)
{
if(ptr->info > s->info)
{
value = ptr->info;
ptr->info = s->info;
s->info = value;
}
}
ptr = ptr->next;
}
}
/* Delete element at a given position */
void single_llist::delete_pos()
{
int pos, i, counter =0;
if(start ==NULL)
{
cout<<"List is empty"<<endl;
return;
}
cout<<"Enter the position of value to be deleted: ";
cin>>pos;
struct node *s, *ptr;
s = start;
if(pos ==1)
{
start = s->next;
}
else

EC6301 / OOPS AND DS BE (ECE) III Sem / II Year
Page 98
{
while(s !=NULL)
{
s = s->next;
counter++;
}
if(pos >0&& pos <= counter)
{
s = start;
for(i =1;i < pos;i++)
{
ptr = s;
s = s->next;
}
ptr->next = s->next;
}
else
{
cout<<"Position out of range"<<endl;
}
free(s);
cout<<"Element Deleted"<<endl;
}
}
/* Update a given Node */
void single_llist::update()
{
int value, pos, i;
if(start ==NULL)
{
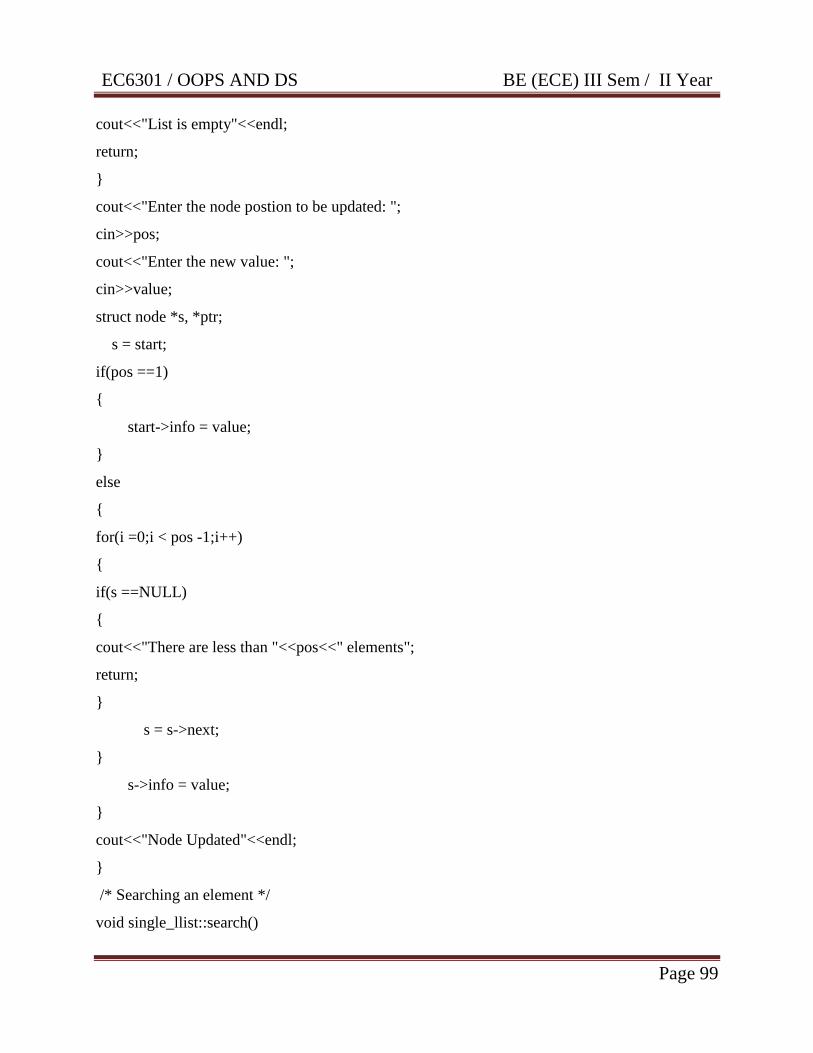
EC6301 / OOPS AND DS BE (ECE) III Sem / II Year
Page 99
cout<<"List is empty"<<endl;
return;
}
cout<<"Enter the node postion to be updated: ";
cin>>pos;
cout<<"Enter the new value: ";
cin>>value;
struct node *s, *ptr;
s = start;
if(pos ==1)
{
start->info = value;
}
else
{
for(i =0;i < pos -1;i++)
{
if(s ==NULL)
{
cout<<"There are less than "<<pos<<" elements";
return;
}
s = s->next;
}
s->info = value;
}
cout<<"Node Updated"<<endl;
}
/* Searching an element */
void single_llist::search()
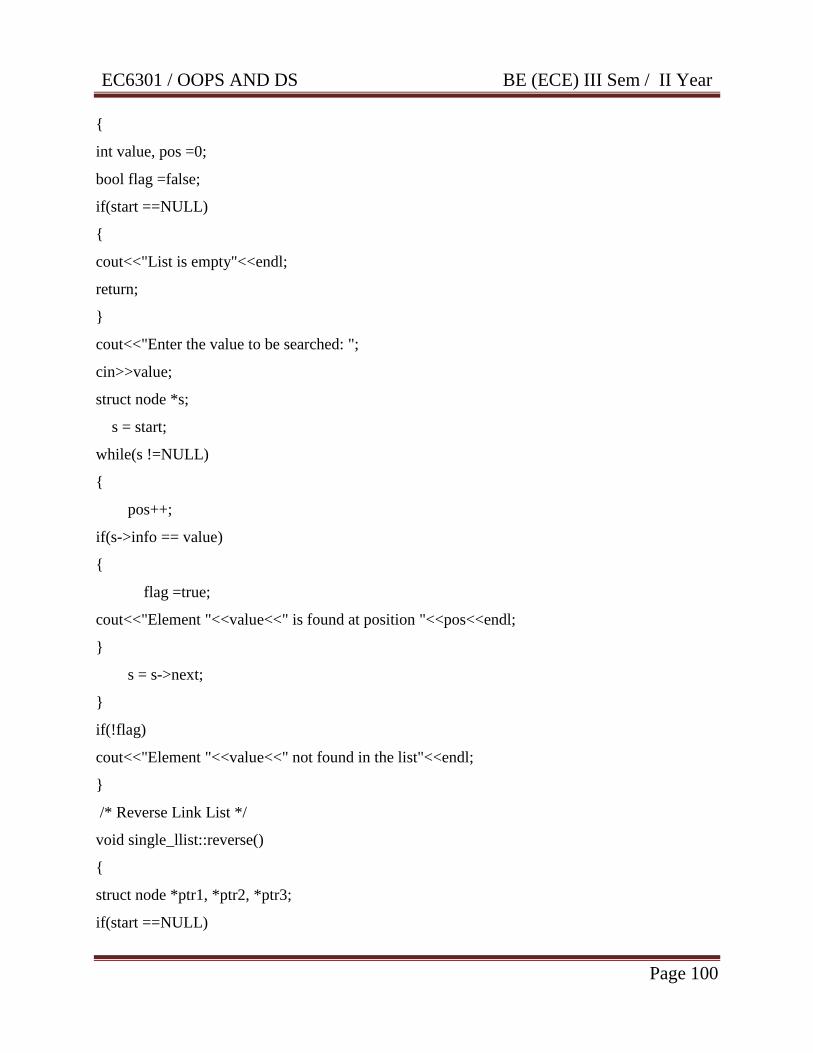
EC6301 / OOPS AND DS BE (ECE) III Sem / II Year
Page 100
{
int value, pos =0;
bool flag =false;
if(start ==NULL)
{
cout<<"List is empty"<<endl;
return;
}
cout<<"Enter the value to be searched: ";
cin>>value;
struct node *s;
s = start;
while(s !=NULL)
{
pos++;
if(s->info == value)
{
flag =true;
cout<<"Element "<<value<<" is found at position "<<pos<<endl;
}
s = s->next;
}
if(!flag)
cout<<"Element "<<value<<" not found in the list"<<endl;
}
/* Reverse Link List */
void single_llist::reverse()
{
struct node *ptr1, *ptr2, *ptr3;
if(start ==NULL)
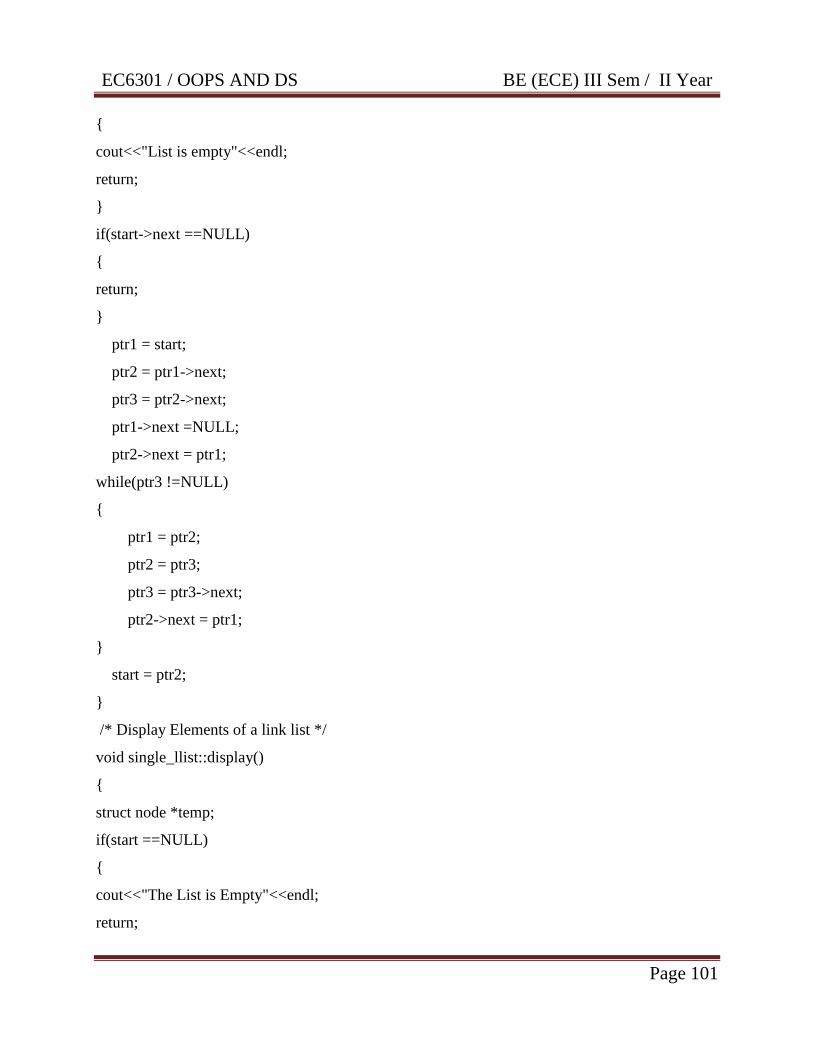
EC6301 / OOPS AND DS BE (ECE) III Sem / II Year
Page 101
{
cout<<"List is empty"<<endl;
return;
}
if(start->next ==NULL)
{
return;
}
ptr1 = start;
ptr2 = ptr1->next;
ptr3 = ptr2->next;
ptr1->next =NULL;
ptr2->next = ptr1;
while(ptr3 !=NULL)
{
ptr1 = ptr2;
ptr2 = ptr3;
ptr3 = ptr3->next;
ptr2->next = ptr1;
}
start = ptr2;
}
/* Display Elements of a link list */
void single_llist::display()
{
struct node *temp;
if(start ==NULL)
{
cout<<"The List is Empty"<<endl;
return;
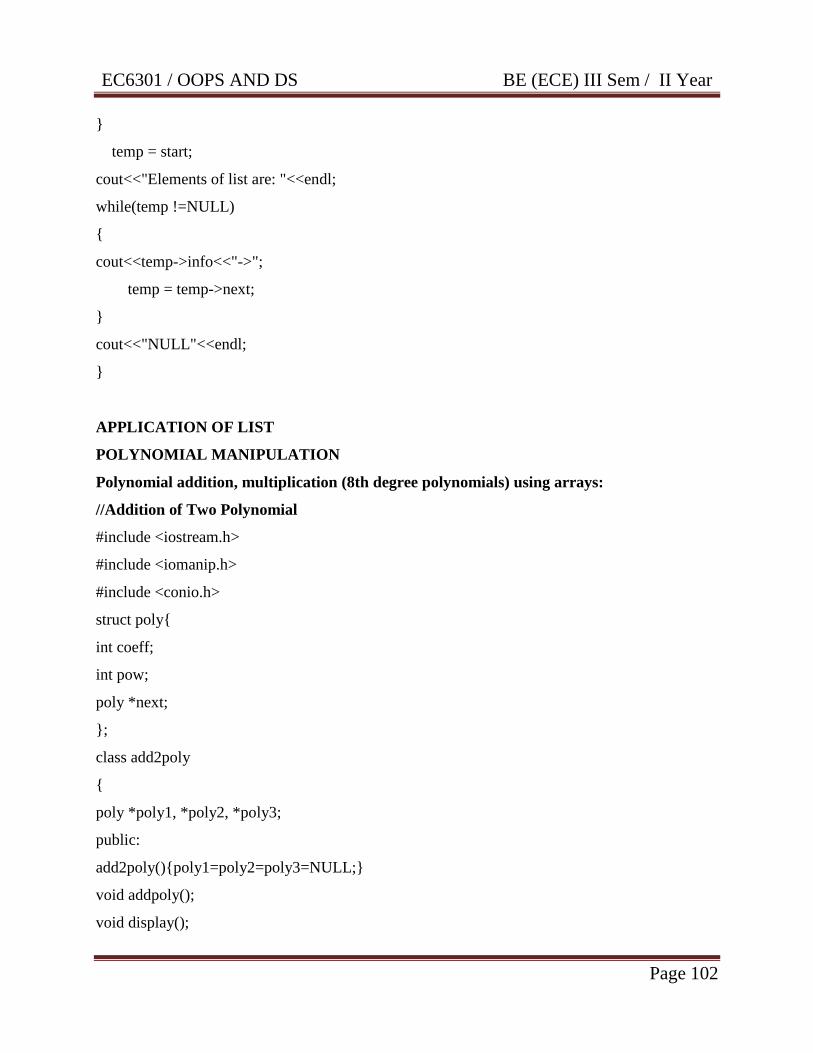
EC6301 / OOPS AND DS BE (ECE) III Sem / II Year
Page 102
}
temp = start;
cout<<"Elements of list are: "<<endl;
while(temp !=NULL)
{
cout<<temp->info<<"->";
temp = temp->next;
}
cout<<"NULL"<<endl;
}
APPLICATION OF LIST
POLYNOMIAL MANIPULATION
Polynomial addition, multiplication (8th degree polynomials) using arrays:
//Addition of Two Polynomial
#include <iostream.h>
#include <iomanip.h>
#include <conio.h>
struct poly{
int coeff;
int pow;
poly *next;
};
class add2poly
{
poly *poly1, *poly2, *poly3;
public:
add2poly(){poly1=poly2=poly3=NULL;}
void addpoly();
void display();
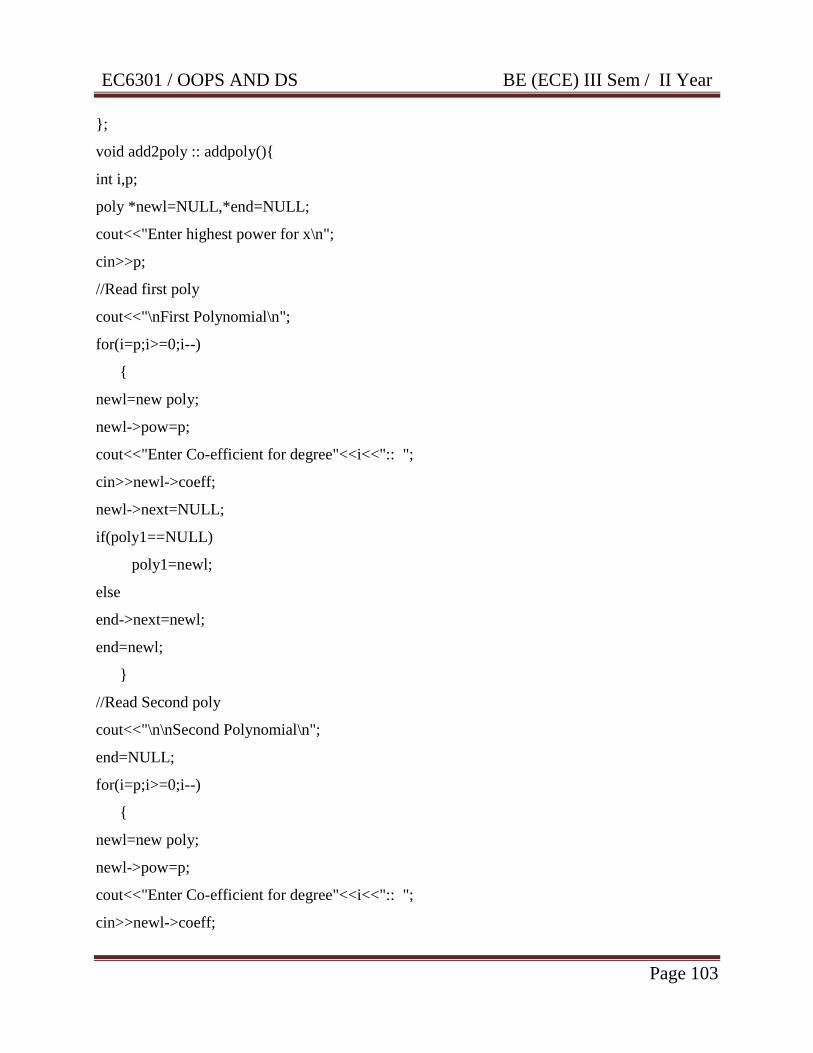
EC6301 / OOPS AND DS BE (ECE) III Sem / II Year
Page 103
};
void add2poly :: addpoly(){
int i,p;
poly *newl=NULL,*end=NULL;
cout<<"Enter highest power for x\n";
cin>>p;
//Read first poly
cout<<"\nFirst Polynomial\n";
for(i=p;i>=0;i--)
{
newl=new poly;
newl->pow=p;
cout<<"Enter Co-efficient for degree"<<i<<":: ";
cin>>newl->coeff;
newl->next=NULL;
if(poly1==NULL)
poly1=newl;
else
end->next=newl;
end=newl;
}
//Read Second poly
cout<<"\n\nSecond Polynomial\n";
end=NULL;
for(i=p;i>=0;i--)
{
newl=new poly;
newl->pow=p;
cout<<"Enter Co-efficient for degree"<<i<<":: ";
cin>>newl->coeff;
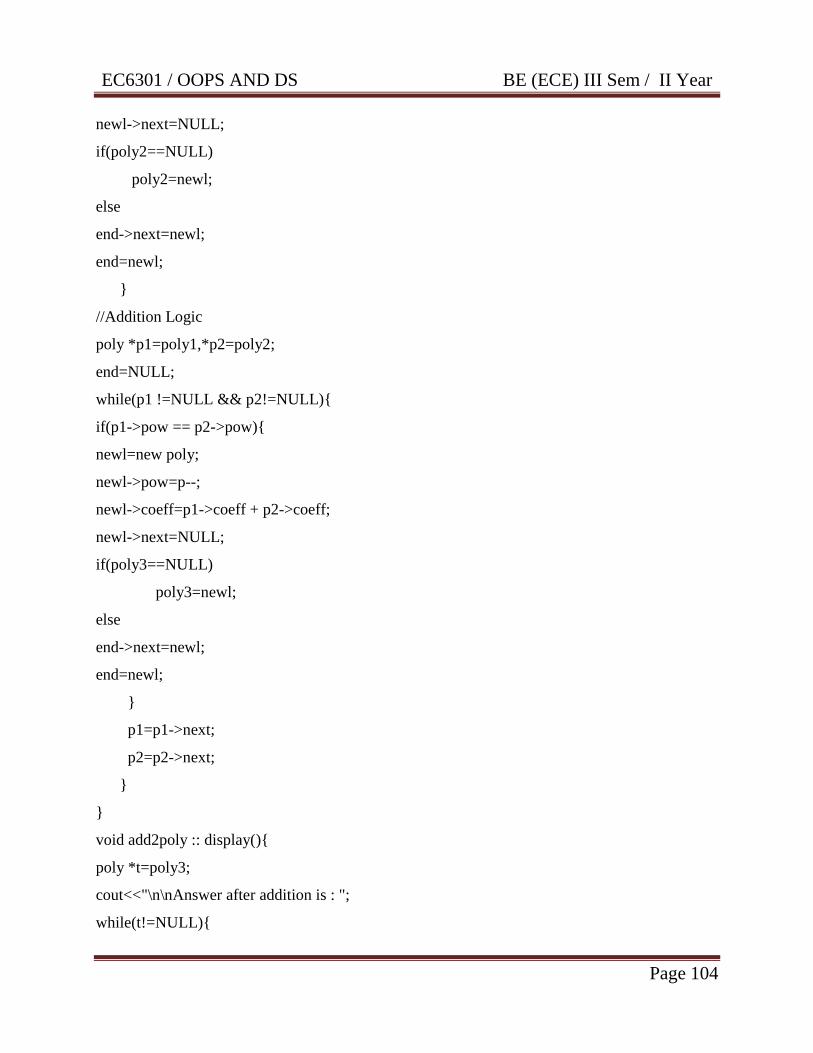
EC6301 / OOPS AND DS BE (ECE) III Sem / II Year
Page 104
newl->next=NULL;
if(poly2==NULL)
poly2=newl;
else
end->next=newl;
end=newl;
}
//Addition Logic
poly *p1=poly1,*p2=poly2;
end=NULL;
while(p1 !=NULL && p2!=NULL){
if(p1->pow == p2->pow){
newl=new poly;
newl->pow=p--;
newl->coeff=p1->coeff + p2->coeff;
newl->next=NULL;
if(poly3==NULL)
poly3=newl;
else
end->next=newl;
end=newl;
}
p1=p1->next;
p2=p2->next;
}
}
void add2poly :: display(){
poly *t=poly3;
cout<<"\n\nAnswer after addition is : ";
while(t!=NULL){
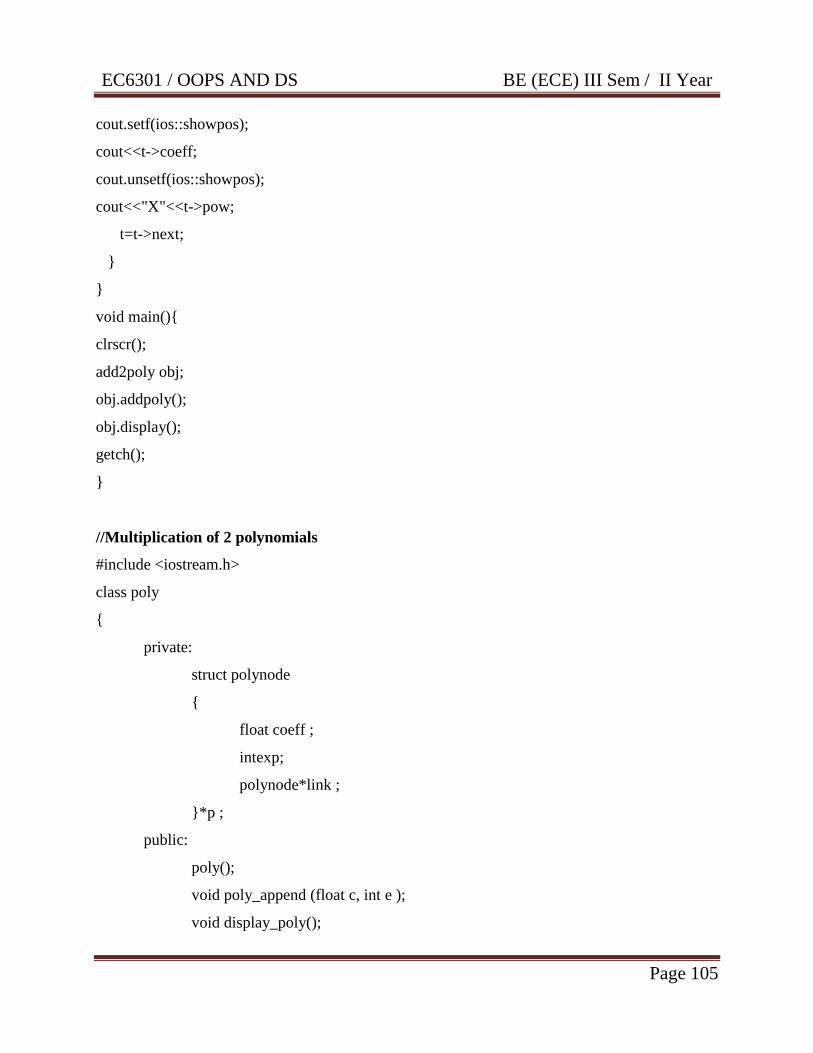
EC6301 / OOPS AND DS BE (ECE) III Sem / II Year
Page 105
cout.setf(ios::showpos);
cout<<t->coeff;
cout.unsetf(ios::showpos);
cout<<"X"<<t->pow;
t=t->next;
}
}
void main(){
clrscr();
add2poly obj;
obj.addpoly();
obj.display();
getch();
}
//Multiplication of 2 polynomials
#include <iostream.h>
class poly
{
private:
struct polynode
{
float coeff ;
intexp;
polynode*link ;
}*p ;
public:
poly();
void poly_append (float c, int e );
void display_poly();

EC6301 / OOPS AND DS BE (ECE) III Sem / II Year
Page 106
void poly_multiply ( poly &p1, poly &p2 );
void padd (float c, int e );
~poly();
};
poly ::poly()
{
p =NULL;
}
void poly ::poly_append(float c, int e )
{
polynode*temp ;
temp= p ;
if( temp ==NULL)
{
temp=new polynode ;
p =temp ;
}
else
{
while( temp -> link !=NULL)
temp= temp -> link ;
temp-> link =new polynode ;
temp= temp -> link ;
}
temp-> coeff = c ;
temp->exp= e ;
temp-> link =NULL;
}
void poly ::display_poly()
{
EC6301 / OOPS AND DS BE (ECE) III Sem / II Year
Page 107
polynode*temp = p ;
int f =0;
while( temp !=NULL)
{
if( f !=0)
{
if( temp -> coeff >0)
cout<<" + ";
else
cout<<" ";
}
if( temp ->exp!=0)
cout<< temp -> coeff <<"x^"<< temp ->exp;
else
cout<< temp -> coeff ;
temp= temp -> link ;
f =1;
}
}
void poly ::poly_multiply( poly &p1, poly &p2 )
{
polynode*temp1, *temp2 ;
float coeff1, exp1 ;
temp1 =p1.p;
temp2 =p2.p;
if( temp1 ==NULL&& temp2 ==NULL)
return;
if( temp1 ==NULL)
p =p2.p;
else
EC6301 / OOPS AND DS BE (ECE) III Sem / II Year
Page 108
{
if( temp2 ==NULL)
p =temp1 ;
else {
while( temp1 !=NULL)
{
while( temp2 !=NULL)
{
coeff1 = temp1 -> coeff * temp2 ->coeff ;
exp1 = temp1 ->exp+ temp2 ->exp;
temp2 = temp2 ->link ;
padd( coeff1, exp1 );
}
temp2 =p2.p;
temp1 = temp1 ->link ;
}
}
}
}
void poly ::padd(float c, int e )
{
polynode*r, *temp ;
temp= p ;
if( temp ==NULL|| c > temp ->exp)
{
r =newpolynode ;
r-> coeff = c ;
r->exp= e ;
if( p ==NULL)
{

EC6301 / OOPS AND DS BE (ECE) III Sem / II Year
Page 109
r-> link =NULL;
p =r ;
}
else
{
r-> link = temp ;
p =r ;
}
}
else
{
while( temp !=NULL)
{
if( temp ->exp== e )
{
temp-> coeff += c ;
return;
}
if( temp ->exp> c &&( temp -> link ->exp< c ||
temp-> link ==NULL))
{
r =newpolynode ;
r-> coeff = c;
r->exp= e ;
r-> link =NULL;
temp-> link = r ;
return;
}
temp= temp -> link ;
}

EC6301 / OOPS AND DS BE (ECE) III Sem / II Year
Page 110
r-> link =NULL;
temp-> link = r ;
}
}
poly :: ~poly()
{
polynode*q ;
while( p !=NULL)
{
q = p ->link ;
delete p ;
p =q ;
}
}
void main()
{
poly p1 ;
p1.poly_append(3, 5);
p1.poly_append(2, 4);
p1.poly_append(1, 2);
cout<<"\nFirst polynomial: "<< endl ;
p1.display_poly();
poly p2 ;
p2.poly_append(1, 6);
p2.poly_append(2, 5);
p2.poly_append(3, 4);
cout<<"\nSecond polynomial: "<< endl ;
p2.display_poly();
poly p3 ;
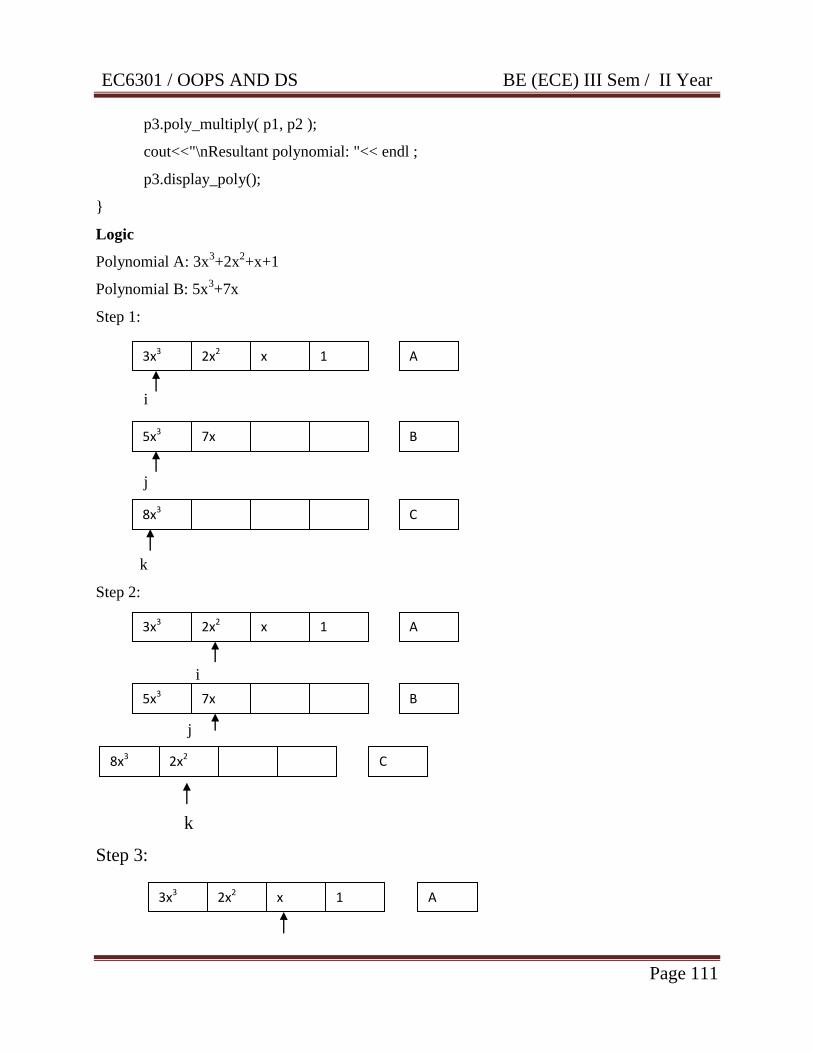
EC6301 / OOPS AND DS BE (ECE) III Sem / II Year
Page 111
p3.poly_multiply( p1, p2 );
cout<<"\nResultant polynomial: "<< endl ;
p3.display_poly();
}
Logic
Polynomial A: 3x3+2x
2+x+1
Polynomial B: 5x3+7x
Step 1:
i
j
k
Step 2:
i
j
k
Step 3:
3x3 2x2 x 1
5x3 7x
8x3
A
B
C
3x3 2x2 x 1 A
5x3 7x B
8x3 2x2 C
3x3 2x2 x 1 A

EC6301 / OOPS AND DS BE (ECE) III Sem / II Year
Page 112
i
j
k
Step 4:
i
j
k
3.4 STACK ADT
A stack is an ordered collection of items accessed as last-in-first-out order. A stack is a
list of elements in which insertions and deletions are restricted to one end. The end from which
the elements are added / removed is referred to as top of the stack. Stack is also referred as piles
and push down lists.
The last element placed in the stack will be at the top of the stack. The last element added
to stack is the first element to be removed. Hence, the stacks are referred to as Last-in-first-out
lists. A stack is referenced via a pointer to the top elements of the stack referred as top pointer.
The top pointer keeps track of the top element in the stack.
Initially, when the stack is empty, the top pointer has a value zero and when the stack
contains a singly element the top pointer has a value one and so on.
Example
5x3 7x
8x3 2x2 8x
B
C
3x3 2x2 x 1
5x3 7x
8x3 2x2 8x 1
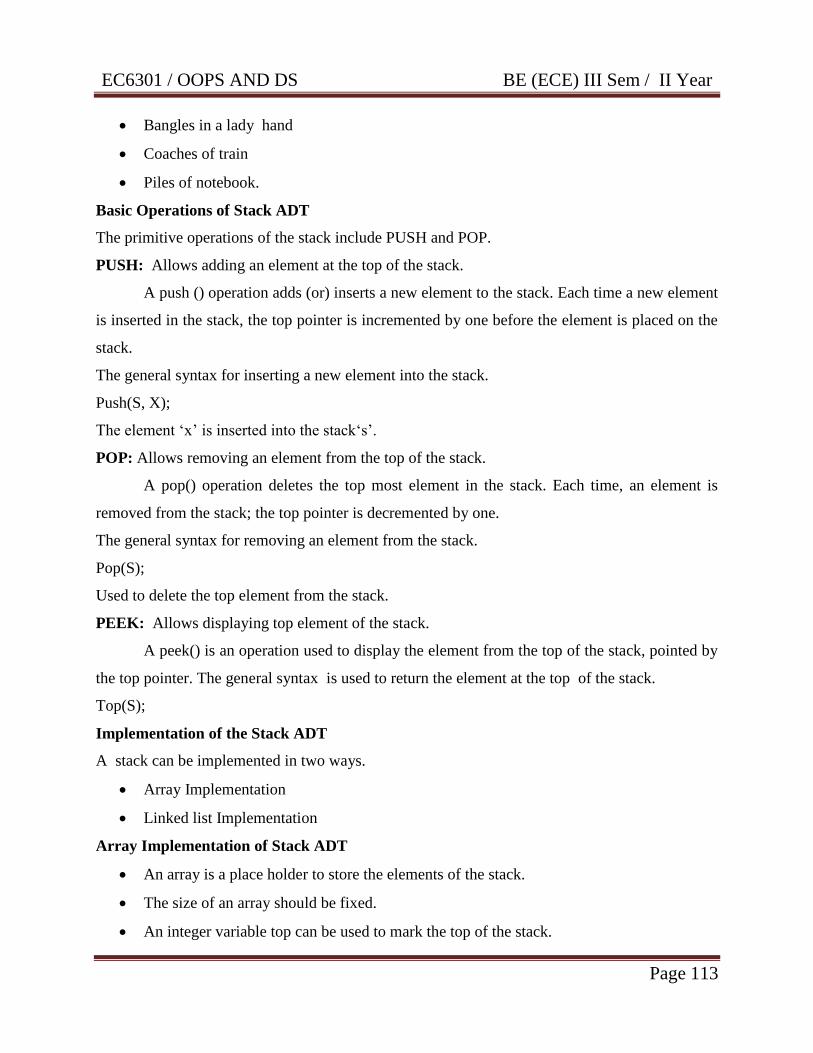
EC6301 / OOPS AND DS BE (ECE) III Sem / II Year
Page 113
Bangles in a lady hand
Coaches of train
Piles of notebook.
Basic Operations of Stack ADT
The primitive operations of the stack include PUSH and POP.
PUSH: Allows adding an element at the top of the stack.
A push () operation adds (or) inserts a new element to the stack. Each time a new element
is inserted in the stack, the top pointer is incremented by one before the element is placed on the
stack.
The general syntax for inserting a new element into the stack.
Push(S, X);
The element „x‟ is inserted into the stack„s‟.
POP: Allows removing an element from the top of the stack.
A pop() operation deletes the top most element in the stack. Each time, an element is
removed from the stack; the top pointer is decremented by one.
The general syntax for removing an element from the stack.
Pop(S);
Used to delete the top element from the stack.
PEEK: Allows displaying top element of the stack.
A peek() is an operation used to display the element from the top of the stack, pointed by
the top pointer. The general syntax is used to return the element at the top of the stack.
Top(S);
Implementation of the Stack ADT
A stack can be implemented in two ways.
Array Implementation
Linked list Implementation
Array Implementation of Stack ADT
An array is a place holder to store the elements of the stack.
The size of an array should be fixed.
An integer variable top can be used to mark the top of the stack.

EC6301 / OOPS AND DS BE (ECE) III Sem / II Year
Page 114
The notation top = -1 is used for initializing the top variable.
Top can be made to point to the top element of the stack.
When a new element is to be pushed then the top can be incremented and the element can
be added.
In this notation, top will be -1 for an empty stack.
Push operation
If the elements are added continuously to the stack using the push operation then the
stack grows at one end.
Initially when the stack is empty the top = -1. The top is a variable which indicates the
position of the topmost element in the stack.
If arrays are used for implementing the stacks, it would be very easy to manage the
stacks.
However, the problem with an array is that we are required to declare the size of the array
before using it in a program.
This means the size of the stack should be fixed. We can declare the array with a
maximum size large enough to manage a stack.
As result, the stack can grow or shrink within the space reserved for it.
Pop operation
On deletion of elements the stack shrinks at the same end, as the elements at the top get removed.
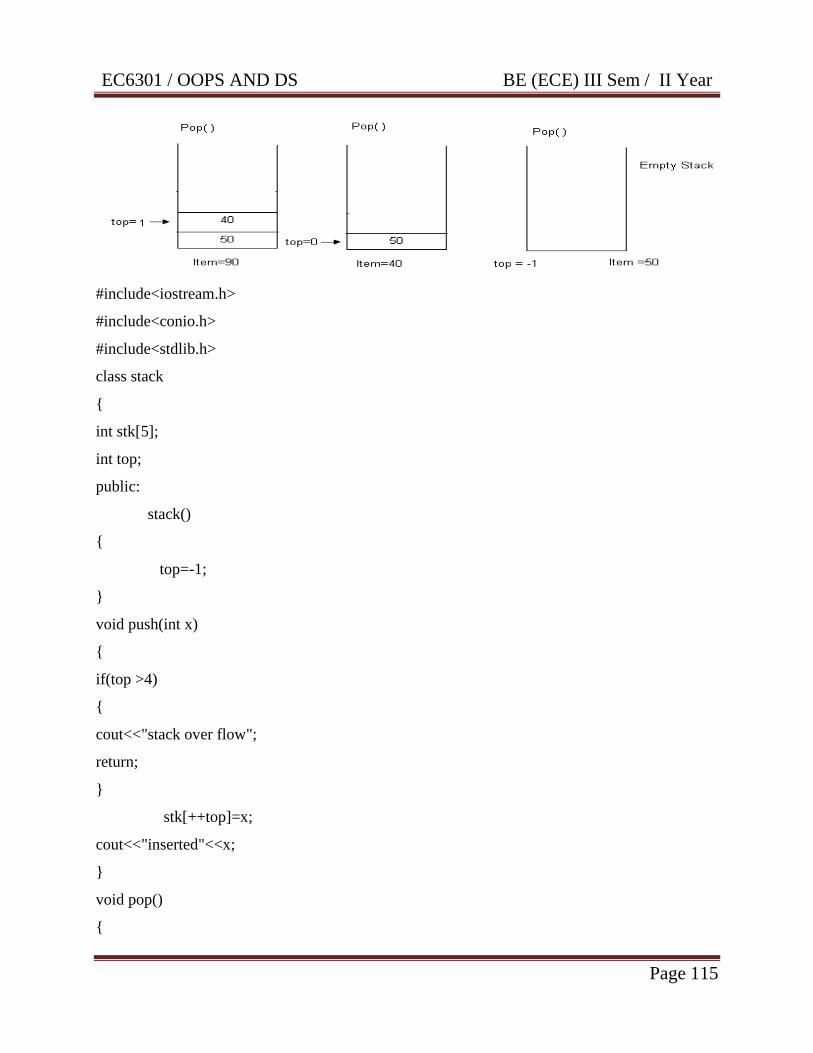
EC6301 / OOPS AND DS BE (ECE) III Sem / II Year
Page 115
#include<iostream.h>
#include<conio.h>
#include<stdlib.h>
class stack
{
int stk[5];
int top;
public:
stack()
{
top=-1;
}
void push(int x)
{
if(top >4)
{
cout<<"stack over flow";
return;
}
stk[++top]=x;
cout<<"inserted"<<x;
}
void pop()
{

EC6301 / OOPS AND DS BE (ECE) III Sem / II Year
Page 116
if(top <0)
{
cout<<"stack under flow";
return;
}
cout<<"deleted"<<stk[top--];
}
void display()
{
if(top<0)
{
cout<<" stack empty";
return;
}
for(int i=top;i>=0;i--)
cout<<stk[i]<<" ";
}
};
main()
{
int ch;
stack st;
while(1)
{
cout<<"\n1.push 2.pop 3.display 4.exit\nEnter ur choice";
cin>> ch;
switch(ch)
{
case1:cout<<"enter the element";
EC6301 / OOPS AND DS BE (ECE) III Sem / II Year
Page 117
cin>> ch;
st.push(ch);
break;
case2: st.pop();break;
case3: st.display();break;
case4:exit(0);
}
}
return(0);
}
Implementation of Stack ADT using Linked Lists
The stack can be implemented by using the singly linked list. This type of the
representation has more advantage than representing stack using array.They are,
It is not necessary to specify the no of elements to be stored in a stack during its
declaration. (memory is allocated dynamically at run time when an element is added to
the stack).
Insertion and deletion can be handled easily and efficiently.
Linked list representation of stack can grow and shrink in size without wasting the
memory space depending upon the insertion and deletion that occurs in the list.
Initially, when the stack is empty, top points to NULL. When an element is added using the
push operation, top is made to point to the latest element whichever is added.
Push operation
Create a temporary node and store the value of x in the data part of the node.
Now make link part of temp point to Top and then top point to Temp. That will make the
new node as the topmost element in the stack.

EC6301 / OOPS AND DS BE (ECE) III Sem / II Year
Page 118
Pop operation
The data in the topmost node of the stack is first stored in a variable called item.
Then a temporary pointer is created to point to top. The top is now safely moved to the
next node below it in the stack.
Temp node is deleted and the item is returned.
#include<iostream.h>
#include<conio.h>
#include<stdlib.h>
class node
{
public:
class node *next;
int data;
};
class stack :public node
{
EC6301 / OOPS AND DS BE (ECE) III Sem / II Year
Page 119
node *head;
int tos;
public:
stack()
{
tos=-1;
}
void push(int x)
{
if(tos <0)
{
head =new node;
head->next=NULL;
head->data=x;
tos ++;
}
else
{
node *temp,*temp1;
temp=head;
if(tos >=4)
{
cout<<"stack over flow";
return;
}
tos++;
while(temp->next !=NULL)
temp=temp->next;
temp1=new node;
temp->next=temp1;
EC6301 / OOPS AND DS BE (ECE) III Sem / II Year
Page 120
temp1->next=NULL;
temp1->data=x;
}
}
void display()
{
node *temp;
temp=head;
if(tos <0)
{
cout<<" stack under flow";
return;
}
while(temp !=NULL)
{
cout<<temp->data<<" ";
temp=temp->next;
}
}
void pop()
{
node *temp;
temp=head;
if( tos <0)
{
cout<<"stack under flow";
return;
}
tos--;
while(temp->next->next!=NULL)
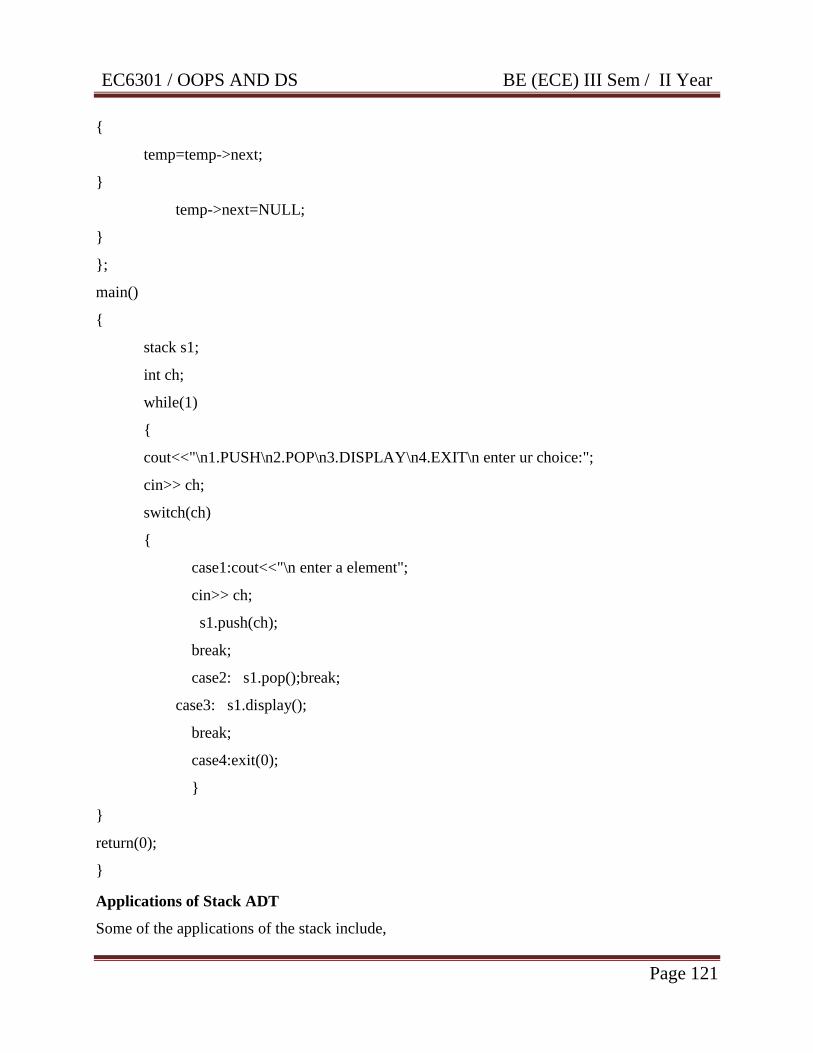
EC6301 / OOPS AND DS BE (ECE) III Sem / II Year
Page 121
{
temp=temp->next;
}
temp->next=NULL;
}
};
main()
{
stack s1;
int ch;
while(1)
{
cout<<"\n1.PUSH\n2.POP\n3.DISPLAY\n4.EXIT\n enter ur choice:";
cin>> ch;
switch(ch)
{
case1:cout<<"\n enter a element";
cin>> ch;
s1.push(ch);
break;
case2: s1.pop();break;
case3: s1.display();
break;
case4:exit(0);
}
}
return(0);
}
Applications of Stack ADT
Some of the applications of the stack include,

EC6301 / OOPS AND DS BE (ECE) III Sem / II Year
Page 122
Towers of Hanoi
Reversing the String
Recursion using stack
Evaluation of Arithmetic Expressions
Towers of Hanoi
Towers of Hanoi is a gaming puzzle.
Invented by French Mathematician Edouard Lucas in1883.
The objective of this puzzle is to transfer the entire disks from Tower1 to Tower3 using
Tower2.
The rules to be followed in moving the disks from tower1 to tower3 using tower2.
Only one disc can be moved at a time.
Only the top disc on any tower can be moved to any other tower.
A larger disc cannot be placed on a smaller disc.
It can be implemented using recursion. To move the largest disc to the bottom of tower3.
We move the remaining n-1 disks to tower2 and then move the largest disc to tower 3.
This process is continue until to place the entire disc in towerr3 in order.
Since, disc are moved from each tower in a LIFO manner each tower may be considered
as stack.
The least no of moves required to solve the problem according to our algorithm is given
by O(N)= 2N-1.
The time complexity is measured in no of movements.
Reversing the String
Main characteristics of the stack are reversing the order of its contents.
The tasks can be accomplished by pushing each character until the end of the string.
Now, the individual characters are popped off from the stack.
Since the last character pushed into the stack would be the first character to be popped off
from the stack.
The string will come off in the reverse order.
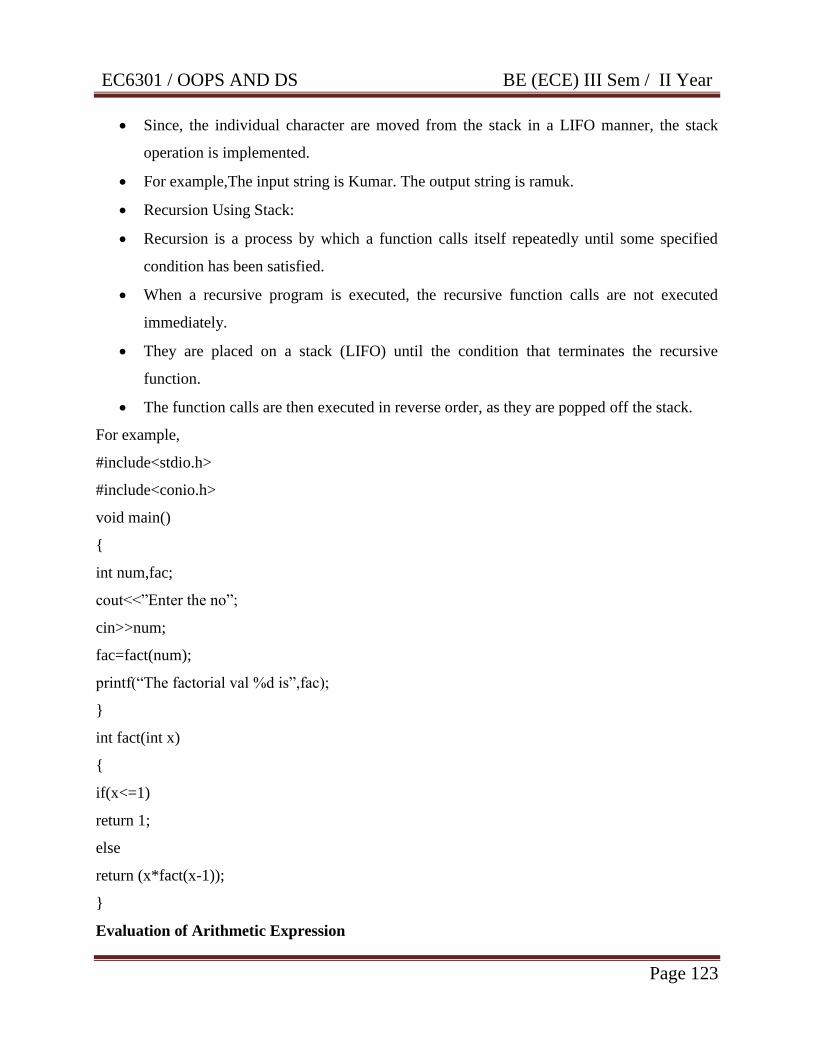
EC6301 / OOPS AND DS BE (ECE) III Sem / II Year
Page 123
Since, the individual character are moved from the stack in a LIFO manner, the stack
operation is implemented.
For example,The input string is Kumar. The output string is ramuk.
Recursion Using Stack:
Recursion is a process by which a function calls itself repeatedly until some specified
condition has been satisfied.
When a recursive program is executed, the recursive function calls are not executed
immediately.
They are placed on a stack (LIFO) until the condition that terminates the recursive
function.
The function calls are then executed in reverse order, as they are popped off the stack.
For example,
#include<stdio.h>
#include<conio.h>
void main()
{
int num,fac;
cout<<”Enter the no”;
cin>>num;
fac=fact(num);
printf(“The factorial val %d is”,fac);
}
int fact(int x)
{
if(x<=1)
return 1;
else
return (x*fact(x-1));
}
Evaluation of Arithmetic Expression
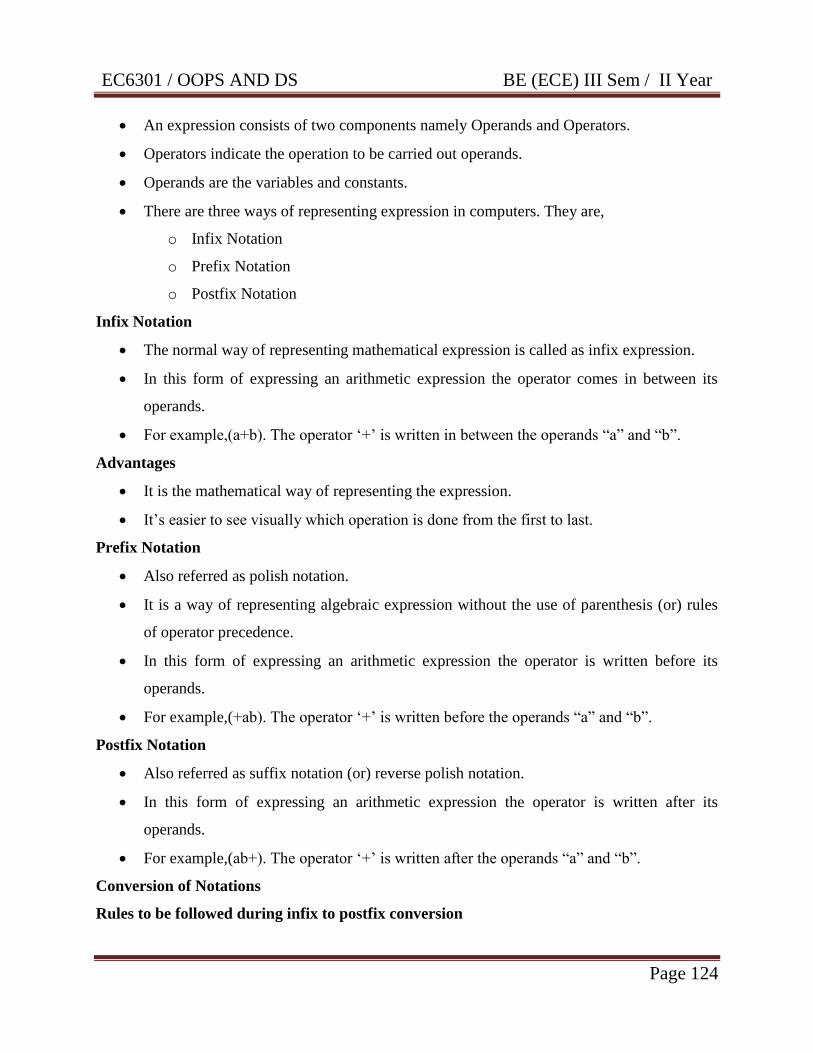
EC6301 / OOPS AND DS BE (ECE) III Sem / II Year
Page 124
An expression consists of two components namely Operands and Operators.
Operators indicate the operation to be carried out operands.
Operands are the variables and constants.
There are three ways of representing expression in computers. They are,
o Infix Notation
o Prefix Notation
o Postfix Notation
Infix Notation
The normal way of representing mathematical expression is called as infix expression.
In this form of expressing an arithmetic expression the operator comes in between its
operands.
For example,(a+b). The operator „+‟ is written in between the operands “a” and “b”.
Advantages
It is the mathematical way of representing the expression.
It‟s easier to see visually which operation is done from the first to last.
Prefix Notation
Also referred as polish notation.
It is a way of representing algebraic expression without the use of parenthesis (or) rules
of operator precedence.
In this form of expressing an arithmetic expression the operator is written before its
operands.
For example,(+ab). The operator „+‟ is written before the operands “a” and “b”.
Postfix Notation
Also referred as suffix notation (or) reverse polish notation.
In this form of expressing an arithmetic expression the operator is written after its
operands.
For example,(ab+). The operator „+‟ is written after the operands “a” and “b”.
Conversion of Notations
Rules to be followed during infix to postfix conversion
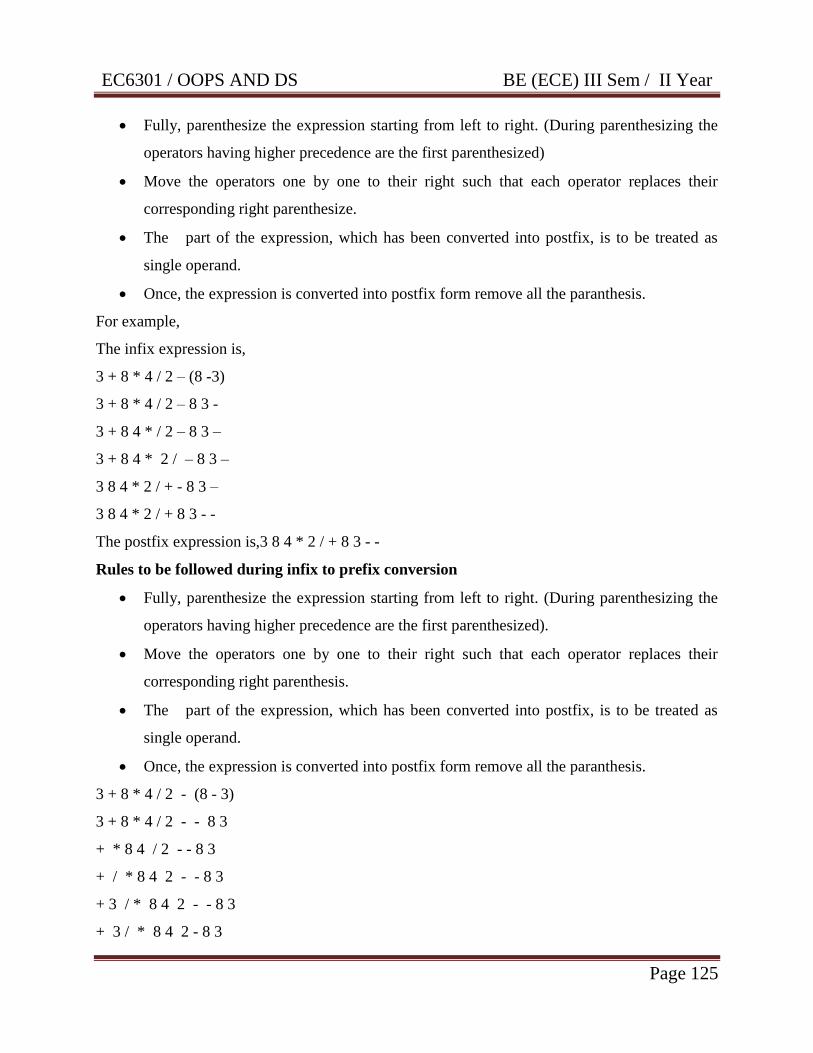
EC6301 / OOPS AND DS BE (ECE) III Sem / II Year
Page 125
Fully, parenthesize the expression starting from left to right. (During parenthesizing the
operators having higher precedence are the first parenthesized)
Move the operators one by one to their right such that each operator replaces their
corresponding right parenthesize.
The part of the expression, which has been converted into postfix, is to be treated as
single operand.
Once, the expression is converted into postfix form remove all the paranthesis.
For example,
The infix expression is,
3 + 8 * 4 / 2 – (8 -3)
3 + 8 * 4 / 2 – 8 3 -
3 + 8 4 * / 2 – 8 3 –
3 + 8 4 * 2 / – 8 3 –
3 8 4 * 2 / + - 8 3 –
3 8 4 * 2 / + 8 3 - -
The postfix expression is,3 8 4 * 2 / + 8 3 - -
Rules to be followed during infix to prefix conversion
Fully, parenthesize the expression starting from left to right. (During parenthesizing the
operators having higher precedence are the first parenthesized).
Move the operators one by one to their right such that each operator replaces their
corresponding right parenthesis.
The part of the expression, which has been converted into postfix, is to be treated as
single operand.
Once, the expression is converted into postfix form remove all the paranthesis.
3 + 8 * 4 / 2 - (8 - 3)
3 + 8 * 4 / 2 - - 8 3
+ * 8 4 / 2 - - 8 3
+ / * 8 4 2 - - 8 3
+ 3 / * 8 4 2 - - 8 3
+ 3 / * 8 4 2 - 8 3

EC6301 / OOPS AND DS BE (ECE) III Sem / II Year
Page 126
The prefix expression is,+ 3 / * 8 4 2 – 8 3
Conversion of Infix to Postfix Form Using Stack
The following procedure is used to convert infix to postfix expression.
Read the infix string.
Traverse from left to right of the expression.
If an operand is encountered, add to the postfix string.
If the item is an operator push it on the stack , if any of the following conditions are
satisfied.
The stack is empty.
If the precedence of the operator at the top of the stack is of lower priority than the
operator being processed.
If all the above condition fails, then pop the operator being processed to the postfix
string.
When the infix string is empty, pop the elements of the stack onto the postfix string to get
the result.
Example:The infix expression is,a + b *c + (d* e + f) * g
INFIX STRING STACK POSTFIX STRING
a+b*c+(d*e+f)*g a
+b*c+(d*e+f)*g + a
b *c+(d*e+f) *g + ab
*c+(d*e+f)*g + ab
c + (d*e+f)*g +* abc
+ ( d*e+f)*g + abc*+
(d*e+f)*g +( abc*+
d*e+f)*g +( abc*+ d
*e + f )*g +( * abc *+ d
e +f)*g +(* abc *+ de
f)*g +(+ abc *+de *f
EC6301 / OOPS AND DS BE (ECE) III Sem / II Year
Page 127
)*g +(+ abc *+de*f+
*g +* abc*+de*f+
G +* abc * + de * f+g*+
Evaluation of Postfix Expression Using a Stack
Rules for evaluating a postfix expression using stack
Traverse from left to right of the expression.
If an operand is encountered push it onto the stack.
If an operator is encountered pop two elements from the stack evaluate those operands
with that operator and push the result back in the stack.
When the evaluation of the entire expression is over, the only thing left on the stack
should be the final result.
If there are zero (or) more than one operands left on the stack either your program is
inconsistent (or) the expression was invalid.
Example:The postfix expression is4 5 7 + *
scan 457: push(4), push(5), push(7)
scan +: op2=7, pop(), op1=5, pop(), push(op1+op2)
scan *: op2=12, pop(), op1=4, pop(), push(op1*op2)
expression end ==> return 48!
3.5 QUEUE ADT
A queue is a linear data structure.
A queue is an ordered collection of elements in which are accessed in a first-in-first-
out(FIFO) order.
In a queue, the elements which are inserted at one end and deletions are made at another
end.
The end at which the insertions are made is referred to as the rear end.
The end at which the deletions are made is referred to as the front end.
In a queue , the first element inserted will be the first element to be removed. So a queue
is referred to as FIFO List.(First-in-First-out List).

EC6301 / OOPS AND DS BE (ECE) III Sem / II Year
Page 128
Deletion Insertion
Front Rear
Representation of Queue
Example
A Reservation Counter
Jobs in a printer
A queue of ready jobs waiting for the processor.
Basic Operations of Queue ADT
The basic operations that can be done on a queue are,
Enqueue()
Dequeue()
Enqueue()
An enqueue() operation adds a new element in a queue.
This process is carried out by incrementing the rear end and adding a new element at the
rear end position.
The syntax for inserting a new element into a queue is,
o Enqueue(Q,X) (or) Insert(Q,X)
The element 'X' inserted into a queue 'Q'.
Dequeue()
A dequeue() operation removes the first element from the queue.
A dequeue() operation is carried out by incrementing the front end and deleting the first
element at the front end position.
The syntax for removing a first element from the queue.
o Dequeue(Q) (or) Delete(Q)
Here, the first element is removed from the queue.
Types of Queue ADT
There are different types of queue.
Linear Queue
Circular Queue

EC6301 / OOPS AND DS BE (ECE) III Sem / II Year
Page 129
Deque
Linear Queue
A queue is referred to as the linear queue.
The queue has two ends such as front end and rear end.
The rear end is where we insert the elements and the front end is where we delete the
elements.
In a linear queue, we can traverse in only one direction.
In a linear queue if the front pointer is in first position, and the rear pointer is in the last
position then the queue is said to be fully occupied.
Initially, the front and rear ends are at the same position(Initialized to -1.)
When we insert the elements, the rear pointer moves one by one until the last index
position is reached.(the front pointer doesn't change.)
When we delete the elements, the front pointer moves one by one until the rear pointer is
reached.(the rear pointer doesn't change.)
If the front and rear pointer positions are initialized to -1, then the queue is said to be
empty.
Circular Queue
Circular Queue is another form of a linear queue in which the last position is connected to
the first position of the list.
It is similar to linear queue has two ends such as front and rear ends.
The rear end is where we insert the elements and front end is where we delete the
elements.
In a circular queue we can traverse in only one direction.
Initially, front and rear ends are at the same position.
When we insert an element, the rear pointer moves one by one until the front end is
reached.(front end doesn't change.)
If the next position of the rear is front, then the queue is said to be fully occupied.
When we delete an element, the front pointer moves one by one until the rear end is
reached.
If the front end reaches the rear end, then the queue is said to be empty.
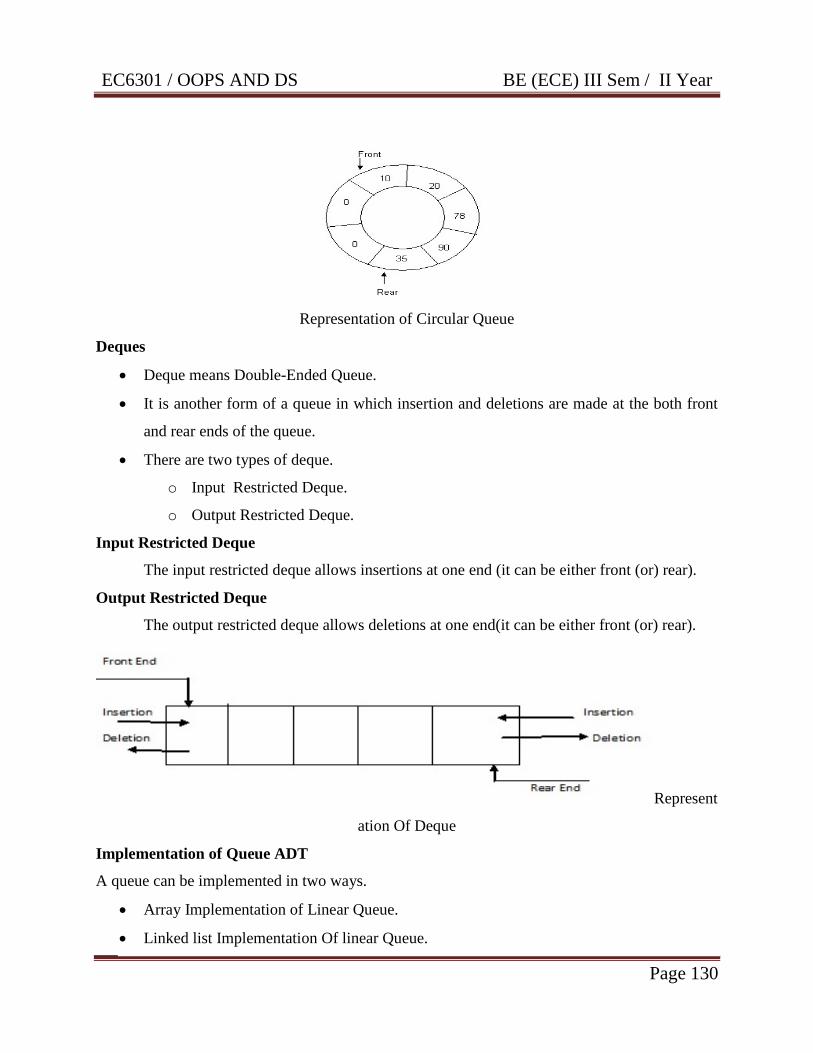
EC6301 / OOPS AND DS BE (ECE) III Sem / II Year
Page 130
Representation of Circular Queue
Deques
Deque means Double-Ended Queue.
It is another form of a queue in which insertion and deletions are made at the both front
and rear ends of the queue.
There are two types of deque.
o Input Restricted Deque.
o Output Restricted Deque.
Input Restricted Deque
The input restricted deque allows insertions at one end (it can be either front (or) rear).
Output Restricted Deque
The output restricted deque allows deletions at one end(it can be either front (or) rear).
Represent
ation Of Deque
Implementation of Queue ADT
A queue can be implemented in two ways.
Array Implementation of Linear Queue.
Linked list Implementation Of linear Queue.
EC6301 / OOPS AND DS BE (ECE) III Sem / II Year
Page 131
Array Implementation of Queue
Queues and Arrays are ordered collection of elements.
The number of elements in the array is fixed. But the size of the queue is constantly
changed when the elements are enqueued and dequeued.
The queue is stored in a part of the array, so an array can be declared large enough to
hold the maximum no of elements of the queue.
During execution of the program, the queue size can be varied within the space reserved
for it.
All the basic operations performed on the queue by using array.
The basic operations are,
o Creation
o Enqueue (or) Insertion
o Dequeue (or) Deletion
Operations on a Queue
There are two common operations in a queue.
They are addition of an element to the queue and deletion of an element from the queue.
Two variables front and rear are used to point to the ends of the queue.
The front points to the front end of the queue where deletion takes place and rear points
to the rear end of the queue, where the addition of elements takes place.
Initially, when the queue is empty, the front and rear is equal to -1.
Creation()
Creation of a queue requires the declaration of an array and initializing front and rear end
indicates to -1 respectively.
Enqueue(X)
An element can be added to the queue only at the rear end of the queue.
Before adding an element in the queue, it is checked whether queue is full.
If the queue is full, then addition cannot take place. Otherwise, the element is added to
the end of the list at the rear side.
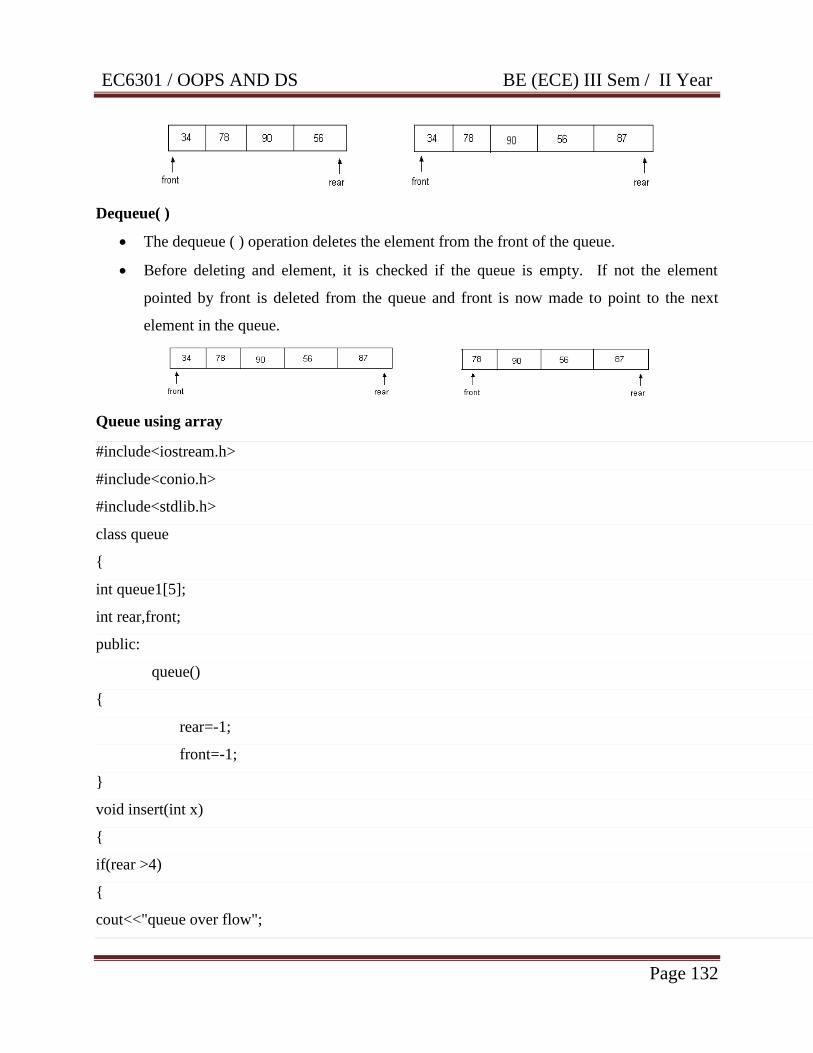
EC6301 / OOPS AND DS BE (ECE) III Sem / II Year
Page 132
Dequeue( )
The dequeue ( ) operation deletes the element from the front of the queue.
Before deleting and element, it is checked if the queue is empty. If not the element
pointed by front is deleted from the queue and front is now made to point to the next
element in the queue.
Queue using array
#include<iostream.h>
#include<conio.h>
#include<stdlib.h>
class queue
{
int queue1[5];
int rear,front;
public:
queue()
{
rear=-1;
front=-1;
}
void insert(int x)
{
if(rear >4)
{
cout<<"queue over flow";
EC6301 / OOPS AND DS BE (ECE) III Sem / II Year
Page 133
front=rear=-1;
return;
}
queue1[++rear]=x;
cout<<"inserted"<<x;
}
void delet()
{
if(front==rear)
{
cout<<"queue under flow";
return;
}
cout<<"deleted"<<queue1[++front];
}
void display()
{
if(rear==front)
{
cout<<" queue empty";
return;
}
for(int i=front+1;i<=rear;i++)
cout<<queue1[i]<<" ";
}
};
main()
{
int ch;
queue qu;
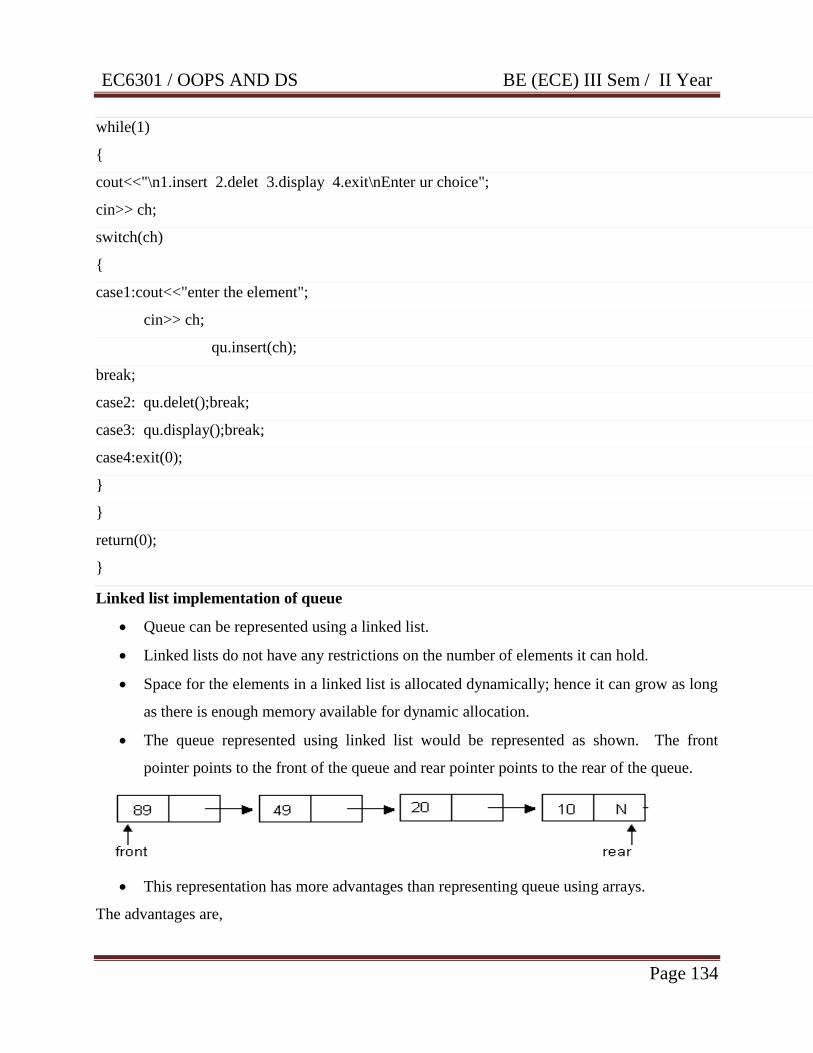
EC6301 / OOPS AND DS BE (ECE) III Sem / II Year
Page 134
while(1)
{
cout<<"\n1.insert 2.delet 3.display 4.exit\nEnter ur choice";
cin>> ch;
switch(ch)
{
case1:cout<<"enter the element";
cin>> ch;
qu.insert(ch);
break;
case2: qu.delet();break;
case3: qu.display();break;
case4:exit(0);
}
}
return(0);
}
Linked list implementation of queue
Queue can be represented using a linked list.
Linked lists do not have any restrictions on the number of elements it can hold.
Space for the elements in a linked list is allocated dynamically; hence it can grow as long
as there is enough memory available for dynamic allocation.
The queue represented using linked list would be represented as shown. The front
pointer points to the front of the queue and rear pointer points to the rear of the queue.
This representation has more advantages than representing queue using arrays.
The advantages are,

EC6301 / OOPS AND DS BE (ECE) III Sem / II Year
Page 135
It is not necessary to specify the no of elements to be stored in a queue during its
declarations.
Insertions and deletions can be handled easily and efficiently.
Linked list representation of queue can grow and shrink in size without wasting the
memory space depending upon the insertion and deletion that occurs in the list.
Basic Operations
The basic operations can be performed on the queue are,
Enqueue()
Dequeue()
Enqueue Operation
In linked list representation of queue, the addition of new element to the queue takes
place at the rear end. It is the normal operation of adding a node at the end of a list.
Dequeue Operation
The dequeue( ) operation deletes the first element from the front end of the queue.
Initially it is checked, if the queue is empty. If it is not empty, then return the value in the node
pointed by front, and moves the front pointer to the next node.
#include<iostream.h>
#include<conio.h>
#include<stdlib.h>
class node
{
public:
class node *next;
int data;
};
class queue :public node
{
EC6301 / OOPS AND DS BE (ECE) III Sem / II Year
Page 136
node *head;
int front,rare;
public:
queue()
{
front=-1;
rare=-1;
}
void push(int x)
{
if(rare <0)
{
head =new node;
head->next=NULL;
head->data=x;
rare ++;
}
else
{
node *temp,*temp1;
temp=head;
if(rare >=4)
{
cout<<"queue over flow";
return;
}
rare++;
while(temp->next !=NULL)
temp=temp->next;
temp1=new node;
EC6301 / OOPS AND DS BE (ECE) III Sem / II Year
Page 137
temp->next=temp1;
temp1->next=NULL;
temp1->data=x;
}}
void display()
{
node *temp;
temp=head;
if(rare <0)
{
cout<<" queue under flow";
return;
}
while(temp !=NULL)
{
cout<<temp->data<<" ";
temp=temp->next;
}
}
void pop()
{
node *temp;
temp=head;
if( rare <0)
{
cout<<"queue under flow";
return;
}
if(front == rare)
EC6301 / OOPS AND DS BE (ECE) III Sem / II Year
Page 138
{
front = rare =-1;
head=NULL;
return;
}
front++;
head=head->next;
}
};
main()
{
queue s1;
int ch;
while(1)
{
cout<<"\n1.PUSH\n2.POP\n3.DISPLAY\n4.EXIT\n enter ru choice:";
cin>> ch;
switch(ch)
{
case1:
cout<<"\n enter a element";
cin>> ch;
s1.push(ch);break;
case2: s1.pop();break;
case3: s1.display();break;
case4:exit(0);
}
}
return(0);
EC6301 / OOPS AND DS BE (ECE) III Sem / II Year
Page 139
}
Applications Of Queue Adt
The applications of the queue such as,
Priority Queue
Scheduling Algorithms
Priority queue
A priority queue is a collection of elements in which the elements are added to the end
and the high priority element is deleted.
In a priority queue, each and every element containing the key referred as the priority for
the elements.
The operations performed in a queue are similar to the queue except that the insertion and
deletion elements made in it.
Elements can be inserted in any order, but are arranged in order of their priority value in
the queue.
The elements are deleted from the queue in the order of their priority.
The elements with the same priority are given equal importance and processed
accordingly.
The priority queue can be implemented in the following ways.
Ordered List Implementation of Priority Queue
Heap Implementation of Priority Queue
Applications of Priority Queue
Modeling of systems. Where the keys might correspond to event times, to be processed in
chronological order.
CPU scheduling in computer systems, where the keys might correspond to priorities
indicating which processes are to be served first.
Numerical computations, where the keys might be computational errors indicating that
the largest should be dealt with first.
EC6301 / OOPS AND DS BE (ECE) III Sem / II Year
Page 140
UNIT IV
NON LINEAR DATA STRUCTURES
Syllabus: Trees – Binary Trees – Binary tree representation and traversals – Application of trees:
Set representation and Union-Find operations – Graph and its representations – Graph Traversals
– Representation of Graphs – Breadth-first search – Depth-first search – Connected components.
4.1 TREE ADT
Definition A tree is a non-linear data structure that is used to represents hierarchical
relationships between individual data items.
A tree is a finite set of one or more nodes such that, there is a specially designated node
called root. The remaining nodes are partitioned into n>=0 disjoint sets T1, T2,..Tn, where each
of these set is a tree T1,…Tn are called the subtrees of the root.
Basic Terminologies
Branch
Branch is the link between the parent and its child.
Leaf
A node with no children is called a leaf.
Sub tree
A Subtree is a subset of a tree that is itself a tree.
Degree
The number of subtrees of a node is called the degree of the node. Hence nodes that have
degree zero are called leaf or terminal nodes. The other nodes are referred as non-terminal
nodes.
Children
The nodes branching from a particular node X are called children of its parent.
Siblings
Children of the same parent are said to be siblings.
Degree of tree
Degree of the tree is the maximum of the degree of the nodes in the tree.
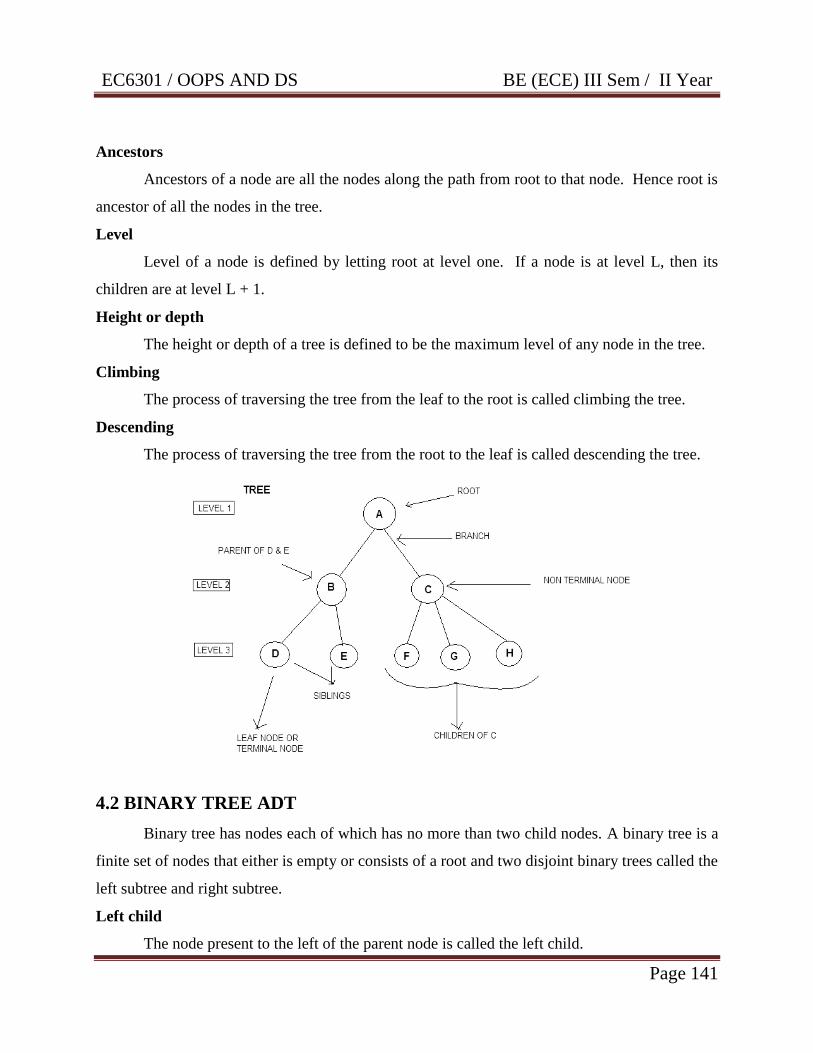
EC6301 / OOPS AND DS BE (ECE) III Sem / II Year
Page 141
Ancestors
Ancestors of a node are all the nodes along the path from root to that node. Hence root is
ancestor of all the nodes in the tree.
Level
Level of a node is defined by letting root at level one. If a node is at level L, then its
children are at level L + 1.
Height or depth
The height or depth of a tree is defined to be the maximum level of any node in the tree.
Climbing
The process of traversing the tree from the leaf to the root is called climbing the tree.
Descending
The process of traversing the tree from the root to the leaf is called descending the tree.
4.2 BINARY TREE ADT
Binary tree has nodes each of which has no more than two child nodes. A binary tree is a
finite set of nodes that either is empty or consists of a root and two disjoint binary trees called the
left subtree and right subtree.
Left child
The node present to the left of the parent node is called the left child.
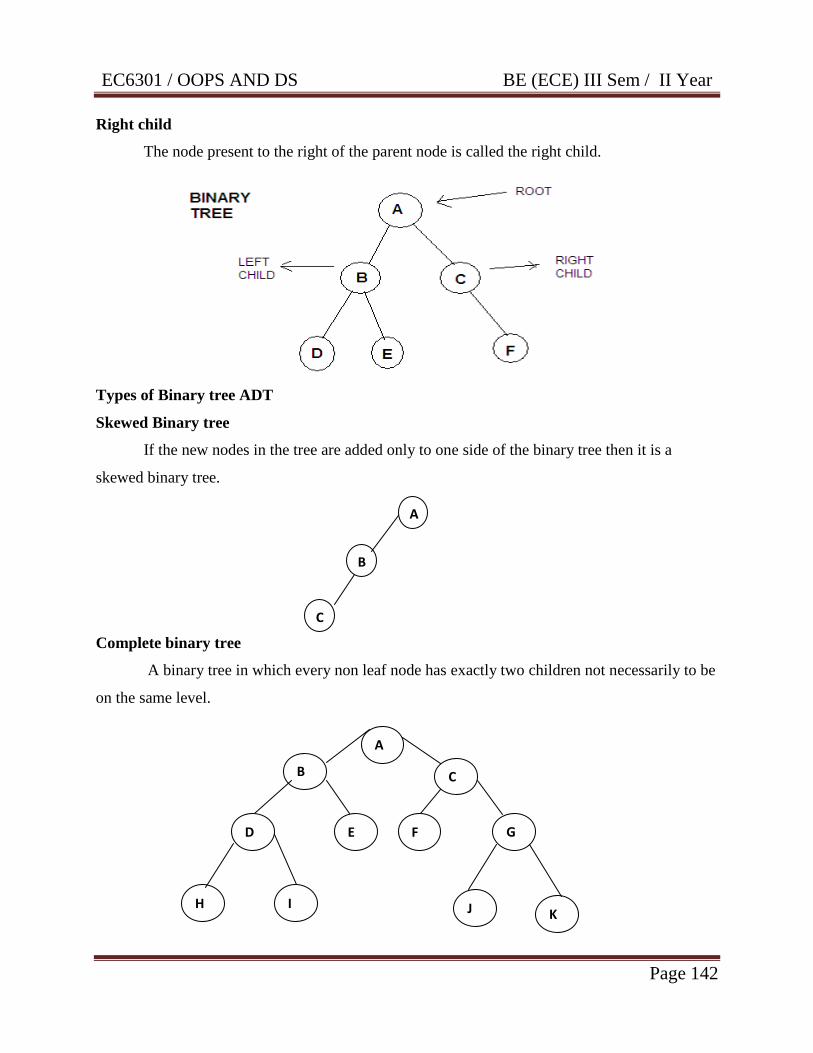
EC6301 / OOPS AND DS BE (ECE) III Sem / II Year
Page 142
Right child
The node present to the right of the parent node is called the right child.
Types of Binary tree ADT
Skewed Binary tree
If the new nodes in the tree are added only to one side of the binary tree then it is a
skewed binary tree.
Complete binary tree
A binary tree in which every non leaf node has exactly two children not necessarily to be
on the same level.
A
B
B C
G D F
I H
K
J
E
A
B
C

EC6301 / OOPS AND DS BE (ECE) III Sem / II Year
Page 143
Full binary tree
A binary tree in which all the leaves are on the same level and every non leaf node has
exactly two children.
4.3 BINARY TREES REPRESENTATION
There are two ways in which a binary tree can be represented. They are:
(i) Array representation of binary trees.
(ii) Linked representation of binary trees
Array Representation of Binary Trees
An array can be used to store the nodes of a binary tree. The nodes stored in an array are
accessed sequentially. Linear representation of binary tree uses a single dimensional array of size
2h+1
– 1, where „h‟ is the height of the tree.
A
B
D E
C
F G
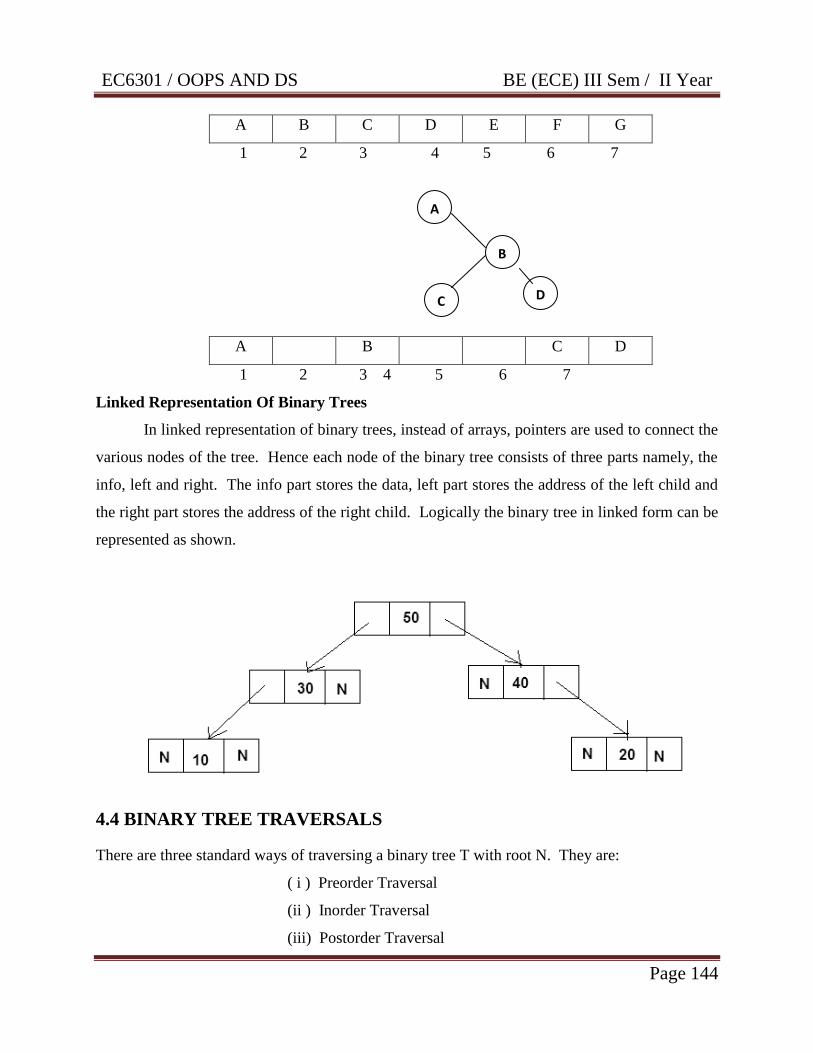
EC6301 / OOPS AND DS BE (ECE) III Sem / II Year
Page 144
A B C D E F G
1 2 3 4 5 6 7
A B C D
1 2 3 4 5 6 7
Linked Representation Of Binary Trees
In linked representation of binary trees, instead of arrays, pointers are used to connect the
various nodes of the tree. Hence each node of the binary tree consists of three parts namely, the
info, left and right. The info part stores the data, left part stores the address of the left child and
the right part stores the address of the right child. Logically the binary tree in linked form can be
represented as shown.
4.4 BINARY TREE TRAVERSALS
There are three standard ways of traversing a binary tree T with root N. They are:
( i ) Preorder Traversal
(ii ) Inorder Traversal
(iii) Postorder Traversal
A
B
D C
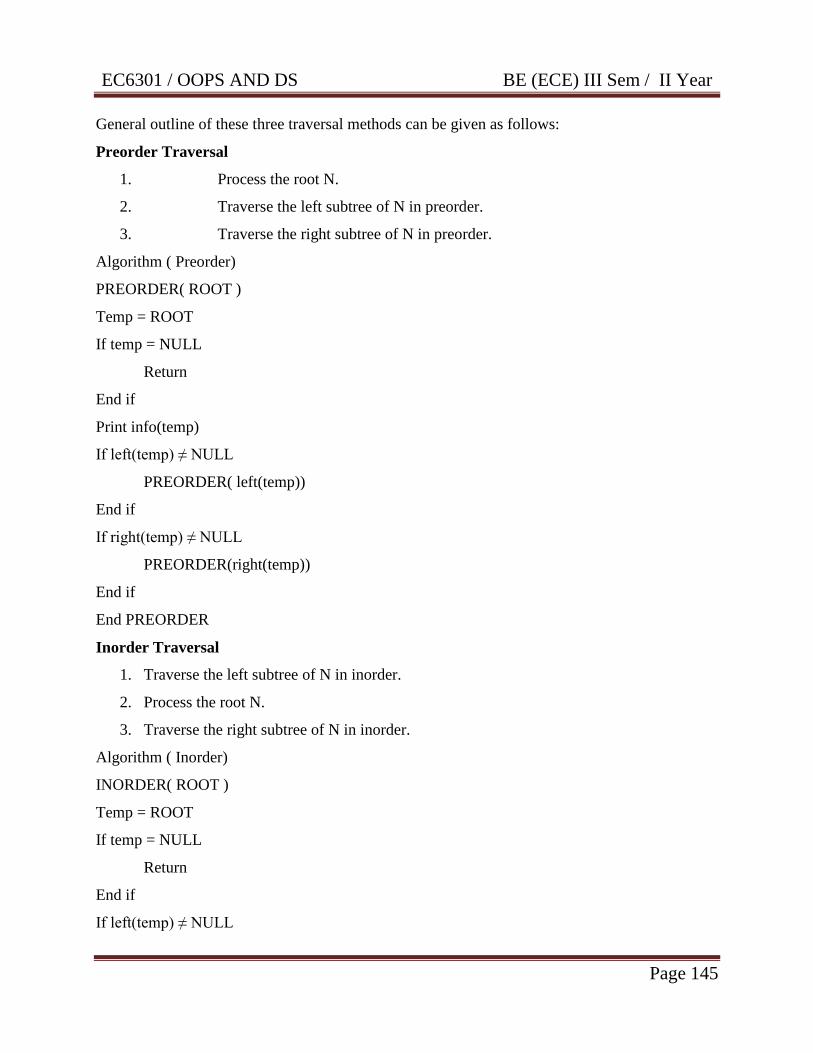
EC6301 / OOPS AND DS BE (ECE) III Sem / II Year
Page 145
General outline of these three traversal methods can be given as follows:
Preorder Traversal
1. Process the root N.
2. Traverse the left subtree of N in preorder.
3. Traverse the right subtree of N in preorder.
Algorithm ( Preorder)
PREORDER( ROOT )
Temp = ROOT
If temp = NULL
Return
End if
Print info(temp)
If left(temp) ≠ NULL
PREORDER( left(temp))
End if
If right(temp) ≠ NULL
PREORDER(right(temp))
End if
End PREORDER
Inorder Traversal
1. Traverse the left subtree of N in inorder.
2. Process the root N.
3. Traverse the right subtree of N in inorder.
Algorithm ( Inorder)
INORDER( ROOT )
Temp = ROOT
If temp = NULL
Return
End if
If left(temp) ≠ NULL

EC6301 / OOPS AND DS BE (ECE) III Sem / II Year
Page 146
INORDER(left(temp))
End if
Print info(temp)
If right(temp) ≠ NULL
INORDER(right(temp))
End if
End INORDER
Postorder Traversal
Traverse the left subtree of N in postorder.
Traverse the right subtree of N in postorder.
Process the root N.
Algorithm ( Postorder)
POSTORDER( ROOT )
Temp = ROOT
If temp = NULL
Return
End if
If left(temp) ≠ NULL
POSTORDER(left(temp))
End if
If right(temp) ≠ NULL
POSTORDER(right(temp))
End if
Print info(temp)
End POSTORDER

EC6301 / OOPS AND DS BE (ECE) III Sem / II Year
Page 147
Example
Pre-order: F, B, A, D, C, E, G, I, H
In-order: A, B, C, D, E, F, G, H, I
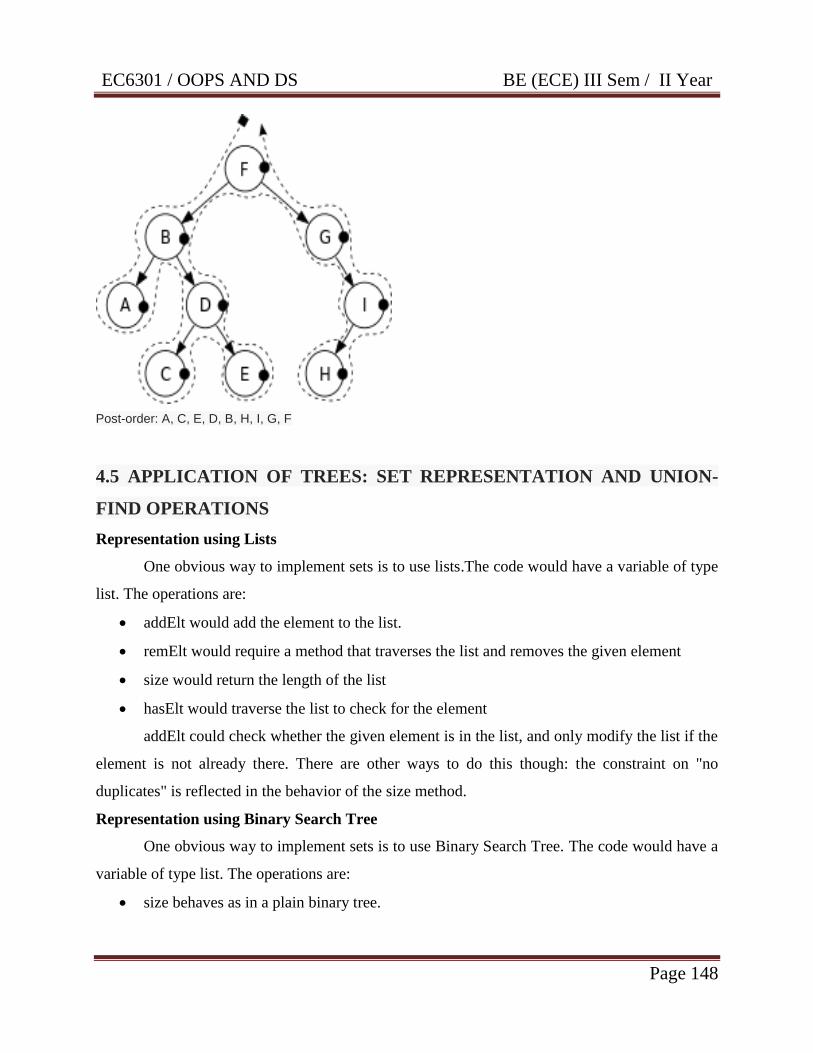
EC6301 / OOPS AND DS BE (ECE) III Sem / II Year
Page 148
Post-order: A, C, E, D, B, H, I, G, F
4.5 APPLICATION OF TREES: SET REPRESENTATION AND UNION-
FIND OPERATIONS
Representation using Lists
One obvious way to implement sets is to use lists.The code would have a variable of type
list. The operations are:
addElt would add the element to the list.
remElt would require a method that traverses the list and removes the given element
size would return the length of the list
hasElt would traverse the list to check for the element
addElt could check whether the given element is in the list, and only modify the list if the
element is not already there. There are other ways to do this though: the constraint on "no
duplicates" is reflected in the behavior of the size method.
Representation using Binary Search Tree
One obvious way to implement sets is to use Binary Search Tree. The code would have a
variable of type list. The operations are:
size behaves as in a plain binary tree.
EC6301 / OOPS AND DS BE (ECE) III Sem / II Year
Page 149
hasElt optimizes on hasElt on a plain binary tree: if the element you‟re looking for is not
in the root, the search recurs on only one of the left subtree (if the element to find is
smaller than that in the root) or the right subtree (if the element to find is larger than that
in the root).
addElt always inserts new elements at a leaf in the tree. It starts from the root, moving to
the left or right subtree as needed to maintain the invariant. When it hits a empty
tree, addElt replaces it with a new node with the data to add and two empty subtrees.
remElt traverses the BST until it finds the node with the element to remove at the root. If
the node has no children, remElt returns the empty tree. If the node has only one
child, remElt replaces it with its child node. If the node has two children, remElt replaces
the value in the node with either the largest element in the left subtree or the smallest
element in the right subtree; remElt then removes the moved node value from its subtree.
Union-Find Operations
Operations supported
Union( x, y ) - Performs a union o f the sets containing two elements x and y.
Find( x ) - Returns a pointer to the set Returns a pointer to the set containing element x.
Example applications
Electrical cable/internet connectivity network
Cities connected by roads
Cities belonging to the same country
Algorithm
function MakeSet(x)
x.parent := x
function Find(x)
if x.parent == x
return x
else
return Find(x.parent)
function Union(x, y)
xRoot := Find(x)
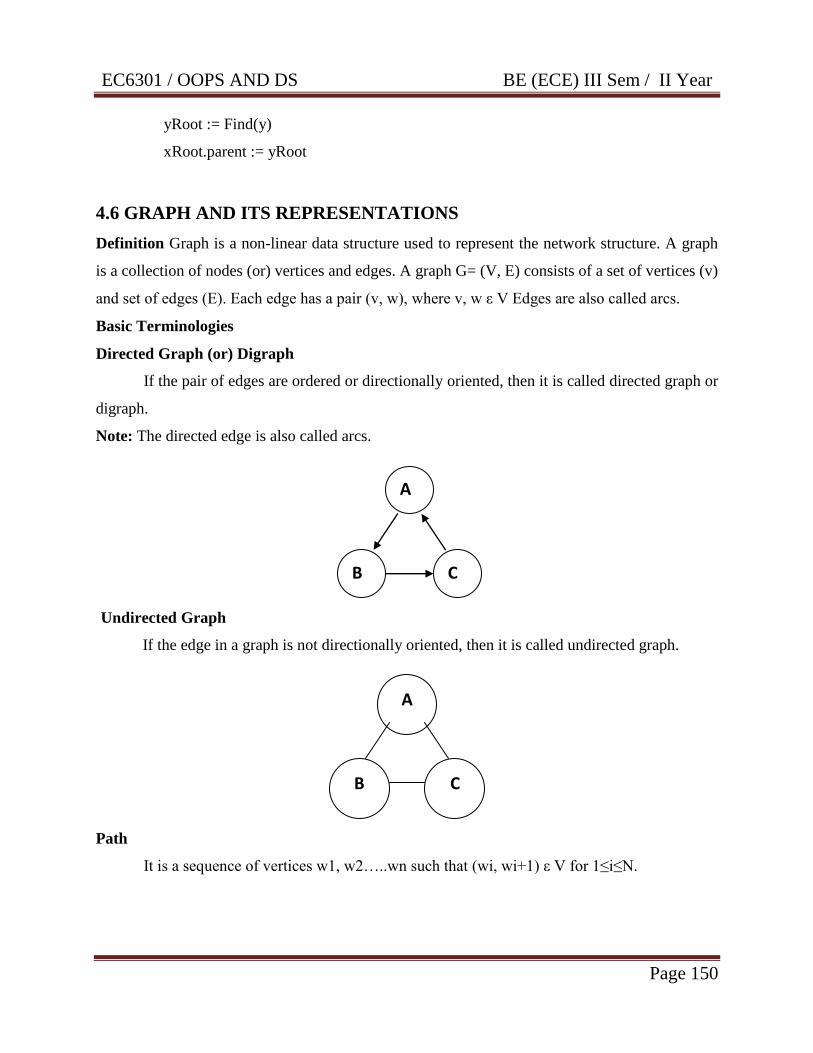
EC6301 / OOPS AND DS BE (ECE) III Sem / II Year
Page 150
yRoot := Find(y)
xRoot.parent := yRoot
4.6 GRAPH AND ITS REPRESENTATIONS
Definition Graph is a non-linear data structure used to represent the network structure. A graph
is a collection of nodes (or) vertices and edges. A graph G= (V, E) consists of a set of vertices (v)
and set of edges (E). Each edge has a pair (v, w), where v, w ε V Edges are also called arcs.
Basic Terminologies
Directed Graph (or) Digraph
If the pair of edges are ordered or directionally oriented, then it is called directed graph or
digraph.
Note: The directed edge is also called arcs.
Undirected Graph
If the edge in a graph is not directionally oriented, then it is called undirected graph.
Path
It is a sequence of vertices w1, w2…..wn such that (wi, wi+1) ε V for 1≤i≤N.
A
C B
A
B C
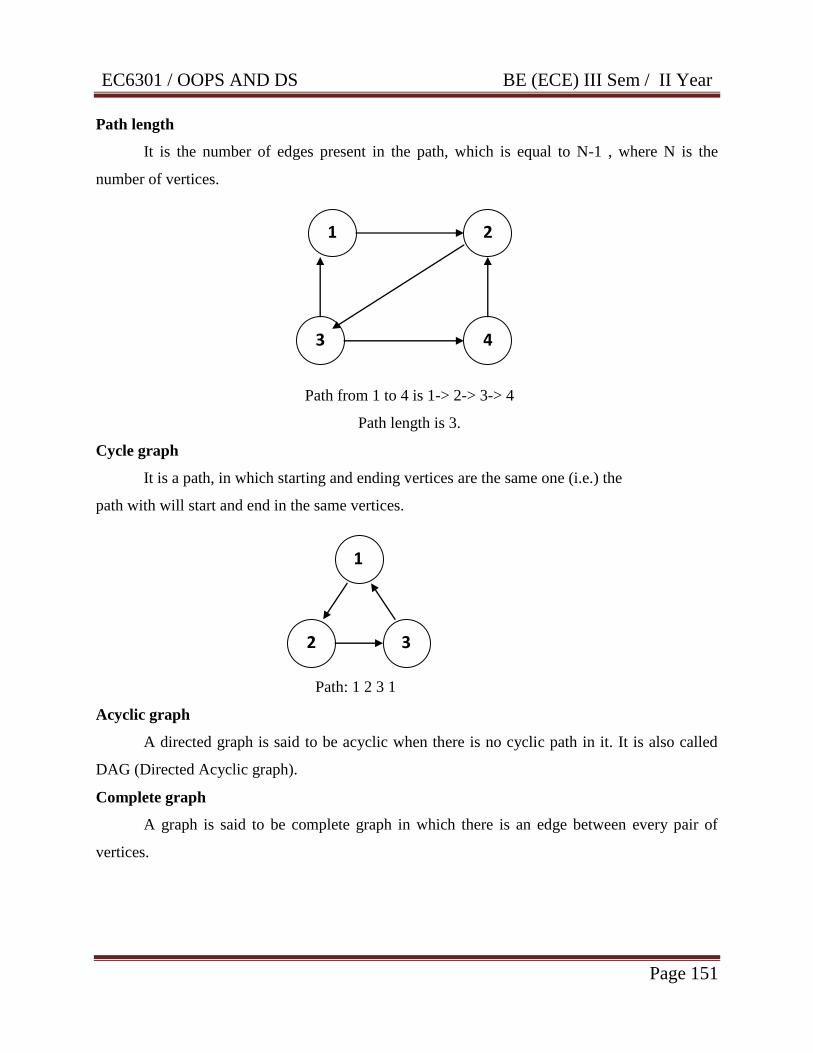
EC6301 / OOPS AND DS BE (ECE) III Sem / II Year
Page 151
Path length
It is the number of edges present in the path, which is equal to N-1 , where N is the
number of vertices.
Path from 1 to 4 is 1-> 2-> 3-> 4
Path length is 3.
Cycle graph
It is a path, in which starting and ending vertices are the same one (i.e.) the
path with will start and end in the same vertices.
Path: 1 2 3 1
Acyclic graph
A directed graph is said to be acyclic when there is no cyclic path in it. It is also called
DAG (Directed Acyclic graph).
Complete graph
A graph is said to be complete graph in which there is an edge between every pair of
vertices.
1
2 3
1 2
3 4

EC6301 / OOPS AND DS BE (ECE) III Sem / II Year
Page 152
Strongly Connected
In a digraph, if there is a path from every vertex to every other vertex is called strongly
connected. Otherwise it is said to be weakly connected graph.
Strongly Connected Weakly Connected
Loop
A loop is a special case of a cycle in which a single arc Begins and ends with
the same vertex
Disjoint
A graph is said to be disjoint, if it is not connected.
Degree
The degree of a vertex is the number of arcs or edges incident to it.
A
C B E
D
A
C B
A
B C C
B
A
A
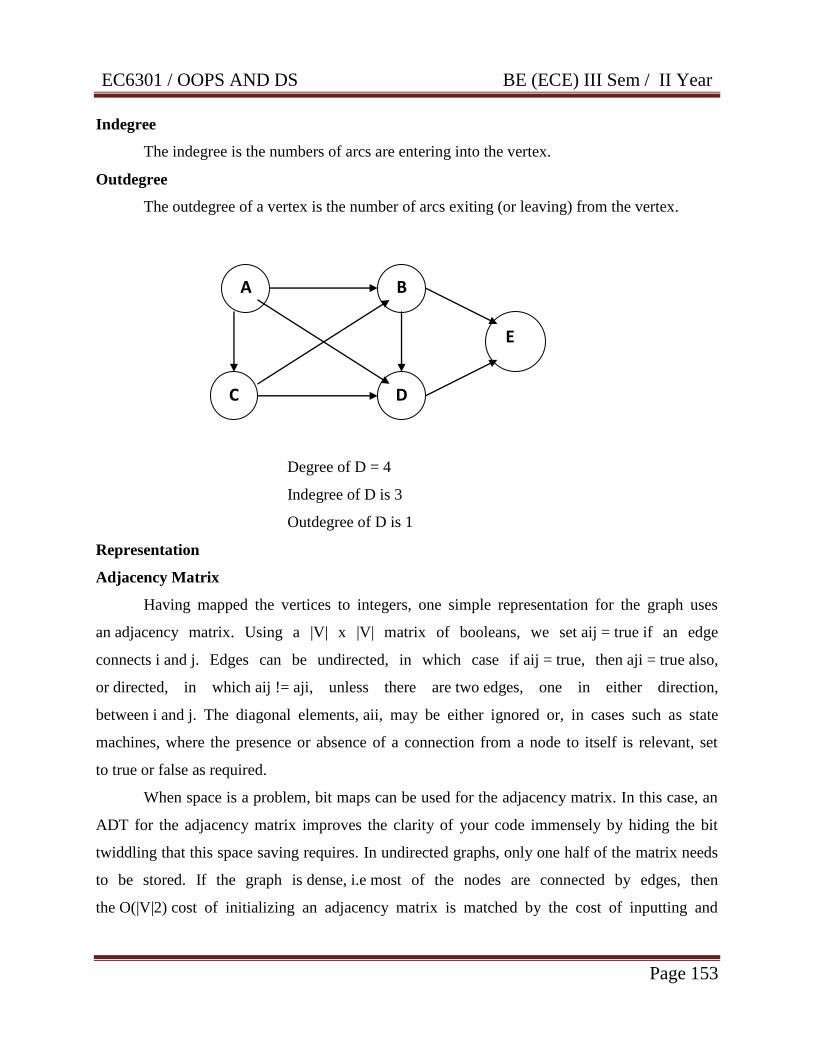
EC6301 / OOPS AND DS BE (ECE) III Sem / II Year
Page 153
Indegree
The indegree is the numbers of arcs are entering into the vertex.
Outdegree
The outdegree of a vertex is the number of arcs exiting (or leaving) from the vertex.
Degree of D = 4
Indegree of D is 3
Outdegree of D is 1
Representation
Adjacency Matrix
Having mapped the vertices to integers, one simple representation for the graph uses
an adjacency matrix. Using a |V| x |V| matrix of booleans, we set aij = true if an edge
connects i and j. Edges can be undirected, in which case if aij = true, then aji = true also,
or directed, in which aij != aji, unless there are two edges, one in either direction,
between i and j. The diagonal elements, aii, may be either ignored or, in cases such as state
machines, where the presence or absence of a connection from a node to itself is relevant, set
to true or false as required.
When space is a problem, bit maps can be used for the adjacency matrix. In this case, an
ADT for the adjacency matrix improves the clarity of your code immensely by hiding the bit
twiddling that this space saving requires. In undirected graphs, only one half of the matrix needs
to be stored. If the graph is dense, i.e most of the nodes are connected by edges, then
the O(|V|2) cost of initializing an adjacency matrix is matched by the cost of inputting and
A B
C D
E

EC6301 / OOPS AND DS BE (ECE) III Sem / II Year
Page 154
setting the edges. However, if the graph is sparse, ie |E| is closer to |V|, then an adjacency list
representation may be more efficient.
Adjacency List Representation
Adjacency lists are lists of nodes that are connected to a given node. For each node, a
linked list of nodes connected to it can be set up. Adding an edge to a graph will generate two
entries in adjacency lists - one in the lists for each of its extremities.
Following is an example undirected graph with 5 vertices.
Adjacency Matrix is,
Adjacency List is,
4.7 GRAPH TRAVERSALS
There are two methods for traversing through the nodes of the graph. They are.
* Breadth First Search Traversal

EC6301 / OOPS AND DS BE (ECE) III Sem / II Year
Page 155
* Depth First Search Traversal
Breadth first search traversal
As the name implies, this method traverse the nodes of the graph by searching through
the nodes breadth wise.
Rules
Select an unvisited node V, visit it. It‟s level is called the current level.
From each node X in the current level, in the order in which the level nodes were visited.
Visit all the unvisited neighbors of X. The newly visited nodes from this level form a new
level. This new level becomes the next current level.
Repeat step 2 for all unvisited vertices.
Repeat from step 1 until no more vertices are remaining.
Algorithm
Algorithm BFT ( G , n )
Begin
repeat for i=1 to n
visited[i] = 0
end repeat
repeat for i=1 to n
if visited[i] = 0
BFS(i)
end if
end repeat
end
Algorithm BFS ( v)
u = v
visited [ v ] = 1
repeat while ( true )
repeat for all vertices w adjacent from u
if visited [w] = 0
Add w to Queue

EC6301 / OOPS AND DS BE (ECE) III Sem / II Year
Page 156
visited [ w ] = 1
end if
end repeat
if Queue is empty
return
end if
delete u from Queue
End while
End BFS

EC6301 / OOPS AND DS BE (ECE) III Sem / II Year
Page 157
Depth First Search Traversal
As the name implies, this method traverse the nodes of the graph by searching through
the nodes depth wise.
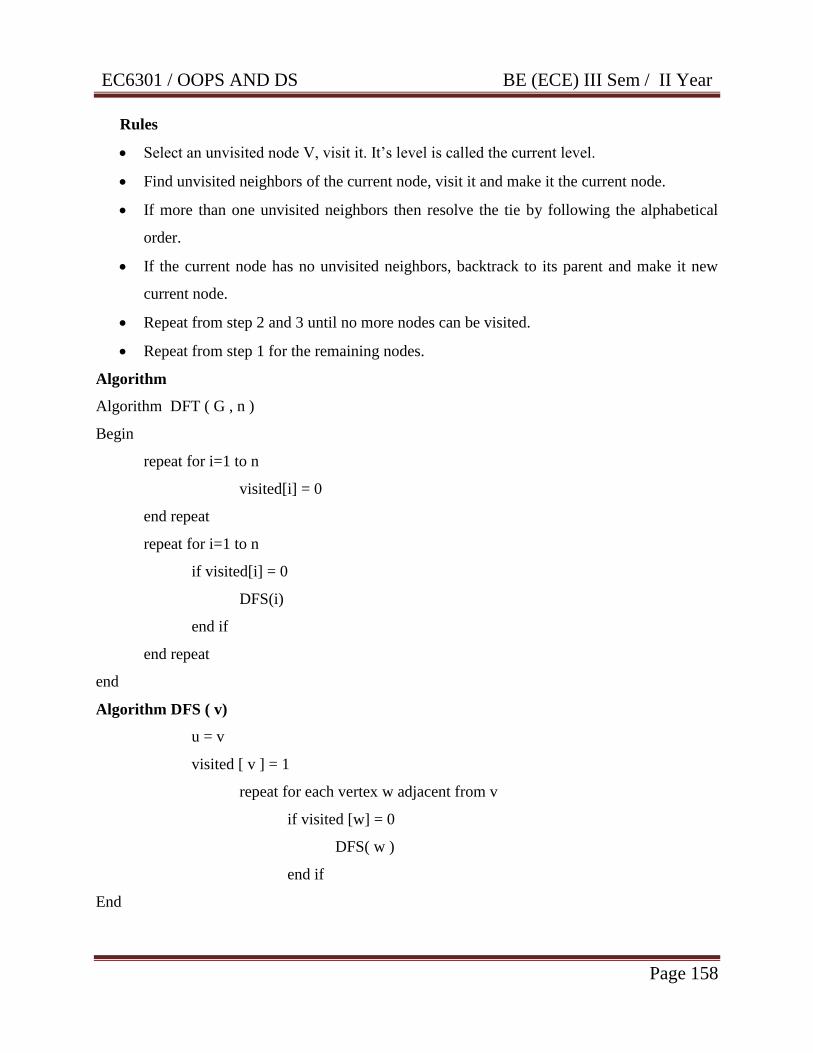
EC6301 / OOPS AND DS BE (ECE) III Sem / II Year
Page 158
Rules
Select an unvisited node V, visit it. It‟s level is called the current level.
Find unvisited neighbors of the current node, visit it and make it the current node.
If more than one unvisited neighbors then resolve the tie by following the alphabetical
order.
If the current node has no unvisited neighbors, backtrack to its parent and make it new
current node.
Repeat from step 2 and 3 until no more nodes can be visited.
Repeat from step 1 for the remaining nodes.
Algorithm
Algorithm DFT ( G , n )
Begin
repeat for i=1 to n
visited[i] = 0
end repeat
repeat for i=1 to n
if visited[i] = 0
DFS(i)
end if
end repeat
end
Algorithm DFS ( v)
u = v
visited [ v ] = 1
repeat for each vertex w adjacent from v
if visited [w] = 0
DFS( w )
end if
End
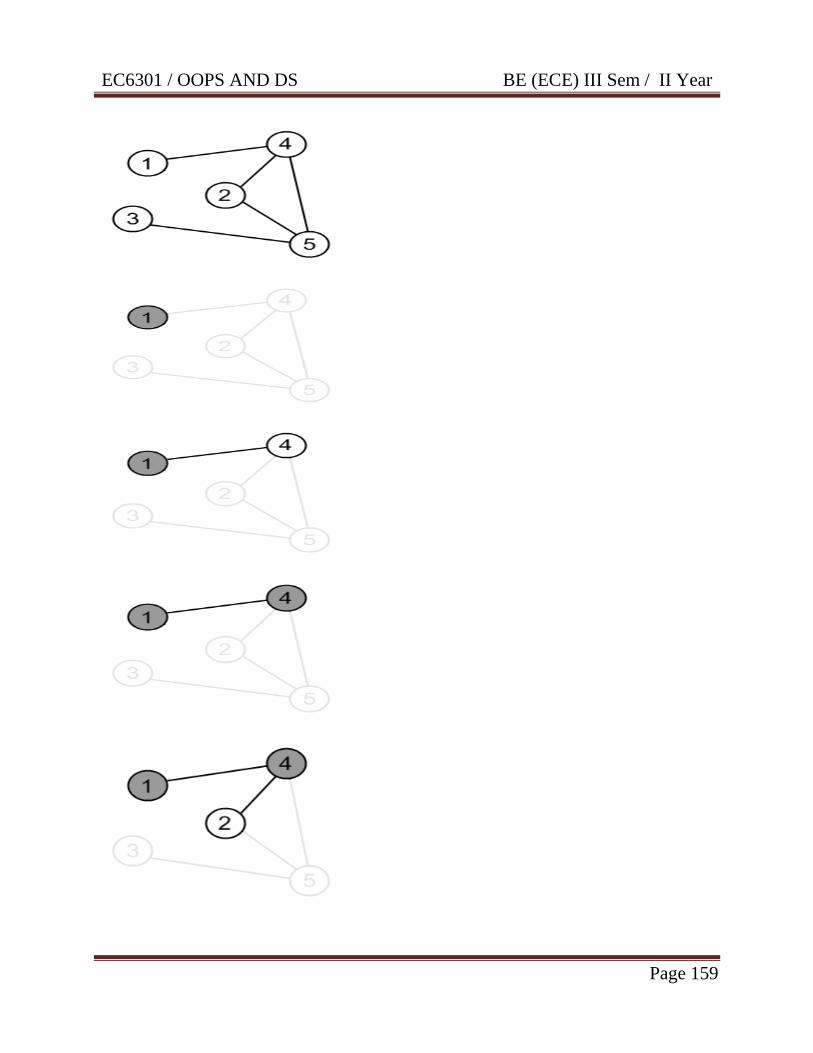
EC6301 / OOPS AND DS BE (ECE) III Sem / II Year
Page 159
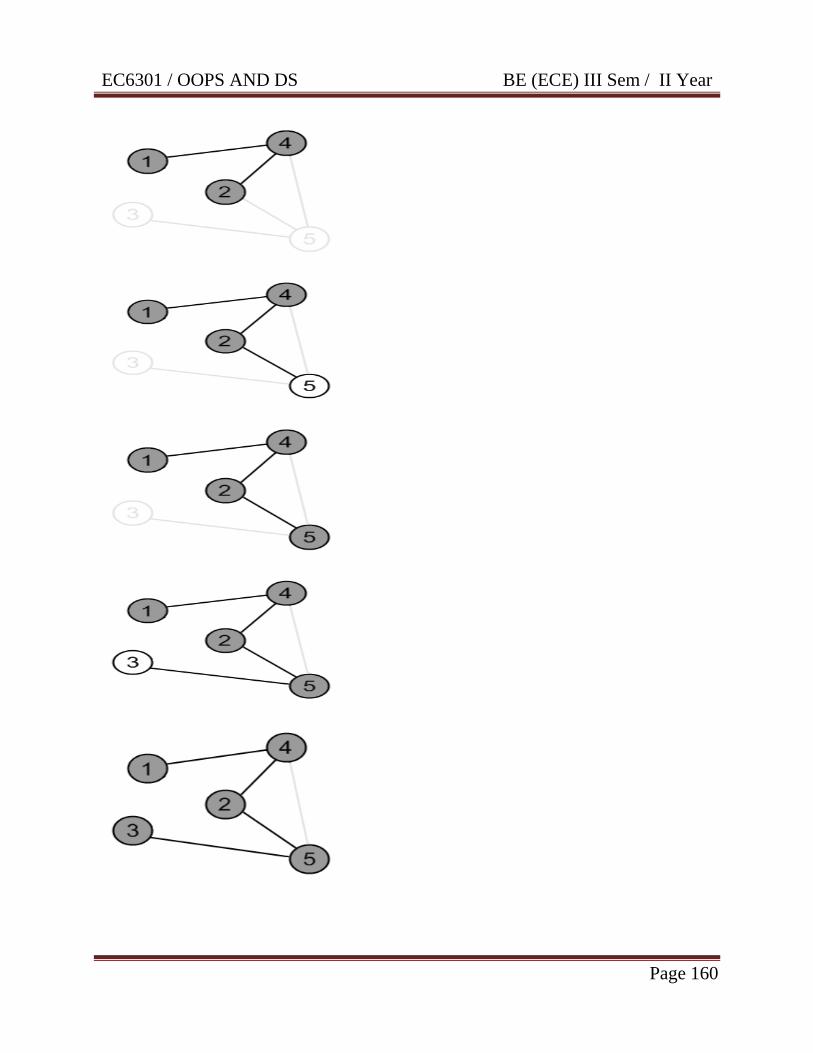
EC6301 / OOPS AND DS BE (ECE) III Sem / II Year
Page 160

EC6301 / OOPS AND DS BE (ECE) III Sem / II Year
Page 161
Depth First Search Traversal Breadth First Search Traversal
This traversal is done with the help of stack
data structure.
This traversal is done with the help of queue
data structure.
It works using two ordering. The first order is
the order in which the vertices are reached for
the first time and second order in which the
vertices become dead.
It works using one ordering. The order in
which the vertices are reached in the same
order they get removed from the queue.
DFS sequence is composed of tree edges and
back edges.
BFS sequence is composed of tree edges and
cross edges.
The efficiency of the adjacency matrix graph is
O(V2)
The efficiency of the adjacency matrix graph is
θ(V2)
The efficiency of the adjacency list graph is
O(|V|+|E|)
The efficiency of the adjacency list graph is
θ(|V|+|E|)
4.8 CONNECTED COMPONENTS
A directed graph is strongly connected if there is a path between all pairs of vertices. A
strongly connected component (SCC) of a directed graph is a maximal strongly connected
subgraph. For example, there are 3 SCCs in the following graph.
We can find all strongly connected components in O(V+E) time.
1) Create an empty stack „S‟ and do DFS traversal of a graph. In DFS traversal, after calling
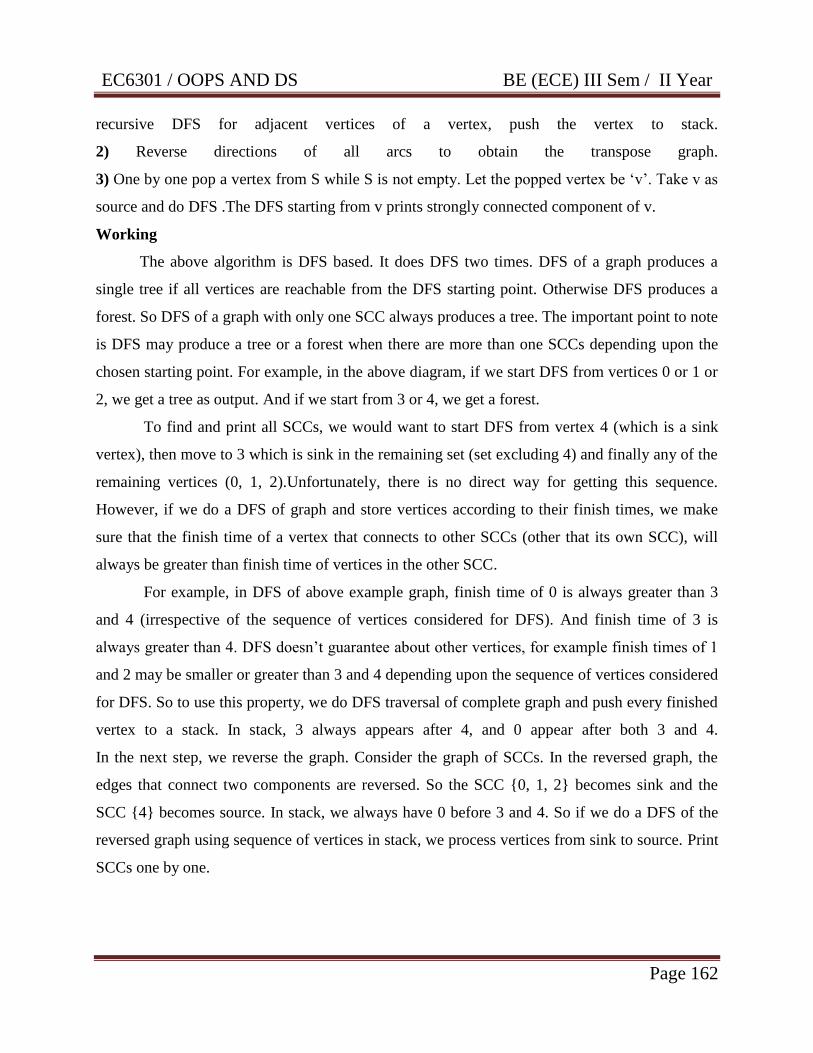
EC6301 / OOPS AND DS BE (ECE) III Sem / II Year
Page 162
recursive DFS for adjacent vertices of a vertex, push the vertex to stack.
2) Reverse directions of all arcs to obtain the transpose graph.
3) One by one pop a vertex from S while S is not empty. Let the popped vertex be „v‟. Take v as
source and do DFS .The DFS starting from v prints strongly connected component of v.
Working
The above algorithm is DFS based. It does DFS two times. DFS of a graph produces a
single tree if all vertices are reachable from the DFS starting point. Otherwise DFS produces a
forest. So DFS of a graph with only one SCC always produces a tree. The important point to note
is DFS may produce a tree or a forest when there are more than one SCCs depending upon the
chosen starting point. For example, in the above diagram, if we start DFS from vertices 0 or 1 or
2, we get a tree as output. And if we start from 3 or 4, we get a forest.
To find and print all SCCs, we would want to start DFS from vertex 4 (which is a sink
vertex), then move to 3 which is sink in the remaining set (set excluding 4) and finally any of the
remaining vertices (0, 1, 2).Unfortunately, there is no direct way for getting this sequence.
However, if we do a DFS of graph and store vertices according to their finish times, we make
sure that the finish time of a vertex that connects to other SCCs (other that its own SCC), will
always be greater than finish time of vertices in the other SCC.
For example, in DFS of above example graph, finish time of 0 is always greater than 3
and 4 (irrespective of the sequence of vertices considered for DFS). And finish time of 3 is
always greater than 4. DFS doesn‟t guarantee about other vertices, for example finish times of 1
and 2 may be smaller or greater than 3 and 4 depending upon the sequence of vertices considered
for DFS. So to use this property, we do DFS traversal of complete graph and push every finished
vertex to a stack. In stack, 3 always appears after 4, and 0 appear after both 3 and 4.
In the next step, we reverse the graph. Consider the graph of SCCs. In the reversed graph, the
edges that connect two components are reversed. So the SCC {0, 1, 2} becomes sink and the
SCC {4} becomes source. In stack, we always have 0 before 3 and 4. So if we do a DFS of the
reversed graph using sequence of vertices in stack, we process vertices from sink to source. Print
SCCs one by one.
EC6301 / OOPS AND DS BE (ECE) III Sem / II Year
Page 163
UNIT V
SORTING AND SEARCHING
Syllabus: Sorting algorithms: Insertion sort - Quick sort – Merge sort – Searching: Linear
search – Binary search.
5.1 SORTING
Sorting is an operation of arranging data, in some given order such as increasing (or)
decreasing with numerical data (or) alphabetically with character data.Sorting methods can be
characterized into two categories:
Internal sorting
External sorting
Internal Sorting
Internal sorting methods are the methods that can be used when the list to be sorted is
small enough so that the entire sort can be carried out in main memory.The key principles of
internal sorting is that all the data items to be stored are retained in the main memory and random
access in the memory space can be efficiently used to sort the data items.The various internal
sorting techniques are:
Bubble sort
Selection sort
Insertion sort
Shell sort
Quick sort
External Sorting
External sorting methods are the methods to be used when the list to be sorted is large
and cannot be accommodated entirely in the main memory. In this case, some of data is present
in the main memory and some is kept in auxiliary memory such as hard disk, floppy disk, tape
etc.
The key principle of external sorting is to move data from secondary storage to main
memory in large blocks for ordering the data.The various external sorting methods are:
EC6301 / OOPS AND DS BE (ECE) III Sem / II Year
Page 164
Merge sort
Tape sort
5.2 INSERTION SORT
The main idea behind the insertion sort is to insert the ith element in its correct place in
the ith pass.Suppose an array A with n elements A[1],A[2],………….A[N] is in main
memory.The insertion sort algorithm scans A from A[1] to A[N] inserting each element A[K]
into its proper position in the previously sorted subarray A[1],A[2],………….A[k-1].
Principle
In insertion sort algorithm, each element A[k] in the list is compared with all the elements
before it (A[1] to A[k-1]).If any element A[1] is found to be greater than A[k] then A[k] is
inserted in the place of A[1]. This process is repeated till all the elements are sorted.
Program
#include<iostream.h>
#include<conio.h>
main()
{
int i,j,temp,a[10],n;
clrscr();
cout << "Enter the Limit :";
cin >> n;
cout << "Enter the elements :";
for(i=0;i<n;i++)
cin >> a[i];
for(i=1;i<=n-1;i++)
{
temp=a[i];
for(j=i;j>=1;j--)
{
if(temp < a[j-1])
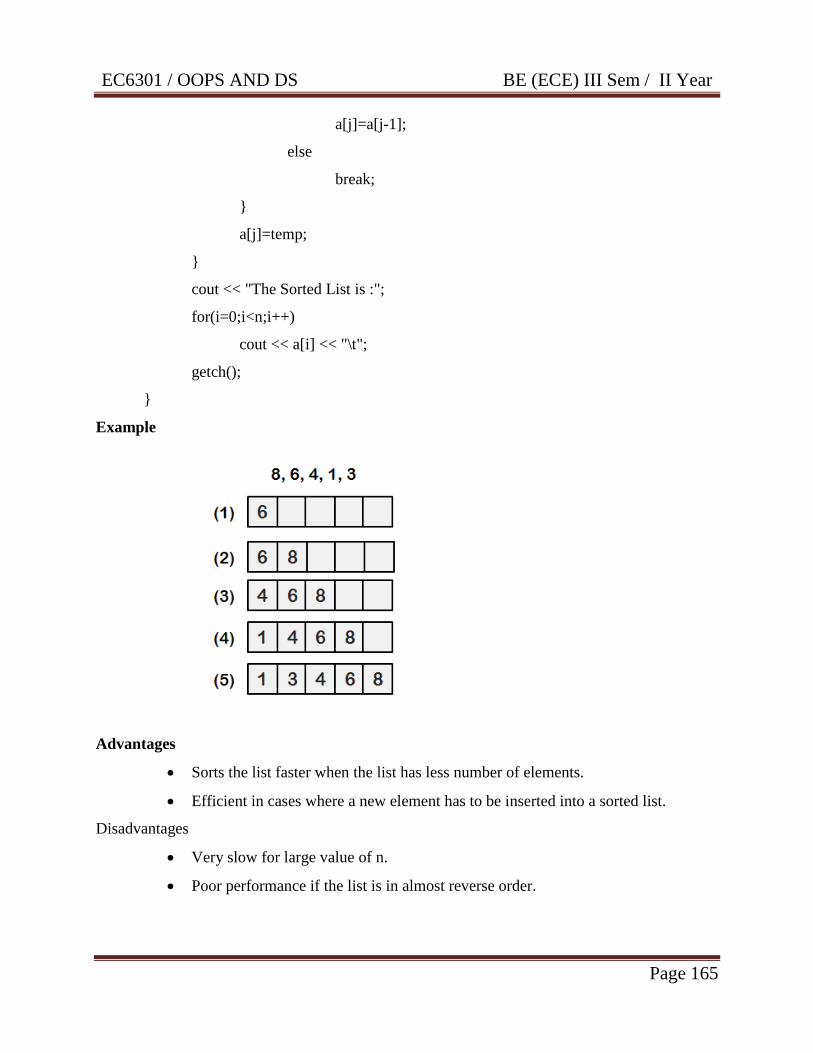
EC6301 / OOPS AND DS BE (ECE) III Sem / II Year
Page 165
a[j]=a[j-1];
else
break;
}
a[j]=temp;
}
cout << "The Sorted List is :";
for(i=0;i<n;i++)
cout << a[i] << "\t";
getch();
}
Example
Advantages
Sorts the list faster when the list has less number of elements.
Efficient in cases where a new element has to be inserted into a sorted list.
Disadvantages
Very slow for large value of n.
Poor performance if the list is in almost reverse order.
EC6301 / OOPS AND DS BE (ECE) III Sem / II Year
Page 166
5.3 MERGE SORT
Merge sort is one of the external sorting technique.Merge sort algorithm follows divide
and conquer strategy.Given a sequence of „n‟ elements A[1],A[2],………A[N].The basic idea
behind the merge sort algorithm is to split the list into two sub lists A[1],…….A[N/2] and
A[(N/2)+1],…….A[N].If the list has even length, split the list into equal sub lists.If the list has
odd length, divide the list in two by making the first sub list one entry greater than the second
sub list.Then split both the sub list is to two and go on until each of the sub lists are of size
one.Finally, start merging the individual sub list to obtain a sorted list.Time complexity of merge
sort is O(n log n).
Principle
The given list is divided into two roughly equal parts called the left and right sub files.
These sub files are sorted using the algorithm recursively and then the two sub files are merged
together to obtain the sorted file.
Program
#include<iostream.h>
#include<conio.h>
void mergesplit(int a[],int first,int last);
void merge(int a[],int f1,int l1,int f2,int l2);
int a[25],b[25];
main()
{
int i,n;
cout << "Enter the limit :";
cin >> n;
for(i=0;i<n;i++)
cin >> a[i];
mergesplit(a,0,n-1);
cout << "The Sorted List is:";
for(i=0;i<n;i++)
cout << a[i];
EC6301 / OOPS AND DS BE (ECE) III Sem / II Year
Page 167
getch();
}
void mergesplit(int a[],int first,int last)
{
int mid;
if(first < last)
{
mid=(first+last)/2;
mergesplit(a,first,mid);
mergesplit(a,mid+1,last);
merge(a,first,mid,mid+1,last);
}
}
void merge(int a[],int f1,int l1,int f2,int l2)
{
int i,j,k=0;
i=f1;
j=f2;
while(i <= l1 && j <= l2)
{
if(a[i] < a[j])
b[k]=a[i++];
else
b[k]=a[j++];
k++;
}
while(i <= l1)
b[k++]=a[i++];
while(j <= l2)
b[k++]=a[j++];
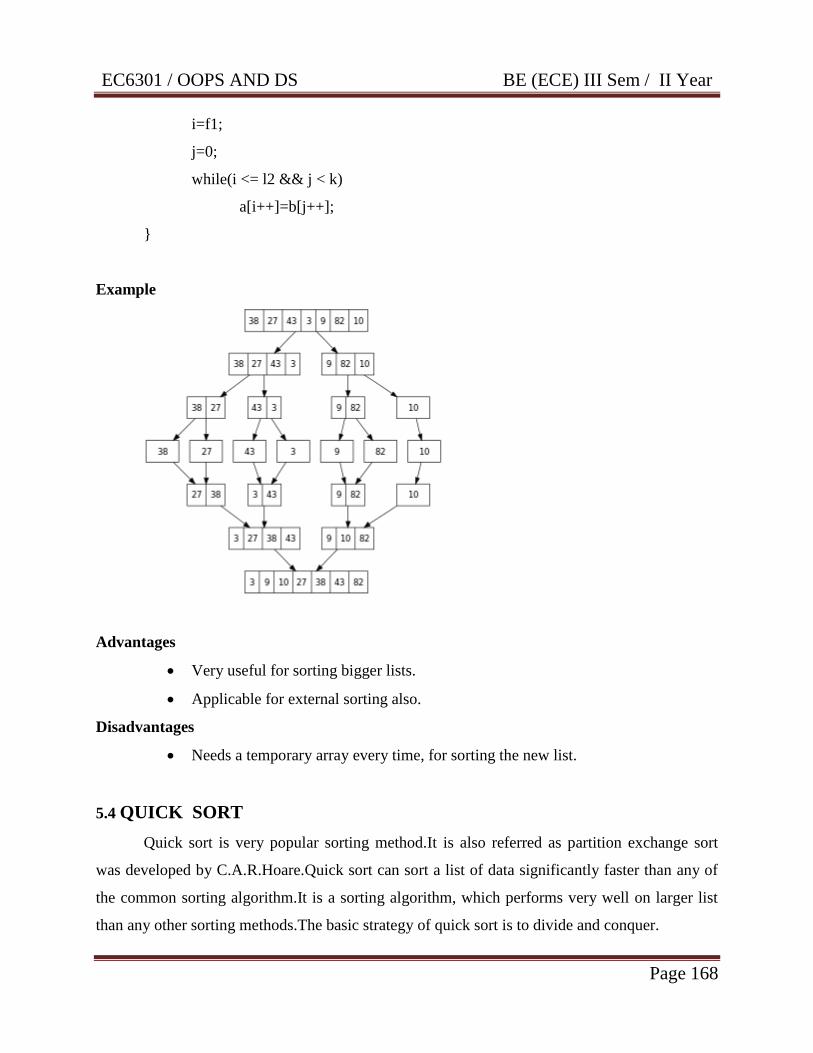
EC6301 / OOPS AND DS BE (ECE) III Sem / II Year
Page 168
i=f1;
j=0;
while(i <= l2 && j < k)
a[i++]=b[j++];
}
Example
Advantages
Very useful for sorting bigger lists.
Applicable for external sorting also.
Disadvantages
Needs a temporary array every time, for sorting the new list.
5.4 QUICK SORT
Quick sort is very popular sorting method.It is also referred as partition exchange sort
was developed by C.A.R.Hoare.Quick sort can sort a list of data significantly faster than any of
the common sorting algorithm.It is a sorting algorithm, which performs very well on larger list
than any other sorting methods.The basic strategy of quick sort is to divide and conquer.
EC6301 / OOPS AND DS BE (ECE) III Sem / II Year
Page 169
The main idea of the quick sort is to divide the initial unsorted list into two parts, such
that the every element in the first list is less than all the elements present in the second list.The
procedure is repeated recursively for both the parts, upto relatively short sequence which can be
sorted until the sequences reduces to length one.The first step of the algorithm requires choosing
a pivot value that will be used to divide large and small numbers.
The first element of list is chosen as a pivot value.Once, the pivot value has been
selected, all the elements smaller than the pivot are placed towards the beginning of the set and
all the elements larger than the pivot are placed at the right.This process essentially sets the pivot
value in the correct place each time.Each side of the pivot is then quick sorted.
The quick sort algorithm reduces the unnecessary swaps and moves an item a great
distance in one move.The median-of-three portioning method is used to select the pivot. In this
method, three elements are randomly chosen and the median of these three values is chosen as
the pivot element.
Principle
A pivot item near the middle of the list is chosen, and the items on either side are moved
so that the data items on one side of the pivot element are smaller than the pivot element where
as those on the other side are larger.
The middle (or) the pivot element is now in its correct position. This procedure is then
applied recursively to the 2 parts of the list, on either side of the pivot element until the whole list
is sorted.
Program
#include<iostream.h>
#include<conio.h>
int i,j,n,pivot,a[20];
void quick(int a[],int left,int right);
void swap(int a[],int i,int j);
main()
{
int i,n,a[20];
cout << "Enter the limit";
EC6301 / OOPS AND DS BE (ECE) III Sem / II Year
Page 170
cin >> n;
cout << "Enter the elements";
for(i=0;i<n;i++)
cin >> a[i];
quick(a,0,n-1);
cout << "Sorted List is:";
for(i=0;i<n;i++)
cout << a[i];
getch();
}
void quick(int a[],int first,int last)
{
if(first < last)
{
pivot=a[first];
i=first;
j=last;
while(i < j)
{
while(a[i] <= pivot && i < last)
i++;
while(a[j] >= pivot && j > first)
j--;
if(i < j)
swap(a,i,j);
}
swap(a,first,j);
quick(a,first,j-1);
quick(a,j+1,last);
}

EC6301 / OOPS AND DS BE (ECE) III Sem / II Year
Page 171
}
void swap(int a[],int i,int j)
{
int t;
t=a[i];
a[i]=a[j];
a[j]=t;
}
Example
45 28 90 1 46 39 33 87
i/pivot j
Increment i till the element pointed by i is less than pivot. Decrement j till the element
pointed by j is greater than the pivot element.
45 28 90 1 46 39 33 87
pivot i j
Now, swap the elements pointed by i and j.
45 28 33 1 46 39 90 87
pivot i j
45 28 33 1 46 39 90 87
pivot i j
Now, swap the elements pointed by i and j.
45 28 33 1 39 46 90 87
Pivot i j
45 28 33 1 39 46 90 87
Pivot j i
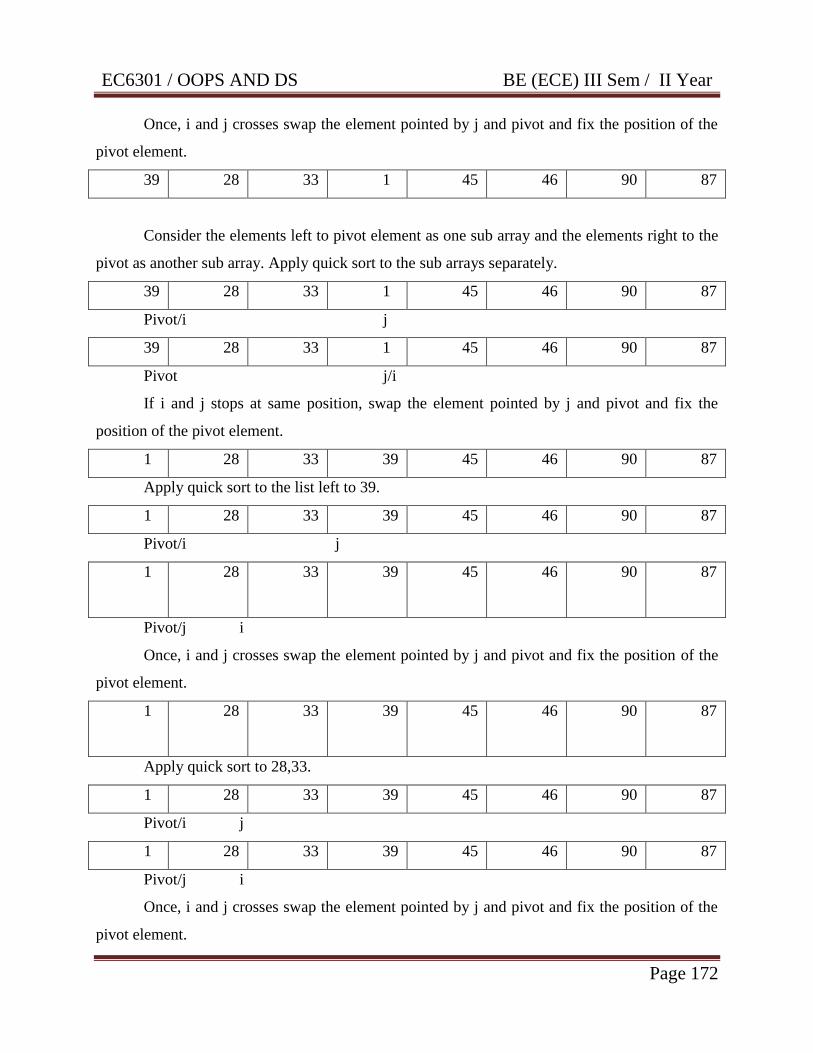
EC6301 / OOPS AND DS BE (ECE) III Sem / II Year
Page 172
Once, i and j crosses swap the element pointed by j and pivot and fix the position of the
pivot element.
39 28 33 1 45 46 90 87
Consider the elements left to pivot element as one sub array and the elements right to the
pivot as another sub array. Apply quick sort to the sub arrays separately.
39 28 33 1 45 46 90 87
Pivot/i j
39 28 33 1 45 46 90 87
Pivot j/i
If i and j stops at same position, swap the element pointed by j and pivot and fix the
position of the pivot element.
1 28 33 39 45 46 90 87
Apply quick sort to the list left to 39.
1 28 33 39 45 46 90 87
Pivot/i j
1
28 33 39 45 46 90 87
Pivot/j i
Once, i and j crosses swap the element pointed by j and pivot and fix the position of the
pivot element.
1
28 33 39 45 46 90 87
Apply quick sort to 28,33.
1 28 33 39 45 46 90 87
Pivot/i j
1 28 33 39 45 46 90 87
Pivot/j i
Once, i and j crosses swap the element pointed by j and pivot and fix the position of the
pivot element.
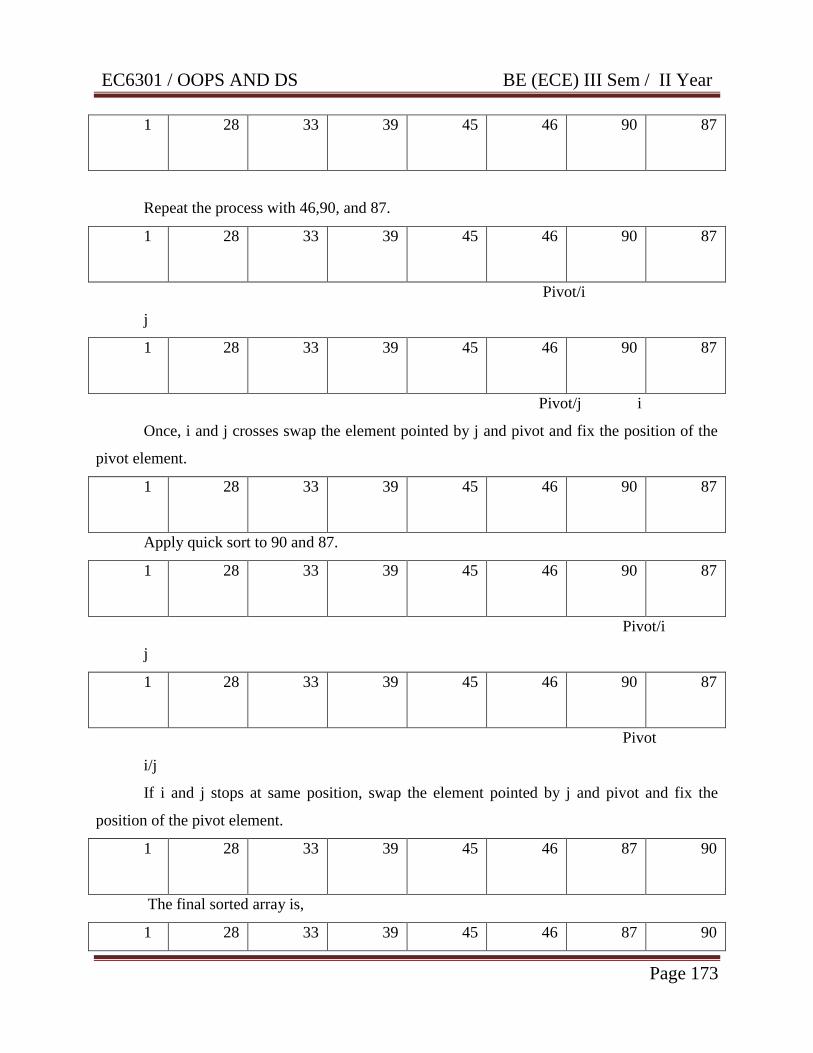
EC6301 / OOPS AND DS BE (ECE) III Sem / II Year
Page 173
1
28 33 39 45 46 90 87
Repeat the process with 46,90, and 87.
1
28 33 39 45 46 90 87
Pivot/i
j
1
28 33 39 45 46 90 87
Pivot/j i
Once, i and j crosses swap the element pointed by j and pivot and fix the position of the
pivot element.
1
28 33 39 45 46 90 87
Apply quick sort to 90 and 87.
1
28 33 39 45 46 90 87
Pivot/i
j
1
28 33 39 45 46 90 87
Pivot
i/j
If i and j stops at same position, swap the element pointed by j and pivot and fix the
position of the pivot element.
1
28 33 39 45 46 87 90
The final sorted array is,
1 28 33 39 45 46 87 90
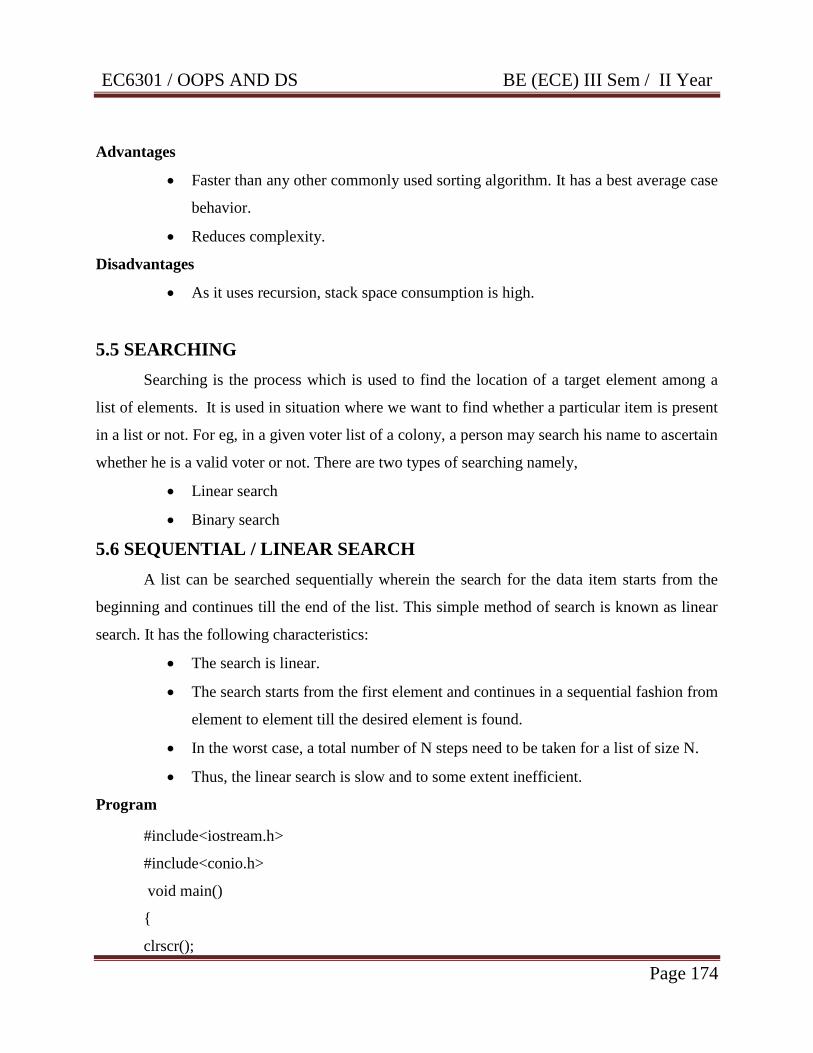
EC6301 / OOPS AND DS BE (ECE) III Sem / II Year
Page 174
Advantages
Faster than any other commonly used sorting algorithm. It has a best average case
behavior.
Reduces complexity.
Disadvantages
As it uses recursion, stack space consumption is high.
5.5 SEARCHING
Searching is the process which is used to find the location of a target element among a
list of elements. It is used in situation where we want to find whether a particular item is present
in a list or not. For eg, in a given voter list of a colony, a person may search his name to ascertain
whether he is a valid voter or not. There are two types of searching namely,
Linear search
Binary search
5.6 SEQUENTIAL / LINEAR SEARCH
A list can be searched sequentially wherein the search for the data item starts from the
beginning and continues till the end of the list. This simple method of search is known as linear
search. It has the following characteristics:
The search is linear.
The search starts from the first element and continues in a sequential fashion from
element to element till the desired element is found.
In the worst case, a total number of N steps need to be taken for a list of size N.
Thus, the linear search is slow and to some extent inefficient.
Program
#include<iostream.h>
#include<conio.h>
void main()
{
clrscr();
EC6301 / OOPS AND DS BE (ECE) III Sem / II Year
Page 175
int a[100],i,n,item,s=0;
cout<<"\n------------ LINEAR SEARCH ------------ \n\n";
cout<<"Enter No. of Elements=";
cin>>n;
cout<<"\nEnter Elements=\n";
for(i=1;i<=n;i++)
{
cin>>a[i];
}
cout<<"\nEnter Element you want to Search=";
cin>>item;
for(i=1;i<=n;i++) //Array Elements Comparison with Item
{
if(a[i]==item)
{
cout<<"\nData is Found at Location : "<<i;
s=1;
break;
}
}
f(s==0)
{
cout<<"Data is Not Found";
}
getch();
}

EC6301 / OOPS AND DS BE (ECE) III Sem / II Year
Page 176
5.7 BINARY SEARCH
The input should be sorted. The search in the list can be made faster by using “divide and
conquer” technique.It has the following characteristics:
The input list must be sorted
It is faster as compared to linear search.
Program
#include<iostream.h>
#include<conio.h>
void main()
{
clrscr();
int a[100],n,i,beg,end,mid,item;
cout<<"\n------------ BINARY SEARCH ------------ \n\n";
cout<<"Enter No. of Elements= ";
cin>>n;
cout<<"\nEnter Elements in Sorted Order=\n";
for(i=1;i<=n;i++)
{
cin>>a[i];
}
cout<<"\nEnter Item you want to Search= ";
cin>>item;
beg=1;
end=n;
mid=(beg+end)/2; // Find Mid Location of Array
EC6301 / OOPS AND DS BE (ECE) III Sem / II Year
Page 177
while(beg<=end && a[mid]!=item) // Compare Item and Value of Mid
{
if(a[mid]<item)
beg=mid+1;
else
end=mid-1;
mid=(beg+end)/2;
}
if(a[mid]==item)
{
cout<<"\nData is Found at Location : "<<mid;
}
else
{
cout<<"Data is Not Found";
}
getch();
}
Example
Find 6 in {-1, 5, 6, 18, 19, 25, 46, 78, 102, 114}.
Step 1 (middle element is 19 > 6): -1 5 6 18 19 25 46 78 102 114
Step 2 (middle element is 5 < 6): -1 5 6 18 19 25 46 78 102 114
Step 3 (middle element is 6 == 6): -1 5 6 18 19 25 46 78 102 114
EC6301 / OOPS AND DS BE (ECE) III Sem / II Year
Page 178