
Eaton UltraShift PLUS and Fuller Advantage® Automated ...pub/...Hill Start Aid (HSA) Lamp The Hill...
11
Transmission Lamp and Gear Display Descriptions Overview All UltraShift PLUS and Fuller Advantage Automated transmission systems utilize a ser- vice lamp that can be illuminated when certain system failures are detected. The service lamp may be part of the Shift Device or may be a separate light in the vehicle dash. Additionally, UltraShift PLUS and Fuller Advantage transmission systems utilize a gear dis- play that indicates the current state of the transmission. The gear display may be an inte- gral part of the vehicle dash, or may be a separate dash mounted display. This procedure describes the possible states of the service lamp and gear display. SERVICE SHIFT MANUAL EATON FULLER TRANSMISSIONS LOW D N R Reverse Neutral Drive Manual Low - Upshift - Downshift Button not used Service Indicator Fleet Breakdown Quick Reference Guide Eaton UltraShift PLUS and Fuller Advantage® Automated Transmissions TRDR0943 EN-US April 2016 Important: This is a quick reference guide only. See specific product literature for detailed information, instructions and diagnostics. !
Transcript of Eaton UltraShift PLUS and Fuller Advantage® Automated ...pub/...Hill Start Aid (HSA) Lamp The Hill...

Fleet Breakdown Quick Reference Guide
Transmission Lamp and Gear Display Descriptions
Overview
All UltraShift PLUS and Fuller Advantage Automated transmission systems utilize a ser-vice lamp that can be illuminated when certain system failures are detected. The service lamp may be part of the Shift Device or may be a separate light in the vehicle dash.
Additionally, UltraShift PLUS and Fuller Advantage transmission systems utilize a gear dis-play that indicates the current state of the transmission. The gear display may be an inte-gral part of the vehicle dash, or may be a separate dash mounted display.
This procedure describes the possible states of the service lamp and gear display.
SERVICE
SHIFT
MANUAL
EATON FULLERTRANSMISSIONS
LOW
D
N
R Reverse
Neutral
Drive
Manual
Low
- Upshift
- Downshift
Button not used
Service Indicator
Eaton UltraShift PLUS and Fuller Advantage® Automated Transmissions
TRDR0943 EN-USApril 2016 Important: This is a quick reference guide only.
See specific product literature for detailed information, instructions and diagnostics.
!

Lamp Descriptions
Transmission Service Lamp
The Transmission Service Lamp is usually a red light that reads “Service”. However, on some chassis an amber transmission icon or “Check Trans” light may be substituted for the red Service Lamp. It may be located on the Push Button Shift Control, Shift Lever, or in the vehicle dash. The Transmission Service Lamp is commanded on and off by the Trans-mission Electronic Control Unit (TECU) via a direct wire, J1939, or the High Integrity Link (HIL).
• Under normal conditions, the Service Lamp lights momentarily at key-on as part of the TECU self-test.
• A continuously flashing Service Lamp indicates a currently Active fault code. However, not all fault codes will turn on the Service Lamp.
• A Service Lamp that is continuously illuminated indicates a failure of the TECU.
Hill Start Aid (HSA) Lamp
The Hill Start Aid (HSA) lamp flashes when the Hill Start Aid is turned off. The Hill Start Aid (HSA) defaults to the “On” position. In Heavy-Duty UltraShift PLUS and Fuller Advantage Automated models, HSA can be turned “Off” by pressing and releasing the HSA Switch.
Gear Display Descriptions
Solid “N” in Gear Display
Indicates that the transmission is currently in Neutral.
2 © 2015 Eaton. All rights reserved 4/7/16
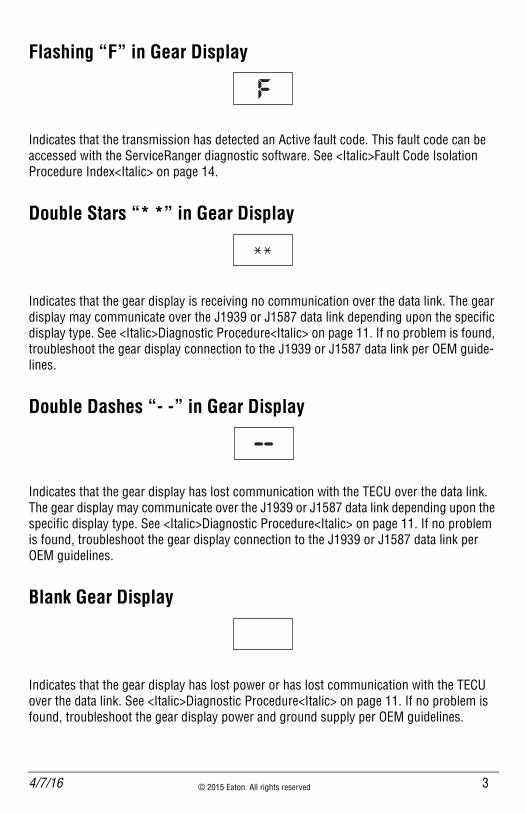
Flashing “F” in Gear Display
Indicates that the transmission has detected an Active fault code. This fault code can be accessed with the ServiceRanger diagnostic software. See <Italic>Fault Code Isolation Procedure Index<Italic> on page 14.
Double Stars “* *” in Gear Display
Indicates that the gear display is receiving no communication over the data link. The gear display may communicate over the J1939 or J1587 data link depending upon the specific display type. See <Italic>Diagnostic Procedure<Italic> on page 11. If no problem is found, troubleshoot the gear display connection to the J1939 or J1587 data link per OEM guide-lines.
Double Dashes “- -” in Gear Display
Indicates that the gear display has lost communication with the TECU over the data link. The gear display may communicate over the J1939 or J1587 data link depending upon the specific display type. See <Italic>Diagnostic Procedure<Italic> on page 11. If no problem is found, troubleshoot the gear display connection to the J1939 or J1587 data link per OEM guidelines.
Blank Gear Display
Indicates that the gear display has lost power or has lost communication with the TECU over the data link. See <Italic>Diagnostic Procedure<Italic> on page 11. If no problem is found, troubleshoot the gear display power and ground supply per OEM guidelines.
4/7/16 © 2015 Eaton. All rights reserved 3
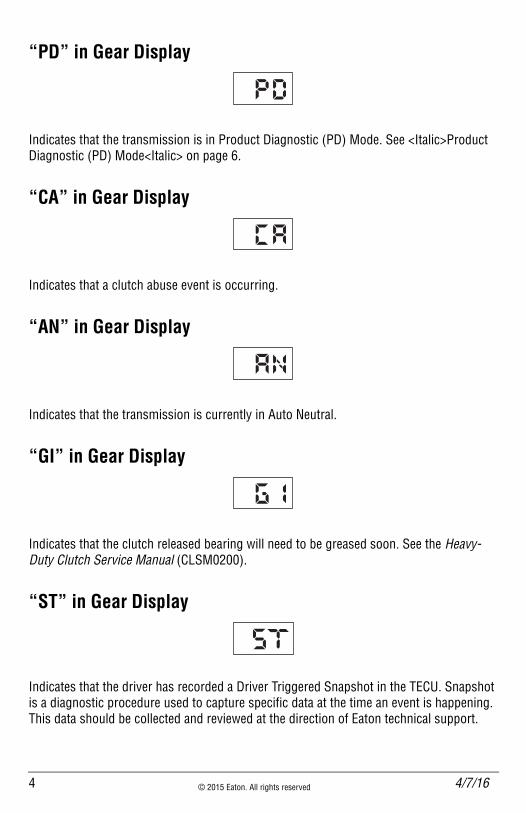
“PD” in Gear Display
Indicates that the transmission is in Product Diagnostic (PD) Mode. See <Italic>Product Diagnostic (PD) Mode<Italic> on page 6.
“CA” in Gear Display
Indicates that a clutch abuse event is occurring.
“AN” in Gear Display
Indicates that the transmission is currently in Auto Neutral.
“GI” in Gear Display
Indicates that the clutch released bearing will need to be greased soon. See the Heavy-Duty Clutch Service Manual (CLSM0200).
“ST” in Gear Display
Indicates that the driver has recorded a Driver Triggered Snapshot in the TECU. Snapshot is a diagnostic procedure used to capture specific data at the time an event is happening. This data should be collected and reviewed at the direction of Eaton technical support.
4 © 2015 Eaton. All rights reserved 4/7/16
To collect a Driver Triggered Snapshot:
1. Drive or operate vehicle and attempt to duplicate the shift complaint.
IMPORTANT: The purpose of this test is to duplicate the complaint and set a fault code or capture a driver triggered snapshot of the event happening.
2. If the shift complaint is duplicated, while driving capture a driver triggered snap-shot of the event by placing the transmission shift device into Low (L) mode, and quickly pressing the upshift button twice.
IMPORTANT: Capturing the driver triggered snapshot is time sensitive; for the best results, perform this sequence immediately after the symptoms occur.
3. The transmission will set a tone and the letters “ST” will appear in the gear dis-play if the Snapshot is captured.
Note: A driver triggered snapshot will capture data that cannot otherwise be captured. This data can be reviewed with Eaton technical support.
4. Key on with engine off. 5. Connect ServiceRanger. 6. Retrieve Snapshot and VPA data by creating a Service Activity Report within Ser-
viceRanger.7. Contact Eaton technical support at (800) 826-4357 for review.
!
!
5 © 2015 Eaton. All rights reserved 4/7/16
!
Product Diagnostic (PD) Mode
PD Mode is used to diagnose Inactive fault codes that may have set during normal operation. This diagnostic mode increases the fault sensing capability of the transmission system, making it more likely to detect intermittent electrical or wiring issues. The PD Mode procedure tests loose, degraded and intermittent connections.
When troubleshooting an Inactive fault code, use the Fault Isolation Procedures to guide you to the wiring and connectors associated with that fault. Once PD Mode is activated, flex the wiring harness and connectors to attempt to recreate the fault.
This procedure may be used prior to performing any troubleshooting or as directed by a Fault Isolation Procedure. PD Mode may be used to troubleshoot intermittent electrical fault issues when there are no Active fault codes present.
IMPORTANT: The vehicle will not start in PD Mode. You must turn vehicle key off, and allow the transmission to fully power down to exit PD Mode before the vehicle will start.
PD Mode Inactive Fault Codes
The following is a list of fault codes that work with PD Mode:
13, 14, 15, 16, 17, 19, 22, 29, 33, 34, 35, 36, 43, 44, 46, 51, 52, 56, 57, 58, 61, 63, 65, 66, 67 and 99.
Entering PD Mode
Note: Vehicle must have no Active fault codes.
Note: Vehicle must be stationary, engine off with vehicle parking brake set.
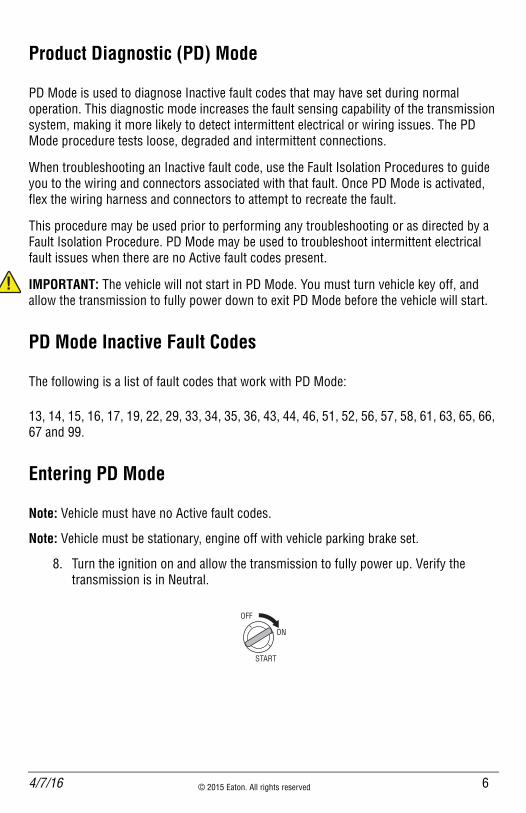
8. Turn the ignition on and allow the transmission to fully power up. Verify the transmission is in Neutral.
OFF
ON
START
4/7/16 © 2015 Eaton. All rights reserved 6
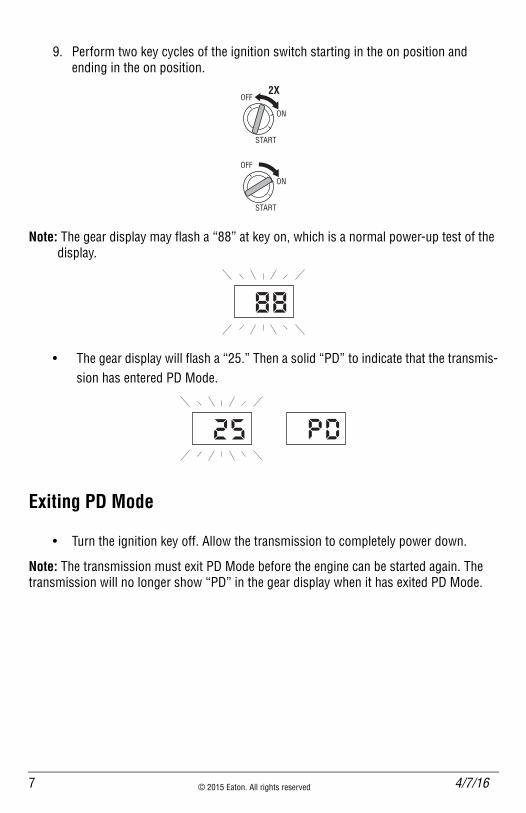
9. Perform two key cycles of the ignition switch starting in the on position and ending in the on position.
Note: The gear display may flash a “88” at key on, which is a normal power-up test of the display.
• The gear display will flash a “25.” Then a solid “PD” to indicate that the transmis-sion has entered PD Mode.
Exiting PD Mode
• Turn the ignition key off. Allow the transmission to completely power down.
Note: The transmission must exit PD Mode before the engine can be started again. The transmission will no longer show “PD” in the gear display when it has exited PD Mode.
2XOFF
ON
START
OFF
ON
START
7 © 2015 Eaton. All rights reserved 4/7/16
Condition: Engine Will Not Start
Possible Cause: Shift control not in Neutral, Vehicle Power and Ground
Action:
1. Confirm the transmission shift lever in “N” NEUTRAL and turn the ignition key to the Off position.
2. Wait at least 2 minutes.
3. Turn the Key to the ON position and wait until a solid “N” is in the gear display. 4. Turn the Key to the START position and restart the engine.
5. If the problem continues and the vehicle is inoperable, contact a service facility to have the vehicle and transmission system evaluated.
Condition: Transmission frequently shifting between two gears as the road terrain changes OR Transmission skip shifting OR Transmission not skip shifting.
Possible Cause: This is Normal Operation. The transmission constantly adapts based on weight of load, grade, and engine power. The appropriate starting gear is selected and makes shift decisions based on grade, vehicle weight, engine torque and throttle posi-tion—skip shifting when appropriate, making the most efficient shift changes based on those conditions.
Action: For optimal vehicle performance, it is recommended the vehicle be operated in “D” Drive mode. MULTIPLE OPERATING MODES: Automatic, Manual and Low modes offer the driver full control. In Manual mode, the driver can override computerized shifts on demand. Using Low mode can help maximize engine braking and reduce wear on brakes.
4/7/16 © 2015 Eaton. All rights reserved 8
Condition: Transmission will not shift in Manual mode when pushing the up/down but-tons.
Possible Cause: The ability to restrict driver use of MANUAL mode is configurable. The default setting for this configuration allows standard MANUAL mode operation in all gears. When configured to Hold Mode the MANUAL mode becomes a Hold gear function only (i.e. up/down buttons have no effect). In addition, provides an alert tone every 10 seconds. If the driver has selected MANUAL mode, and the transmission is in a gear equal to or greater than the configured Hold Gear; the transmission will remain in the current gear, up/down buttons are disabled (except for “Transmission Override” conditions). Gears lower than the configured hold gear will allow standard MANUAL mode operation.
Action: Fleets have the ability to choose how Manual mode is configured. Low mode may be used on downgrades instead of Manual mode if the transmission is configured to Hold Mode and the driver is unable to manually shift the transmission using the up/down but-tons. Reference the transmission Driver Instruction Guide for details on Low mode and how it can be used to maximize engine braking. Changes to the transmission ECU config-uration requires Fleet approval and is typically done at a dealership.
Condition: Transmission holds a gear instead of upshifting right after engine power-up or after changing loads OR makes an aggressive shift right after engine power-up or after changing loads OR Transmission not shifting fast enough from a stop with a loaded trailer.
Possible Cause: This is Normal Operation. The transmission constantly adapts based on weight of load, grade, and engine power. Right after engine power-up or after changing loads, the transmission needs to learn the new conditions. While learning, it may hold a gear longer instead of up shifting resulting in an aggressive shift at a higher rpm.
Action: Push the up button to start the up shift. It may take three or four shifts for Ultra-Shift to learn the new conditions. Upshifts and downshifts will now be handled automati-cally.
Condition: Truck lacks power.
Possible Cause: This may be Normal Operation. The appropriate gears are selected and shift decisions are based on grade, vehicle weight, engine torque and throttle position, making the most efficient shift changes. Eaton and the Engine manufactures have worked to develop shift strategies to keep the engine within its designed sweet spot.
Action: For optimal vehicle performance, it is recommended the vehicle be operated in “D” Drive mode. MULTIPLE OPERATING MODES: Automatic, Manual and Low modes offer the driver full control. In Manual mode, the driver can override computerized shifts on demand. Using Low mode can help maximize engine braking and reduce wear on brakes.
9 © 2015 Eaton. All rights reserved 4/7/16
Condition: Transmission continues to pull at engine idle speed.
Possible Cause: Creep Mode is most likely activated and engaged. The Creep mode func-tion allows the vehicle to be driven at a constant speed at engine idle without the need to hold the throttle pedal position. The mode is useful for very slow speed maneuvering or applications where steady vehicle speed is required. By default, Creep mode can be acti-vated while in MANUAL or LOW mode. In some applications Creep mode may be desirable in Drive and/or Reverse.
Action: Fleets have the ability to choose how Creep Mode is configured. Changes to the transmission ECU configuration requires Fleet approval and is typical.
4/7/16 © 2015 Eaton. All rights reserved 10
Copyright Eaton, 2016.Eaton hereby grant their customers, vendors, or distributors permission to freely copy, reproduce and/or distribute this document in printed format. It may be copied only in its entirety without any changes or modifications. THIS INFORMATION IS NOT INTENDED FOR SALE OR RESALE, AND THIS NOTICE MUST REMAIN ON ALL COPIES.
Note: Features and specificationslisted in this document are subject tochange without notice and representthe maximum capabilities of thesoftware and products with all optionsinstalled. Although every attempt hasbeen made to ensure the accuracy ofinformation contained within, Eatonmakes no representation about thecompleteness, correctness or accuracyand assumes no responsibility forany errors or omissions. Features andfunctionality may vary depending onselected options.
For spec’ing or service assistance, call 1-800-826-HELP (4357) or visit www.eaton.com/roadranger.In Mexico, call 001-800-826-4357.
EatonVehicle GroupP.O. Box 4013Kalamazoo, MI 49003 USA800-826-HELP (4357)www.eaton.com/roadranger
Printed in USA
Roadranger: Eaton and trusted partners providing the best products and services in the industry, ensuring more time on the road.


![VO Job Aid - Front Desk Part 2 v0.2 - Griffith University · [Patient JobManagement System] Aid–Front Desk Part 2 5 | Page 1.2 Start your Till for the Day It is important to start](https://static.fdocuments.in/doc/165x107/5e211b9b4ff4a2195948e526/vo-job-aid-front-desk-part-2-v02-griffith-university-patient-jobmanagement.jpg)


