draft Bike For Life curriculum - Wisconsin Bike Fed
99
Bike For Life Bicycle Safety Education Curriculum for Physical Education Classes
Transcript of draft Bike For Life curriculum - Wisconsin Bike Fed

Bike For LifeBicycle Safety Education Curriculum for Physical Education Classes
Kathryn Kingsbury
draft tif
Acknowledgements
Curriculum Creation and Development—Jessica Binder, Jeff McNameeLayout and Design- Sami Mainiero
Bike for Life builds upon a number of other successful curricula. These include:
• Bicycle Federation of Wisconson-Bike Driver’s Ed• Bicycle Federation of America—Basics of Bicycling • Bicycle Transportation Alliance—Safe Routes to School Curriculum• League of American Bicyclists—BikeEd Program• Marin County Bicycle Coalition—Safe Routes to School Curriculum• Mayor Daley’s Bicycling Ambassadors• Wisconsin Department of Transportation—Teaching Safe Bicycling Program
We would like to give special thanks to the Bicycle Transportation Alliance for the extensive use of their wonderful curriculum and some visuals. This curriculum was developed for the Wisconsin Department of Transportation Safe Routes to School Program by the Bicycle Federation of Wisconsin. This curriculum may be used in whole or in part for nonprofit uses only with credit given to the Bicycle Federation of Wisconsin. For additional copies of the curriculum or questions regarding Safe Routes to School, contactBicycle Federation of WI1845 N. Farewell Ave. Suite #100Milwaukee, WI 53202. 414-431-1761 Fax: 414-273-7293 [email protected] www.BFW.org
Kathryn Kingsbury
draft tif
Table of ContentsLetter to Physical Educators ......................................................................................................................4Introduction to Bike for Life ...................................................................................................................5WI DPI/NASPE PE Standards ...............................................................................................................10Elementary 10 day Block Plan .............................................................................................................13Lesson 1: Intro to Biking .......................................................................................................................14Lesson 2: Basic Bike Skills ..................................................................................................................17Lesson 3: Basic Skills, continued ......................................................................................................22Lesson 4: Bike as a Vehicle..................................................................................................................25Lesson 5: Bike as a Vehicle and Flat Tire Repair ..........................................................................29Lesson 6: Riding in the Road and Hazards......................................................................................33Lesson 7: Intersections - Left Turns ..................................................................................................35Lesson 7: Intersection Left Turn Course Set-up ............................................................................37Lesson 8: Intersections and Right-of-Way .......................................................................................38Lesson 9: Riding in Traffic....................................................................................................................41Lesson 10: Neighborhood Ride or Bike Challenge Stations......................................................43Bike Skills Scoring Guide .....................................................................................................................45Bike for Life Program: Secondary Level..........................................................................................47WI DPI/NASPE PE Standards:..............................................................................................................47Bike for Life Secondary 10 day Block Plan ......................................................................................50Lesson 1: Intro to Biking .......................................................................................................................51Lesson 2: Basic Bike Skills ..................................................................................................................54Bike Fit Peer Assessment .....................................................................................................................57Lesson 3: Basic Skills, continued ......................................................................................................58Lesson 4: Bike as a Vehicle..................................................................................................................61Lesson 5: Bike as a Vehicle and Flat Tire Repair ...............................................................................65Lesson 6: Riding in the Road and Hazards......................................................................................69Lesson 7: Intersections - Left Turns ..................................................................................................71Lesson 7: Intersection ...........................................................................................................................73Lesson 8: Intersections and Right-of-Way .......................................................................................74Lesson 9: Riding in traffic ....................................................................................................................77Lesson 10: Neighborhood Ride or Bike Challenge Stations......................................................79Appendix .....................................................................................................................................................81
Kathryn Kingsbury
draft tif
Dear Physical Educator,
Thank you for taking class time to teach biking and the Safe Routes to School (SRTS) curriculum. The goal of SRTS, to increase the number and safety of students biking and walking to school, cannot be met without the cooperation of schools, principals, and especially teachers. Your participation is extremely valuable and your students will benefit greatly from your instruction.
By teaching your students to participate and learn about safe and active transportation, you are giving them the tools for a healthy active lifestyle. The immediate goal of our program is to give students the knowledge they need to safely enjoy riding bicycles in their communities. Children who are equipped with the skills and a working knowledge of the rules of the road not only reduce their chances of injury, but also enjoy bicycling and the freedom it brings. Bicycle riding not only serves as transportation, but also as an ingredient for the health of the body, mind, spirit and ultimately the planet.
This program works well as part of a larger SRTS program that seeks to increase the number and safety of children walking and biking to school. These programs are funded through the revised federal transportation act - SAFETEA-LU - signed into law on August 10, 2005. This legislation provides funding to state departments of transportation to create and administer SRTS programs. SRTS programs improve walking and biking travel options, promote healthier lifestyles in children at an early age and decrease auto-related emissions near schools
The Bike Driver’s Ed program was created to last approximately two weeks (10 lessons), depending upon your school’s physical education schedule. Our curriculum will likely touch on other items taught in your school including health, geography, history and environmental science. To extend the impact and effectiveness of the program, we have compiled this SRTS Education Packet. The Bike Education Packet includes assignments and in-class activities to reinforce the SRTS lessons on safe bicycle driving. We invite you to play an active role and believe you’ll find the included activities and resources valuable.
“Pedal Across America” (similar to Walk or Read Across America) or the SRTS Mileage Club can help expand the healthy habit of biking out side of PE class. Free posters, punch cards, and prizes for the Mileage Club are available here: http://www.dot.wisconsin.gov/localgov/aid/saferoutes-club.htm. You might consider presenting the Bike Driver’s Ed curriculum in May during National Bike Month or around Walk and Bike to School Day on the first Wednesday in October. Other activities you may wish to present include Walk and Roll Wednesdays, Walking/Riding School Buses, Car Free Fridays, and homework assignments to engage the entire family. Details of these specific activities and many more are included in the appendix.
Thank you for your attention and working with us to make responsible bike drivers.
Safe Routes to School Project Team
4
Letter to Physical Educators
Kathryn Kingsbury
draft tif

Introduction
Ask a group of children, “Why do people like to ride bikes?” and you get many wonderful answers. The diversity of the responses underscores the myriad benefits of bicycling and the importance of teaching safe bicycling to children. Further, the responses also address critical issues that are facing our nation including oil independence and childhood obesity. A report published in the International Journal of Pediatric Obesity, predicts that nearly half of the children in North America will be overweight by 2010. By encouraging active transportation to school we can help to change the alarming trend towards increased obesity rates and raise the next generation to be healthier, more active, and oil independent. Kids deserve to be independent, safe, and have multiple opportunities for physical activity and a healthy lifestyle. Safe Routes to School programs seek to provide a safe and supportive atmosphere for children and parents to bike to school.
The Wisconsin Department of Transportation SRTS program hired the Bicycle Federation of Wisconsin to create Bike for Life. Bike for Life is intended to be part of a broader Safe Routes to School program that encourages walking and bicycling to school. The curriculum not only teaches students how to be safer bicyclists, but also why active transportation is important and beneficial. The curriculum includes such items as Walking and Roll Wednesday flyers to assist in school wide efforts. The curriculum can be used as a stand alone educational program but is more effective when combined with a Safe Routes to School program that involves all five of the E’s of safety (education, encouragement, engineering, enforcement, and evaluation). The bicycle education curriculum was originally developed by Jessica Wineberg in the winter of 2005 as part of a Milwaukee Public Schools pilot project. The Bicycle Transportation Alliance’s Bicycle Safety Program Curriculum was invaluable as a base. Many of the activities are based on the BTA curriculum. That program has been delivered to over 10,000 students. In 2010, the Wisconsin Department of Transportation SRTS program hired the Bicycle Federation of Wisconsin to create Bike for Life, a version of the program for physical education teachers. This version includes do desk work and almost constant activity and is aligned with the Wisconsin Department of Transportation PE Standards and the National Association for Sport and Physical Education (NASPE).
Before beginning the program it is essential to be knowledgeable about local laws that pertain to bicycles. The program was designed for Wisconsin and therefore is based on the Wisconsin State Vehicle Code and Milwaukee Municipal Code. State and city bicycle laws can vary greatly; be sure to tailor the language of the curriculum to meet your local laws. Some of the most essential legal issues include:
• Bicycles considered vehicles • What type of right turn hand signal is permitted under the law?• Is it legal for child bicyclists to ride on sidewalks?• Is it legal for adults to ride on sidewalks?• Helmets are not required by law but should be encouraged• At what age are bicycling children considered adults?
Bike Driver’s Ed was originally developed for 5th and 6th graders as a 10 hour program. Bike for Life includes 10 lessons for elementary-aged (3rd-5th) and secondary-aged (6th-12th) students, including an optional neighborhood ride. The elementary lesson plans are intended to be 30 min. while the secondary last approximately 45 minutes. Both versions utilize gym and campus space.
“Helps precent pollution!” “Saves money!”
“It takes you places!”“It’s fun!”
“It’s good for your body!”
Items needed for this program:• Fleet of bikes (at least half as many as
the number of students)• Helmets• 5 or more bicycle locks for school
Lock Library• Bike parking rack at school• Helmet storage bags• Traffic cones• Caution tape• Tennis ball halves• Permanent markers
5
Kathryn Kingsbury
draft tif
General Tips for Instructors• Recruit parent and community volunteers to assist on ride days • Use a query based teaching style and check for understanding as much as possible• Communicate the lesson objective(s) to the students at the beginning of the lesson• Lead by example- walk or bike to school• Use vocabulary consistently (e.g. crash, not accident)• Recruit the students’ classroom teacher(s) to integrate bike content, including suggested videos,
before, during, and after the unit is covered in physical education • At times it may be advantageous to split the class into two groups (one group practicing riding activity
and one practicing an off-bike activity like flat repair)• Always demonstrate an activity or skill BEFORE discussing it• Connect activities/concepts to the real world and always communicate the lesson objective(s) at the
beginning of the lesson• Continually “check for understanding” after demonstrations and/or instructions (e.g., “what does ABC
Quick Check stand for again?; where should you start the activity when I say go?”)• Slowly introduce some of the activities from the Bike Driver’s Ed unit BEFORE the unit begins. Health-
related physical activities, such as Echelon Fitness or Jump and Pedal fitness, could be introduced in existing units without the use of bikes. Instead of biking, for example, students can walk or jog. Introducing an activity several times before the Bike Driver’s Ed unit will help students become familiar with its general organization and reduce instruction/management time later during the Bike Driver’s Ed unit.
• Introduce the Bike Driver’s Ed program 2-3 weeks BEFORE the program will begin so that students and parents have an opportunity to prepare. Organize a free bike repair day at your local bike shop BEFORE the program begins so that students’ bikes (if they will be supplying their own) have been inspected and repaired.
• Handout any necessary permission slips or letters (sample letters can be found in the appendix) several weeks BEFORE the unit begins.
• Organize a helmet fundraiser early in the school year and, if possible, integrate short helmet fitting sessions into other units of instruction to decrease management time during the Bike Driver’s Ed unit.
The goal of the Bike for Life curriculum is to help your students feel confident and competent while riding their bikes in their neighborhood for physical activity and active transportation. A major focus of this curriculum is to allocate substantial time to on-the-bike skills and help physical educators meet Healthy People 2020 physical activity related goals. To reduce instruction time and increase practice opportunities during the Bike for Life unit we suggest introducing/integrating the following content PRIOR to the beginning of the Bike for Life unit with other academic areas:
A. Transportation Investigation (conducted during the Bike Ed unit as well)Consider having students track their modes of transportation to school at www.peclogit.org or on a bulletin that includes a chart with students’ names and transportation mode (e.g., Today I arrived by: bike, foot, bus, or family vehicle). If using a bulletin board have students “mark” their mode of transportation as they enter the gym. This activity could also be integrated within the classroom and provides a great opportunity for students to practice math concepts.
B. Seven Bike Safety Practices Incorporate the Seven Bike Safety Practices into existing physical education units throughout the school year versus introducing them to students only during the Bike for Life unit. For example, while walking/ jogging around the gym during a warm up activity ask half the students to pretend they are cars and ask the other half to pretend they are bikes. To begin, ask all students to move clockwise around the play space. After 30s ask the bike students to show you the direction bikes should travel (i.e., with cars or against?). You might also designate car and bike “lanes” so that students can further practice where each vehicle is positioned in the road.
We have included possible conversation points for each of the seven bike safety practices below:6
Kathryn Kingsbury
draft tif
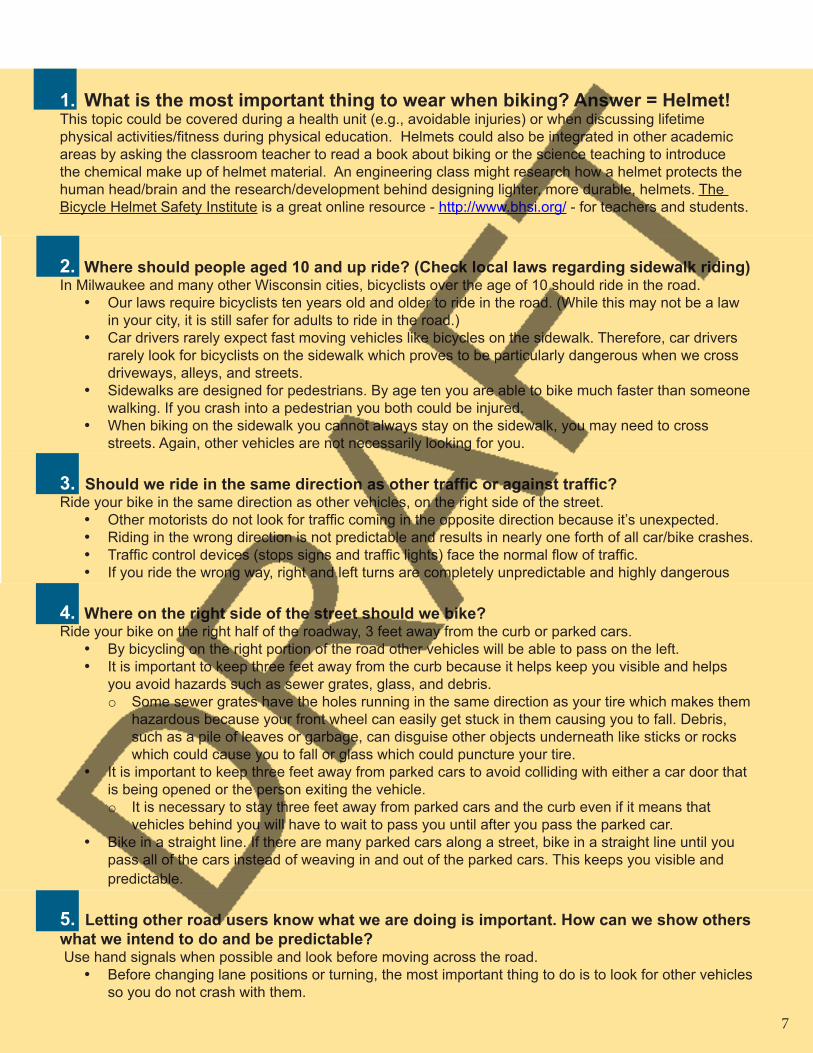
1. What is the most important thing to wear when biking? Answer = Helmet!This topic could be covered during a health unit (e.g., avoidable injuries) or when discussing lifetime physical activities/fitness during physical education. Helmets could also be integrated in other academic areas by asking the classroom teacher to read a book about biking or the science teaching to introduce the chemical make up of helmet material. An engineering class might research how a helmet protects the human head/brain and the research/development behind designing lighter, more durable, helmets. The Bicycle Helmet Safety Institute is a great online resource - http://www.bhsi.org/ - for teachers and students.
2. Where should people aged 10 and up ride? (Check local laws regarding sidewalk riding)In Milwaukee and many other Wisconsin cities, bicyclists over the age of 10 should ride in the road.
• Our laws require bicyclists ten years old and older to ride in the road. (While this may not be a law in your city, it is still safer for adults to ride in the road.)
• Car drivers rarely expect fast moving vehicles like bicycles on the sidewalk. Therefore, car drivers rarely look for bicyclists on the sidewalk which proves to be particularly dangerous when we cross driveways, alleys, and streets.
• Sidewalks are designed for pedestrians. By age ten you are able to bike much faster than someone walking. If you crash into a pedestrian you both could be injured.
• When biking on the sidewalk you cannot always stay on the sidewalk, you may need to cross streets. Again, other vehicles are not necessarily looking for you.
3. Should we ride in the same direction as other traffic or against traffic?Ride your bike in the same direction as other vehicles, on the right side of the street.
• Other motorists do not look for traffic coming in the opposite direction because it’s unexpected. • Riding in the wrong direction is not predictable and results in nearly one forth of all car/bike crashes.• Traffic control devices (stops signs and traffic lights) face the normal flow of traffic.• If you ride the wrong way, right and left turns are completely unpredictable and highly dangerous
4. Where on the right side of the street should we bike?Ride your bike on the right half of the roadway, 3 feet away from the curb or parked cars.
• By bicycling on the right portion of the road other vehicles will be able to pass on the left.• It is important to keep three feet away from the curb because it helps keep you visible and helps
you avoid hazards such as sewer grates, glass, and debris.o Some sewer grates have the holes running in the same direction as your tire which makes them
hazardous because your front wheel can easily get stuck in them causing you to fall. Debris, such as a pile of leaves or garbage, can disguise other objects underneath like sticks or rocks which could cause you to fall or glass which could puncture your tire.
• It is important to keep three feet away from parked cars to avoid colliding with either a car door that is being opened or the person exiting the vehicle.o It is necessary to stay three feet away from parked cars and the curb even if it means that
vehicles behind you will have to wait to pass you until after you pass the parked car.• Bike in a straight line. If there are many parked cars along a street, bike in a straight line until you
pass all of the cars instead of weaving in and out of the parked cars. This keeps you visible and predictable.
5. Letting other road users know what we are doing is important. How can we show others what we intend to do and be predictable? Use hand signals when possible and look before moving across the road.
• Before changing lane positions or turning, the most important thing to do is to look for other vehicles so you do not crash with them.
7
Kathryn Kingsbury
draft tif
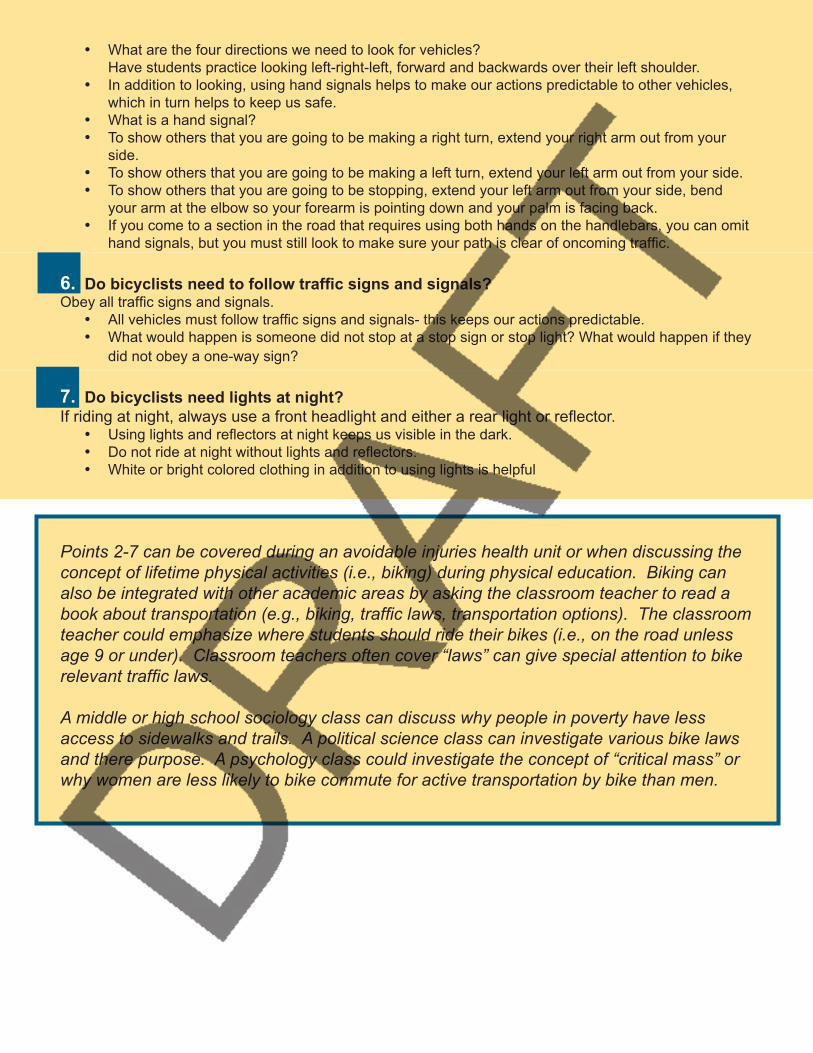
• What are the four directions we need to look for vehicles? Have students practice looking left-right-left, forward and backwards over their left shoulder.
• In addition to looking, using hand signals helps to make our actions predictable to other vehicles, which in turn helps to keep us safe.
• What is a hand signal? • To show others that you are going to be making a right turn, extend your right arm out from your
side. • To show others that you are going to be making a left turn, extend your left arm out from your side. • To show others that you are going to be stopping, extend your left arm out from your side, bend
your arm at the elbow so your forearm is pointing down and your palm is facing back. • If you come to a section in the road that requires using both hands on the handlebars, you can omit
hand signals, but you must still look to make sure your path is clear of oncoming traffic.
6. Do bicyclists need to follow traffic signs and signals?Obey all traffic signs and signals.
• All vehicles must follow traffic signs and signals- this keeps our actions predictable. • What would happen is someone did not stop at a stop sign or stop light? What would happen if they
did not obey a one-way sign?
7. Do bicyclists need lights at night?If riding at night, always use a front headlight and either a rear light or reflector.
• Using lights and reflectors at night keeps us visible in the dark. • Do not ride at night without lights and reflectors.• White or bright colored clothing in addition to using lights is helpful
Points 2-7 can be covered during an avoidable injuries health unit or when discussing the concept of lifetime physical activities (i.e., biking) during physical education. Biking can also be integrated with other academic areas by asking the classroom teacher to read a book about transportation (e.g., biking, traffic laws, transportation options). The classroom teacher could emphasize where students should ride their bikes (i.e., on the road unless age 9 or under). Classroom teachers often cover “laws” can give special attention to bike relevant traffic laws.
A middle or high school sociology class can discuss why people in poverty have less access to sidewalks and trails. A political science class can investigate various bike laws and there purpose. A psychology class could investigate the concept of “critical mass” or why women are less likely to bike commute for active transportation by bike than men.
Kathryn Kingsbury
draft tif
Lesson Plan StructureLessons plans were developed for a 30 min. class period. We’ve over planned in terms of activities allowing instructors to modify as they choose. Lessons are structured using the following SIX components:
1. Instant Activity (IA; ~1-5 min.) - used to instantlly move students and gain their attention/focus2. Health-related Physical Activities (HRPA; ~5-10 min.) - used to increase students’ health-related
physical fitness and bike skills3. Skill Practice Activities (~10-20 min.) - used to introduce and practice bike related concepts and skills 4. Game Activities (~10-15 min.) - used to integate bike related concepts and skills in a reiforcing and
engaging manner.5. Closure Activities (~1-2 min.) – used to review lesson objectives6. Assignment – use to reinfirce concepts that were covered in class at home
On-the-Bike Rules
Before receiving a bicycle, everyone must be wearing his or her helmet properly.
Helmets must be worn throughout the duration of the class period.
Do not ride your bicycle unless instructed to do so by an instructor.
Only ride in designated areas.
No bike tricks will be tolerated. This includes but is not limited to: skidding, wheelies, riding with no hands, racing and jumping.
Treat fellow students, instructors, self, and equipment with respect.
Bike for LifeProgram: Elementary LevelLesson Objectives and their relationship to the National Association for Sport and Physical Education (NASPE) and WI Department of Instruction’s Physical Education Content Standards:
NASPE Standards (last revised 2004)
Standard 1: Demonstrates competency in motor skills and movement patterns needed to perform a variety of physical activities. Standard 2: Demonstrates understanding of movement concepts, principles, strategies, and tactics as they apply to the learning and performance of physical activities. Standard 3: Participates regularly in physical activity. Standard 4: Achieves and maintains a health-enhancing level of physical fitness. Standard 5: Exhibits responsible personal and social behavior that respects self and others in physical activity settings. Standard 6: Values physical activity for health, enjoyment, challenge, self-expression, and/or social interaction.
9
Kathryn Kingsbury
draft tif
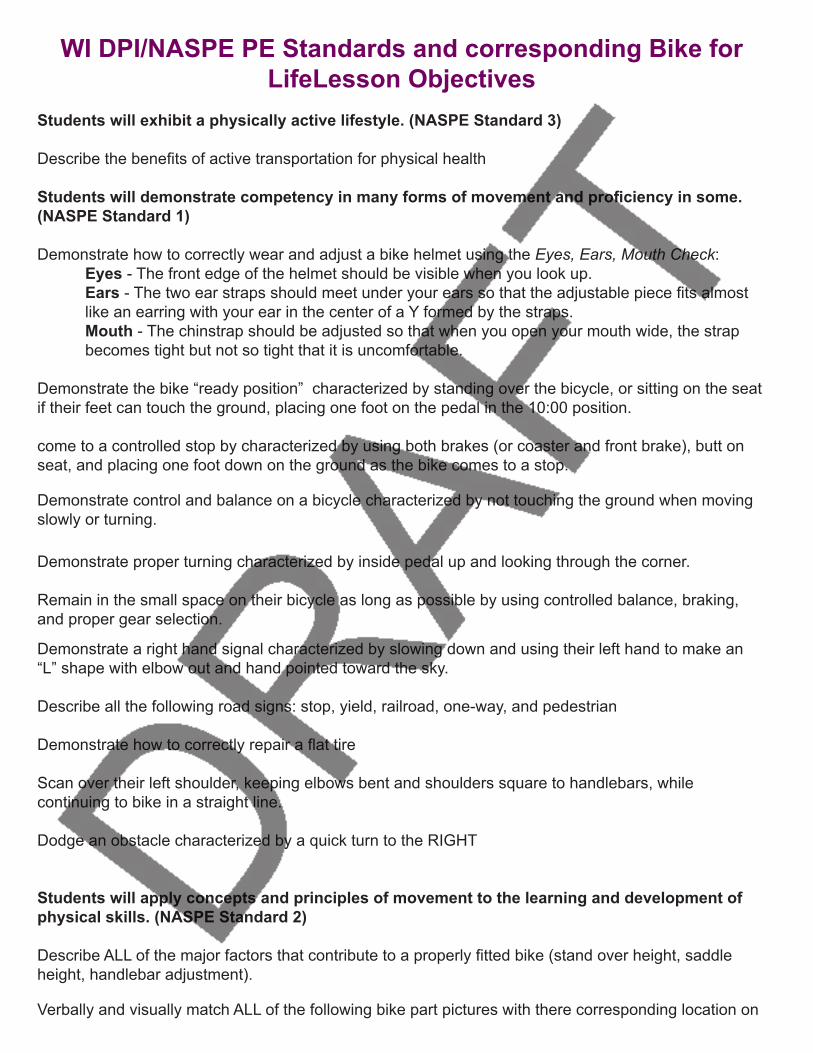
WI DPI/NASPE PE Standards and corresponding Bike for LifeLesson Objectives
Students will exhibit a physically active lifestyle. (NASPE Standard 3) Describe the benefits of active transportation for physical health
Students will demonstrate competency in many forms of movement and proficiency in some. (NASPE Standard 1)
Demonstrate how to correctly wear and adjust a bike helmet using the Eyes, Ears, Mouth Check: Eyes - The front edge of the helmet should be visible when you look up.
Ears - The two ear straps should meet under your ears so that the adjustable piece fits almost like an earring with your ear in the center of a Y formed by the straps. Mouth - The chinstrap should be adjusted so that when you open your mouth wide, the strap becomes tight but not so tight that it is uncomfortable.
Demonstrate the bike “ready position” characterized by standing over the bicycle, or sitting on the seat if their feet can touch the ground, placing one foot on the pedal in the 10:00 position.
come to a controlled stop by characterized by using both brakes (or coaster and front brake), butt on seat, and placing one foot down on the ground as the bike comes to a stop.
Demonstrate control and balance on a bicycle characterized by not touching the ground when moving slowly or turning.
Demonstrate proper turning characterized by inside pedal up and looking through the corner.
Remain in the small space on their bicycle as long as possible by using controlled balance, braking, and proper gear selection.
Demonstrate a right hand signal characterized by slowing down and using their left hand to make an “L” shape with elbow out and hand pointed toward the sky.
Describe all the following road signs: stop, yield, railroad, one-way, and pedestrian
Demonstrate how to correctly repair a flat tire
Scan over their left shoulder, keeping elbows bent and shoulders square to handlebars, while continuing to bike in a straight line.
Dodge an obstacle characterized by a quick turn to the RIGHT
Students will apply concepts and principles of movement to the learning and development of physical skills. (NASPE Standard 2)
Describe ALL of the major factors that contribute to a properly fitted bike (stand over height, saddle height, handlebar adjustment).
Verbally and visually match ALL of the following bike part pictures with there corresponding location on
Kathryn Kingsbury
draft tif

a bike: frame top tube, wheel, tire, fork, crank, pedal, and chain. (If your bike fleet includes geared bikes students should also be able point out the front and rear derailleur.)
Demonstrate being predictable cyclist characterized by use of correct hand signals, communicate with other riders, and obey all traffic laws and traffic signs at all times.
Verbally list and physically demonstrate what each letter and/or word of the ABC Quick Check stands for.
Demonstrate entering the roadway correctly characterized by coming to a complete stop, looking left, right, and left again (check the sidewalk if one is present), signaling (point in the direction of travel), and then entering the roadway when it is clear.
Demonstrate entering the roadway correctly characterized by coming to a complete stop, looking left, right, and left again (check the sidewalk if one is present), signaling (point in the direction of travel), and then entering the roadway when it is clear.
Demonstrate a correct ROW left turn characterized by yielding to the bike/student that arrived at the intersection first.
Demonstrate a correct pedestrian and traffic left turn
Demonstrate a correct ROW left turn characterized by yielding to the bike/student that arrived at the intersection first.
Students will understand that physical activity provides opportunities for enjoyment, challenge, self-expression, and social interaction. (NASPE Standard 6)Students will write about and discuss the benefits of bicycling and will work in social groups for many activities.
Students will achieve and maintain a health-enhancing level of physical fitness. (NASPE Standard 4)
Continuously ride their bicycle for 20 minutes.
Students will demonstrate responsible personal and social behavior in physical-activity settings. (NASPE Standard 5)
Demonstrate proper cycling etiquette and communication while riding with a group of cyclist
Verbally define right-of-way as it relates to intersections: The vehicle that arrives at the intersection first has the “right-of-way.”
Scope and Sequence of Bike-related Concepts and Skills
11
Kathryn Kingsbury
draft tif
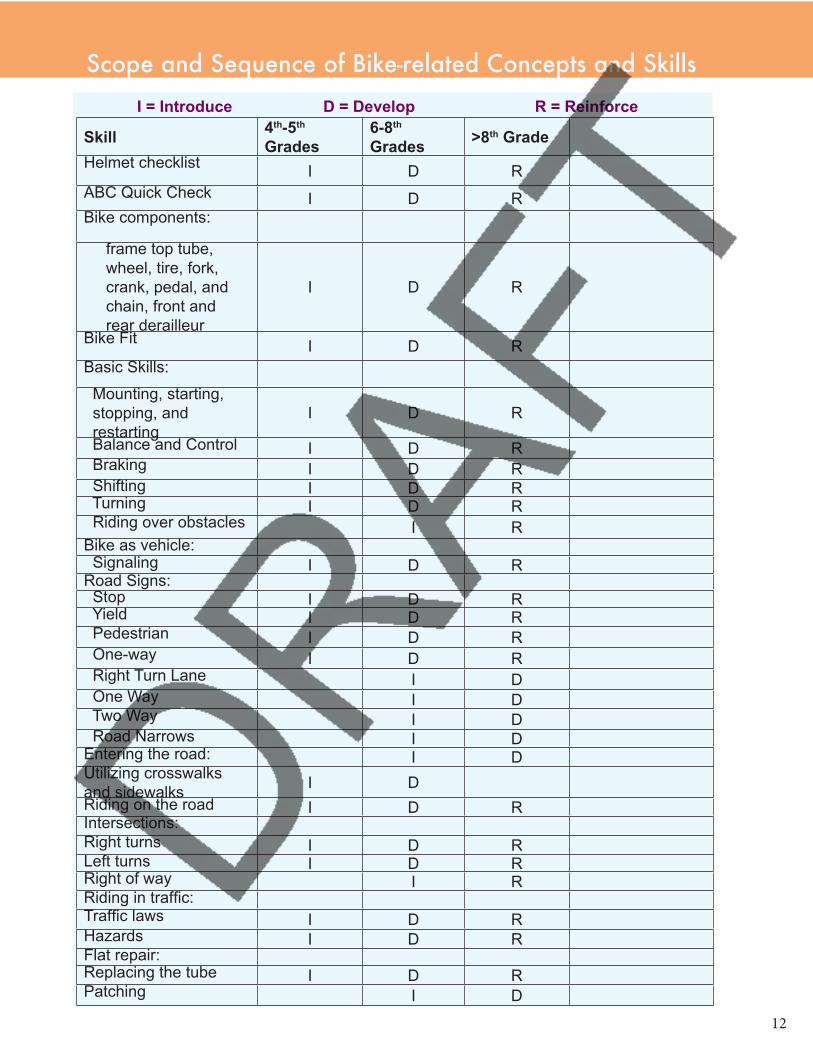
I = Introduce D = Develop R = Reinforce
Skill 4th-5th Grades
6-8th Grades >8th Grade
Helmet checklist I D RABC Quick Check I D RBike components:
frame top tube, wheel, tire, fork, crank, pedal, and chain, front and rear derailleur
I D R
Bike Fit I D RBasic Skills:
Mounting, starting, stopping, and restarting
I D R
Balance and Control I D R Braking I D R Shifting I D R Turning I D R Riding over obstacles I RBike as vehicle: Signaling I D RRoad Signs: Stop I D R Yield I D R Pedestrian I D R One-way I D R Right Turn Lane I D One Way I D Two Way I D Road Narrows I DEntering the road: I DUtilizing crosswalks and sidewalks I DRiding on the road I D RIntersections:Right turns I D RLeft turns I D RRight of way I RRiding in traffic:Traffic laws I D RHazards I D RFlat repair:Replacing the tube I D RPatching I D
Scope and Sequence of Bike-related Concepts and Skills
12
Kathryn Kingsbury
draft tif

Day 1 Day 2 Day 3 Day 4 Day 5IA: Locomotors Moves
HRPA: Echelon Fitness
Content:Helmet Checklist ABC Quick CheckBike Parts
Assessment:Peer Helmet Check-list
IA: Why we bike BB
HRPA: Locomotors Moves
Content:Bike FitMounting, starting, stopping, and re-startingBalance and Con-trol
Assessment:Bike Fit Peer As-sessment
IA: Bike Fit review and Follow the leader
HRPA: Echelon Fit-ness
Content:BrakingTurning
Assessment:Bike Skills Scoring Guide
IA: Slalom Course
HRPA: Right Turn Fitness
Content:TurningEntering the RoadRoad Signs
Assessment:Bike Skills Scoring Guide
IA: Road Sign Ac-tivity Exchange
HRPA: Right Turn Fitness
Content:Entering the RoadFlat Tire RepairLocking your Bike
Assessment:Bike Skills Scoring Guide
Day 6 Day 7 Day 8 Day 9 Day 10IA: Flat Tire Review
HRPA: Jump & Pedal Fitness
Content:Riding on the RoadScanningRiding in a straight lineDodging obstacles
Assessment:Bike Skills Scoring Guide
IA: Right Turn Fit-ness
HRPA: Jump & Pedal Fitness
Content:Intersections: Left Turns
Assessment:Bike Skills Scoring Guide
IA: Traffic Style Left Turns
HRPA: Aces Wild
Content:Intersections: R/L Turns and Right of Way (ROW)
Assessment:Bike Skills Scoring Guide
IA: PEDAL
HRPA: Bike Specific Partner Resistance Activities
Content: Riding in trafficGearing
Assessment:Bike Skills Scoring Guide
Neighborhood Ride or Station Chal-lenge
Assessment:Bike Skills Scoring Guide
Bike for LifeProgram: Elementary 10 day Block Plan
*IA = Instant Activity **HRPA = Health-related Physical Activities
13
Kathryn Kingsbury
draft tif
Lesson 1: Intro to Biking
WI PE Standard(s) and Lesson Objective(s): Demonstrate how to correctly wear and adjust a bike helmet using the Eyes, Ears, Mouth Check:
Eyes - The front edge of the helmet should be visible when you look up.Ears - The two ear straps should meet under your ears so that the adjustable piece fits almost like an earring with your ear in the center of a Y formed by the straps. Mouth - The chinstrap should be adjusted so that when you open your mouth wide, the strap becomes tight but not so tight that it is uncomfortable.
Verbally list and physically demonstrate what each letter and word of the ABC Quick Check stands for.
Verbally and visually match ALL of the following bike part pictures with there corresponding location on a bike: frame top tube, wheel, tire, fork, crank, pedal, and chain. (If your bike fleet includes geared bikes students should also be able point out the front and rear derailleur.)
A. Instant Activity: Locomotors Moves (3 min.)As students enter the gym ask them to travel around the outside of the play space in the same direction using their favorite locomotor movement (e.g., jogging, galloping, walking, etc). Freeze all students after 30s and use a grouping strategy (see http://www.pecentral.org/lessonideas/ViewLesson.asp?ID=259) ask half of the class to pretend they are on a bicycle (the bicyclist students will skip and all others can choose a different locomotor movement) and half will be pretending they are driving a car. Before beginning again ask the question: “What must all bicyclist wear before they ride their bikes?” There may several good answers (e.g., bright clothing, protective pads) but your looking for HELMET.
Have the bicyclist pretend to put helmets on and emphasize a “clicking” sound so you know they have buckled their helmets. Once helmets are “on” give the “go” signal and allow students to move about the play space again. At first, don’t be concerned about where (e.g., bikes to outside in the “bike lane”) the bikes and cars are moving.
After another 30s “freeze” all students and ask the “cars” and “bikes” to switch. Have students pretend they are exchanging helmets. Ask students to make the “click” sound.
B. Health-related Physical Activity (HRPA): Echelon Fitness (8 min.)Formation/Grouping:
• 3-5 students per groupExplanation:
• Students will work together like an echelon in a bike race. Explain echelon and how the leader of a group of birds or bikers breaks the wind for the other group members for a short time before integrating back into the group and the next group member in line takes the lead.
• Bikes are not used during this first introduction of Echelon Fitness• Each squad receives a “Echelon Leader Fitness” task card • Students within the squad take turns acting as the leader• Once the entire groups completes the task, a new leader reads the next task to the group• Squads will be performing different physical activities on and off their bikes based on the order of the
activities listed in the task card• Groups start over if they complete all tasks before other groups
Transportation Investigation:If you’re charting modes of transportation to school in class, have students chart their mode as they transition from the HRPA to the next activity during this and future lessons.
14
Kathryn Kingsbury
draft tif
SRTS (2 min.) • During the next several class sessions we are going to learn how to safely use our bikes as vehicles.• In addition to having fun learning new information, we will be going outside and practicing riding bikes in the
road the same way that other vehicles drive in the road.
C. Skill Activity: Helmets and ABC Quick Check
Discuss the Importance of the Brain (3 min.)What is the most important part of your body?
• The brain is the most important part of the human body. • The brain is the central control station for our whole body. • What does your brain do for you?
o Like a computer’s hard drive, the brain controls all functions of our body.
Place a helmet on yourself or a student and demonstrate how to properly wear and fit a helmet.
Eyes, Ears, Mouth Check• A helmet has to be worn properly to protect your brain.• Demonstrate a properly fitted helmet using the eyes, ears, mouth check.• Eyes—The front edge of the helmet should be visible when you look up.• Ears—The two ear straps should meet under your ears so that the adjustable piece fits almost like an
earring with your ear in the center of a Y formed by the straps. • Mouth—The chinstrap should be adjusted so that when you open your mouth wide, the strap becomes
tight but not so tight that it is uncomfortable.• Misadjust your helmet and have students explain how to fit your helmet correctly.
Distribute Helmets (3 min.)• Have students help to adjust each other’s helmets using the Helmet Peer Assessment Checklist • Double check student’s helmets for proper fit and label each helmet with students name in permanent
marker. • Have students put helmets in plastic grocery bags to prevent lice transfer.
Helmet Peer Assessment
_____ Eyes - The front edge of the helmet should be visible when you look up.
_____ Ears - The two ear straps should meet under your ears so that the adjustable piece fits almost like an earring with your ear in the center of a Y formed by the straps.
_____ Mouth - The chinstrap should be adjusted so that when you open your mouth wide, the strap becomes tight but not so tight that it is uncomfortable.
ABC Quick Check (10 min.)Using your own bike, demonstrate the ABC Quick Check. The ABC Quick Check is a simple check that should be done each time before riding your bike to ensure is safe. Each letter or word in ABC Quick Check stands for something. Be sure to demonstrate • What do you think the A stands for? Air: Push down on each tire with your thumb to see if there is
enough air.o A properly inflated tire should be hard when you push down on it.
• What do you think the B stands for? Brakes: Squeeze each brake lever one at a time, the brake pads should contact the rim squarely and fully stop the wheel from moving.
o If your bike has a coaster brake, you stop by pedaling backwards. Make sure that the coaster brake arm is fastened to the chain stay of the bicycle.
15
Kathryn Kingsbury
draft tif
• What do you think the C stands for? Chain: Touch the chain to make sure that it is well oiled.o If you have a bike without front and rear brakes, make sure that the chain is tight.o What color should your chain be? Silver, black. What colors are bad? Red, brown. o What does it mean if your chain is red or brown? It’s rusty.o How can we keep a chain from rusting? Oilo What kind of oil should we use? Bike oil only.
• Quick: Look to see that all of the quick release levers are secure (they may be located on the axle of each wheel and the seat post).
o Demonstrate how to properly close a quick release lever: holding the quick release lever open, tighten the axle nut so that when you close the lever you feel some resistance.
o A quick release lever is closed properly if the side of the lever facing outward says “closed” or the lever is curved inward.
o Demonstrate how easily a front wheel can be removed if the quick release lever is not secured. Imagine if your wheel came off while you were riding!
• Check: Spin each wheel to check that it is straight and not rubbing the brakes.• Demonstration: Ask how long the students think the ABC Quick Check would take. Have them time you
doing it. (It could take as little as 10 seconds.) Ask if they think they could spare that many seconds before each ride to make sure their bike is safe.
• ABC Quick Check Practice Partner students and ask one partner to retrieve a bike. Students will be use visually and verbally practice the ABC Quick Check.
D. Game Activity: Bike Part Matching Game (3 min.)3-5 students per group. Each group gets a “deck” of bike parts (paste parts on the back of playing cards or use index cards (use Velcro or tape on the opposite side) and one large picture of a bike. Each group should shuffle their deck and place the cards into a Frisbee. Spread the groups around the play space and hang a bike picture on the wall, or cone, for each group. Be sure to place the bike picture at least 30 yards away. When the teacher says “go” one student picks a card out of the deck, runs to their designated bike picture, and hangs the bike part card in the correction location on the bike. After the students hangs the card he/she runs back to the groups and another student picks out a card. Have waiting students perform a flexibility, muscular strength, or muscular endurance activity while they are waiting for the running student to arrive. This is NOT a relay race. Have groups perform the activity for 2-3 min. and then stop and check their work. Discuss common mistakes.
E. Closure: Before transitioning to the exit line and Hand Signal Game, have students stay in their groups from the previous activity and verbally review helmet fit and the ABC Quick Check.
Assignment (1 min.)Your first assignment is to discuss the following questions with your family: How do you/we normally get around? How do you/we get to school/work? Do you/we think you/we live close enough to bike or walk to school/work?
Hand Signal Game (1 min.)Play this game while waiting for the classroom teacher to retrieve students or when you have a spare minute in class. Say right, left or stop in random order and have students respond with the proper signal while waiting in line. Consider asking classroom teaches to utilize these hand signals as students travel through the school’s hallways.
16
Kathryn Kingsbury
draft tif
Lesson 2: Basic Bike Skills
WI PE Standard(s) and Lesson Objective(s):
Describe ALL of the major factors that contribute to a properly fitted bike (stand over height, saddle height, handlebar adjustment).
Demonstrate the bike “ready position” characterized by standing over the bicycle, or sitting on the seat if their feet can touch the ground, placing one foot on the pedal in the 10:00 position.
Come to a controlled stop characterized by using both brakes (or coaster and front brake), butt on seat, and placing one foot down on the ground as the bike comes to a stop.
Verbally describe what is meant by being a predictable and visible cyclist
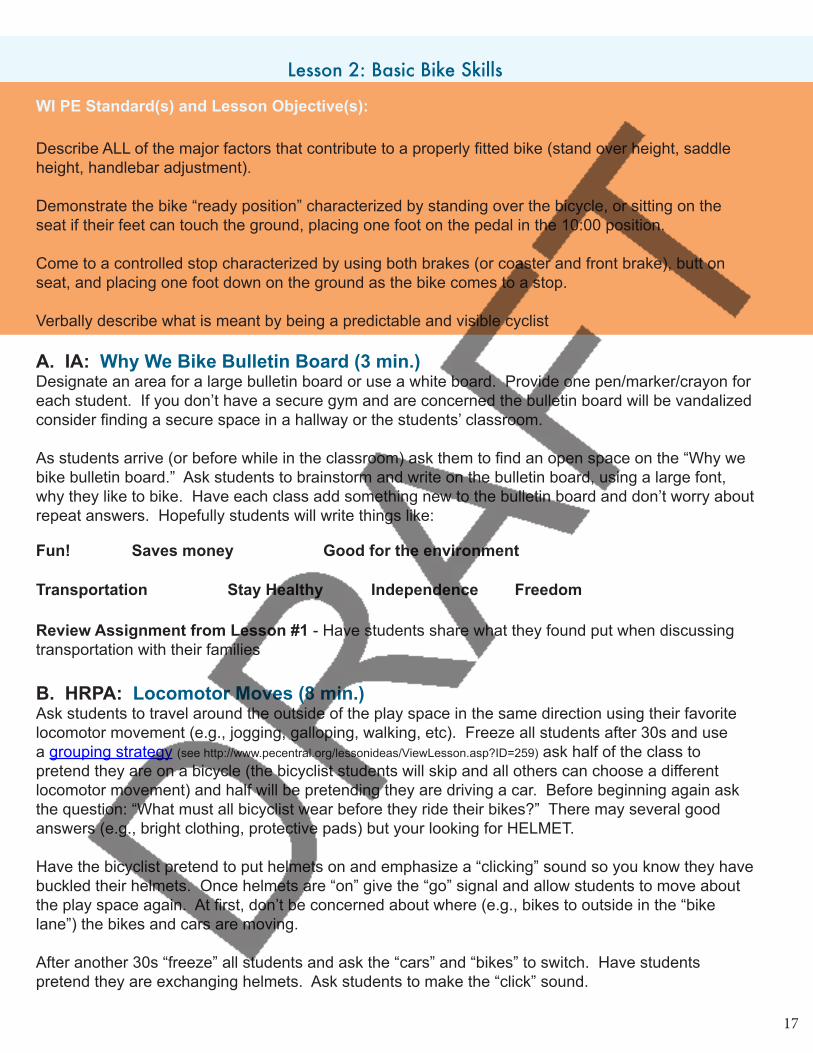
A. IA: Why We Bike Bulletin Board (3 min.)Designate an area for a large bulletin board or use a white board. Provide one pen/marker/crayon for each student. If you don’t have a secure gym and are concerned the bulletin board will be vandalized consider finding a secure space in a hallway or the students’ classroom.
As students arrive (or before while in the classroom) ask them to find an open space on the “Why we bike bulletin board.” Ask students to brainstorm and write on the bulletin board, using a large font, why they like to bike. Have each class add something new to the bulletin board and don’t worry about repeat answers. Hopefully students will write things like:
Fun! Saves money Good for the environment
Transportation Stay Healthy Independence Freedom
Review Assignment from Lesson #1 - Have students share what they found put when discussing transportation with their families
B. HRPA: Locomotor Moves (8 min.)Ask students to travel around the outside of the play space in the same direction using their favorite locomotor movement (e.g., jogging, galloping, walking, etc). Freeze all students after 30s and use a grouping strategy (see http://www.pecentral.org/lessonideas/ViewLesson.asp?ID=259) ask half of the class to pretend they are on a bicycle (the bicyclist students will skip and all others can choose a different locomotor movement) and half will be pretending they are driving a car. Before beginning again ask the question: “What must all bicyclist wear before they ride their bikes?” There may several good answers (e.g., bright clothing, protective pads) but your looking for HELMET.
Have the bicyclist pretend to put helmets on and emphasize a “clicking” sound so you know they have buckled their helmets. Once helmets are “on” give the “go” signal and allow students to move about the play space again. At first, don’t be concerned about where (e.g., bikes to outside in the “bike lane”) the bikes and cars are moving.
After another 30s “freeze” all students and ask the “cars” and “bikes” to switch. Have students pretend they are exchanging helmets. Ask students to make the “click” sound.
17
Kathryn Kingsbury
draft tif
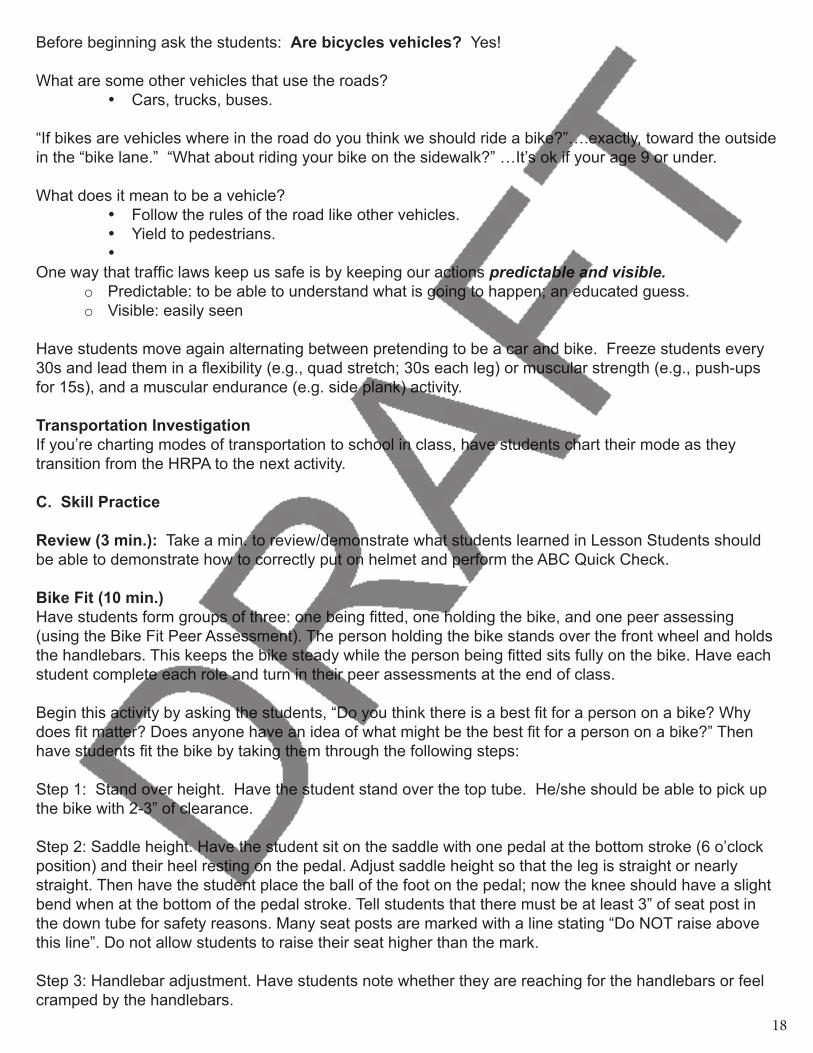
Before beginning ask the students: Are bicycles vehicles? Yes!
What are some other vehicles that use the roads?• Cars, trucks, buses.
“If bikes are vehicles where in the road do you think we should ride a bike?”….exactly, toward the outside in the “bike lane.” “What about riding your bike on the sidewalk?” …It’s ok if your age 9 or under.
What does it mean to be a vehicle? • Follow the rules of the road like other vehicles.• Yield to pedestrians.•
One way that traffic laws keep us safe is by keeping our actions predictable and visible.o Predictable: to be able to understand what is going to happen; an educated guess.o Visible: easily seen
Have students move again alternating between pretending to be a car and bike. Freeze students every 30s and lead them in a flexibility (e.g., quad stretch; 30s each leg) or muscular strength (e.g., push-ups for 15s), and a muscular endurance (e.g. side plank) activity.
Transportation InvestigationIf you’re charting modes of transportation to school in class, have students chart their mode as they transition from the HRPA to the next activity.
C. Skill Practice
Review (3 min.): Take a min. to review/demonstrate what students learned in Lesson Students should be able to demonstrate how to correctly put on helmet and perform the ABC Quick Check.
Bike Fit (10 min.)Have students form groups of three: one being fitted, one holding the bike, and one peer assessing (using the Bike Fit Peer Assessment). The person holding the bike stands over the front wheel and holds the handlebars. This keeps the bike steady while the person being fitted sits fully on the bike. Have each student complete each role and turn in their peer assessments at the end of class.
Begin this activity by asking the students, “Do you think there is a best fit for a person on a bike? Why does fit matter? Does anyone have an idea of what might be the best fit for a person on a bike?” Then have students fit the bike by taking them through the following steps:
Step 1: Stand over height. Have the student stand over the top tube. He/she should be able to pick up the bike with 2-3” of clearance.
Step 2: Saddle height. Have the student sit on the saddle with one pedal at the bottom stroke (6 o’clock position) and their heel resting on the pedal. Adjust saddle height so that the leg is straight or nearly straight. Then have the student place the ball of the foot on the pedal; now the knee should have a slight bend when at the bottom of the pedal stroke. Tell students that there must be at least 3” of seat post in the down tube for safety reasons. Many seat posts are marked with a line stating “Do NOT raise above this line”. Do not allow students to raise their seat higher than the mark.
Step 3: Handlebar adjustment. Have students note whether they are reaching for the handlebars or feel cramped by the handlebars.
18
Kathryn Kingsbury
draft tif

Step 4: Seat tilt. Students should look for saddle tilt and make sure that the saddle is level or parallel to the ground. While sitting up (no hands on the handlebars), students should be able to feel if they are sliding forward or backward on the saddle. Have students adjust the saddle if necessary.
Adapted from J. Steffen and J. Steihl in Teaching outdoor pursuits in physical education. Reprinted with permission from Human Kinetics
READY, SET, GO, and Stop! Mounting, Pushing Off, and Braking (10 min.)This drill teaches cyclists the correct position to be in for starting off when cycling. By having their foot on the pedal in the proper push off position, cyclists will be able to start up quickly and efficiently. This skill will enable them to cross streets and enter traffic without stumbling and falling, and to be predictable.
Have cyclists line up along one side of the play space, court or parking lot.
Demonstrate how if your feet are on the ground and you know where the pedal is, you won’t fumble and will be able to get started quickly.
Demonstrate and teach the Ready Position:Stand over the bicycle, or sit on the seat if your feet can touch the ground.Place one foot on the pedal in the 10:00 position. The right or left foot can be used, but you should be consistent and always use the same foot so this skill becomes a natural habit.
Choose two students. Have one cyclist put their foot in the ready position and the other stand over the bike with their feet on the ground. Say “Ready, Set,” and see who has the faster and safer start.
Now you are ready to get a good push when the traffic light changes, when there is a break in traffic to cross the street, or when the group starts riding so that you don’t get left behind.
Have students line up and get in the ready position. Tell them to cycle across to the other side of the court and wait there until everyone is finished.
After students have had a few opportunities to practice add in deliberate braking. Remind students to apply equal pressure to each brake lever or use both the hand brake and coaster brake when slowing down or stopping. Always keep your butt on the seat when braking!
Demonstrate how easy it is for the back of the bicycle to lift up when there is no weight over the rear wheel. Then show how difficult it is for the back of the bike to be lifted up with weight over the back wheel by staying seated.
As students practice their “Ready, Set, Go” call out a “freeze” signal once and awhile. Students should be able to come to a controlled stop by characterized by using both brakes (or coaster and front brake), butt on seat, and placing one foot down on the ground.
D. Game Activity: Scramble Drill (6 min.)This activity will help you explain to the cyclists how to be predictable and why they should follow the rules of the road. This helps students understand the concept of predictability.
Have cyclists line up on one side of the paved area you are using. Explain that they may ride
19
Kathryn Kingsbury
draft tif

wherever they want when you blow the whistle as long as they stay on the designated area of the play space (30 x 60).
Give the “go” signal and let the “chaotic riding” begin. Give cyclists about 2 minutes, then have them freeze/stop.
Discuss what just happened. Normally, as the kids ride they naturally tend to end up riding in the same direction. The chaos is too annoying and unpredictable and the majority of kids will, without overt communication, begin to ride in a circular pattern, developing their own unspoken “rules”.
Ask: What would happen if cars were allowed to drive wherever the wanted like you just did? To avoid accidents, we have rules of the road that everyone must follow. When you are riding on the street, you are considered a vehicle, just like a car, van, or truck, and you must follow all the same traffic rules they do. Not only is this the law, but it will help to keep you from getting hurt.
E. Closure: Think/Pair/Share (2 min.)Students work together in their “Bike Fit” group and verbalize to one another what they should look for in a “good” bike fit.
Hand Signal Game (2 min.)Play this game while waiting for the classroom teacher to retrieve students or when you have a spare minute in class. Say right, left or stop in random order and have students respond with the proper signal while waiting in line. Consider asking classroom teaches to utilize these hand signal and students travel through the school’s hallways.
Assignment• Vocabulary worksheet (see appendix)
20
Kathryn Kingsbury
draft tif
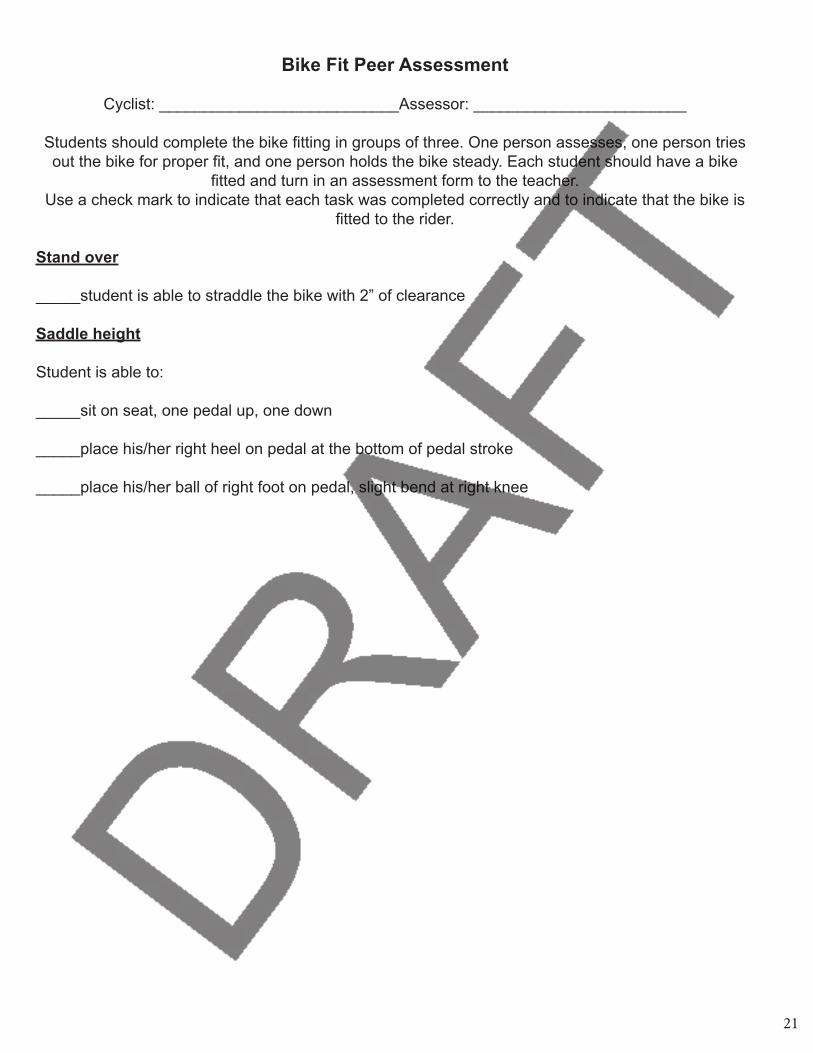
Bike Fit Peer Assessment
Cyclist: ___________________________Assessor: ________________________
Students should complete the bike fitting in groups of three. One person assesses, one person tries out the bike for proper fit, and one person holds the bike steady. Each student should have a bike
fitted and turn in an assessment form to the teacher.Use a check mark to indicate that each task was completed correctly and to indicate that the bike is
fitted to the rider.
Stand over
_____student is able to straddle the bike with 2” of clearance
Saddle height
Student is able to:
_____sit on seat, one pedal up, one down
_____place his/her right heel on pedal at the bottom of pedal stroke
_____place his/her ball of right foot on pedal, slight bend at right knee
21
Kathryn Kingsbury
draft tif

Lesson 3: Basic Skills, continued
WI PE Standard(s) and Lesson Objective(s):
Demonstrate control and balance on a bike characterized by not touching the ground when moving slowly or turning.
Demonstrate proper turning characterized by inside pedal up and looking through the corner.
A. IA: Bike Fit Review and Follow the Leader (3 min.)Have students place their helmets on, find a partner, and run through the bike fit checklist. Once students have completed the helmet, ABC Quick Check, and bike fit checklists they can begin playing follow the leader in a designated area. Leaders should emphasize slow movement to refine balance and turns.
B. HRPA: Echelon Fitness (6 min.)Formation/Grouping:
• 3-5 students per groupExplanation:
• Students will work together like an echelon in a bike race. Explain echelon and how the leader of a group of birds or bikers breaks the wind for the other group members for a short time before integrating back into the group and the next group member in line takes the lead.
• Each squad receives a “Echelon Leader Fitness” task card (see appendix)• Students within the squad take turns acting as the leader• Once the entire groups completes the task, a new leader reads the next task to the group• Squads will be performing different physical activities on and off their bikes based on the order of the
activities listed in the task card• Groups start over if they complete all tasks before other groups
C. Skill Practice:
Review “ready position”, “push off” and rules that must be followed outside.o If you are on a bike you must wear your helmet!o The instructors will give out bikes, only ride when asked to.o Only bike within the designated areas and when it’s your turn.o Distribute helmets and review the eyes, ears, mouth check.
Consider organizing the following activities into FOUR stations. Students spend about 3-4 min. at each station.
Slalom CourseUse the set below for both activities. Have students practice weaving in and out of line half tennis balls that are spaced between 3 and 6 feet apart.
22
Kathryn Kingsbury
draft tif
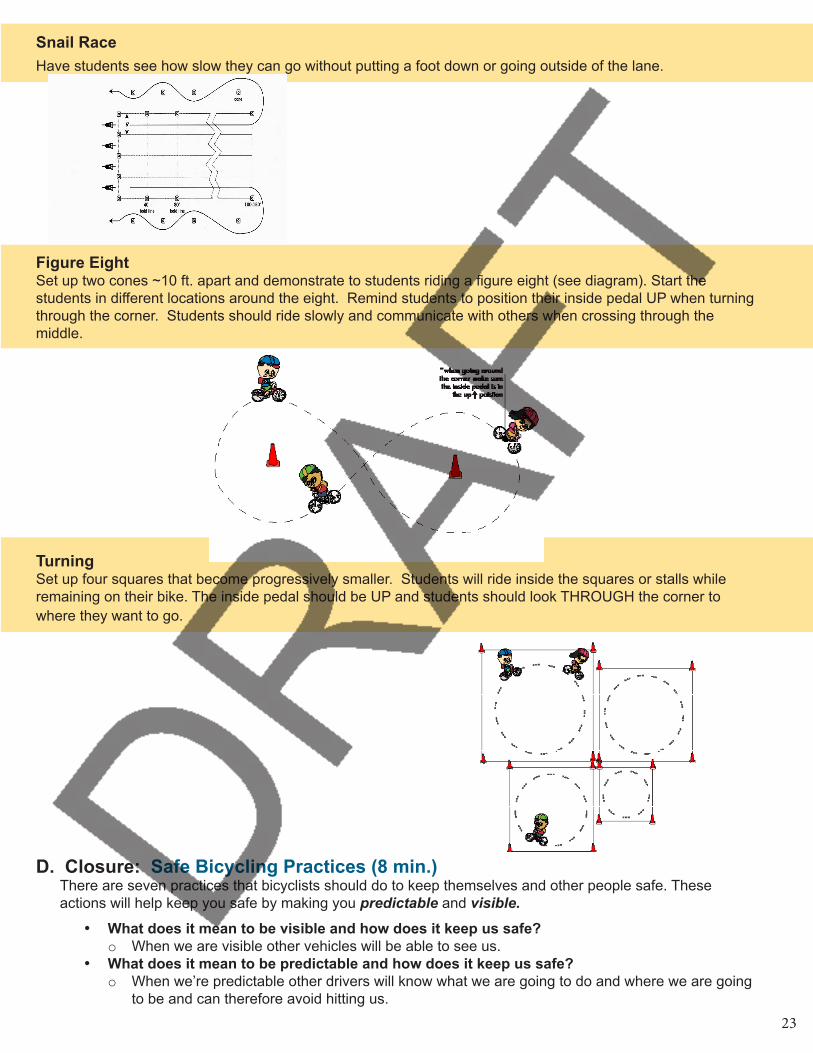
Snail Race Have students see how slow they can go without putting a foot down or going outside of the lane.
Figure EightSet up two cones ~10 ft. apart and demonstrate to students riding a figure eight (see diagram). Start the students in different locations around the eight. Remind students to position their inside pedal UP when turning through the corner. Students should ride slowly and communicate with others when crossing through the middle.
Turning Set up four squares that become progressively smaller. Students will ride inside the squares or stalls while remaining on their bike. The inside pedal should be UP and students should look THROUGH the corner to where they want to go.
D. Closure: Safe Bicycling Practices (8 min.)There are seven practices that bicyclists should do to keep themselves and other people safe. These actions will help keep you safe by making you predictable and visible.
• What does it mean to be visible and how does it keep us safe? o When we are visible other vehicles will be able to see us.
• What does it mean to be predictable and how does it keep us safe?o When we’re predictable other drivers will know what we are going to do and where we are going
to be and can therefore avoid hitting us.
23
Kathryn Kingsbury
draft tif
o For example, a traffic light turns red, what do you expect cars to do ahead of you? What are you going to do because of their reaction?
• What is the most important thing to have with you when you’re biking?o A helmet. Why?
• Where should people over the age of 10 ride their bikes?o In the street. Why?
• What side of the street should you ride your bike on?o Stay to the right. Why?o What lane position is that? o How many feet away from the curb or parked cars should we ride our bikes?
• What does it mean to ride your bike in the same direction as traffic? • Do bicyclists need to follow traffic signs, or are there exceptions?
o Obey all traffic signs. Why?o What are some traffic signs? What do they mean?
• You are approaching a turn. You look behind you and left-right-left and see that it is clear, what do you do next?o Use hand signals. Why? o Which is more important, looking for other vehicles or signaling a turn? Why?o Should you signal before, after, or during a turn? How do hand signals help us be predictable?o What’s the difference between a hand signal and a traffic signal?
• If you are going to be riding at night, what should you have on your bike?o White front headlight and either a red rear light or reflector depending on local laws.o Does this keep you predictable or visible?o Wearing white or brightly colored clothing can also help to keep you visible.
AssignmentDiscuss with your families the barriers/obstacles (physical and policy related) in your neighborhood that impede you and your family from riding your bikes for enjoyment and active transportation. Are there steps/actions that you and family to take to change one or several of these barriers? If so, write down a goal (e.g., one of my family members has a flat tire so we’ll take the wheel in and get it fixed) that you and your family could accomplish in the next two weeks.
24
Kathryn Kingsbury
draft tif
Lesson 4: Bike as a Vehicle
WI PE Standard(s) and Lesson Objective(s):
Demonstrate a right hand signal characterized by slowing down and using their left hand to make an “L” shape with elbow out and hand pointed toward the sky.
Describe all the following road signs: stop, yield, railroad, one-way, and pedestrian.
demonstrate entering the roadway correctly characterized by coming to a complete stop, looking left, right, and left again (check the sidewalk if one is present), signaling (point in the direction of travel), and then entering the roadway when it is clear.
A. IA: Salmon Course (3 min.)After students retrieve their bikes and show a peer their properly fitted helmet they can begin:
Slalom CourseHave students practice weaving in and out of line half tennis balls that are spaced between 3 and 6 feet apart.
B. HRPA: Right Turn Fitness (8 min.)Formation/Grouping:
• 2-3 Rectangular areas (20yards x 40yards)• Set 4 cones in each corner of the rectangular play area. Optional: Place stop signs in two, or all four,
of the cones (see appendix for stop sign cut out)• Students continually move around the rectangle when music is playing, making the appropriate right
hand signal each time they come to a cone (remind students to do an over the shoulder check before signaling).
• Students should use the stop signal if stop signs are included.• Several students can stop (shoulder to shoulder) on the stop line. Passing may occur in the outside
lane(s). Be sure students use a vocal prompt (“passing on your left) when passing slower students.Equipment:
• Task cards, listing the task to be completed to reach the next cone, at each corner placed on large coneExplanation:
• At each corner a different activity is performed to the next cone• Activities include: slow as you can go, walk your bike, regular biking speed, walk your bike using just
the saddle of the bike, run with your bike• Start students in several different areas of the rectangle (not just at the cones) so there is less of a
chance of “bunching” up• Pause the music every 45s. When the music stops students should use the stop signal, come
to a complete stop wherever they might be, and safely dismount their bike. Once students have dismounted, prompt them to gently lay down their bike or utilize their kickstand.
• Teacher demonstrates (or can call on a student to lead) a health-related physical fitness task (e.g., plank for 20s).
Variation(s):• Students design an off-the-bike locomotor movement• Build in a few “choice” task listed on the task card
25
Kathryn Kingsbury
draft tif

C. Skill Practice
Turning Practice (8 min.)Use a cone or a natural object such as rock or tree for this activity. Demonstrate a proper turn: Brake BEFORE the turn, keep the inside pedal up, and look THROUGH the turn. Set up several stations so that students can optimize their turning practice and to reduce student wait time.
Entering the road simulation (10 min.)Students will be practicing entering the road from a driveway. Set up a road simulation as outlined below on the school grounds with a real driveway or in the gym. Make the course large enough, or set up multiple courses, so that only 3-4 students are waiting in line at ay time. Have students begin riding the loop. Don’t be concerned about entering the roadway correctly at first; just allow students to practice the path of travel. Use a student to demonstrate properly entering the roadway from a driveway:
• Come to a complete stop• Look left, right, and left again (check the sidewalk if one is present)• Signal (point in the direction of travel)• Enter the roadway when it is clear
As students become more confident you can add cones/markers to represent obstructions. If they cannot see the roadway have students move out slowly to see past the obstruction, but only enter the travel lane when they are sure it is clear.
As students practice you can add other road hazards in, or to the side, of the roadway. If cars are added be sure students check to see if a driver an if he/she might be opening the door. Students, or parent volunteers, can be used to simulate parked cars. Parked cars can swing their arm (a safe distance away from the bicyclist) to represent a door opening.
26
Kathryn Kingsbury
draft tif
D. Game: Road Sign Activity Exchange (5 min.)Formation/Grouping:
• Groups of 3-5 Equipment:
• Several “containers” (e.g., shoe boxes, frisbees, gallon ice cream containers)• This activity does not require bikes• Road signs and corresponding road signs on paper or index cards (see appendix for template)• Consider laminating
Explanation:• Use Health-related Physical Fitness activities (i.e., Muscular strength and endurance, Flexibility, and
Cardiovascular Endurance)• Color code road sign and activity (e.g., red stop sign = C.V. Endurance activity)• Road signs/activities are placed in containers• Containers are set in the middle of the play space• Students take turns going to the container and choosing a different color, or fitness component, each
time• Once completed, road sign/activity cards go back into the container • Students start over once each component has been chosen• If students accidentally choose the same activity twice, just have them place it back in the container
and choose a new activityStudents define and explain sign before or during exercisesVariation(s):
• Pre-programmed music could cue students to perform the activity (e.g., for 20 sec.) and change activities (e.g., 5 sec. pause)
Signs and ActivitiesSee appendix for Activities Card Template. Activities below represent ONE set. Make ~6 sets and place one set of activities in one container (old yogurt container would work)
Activities (inserted on back)
Stop Sign (red/cardio)Walk or jog for 1 min.Jump rope (or pretend) for 1 min.Power Skips for 30sMountain climbers for 1 min.Bike Peddlers for 1 min.
Yield Sign (red/cardio) Jumping jacks for 1 min. Power slide for 1 min. Jump squats for 30s Bench step ups for 1 min. Skier jumps for 30s
Railroad Crossing Sign (yellow/flexibility) Quad (quadriceps) stretch for 30s each leg Shoulder (deltoids) stretch for 30s each arm Calf stretch (gastrocnemius) for 30s each leg Back stretch (erecter spinae) for 30s Hamstring (biceps femoris) for 30s each leg
27
Kathryn Kingsbury
draft tif

One Way (white/muscular strength) Squats for 30s Push ups for 30s Curl ups for 30s Leg extensions with partner resistance for 30s Leg curls with partner resistance for 30s
Pedestrian Crossing (white muscular endurance) Front plank for 30s Left side plank for 30s; R side plank for 30s
Lunges for 30s Toe raises for 30s Backward crab walk for 30s
E. Closure: Street Demonstration (Optional)• After having students put their bicycles away, walk over to the sidewalk (or prepare a chalked
outline of a typical street near your school)• Discuss the traffic situation around the school.• When streets have vehicles traveling in both directions, the street is divided in half. Vehicles always
travel on the right half of the road.• Streets are divided into traffic lanes. Generally there is one in each direction. How many lanes does
the street we are looking at have?• To teach where to ride a bicycle, we divide each lane into 3 parts.
o Lane position 1 is closest to the middle of the road.o Lane position 2 is in the middle of the lane.o Lane position 3 is closest to the right side of the road.• Which lane position do you think bicyclists should use if they are going straight? Lane position 3
and stay 3 feet away from the curb and parked cars.• What should you do when you want to cross the street or enter it? Stop, look left-right-left. Why do
we look left first and again? Because cars are coming from the left.
Assignment: Common Reasons for Bicycle Crashes • Ask families to brainstorm potential biking and walking hazards near their home.• Students and families create a list what they believe to be the most common reasons for bicycle
crashes.• Students share with their families: 85% of all bike crashes don’t involve a motor vehicle and that Youth
are at fault almost all of the time when they do crash with a motor vehicle.• The frequent causes of major bicycle crashes for kids are:
o Cyclist comes out of a driveway and doesn’t stopo Cyclist runs a stop sign or traffic signalo Riding the wrong way is another major issueo Solution: be predictable and visible like other vehicles.
• Families create a list of two-three things they can do to improve bike/pedestrian safety near their home.
28
Kathryn Kingsbury
draft tif
Lesson 5: Bike as a Vehicle and Flat Tire Repair
WI PE Standard(s) and Lesson Objective(s):
Demonstrate entering the roadway correctly characterized by coming to a complete stop, looking left, right, and left again (check the sidewalk if one is present), signaling (point in the direction of travel), and then entering the roadway when it is clear.
Demonstrate how to correctly repair a flat tire characterized by:• shifting into the smallest rear cog• releasing the brakes (linear or v brakes only)• taking the wheel off using a wrench or quick release • using tire irons to take one side of the tire off the rim• pumping up the new tube until it has just enough air in it to hold its shape• pumping up the tube to full pressure and making sure the tire has seated back onto the rim• replacing the wheel on the bike
A. IA: Road Sign Activity Exchange (6 min.)Formation/Grouping:
• Groups of 3-5 Equipment:
• Several “containers” (e.g., shoe boxes, frisbees, gallon ice cream containers)• This activity does not require bikes• Road signs and corresponding road signs on paper or index cards (see appendix for template)• Consider laminating
Explanation:• Use Health-related Physical Fitness activities (i.e., Muscular strength and endurance, Flexibility,
and Cardiovascular Endurance)• Color code road sign and activity (e.g., red stop sign = C.V. Endurance activity)• Road signs/activities are placed in containers• Containers are set in the middle of the play space• Students take turns going to the container and choosing a different color, or fitness component,
each time• Once completed, road sign/activity cards go back into the container • Students start over once each component has been chosen• If students accidentally choose the same activity twice, just have them place it back in the
container and choose a new activity
Variation(s):• Sport related skills can be integrated • Pre-programmed music could cue students to perform the activity (e.g., for 20 sec.) and change
activities (e.g., 5 sec. pause)
Signs and ActivitiesStop Sign (red/cardio)
Walk or jog for 1 min.Jump rope (or pretend) for 1 min.Power Skips for 30sMountain climbers for 1 min.Bike Peddlers for 1 min.
29
Kathryn Kingsbury
draft tif
Yield Sign (red/cardio) Jumping jacks for 1 min. Power slide for 1 min. Jump squats for 30s Bench step ups for 1 min. Skier jumps for 30s
Railroad Crossing Sign (yellow/flexibility) Quad (quadriceps) stretch for 30s each leg Shoulder (deltoids) stretch for 30s each arm Calf stretch (gastrocnemius) for 30s each leg Back stretch (erecter spinae) for 30s Hamstring (biceps femoris) for 30s each leg
One Way (white/muscular strength) Squats for 30s Push ups for 30s Curl ups for 30s Leg extensions with partner resistance for 30s Leg curls with partner resistance for 30s
Pedestrian Crossing (white muscular endurance) Front plank for 30s Left side plank for 30s; R side plank for 30s
Lunges for 30s Toe raises for 30s Backward crab walk for 30s
B. HRPA: Right Turn Fitness (8 min.)Formation/Grouping:
• 2-3 Rectangular areas (20yards x 40yards)• Set 4 cones in each corner of the rectangular play area. Optional: Place stop signs in two, or all four, of
the cones (see appendix for stop sign cut out)• Students continually move around the rectangle when music is playing, making the appropriate right hand
signal each time they come to a cone (remind students to do an over the shoulder check before signaling). • Students should use the stop signal if stop signs are included.• Several students can stop (shoulder to shoulder) on the stop line. Passing may occur in the outside
lane(s). Be sure students use a vocal prompt (“passing on your left) when passing slower students.Equipment:
• Task cards, listing the task to be completed to reach the next cone, at each corner placed on large coneExplanation:
• At each corner a different activity is performed to the next cone• Activities include: slow as you can go, walk your bike, regular biking speed, walk your bike using just the
saddle of the bike, run with your bike• Start students in several different areas of the rectangle (not just at the cones) so there is less of a chance
of “bunching” up• Pause the music every 45s. When the music stops students should use the stop signal, come to a
complete stop wherever they might be, and safely dismount their bike. Once students have dismounted, prompt them to gently lay down their bike or utilize their kickstand.
• Teacher demonstrates (or can call on a student to lead) a health-related physical fitness task (e.g., plank for 20s).
30
Kathryn Kingsbury
draft tif
C. Skill PracticeSplit class into two groups. One group will be practicing the entering the road activity from Lesson 4 and one group will be practicing flat tire repair.
Biking Activity: Entering the road simulation (12 min.)Students will be practicing entering the road from a driveway. Set up a road simulation as outlined below. Make the course large enough, or set up multiple courses, so that only 3-4 students are waiting in line at ay time. Have students begin riding the loop. Don’t be concerned about entering the roadway correctly at first; just allow students to practice the path of travel. Use a student to demonstrate properly entering the roadway from a driveway:
• Come to a complete stop• Look left, right, and left again (check the sidewalk if one is present)• Signal (point in the direction of travel)• Enter the roadway when it is clear
As students become more confident you can add cones/markers to represent obstructions. If they cannot see the roadway have students move out slowly to see past the obstruction, but only enter the travel lane when they are sure it is clear.
As students practice you can add other road hazards in, or to the side, of the roadway. If cars are added be sure students check to see if a driver an if he/she might be opening the door. Students, or parent volunteers, can be used to simulate parked cars. Parked cars can swing their arm (a safe distance away from the bicyclist) to represent a door opening.
Flat Tire Repair• When your bicycle has a flat tire you can choose to either patch the hole or replace the entire inner
tube. Inner tubes generally cost around $3 while a patch can cost as little as 10 cents. Many of use our bikes to get somewhere on time (e.g., school) so, although a patch is much less expensive and requires more steps, we are first going to learn how to replace a tube. I would suggest patching at home when you have more time and can repair several tubes at one time.
• Teaching tip: There are several wonderful videos online (e.g., youtube.com, vimeo.com) that demonstrate how to change a flat tire.
First demonstrate then explain how to change a flat tire by doing the following:1. Shift into the smallest rear cog.2. Release the brakes (this is not necessary with disc brakes).3. Take the wheel off using a wrench or quick release (be careful of the derailleur while taking the back
wheel off).4. Using tire levers, remove one side of tire from rim to expose the rim and remove inner tube.5. Inflate tube to locate the hole and mark it with a pen or marker.6. Deflate the tube, use sandpaper to roughen and clean the area surrounding the puncture.7. Spread a thin layer of glue around the hole, about the size of a quarter.8. While glue is drying, try to locate the source of the puncture on the inside of the tire or the surface of the
rim.9. When glue is completely dry, discard the aluminum backing of the patch and adhere the patch to the
tube, pressing it firmly in place. Leave plastic on.10. Put the valve stem through the rim and put the tube back inside of the tire (one side of the tire is still
on the rim).11. Push the bead of the tire back onto the rim with your hands, use tire levers if necessary.12. Partially inflate the tire, check to make sure the tire is seated correctly, and then inflate to the
recommended PSI (pounds per square inch) that is printed on the tire. Check the edge of the tire where it meets the rim. You should see an even amount of tire sowing along the rim.
9. Replace the wheel on the bike.
Locking your bike:o Talk about the types of places that you can lock your bike to (fence, pole, and bike parking rack).
31
Kathryn Kingsbury
draft tif
o Show the importance of locking the front wheel if quick release levers are present.o Show the difference in locks (U-locks, combination locks, cable locks).
D. Closure: Hand Signal Review (1 min.)Ask students to stand up and turns their backs to you. Verbally announce each of the hand signals and have students respond. Use this opportunity to assess students hand signaling skill and complete the Bike Unit Scoring Guide.
Assignment: Test your families’ hand signal knowledge when you get home. Ask family members to show you a L, R and STOP hand signal.
32
Kathryn Kingsbury
draft tif

Lesson 6: Riding in the Road and Hazards
WI PE Standard(s) and Lesson Objective(s):
Scan over their left shoulder, keeping elbows bent and shoulders square to handlebars, while continuing to bike in a straight line.
Dodge an obstacle characterized by a quick turn to the RIGHT
A. IA: Flat tire review (5 min.)Place a front wheel out for each pair of students. As students enter have them practice repairing a flat tire as presented in Lesson 5.
B. HRPA: Jump & Pedal Fitness (focus on Right turns) (6 in.)Formation/Grouping:
• Split group in half using a partner strategy • Set up large square/rectangle using 6-8 cones• Have students find a partner to begin activity (partner 1 bikes; partner 2 performs jump rope activities listed
on the Jump Rope task sheet inside the square/rectangle.• Designate an area for students’ bikes when performing jump rope activities
Equipment: • Cones• Task cards with jump rope variations fastened on cones
Explanation:• Inner square/rectangle includes task cards with several jump rope variations • Once activity begins, students switch roles on paused music (not when one lap is completed) from biking to
jump rope and visa versa • Students DO NOT need to go back to original partner!! • Bikers should e traveling counterclockwise and practice making left turns (including use of hand signals).• When music stops, biker travels to the designated area (use appropriate hand signals), places bike in
designated location away from cycle track, and finds nearest cone/jump rope and chooses next jump rope activity down the line…inner circle partner retrieves their bike and begins biking
• Biking students should assume they are entering traffic from a driveway. Students practice exiting the driveway and turning right while making sure to stop, look for traffic and bike in the correct lane position in the road.
C. Skill Practice (10 min.):
Riding in a Straight LineHave students bike in a straight line, following a line on the ground, practicing braking at the end of the course. Students should return to the starting area. The activity can be made more difficult by adding hand signals (left and/or right) before they turn to get back in line.
Scanning• When we are biking in the street it is our job to be aware of all the other vehicles around us and yield to
them when they have the right-of-way.• When we want to turn left on a bicycle where do we need to look for cars? ALL directions, but first
behind us. Have instructors demonstrate the need to look back before moving left.• We scan to make sure that there are no vehicles behind us or on our left.• Everyone is going to practice riding a straight line and checking behind them for traffic. Why is it
important to be able to keep biking straight while looking backwards?33
Kathryn Kingsbury
draft tif
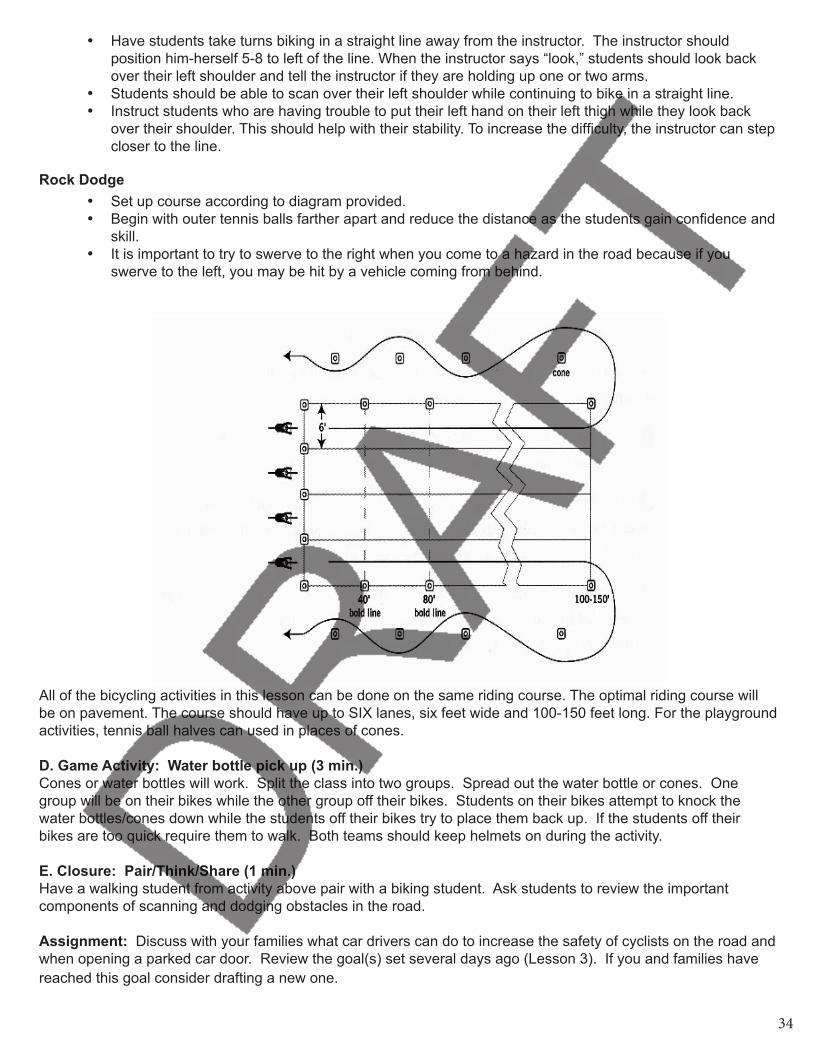
• Have students take turns biking in a straight line away from the instructor. The instructor should position him-herself 5-8 to left of the line. When the instructor says “look,” students should look back over their left shoulder and tell the instructor if they are holding up one or two arms.
• Students should be able to scan over their left shoulder while continuing to bike in a straight line.• Instruct students who are having trouble to put their left hand on their left thigh while they look back
over their shoulder. This should help with their stability. To increase the difficulty, the instructor can step closer to the line.
Rock Dodge• Set up course according to diagram provided. • Begin with outer tennis balls farther apart and reduce the distance as the students gain confidence and
skill.• It is important to try to swerve to the right when you come to a hazard in the road because if you
swerve to the left, you may be hit by a vehicle coming from behind.
All of the bicycling activities in this lesson can be done on the same riding course. The optimal riding course will be on pavement. The course should have up to SIX lanes, six feet wide and 100-150 feet long. For the playground activities, tennis ball halves can used in places of cones.
D. Game Activity: Water bottle pick up (3 min.)Cones or water bottles will work. Split the class into two groups. Spread out the water bottle or cones. One group will be on their bikes while the other group off their bikes. Students on their bikes attempt to knock the water bottles/cones down while the students off their bikes try to place them back up. If the students off their bikes are too quick require them to walk. Both teams should keep helmets on during the activity.
E. Closure: Pair/Think/Share (1 min.)Have a walking student from activity above pair with a biking student. Ask students to review the important components of scanning and dodging obstacles in the road.
Assignment: Discuss with your families what car drivers can do to increase the safety of cyclists on the road and when opening a parked car door. Review the goal(s) set several days ago (Lesson 3). If you and families have reached this goal consider drafting a new one.
34
Kathryn Kingsbury
draft tif
Lesson 7: Intersections - Left Turns
WI PE Standard(s) and Lesson Objective(s):
Demonstrate a correct pedestrian and traffic left turn characterized by:
(Pedestrian) bike to the corner of the intersection, walk across the first street, position their bicycle in lane position 3 and dismount and walk their bikes across the other crosswalk.
(Traffic) biking straight in the street (lane position 3) toward the intersection, looking over their left shoulder to see if there are any vehicles coming from behind, signal left, move to lane position 1, stop (if there is a stop sign), look left-right-left, signal a left turn, turn left through the intersection completing the turn in lane position 3
A. IA: Right Turn Fitness (5 min.)Formation/Grouping:
• 2-3 Rectangular areas (20yards x 40yards)• Set 4 cones in each corner of the rectangular play area. Optional: Place stop signs in two, or all four, of the
cones (see appendix for stop sign cut out)• Students continually move around the rectangle when music is playing, making the appropriate right hand
signal each time they come to a cone (remind students to do an over the shoulder check before signaling). • Students should use the stop signal if stop signs are included.• Several students can stop (shoulder to shoulder) on the stop line. Passing may occur in the outside lane(s).
Be sure students use a vocal prompt (“passing on your left”) when passing slower students.
Equipment:• Task cards, listing the task to be completed to reach the next cone, at each corner placed on large cone
Explanation:• At each corner a different activity is performed to the next cone• Activities include: slow as you can go, walk your bike, regular biking speed, walk your bike using just the
saddle of the bike, run with your bike• Start students in several different areas of the rectangle (not just at the cones) so there is less of a chance
of “bunching” up•
B. Jump and Pedal Fitness (focus on Right turns) (8 min.)
Formation/Grouping:• Split group in half using a partner strategy • Set up large square/rectangle using 6-8 cones• Have students find a partner to begin activity (partner 1 bikes; partner 2 performs jump rope activities listed
on the Jump Rope task sheet inside the square/rectangle.• Designate an area for students’ bikes when performing jump rope activities
Equipment: • Cones• Task cards with jump rope variations fastened on cones (see appendix)
Explanation:• Inner square/rectangle includes task cards with several jump rope variations • Once activity begins, students switch roles on paused music (not when one lap is completed) from biking to
35
Kathryn Kingsbury
draft tif

jump rope and visa versa • Students DO NOT need to go back to original partner!! • Bikers should e traveling counterclockwise and practice making left turns (including use of hand signals).• When music stops, biker travels to the designated area (use appropriate hand signals), places bike in
designated location away from cycle track, and finds nearest cone/jump rope and chooses next jump rope activity down the line…inner circle partner retrieves their bike and begins biking
• Biking students should assume they are entering traffic from a driveway. Students practice exiting the driveway and turning right while making sure to stop, look for traffic and bike in the correct lane position in the road.
C. Skill Practice Left Turns (15 min.)Set up an intersection as seen in Figure X. If additional leaders are available, it is best to split the class in two and teach each group separately on opposite sides of the intersection. You might consider setting up two intersections and/or have half of the class practice the Pedestrian Style while the other half practices the Traffic Style.
Pedestrian Style Left Turno This style of left turn is particularly useful when turning left through a busy intersection or when there
are multiple lanes to cross to get to the left turn lane.o Demonstrate and then have students bike to the corner, walk or ride across the first street, position
their bicycle in lane position 3 and bike across the street or dismount and walk their bikes across the other crosswalk.
Traffic Style Left Turno Chalk a starting line in lane position 3 at least 25 feet from the intersection. Have students begin by
biking straight in the street (lane position 3) toward the intersection, scanning over their left shoulder to see if there are any vehicles coming from behind, signal left, move to lane position 1, stop (if there is a stop sign), yield to oncoming traffic, look left-right-left, signal a left turn, turn left through the intersection completing the turn in lane position 3.
o Emphasize the importance of looking back over the left shoulder! This is more important than signaling!
• Split the class into two groups and have each take turns turning through the intersection. • Students must follow all of the safe bicycling practices, look left-right-left, yield when others have the
right of way, follow signs, etc.
Continuous Left Turn Practice
D. Game Activity: Whistle Turn and StopStudents spread out around the play space and begin riding slowly. When the whistle blows students come to a controlled stop and begin again on teacher’s signal. When the whistle blows twice students perform a Left turn. When the whistle blows three times the students perform a Right turn.
E. Closure: Pair/Think/Share (1 min.)In groups of two, students review the two types of Left turns covered in class (Traffic and Pedestrian).
AssignmentThe next time your riding your car and come to an intersection watch what other cars do. Ask your family to ride together to a nearby intersection and practice the Traffic and Pedestrian style Left turns.
36
Kathryn Kingsbury
draft tif
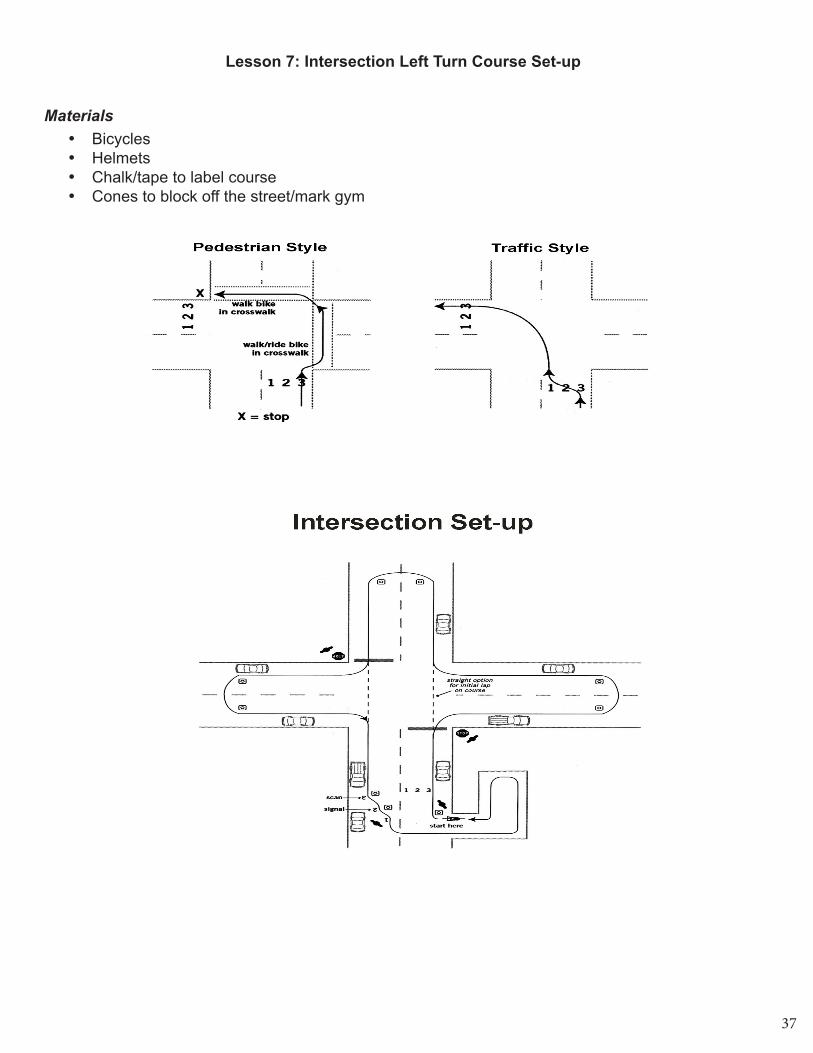
Lesson 7: Intersection Left Turn Course Set-up
Materials• Bicycles• Helmets• Chalk/tape to label course• Cones to block off the street/mark gym
37
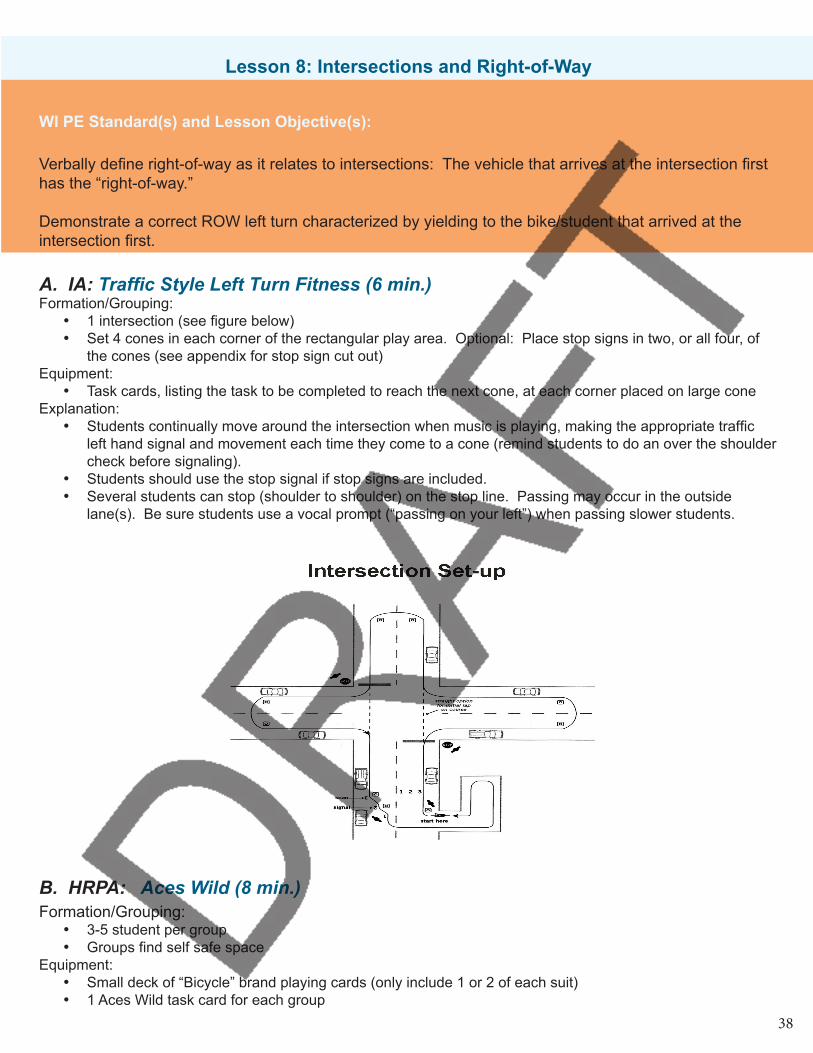
Lesson 8: Intersections and Right-of-Way
WI PE Standard(s) and Lesson Objective(s):
Verbally define right-of-way as it relates to intersections: The vehicle that arrives at the intersection first has the “right-of-way.”
Demonstrate a correct ROW left turn characterized by yielding to the bike/student that arrived at the intersection first.
A. IA: Traffic Style Left Turn Fitness (6 min.)Formation/Grouping:
• 1 intersection (see figure below)• Set 4 cones in each corner of the rectangular play area. Optional: Place stop signs in two, or all four, of
the cones (see appendix for stop sign cut out)Equipment:
• Task cards, listing the task to be completed to reach the next cone, at each corner placed on large coneExplanation:
• Students continually move around the intersection when music is playing, making the appropriate traffic left hand signal and movement each time they come to a cone (remind students to do an over the shoulder check before signaling).
• Students should use the stop signal if stop signs are included.• Several students can stop (shoulder to shoulder) on the stop line. Passing may occur in the outside
lane(s). Be sure students use a vocal prompt (“passing on your left”) when passing slower students.
B. HRPA: Aces Wild (8 min.)Formation/Grouping:
• 3-5 student per group• Groups find self safe space
Equipment: • Small deck of “Bicycle” brand playing cards (only include 1 or 2 of each suit)• 1 Aces Wild task card for each group
38
Kathryn Kingsbury
draft tif
• Frisbee to keep cards organizedExplanation:
• Students take turns choosing one card from deck• When a card is chosen students match it with Task Card and perform associated bicycling or other activity• Card # = time of activity• Aces are “Wild” and students can choose from teacher designated tasks
C. Skill Practice
Right-of-Way (5 min.)• Draw a few intersections on the board, both 2-way and 4-way.• What does a traffic stop sign mean? Ok, once we stop what do we do? How do we know if we should go
first or let the other driver go first? • There are two kinds of stop signs, 2-way and 4-way.• Imagine biking down the street and you see that the intersection ahead of you is controlled by a stop sign
only on your street, meaning the traffic on the cross street does not stop (this is called a 2-way intersection). When you come to the intersection you stop, look to the left to see if there is a car approaching. If they don’t have a stop sign, what do you do? If they do have a stop sign, what do you do? Count the number of stop signs to see if it’s a 2-way or 4-way stop.
• Now, imagine biking down a street and coming to an intersection with a stop sign on each corner (this is called a 4-way intersection). You and two other vehicles all stop at different stop signs at the exact same time. How do you decide who gets to go first?
• The vehicle that arrives at the intersection first has the “right-of-way” and other vehicles, bikes included, must yield to this vehicle. Yield means to let other vehicles go first.
• Knowing the right of way rules would help you decide who would go first at this intersection or at an intersection without any signs.
Riding in a Straight LineHave students bike in a straight line, following a line on the ground, practicing braking at the end of the course. Students should return to the starting area. The activity can be made more difficult by adding hand signals (left and/or right) before they turn to get back in line.
Scanning• When we are biking in the street it is our job to be aware of all the other vehicles around us and yield to
them when they have the right-of-way.• When we want to turn left on a bicycle where do we need to look for cars? ALL directions, but first
behind us. Have instructors demonstrate the need to look back before moving left.• We scan to make sure that there are no vehicles behind us or on our left.• Everyone is going to practice riding a straight line and checking behind them for traffic. Why is it
important to be able to keep biking straight while looking backwards?• Have students take turns biking in a straight line away from the instructor. The instructor should position
him-herself 5-8 to left of the line. When the instructor says “look,” students should look back over their left shoulder and tell the instructor if they are holding up one or two arms.
• Students should be able to scan over their left shoulder while continuing to bike in a straight line.• Instruct students who are having trouble to put their left hand on their left thigh while they look back
over their shoulder. This should help with their stability. To increase the difficulty, the instructor can step closer to the line.
ROW Practice (12 min.)Set up 1-2 traffic style left turn (see figure) intersections from Lesson #7. Split your class into 4 or 8 groups. One group per lane. Groups begin about 20 yards back from the intersection. As students approach, they use their look back technique, hand signals and correct stop, follow the ROW rules, and proceed to make a left turn (you could designate some groups as right turn lanes). After making their left turn, students fold into the group/lane nearest them. Have students keep rotating through the intersection.
39
Kathryn Kingsbury
draft tif
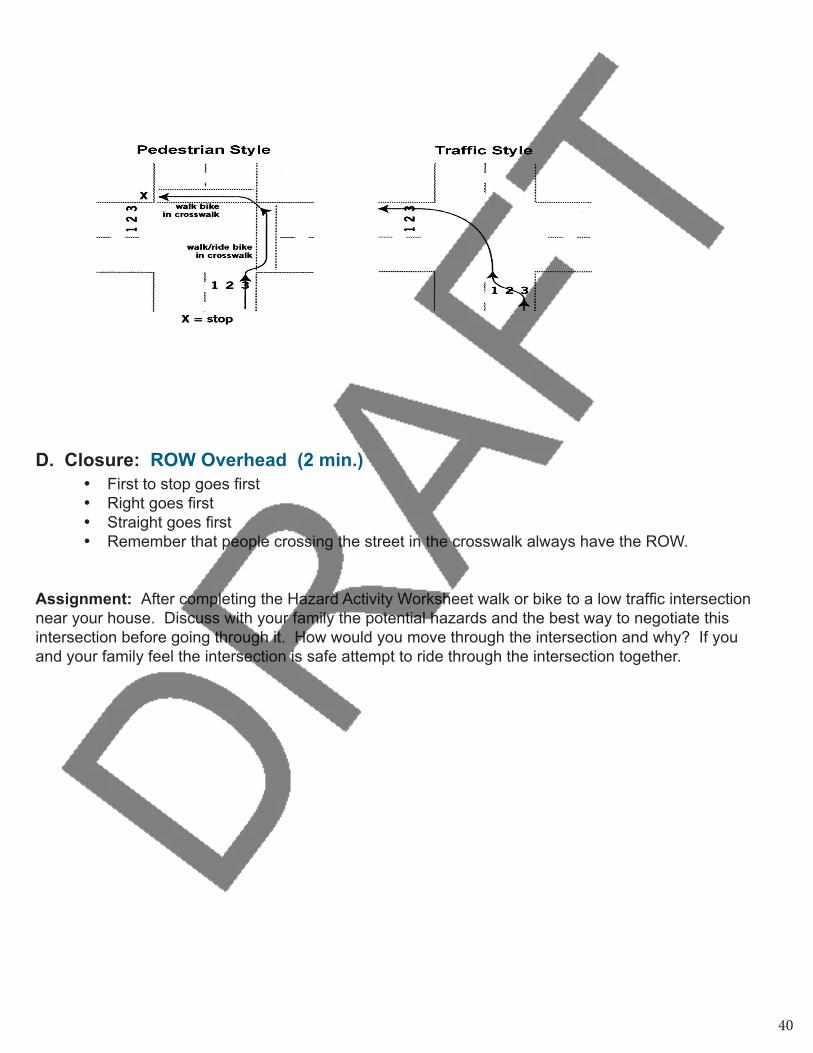
D. Closure: ROW Overhead (2 min.)• First to stop goes first• Right goes first• Straight goes first• Remember that people crossing the street in the crosswalk always have the ROW.
Assignment: After completing the Hazard Activity Worksheet walk or bike to a low traffic intersection near your house. Discuss with your family the potential hazards and the best way to negotiate this intersection before going through it. How would you move through the intersection and why? If you and your family feel the intersection is safe attempt to ride through the intersection together.
40
Kathryn Kingsbury
draft tif
Lesson 9: Riding in trafficStudents will be able to:
Remain in the squeeze box (a small space) as long as possible by using controlled balance, braking, and proper gear selection.
Demonstrate being predictable cyclist characterized by use of correct hand signals, communicate with other riders, and obey all traffic laws and traffic signs at all times.
A. IA: PEDAL (6 min.)PEDAL is played just like HORSE or PIG in basketball. Students work in pairs and try to give each other a letter. Student one leads for 30s and moves around obstacles slowly. The leader can try and get their opponent a letter by coming to a stop, balancing for as long as they can, and then moving. If the following student touches the ground they are assigned a “P”. Students take turns leading. The goal is NOT to be the first to spell PEDAL. Fewer word versions include TIRE, Right-of-way (ROW)
B. HRPA: Bike Specific Partner Resistance Activities (8 min.)Formation/Grouping:
• Partners spread around gymEquipment:
• Task cardsExplanation:
• Students should be matched for strength and size• Activities should be performed through the full range of motion for 8-12 sec.• Partner providing resistance should give a “BEGIN” command and count the duration of the activity • Each partner should perform 1 set the first time the activity is introduced and up to 2 sets later on• Develop a task card that alternates between upper/lower body movements, large to small muscle groups,
and on-the-bike activities.• After each partner has completed one set of resistance exercises the partners get on their bikes and ride for
1 min (display a countdown clock or use music intervals)• After riding for 1 min. the partner choose another resistance activity and keep alternating until the teacher
ask the class to stopVariation(s):
• Students create their own routine using teacher specified activities
C. Skill Practice
Squeeze Box (6 min.)Create two squeeze boxes on the ground using cones and jump ropes as boundary markers. A squeeze box can be approximately 12 ft x 12 ft (modify the size according to the skill level of the riders. A smaller squeeze box is more difficult to ride in. Have students begin cycling in one of the squeeze boxes. To remain in the box, a biker must keep both feet off the ground and remain within the boundaries. The goal is to be the last rider in the box. Contact with another bike or person is NOT allowed. Students who put a foot on the ground or contact another rider are out and must move to the second squeeze box to continue a new round of competition. Students should keep moving back and forth between areas (3-4 boxes is beneficial) if their foot touches the ground.
Campus/Parking Lot Ride (6 min.)3-4 volunteers would be beneficial for this activity. The goal is to simulate traffic conditions in a fairly controlled manner. Split students in 4-5 groups that MUST stay together at all times. Groups should utilize communication, hand signals, turning, and other bikes related skills presented during the unit. Design a course around your campus that includes roads, parking areas, stop signs, intersections, and hazards. Consider having volunteers
41
Kathryn Kingsbury
draft tif
simulate vehicle door opening near the parked cars to reinforce the 3 ft. rule. If your campus has few traffic signs consider placing some around the course (you can print off the signs found in the appendix). You might want to post signage around your campus notifying vehicles that a bike activity is in progress on campus and ask vehicles to drive extra slow and pay attention to cyclists.
Students should remember to:
• Be predictable/ ride on the right • Use hand signals• Communicate with other riders• Obey all traffic laws and traffic signs
Gearing (optional)You might consider adding in a small hill to the campus/parking lot ride. Explain to students that gears makes it easier to go up and down hills. Different bikes have different types of shifters. Some require that you turn them on the handlebar. These are called twist or grip shifters. Others require that your press a lever with your finger and thumb. These are called trigger shifters. Both are indexed meaning each “click” moves the derailleur one gear. Most bikes have 8-9 gears in the rear and 2-3 in the front, located near your brakes. The right shifter moves the rear derailleur up and down the cassette, or cogs on the rear wheel. The left shifter moves the front derailleur up and down the gears on the crank set. In the rear cassette the smaller the gear the more difficult it is to pedal. In the front, the smaller gear the easier it is to pedal. Be sure students shift to an easier gear BEFORE the hill. The front derailleur should be shifted to the smallest cog and the rear dealer should be shifted to the largest cog.
Closure: Pair/Think/Share (1 min.)What sorts of obstacles/hazards did you notice while riding around campus? What specific skills have we practiced over the last few days that will help you manage these hazards?
Assignment: Mapping Activity What are maps? Why do people make maps? What are important things to have on a map? What do you need to be able to use a map? With your family, design a biking and/or walking route and map to your favorite, nearby (within 2 miles), destinations. You might consider using Google Maps and its new “bike route” application
42
Kathryn Kingsbury
draft tif
Lesson 10: Neighborhood Ride or Bike Challenge Stations
Students will be able to:
Demonstrate each of the bike skills presented in the previous lessons during a neighborhood ride or while at several stations.
Instructors can choose between a neighborhood ride, campus ride, or station design for this lesson. The station set up and the campus would be ideal for completing the Bike Skills Scoring Guide.
Neighborhood or Campus RideRecruit several volunteers for this lesson. Create 3-4 groups of students and 2 adult volunteers for each group. One adult should lead the group and the other adult should sweep behind.
Remind students and volunteers:• To be visible and predictable• Follow all traffic laws• Ride as though your by yourself, don’t just automatically follow the leader• Ride single file on the right side of the road• Communicate verbally with other riders and use hand signals
Station SuggestionsBelow are several possible stations that could be used during this lesson. Students will have 5-8 min. at each station. One adult volunteer at each station would be helpful.
Station #1: Squeeze Box Create two squeeze boxes on the ground using cones and jump ropes as boundary markers. A squeeze box can be approximately 12 ft x 12 ft (modify the size according to the skill level of the riders. A smaller squeeze box is more difficult to ride in. Have students begin cycling in one of the squeeze boxes. To remain in the box, a biker must keep both feet off the ground and remain within the boundaries. The goal is to be the last rider in the box. Contact with another bike or person is NOT allowed. Students who put a foot on the ground or contact another rider are out and must move to the second squeeze box to continue a new round of competition. Students should keep moving back and forth between areas (3-4 boxes is beneficial) if their foot touches the ground.
Station #2: Riding in a Straight LineHave students bike in a straight line, following a line on the ground, practicing braking at the end of the course. Students should return to the starting area. The activity can be made more difficult by adding hand signals (left and/or right) before they turn to get back in line.
Station #3: Continuous Left Turns
Station #4: Rock Dodge• Set up course according to diagram provided. • Begin with outer tennis balls farther apart and reduce the distance as the students gain confidence
and skill.• It is important to try to swerve to the right when you come to a hazard in the road because if you
swerve to the left, you may be hit by a vehicle coming from behind.
Station #5: Left Turns
43
Kathryn Kingsbury
draft tif
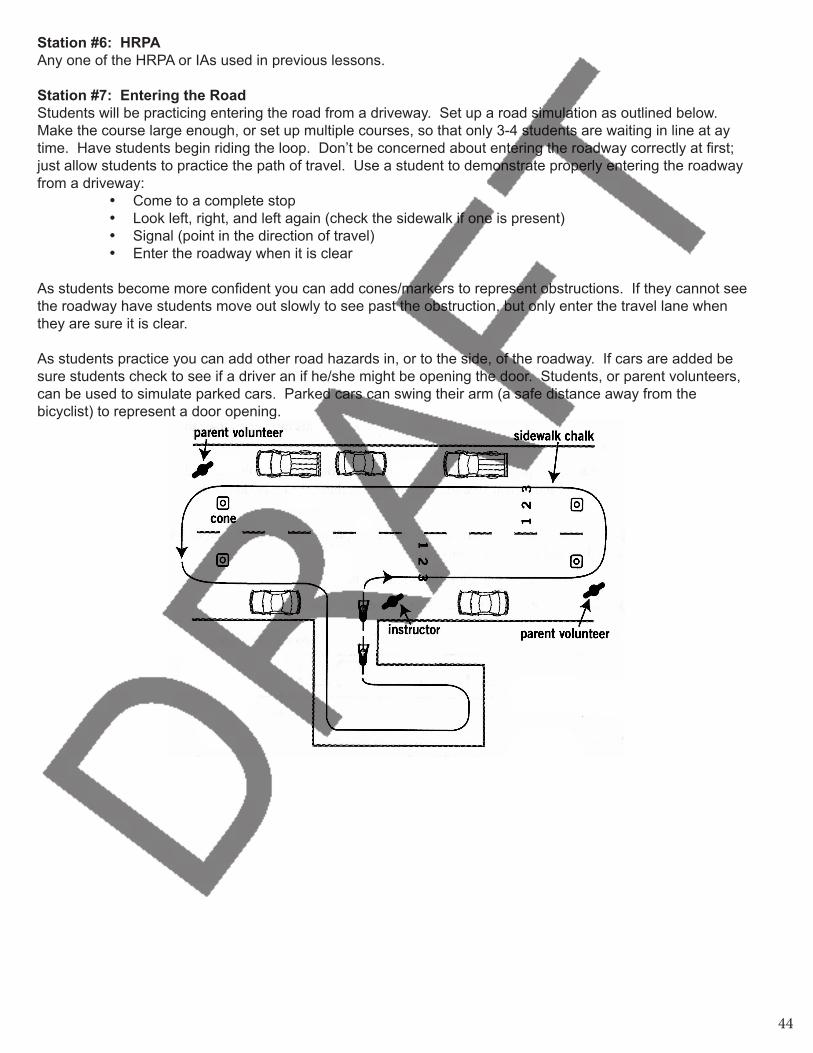
Station #6: HRPAAny one of the HRPA or IAs used in previous lessons.
Station #7: Entering the RoadStudents will be practicing entering the road from a driveway. Set up a road simulation as outlined below. Make the course large enough, or set up multiple courses, so that only 3-4 students are waiting in line at ay time. Have students begin riding the loop. Don’t be concerned about entering the roadway correctly at first; just allow students to practice the path of travel. Use a student to demonstrate properly entering the roadway from a driveway:
• Come to a complete stop• Look left, right, and left again (check the sidewalk if one is present)• Signal (point in the direction of travel)• Enter the roadway when it is clear
As students become more confident you can add cones/markers to represent obstructions. If they cannot see the roadway have students move out slowly to see past the obstruction, but only enter the travel lane when they are sure it is clear.
As students practice you can add other road hazards in, or to the side, of the roadway. If cars are added be sure students check to see if a driver an if he/she might be opening the door. Students, or parent volunteers, can be used to simulate parked cars. Parked cars can swing their arm (a safe distance away from the bicyclist) to represent a door opening.
44
Kathryn Kingsbury
draft tif

Bike Skills Scoring Guide
Ready to ride – A rangeStudent always:
• Places his/her helmet on correctly and can adjust their helmet using the eyes, ears, and mouth check.
• performs the ABC Quick Check correctly • verbalizes the correct bicycle parts covered in class• demonstrates a proper “ready position” before pushing off• comes to controlled stop using bike specific brake systems• demonstrates balance and control• demonstrates proper turning technique• correctly negotiates an intersection• correctly uses the traffic and pedestrian style left turns• can identify and list ALL of the following road signs: stop, yield, railroad, one-way, and
pedestrian• repair a flat tire without physical assistance• utilizes proper scanning technique as they come to an intersection • verbalize the ROW concept • using proper etiquette and communication while alone and within a group• explains the importance of predictable and visible
On-the-pedal – B rangeStudent consistently:
• Places his/her helmet on correctly and can adjust their helmet using the eyes, ears, and mouth check.
• performs the ABC Quick Check correctly • verbalizes the correct bicycle parts covered in class• demonstrates a proper “ready position” before pushing off• comes to controlled stop using bike specific brake systems• demonstrates balance and control• demonstrates proper turning technique• correctly negotiates an intersection• correctly uses the traffic and pedestrian style left turns• can identify and list ALL of the following road signs: stop, yield, railroad, one-way, and
pedestrian• repair a flat tire without physical assistance• utilizes proper scanning technique as they come to an intersection • verbalize the ROW concept • using proper etiquette and communication while alone and within a group• explains the importance of predictable and visible•
On-the-saddle – C rangeStudent sometimes:
• Places his/her helmet on correctly and can adjust their helmet using the eyes, ears, and mouth check.
• performs the ABC Quick Check correctly • verbalizes the correct bicycle parts covered in class• demonstrates a proper “ready position” before pushing off
45
Kathryn Kingsbury
draft tif
• comes to controlled stop using bike specific brake systems• demonstrates balance and control• demonstrates proper turning technique• correctly negotiates an intersection• correctly uses the traffic and pedestrian style left turns• can identify and list ALL of the following road signs: stop, yield, railroad, one-way, and
pedestrian• repair a flat tire without physical assistance• utilizes proper scanning technique as they come to an intersection • verbalize the ROW concept • using proper etiquette and communication while alone and within a group• explains the importance of predictable and visible
Off-the-bike – D rangeStudent rarely:
• Places his/her helmet on correctly and can adjust their helmet using the eyes, ears, and mouth check.
• performs the ABC Quick Check correctly • verbalizes the correct bicycle parts covered in class• demonstrates a proper “ready position” before pushing off• comes to controlled stop using bike specific brake systems• demonstrates balance and control• demonstrates proper turning technique• correctly negotiates an intersection• correctly uses the traffic and pedestrian style left turns• can identify and list ALL of the following road signs: stop, yield, railroad, one-way, and
pedestrian• repair a flat tire without physical assistance• utilizes proper scanning technique as they come to an intersection • verbalize the ROW concept • using proper etiquette and communication while alone and within a group• explains the importance of predictable and visible
46
Kathryn Kingsbury
draft tif
Bike for Life Program: Secondary Level
The Secondary version of the Driver’s Ed Program DOES NOT assume students have participated in activities found in the Elementary version. Please review the Elementary version of the Bike for LifeProgram and make the appropriate adjustments based on students biking past exposure to bike-related activities and skill level.
Suggestions for the Secondary Version:1. Coordinate with your local elementary physical educator and implement the Elementary and
Secondary versions simultaneously. If proximity allows, have the secondary students lead portions of the lessons to the Elementary students (e.g., lessons when you need volunteers, stations, campus ride, and/or neighborhood ride.
2. Secondary student could create a station format or “bike skills challenge” day for the elementary students and visa versa. Schools wouldn’t necessarily have to be close in proximity to accomplish this. Students could work on a “challenge task sheet” outlining the stations/challenges and send the challenge to other participating school.Secondary students could organize a Saturday ride for all beginning cyclist to a nearby park or to the Saturday morning farmer’s market. Check to see if you have a Kiddical Mass organization http://www.kidicalmass.org/ in your area to help.
3. If a Kiddical Mass organization does not exist in your area have the secondary students create one as part of their final project.
Lesson Objectives and their relationship to the National Association of Sports and Physical Education (NASPE) and WI Department of Instruction’s Physical Education Content Standards:
NASPE Standards (last revised 2004)
Standard 1: Demonstrates competency in motor skills and movement patterns needed to perform a variety of physical activities. Standard 2: Demonstrates understanding of movement concepts, principles, strategies, and tactics as they apply to the learning and performance of physical activities. Standard 3: Participates regularly in physical activity. Standard 4: Achieves and maintains a health-enhancing level of physical fitness. Standard 5: Exhibits responsible personal and social behavior that respects self and others in physical activity settings. Standard 6: Values physical activity for health, enjoyment, challenge, self-expression, and/or social interaction.
WI DPI/NASPE PE Standards and corresponding Bike for LifeLesson Objectives
Students in WI will exhibit a physically active lifestyle. (NASPE Standard 3) Describe the benefits of active transportation for physical health
47
Kathryn Kingsbury
draft tif
Students in WI will demonstrate competency in many forms of movement and proficiency in some. (NASPE Standard 1)
Demonstrate how to correctly wear and adjust a bike helmet using the Eyes, Ears, Mouth Check: Eyes - The front edge of the helmet should be visible when you look up.
Ears - The two ear straps should meet under your ears so that the adjustable piece fits almost like an earring with your ear in the center of a Y formed by the straps. Mouth - The chinstrap should be adjusted so that when you open your mouth wide, the strap becomes tight but not so tight that it is uncomfortable.
Demonstrate the bike “ready position” characterized by standing over the bicycle, or sitting on the seat if their feet can touch the ground, placing one foot on the pedal in the 10:00 position.
come to a controlled stop by characterized by using both brakes (or coaster and front brake), butt on seat, and placing one foot down on the ground as the bike comes to a stop.
Demonstrate control and balance on a bicycle characterized by not touching the ground when moving slowly or turning.
Demonstrate proper turning characterized by inside pedal up and looking through the corner.
Remain in the small space on their bicycle as long as possible by using controlled balance, braking, and proper gear selection.
Demonstrate a right hand signal characterized by slowing down and using their left hand to make an “L” shape with elbow out and hand pointed toward the sky.
Describe all the following road signs: stop, yield, railroad, one-way, and pedestrian
Demonstrate how to correctly repair a flat tire
scan over their left shoulder, keeping elbows bent and shoulders square to handlebars, while continuing to bike in a straight line.
Dodge an obstacle characterized by a quick turn to the RIGHT
Students will apply concepts and principles of movement to the learning and development of physical skills. (NASPE Standard 2)
Describe ALL of the major factors that contribute to a properly fitted bike (stand over height, saddle height, handlebar adjustment).
Verbally and visually match ALL of the following bike part pictures with there corresponding location on a bike: frame top tube, wheel, tire, fork, crank, pedal, and chain. (If your bike fleet includes geared bikes students should also be able point out the front and rear derailleur.)
Demonstrate being predictable cyclist characterized by use of correct hand signals, communicate with other riders, and obey all traffic laws and traffic signs at all times.
48
Kathryn Kingsbury
draft tif
Verbally list and physically demonstrate what each letter and/or word of the ABC Quick Check stands for.
demonstrate entering the roadway correctly characterized by coming to a complete stop, looking left, right, and left again (check the sidewalk if one is present), signaling (point in the direction of travel), and then entering the roadway when it is clear.
demonstrate entering the roadway correctly characterized by coming to a complete stop, looking left, right, and left again (check the sidewalk if one is present), signaling (point in the direction of travel), and then entering the roadway when it is clear.
Demonstrate a correct ROW left turn characterized by yielding to the bike/student that arrived at the intersection first.
Demonstrate a correct pedestrian and traffic left turn
Demonstrate a correct ROW left turn characterized by yielding to the bike/student that arrived at the intersection first.
Students will understand that physical activity provides opportunities for enjoyment, challenge, self-expression, and social interaction. (NASPE Standard 6)
Students will achieve and maintain a health-enhancing level of physical fitness. (NASPE Standard 4)
Continuously ride their bicycle for 20 minutes.
Students will demonstrate responsible personal and social behavior in physical-activity settings. (NASPE Standard 5)
Demonstrate proper cycling etiquette and communication while riding with a group of cyclist
Verbally define right-of-way as it relates to intersections: The vehicle that arrives at the intersection first has the “right-of-way.”
49
Kathryn Kingsbury
draft tif
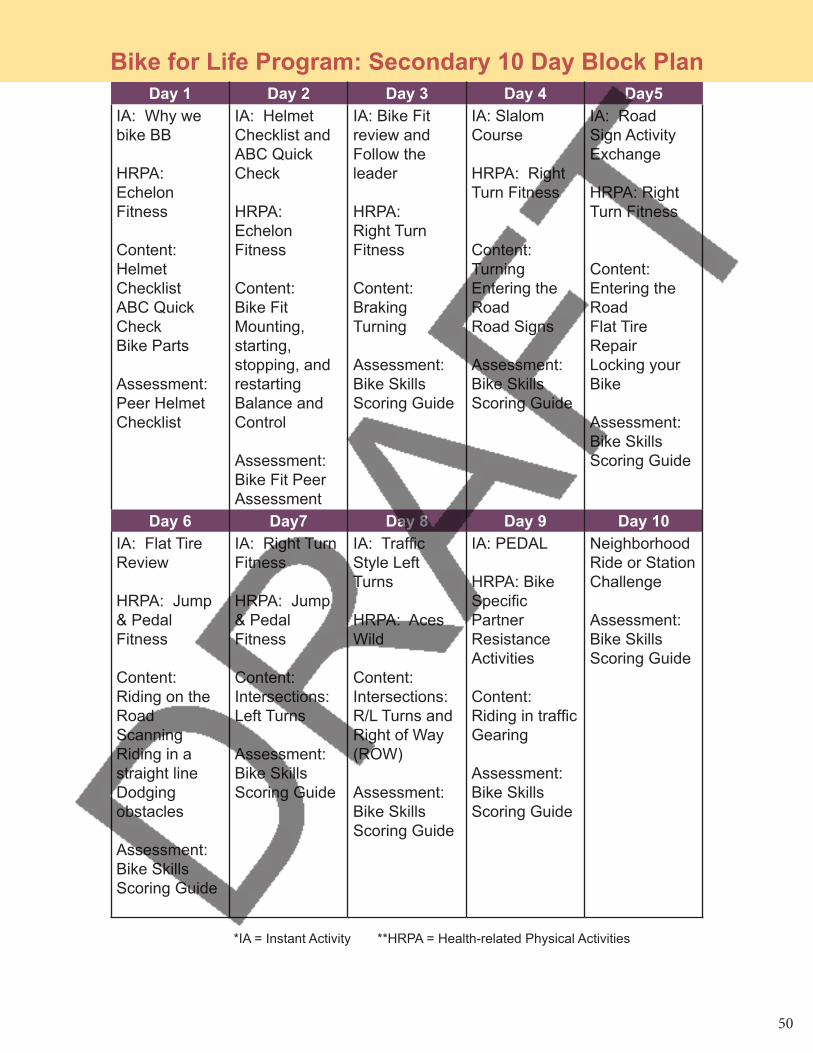
Day 1 Day 2 Day 3 Day 4 Day5IA: Why we bike BB
HRPA: Echelon Fitness
Content:Helmet Checklist ABC Quick CheckBike Parts
Assessment:Peer Helmet Checklist
IA: Helmet Checklist and ABC Quick Check
HRPA: Echelon Fitness
Content:Bike FitMounting, starting, stopping, and restartingBalance and Control
Assessment:Bike Fit Peer Assessment
IA: Bike Fit review and Follow the leader
HRPA: Right Turn Fitness
Content:BrakingTurning
Assessment:Bike Skills Scoring Guide
IA: Slalom Course
HRPA: Right Turn Fitness
Content:TurningEntering the RoadRoad Signs
Assessment:Bike Skills Scoring Guide
IA: Road Sign Activity Exchange
HRPA: Right Turn Fitness
Content:Entering the RoadFlat Tire RepairLocking your Bike
Assessment:Bike Skills Scoring Guide
Day 6 Day7 Day 8 Day 9 Day 10IA: Flat Tire Review
HRPA: Jump & Pedal Fitness
Content:Riding on the RoadScanningRiding in a straight lineDodging obstacles
Assessment:Bike Skills Scoring Guide
IA: Right Turn Fitness
HRPA: Jump & Pedal Fitness
Content:Intersections: Left Turns
Assessment:Bike Skills Scoring Guide
IA: Traffic Style Left Turns
HRPA: Aces Wild
Content:Intersections: R/L Turns and Right of Way (ROW)
Assessment:Bike Skills Scoring Guide
IA: PEDAL
HRPA: Bike Specific Partner Resistance Activities
Content: Riding in trafficGearing
Assessment:Bike Skills Scoring Guide
Neighborhood Ride or Station Challenge
Assessment:Bike Skills Scoring Guide
Bike for Life Program: Secondary 10 Day Block Plan
*IA = Instant Activity **HRPA = Health-related Physical Activities
50
Kathryn Kingsbury
draft tif
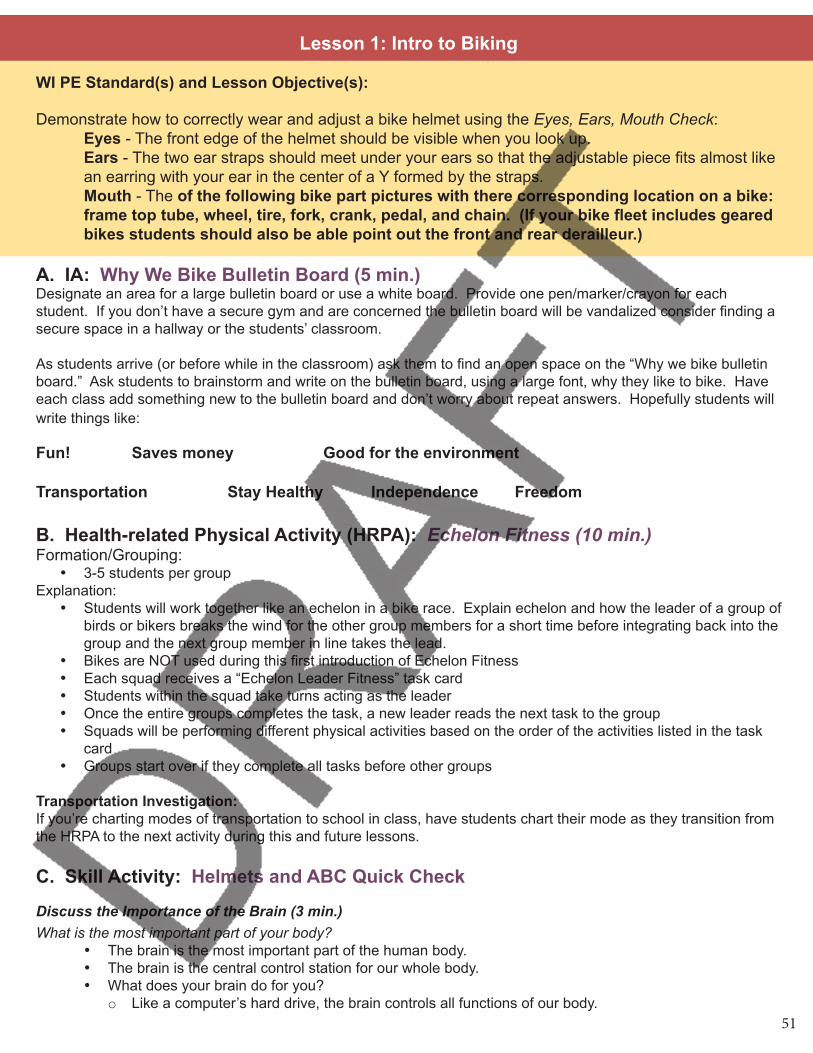
Lesson 1: Intro to Biking
WI PE Standard(s) and Lesson Objective(s): Demonstrate how to correctly wear and adjust a bike helmet using the Eyes, Ears, Mouth Check:
Eyes - The front edge of the helmet should be visible when you look up.Ears - The two ear straps should meet under your ears so that the adjustable piece fits almost like an earring with your ear in the center of a Y formed by the straps. Mouth - The of the following bike part pictures with there corresponding location on a bike: frame top tube, wheel, tire, fork, crank, pedal, and chain. (If your bike fleet includes geared bikes students should also be able point out the front and rear derailleur.)
A. IA: Why We Bike Bulletin Board (5 min.)Designate an area for a large bulletin board or use a white board. Provide one pen/marker/crayon for each student. If you don’t have a secure gym and are concerned the bulletin board will be vandalized consider finding a secure space in a hallway or the students’ classroom.
As students arrive (or before while in the classroom) ask them to find an open space on the “Why we bike bulletin board.” Ask students to brainstorm and write on the bulletin board, using a large font, why they like to bike. Have each class add something new to the bulletin board and don’t worry about repeat answers. Hopefully students will write things like:
Fun! Saves money Good for the environment
Transportation Stay Healthy Independence Freedom
B. Health-related Physical Activity (HRPA): Echelon Fitness (10 min.)Formation/Grouping:
• 3-5 students per groupExplanation:
• Students will work together like an echelon in a bike race. Explain echelon and how the leader of a group of birds or bikers breaks the wind for the other group members for a short time before integrating back into the group and the next group member in line takes the lead.
• Bikes are NOT used during this first introduction of Echelon Fitness• Each squad receives a “Echelon Leader Fitness” task card • Students within the squad take turns acting as the leader• Once the entire groups completes the task, a new leader reads the next task to the group• Squads will be performing different physical activities based on the order of the activities listed in the task
card• Groups start over if they complete all tasks before other groups
Transportation Investigation:If you’re charting modes of transportation to school in class, have students chart their mode as they transition from the HRPA to the next activity during this and future lessons.
C. Skill Activity: Helmets and ABC Quick Check
Discuss the Importance of the Brain (3 min.)What is the most important part of your body?
• The brain is the most important part of the human body. • The brain is the central control station for our whole body. • What does your brain do for you?
o Like a computer’s hard drive, the brain controls all functions of our body. 51
Kathryn Kingsbury
draft tif
Place a helmet on yourself or a student and demonstrate how to properly wear and fit a helmet.
Eyes, Ears, Mouth Check• A helmet has to be worn properly to protect your brain.• Demonstrate a properly fitted helmet using the eyes, ears, mouth check.• Eyes—The front edge of the helmet should be visible when you look up.• Ears—The two ear straps should meet under your ears so that the adjustable piece fits almost like an
earring with your ear in the center of a Y formed by the straps. • Mouth—The chinstrap should be adjusted so that when you open your mouth wide, the strap becomes
tight but not so tight that it is uncomfortable.• Misadjust your helmet and have students explain how to fit your helmet correctly.
Distribute Helmets (3 min.)• Have students help to adjust each other’s helmets using the Helmet Peer Assessment Checklist • Double check student’s helmets for proper fit and label each helmet with students name in permanent
marker. • Have students put helmets in plastic grocery bags to prevent lice transfer.
Helmet Peer Assessment
_____ Eyes - The front edge of the helmet should be visible when you look up.
_____ Ears - The two ear straps should meet under your ears so that the adjustable piece fits almost like an earring with your ear in the center of a Y formed by the straps.
_____ Mouth - The chinstrap should be adjusted so that when you open your mouth wide, the strap becomes tight but not so tight that it is uncomfortable.
ABC Quick Check (10 min.)Using your own bike, demonstrate the ABC Quick Check. The ABC Quick Check is a simple check that should be done each time before riding your bike to ensure is safe. Each letter or word in ABC Quick Check stands for something. Be sure to demonstrate • What do you think the A stands for? Air: Push down on each tire with your thumb to see if there is
enough air.o A properly inflated tire should be hard when you push down on it.
• What do you think the B stands for? Brakes: Squeeze each brake lever one at a time, the brake pads should contact the rim squarely and fully stop the wheel from moving.
o If your bike has a coaster brake, you stop by pedaling backwards. Make sure that the coaster brake arm is fastened to the chain stay of the bicycle.
• What do you think the C stands for? Chain: Touch the chain to make sure that it is well oiled.o If you have a bike without front and rear brakes, make sure that the chain is tight.o What color should your chain be? Silver, black. What colors are bad? Red, brown. o What does it mean if your chain is red or brown? It’s rusty.o How can we keep a chain from rusting? Oilo What kind of oil should we use? Bike oil only.
• Quick: Look to see that all of the quick release levers are secure (they may be located on the axle of each wheel and the seat post).
o Demonstrate how to properly close a quick release lever: holding the quick release lever open, tighten the axle nut so that when you close the lever you feel some resistance.
o A quick release lever is closed properly if the side of the lever facing outward says “closed” or the lever is curved inward.
o Demonstrate how easily a front wheel can be removed if the quick release lever is not secured. Imagine if your wheel came off while you were riding!
• Check: Spin each wheel to check that it is straight and not rubbing the brakes.52
Kathryn Kingsbury
draft tif
• Demonstration: Ask how long the students think the ABC Quick Check would take. Have them time you doing it. (It could take as little as 10 seconds.) Ask if they think they could spare that many seconds before each ride to make sure their bike is safe.
ABC Quick Check Practice (5 min.)Partner students and ask one partner to retrieve a bike. Students will be use visually and verbally practice the ABC Quick Check.
D. Game Activity: Bike Part Matching Game (5 min.)3-5 students per group. Each group gets a “deck” of bike parts (paste parts on the back of playing cards or use index cards (use Velcro or tape on the opposite side) and one large picture of a bike. Each group should shuffle their deck and place the cards into a Frisbee. Spread the groups around the play space and hang a bike picture on the wall, or cone, for each group. Be sure to place the bike picture at least 30 yards away. When the teacher says “go” one student picks a card out of the deck, runs to their designated bike picture, and hangs the bike part card in the correction location on the bike. After the students hangs the card he/she runs back to the groups and another student picks out a card. Have waiting students perform a flexibility, muscular strength, or muscular endurance activity while they are waiting for the running student to arrive. This is NOT a relay race. Have groups perform the activity for 2-3 min. and then stop and check their work. Discuss common mistakes.
E. Closure: Before transitioning to the exit line and Hand Signal Game, have students stay in their groups from the previous activity and verbally review helmet fit and the ABC Quick Check.
Assignments (2 min.)Your first assignment is to discuss the following questions with your family: How do you/we normally get around? How do you/we get to school/work? Do you/we think you/we live close enough to bike or walk to school/work?
When you arrive to school tomorrow count the number of bike rakes you see at our school. What do you think about the placement of the bike rack? What about the type of back rack? Do you believe it’s functional?
More information about appropriate bicycle parking found at:http://www.bicyclinginfo.org/engineering/parking.cf
53
Kathryn Kingsbury
draft tif
Lesson 2: Basic Bike Skills
WI PE Standard(s) and Lesson Objective(s):
Describe ALL of the major factors that contribute to a properly fitted bike (stand over height, saddle height, handlebar adjustment).
Demonstrate the bike “ready position” characterized by standing over the bicycle, or sitting on the seat if their feet can touch the ground, placing one foot on the pedal in the 10:00 position.
come to a controlled stop characterized by using both brakes (or coaster and front brake), butt on seat, and placing one foot down on the ground as the bike comes to a stop.
Verbally describe what is meant by being a predictable and visible cyclist
A. Helmet Checklist and ABC Quick Check
Review Assignment from Lesson #1 - Have students share what they found put when discussing transportation with their families
B. HRPA: Echelon Fitness (w/ bikes) (10 min.)Formation/Grouping:
• 3-5 students per groupExplanation:
• Students will work together like an echelon in a bike race. Explain echelon and how the leader of a group of birds or bikers breaks the wind for the other group members for a short time before integrating back into the group and the next group member in line takes the lead.
• Each squad receives a “Echelon Leader Fitness” task card • Students within the squad take turns acting as the leader• Once the entire groups completes the task, a new leader reads the next task to the group• Squads will be performing different physical activities on and off their bikes based on the order of the
activities listed in the task card• Stop the class every 30s-45s and complete a whole class activity (e.g., stretch, plank, etc). Integrate
pieces of the Bike Ed curriculum into these breaks (remember: give students just one bit of info, not all of it. For example, while stretching ask the question: are bicycle vehicles? ….YES
“What are some other vehicles that use the roads?” Cars, trucks, buses
“If bikes are vehicles where in the road do you think we should ride a bike?”….exactly, toward the outside in the “bike lane.”
During the next break you might ask: “What about riding your bike on the sidewalk?” …It’s ok if your age 9 or under.
During the third break ask: What does it mean to be a vehicle? • Follow the rules of the road like other vehicles.• Yield to pedestrians.•
During the final break discuss being visible and predictable: “One way that traffic laws keep us safe is by keeping our actions predictable and visible.”
o Predictable: to be able to understand what is going to happen; an educated guess.o Visible: easily seen
• Groups start over if they complete all tasks before other groups 54
Kathryn Kingsbury
draft tif
Transportation InvestigationIf you’re charting modes of transportation to school in class, have students chart their mode as they transition from the HRPA to the next activity.
C. Skill Practice
Review (3 min.): Take a min. to review/demonstrate what students learned in Lesson Students should be able to demonstrate how to correctly put on helmet and perform the ABC Quick Check.
Bike Fit (15 min.)Have students form groups of three: one being fitted, one holding the bike, and one peer assessing (using the Bike Fit Peer Assessment). The person holding the bike stands over the front wheel and holds the handlebars. This keeps the bike steady while the person being fitted sits fully on the bike. Have each student complete each role and turn in their peer assessments at the end of class.
Begin this activity by asking the students, “Do you think there is a best fit for a person on a bike? Why does fit matter? Does anyone have an idea of what might be the best fit for a person on a bike?” Then have students fit the bike by taking them through the following steps:
Step 1: Stand over height. Have the student stand over the top tube. He/she should be able to pick up the bike with 2-3” of clearance.
Step 2: Saddle height. Have the student sit on the saddle with one pedal at the bottom stroke (6 o’clock position) and their heel resting on the pedal. Adjust saddle height so that the leg is straight or nearly straight. Then have the student place the ball of the foot on the pedal; now the knee should have a slight bend when at the bottom of the pedal stroke. Tell students that there must be at least 3” of seat post in the down tube for safety reasons. Many seat posts are marked with a line stating “Do NOT raise above this line”. Do not allow students to raise their seat higher than the mark.
Step 3: Handlebar adjustment. Have students note whether they are reaching for the handlebars or feel cramped by the handlebars.
Step 4: Seat tilt. Students should look for saddle tilt and make sure that the saddle is level or parallel to the ground. While sitting up (no hands on the handlebars), students should be able to feel if they are sliding forward or backward on the saddle. Have students adjust the saddle if necessary.
Adapted from J. Steffen and J. Steihl in Teaching outdoor pursuits in physical education. Reprinted with permission from Human Kinetics
READY, SET, GO, and Stop! Mounting, Pushing Off, and Braking (10 min.)This drill teaches cyclists the correct position to be in for starting off when cycling. By having their foot on the pedal in the proper push off position, cyclists will be able to start up quickly and efficiently. This skill will enable them to cross streets and enter traffic without stumbling and falling, and to be predictable.
Have cyclists line up along one side of the play space, court or parking lot.
Demonstrate how if your feet are on the ground and you know where the pedal is, you won’t fumble and will be able to get started quickly.
Demonstrate and teach the Ready Position:Stand over the bicycle, or sit on the seat if your feet can touch the ground.Place one foot on the pedal in the 10:00 position. The right or left foot can be used, but you should be consistent and always use the same foot so this skill becomes a natural habit.
55
Kathryn Kingsbury
draft tif
Choose two students. Have one cyclist put their foot in the ready position and the other stand over the bike with their feet on the ground. Say “Ready, Set,” and see who has the faster and safer start.
Now you are ready to get a good push when the traffic light changes, when there is a break in traffic to cross the street, or when the group starts riding so that you don’t get left behind.
Have students line up and get in the ready position. Tell them to cycle across to the other side of the court and wait there until everyone is finished.
After students have had a few opportunities to practice add in deliberate braking. Remind students to apply equal pressure to each brake lever or use both the hand brake and coaster brake when slowing down or stopping. Always keep your butt on the seat when braking!
Demonstrate how easy it is for the back of the bicycle to lift up when there is no weight over the rear wheel. Then show how difficult it is for the back of the bike to be lifted up with weight over the back wheel by staying seated.
As students practice their “Ready, Set, Go” call out a “freeze” signal once and awhile. Students should be able to come to a controlled stop by characterized by using both brakes (or coaster and front brake), butt on seat, and placing one foot down on the ground.
D. Game Activity: Scramble Drill (10 min.)This activity will help you explain to the cyclists how to be predictable and why they should follow the rules of the road. This helps students understand the concept of predictability.
Have cyclists line up on one side of the paved area you are using. Explain that they may ride wherever they want when you blow the whistle as long as they stay on the designated area of the play space (30 x 60).
Give the “go” signal and let the “chaotic riding” begin. Give cyclists about 2 minutes, then have them freeze/stop.
Discuss what just happened. Normally, as the kids ride they naturally tend to end up riding in the same direction. The chaos is too annoying and unpredictable and the majority of kids will, without overt communication, begin to ride in a circular pattern, developing their own unspoken “rules”.
Ask: What would happen if cars were allowed to drive wherever the wanted like you just did? To avoid accidents, we have rules of the road that everyone must follow. When you are riding on the street, you are considered a vehicle, just like a car, van, or truck, and you must follow all the same traffic rules they do. Not only is this the law, but it will help to keep you from getting hurt.
E. Closure: Think/Pair/Share (2 min.)Students work together in their “Bike Fit” group and verbalize to one another what they should look for in a “good” bike fit.
Assignment - Final Assignment IntroBeyond demonstrating that you can travel safely on your bike in traffic you’ll also be asked to complete a final written assignment. Review “X” case studies from http://www.bicyclinginfo.org/case_studies/ and answer the following questions:
What do you see as a common theme? What made these cities/organizations successful?
Think about our city and its bike infrastructure and policies and the write a letter to our City’s transportation director discussing what you believe to be the most important bike-related elements that should be added/modified to increase bicycling in our community.
56
Kathryn Kingsbury
draft tif
Bike Fit Peer Assessment
Cyclist: ___________________________Assessor: ________________________
Students should complete the bike fitting in groups of three. One person assesses, one person tries out the bike for proper fit, and one person holds the bike steady. Each student should have a bike fitted and turn in an assessment form to the teacher.Use a check mark to indicate that each task was completed correctly and to indicate that the bike is fitted to the rider.
Stand over
_____student is able to straddle the bike with 2” of clearance
Saddle height
Student is able to:
_____sit on seat, one pedal up, one down
_____place his/her right heel on pedal at the bottom of pedal stroke
_____place his/her ball of right foot on pedal, slight bend at right knee
57
Kathryn Kingsbury
draft tif
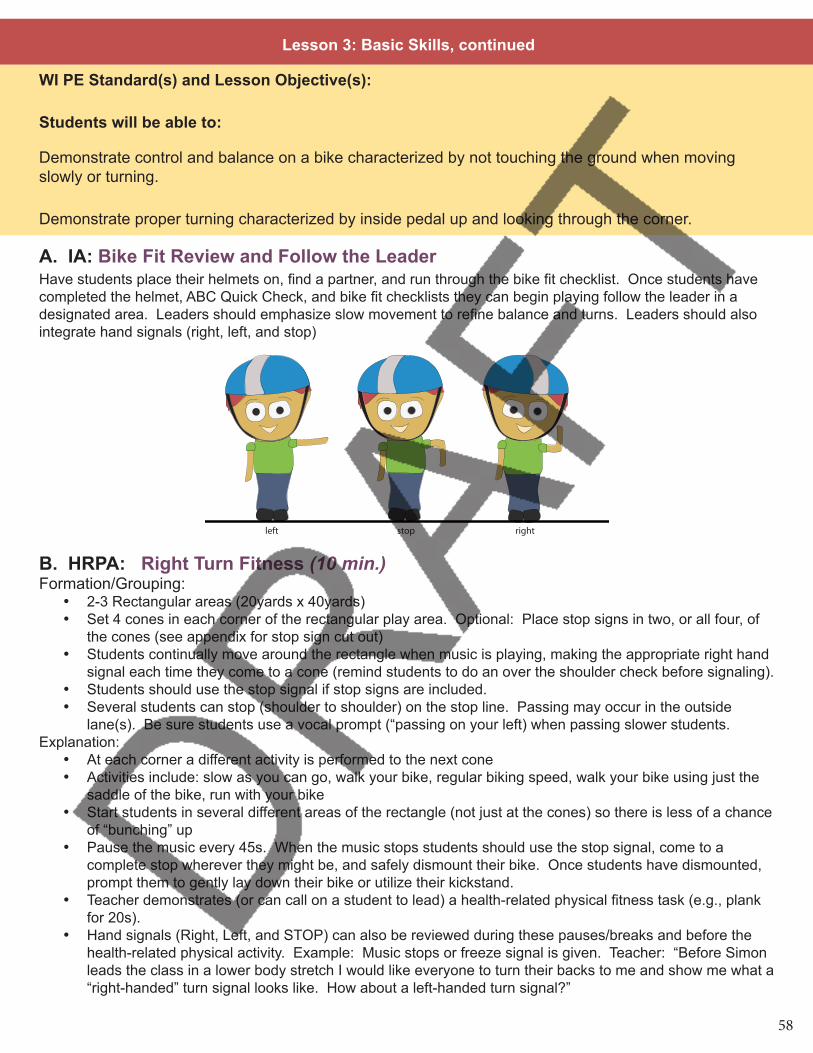
Lesson 3: Basic Skills, continued
WI PE Standard(s) and Lesson Objective(s):
Students will be able to:
Demonstrate control and balance on a bike characterized by not touching the ground when moving slowly or turning.
Demonstrate proper turning characterized by inside pedal up and looking through the corner.
A. IA: Bike Fit Review and Follow the LeaderHave students place their helmets on, find a partner, and run through the bike fit checklist. Once students have completed the helmet, ABC Quick Check, and bike fit checklists they can begin playing follow the leader in a designated area. Leaders should emphasize slow movement to refine balance and turns. Leaders should also integrate hand signals (right, left, and stop)
B. HRPA: Right Turn Fitness (10 min.)Formation/Grouping:
• 2-3 Rectangular areas (20yards x 40yards)• Set 4 cones in each corner of the rectangular play area. Optional: Place stop signs in two, or all four, of
the cones (see appendix for stop sign cut out)• Students continually move around the rectangle when music is playing, making the appropriate right hand
signal each time they come to a cone (remind students to do an over the shoulder check before signaling). • Students should use the stop signal if stop signs are included.• Several students can stop (shoulder to shoulder) on the stop line. Passing may occur in the outside
lane(s). Be sure students use a vocal prompt (“passing on your left) when passing slower students.Explanation:
• At each corner a different activity is performed to the next cone• Activities include: slow as you can go, walk your bike, regular biking speed, walk your bike using just the
saddle of the bike, run with your bike• Start students in several different areas of the rectangle (not just at the cones) so there is less of a chance
of “bunching” up• Pause the music every 45s. When the music stops students should use the stop signal, come to a
complete stop wherever they might be, and safely dismount their bike. Once students have dismounted, prompt them to gently lay down their bike or utilize their kickstand.
• Teacher demonstrates (or can call on a student to lead) a health-related physical fitness task (e.g., plank for 20s).
• Hand signals (Right, Left, and STOP) can also be reviewed during these pauses/breaks and before the health-related physical activity. Example: Music stops or freeze signal is given. Teacher: “Before Simon leads the class in a lower body stretch I would like everyone to turn their backs to me and show me what a “right-handed” turn signal looks like. How about a left-handed turn signal?”
rightleft stop
58
Kathryn Kingsbury
draft tif
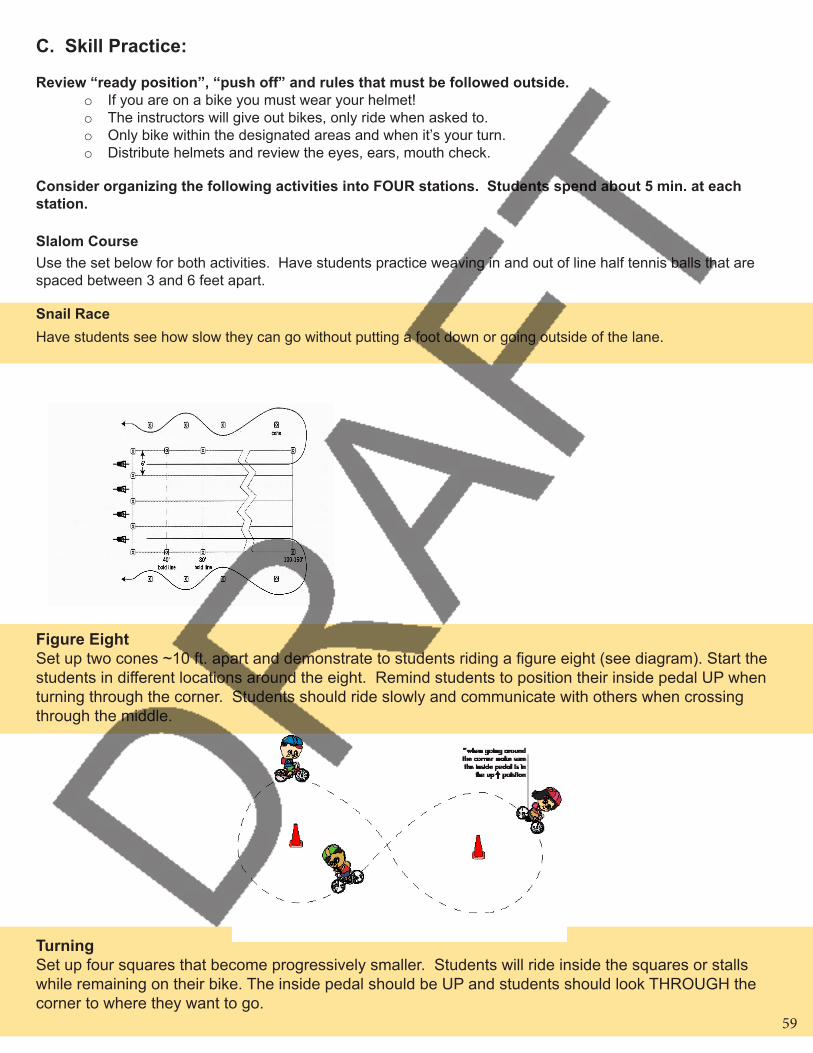
C. Skill Practice:
Review “ready position”, “push off” and rules that must be followed outside.o If you are on a bike you must wear your helmet!o The instructors will give out bikes, only ride when asked to.o Only bike within the designated areas and when it’s your turn.o Distribute helmets and review the eyes, ears, mouth check.
Consider organizing the following activities into FOUR stations. Students spend about 5 min. at each station.
Slalom CourseUse the set below for both activities. Have students practice weaving in and out of line half tennis balls that are spaced between 3 and 6 feet apart.
Snail Race Have students see how slow they can go without putting a foot down or going outside of the lane.
Figure EightSet up two cones ~10 ft. apart and demonstrate to students riding a figure eight (see diagram). Start the students in different locations around the eight. Remind students to position their inside pedal UP when turning through the corner. Students should ride slowly and communicate with others when crossing through the middle.
Turning Set up four squares that become progressively smaller. Students will ride inside the squares or stalls while remaining on their bike. The inside pedal should be UP and students should look THROUGH the corner to where they want to go.
59
Kathryn Kingsbury
draft tif
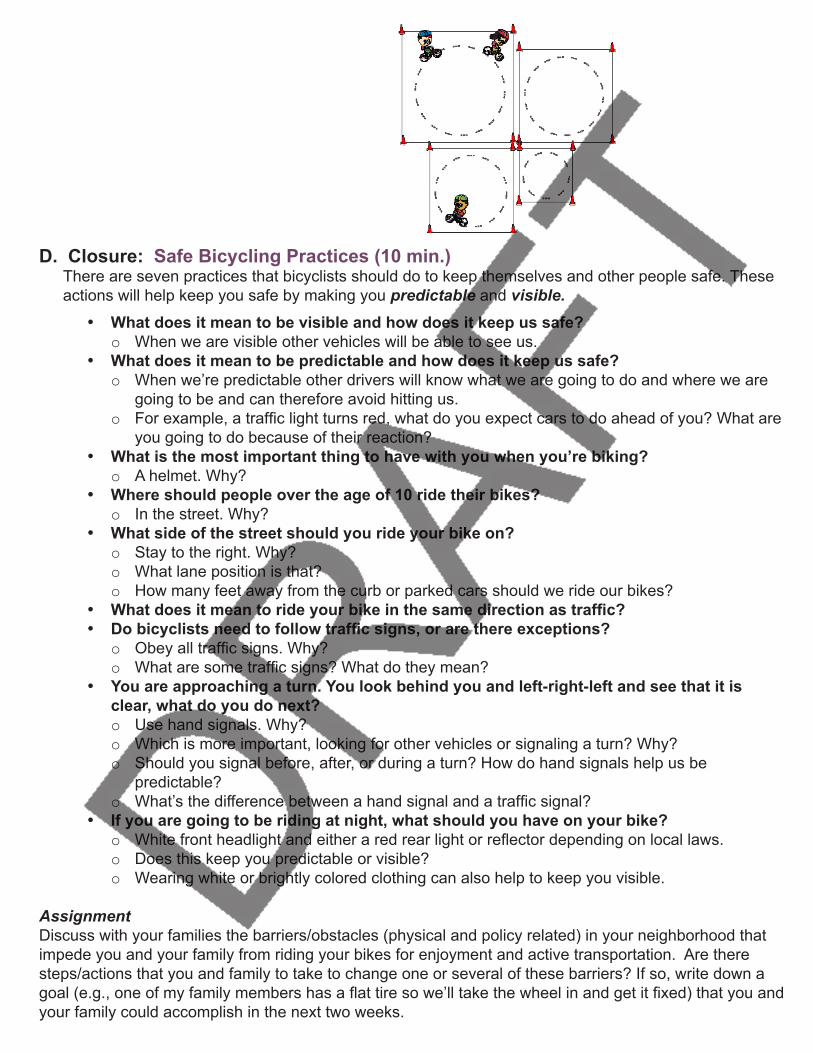
D. Closure: Safe Bicycling Practices (10 min.)There are seven practices that bicyclists should do to keep themselves and other people safe. These actions will help keep you safe by making you predictable and visible.
• What does it mean to be visible and how does it keep us safe? o When we are visible other vehicles will be able to see us.
• What does it mean to be predictable and how does it keep us safe?o When we’re predictable other drivers will know what we are going to do and where we are
going to be and can therefore avoid hitting us.o For example, a traffic light turns red, what do you expect cars to do ahead of you? What are
you going to do because of their reaction?• What is the most important thing to have with you when you’re biking?
o A helmet. Why?• Where should people over the age of 10 ride their bikes?
o In the street. Why?• What side of the street should you ride your bike on?
o Stay to the right. Why?o What lane position is that? o How many feet away from the curb or parked cars should we ride our bikes?
• What does it mean to ride your bike in the same direction as traffic? • Do bicyclists need to follow traffic signs, or are there exceptions?
o Obey all traffic signs. Why?o What are some traffic signs? What do they mean?
• You are approaching a turn. You look behind you and left-right-left and see that it is clear, what do you do next?o Use hand signals. Why? o Which is more important, looking for other vehicles or signaling a turn? Why?o Should you signal before, after, or during a turn? How do hand signals help us be
predictable?o What’s the difference between a hand signal and a traffic signal?
• If you are going to be riding at night, what should you have on your bike?o White front headlight and either a red rear light or reflector depending on local laws.o Does this keep you predictable or visible?o Wearing white or brightly colored clothing can also help to keep you visible.
AssignmentDiscuss with your families the barriers/obstacles (physical and policy related) in your neighborhood that impede you and your family from riding your bikes for enjoyment and active transportation. Are there steps/actions that you and family to take to change one or several of these barriers? If so, write down a goal (e.g., one of my family members has a flat tire so we’ll take the wheel in and get it fixed) that you and your family could accomplish in the next two weeks.
Kathryn Kingsbury
draft tif
Lesson 4: Bike as a Vehicle
WI PE Standard(s) and Lesson Objective(s):
Demonstrate a right hand signal characterized by slowing down and using their left hand to make an “L” shape with elbow out and hand pointed toward the sky.
Describe all the following road signs: stop, yield, railroad, one-way, and pedestrian.
demonstrate entering the roadway correctly characterized by coming to a complete stop, looking left, right, and left again (check the sidewalk if one is present), signaling (point in the direction of travel), and then entering the roadway when it is clear.
A. IA: Salmon CourseAfter students retrieve their bikes and show a peer their properly fitted helmet they can begin:
Slalom CourseHave students practice weaving in and out of line half tennis balls that are spaced between 3 and 6 feet apart.
B. HRPA: Right Turn Fitness (10 min.)Formation/Grouping:
• 2-3 Rectangular areas (20yards x 40yards)• Set 4 cones in each corner of the rectangular play area. Optional: Place stop signs in two, or all four, of the
cones (see appendix for stop sign cut out)• Students continually move around the rectangle when music is playing, making the appropriate right hand
signal each time they come to a cone (remind students to do an over the shoulder check before signaling). • Students should use the stop signal if stop signs are included.• Several students can stop (shoulder to shoulder) on the stop line. Passing may occur in the outside lane(s).
Be sure students use a vocal prompt (“passing on your left) when passing slower students.Equipment:
• Task cards, listing the task to be completed to reach the next cone, at each corner placed on large coneExplanation:
• At each corner a different activity is performed to the next cone• Activities include: slow as you can go, walk your bike, regular biking speed, walk your bike using just the
saddle of the bike, run with your bike• Start students in several different areas of the rectangle (not just at the cones) so there is less of a chance
of “bunching” up• Pause the music every 45s. When the music stops students should use the stop signal, come to a
complete stop wherever they might be, and safely dismount their bike. Once students have dismounted, prompt them to gently lay down their bike or utilize their kickstand.
• Teacher demonstrates (or can call on a student to lead) a health-related physical fitness task (e.g., plank for 20s).
Variation(s):• Students design an off-the-bike locomotor movement• Build in a few “choice” task listed on the task card
C. Skill Practice
Turning Practice (10 min.)Use a cone or a natural object such as rock or tree for this activity. Demonstrate a proper turn: Brake BEFORE the turn, keep the inside pedal up, and look THROUGH the turn. Set up several stations so that students can optimize their turning practice and to reduce student wait time.
61
Kathryn Kingsbury
draft tif
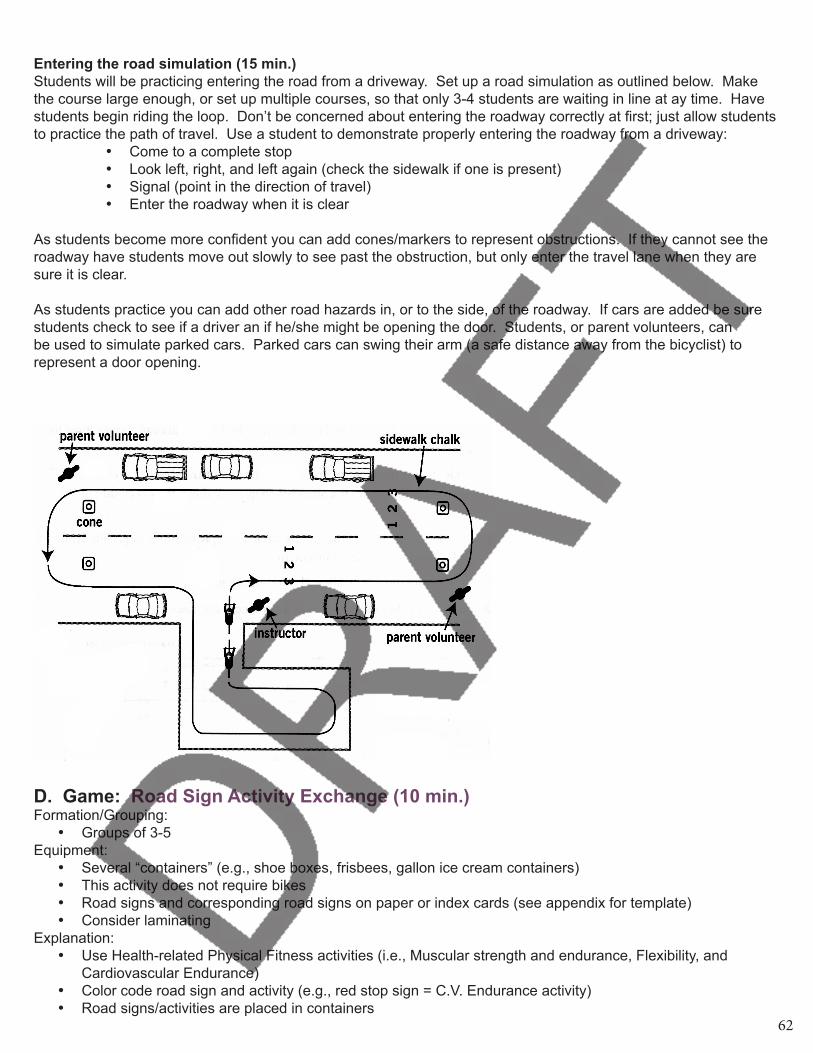
Entering the road simulation (15 min.)Students will be practicing entering the road from a driveway. Set up a road simulation as outlined below. Make the course large enough, or set up multiple courses, so that only 3-4 students are waiting in line at ay time. Have students begin riding the loop. Don’t be concerned about entering the roadway correctly at first; just allow students to practice the path of travel. Use a student to demonstrate properly entering the roadway from a driveway:
• Come to a complete stop• Look left, right, and left again (check the sidewalk if one is present)• Signal (point in the direction of travel)• Enter the roadway when it is clear
As students become more confident you can add cones/markers to represent obstructions. If they cannot see the roadway have students move out slowly to see past the obstruction, but only enter the travel lane when they are sure it is clear.
As students practice you can add other road hazards in, or to the side, of the roadway. If cars are added be sure students check to see if a driver an if he/she might be opening the door. Students, or parent volunteers, can be used to simulate parked cars. Parked cars can swing their arm (a safe distance away from the bicyclist) to represent a door opening.
D. Game: Road Sign Activity Exchange (10 min.)Formation/Grouping:
• Groups of 3-5 Equipment:
• Several “containers” (e.g., shoe boxes, frisbees, gallon ice cream containers)• This activity does not require bikes• Road signs and corresponding road signs on paper or index cards (see appendix for template)• Consider laminating
Explanation:• Use Health-related Physical Fitness activities (i.e., Muscular strength and endurance, Flexibility, and
Cardiovascular Endurance)• Color code road sign and activity (e.g., red stop sign = C.V. Endurance activity)• Road signs/activities are placed in containers
62
Kathryn Kingsbury
draft tif
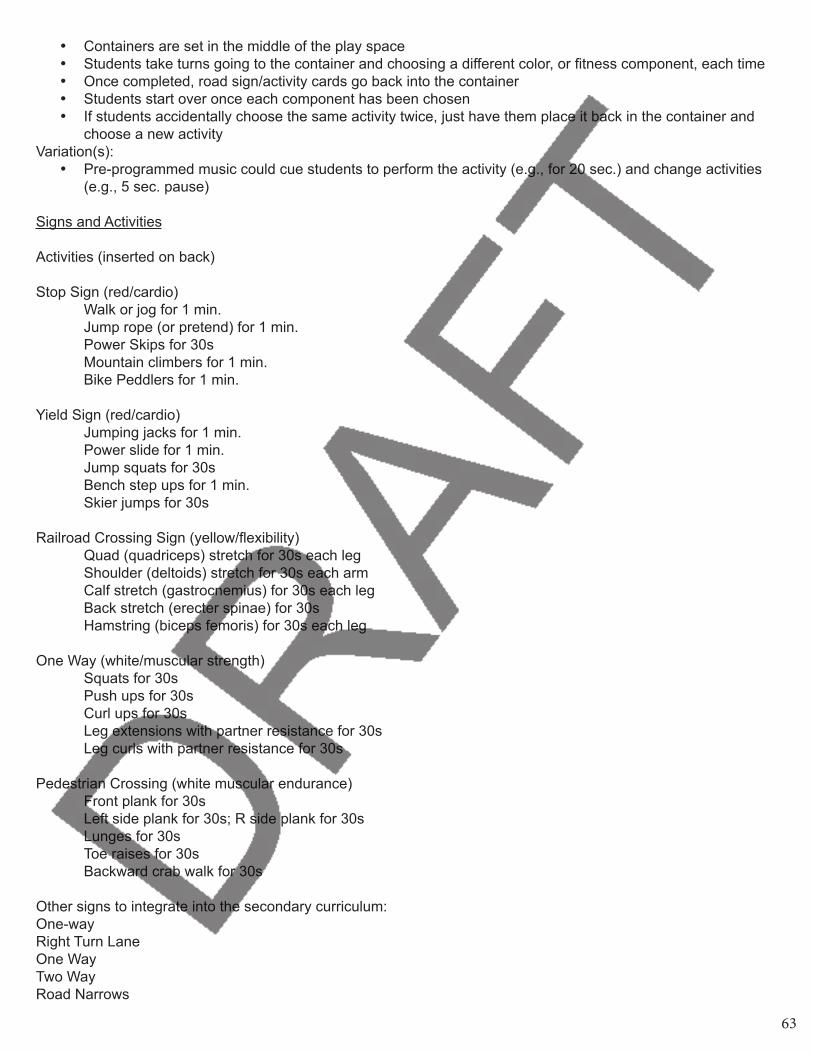
• Containers are set in the middle of the play space• Students take turns going to the container and choosing a different color, or fitness component, each time• Once completed, road sign/activity cards go back into the container • Students start over once each component has been chosen• If students accidentally choose the same activity twice, just have them place it back in the container and
choose a new activityVariation(s):
• Pre-programmed music could cue students to perform the activity (e.g., for 20 sec.) and change activities (e.g., 5 sec. pause)
Signs and Activities
Activities (inserted on back)
Stop Sign (red/cardio)Walk or jog for 1 min.Jump rope (or pretend) for 1 min.Power Skips for 30sMountain climbers for 1 min.Bike Peddlers for 1 min.
Yield Sign (red/cardio) Jumping jacks for 1 min. Power slide for 1 min. Jump squats for 30s Bench step ups for 1 min. Skier jumps for 30s
Railroad Crossing Sign (yellow/flexibility) Quad (quadriceps) stretch for 30s each leg Shoulder (deltoids) stretch for 30s each arm Calf stretch (gastrocnemius) for 30s each leg Back stretch (erecter spinae) for 30s Hamstring (biceps femoris) for 30s each leg
One Way (white/muscular strength) Squats for 30s Push ups for 30s Curl ups for 30s Leg extensions with partner resistance for 30s Leg curls with partner resistance for 30s
Pedestrian Crossing (white muscular endurance) Front plank for 30s Left side plank for 30s; R side plank for 30s
Lunges for 30s Toe raises for 30s Backward crab walk for 30s
Other signs to integrate into the secondary curriculum:One-wayRight Turn LaneOne WayTwo WayRoad Narrows
63
Kathryn Kingsbury
draft tif

E. Closure: Street Demonstration (5 min.)• After having students put their bicycles away, walk over to the sidewalk (or prepare a chalked
outline of a typical street near your school)• Discuss the traffic situation around the school.• When streets have vehicles traveling in both directions, the street is divided in half. Vehicles always
travel on the right half of the road.• Streets are divided into traffic lanes. Generally there is one in each direction. How many lanes does
the street we are looking at have?• To teach where to ride a bicycle, we divide each lane into 3 parts.
o Lane position 1 is closest to the middle of the road.o Lane position 2 is in the middle of the lane.o Lane position 3 is closest to the right side of the road.• Which lane position do you think bicyclists should use if they are going straight? Lane position 3
and stay 3 feet away from the curb and parked cars.• What should you do when you want to cross the street or enter it? Stop, look left-right-left. Why do
we look left first and again? Because cars are coming from the left.
Assignment: Common Reasons for Bicycle Crashes • Ask families to brainstorm potential biking and walking hazards near their home.• Students and families create a list what they believe to be the most common reasons for
bicycle crashes.• Students share with their families: 85% of all bike crashes don’t involve a motor vehicle and
that Youth are at fault almost all of the time when they do crash with a motor vehicle.• The frequent causes of major bicycle crashes for kids are:
o Cyclist comes out of a driveway and doesn’t stopo Cyclist runs a stop sign or traffic signalo Riding the wrong way is another major issueo Solution: be predictable and visible like other vehicles.
• Families create a list of two-three things they can do to improve bike/pedestrian safety near their home.
64
Kathryn Kingsbury
draft tif
Lesson 5: Bike as a Vehicle and Flat Tire Repair
WI PE Standard(s) and Lesson Objective(s):
Demonstrate entering the roadway correctly characterized by coming to a complete stop, looking left, right, and left again (check the sidewalk if one is present), signaling (point in the direction of travel), and then entering the roadway when it is clear.
Demonstrate how to correctly repair a flat tire characterized by:• shifting into the smallest rear cog• releasing the brakes (linear or v brakes only)• taking the wheel off using a wrench or quick release • using tire irons to take one side of the tire off the rim• pumping up the new tube until it has just enough air in it to hold its shape• pumping up the tube to full pressure and making sure the tire has seated back onto the rim• replacing the wheel on the bike
A. IA: Road Sign Activity Exchange (8 min.)Formation/Grouping:
• Groups of 3-5 Equipment:
• Several “containers” (e.g., shoe boxes, frisbees, gallon ice cream containers)• This activity does not require bikes• Road signs and corresponding road signs on paper or index cards (see appendix for template)• Consider laminating
Explanation:• Use Health-related Physical Fitness activities (i.e., Muscular strength and endurance, Flexibility, and
Cardiovascular Endurance)• Color code road sign and activity (e.g., red stop sign = C.V. Endurance activity)• Road signs/activities are placed in containers• Containers are set in the middle of the play space• Students take turns going to the container and choosing a different color, or fitness component, each time• Once completed, road sign/activity cards go back into the container • Students start over once each component has been chosen• If students accidentally choose the same activity twice, just have them place it back in the container and
choose a new activity
Variation(s):• Sport related skills can be integrated • Pre-programmed music could cue students to perform the activity (e.g., for 20 sec.) and change activities
(e.g., 5 sec. pause)
Signs and Activities
Activities (inserted on back)
Stop Sign (red/cardio)Walk or jog for 1 min.Jump rope (or pretend) for 1 min.Power Skips for 30sMountain climbers for 1 min.Bike Peddlers for 1 min.
65
Kathryn Kingsbury
draft tif

Yield Sign (red/cardio) Jumping jacks for 1 min. Power slide for 1 min. Jump squats for 30s Bench step ups for 1 min. Skier jumps for 30s
Railroad Crossing Sign (yellow/flexibility) Quad (quadriceps) stretch for 30s each leg Shoulder (deltoids) stretch for 30s each arm Calf stretch (gastrocnemius) for 30s each leg Back stretch (erecter spinae) for 30s Hamstring (biceps femoris) for 30s each leg
One Way (white/muscular strength) Squats for 30s Push ups for 30s Curl ups for 30s Leg extensions with partner resistance for 30s Leg curls with partner resistance for 30s
Pedestrian Crossing (white muscular endurance) Front plank for 30s Left side plank for 30s; R side plank for 30s
Lunges for 30s Toe raises for 30s Backward crab walk for 30s
B. HRPA: Right Turn Fitness (10 min.)Formation/Grouping:
• 2-3 Rectangular areas (20yards x 40yards)• Set 4 cones in each corner of the rectangular play area. Optional: Place stop signs in two, or all four,
of the cones (see appendix for stop sign cut out)• Students continually move around the rectangle when music is playing, making the appropriate right
hand signal each time they come to a cone (remind students to do an over the shoulder check before signaling).
• Students should use the stop signal if stop signs are included.• Several students can stop (shoulder to shoulder) on the stop line. Passing may occur in the outside
lane(s). Be sure students use a vocal prompt (“passing on your left) when passing slower students.Equipment:
• Task cards, listing the task to be completed to reach the next cone, at each corner placed on large coneExplanation:
• At each corner a different activity is performed to the next cone• Activities include: slow as you can go, walk your bike, regular biking speed, walk your bike using just
the saddle of the bike, run with your bike• Start students in several different areas of the rectangle (not just at the cones) so there is less of a
chance of “bunching” up• Pause the music every 45s. When the music stops students should use the stop signal, come
to a complete stop wherever they might be, and safely dismount their bike. Once students have dismounted, prompt them to gently lay down their bike or utilize their kickstand.
• Teacher demonstrates (or can call on a student to lead) a health-related physical fitness task (e.g., plank for 20s).
66
Kathryn Kingsbury
draft tif
C. Skill PracticeSplit class into two groups. One group will be practicing the entering the road activity from Lesson 4 and one group will be practicing flat tire repair.
Biking Activity: Entering the road simulation (15 min.)Students will be practicing entering the road from a driveway. Set up a road simulation as outlined below. Make the course large enough, or set up multiple courses, so that only 3-4 students are waiting in line at ay time. Have students begin riding the loop. Don’t be concerned about entering the roadway correctly at first; just allow students to practice the path of travel. Use a student to demonstrate properly entering the roadway from a driveway:
• Come to a complete stop• Look left, right, and left again (check the sidewalk if one is present)• Signal (point in the direction of travel)• Enter the roadway when it is clear
As students become more confident you can add cones/markers to represent obstructions. If they cannot see the roadway have students move out slowly to see past the obstruction, but only enter the travel lane when they are sure it is clear.
As students practice you can add other road hazards in, or to the side, of the roadway. If cars are added be sure students check to see if a driver an if he/she might be opening the door. Students, or parent volunteers, can be used to simulate parked cars. Parked cars can swing their arm (a safe distance away from the bicyclist) to represent a door opening.
Flat Tire Repair – Replacing the tube• When your bicycle has a flat tire you can choose to either patch the hole or replace the entire inner
tube. Inner tubes generally cost around $3 while a patch can cost as little as 10 cents. Many of use our bikes to get somewhere on time (e.g., school) so, although a patch is much less expensive and requires more steps, we are first going to learn how to replace a tube. I would suggest patching at home when you have more time and can repair several tubes at one time.
• Teaching tip: There are several wonderful videos online (e.g., youtube.com, vimeo.com) that demonstrate how to change a flat tire.
First demonstrate then explain how to change a flat tire by doing the following: 1. Shift into the smallest rear cog. 2. Release the brakes (this is not necessary with disc brakes). 3. Take the wheel off using a wrench or quick release (be careful of the derailleur while taking the
back wheel off). 4. Squeeze the remaining air out of the tire (this doesn’t have to be perfect). 5. Use 2 to 3 tire irons (or plastic wedges can be purchased at any bike shop) to take one side of the
tire off the wheel rim. Don’t take the tire off completely. You only want to be able to get the tube off or on through one side. Take care not to puncture the tube!
6. Check the inside of the tire rim for thorns or glass. Save the punctured tubes for patching at a later date.
7. Replace the old tube with a new one. 8. Pump up the new tube until it has just enough air in it to hold its shape. Put it inside tire and then
back on rim. Use tire irons if necessary. 9. Pump up the tube or tire to full pressure (see recommended tire PSI on the sidewall of the tire) and
be sure the tire has seated back onto the rim. Check the edge of the tire where it meets the rim. You should see an even amount of tire sowing along the rim.
10. Replace the wheel on the bike.
Locking your bike:
67
Kathryn Kingsbury
draft tif
o Talk about the types of places that you can lock your bike to (fence, pole, and bike parking rack).o Show the importance of locking the front wheel if quick release levers are present.o Show the difference in locks (U-locks, combination locks, cable locks).
Flat Tire Repair - Patching
o Using tire levers, remove one side of tire from rim to expose the rim and remove inner tube.o Inflate tube to locate the hole and mark it with a pen or marker.o Deflate the tube, use sandpaper to roughen and clean the area surrounding the puncture.o Spread a thin layer of glue around the hole, about the size of a quarter.o While glue is drying, try to locate the source of the puncture on the inside of the tire or the
surface of the rim.o When glue is completely dry, discard the aluminum backing of the patch and adhere the patch
to the tube, pressing it firmly in place. Leave plastic on.o Put the valve stem through the rim and put the tube back inside of the tire (one side of the tire is
still on the rim).o Push the bead of the tire back onto the rim with your hands, use tire levers if necessary.o Partially inflate the tire, check to make sure the tire is seated correctly, and then inflate to the
recommended PSI (pounds per square inch) that is printed on the tire.
D. Closure: Hand Signal Review Ask students to stand up and turns their backs to you. Verbally announce each of the hand signals and have students respond. Use this opportunity to assess students hand signaling skill and complete the Bike Unit Scoring Guide.
Assignment: Test your families’ hand signal knowledge when you get home. Ask family members to show you a L, R and STOP hand signal. Discuss how bicyclist can be visible and predictable for other vehicles using the road.
69
Kathryn Kingsbury
draft tif
Lesson 6: Riding in the Road and Hazards
WI PE Standard(s) and Lesson Objective(s):
Scan over their left shoulder, keeping elbows bent and shoulders square to handlebars, while continuing to bike in a straight line.
Dodge an obstacle characterized by a quick turn to the RIGHT
A. IA: Flat tire reviewPlace a front wheel out for each pair of students. As students enter have them practice repairing a flat tire as presented in Lesson 5.
B. HRPA: Jump & Pedal Fitness (focus on Right turns)Formation/Grouping:
• Split group in half using a partner strategy • Set up large square/rectangle using 6-8 cones• Have students find a partner to begin activity (partner 1 bikes; partner 2 performs jump rope activities listed
on the Jump Rope task sheet inside the square/rectangle.• Designate an area for students’ bikes when performing jump rope activities
Equipment: • Cones• Task cards with jump rope variations fastened on cones
Explanation:• Inner square/rectangle includes task cards with several jump rope variations • Once activity begins, students switch roles on paused music (not when one lap is completed) from biking to
jump rope and visa versa • Students DO NOT need to go back to original partner!! • Bikers should e traveling counterclockwise and practice making left turns (including use of hand signals).• When music stops, biker travels to the designated area (use appropriate hand signals), places bike in
designated location away from cycle track, and finds nearest cone/jump rope and chooses next jump rope activity down the line…inner circle partner retrieves their bike and begins biking
• Biking students should assume they are entering traffic from a driveway. Students practice exiting the driveway and turning right while making sure to stop, look for traffic and bike in the correct lane position in the road.
C. Skill Practice:
Riding in a Straight LineHave students bike in a straight line, following a line on the ground, practicing braking at the end of the course. Students should return to the starting area. The activity can be made more difficult by adding hand signals (left and/or right) before they turn to get back in line.
Scanning• When we are biking in the street it is our job to be aware of all the other vehicles around us and yield to
them when they have the right-of-way.• When we want to turn left on a bicycle where do we need to look for cars? ALL directions, but first
behind us. Have instructors demonstrate the need to look back before moving left.• We scan to make sure that there are no vehicles behind us or on our left.• Everyone is going to practice riding a straight line and checking behind them for traffic. Why is it
important to be able to keep biking straight while looking backwards?• Have students take turns biking in a straight line away from the instructor. The instructor should position
69
Kathryn Kingsbury
draft tif
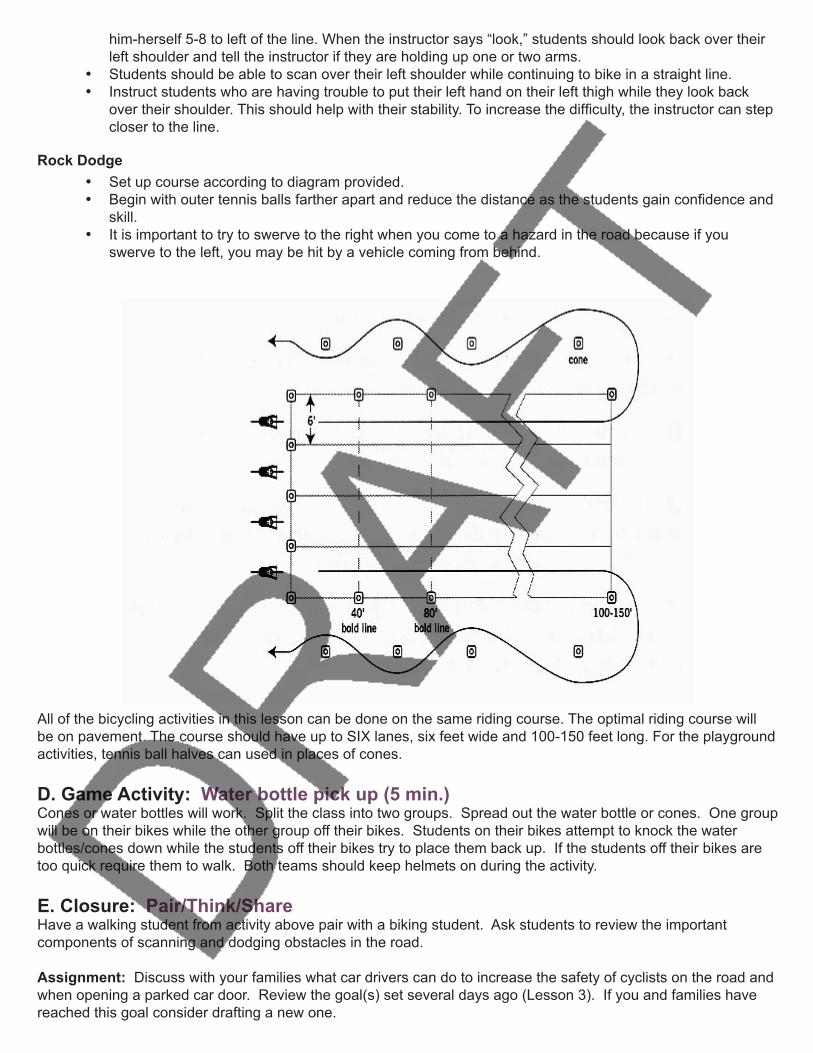
him-herself 5-8 to left of the line. When the instructor says “look,” students should look back over their left shoulder and tell the instructor if they are holding up one or two arms.
• Students should be able to scan over their left shoulder while continuing to bike in a straight line.• Instruct students who are having trouble to put their left hand on their left thigh while they look back
over their shoulder. This should help with their stability. To increase the difficulty, the instructor can step closer to the line.
Rock Dodge• Set up course according to diagram provided. • Begin with outer tennis balls farther apart and reduce the distance as the students gain confidence and
skill.• It is important to try to swerve to the right when you come to a hazard in the road because if you
swerve to the left, you may be hit by a vehicle coming from behind.
All of the bicycling activities in this lesson can be done on the same riding course. The optimal riding course will be on pavement. The course should have up to SIX lanes, six feet wide and 100-150 feet long. For the playground activities, tennis ball halves can used in places of cones.
D. Game Activity: Water bottle pick up (5 min.)Cones or water bottles will work. Split the class into two groups. Spread out the water bottle or cones. One group will be on their bikes while the other group off their bikes. Students on their bikes attempt to knock the water bottles/cones down while the students off their bikes try to place them back up. If the students off their bikes are too quick require them to walk. Both teams should keep helmets on during the activity.
E. Closure: Pair/Think/ShareHave a walking student from activity above pair with a biking student. Ask students to review the important components of scanning and dodging obstacles in the road.
Assignment: Discuss with your families what car drivers can do to increase the safety of cyclists on the road and when opening a parked car door. Review the goal(s) set several days ago (Lesson 3). If you and families have reached this goal consider drafting a new one.
Kathryn Kingsbury
draft tif
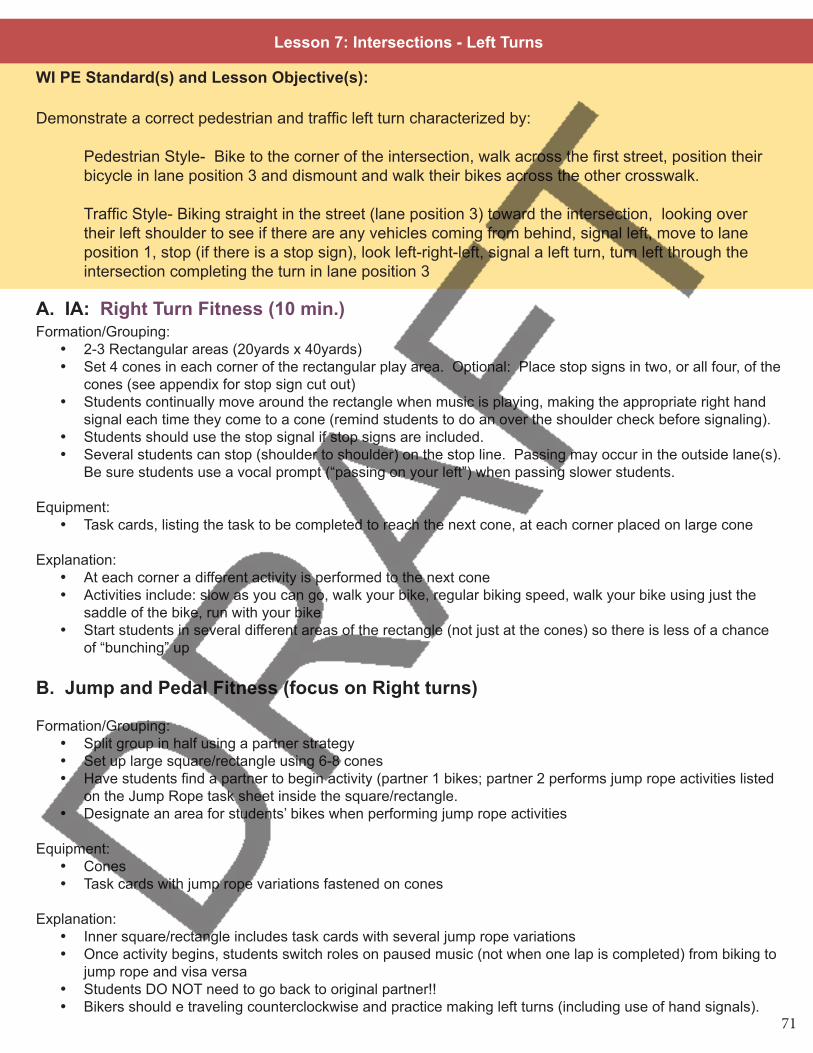
Lesson 7: Intersections - Left Turns
WI PE Standard(s) and Lesson Objective(s):
Demonstrate a correct pedestrian and traffic left turn characterized by:
Pedestrian Style- Bike to the corner of the intersection, walk across the first street, position their bicycle in lane position 3 and dismount and walk their bikes across the other crosswalk.
Traffic Style- Biking straight in the street (lane position 3) toward the intersection, looking over their left shoulder to see if there are any vehicles coming from behind, signal left, move to lane position 1, stop (if there is a stop sign), look left-right-left, signal a left turn, turn left through the intersection completing the turn in lane position 3
A. IA: Right Turn Fitness (10 min.)Formation/Grouping:
• 2-3 Rectangular areas (20yards x 40yards)• Set 4 cones in each corner of the rectangular play area. Optional: Place stop signs in two, or all four, of the
cones (see appendix for stop sign cut out)• Students continually move around the rectangle when music is playing, making the appropriate right hand
signal each time they come to a cone (remind students to do an over the shoulder check before signaling). • Students should use the stop signal if stop signs are included.• Several students can stop (shoulder to shoulder) on the stop line. Passing may occur in the outside lane(s).
Be sure students use a vocal prompt (“passing on your left”) when passing slower students.
Equipment:• Task cards, listing the task to be completed to reach the next cone, at each corner placed on large cone
Explanation:• At each corner a different activity is performed to the next cone• Activities include: slow as you can go, walk your bike, regular biking speed, walk your bike using just the
saddle of the bike, run with your bike• Start students in several different areas of the rectangle (not just at the cones) so there is less of a chance
of “bunching” up
B. Jump and Pedal Fitness (focus on Right turns)
Formation/Grouping:• Split group in half using a partner strategy • Set up large square/rectangle using 6-8 cones• Have students find a partner to begin activity (partner 1 bikes; partner 2 performs jump rope activities listed
on the Jump Rope task sheet inside the square/rectangle.• Designate an area for students’ bikes when performing jump rope activities
Equipment: • Cones• Task cards with jump rope variations fastened on cones
Explanation:• Inner square/rectangle includes task cards with several jump rope variations • Once activity begins, students switch roles on paused music (not when one lap is completed) from biking to
jump rope and visa versa • Students DO NOT need to go back to original partner!! • Bikers should e traveling counterclockwise and practice making left turns (including use of hand signals).
71
Kathryn Kingsbury
draft tif
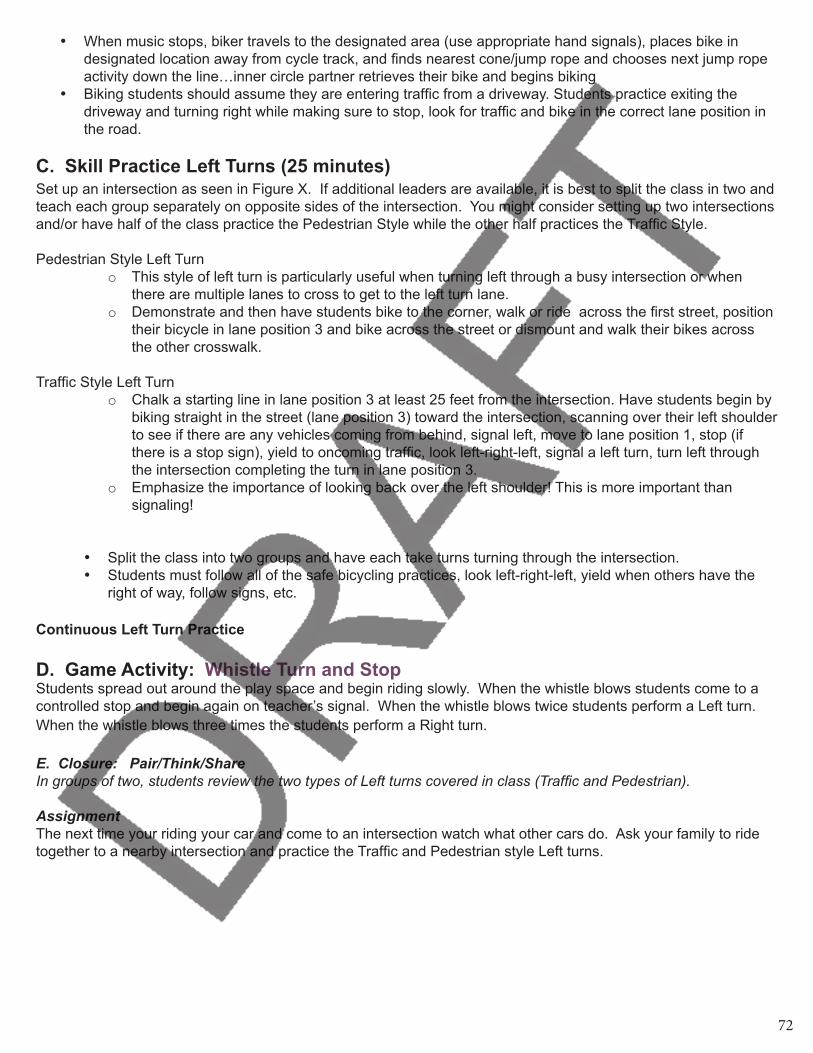
• When music stops, biker travels to the designated area (use appropriate hand signals), places bike in designated location away from cycle track, and finds nearest cone/jump rope and chooses next jump rope activity down the line…inner circle partner retrieves their bike and begins biking
• Biking students should assume they are entering traffic from a driveway. Students practice exiting the driveway and turning right while making sure to stop, look for traffic and bike in the correct lane position in the road.
C. Skill Practice Left Turns (25 minutes)Set up an intersection as seen in Figure X. If additional leaders are available, it is best to split the class in two and teach each group separately on opposite sides of the intersection. You might consider setting up two intersections and/or have half of the class practice the Pedestrian Style while the other half practices the Traffic Style.
Pedestrian Style Left Turno This style of left turn is particularly useful when turning left through a busy intersection or when
there are multiple lanes to cross to get to the left turn lane.o Demonstrate and then have students bike to the corner, walk or ride across the first street, position
their bicycle in lane position 3 and bike across the street or dismount and walk their bikes across the other crosswalk.
Traffic Style Left Turno Chalk a starting line in lane position 3 at least 25 feet from the intersection. Have students begin by
biking straight in the street (lane position 3) toward the intersection, scanning over their left shoulder to see if there are any vehicles coming from behind, signal left, move to lane position 1, stop (if there is a stop sign), yield to oncoming traffic, look left-right-left, signal a left turn, turn left through the intersection completing the turn in lane position 3.
o Emphasize the importance of looking back over the left shoulder! This is more important than signaling!
• Split the class into two groups and have each take turns turning through the intersection. • Students must follow all of the safe bicycling practices, look left-right-left, yield when others have the
right of way, follow signs, etc.
Continuous Left Turn Practice
D. Game Activity: Whistle Turn and StopStudents spread out around the play space and begin riding slowly. When the whistle blows students come to a controlled stop and begin again on teacher’s signal. When the whistle blows twice students perform a Left turn. When the whistle blows three times the students perform a Right turn.
E. Closure: Pair/Think/ShareIn groups of two, students review the two types of Left turns covered in class (Traffic and Pedestrian).
AssignmentThe next time your riding your car and come to an intersection watch what other cars do. Ask your family to ride together to a nearby intersection and practice the Traffic and Pedestrian style Left turns.
72
Kathryn Kingsbury
draft tif
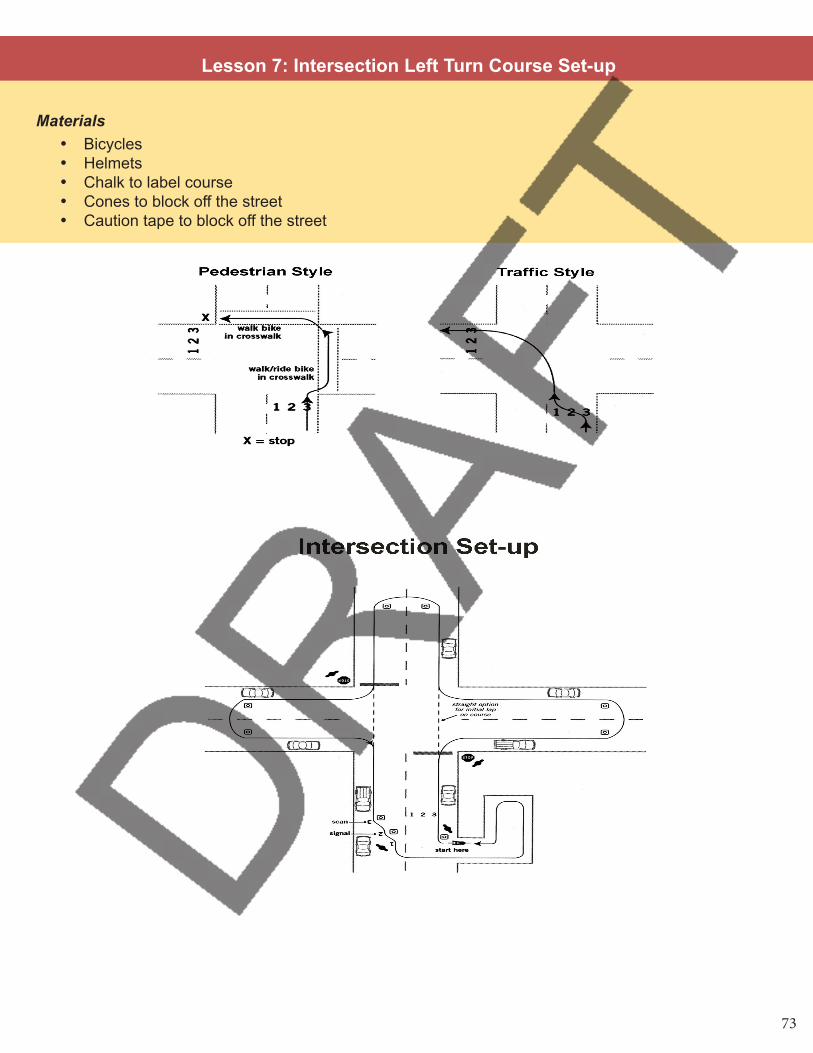
Lesson 7: Intersection Left Turn Course Set-up
Materials• Bicycles• Helmets• Chalk to label course• Cones to block off the street• Caution tape to block off the street
73
Kathryn Kingsbury
draft tif
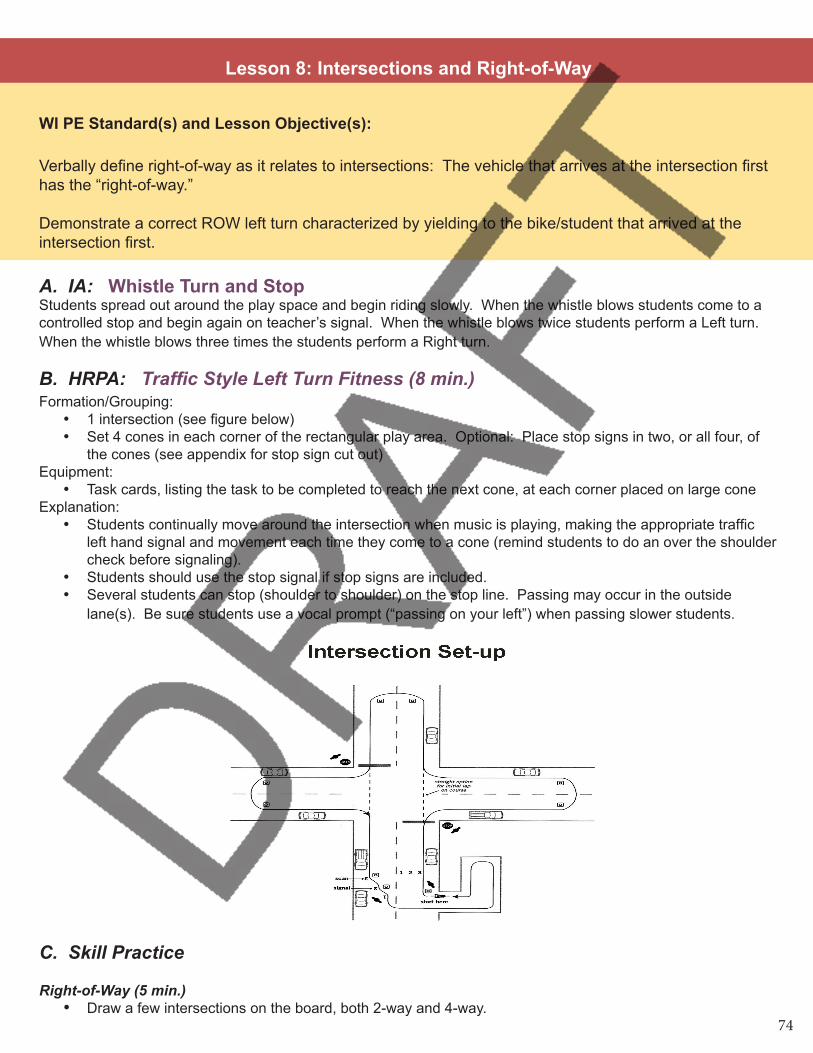
Lesson 8: Intersections and Right-of-Way
WI PE Standard(s) and Lesson Objective(s):
Verbally define right-of-way as it relates to intersections: The vehicle that arrives at the intersection first has the “right-of-way.”
Demonstrate a correct ROW left turn characterized by yielding to the bike/student that arrived at the intersection first.
A. IA: Whistle Turn and StopStudents spread out around the play space and begin riding slowly. When the whistle blows students come to a controlled stop and begin again on teacher’s signal. When the whistle blows twice students perform a Left turn. When the whistle blows three times the students perform a Right turn.
B. HRPA: Traffic Style Left Turn Fitness (8 min.)Formation/Grouping:
• 1 intersection (see figure below)• Set 4 cones in each corner of the rectangular play area. Optional: Place stop signs in two, or all four, of
the cones (see appendix for stop sign cut out)Equipment:
• Task cards, listing the task to be completed to reach the next cone, at each corner placed on large coneExplanation:
• Students continually move around the intersection when music is playing, making the appropriate traffic left hand signal and movement each time they come to a cone (remind students to do an over the shoulder check before signaling).
• Students should use the stop signal if stop signs are included.• Several students can stop (shoulder to shoulder) on the stop line. Passing may occur in the outside
lane(s). Be sure students use a vocal prompt (“passing on your left”) when passing slower students.
C. Skill Practice
Right-of-Way (5 min.)• Draw a few intersections on the board, both 2-way and 4-way.
74
Kathryn Kingsbury
draft tif

• What does a traffic stop sign mean? Ok, once we stop what do we do? How do we know if we should go first or let the other driver go first?
• There are two kinds of stop signs, 2-way and 4-way.• Imagine biking down the street and you see that the intersection ahead of you is controlled by a stop sign
only on your street, meaning the traffic on the cross street does not stop (this is called a 2-way intersection). When you come to the intersection you stop, look to the left to see if there is a car approaching. If they don’t have a stop sign, what do you do? If they do have a stop sign, what do you do? Count the number of stop signs to see if it’s a 2-way or 4-way stop.
• Now, imagine biking down a street and coming to an intersection with a stop sign on each corner (this is called a 4-way intersection). You and two other vehicles all stop at different stop signs at the exact same time. How do you decide who gets to go first?
• The vehicle that arrives at the intersection first has the “right-of-way” and other vehicles, bikes included, must yield to this vehicle. Yield means to let other vehicles go first.
• Knowing the right of way rules would help you decide who would go first at this intersection or at an intersection without any signs.
Riding in a Straight LineHave students bike in a straight line, following a line on the ground, practicing braking at the end of the course. Students should return to the starting area. The activity can be made more difficult by adding hand signals (left and/or right) before they turn to get back in line.
Scanning• When we are biking in the street it is our job to be aware of all the other vehicles around us and yield to
them when they have the right-of-way.• When we want to turn left on a bicycle where do we need to look for cars? ALL directions, but first
behind us. Have instructors demonstrate the need to look back before moving left.• We scan to make sure that there are no vehicles behind us or on our left.• Everyone is going to practice riding a straight line and checking behind them for traffic. Why is it
important to be able to keep biking straight while looking backwards?• Have students take turns biking in a straight line away from the instructor. The instructor should position
him-herself 5-8 to left of the line. When the instructor says “look,” students should look back over their left shoulder and tell the instructor if they are holding up one or two arms.
• Students should be able to scan over their left shoulder while continuing to bike in a straight line.• Instruct students who are having trouble to put their left hand on their left thigh while they look back
over their shoulder. This should help with their stability. To increase the difficulty, the instructor can step closer to the line.
ROW Practice (15 min.)Set up 1-2 traffic style left turn (see figure) intersections from Lesson #7. Split your class into 4 or 8 groups. One group per lane. Groups begin about 20 yards back from the intersection. As students approach, they use their look back technique, hand signals and correct stop, follow the ROW rules, and proceed to make a left turn (you could designate some groups as right turn lanes). After making their left turn, students fold into the group/lane nearest them. Have students keep rotating through the intersection.
75
Kathryn Kingsbury
draft tif
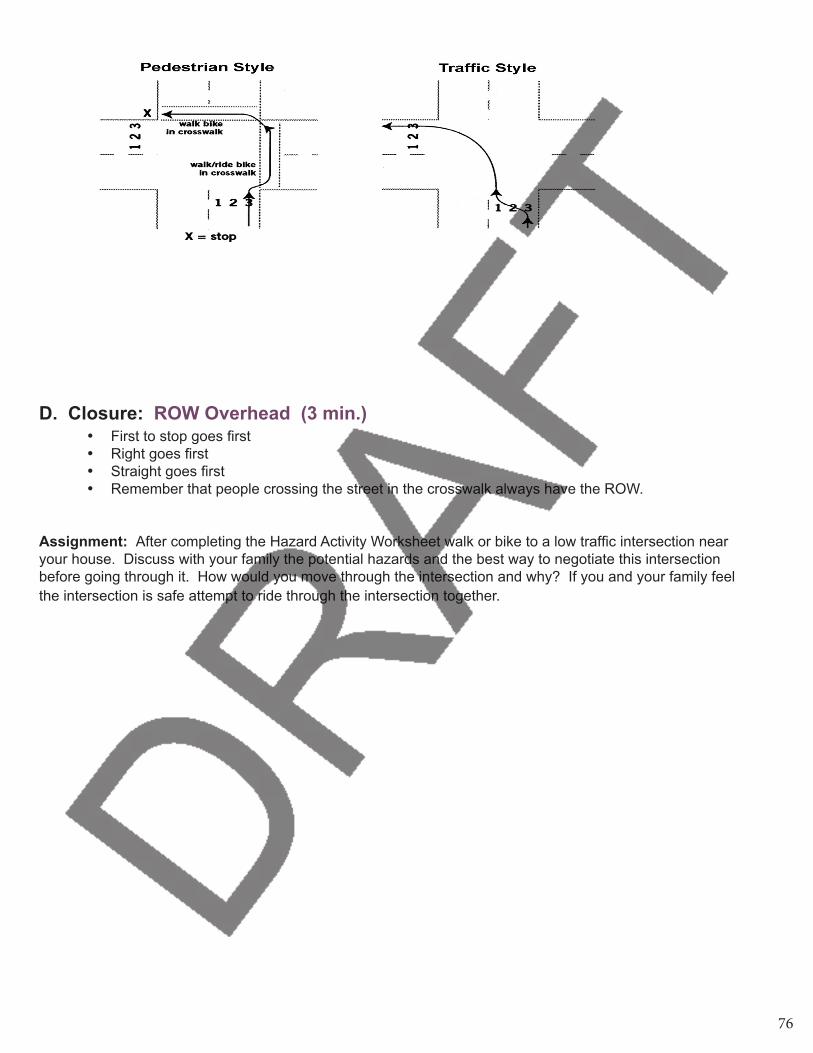
D. Closure: ROW Overhead (3 min.)• First to stop goes first• Right goes first• Straight goes first• Remember that people crossing the street in the crosswalk always have the ROW.
Assignment: After completing the Hazard Activity Worksheet walk or bike to a low traffic intersection near your house. Discuss with your family the potential hazards and the best way to negotiate this intersection before going through it. How would you move through the intersection and why? If you and your family feel the intersection is safe attempt to ride through the intersection together.
76
Kathryn Kingsbury
draft tif
Lesson 9: Riding in traffic
WI PE Standard(s) and Lesson Objective(s):Remain in the squeeze box (a small space) as long as possible by using controlled balance, braking, and proper gear selection.
Demonstrate being predictable cyclist characterized by use of correct hand signals, communicate with other riders, and obey all traffic laws and traffic signs at all times.
A. IA: PEDAL (6 min.)PEDAL is played just like HORSE or PIG in basketball. Students work in pairs and try to give each other a letter. Student one leads for 30s and moves around obstacles slowly. The leader can try and get their opponent a letter by coming to a stop, balancing for as long as they can, and then moving. If the following student touches the ground they are assigned a “P”. Students take turns leading. The goal is NOT to be the first to spell PEDAL. Fewer word versions include TIRE, Right-of-way (ROW)
B. HRPA: Bike Specific Partner Resistance Activities Formation/Grouping:
• Partners spread around gymEquipment:
• Task cardsExplanation:
• Students should be matched for strength and size• Activities should be performed through the full range of motion for 8-12 sec.• Partner providing resistance should give a “BEGIN” command and count the duration of the activity • Each partner should perform 1 set the first time the activity is introduced and up to 2 sets later on• Develop a task card that alternates between upper/lower body movements, large to small muscle groups,
and on-the-bike activities.• After each partner has completed one set of resistance exercises the partners get on their bikes and ride for
1 min (display a countdown clock or use music intervals)• After riding for 1 min. the partner choose another resistance activity and keep alternating until the teacher
ask the class to stopVariation(s):
• Students create their own routine using teacher specified activities
C. Skill Practice
Squeeze Box (15 min.)Create two squeeze boxes on the ground using cones and jump ropes as boundary markers. A squeeze box can be approximately 12 ft x 12 ft (modify the size according to the skill level of the riders. A smaller squeeze box is more difficult to ride in. Have students begin cycling in one of the squeeze boxes. To remain in the box, a biker must keep both feet off the ground and remain within the boundaries. The goal is to be the last rider in the box. Contact with another bike or person is NOT allowed. Students who put a foot on the ground or contact another rider are out and must move to the second squeeze box to continue a new round of competition. Students should keep moving back and forth between areas (3-4 boxes is beneficial) if their foot touches the ground.
Campus/Parking Lot Ride 3-4 volunteers would be beneficial for this activity. The goal is to simulate traffic conditions in a fairly controlled manner. Split students in 4-5 groups that MUST stay together at all times. Groups should utilize communication, hand signals, turning, and other bikes related skills presented during the unit. Design a course around your campus that includes roads, parking areas, stop signs, intersections, and hazards. Consider having volunteers
77
Kathryn Kingsbury
draft tif
simulate vehicle door opening near the parked cars to reinforce the 3 ft. rule. If your campus has few traffic signs consider placing some around the course (you can print off the signs found in the appendix). You might want to post signage around your campus notifying vehicles that a bike activity is in progress on campus and ask vehicles to drive extra slow and pay attention to cyclists.
Students should remember to:
• Be predictable/ ride on the right • Use hand signals• Communicate with other riders• Obey all traffic laws and traffic signs
Gearing Add in a small hill to the campus/parking lot ride. Explain to students that gears make it easier to go up and down hills. Different bikes have different types of shifters. Some require that you turn them on the handlebar. These are called twist or grip shifters. Others require that your press a lever with your finger and thumb. These are called trigger shifters. Both are indexed meaning each “click” moves the derailleur one gear. Most bikes have 8-9 gears in the rear and 2-3 in the front, located near your brakes. The right shifter moves the rear derailleur up and down the cassette, or cogs on the rear wheel. The left shifter moves the front derailleur up and down the gears on the crank set. In the rear cassette the smaller the gear the more difficult it is to pedal. In the front, the smaller gear the easier it is to pedal. Be sure students shift to an easier gear BEFORE the hill. The front derailleur should be shifted to the smallest cog and the rear dealer should be shifted to the largest cog.
Closure: Pair/Think/Share:What sorts of obstacles/hazards did you notice while riding around campus? What specific skills have we practiced over the last few days that will help you manage these hazards?
Assignment: Mapping Activity What are maps? Why do people make maps? What are important things to have on a map? What do you need to be able to use a map? With your family, design a biking and/or walking route and map to your favorite, nearby (within 2 miles), destinations. You might consider using Google Maps and its new “bike route” application
78
Kathryn Kingsbury
draft tif
Lesson 10: Neighborhood Ride or Bike Challenge Stations
WI PE Standard(s) and Lesson Objective(s):Demonstrate each of the bike skills presented in the previous lessons during a neighborhood ride or while at several stations.
Instructors can choose between a neighborhood ride, campus ride, or station design for this lesson. The station set up and the campus would be ideal for completing the Bike Skills Scoring Guide.
Neighborhood or Campus RideRecruit several volunteers for this lesson. Create 3-4 groups of students and 2 adult volunteers for each group. One adult should lead the group and the other adult should sweep behind.
Remind students and volunteers:• To be visible and predictable• Follow all traffic laws• Ride as though your by yourself, don’t just automatically follow the leader• Ride single file on the right side of the road• Communicate verbally with other riders and use hand signals
Station SuggestionsBelow are several possible stations that could be used during this lesson. Students will have 5-8 min. at each station. One adult volunteer at each station would be helpful.
Station #1: Squeeze Box Create two squeeze boxes on the ground using cones and jump ropes as boundary markers. A squeeze box can be approximately 12 ft x 12 ft (modify the size according to the skill level of the riders. A smaller squeeze box is more difficult to ride in. Have students begin cycling in one of the squeeze boxes. To remain in the box, a biker must keep both feet off the ground and remain within the boundaries. The goal is to be the last rider in the box. Contact with another bike or person is NOT allowed. Students who put a foot on the ground or contact another rider are out and must move to the second squeeze box to continue a new round of competition. Students should keep moving back and forth between areas (3-4 boxes is beneficial) if their foot touches the ground.
Station #2: Riding in a Straight LineHave students bike in a straight line, following a line on the ground, practicing braking at the end of the course. Students should return to the starting area. The activity can be made more difficult by adding hand signals (left and/or right) before they turn to get back in line.
Station #3: Continuous Left Turns (BTA; p. 70)
Station #4: Rock Dodge• Set up course according to diagram provided. • Begin with outer tennis balls farther apart and reduce the distance as the students gain confidence and
skill.• It is important to try to swerve to the right when you come to a hazard in the road because if you swerve
to the left, you may be hit by a vehicle coming from behind.
79
Kathryn Kingsbury
draft tif
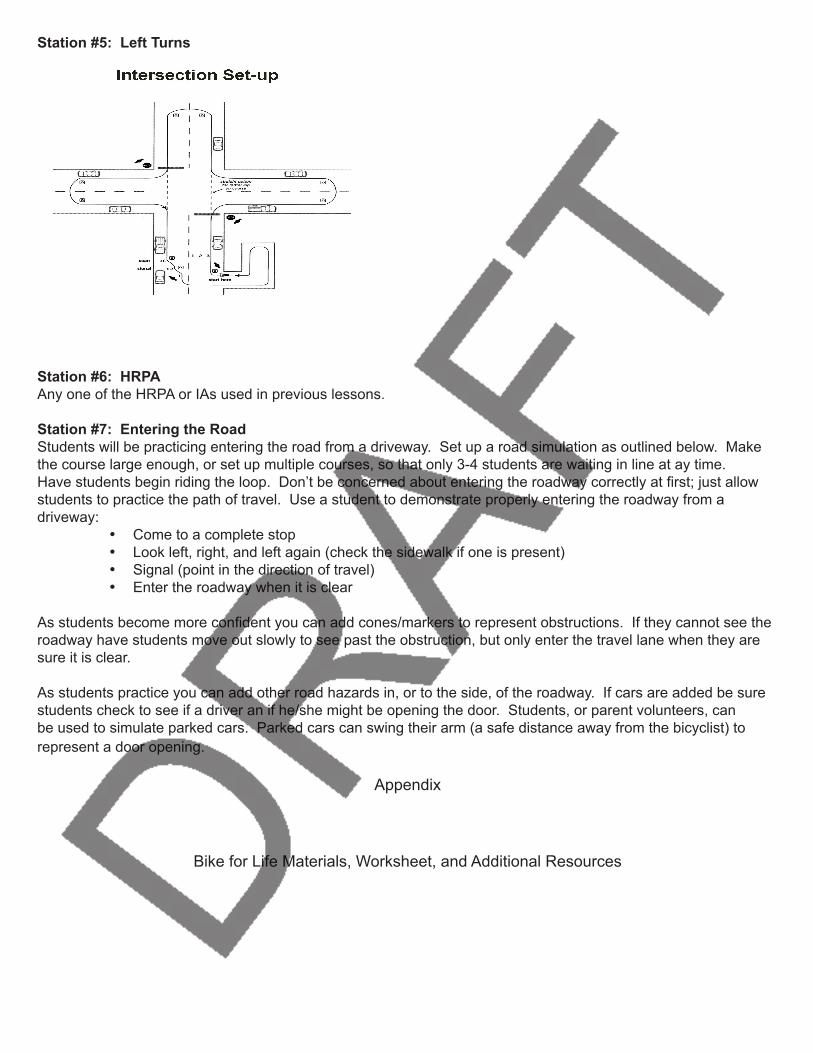
Station #5: Left Turns
Station #6: HRPAAny one of the HRPA or IAs used in previous lessons.
Station #7: Entering the RoadStudents will be practicing entering the road from a driveway. Set up a road simulation as outlined below. Make the course large enough, or set up multiple courses, so that only 3-4 students are waiting in line at ay time. Have students begin riding the loop. Don’t be concerned about entering the roadway correctly at first; just allow students to practice the path of travel. Use a student to demonstrate properly entering the roadway from a driveway:
• Come to a complete stop• Look left, right, and left again (check the sidewalk if one is present)• Signal (point in the direction of travel)• Enter the roadway when it is clear
As students become more confident you can add cones/markers to represent obstructions. If they cannot see the roadway have students move out slowly to see past the obstruction, but only enter the travel lane when they are sure it is clear.
As students practice you can add other road hazards in, or to the side, of the roadway. If cars are added be sure students check to see if a driver an if he/she might be opening the door. Students, or parent volunteers, can be used to simulate parked cars. Parked cars can swing their arm (a safe distance away from the bicyclist) to represent a door opening.
Appendix
Bike for Life Materials, Worksheet, and Additional Resources
Kathryn Kingsbury
draft tif
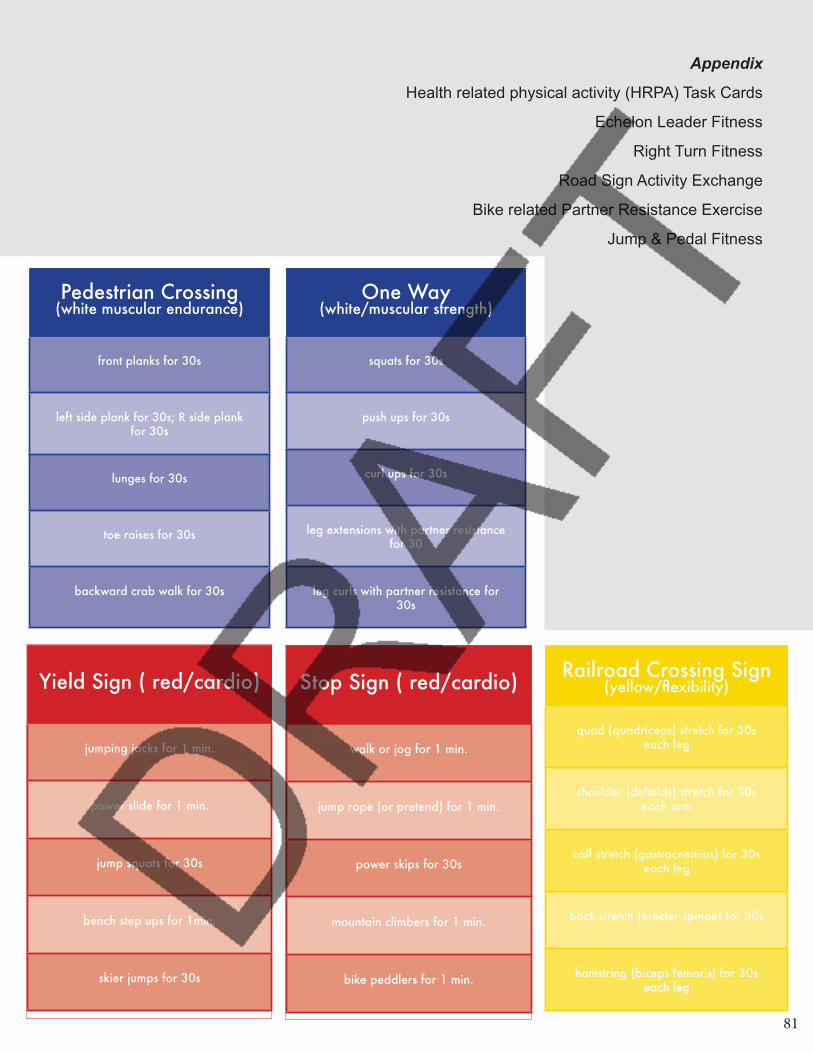
Appendix
Health related physical activity (HRPA) Task Cards
Echelon Leader Fitness
Right Turn Fitness
Road Sign Activity Exchange
Bike related Partner Resistance Exercise
Jump & Pedal Fitness
ACES Wild
Railroad Crossing Sign (yellow/flexibility)
quad (quadriceps) stretch for 30s each leg
shoulder (deltoids) stretch for 30s each arm
calf stretch (gastrocnemius) for 30s each leg
back stretch (erecter spinae) for 30s
hamstring (biceps femoris) for 30s each leg
Yield Sign ( red/cardio)
jumping jacks for 1 min.
power slide for 1 min.
jump squats for 30s
bench step ups for 1min.
skier jumps for 30s
One Way (white/muscular strength)
squats for 30s
push ups for 30s
curl ups for 30s
leg extensions with partner resistance for 30
leg curls with partner resistance for 30s
Pedestrian Crossing (white muscular endurance)
front planks for 30s
left side plank for 30s; R side plank for 30s
lunges for 30s
toe raises for 30s
backward crab walk for 30s
Stop Sign ( red/cardio)
walk or jog for 1 min.
jump rope (or pretend) for 1 min.
power skips for 30s
mountain climbers for 1 min.
bike peddlers for 1 min.
81
Kathryn Kingsbury
draft tif
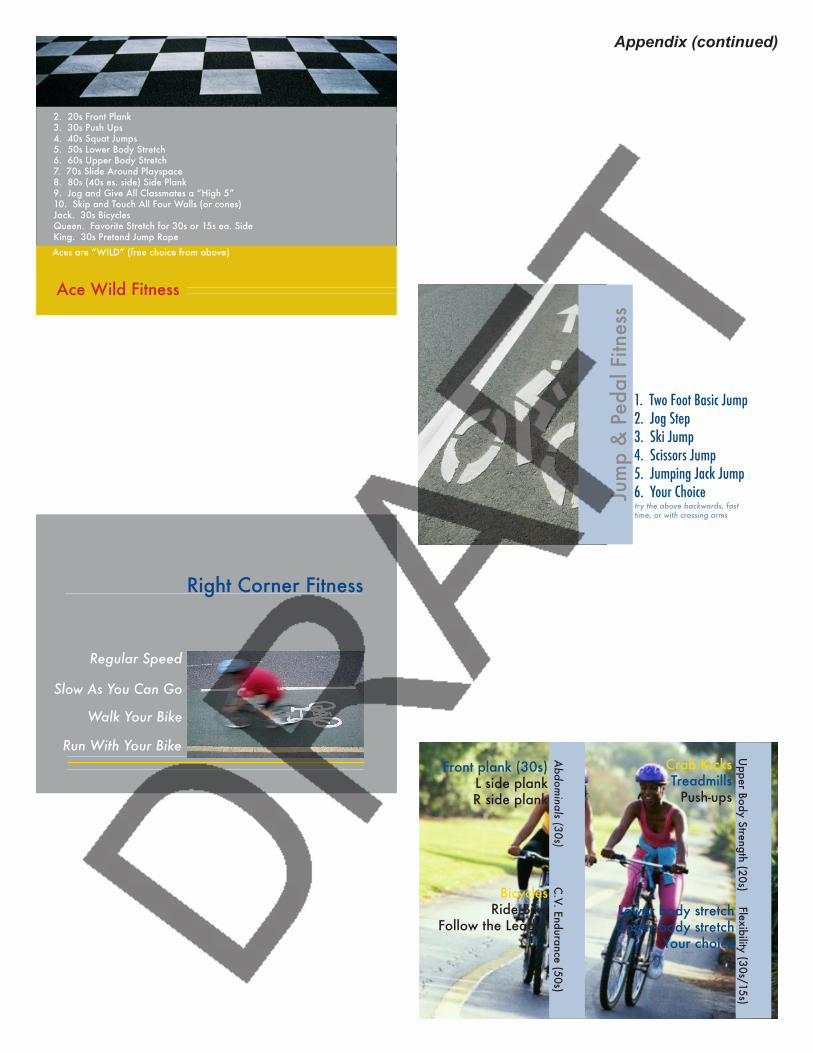
Regular Speed
Slow As You Can Go
Walk Your Bike
Run With Your Bike
Right Corner Fitness
Ace Wild Fitness
2. 20s Front Plank3. 30s Push Ups4. 40s Squat Jumps5. 50s Lower Body Stretch6. 60s Upper Body Stretch7. 70s Slide Around Playspace8. 80s (40s es. side) Side Plank9. Jog and Give All Classmates a “High 5”10. Skip and Touch All Four Walls (or cones)Jack. 30s BicyclesQueen. Favorite Stretch for 30s or 15s ea. SideKing. 30s Pretend Jump RopeAces are “WILD” (free choice from above)
Abdom
inals (30s)
Upper Body Strength (20s)
Crab KicksTreadmills
Push-ups
Lower body stretchUpper body stretch
Your choice
Front plank (30s)L side plankR side plank
C.V. Endurance (50s)
BicyclesRide Bike
Follow the Leader
Flexibility (30s/15s)
1. Two Foot Basic Jump2. Jog Step3. Ski Jump4. Scissors Jump5. Jumping Jack Jump6. Your Choicetry the above backwards, fast time, or with crossing arms
Jum
p &
Ped
al F
itnes
s
Appendix (continued)
Kathryn Kingsbury
draft tif
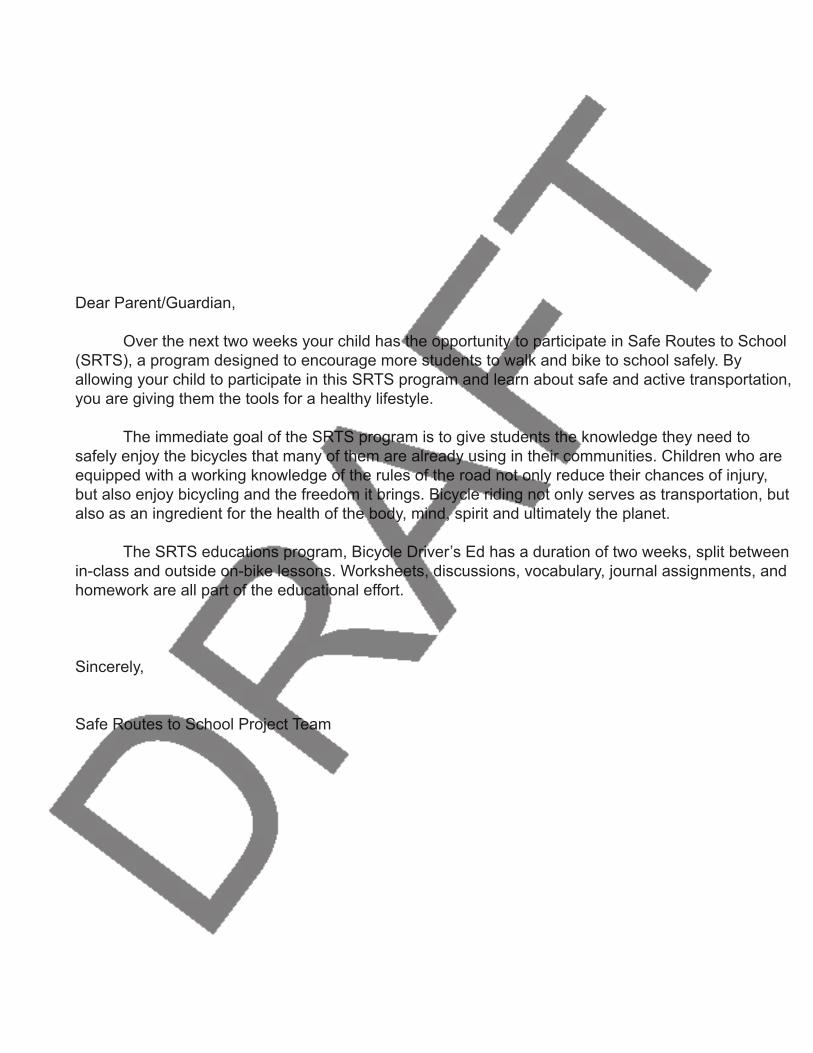
Dear Parent/Guardian,
Over the next two weeks your child has the opportunity to participate in Safe Routes to School (SRTS), a program designed to encourage more students to walk and bike to school safely. By allowing your child to participate in this SRTS program and learn about safe and active transportation, you are giving them the tools for a healthy lifestyle.
The immediate goal of the SRTS program is to give students the knowledge they need to safely enjoy the bicycles that many of them are already using in their communities. Children who are equipped with a working knowledge of the rules of the road not only reduce their chances of injury, but also enjoy bicycling and the freedom it brings. Bicycle riding not only serves as transportation, but also as an ingredient for the health of the body, mind, spirit and ultimately the planet.
The SRTS educations program, Bicycle Driver’s Ed has a duration of two weeks, split between in-class and outside on-bike lessons. Worksheets, discussions, vocabulary, journal assignments, and homework are all part of the educational effort.
Sincerely,
Safe Routes to School Project Team
Kathryn Kingsbury
draft tif

Transportation Investigation Chart
DATE WALKED BIKED TOTAL
Transportation Investigation Line Graph
30
25
20
15
10
5
Date
Stud
ents
wal
king
& b
ikin
g
Kathryn Kingsbury
draft tif
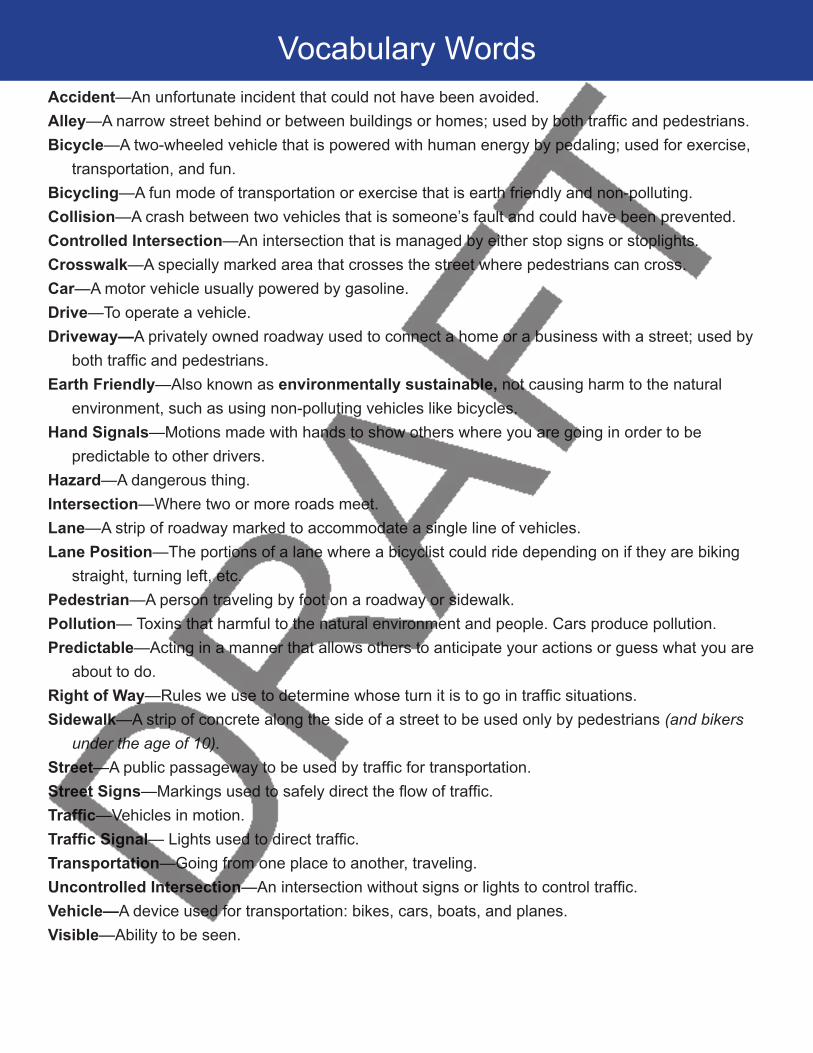
Vocabulary WordsAccident—An unfortunate incident that could not have been avoided. Alley—A narrow street behind or between buildings or homes; used by both traffic and pedestrians.Bicycle—A two-wheeled vehicle that is powered with human energy by pedaling; used for exercise,
transportation, and fun.Bicycling—A fun mode of transportation or exercise that is earth friendly and non-polluting.Collision—A crash between two vehicles that is someone’s fault and could have been prevented.Controlled Intersection—An intersection that is managed by either stop signs or stoplights. Crosswalk—A specially marked area that crosses the street where pedestrians can cross.Car—A motor vehicle usually powered by gasoline.Drive—To operate a vehicle.Driveway—A privately owned roadway used to connect a home or a business with a street; used by
both traffic and pedestrians.Earth Friendly—Also known as environmentally sustainable, not causing harm to the natural
environment, such as using non-polluting vehicles like bicycles.Hand Signals—Motions made with hands to show others where you are going in order to be
predictable to other drivers.Hazard—A dangerous thing.Intersection—Where two or more roads meet.Lane—A strip of roadway marked to accommodate a single line of vehicles.Lane Position—The portions of a lane where a bicyclist could ride depending on if they are biking
straight, turning left, etc. Pedestrian—A person traveling by foot on a roadway or sidewalk.Pollution— Toxins that harmful to the natural environment and people. Cars produce pollution.Predictable—Acting in a manner that allows others to anticipate your actions or guess what you are
about to do.Right of Way—Rules we use to determine whose turn it is to go in traffic situations.Sidewalk—A strip of concrete along the side of a street to be used only by pedestrians (and bikers
under the age of 10).Street—A public passageway to be used by traffic for transportation.Street Signs—Markings used to safely direct the flow of traffic.Traffic—Vehicles in motion.Traffic Signal— Lights used to direct traffic.Transportation—Going from one place to another, traveling. Uncontrolled Intersection—An intersection without signs or lights to control traffic.Vehicle—A device used for transportation: bikes, cars, boats, and planes.Visible—Ability to be seen.
Kathryn Kingsbury
draft tif
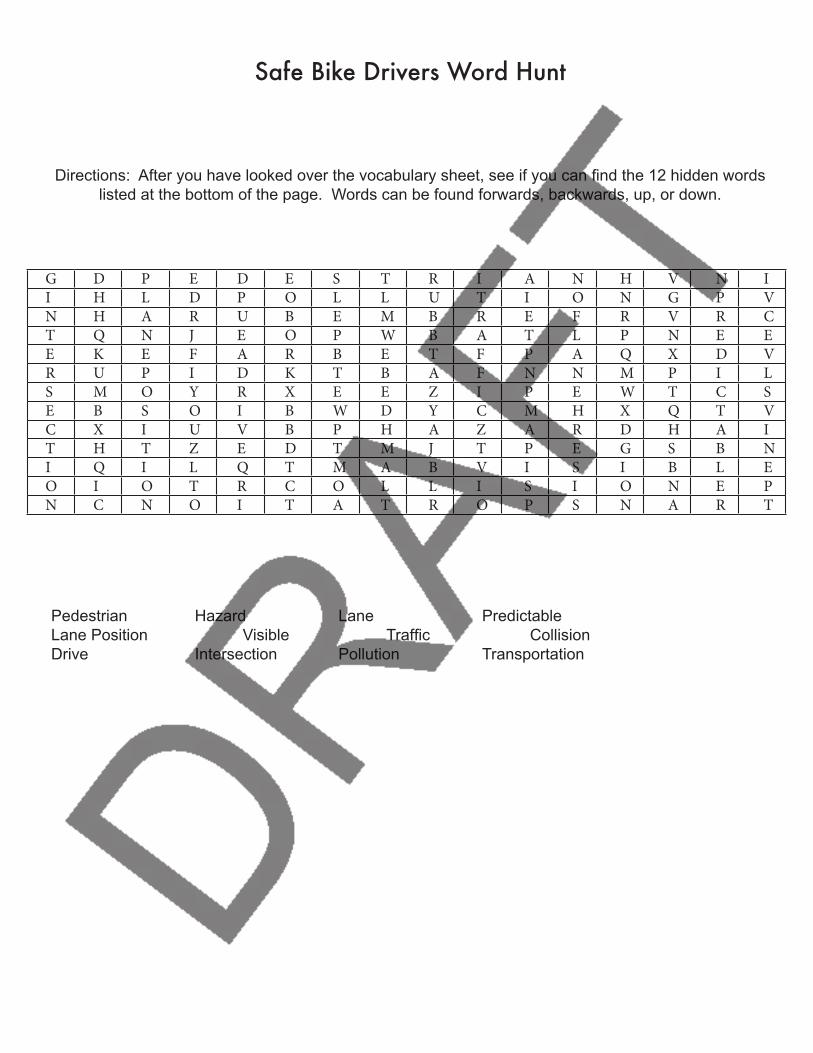
Safe Bike Drivers Word Hunt
Directions: After you have looked over the vocabulary sheet, see if you can find the 12 hidden words listed at the bottom of the page. Words can be found forwards, backwards, up, or down.
Pedestrian Hazard Lane PredictableLane Position Visible Traffic CollisionDrive Intersection Pollution Transportation
G D P E D E S T R I A N H V N II H L D P O L L U T I O N G P VN H A R U B E M B R E F R V R CT Q N J E O P W B A T L P N E EE K E F A R B E T F P A Q X D VR U P I D K T B A F N N M P I LS M O Y R X E E Z I P E W T C SE B S O I B W D Y C M H X Q T VC X I U V B P H A Z A R D H A IT H T Z E D T M J T P E G S B NI Q I L Q T M A B V I S I B L EO I O T R C O L L I S I O N E PN C N O I T A T R O P S N A R T
Kathryn Kingsbury
draft tif
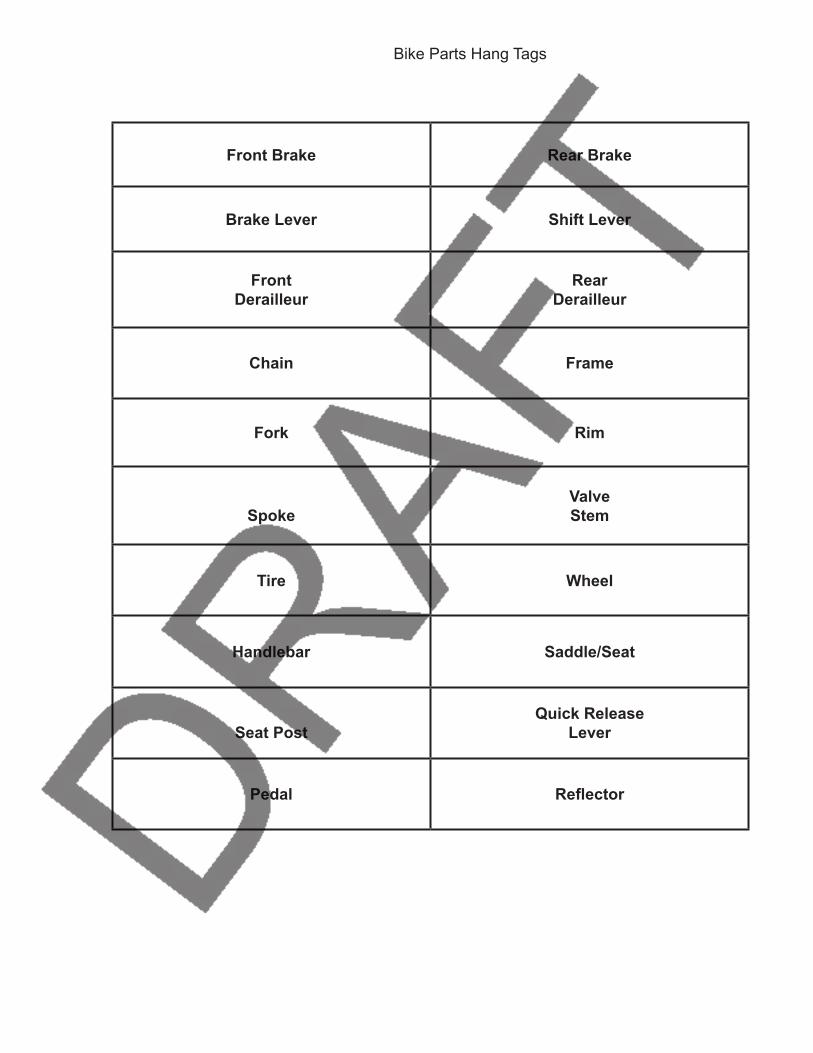
Bike Parts Hang Tags
Front Brake Rear Brake
Brake Lever Shift Lever
FrontDerailleur
RearDerailleur
Chain Frame
Fork Rim
SpokeValveStem
Tire Wheel
Handlebar Saddle/Seat
Seat PostQuick Release
Lever
Pedal Reflector
Kathryn Kingsbury
draft tif

Bike Parts Worksheet
Draw a line and write the letter for each bicycle part, on the bike drawing below
Kathryn Kingsbury
draft tif

Turning Worksheet
The intersection below is labeled with lane positions 1, 2 and 3. Starting at the bicycle in lane position 3, draw the path the bicyclist would make when turning RIGHT, continuing STRAIGHT and turning LEFT.
Right Turn g Continuing Straight h Left Turn f
Turning WorksheetThe intersection below is labeled with lane positions 1, 2 and 3. Starting at the bicycle in lane position 3, draw the path the bicyclist would make when turning RIGHT, continuing STRAIGHT and turning LEFT.
Right Turn g Continuing Straight h Left Turn f
Kathryn Kingsbury
draft tif
Right of Way RulesWho Goes First?
Right of Way Worksheet
Kathryn Kingsbury
draft tif
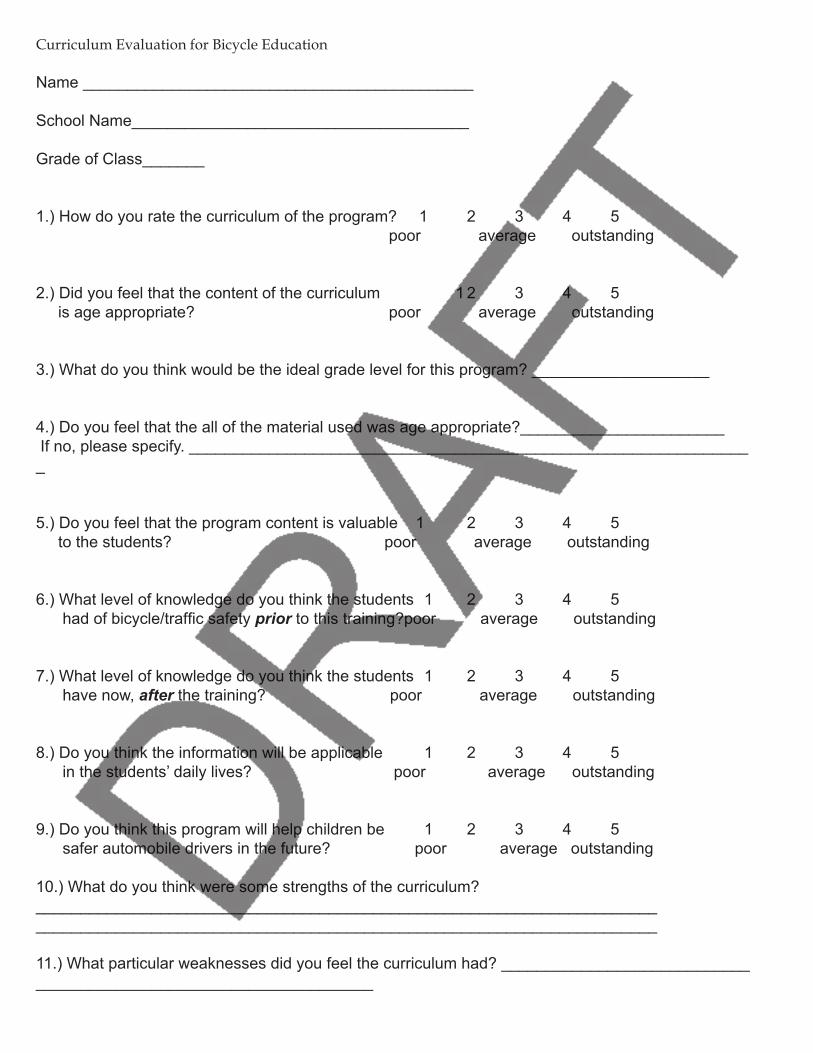
Curriculum Evaluation for Bicycle Education
Name ____________________________________________
School Name______________________________________
Grade of Class_______
1.) How do you rate the curriculum of the program? 1 2 3 4 5 poor average outstanding
2.) Did you feel that the content of the curriculum 1 2 3 4 5 is age appropriate? poor average outstanding
3.) What do you think would be the ideal grade level for this program? ____________________
4.) Do you feel that the all of the material used was age appropriate?_______________________ If no, please specify. ________________________________________________________________
5.) Do you feel that the program content is valuable 1 2 3 4 5 to the students? poor average outstanding
6.) What level of knowledge do you think the students 1 2 3 4 5 had of bicycle/traffic safety prior to this training?poor average outstanding
7.) What level of knowledge do you think the students 1 2 3 4 5 have now, after the training? poor average outstanding
8.) Do you think the information will be applicable 1 2 3 4 5 in the students’ daily lives? poor average outstanding
9.) Do you think this program will help children be 1 2 3 4 5 safer automobile drivers in the future? poor average outstanding
10.) What do you think were some strengths of the curriculum?____________________________________________________________________________________________________________________________________________
11.) What particular weaknesses did you feel the curriculum had? __________________________________________________________________
Kathryn Kingsbury
draft tif

__________________________________________________________________
12.) What traits can be improved upon? ____________________________________________________________________________________________________________________________________________
14.) Do you think that this program added value to the community? How?_________________________________________________________________ ______________________________________________________________________
Please feel free to email your answers to [email protected] so that revisions to the program can be made
Kathryn Kingsbury
draft tif
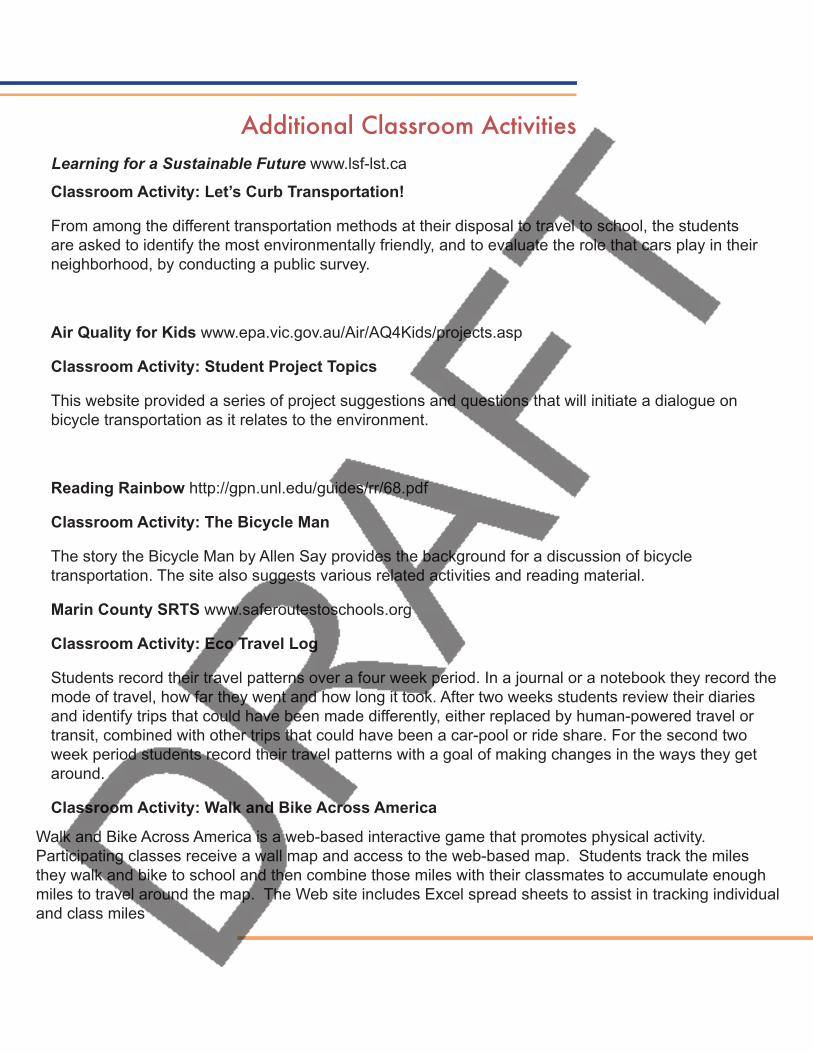
Additional Classroom ActivitiesLearning for a Sustainable Future www.lsf-lst.ca
Classroom Activity: Let’s Curb Transportation!
From among the different transportation methods at their disposal to travel to school, the students are asked to identify the most environmentally friendly, and to evaluate the role that cars play in their neighborhood, by conducting a public survey.
Air Quality for Kids www.epa.vic.gov.au/Air/AQ4Kids/projects.asp
Classroom Activity: Student Project Topics
This website provided a series of project suggestions and questions that will initiate a dialogue on bicycle transportation as it relates to the environment.
Reading Rainbow http://gpn.unl.edu/guides/rr/68.pdf
Classroom Activity: The Bicycle Man
The story the Bicycle Man by Allen Say provides the background for a discussion of bicycle transportation. The site also suggests various related activities and reading material.
Marin County SRTS www.saferoutestoschools.org
Classroom Activity: Eco Travel Log
Students record their travel patterns over a four week period. In a journal or a notebook they record the mode of travel, how far they went and how long it took. After two weeks students review their diaries and identify trips that could have been made differently, either replaced by human-powered travel or transit, combined with other trips that could have been a car-pool or ride share. For the second two week period students record their travel patterns with a goal of making changes in the ways they get around.
Classroom Activity: Walk and Bike Across America
Walk and Bike Across America is a web-based interactive game that promotes physical activity. Participating classes receive a wall map and access to the web-based map. Students track the miles they walk and bike to school and then combine those miles with their classmates to accumulate enough miles to travel around the map. The Web site includes Excel spread sheets to assist in tracking individual and class miles
Kathryn Kingsbury
draft tif

Traffic Signs Activity
In-class (20 minutes)Purpose: Students should become familiar with various traffic signs.
• Allow students to come to the board and draw any street signs that they know.• After a couple of minutes, have students sit down and discuss each sign.• Make sure to discuss: stop signs, yield signs, one way signs, traffic lights, speed limit
signs, school crossing signs, no right/left turn signs, and signs indicating that multiple lanes must turn a specific direction. Some of these are picture below.
Kathryn Kingsbury
draft tif

Environmental Organization Activity
Purpose: By educating students about organizations addressing environmental issues in their community, students will be able to more fully understand the link between bicycles and sustainable transportation.
• Divide the class into 5 groups, giving each group the name of a local organization that is working on an environmental issue. Ideally, each organizations focus would be on sustainable transportation.
• Over the next week each group should prepare a three to five minute presentation to be given the following week.
• If possible, arrange class time to be spent in the computer lab so that students can use the Internet to research their organization together.
• Encourage students to plan a time outside of class to work on their presentations.• Make a worksheet for each student which would include each organizations name and contact
information as well as these questions (sample worksheet provided as a guide):o What is the name and location of your organization?o Does your organization have a state or city focus?o What is the mission statement of your organization?o What issue is your organization addressing?o What are some of the projects your organization has done to address the issue?o Is this an organization you want to be involved with?o What are some actions your group is already taking to help the environment?
Kathryn Kingsbury
draft tif

On-Bike Training DrillsDescriptions for Instructors
SNAIL RACE
This activity helps students practice the Ready, Set, Go mounting and pushing off skill they just learned, as well as practice maintaining control of their bicycle at low speeds.
Set up 2-4 lanes about 10 feet wide and 40 ft. long. Use lines already on the pavement, sidewalk chalk or tennis balls.
Divide cyclists into groups for each lane. Cyclists should line up in their groups at one end of the lanes.
Explain the rules:
You must start in the Ready Position we just learned. When the whistle blows, push off and go as slow as you can. You must stay in your lane, and you may not put your foot down. The last one to cross the finish line wins. If you put your foot down or weave out of your lane, you are eliminated.
Have one instructor positioned at the start line and one at the finish line. Conduct the race in heats to find an overall winner.
BRAKING AND STOPPING
Braking:Discuss the three different had braking combinations and their advantages/disadvantages:
1. Front brake only: Unsafe, can cause you to flip over the handlebars. Can cause your rear wheel to skid as too much force is on the front of the bike.
2. Rear brake only: Can cause you to skid or do a “wheelie” Less powerful than the front brake, further stopping distance. Rear brake lever is usually installed on the right handle bar as this hand is stronger for right handed people. If you are left handed, you may want to Consider switching the rear brake lever to the left handlebar.3. Both brakes together: Safest combination, both brakes should be applied with equal pressure. Most powerful of all, shortest stopping distance. If you skid, the front brake is probably being applied harder than the rear brake. Stopping:After applying brakes, place one foot on the pavement. Remain seated if you can reach if you can reach the ground, or stand over the bike. If you are finished riding, dismount your bike after coming to a complete stop, with your foot down on the pavement. If you will be continuing to ride, place the other foot on the pedal of your choice in the 10:00 Ready Position.
Kathryn Kingsbury
draft tif
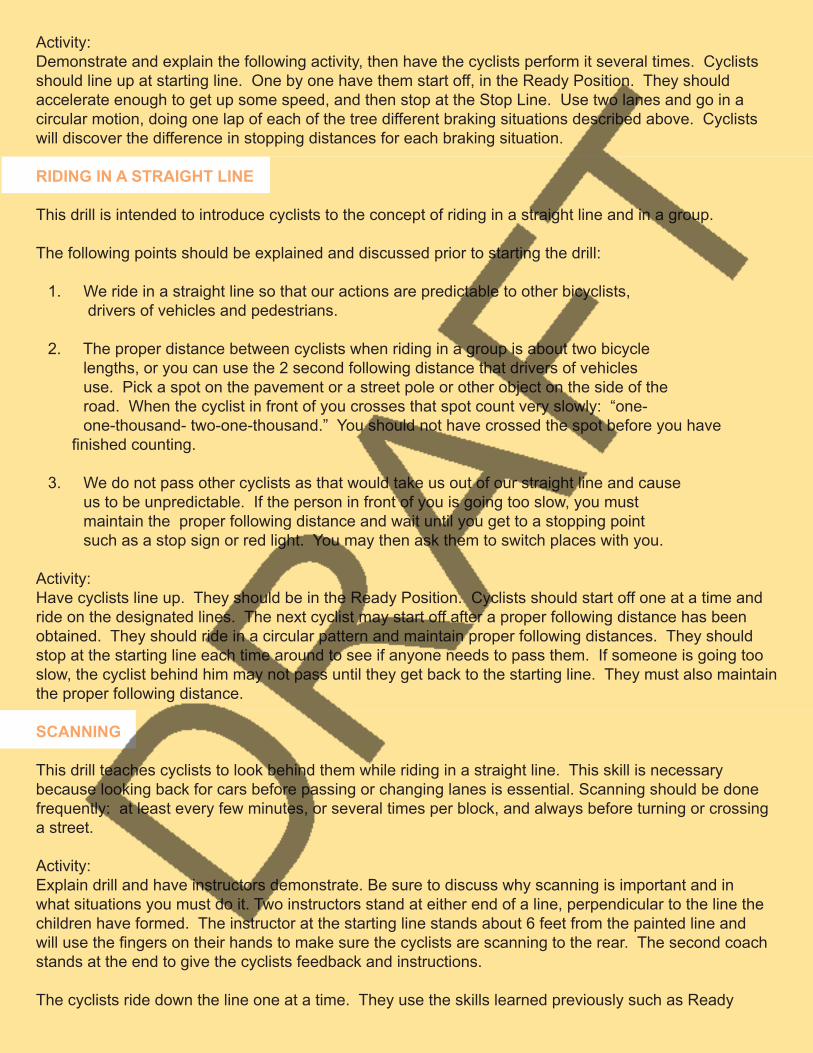
Activity:Demonstrate and explain the following activity, then have the cyclists perform it several times. Cyclists should line up at starting line. One by one have them start off, in the Ready Position. They should accelerate enough to get up some speed, and then stop at the Stop Line. Use two lanes and go in a circular motion, doing one lap of each of the tree different braking situations described above. Cyclists will discover the difference in stopping distances for each braking situation.
RIDING IN A STRAIGHT LINE
This drill is intended to introduce cyclists to the concept of riding in a straight line and in a group.
The following points should be explained and discussed prior to starting the drill:
1. We ride in a straight line so that our actions are predictable to other bicyclists, drivers of vehicles and pedestrians.
2. The proper distance between cyclists when riding in a group is about two bicycle lengths, or you can use the 2 second following distance that drivers of vehicles use. Pick a spot on the pavement or a street pole or other object on the side of the road. When the cyclist in front of you crosses that spot count very slowly: “one- one-thousand- two-one-thousand.” You should not have crossed the spot before you have
finished counting.
3. We do not pass other cyclists as that would take us out of our straight line and cause us to be unpredictable. If the person in front of you is going too slow, you must maintain the proper following distance and wait until you get to a stopping point such as a stop sign or red light. You may then ask them to switch places with you.
Activity:Have cyclists line up. They should be in the Ready Position. Cyclists should start off one at a time and ride on the designated lines. The next cyclist may start off after a proper following distance has been obtained. They should ride in a circular pattern and maintain proper following distances. They should stop at the starting line each time around to see if anyone needs to pass them. If someone is going too slow, the cyclist behind him may not pass until they get back to the starting line. They must also maintain the proper following distance.
SCANNING
This drill teaches cyclists to look behind them while riding in a straight line. This skill is necessary because looking back for cars before passing or changing lanes is essential. Scanning should be done frequently: at least every few minutes, or several times per block, and always before turning or crossing a street.
Activity:Explain drill and have instructors demonstrate. Be sure to discuss why scanning is important and in what situations you must do it. Two instructors stand at either end of a line, perpendicular to the line the children have formed. The instructor at the starting line stands about 6 feet from the painted line and will use the fingers on their hands to make sure the cyclists are scanning to the rear. The second coach stands at the end to give the cyclists feedback and instructions.
The cyclists ride down the line one at a time. They use the skills learned previously such as Ready
Kathryn Kingsbury
draft tif
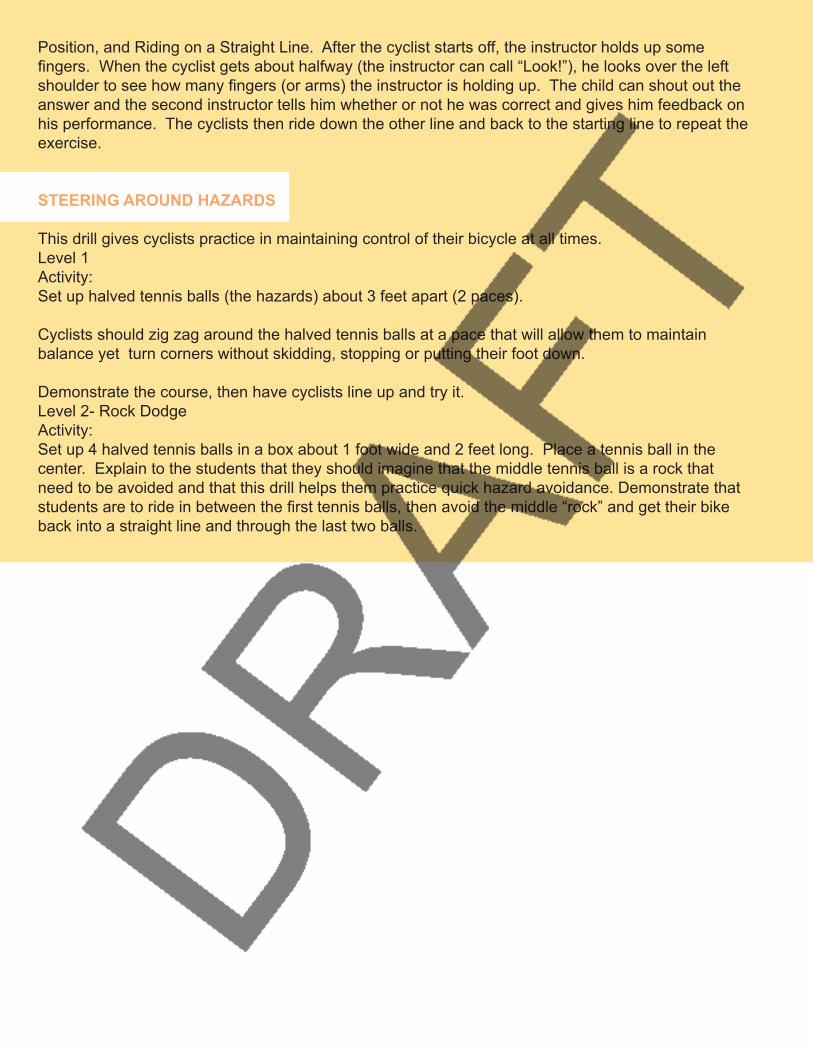
Position, and Riding on a Straight Line. After the cyclist starts off, the instructor holds up some fingers. When the cyclist gets about halfway (the instructor can call “Look!”), he looks over the left shoulder to see how many fingers (or arms) the instructor is holding up. The child can shout out the answer and the second instructor tells him whether or not he was correct and gives him feedback on his performance. The cyclists then ride down the other line and back to the starting line to repeat the exercise.
STEERING AROUND HAZARDS
This drill gives cyclists practice in maintaining control of their bicycle at all times.Level 1Activity:Set up halved tennis balls (the hazards) about 3 feet apart (2 paces).
Cyclists should zig zag around the halved tennis balls at a pace that will allow them to maintain balance yet turn corners without skidding, stopping or putting their foot down.
Demonstrate the course, then have cyclists line up and try it.Level 2- Rock DodgeActivity:Set up 4 halved tennis balls in a box about 1 foot wide and 2 feet long. Place a tennis ball in the center. Explain to the students that they should imagine that the middle tennis ball is a rock that need to be avoided and that this drill helps them practice quick hazard avoidance. Demonstrate that students are to ride in between the first tennis balls, then avoid the middle “rock” and get their bike back into a straight line and through the last two balls.
Kathryn Kingsbury
draft tif
Media SourcesBasics of Bicycling (video)
North Carolina Department of TransportationDivision of Bicycle and Pedestrian Transportation1552 Mail Service CenterRaleigh, NC 27699-1552Voice (919) 733-2804 Fax (919) [email protected] www.ncdot.org/transit/bicycle
Ride Smart: It’s Time to Start (video)National Highway Traffic Safety Administration, 2002www.nhtsa.gov
Step to Safety with ASIMO (video)American Honda Motor Co., Inc.Corporate Affairs and Communications1919 Torrance Blvd. 100-3C-2ATorrance, CA 90501(310) [email protected] asimo.honda.com
First Gear (video)Bicycle Transportation AllianceP.O. Box 9072Portland, OR 97207-9072(503)226-0676www.bta4bikes.org
Family Mouse Behind to the Wheel (book)By Wolfgang Zuckermann Illustrations by Roger Tweedt, 1992The Lutterworth Press, P.O. Box 60, Cambridge CB1 2NThttps://order.kagi.com/cgi-bin/store.cgi?storeID=8WP&&
Internet ResourcesBicycle Federation of WI www.bfw.org
Bicycle Transportation Alliance www.bta4bikes.org
Marin County Safe Routes to School www.saferoutestoschools.org
Maryland Pedestrian and Bicycle Safety Education Program www.waba.org/bikesafety
International Walk to School Day www.iwalktoschool.org
Walk and Bike to School www.walktoschool.org
Walking School Bus www.walkingschoolbus.org
Kathryn Kingsbury
draft tif