DPH-140S Peer-to-Peer Layout Call Flow: HO Branch.
18
DPH-140S Peer-to-Peer Layout Call Flow: HO Branch
-
Upload
anissa-craig -
Category
Documents
-
view
221 -
download
0
Transcript of DPH-140S Peer-to-Peer Layout Call Flow: HO Branch.

DPH-140S Peer-to-Peer LayoutCall Flow: HO Branch

1. Two DDNS accounts configured on DSL routers located in HO & Branch (In case ISP does not offer static IP over DSL. So user can call up remote party by Domain Name)
2. DMZ setup on DSL Router(DPH-140S IP setup as DMZ on either sides of DSL Routers to allow all incoming VoIP traffic)
Pre-Requisite

1. Setup IP address, Gateway & DNS Server Info
2. Setup SIP Account Settings
3. Add Phone-Book Entry
4. Dialing a Call
Setup Procedure

DPH-140S Setup @ HO
HO

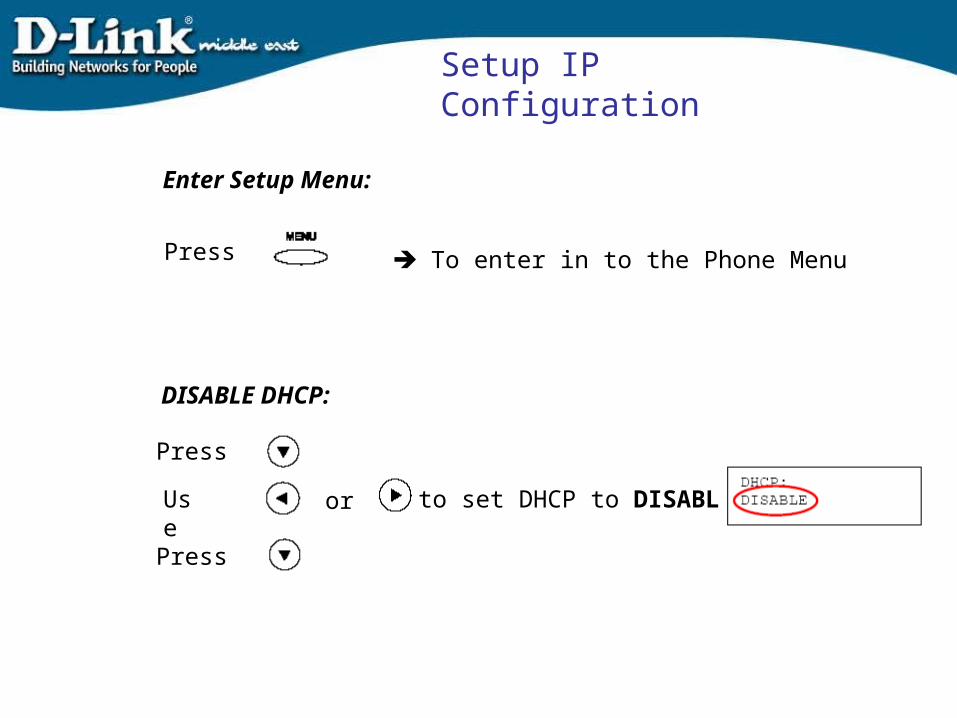
DISABLE DHCP:
Press
Use or to set DHCP to DISABLE
Press
Press To enter in to the Phone Menu
Setup IP Configuration
Enter Setup Menu:

Press
Enter the IP address
Press
Enter the subnet mask
Press
Enter the Router IP address
Enter: 255.255.255.0
Enter: 192.168.1.1
Enter: 192.168.1.10
Enter IP Address, Subnet Mask & Gateway:
Setup IP Configuration

DNS Server IP:
Press
Enter DNS server IP
Save and exit
NOTE: Use left and right arrow on the direction pad to select ENABLE or DISABLE. Left arrow key can be used as Backspace key.
DNS In UAE:213.42.20.20
To quit without saving
Setup IP Configuration

1. Type in DPH-140S IP & port to log-in Exa; http://192.168.1.10:9999
2. Click OK to bypass log-in screen
Note: By default Username & Password are Blank.
Setup SIP Account Settings

Click SIPSettings
Enter: Display Name= dubaiSIP U/N = dubai
Click “Submit” to save changes
Setup SIP Account Settings

Add Phone-Book Entry
Click Phone Book
Add entry for Branch Office:Name = 2222Number = [email protected]
Phone Book helps user to dial saved number as a Quick-dial
Click “New” to add desired entry

Branch
DPH-140S Setup @ Branch
DISABLE DHCP:
Press
Use or to set DHCP to DISABLE
Press
Press To enter in to the Phone Menu
Setup IP Configuration
Enter Setup Menu:

Press
Enter the IP address
Press
Enter the subnet mask
Press
Enter the Router IP address
Enter: 255.255.255.0
Enter: 192.168.2.1
Enter: 192.168.2.10
Enter IP Address, Subnet Mask & Gateway:
Setup IP Configuration

DNS Server IP:
Press
Enter DNS server IP
Save and exit
NOTE: Use left and right arrow on the direction pad to select ENABLE or DISABLE. Left arrow key can be used as Backspace key.
DNS IP:Confirm with ISP
To quit without saving
Setup IP Configuration

1. Type in DPH-140S IP & port to log-in Exa; http://192.168.2.10:9999
2. Click OK to bypass log-in screen
Note: By default Username & Password are Blank.
Setup SIP Account Settings

Click SIPSettings
Enter: Display Name= egyptSIP U/N = egypt
Click “Submit” to save changes
Setup SIP Account Settings

Add Phone-Book Entry
Click Phone Book
Add entry for HO Office:Name = 1111Number = [email protected]
Phone Book helps user to dial saved number as a Quick-dial
Click “New” to add desired entry
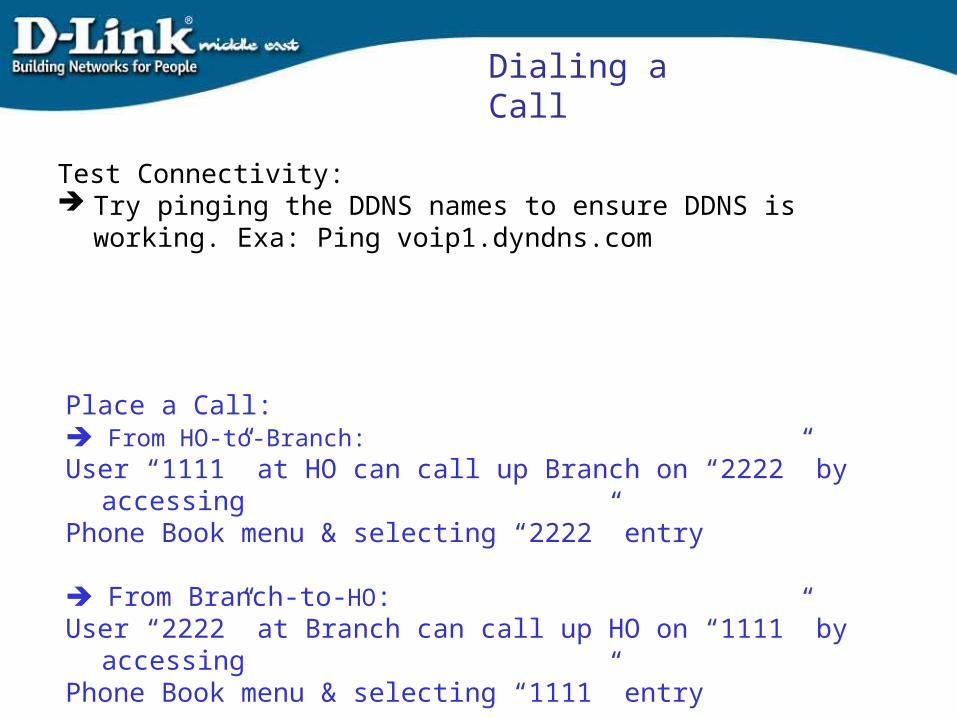
Test Connectivity: Try pinging the DDNS names to ensure DDNS is working. Exa:
Ping voip1.dyndns.com
Dialing a Call
Place a Call: From HO-to-Branch:User “1111” at HO can call up Branch on “2222” by accessing Phone Book menu & selecting “2222” entry
From Branch-to-HO:User “2222” at Branch can call up HO on “1111” by accessing Phone Book menu & selecting “1111” entry