
Database Migration from Sybase to PostgreSQL · Database Migration from Sybase to PostgreSQL 1...
44
Database Migration from Sybase to PostgreSQL 1 Database Migration from Sybase to PostgreSQL October 2019 ZENworks 2020 onwards, the Sybase database will not be supported, and the Sybase data should be migrated to any database that is supported by ZENworks. This document provides a detailed information on migrating your Management Zone from the Sybase database to the PostgreSQL database. IMPORTANT: The Sybase database can be migrated to PostgreSQL either by using the Migration Tool or the ZENworks 2020 Installer. The database migration tool can be downloaded from the Micro Focus Customer Center. NOTE: Ensure that you download 2.0 (db-migration-tool-2.0.zip) or higher version. Optimizing the Database Migration (page 1) Using the Migration Tool to Migrate the Zone to PostgreSQL (page 4) Using the ZENworks Installer to Migrate the Zone to PostgreSQL (page 16) Using the Silent Migration Feature to Perform Database Migration (page 26) Installing PostgreSQL (page 30) Reverting to the Sybase Database (page 35) Troubleshooting (page 36) 1 Optimizing the Database Migration Before starting the database migration, if required, you can improve the performance of the database migration either by specifying the heap space while initiating the migration or by using the dbmigration-input.properties file. Section 1.1, “Optimizing using the dbmigration-input.properties file,” on page 1 Section 1.2, “Modifying the Heap Space During the Migration,” on page 4 1.1 Optimizing using the dbmigration-input.properties file Depending on the size of the source database, you can customize the database migration to improve the time taken to migrate. The migration can be customized by creating and copying the dbmigration-input.properties file in the following location. However, it is recommended that you contact Micro Focus customer support before customizing the migration. On Windows: %ZENWORKS_HOME%\bin On Linux/Appliance: /opt/novell/zenworks/bin
Transcript of Database Migration from Sybase to PostgreSQL · Database Migration from Sybase to PostgreSQL 1...

Database Migration from Sybase to PostgreSQLOctober 2019
ZENworks 2020 onwards, the Sybase database will not be supported, and the Sybase data should be migrated to any database that is supported by ZENworks.
This document provides a detailed information on migrating your Management Zone from the Sybase database to the PostgreSQL database.
IMPORTANT: The Sybase database can be migrated to PostgreSQL either by using the Migration Tool or the ZENworks 2020 Installer. The database migration tool can be downloaded from the Micro Focus Customer Center.
NOTE: Ensure that you download 2.0 (db-migration-tool-2.0.zip) or higher version.
Optimizing the Database Migration (page 1) Using the Migration Tool to Migrate the Zone to PostgreSQL (page 4) Using the ZENworks Installer to Migrate the Zone to PostgreSQL (page 16) Using the Silent Migration Feature to Perform Database Migration (page 26) Installing PostgreSQL (page 30) Reverting to the Sybase Database (page 35) Troubleshooting (page 36)
1 Optimizing the Database MigrationBefore starting the database migration, if required, you can improve the performance of the database migration either by specifying the heap space while initiating the migration or by using the dbmigration-input.properties file.
Section 1.1, “Optimizing using the dbmigration-input.properties file,” on page 1 Section 1.2, “Modifying the Heap Space During the Migration,” on page 4
1.1 Optimizing using the dbmigration-input.properties fileDepending on the size of the source database, you can customize the database migration to improve the time taken to migrate. The migration can be customized by creating and copying the dbmigration-input.properties file in the following location. However, it is recommended that you contact Micro Focus customer support before customizing the migration.
On Windows: %ZENWORKS_HOME%\bin On Linux/Appliance: /opt/novell/zenworks/bin
Database Migration from Sybase to PostgreSQL 1
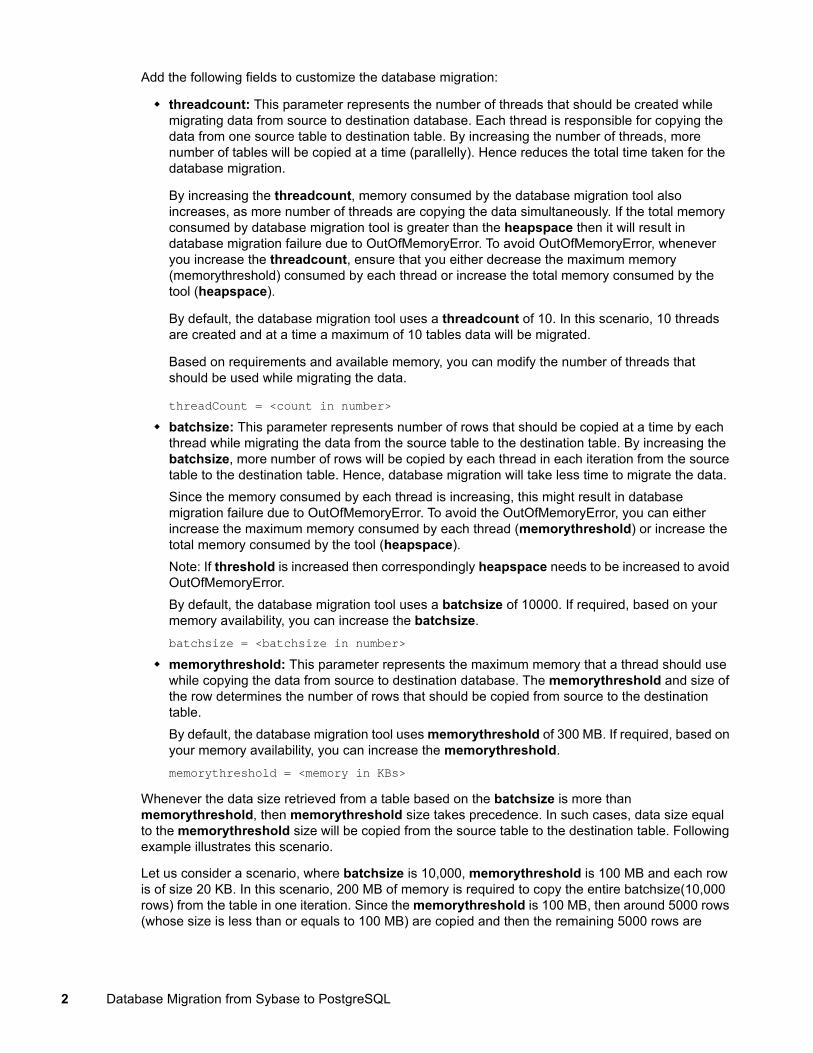
Add the following fields to customize the database migration:
threadcount: This parameter represents the number of threads that should be created while migrating data from source to destination database. Each thread is responsible for copying the data from one source table to destination table. By increasing the number of threads, more number of tables will be copied at a time (parallelly). Hence reduces the total time taken for the database migration.
By increasing the threadcount, memory consumed by the database migration tool also increases, as more number of threads are copying the data simultaneously. If the total memory consumed by database migration tool is greater than the heapspace then it will result in database migration failure due to OutOfMemoryError. To avoid OutOfMemoryError, whenever you increase the threadcount, ensure that you either decrease the maximum memory (memorythreshold) consumed by each thread or increase the total memory consumed by the tool (heapspace).
By default, the database migration tool uses a threadcount of 10. In this scenario, 10 threads are created and at a time a maximum of 10 tables data will be migrated.
Based on requirements and available memory, you can modify the number of threads that should be used while migrating the data.
threadCount = <count in number> batchsize: This parameter represents number of rows that should be copied at a time by each
thread while migrating the data from the source table to the destination table. By increasing the batchsize, more number of rows will be copied by each thread in each iteration from the source table to the destination table. Hence, database migration will take less time to migrate the data. Since the memory consumed by each thread is increasing, this might result in database migration failure due to OutOfMemoryError. To avoid the OutOfMemoryError, you can either increase the maximum memory consumed by each thread (memorythreshold) or increase the total memory consumed by the tool (heapspace).Note: If threshold is increased then correspondingly heapspace needs to be increased to avoid OutOfMemoryError.By default, the database migration tool uses a batchsize of 10000. If required, based on your memory availability, you can increase the batchsize.batchsize = <batchsize in number>
memorythreshold: This parameter represents the maximum memory that a thread should use while copying the data from source to destination database. The memorythreshold and size of the row determines the number of rows that should be copied from source to the destination table.By default, the database migration tool uses memorythreshold of 300 MB. If required, based on your memory availability, you can increase the memorythreshold.memorythreshold = <memory in KBs>
Whenever the data size retrieved from a table based on the batchsize is more than memorythreshold, then memorythreshold size takes precedence. In such cases, data size equal to the memorythreshold size will be copied from the source table to the destination table. Following example illustrates this scenario.
Let us consider a scenario, where batchsize is 10,000, memorythreshold is 100 MB and each row is of size 20 KB. In this scenario, 200 MB of memory is required to copy the entire batchsize(10,000 rows) from the table in one iteration. Since the memorythreshold is 100 MB, then around 5000 rows (whose size is less than or equals to 100 MB) are copied and then the remaining 5000 rows are
2 Database Migration from Sybase to PostgreSQL

copied in the next cycle to the destination table. Instead, if the memorythreshold is set to 300 MB, then all the batchsize number of rows (10,000) will be copied at a time. Hence, by increasing memorythreshold, the time taken by the migration can be reduced.
Since memorythreshold is for each thread, increasing the threshold implies that the maximum limit for total data being copied by all threads is also increased. Ensure that the total memory upper limit never crosses the maximum available heapspace. Increasing the batchsize and threadcount can immediately result in increased memory usage, whereas increasing memorythreshold only increases the upper limit for each thread. If all threads start consuming the memory based on the upper memory limit and total consumed memory is greater than the heapspace, then the migration will result in OutOfMemoryError.
The following cases explain various scenarios that impact the overall memory consumption:
Let us consider a scenario, where threadcount is 10, batchsize is 10,000, memorythreshold is 100 MB and heapspace is 1 GB.
Assume that each size of a row in a table is 5 KB, then for a batchsize of 10,000 rows, a thread will consume 50 MB (5 KB * 10,000 = 50MB). Even though the threshold is set to 100 MB, which is the upper limit to copy the data, each thread will copy a maximum of 50 MB data for each iteration. The database migration tool will consume a total memory of 500 MB (10 * 50 MB = 500 MB) from the heapspace.
Case 1: Increasing the threadcount
threadcount=15, batchsize=10,000, memorythreshold=100 MB, heapspace=1 GB
Each thread still copies a 50 MB of data in each iteration (5 KB * 10,000=50MB), but the total memory consumed by the tool is 750 MB (15*50 MB=750 MB). Hence, increasing the number of threads results in immediate increase in total memory consumption by database migration tool.
Case 2: Increasing the threadcount
threadcount=25, batchsize=10,000, memorythreshold=100 MB, heapspace=1 GB
Each thread still copies 50 MB data in each iteration (5 KB*10,000=50 MB), but the total memory consumed by the tool is 1.25 GB (25*50 MB = 1250 MB). The defined maximum heapspace is 1 GB. Hence, the migration might fail with OutOfMemoryError.
Case 3: Increasing batchsize
threadcount=10, batchsize=15000, memorythreshold=100 MB, heapspace=1 GB
Each thread copies a data size of 75 MB (5 KB*15000=75 MB, which is less than thresholdmemory). The total memory consumed by the tool is 750 MB (10*75 MB = 750 MB). Hence, increased batchsize immediately results in increased memory consumption.
Case 4: Increasing batchsize
threadcount=10, batchsize=25000, memorythreshold=100 MB, heapspace=1 GB
Each thread copies a data of 100 MB (5KB * 25000 = 125 MB, which is greater than thresholdmemory). So, a maximum of 100 MB will be copied per iteration. Hence, the total memory consumed by the tool is 1 GB (10 * 100 MB = 1 GB).
Case 5: Increasing memorythreshold
threadcount=10, batchsize=10000, memorythreshold=200 MB, heapspace =1 GB
Database Migration from Sybase to PostgreSQL 3

Each thread copies a data of 50 MB (5KB * 10000 = 50 MB), the total memory consumption is 500 MB (10*50 MB=500 MB). Increase in threshold results in increased upper limit for memory consumption for each thread. Hence, this might not result in any change in total memory consumed by the migration tool.
1.2 Modifying the Heap Space During the MigrationHeap space is the memory that is used while migrating the data from source to destination database. By default, the database migration tool uses 6 GB of heap space to migrate the database. However, depending on the available memory, you can increase the heap space and initiate the database migration. Ensure that the heap space never exceeds the maximum available physical memory.
To modify the heap space used during migration, use the following command while initiating the database migration:
%ZENWORKS_HOME%/share/java/bin/java.exe -Dzen.mig.maxMemory=<value> -jar <location-of db-migration-tool-<version>.jar
Where <value> is the heap space size in MB.
NOTE: Depending on memorythreshold, batchsize and threadcount that you have specified, ensure that you assign optimum heapspace to avoid OutOfMemoryError.
2 Using the Migration Tool to Migrate the Zone to PostgreSQLUsing the Database Migration tool you can migrate from Sybase database to PostgreSQL. The migration tool is available in Micro Focus Customer Center.
When you execute the JAR file, then following actions are performed:
If you have more than one Primary Server in the zone, then a check is performed to identify if ZENworks services are running on the other Primary Servers.
If the services are running on the other Primary Servers, then the migration is terminated and displays list of servers on which services are still running. Ensure that the services are stopped by running the novell-zenworks-configure -c Start command on the reported servers.
ZENworks Diagnostic Center (ZDC) check is performed on both ZENworks and Audit databases.If any mismatches are found, then the migration is terminated. Ensure that all the reported issues are resolved, and then re-initiate with the migration.
Data will be migrated from Sybase to PostgreSQL. After successful migration, ZENworks points to the PostgreSQL database.
NOTE: The Sybase data will be retained in the existing location, and a backup of the Sybase database configuration files are created, which enables you to revert to the Sybase database, if required.
Until the migration is successfully completed, ZENworks continues to use the Sybase database. At any point, if the migration is terminated, you have an option to resume the migration from the point where it was halted, or you can restart the migration. For more information see, Resuming or Restarting the Database Migration. In any case, if the database migration fails, the zone is automatically rolled back to use the Sybase database.
4 Database Migration from Sybase to PostgreSQL

Depending on your requirements, refer to any of the following section:
Section 2.1, “Migrating to the Embedded PostgreSQL Database,” on page 5 Section 2.2, “Migrating to the External PostgreSQL Database,” on page 10
2.1 Migrating to the Embedded PostgreSQL Database Section 2.1.1, “Prerequisites,” on page 5 Section 2.1.2, “Pre-migration Tasks,” on page 5 Section 2.1.3, “Procedure,” on page 6 Section 2.1.4, “Post-migration Tasks,” on page 9
2.1.1 PrerequisitesIf you want to migrate to an Embedded PostgreSQL database, then ensure that the following prerequisites are met:
The Management Zone should be either at the ZENworks 2017, or ZENworks 2017 Update x version.
The Migration tool can be executed by users with following access: Administrator (Windows) or root (Linux/Appliance) ZENworks Super Administrator
The database migration should be initiated on the Primary Server that has the database role. The database and ZENworks services should be running on the server in which you initiate the
database migration. Ensure that the Primary Server on which the migration is initiated has enough space to migrate
the Sybase data.To view the size of the Sybase database, log into ZCC, and then click Diagnostic.
For example, if the Sybase data size is 1 GB, then ensure that the server on which the migration is initiated has minimum 2 GB of free space.
2.1.2 Pre-migration TasksBefore running the Migration tool, you need to perform the following tasks:
Ensure that you take a backup of the Sybase database.
For more information, see Backing Up the Embedded Sybase Anywhere Database. Ensure that you take a backup of the configuration files (zdm.xml, zenaudit.xml,
dmaccounts.properties, dmmappings.properties and zenaudit_dmaccounts.properties) that are available in the following location: On Windows: %ZENWORKS_HOME%\conf\datamodel On Linux/Appliance: /etc/opt/novell/zenworks/datamodel
Database Migration from Sybase to PostgreSQL 5

If you have more than one Primary Server in your zone, then ensure that the novell-zenserver and novell-zenloader services are manually stopped on all the other Primary Servers in the zone.(conditional) If ZENworks monitor service exists and running, then ensure that the service is also stopped on all the other Primary Servers.The services can be stopped on each Primary Server by using the novell-zenworks-configure -c Start command.
IMPORTANT: If the services are not stopped on all the other Primary Servers in the zone, then database migration is terminated.
2.1.3 ProcedureTo migrate the database to an Embedded PostgreSQL database, perform the following steps:
1. Extract the db-migration-tool-<version>.zip file to a temp location in the server on which you will initiate the database migration.
2. Open the command prompt as an Administrator or a root user, and then run the database migration tool as shown below: On Windows: %ZENWORKS_HOME%/share/java/bin/java.exe -jar <location of db-
migration-tool-<version>.jar> On Linux/Appliance: /opt/novell/zenworks/share/java/bin/java -jar <location
of db-migration-tool-<version>.jar>
3. Ensure that you read the displayed instructions, and then proceed with the migration.
6 Database Migration from Sybase to PostgreSQL

4. Enter the ZENworks Administrator user name and password.If you have more than one Primary Server in the zone, then a check is performed to identify if ZENworks services are stopped on the other Primary Servers. If the services are running on the other Primary Servers, then the migration is terminated and displays list of servers on which services are still running. Ensure that the services are stopped by running the novell-zenworks-configure -c Start command on the reported servers. ZDC is automatically launched and validates the Sybase database schema, if any errors are identified, then the database migration is terminated. Ensure that you resolve the issues and then restart the migration. For more information, see Troubleshooting the ZDC Error.
5. Select the target database type for the ZENworks database. In this scenario, select the Embedded PostgreSQL for the ZENworks database.
6. Select the target database type for Audit database. In this scenario, select the Embedded PostgreSQL for the Audit database.
Database Migration from Sybase to PostgreSQL 7
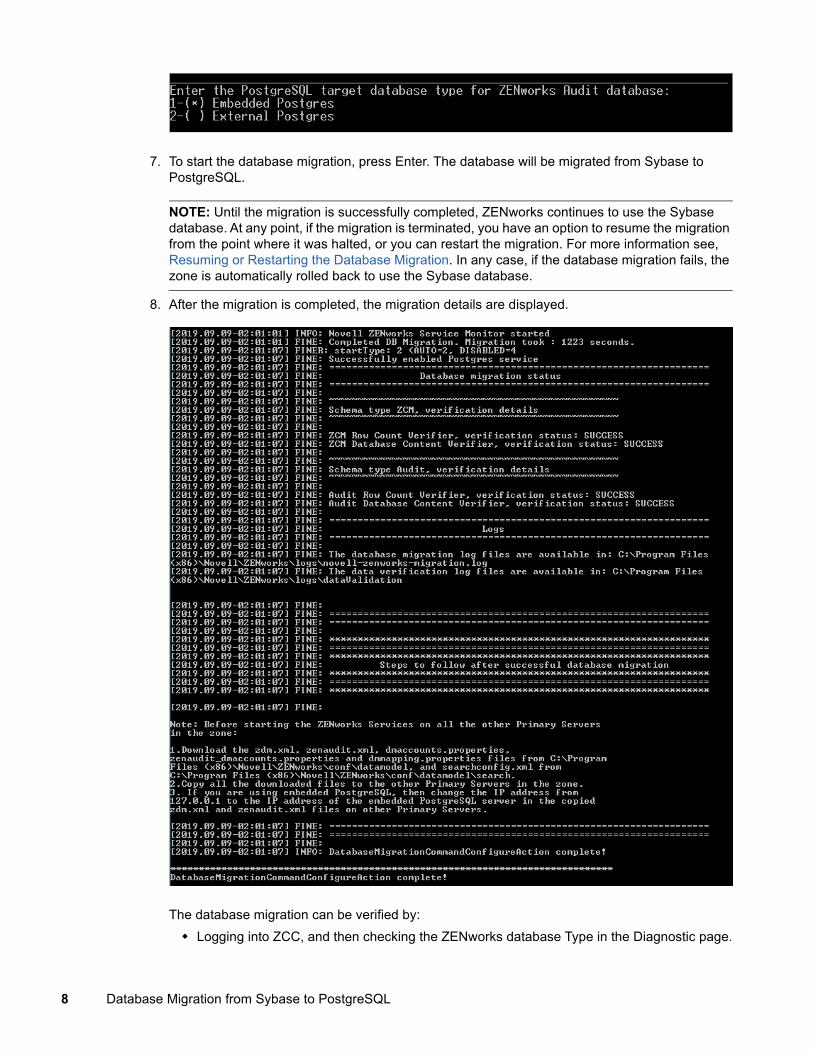
7. To start the database migration, press Enter. The database will be migrated from Sybase to PostgreSQL.
NOTE: Until the migration is successfully completed, ZENworks continues to use the Sybase database. At any point, if the migration is terminated, you have an option to resume the migration from the point where it was halted, or you can restart the migration. For more information see, Resuming or Restarting the Database Migration. In any case, if the database migration fails, the zone is automatically rolled back to use the Sybase database.
8. After the migration is completed, the migration details are displayed.
The database migration can be verified by: Logging into ZCC, and then checking the ZENworks database Type in the Diagnostic page.
8 Database Migration from Sybase to PostgreSQL

Checking the log file available in the following location: On Windows: %ZENWORKS_HOME%\logs\migration\novell-zenworks-
migration.log On Linux/Appliance: /var/opt/novell/log/zenworks/migration/novell-
zenworks-migration.log
NOTE: After successfully migrating to the PostgreSQL database, if you were using the Embedded Sybase database, then the Sybase services are disabled. The Sybase data will be retained in the existing location, and a backup of the Sybase database configuration files(zdm.xml, zenaudit.xml, dmaccounts.properties, dmmappings.properties and zenaudit_dmaccounts.properties) are created in the following location: On Windows: %ZENWORKS_HOME%\conf\datamodel\SQLAnywhereDatabase_Backup On Linux/Appliance: /etc/opt/novell/zenworks/datamodel/
SQLAnywhereDatabase_Backup
It is recommended that you use ZENworks with PostgreSQL for at least two weeks to ensure that there are no issues post-migration, and then proceed to upgrade your zone to ZENworks 2020. If you are facing any issues post-migration, then you can revert to the Sybase database. You will be able to revert to Sybase only if you are using ZENworks 2017 Update x. After upgrading your zone to ZENworks 2020, you will not be able to revert to the Sybase database. For more information, see the Reverting to the Sybase Database.
IMPORTANT: While upgrading the zone to ZENworks 2020, the Sybase data and related configuration files will be deleted.
9. After successfully migrating the data, before starting ZENworks services on the other Primary Servers, ensure that you perform the steps specified in the Post-migration Tasks section.
2.1.4 Post-migration TasksIf you have more than one Primary Server in your zone, then after successfully completing the database migration, ensure that you perform the following steps on the other Primary Servers:
1. Before starting services on the other Primary Servers and to use the newly configured PostgreSQL database, copy the zdm.xml, zenaudit.xml, dmaccounts.properties, dmmappings.properties, and zenaudit_dmaccounts.properties files to the other Primary Servers.
These files should be copied from the following location in the Primary Server on which migration was successful, to the same location on the other Primary Servers: On Windows: %ZENWORKS_HOME%\conf\datamodel On Linux/Appliance: /etc/opt/novell/zenworks/datamodel
2. Change the IP address from 127.0.0.1 to the IP address of the embedded PostgreSQL server in the copied zdm.xml and zenaudit.xml files on the other Primary Servers.
3. Copy the SearchConfig.xml file available in the following location to the same location on the other Primary Servers: On Windows: %ZENWORKS_HOME%\conf\datamodel\search On Linux/Appliance: /etc/opt/novell/zenworks/datamodel/search
The SearchConfig.xml file should be copied to ensure that the ZCC login credentials are case insensitive.
Database Migration from Sybase to PostgreSQL 9
IMPORTANT: Ensure that you DO NOT MODIFY the zdm.xml and zenaudit.xml files on the Primary Server in which the migration was initiated.
2.2 Migrating to the External PostgreSQL Database Section 2.2.1, “Preparing the External PostgreSQL Database,” on page 10 Section 2.2.2, “Prerequisites,” on page 11 Section 2.2.3, “Pre-migration Tasks,” on page 11 Section 2.2.4, “Procedure,” on page 12 Section 2.2.5, “Post-migration Tasks,” on page 16
2.2.1 Preparing the External PostgreSQL DatabaseIf you are planning to using an external database, then ensure that you perform the following steps for the ZENworks database and then on Audit database, so that the external database communicates with ZENworks:
1. Install the PostgreSQL database.
For more information on installing PostgreSQL, see Installing PostgreSQL.2. After installing the database, start the PostgreSQL service.
To start the PostgreSQL service: On Windows: To start the service, perform the following:
1. Press Windows + R keys.2. Type services.msc.3. Search for the PostgreSQL service based on the installed version.4. Click Start the service.
On Linux: To start the service, run the systemctl start postgresql-<version>.service command.
5. After starting the service, perform the following steps: In the PostgreSQL database install location, perform the following steps:
a. In the pg_hba.conf file, add the following text at the end:host all all 0.0.0.0/0 md5
b. In the postgresql.conf file, add the following text at the end:port=54327listen_addresses='*'max_locks_per_transaction=128max_pred_locks_per_transaction=128max_connections = Number of Primary Servers * 300By default, max_connections = 500 for Embedded PostgreSQL.The pg_hba.conf and postgresql.conf are available in the following location: On Windows: <install_directory>\PostgreSQL\<version>\data On Linux: /var/lib/pgsql/<version>/data
10 Database Migration from Sybase to PostgreSQL

Along with above mentioned steps, based on the zone requirements, you can increase the number of database connections. For more information on configuring the number of connections, see Configuring PostgreSQL.
NOTE: By default, PostgreSQL uses the port 5432. However, in ZENworks 54327 is used as the default port for PostgreSQL. You can change the default port number if there is a conflict. However, you must ensure that the PostgreSQL port is opened in Firewall, so that the Primary Servers can talk to the database.
c. Restart the PostgreSQL service.Now, you can proceed with the database migration.
NOTE: Ensure that the port is opened in Firewall, so that all the Primary Servers can talk to the database.
2.2.2 PrerequisitesIf you want to migrate to the External PostgreSQL database, then ensure that the following prerequisites are met:
The Management Zone should be either at the ZENworks 2017, or ZENworks 2017 Update x version.
The Migration Tool can be executed by users with following access: Administrator (Windows) or root (Linux/Appliance) ZENworks Super Administrator
External PostgreSQL database should be setup and ready for the migration. For more information and steps to setup the PostgreSQL database, see Preparing the External PostgreSQL Database section.
If you have more than one Primary Server in your zone, then ensure that the novell-zenserver and novell-zenloader services are manually stopped on all the other Primary Servers in the zone.(conditional) If ZENworks monitor service exists and running, then ensure that the service is also stopped on all the other Primary Servers.The services can be stopped on each Primary Server by using the following command:novell-zenworks-configure -c Start
IMPORTANT: If the services are not stopped on all the other Primary Servers in the zone, then database migration is terminated.
2.2.3 Pre-migration TasksIf you want to migrate to the External PostgreSQL database, then ensure that you perform the pre-migration tasks:
Ensure that you take a backup of the Sybase database.
For more information, see Backing Up the Embedded Sybase Anywhere Database.
Database Migration from Sybase to PostgreSQL 11
Ensure that you take a backup of the configuration files (zdm.xml, zenaudit.xml, dmaccounts.properties, dmmappings.properties and zenaudit_dmaccounts.properties) that are available in the following location: On Windows: %ZENWORKS_HOME%\conf\datamodel On Linux/Appliance: /etc/opt/novell/zenworks/datamodel
2.2.4 ProcedureTo migrate the data to an External PostgreSQL database, perform the following steps:
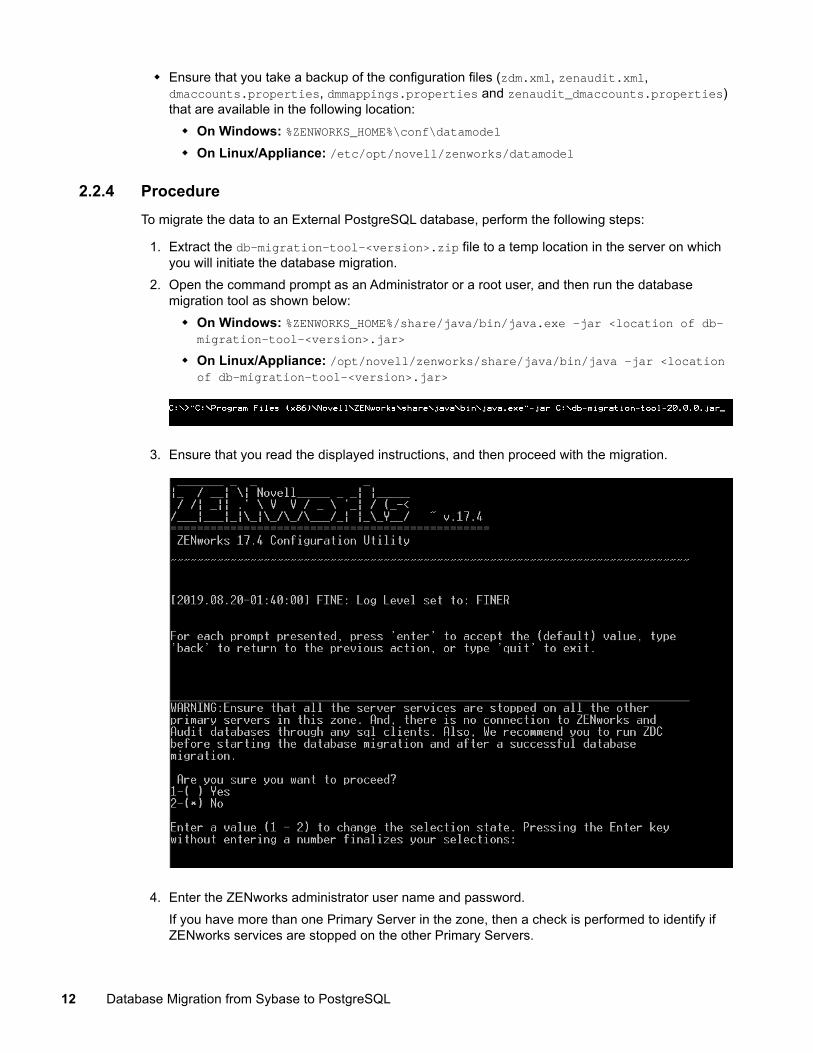
1. Extract the db-migration-tool-<version>.zip file to a temp location in the server on which you will initiate the database migration.
2. Open the command prompt as an Administrator or a root user, and then run the database migration tool as shown below: On Windows: %ZENWORKS_HOME%/share/java/bin/java.exe -jar <location of db-
migration-tool-<version>.jar> On Linux/Appliance: /opt/novell/zenworks/share/java/bin/java -jar <location
of db-migration-tool-<version>.jar>
3. Ensure that you read the displayed instructions, and then proceed with the migration.
4. Enter the ZENworks administrator user name and password.If you have more than one Primary Server in the zone, then a check is performed to identify if ZENworks services are stopped on the other Primary Servers.
12 Database Migration from Sybase to PostgreSQL

If the services are running on the other Primary Servers, then the migration is terminated and displays list of servers on which services are still running. Ensure that the services are stopped by running the novell-zenworks-configure -c Start command on the reported servers. ZDC is automatically launched and validates the Sybase database schema, if any errors are identified, then the database migration is terminated. Ensure that you resolve the issues and then restart the migration.
For more information on accessing the ZDC Report, see Viewing the ZDC Error Report5. Select the target database type as ZENworks database. In this scenario, select External
PostgreSQL for the ZENworks database, and then perform the following steps:a. Enter the IP address or host name of the PostgreSQL database server.b. Enter the port used by the PostgreSQL database server.
NOTE: By default, PosrgreSQL uses the port 5432. However, in ZENworks 54327 is used as the default port for PostgreSQL. You can change the default port number if there is a conflict. However, you must ensure that the PostgreSQL port is opened in Firewall, so that the Primary Servers can talk to the database.
c. Specify whether you want to create a new database or use an existing database.To create a new database, continue to step d.To use an existing database, skip to step e.
d. To migrate to a new database, perform the following steps:i. Enter the ZENworks database (PostgreSQL) server administrator user name.ii. Enter the ZENworks database (PostgreSQL) server administrator password.iii. Enter the ZENworks database user name for PostgreSQL.iv. Enter the ZENworks database password for PostgreSQL.v. Enter a name for the ZENworks database. For more information, see PostgreSQL
Naming Convention.
NOTE: After entering all the details, the tool verifies the PostgreSQL administrator credentials to connect to the database
e. To migrate to an existing database, perform the following:i. Enter the database user name.ii. Enter the ZENworks database password.iii. Enter the ZENworks database name.
NOTE: After entering all the details, the tool verifies the ZENworks database user credentials to connect to the database
6. Select the target database type as Audit database. In this scenario, select External PostgreSQL for the Audit database.For External PostgreSQL as the target Audit database, perform the following steps:
a. Enter the IP address or host name of the PostgreSQL Audit database server.
Database Migration from Sybase to PostgreSQL 13

b. Enter the port used by the PostgreSQL Audit database server.c. Specify whether you want to create a new database or use an existing database.
To create a new database, continue to step d.To use an existing database, skip to step e.
d. To migrate to a new database, perform the following steps:i. Enter the Audit database (PostgreSQL) server administrator user name.ii. Enter the Audit database (PostgreSQL) server administrator password.iii. Enter the Audit database user name for PostgreSQL.iv. Enter the Audit database password for PostgreSQL.v. Enter a name for the Audit database. For more information, see PostgreSQL Naming
Convention.
NOTE: After entering all the details, the tool verifies the PostgreSQL administrator credentials to connect to the database.
e. To migrate to an existing database, perform the following:i. Enter the Audit database user name.ii. Enter the Audit database password.iii. Enter the Audit database name.
NOTE: After specifying all the credentials, the tool verifies the audit database user credentials to connect to the database.
7. To start the migration, press Enter. The data is migrated from Sybase to PostgreSQL.At any point, if the migration is terminated, you have an option to resume the migration from the point where it was halted, or you can restart the migration. For more information see, Resuming or Restarting the Database Migration. In any case, if the database migration fails, the zone is rolled back to use the Sybase database.
8. After the migration is completed, the migration details are displayed:
14 Database Migration from Sybase to PostgreSQL

The database migration can be verified by: Logging into ZCC, and then checking the ZENworks database Type in the Diagnostic page. Checking the log file available in the following location:
On Windows: %ZENWORKS_HOME%\logs\migration\novell-zenworks-migration.log
On Linux/Appliance: /var/opt/novell/log/zenworks/migration/novell-zenworks-migration.log
NOTE: After successfully migrating to the PostgreSQL database, if you were using the Sybase database, then the Sybase data will be retained in the existing location, and a backup of the Sybase database configuration files(zdm.xml, zenaudit.xml, dmaccounts.properties, dmmappings.properties and zenaudit_dmaccounts.properties) are created in the following location: On Windows: %ZENWORKS_HOME%\conf\datamodel\SQLAnywhereDatabase_Backup On Linux/Appliance: /etc/opt/novell/zenworks/datamodel/
SQLAnywhereDatabase_Backup
Database Migration from Sybase to PostgreSQL 15

It is recommended that you use ZENworks with PostgreSQL for at least two weeks to ensure that there are no issues post-migration, and then proceed to upgrade your zone to ZENworks 2020. If you are facing any issues post-migration, then you can revert to the Sybase database. You will be able to revert to Sybase only if you are using ZENworks 2017 Update x. After upgrading your zone to ZENworks 2020, you will not be able to revert to the Sybase database. For more information, see the Reverting to the Sybase Database.
IMPORTANT: While upgrading the zone to ZENworks 2020, the Sybase data and related configuration files will be deleted.
9. After successfully migrating the data, ensure that you perform the steps specified in the Post-migration Tasks.
2.2.5 Post-migration TasksIf you have more than one Primary Server in your zone, then after successfully completing the database migration, ensure that you perform the following steps on the other Primary Servers:
1. Before starting services on the other Primary Servers and to use the newly configured PostgreSQL database, copy the zdm.xml, zenaudit.xml, dmaccounts.properties, dmmappings.properties, and zenaudit_dmaccounts.properties files to the other Primary Servers.
These files should be copied from the following location in the Primary Server on which migration was successful, to the same location on the other Primary Servers: On Windows: %ZENWORKS_HOME%\conf\datamodel On Linux/Appliance: /etc/opt/novell/zenworks/datamodel
2. Copy the SearchConfig.xml file available in the following location to the same location on the other Primary Servers: On Windows: %ZENWORKS_HOME%\conf\datamodel\search On Linux/Appliance: /etc/opt/novell/zenworks/datamodel/search
The SearchConfig.xml file should be copied to ensure that the ZCC login credentials are case insensitive.
3 Using the ZENworks Installer to Migrate the Zone to PostgreSQLWhen you are upgrading your zone to ZENworks 2020, if Sybase is detected in your zone, then using the ZENworks installer you can migrate from Sybase to PostgreSQL.
After successfully migrating the database, ZENworks points to the PostgreSQL database. Use the ZENworks installer again to upgrade your zone to ZENworks 2020.
Section 3.1, “Migrating to the Embedded PostgreSQL Database,” on page 16 Section 3.2, “Migrating to the External PostgreSQL Database,” on page 21
3.1 Migrating to the Embedded PostgreSQL Database Section 3.1.1, “Prerequisites,” on page 17 Section 3.1.2, “Pre-migration Tasks,” on page 17
16 Database Migration from Sybase to PostgreSQL

Section 3.1.3, “Procedure,” on page 18 Section 3.1.4, “Post-migration Tasks,” on page 20
3.1.1 PrerequisitesIf you want to migrate to an Embedded PostgreSQL database, then ensure that the following prerequisites are met:
The Management Zone should be either at the ZENworks 2017, or ZENworks 2017 Update x version.
The Migration Utility can be executed by users with following access: Administrator (Windows) or root (Linux/Appliance) ZENworks Super Administrator
The database migration should be initiated on the Primary Server that has the database role. The database and ZENworks services should be running on the server in which you initiate the
database migration. Ensure that the Primary Server on which the migration is initiated has enough space to migrate
the Sybase data.To view the size of the Sybase database, log into ZCC, and then click Diagnostic.
For example, if the Sybase data size is 1 GB, then ensure that the server on which the migration is initiated has minimum 2 GB of free space.
3.1.2 Pre-migration TasksBefore starting the database migration, you need to perform the following tasks:
Ensure that you take a backup of the Sybase database.
For more information, see Backing Up the Embedded Sybase Anywhere Database. Ensure that you take a backup of the configuration files (zdm.xml, zenaudit.xml,
dmaccounts.properties, dmmappings.properties and zenaudit_dmaccounts.properties) that are available in the following location: On Windows: %ZENWORKS_HOME%\conf\datamodel On Linux/Appliance: /etc/opt/novell/zenworks/datamodel
If you have more than one Primary Server in your zone, then ensure that the novell-zenserver and novell-zenloader services are manually stopped on all the other Primary Servers in the zone.(conditional) If ZENworks monitor service exists and running, then ensure that the service is also stopped on all the other Primary Servers.The services can be stopped on each Primary Server by using the novell-zenworks-configure -c Start command.
IMPORTANT: If the services are not stopped on all the other Primary Servers in the zone, then database migration is terminated.
Database Migration from Sybase to PostgreSQL 17

3.1.3 ProcedureTo migrate the database to an Embedded PostgreSQL database, perform the following steps:
1 Mount the ZENworks 2020 ISO.2 Click Setup and then click Continue.
3 Read the introduction, and then click Next.4 Read and accept the license agreement, and then click Next.5 (Optional) Ensure that all the prerequisites are met, and then click Next.
Ensure that you first upgrade the first Primary Server, and then upgrade to other Primary Server.6 Click Next.7 Specify the Zone administrator credentials, and then click Next.8 Select the required database type for ZENworks database. In this scenario, select the
Embedded PostgreSQL, and then click Next.
The Sybase database is not supported from ZENworks 2020 onwards, the data from Sybase should be moved to PostgreSQL. The ZENworks installer migrates the database from Sybase to PostgreSQL.
18 Database Migration from Sybase to PostgreSQL

9 Select the required database type for Audit database. In this scenario, select the Embedded PostgreSQL, and then click Next.
10 On clicking Next, ZDC is automatically launched and validates the Sybase database schema. If there are any mismatch in the database, an error window is displayed that includes the location for error log file.
Ensure that you resolve the issues and then proceed with the database migration. For more information, see Troubleshooting.
11 Ensure that you take a backup of the database and stop the ZENworks services on all other Primary Servers. Select the checkboxes and then click Next.
IMPORTANT: If you have more than one Primary Server in the Zone, then ensure that you stop ZENworks services on all other Primary Servers. If ZENworks services are not stopped on all other Primary Servers, then an error window is displayed with a location to a file that lists the servers on which services are not stopped.
12 Click Install to proceed with the data migration.
Database Migration from Sybase to PostgreSQL 19

13 After successful migration, a window is displayed which displays the status of the migration. Click Done.After completing the migration, ensure that you perform the steps specified in the Post-migration Tasks.
3.1.4 Post-migration TasksIf you have more than one Primary Server in your zone, then after successfully completing the database migration, ensure that you perform the following steps on the other Primary Servers:
1. Before starting services on the other Primary Servers and to use the newly configured PostgreSQL database, copy the zdm.xml, zenaudit.xml, dmaccounts.properties, dmmappings.properties, and zenaudit_dmaccounts.properties files to the other Primary Servers.
These files should be copied from the following location in the Primary Server on which migration was successful, to the same location on the other Primary Servers: On Windows: %ZENWORKS_HOME%\conf\datamodel On Linux/Appliance: /etc/opt/novell/zenworks/datamodel
2. Change the IP address from 127.0.0.1 to the IP address of the embedded PostgreSQL server in the copied zdm.xml and zenaudit.xml files on the other Primary Servers.
3. Copy the SearchConfig.xml file available in the following location to the same location on the other Primary Servers: On Windows: %ZENWORKS_HOME%\conf\datamodel\search On Linux/Appliance: /etc/opt/novell/zenworks/datamodel/search
The SearchConfig.xml file should be copied to ensure that the ZCC login credentials are case insensitive.
IMPORTANT: Ensure that you DO NOT MODIFY the zdm.xml and zenaudit.xml files on the Primary Server in which the migration was initiated.
20 Database Migration from Sybase to PostgreSQL
3.2 Migrating to the External PostgreSQL Database Section 3.2.1, “Prerequisites,” on page 21 Section 3.2.2, “Pre-migration Tasks,” on page 21 Section 3.2.3, “Procedure,” on page 21 Section 3.2.4, “Post-migration Tasks,” on page 26
3.2.1 PrerequisitesIf you want to migrate to the External PostgreSQL database, then ensure that the following prerequisites are met:
The Management Zone should be either at the ZENworks 2017, or ZENworks 2017 Update x version.
The Migration Tool can be executed by users with following access: Administrator (Windows) or root (Linux/Appliance) ZENworks Super Administrator
External PostgreSQL database should be setup and ready for the migration. For more information and steps to setup the PostgreSQL database, see Preparing the External PostgreSQL Database section.
If you have more than one Primary Server in your zone, then ensure that the novell-zenserver and novell-zenloader services are manually stopped on all the other Primary Servers in the zone.(conditional) If ZENworks monitor service exists and running, then ensure that the service is also stopped on all the other Primary Servers.The services can be stopped on each Primary Server by using the following command:novell-zenworks-configure -c Start
IMPORTANT: If the services are not stopped on all the other Primary Servers in the zone, then database migration is terminated.
3.2.2 Pre-migration TasksIf you want to migrate to the External PostgreSQL database, then ensure that you perform the pre-migration tasks:
Ensure that you take a backup of the Sybase database.
For more information, see Backing Up the Embedded Sybase Anywhere Database. Ensure that you take a backup of the configuration files (zdm.xml, zenaudit.xml,
dmaccounts.properties, dmmappings.properties and zenaudit_dmaccounts.properties) that are available in the following location: On Windows: %ZENWORKS_HOME%\conf\datamodel On Linux/Appliance: /etc/opt/novell/zenworks/datamodel
3.2.3 Procedure1 Mount the ZENworks 2020 ISO.2 Click Setup and then click Continue.
Database Migration from Sybase to PostgreSQL 21

3 Read the introduction, and then click Next.4 Read and accept the license agreement, and then click Next.5 (Optional) Ensure that all the prerequisites are met, and then click Next.
Ensure that you first upgrade the first Primary Server, and then upgrade to other Primary Server.6 Click Next.7 Specify the Zone administrator credentials, and then click Next.8 Select the required database type for ZENworks database. In this scenario, select the External
PostgreSQL, and then click Next.
The Sybase database is not supported from ZENworks 2020 onwards, the Sybase database should be moved to PostgreSQL. The ZENworks installer migrates the data from Sybase to PostgreSQL.
9 Perform the following for the External PostgreSQL database, and then click Next.Select whether you want to create a new user schema or use an existing user schema. To create a new user schema, perform the steps specified in Step 9a.
22 Database Migration from Sybase to PostgreSQL

To use an existing user schema, skip to Step 9b.9a If you select Create New User Schema, then specify the following:
Server Address Port Username Password
To create a database user, specify the following, and then click Next: Username Password Repeat Password Database Name
NOTE: Ensure that the PostgreSQL database name follows the PostgreSQL Naming Convention.
9b If you select Use Existing User Schema, then perform the following: Server Address Port
Specify the following for the existing database user: Username Password Database Name
10 Select the required database type for Audit database. In this scenario, Select the External PostgreSQL, and then click Next.
Database Migration from Sybase to PostgreSQL 23

11 Select whether you want to create a new user schema or use an existing user schema. To create a new user schema, perform the steps specified in Step 11a. To use an existing user schema, skip to Step 11b.11a If you select Create New User Schema, then specify the following:
Server Address Port Username Password
To create an audit database user, specify the following, and then click Next: Username Password Repeat Password Database Name
NOTE: Ensure that the PostgreSQL database name follows the PostgreSQL Naming Convention.
11b If you select Use Existing User Schema, then specify the following: Server Address Port
Specify the following for the existing database user: Username Password Database Name
12 On clicking Next, ZDC verifies the health of both ZENworks and Audit databases.
24 Database Migration from Sybase to PostgreSQL

If there are any mismatch in the database, an error window is displayed that includes the location for error log file.
Ensure that you resolve the issues and then proceed with the database migration. For more information, see the Troubleshooting section.
13 Ensure that you take a backup of the database and stop the ZENworks services on all other Primary Servers. Select the checkboxes and then click Next.
IMPORTANT: If you have more than one Primary Server in the Zone, then ensure that you stop ZENworks services on all other Primary Servers. If ZENworks services are not stopped on all other Primary Servers, then an error window is displayed with a location to a file that lists the servers on which services are not stopped.
14 Click Install to proceed with the migration. 15 After successful migration, status window is displayed. Click Done.
After completing the migration, ensure that you perform the steps specified in the Post-migration Tasks.
Database Migration from Sybase to PostgreSQL 25

3.2.4 Post-migration TasksIf you have more than one Primary Server in your zone, then after successfully completing the database migration, ensure that you perform the following steps on the other Primary Servers:
1. Before starting services on the other Primary Servers and to use the newly configured PostgreSQL database, copy the zdm.xml, zenaudit.xml, dmaccounts.properties, dmmappings.properties, and zenaudit_dmaccounts.properties files to the other Primary Servers.
These files should be copied from the following location in the Primary Server on which migration was successful, to the same location on the other Primary Servers: On Windows: %ZENWORKS_HOME%\conf\datamodel On Linux/Appliance: /etc/opt/novell/zenworks/datamodel
2. Copy the SearchConfig.xml file available in the following location to the same location on the other Primary Servers: On Windows: %ZENWORKS_HOME%\conf\datamodel\search On Linux/Appliance: /etc/opt/novell/zenworks/datamodel/search
The SearchConfig.xml file should be copied to ensure that the ZCC login credentials are case insensitive.
4 Using the Silent Migration Feature to Perform Database Migration Using the silent database migration, you can migrate the database with zero administration and you will not be prompted for any inputs. The silent database migration, can be performed by using a configuration (novell-zenworks-configure.properties) file. Based on requirements, you can use the configuration file to migrate to an embedded or an external database. The input details specified in the configuration file will be considered during the database migration to PostgreSQL.
Section 4.1, “Preparing and Performing the Silent Migration,” on page 26 Section 4.2, “Examples for Silent Database Migration,” on page 29
NOTE: Whenever you are performing the silent migration, ensure that you create a new configuration file.
4.1 Preparing and Performing the Silent MigrationDepending on your target database, refer to any of the following sections to prepare the configuration file:
Section 4.1.1, “Preparing the Configuration File for Embedded Database Migration,” on page 26 Section 4.1.2, “Preparing the Configuration File for External Database Migration,” on page 27 Section 4.1.3, “Restart or Resume the Silent Database Migration,” on page 29
4.1.1 Preparing the Configuration File for Embedded Database MigrationIf you are migrating to an embedded PostgreSQL database, then perform the following steps to prepare the configuration file:
26 Database Migration from Sybase to PostgreSQL

IMPORTANT: If any of the specified parameter is invalid or incorrect, then the database migration fails and the database cannot be reverted to the previous version.
1 Create a novell-zenworks-configure.properties file and add the following parameters: zenworks.configure.debug.silent: To enable the silent database migration, set this
parameter to true. DBMigrateConfigureAction.DB_MIGRATE_TYPE: Specify if you want to migrate the
ZENworks database to an embedded or an external databaseTo migrate to an embedded database, specify true,false.To migrate to an external database, specify false,true.
DBMigrateConfigureAction.AUDIT_DB_MIGRATE_TYPE: Specify if you want to migrate the Audit database to an embedded or an external database.To migrate to an embedded database, specify true,false.To migrate to an external database, specify false,true.
For additional information, see Section 2.1, “Migrating to the Embedded PostgreSQL Database,” on page 5
2 After updating the file, ensure that you copy the file to the following location: On Windows: %ZENWORKS_HOME%\conf On Linux/Appliance: /etc/opt/novell/zenworks
3 Initiate the database migration. For more information, see Section 2.1, “Migrating to the Embedded PostgreSQL Database,” on page 5.
At any point, if the migration is terminated, you have an option to resume the migration from the point where it was halted, or you can restart the migration. For more information see, Section 4.1.3, “Restart or Resume the Silent Database Migration,” on page 29
4.1.2 Preparing the Configuration File for External Database MigrationIf you are migrating to an external PostgreSQL database (ZENworks and Audit), then perform the following steps to prepare the configuration file:
IMPORTANT: If any of the specified parameter is invalid or incorrect, then the database migration fails and the database cannot be reverted to the previous version.
1 Create a novell-zenworks-configure.properties file and add the following parameters:For ZENworks Database: For ZENworks database, add the following parameters: zenworks.configure.debug.silent Set this parameter to true to enable the silent database
migration. DBMigrateConfigureAction.DB_MIGRATE_TYPE: Specify if you want to migrate the
ZENworks database to an embedded or an external databaseTo migrate to an external database, specify false,true.To migrate to an embedded database, specify true,false.
DBMigrateConfigureAction.DB_MIGRATE_SERVER_ADDRESS: Specify the IP address of the external database server.
DBMigrateConfigureAction.DB_MIGRATE_SERVER_PORT: Specify the port number used by the external database server.
Database Migration from Sybase to PostgreSQL 27

DBMigrateConfigureAction.DB_MIGRATE_ADMIN_USER: Specify the ZENworks database server administrator user name.
DBMigrateConfigureAction.DB_MIGRATE_ADMIN_PASSWORD: Specify the ZENworks database server administrator password.
DBMigrateConfigureAction.DB_MIGRATE_ACCESS_USER: Specify the ZENworks database user name.
DBMigrateConfigureAction.DB_MIGRATE_ACCESS_PASSWORD: Specify the ZENworks database password.
DBMigrateConfigureAction.DB_MIGRATE_DB_NAME: Specify the name of the database.
DBMigrateConfigureAction.CREATE_NEW_EXTERNAL_DATABASE: Specify true you want to create a new database, else specify false.
For Audit Database: For audit database, add the following parameters: DBMigrateConfigureAction.AUDIT_DB_MIGRATE_TYPE: Specify if you want to migrate
the Audit database to an embedded or an external databaseTo migrate to an external database, specify false,true.To migrate to an embedded database, specify true,false.
DBMigrateConfigureAction.AUDIT_DB_MIGRATE_SERVER_ADDRESS: Specify the IP address of the external database server.
DBMigrateConfigureAction.AUDIT_DB_MIGRATE_SERVER_PORT: Specify the port number used by the external database server.
DBMigrateConfigureAction.AUDIT_DB_MIGRATE_ADMIN_USER: Specify the ZENworks Audit database server administrator user name.
DBMigrateConfigureAction.AUDIT_DB_MIGRATE_ADMIN_PASSWORD: Specify the ZENworks Audit database server administrator password.
DBMigrateConfigureAction.AUDIT_DB_MIGRATE_ACCESS_USER: Specify the ZENworks Audit database user name.
DBMigrateConfigureAction.AUDIT_DB_MIGRATE_ACCESS_PASSWORD: Specify the ZENworks Audit database password.
DBMigrateConfigureAction.AUDIT_DB_MIGRATE_DB_NAME: Specify the name of the database.
DBMigrateConfigureAction.CREATE_NEW_EXTERNAL_AUDIT_DATABASE: Specify true if you want to create a new database, else specify false.
For additional information, see Section 2.2, “Migrating to the External PostgreSQL Database,” on page 10
2 After updating the file, ensure that you copy the file to the following location: On Windows: %ZENWORKS_HOME%\conf On Linux/Appliance: /etc/opt/novell/zenworks
3 Initiate the database migration. For more information, see Section 2.2, “Migrating to the External PostgreSQL Database,” on page 10.
At any point, if the migration is terminated, you have an option to resume the migration from the point where it was halted, or you can restart the migration. For more information see, Section 4.1.3, “Restart or Resume the Silent Database Migration,” on page 29
28 Database Migration from Sybase to PostgreSQL

4.1.3 Restart or Resume the Silent Database MigrationTo restart or resume the database migration, add the DBMigrateConfigureAction.DB_MIGRATE_RESTART_OR_RESUME parameter along with the other parameters mentioned in above sections, and then re-initiate the migration.
To restart the migration, specify DBMigrateConfigureAction.DB_MIGRATE_RESTART_OR_RESUME=true,false
To resume the migration, specify DBMigrateConfigureAction.DB_MIGRATE_RESTART_OR_RESUME=false,true
For additional information, see Section 4.2, “Examples for Silent Database Migration,” on page 29
4.2 Examples for Silent Database Migration Section 4.2.1, “Embedded PostgreSQL Database Migration,” on page 29 Section 4.2.2, “External PostgreSQL Database Migration,” on page 29 Section 4.2.3, “Restarting the PostgreSQL Database,” on page 30 Section 4.2.4, “Resuming the PostgreSQL Database Migration,” on page 30
4.2.1 Embedded PostgreSQL Database MigrationIn this example, both ZENworks and Audit databases are migrated to an embedded PostgreSQL database.
zenworks.configure.debug.silent= true DBMigrateConfigureAction.DB_MIGRATE_TYPE= true,false DBMigrateConfigureAction.AUDIT_DB_MIGRATE_TYPE= true,false
4.2.2 External PostgreSQL Database MigrationIn this example, both ZENworks and Audit databases are migrated to an external PostgreSQL database.
For ZENworks Database:
zenworks.configure.debug.silent= true DBMigrateConfigureAction.DB_MIGRATE_TYPE= false,true DBMigrateConfigureAction.DB_MIGRATE_SERVER_ADDRESS= 10.71.68.129 DBMigrateConfigureAction.DB_MIGRATE_SERVER_PORT= 54327 DBMigrateConfigureAction.DB_MIGRATE_ADMIN_USER= postgres DBMigrateConfigureAction.DB_MIGRATE_ADMIN_PASSWORD= password123 DBMigrateConfigureAction.DB_MIGRATE_ACCESS_USER= zuser DBMigrateConfigureAction.DB_MIGRATE_ACCESS_PASSWORD= password123 DBMigrateConfigureAction.DB_MIGRATE_DB_NAME= zendb DBMigrateConfigureAction.CREATE_NEW_EXTERNAL_DATABASE= true
For Audit database:
DBMigrateConfigureAction.AUDIT_DB_MIGRATE_TYPE= false,true DBMigrateConfigureAction.AUDIT_DB_MIGRATE_SERVER_ADDRESS= 10.71.68.129
Database Migration from Sybase to PostgreSQL 29

DBMigrateConfigureAction.AUDIT_DB_MIGRATE_SERVER_PORT= 54327 DBMigrateConfigureAction.AUDIT_DB_MIGRATE_ADMIN_USER= postgres DBMigrateConfigureAction.AUDIT_DB_MIGRATE_ADMIN_PASSWORD= password123 DBMigrateConfigureAction.AUDIT_DB_MIGRATE_ACCESS_USER= audituser DBMigrateConfigureAction.AUDIT_DB_MIGRATE_ACCESS_PASSWORD= password123 DBMigrateConfigureAction.AUDIT_DB_MIGRATE_DB_NAME= zenauditdb DBMigrateConfigureAction.CREATE_NEW_EXTERNAL_AUDIT_DATABASE: true
4.2.3 Restarting the PostgreSQL DatabaseTo restart the database migration, the configuration file should include the following parameter along with the other parameters: DBMigrateConfigureAction.DB_MIGRATE_RESTART_OR_RESUME=true,false
4.2.4 Resuming the PostgreSQL Database MigrationIf the database migration was terminated, then to resume the database migration, the configuration file should include the following parameter:
To resume the migration, specify DBMigrateConfigureAction.DB_MIGRATE_RESTART_OR_RESUME=false,true
5 Installing PostgreSQL Section 5.1, “Installing PostgreSQL on Windows,” on page 30 Section 5.2, “Installing PostgreSQL on Linux,” on page 33
IMPORTANT: If you are installing a PostgreSQL version higher than 11.4, then ensure that you perform the following steps before initiating the migration:
1. Create a db-version.properties file.2. Add db-version=<installed_postgresql_version>, and then save the file.
For example: If you are using 11.6 version, then add db-version=11.63. After updating the file, copy the file to the following location, and then initiate the database
migration. On Windows: %ZENWORKS_HOME%/bin/ On Linux/Appliance: /opt/novell/zenworks/bin/
5.1 Installing PostgreSQL on WindowsDownload and install the required version of PostgreSQL.
The PostgreSQL can be downloaded from PostgreSQL for Windows (https://www.postgresql.org/download/windows/).
NOTE: Depending on the ZENworks version, download and install the supported version of PostgreSQL. For more information on supported versions, see the following table:
30 Database Migration from Sybase to PostgreSQL

For more information, see System Requirements in ZENworks 2017 (https://www.novell.com/documentation/zenworks2017/) or ZENworks 2020 (https://www.novell.com/documentation/zenworks-2020/) documentation page.
After installing PostgreSQL, continue with the steps specified in the Preparing the External PostgreSQL Database section.
5.1.1 Example: Installing PostgreSQL 9.6 on WindowsTo install PostgreSQL 9.6 on a Windows device, perform the following steps:
1. After downloading the PostgreSQL 9.6 binary package, double click the downloaded installer file (PostgreSQL 9.6). An installation wizard is displayed, which guides you through multiple steps involved in installing the PostgreSQL database.
2. Click Next.
3. Specify the installation directory where the PostgreSQL should be installed, and then click Next.4. Select a directory in which the PostgreSQL data should be stored.
It is recommended to use the default directory.
ZENworks Version Supported PostgreSQL Version
2017 Update 4 PostgreSQL 9.x, 10.x or 11.x (Except 11.2)
11.4 is the recommended version
2017 Update 3 PostgreSQL 9.x or 10.x
2017 Update 2 PostgreSQL 9.x
2017 Update 1 PostgreSQL 9.x
2017 PostgreSQL 9.x
Database Migration from Sybase to PostgreSQL 31

5. Specify the password for the database superuser (postgres), and then click Next.
6. Specify the port for PostgreSQL. By default ZENworks uses 54327 as the post. If required, you can use a different port number.
NOTE: By default, PostgreSQL uses the port 5432. However, in ZENworks 54327 is used as the default port for PostgreSQL. You can change the default port number if there is a conflict. However, you must ensure that the PostgreSQL port is opened in Firewall, so that the Primary Servers can talk to the database.
7. Select the default locale used by the database, and then click Next.8. Click Next to start PostgreSQL installation.
32 Database Migration from Sybase to PostgreSQL

9. Click Finish to complete the installation.If required, you can install Stack Builder by selecting the check box.
10. Continue with the steps specified in the Preparing the External PostgreSQL Database section.
5.2 Installing PostgreSQL on LinuxDownload and install the required version of PostgreSQL.
The PostgreSQL can be downloaded from PostgreSQL for Linux (https://www.postgresql.org/download/).
NOTE: The link redirects to an external site that is subject to change without prior notice.
Before installing PostgreSQL on a SLES device, ensure that the PostgreSQL version is supported on the SLES version installed on the device.
NOTE: At the time when this document was updated, we were unable to install the latest version of PostgreSQL (11.6) on SLES 12 SP3 devices.
Depending on the ZENworks version, download and install the supported version of PostgreSQL. For more information on supported versions, see the following table:
ZENworks Version Supported PostgreSQL Version
2017 Update 4 PostgreSQL 9.x, 10.x or 11.x (Except 11.2)
11.4 is the recommended version
2017 Update 3 PostgreSQL 9.x or 10.x
2017 Update 2 PostgreSQL 9.x
2017 Update 1 PostgreSQL 9.x
Database Migration from Sybase to PostgreSQL 33

For more information, see System Requirements in ZENworks 2017 (https://www.novell.com/documentation/zenworks2017/) or ZENworks 2020 (https://www.novell.com/documentation/zenworks-2020/) documentation page.
After installing PostgreSQL, continue with the steps specified in the Preparing the External PostgreSQL Database section.
5.2.1 Example: Installing PostgreSQL 11 on a SLES 12 SP4 Device Following is an example to install PostgreSQL 11.6 on a SLES 12 SP4 device.
NOTE: At the time when this document was updated, the following installation steps were tested and documented. However, depending on PostgreSQL, the following steps might change without prior notice. Hence, it is recommended that you go through the PostgreSQL documentation before installing PostgreSQL on any supported platform.
1. Open the Terminal as a root user.2. Add the PostgreSQL 11 repository by running the following command:
zypper addrepo https://download.postgresql.org/pub/repos/zypp/repo/pgdg-sles-11.repo
NOTE: The repo location is from an external site that is subject to change without prior notice.
3. To refresh the repositories, run zypper refresh.4. After repo refresh, install the PostgreSQL database by running the zypper install
postgresql11-server command.Ensure that you install all the dependent packages.
5. Initialize the database by running the following command:/usr/pgsql-11/bin/postgresql-11-setup initdbIf database is not initialized, then folders required to store the data are not created.
6. After initializing the database, enable the PostgreSQL database by running the systemctl enable postgresql-11.service command.
7. Start the PostgreSQL service by running the systemctl start postgresql-11.service command.
8. Continue with the steps specified in the Preparing the External PostgreSQL Database section.
6 Verifying the Database MigrationTo verify whether the database migration was successful or not, perform any of the following:
Log into ZCC, check the ZENworks Database Type in the Diagnostics page. If the type is PostgreSQL, then the migration is successful. If the type is other than PostgreSQL (ZENworks or Audit), then the migration has failed.
2017 PostgreSQL 9.x
ZENworks Version Supported PostgreSQL Version
34 Database Migration from Sybase to PostgreSQL

Check the novell-zenworks-migration.log file available in the following location: On Windows: %ZENWORKS_HOME%\logs\migration On Linux/Appliance: /var/opt/novell/log/zenworks/migration
(Conditional) If you are using 3.0 (db-migration-tool-3.0.zip) or higher version, then check the log files available in the following location:This is a consolidated file that includes ZDC, migration and data validation logs. Click Download All to download the log files in the ZIP format. On Windows: %ZENWORKS_HOME%\logs\migration\logviewer\index.html On Linux/Appliance: /var/opt/novell/log/zenworks/migration/logviewer/
index.html
7 Reverting to the Sybase DatabaseDuring the database migration, all the Sybase database configuration files are backed-up and while reverting the database, the PostgreSQL database configuration files will be replaced with the Sybase database configuration files.
If the source database is an Embedded Sybase database, then the data is retained even post-migration to enable you to revert to the Sybase database (if required). However, if your zone is upgraded to ZENworks 2020, then the Sybase data will be deleted. Hence, you will not be able to revert to the Sybase database.
IMPORTANT: Before reverting the database, ensure that you go through the following instructions:
If the following instructions are not met, then after reverting the database, ZENworks fails to connect to the Sybase database and the Management Zone might not work.
If the source database was an Embedded Sybase database, ensure that the Sybase data is retained in the same state when the database migration was initiated.
If the source database was an External Sybase database, ensure that the Sybase database server is retained in the same state when the database migration was initiated, and the Sybase database server is up and running.
The PostgreSQL database can be reverted to the Sybase database using the following command:
novell-zenworks-configure -c RevertDBMigrationConfigureAction
After successfully reverting, the ZENworks zone will point to the Sybase database.
This configure action takes a backup of the PostgreSQL data in the following location:
On Windows: %ZENWORKS_HOME%\database\pgsql\data.bkp On Linux/Appliance: /var/opt/novell/pgsql/data.bkp
To revert to the Sybase database, perform the following steps:
1. Stop novell-zenserver and novell-zenloader services on all the other Primary Servers in your Management Zone.
Database Migration from Sybase to PostgreSQL 35

(conditional) If ZENworks monitor service exists and running, then ensure that the service is also stopped on all the other Primary Servers.
The services can be stopped by using the following command:
novell-zenworks-configure -c Start 2. Run the following command on the device in which the migration was successful.
novell-zenworks-configure -c RevertDBMigrationConfigureAction 3. After completing the revert action, copy the zdm.xml, zenaudit.xml, dmaccounts.properties,
dmmappings.properties and zenaudit_dmaccounts.properties files to other Primary Servers in the zone, so that the zone uses the Sybase database.These files should be copied from the following location in the Primary Server on which migration was successful, to the same location on the other Primary Servers: On Windows: %ZENWORKS_HOME%\conf\datamodel On Linux/Appliance: /etc/opt/novell/zenworks/datamodel
4. (Conditional) If you are using the embedded Sybase, then change the IP address from 127.0.0.1 to the IP address of the Sybase server in the copied zdm.xml and zenaudit.xml files on the other Primary Servers.
5. Start the ZENworks services on all the other Primary Servers.
NOTE: After successfully reverting the database, the zone rolls back to the state where the migration was initially started. Hence, after successfully reverting to the Sybase database, the data that was captured post-migration is lost.
8 TroubleshootingThis section provides information on issues that you might encounter while using this Migration tool and it also provides information about the ZDC log files that can be accessed to identify if there are any issues with the ZENworks and Audit databases.
Section 8.1, “ZDC Related Issues,” on page 36 Section 8.2, “Migration Related Issues,” on page 39 Section 8.3, “Data Validation Issues,” on page 42 Section 8.4, “Resuming or Restarting the Database Migration,” on page 43
8.1 ZDC Related IssuesThe ZDC related issues are logged in the ZDC Reports and ZDC_results.json.
The ZDC Reports are available in the following location:
Windows: %ZENWORKS_HOME%\logs\migration\zdc\reports Linux/Appliance: /var/opt/novell/log/zenworks/migration/zdc/reports
The ZDC_results.json file is available in the following location:
Windows: %ZENWORKS_HOME%\logs\migration Linux/Appliance: /var/opt/novell/log/zenworks/migration
36 Database Migration from Sybase to PostgreSQL

8.1.1 Viewing the ZDC Error ReportWhen you run the Migration tool, ZDC is launched automatically by the tool. The ZDC verifies the health of the database and if any errors are identified, two folders containing the error reports are created, one for the ZENworks database and another for the Audit database. The folders can be identified by the timestamp of when the Migration tool was run. The folder with latest timestamp is for audit database and the other folder is for ZENworks database.
To view the reports, open the index.html from the timestamp folder available in the following location:
Windows: %ZENWORKS_HOME%\logs\migration\zdc\reports Linux/Appliance: /var/opt/novell/log/zenworks/migration/zdc/reports
For troubleshooting the ZDC errors, see Troubleshooting the ZDC Error.
8.1.2 Troubleshooting the ZDC ErrorWhen you run the Migration tool, ZDC is launched automatically by the tool. The ZDC verifies the health of the database, and if any errors are identified, the migration is terminated. This might be due to missing tables, columns and constraints in the Sybase database.
IMPORTANT: Ensure that you analyze and rectify the reported errors, if any, on the source database and contact Micro Focus Customer Support before performing the following troubleshooting steps.
Troubleshooting:
To skip the missing objects, perform the following steps:
NOTE: The following steps should be performed only if you are sure that the missing objects can be skipper, else contact the Micro Focus Customer Support.
1. Modify the zdc.conf file available in the following location: Windows: %ZENWORKS_HOME%\logs\migration Linux/Appliance: /var/opt/novell/log/zenworks/migration
In the zdc.conf file, based on requirement, specify the objects in the respective parameters as shown below table:
Parameter Description
tables.to.skip= Skips the specified tables.
columns.to.skip= Skips the specified columns.
NOTE: The column names should be specified along with the table name, as shown in the below example.
Example: StorageDevicePolicy.portableaccessid
Here, StorageDevicePolicy is the table name and portableaccessid is the column name.
constraints.to.skip= Skips the specified constraints.
triggers.to.skip= Skips the specified triggers.
Database Migration from Sybase to PostgreSQL 37

NOTE: Multiple values can be specified by using a comma.
2. After modifying the zdc.conf file, restart the database migration.
8.1.3 Issues with Indexes, Triggers, Procedures and ViewsProblem: The ZDC reports any errors with Indexes, Triggers, Procedures and Views in the existing database.
Solution:
If the ZDC check is performed during migration, then the ZDC has an intelligence to skip such errors.
8.1.4 The expected column length is more than the actual column lengthProblem: The ZDC reports that the expected column length is more than the actual column length.
Solution:
If the ZDC check is performed during migration, then the ZDC has an intelligence to skip such errors.
For example, in the following image, zAppAssignment the expected size is 255 and actual size is 65. Hence, this inconsistency can be ignored.
IMPORTANT: When the actual column length is more than the expected column length, then such inconsistencies SHOULD NOT be ignored.
For example, in the following image, for the ZESM_CertInformation column, the expected length is 255 and actual column length is 2147483647. In such scenarios, the column length parameter should not be ignored.
If the data in such tables are empty, then those entries can be ignored, or please contact Micro Focus Customer Support before starting the database migration.
indices.to.skip= Skips the specified indices.
Parameter Description
38 Database Migration from Sybase to PostgreSQL

8.1.5 The nullability in the actual column is false and the expected column is trueProblem: The ZDC reports that the nullability of actual column is false (i.e. only non-null values can be inserted) and expected nullability for the column is true (i.e. null entries can be inserted).
Solution:
If the ZDC check is performed manually, then this inconsistency can be ignored. If the ZDC check is performed during migration, then the ZDC has an intelligence to skip
such errors.
For example, in the following image, for the zZENObjectDelete_log column, the expected nullability of the column is true and actual nullability of the column is false. Hence, this inconsistency can be ignored.
IMPORTANT: If the nullability of the expected column is false and actual column is true, then such inconsistency SHOULD NOT be ignored.
For example, in the following image, the zRestrictionEnforcementState column, the actual column nullability is true and expected column nullablity is false. In such scenarios, the null values cannot be inserted into the columns where nullability is false. Hence, such inconsistency cannot be ignored.
If the data in such tables are empty, then those entries can be ignored, or please contact Micro Focus Customer Support before starting the database migration.
8.2 Migration Related IssuesWhen you are migrating from Sybase to PostgreSQL, an error or a warning message might be displayed in the migration summary window. Depending on the message, refer to the following relevant sections:
Section 8.2.1, “Migration Failed with Errors,” on page 39 Section 8.2.2, “Sybase to PostgreSQL database migration fails during database creation,” on
page 41 Section 8.2.3, “Migration Completed with Warning,” on page 41 Section 8.2.4, “Post Migration Issues,” on page 42
8.2.1 Migration Failed with ErrorsIf the database migration has failed, then check the following applicable log files:
Database Migration from Sybase to PostgreSQL 39

8.2.1.1 Upgrade Log
The Upgrade log is available in the following location:
On Windows: %ZENWORKS_HOME%/logs On Linux/Appliance: /var/opt/novell/log/zenworks/
1. “We were unable to open and test the requested Windows service” error message is logged.
Solution: In this scenario, ignore the error log and verify if the database migration is successfully completed. To verify whether the database migration is successful or not, see the Section 6, “Verifying the Database Migration,” on page 34.
8.2.1.2 Migration Log
The migration log is available in the following location:
On Windows: %ZENWORKS_HOME%\logs\migration\novell-zenworksmigration.log On Linux/Appliance: /var/opt/novell/log/zenworks/migration/novell-
zenworksmigration.log
1. “NullPointerException at Flexeraac4.appendError(Unknown Source) error message is logged.
Solution: In this scenario, restart or resume the database migration. For more information, see the Section 8.4, “Resuming or Restarting the Database Migration,” on page 43.
2. Out Of Memory Error exception is logged. Solution: In this scenario, ensure that you have assigned enough heap space for the database migration.To modify the heap space used during migration, perform the following: For the Migration tool: By default, the database migration tool uses 6 GB of heap space to
migrate the database. However, if required, you can initiate the database migration with increased heap space using the following command:%ZENWORKS_HOME%/share/java/bin/java.exe -Dzen.mig.maxMemory=<value> -jar <location-of db-migration-tool-<version>.jarWhere <value> is the heap space size in MB.
For ZENworks installer: By default, the ZENworks installer uses 4 GB of heap space to migrate the database. If database migration fails with the default heap space, use the database migration tool to migrate from Sybase to PostgreSQL, for more information see, Section 2, “Using the Migration Tool to Migrate the Zone to PostgreSQL,” on page 4. If you still face the issue, contact Micro Focus Customer Support.
NOTE: Even after increasing the heap space to the maximum available memory limit (approximately 75% of the total memory of Primary Server), if you are still facing the out of memory issue, then see the Optimizing the Database Migration section.
3. Row count validation Failed If the database migration failed, the zone is reverted to use the Sybase database. If you make any changes in the zone, and re-initiate the database migration by selecting the Resume option, then the tables that were already migrated to the PostgreSQL will be ignored. Hence, the data captured in the Sybase database tables that were already migrated to the PostgreSQL database will not be migrated. In this scenario, the row count validation fails.Solution: Select the Restart option when you re-initiate the database migration.
40 Database Migration from Sybase to PostgreSQL

8.2.2 Sybase to PostgreSQL database migration fails during database creationWhile migrating from Sybase to PostgreSQL on a Windows 2012 server, the database migration fails during the database creation, and the initdb – initialize a new database cluster has stopped working pop-up window is displayed as shown in the following image:
Solution: Ensure that you install Microsoft Visual C++ 2013 (version 12.0.40649.5 or later) and then reinitiate the database migration.
8.2.3 Migration Completed with WarningIf the database migration is completed with warnings, then check the following applicable log files:
8.2.3.1 Migration Log
On Windows: %ZENWORKS_HOME%\logs\migration\novell-zenworksmigration.log On Linux/Appliance: /var/opt/novell/log/zenworks/migration/novell-
zenworksmigration.log
1. “ZENworks services could not be started” message is logged.
Solution: Ignore the warning and wait for a couple of minutes till the services are started automatically, or start the ZENworks services manually.
2. Data validation error Solution: If migration is completed with data validation error, then see the Section 8.3, “Data Validation Issues,” on page 42 for more information.
Database Migration from Sybase to PostgreSQL 41

8.2.4 Post Migration IssuesAfter successfully completing the database migration and you might face several issues while using ZENworks with PostgreSQL. This section provides information on issues that you might face while using the PostgreSQL database:
8.2.4.1 Some Hints, statements and errors are logged in the Postmaster logs.
Hints, Statements and errors might be logged in the Postmaster logs. These messages are logged after completing the database migration:
HINT: No operator matches the given name and argument type(s). You might need to add explicit type casts.
STATEMENT: select subscribed0_.ZUID as ZUID434_, subscribed0_.ZoneUID as ZoneUID434_, subscribed0_.ZoneName as ZoneName434_, subscribed0_.LastSuccessServer as LastSucc4_434_ from zSubscribedZone subscribed0_ where subscribed0_.ZoneUID=$1 and subscribed0_.ZoneName=$2 limit $3
ERROR: current transaction is aborted, commands ignored until end of transaction block
STATEMENT: select 1 from zZone
Solution: If you are using multi-zone with the zone sharing settings, only then the hints, statements and error are logged.
These messages can be ignored.
8.2.4.2 After migrating the database to PostgreSQL, the PostgreSQL service is not listed in the novell-zenworks-configure -c Start action
If you are using ZENworks 2017 or ZENworks 2017 Update 1 Appliance and migrated to the PostgreSQL database, then when you try to Start or Stop the ZENworks services using the novell-zenworks-configure -c Start command, the PostgreSQL service might not be listed.
Solution: Manually Start or Stop the PostgreSQL service.
To Start or Stop the PostgreSQL service manually:
On Windows: To Start or Stop the service, perform the following:1. Press Windows + R keys.2. Type services.msc.3. Search for the PostgreSQL service based on the installed version.4. Click Start or Stop the service.
On Linux: To start or stop the service, run the systemctl start postgresql-<version>.service or systemctl stop postgresql-<version>.service command.
On Appliance: To start or stop the service run, the systemctl start zenpostgresql or systemctl stop zenpostgresql command.
8.3 Data Validation IssuesDuring the database migration from Sybase to PostgreSQL, the data validation might have failed, even if the migration was successful.
Following are some of the scenarios, where the table content validation has failed even if the migration was successful:
42 Database Migration from Sybase to PostgreSQL
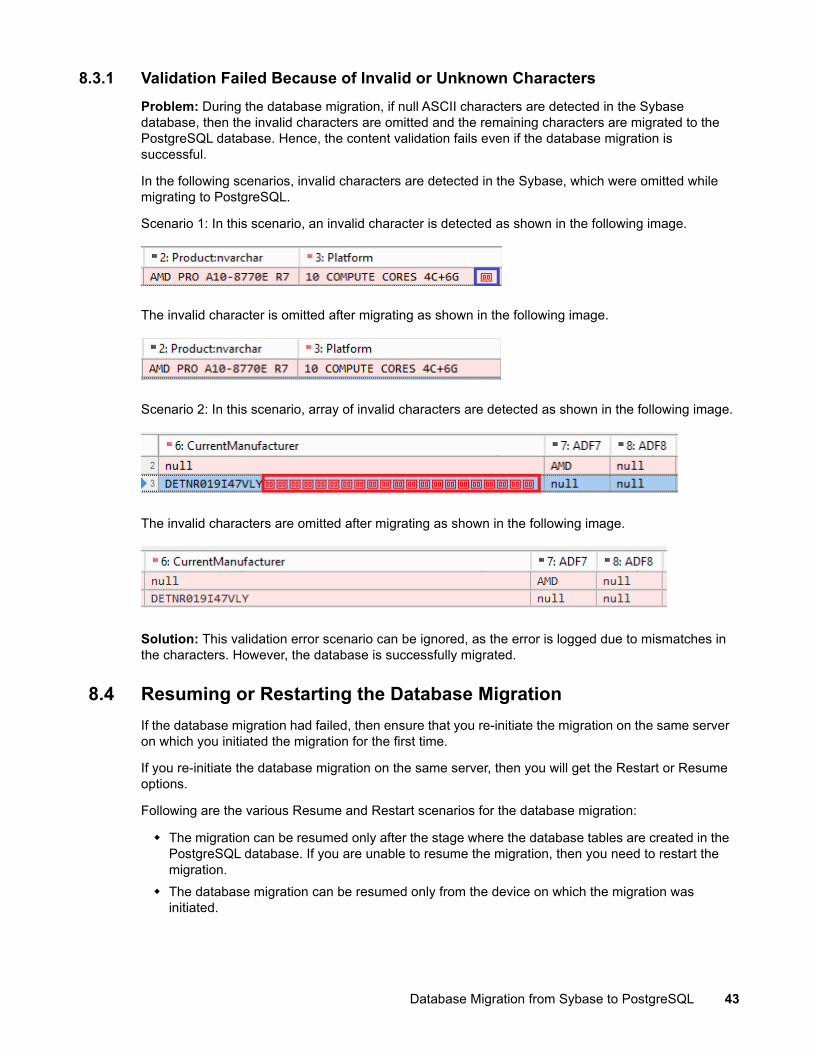
8.3.1 Validation Failed Because of Invalid or Unknown CharactersProblem: During the database migration, if null ASCII characters are detected in the Sybase database, then the invalid characters are omitted and the remaining characters are migrated to the PostgreSQL database. Hence, the content validation fails even if the database migration is successful.
In the following scenarios, invalid characters are detected in the Sybase, which were omitted while migrating to PostgreSQL.
Scenario 1: In this scenario, an invalid character is detected as shown in the following image.
The invalid character is omitted after migrating as shown in the following image.
Scenario 2: In this scenario, array of invalid characters are detected as shown in the following image.
The invalid characters are omitted after migrating as shown in the following image.
Solution: This validation error scenario can be ignored, as the error is logged due to mismatches in the characters. However, the database is successfully migrated.
8.4 Resuming or Restarting the Database MigrationIf the database migration had failed, then ensure that you re-initiate the migration on the same server on which you initiated the migration for the first time.
If you re-initiate the database migration on the same server, then you will get the Restart or Resume options.
Following are the various Resume and Restart scenarios for the database migration:
The migration can be resumed only after the stage where the database tables are created in the PostgreSQL database. If you are unable to resume the migration, then you need to restart the migration.
The database migration can be resumed only from the device on which the migration was initiated.
Database Migration from Sybase to PostgreSQL 43

IMPORTANT: If the database migration failed, the zone is reverted to use the Sybase database. If you make any changes in the zone, and re-initiate the database migration by selecting the Resume option, then the tables that were already migrated to the PostgreSQL will be ignored. Hence, the data captured in the Sybase database tables that were already migrated to the PostgreSQL database will not be migrated. Hence, it is recommended that you select the Restart option.
9 Additional InformationThis section provides some additional information on the database migration:
9.1 Huge data in the zBinaryData tableProblem: While creating a bundle, if you have added an icon, then the relevant data is updated in the zBinaryData table in the database. Due to a random issue, the icon that was uploaded within a bundle might be converted to a huge unwanted data (approximately 900 MB) in the table.
Solution: During the database migration, the tool checks the data row by row and then migrates the data to the PostgreSQL database. If the tool detects that the icon size is more than 10 MB, then in the PostgreSQL, a null value is inserted. Hence, ignore the issue.
9.2 PostgreSQL Naming ConventionWhile creating the PostgreSQL database, ensure that the PostgreSQL database name must start with a letter or an underscore, the rest of the string should contain letters, digits, and underscores only.
10 Legal NoticesFor information about legal notices, trademarks, disclaimers, warranties, export and other use restrictions, U.S. Government rights, patent policy, and FIPS compliance, see (https://www.microfocus.com/about/legal/).
© Copyright 2008 - 2020 Micro Focus or one of its affiliates.
The only warranties for products and services of Micro Focus and its affiliates and licensors (“Micro Focus”) are set forth in the express warranty statements accompanying such products and services. Nothing herein should be construed as constituting an additional warranty. Micro Focus shall not be liable for technical or editorial errors or omissions contained herein. The information contained herein is subject to change without notice.
44 Database Migration from Sybase to PostgreSQL


