Cyclist skills training guide - Home | NZ Transport Agency · During training ... • to outline...
83
Transcript of Cyclist skills training guide - Home | NZ Transport Agency · During training ... • to outline...
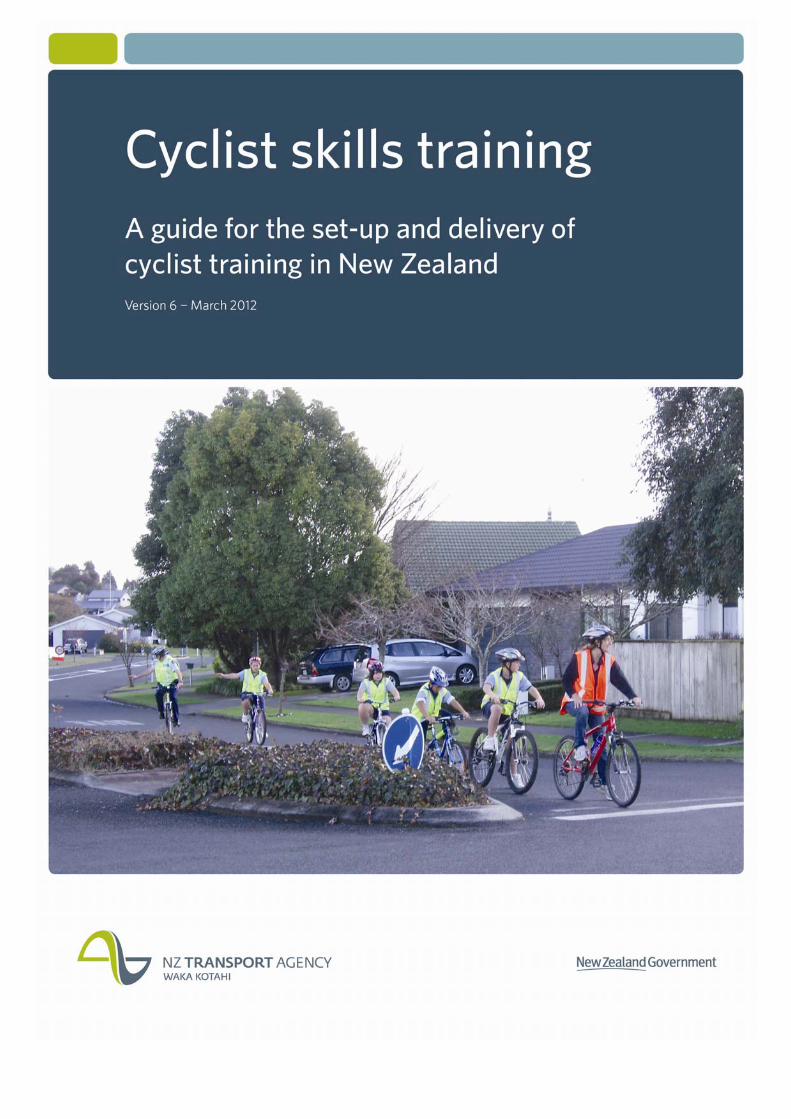

Cyclist skills training
A guide for the set-up and delivery of cyclist training in New Zealand
Prepared by: Opus International Consultants Limited
March 2012 (version 6)
© 2012, NZ Transport Agency, www.nzta.govt.nz
ISBN (PDF): 978-0-478-35242-9
ISBN (print): 978-0-478-35243-6
Copyright information
This publication is copyright © NZ Transport Agency.
Material in it may be reproduced for personal or in-
house use without formal permission or charge,
provided suitable acknowledgement is made to this
publication and the NZ Transport Agency as the
source. Requests and enquiries about the
reproduction of material in this publication for any
other purpose should be made to:
Manager, Information
NZ Transport Agency
Private Bag 6995
Wellington 6141
The permission to reproduce material in this
publication does not extend to any material for which
the copyright is identified as being held by a third
party. Authorisation to reproduce material belonging
to a third party must be obtained from the copyright
holder(s) concerned.
More information
NZ Transport Agency
Published March 2012
If you have further queries, call our contact centre on
0800 699 000 or write to us:
NZ Transport Agency
Private Bag 6995
Wellington 6141
This document is available on the NZ Transport
Agency’s website at www.nzta.govt.nz
Contents
Acknowledgements ............................................................................................................. 1
Background ....................................................................................................................... 2
Introduction ...................................................................................................................... 3
Purpose of the guidelines .................................................................................................... 3
Cyclist skills links ............................................................................................................... 4
Part A Cyclist skills training course sessions and core skills ............................................. 5
Setting up course sessions .................................................................................................. 6
Prior to training ......................................................................................................... 6 During training ........................................................................................................ 10 After training – monitoring and evaluation ................................................................... 11 Instructor/trainee ratios ........................................................................................... 12 Age of trainees ........................................................................................................ 13 Health and behavioural needs .................................................................................... 13 Cultural differences .................................................................................................. 14 Cyclist training guidelines ......................................................................................... 15
Complete beginner – learn to ride (not assessed) ................................................................. 16
Overview ................................................................................................................ 16 Core skills for a complete beginner ............................................................................. 16 Exercises for complete beginners ............................................................................... 16
Grade 1 – beginner .......................................................................................................... 18
Overview ................................................................................................................ 18 Location ................................................................................................................. 19 Course duration ....................................................................................................... 19 Ratios of instructors to trainees ................................................................................. 19 Core skills for grade 1 .............................................................................................. 20 Exercises for learning grade 1 core skills ..................................................................... 20 Summary of core skills and observable outcomes ......................................................... 29
Grade 2 – intermediate ..................................................................................................... 32
Overview ................................................................................................................ 32 Traffic environment .................................................................................................. 32 Course duration ....................................................................................................... 33 Ratios of instructors to trainees ................................................................................. 33 Core skills for grade 2 .............................................................................................. 34 Tips for teaching on-road (in traffic situations) ............................................................. 34 Exercises for grade 2 core skills ................................................................................. 36 Summary of core skills and observable outcomes ......................................................... 48
Grade 3 – advanced ......................................................................................................... 50
Overview ................................................................................................................ 50 Location ................................................................................................................. 50 Course duration ....................................................................................................... 51 Instructor to trainee ratios ........................................................................................ 51 Core skills for grade 3 .............................................................................................. 51 Exercises for grade 3 skills ........................................................................................ 51 Optional activities for grade 3 .................................................................................... 54 Summary of core skills and observable outcomes ......................................................... 55 After cyclist training – continuing the benefits and enjoyment of cycling ......................... 58

Part B Guidelines for training providers ......................................................................... 59
Introduction .................................................................................................................... 60
Roles in cyclist training ..................................................................................................... 61
Instructor training providers (ITP) .............................................................................. 61 Cyclist training organisations ..................................................................................... 62 Instructors ............................................................................................................. 62 Trainees ................................................................................................................. 62
Setting up the organisation structure .................................................................................. 63
Reporting requirements and a communication plan ....................................................... 63 Integration with other road safety and health-related programmes ................................. 63 Written instructor recruitment and monitoring procedures ............................................. 63 Health and safety policy ........................................................................................... 63 Insurance and liability .............................................................................................. 64 An equal opportunities policy ..................................................................................... 65 Treaty of Waitangi obligations ................................................................................... 65 Checklist for setting up ............................................................................................. 65
Targeting and marketing ................................................................................................... 67
Pricing ................................................................................................................... 67
What makes a good instructor ............................................................................................ 68
Instructor requirements ............................................................................................ 69 Requirements for organisations when recruiting instructors ............................................ 70 Why target instructors who are cyclists? ..................................................................... 71 Monitoring and development of cyclist instructors ......................................................... 71 Continuing professional development .......................................................................... 72
Glossary ......................................................................................................................... 73
Further information and resources ...................................................................................... 74
Reference list .................................................................................................................. 75
Appendix – Recommended skills matrix of appropriate age groups for cycle skills ...................... 77
1
Acknowledgements
The guidelines have been prepared by Opus International Consultants Ltd in consultation with a
national Cycle Training Advisory Group (CTAG). We would like to thank those organisations on the
CTAG for their significant contribution to the development of the guidelines. Members of the CTAG
are:
• NZ Transport Agency
• New Zealand Police
• Ministry of Education
• Cycling Advocates’ Network (CAN)
• Ministry of Transport
• SPARC
• Waitakere City Council
• Ministry of Health
• ACC
• Bike NZ
• New Zealand School Trustees Association
• Christchurch City Council Cyclesafe
• Greater Wellington Regional Council.
Thanks need to go to Francis and Cambridge Ltd and Transport Initiatives (UK) for work
undertaken on the first three workstream reports that guided the development of these guidelines.
We are particularly grateful for the significant contribution from the Christchurch City Council
Cyclesafe team that undertook the original trial of the cyclist training guidelines to gain an
understanding of their ease of use and adaptability into current cyclist training programmes in New
Zealand. Also, thanks need to go to Peter Zanzottera of Steer Davies Gleave (UK) for his input into
trialling the guidelines in the New Zealand context.

2
Background
As part of a commitment to New Zealand’s ‘Getting there – on foot, by cycle’ plan and Safer
Journeys 2020, the NZ Transport Agency (NZTA) seeks a consistent approach to the delivery of
cyclist skills education to encourage people to cycle more often. As a result, a core set of national
guidelines have been developed to enable instructors to teach cyclist training in both school and
adult training environments.
The guidelines have been adapted to suit the New Zealand environment from the UK Bikeability
programme established on behalf of Cycling England. These guidelines have been evaluated as best
practice, particularly for providing practical cycling skills on the road.
Three reports that were produced as part of stage 1 of this project have helped develop the
guidelines:
• Workstream 1: A review, analysis and update of cycle skills courses operating in New Zealand
(conducted by Bike NZ)
• Workstream 2: Development of guidelines on minimum content and delivery standards for
cycle skills education programmes in New Zealand
• Workstream 3: Recommendations and costings for the national delivery of cycle skills
education.
Stage 2 of this project involved the development of cyclist skills training and instructor guidelines,
the establishment of a national Cycle Training Advisory Group (CTAG) and a trial programme with
cyclist training providers to gain an understanding of their ease of use and ability to promote safe
cycling skills to current and new cyclists.
The stage 3 process commenced in February 2008 with a number of associated workstreams and
the roll-out of trial programmes across New Zealand, with further trialling in 2008 and 2009.
The final stage in 2009–2010 developed a nationally recognised qualification for cyclist skills
instructors. The qualification – National Certificate in Recreation and Sports with a strand in Cycle
Skills Instructor - is now registered with the NZQA and is designed to recognise the skills and
knowledge of people who wish to instruct participants in cycle skills.
These guidelines will be updated as and when required.

3
Introduction
The vision for cyclist training is:
A New Zealand where everyone has the opportunity to become a confident and capable cyclist
These guidelines address cyclist training skills to prepare trainees to cycle confidently on the road.
The guidelines have been developed to cater for a range of trainees and suit both school and adult
training environments. The guidelines are based on a number of core skills to ensure that
demonstrated ability is achieved.
Please note that the guidelines aim to teach cycle safety skills and how to ride safely in traffic
situations. They do not assume that the road traffic environment will be safe, and so cyclists need
to be aware of hazards when cycling in traffic environments. Course templates are available
separately on the NZTA’s website: http://www.nzta.govt.nz/resources/cyclist-skills-training-guide .
The NZTA has developed another resource to accompany this guideline and help cyclists keep safe
on the roads.
The official New Zealand code for cyclists can be downloaded free from the NZTA website at
www.nzta.govt.nz/resources/roadcode/index.html. Like the road codes for motorists (also available
online), the code for cyclists is a user-friendly guide to New Zealand’s traffic law as it relates to
cyclists and also includes lots of useful information on safe cycling practices.
The code will be particularly useful for people who are just learning about cycling on the road or
those teaching someone else to ride. The NZTA is also encouraging more experienced cyclists to
take advantage of the new resource to brush up on their knowledge of the road rules and safe
cycling practices.
Purpose of the guidelines
The purpose of the guidelines is two-fold:
• to outline guidelines for a consistent approach for the delivery of cyclist training in New
Zealand
• to outline the cyclist skill sets to be achieved in order to attain each grade.
The guidelines have been divided into two parts:
• part A outlines the set-up of the course sessions and core skills for cyclist training
• part B outlines the organisation and instructor training requirements.

4
Cyclist skills links
Cyclist skills training has numerous links with a range of health, road safety and education-related
programmes. With education, the training links specifically with the health, social studies and
science curriculums. It also links with neighbourhood accessibility plans, supporting local authority
engineering/cycle planning work, workplace and school travel plans, community focused land
transport activities, sport cycling programmes, and New Zealand Police programmes.
Figure 1 Cyclist skills links
Neighbour-hood
accessibility plans
SPARC active living
programmes
Model walking
& cycling Communities
Sport cycling programmes
NZ Police
Community
land transport activities
School
curriculum
School travel plans
Workplace travel plans
Local authority
engineering/ cycle planning
work
Cyclist skills guidelines

5
Part A
Cyclist skills training course sessions and core skills
6
Setting up course sessions
When setting up a cyclist training course session, there are a number of general requirements to
ensure that course sessions run smoothly. A list of course templates is included at the end of this
document. The templates are available on the NZTA’s website:
http://www.nzta.govt.nz/resources/cyclist-skills-training-guide .
Prior to training
Course information form
When working with children, a letter must be sent to parents or caregivers informing them of the
cycle training and any risks associated with the programme. When working with schools, it is
imperative that parental consent is gained when training is undertaken outside the school grounds.
There should also be provision for the parents and caregivers to inform the school and instructors
of any risks associated with their child’s involvement, eg a student’s special requirements, skills,
medical conditions and cultural practices.
The letter should also outline the requirements for the child to bring along their bicycle (in good
working order) and a standards-approved bicycle helmet. The letter should outline the cycle
training being undertaken and expected outcomes and also encourage opportunities for the trainee
to practise and develop their skills during and after training.
Trainee register
Before training commences, a trainee register should be completed with trainees’ names and any
special needs or medical notes. Mark attendance at the course, whether they pass or fail and any
comments from previous training undertaken.
Trainee assessment
For evaluation purposes, it is important to know baseline information to assess trainees’ knowledge
and behaviour before and after training. At a minimum, it is useful to know information such as
mode shift (eg increase or decrease in cycling to school/work/university). This information can be
gathered via a ‘hands up’ survey or a written survey.
A trainee pre and post survey enables information to be gathered relating to:
• mode shift data (required for the final report)
• information regarding trainees’ knowledge of cycling and road rules before and after training
• information regarding trainees’ confidence in riding a bike in various environments before and
after training.
The pre survey should ideally be completed by trainees two weeks prior to training commencing,
with the post survey being completed at least three weeks after training.
7
Health and safety
When undertaking cyclist training, the safety and wellbeing of instructors, trainees and others is of
primary importance. At a minimum, cyclist training organisations must demonstrate processes for
the following:
• roles and responsibilities for health and safety
• incident management
• hazard management
• accident and emergency procedures.
Prior to training, a health and safety plan should be completed that details the above requirements
and outlines risk management and emergency procedures.
Risk assessment and management
Risk assessment involves identifying risks and then taking measures to either avoid or manage
exposure to the risk. Risk can be defined in three ways:
• risk of personal injury to staff or trainees
• risk to the organisation, ie lack of a formal, clear management structure of responsibility may
leave the training provider open to litigation in the event of an incident
• risk of non-delivery of training to the desired standard.
Each course location must be risk assessed by a senior instructor prior to training, as training
conditions may change (particularly for grade 2 and 3 training). We recommend that a fixed site or
area is used for grade 1 and 2 courses. The written risk assessment should be available to all
instructors. Grade 3 courses may vary from training in set areas or over set routes to a more
dynamic approach where roads in a wider area may be used. In this case, instructors must
familiarise themselves with the general area prior to training.
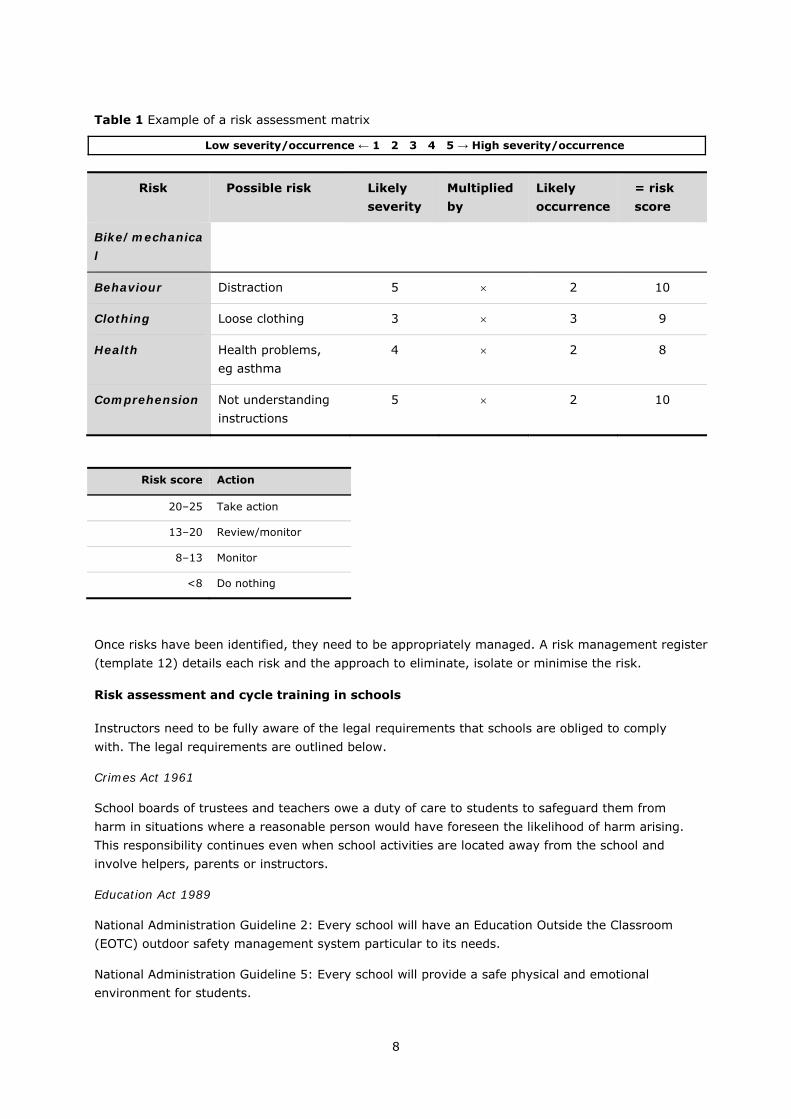
Table 1 provides an example of a risk assessment matrix. The risks are identified and the likely
severity and occurrence of these are recorded on a scale of 1–5. The numbers assigned to severity
and occurrence are multiplied together, and the answer represents the risk. The key below the
matrix then indicates whether or not action should be taken to manage or avoid the risk.
8
Table 1 Example of a risk assessment matrix
Low severity/occurrence ← 1 2 3 4 5 → High severity/occurrence
Risk Possible risk Likely
severity
Multiplied
by
Likely
occurrence
= risk
score
Bike/mechanica
l
Faulty
parts/mechanical
53 X 22 10
Behaviour Distraction 5 2 10
Clothing Loose clothing 3 3 9
Health Health problems,
eg asthma
4 2 8
Comprehension Not understanding
instructions
5 2 10
Risk score Action
20–25 Take action
13–20 Review/monitor
8–13 Monitor
<8 Do nothing
Once risks have been identified, they need to be appropriately managed. A risk management register
(template 12) details each risk and the approach to eliminate, isolate or minimise the risk.
Risk assessment and cycle training in schools
Instructors need to be fully aware of the legal requirements that schools are obliged to comply
with. The legal requirements are outlined below.
Crimes Act 1961
School boards of trustees and teachers owe a duty of care to students to safeguard them from
harm in situations where a reasonable person would have foreseen the likelihood of harm arising.
This responsibility continues even when school activities are located away from the school and
involve helpers, parents or instructors.
Education Act 1989
National Administration Guideline 2: Every school will have an Education Outside the Classroom
(EOTC) outdoor safety management system particular to its needs.
National Administration Guideline 5: Every school will provide a safe physical and emotional
environment for students.

9
Health and Safety in Employment Act 1992
The Health and Safety in Employment Act 1992 refers to the health and safety of employees,
students and other visitors to the school.
Boards have a duty to:
• take all reasonable steps to ensure the safety of students
• identify hazards and take steps to eliminate, isolate or minimise them.
When working within school settings, schools refer to risk management and assessment as RAMS
(Risk Assessment and Management System). Teachers complete a RAMS form when they take
students away from the school.
For assistance and advice on how to manage the training safely for all participants, the publication
Safety and EOTC: A good practice guide for New Zealand schools is useful, focusing on education
outside the classroom. It includes information on how to set up safety management systems and
also what legal requirements apply to education outside the classroom. This publication can be
accessed from the TKI website: www.tki.org.nz/r/eotc/resources/safety_e.php
Bike and helmet check
The bike and helmet check is necessary to ensure that the equipment is fit for use and all
components are working effectively.
For more detailed information on what to check when undertaking a bike and helmet check, see
the section ‘Exercises for learning grade 1 core skills’ (page 19).
Traffic management plan
A traffic management plan (TMP) is a document that describes the potential effect that an activity
will have on normal road users. TMPs are required for all activities that vary the normal operating
conditions of a road, irrespective of whether the activity is on a road, road shoulder or footpath.
TMPs are also needed for activities outside the road reserve that will affect the normal operating
conditions of a road.
Delivering cyclist training on the road as recommended is done with a small number of trainees.
The instructor and trainees in this situation are considered to be normal road users and are not
affecting the normal operating conditions of a road so a TMP is not required.
As outlined in the risk assessment section above, we recommend that a full risk assessment be
done on all the site locations that training will take place. We also recommend that the training
provider contact the road controlling authority(s) (RCA) and make them aware that they will be
delivering cyclist training in the community.
If a group ride or event is organised during the course of the training programme, then full
consideration needs to be given to the implications of this activity on other road users. This activity
will very likely affect the normal operating conditions of the road and the RCA may require a TMP.
Please contact your local RCA for advice.

10
During training
Incident reporting
As part of health and safety requirements, any hazards or incidents must be reported. Examples
include: damage to any property, injuries to trainees or any verbal or physical abuse during
training. Serious harm incidences (serious injuries and major incidents) must be reported
immediately to the cyclist training organisation. Instructors should consult with schools to find out
what systems are in place for incident reporting. Many schools will already have these systems and
procedures set up, and will require the training provider to follow them. Under the Health and
Safety in Employment Act 1992, it is a legal requirement to record accidents that have caused
serious harm to staff or students.
Trainee assessment
Trainee assessment against the range of core skills should take place throughout the training.
Assessment is preferred to testing as this enables trainees to continue working on skills over the
duration of the course.
Assessment forms can be used to keep track of the trainees’ progress throughout the course. At
the end of each session in a training course, instructors should provide an opportunity to review
goals for the next session. In turn, the review is an important stage in the trainee learning process,
as it reinforces the session in the trainee’s mind and sets the tone for the following lesson.
While assessment is preferred, instructors may choose to use an on-road test. Figure 2 shows an
example of a test route. Instructors and other assistants (teachers, parents or volunteers) are set
up at various points on the road. They are represented by the numbers 1–6. Trainees are
measured on the core skills for grade 2 and grade 3 (eg observation of the skills to undertake a
right turn). The trainees are set off at one-minute intervals so that each assessor only has one
trainee to mark at a time. Trainees are measured on the number of core skills achieved.
Figure 2 Example of a test route

11
After training – monitoring and evaluation
Accurate monitoring and evaluation is essential and should be integral to all cyclist skills training courses. It will enable organisers to continually improve their courses and can assist with future funding opportunities. There are many reasons why monitoring and evaluation is important:
• To monitor the delivery of cyclist skills training, eg did we do what we said we would do?
• To fulfil the requirement to evaluate the effectiveness and efficiency of cyclist skills training, eg was the activity successful?
• To provide feedback on the guidelines so that ongoing improvements can be made, eg what
can we do better?
A cyclist skills training monitoring and evaluation framework has been developed and is available
on the NZTA website: http://www.nzta.govt.nz/resources/cyclist-skills-training-guide This
framework aims to gain an understanding of the uptake and outcomes of the national cyclist skills
training guidelines.
Providing information should be voluntary and in confidence and it should be explained why the
information is being gathered. It may be more difficult to get written information from trainees that
are children and therefore the instructor may want to use a group session to ask the trainees what
they learnt from the course. In addition to the pre and post survey, a number of other surveys (see
below) can be used to complement the course evaluation. We recommend that the surveys are
completed approximately three weeks after training. All of these surveys are available on the
NZTA’s website at: http://www.nzta.govt.nz/resources/cyclist-skills-training-guide .
Parent/caregiver survey
Where cyclist skills training is targeted at children, this survey seeks feedback relating to the
parent’s perceptions of their child’s behaviour when cycling. Questions are also framed to
encourage parents/caregivers to think about how their own perceptions and behaviour may or may
not have changed as a result of their child undertaking the training (eg allowing their child to cycle
to school when they previously had not).
If the trainees are part of a school holiday programme or similar, contact details will need to be
obtained to enable a parent/caregiver survey to be sent out.
Target group survey
This survey can be completed by the group coordinator (eg head teacher, school holiday
programme coordinator, adult training centre coordinator). The survey asks the coordinator to
consider the impact the programme has had on trainees’ cycling competence and confidence, as
well as any measurable increases in cycling. As with the parent survey, questions are framed
around any changes as a result of the cyclist skills training.
Trainee assessment – outcome certificates
At the end of the training course, instructors should assess individuals’ achievement towards the
desired outcomes for the cyclist skills course. Feedback should be in written form on a clear template
or certificate that states the date or dates that the trainee participated in the course, the skills that

12
were taught and the skills that the trainee performed to the required standard. Emphasise that the
certificate is not to be considered a licence. The guidelines aim to teach cycle safety skills and how to
ride safely in traffic. Trainees still need to be aware that the road environment can be dangerous,
and cyclists need to be aware of hazards when cycling in a traffic environment.
Instructors should aim to provide trainees with suitable comments and feedback on their progress
in order to help them improve, and it should be emphasised to parents (if teaching children) and
trainees alike that cyclist training is ongoing and further opportunities for the trainee to practise
and develop their skills should be encouraged. To assist with reporting progress, the trainees’
register can be used to make notes throughout the training.
Other recording information
Cyclist training organisations can summarise the details of each training course on a record sheet.
Instructor/trainee ratios
Training must be tailored to the particular needs and concerns of the trainee. Organisers must
ensure that individuals receive sufficient attention.
Where trainees are taught in larger groups, the dynamic of group learning can be seriously affected
by the balance of the trainees’ cognitive skills. If the majority of trainees in a group are competent
cyclists with good cognitive skills, they will tend to lift the performance of the less competent
trainees. Instructors will be able to give slightly more instruction time to the poorer performers
without slowing the improvement of those with better skills. Where the majority of a group have
poorer skills, this can have a serious detrimental effect on the progress of the whole group, as
instructors will need to spend more time on simpler tasks. Lower ratios of trainees to instructors
are consequently very important for high-quality training, as well as risk management when
training in traffic environments.
The ratios in table 2 are recommended, but may need to be altered in each particular case
depending on the training environment and trainee capabilities.
Table 2 Recommended ratios for trainees to instructor for each training grade
Trainee group Recommended ratios – trainees to instructor
Complete beginner 1 to 1
Grade 1 (non-traffic) Theory maximum: 30 to 1
Practical maximum: 15 to 1
Grade 2 Theory maximum: 30 to 1
Practical (traffic environment) maximum: 6 to 1
Grade 3 Practical (traffic environment) maximum: 3 to 1
(note: depends on assessment of trainee)
13
Cyclist training in schools
The school principal (or their delegate) is ultimately responsible for the safety of the students.
Instructors must comply with the school’s policies. Teachers must be present at all times when
instructors are working with school children. The Education Act 1989 requires students to be under
the direct supervision of a teacher at all times.
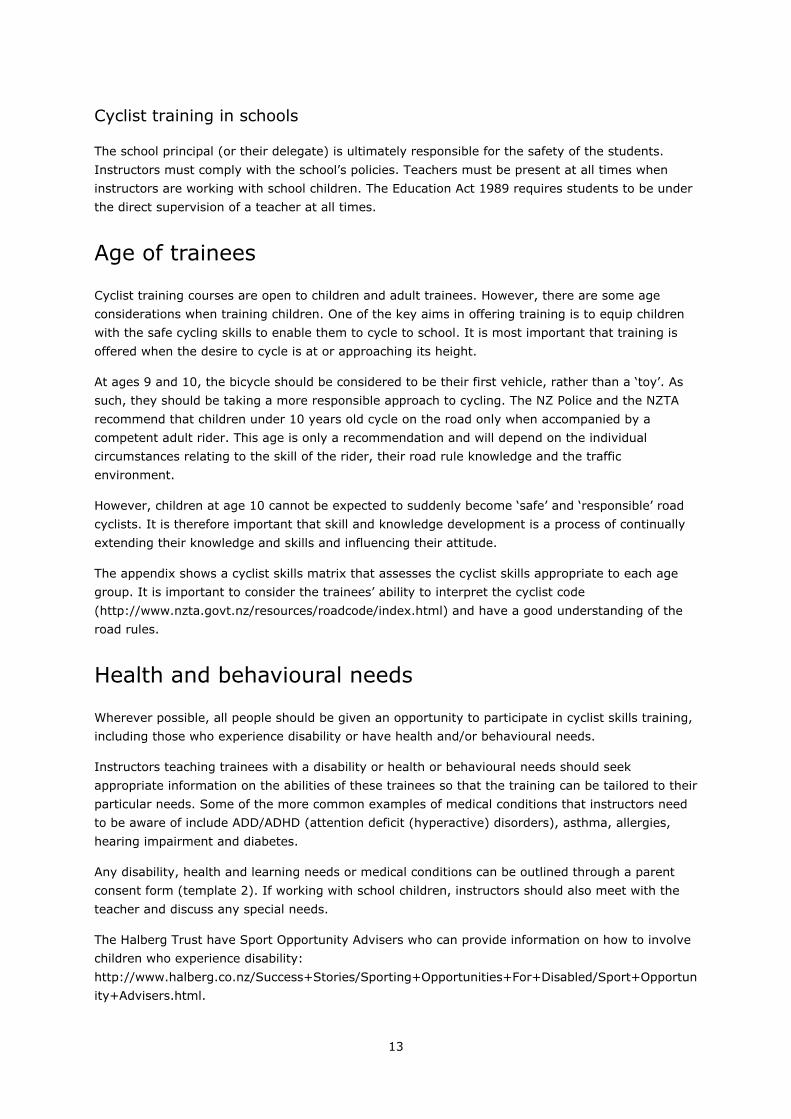
Age of trainees
Cyclist training courses are open to children and adult trainees. However, there are some age
considerations when training children. One of the key aims in offering training is to equip children
with the safe cycling skills to enable them to cycle to school. It is most important that training is
offered when the desire to cycle is at or approaching its height.
At ages 9 and 10, the bicycle should be considered to be their first vehicle, rather than a ‘toy’. As
such, they should be taking a more responsible approach to cycling. The NZ Police and the NZTA
recommend that children under 10 years old cycle on the road only when accompanied by a
competent adult rider. This age is only a recommendation and will depend on the individual
circumstances relating to the skill of the rider, their road rule knowledge and the traffic
environment.
However, children at age 10 cannot be expected to suddenly become ‘safe’ and ‘responsible’ road
cyclists. It is therefore important that skill and knowledge development is a process of continually
extending their knowledge and skills and influencing their attitude.
The appendix shows a cyclist skills matrix that assesses the cyclist skills appropriate to each age
group. It is important to consider the trainees’ ability to interpret the cyclist code
(http://www.nzta.govt.nz/resources/roadcode/index.html) and have a good understanding of the
road rules.
Health and behavioural needs
Wherever possible, all people should be given an opportunity to participate in cyclist skills training,
including those who experience disability or have health and/or behavioural needs.
Instructors teaching trainees with a disability or health or behavioural needs should seek
appropriate information on the abilities of these trainees so that the training can be tailored to their
particular needs. Some of the more common examples of medical conditions that instructors need
to be aware of include ADD/ADHD (attention deficit (hyperactive) disorders), asthma, allergies,
hearing impairment and diabetes.
Any disability, health and learning needs or medical conditions can be outlined through a parent
consent form (template 2). If working with school children, instructors should also meet with the
teacher and discuss any special needs.
The Halberg Trust have Sport Opportunity Advisers who can provide information on how to involve
children who experience disability:
http://www.halberg.co.nz/Success+Stories/Sporting+Opportunities+For+Disabled/Sport+Opportun
ity+Advisers.html.

14
Cultural differences
Trainees may also have English as a second language or cultural or religious needs. The instructor
should consider how to manage these prior to training. Any cultural requirements can be outlined
in a parent consent form and discussed with the teacher when working with children.

15
Cyclist training guidelines
The following sections are split into three. Course providers will need to set objectives for their
courses and make it clear whether they are providing a grade 1, grade 2 or grade 3 course (see
part B ‘Guidelines for training providers’). If they are providing a grade 1 course, they will have to
make it clear to students and parents that the students have not been taught to ride on the road
and that this is not the aim of the course.
Table 3 Summary of the grades for cyclist skills training
Entry grade Non-traffic/ traffic environment
Summary of outcome
Recommended minimum training hours
Trainee to Instructor ratios
Complete Beginner (not assessed)
Non-traffic Trainees can demonstrate that they can ride a bike without support
Assessment depends on skill of the trainee
1 to 1
Grade 1 (beginner)
Non-traffic Trainees can demonstrate skills for full bicycle control in non-traffic environments
3-5 hours Theory 30 to 1
Practical 15 to 1
Grade 2 (intermediate)
Traffic Trainees can demonstrate skills to cycle in a variety of traffic environments
7–8 hours (6 hours on-road training)
Theory 30 to 1
Practical 6 to 1
Grade 3 (advanced)
Traffic Trainees can demonstrate skills to cycle confidently in all traffic environments
Assessment depends on skill of the trainee
Maximum 3 to 1 (note: depends on assessment of trainee; 1 to 2 may be more appropriate)
The following assumptions have been made about the training guidelines:
• The same outcomes for bike control and handling are expected from adults and children.
• Trainees are not tested, but they progress to the next grade only after they have achieved the
overall outcomes for each grade. It is up to the trainer to decide whether the trainees are
competent and whether some core skills require more or less focus in the training sessions.
• Grade 1 teaches cycle control and does not teach road awareness and safety (although this
grade may explain some control techniques in relation to riding on the road).
• Grade 2 and 3 training takes place on real roads in realistic conditions, starting on quiet roads
and progressing to busier roads as trainees progress.
• Instructors will always teach trainees to signal (indicate) when changing direction.

16
Complete beginner – learn to ride (not assessed)
Outcome – a cyclist who can demonstrate that they can ride a bike without support
(note that this is not assessed)
Overview
• Number of hours will vary depending on the skill grade of the trainee
• Non-traffic environment (eg playground/netball court)
• Trainee to instructor ratio 1 to 1
• Cycle skills exercises to teach complete beginners
Complete beginners are people of any age who don’t know how to ride a bike or haven’t done so
for a long time. The difference between complete beginners and grade 1 is that beginners have
additional training requirements.
Learning to ride a bike is generally parent/caregiver led, particularly at a younger age. In some
cases, complete beginners may present themselves at training. Ideally these trainees should not be
excluded from participating in the programme, although this depends on course resources. As with
grade 1, complete beginners should learn to ride a bike in a non-traffic environment.
Complete beginners may be able to integrate into some grade 1 skills but they may require
separate tuition for practical skills.
Core skills for a complete beginner
Core skills for complete beginners include the following (see grade 1 for teaching skills):
• get on and off the bike without help
• start off and pedal without help
• stop quickly and with control
• steer the bike to where they want to go.
Exercises for complete beginners
Balancing and steering
Complete beginners need to gain balance and basic steering skills. One way to teach trainees to
balance is to have them sit on the bike seat and ‘scoot’ along the ground using their feet. The
trainees can then practise increasing the distance of each ‘scoot’, until 10 metres can be covered
for each push on the ground.

17
The official New Zealand code for cyclists recommends the following tips for trainees learning to
ride:
• A couple of strong pushes on the pedals to start with will get the bicycle going, and help make
balancing easier.
• Fix your eyes on a distant point (try not to look down).
• Don’t worry about steering a straight line initially.
• If you start to tilt to the left, steer left slightly. If tilting to the right, steer right.
• Try to keep your body relaxed.
The instructor could set up some cones and get the trainee to undertake simple right and left turns
(not too sharp). Complex manoeuvring should be left until grade 1.

18
Grade 1 – beginner
Outcome – the trainee cyclist can demonstrate full control of their bicycle in non-traffic
environments while carrying out all-round observation, signalling and manoeuvring.
They will not yet have been observed using these skills on the road and in traffic.
Overview
• 3 - 5 hours minimum
• Non-traffic environment (eg playground, netball court)
• Trainee to instructor maximum ratio of 30 to 1 (theory) and 15 to 1 (practical)
• Cycle skills exercises to promote confidence and safe bike handling
• 8+ years old (year 4)
• Equipment needed – at least 20 cones, whiteboard, clipboard, flash cards1 (where available),
basic toolkit and bike pump, first aid kit
Grade 1 documentation Template
√ Helmet/bicycle check form 14
√ Flash cards 15
√ Course session plan 16
√ Grade 1 trainee skills assessment 17
√ Grade 1 trainee outcome certificate 18
This grade teaches cycle control skills in a non-traffic environment and focuses on specific bike
handling skills to promote bike confidence and safe bike handling. Road rules and signs can also be
taught at this grade but grade 1 should not be in a simulated road environment. Trainees must be
made aware that it is not training for riding on the road.
Trainees can be any age – either a child or an adult who can ride a bike without support but require
training in cycle skills and confidence before progressing on to the road. There may be advantages in
teaching some of the basic grade 1 skills to young children (ages 5 and 6 years), as many ride with
their families on off-road paths (see the appendix for a cycle skills matrix and age groups).
Trainees should not proceed to grade 2 until they have achieved all the core skills for grade 1 and
the overall outcome.
1 Flash cards can be used to help prepare trainees for progressing onto the road. Flash cards showing various types of vehicles of different colours can be held up as the trainee looks back over their shoulders to identify what is on the card. If flash cards are not available, instructors can hold up other objects.

19
Location
Grade 1 training is undertaken in a non-traffic environment. A flat hard-surfaced area, such as a
playground, is ideal. A hard surface is better than grass, although grass can be used to teach basic
lower-grade skills for complete beginners. Regardless of the surface used, instructors should be
prepared, as it is likely that crashes will happen, particularly in groups where there are a number of
trainees with little or no riding experience. The area should be large enough to accommodate the
number of students to be trained in the session with everyone riding at the same time. Training
could take place indoors, providing the indoor area is large enough and adequately lit. Permission
may be required from the caretaker if you plan to use bikes in school halls – particularly when
practising braking!
Access to toilets, refreshments (drinking water) and a seating area may be desirable.
Course duration
Given that trainees working towards grade 1 may often be younger children, it is not advisable to
have long sessions. Typically, 3–4 hours should be enough time to deliver grade 1 to groups of
children who have ridden before. This could be split into sessions of 1–1.5 hours, with either a
break between them or on different days. For adults or children who have never ridden a bicycle,
the course may need to be considerably longer.
It is expected that not all children who undertake grade 1 will complete the grade 1 outcomes.
Grade 1 courses should be fun and interesting. Trainees attending a course should be encouraged
to cycle more after the course off-road, thereby further improving their skills, before joining a
grade 2 course.
When teaching in schools, course duration may also be limited by the school curriculum and by the
need to fit within the hours of the school day. Instructors should be prepared to discuss this with
the school involved.
Ratios of instructors to trainees
The recommended maximum ratios (30 to 1 theory and 15 to 1 practical) must be applied –
particularly to groups of school children who already had some experience of riding. In the school
setting, teachers should be present during all components. Where the trainees are complete
beginners (children and adults), ratios should be much lower, at least until the trainees are able to
ride. Instructors must be trained to be able to undertake cycle training on the road. Volunteers
(including parents and teachers) must be trained if they are taking an active role in cycle training
in the roading environment. Careful consideration must be given to the skills and experience of the
volunteer if they are being used in other aspects of the training.

20
Core skills for grade 1
The trainee should be able to do the following core skills consistently for grade 1:
• Carry out a bike check.
• Carry out a helmet check.
• Understand the legal requirements and safety equipment for bicycles.
• Get on and off the bike without help.
• Start off and pedal without help.
• Stop quickly and with control.
• Steer the bike and manoeuvre safely to avoid objects.
• Look behind.
• Signal – stop, left and right.
• Use the gears.
Exercises for learning grade 1 core skills
Carrying out a bike check
Instructors must assess the safety of the trainee’s bicycle prior to training. The bike check is
necessary to ensure that the bike is a suitable size and fit for the rider and all the components are
working effectively. Assistance with bike checks may be undertaken by a local bike shop. Any
major faults should be fixed by a reputable bike mechanic.
Carry out the bike and helmet check provided in template 14. Identify any parts that require repair
or adjustment prior to undertaking cycle training. To ensure maximum time is spent on cycle
training, bikes can be checked a couple of weeks before the course starts so that any repairs can
be done but a final check must be completed on the day.
Trainees should check the following (see template 14):
• Frame and seat
No rust or cracks.
The right size – when straddling the bike, both feet are flat on the ground.
The seat is positioned at the correct height so that toes touch the ground when seated.
The seat quick-release lever is firmly done up, and the seat is firmly fixed (cannot be
twisted).
• Handlebars and headset
The handlebars are tight and secure. To check this, twist them to make sure they do not
move independently of the wheel.

21
The handlebar grips are covering the ends of the handlebars.
The headset and stem are tight and secure with no movement.
• Brakes
The front and back brakes work well. Check this by making sure the brake pads are secure
and not excessively worn and are making good contact with the rims. Brakes should
respond quickly with firm contact. With disk brakes, make sure the brake pads are making
contact with the rotor. The brake levers shouldn’t pull too far towards the handlebar grips.
• Wheels and tyres
The wheel fasteners are tight and the wheels spin freely.
The spokes are not broken or missing and wheels are not buckled.
The tyres have good tread with no cracks.
The tyres are pumped up to the correct pressure.
The front and rear wheel quick-release levers are firmly done up.
• Chain and pedals
The pedals spin freely and are not loose.
The chain is lightly oiled and tension is firm, with about 5cm of movement up and down.
• Reflectors
The reflectors are visible, secure and clean.
The bike has a rear reflector as per the legal requirements.
• Other
The front and rear shock absorbers are working effectively (if applicable).
Any accessories (such as carrier, bottle holder, lights or kickstand) are secure.
In all instances, instructors must not allow a trainee with a helmet and bike equipment that do not
meet the legal requirements, or have any other serious faults, to undertake the course until the
faults have been rectified.
The faults should be recorded on the helmet/bicycle check form and these should be explained to
the trainee. When children are being trained, the helmet/bicycle check form should be sent home
to the parent or caregiver.
If the instructor is lending their own equipment to trainees, it should be in satisfactory condition.
We recommend that the instructor keeps a register detailing the equipment, any faults identified
and maintenance notes (including dates of service).
22
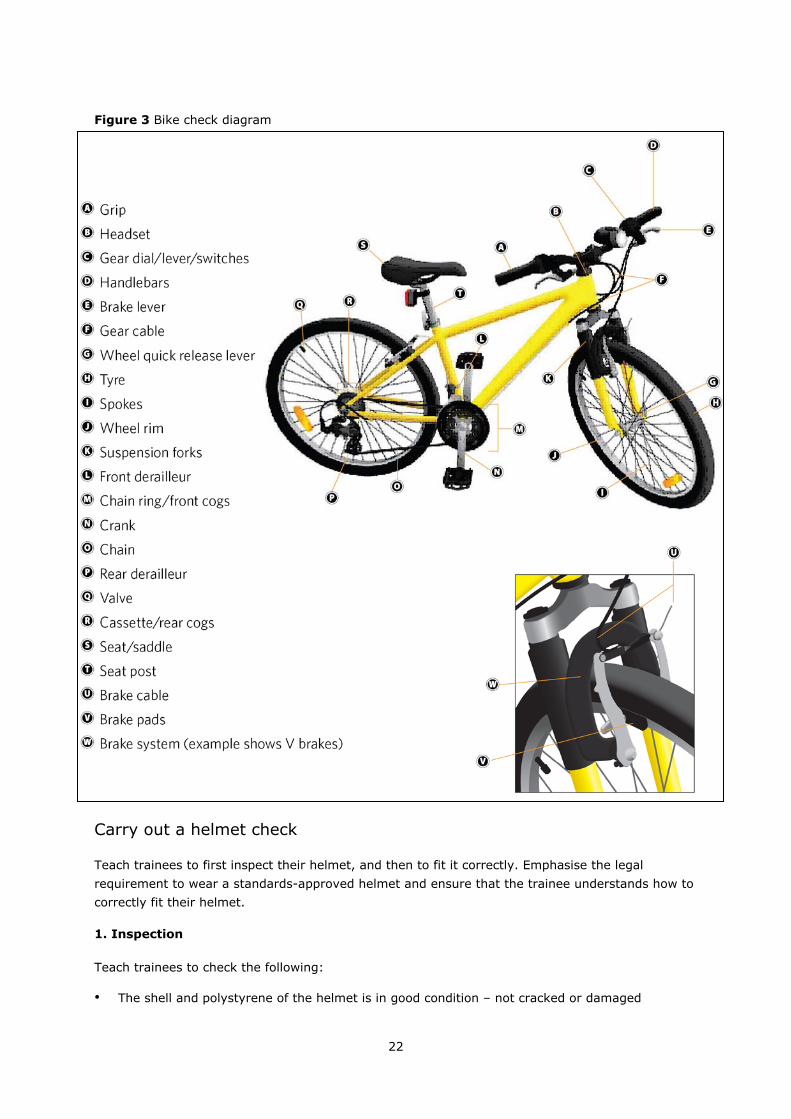
Figure 3 Bike check diagram
Carry out a helmet check
Teach trainees to first inspect their helmet, and then to fit it correctly. Emphasise the legal
requirement to wear a standards-approved helmet and ensure that the trainee understands how to
correctly fit their helmet.
1. Inspection
Teach trainees to check the following:
• The shell and polystyrene of the helmet is in good condition – not cracked or damaged

23
• The straps and buckles are in good order – not frayed or broken.
• The helmet has a standards-approved sticker – examples of the approved stickers are shown below.
The US Consumer Product Safety Commission’s bicycle helmet safety standard is also approved.
2. Fitting
Teach trainees to check the following:
• The helmet is the correct size – with little or no wobble when fitted on the trainee’s head.
• The helmet touches the head all the way around the rim.
• The helmet should sit flat and square on the head, with the rim of the helmet 1–1.5cm above
the eyebrows.
• The helmet is unable to be pulled back to expose the forehead and cannot be tilted forward,
back or sideways.
• The chin and back straps should run in straight lines from the rim of the helmet, and meet on
the jaw, below and to the front of the ear lobe.
• The straps must buckle up under the chin, not on the jaw. The chin strap should be firm but
not too tight.
• We advise that caps or beanies should not be worn underneath the helmet.
Understanding the legal requirements for bicycles and safety equipment
The aim is to make trainees aware of the legal requirements and why they are important. The
instructor could teach this in a classroom or out in the playground, using a bike to point out the
various features. The instructor should point out that some requirements are required by law and
others are optional.
The following information is taken from the NZTA’s factsheet 1 – Cycles: road rules and equipment
( www.nzta.govt.nz/resources/factsheets/01 ).
In New Zealand, the legal requirements for bicycles are:
• red or yellow reflector at the back that is visible from a distance of 100m when light shines on it
• good brakes on the front and back wheels (or, if the bike was made on or before 1 January 1988, a
good brake on the back wheel).
24
When riding at night, bicycles must have:
• a steady or flashing rear-facing red light that can be seen at night from a distance of 100 metres
• a steady or flashing forward-facing white light that can be seen at night from a distance of
100 metres.
In addition to the two lights above, you can also display a forward-facing white or amber light (only one
forward-facing light may be flashing, however).
When riding at night, you must also have either:
• yellow pedal reflectors on the forward- and rearward-facing surfaces of each pedal, or
• reflective clothing.
It is a legal requirement that a securely fastened, standards-approved helmet is worn.
Optional equipment may include:
• warning devices, eg bell or horn and yellow spoke reflectors
• safety apparel, eg securely fastened closed-in shoes, high-visibility clothing
• safety devices, eg flags
• other equipment, eg bike pump, spare tube or puncture repair kit.
Getting on and off the bike without help
Teach the trainee to:
• get on and off from the left of the bike away from traffic
• hold the brakes while mounting and dismounting to hold the bike steady
• lower the seat, if necessary.
Start off and pedal without help
Show the ‘pedal ready’ position, where trainees start with the left foot down and right pedal up.
Ensure that the bike is in a low gear. When ready to move off, push down using the right foot,
which will mean the trainee leans away from the traffic. Teach trainees to pedal with the balls of
their feet. Trainees should be able to pedal in a straight line.
Exercise 1
‘Slow rides’ can be used to teach balance and control of the bicycle. In this activity, cyclists all ride
in a straight line from one point to another (eg from one end of a netball court to the other) and
the cyclist who is the slowest to the finish line wins. Trainees will need to select a low gear for this
exercise.

25
Stop quickly and with control
Teach trainees to use both back and front brakes together gently to come to a quick controlled
stop. Note that there may be foot brakes on some children’s bicycles. Show them how to brace
their arms and move their weight to the back of the bike by sliding toward the rear of the seat.
Trainees can practise this skill by being given a particular line that they must ride towards and stop
at. To practise an emergency stop, get the trainees to cycle around in a circle and, when the
instructor calls out ‘stop’, the trainees must stop quickly.
Exercise 2
Ask the trainee to hold the handlebars with hands covering the brakes and run with the bike out to
their right. The trainee should then practise applying each of the brakes individually – first the right
brake, and then the left brake. This will demonstrate the difference in how the bike responds to
front and rear brakes. When the right (front) lever is applied, the bike stops quickly but often the
rear wheel lifts off the ground. When the left (back) lever is applied, the bike stops more slowly,
but without the rear wheel jumping. Trainees should be taught to apply both brakes to stop, but
applying the rear brake slightly earlier will prevent the back wheel jumping. Repeat this exercise
until the trainee can bring the bike to a smooth stop.
Steer the bike and manoeuvre safely to avoid objects
Teach the trainees how to steer the bike to the right and left with control. Exercise 2 is an example
of how to practise this exercise. Once trainees are able to steer the bike, they need to be taught
how to manoeuvre safely to avoid objects at speed, and also to manoeuvre safely to avoid closely
placed objects at low speed. Exercises 3 and 4 can be used to teach these skills.
Exercise 3 – Steering and ‘figure of 8’ exercise
Divide the trainees into two groups.
Position one group at each corner of the same end of the course.
One trainee from each group, at the same time, starts riding diagonally towards the centre.
Both trainees must pass through the centre mark, adjusting their speed in order to avoid a
collision.
Trainees can then ride to the other side of the course and wait in the corners to repeat the
manoeuvre again from this side.
Exercise 4 – Manoeuvring to avoid objects
Place markers/cones in a straight line no more than 1.5 metres apart.
Have trainees cycle in slalom between the markers, keeping both hands on the handlebars and
pedalling continuously. Pedalling should be smooth and controlled (ie no jerking or sudden back
braking). Brakes can be used with control to moderate speed.
Have trainees repeat this exercise but at slow speed. Markers/cones can be placed closer
together.
26
An alternative option for practising this skill is the ‘slalom’ exercise, which can be used to develop
more advanced manoeuvring skills. Trainees arrange themselves in a circle with a gap between
each rider. One trainee is then chosen to ride around the circle, weaving in and out of the
stationary trainees. Once this person gets back to their starting point, the next trainee sets off
around the circle. This exercise also allows trainees to keep practising getting on and off their bike
and starting and stopping.
Look behind
Learning to look behind while continuing to cycle in a straight line is an essential skill for safe
cycling. It is important to master this skill in the playground, to get trainees used to checking for
traffic behind them before making turns or passing parked cars in the road environment.
It is also important to discuss the different kinds of looking, either a quick glance or making eye
contact with the driver of a vehicle. Explain that making meaningful contact with other drivers can
influence driver behaviour, eg it may make them more cautious2. Also discuss the importance of
choosing appropriate times to look behind. For example, when no one is crossing in front of you, or
any other potential hazard that requires your full attention to the front.
This skill can be taught by teaching trainees how to look behind without wobbling while cycling in a
straight line. Trainees’ hands must remain on the handlebars, and trainees must lean forward and
bend one arm. When turning the head to the right, bend the left arm. When turning the head to
the left, bend the right arm.
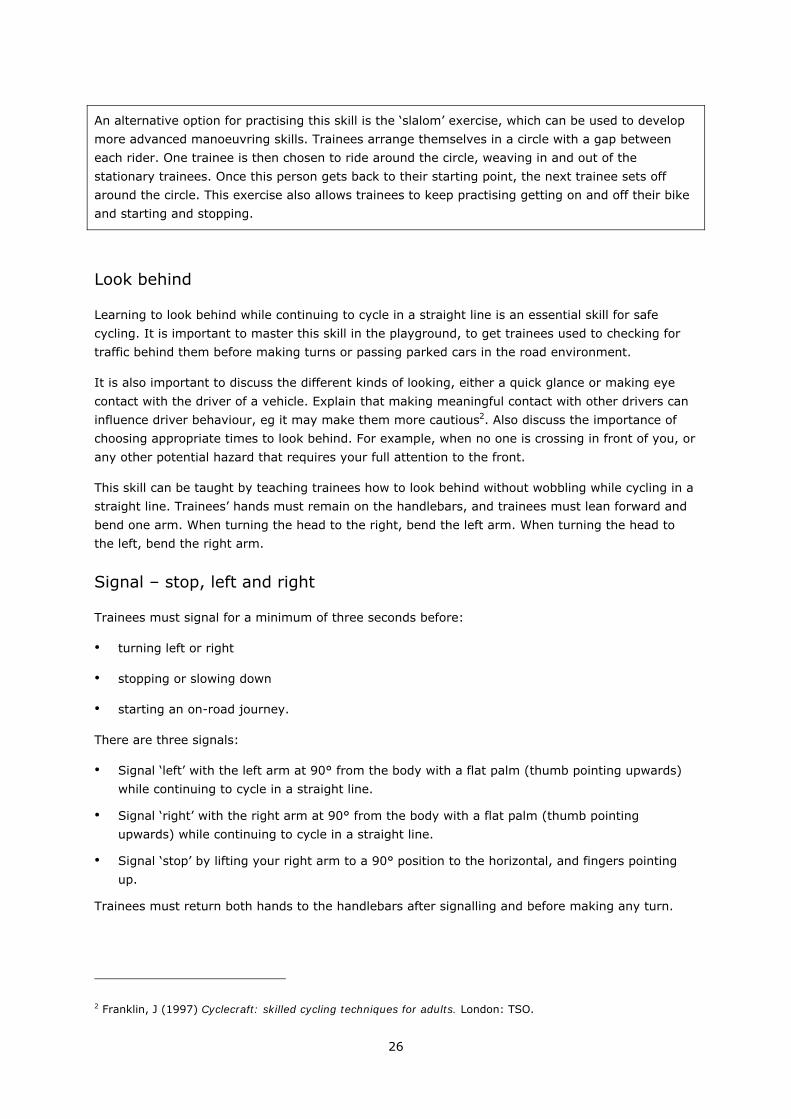
Signal – stop, left and right
Trainees must signal for a minimum of three seconds before:
• turning left or right
• stopping or slowing down
• starting an on-road journey.
There are three signals:
• Signal ‘left’ with the left arm at 90° from the body with a flat palm (thumb pointing upwards)
while continuing to cycle in a straight line.
• Signal ‘right’ with the right arm at 90° from the body with a flat palm (thumb pointing
upwards) while continuing to cycle in a straight line.
• Signal ‘stop’ by lifting your right arm to a 90° position to the horizontal, and fingers pointing
up.
Trainees must return both hands to the handlebars after signalling and before making any turn.
2 Franklin, J (1997) Cyclecraft: skilled cycling techniques for adults. London: TSO.
27
Signal right Stop sign Signal left
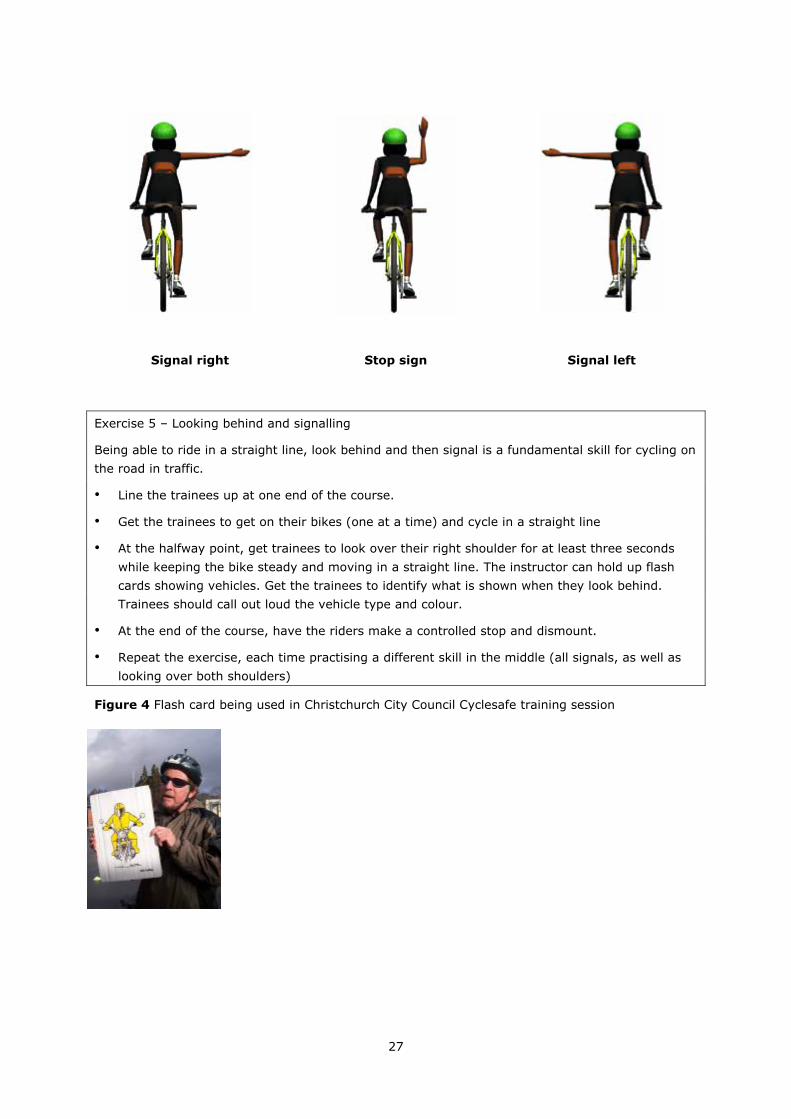
Exercise 5 – Looking behind and signalling
Being able to ride in a straight line, look behind and then signal is a fundamental skill for cycling on
the road in traffic.
• Line the trainees up at one end of the course.
• Get the trainees to get on their bikes (one at a time) and cycle in a straight line
• At the halfway point, get trainees to look over their right shoulder for at least three seconds
while keeping the bike steady and moving in a straight line. The instructor can hold up flash
cards showing vehicles. Get the trainees to identify what is shown when they look behind.
Trainees should call out loud the vehicle type and colour.
• At the end of the course, have the riders make a controlled stop and dismount.
• Repeat the exercise, each time practising a different skill in the middle (all signals, as well as
looking over both shoulders)
Figure 4 Flash card being used in Christchurch City Council Cyclesafe training session

28
Using the gears
Explain to the trainees what the different gears are used for. Trainees should be taught that being
able to change the gears quickly and efficiently will help them control their bicycle in traffic. Teach
them not to change gears when the bike is stationary and explain why it’s important the bike
should be moving when changing gears. Trainees should be taught to always change down to a
lower gear before stopping, as this will make starting off quicker and less tiring.
When riding along, using the gears properly should enable the trainee to maintain a mostly steady
rate of pedalling, regardless of the road conditions and gradients on which they are riding. The
gears also enable the trainee to pedal at a comfortable rate. Ask the trainees to describe the
different effects of the various gears they select.
Using the gears can be quite a difficult skill for trainees to master, and will need to be practised.
Trainees’ bikes will probably have various types of gear levers for operating gears. Be prepared to
show individual trainees how to use their particular controls. For example, Derailleur gears can only
be changed while the pedals are moving. It is also good to relieve the pressure applied to the
pedals when changing gears, as this decreases tension in the chain.
Exercise 6
Have trainees cycle around individually or as a group, changing gears from the ‘hardest’ (high
gear) to the ‘easiest’ (low gear) as they go. Once they are comfortable with this, ask them to put
their bikes in a low gear and start from a stop at one end of the netball court/practice space. They
should cycle to the other end, changing gears up as they go and then changing them down again
so that they are in a suitable gear for starting off again by the time they come to a stop.

29
Summary of core skills and observable outcomes
Table 4 Grade 1 summary of core skills and observable outcomes
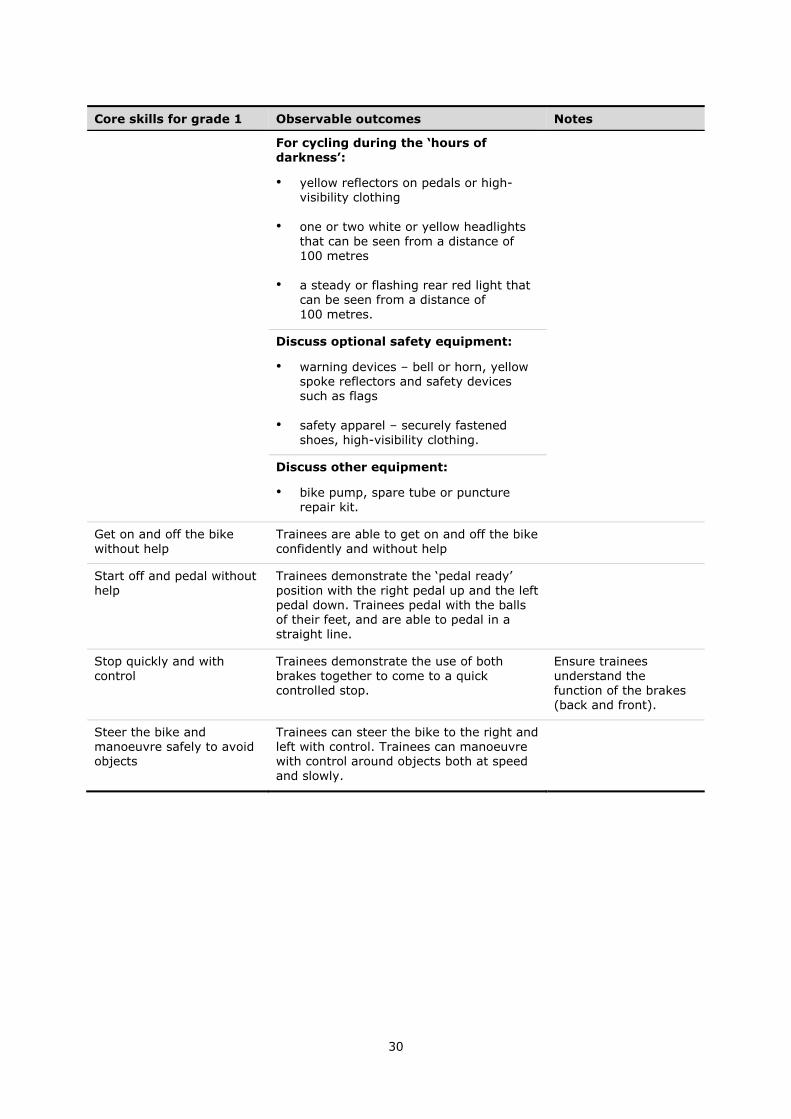
Core skills for grade 1 Observable outcomes Notes
Carry out a bike check Inspection
Trainees can check the following components of a bike prior to riding, and are able to identify where repairs are needed:
• frame
• handlebars and headset
• brakes
• wheels
• chain and pedals
• reflectors
• other components (where applicable).
Carry out a helmet check The trainee understands the following key components of a helmet to check, and can inspect and fit their helmet correctly.
Inspection
Cycle helmet is correct size, with little or no wobble when fitted on head.
Shell and polystyrene in good condition and not cracked or damaged.
Straps and buckles in good order (not frayed or broken).
Standards-approved sticker on helmet.
Fitting
Helmet is firm on head.
Chin and back straps meet on jaw, below ear lobe.
Not able to tilt helmet back to expose forehead, nor tilt it forwards, backwards or sideways.
Chin strap firm but not too tight.
If the helmet tips sideways, backwards or forwards, it is too loose. Helmet should fit 1–1.5cm above eyebrows.
Understand the legal requirements and safety equipment for bicycles
Demonstrate understanding of legal requirements for bicycles:
• good brakes on the front and back wheels
• rear red or yellow reflectors.
30
Core skills for grade 1 Observable outcomes Notes
For cycling during the ‘hours of darkness’:
• yellow reflectors on pedals or high-visibility clothing
• one or two white or yellow headlights that can be seen from a distance of 100 metres
• a steady or flashing rear red light that can be seen from a distance of 100 metres.
Discuss optional safety equipment:
• warning devices – bell or horn, yellow spoke reflectors and safety devices such as flags
• safety apparel – securely fastened shoes, high-visibility clothing.
Discuss other equipment:
• bike pump, spare tube or puncture repair kit.
Get on and off the bike without help
Trainees are able to get on and off the bike confidently and without help
Start off and pedal without help
Trainees demonstrate the ‘pedal ready’ position with the right pedal up and the left pedal down. Trainees pedal with the balls of their feet, and are able to pedal in a straight line.
Stop quickly and with control
Trainees demonstrate the use of both brakes together to come to a quick controlled stop.
Ensure trainees understand the function of the brakes (back and front).
Steer the bike and manoeuvre safely to avoid objects
Trainees can steer the bike to the right and left with control. Trainees can manoeuvre with control around objects both at speed and slowly.

31
Core skills for grade 1 Observable outcomes Notes
Look behind Trainees can look behind without wobbling while cycling in a straight line.
Discuss with trainees the different types of looking behind (‘glance’ for checking and a communicative longer look – ‘stare’).
Make sure the trainee looks behind long enough to identify what is behind them without swerving or losing balance.
Ensure the trainee bends the elbow opposite to the shoulder that is being looked over to ensure they can turn fully around.
Signal – stop, left and right
Trainees must demonstrate the following signals while cycling in a straight line:
• a stop signal
• a left turn signal
• a right turn signal.
For children, the skill of looking behind and then signalling may be difficult initially and trainees may ‘wobble’ when practising this task.
Trainee must signal for at least three seconds.
Looking behind and then signalling:
Trainees must demonstrate looking behind, returning eyes to the front and then signalling while cycling in a straight line. Before turning (at any intersection), the following outcomes must be observed:
• Trainees look over shoulder to check for traffic.
• Trainees signal their intention to turn.
• Trainees return hands to handlebars.
• Trainees complete turn.
Ensure that the trainee puts their hands back on handlebars before turning right or left.
Use the gears Trainees are able to change gears from the ‘hardest’ to the ‘easiest’ while riding. Teach trainees to understand what the different gears are used for and when to change the gears.
32
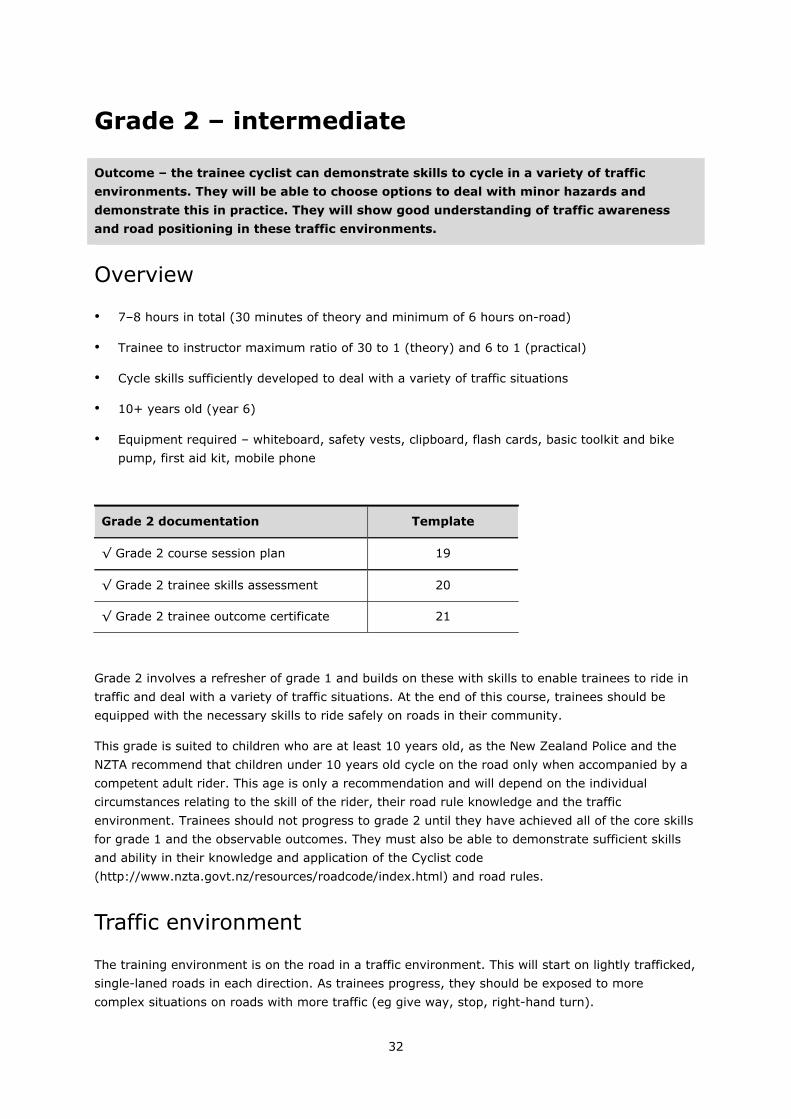
Grade 2 – intermediate
Outcome – the trainee cyclist can demonstrate skills to cycle in a variety of traffic
environments. They will be able to choose options to deal with minor hazards and
demonstrate this in practice. They will show good understanding of traffic awareness
and road positioning in these traffic environments.
Overview
• 7–8 hours in total (30 minutes of theory and minimum of 6 hours on-road)
• Trainee to instructor maximum ratio of 30 to 1 (theory) and 6 to 1 (practical)
• Cycle skills sufficiently developed to deal with a variety of traffic situations
• 10+ years old (year 6)
• Equipment required – whiteboard, safety vests, clipboard, flash cards, basic toolkit and bike
pump, first aid kit, mobile phone
Grade 2 documentation Template
√ Grade 2 course session plan 19
√ Grade 2 trainee skills assessment 20
√ Grade 2 trainee outcome certificate 21
Grade 2 involves a refresher of grade 1 and builds on these with skills to enable trainees to ride in
traffic and deal with a variety of traffic situations. At the end of this course, trainees should be
equipped with the necessary skills to ride safely on roads in their community.
This grade is suited to children who are at least 10 years old, as the New Zealand Police and the
NZTA recommend that children under 10 years old cycle on the road only when accompanied by a
competent adult rider. This age is only a recommendation and will depend on the individual
circumstances relating to the skill of the rider, their road rule knowledge and the traffic
environment. Trainees should not progress to grade 2 until they have achieved all of the core skills
for grade 1 and the observable outcomes. They must also be able to demonstrate sufficient skills
and ability in their knowledge and application of the Cyclist code
(http://www.nzta.govt.nz/resources/roadcode/index.html) and road rules.
Traffic environment
The training environment is on the road in a traffic environment. This will start on lightly trafficked,
single-laned roads in each direction. As trainees progress, they should be exposed to more
complex situations on roads with more traffic (eg give way, stop, right-hand turn).

33
Features that can make the road environment hazardous are:
• high traffic numbers
• high speed
• multi-lane
• complex intersections
• roundabouts
• consistently poor sight distance
• limited shoulder width for cycling left of traffic (particularly in high-speed, high traffic volume
environments).
Training on roads with these types of features should only be done at grade 3 and only when the
trainees have the confidence and capability.
The training session can be carried out over quite a compact geographical area. Devise a circuit or
course that includes straight stretches and intersections (up to 9–10 corners), and with the
potential to practise the complete list of manoeuvres outlined in the guidelines. Instructors should
have good knowledge of local cycle routes and networks, especially close to popular destinations
such as schools, leisure facilities, town centres and links with public transport (eg rail stations).
When cyclist training in schools, this might be the local school district.
Instructors can also include area-specific features, such as shared-use paths and rail crossings that
grade 2 riders will be likely to use. In addition, specific skills such as cycling over traffic-calming
measures (eg speed humps) can be practised.
Course duration
The time necessary to achieve the milestones will be affected by the ratios of instructors to
trainees and the nature of the sites on which training takes place. Courses of a minimum of 6 hours
should achieve the learning core skills. A break of approximately a week between sessions is most
effective, with course sessions approximately 1–1.5 hours in duration. There needs to be some
flexibility with the structure of courses in schools, in order to fit within the school programme.
Ratios of instructors to trainees
As with grade 1, the theory component of the session can be undertaken with a maximum ratio of
30 trainees to one instructor. However, more instructors will be required for the practical session in
the traffic environment. In the traffic environment, background noise and the space that a larger
group will take up make instruction of more than six trainees very difficult.
For grade 2, training ratios should not exceed 6 to 1, as this will significantly reduce the amount of
riding time for each pupil and also reduce individual instruction time that instructors will have to
help trainees improve sufficiently to achieve the core skills and may impact on the grade 2
outcome. Instructor to trainee ratios must also be considered with regard to safety and risk
management, when training in traffic environments.
34
Best practice might consist of a group of up to 18 trainees split equally between three trained
instructors, each using a different part of the area for training. If suitable intersections are within
the area, there could be a class of 30 trainees in five groups, each with an instructor. Instructors
may also find it easier to assign two instructors per group, ie 12 trainees per 2 instructors (6 to 1).
Core skills for grade 2
The trainee should be able to demonstrate the following core skills consistently for grade 2:
• Achieve all grade 1 core skills.
• Recall an understanding of road signs and the road rules.
• Start from side of road (kerb).
• Stop on side of road (kerb).
• Ride along the road.
• Pass a parked or slower-moving vehicle.
• Turn left – at a controlled and uncontrolled intersection.
• Turn right – at a controlled and uncontrolled intersection.
• Travel straight through controlled and uncontrolled intersections.
Optional skills for grade 2
Teaching the optional skills will depend on the environment and what facilities are available. Rural
areas will be different from urban areas, so each environment will need to be assessed differently
by the instructor. Examples of optional skills include:
• use of shared paths and cycle lanes
• cycling through single-lane roundabouts
• traffic signals.
Tips for teaching on-road (in traffic situations)
• Progressively layer each skill and build on them by increasing activity difficulty using
surrounding roads, parked cars, intersections, etc.
• Be clear on instructions regarding where you want the trainees to stand when teaching each of
the skills.
• Ask questions about different procedures and encourage children to provide answers to how a
procedure should be done. Peer critique can also be valuable.
• The best way to demonstrate a skill is on your bike. Discuss the skill, demonstrate it and then
get the trainees to practise it themselves many times on their own bikes.

35
• When watching trainees carry out a manoeuvre, place yourself in a receiver position. For
example, if watching a trainee perform a right turn, watch from the top of the intersection with
the trainee coming towards you, rather than watching from behind.
• Explain to trainees that a cyclist, more than any other road user, should be constantly aware of
what is around them. Checking over the right shoulder regularly is important for being aware of
what is behind. Trainees should not only be observing what is happening on the road but also
the surrounding area, including pedestrians, driveways, parked vehicles and intersections.
• Teach the trainees hazard awareness through the layered teaching approach. As activity
difficulty increases, talk to the trainees about the various hazards that might arise. This will
help them learn to identify for themselves when situations are complex and when there is not
enough room to carry out a particular manoeuvre. Trainees should know that there will be
some situations where the best option is to get off the bike and walk.
• Talk to trainees about sharing the road, and that wherever they ride, they are sharing space
with other road users. Understanding and respecting the needs of other users ensures
everyone is safe and comfortable while they are on the road or on paths.
• Discuss with trainees the importance of being visible to other road users when cycling on the
road. This includes the use of reflective clothing, bright colours, lights and reflectors, as well as
correct road positioning to ensure that you can be seen by other road users.
Figure 5 Procedure for demonstrating a manoeuvre
Discuss Demonstrate Practise
36
Exercises for grade 2 core skills
Recall an understanding of road signs and the road rules
Road signs
Teach trainees the importance of the need to recognise and obey traffic signs, just as other drivers
are required to do. Road signs can be taught using flash cards and supported by practising the
skills on the road. Refer to the official New Zealand code for cyclists for further information
(http://www.nzta.govt.nz/resources/roadcode/index.html ).
Compulsory signs (stop sign and give way sign)
• Stop sign:
You must come to a complete stop and place one foot on the ground
(not just slow down).
Stop where you can see vehicles coming from all directions.
Stay stopped and give way to all other vehicles.
Use the give way rules if you and another vehicle are coming towards each other and you
are both at stop signs.
Do not go until it is safe for you and all other traffic.
• Give way sign:
Slow down and be ready to stop.
Give way to all other vehicles, except those that have stopped at a stop
sign.
If you and another vehicle are coming towards each other and you are both
at give way signs, use the give way rules.
You must not go until it is safe for you and all other traffic.
Traffic light signals (if applicable)
• Red traffic signal – STOP. You must completely stop with one foot on the ground and wait for
the light to turn green.
• Yellow traffic signal – WARNING. The signal is changing to red. Slow down and stop, unless you
are so close to the intersection that you can’t stop safely.
• Green traffic signal – GO. A green signal means go, provided it is safe. If you are turning right,
give way to vehicles coming towards you that are going straight through or turning left. If you
are turning left or right, give way to pedestrians crossing the road you are turning into.
• A flashing yellow signal means the traffic signals are not working. In this case, you must apply
the give way rules.
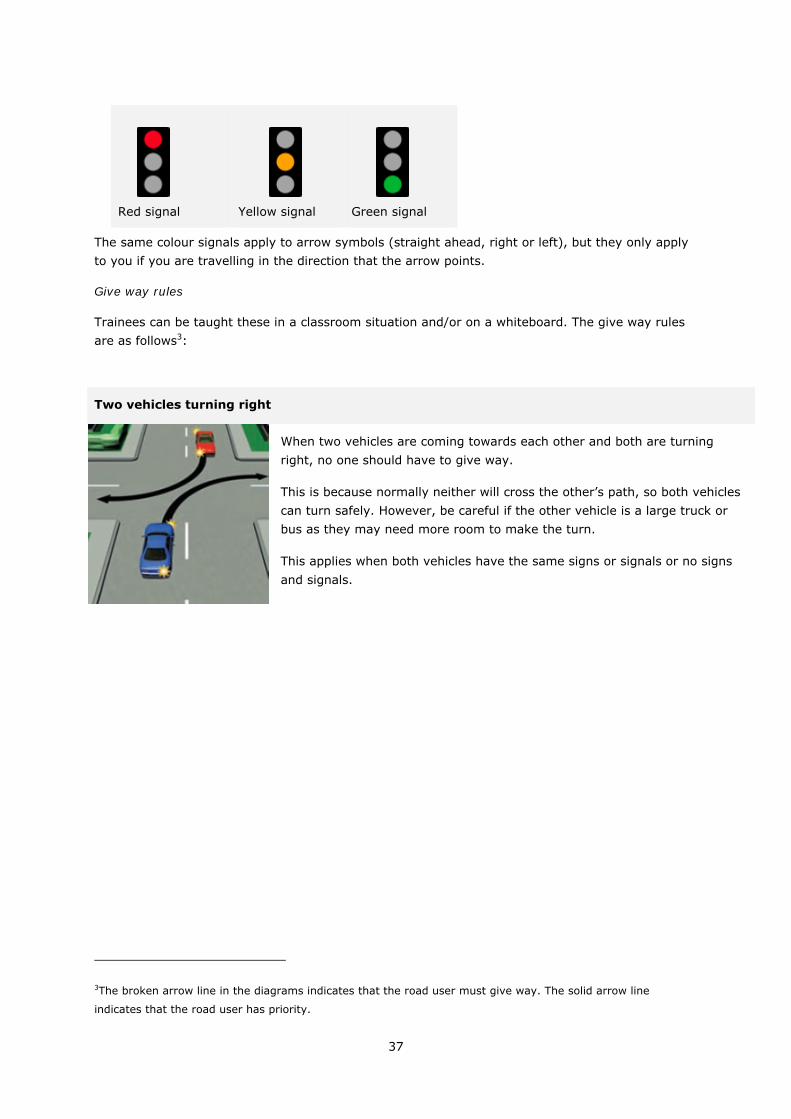
37
Red signal
Yellow signal
Green signal
The same colour signals apply to arrow symbols (straight ahead, right or left), but they only apply
to you if you are travelling in the direction that the arrow points.
Give way rules
Trainees can be taught these in a classroom situation and/or on a whiteboard. The give way rules
are as follows3:
Two vehicles turning right
When two vehicles are coming towards each other and both are turning
right, no one should have to give way.
This is because normally neither will cross the other’s path, so both vehicles
can turn safely. However, be careful if the other vehicle is a large truck or
bus as they may need more room to make the turn.
This applies when both vehicles have the same signs or signals or no signs
and signals.
3The broken arrow line in the diagrams indicates that the road user must give way. The solid arrow line
indicates that the road user has priority.

38
Give way when turning
When turning left at an uncontrolled intersection, give way to:
• all vehicles coming straight through from your right
When turning right at an uncontrolled intersection, give way to:
• all vehicles coming straight through from your left
• all vehicles coming straight through from your right
• all vehicles coming straight towards you
• all vehicles coming towards you and turning left
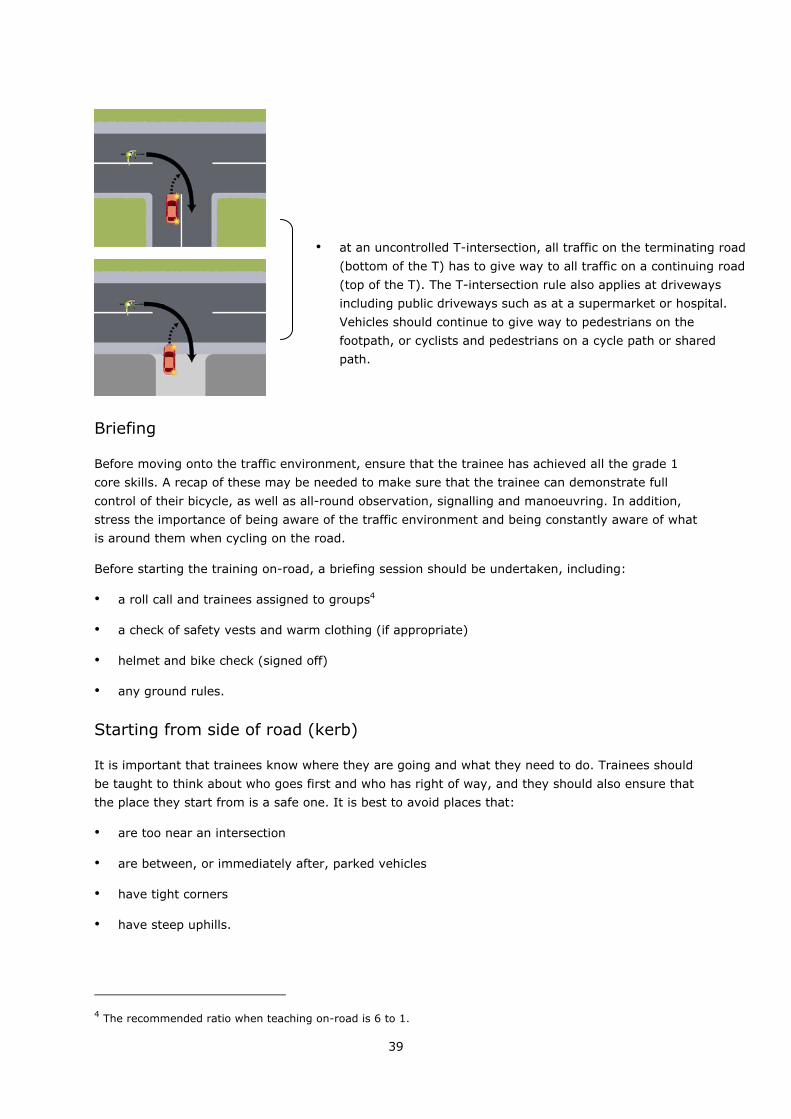
39
• at an uncontrolled T-intersection, all traffic on the terminating road
(bottom of the T) has to give way to all traffic on a continuing road
(top of the T). The T-intersection rule also applies at driveways
including public driveways such as at a supermarket or hospital.
Vehicles should continue to give way to pedestrians on the
footpath, or cyclists and pedestrians on a cycle path or shared
path.
Briefing
Before moving onto the traffic environment, ensure that the trainee has achieved all the grade 1
core skills. A recap of these may be needed to make sure that the trainee can demonstrate full
control of their bicycle, as well as all-round observation, signalling and manoeuvring. In addition,
stress the importance of being aware of the traffic environment and being constantly aware of what
is around them when cycling on the road.
Before starting the training on-road, a briefing session should be undertaken, including:
• a roll call and trainees assigned to groups4
• a check of safety vests and warm clothing (if appropriate)
• helmet and bike check (signed off)
• any ground rules.
Starting from side of road (kerb)
It is important that trainees know where they are going and what they need to do. Trainees should
be taught to think about who goes first and who has right of way, and they should also ensure that
the place they start from is a safe one. It is best to avoid places that:
• are too near an intersection
• are between, or immediately after, parked vehicles
• have tight corners
• have steep uphills.
4 The recommended ratio when teaching on-road is 6 to 1.

40
The best places to start off are straight roads with clear visibility in both directions, where trainees
can see and be seen. It is also worth explaining to trainees that it is a good idea to walk their bikes
to a safe starting point, rather than starting off from a risky place.
Specifically, trainees need to learn a series of steps to ensure their safety when moving off:
1. Get on the bike out of the stream of traffic – standing on the footpath with the bike wheels at
the edge of the roadway (gutter).
2. If there are parked vehicles, get on the bike just beyond the line of parked vehicles (but out of
the traffic stream) where you can see and be seen. Maintain the pedal ready position.
3. Look behind to check for traffic and signal before setting off. Ensure both hands are on the
handlebars when setting off.
4. Give way to traffic already on the road.
5. Ride on the left of the lane about 1m out from the kerb.
Stopping on side of road (kerb)
As with starting a journey, trainees will need to think about where they are going and what they
need to do to finish their journey. Again, there are specific steps that can be taught:
1. Look behind over the right or left shoulder just before pulling over to the left (in most cases,
the right shoulder will be more appropriate) to check for close-following vehicles.
2. Signal to stop for at least three seconds, and then brake, using two brakes.
3. Pull in, get off the bike and walk your bike onto the footpath.
• On a road with parked vehicles, pull into a gap between the parked vehicles if it is safe to do
so.
• If a vehicle is following closely behind, you may wish to slow down gradually and allow it to
overtake before stopping.
Riding along the road
Trainees will need to be taught that different positions on the road will need to be taken, depending
on the situation.
When trainees are starting out, it can be useful to use road markings and distance from the kerb as
a means of determining position on the road. Generally ride about 1m from the kerb and parked
vehicles, keeping out of the gutter. Teach trainees to recognise situations where they may need to
alter their road position in response to any changes (eg passing a parked car). Trainees will need
to learn when this is and isn’t appropriate, depending on the environment they are in. For example,
in a high speed environment, it may be safer to cycle as close to the edge of the road as possible.
In situations where the road is narrow or there are wide vehicles parked on the side of the road, it
may be safest to get off and walk.
When riding along the road, ‘search and scan’ to check for hazards in front, behind and all around.
It is also important to be aware of other traffic at all times and ensure you are visible and seen by
other road users at all times.

41
Check for drivers in parked vehicles as they may be preparing to open their door or intending to
drive out from the kerb into the path of the cyclist.
In most traffic environments, single file is the safest method of riding along the road. Explain to the
trainees that they must ride in single file when passing other vehicles – including parked vehicles.
If riding with other cyclists, don’t ride more than two abreast. Be aware not to impede the normal
and reasonable flow of traffic, so it may be more reasonably practicable to ride single file to allow
following traffic to pass.
Passing parked or slower-moving vehicles
Travelling around parked vehicles
Passing parked cars
Explain to the trainees the hazards surrounding parked vehicles, such as vehicle doors opening or
the vehicle moving off suddenly.
1. Plan the manoeuvre on the approach. Be aware of oncoming traffic and the possibility of having
to negotiate for space, especially on a narrow road with parked vehicles on both sides. If
trainees feel uncomfortable about this, it may be best to get off and walk the bike along the
footpath.
2. Look behind.
3. If it is safe, gradually move out, ensuring that they cycle 1m out when passing parked or
slower-moving vehicles.
4. Once past the car, move smoothly back to the normal riding position.

42
Intersections
An intersection is where two or more streets or roads join or cross. A controlled intersection is
where there are give way signs, stop signs or traffic signals. An uncontrolled intersection is an
intersection where there are no give way signs, stop signs, roundabouts or traffic signals to tell you
who has to give way.
The trainees need to understand the road rules and signs that indicate who has priority.
Trainees should use the ‘search and scan’ technique to check for hazards (vehicles and
pedestrians) in front, behind and to the sides.
Trainees should be warned about riding near trucks and other heavy vehicles, and should never
ride up along the left side of a truck that is turning left.
Turning left – at an uncontrolled intersection
When making a left turn at an uncontrolled intersection, trainees should be taught the following
steps:
1. Look behind over right shoulder while riding along.
2. Signal left for at least three seconds when approaching the intersection before you turn left.
3. As the trainee gets close to the intersection, return left hand to the handlebar and brake gently
to slow down.
4. When it is safe, complete the left turn manoeuvre.

43
Turning left at a controlled intersection
When making a left turn at a controlled intersection, trainees should be taught the following steps:
1. Look behind over right shoulder while riding along.
2. Signal left for at least three seconds when approaching the intersection before you turn left.
3. As the trainee gets close to the intersection, return left hand to the handlebar and brake gently
to slow down and obey the road signs.
4. When it is safe, complete the left turn manoeuvre.
Turning right at an uncontrolled intersection
Turning right is a more difficult manoeuvre. If the trainee finds it difficult to move over to the right,
they can pull over to the left stop and walk across, or wait opposite the intersection until all other
traffic is gone before cycling across.
When making a right turn at an uncontrolled intersection, trainees should be taught the following
steps:

44
1. Look behind over right shoulder while riding along.
2. Signal right for at least three seconds when approaching the intersection before you turn right.
3. As the trainee approaches the intersection, return right hand to the handlebar and move out to
occupy the lane when it is safe and there is space to do so – do a ‘life-saving’ second look to
the right as you move out. If there is a right turning lane, use it.
4. Stop to the left of the centre line if prevented from completing the turn by oncoming traffic.
5. When it is safe, complete the right turn manoeuvre.
Ensure trainees don’t cut the corner. Teach them to turn in an arc (spending the shortest amount
of time on the ‘wrong’ side of the road), and ending up on the left-hand side of the road they are
turning into.
Turning right at a controlled intersection
When making a right turn at a controlled intersection, trainees should be taught the following steps:
1. Look behind over right shoulder while riding along.
2. Signal right for at least three seconds when approaching the intersection before you turn right.
3. Return right hand to the handlebar and move out to occupy the lane when it is safe and there
is space to do so – do a ‘life-saving’ second look to the right as you move out. If there is a right
turning lane, use it.
4. Stop to the left of the centre line if prevented from completing the turn by oncoming traffic.
5. Obey the road signs.
6. When it is safe, complete the right turn manoeuvre
Ensure trainees don’t cut the corner. Teach them to turn in an arc (spending the shortest amount
of time on the ‘wrong’ side of the road), and ending up on the left-hand side of the road they are
turning into.
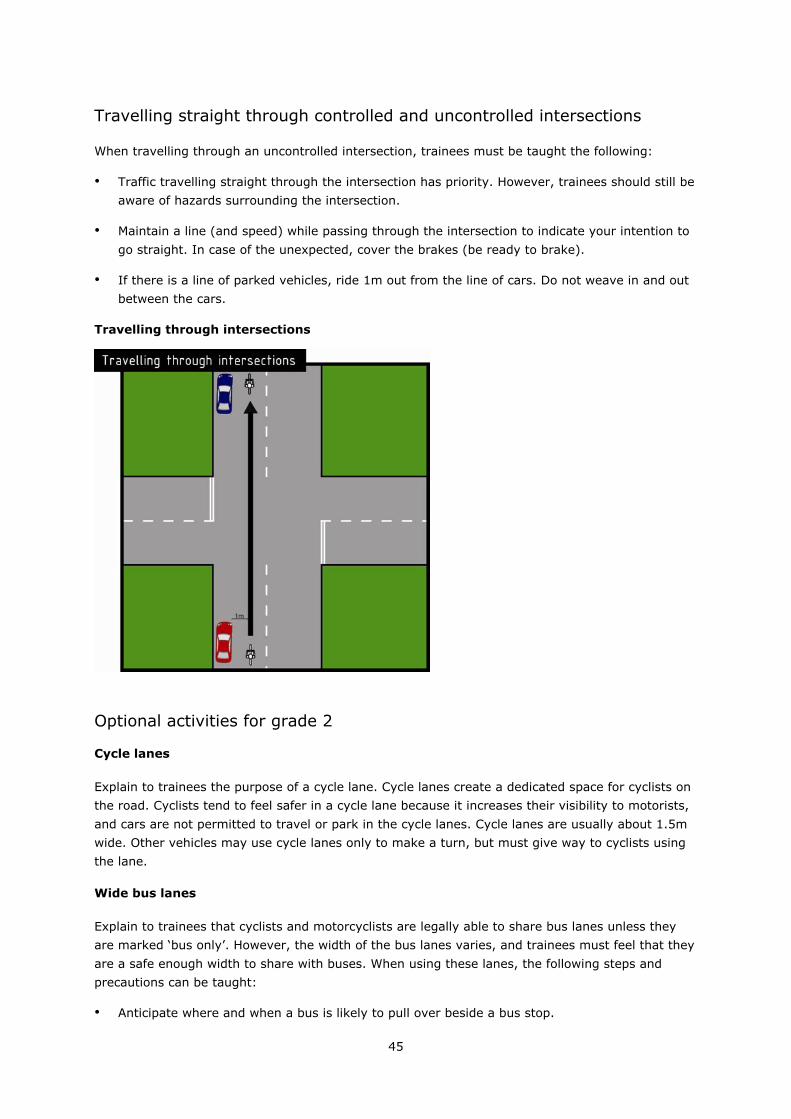
45
Travelling straight through controlled and uncontrolled intersections
When travelling through an uncontrolled intersection, trainees must be taught the following:
• Traffic travelling straight through the intersection has priority. However, trainees should still be
aware of hazards surrounding the intersection.
• Maintain a line (and speed) while passing through the intersection to indicate your intention to
go straight. In case of the unexpected, cover the brakes (be ready to brake).
• If there is a line of parked vehicles, ride 1m out from the line of cars. Do not weave in and out
between the cars.
Travelling through intersections
Optional activities for grade 2
Cycle lanes
Explain to trainees the purpose of a cycle lane. Cycle lanes create a dedicated space for cyclists on
the road. Cyclists tend to feel safer in a cycle lane because it increases their visibility to motorists,
and cars are not permitted to travel or park in the cycle lanes. Cycle lanes are usually about 1.5m
wide. Other vehicles may use cycle lanes only to make a turn, but must give way to cyclists using
the lane.
Wide bus lanes
Explain to trainees that cyclists and motorcyclists are legally able to share bus lanes unless they
are marked ‘bus only’. However, the width of the bus lanes varies, and trainees must feel that they
are a safe enough width to share with buses. When using these lanes, the following steps and
precautions can be taught:
• Anticipate where and when a bus is likely to pull over beside a bus stop.

46
• Be aware of the bus driver’s blind spots.
• Be visible to bus drivers – they rely on your front light at night to see where you are in their
mirrors – and share the lane with care.
• If you can’t see the driver’s mirror, the driver can’t see you.
• Don’t pass the bus if the direction indicators are flashing – the driver may be about to pull out
from the bus stop.
Shared paths
It is normally illegal to ride on footpaths, unless delivering mail or when cycling a wheeled
recreational device that has a wheel diameter less than 355mm (normally a tricycle or small child’s
bicycle). In some places, cyclists may be able to use the off-road network of shared paths for safe,
convenient and pleasant access to a number of locations.
Teach trainees that shared paths are off-road routes designed to be shared by pedestrians and
cyclists. In many cases, the sign advises what type of user has priority and who has to give way. If
a shared path does not have priority signs, the user of the path must give way to the slower user.
Care should be taken when entering and exiting and using shared paths, as they often have
driveways intersecting them. Check behind for cars and signal when crossing between shared
paths. Ride along with care and cover brakes.
The official New Zealand code for cyclists recommends the following actions if you are riding on a
shared path:
Keep left.
Let pedestrians know you are there by politely calling out or ringing a bell (when you are approaching from behind them).
Pass on the right, when possible. If the pedestrians are on the right, pass them in the safest way you see fit.
Ride defensively and cycle at a speed that does not put others at risk.
Look out for traffic going in and out of driveways (vehicles from driveways do need to give way to those on the shared path, but often drivers may not expect fast traffic on the shared path).
Be careful at intersections and give way to motor vehicles if you need to.
Demonstrate cycling through roundabouts
At this grade, trainees should only practise cycling through single-lane roundabouts. More complex
multi-laned roundabouts are covered in grade 3. Cyclists should take the following steps when they
come up to a roundabout that has only one lane in each direction:
• Slow down as you come up to the roundabout.
• Look behind for approaching traffic. If you are turning left, keep to the left, and if you are
going straight or to the right, signal your intention to move into the lane.
• Make a final ‘life-saving look’ over right shoulder before moving out into the lane.

47
• As you come up to the roundabout, check to your right and give way to all road users who will
cross your path as you enter the roundabout. Also ensure that drivers who are entering the
roundabout to your left have seen you.
• Ride around the roundabout in the middle of the lane, not around the inner or outer edge. All
road users on a roundabout must travel to the left of the middle island.
• Make eye contact with drivers wanting to join the roundabout as you pass the entrance roads.
Signalling at roundabouts
Signalling at roundabouts can be difficult for cyclists, due to the need for both hands to be on the
handlebars to safely make the manoeuvre. For this reason, the signalling rules for cyclists at
intersections are slightly different from those for other road users. Cyclists should still try to give
other road users around them clear indications of their intentions. Signalling should be as follows:
• If turning left at the first exit of a roundabout, signal left as you come up to the roundabout.
• If travelling ‘straight through’ the roundabout, don’t signal as you come up to the roundabout,
then signal left as you pass the exit before the one you want to take.
• If travelling right at a roundabout, you should signal your intention to turn right as you enter
the roundabout.
When turning right at a roundabout, it can also be a good idea to signal intermittently as you cycle
around the roundabout. This is more important as you pass entry points, so that cars waiting to
enter the roundabout are clear on your intentions. Signal left as you pass the exit before the one
you want to take.
Travelling around roundabouts
48
Traffic-signal controlled intersections
It is important not to assume that new riders (especially if they are children) will know what the
different traffic signals mean. Therefore, if planning to take trainees through traffic signals, ensure
trainees have a thorough understanding of these.
When going straight through or turning at a traffic light controlled intersection, trainees should
apply the same steps as were taught for intersections. However, they must also respond
appropriately to the various traffic signals and be able to apply the give way rules when required.
U-turns
This is a useful skill that will enable instructors to run a continuous drill, but it should only be
taught to competent adult cyclists.
• As the trainee comes up to the point where they want to turn, they should carry out a check
over their right shoulder.
• They must signal their intention to turn. Only do a U-turn if there are no other road users in
either direction.
• They must give way to all other road users.
• Make a ‘life-saving’ second look.
• Carry out the turn, slowing down to do so if necessary.
• Once they have completed the turn, they must take up the appropriate position on the road.
Summary of core skills and observable outcomes
Table 5 Grade 2 summary of core skills and observable outcomes
Core skills Observable outcomes Notes
Recall an
understanding of
road signs and the
road rules
Achieve all grade 1 core skills.
Recall the following understanding:
• road signs – stop and give way
• give way rules
• ‘search and scan’ to check for hazards in
front, behind and to the sides.
Ensure trainees
understand hazard
awareness and note that
not all car drivers obey
road rules!
Start from side of
road (kerb)
Trainee can choose an appropriate place to get
on the bike.
Trainees look behind and signal before setting
off.
For example: Why did
you choose not to start
your journey here?
Where would you feel
more comfortable
starting and why?
49
Core skills Observable outcomes Notes
Stop on side of road
(kerb)
Trainees can choose a safe place to stop on the
side of the road and are able to correctly answer
if questioned about this.
Trainees make the appropriate checks and
signals.
For example: Why did
you choose that
particular place as an
appropriate place to
stop?
Ride along the road Trainees ride in a safe position and are able to
correctly answer questions about this.
Correct cycling position
is about 1m out from the
kerb.
Pass a parked or slower moving vehicle
Trainees ride about 1m out from the line of parked vehicles.
Trainees do not weave in and out between vehicles.
Turn left – at a controlled and uncontrolled intersection
Trainees look behind over their right shoulder while riding along.
Trainees signal left for at least three seconds when approaching the intersection before turning left.
Trainees return hand to the handlebar and brake gently to slow down.
Trainees obey the road rules and road signs.
Trainee should be able to
explain what they can
see to the instructor, if
asked.
Turn right – at a controlled and uncontrolled intersection
Trainees look behind over their right shoulder while riding along.
Trainees signal right for at least three seconds when approaching the intersection before turning right.
Trainees return hand to the handlebar and move to the right.
Trainees demonstrate a ‘life-saving’ second look to the right as they move out.
Trainees obey the road rules and road signs.
Watch for trainees cutting corners.
Travel straight through controlled and uncontrolled intersections
Trainees understand that traffic travelling straight through has priority.
Trainees, when going straight ahead at an
uncontrolled intersection, give way to all
vehicles coming straight through from the right.
Trainees maintain a line (and steady speed)
while passing through the intersection.
Trainees ride about 1m out from the line of
parked vehicles.
50
Grade 3 – advanced
Outcome – the trainee cyclist understands and can demonstrate a full range of skills to
cycle confidently in all traffic environments.
Overview
• 2–8 hours, depending on requirements.
• Trainee to instructor ratio 3 to 1 (maximum), recommended 2 to 1.
• Training takes place in more challenging traffic environments, such as heavier traffic, higher
speeds and multi-laned intersections.
• 12+ years old (year 8).
• Equipment needed – safety vests, clipboard, flash cards.
Grade 3 documentation Template
√ Grade 3 course session plan 22
√ Grade 3 trainee skills assessment 23
√ Grade 3 trainee outcome certificate 24
Grade 3 skills are for trainees aged 12 years and up, including adults, who may wish to ride in
more difficult situations, such as heavily trafficked environments with higher speeds and multi-
laned intersections. This grade can be taught one on one, and so the skills covered in the lesson
can be adjusted to suit what the trainee wants.
Location
Trainees at grade 3 must have completed grade 2 and are progressing into learning to ride in
heavier traffic and possibly high-speed rural roads. It must be remembered that, even at this
grade, there will be conditions when the appropriate grade 3 strategy is to get off and walk or to
make a detour to avoid particular hazards.
Grade 3 training must be conducted in a more technically demanding range of traffic conditions and
road features, such as multi-laned roads and roundabouts. The training session may need to cover
a wider geographical area. The training course organiser or the instructor may select the roads to
be used. Alternatively, the trainee may make the selection. For example, training may be an
opportunity to rehearse a trainee’s route to work or other trip that they intend to cycle. Select a
route with a variety of road conditions.

51
Course duration
Course duration is highly dependent on trainee requirements. Trainees may have specific needs,
such as mastering a journey from home to work or to a recreational centre. A single two-hour
session may be all that a trainee needs to achieve the outcome they desire. More formal group
training may have more set objectives and will therefore take longer. Up to eight hours for a set
course over three or four sessions would be typical.
Instructor to trainee ratios As this training is undertaken in all types of traffic conditions, including more complex manoeuvres,
a ratio lower than 6 may apply, with a 2 to 1 ratio being more appropriate. Trainees must be able
to hear instruction at all times in loud traffic. There is little experience in New Zealand with running
grade 3 courses, so they will be subject to development.
Core skills for grade 3
The trainee should be able to demonstrate the following core skills consistently for grade 3:
• all of the grade 1 and 2 core skills
• roundabouts (multi-laned)
• traffic-signal controlled intersections
• multi-laned roads – turning into and out of
• overtaking to the start of the queue
• recognising hazards and being an assertive but safe confident cyclist
• rural cycling in high-speed traffic environments.
Optional skills
• Hook turns
• Cycling in groups
Exercises for grade 3 skills
Multi-laned roundabouts
Discuss with trainees the need to be assertive, safe and confident cycling through roundabouts, as
once you have entered it is not usually possible to turn back.
Two principal dangers at roundabouts are traffic entering the roundabout and changing lanes to
exit. Cyclists must be alert at all times.
Discuss the importance of knowing where you are going, as where and when to signal on
approaching a roundabout will depend on the exit you plan to take.

52
• At a roundabout, give way to all road users that will cross your path from your right as you
enter the roundabout. All road users on a roundabout must travel to the left of the middle
island.
• On multi-laned roundabouts, take the appropriate lane when entering. Look at the lane
markings as you approach, as they may vary. Generally speaking:
use the left lane for turning left or going straight ahead
use the right lane for turning right, or taking the third or subsequent exits.
• When approaching a multi-laned roundabout, make your presence known early by positioning
yourself in the centre of the lane.
• Once you have entered the roundabout, proceed as quickly as you can.
• If you want to turn left, keep about 2m from the edge all the way through the roundabout,
except if there are three or more entry lanes, in which case enter in the centre of the left-hand
lane and maintain that distance.
• To go ahead (or to the second exit), on the approach, ease gradually to a position to the left-
hand lane, but take care that no one can pass on your left.
• Many roundabouts revert to a single lane in each direction at the exit point. This can act as a
pinch point between drivers accelerating away and a cyclist. Position yourself in the centre of
the lane to deter drivers from getting too close until the pinch point is passed.
• Signal left and look behind before the exit you want to take.
• Make eye contact with drivers wanting to join the roundabout as you pass the entrance roads.
• Check for following traffic where lanes merge, or if changing lanes.
Traffic-signal controlled intersections
Stress the importance that traffic signals apply to cyclists and that they need to obey them. Ensure
that trainees know and understand the meaning of all traffic signals.
• Drop gear and cover brakes when approaching traffic signals to either accelerate or slow to
stop.
• A cyclist has three options:
1. stay in the queue (recommended)
2. overtake on the left only when there are two or more lanes on your side of the centre
line and you are able to pass safely by using the left-hand lane. Do not overtake vehicles
on the left in the same lane unless they have stopped or are signalling a right turn
3. filter to the right to get to the front.
The safest option will vary, depending on the situation and the confidence of the cyclist.
A discussion of the use of advanced stop boxes is also useful. Explain to trainees that there are
sometimes advanced stop boxes present. Advanced stop boxes are located at the front of an

53
intersection to enable cyclists to make a safe head start when the lights turn green. They are
usually marked green to make cyclists more visible to drivers.
Multi-laned roads
• Where to ride on a multi-laned road will depend on the width of the traffic lanes.
• Generally ride about 1m from the kerb of the road and parked cars.
• Ride in the centre of the lane when you need to emphasise your presence to traffic ahead, or
when you need to prevent drivers from passing you dangerously. For cyclists who want to ride
in the centre of the lane, it is preferable that they can match the speed of the traffic stream.
For this and other safety reasons, this skill is unlikely to be taught to young children, and more
likely to be taught only to more confident adult cyclists who want to learn advanced skills. In
this position, a cyclist can be seen earlier and see further.
• Plan manoeuvres further in advance for faster-moving traffic.
• When riding straight ahead or right at an intersection, watch for traffic in the opposite direction
(drivers can sometimes misjudge the speed of the cyclist).
• When turning right from a multi-laned or busy road, be aware of traffic (oncoming and
following) at least 100m before the intersection. Continue to cycle about 1m from the kerb of
the road and parked cars. Select a gap in the traffic slightly longer than average, and signal
right. Accompany this with a movement to the right that puts you just on the edge of the
moving traffic lane. If traffic following is visible, signal and move across when it is safe to do
so.
• In some instances, it may be easier to wait in the middle of a multi-laned road (in the central
median strip). If this is the case, ensure that you are clearly visible by waiting with the cycle at
about 45° to the main road.
Overtaking to the start of the queue
It is sometimes safer to overtake traffic that is stopped, since there is more room to manoeuvre
and you are clearly visible to oncoming drivers. Drivers expect to be overtaken on their right and
use their right-hand mirrors more and pedestrians are less likely to step out in front of you. If
overtaking:
• first ‘search and scan’ to make sure there are no vehicles coming towards you
• signal right for at least three seconds before moving out to pass
• check for people stepping out from between cars
• be aware of driver blind spots – if possible, ensure you can see the driver’s eyes in their vehicle
mirror
• before pulling in front of a vehicle you have passed, check over your shoulder to ensure that is
safely behind you.

54
Hazards and assertive, confident cycling
Recognise situations when it is necessary to get off and walk or detour.
Recognise the importance of route planning.
Rural cycling in high-speed traffic environments
Where to ride in the rural environment will depend on the width of the lanes. When riding along
narrow bends on local country roads, ride out slightly more from the edge line. Listen for other
vehicles and be sure to return to the left side of the road when the road widens.
Also understand the importance of safety and the need to wear high-visibility clothing.
Optional activities for grade 3
Hook turns
A hook turn is a different way for cyclists to turn right at an intersection. Hook turns can be done at
any intersection, except at intersections that have signs banning hook turns. Some intersections
may have special marked areas to stop in at the halfway turning point. It should be noted that
hook turns can be done at intersections with or without the marked stopping area.
How to do a hook turn
1. Keep in the cycle lane, the left lane or the
left-most lane that goes straight ahead.
2. Cycle across the intersection when the way is
clear or the traffic signal, for going straight
ahead, turns green.
3. Stop in the marked area of road just before
the footpath. If there is not a marked place,
stop ahead of the lane for the direction you
wish to travel in. When choosing a place to
stop, be mindful of:
crossing pedestrians
traffic behind you that is travelling
straight ahead
traffic that will want to turn left from the second arm of the intersection.
4. Wait until the way is clear or the traffic signals on the other side of the road turn green and
then cycle across the intersection keeping left.
Source: NZTA (2009) The official New Zealand code for cyclists.
2
3 4
1
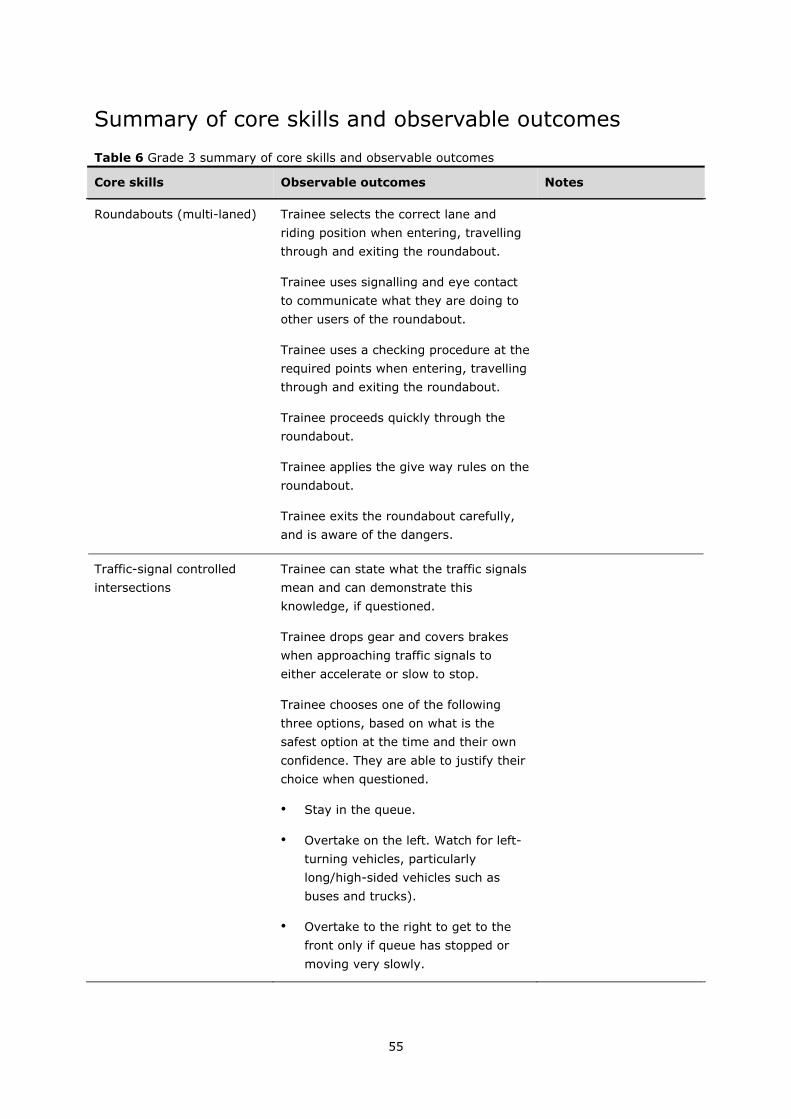
55
Summary of core skills and observable outcomes
Table 6 Grade 3 summary of core skills and observable outcomes
Core skills Observable outcomes Notes
Roundabouts (multi-laned) Trainee selects the correct lane and
riding position when entering, travelling
through and exiting the roundabout.
Trainee uses signalling and eye contact
to communicate what they are doing to
other users of the roundabout.
Trainee uses a checking procedure at the
required points when entering, travelling
through and exiting the roundabout.
Trainee proceeds quickly through the
roundabout.
Trainee applies the give way rules on the
roundabout.
Trainee exits the roundabout carefully,
and is aware of the dangers.
Traffic-signal controlled
intersections
Trainee can state what the traffic signals
mean and can demonstrate this
knowledge, if questioned.
Trainee drops gear and covers brakes
when approaching traffic signals to
either accelerate or slow to stop.
Trainee chooses one of the following
three options, based on what is the
safest option at the time and their own
confidence. They are able to justify their
choice when questioned.
• Stay in the queue.
• Overtake on the left. Watch for left-
turning vehicles, particularly
long/high-sided vehicles such as
buses and trucks).
• Overtake to the right to get to the
front only if queue has stopped or
moving very slowly.

56
Core skills Observable outcomes Notes
Multi-laned roads Trainee can assess the width of the lanes
and choose a riding position in the lane
that is most suitable. They should be
able to justify this decision when
questioned.
Trainee can navigate across lines of
traffic using good communication skills
(looking behind and signalling).
Trainee can plan manoeuvres further in
advance for faster-moving traffic.
Trainee is watchful and aware of other
road users, particularly at intersections,
and understands that other vehicles can
sometimes misjudge the speed of a
cyclist.
When turning right from a multi-laned or
busy road, trainee is aware of traffic
(oncoming and following) at least 100m
before the intersection. Select a riding
position and a gap in the traffic slightly
longer than average, and signal right.
Accompany this with a movement to the
right that puts you just on the edge of
the moving traffic lane. If traffic
following is visible, signal and move
across when it is safe to do so
Overtaking to the start of
the queue
Trainee understands when this
manoeuvre is used.
Trainee maintains speed so that they are
not moving much faster than the traffic.
Trainee is mindful of the possibility of
pedestrians stepping out from between
cars and ‘search and scan’ carefully.
They also search and scan for vehicles
and motorcycles.
Trainee is aware of driver blind spots
and attempts to make eye contact with
drivers in their vehicle mirrors.

57
Core skills Observable outcomes Notes
Hazards and assertive,
confident cycling
Trainee can demonstrate when it is
necessary to get off and walk or detour.
Trainee can demonstrate the importance
of route planning.
Rural cycling in high-speed
environments
Trainee demonstrates the importance of
monitoring visibility.
Trainee demonstrates the correct
position while travelling on rural roads
and about moving further out from the
edge line. They demonstrate that they
can do this safely, listening carefully for
other vehicles.

58
After cyclist training – continuing the benefits and enjoyment of cycling
In order to encourage future cycling, instructors are encouraged
to promote the continued benefits of cycling and opportunities
for cycling in the community. Often, this can be undertaken
through the promotion of cycle events and community resources
that are available to assist.
At the end of the cyclist training, instructors should discuss the
resources and opportunities available to continue cycling
(eg cycle events/clubs, development programmes, cycle maps,
cycling to work/school) and any goals that the trainees may
have to improve and enjoy cycling.

59
Part B
Guidelines for training providers

60
Introduction
The success of any training organisation depends on its set-up, practices and the quality of the
instruction delivered. This section sets out recommended requirements for setting up a cyclist skills
programme and also outlines desirable qualities and skills for instructors in cyclist training. It also
covers the monitoring and professional development of cycle instructors.
New Zealand’s ‘Getting there – on foot, by cycle’ strategy has a goal of ‘more people choosing to
walk and cycle, more often’. When designing the delivery of cyclist training, this overall goal needs
to be considered. Instructors will need to be positive about cycling as an enjoyable and beneficial
option for personal transport and encourage similar attitudes among their trainees. Particular
things to highlight are the benefits of cycling for personal health and well-being and for the
environment, and the use of cycling as a means of personal transport.
As well as the need for cyclist training to be fun and interesting, clear objectives and roles need to
be identified and risks need to be managed to enable a successful and safe cyclist training
programme.
The NZTA makes its investment in land transport through the National Land Transport Programme
(NLTP). The NZTA strongly recommends that training organisations who wish to apply for funding
for Cyclist Skills Training programmes follow these Guidelines for training providers, including
instructor qualification.
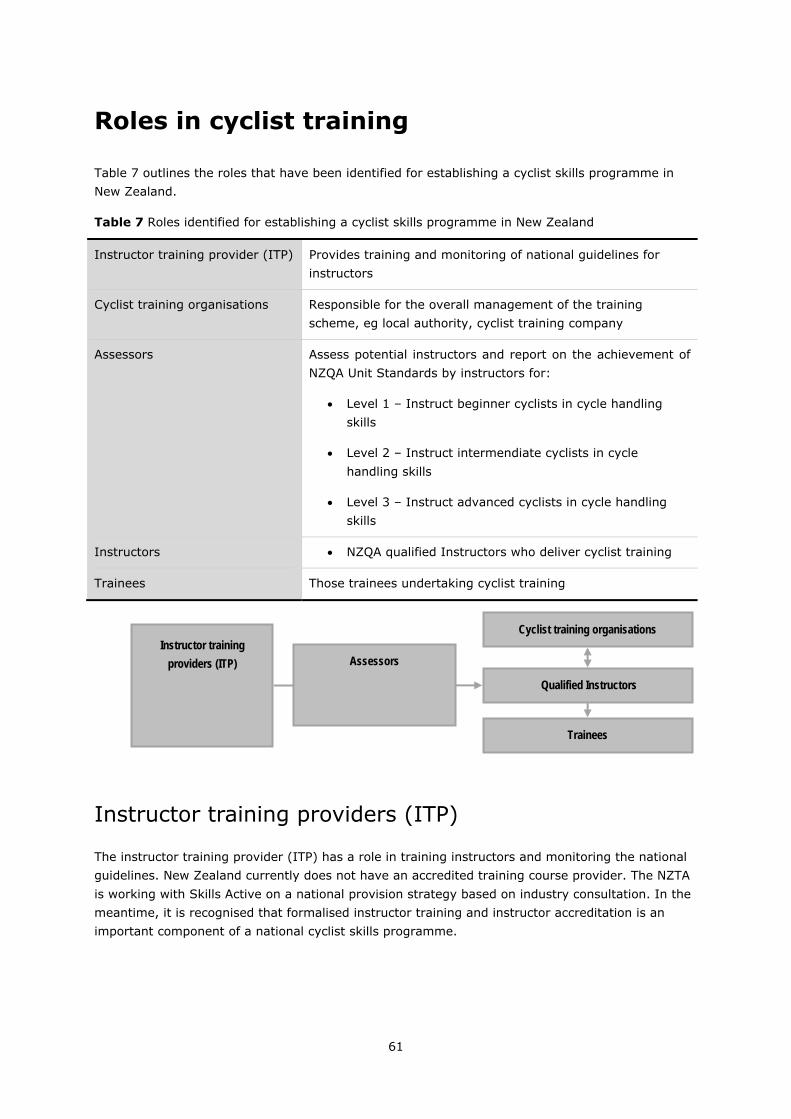
61
Roles in cyclist training
Table 7 outlines the roles that have been identified for establishing a cyclist skills programme in
New Zealand.
Table 7 Roles identified for establishing a cyclist skills programme in New Zealand
Instructor training provider (ITP) Provides training and monitoring of national guidelines for
instructors
Cyclist training organisations Responsible for the overall management of the training
scheme, eg local authority, cyclist training company
Assessors Assess potential instructors and report on the achievement of
NZQA Unit Standards by instructors for:
Level 1 – Instruct beginner cyclists in cycle handling
skills
Level 2 – Instruct intermendiate cyclists in cycle
handling skills
Level 3 – Instruct advanced cyclists in cycle handling
skills
Instructors NZQA qualified Instructors who deliver cyclist training
Trainees Those trainees undertaking cyclist training
Instructor training providers (ITP)
The instructor training provider (ITP) has a role in training instructors and monitoring the national
guidelines. New Zealand currently does not have an accredited training course provider. The NZTA
is working with Skills Active on a national provision strategy based on industry consultation. In the
meantime, it is recognised that formalised instructor training and instructor accreditation is an
important component of a national cyclist skills programme.
Cyclist training organisations
Qualified Instructors
Trainees
Instructor training
providers (ITP) Assessors

62
Cyclist training organisations
There are many cyclist training organisations currently operating across New Zealand. Many of
these operate as part of the local council (eg Christchurch City Council Cyclesafe Programme) or
through the New Zealand Police Youth Education Service, while others operate independently on a
contractual basis via schools or adult education programmes.
Cyclist training organisations are responsible for ensuring that the programme operates in a
professional manner, bearing in mind a wide range of issues from employment law to health and
safety. Cyclist programmes operating as part of a larger organisation such as a local council will
already have well-established procedures for managing the hiring of employees and liability issues.
It is recommended that cyclist training organisations set clear objectives for their courses and
include whether they are providing a grade 1, grade 2 or grade 3 course or a combination. If they
are providing a grade 1 course, providers will need to stress to students and parents that the aim
of the course is to teach cycle control skills and it is not training for riding on the road.
Assessors
Assess potential instructors and report on the achievement of NZQA Unit Standards by instructors
for level 1, level 2 and level 3. Assessor may also choose to have a role in providing instructor
training and in the delivery of cyclist skills programmes.
Instructors
Instructors are employed by the cyclist training organisations to provide cyclist training to
participants in the programme. Their role is critical to the successful delivery of training and so
their selection and training is important. Further detail on the recruitment, monitoring and
professional development of cyclist instructors is provided in the section ‘What makes a good
instructor’.
Trainees
Trainees are those who are undertaking cyclist training.
63
Setting up the organisation structure
When setting up a cyclist training programme, as a cyclist training organisation, there are a
number of elements that should be covered. Specifically, the following should be addressed.
Reporting requirements and a communication plan
A clear organisation communication plan that is identified in a written structure available for
inspection, and of which all staff are made fully aware, will minimise risk to the training
organisation.
Integration with other road safety and health-related programmes
It is often useful to show the links between the cyclist skills programme and other programmes and
tap into these. There are numerous road safety and health-related programmes within
communities. Cyclist training can integrate with programmes such as neighbourhood accessibility
plans, Police Youth Education programmes, workplace and school travel plans, health promotion
and Bike Wise Month initiatives.
Written instructor recruitment and monitoring procedures
Effective delivery of this element will minimise risks. Monitoring instructors will ensure that they
continue to deliver cyclist training to the required standard and reveal areas where further training
and development may be needed. Note that cycle instructor training through an NZQA national
standard is now available in New Zealand.
Health and safety policy
Sound health and safety procedures will minimise the risk of injury during training and must be in
place to protect the training provider.
A health and safety policy is essential for the safe operation of a cyclist training scheme. As part of
good practice, all cyclist training organisers should have a nominated person who is responsible for
the day-to-day operation of health and safety issues (the health and safety representative).
Essentially, the health and safety policy must include the following:
• commitment to providing an overall safe and healthy environment
• systems for identifying and managing hazards (risk assessment)
• appointment of a health and safety representative
• provision and use of suitable safety clothing and equipment for instructors and trainees
64
• management and maintenance of instructor equipment
• provision of safety information
• management of serious harm incidents
• taking all practicable steps to provide a safe working environment for instructors
• emergency procedures and equipment (eg first aid kits)
• reporting of hazards and incidents
• training for instructors on risk assessment and management.
When working with schools, it is important to understand how health and safety policy works within
the school context. The board of trustees is legally responsible for student safety in accordance
with the National Administration Guidelines (NAGs) and health and safety legislation. This remains
the case when the students are involved in education outside the classroom and are being taught
by an outside training provider. The National Administration Guideline 5 covers health and safety,
and the following two provisions are relevant to education outside the classroom – boards must:
provide a safe physical and emotional environment for students; and
comply in full with any legislation in force or planned, to ensure the safety of students and
employees.
This will involve complying with all relevant health and safety legislation. Therefore it will be
important for the instructor and training provider to discuss health and safety practices and be
prepared to work with the systems already in place at the school. Health and safety plans
developed by the training organisation will require approval from the school.
Under general law, boards have a duty of care to safeguard students from harm in situations where
a reasonable person would have foreseen the likelihood of harm arising (hence the importance of
risk assessment and management). It is important for instructors and training providers to
recognise that the board’s duty of care continues even when students are participating in activities
outside the classroom and are being taught by an outside provider. For this reason, a teacher
should be present at cyclist skills training sessions to represent the board in terms of this
responsibility.
An example of a health and safety plan is included as template 11. An example of a risk
assessment exercise is identified earlier in this report under ‘Setting up course sessions’. Also refer
to the publication Safety and EOTC: A good practice guide for New Zealand schools when working
with schools.
Insurance and liability
In New Zealand, injuries on the road are covered by ACC under the Injury Prevention,
Rehabilitation, and Compensation Act 2001.
Schools in New Zealand have insurance to cover injuries to students during school hours and any
damage caused by them. The school’s insurance company may need to be consulted when setting
up cyclist training courses on the road. Cyclist training organisations should all have their own
insurance so they are covered at all times.

65
It is important that cyclist training providers have proper risk management procedures and keep
records that show they have taken all due care. These records must be able to be viewed in case of
an incident of damage or injury. In addition, consultation with the Department of Labour will
ensure health and safety requirements are met.
In the rare event that damage to property is incurred during training, public liability insurance
covers the training organisation. The cost of public liability, professional indemnity insurance and
possible occasional payouts for minor damage needs to be calculated into the funding for the cyclist
training courses. Where a provider is contracted or employed by a local council, the organisation
may be covered by the council’s insurance. The responsibility for damage or injury needs to be
worked out in advance between the provider and the local council.
An equal opportunities policy
One of the primary goals of the Human Rights Commission is ‘that all people in New Zealand have
equal employment opportunities and access to decent and productive work’. Equal employment
opportunities (EEOs) mean eliminating barriers to ensure that all employees are considered for the
employment of their choice and have the chance to perform to their maximum potential.
Treaty of Waitangi obligations
Cyclist training organisations will need to adhere to the principles of the Treaty of Waitangi of
providing fairness and meeting the needs of all participants in the programme. Therefore
instructors need to take into account the needs of all students (including Māori).
Refer to www.waitangi-tribunal.govt.nz/doclibrary/public/Appendix(99).pdf.
Checklist for setting up
Table 8 is a checklist of the elements to be considered when setting up the organisation structure.
Table 8 Checklist for setting up the organisation structure
Elements to be considered √
Reporting requirements and a clearly defined communication plan
(including regular communication between course managers and instructors)
Opportunities for integration with other road safety and health-related programmes
Written instructor recruitment, training and monitoring procedures
Instructor requirements (criminal record and licence checks)
Health and safety plan (including risk management)
Public liability insurance
An equal opportunities policy

66
Treaty of Waitangi obligations

67
Targeting and marketing
A huge amount of research and material is available on cycle users, the market and mechanisms
for promoting cycle use. The most important aspect for cyclist training organisations is to recognise
that there are different types of cyclists. Before offering a cyclist training scheme, it is very
important for organisers to carry out some research on the likely demand and gaps and
opportunities for cyclist training in their area. Organisers will need to consider carefully which
groups they are targeting and structure their courses to take trainees’ varying needs and concerns
into account.
For example, adult training requirements differ substantially from child cycle training with regard to
the objectives of the trainees. Children’s trips may focus on journeys to school, whereas adult trips
may be more diverse, including health and fitness and journeys to work. Courses need to be
tailored to meet a range of objectives and organisers must be able to clearly identify their purposes
for the training and their target market.
Cyclist training may be promoted in a variety of ways: posters, flyers and word of mouth can be
effective. Organisers may also pay for advertising in local newspapers and promote training
through other organisations, such as community groups, schools and colleges, employers and bike
shops. While adult cyclist training is a relatively new and unusual concept, it is highly newsworthy
and organisers may find local media interested.
Promotion is important to ensure adequate take-up. Training must be marketed with particular
customers in mind and with relevant promotional materials.
Pricing
Most adult cyclist training courses charge trainees, unless an external funder is supporting the
organiser’s costs or they are entirely using volunteer instructors. Often, the funder will decide
whether they will offer their training for free. Organisers should be aware of the value of cyclist
training as a service and should consider charging for it.
A charge may also have the benefit of focusing trainees’ minds and ensuring that they take the
training seriously. Charges need to be set appropriately – concessions may be considered for
people on low incomes so they are not deterred from taking the training.

68
What makes a good instructor
The instructor’s role is critical to the successful delivery of cycle skills to trainees. Selection and
training of instructors is therefore also critical.
Some programmes operate with volunteers who help deliver cyclist training. However, many
providers find it more effective to employ instructors so that they can pay wages to retain a high
standard of staff and delivery.
Cycle Skills Instructor qualification
A National Certificate in Recreation and Sport with a strand in Cycle Skills Instructor is now
available through the NZQA. This qualification is designed to recognise the skills and knowledge of
people who wish to instruct trainees in cycle skills.
There are a number of Unit Standards within the qualification, which include:
planning/delivery/evaluation of training sessions; effective facilitation and coaching skills; hazard
and risk management; communication skills; applying knowledge of road traffic environments;
instructing beginner, intermediate or advanced cycle handling skills.
Over time, this qualification will become the industry standard for any person working as a cyclist
skills instructor.
There are many benefits that can be gained through industry training and qualification.
Benefits to instructors:
Specialised and rewarding careers
Nationally and internationally recognised qualifications
Enhanced promotion prospects
Increased job satisfaction
Improved employment opportunities
Improved knowledge and skills
Increased motivation and morale
Increased job security
Better knowledge and understanding of the workplace
Benefits to employers:
Increase staff retention
Increase your customers satisfaction
Improve quality and service levels

69
Increase staff morale
Reduce costs by decreasing wasted time and materials
Instructor requirements
Not everyone makes a good cyclist training instructor and not all instructors
are good in all situations. However, there are a number of desirable skills and
qualities for instructor training, and these should be considered when
recruiting instructors (whether they are paid or unpaid). An instructor with
the right skills and qualities is more likely to deliver a high-quality of
instruction and therefore a successful cyclist training programme. The
following are some generic qualities required in all prospective instructors:
• ability to cycle competently and confidently and have recent, preferably
regular, experience in a variety of modern traffic conditions
• good in-depth knowledge of the New Zealand road code and cyclist code
and road rules
• a current first-aid qualification
• an understanding of the principles of safe cycling and familiarity with current theory of safe
cycling and/or a willingness to learn
• friendliness, tolerance and an outgoing personality and the ability to empathise with the
problems that the trainees may experience
• good organisational skills
• good listening and communication skills (including good proficiency of the English language)
• ability to stay calm in all situations
• punctuality, reliability and trustworthiness
• commitment to increasing cycling in New Zealand and communicating the positive benefits of
cycling to trainees.
It is also desirable that instructors have:
• experience in a teaching, training or instructing role
• experience of cyclist training as an assistant or volunteer
• an understanding of the Treaty of Waitangi
• a good working bike
• good in-depth knowledge of the national cyclist skills training guidelines
• a clean criminal record.

70
Requirements for organisations when recruiting instructors
There are a number of basic requirements for organisations when recruiting instructors:
• a job description listing the skills and experience needed to be an instructor
• an application form that captures all the relevant information
• a method of checking relevant qualifications, experience and references
• a recruitment procedure to pull the process of recruitment together
• a contract of employment, a volunteer agreement or a service grade agreement for third
parties that commits instructors to the standards of operation and procedures of the
organisation and national guidelines
• a complaints and grievance procedure for instructors.
It is recommended that referee checks and checks of criminal records and driver licences are
carried out when recruiting instructors.
Referees
It is recommended that two referees are provided by the instructor, preferably by someone who
has been an employer or is aware of the instructor in a training or leadership environment. The
nature of the duties of the instructor should be explained clearly.
Criminal record and licence checks
Police checks for potential instructors are a crucial element for reducing risk – particularly when
working with child cyclists. It is therefore important that these checks are undertaken for all
potential instructors and the police check must have been seen and authorised by the training
organisation prior to any training being undertaken. Copies of a person’s criminal record can be
obtained from the Police. This check will show up any prior criminal convictions. Driver records can
also be checked for any traffic convictions. It is important to note that this information has to be
authorised for release by the potential instructor, as you cannot apply for another person’s criminal
record without their written permission.
Driver licence checks should also be undertaken (particularly if driving will be required of the
instructor). In this case, they will need to have a current full New Zealand driver licence.
Information on driver licence status and conditions can be obtained from the NZ Transport Agency.
Having undertaken these checks, the training organisation will need to make decisions about what
is and is not acceptable. In some cases, it will be relatively straightforward making such decisions,
eg where an applicant has a history of child abuse. There will be other situations where it is not so
clear cut and there is difficulty in determining what is acceptable. There are no rules about this,
and decisions will need to be made on a case-by-case basis, although employers should always
consider the trainees’ safety as the bottom line when making employment decisions.
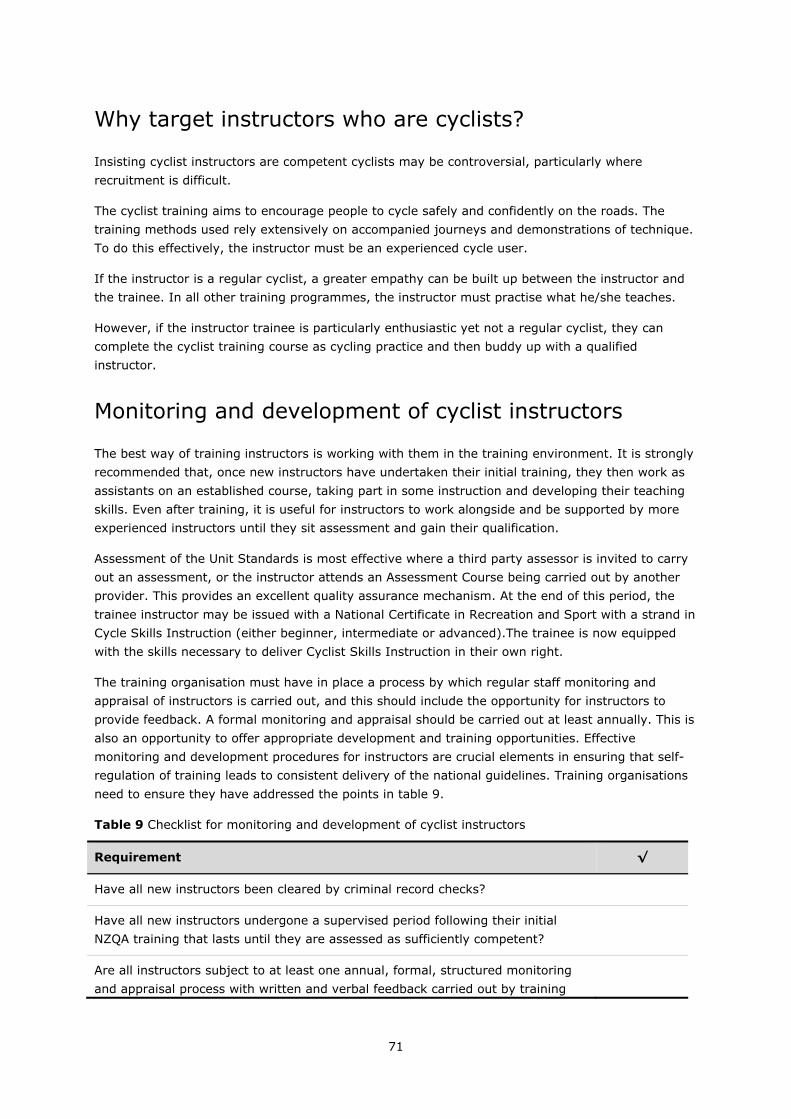
71
Why target instructors who are cyclists?
Insisting cyclist instructors are competent cyclists may be controversial, particularly where
recruitment is difficult.
The cyclist training aims to encourage people to cycle safely and confidently on the roads. The
training methods used rely extensively on accompanied journeys and demonstrations of technique.
To do this effectively, the instructor must be an experienced cycle user.
If the instructor is a regular cyclist, a greater empathy can be built up between the instructor and
the trainee. In all other training programmes, the instructor must practise what he/she teaches.
However, if the instructor trainee is particularly enthusiastic yet not a regular cyclist, they can
complete the cyclist training course as cycling practice and then buddy up with a qualified
instructor.
Monitoring and development of cyclist instructors
The best way of training instructors is working with them in the training environment. It is strongly
recommended that, once new instructors have undertaken their initial training, they then work as
assistants on an established course, taking part in some instruction and developing their teaching
skills. Even after training, it is useful for instructors to work alongside and be supported by more
experienced instructors until they sit assessment and gain their qualification.
Assessment of the Unit Standards is most effective where a third party assessor is invited to carry
out an assessment, or the instructor attends an Assessment Course being carried out by another
provider. This provides an excellent quality assurance mechanism. At the end of this period, the
trainee instructor may be issued with a National Certificate in Recreation and Sport with a strand in
Cycle Skills Instruction (either beginner, intermediate or advanced).The trainee is now equipped
with the skills necessary to deliver Cyclist Skills Instruction in their own right.
The training organisation must have in place a process by which regular staff monitoring and
appraisal of instructors is carried out, and this should include the opportunity for instructors to
provide feedback. A formal monitoring and appraisal should be carried out at least annually. This is
also an opportunity to offer appropriate development and training opportunities. Effective
monitoring and development procedures for instructors are crucial elements in ensuring that self-
regulation of training leads to consistent delivery of the national guidelines. Training organisations
need to ensure they have addressed the points in table 9.
Table 9 Checklist for monitoring and development of cyclist instructors
Requirement √
Have all new instructors been cleared by criminal record checks?
Have all new instructors undergone a supervised period following their initial
NZQA training that lasts until they are assessed as sufficiently competent?
Are all instructors subject to at least one annual, formal, structured monitoring
and appraisal process with written and verbal feedback carried out by training

72
managers or competent agents employed on their behalf?
Have all instructors been offered opportunities to receive development training to
broaden their skills, eg first aid, advanced cycle maintenance?
Many established programmes welcome additional assistants, and training managers may develop
a network of other providers in their region who are willing to work together to develop instructors.
Continuing professional development
Training is an ongoing process. Instructors must demonstrate that they are learning, maintaining
and improving their skills as they practise.
All cyclist training organisations must ensure that they have a mechanism for monitoring
instructors’ performance and refreshing training on a routine basis. This is a good opportunity to
give general feedback, which may be drawn from trainee feedback.
As a minimum, all instructors should receive at least one day of professional development training
off the job per year – one day if there are new initiatives or changes to the programme and a
refresher course if they have not been training for some while.
In addition, there are other courses that are available from other providers that can support cyclist
instructor training, eg:
• first-aid training
• bike coaching development courses
• risk management.

73
Glossary
A number of terms have been referred to within the guidelines. The definitions are outlined below.
Term Definition
Non-traffic
environment
Grade 1 training area in a non-traffic environment, eg playground
Traffic environment Grade 2 and grade 3 training area – in traffic on public roads
Advanced road
features
Grade 3 training area – a road with higher traffic volumes depicting the
typical characteristics of grade 3 road features, eg multi-laned road,
roundabout, signalised intersection
‘Life-saving’ look Road safety term for a last-minute check (just as you are about to move
off) to ensure a manoeuvre is still safe to perform
‘Search and scan’ Checking for hazards in front, behind and to the sides while riding along
‘Pedal ready’ position This is the starting-off position, where trainees start with the left foot
down on the ground and right pedal up at the ‘10 past’ position. They can
then push down using the right foot to move off.
Overtaking Passing on usually the left-hand side of a vehicle where there isn’t a
specific (separate) lane
Controlled intersection A controlled intersection is an intersection where there are give way signs,
stop signs, roundabouts or traffic signals to tell you who has to give way
Uncontrolled
intersection
An uncontrolled intersection is an intersection where there are no give way
signs, stop signs, roundabouts or traffic signals to tell you who has to give
way
Cyclist training
organisations
Responsible for the overall management of the training scheme, eg local
council, cycle training company
Instructors Instructors who deliver the training programme
Trainees Those who are undertaking cycle training

74
Further information and resources Bikeability UK
Bikeability is the UK national standard for cycle training. This website has lots of good information
on cycle training for children, parents and professionals. http://bikeability.org.uk
BikeNZ
BikeNZ is the umbrella organisation for all national bike and cycling organisations. The website
includes information about cycling events, advocacy and other cycling clubs and organisations in
New Zealand. www.bikenz.org.nz
Bike Wise
Bike Wise is a nationally coordinated event that promotes safety and biking as a sustainable, fun,
healthy and enjoyable means of transport. Bike Wise is funded by the NZTA and the Ministry of
Health and is the only nationwide programme of cycling events. www.bikewise.co.nz
Cycling Advocates’ Network (CAN)
CAN is New Zealand’s national network of cycling advocates. The network works with government
and local authorities on behalf of cyclists, for a better cycling environment. The website has a
number of useful resources, including cycling maps and information on events, research, training
and more. www.can.org.nz
NZ Transport Agency
Safety information for cyclists: Cycle helmets. www.nzta.govt.nz/resources/safety-information-for-
cyclists/helmets.html
Cycles: Road rules and equipment (factsheet 1).
www.nzta.govt.nz/resources/factsheets/01/index.html
Safety information for cyclists: The safe cycling checklist. www.nzta.govt.nz/resources/safety-
information-for-cyclists/checklist.html
Getting around by bike. http://www.nzta.govt.nz/traffic/ways/bike/index.html
Planning for walking and cycling. http://www.nzta.govt.nz/planning/process/walking-cycling.html
New Zealand Police
The Youth Education Service provides a coordinated series of Road Safety Education programmes
applicable to all grades of the school curriculum.
Contact your Police Education Officer at your local police station. http://www.police.govt.nz/new-
zealand-police-youth-education-services-yes

75
Reference list
Bikeability (2008) www.bikeability.org.uk
Franklin, John (1997) Cyclecraft: Skilled Cycling Techniques for Adults. Stationary Office Books,
London.
Franklin, John (2007) Cyclecraft: The Complete Guide to Safe and Enjoyable Cycling for Adults and
Children. TSO, London.
Land Transport Safety Authority (c1990) Safe Cycling Kit. Land Transport NZ, Wellington.
Land Transport Safety Authority (1996) The Bike Code. GP Publications, Wellington.
Land Transport Safety Authority (2000) The Safe Cycling Book. DLM Campaign Ltd, Wellington.
Ministry of Education. Safety and EOTC: A good practice guide for New Zealand Schools.
www.tki.org.nz/r/eotc/resources/safety_e.php
Ministry of Transport (1991) Safe Cycling. Land Transport NZ, Wellington.
New Zealand Police (2005) School road safety out and about teaching guide.
www.police.govt.nz/service/yes/downloads/pdfdownload.php?filename=school-road-safety/out-
and-about-teaching-guide-y-7-8.pdf
NZ Transport Agency (2009) The official New Zealand code for cyclists. NZTA, Wellington.
NZ Transport Agency (2007) Cycles: Road rules and equipment (factsheet 1). NZTA, Wellington.
NZ Transport Agency (2007) Safety Information for Cyclists: www.nzta.govt.nz/resources/safety-
information-for-cyclists/
NZ Transport Agency (2009) The official New Zealand road code.
http://www.nzta.govt.nz/resources/roadcode/index.html
NZ Transport Agency (2009) The official New Zealand code for Cyclists
http://www.nzta.govt.nz/resources/roadcode/cyclist-code/index.html
Rose, J (September 2004) ‘If the helmet fits, wear it’, New Zealand Consumer Magazine, no. 440,
p20–22.
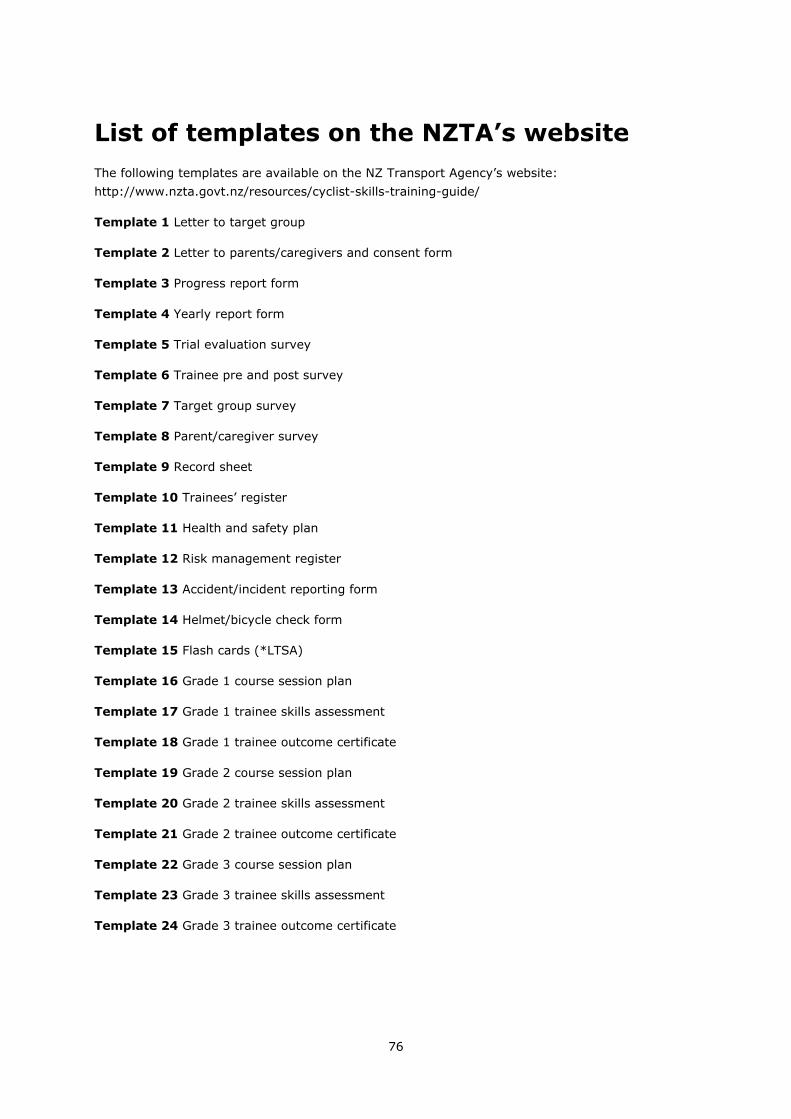
76
List of templates on the NZTA’s website
The following templates are available on the NZ Transport Agency’s website:
http://www.nzta.govt.nz/resources/cyclist-skills-training-guide/
Template 1 Letter to target group
Template 2 Letter to parents/caregivers and consent form
Template 3 Progress report form
Template 4 Yearly report form
Template 5 Trial evaluation survey
Template 6 Trainee pre and post survey
Template 7 Target group survey
Template 8 Parent/caregiver survey
Template 9 Record sheet
Template 10 Trainees’ register
Template 11 Health and safety plan
Template 12 Risk management register
Template 13 Accident/incident reporting form
Template 14 Helmet/bicycle check form
Template 15 Flash cards (*LTSA)
Template 16 Grade 1 course session plan
Template 17 Grade 1 trainee skills assessment
Template 18 Grade 1 trainee outcome certificate
Template 19 Grade 2 course session plan
Template 20 Grade 2 trainee skills assessment
Template 21 Grade 2 trainee outcome certificate
Template 22 Grade 3 course session plan
Template 23 Grade 3 trainee skills assessment
Template 24 Grade 3 trainee outcome certificate

77
Appendix – Recommended skills matrix of appropriate age groups for cycle skills
Ages 5 and 6
Basic skills and knowledge are required of a young child who has a bike for the first time. Children
are cycling with either a three-wheeler or a two-wheeler with or without trainer wheels.
Ages 7 and 8
At ages 7 and 8, children will invariably be riding two-wheeled bikes. It is important that the level
of motor skills is such that balance and control are easily achieved. It is also appropriate that they
are aware of the need to ride a bike that is in a safe condition, and for them to wear correctly fitted
helmets. At age 8, they can be asked to consider their responsibilities when cycling.
Ages 9 and 10
At ages 9 and 10, the bicycle should be considered to be their first vehicle, rather than a ‘toy’. As
such, they should be taking a more responsible approach to cycling. The New Zealand Police and
the NZTA recommend that children under 10 years old cycle on the road only when accompanied
by a competent adult rider. This age is only a recommendation and will depend on the individual
circumstances relating to the skill of the rider, their road rule knowledge and the traffic
environment.
However, children at age 10 cannot be expected to suddenly become ‘safe’ and ‘responsible’ road
cyclists. It is therefore important that skill and knowledge development is a continuous process,
continually extending their knowledge and skills and influencing their attitude.
Ages 11 and 12
12-year-old students are generally better able to assess traffic situations, ie speed, direction and
distance, and at the same time recognise what is required of them in the way of signalling, lane
positioning and application of road rules. However, there are inherent dangers in assuming this is
the case for all.
Students who have progressed through a series of cyclist training modules, at different stages of
their development (as described in the matrix below), would be expected to be safer riders than
those who had not.
By extending knowledge and training to include the more advanced skills of, say, hazard
recognition and hazard avoidance, it is hoped that students will accelerate their experiences in a
safe manner.

78
Skills Grade 1 2 3
Age 5yrs 6 7 8 9 10 11 12+ Motorists
Cycle and
equipment
Legal requirements for bicycles + + + +
Cycle inspection + +
Cycle maintenance + +
Optional safety fittings + +
Helmet inspection + + +
Helmet fitting +
Safety apparel + +
Motor skills
Basic handling skills + +
Starting off and stopping + +
Signalling and looking behind
Emergency braking
Advanced cycle skills
Road rules
Basic road rules
Signs and signals + + +
Responsibilities as road users +
Simulated (off-road) riding
On-road
cycling
On-road practice – quiet roads +
On-road assessment +
Group cycling + +
Advanced
cycling
On-road practice – busy roads +
On-road assessment +
Hazard recognition + +
Hazard avoidance + +
Cycle
advocacy
Cost benefits of cycling +
Cycling as a viable mode of
travel +
Key: = Training can commence here + = Extend beyond existing knowledge
= Should already be trained