Creating a TOC and a TOA - Mac Edition
52
Using MS Word to set up: •Pagination (page numbers) •Table of Contents •Table of Authorities
-
Upload
rebekah-skiba -
Category
Technology
-
view
93 -
download
0
Transcript of Creating a TOC and a TOA - Mac Edition
Using MS Word to set up:
•Pagination (page numbers)•Table of Contents•Table of Authorities

Go to the Library Portal Page and copy onto your desktop this document if you have not already:
1MSWord.PgsTocToA.docx

Open the document.Observe - 4 things have been done already to make things easier:
1. No hard page breaks and no section breaks are included.
2. No styles applied yet.3. All first-level headings were
typed in capital letters. 4. Special styles created already.


First goal: Insert Next Page section breaks
just before any new page headings.Note: If you place your cursor before a paragraph symbol, the paragraph space will be moved to the next page. Deleting these paragraph symbols can often cause problems once your footers are set, so avoiding the situation all together is wise.


The final “next-page section break” to be inserted should be just before the heading that will start the main body of text.

AT THIS TIME: Make sure top-of-page headers really are at the top of their pages.
They should look like this:
Note there is NO paragraph iconbefore T in Table
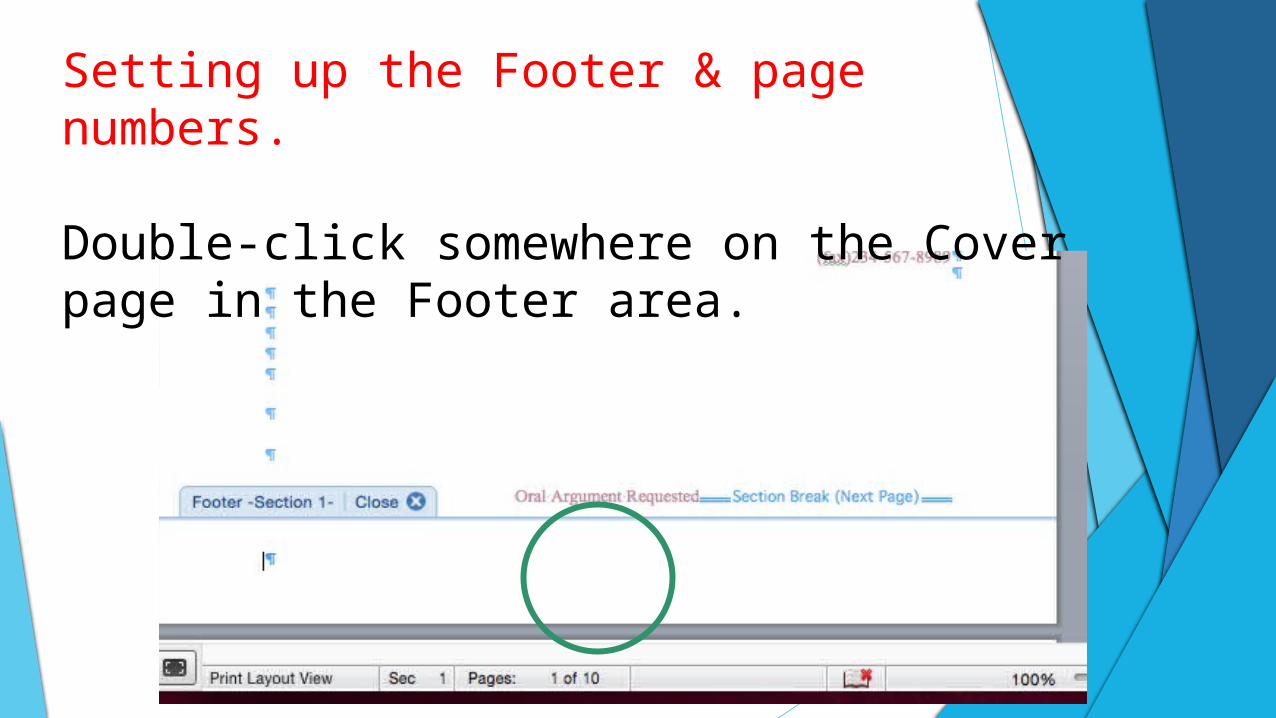
Setting up the Footer & page numbers.
Double-click somewhere on the Cover page in the Footer area.

It’s easiest to choose Blank (Three columns) as it will give you a place for your centered page number and, if you need it, a place to enter your Exam ID and course section ID.

The Footer is going to pop up. It’s going to have “Type here” across thethe bottom in three locations.
DeleteType in
Exam ID #
To set up the
page # . . .

Highlight the text in the Footer where you want the page number.
Click on Page # to insert basic page numbers.
You’ve now set up your basic page number set up in the footer.

For the cover page, however, we don’t want a footer, so click Different First Page. We want the “Type” fields in the footer to disappear. Close the Footer.
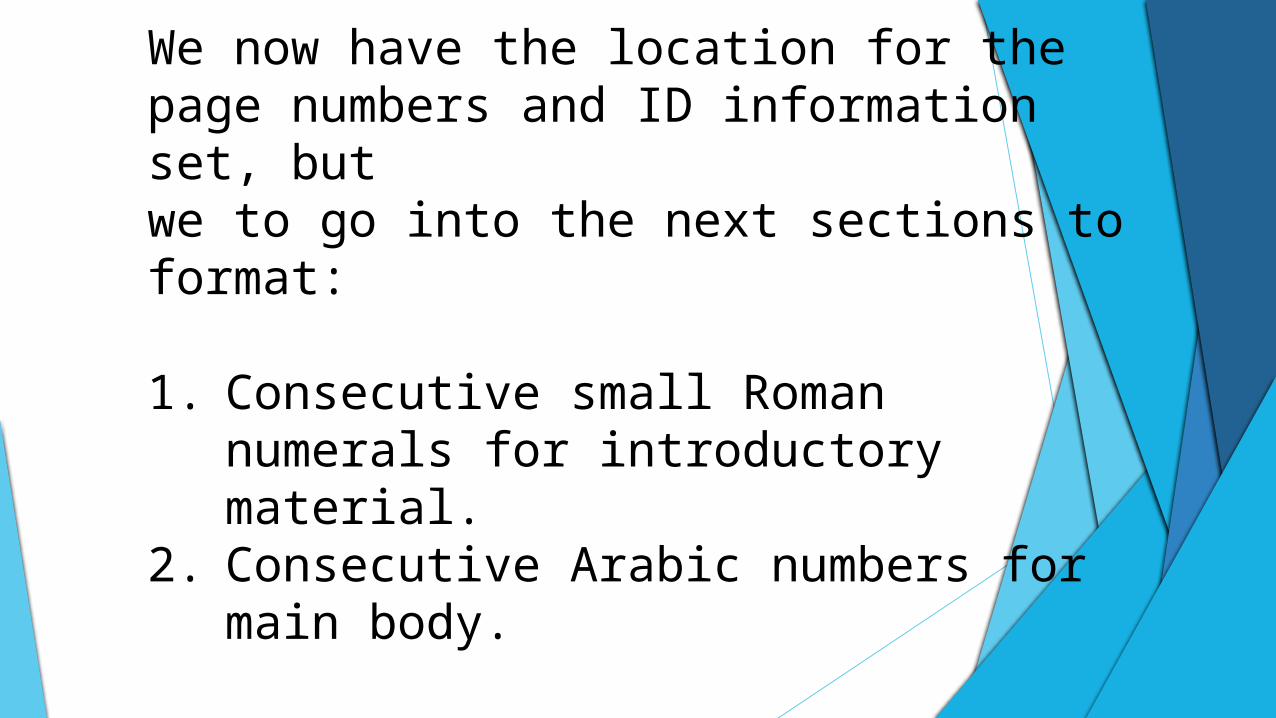
We now have the location for the page numbers and ID information set, butwe to go into the next sections to format:
1. Consecutive small Roman numerals for introductory material.
2. Consecutive Arabic numbers for main body.

Go to “TABLE OF CONTENTS” heading, and place the cursor in that heading (or anywhere before the section break for that section.
On INSERT ribbon 1. Page Number2. Format Page #

1. Choose the small Roman numerals.
2. Start at i.3. Click OK.

Now place the cursor somewhere in the middle of “Table of Authorities” and repeat the formatting of the page number.

For the Table of Authorities page -- and any other sections of introductory material, do NOT start at “i”. . .
You want to choose “Continue from previous section” and hit OK.

After using the INSERT > Page number > Format Page number process for introductory materials, one would do the same process for the main body of a document in Word.

For such pages you would choose Arabic numbers and choose what number is used to start and hit OK.
However, we don’t really need to do this because of the process we’ve used; it’s already set up.

Tip: Avoid inserting other material later.
If you do need to do so, however?
Remove from the text to be inserted all section breaks and footer formatting, so you aren’t inserting conflicting formats into the document. Theoretically these won’t necessarily carry over but better safe than sorry.

Trick: If you need more than one page without a footer and you cannot figure out how to do it ….1. Select text of footer section that you
don’t want showing and change font color to white.
2. Check next section to see if it is also white.
3. If it is, click the “Link to Previous” option in the ribbon and make the font black.

With this process we have completed setting up our page numbers.
Now we want to set up our Table of Contents so it will generate automatically.

To set up the Table of Contents, we need to apply “styles” to the parts of the document we want to appear in the Table of Contents – e.g., headers.

Return to the HOME tab and look at the “Styles” box and the types of Styles that appear there.

For this exercise, note the specially modified and created styles . . .
modifiedcreated

For the purposes of this exercise: Select all the text for headings beginning with “Table of Contents” and apply to them the Heading 1 style.

Tip 1 : You can select the whole header line by placing your cursor off to the left edge and clicking. Then click on Heading 1 in the Styles box to apply it.
Tip 2: Repeat the selection process and press F4 key to repeat the last action.

All the headings have now been coded to be entered automatically in the Table of Contents.
But we also have some argument points and subpoints to be included.

Look for points highlighted in green . . .
Note that this starts with a Roman numeral, so apply the style “Argument Rom pt.”

Other points start with a letter, so . . .
Apply the style “Argument Lttr pt.”

There are 3 Roman numeral Argument points and 2 letter sub-points to which we should have styles applied.
When that is completed, we are ready to generate the Table of Contents.

1. Place your cursor where you want the table to generate.
2. Select the Insert “Index and Tables”.
3. Select Table of Contents and Manual Table of Contents from the drop down menu.

When the formatting box appears, make sure page number location and tab leaders are set.
Hit Options to include and set up the special styles that are needed in the TOC.
Insert 3 by the “letter” subpoint style and 2 by the Roman numeral point so that the points start at those heading indents.


After hitting OK twice to get through the dialog boxes, we are going to see the Table of Contents is generated.
At this point we want to go through and check the formatting on the Table and make adjustments –
e.g. via the Home tab > Font area, we can get rid of the green highlighting.
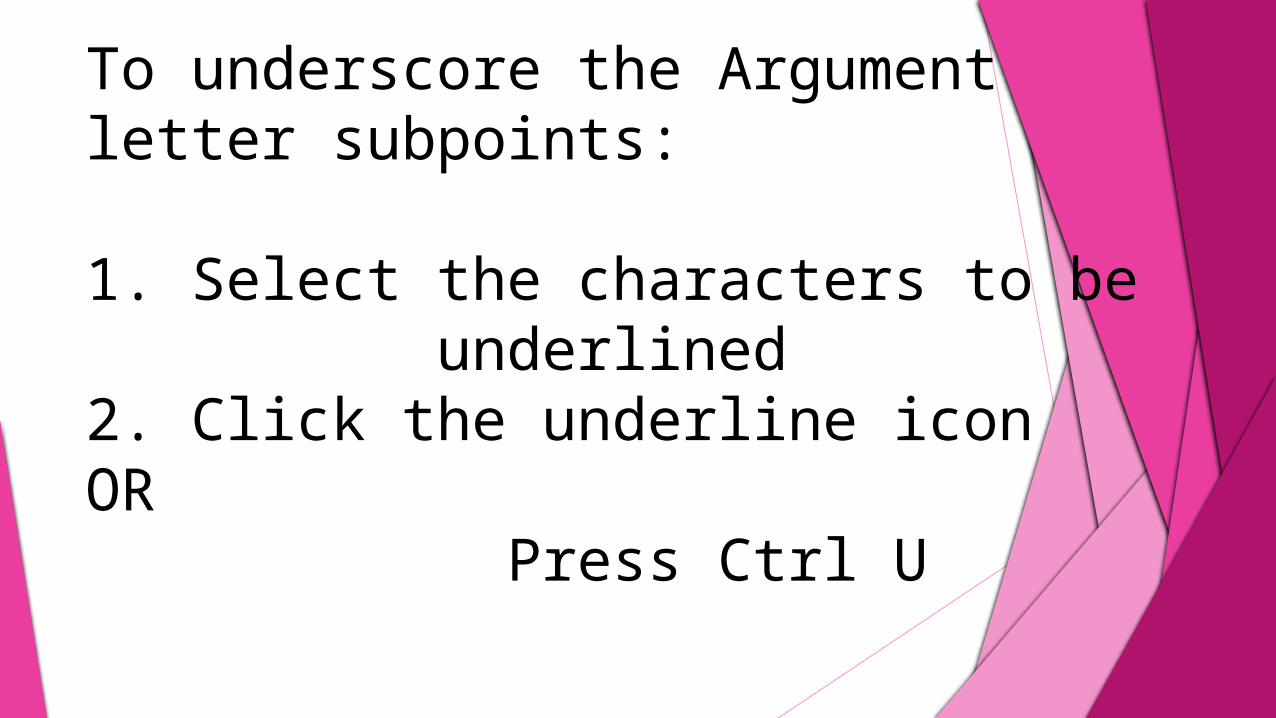
To underscore the Argument letter subpoints:
1. Select the characters to be underlined2. Click the underline icon OR Press Ctrl U

After getting the characters set up, there may be some needed adjustments to the spacing between the paragraphs breaks.
To make those adjustments:On the Home tab, go to the paragraph settings arrow (lower right corner).

SETTING UP THE TABLE OF AUTHORITIES
1. Search document for citations and select each one.
2. With Insert tab, click on Index & Tables.3. In the Dialogue box under Table of
Authorities, A. Click on “mark citation.”B. Edit the citation to appear correctly for the ToA. This is done in the top box.C. Designate type of citation. Drop down.D. Type in a short search citation term.

EDIT THE CITATION FOR TABLE HERE
If you need to access a font adjustment, right click on text.

Dialog box after marking a citation:

Two options:
You can choose to CLOSE the box and just do a visual search on your own. Or . . .
Hit Next Citation to see what MSWord finds. Just be aware it can miss things!
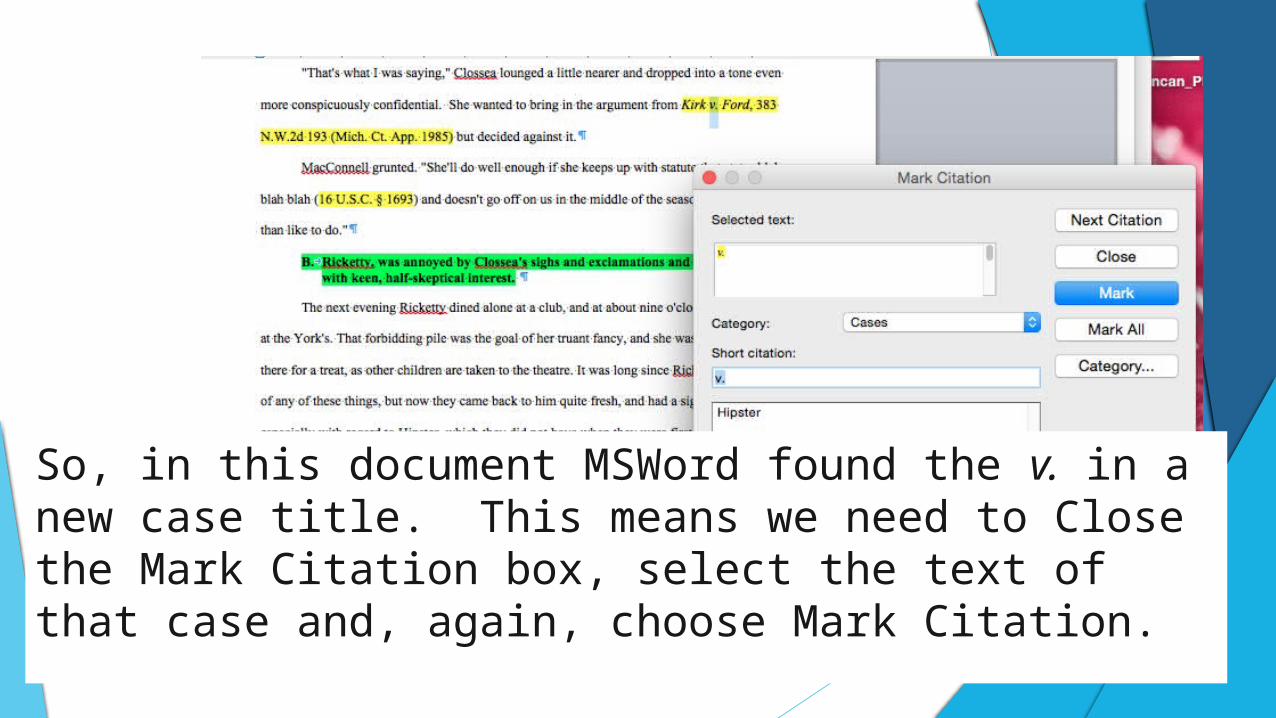
So, in this document MSWord found the v. in a new case title. This means we need to Close the Mark Citation box, select the text of that case and, again, choose Mark Citation.

For repeated sources, or id. citations, click
on the appropriate
short citation, then click “Mark.”

Once you’ve found all your citations, editing them and
categorizing them for your Table of Authorities:
Go to the Table of Authorities page.
Place your cursor where you want the table to generate.

Where to Insert or update the ToA

Decide: unclick passim . . .?
You may want to check on the styles of the category labels – to do that click Modify

If everything is fine, click OK and the Table will generate . . .

Now: Do any categories out of order? If a citation is incorrectly categorized, you will need to search the document for it and change the ToA field code.
For this exercise “Select All” on the Home tab and get rid of all highlighting & make sure everything is in a black font.
Update the page numbers on your Table of Contents.