cover Front cover - GitHub Pages
104
V11.2 cover Front cover Course Exercises Guide IBM MQ V9 Advanced System Administration (Distributed) Course code WM213 / ZM213 ERC 1.0
Transcript of cover Front cover - GitHub Pages

V11.2
cover
Front cover
Course Exercises Guide
IBM MQ V9 Advanced System Administration (Distributed)Course code WM213 / ZM213 ERC 1.0

May 2017 edition
Notices
This information was developed for products and services offered in the US.
IBM may not offer the products, services, or features discussed in this document in other countries. Consult your local IBM representative for information on the products and services currently available in your area. Any reference to an IBM product, program, or service is not intended to state or imply that only that IBM product, program, or service may be used. Any functionally equivalent product, program, or service that does not infringe any IBM intellectual property right may be used instead. However, it is the user's responsibility to evaluate and verify the operation of any non-IBM product, program, or service.
IBM may have patents or pending patent applications covering subject matter described in this document. The furnishing of this document does not grant you any license to these patents. You can send license inquiries, in writing, to:
IBM Director of Licensing IBM Corporation North Castle Drive, MD-NC119 Armonk, NY 10504-1785 United States of AmericaINTERNATIONAL BUSINESS MACHINES CORPORATION PROVIDES THIS PUBLICATION "AS IS" WITHOUT WARRANTY OF ANY KIND, EITHER EXPRESS OR IMPLIED, INCLUDING, BUT NOT LIMITED TO, THE IMPLIED WARRANTIES OF NON-INFRINGEMENT, MERCHANTABILITY OR FITNESS FOR A PARTICULAR PURPOSE. Some jurisdictions do not allow disclaimer of express or implied warranties in certain transactions, therefore, this statement may not apply to you.
This information could include technical inaccuracies or typographical errors. Changes are periodically made to the information herein; these changes will be incorporated in new editions of the publication. IBM may make improvements and/or changes in the product(s) and/or the program(s) described in this publication at any time without notice.
Any references in this information to non-IBM websites are provided for convenience only and do not in any manner serve as an endorsement of those websites. The materials at those websites are not part of the materials for this IBM product and use of those websites is at your own risk.
IBM may use or distribute any of the information you provide in any way it believes appropriate without incurring any obligation to you.
Information concerning non-IBM products was obtained from the suppliers of those products, their published announcements or other publicly available sources. IBM has not tested those products and cannot confirm the accuracy of performance, compatibility or any other claims related to non-IBM products. Questions on the capabilities of non-IBM products should be addressed to the suppliers of those products.
This information contains examples of data and reports used in daily business operations. To illustrate them as completely as possible, the examples include the names of individuals, companies, brands, and products. All of these names are fictitious and any similarity to actual people or business enterprises is entirely coincidental.
Trademarks
IBM, the IBM logo, and ibm.com are trademarks or registered trademarks of International Business Machines Corp., registered in many jurisdictions worldwide. Other product and service names might be trademarks of IBM or other companies. A current list of IBM trademarks is available on the web at “Copyright and trademark information” at www.ibm.com/legal/copytrade.shtml.
© Copyright International Business Machines Corporation 2017. This document may not be reproduced in whole or in part without the prior written permission of IBM.
US Government Users Restricted Rights - Use, duplication or disclosure restricted by GSA ADP Schedule Contract with IBM Corp.

V11.2
TOC
Contents
Course materials may not be reproduced in whole or in part without the prior written permission of IBM.
© Copyright IBM Corp. 2017 iii
Contents
Trademarks . . . . . . . . . . . . . . . . . . . . . . . . . . . . . . . . . . . . . . . . . . . . . . . . . . . . . . . . . . . . . . . . . . . . . . iv
Exercises description . . . . . . . . . . . . . . . . . . . . . . . . . . . . . . . . . . . . . . . . . . . . . . . . . . . . . . . . . . . . . . v
Exercise 1. Securing channels with TLS . . . . . . . . . . . . . . . . . . . . . . . . . . . . . . . . . . . . . . . . . . . . . 1-1Part 1: Exercise set up . . . . . . . . . . . . . . . . . . . . . . . . . . . . . . . . . . . . . . . . . . . . . . . . . . . . . . . . . . . 1-3Part 2: Eavesdropping demonstration . . . . . . . . . . . . . . . . . . . . . . . . . . . . . . . . . . . . . . . . . . . . . . . 1-3Part 3: Setting up the key repository . . . . . . . . . . . . . . . . . . . . . . . . . . . . . . . . . . . . . . . . . . . . . . . . 1-7Part 4: Creating a certificate signing request (CSR) . . . . . . . . . . . . . . . . . . . . . . . . . . . . . . . . . . . . 1-8Part 5: Creating a self-signed certificate . . . . . . . . . . . . . . . . . . . . . . . . . . . . . . . . . . . . . . . . . . . . 1-11Part 6: Exchanging certificates . . . . . . . . . . . . . . . . . . . . . . . . . . . . . . . . . . . . . . . . . . . . . . . . . . . . 1-12Part 7: Defining your TLS channels . . . . . . . . . . . . . . . . . . . . . . . . . . . . . . . . . . . . . . . . . . . . . . . . 1-14Part 8: TLS with IBM MQ clients . . . . . . . . . . . . . . . . . . . . . . . . . . . . . . . . . . . . . . . . . . . . . . . . . . 1-16
Exercise 2. Implementing connection authentication . . . . . . . . . . . . . . . . . . . . . . . . . . . . . . . . . . 2-1Part 1: Exercise set up . . . . . . . . . . . . . . . . . . . . . . . . . . . . . . . . . . . . . . . . . . . . . . . . . . . . . . . . . . . 2-3Part 2: Defining user ID and password connection authentication . . . . . . . . . . . . . . . . . . . . . . . . . . 2-6Part 3: Checking locally bound connections . . . . . . . . . . . . . . . . . . . . . . . . . . . . . . . . . . . . . . . . . . 2-7Part 4: Checking client connections (IBM MQ client bindings) . . . . . . . . . . . . . . . . . . . . . . . . . . . . 2-11Part 5: Authentication failure delay . . . . . . . . . . . . . . . . . . . . . . . . . . . . . . . . . . . . . . . . . . . . . . . . 2-13
Exercise 3. Implementing workload management in a cluster . . . . . . . . . . . . . . . . . . . . . . . . . . . 3-1Part 1: Defining the cluster queue managers, channels, and queues . . . . . . . . . . . . . . . . . . . . . . . 3-3Part 2: Using a round-robin approach for workload balancing . . . . . . . . . . . . . . . . . . . . . . . . . . . . . 3-7Part 3: Using channel and queue rank to control workload . . . . . . . . . . . . . . . . . . . . . . . . . . . . . . . 3-9Part 4: Using channel priority to control workload . . . . . . . . . . . . . . . . . . . . . . . . . . . . . . . . . . . . . 3-10Part 5: Using channel WEIGHT to control workload . . . . . . . . . . . . . . . . . . . . . . . . . . . . . . . . . . . 3-11Part 6: Restricting the number of outbound cluster channels . . . . . . . . . . . . . . . . . . . . . . . . . . . . 3-11
Exercise 4. Tracing message routes . . . . . . . . . . . . . . . . . . . . . . . . . . . . . . . . . . . . . . . . . . . . . . . . 4-1Part 1: Creating the queue manager and connections . . . . . . . . . . . . . . . . . . . . . . . . . . . . . . . . . . . 4-3Part 2: Using the dspmqrte application . . . . . . . . . . . . . . . . . . . . . . . . . . . . . . . . . . . . . . . . . . . . . . 4-4
Exercise 5. Handling messages on the dead-letter queue . . . . . . . . . . . . . . . . . . . . . . . . . . . . . . 5-1Part 1: Causing a message to be put on the dead-letter queue . . . . . . . . . . . . . . . . . . . . . . . . . . . . 5-3Part 2: Using the dead-letter queue handler . . . . . . . . . . . . . . . . . . . . . . . . . . . . . . . . . . . . . . . . . . 5-4
Exercise 6. Configuring distributed publish/subscribe . . . . . . . . . . . . . . . . . . . . . . . . . . . . . . . . . 6-1Part 1: Clustered publish/subscribe with direct routing . . . . . . . . . . . . . . . . . . . . . . . . . . . . . . . . . . 6-3Part 2: Testing cluster publication routing . . . . . . . . . . . . . . . . . . . . . . . . . . . . . . . . . . . . . . . . . . . . 6-7Part 3: Clustered publish/subscribe with topic host routing . . . . . . . . . . . . . . . . . . . . . . . . . . . . . . 6-11
Exercise 7. Getting started with the IBM MQ Console . . . . . . . . . . . . . . . . . . . . . . . . . . . . . . . . . . 7-1Part 1: Setting up the IBM MQ Console environment . . . . . . . . . . . . . . . . . . . . . . . . . . . . . . . . . . . 7-3Part 2: Managing IBM MQ objects . . . . . . . . . . . . . . . . . . . . . . . . . . . . . . . . . . . . . . . . . . . . . . . . . . 7-5Part 3: Monitoring IBM MQ objects . . . . . . . . . . . . . . . . . . . . . . . . . . . . . . . . . . . . . . . . . . . . . . . . 7-10
V11.2
TMK
Trademarks
Course materials may not be reproduced in whole or in part without the prior written permission of IBM.
© Copyright IBM Corp. 2017 iv
Trademarks
The reader should recognize that the following terms, which appear in the content of this training document, are official trademarks of IBM or other companies:
IBM, the IBM logo, and ibm.com are trademarks or registered trademarks of International Business Machines Corp., registered in many jurisdictions worldwide.
The following are trademarks of International Business Machines Corporation, registered in many jurisdictions worldwide:
Linux is a registered trademark of Linus Torvalds in the United States, other countries, or both.
Microsoft and Windows are trademarks of Microsoft Corporation in the United States, other countries, or both.
Java™ and all Java-based trademarks and logos are trademarks or registered trademarks of Oracle and/or its affiliates.
UNIX is a registered trademark of The Open Group in the United States and other countries.
Other product and service names might be trademarks of IBM or other companies.
AIX® Approach® FFST™First Failure Support Technology™
Notes® PowerHA®
WebSphere® z/OS®

V11.2
pref
Exercises description
Course materials may not be reproduced in whole or in part without the prior written permission of IBM.
© Copyright IBM Corp. 2017 v
Exercises description
This course includes the following exercises:
• Securing channels with TLS
• Implementing connection authentication
• Implementing workload management in a cluster
• Tracing message routes
• Handling messages on the dead-letter queue
• Configuring distributed publish/subscribe
• Getting started with the IBM MQ Console
In the exercise instructions, you can check off the line before each step as you complete it to track your progress.
Most exercises include required sections, which should always be completed. It might be necessary to complete these sections before you can start later exercises. If you have sufficient time and want an extra challenge, some exercises might also include optional sections that you can complete.
Some labs require that you also complete portions of other exercises.
• The “Handling messages on the dead-letter queue” exercise assumes that you created the queue managers, queues, and channels in Part 1 of the “Tracing message routes” exercise.
• The “Configuring distributed publish/subscribe” exercise assumes that you created the queues managers, cluster, and cluster queues in Part 1 of the “Implementing workload management in a cluster” exercise.
The lab image for this course is based on Windows 2012 server.
The lab files for this course are in C:\labfiles directory. Not all exercises require lab files.
The user name for the lab image is: Administrator
The password for the lab image is: passw0rd
Important
Online course material updates might exist for this course. To check for updates, visit the Instructor wiki at http://ibm.biz/CloudEduCourses.

V11.2
EXemp
Exercise 1. Securing channels with TLS
ty
Exercise 1. Securing channels with TLS
Estimated time
01:30
Overview
In this exercise, you define and start TLS channels between IBM MQ queue managers, and between an IBM MQ client and an IBM MQ server.
Objectives
After completing this exercise, you should be able to:
• Use the certificate management utility IBM Key Management to create a certificate request
• Secure channels by using TLS on the channel
Introduction
In Part 1 of the exercise, you create the queue managers and set up the environment for the sample Java program that is used in this exercise.
In Part 2 of this exercise, you create the sender and receiver channels on the queue managers. You then trace the message flow across a standard, non-encrypted channel to observe that it is relatively easy to eavesdrop on data that is sent across TCP/IP channels. You use the IBM MQ supplied sample applications and a Java proxy program that is supplied with the lab files for this part of the exercise.
In Part 3 of this exercise, you use the IBM Key Management program to create a certificate request. You then export this certificate request and examine the certreq file that you created.
In Part 4 and Part 5, you create self-signed certificates and locate the default key repository for the queue manager in the directory system. After they are created, you start IBM Key Management and create a key database file. You then create certificate requests and self-signed certificates, putting them in the key database file you created and exporting or extracting to files.
In Part 6, you exchange the certificates between the queue managers.
In Part 7, you define and test the secure channels.
In Part 8, you define a client certificate and exchange the certificates between the queue manager and the client. You also define the channel to use distinguished name matching.
Requirements
• IBM MQ V9 and IBM MQ Explorer
• Lab files for this exercise are in the C:\labfiles\Lab01 directory
Course materials may not be reproduced in whole or in part without the prior written permission of IBM.
© Copyright IBM Corp. 2017 1-1

V11.2
EXemp
Exercise 1. Securing channels with TLS
ty • The Windows PATH environment variable points to the Java runtime directory: C:\Program
Files\IBM\MQ\java\jre\bin
Course materials may not be reproduced in whole or in part without the prior written permission of IBM.
© Copyright IBM Corp. 2017 1-2

V11.2
EXemp
Exercise 1. Securing channels with TLS
tyExercise instructions
Part 1: Exercise set up
In this first part of this exercise, you create the queue managers for this exercise.
Channel authentication and connection authentication are enabled by default on all new queue managers and might cause problems when the connection is made as MCAUSER. The queue manager configuration scripts that are provided in the lab files disable channel authentication and connection authentication on the queue managers.
__ 1. Using IBM MQ Explorer, create two queue managers that are named SECQM1 and SECQM2.
__ a. Create a queue manager that is named SECQM1 that uses a dead-letter queue that is named DLQ and a TCP listener port of 9001.
__ b. Create a queue manager that is name SECQM2 that uses a dead-letter queue that is named DLQ and a TCP listener port of 9002.
__ 2. Run the MQSC script SECQM.mqsc that is provided in the C:\labfiles\Lab01 directory to create the dead-letter queue (DLQ), disable channel authentication, disable connection authentication, and refresh security on each queue manager.
__ a. Run the MQSC file against SECQM1 and verify that all commands complete successfully. In a command window, type:
runmqsc SECQM1 < C:\labfiles\Lab01\SECQM.mqsc
__ b. Run the MQSC file against SECQM2 and verify that all commands complete successfully. In a command window, type:
runmqsc SECQM2 < C:\labfiles\Lab01\SECQM.mqsc
Part 2: Eavesdropping demonstration
In this part of the exercise, you simulate someone who spies on the communication between two queue managers over an unencrypted channel. For the purposes of this exercise, you use a proxy program to inspect the communications flows as a message is received on the destination queue manager. 9001
The supplied Java proxy program that is started with the sps.bat command receives TCP port requests on the receiving end of the channel. It then forwards requests onto the channel listener port and also writes the data when it passes through the proxy to the screen.
+ 2 1 1 Example
If the channel listener is listening on port 9002, change the sending end of the channel to connect to another port (such as 19002). Then, run the proxy so that is listens on port 19002 and forwards the messages to port 9002. The port number is changed on the Connection Name property of the sending channel. The channel listener remains the same and notices no difference.
Course materials may not be reproduced in whole or in part without the prior written permission of IBM.
© Copyright IBM Corp. 2017 1-3

V11.2
EXem
Exercise 1. Securing channels with TLS
pty In this demonstration, the SECQM2 channel listener is listening on port 9002. You create a sender channel that is named SECQM1.SECQM2 that connects to port 19002. The proxy is responsible for forwarding packets from port 19002 to port 9002 and displaying the data.
__ 1. Create the following objects on SECQM1.
__ a. Create a transmission queue that is named SECQM2.
__ b. Create a remote queue definition that is named QRMT that points to the queue SECRETS on queue manager SECQM2 and uses the transmission queue that is named SECQM2.
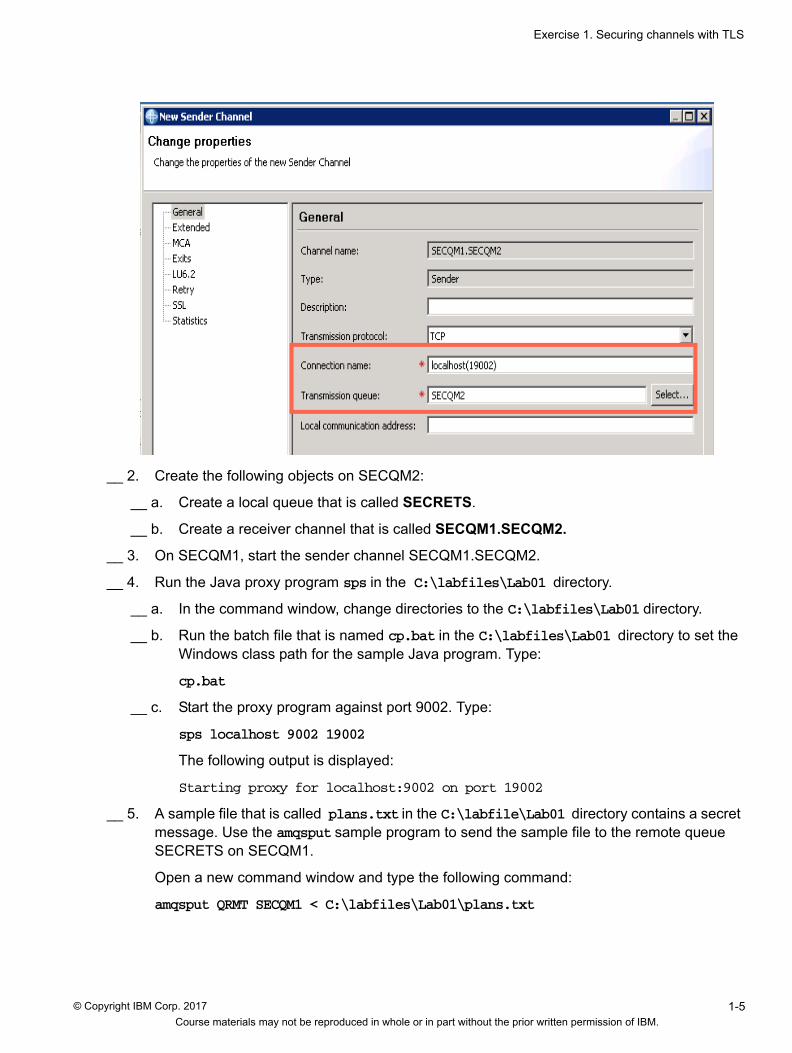
__ c. Create a sender channel that is named SECQM1.SECQM2 that uses a Connection Name of localhost(19002) and the transmission queue SECQM2.
Course materials may not be reproduced in whole or in part without the prior written permission of IBM.
© Copyright IBM Corp. 2017 1-4
V11.2
EXemp
Exercise 1. Securing channels with TLS
ty
__ 2. Create the following objects on SECQM2:
__ a. Create a local queue that is called SECRETS.
__ b. Create a receiver channel that is called SECQM1.SECQM2.
__ 3. On SECQM1, start the sender channel SECQM1.SECQM2.
__ 4. Run the Java proxy program sps in the C:\labfiles\Lab01 directory.
__ a. In the command window, change directories to the C:\labfiles\Lab01 directory.
__ b. Run the batch file that is named cp.bat in the C:\labfiles\Lab01 directory to set the Windows class path for the sample Java program. Type:
cp.bat
__ c. Start the proxy program against port 9002. Type:
sps localhost 9002 19002
The following output is displayed:
Starting proxy for localhost:9002 on port 19002
__ 5. A sample file that is called plans.txt in the C:\labfile\Lab01 directory contains a secret message. Use the amqsput sample program to send the sample file to the remote queue SECRETS on SECQM1.
Open a new command window and type the following command:
amqsput QRMT SECQM1 < C:\labfiles\Lab01\plans.txt
Course materials may not be reproduced in whole or in part without the prior written permission of IBM.
© Copyright IBM Corp. 2017 1-5

V11.2
EXemp
Exercise 1. Securing channels with TLS
tyYou should see this response:
Sample AMQSPUT0 start target queue is QMRTSample AMQSPUT0 end
__ 6. Go back to the command window that is running the proxy program and inspect the data. As you scroll through the data, you should see the transmitted message. It should match the message in the plans.txt file.
__ 7. Leave the sps proxy program running in the command window but stop the sender channel SECQM1.SECQM2 on SECQM1.
Course materials may not be reproduced in whole or in part without the prior written permission of IBM.
© Copyright IBM Corp. 2017 1-6

V11.2
EXemp
Exercise 1. Securing channels with TLS
tyPart 3: Setting up the key repository
In this part of the exercise, you begin security configuration for the queue managers by creating a key repository for each queue manager.
Important
To avoid a TLS mismatch later in this exercise, type the label and file names exactly as they are shown in the exercise instructions.
__ 1. Using Windows Explorer, create a directory that is named C:\Certificates. This directory is used to store the key and certificates that you create in this exercise.
__ 2. Start IBM Key Management by clicking the IBM Key Management icon in the taskbar.
__ 3. Click Key Database File > New.
__ 4. In the New window:
__ a. Select CMS as the Key database type.
__ b. Name the new file, type: SECQM1.kdb
__ c. For the Location, type: C:\Certificates\
__ d. Click OK.
__ 5. In the Password Prompt window, create a password and select the option to Stash the password to a file.
Use a simple password such as mqpass.
The password is stored in the C:\Certificates directory.
Course materials may not be reproduced in whole or in part without the prior written permission of IBM.
© Copyright IBM Corp. 2017 1-7

V11.2
EXemp
Exercise 1. Securing channels with TLS
ty__ 6. Select Personal Certificates (under the Key database content subheading) if it is not
already selected. The list of personal certificates should be empty.
__ 7. In IBM MQ Explorer, specify the location of your queue manager key database file on SECQM1.
__ a. Right-click the queue manager and then click Properties.
__ b. Click SSL to display the SSL/TLS properties.
__ c. In the SSL Key repository field, change the location and name of the key database file to the file that you created in Step 5.
You do not need to specify the file extension (.kdb).
__ d. Record the certificate label that is created automatically in the Certificate label field.
__ e. Click OK.
__ f. Click Yes on the confirmation window.
__ 8. Repeat steps 3-7 to create a key database file for SECQM2 that is named SECQM2.kdb.
Part 4: Creating a certificate signing request (CSR)
In this part of the exercise, you create a self-signed certificate for testing your configuration. In a real application, you need to use a certificate that a CA certified or an internal organizational (intermediate) CA certified. Self-signed certificates have little security value apart from testing.
__ 1. In IBM Key Management, click Key Database File > Open and select the key database file SECQM1.kdb.
__ 2. Enter the password that you specified for the file in Part 3 of this exercise.
Course materials may not be reproduced in whole or in part without the prior written permission of IBM.
© Copyright IBM Corp. 2017 1-8

V11.2
EXemp
Exercise 1. Securing channels with TLS
ty__ 3. From the Key database content menu, click Personal Certificate Requests.
__ 4. Click New.
__ 5. Enter the following information in the fields. Make sure that you update the directory in which CSR is placed.
__ a. For Key Label, type: SECQM1cert
__ b. For Common Name, type: IBM
__ c. For the Organization, type: IBM
__ d. For the Organization Unit, type: Education
__ e. For the name of the certificate file to store, accept the default of C:\Certificates\certreq.arm
__ f. Click OK.
Course materials may not be reproduced in whole or in part without the prior written permission of IBM.
© Copyright IBM Corp. 2017 1-9

V11.2
EXemp
Exercise 1. Securing channels with TLS
ty
__ 6. Click OK and acknowledge the creation of the certificate request in C:\Certificates\certreq.arm. The new certificate request is listed under Personal Certificate Requests.
__ 7. Click View to confirm that the details in the certreq.arm file are the same as the values you entered, plus a generated key.
Course materials may not be reproduced in whole or in part without the prior written permission of IBM.
© Copyright IBM Corp. 2017 1-10
V11.2
EXemp
Exercise 1. Securing channels with TLS
ty
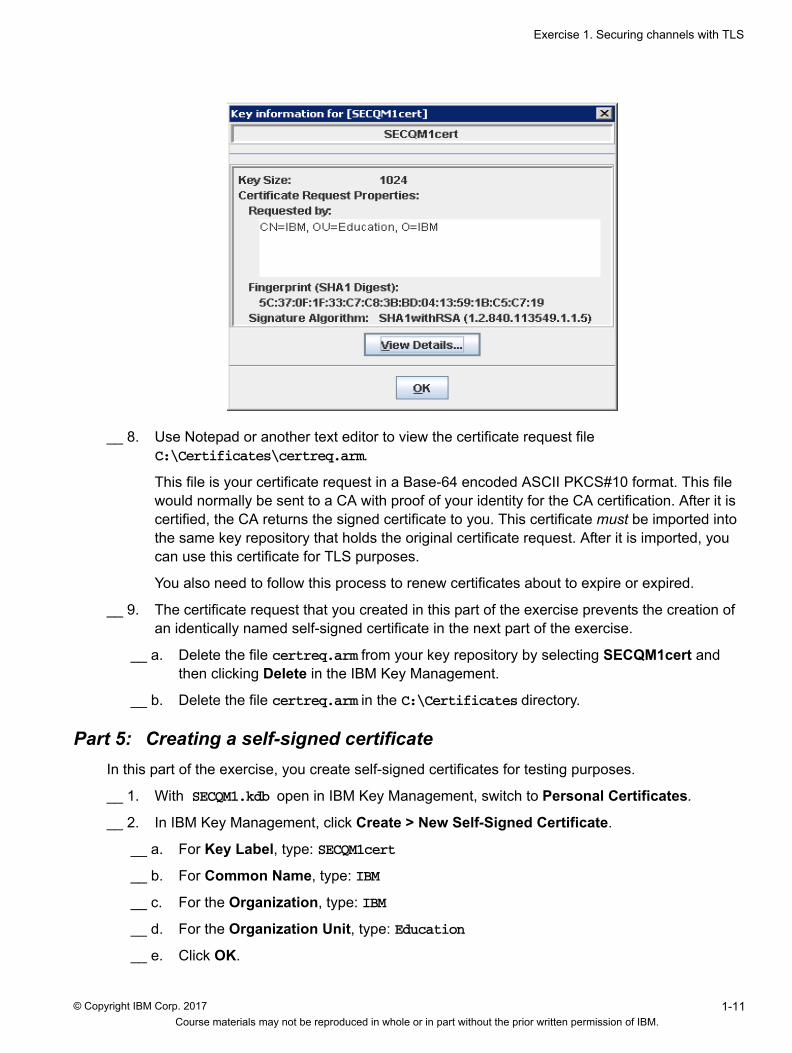
__ 8. Use Notepad or another text editor to view the certificate request file C:\Certificates\certreq.arm.
This file is your certificate request in a Base-64 encoded ASCII PKCS#10 format. This file would normally be sent to a CA with proof of your identity for the CA certification. After it is certified, the CA returns the signed certificate to you. This certificate must be imported into the same key repository that holds the original certificate request. After it is imported, you can use this certificate for TLS purposes.
You also need to follow this process to renew certificates about to expire or expired.
__ 9. The certificate request that you created in this part of the exercise prevents the creation of an identically named self-signed certificate in the next part of the exercise.
__ a. Delete the file certreq.arm from your key repository by selecting SECQM1cert and then clicking Delete in the IBM Key Management.
__ b. Delete the file certreq.arm in the C:\Certificates directory.
Part 5: Creating a self-signed certificate
In this part of the exercise, you create self-signed certificates for testing purposes.
__ 1. With SECQM1.kdb open in IBM Key Management, switch to Personal Certificates.
__ 2. In IBM Key Management, click Create > New Self-Signed Certificate.
__ a. For Key Label, type: SECQM1cert
__ b. For Common Name, type: IBM
__ c. For the Organization, type: IBM
__ d. For the Organization Unit, type: Education
__ e. Click OK.
Course materials may not be reproduced in whole or in part without the prior written permission of IBM.
© Copyright IBM Corp. 2017 1-11

V11.2
EXemp
Exercise 1. Securing channels with TLS
ty__ 3. Select the new certificate from the list of Personal Certificates and then click Extract
Certificate.
Name the certificate file SECQM1cert.arm and set the directory to C:\Certificates.
Click OK.
__ 4. In IBM MQ Explorer, change the SSL Certificate Label property for queue manager SECQM1 to SECQM1cert.
__ 5. Repeat the steps 1 - 4 of this part of the exercise for SECQM2 and use SECQM2.kdb for the key database repository name.
Label the certificate SECQM2cert and save the file as SECQM2cert.arm.
Part 6: Exchanging certificates
There is no way to verify a self-signed certificate by itself. As a proof of identity, it is almost useless. You must manually import the self-signed certificate from the other queue manager and accept it as a CA certificate so that your queue manager accepts the self-signed certificate.
__ 1. Reopen SECQM1.kdb with IBM Key Management.
Course materials may not be reproduced in whole or in part without the prior written permission of IBM.
© Copyright IBM Corp. 2017 1-12

V11.2
EXemp
Exercise 1. Securing channels with TLS
ty__ 2. Select Signer Certificates.
__ 3. Click Add and browse to C:\Certificates and then select SECQM2cert.arm
__ 4. Specify the correct certificate label: SECQM2cert
__ 5. The certificate SECQM2cert should be listed in the list of signer certificates.
__ 6. Reopen SECQM2.kdb with IBM Key Management and repeat steps 1 - 5 for queue manager SECQM2, but select SECQM1cert.arm and specify SECQM1cert as the certificate label.
Course materials may not be reproduced in whole or in part without the prior written permission of IBM.
© Copyright IBM Corp. 2017 1-13

V11.2
EXemp
Exercise 1. Securing channels with TLS
tyPart 7: Defining your TLS channels
In this part of the exercise, you define the TLS channels by using IBM MQ Explorer. You also create a transmission queue to use for secure connection.
Information
In actual practice, you should define and test the new channels without TLS first. Then, after you successfully test the new channels without TLS, enable TLS on the channels. If you choose to test without TLS first, then do not specify (leave blank) the cipher specification for the sender and receiver channels until you can successfully send and receive messages.
__ 1. On the queue manager SECQM1, create a transmission queue that is named SECQM2TLS.
On the Triggering properties for the transmission queue, set Trigger control to On and specify the SYSTEM.CHANNEL.INITQ as the initiation queue so that the channel starts automatically.
__ 2. On the queue manager SECQM1, define a new sender channel to SECQM2 that is named SECQM1.TLS.SECQM2:
__ a. Select SECQM2TLS as the transmission queue.
__ b. Specify localhost(19002) as the connection name.
__ c. On the SSL properties page for the sender channel, specify a cipher specification of TLS_RSA_WITH_AES_128_CBC_SHA.
Leave the other properties on this page set to their default values.
__ 3. Create the corresponding receiver channel on SECQM2. Make sure that you specify the same channel name (SECQM1.TLS.SECQM2) and cipher specification in the SSL properties for the channel.
__ 4. On SECQM2, create a local queue that is called DEPOSIT2.
Course materials may not be reproduced in whole or in part without the prior written permission of IBM.
© Copyright IBM Corp. 2017 1-14

V11.2
EXemp
Exercise 1. Securing channels with TLS
ty__ 5. On SECQM1, create a remote queue definition that is called DEPOSIT2 by specifying the
following information:
▪ A remote queue that is named DEPOSIT2
▪ A remote queue manager that is named SECQM2
▪ A transmission queue that is named SECQM2TLS
__ 6. Refresh the security cache by stopping and starting the queue managers or by using the following MQSC command on SECQM1 and SECQM2.
REFRESH SECURITY TYPE(SSL)
__ 7. Use IBM MQ Explorer to put a test message to DEPOSIT2 on SECQM1. Putting a test message to DEPOSIT2 should start the channel SECQM1.TLS.SECQM2.
__ 8. Did the message arrive on the queue? First, check the local queue DEPOSIT2 on SECQM2.
If the message is not on the queue, verify that the channel started. If the channel started, check the dead-letter queues on both sides of the channel.
Course materials may not be reproduced in whole or in part without the prior written permission of IBM.
© Copyright IBM Corp. 2017 1-15
V11.2
EXemp
Exercise 1. Securing channels with TLS
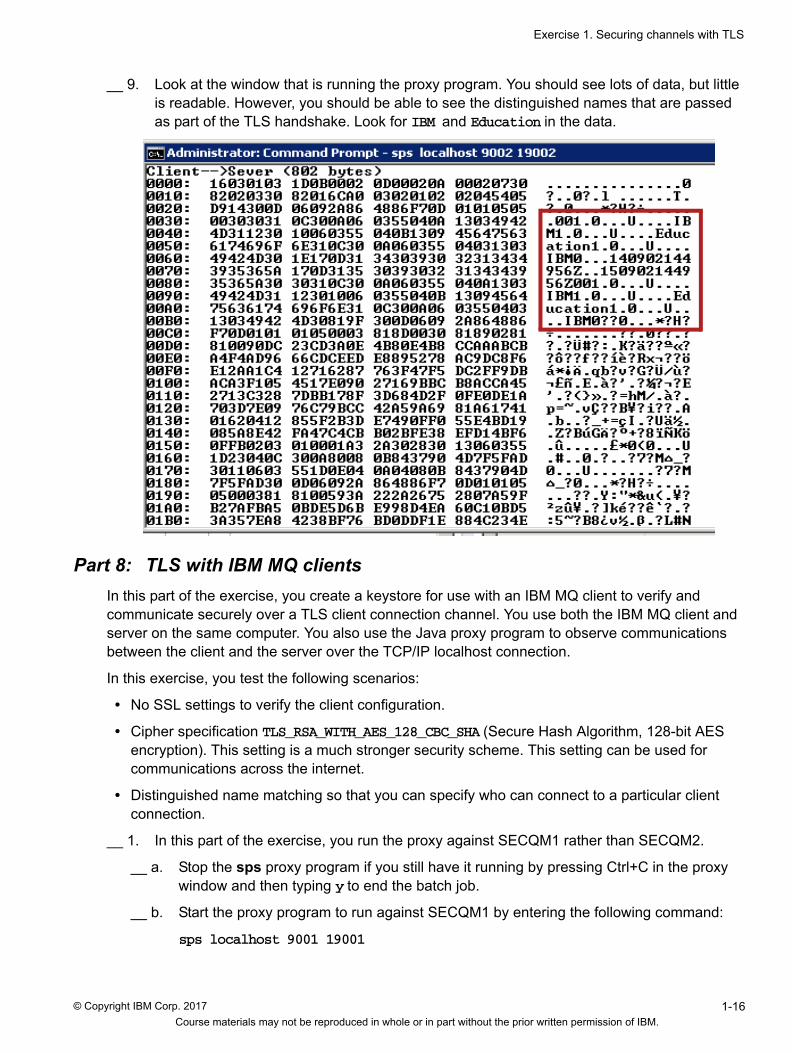
ty__ 9. Look at the window that is running the proxy program. You should see lots of data, but little
is readable. However, you should be able to see the distinguished names that are passed as part of the TLS handshake. Look for IBM and Education in the data.
Part 8: TLS with IBM MQ clients
In this part of the exercise, you create a keystore for use with an IBM MQ client to verify and communicate securely over a TLS client connection channel. You use both the IBM MQ client and server on the same computer. You also use the Java proxy program to observe communications between the client and the server over the TCP/IP localhost connection.
In this exercise, you test the following scenarios:
• No SSL settings to verify the client configuration.
• Cipher specification TLS_RSA_WITH_AES_128_CBC_SHA (Secure Hash Algorithm, 128-bit AES encryption). This setting is a much stronger security scheme. This setting can be used for communications across the internet.
• Distinguished name matching so that you can specify who can connect to a particular client connection.
__ 1. In this part of the exercise, you run the proxy against SECQM1 rather than SECQM2.
__ a. Stop the sps proxy program if you still have it running by pressing Ctrl+C in the proxy window and then typing y to end the batch job.
__ b. Start the proxy program to run against SECQM1 by entering the following command:
sps localhost 9001 19001
Course materials may not be reproduced in whole or in part without the prior written permission of IBM.
© Copyright IBM Corp. 2017 1-16

V11.2
EXemp
Exercise 1. Securing channels with TLS
ty__ 2. Create the client channel:
__ a. Using IBM MQ Explorer, create a client-connection channel on SECQM1 that called CLIENT.TLS.
__ b. On the General page, set Connection name to: localhost(19001)
Port 19001 is the proxy port. If you use 9001, the channel functions, but you do not see any output in the proxy window.
__ c. Click Finish.
__ 3. Create a server-connection channel on SECQM1 that is called CLIENT.TLS. Do not specify any SSL (TLS) properties yet.
__ 4. You cannot use the MQSERVER environment variable for channels with TLS attributes. In this step, you use the client channel definition table that is generated automatically in the following directory:
c:\ProgramData\IBM\MQ\qmgrs\SECQM1\@ipcc\AMQCLCHL.TAB
Normally, you would first need to copy this file to the client computer. In this exercise, you are using the same computer for both the client and server. You do not need to copy the file for this exercise.
Open a new command window and enter the following commands to set the MQCHLLIB and MQCHLTAB environment variables:
set MQCHLLIB=c:\ProgramData\IBM\MQ\qmgrs\SECQM1\@ipcc set MQCHLTAB=AMQCLCHL.TAB
__ 5. Create a local queue on SECQM1 that is named DEPOSIT1.
__ 6. In the same command window that you set the environment variables, run the IBM sample program amqsputc to put a message as a client program on DEPOSIT1 on SECQM1. Type:
amqsputc DEPOSIT1
__ 7. Look at the proxy window. You should see that the channel CLIENT.TLS was used.
Course materials may not be reproduced in whole or in part without the prior written permission of IBM.
© Copyright IBM Corp. 2017 1-17

V11.2
EXemp
Exercise 1. Securing channels with TLS
ty
__ 8. Create a keystore in C:\Certificates that is called client.kdb by using IBM Key Management.
__ a. In IBM Key Management, click Key Database File > New.
__ b. In the New window, name the file client.kdb and specify the Location as C:\Certificates
__ c. For a password, enter mqpass and select the option to stash the password to a file.
__ 9. With IBM Key Management running and your new client.kdb open, create a self-signed certificate for the client. For the IBM MQ client, label the certificate MQClient.
__ a. In IBM Key Management, click Create > New Self-Signed Certificate
__ a. For Key Label, type: MQClient
__ b. For Common Name, type: IBM
__ c. For the Organization, type: IBM
__ d. For the Organization Unit, type: Education
__ 10. Extract the certificate to a file that is named ClientCert.arm in the C:\Certificates directory.
__ a. Select the new certificate from the list of Personal Certificates and then click Extract Certificate.
__ b. For the Certificate file name, specify ClientCert.arm.
__ 11. With IBM Key Management application still open on your client certificate store, switch to Signer Certificates and add the SECQM1 exported certificate SECQM1cert.arm as a signer certificate. For the label name, enter SECQM1cert.
This step is required so that the IBM MQ client can verify the identity that is passed on the certificate from SEQM1.
__ 12. Now open SECQM1.kdb in IBM Key Management and add the newly exported client certificate ClientCert.arm into the SECQM1 certificate store as a signer certificate. For the label, enter MQClient.
__ 13. In the command window that you used to test the client connection, enter the following command to set the keystore for the IBM MQ client:
set MQSSLKEYR=C:\Certificates\client
Course materials may not be reproduced in whole or in part without the prior written permission of IBM.
© Copyright IBM Corp. 2017 1-18

V11.2
EXemp
Exercise 1. Securing channels with TLS
tyThe .kdb file extension is not required on the MQSSLKEYR variable.
__ 14. Test with cipher specification TLS_RSA_WITH_AES_128_CBC_SHA and identify the certificate label to send on the server-connection and client-connection channels.
__ a. In IBM MQ Explorer, change the SSL (TLS) properties of the server-connection channel CLIENT.TLS to use the TLS_RSA_WITH_AES_128_CBC_SHA cipher specification. For the Certificate label, type: SECQM1cert
__ b. Change the SSL (TLS) properties of the client-connection channel CLIENT.TLS to use the TLS_RSA_WITH_AES_128_CBC_SHA cipher specification. For the Certificate label, type: MQClient
__ 15. Repeat the put test. Type: amqsputc DEPOSIT1
The results in the command window should be identical to the results seen in the last test.
Look at the proxy window. More information is passed back and forth between the client and server, including certificates for mutual authentication.
Course materials may not be reproduced in whole or in part without the prior written permission of IBM.
© Copyright IBM Corp. 2017 1-19

V11.2
EXemp
Exercise 1. Securing channels with TLS
tyIt is important to note that message hashes are generated for the data that is passed, so that each side can verify that the passed data was not tampered with.
Troubleshooting
Many things can go wrong with TLS client channels. Sometimes, the problems are not easy to figure out. These troubleshooting suggestions might help you find the problem.
• Define the channels without TLS first and ensure that they work correctly. Complete an end-to-end test without TLS, by using a sample program such as amqsputc.
• Make sure that the client certificate is labeled correctly.
• If you are using self-signed certificates, ensure that your client certificate is imported into your queue manager certificate store as a CA signer certificate.
• If you receive MQRC 2538 errors, try setting your queue manager listener to use IP address localhost, then restart the listener and rerun the test.
• Refresh SSL (TLS) on the queue manager
__ 16. Test distinguished name matching.
__ a. Using IBM MQ Explorer, change the SSL properties of the CLIENT.TLS server-connection channel on SECQM1 to accept only certificates with Distinguished Names that match these values:
CN=IBM*,OU=Education,O=IBM
This value is the SSLPEER value and should match the DN in your existing client certificate.
__ b. Repeat the amqsputc test. The results should not be different from previous tests.
Course materials may not be reproduced in whole or in part without the prior written permission of IBM.
© Copyright IBM Corp. 2017 1-20

V11.2
EXemp
Exercise 1. Securing channels with TLS
ty__ c. Now test with a DN that does not match. Change the organizational unit to Research
instead of Education.
In the SSL properties for the channel CLIENT.TLS, modify the DN string to use the following string:
CN=”IBM”,OU=Research,O=IBM
__ d. Repeat the amqsputc test from the command window.
After a brief delay, the program returns the following error code:
MQCONNX ended with reason code 2538
__ e. Look at the error messages for SECQM1.
Open Windows Notepad and open the file C:\ProgramData\IBM\MQ\qmgrs\SECQM1\errors\AMQERR01.LOG
__ f. Go to the end of the file and examine the AMQ9636 error message. The message should appear similar to following example.
AMQ9636: SSL distinguished name does not match peer name, channel 'CLIENT.TLS'.
EXPLANATION:The distinguished name, 'SERIALNUMBER=54:0F:00:13,CN=IBM,OU=Education,O=IBM',contained in the SSL certificate for the remote end of the channel does not match the local SSL peer name for channel 'CLIENT.TLS'. The distinguished name at the remote host 'ws2008r2x64 (127.0.0.1)' must match the peer name specified (which can be generic) before the channel can be started.ACTION:If this remote system should be allowed to connect, either change the SSL peer name specification for the local channel so that it matches the distinguished name in the SSL certificate for the remote end of the channel, or obtain the correct certificate for the remote end of the channel.
This error might indicate that the remote end of the channel is configured to use the wrong certificate. Check the certificate label for the remote end of the channel.
Restart the channel.
The client application sees that the connection to the server was unsuccessful.
The reason for the failure is not passed back to the client. The AMQ9636 message is in the server queue manager’s error log.
Exercise cleanup
__ 1. Close all open command windows.
__ 2. Close the IBM Key Management application.
Course materials may not be reproduced in whole or in part without the prior written permission of IBM.
© Copyright IBM Corp. 2017 1-21

V11.2
EXemp
Exercise 1. Securing channels with TLS
ty__ 3. Close Notepad.
__ 4. Stop the queue managers SECQM1 and SECQM2.
__ 5. Delete queue managers SECQM1 and SECQM2.
End of Exercise
Course materials may not be reproduced in whole or in part without the prior written permission of IBM.
© Copyright IBM Corp. 2017 1-22

V11.2
EXemp
Exercise 1. Securing channels with TLS
tyExercise review and wrap-up
In this exercise, you completed the following tasks:
• Created an IBM MQ certificate store and added certificates to the store
• Generated a certificate request that is ready for signing by a CA
• Secured channels by specifying TLS attributes on the channel
• Restricted access to clients by using a distinguished name
Course materials may not be reproduced in whole or in part without the prior written permission of IBM.
© Copyright IBM Corp. 2017 1-23

V11.2
EXemp
Exercise 2. Implementing connection authentication
ty
Exercise 2. Implementing connection authentication
Estimated time
01:30
Overview
In this exercise, you modify an IBM MQ network to add connection authentication security.
Objectives
After completing this exercise, you should be able to:
• Check locally bound connections
• Check client connections
• Configure the authentication failure delay
Introduction
In this exercise, you enable connection authentication security on a queue manager to check the user ID and password for local connections and client connections. You use the IBM MQ sample programs amqsput, amqsget, amqsputc, and amqsgetc to test the authentication.
In Part 1 of this exercise, you set up the queue manager and the basic permissions for the non-administrative user.
In Part 2 of this exercise, you create an authentication information object that is named AUTHUSER and configure the queue manager to use this authentication information object.
In Part 3 of the exercise, you modify the Check locally bound connection property to see how this property affects connection authentication. This part of the exercise focuses on IBM MQ local bindings. You use the IBM MQ sample programs amqsput and amqsget to test the connection authentication and the MQSAMP_USER_ID environment variable to provide the user identification and password for the sample programs.
In Part 4 of this exercise, you use the client connection option to authenticate client connections. You use the amqsputc and amqsgetc sample programs to provide user identification and password.
In Part 5 of this exercise, you use the Authentication failure delay property to control the delay whenever an authentication failure occurs.
Requirements
• IBM MQ V9 and IBM MQ Explorer
Course materials may not be reproduced in whole or in part without the prior written permission of IBM.
© Copyright IBM Corp. 2017 2-1

V11.2
EXemp
Exercise 2. Implementing connection authentication
ty • A user that is named “mquser” with a password of “passw0rd” that is not a member of the
“mqm” group. The password is set to not expire.
Course materials may not be reproduced in whole or in part without the prior written permission of IBM.
© Copyright IBM Corp. 2017 2-2

V11.2
EXemp
Exercise 2. Implementing connection authentication
tyExercise instructions
Part 1: Exercise set up
In this part of the exercise, you set up the queue manager and create some local queues for testing purposes. This exercise requires a non-administrative user that is named mquser.
__ 1. Using IBM MQ Explorer or IBM MQ commands, create a queue manager that is named QM8 on listener port 5555.
Information
To create the queue manager QM8 from a command, type: crtmqm QM8
To start the queue manager QM8 from a command, type: strmqm QM8
If the queue manager is created from a command line, create and start a listener by using MQSC. In MQSC for QM8, type:
DEFINE LISTENER('LISTENER.TCP') TRPTYPE(TCP) PORT(5555)START LISTENER('LISTENER.TCP')
__ 2. Create a local queue on QM8 that is named TESTQ.
__ 3. The user “mquser” requires permission to read and write messages from the local queue TESTQ on QM8. Using IBM MQ Explorer, ensure that user “mquser” has appropriate permissions to read and write on TESTQ.
__ a. Right-click TESTQ in the Queues content view and then click Object Authorities > Manage Authority Records.
__ b. Under Specific Profile, click TESTQ.
__ c. On the Users tab, click New.
__ d. For the Entity name, type: mquser.
__ e. Select the Put and Get options under the MQI heading.
Course materials may not be reproduced in whole or in part without the prior written permission of IBM.
© Copyright IBM Corp. 2017 2-3

V11.2
EXemp
Exercise 2. Implementing connection authentication
ty
__ f. Click OK. Click Refresh and then click Close.
Alternatively, you can use the setmqaut commands that are provided in the command preview window.
__ 4. Provide the connection and inquire permissions on the queue manager (QM8) to the user “mquser”.
__ a. In the IBM MQ Explorer - Navigator view, right-click QM8 and then click Object Authorities > Manage Queue Manager Authority Records.
__ b. On the Users tab, click New.
__ c. For the Entity name, type: mquser
__ d. Click the Connect and Inquire options under the MCI heading and then click OK.
Course materials may not be reproduced in whole or in part without the prior written permission of IBM.
© Copyright IBM Corp. 2017 2-4

V11.2
EXemp
Exercise 2. Implementing connection authentication
ty
__ e. Click Refresh to ensure that changes are applied to the queue manager and then click Close.
__ 5. Create a server connection channel that is named MYSVRCONN. This channel is required for IBM MQ client connections that are used later in this exercise.
__ a. Using IBM MQ Explorer, right-click the Channels folder under the queue manager QM8 and then click New > Server-connection Channel.
__ b. Enter MYSVRCONN for the channel name and then click Finish.
Information
The equivalent MQSC command is: DEFINE CHL(MYSVRCONN) CHLTYPE(SVRCONN)
Course materials may not be reproduced in whole or in part without the prior written permission of IBM.
© Copyright IBM Corp. 2017 2-5

V11.2
EXemp
Exercise 2. Implementing connection authentication
tyPart 2: Defining user ID and password connection authentication
The Authentication information (AUTHINFO) object and the Connection authentication (CONNAUTH) property of the queue manager work together to provide connection authentication. In this part of the exercise, you create the AUTHINFO object.
__ 1. Create an AUTHINFO object that is named USERAUTH to store the security configuration data.
__ a. In the MQ Explorer - Navigator view, right-click the Authentication Information folder under QM8 and then click New > O/S User ID + Password Authentication Information.
__ b. For the AUTHINFO object name, type: USERAUTH.
The AUTHINFO object name is case-sensitive so enter the name in all uppercase characters.
__ c. Click Next.
__ d. Click Finish.
Information
The equivalent MQSC command is: DEFINE AUTHINFO(‘USERAUTH’) AUTHTYPE(IDPWOS)
__ 2. Modify the queue manager Connection Authentication property to use the USERAUTH object that you created in Step 1.
__ a. In IBM MQ Explorer, right-click the queue manager (QM8) and then click Properties.
__ b. Click Extended to display the extended properties.
__ c. For the Connection authentication property, type: USERAUTH
Course materials may not be reproduced in whole or in part without the prior written permission of IBM.
© Copyright IBM Corp. 2017 2-6

V11.2
EXemp
Exercise 2. Implementing connection authentication
ty
__ d. Click Apply and then click OK.
Information
The equivalent MQSC command is: ALTER QMGR CONNAUTH(‘USERAUTH’)
__ 3. Restart the queue manager or run the REFRESH SECURITY TYPE(CONNAUTH) command so that the queue manager recognizes the security changes.
Part 3: Checking locally bound connections
In this part of the exercise, you modify the Check locally bound connection property to see how this property affects connection authentication. This part of the exercise focuses on IBM MQ local bindings.
You use the IBM MQ sample programs amqsput and amqsget to test the connection authentication and the MQSAMP_USER_ID environment variable to provide the user identification and password for the sample programs.
__ 1. Set the Check locally bound connections option to None on the USERAUTH object.
__ a. In the IBM MQ Explorer - Navigator view, click the Authentication Information folder to display the Authentication Information content view.
__ b. In the Authentication Information content view, right-click USERAUTH and then click Properties.
__ c. On the User ID + Password properties page, set Check locally bound connections to None.
__ d. Click Apply and then click OK.
Course materials may not be reproduced in whole or in part without the prior written permission of IBM.
© Copyright IBM Corp. 2017 2-7

V11.2
EXemp
Exercise 2. Implementing connection authentication
ty
Information
The equivalent MQSC command to modify the Check locally bound connection property for USERAUTH is: ALTER AUTHINFO('USERAUTH') AUTHTYPE(IDPWOS) CHCKLOCL(NONE)
__ 2. Restart the queue manager or run the REFRESH SECURITY(*) command so that the queue manager recognizes the security changes.
__ 3. Use the IBM MQ amqsput and amqsget sample programs to test the configuration.
__ a. Open two command prompt windows.
__ b. In the first command window, type the following command to put messages on the queue TESTQ on QM8:
amqsput TESTQ QM8
Type some messages. Press the Enter key twice to close the sample.
__ c. Use IBM MQ Explorer to verify that the messages are on the queue TESTQ.
__ d. In a second command window, type the following command to get the messages from the queue TESTQ on QM8:
amqsget TESTQ QM8
This program stops when there are no more messages on the queue.
__ 4. Set the Check locally bound connection property to Optional on the USERAUTH object.
Remember to restart the queue manager or use the REFRESH SECURITY(*) command to force the queue manager to recognize changes to the USERAUTH object.
Course materials may not be reproduced in whole or in part without the prior written permission of IBM.
© Copyright IBM Corp. 2017 2-8

V11.2
EXemp
Exercise 2. Implementing connection authentication
ty
Information
The equivalent MQSC command to modify the Check locally bound connection property for USERAUTH is: ALTER AUTHINFO('USERAUTH') AUTHTYPE(IDPWOS) CHCKLOCL(OPTIONAL)
__ 5. Use the amqsput and amqsget sample program to test the configuration.
__ a. In both command windows, set the MQSAMP_USER_ID environment variable. Type:
set MQSAMP_USER_ID=Administrator
__ b. In the first command window, run the amqsput sample to put messages on TESTQ on QM8.
Enter the password for the user “Administrator”, which is passw0rd and then type some messages in the first command window.
__ c. Use the IBM MQ Explorer to verify that the messages were put on the queue.
__ d. In the second command window, run the amqsget sample program to get the messages off the queue TESTQ.
Enter the password for the user “Administrator”, which is passw0rd.
__ 6. Rerun the amqsput sample program with an invalid password to verify that you get an authorization failure (MQCONNX ended with reason code 2035).
__ 7. Open a new command window and run the amqsget sample program.
You should see that a password is not required in this command window because the Check locally bound connection is set to Optional and you did not set the MQSAMP_USER_ID environment variable in this command window.
__ 8. Set the Check locally bound connection property to Required for all on the USERAUTH object.
Restart the queue manager or refresh security.
Information
The equivalent MQSC command to modify the Check locally bound connection property for USERAUTH is: ALTER AUTHINFO('USERAUTH') AUTHTYPE(IDPWOS) CHCKLOCL(REQUIRED)
__ 9. Test the configuration by using the amqsput and amqsget sample programs.
__ a. In the first command window, set the MQSAMP_USER_ID environment variable to “Administrator” and run the amqsput sample. Provide a valid password when prompted.
The sample program should successfully connect to the queue manager and write messages.
__ b. In the second command window, set the MQSAMP_USER_ID environment variable to “Administrator” and run the amqsget sample with a valid user ID and password combination.
Course materials may not be reproduced in whole or in part without the prior written permission of IBM.
© Copyright IBM Corp. 2017 2-9

V11.2
EXemp
Exercise 2. Implementing connection authentication
tyThe sample program should successfully connect to the queue manager and get the messages.
__ 10. In one of the command windows, specify mquser for the MQSAMP_USER_ID environment variable.Type:
set MQSAMP_USER_ID=mquser
__ 11. Run the amqsput sample. Provide the valid password of passw0rd when prompted.
You should see that the applications can connect to the queue manager by using a different user ID and password. The user ID must have the authority read and write on the queue.
__ 12. Rerun the tests but specify an invalid password. Verify that the application now generates an authorization failure (reason code 2035).
Information
Setting CHCKLOCL to REQUIRED or REQDADM means that you cannot locally administer the queue manager by using MQSC unless the user specifies the -u UserId parameter on the runmqsc command line. With the user ID set, runmqsc prompts for the user's password at the console.
Similarly, a user running IBM MQ Explorer on the local system receives error AMQ4036 when attempting to connect to the queue manager. To specify a user name and password in IBM MQ Explorer, right-click the local queue manager object and then click Connection Details > Properties. In the Userid section, enter the user name and password.
__ 13. Try to connect to the queue manager by using MQSC. You should receive a “Not authorized” error message. When the Check locally bound connection property is set to Required for all, the queue manager prohibits any access without authentication. Run MQSC as the Administrator to change the Check locally bound connection property back to Optional.
__ a. Open a command window by using the Run as administrator option.
__ b. Start MQSC with a valid user ID. Type:
runmqsc -u Administrator QM8
__ c. Enter the password for Administrator when prompted.
__ d. Change the Check locally bound connection property back to Optional. Type:
ALTER AUTHINFO('USERAUTH') AUTHTYPE(IDPWOS) CHCKLOCL(OPTIONAL)
__ e. Restart the queue manager by using commands. Type:
endmqm –i QM8strmqm QM8
__ f. Verify that you can use IBM MQ Explorer to browse the contents of the TESTQ on QM8.
Course materials may not be reproduced in whole or in part without the prior written permission of IBM.
© Copyright IBM Corp. 2017 2-10

V11.2
EXemp
Exercise 2. Implementing connection authentication
tyPart 4: Checking client connections (IBM MQ client bindings)
In this part of the exercise, you use the client connection option to authenticate client connections. You use the amqsputc and amqsgetc sample programs to provide user identification and password.
__ 1. Open a new command window and set the MQSERVER environment variable. Type:
set MQSERVER=MYSVRCONN/TCP/localhost(5555)
Note
Set the MQSERVER environment variable in any command window in which you are running the client sample programs in this exercise.
__ 2. Set the Check client connections property for the USERAUTH authentication information object to None.
Information
The equivalent MQSC command to modify the Check client connections property for USERAUTH is: ALTER AUTHINFO('USERAUTH') AUTHTYPE(IDPWOS) CHCKCLNT(NONE)
__ 3. Restart the queue manager or refresh security so that the queue manager recognizes the changes on the USERAUTH object.
__ 4. When a queue manager is created, channel authentication records are enabled by default. Disable channel authentication so that it does not block the channel in this exercise.
__ a. In the MQ Explorer - Navigator view, expand the Channels folder under QM8.
__ b. Click the Channel Authentication Records folder under the Channels folder to display the current channel authentication records.
Course materials may not be reproduced in whole or in part without the prior written permission of IBM.
© Copyright IBM Corp. 2017 2-11

V11.2
EXemp
Exercise 2. Implementing connection authentication
ty__ c. The current channel authentication profile blocks all users. Right-click the profile and
then click Delete. Confirm that you want to delete the profile.
__ 5. Use the client sample programs amqsputc and amqsgetc to test the client authentication settings. You should see that connection authentication is not required to write and read the messages from the queue.
__ a. In the command window, run the amqsputc sample program to put some messages. Type:
amqsputc TESTQ
Enter some messages.
__ b. In the same command window, run the amqsgetc sample to get the messages. Type:
amqsgetc TESTQ
__ 6. Set the Check client connections property to Optional on the USERAUTH authentication information object.
Information
The equivalent MQSC command to set the Check client connections property to Optional on USERAUTH is: ALTER AUTHINFO('USERAUTH') AUTHTYPE(IDPWOS) CHCKCLNT(OPTIONAL)
__ 7. Restart the queue manager or refresh security after you change the USERAUTH property.
__ 8. Use the client sample programs amqsputc and amqsgetc to test the client connection.
__ a. Set the MQSAMP_USER_ID environment variable in the command window to Administrator. Type:
SET MQSAMP_USER_ID=Administrator
__ b. Run the amqsputc sample program to put a message to TESTQ. When prompted for a password, type: passw0rd
__ c. In the same command window, run the amqsgetc sample program to get the messages. When prompted for a password, type: passw0rd
Course materials may not be reproduced in whole or in part without the prior written permission of IBM.
© Copyright IBM Corp. 2017 2-12

V11.2
EXemp
Exercise 2. Implementing connection authentication
ty__ 9. Test the connection again by using the amqsputc sample program but enter an invalid
password to ensure that connection authentication is enabled.
__ 10. Set the Check client connection property to Required for all for USERAUTH.
__ 11. Restart the queue manager or enter the REFRESH SECURITY(*) command to update it for the authentication change.
Information
The equivalent MQSC command to set the Check client connection property to Required for all for USERAUTH is: ALTER AUTHINFO('USERAUTH') AUTHTYPE(IDPWOS) CHCKCLNT(REQUIRED)
__ 12. Use the client sample programs amqsputc and amqsgetc to test the client connection.
__ 13. Change the MQSAMP_USER_ID environment variable in the command window to use the “mquser” user ID instead of “Administrator”. Type:
SET MQSAMP_USER_ID=mquser
__ 14. Use the client sample programs amqsputc and amqsgetc to test authentication on the client The application uses the Administrator user ID because Adopt the authentication user is set to No for USERAUTH.
Press Enter on a blank line in the amqsputc command window to close the sample program.
__ 15. The user ID is contained in the message header. View the message header by browsing the message on TESTQ in IBM MQ Explorer.
Part 5: Authentication failure delay
In this part of the exercise, you use the Authentication failure delay property to control the delay whenever an authentication failure occurs.
__ 1. Using IBM MQ Explorer, change the Authentication failure delay property on the User ID + Password properties page for the USERAUTH authentication information object to 15.
Information
The equivalent MQSC command to set the Authentication failure delay property for the USERAUTH authentication information object to 15 is:
ALTER AUTHINFO('TESTAUTH') AUTHTYPE(IDPWOS) FAILDLAY(15)
Course materials may not be reproduced in whole or in part without the prior written permission of IBM.
© Copyright IBM Corp. 2017 2-13

V11.2
EXemp
Exercise 2. Implementing connection authentication
ty
__ 2. Refresh security on the queue manager.
__ 3. Use the amqsputc sample program to test the authentication settings.
The command window must have the MQSERVER environment variable set to MYSVRCONN/TCP/localhost(5555) and the MQSAMP_USER_ID environment variable set to mquser.
Enter an invalid password for the “mquser” user id. The authentication error should take about 15 seconds to appear.
Exercise cleanup
__ 1. Close all command windows.
__ 2. Stop the queue manager QM8.
End of exercise
Course materials may not be reproduced in whole or in part without the prior written permission of IBM.
© Copyright IBM Corp. 2017 2-14

V11.2
EXemp
Exercise 2. Implementing connection authentication
tyExercise review and wrap-up
In Part 1 of this exercise, you set up the queue manager and the basic permissions for the non-administrative user.
In Part 2 of this exercise, you created an authentication information object that is named AUTHUSER and configured the queue manager to use this authentication information object.
In Part 3 of the exercise, you modified the Check locally bound connection property to see how this property affects connection authentication. You used the IBM MQ sample programs amqsput and amqsget to test the connection authentication and the MQSAMP_USER_ID environment variable to provide the user identification and password for the sample programs.
In Part 4 of this exercise, you used the client connection option to authenticate client connections. You used the amqsputc and amqsgetc sample programs to provide user identification and password.
In Part 5 of this exercise, you used the Authentication failure delay property to control the delay whenever an authentication failure occurs.
Course materials may not be reproduced in whole or in part without the prior written permission of IBM.
© Copyright IBM Corp. 2017 2-15

V11.2
EXemp
Exercise 3. Implementing workload management in a cluster
ty
Exercise 3. Implementing workload management in a cluster
Estimated time
01:00
Overview
In this exercise, you create a cluster of four queue managers. You then use the cluster mechanism to send messages between queues on all queue managers in the cluster.
Objectives
After completing this exercise, you should be able to:
• Create a queue manager cluster
• Use channel and queue attributes in various combinations to alter the workload distribution in a cluster
Introduction
The first part of this exercise you use IBM MQ Explorer to create the queue managers and a cluster. In the remaining parts of the exercise, you modify queue manager, queue, and channel cluster workload properties to change the allocation of messages to the cluster queues.
In this exercise you use IBM MQ Explorer to create a basic cluster that is named CLUS1 with four queue managers:
• Full repository queue manager QMC1 on localhost(9001) • Full repository queue manager QMC2 on localhost(9002) • Partial repository queue manager QMC3 on localhost(9003) • Partial repository queue manager QMC4 on localhost(9004)
You also define the following channel definitions:
• One cluster-receiver (CLUSRCVR) channel to each queue manager in the cluster
• One cluster-sender (CLUSSDR) channel between the full repository queue managers, QMC1 and QMC2
After you create the queue managers and the cluster, you define the following cluster queues:
• CLUSQ1 on QMC1, QMC2, QMC3 • CLUSQ2 on QMC4
Course materials may not be reproduced in whole or in part without the prior written permission of IBM.
© Copyright IBM Corp. 2017 3-1

V11.2
EXemp
Exercise 3. Implementing workload management in a cluster
ty
Requirements
• IBM MQ V9 and IBM MQ Explorer
• data.txt file in the C:\labfiles\Lab03 directory
Cluster = CLUS1
QMC1 (9001) QMC2 (9002)
Full repositoryCluster-receiver:CLUS1.QMC1
Cluster-receiver:CLUS1.QMC2
CLUSQ1 CLUSQ1
Full repository
QMC3 (9003) QMC4 (9004)Cluster-receiver:CLUS1.QMC3
Cluster-receiver:CLUS1.QMC4CLUSQ1 CLUSQ2
Cluster-sender:CLUS1.QMC2
Course materials may not be reproduced in whole or in part without the prior written permission of IBM.
© Copyright IBM Corp. 2017 3-2
V11.2
EXemp
Exercise 3. Implementing workload management in a cluster
tyExercise instructions
Part 1: Defining the cluster queue managers, channels, and queues
In this part of the exercise, you define the cluster queue manager, channels, and clustered queues. You use IBM MQ Explorer to verify your configuration.
__ 1. Open IBM MQ Explorer unless it is already open.
__ 2. Using IBM MQ Explorer, stop any running queue managers from previous exercises.
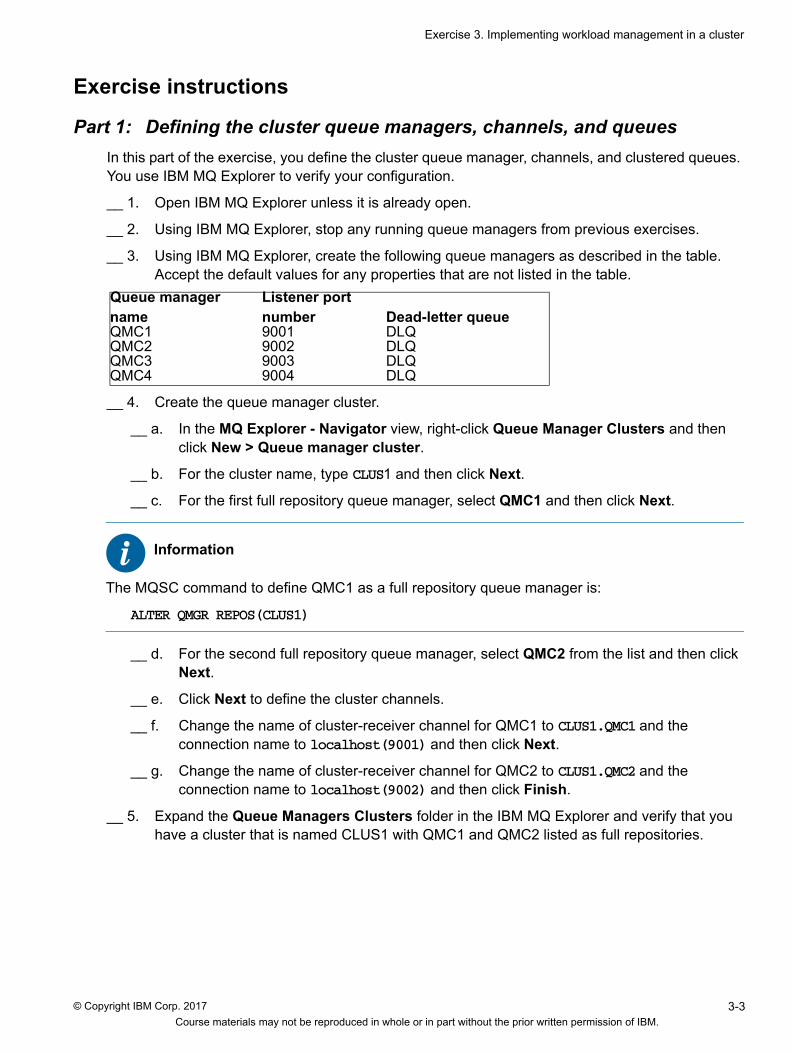
__ 3. Using IBM MQ Explorer, create the following queue managers as described in the table. Accept the default values for any properties that are not listed in the table.
__ 4. Create the queue manager cluster.
__ a. In the MQ Explorer - Navigator view, right-click Queue Manager Clusters and then click New > Queue manager cluster.
__ b. For the cluster name, type CLUS1 and then click Next.
__ c. For the first full repository queue manager, select QMC1 and then click Next.
Information
The MQSC command to define QMC1 as a full repository queue manager is:
ALTER QMGR REPOS(CLUS1)
__ d. For the second full repository queue manager, select QMC2 from the list and then click Next.
__ e. Click Next to define the cluster channels.
__ f. Change the name of cluster-receiver channel for QMC1 to CLUS1.QMC1 and the connection name to localhost(9001) and then click Next.
__ g. Change the name of cluster-receiver channel for QMC2 to CLUS1.QMC2 and the connection name to localhost(9002) and then click Finish.
__ 5. Expand the Queue Managers Clusters folder in the IBM MQ Explorer and verify that you have a cluster that is named CLUS1 with QMC1 and QMC2 listed as full repositories.
Queue manager name
Listener port number Dead-letter queue
QMC1 9001 DLQQMC2 9002 DLQQMC3 9003 DLQQMC4 9004 DLQ
Course materials may not be reproduced in whole or in part without the prior written permission of IBM.
© Copyright IBM Corp. 2017 3-3
V11.2
EXemp
Exercise 3. Implementing workload management in a cluster
ty
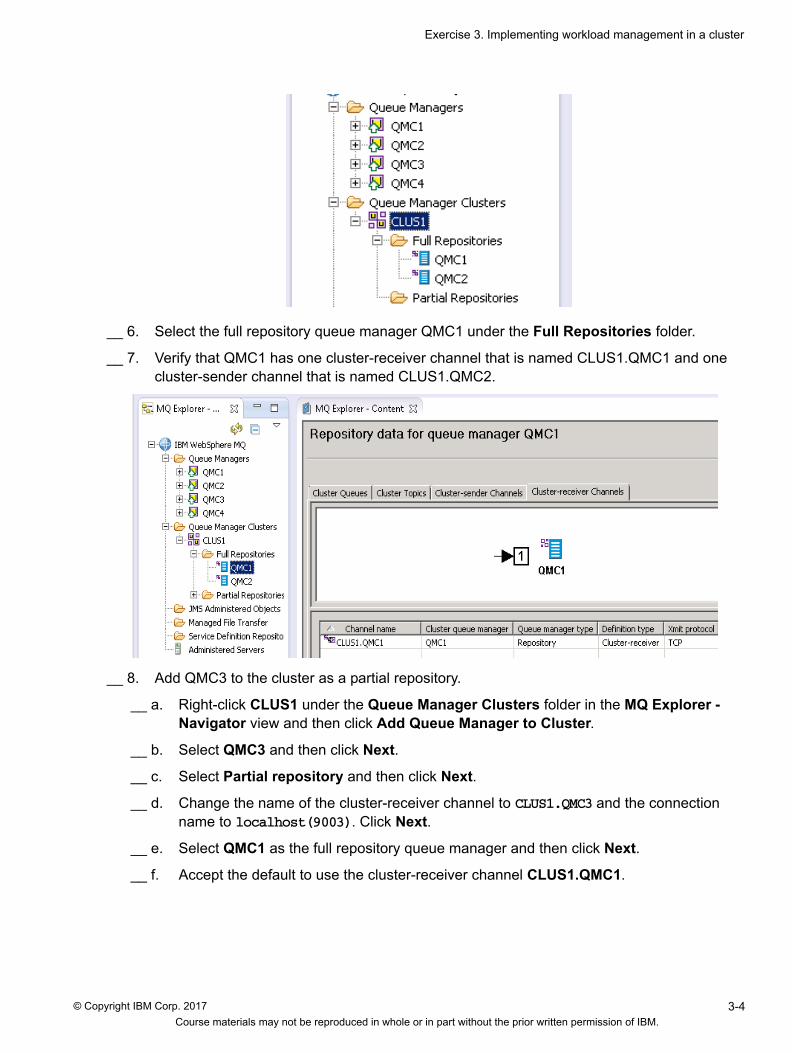
__ 6. Select the full repository queue manager QMC1 under the Full Repositories folder.
__ 7. Verify that QMC1 has one cluster-receiver channel that is named CLUS1.QMC1 and one cluster-sender channel that is named CLUS1.QMC2.
__ 8. Add QMC3 to the cluster as a partial repository.
__ a. Right-click CLUS1 under the Queue Manager Clusters folder in the MQ Explorer - Navigator view and then click Add Queue Manager to Cluster.
__ b. Select QMC3 and then click Next.
__ c. Select Partial repository and then click Next.
__ d. Change the name of the cluster-receiver channel to CLUS1.QMC3 and the connection name to localhost(9003). Click Next.
__ e. Select QMC1 as the full repository queue manager and then click Next.
__ f. Accept the default to use the cluster-receiver channel CLUS1.QMC1.
Course materials may not be reproduced in whole or in part without the prior written permission of IBM.
© Copyright IBM Corp. 2017 3-4

V11.2
EXemp
Exercise 3. Implementing workload management in a cluster
ty
Information
To use MQSC to add a partial repository to a cluster, define a cluster-receiver channel for QMC3 and define a cluster-sender channel that points to one of the full repository queue managers.
The equivalent MQSC commands to add QMC3 to the cluster as a partial repository are:
DEFINE CHANNEL(CLUS1.QMC3) CHLTYPE(CLUSRCVR) TRPTYPE(TCP) + CONNAME('localhost(9003)') CLUSTER(CLUS1)
DEFINE CHANNEL(CLUS1.QMC1) CHLTYPE(CLUSSDR) TRPTYPE(TCP) + CONNAME('localhost(9001)') CLUSTER(CLUS1)
__ 9. Add QMC4 to the cluster as a partial repository.
__ a. Create a cluster-receiver channel that is named CLUS1.QMC4 and the connection localhost(9004).
__ b. Create a cluster-sender channel that points to one of the full repository queue managers.
__ 10. Click QMC1 under the Full Repositories folder and verify that cluster-sender channels were automatically defined between the partial repositories QMC3 and QMC4 and the full repository QMC1.
__ 11. Select QMC3 under the Partial Repositories folder and verify that QMC3 has cluster-sender channels to both full repositories (QMC1 and QMC2).
Notice that the channel to the second full repository (QMC2) was automatically defined.
Course materials may not be reproduced in whole or in part without the prior written permission of IBM.
© Copyright IBM Corp. 2017 3-5

V11.2
EXemp
Exercise 3. Implementing workload management in a cluster
ty
__ 12. Create the dead-letter queue and a cluster queue on QMC1.
__ a. Right-click Queues under QMC1 in the MQ Explorer - Navigator view and then click New > Local Queue.
__ b. Enter DLQ for the queue name and then click Finish.
__ c. Right-click Queues and then click New > Local Queue.
__ d. Enter CLUSQ1 for the queue name and then click Next.
__ e. On the Cluster properties page, click Shared in cluster and type CLUS1 for the cluster name.
Information
The MQSC command for creating a cluster queue is: DEF QL(CLUSQ1) CLUSTER(CLUS1)
__ f. Click Finish. You should have two local queues on QMC1.
Course materials may not be reproduced in whole or in part without the prior written permission of IBM.
© Copyright IBM Corp. 2017 3-6

V11.2
EXemp
Exercise 3. Implementing workload management in a cluster
ty
__ 13. Follow the procedure in Step 12 and create the following queues on QMC2, QMC3, QMC4:
▪ On QMC2, create a local queue that is named DLQ and a cluster queue on CLUS1 that is named CLUSQ1.
▪ On QMC3, create a local queue that is named DLQ and a cluster queue on CLUS1 that is named CLUSQ1.
▪ On QMC4, create a local queue that is named DLQ and a cluster queue on CLUS1 that is named CLUSQ2.
__ 14. Select QMC1 under the Full Repositories folder and then click the Cluster Queues tab to verify that you have a cluster queue on each queue manager.
You should have a cluster queue that is named CLUSQ1 on QMC1, QMC2, and QM3 and a cluster queue that is named CLUSQ2 on QMC4.
Part 2: Using a round-robin approach for workload balancing
In the most basic scenario, if a number of messages are put to the cluster queue CLUSQ1, messages are equally distributed between servers in the cluster in which a local definition of the queue exists.
In this scenario, CLUSQ1 is defined locally on three queue managers: QMC1, QMC2, and QMC3.
__ 1. Use the sample program amqsput and the supplied text file data.txt in the C:\labfiles\Lab03 directory to write 15 messages to the cluster queue CLUSQ1.
In a command window, type:
amqsput CLUSQ1 QMC1 < C:\labfiles\Lab03\data.txt
Course materials may not be reproduced in whole or in part without the prior written permission of IBM.
© Copyright IBM Corp. 2017 3-7

V11.2
EXemp
Exercise 3. Implementing workload management in a cluster
ty__ 2. Use IBM MQ Explorer to view the queue depth of CLUSQ1 on QMC1, QMC2, and QMC3.
You should see that all 15 messages were put to one queue manager, QMC1.
The default queue definition has the Default bind type (DEFBIND) set to Open and the Cluster workload use queue (CLWLUSEQ) set to queue manager. These settings explain why all the messages were placed onto one queue manager.
- DEFBIND(OPEN) binds the queue handle to a specific instance of the cluster queue when the queue is opened.
- CLWLUSEQ(QMGR) means that the CLWLUSEQ attribute of the queue manager definition specifies the behavior. By default, the target of an MQPUT is the local cluster queue instance, if one exists.
__ 3. Change the queue definition for CLUSQ1 queue on QMC1, QMC2, and QMC3 so that Default bind type is set to Not fixed and Cluster workload use queue is set to Any.
__ a. Right-click CLUSQ1 on the Queue content view and then click Properties.
__ b. Click Cluster to display the Cluster properties.
__ c. Change Default bind type set to Not fixed so that the queue handle is not bound to any one instance of the cluster queue.
__ d. Change Cluster workload use queue to Any so that any queue can be used.
__ e. Click OK.
Information
The MQSC command for changing the cluster queue properties is:
ALTER QL(CLUSQ1) DEFBIND(NOTFIXED) CLQLUSEQ(ANY)
__ 4. Repeat the steps to put the 15 messages to the cluster queue CLUSQ1.
__ a. Use IBM MQ Explorer to clear the messages from CLUSQ1 on queue manager QMC1.
Course materials may not be reproduced in whole or in part without the prior written permission of IBM.
© Copyright IBM Corp. 2017 3-8

V11.2
EXemp
Exercise 3. Implementing workload management in a cluster
ty__ b. Run the amqsput program with the data file that is named data.txt.
amqsput CLUSQ1 QMC1 < C:\labfiles\Lab03\data.txt
__ c. View the queue depth of CLUSQ1 on the three queue managers.
You should see that messages were distributed between the three instances of the clustered queues CLUSQ1.
Part 3: Using channel and queue rank to control workload
In this part of the exercise, you alter the queue and channels definitions to specify a cluster workload rank attribute. The rank attribute directs messages to only two of the three queue managers in the cluster.
__ 1. Use IBM MQ Explorer to change the cluster-receiver channel definitions of QMC1 to have a cluster workload channel rank of 7.
__ a. In the MQ Explorer - Navigator view, click the Channels folder under the queue manager to display the Channels content view.
__ b. Right-click the cluster-receiver channel and then click Properties.
__ c. On the Cluster page, set the CLWL channel rank property to 7.
__ d. Click OK.
Information
The MQSC command to change the cluster-receiver channel definition on QMC1 is:
ALTER CHANNEL(CLUS1.QMC1) CHLTYPE(CLUSRCVR) CLWLRANK(7)
__ 2. Follow the same procedure as Step 1 and change the cluster-receiver channel definition of QMC3 to have a cluster workload channel rank of 7.
Course materials may not be reproduced in whole or in part without the prior written permission of IBM.
© Copyright IBM Corp. 2017 3-9

V11.2
EXemp
Exercise 3. Implementing workload management in a cluster
ty__ 3. Clear the cluster queue CLUSQ1 of all messages on each queue manager so that queue
depth is zero.
If the Open output count of the CLUSQ1 on any of the queue managers is greater than 0, an application still has the queue open for output. The queue can be cleared by right-clicking the queue in the Queue contents view, clicking Clear Messages, and then selecting Queue will be cleared using MQGET API calls. This option gets the messages and closes the queue.
__ 4. Run the amqsput program on QMC1 with data.txt to put 15 messages to the cluster queue CLUSQ1.
amqsput CLUSQ1 QMC1 < C:\labfiles\Lab03\data.txt
You should see that QMC1 has eight messages, QMC2 has zero messages, and QMC3 has seven messages.
__ 5. Change the cluster workload channel rank for the QMC2 cluster-receiver channel to a value of 9, and rerun the amqsput program.
All the messages should now be directed to QMC2.
__ 6. Change the cluster workload queue rank (CLWLRANK) property for the queue CLUSQ1 on QMC3 to 6.
__ a. Right-click CLUSQ1 on the Queue content view and then click Properties.
__ b. Click Cluster to display the Cluster properties.
__ c. Change CLWL queue rank to 6.
__ d. Click OK.
Information
The MQSC command to alter the queue definition of CLUSQ1 on QMC3 is:
ALTER QL(CLUSQ1) CLWLRANK(6)
__ 7. Use amqsput again to put messages to the cluster queue CLUSQ1 and notice where the messages were put this time.
amqsput CLUSQ1 QMC1 < C:\labfiles\Lab03\data.txt
Part 4: Using channel priority to control workload
In this part of the exercise, you use the channel priority property to control the distribution of messages on the instances of the cluster queue.
__ 1. Use IBM MQ Explorer to reset the cluster workload channel rank (CLWLRANK) for all cluster-receiver channels to a value of zero.
__ 2. Clear the cluster queue CLUSQ1 on QMC1, QMC2, and QMC3.
__ 3. Using IBM MQ Explorer, set the cluster-receiver channel priority (CLWPRTY) of QMC2 to 3 and QMC3 to 1.
Course materials may not be reproduced in whole or in part without the prior written permission of IBM.
© Copyright IBM Corp. 2017 3-10

V11.2
EXemp
Exercise 3. Implementing workload management in a cluster
ty__ 4. Put the messages again by using the amqsput program.
All the messages are put on CLUSQ1 on QMC3. Even though QMC2 has a higher channel priority, the CLWL queue rank on CLUSQ1 on QMC3 is still set to 6 from Part 3. The cluster workload algorithm uses channel and queue rank over priority.
__ 5. Fix the problem so that all the messages are directed to the highest priority queue manager, QMC2.
Alter the CLUSQ1 queue definition on QMC3 so that the CLWL queue rank (CLWLRANK) is zero.
__ 6. Stop the cluster-receiver (CLUSRCVR) channel CLUS1.QMC2.
__ 7. Run the amqsput test again. You should see that all the messages go to QMC3, which is the highest priority queue manager.
__ 8. Restart the cluster-receiver channel (CLUSRCVR) on channel on QMC2.
Part 5: Using channel WEIGHT to control workload
Suppose now that QMC3 has greater processing power that any of the other queue managers in this cluster. Channel weighting can be used to direct workload to the most powerful queue manager.
__ 1. Reset the cluster workload cluster priority (CLWLPRTY) of the QMC2 and QMC3 cluster-receiver channels to 0.
__ 2. Assuming that QMC3 has twice the processing power of QMC1 and QMC2, set the following channel weights on the cluster-receiver channels:
▪ QMC1: CLWL channel weight = 25
▪ QMC2: CLWL channel weight = 25
▪ QMC3: CLWL channel weight =50
__ 3. Clear all messages from the CLUSQ1 on QMC1, QMC2, and QMC3.
__ 4. Run four iterations of the amqsput test and observe the queue depths of CLUSQ1 on QMC1, QMC2, and QMC3.
You should see that 50% of the messages went to QMC3, 25% of the messages went to QMC1, and the other 25% of the messages went to QMC2.
Part 6: Restricting the number of outbound cluster channels
The cluster workload most recently used attribute (CLWLMRUC) is specified on a queue manager definition. It controls the number of channels that can be used as the destination of a message that is put into a large network where many valid destinations exist.
In this step, QMC1 is used as a gateway queue manager. It no longer contains local instances of cluster queues.
__ 1. Clear all messages from the CLUSQ1 from QMC1, QMC2, and QMC3.
Course materials may not be reproduced in whole or in part without the prior written permission of IBM.
© Copyright IBM Corp. 2017 3-11

V11.2
EXemp
Exercise 3. Implementing workload management in a cluster
ty__ 2. Reset the cluster workload attributes to the default values.
__ a. Reset the cluster workload channel weight (CLWLWGHT) attribute on the cluster-receiver channel to the default value of 50 on each queue manager.
__ b. Reset the cluster workload channel rank (CLWLRANK) attribute to zero on each queue manager.
__ c. Reset the cluster workload channel priority (CLWLPRTY) attribute to zero on each queue manager.
__ 3. Delete the local queue CLUSQ1 from QMC1.
__ 4. Define the local queue CLUSQ1 on QMC4 so that Default bind type is set to Not fixed and Cluster workload use queue is set to Any.
Information
The MQSC command to create the cluster queue on QMC4 is:
DEF QL(CLUSQ1) CLUSTER(CLUS1) DEFBIND(NOTFIXED) CLWLUSEQ(ANY)
__ 5. Limit the number of queue manager destinations to two by setting the Max outbound cluster channels property (CLWLMRUC) to 2 on QMC1.
Information
The MQSC command to restrict the maximum number of outbound cluster channels to 2 is:
ALTER QMGR CLWLMRUC(2)
__ 6. Repeat the amqsput test.
Course materials may not be reproduced in whole or in part without the prior written permission of IBM.
© Copyright IBM Corp. 2017 3-12

V11.2
EXemp
Exercise 3. Implementing workload management in a cluster
tyYou should see that the workload algorithm limited the messages to two queue managers (QMC2 and QMC3).
__ 7. Now run the amqsput program to put messages to cluster queue CLUSQ2 on QMC4.
amqsput CLUSQ2 QMC4 < C:\labfiles\Lab03\data.txt
__ 8. Check the queue depth on QMC4 for CLUSQ2.
__ 9. Run the amqsput to put messages to CLUSQ1.
The messages are now spread across QMC2 and QMC3 or QMC3 and QMC4. One channel was eliminated as a destination this time, even though it was being used for a different queue.
Exercise cleanup
Stop all running queue managers.
Do not delete these queue managers. You use these queue managers and this cluster again in a later exercise.
End of exercise
Course materials may not be reproduced in whole or in part without the prior written permission of IBM.
© Copyright IBM Corp. 2017 3-13

V11.2
EXemp
Exercise 3. Implementing workload management in a cluster
tyExercise review and wrap-up
The first part of the exercise, you created a cluster with two full repository queue managers and two partial repository queue managers. You then created cluster queues on each queue manager. Finally, you used the queue manager, queue, and channel cluster properties to control the workload.
Course materials may not be reproduced in whole or in part without the prior written permission of IBM.
© Copyright IBM Corp. 2017 3-14

V11.2
EXemp
Exercise 4. Tracing message routes
ty
Exercise 4. Tracing message routes
Estimated time
01:00
Overview
In this exercise, you use a network of two queue managers that are connected with channels in a linear fashion, with remote queue definitions that pass a message from one queue manager to another and back. You use the display route application to trace the message and observe the results under various scenarios.
Objectives
After completing this exercise, you should be able to:
• Use the IBM MQ display route application to determine the route that a message took through a queue manager network
Introduction
In this exercise, you use the IBM MQ display route information application (dspmqrte) to diagnose some typical situations where message processing is halted across a distributed network.
This exercise uses queue managers QM1 and QM17. In the first part of this exercise, you create and start the queue managers. You then run MQSC scripts that create the transmission queues, dead-letter queues, sender channels, and receiver channels on both queue managers so that you can send messages between the QM17 and QM1. The MQSC script for QM17 also creates a local definition of the remote queue QL.A on QM1.
Course materials may not be reproduced in whole or in part without the prior written permission of IBM.
© Copyright IBM Corp. 2017 4-1

V11.2
EXemp
Exercise 4. Tracing message routes
tyIn the second part of this exercise, you run the display route application (dspmqrte) on a remote queue that is known to be functioning correctly. You examine the output of the dspmqrte application when the message is routed successfully.
In the next part of the exercise, you stop the sender channel on QM17. You then run the dspmqrte application again and observe the results. The application seems to stop while waiting for responses that never arrive. The channel is restarted.
Next, the remote queue definition is PUT inhibited and the test is run again. Again, the results are observed.
In the final scenario, a remote queue and a transmission queue are defined on the local queue manager. The remote queue points to a non-existent queue. You then run the dspmqrte program to put a message on the remote queue.
Requirements
• IBM MQ V9 and IBM MQ Explorer
• MQSC scripts that create the queues and channels between QM1(1414) and QM17(1417). The scripts are in the C:\labfiles\Lab04 directory.
Course materials may not be reproduced in whole or in part without the prior written permission of IBM.
© Copyright IBM Corp. 2017 4-2

V11.2
EXemp
Exercise 4. Tracing message routes
tyExercise instructions
Part 1: Creating the queue manager and connections
In this part of the exercise, you create the queue managers and that channels and queues so that you can send and receive messages with the queue manager QM1. You also modify the queue manager QM1 so that it can send and receive messages with the queue manager QM17.
You then use the IBM MQ sample programs to verify that you can send a message from QM17 to QL.A on QM1.
__ 1. Using IBM MQ Explorer, create a queue manager that is named QM1 on listener 1414 with a dead-letter queue that is named DLQ.
__ 2. Run the script QM1.mqsc against QM1 to create the queues, and channels so that QM1 and send and receive message from QM17. This script also disables channel and connection authentication on the queue manager for this exercise.
This script creates the following objects:
- A local queue that is named QL.A
- A dead-letter queue that is named DLQ
- A transmission queue that is named QM17
- A sender channel to QM1 that is named QM1.QM17 that points to QM17 and uses the transmission queue QM17
- A receiver channel that is named QM17.QM1
__ a. In a command window, type:
runmqsc QM1 < C:\labfiles\Lab04\QM1.mqsc
__ b. Verify that commands ran successfully.
__ 3. Using IBM MQ Explorer, create a queue manager that is named QM17 on listener 1417 with a dead-letter queue that is named DLQ.
__ 4. Run the script QM17.mqsc against QM17 to create the IBM MQ objects that this exercise requires. This script also disables channel and connection authentication on the queue manager for this exercise.
This script creates the following objects:
▪ A transmission queue that is named QM1
▪ A dead-letter queue that is named DLQ
▪ A sender channel to QM1 that is named QM17.QM1 that points to QM1 and uses the transmission queue QM1
▪ A receiver channel that is named QM1.QM17
▪ A remote queue definition that is named QRMT1 that points to QL.A on QM1 and uses the transmission queue that is named QM1
__ a. In a command window, type:
runmqsc QM17 < C:\labfiles\Lab04\QM17.mqsc
Course materials may not be reproduced in whole or in part without the prior written permission of IBM.
© Copyright IBM Corp. 2017 4-3

V11.2
EXemp
Exercise 4. Tracing message routes
ty__ 5. To test the channel definitions, use the MQSC ping command on QM17 to ping the
message channel from the QM17 (the sender). On MQSC for QM17, type:
PING CHL(QM17.QM1)
Check for successful completion of the ping command.
__ 6. In MQSC for QM17, use the START CHANNEL command to start the sender channel. Type:
START CHL(QM17.QM1)
__ 7. Use the sample program amqsput to test the connection by sending a message from the queue manager QM17 to the queue QL.A on the queue manager QM1.
In a command window, type:
amqsput QRMT1 QM17
Enter a test message and then press Enter twice to end the program.
__ 8. Use IBM MQ Explorer to verify that the message was put on QL.A on QM1.
Part 2: Using the dspmqrte application
In this part of the exercise, QM17 is the local queue manager and QM1 is the remote queue manager.
__ 1. The display route application sends a message to and from a queue manager. Before starting this exercise, ensure that the sender (SDR) channels are started on QM17 and QM1, and that the listeners are running.
__ 2. Observe the route of the normal delivery of a message by using a remote queue.
__ a. QM17 has remote queue definition, QRMT1, that points to QL.A on QM1. Use the amqsput sample program to send a message from QM17 to QL.A on QM1.
In a command window, type:
amqsput QRMT1 QM17
Enter a message.
__ b. Verify that the message arrived on QL.A on QM1.
__ c. Run the display route command and examine the response. Type:
dspmqrte –m QM17 -q QRMT1 –v outline
Course materials may not be reproduced in whole or in part without the prior written permission of IBM.
© Copyright IBM Corp. 2017 4-4

V11.2
EXemp
Exercise 4. Tracing message routes
tyYour results should look similar to following example.
AMQ8653: DSPMQRTE command started with options '-m QM17 -q QRMT1 -v outline'.AMQ8659: DSPMQRTE command successfully put a message on queue 'QM1', queue manager 'QM17'.AMQ8674: DSPMQRTE command is now waiting for information to display.------------------------------------------------------------------------Activity: ApplName: 'IBM\MQ\bin64\dspmqrte.exe'
Operation: OperationType: Put QMgrName: 'QM17' QName: 'QRMT1' ResolvedQName: 'QM1' RemoteQName: 'QL.A' RemoteQMgrName: 'QM1'------------------------------------------------------------------------Activity: ApplName: 'IBM\MQ\bin64\runmqchl.exe'
Operation: OperationType: Get QMgrName: 'QM17' QName: 'QM1' ResolvedQName: 'QM1'Operation: OperationType: Send QMgrName: 'QM17' RemoteQMgrName: 'QM1' ChannelName: 'QM17.QM1' ChannelType: Sender XmitQName: 'QM1'------------------------------------------------------------------------
Course materials may not be reproduced in whole or in part without the prior written permission of IBM.
© Copyright IBM Corp. 2017 4-5
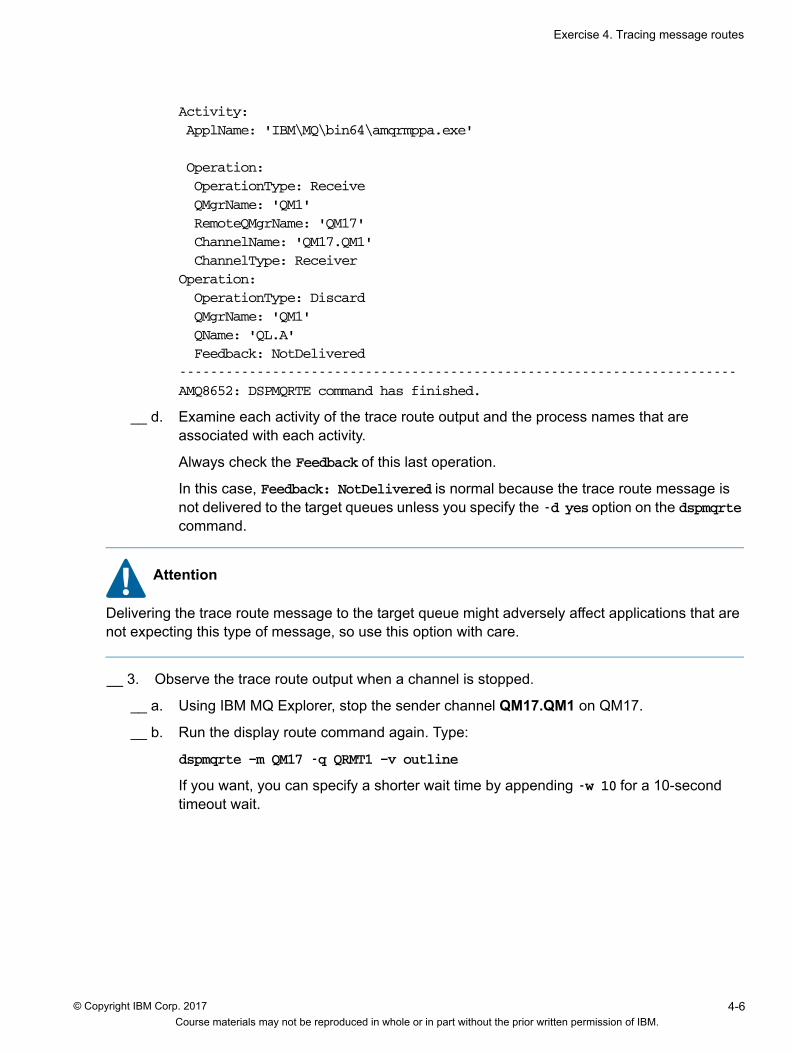
V11.2
EXemp
Exercise 4. Tracing message routes
ty
Activity: ApplName: 'IBM\MQ\bin64\amqrmppa.exe'
Operation: OperationType: Receive QMgrName: 'QM1' RemoteQMgrName: 'QM17' ChannelName: 'QM17.QM1' ChannelType: ReceiverOperation: OperationType: Discard QMgrName: 'QM1' QName: 'QL.A' Feedback: NotDelivered------------------------------------------------------------------------AMQ8652: DSPMQRTE command has finished.
__ d. Examine each activity of the trace route output and the process names that are associated with each activity.
Always check the Feedback of this last operation.
In this case, Feedback: NotDelivered is normal because the trace route message is not delivered to the target queues unless you specify the -d yes option on the dspmqrte command.
Attention
Delivering the trace route message to the target queue might adversely affect applications that are not expecting this type of message, so use this option with care.
__ 3. Observe the trace route output when a channel is stopped.
__ a. Using IBM MQ Explorer, stop the sender channel QM17.QM1 on QM17.
__ b. Run the display route command again. Type:
dspmqrte –m QM17 -q QRMT1 –v outline
If you want, you can specify a shorter wait time by appending -w 10 for a 10-second timeout wait.
Course materials may not be reproduced in whole or in part without the prior written permission of IBM.
© Copyright IBM Corp. 2017 4-6

V11.2
EXemp
Exercise 4. Tracing message routes
ty__ c. What do you observe as the final activity? Does this activity look like an erroneous
outcome?
Activity: ApplName: 'IBM\MQ\bin64\dspmqrte.exe'
Operation: OperationType: Put QMgrName: 'QM17 QName: 'QRMT1 ResolvedQName: 'QM1 RemoteQName: 'QL.A RemoteQMgrName: 'QM1
The result is not erroneous. It is incomplete. You must conclude that the message is being held up.
The message is on the transmission queue QM1. You should conclude that the channel is not processing messages for some reason.
__ 4. Restart the sender channel QM17.QM1 on QM17.
__ 5. Observe the route when the remote queue is changed to inhibit PUT on the queue.
__ a. Use MQSC or IBM MQ Explorer to inhibit PUT on QL.A on queue manager QM1.
__ b. Try to put a message on the QL.A on QM1 from the queue manager QM17. Type:
amqsput QRMT1 QM17
Enter a test message.
You should see that message is put on the dead-letter queue of QM1.
__ c. Run the display route command and observe the response:
dspmqrte –m QM17 -q QRMT1 –v outline
__ d. You should see that the last activity has Feedback: PutInhibited, which means that the operation failed because the queue had PUT inhibited.
Activity: ApplName: 'IBM\MQ\bin64\amqrmppa.exe'
Operation: OperationType: Receive QMgrName: 'QM1' RemoteQMgrName: 'QM17' ChannelName: 'QMR1.QM1' ChannelType: ReceiverOperation: OperationType: Discard QMgrName: 'QM1' Feedback: PutInhibited
__ 6. Modify QL.A on QM1 to allow PUT.
Course materials may not be reproduced in whole or in part without the prior written permission of IBM.
© Copyright IBM Corp. 2017 4-7

V11.2
EXemp
Exercise 4. Tracing message routes
tyExercise cleanup
Do not stop or delete these managers. You use these queue managers and queues in the next exercise.
End of exercise
Course materials may not be reproduced in whole or in part without the prior written permission of IBM.
© Copyright IBM Corp. 2017 4-8

V11.2
EXemp
Exercise 4. Tracing message routes
tyExercise review and wrap-up
In this exercise, you ran the display route application to view the message route from a remote queue manager to a local queue manager. In subsequent steps, you modified the queue managers and queues to simulate typical problems and then use the display route application to identify the problem in the IBM MQ network.
Course materials may not be reproduced in whole or in part without the prior written permission of IBM.
© Copyright IBM Corp. 2017 4-9

V11.2
EXemp
Exercise 5. Handling messages on the dead-letter queue
ty
Exercise 5. Handling messages on the dead-letter queue
Estimated time
01:00
Overview
In this exercise, you configure IBM MQ to automatically handle messages that arrive on the dead-letter queue by using the dead-letter queue handler.
Objectives
After completing this exercise, you should be able to:
• Configure the queue manager to use a dead-letter queue
• Handle dead-letter messages
Introduction
In this exercise, you use the IBM MQ dead-letter handler to process messages that arrive on the queue manager dead-letter queue.
This exercise uses the queue managers, queue, and channels that you defined in Exercise 4 (QM1 on 1414 and QM17 on 1417) so that you can generate network traffic and cause messages to be put to the dead-letter queue.
This exercise uses the following IBM MQ sample programs:
Course materials may not be reproduced in whole or in part without the prior written permission of IBM.
© Copyright IBM Corp. 2017 5-1

V11.2
EXemp
Exercise 5. Handling messages on the dead-letter queue
ty • The amqsbcg sample program is run in a command window. It accepts two input parameters,
the name of the dead-letter queue and the name of queue manager that owns it. This program outputs both the message descriptor and content fields of each message on the queue.
• The runmqdlq command starts dead-letter queue handler, which monitors and handles messages on a dead-letter queue. The program can take its input interactively from the command window or from a rules table file. In this exercise, you create and use a rules table.
In the first part of the exercise, you cause a problem in the queue manager so that IBM MQ puts the message in the dead-letter queue. You then use the IBM MQ Explorer and the amqsbcg sample problem to examine the dead-letter header to determine the reason code.
In the second part of the exercise, you use the IBM MQ dead-letter queue handler to process messages on the dead-letter queue.
Requirements
• IBM MQ V9 and IBM MQ Explorer.
• This exercise uses the queue managers (QM1 and QM17), queues, and channels that you created and used in Exercise 4, “Handling messages on the dead-letter queue”.
• IBM MQ Sample programs amqsbcg and amqsput.
Course materials may not be reproduced in whole or in part without the prior written permission of IBM.
© Copyright IBM Corp. 2017 5-2

V11.2
EXemp
Exercise 5. Handling messages on the dead-letter queue
tyExercise instructions
Part 1: Causing a message to be put on the dead-letter queue
In this part of the exercise, you intentionally cause a problem in the queue manager network so that messages are put to the queue manager dead-letter queue.
__ 1. Start the queue managers QM1 and QM17 that you defined in Exercise 4 if they are not running.
__ 2. Using IBM MQ Explorer or MQSC, inhibit PUT on QL.A on QM1.
To use MQSC for QM1, type:
ALTER QL(QL.A) PUT(DISABLED)
To use IBM MQ Explorer, right-click QL.A in the Queues content view. Set Put messages to Inhibited on the General properties page.
__ 3. Using the amqsput command or IBM MQ Explorer, put a message on QRMT1 on the queue manager QM17.
Type: amqsput QRMT1 QM17
Enter a message.
__ 4. Using IBM MQ Explorer or MQSC, locate the message on the dead-letter queue on QM1.
Check the current depth parameter to see whether a message is on the queue DLQ.
__ 5. Examine the dead-letter queue (DLQ) header by using the browse queue sample program amqsbcg or IBM MQ Explorer and determine the reason code.
Use the sample program to find the reason code.
__ a. Type: amqsbcg DLQ QM1
__ b. Locate the 4-byte reason code in the dead-letter header (bytes 9-12) under the Message section.
**** Message ****length - 177 of 177 bytes 00000000: 444C 4820 0100 0000 0308 0000 514C 2E41 'DLH ........QL.A'00000010: 2020 2020 2020 2020 2020 2020 2020 2020 ' '00000020: 2020 2020 2020 2020 2020 2020 2020 2020 ' '00000030: 2020 2020 2020 2020 2020 2020 514D 3120 ' QM1 '00000040: 2020 2020 2020 2020 2020 2020 2020 2020 ' '00000050: 2020 2020 2020 2020 2020 2020 2020 2020 ' '00000060: 2020 2020 2020 2020 2020 2020 2202 0000 ' "...'00000070: B501 0000 4D51 5354 5220 2020 0B00 0000 '....MQSTR ....'00000080: 5370 6865 7265 204D 515C 6269 6E36 345C 'MQ\bin\amqrmpaa.'00000090: 616D 7172 6D70 7061 2E65 7865 3230 3134 '.exe201704251403'000000A0: 3038 3235 3134 3033 3230 3437 7465 7374 '2047test '
__ c. Use the mqrc command to find the meaning of this reason code.
Course materials may not be reproduced in whole or in part without the prior written permission of IBM.
© Copyright IBM Corp. 2017 5-3

V11.2
EXemp
Exercise 5. Handling messages on the dead-letter queue
tyIn the results of the browse queue sample program amqsbcg, the 4-byte reason code is represented as 0308 0000, which is interpreted as 0000 0803.Type:
mqrc 0x00000803
This command should return the reason of MQRC_PUT_INHIBITED.
__ 6. Use In IBM MQ Explorer to find the reason code:
__ a. Right-click the dead-letter queue DLQ in QM1 and click Browse messages.
__ b. Right-click the relevant message and click Properties.
__ c. Click Dead-letter header from the left column.
This procedure shows the DLQ header in the standard format. You should see that the Reason field is set to MQRC_PUT_INHIBITED.
Part 2: Using the dead-letter queue handler
In this part of the exercise, you use the IBM MQ dead-letter queue handler program to process messages on the dead-letter queue.
__ 1. Using MQSC or IBM MQ Explorer, create a local queue on QM1 that is named QL.B. In this exercise, this queue is used to store messages from the dead-letter queue DLQ.
__ 2. Create a dead-letter queue handler rules table file that forwards the dead-letter message that is destined for QL.A on QM1 to QL.B on QM1 but strips the DLQ header.
__ a. Open Notepad and type the following rules:
inputqm(QM1) inputq(DLQ)reason(MQRC_PUT_INHIBITED) action(fwd) fwdq(QL.B) + fwdqm(QM1) header(no)
Course materials may not be reproduced in whole or in part without the prior written permission of IBM.
© Copyright IBM Corp. 2017 5-4

V11.2
EXemp
Exercise 5. Handling messages on the dead-letter queue
ty
W Windows
You must add a blank line after the last line in the rules table file on Windows.
__ b. Save the file in the C:\labfiles directory as DLQrules.txt.
__ 3. Open a new command window and start the dead-letter queue handler. Type:
runmqdlq DLQ QM1 < C:\labfiles\DLQrules.txt
You should see a message that the dead-letter queue handler started to process INPUT(DLQ).
AMQ8708: Dead-letter queue handler started to process INPUTQ(DLQ)
__ 4. Use MQSC or IBM MQ Explorer to see whether the dead-letter queue handler moved the message from the dead-letter queue DLQ to QL.B.
__ 5. Use IBM MQ Explorer or the amqsbcg program to browse the message on QL.B and verify that the dead-letter header was removed from the message.
Exercise clean-up
__ 1. Close the command window that is running the dead-letter queue handler.
__ 2. Stop the queue managers QM1 and QM17
End of exercise
Course materials may not be reproduced in whole or in part without the prior written permission of IBM.
© Copyright IBM Corp. 2017 5-5

V11.2
EXemp
Exercise 5. Handling messages on the dead-letter queue
tyExercise review and wrap-up
Having completed this exercise, you should be able to:
• Examine a dead letter header to determine the reason that the message arrived on the dead letter queue
• Write a rules table as input for runmqdlq to handle dead letter messages
A solution is provided in the C:\labfiles\Lab05\Solution directory.
Course materials may not be reproduced in whole or in part without the prior written permission of IBM.
© Copyright IBM Corp. 2017 5-6

V11.2
EXemp
Exercise 6. Configuring distributed publish/subscribe
ty
Exercise 6. Configuring distributed publish/subscribe
Estimated time
01:30
Overview
In this exercise, you define and test an IBM MQ publish/subscribe network by using a direct cluster and a topic host cluster. You also use the IBM MQ sample programs and IBM MQ Explorer to test the cluster and the IBM MQ display route command to show the message route through the publish/subscribe cluster.
Objectives
After completing this exercise, you should be able to:
• Define a direct route publish/subscribe cluster
• Define a topic host route publish/subscribe cluster
• Test the publish/subscribe cluster
• Use the IBM MQ display route (dspmqrte) command to verify the route that the message takes through the publish/subscribe cluster
Introduction
In this exercise, you use the cluster of queue managers that you created in Part 1 of Exercise 3, “Implementing workload management in a cluster”.
The cluster is named CLUS1 and contains four queue managers:
• Full repository queue manager QMC1 on localhost(9001) • Full repository queue manager QMC2 on localhost(9002) • Partial repository queue manager QMC3 on localhost(9003) • Partial repository queue manager QMC4 on localhost(9004)
The cluster contains the following channel definitions:
• One cluster-receiver (CLUSRCVR) channel to each queue manager in the cluster
• One cluster-sender (CLUSSDR) channel between the full repository queue managers, QMC1 and QMC2
The cluster also contains some cluster queues.
Course materials may not be reproduced in whole or in part without the prior written permission of IBM.
© Copyright IBM Corp. 2017 6-1

V11.2
EXemp
Exercise 6. Configuring distributed publish/subscribe
ty
In Part 1 of the exercise, you set up a publish/subscribe cluster and use MQSC commands and IBM MQ Explorer to verify the cluster properties. To attach a sample publish/subscribe application and start to send messages through the publish/subscribe cluster, you use the amqssub and amqsput sample programs and IBM MQ Explorer.
In Part 2 of the exercise, you use the IBM MQ display route command (dspmqrte) to verify the route that the message takes through the cluster. You also use IBM MQ Explorer to view the proxy subscriptions.
In Part 3 of the exercise, you modify the publish/subscribe cluster to use topic host routing. You use the IBM MQ display route command (dspmqrte) to verify the route that the message is routed through the topic host.
Requirements
• IBM MQ V9 and IBM MQ V9 Explorer
• The IBM MQ cluster that was defined and tested in Exercise 3, Part 1: “Implementing workload management in a cluster”
• The IBM MQ amqssub and amqsput sample programs
Cluster = CLUS1
QMC1 (9001) QMC2 (9002)
Full repositoryCluster-receiver:CLUS1.QMC1
Cluster-receiver:CLUS1.QMC2
CLUSQ1 CLUSQ1
Full repository
QMC3 (9003) QMC4 (9004)Cluster-receiver:CLUS1.QMC3
Cluster-receiver:CLUS1.QMC4CLUSQ1 CLUSQ2
Cluster-sender:CLUS1.QMC2
Course materials may not be reproduced in whole or in part without the prior written permission of IBM.
© Copyright IBM Corp. 2017 6-2

V11.2
EXemp
Exercise 6. Configuring distributed publish/subscribe
tyExercise instructions
Part 1: Clustered publish/subscribe with direct routing
Direct routing is the simplest way to enable a publish/subscribe network. In this configuration, all queue managers in the cluster become aware of all other queue managers in the cluster. A proxy subscription is sent to each queue manager so that any queue manager in the cluster that receives a publication can connect to a subscriber’s queue manager.
In this part of the exercise, you use a cluster with five queue managers (QMC1 to QMC5). An administered topic object that is named TENNIS.TOPIC, which has CLROUTE(DIRECT), is declared on the QMC2 queue manager. When the subscriber application runs and attaches to the QMC4 queue manager through the topic string /News/Sports/Tennis, proxy subscriptions are propagated to every member of the cluster.
In this part of the exercise, a publication that is published on QMC1 is routed directly to the subscriber on QMC4 by using the cluster channels between QMC1 and QMC4. The arrows in the figure show the path that message follows when the publish/subscribe cluster uses direct routing.
__ 1. Using IBM MQ Explorer, restart the cluster queue managers that you created in Part 1 of Exercise 3: QMC1, QMC2, QMC3, and QMC4.
CLUSTER(CLUS1)CLROUTE(DIRECT)
QMC1 (9001)
QMC2 (9002)
Full repository
Full repository
QMC3 (9003)
QMC4 (9004)QMC5 (9005)
TOPIC(TENNIS.TOPIC)
Publisher/News/Sports/Tennis
Subscriber/News/Sports/Tennis
Proxy1
Proxy1
Proxy1
Proxy1
Course materials may not be reproduced in whole or in part without the prior written permission of IBM.
© Copyright IBM Corp. 2017 6-3

V11.2
EXemp
Exercise 6. Configuring distributed publish/subscribe
ty
__ 2. The cluster that you created in Exercise 3 has two partial repository queue managers (QMC3 and QMC4). For this exercise, you need another partial repository queue manager.
Using IBM MQ Explorer, create a partial repository queue manager that is named QMC5 that has a dead-letter queue that is named DLQ and a listener port number of 9005.
__ a. Create the queue manager QMC5.
__ b. Create the local queue that is named DLQ.
__ c. Right-click CLUS1 in the MQ Explorer - Navigator view and then click Add Queue Manager to Cluster.
__ d. Select QMC5.
__ e. Enter CLUS1.QMC5 for the cluster-receiver channel name and localhost(9005) for the cluster-receiver channel connection name.
__ f. Select QMC1 as the full repository queue manager.
__ g. Select CLUS1.QMC1 as the cluster-receiver channel to be used by the full repository queue manager.
__ 3. Run the MQSC DISPLAY CLUSQMGR command with the QMTYPE option on QMC1 to display the CLUS1 cluster and verify the components of the cluster. Type:
DISPLAY CLUSQMGR(*) QMTYPE
The command should return results similar to the following example:
AMQ8441: Display Cluster Queue Manager details.CLUSQMGR(QMC1)CHANNEL(CLUS1.QMC1) CLUSTER(CLUS1)QMTYPE(REPOS)
AMQ8441: Display Cluster Queue Manager details. CLUSQMGR(QMC2)CHANNEL(CLUS1.QMC2) CLUSTER(CLUS1)QMTYPE(REPOS)
AMQ8441: Display Cluster Queue Manager details. CLUSQMGR(QMC3)CHANNEL(CLUS1.QMC3) CLUSTER(CLUS1QMTYPE(NORMAL)
Course materials may not be reproduced in whole or in part without the prior written permission of IBM.
© Copyright IBM Corp. 2017 6-4
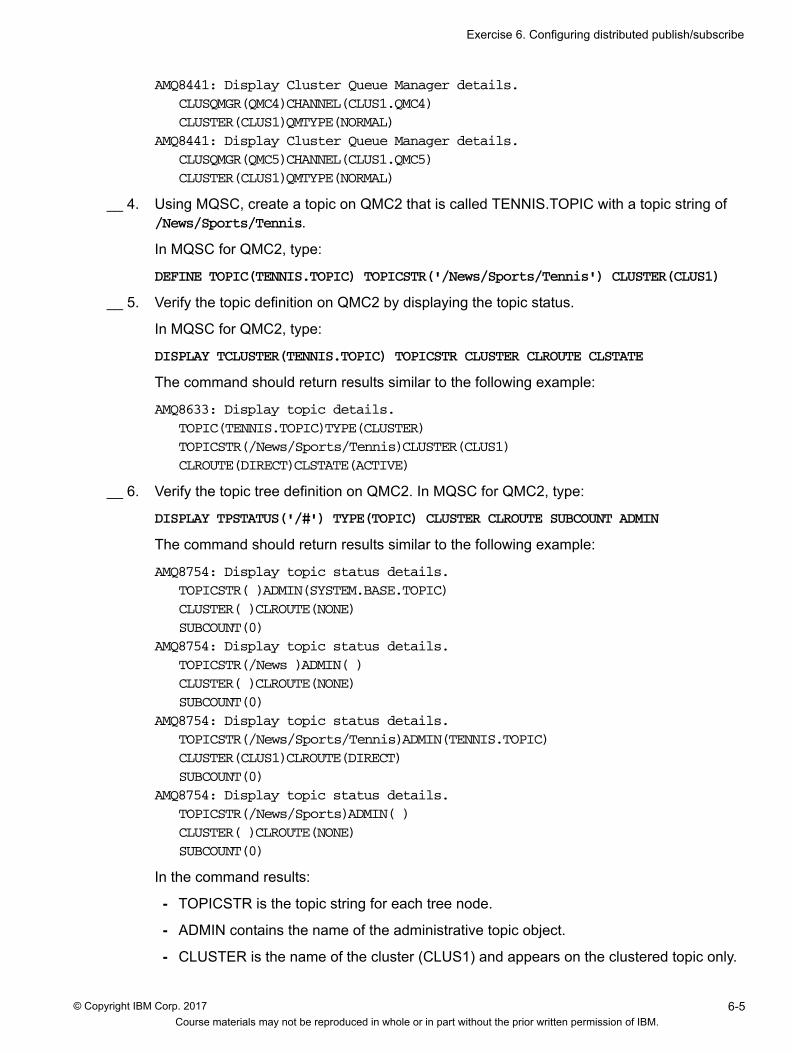
V11.2
EXemp
Exercise 6. Configuring distributed publish/subscribe
tyAMQ8441: Display Cluster Queue Manager details.
CLUSQMGR(QMC4)CHANNEL(CLUS1.QMC4) CLUSTER(CLUS1)QMTYPE(NORMAL)
AMQ8441: Display Cluster Queue Manager details. CLUSQMGR(QMC5)CHANNEL(CLUS1.QMC5) CLUSTER(CLUS1)QMTYPE(NORMAL)
__ 4. Using MQSC, create a topic on QMC2 that is called TENNIS.TOPIC with a topic string of /News/Sports/Tennis.
In MQSC for QMC2, type:
DEFINE TOPIC(TENNIS.TOPIC) TOPICSTR('/News/Sports/Tennis') CLUSTER(CLUS1)
__ 5. Verify the topic definition on QMC2 by displaying the topic status.
In MQSC for QMC2, type:
DISPLAY TCLUSTER(TENNIS.TOPIC) TOPICSTR CLUSTER CLROUTE CLSTATE
The command should return results similar to the following example:
AMQ8633: Display topic details. TOPIC(TENNIS.TOPIC)TYPE(CLUSTER) TOPICSTR(/News/Sports/Tennis)CLUSTER(CLUS1) CLROUTE(DIRECT)CLSTATE(ACTIVE)
__ 6. Verify the topic tree definition on QMC2. In MQSC for QMC2, type:
DISPLAY TPSTATUS('/#') TYPE(TOPIC) CLUSTER CLROUTE SUBCOUNT ADMIN
The command should return results similar to the following example:
AMQ8754: Display topic status details. TOPICSTR( )ADMIN(SYSTEM.BASE.TOPIC) CLUSTER( )CLROUTE(NONE) SUBCOUNT(0)
AMQ8754: Display topic status details. TOPICSTR(/News )ADMIN( ) CLUSTER( )CLROUTE(NONE) SUBCOUNT(0)
AMQ8754: Display topic status details. TOPICSTR(/News/Sports/Tennis)ADMIN(TENNIS.TOPIC) CLUSTER(CLUS1)CLROUTE(DIRECT) SUBCOUNT(0)
AMQ8754: Display topic status details. TOPICSTR(/News/Sports)ADMIN( ) CLUSTER( )CLROUTE(NONE) SUBCOUNT(0)
In the command results:
- TOPICSTR is the topic string for each tree node.
- ADMIN contains the name of the administrative topic object.
- CLUSTER is the name of the cluster (CLUS1) and appears on the clustered topic only.
Course materials may not be reproduced in whole or in part without the prior written permission of IBM.
© Copyright IBM Corp. 2017 6-5

V11.2
EXemp
Exercise 6. Configuring distributed publish/subscribe
ty - CLROUTE is set to NONE except for the TENNIS.TOPIC where it is set to DIRECT,
which indicates direct routing.
- SUBCOUNT is the number of subscriptions currently aware of the topic.
__ 7. The topic knowledge is spread to all cluster members so that the publish/subscribe engine can match its publications to subscriptions in the same queue manager by using the topic tree.
Repeat steps 5 and 6 for the other queue managers in the cluster to verify that the topic status is the same on all queue managers.
__ 8. Test the publish/subscribe cluster.
__ a. Open three command windows and arrange them so that you can see each window.
__ b. In the first command window, set up a publisher on QMC1 by entering the following command:
amqspub /News/Sports/Tennis QMC1
__ c. In the second and third command windows, set up two subscribers on QMC3 and QMC4 by entering the following commands:
amqssub /News/Sports/Tennis QMC3amqssub /News/Sports/Tennis QMC4
__ 9. In the publisher prompt window (the window from Step 8.b), enter a message. The message is displayed in both the subscribing command prompt windows.
Course materials may not be reproduced in whole or in part without the prior written permission of IBM.
© Copyright IBM Corp. 2017 6-6

V11.2
EXemp
Exercise 6. Configuring distributed publish/subscribe
ty
Important
The subscription has a timeout of 30 seconds before it automatically disconnects.
If the automatic timeout is causing you problems, type the commands in each command window but do not press Enter until all the commands are ready. Then, go back to each command window, starting with the subscriptions windows, and press Enter.
__ 10. Close the subscriber command prompt windows but leave the publisher (amqspub) running.
Part 2: Testing cluster publication routing
In Part 1 of this exercise, the test showed that messages are delivered from publisher to subscriber, but you cannot see how the messages are routed from the publisher to the subscriber.
In this part of the exercise, you use IBM MQ Explorer to attach subscribers and the IBM MQ display route application (dspmqrte) to display the route of the message through the cluster.
__ 1. In IBM MQ Explorer, create a test subscription.
__ a. Expand the queue manager QMC4 under the Queue Managers folder in the MQ Explorer - Navigator view.
__ b. Right-click Topics, then click Test Subscription.
__ c. In the Topic String field, type: /News/Sports/Tennis
__ d. Click Subscribe. Do not click Close.
__ 2. In the publisher command prompt window that is running the amqspub sample program, enter a message. You should see the message in the Subscribe window in IBM MQ Explorer.
__ 3. View the message route.
In a new command prompt window, use the display route command to view the path of the message through the publish/subscribe cluster. Type:
dspmqrte -ts /News/Sports/Tennis -ac -d yes -v outline activity -w 3 -m QMC1
Course materials may not be reproduced in whole or in part without the prior written permission of IBM.
© Copyright IBM Corp. 2017 6-7

V11.2
EXemp
Exercise 6. Configuring distributed publish/subscribe
tyThe command should return results similar to the following example:
AMQ8694: DSPMQRTE command successfully put a message to topic string '/News/Sports/Tennis', queue manager 'QMC1'.AMQ8657: DSPMQRTE command used CorrelId 0x414D5120514D433120202020202020205BB5F45320007D04.AMQ8674: DSPMQRTE command is now waiting for information to display.--------------------------------------------------------------------------Activity: ApplName: 'QMC1'Operation: OperationType: Put QMgrName: 'QMC1' TopicString: '/News/Sports/Tennis'Operation: OperationType: Publish SubId: X'414D5120514D433120202020202020205BB5F45320000D0F' SubLevel: 1 QMgrName: 'QMC1'----------------------------------------------------------------------------Activity: ApplName: 'IBM\MQ\bin64\amqrmppa.exe'Operation: OperationType: Get QMgrName: 'QMC1' QName: 'SYSTEM.CLUSTER.TRANSMIT.QUEUE' ResolvedQName: 'SYSTEM.CLUSTER.TRANSMIT.QUEUE'
Course materials may not be reproduced in whole or in part without the prior written permission of IBM.
© Copyright IBM Corp. 2017 6-8

V11.2
EXemp
Exercise 6. Configuring distributed publish/subscribe
ty
Operation: OperationType: Send QMgrName: 'QMC1' RemoteQMgrName: 'QMC4' ChannelName: 'CLUS1.QMC4' ChannelType: ClusSdr XmitQName: 'SYSTEM.CLUSTER.TRANSMIT.QUEUE'--------------------------------------------------------------------------Activity: ApplName: 'IBM\MQ\bin64\amqrmppa.exe'Operation: OperationType: Receive QMgrName: 'QMC4' RemoteQMgrName: 'QMC1' ChannelName: 'CLUS1.QMC4' ChannelType: ClusRcvrOperation: OperationType: Put QMgrName: 'QMC4' QName: 'SYSTEM.INTER.QMGR.PUBS' ResolvedQName: 'SYSTEM.INTER.QMGR.PUBS'---------------------------------------------------------------------------Activity: ApplName: 'QMC4'Operation: OperationType: Put QMgrName: 'QMC4' TopicString: '/News/Sports/Tennis'Operation: OperationType: Publish SubId: X'414D5120514D4334202020202020202084B5F45320006404' SubLevel: 1 QMgrName: 'QMC4'----------------------------------------------------------------------------AMQ8652: DSPMQRTE command has finished.
The report shows that the message was sent directly from the publisher (QMC1) to the subscriber (QMC4) by using the cluster channels.
__ 4. Follow the procedure in Step 1 to create a subscription on QMC5.
__ 5. Validate the proxy subscriptions by using IBM MQ Explorer:
__ a. In the MQ Explorer - Navigator view, expand the queue manager QMC5 under the Queue Managers folder.
__ b. Right-click Topics, then click Status.
__ c. Expand the topic tree to view the details of the Tennis node, starting from the [Empty] node. The proxy subscription count is provided in the Sub count column.
Course materials may not be reproduced in whole or in part without the prior written permission of IBM.
© Copyright IBM Corp. 2017 6-9

V11.2
EXemp
Exercise 6. Configuring distributed publish/subscribe
ty
__ d. Right-click the Tennis node line and then select Topic Status - Subscribers to display more information about the proxy subscription such as the subscription ID.
Course materials may not be reproduced in whole or in part without the prior written permission of IBM.
© Copyright IBM Corp. 2017 6-10

V11.2
EXemp
Exercise 6. Configuring distributed publish/subscribe
tyPart 3: Clustered publish/subscribe with topic host routing
In this part of the exercise, you modify the topic on QMC2 to change it from direct routing to topic host routing. In this part of the exercise, QMC2 is the topic host, as shown in the figure. When you modify the topic, create a subscription, and trace the route, you see that the message is now routed through the topic host queue manager.
__ 1. Replace the existing DIRECT routed topic on QMC2 with a TOPICHOST routed topic.
__ a. Remove the existing TENNIS.TOPIC topic that has routing set to DIRECT from QMC2.
In MQSC for QMC2, type:
ALTER TOPIC(TENNIS.TOPIC) CLUSTER('')
Important
The topic object must be removed from the cluster by clearing the CLUSTER attribute before the CLROUTE attribute is changed in the next step. If you do not remove the topic object first, you receive a system error that warns you to do so.
__ b. Add the TENNIS.TOPIC to QMC2 (the topic host) with routing set to TOPICHOST. Type:
ALTER TOPIC(TENNIS.TOPIC) CLROUTE(TOPICHOST) CLUSTER(CLUS1)
CLUSTER(CLUS1)CLROUTE(TOPICHOST)
QMC1 (9001)
QMC2 (9002)
Full repository
Fullrepository
QMC3 (9003)
QMC4 (9004)QMC5 (9005)
Publisher/News/Sports/Tennis
Subscriber/News/Sports/Tennis
Proxy1
Proxy1
Proxy2
TOPIC(TENNIS.TOPIC)
Subscriber/News/Sports/Tennis
Course materials may not be reproduced in whole or in part without the prior written permission of IBM.
© Copyright IBM Corp. 2017 6-11

V11.2
EXemp
Exercise 6. Configuring distributed publish/subscribe
ty__ c. Verify the topic definition by displaying the topic status. Type:
DISPLAY TCLUSTER(TENNIS.TOPIC) TOPICSTR CLUSTER CLROUTE CLSTATE
The command should return the following status:
TOPIC(TENNIS.TOPIC)TYPE(CLUSTER) TOPICSTR(/News/Sports/Tennis)CLUSTER(CLUS1) CLROUTE(TOPICHOST)CLSTATE(ACTIVE)
__ 2. Verify that the topic definition is on the other queue managers (QM1, QM3, QM4, and QM5) by displaying the topic status.
In MQSC for each queue manager, type:
DISPLAY TCLUSTER(TENNIS.TOPIC) TOPICSTR CLUSTER CLROUTE CLSTATE
The topic status should match the status that QMC2 returns (Step 1c).
__ 3. Test the topic host routing by creating a test subscription on QMC4 in IBM MQ Explorer.
__ a. In the MQ Explorer - Navigator view, expand the queue manager QMC4 under the Queue Managers folder.
__ b. Right-click Topics, and then click Test Subscription.
__ c. In the Topic String field, type: /News/Sports/Tennis
__ d. Click Subscribe. Do not click Close.
__ 4. Publish a message on QMC1 by using the amqspub sample program.
__ a. If you closed the command prompt window that was running the amqspub sample program, open a new command prompt window.
__ b. In the command prompt window, type: amqspub /News/Sports/Tennis QMC1
__ c. Enter a message.
__ 5. Display the route to verify that the message went through the topic host. Type:
dspmqrte -ts /News/Sports/Tennis -ac -d yes -v outline activity -w 3 -m QMC1
Course materials may not be reproduced in whole or in part without the prior written permission of IBM.
© Copyright IBM Corp. 2017 6-12

V11.2
EXemp
Exercise 6. Configuring distributed publish/subscribe
tyThe command should return results similar to the following example, which shows that the message is now routed through QMC2 (the topic host).
AMQ8694: DSPMQRTE command successfully put a message to topic string '/News/Sports/Tennis', queue manager 'QMC1'.AMQ8657: DSPMQRTE command used CorrelId 0x414D5120514D433120202020202020205BB5F45320017304.AMQ8674: DSPMQRTE command is now waiting for information to display.--------------------------------------------------------------------------Activity: ApplName: 'QMC1
Operation: OperationType: Put QMgrName: 'QMC1' TopicString: '/News/Sports/Tennis'--------------------------------------------------------------------------Activity: ApplName: 'MQ\bin\amqrmppa.exe'
Operation: OperationType: Get QMgrName: 'QMC1' QName: 'SYSTEM.CLUSTER.TRANSMIT.QUEUE' ResolvedQName: 'SYSTEM.CLUSTER.TRANSMIT.QUEUE'Operation: OperationType: Send QMgrName: 'QMC1' RemoteQMgrName: 'QMC2' ChannelName: 'CLUS1.QMC2' ChannelType: ClusSdr XmitQName: 'SYSTEM.CLUSTER.TRANSMIT.QUEUE'---------------------------------------------------------------------------Activity: ApplName: 'MQ\bin\amqrmppa.exe'
Operation: OperationType: Receive QMgrName: 'QMC2' RemoteQMgrName: 'QMC1' ChannelName: 'CLUS1.QMC2' ChannelType: ClusRcvrOperation: OperationType: Put QMgrName: 'QMC2' QName: 'SYSTEM.INTER.QMGR.PUBS' ResolvedQName: 'SYSTEM.INTER.QMGR.PUBS'---------------------------------------------------------------------------
Course materials may not be reproduced in whole or in part without the prior written permission of IBM.
© Copyright IBM Corp. 2017 6-13

V11.2
EXemp
Exercise 6. Configuring distributed publish/subscribe
tyActivity: ApplName: 'QMC2'
Operation: OperationType: Put QMgrName: 'QMC2' TopicString: '/News/Sports/Tennis'Operation: OperationType: Publish SubId: X'414D5120514D4332202020202020202068B5F45320000D19' SubLevel: 1 QMgrName: 'QMC2'---------------------------------------------------------------------------
Activity: ApplName: 'IBM\MQ\bin64\amqrmppa.exe'
Operation: OperationType: Get QMgrName: 'QMC2' QName: 'SYSTEM.CLUSTER.TRANSMIT.QUEUE' ResolvedQName: 'SYSTEM.CLUSTER.TRANSMIT.QUEUE'Operation: OperationType: Send QMgrName: 'QMC2' RemoteQMgrName: 'QMC4' ChannelName: 'CLUS1.QMC4' ChannelType: ClusSdr XmitQName: 'SYSTEM.CLUSTER.TRANSMIT.QUEUE'------------------------------------------------------------------------Activity: ApplName: 'IBM\MQ\bin64\amqrmppa.exe'
Operation: OperationType: Receive QMgrName: 'QMC4' RemoteQMgrName: 'QMC2' ChannelName: 'CLUS1.QMC4' ChannelType: ClusRcvrOperation: OperationType: Put QMgrName: 'QMC4' QName: 'SYSTEM.INTER.QMGR.PUBS' ResolvedQName: 'SYSTEM.INTER.QMGR.PUBS'------------------------------------------------------------------------
Course materials may not be reproduced in whole or in part without the prior written permission of IBM.
© Copyright IBM Corp. 2017 6-14
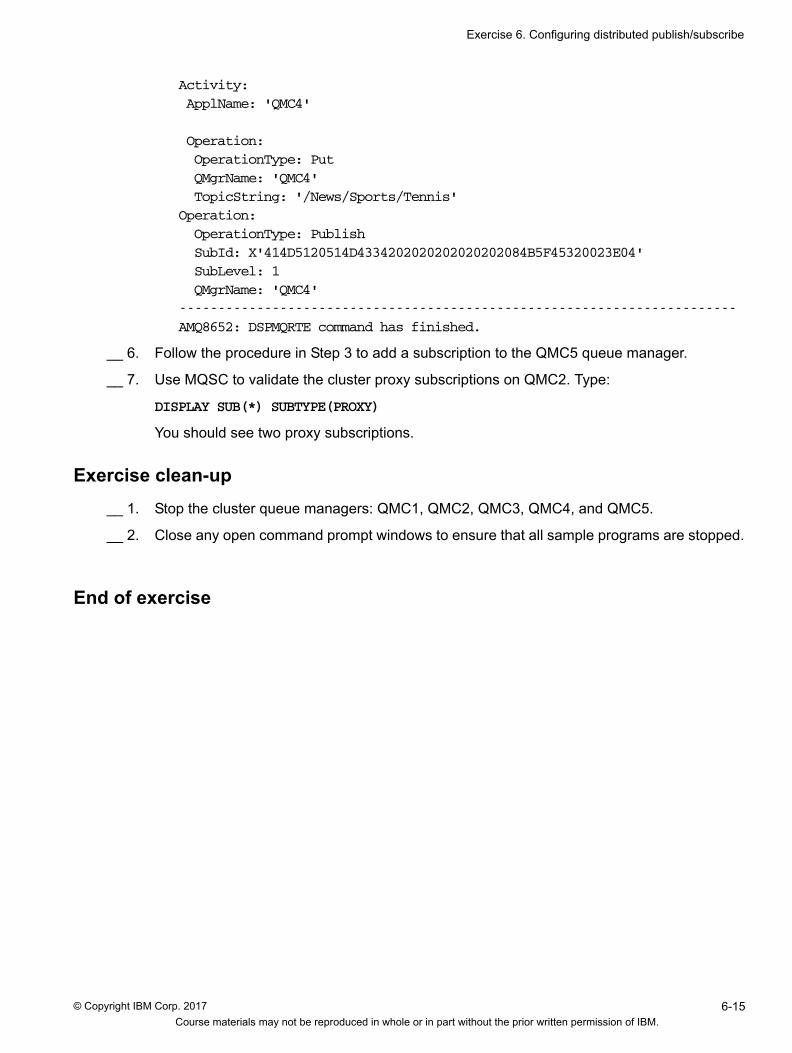
V11.2
EXemp
Exercise 6. Configuring distributed publish/subscribe
tyActivity: ApplName: 'QMC4'
Operation: OperationType: Put QMgrName: 'QMC4' TopicString: '/News/Sports/Tennis'Operation: OperationType: Publish SubId: X'414D5120514D4334202020202020202084B5F45320023E04' SubLevel: 1 QMgrName: 'QMC4'------------------------------------------------------------------------AMQ8652: DSPMQRTE command has finished.
__ 6. Follow the procedure in Step 3 to add a subscription to the QMC5 queue manager.
__ 7. Use MQSC to validate the cluster proxy subscriptions on QMC2. Type:
DISPLAY SUB(*) SUBTYPE(PROXY)
You should see two proxy subscriptions.
Exercise clean-up
__ 1. Stop the cluster queue managers: QMC1, QMC2, QMC3, QMC4, and QMC5.
__ 2. Close any open command prompt windows to ensure that all sample programs are stopped.
End of exercise
Course materials may not be reproduced in whole or in part without the prior written permission of IBM.
© Copyright IBM Corp. 2017 6-15

V11.2
EXemp
Exercise 6. Configuring distributed publish/subscribe
tyExercise review and wrap-up
In this exercise, you completed the following tasks:
• Created a publish/subscribe cluster that uses direct routing.
• Tested the publish/subscribe cluster and verified the message route.
• Verified the publish/subscribe configuration and status by using MQSC and IBM MQ Explorer.
• Created a publish/subscribe cluster that uses topic host routing.
Course materials may not be reproduced in whole or in part without the prior written permission of IBM.
© Copyright IBM Corp. 2017 6-16

V11.2
EXemp
Exercise 7. Getting started with the IBM MQ Console
ty
Exercise 7. Getting started with the IBM MQ Console
Estimated time
01:00
Overview
In this exercise, you set up and use the IBM MQ Console for basic administration of IBM MQ objects. You also monitor system resources and configure dashboard layouts.
Objectives
After completing this exercise, you should be able to:
• Configure basic security to allow users and groups to access the IBM MQ Console
• Start the IBM MQ Console
• Manage local queue managers
• Monitor system resources
• Configure dashboard layouts
Introduction
IBM MQ V9.0.1 introduces the IBM MQ Console browser-based interface. This lab explores some of the IBM MQ administration capabilities that the IBM MQ Console provides.
With the IBM MQ Console, users can create a more customized experience for monitoring and administering IBM MQ by using dashboards and widgets.
• Dashboards represent the presentation space that users create. Dashboards are customizable, and can be configured to suit a user’s requirements and preferences. The IBM MQ Console can contain multiple dashboard views on tabs. For example, dashboards can be created that offer views for different business applications that use IBM MQ. Optionally, you can have a tab for monitoring.
• Widgets represent the object types that are displayed on the dashboard. Each dashboard tab can hold a number of widgets, arranged in a grid. Widgets representing IBM MQ objects can be added, viewed, and deleted from the dashboard as needed. In addition, some of the properties of the IBM MQ objects represented by these widgets can be modified.
Course materials may not be reproduced in whole or in part without the prior written permission of IBM.
© Copyright IBM Corp. 2017 7-1

V11.2
EXemp
Exercise 7. Getting started with the IBM MQ Console
ty
Information
The IBM MQ Console does not presently offer all of the configuration functions of the IBM MQ Explorer. In some cases, it might be necessary to use IBM MQ Explorer or MQSC to complete some configuration and monitoring tasks.
In the first part of this lab, you configure basic security and start the IBM MQ Console.
In the second part of the exercise, you explore some of the configuration options that the IBM MQ Console supports.
In the third part of this lab, you explore some of the monitoring capabilities of the IBM MQ Console.
Requirements
IBM MQ V9.0.1 or later
Course materials may not be reproduced in whole or in part without the prior written permission of IBM.
© Copyright IBM Corp. 2017 7-2

V11.2
EXemp
Exercise 7. Getting started with the IBM MQ Console
tyExercise instructions
Part 1: Setting up the IBM MQ Console environment
In this part of the exercise, you configure basic security for the IBM MQ Console. You then start the IBM MQ Console web server, connect to the IBM MQ Console and login as an administrator.
__ 1. Configure basic security for users and groups to access the IBM MQ Console.
a. Using a text editor, such as Notepad, examine the contents of the basic_registry.xml file in the C:\Program Files\IBM\MQ\web\samp\configuration directory.
This sample file includes definitions for three security roles: MQWebAdmin, MQWebAdminRO, and MQWebUser.
<!-- Roles for the MQ Console --> <enterpriseApplication id="com.ibm.mq.console"> <application-bnd> <security-role name="MQWebAdmin"> <group name="MQWebUI" realm="defaultRealm"/> </security-role> <security-role name="MQWebAdminRO"> <user name="mqreader" realm="defaultRealm"/> </security-role> <security-role name="MQWebUser"> <special-subject type="ALL_AUTHENTICATED_USERS"/> </security-role> </application-bnd> </enterpriseApplication>
In the sample file, members of the group MQWebUI are given MQWebAdmin permissions.
<security-role name="MQWebAdmin"><group name="MQWebUI" realm="defaultRealm"/>
The basicRegistry section of the sample file defines the users and groups.
<basicRegistry id="basic" realm="defaultRealm"> <!-- This sample defines two users with unencoded passwords --> <!-- and a group, these are used by the role mappings above --> <user name="mqadmin" password="mqadmin"/> <user name="mqreader" password="mqreader"/> <group name="MQWebUI"> <member name="mqadmin"/> </group></basicRegistry>
This sample file defines two users: mqadmin and mqreader.
The user mqadmin is defined as a member of the MQWebUI group, which is defined as a member of the MQWebAdmin role. Later In this exercise, you log in as mqadmin so that you have full administration authorization.
Course materials may not be reproduced in whole or in part without the prior written permission of IBM.
© Copyright IBM Corp. 2017 7-3

V11.2
EXemp
Exercise 7. Getting started with the IBM MQ Console
tyb. Using Windows Explorer, rename the file mqwebuser.xml in the
C:\ProgramData\IBM\MQ\web\installations\Installation1\servers\mqweb directory to savemqwebuser.xml
c. Using Windows Explorer, copy the file basic_registry.xml from the C:\Program Files\IBM\MQ\web\samp\configuration directory to the C:\ProgramData\IBM\MQ\web\installations\Installation1\servers\mqweb directory.
d. Using Windows Explorer, rename the file basic_registry.xml in the C:\ProgramData\IBM\MQ\web\installations\Installation1\servers\mqweb directory to mqwebuser.xml
__ 2. Start the IBM MQ Console web server.
Open a command prompt window and type: strmqweb
The command should return the following messages:
Starting server mqweb.Server mqweb started.
__ 3. Display the URL for the IBM MQ Console.
In the command prompt window, type: dspmqweb
The command should return information about the status of the web server and the URLs for the web console and REST API.
Server mqweb is running.URLs:
https://localhost:9443/ibmmq/console/https://localhost:9443/ibmmq/rest/v1/
Information
The dspmqweb command returns URLs for the console and the REST API. From IBM MQ Version 9.0.1, you can use the administrative REST API to request information about queue manager and installations. The REST API is not used in this exercise.
__ 4. Connect to the IBM MQ Console from a web browser by using the console URL you obtained in Step 3.
__ a. Start Mozilla Firefox.
__ b. For the URL, type: https://localhost:9443/ibmmq/console
__ c. If you receive any security messages that the connection is untrusted, click I Understand the Risks and then add the exception.
__ 5. In the IBM MQ Console - Login window, log in with a user name of mqadmin and a password of mqadmin.
The IBM MQ Console displays the default dashboard.
Course materials may not be reproduced in whole or in part without the prior written permission of IBM.
© Copyright IBM Corp. 2017 7-4

V11.2
EXemp
Exercise 7. Getting started with the IBM MQ Console
tyThe default dashboard includes a window frame or widget that shows any local queue managers on the server. If you have already run some exercises before this exercise, you see the queue managers in the Local Queue Managers widget.
Part 2: Managing IBM MQ objects
In this part of exercise, you use the IBM MQ Console to configure and manage an IBM MQ queue manager, queues, and channels. The exercise does not cover all of the IBM MQ configuration and administration features. Instead, this part of the exercise focuses on some key features of the IBM MQ Console.
__ 1. Create a queue manager that is named MQCONLAB on port 1418.
__ a. Click + on the Local Queue Managers widget.
__ b. For the Queue manager name, type: MQCONLAB
__ c. For the Port, type: 1418
Course materials may not be reproduced in whole or in part without the prior written permission of IBM.
© Copyright IBM Corp. 2017 7-5

V11.2
EXemp
Exercise 7. Getting started with the IBM MQ Console
ty
__ d. Click Create. The new queue manager is created and started. It appears in the Local Queue Managers widget.
__ 2. Display the queue manager properties for the MQCONLAB queue manager.
__ a. In the Local Queue Managers widget, click the MQCONLAB queue manager and then click the Properties icon.
The properties editor contains information that is familiar to administrators who use either MQSC or IBM MQ Explorer to view queue manager properties.
__ b. On the General tab, type a description into the Description field.
__ c. Click Status to view the current status of the queue manager.
Course materials may not be reproduced in whole or in part without the prior written permission of IBM.
© Copyright IBM Corp. 2017 7-6

V11.2
EXemp
Exercise 7. Getting started with the IBM MQ Console
ty
__ d. The IBM MQ Console indicates that you have unsaved changes. Click Save to accept the changes.
Course materials may not be reproduced in whole or in part without the prior written permission of IBM.
© Copyright IBM Corp. 2017 7-7

V11.2
EXemp
Exercise 7. Getting started with the IBM MQ Console
ty
__ 3. Add a Queues widget for the MQCONLAB queue manager.
__ a. With the MQCONLAB queue manager selected in the Local Queue Managers widget, click Add widget.
__ b. Click the Queues link to create the widget. The widget is placed on the current tab.
__ 4. With a Queues widget you can create and delete queues, modify queue properties, put a test message, and browse messages. On the More menu, you can clear the queue and manage authority records.
Create a local queue that is named SALES.
__ a. Click the Create icon on the Queues on MQCONLAB widget.
__ b. For the Queue name, type: SALES
__ c. For the Queue type, click Local.
Course materials may not be reproduced in whole or in part without the prior written permission of IBM.
© Copyright IBM Corp. 2017 7-8

V11.2
EXemp
Exercise 7. Getting started with the IBM MQ Console
ty__ d. Click Create.
__ 5. Put a message on the queue SALES.
__ a. Select the SALES queue in the widget and click the Put message icon.
__ b. Enter a message in the Message field and then click Put to send the message.
__ c. Verify that Queue depth of SALES is now 1.
__ 6. The default tab that the IBM MQ Console creates is named Tab 1. Customize the tab to name it Overview.
__ a. Click the down arrow next to the dashboard tab that is named Tab 1.
__ b. Click Configure tab.
__ c. For the Tab name, type: Overview
__ d. For the Description, type: Main view of lab exercise
The description gives a clearer meaning to the intention of what the tab is showing.
__ e. Click Rename.
__ 7. Add a channel widget for the MQCONLAB queue manager.
__ a. Click Add Widget.
__ b. Click the Channels link to create the widget. The widget is placed on the current tab.
Course materials may not be reproduced in whole or in part without the prior written permission of IBM.
© Copyright IBM Corp. 2017 7-9

V11.2
EXemp
Exercise 7. Getting started with the IBM MQ Console
ty__ 8. With a Channels widget you can create and delete channels, modify channel properties,
start a channel, and stop a channel, With the More menu, you can clear the queue and manage authority records. On the More menu, you can reset, resolve, ping, and manage authority records for the channel.
Define a new server-connection channel that is named USER.SVRCONN.
__ a. Click the Create icon in the Channels on MQCONLAB widget.
__ b. For the Channel name, type: USER.SVRCONN
__ c. For the Channel type, select Server-connection.
__ d. Click Create. The channel is added to the widget.
__ 9. Widgets can be organized on the tab by dragging them to the required location. The remaining widgets adjust their position as required.
Click the Channels widget title bar and then drag the widget so that it appears at the top of the tab.
Part 3: Monitoring IBM MQ objects
In this part of the exercise, you create custom dashboards for monitoring and problem determination purposes.
__ 1. Create a tab for monitoring some aspects of the environment.
__ a. Click the Add a new tab icon.
__ b. For the Tab name, type: System Monitoring
__ c. For the Description, type: Monitor system resources
__ d. Click Add. The Monitoring tab is created in the IBM MQ Console.
__ 2. Add a Chart widget to the Monitoring tab.
__ a. On the Monitoring tab, click Add widget.
__ b. Click the Chart link. An empty, unconfigured chart widget is created.
Course materials may not be reproduced in whole or in part without the prior written permission of IBM.
© Copyright IBM Corp. 2017 7-10

V11.2
EXemp
Exercise 7. Getting started with the IBM MQ Console
ty__ 3. For each chart widget, you must configure it to display what you require. Configure the chart
widget to show the CPU estimation for the queue managers that are configured in this widget.
__ a. Click the Configure widget icon.
__ b. For the Widget title, type: CPU for queue managers
__ c. For Resource class, select Platform central processing units
__ d. For Resource type, select CPU performance - running queue manager
__ e. For Resource element, select System CPU time - percentage estimate for queue manager.
Course materials may not be reproduced in whole or in part without the prior written permission of IBM.
© Copyright IBM Corp. 2017 7-11

V11.2
EXemp
Exercise 7. Getting started with the IBM MQ Console
ty
Information
To monitor multiple queue managers, click Add queue manager and then select the queue manager. Each queue manager is assigned a unique color for monitoring purposes.
__ f. Click Save to commit your changes.
The CPU for queue managers widget is created and displays the system CPU time for the queue managers that you selected in Step 3.
Course materials may not be reproduced in whole or in part without the prior written permission of IBM.
© Copyright IBM Corp. 2017 7-12

V11.2
EXemp
Exercise 7. Getting started with the IBM MQ Console
tyThis example shows monitoring for two queue managers: MQCONLAB and QM1.
Information
You can click the graph in the widget window to display the value chart values for at any specific time instance.
__ 4. Add a chart widget for RAM usage estimation to the Monitoring tab.
__ a. For the Widget title, type: RAM for queue managers
__ b. For Resource class, select Platform central processing units.
__ c. For Resource type, select CPU performance - running queue manager.
__ d. For Resource element, select RAM total bytes - estimate for queue manager.
__ e. Click Save to commit your changes. The RAM for queue managers chart is displayed on the Monitoring tab.
__ 5. Examine the other options for the Chart widget resource class, resource type, and resource element so that you are familiar with the other monitoring options that the IBM MQ Console supports.
Course materials may not be reproduced in whole or in part without the prior written permission of IBM.
© Copyright IBM Corp. 2017 7-13

V11.2
EXemp
Exercise 7. Getting started with the IBM MQ Console
ty__ 6. Log out of the IBM MQ Console. On the IBM MQ Console dashboard menu, click Logout
“mqadmin”.
End of exercise
Course materials may not be reproduced in whole or in part without the prior written permission of IBM.
© Copyright IBM Corp. 2017 7-14

V11.2
EXemp
Exercise 7. Getting started with the IBM MQ Console
tyExercise review and wrap-up
In the first part of this exercise, you configured basic security for the IBM MQ Console. You then started the IBM MQ Console web server, connected to the IBM MQ Console, and logged in as an administrator.
In second part of the exercise, you used the IBM MQ Console to configure and manage an IBM MQ queue manager, queues, and channels. This part of the exercise focused on some key features of the IBM MQ Console.
In the third part of the exercise, you created custom dashboards for monitoring and problem determination purposes.
Course materials may not be reproduced in whole or in part without the prior written permission of IBM.
© Copyright IBM Corp. 2017 7-15

®
© Copyright International Business Machines Corporation 2017.
V11.2
backpg