Complete Users Manual TUMI FINAL 7.5.17 -...
16
Transcript of Complete Users Manual TUMI FINAL 7.5.17 -...


USER MANUAL
TABLE OF CONTENTS Overview - 3 Charging Your TUMI Global Locator Device - 3 Registering and Connecting Your Device - 3 Setting Up Your TUMI Global Locator Device - 5 Using the Global Locator App - 6 Getting to Know Your Global Locator Map - 9 Map Menu Bar - 10 Technical Specifications, Warranty, and Certifications - 11 Appendix - 15
2

OVERVIEW Welcome to the TUMI Global Locator (Global Locator) Complete User’s Manual. To get you started on the right track, keep your device OFF while downloading your Global Locator App, creating an account and registering your new Global Locator Device. Following these steps will help to ensure that your device easily connects with your smartphone and Global Locator App. The Global Locator is an AT&T certified device and like your smartphone, an active cellular signal is required for optimal performance. A data or Wi-Fi connection is required to operate your Global Locator App.
CHARGING YOUR TUMI GLOBAL LOCATOR DEVICE ● Please be sure to use the charging adapter that came with your TUMI Global Locator, failure to do so could cause damage and may invalidate the product warranty.
● It is highly advised to travel with a fully charged device. Approximate charging time, using the provided AC adapter, is 2 hours with an estimated battery life of 72 hours depending on usage.
● When your device is plugged in and charging, a flashing red light will appear.
● When your device is plugged in and fully charged, a steady green light will appear. ● When the device is unplugged, the charging light goes off. ● If the battery charge on your device falls below 15%, you will receive an email, push, and/or SMS (text) notification to inform you of your battery status.
○ Note: The method of notifications you receive can be managed under the Settings tab, found in the Main Menu. ● You can also keep track of your device’s battery level via your TUMI Global Locator App.
REGISTERING AND CONNECTING YOUR DEVICE ● When using your smartphone, access the App Store or Google Play.
● Search “TUMI Global Locator” and find this icon:
● Follow the necessary instructions provided by iTunes or Google Play to download your TUMI Global Locator App. ● Once you have successfully downloaded your TUMI Global Locator App and charged your device, with your Global Locator Device OFF, open the Global Locator app on
your smartphone.
● Create Account: When running your app for the first time, click CREATE ACCOUNT using the email address of your choice (Appendix reference diagram A.1) or click the
LOGIN WITH FACEBOOK button and enter your Facebook login and password to create your new Global Locator account using your Facebook credentials (Appendix
reference diagram A.2).
3

o Creating an Account: You will be prompted to enter in an email address of your choice. This email address will now be considered your USERNAME. You will then be
asked to enter and re-enter a password for your Global Locator account. Then click CREATE ACCOUNT. Note: Your password must be a minimum of 8 characters
long and use a combination of letters, numbers and special characters.
o Logging in with Facebook: When creating your account via Facebook, you will be redirected to a Facebook login screen. Only enter your Facebook account login and
Facebook password on this screen and click the blue “Login” button. Do not click the “Create New Account” button (this option is in relation to Facebook, not
Global Locator). Each time you login, you must use the option to LOGIN WITH FACEBOOK. When you do this, you will be prompted with a second window that says
“You have already authorized TUMI Global Locator Login.” Click OK to launch your Global Locator App. If you click CANCEL, you will be redirected to the Global
Locator login screen.
o Once you have created your TUMI account, every time you open your Global Locator App, you will automatically be logged into your account and taken directly to
your Global Locator Map (Appendix reference diagram B.1).
o Upon logging out of your account (which can be found under Main Menu icon ), the next time you login, you will be prompted to enter your USERNAME and
PASSWORD, followed by pushing the red SIGN IN button (Appendix reference diagram A.1).
o Forgetting Username or Password:
● Username: On the login page, select FORGOT YOUR USERNAME. You will be prompted to enter your device’s ICCID Number. Click CONFIRM and your account
information will be emailed to the address on file. If you have multiple devices registered under your account, you can use any of your devices’ ICCID numbers
to have your account information emailed to you.
● Password: On the login page, select FORGOT YOUR PASSWORD. You will be prompted to enter your USERNAME. Click CONFIRM and your account information
will be emailed to the address on file.
● TUMI’s Customer End User Agreement: Use your fingers to read and scroll through the text in the white box (Appendix reference diagram A.3). To indicate that you have
reached the end of the User Agreement, the I AGREE button at the bottom of your screen will change from gray to red and white. By clicking on I AGREE you are
confirming that you have read, understood and accept TUMI’s End User License Agreement.
● TUMI Global Locator Privacy Policy: Use your fingers to read and scroll through the text in the white box. To indicate that you have reached the end of the Privacy Policy,
the I Agree button at the bottom of your screen will change from gray to red and white. By clicking on I AGREE, you are confirming that you have read, understood and
accept the “TUMI Global Locator Privacy Policy.”
● Now it’s time to enter your contact details. All fields marked with a * are mandatory.
● A “Welcome!” message will appear to inform you that:
o “Global Locator uses Bluetooth to find your device when a connection is not available.” If you need further instruction, please reference ACTIVATING BLUETOOTH
below.
o “Global Locator uses the Geolocation of this device for a better user experience. When you select Continue, please allow Global Locator to use your current
location.” If you haven’t already granted Global Locator this access, you will be prompted to do so when first launching your Global Locator Map.
● Click the red CONTINUE button to move on.
● Connect your device to your account and smartphone:
o Your device should remain OFF and you will be prompted to ADD A DEVICE (Appendix reference diagram A.4). To register your device, you will need to enter the
ICCID Number located on your packaging and on the back of your device.
4
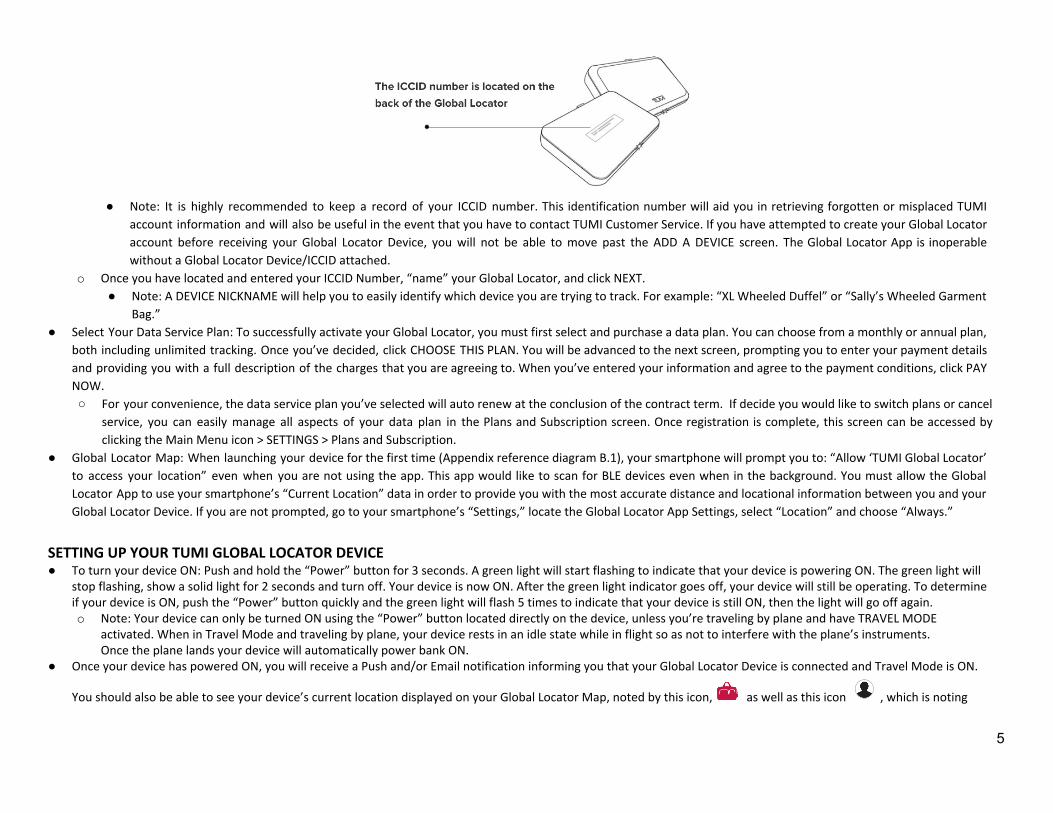
● Note: It is highly recommended to keep a record of your ICCID number. This identification number will aid you in retrieving forgotten or misplaced TUMI
account information and will also be useful in the event that you have to contact TUMI Customer Service. If you have attempted to create your Global Locator
account before receiving your Global Locator Device, you will not be able to move past the ADD A DEVICE screen. The Global Locator App is inoperable
without a Global Locator Device/ICCID attached.
o Once you have located and entered your ICCID Number, “name” your Global Locator, and click NEXT.
● Note: A DEVICE NICKNAME will help you to easily identify which device you are trying to track. For example: “XL Wheeled Duffel” or “Sally’s Wheeled Garment
Bag.”
● Select Your Data Service Plan: To successfully activate your Global Locator, you must first select and purchase a data plan. You can choose from a monthly or annual plan,
both including unlimited tracking. Once you’ve decided, click CHOOSE THIS PLAN. You will be advanced to the next screen, prompting you to enter your payment details
and providing you with a full description of the charges that you are agreeing to. When you’ve entered your information and agree to the payment conditions, click PAY
NOW.
○ For your convenience, the data service plan you’ve selected will auto renew at the conclusion of the contract term. If decide you would like to switch plans or cancel
service, you can easily manage all aspects of your data plan in the Plans and Subscription screen. Once registration is complete, this screen can be accessed by
clicking the Main Menu icon > SETTINGS > Plans and Subscription.
● Global Locator Map: When launching your device for the first time (Appendix reference diagram B.1), your smartphone will prompt you to: “Allow ‘TUMI Global Locator’
to access your location” even when you are not using the app. This app would like to scan for BLE devices even when in the background. You must allow the Global
Locator App to use your smartphone’s “Current Location” data in order to provide you with the most accurate distance and locational information between you and your
Global Locator Device. If you are not prompted, go to your smartphone’s “Settings,” locate the Global Locator App Settings, select “Location” and choose “Always.”
SETTING UP YOUR TUMI GLOBAL LOCATOR DEVICE ● To turn your device ON: Push and hold the “Power” button for 3 seconds. A green light will start flashing to indicate that your device is powering ON. The green light will
stop flashing, show a solid light for 2 seconds and turn off. Your device is now ON. After the green light indicator goes off, your device will still be operating. To determine if your device is ON, push the “Power” button quickly and the green light will flash 5 times to indicate that your device is still ON, then the light will go off again. o Note: Your device can only be turned ON using the “Power” button located directly on the device, unless you’re traveling by plane and have TRAVEL MODE
activated. When in Travel Mode and traveling by plane, your device rests in an idle state while in flight so as not to interfere with the plane’s instruments. Once the plane lands your device will automatically power bank ON.
● Once your device has powered ON, you will receive a Push and/or Email notification informing you that your Global Locator Device is connected and Travel Mode is ON.
You should also be able to see your device’s current location displayed on your Global Locator Map, noted by this icon, as well as this icon , which is noting
5

your location with your smartphone (Appendix reference diagram B.1). Note: Once you have received your notification, it may take up to 1 minute or so for your device to load, connect and appear on your Global Locator Map.
● If you have received a Push or Email Notification and/or can view your device’s current location on your Global Locator Map, then you have successfully activated your your data service plan, registered your device and connected it with your smartphone.
● If after a few minutes your Global Locator Map has not displayed your device’s current location, then follow these steps: ● Turn your device OFF: Push the “Power” button for 3 seconds. A red light will start flashing to indicate that your device is powering OFF. When the red light stops
flashing, your device has successfully turned OFF. ● Completely close out of your Global Locator App, turn your device back ON and relaunch your App.
● Look at your Global Locator Map (Appendix reference diagram B.1). Once this icon appears on your Global Locator Map noting your device’s current location, you have successfully completed registering your device and connecting it with your smartphone. o Note: When a Software Update is available for your Global Locator Device, it will intuitively begin to exhibit a varied lighting sequence after you have powered the
device ON. Additionally, a banner-notification will appear over your Global Locator Map when a software update is in progress, notifying you that: “Device update in progress. Your device will reboot shortly when the update is complete.” This update can occur when your device is powered ON for the first time and may result in you receiving multiple notifications. This is normal behavior and part of the software update process.
● Activate Bluetooth: Your Global Locator Device utilizes Bluetooth to connect with your smartphone when there is a short distance between your phone and the device. You will want to ensure that the Bluetooth signal is activated in your smartphone phone settings. If detected as inactive, your Global Locator App will automatically prompt you to activate your Bluetooth: “Turn On Bluetooth to Allow ‘TUMI Global Locator’ to Connect” and it will give you the option to click “Settings” to activate Bluetooth or “OK” to close the prompt.
USING THE GLOBAL LOCATOR APP
● MAIN MENU: The Main Menu can be accessed by clicking the 3-line icon located in the upper-right corner of your screen (Appendix reference diagram C.1)
o My Devices: You will see a list of your designated DEVICE NICKNAME(s), noting the device(s) that are currently registered to your Global Locator account. By clicking
on any DEVICE NICKNAME, the individualized Global Locator Map will be generated for that particular device. o Locate All Devices: A map will be generated to show you the last recorded location of all devices currently registered to your account. This is the quickest way to
pinpoint the last known location of all devices that you have linked to your Global Locator account. To navigate out of this map, click the Main Menu icon and
make a new selection.
o Add Devices: Click ADD DEVICES to add a new Global Locator Device to your account. You can add up to 6 different Global Locator Devices. You will be prompted to
enter the ICCID NUMBER (Appendix reference diagram A.4) and DEVICE NICKNAME for each device. Next, click the ADD button and you will be redirected to the
Device Details (Appendix reference diagram B.4). Here you can edit your DEVICE NICKNAME and Add Photos. Once complete, click SAVE and you will be navigated
back to the Global Locator Map for that device (Appendix reference diagram B.1)
o Unlink Devices: On the far right of your Map Menu Bar, you will see EDIT accompanied by a pencil icon . Click here to access the Device Details screen (Appendix reference diagram B.4). Click UNLINK DEVICE to remove a device from your Global Locator App. Once you have unlinked a device, you may reconnect it
by clicking the Main Menu icon and use the ADD DEVICES feature. If you unlink all devices paired with your Global Locator account, you will automatically be redirected to the ADD A DEVICE screen and will not be able to access the rest of the Global Locator App until you have a device to add. Otherwise, you can navigate away from the ADD DEVICES screen, by using the “or logout” link found in the upper right corner. By clicking “or logout,” you will be redirected to the Login screen
6

(Appendix reference diagram A.1). The Global Locator App is inoperable without a Global Locator Device attached. After any changes have been made, click SAVE and you will be taken back to that device’s individualized Global Locator Map. ● Unlinking a device from your account will still maintain the data service plan you have paid for, while allowing you to share your device with friends and family
under their own Global Locator account.
● If you are trying to end your data service, rendering your device inoperable, then you must go to the Main Menu > SETTINGS > Plans and Subscriptions, to start the Cancel Subscription process.
o Help:
● PROBLEM WITH DEVICE: Click on the top circle with the TUMI Global Locator icon o TUMI SUPPORT: To speak with a TUMI Customer Service Representative, click TUMI SUPPORT. In the drop down menu, select a country based on your
preferred choice of language or the country that you are presently in. Click on the phone number that has been provided, a pop-up window will be automated and ask you if you would like to CALL or CANCEL.
o QUICK START GUIDE: Click here to locate a digital version of the Quick Start Guide that was packaged with your Global Locator Device. o TRACKING MODES DETAIL: Click here for a full description on all modes as well as the “Locate” and “History” features o FAQ’s: Click FAQ’s to access a short list of commonly asked User questions and answers. Click the link provided to be redirected to our extensive online
FAQ’s within your smartphone’s preferred web browser. Note: Because this link redirects you to your smartphone’s web browser, you will have to navigate back to the Global Locator App.
o USER’S MANUAL: For a thorough and comprehensive instruction on operating your Global Locator Device and App (including the Importer & Manufacturer address), click USER’S MANUAL. If your smartphone has the proper network or Wi-Fi connection, you will automatically be redirected to our online User’s Manual within your smartphone’s preferred web browser. Because this link redirects you to your smartphone’s web browser, you will have to navigate back to the Global Locator App.
o DEVICE AND NETWORK SUPPORT: Still have more questions, or want to connect with a Customer Service Representative? Select the DEVICE NICKNAME that you need help with.
● Account management: For help with managing your account, including your personal details, account password, canceling service and more.
● Billing and payments: Questions about your data service plan bills or payments. ● Software and hardware: Problems with your Global Locator device or app? Connect with TUMI Customer Service, find more FAQ’s or
download the User’s Manual. ● Network and connectivity faults: Issues with your quality of connectivity?
● CONNECT WITH YOUR AIRLINE: To contact the airline of your choice, click the bottom circle with the airplane icon. o In the drop-down menu, select the airline you wish to connect with. o A new drop-down menu will appear, select the country based on your current location. If a phone number is not listed for the country you are currently
located in, then please select a country based on your preferred language. ● Note: Some airlines offer a limited amount of international phone numbers. In the event that you cannot find a phone number for the country of
your choice, you can opt to use the website link also provided for that airline by selecting any of the countries listed. In the event of any missing or damaged luggage it is highly recommended by all airlines that you locate an airline representative in person, before leaving the airport. o Once you have selected a country, you will be provided with a phone number and a direct link to the airline’s website (Appendix reference
diagram C.7). If you would like to call the airline, click on the phone number that has been provided. A pop-up window will be automated and ask you if you would like to CALL or CANCEL.
7

o If you’d prefer to review all of the options your airline offers for reporting lost or damaged belongings, click on the website link listed below the phone number. If your smartphone has the proper network or WiFi connection, that link will take you directly to that airline’s website.
o Settings: Click settings and you will be directed to a new screen (Appendix reference diagram C.2)
● EDIT PROFILE: Click to edit your TUMI Profile to have access to editing the first and last name, gender, email address, phone number, street address (optional) and photo associated with your Global Locator account (Appendix reference diagram C.3). o If you activate the option to receive SMS (text) notifications, your phone number must be entered correctly, including your International code. o +1 for the U.S. and Canada. (Example: 212-555-1212, should be entered as +12125551212) o For a full list of Country Calling Codes please visit: http://www.att.com/support_media/images/pdf/Country_Code_List.pdf o You must start your phone number with a “+” followed by your phone number’s international code or else you may not receive SMS (text) alerts o National or International text-messaging rates may apply
● CHANGE PASSWORD: To change your account password, click CHANGE PASSWORD. You will be prompted to enter your new password and then confirm your new password. Then click SAVE. A window will pop up indicating that your password was successfully changed. Click OK to close that window and click the
white arrow at the top-left of your screen to go back to SETTINGS. o Notifications: Control how your Global Locator App communicates with you (Appendix reference diagram C.4). Various notifications are generated when specific
events have occurred to your device. Click NOTIFICATION and you will be taken to a new screen displaying EMAIL, PUSH and SMS (text). To the right of each option,
you will find a white, sliding button . If you slide button to the right, a green color will appear to indicate that NOTIFICATION is active. ● NOTIFICATIONS can be delivered to you via:
o EMAIL: Delivered to the email address that is associated with your TUMI profile. o PUSH: Appears in the form of a pop-up window on your smartphone. A PUSH notification will appear with important information regarding your Global
Locator Device. ● If you are using your Global Locator App when a notification is generated, you will not receive a PUSH NOTIFICATION because you are already using
the app. ● If you are on your phone or using a different app when you receive a PUSH NOTIFICATION, tap the pop-up window and you will automatically be
redirected to your Global Locator App. o SMS: Also known as “text messages,” will be sent to the phone number associated with your TUMI Profile. Standard text messaging rates apply. o Note: Both EMAIL and PUSH NOTIFICATIONS are activated by default when first using your Global Locator App. o DEACTIVATE NOTIFICATIONS: Push the button to the left and the green color will disappear to indicate the NOTIFICATION is now inactive. You can choose
to have any combination of these NOTIFICATIONS active or inactive at any time. o When you LOGOUT of your TUMI App, and your device is still active, you may receive EMAIL or SMS NOTIFICATIONS if they were activated when you
logged out. You will not receive PUSH NOTIFICATIONS, as those are dependent on the Global Locator App being open and running. ● PLANS AND SUBSCRIPTIONS: To view and manage your data plan subscription, click “Plans and Payments.” To cancel your data plan, rendering your device
unusable, click “Cancel Subscription.” (Options available per each Global Locator device linked to your app.) ○ Should you choose to cancel a device’s data plan subscription, you will always be able to reactivate and select a new data plan through the Global Locator
app when you are ready to use your device again. ● PRIVACY POLICY: Click here to read about TUMI’s Privacy Policy. ● TERMS AND CONDITIONS: Click here to read about TUMI’s Terms and Conditions. ● ABOUT THIS VERSION: Click here to determine which version of the Global Locator App you are currently using. This information will update, each time you
download the newest available version of the Global Locator App. ○ Send Us Feedback: We are always looking to improve our User Experience, if you’d like to share any comments or concerns, please click here and an email address will be
provided on the next screen. If your phone has the proper network or Wi-Fi connection, click the email listed in blue and you will be redirected to your phone’s email app.
8

○ Logout: Click here to Logout of your Global Locator App. To confirm that you are ready to LOGOUT, a window will pop up indicating ARE YOU SURE? Click OK to proceed. If you change your mind, click CANCEL.
○ TUMI.COM: Click here to access TUMI’s e-commerce site. If your smartphone has the proper network or Wi-Fi connection, you will automatically be redirected to www.TUMI.com within your smartphone’s preferred web browser. Note: Because this link redirects you to your smartphone’s web browser, you will have to navigate back to the Global Locator App.
GETTING TO KNOW YOUR GLOBAL LOCATOR MAP ● Your Global Locator Map will be the first screen you see each time you launch your Global Locator App or after you go through the standard LOGIN steps. (Appendix
reference diagram B.1). If you have multiple devices paired with your Global Locator App, whichever device you were tracking last will be the Global Locator Map that
appears when the app is launched. As a reminder, your Global Locator Map can be accessed at any time by clicking the Main Menu icon located in the upper-right corner of your screen. In the Main Menu, beneath MY DEVICES, select the device that you would like to track (Appendix reference diagram C.1) and you will be redirected to your Global Locator Map.
● Once your Global Locator Map is displayed, you will see this luggage icon indicating your device’s location on the map, as well as this icon indicating your
location. If you added a photograph to your Profile, you will see your photograph instead of the icon.
● If a number followed by a lowercase letter appears on the red-luggage icon, this is to indicate how long ago your device communicated its last location. “Min” for
minutes, “h” for hours and “d” for days.
● Using Your Map: o Zoom in on your map by double-tapping your screen or place 2 fingers close together and move them farther apart directly on your screen. o Zoom out by placing 2 fingers apart on your screen and moving them closer together.
o In the upper-left corner of your map, you will see a fixed, red luggage icon . Click here, it will turn green , and your map will react in one of two ways: ● If you and your device are within close range of each other, your map will quickly zoom out to show a more inclusive map of your surrounding area. Click the
icon again and the map will automatically zoom back in, to show you your immediate surroundings. ● If you and your device are far away from each other, your map will quickly zoom in to the location of your device, to quickly provide you with its exact location
and immediate surroundings. Click the icon again and the map will automatically zoom back out, to illustrate both your location and the device’s. ● You cannot activate SHOW HISTORY when this luggage icon is green.
o Show History: In the top right corner of your Global Locator map you will see this red icon , this is your SHOW HISTORY feature. ● Click and the icon will change to green, indicating that SHOW HISTORY is active. A map will be generated that pinpoints your device’s 10 most relevant and
recently recorded locations. ● If your device has generally been in the same location over a long period of time, SHOW HISTORY will not display multiple, previous locations. ● To distinguish the order of locations that are pinpointed, you will notice that the #1 most relevant location will be indicated by a luggage icon that is 100%
solid (Appendix reference diagram B.5). The older the location pin, the more transparent the other luggage icons will get, as illustrated here:
9

● To exit SHOW HISTORY, click the green icon at the top of your screen and the color will revert back to red, to indicate that this feature has been deactivated.
MAP MENU BAR Located at the bottom of your Global Locator Map is a menu bar with various icons:
● Battery: This icon displays the estimated battery power percentage as well as a red OFF or a green ON to indicate if your device is active. o Your device could be noted as OFF for 3 reasons:
● Your device has been manually turned off. ● Your battery has run out. ● Your device has no connectivity and is in sleep mode.
● Device Power: Just below the battery icon, you will either see a red power icon to indicate that the device is OFF, or a green power icon to indicate that your device is ON. o If your device is ON, you can turn your device OFF by pushing the power icon.
● When you click the power icon, a pop-up window will appear to inform you that “For in-flight security, Device will remain OFF and automatically turn ON after landing.” If you are not flying, the device will temporarily rest in sleep mode and turn back ON shortly.
● To completely turn OFF, use the power button located on Device. Click CONTINUE to proceed, or CANCEL to stop. o If you turn your device OFF from the Global Locator App, you will NOT be able to turn it back ON from your app. The device can only be turned ON
by pushing the “Power” button on the actual device, unless you’re traveling by plane and have TRAVEL MODE activated.
● Locate: With your device ON, click the satellite icon and your app will work to generate the current location of your device. o Once your map generates the device’s current location, you may receive a NOTIFICATION if the device is in close range. o This feature can be used at any time. Locate is the best and most accurate way to pinpoint the exact location of any device. o This function can take up to 1 minute to provide you with your device’s current location (Appendix reference diagram B.2).
● Modes: Click the wrench icon to access the Modes screen where you can activate and deactivate 3 different features, based on your tracking needs (Appendix reference diagram B.3). Anytime you have made an adjustment to your Modes, you must click SAVE or else the changes will not remain. ● TRAVEL MODE: This mode exists to monitor your bag's journey when you're not around. This mode should be activated before you check your bag(s) at the
airport. Once activated, your device will start recording its location every 20-30 minutes. When your device senses it’s in flight, it will automatically go into “sleep mode” until you land at your destination, at which time it will “wake up,” making your device completely FAA compliant.
o To activate TRAVEL MODE, click the gray and white airplane icon and it will change to green and white to indicate TRAVEL MODE is ON. To deactivate, click the green and white icon again and it will revert back to gray and white to indicate TRAVEL MODE is OFF.
o Note: You cannot have TRAVEL MODE and HOTEL MODE active at the same time. ● HOTEL MODE: This mode exists to make sure that your belongings are safe when you’re staying in an unfamiliar place. This mode should be activated when
you’re intentionally leaving your luggage behind. Once HOTEL MODE is activated, your Global Locator App will notify you if your device has been moved from the location you left it in.
o To activate HOTEL MODE, click the gray and white door-tag icon and it will change to green and white to indicate HOTEL MODE is ON. To deactivate, click the green and white icon again and it will revert back to gray and white to indicate HOTEL MODE is OFF.
10

● PROXIMITY MODE: This tracking feature functions on Bluetooth capabilities and should be utilized for close-range tracking only. Unlike the other tracking modes, PROXIMITY takes into consideration the location of your Global Locator Device in relation to your smartphone. Once PROXIMITY is activated, your device will record its location in proximity to your smartphone. If anything seems out of the ordinary when those locations are recorded, your app will prompt a variety of NOTIFICATIONS to keep you connected and informed.
o To activate PROXIMITY, move the slider-button to the right . To deactivate PROXIMITY, move the slider-button to the left o PROXIMITY can be activated in conjunction with TRAVEL MODE or HOTEL MODE. o In order to work properly, do not close out your Global Locator App. If your phone is in lock-screen mode or if you’re using another app, as long as your
Global Locator App is active, PROXIMITY will provide you with the necessary NOTIFICATIONS. o Additionally, PROXIMITY cannot be activated if you do not have Bluetooth on for your phone. If you attempt to activate PROXIMITY without Bluetooth a
pop-up will appear with the following message: “Warning. Proximity mode works only when Bluetooth is activated. Please check your phone settings and try again."
o Note: PROXIMITY MODE maintains a constant monitoring. Due to the frequency in which this mode alerts you, it may cause your phone’s battery to drain. It is recommended to turn this mode off when not needed.
o Once you have selected the MODE(S) that you want activated for your device, click the red SAVE button and you will be redirected back to your individualized Global Locator.
Technical Specifications, Warranty, and Certifications
TUMI GLOBAL LOCATOR DEVICE TECHNICAL SPECIFICATIONS: ● The TUMI Global Locator may not function as intended when placed inside of a carbon-fiber packing case, an aluminum packing case or any case with metallized film. ● Power Capacity: 3,500 mAh ● Battery Cell: Lithium Polymer ● Rated Input: 100-240v AC, 50/60hz/0.15A ● Rated Output: 5v-1A DC ● Dimensions: (4.33), x (2.55), x (.83) inches (110mm x 65mm x 21mm)
● Weight: 150 grams
● Adapter: 100-240VAC 50/60Hz 500mA (Max) Output: 5V/1A
IMPORTANT DEVICE INFORMATION: This product has demonstrated EMC compliance under conditions that included the use of compliant peripheral devices and shielded cables between system components. It
is important that you use compliant peripheral devices and shielded cables between system components to reduce the possibility of causing interference to radios,
televisions, and other electronic devices. Caution: Risk of fire and burns. Do not open, crush, or heat above 45°C/113°F.
LIMITED WARRANTY FOR THE DEVICE: TUMI Global Locator provides a limited warranty that the device is free from defects in materials or workmanship under normal use when used in compliance with the User
Manual for one year from the original date of purchase from an authorized TUMI Global Locator reseller, subject to the limitations and terms of the warranty disclosure. You
should read TUMI, Inc.’s full warranty disclosure here: http://www.tumi.com/s/product-info-warranty. TUMI, Inc. provides no warranty regarding the wireless service
provided by AT&T. AT&T coverage and service not available everywhere.
11
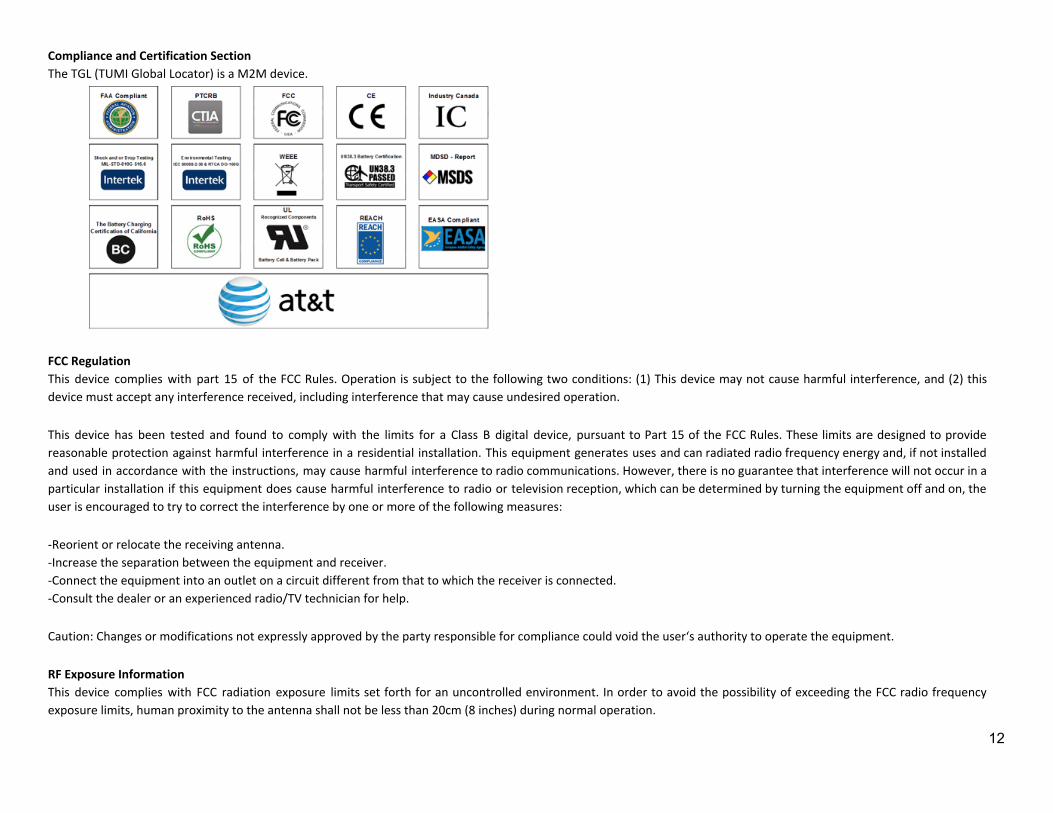
Compliance and Certification Section
The TGL (TUMI Global Locator) is a M2M device.
FCC Regulation This device complies with part 15 of the FCC Rules. Operation is subject to the following two conditions: (1) This device may not cause harmful interference, and (2) this
device must accept any interference received, including interference that may cause undesired operation. This device has been tested and found to comply with the limits for a Class B digital device, pursuant to Part 15 of the FCC Rules. These limits are designed to provide
reasonable protection against harmful interference in a residential installation. This equipment generates uses and can radiated radio frequency energy and, if not installed
and used in accordance with the instructions, may cause harmful interference to radio communications. However, there is no guarantee that interference will not occur in a
particular installation if this equipment does cause harmful interference to radio or television reception, which can be determined by turning the equipment off and on, the
user is encouraged to try to correct the interference by one or more of the following measures: -Reorient or relocate the receiving antenna. -Increase the separation between the equipment and receiver. -Connect the equipment into an outlet on a circuit different from that to which the receiver is connected. -Consult the dealer or an experienced radio/TV technician for help. Caution: Changes or modifications not expressly approved by the party responsible for compliance could void the user‘s authority to operate the equipment. RF Exposure Information This device complies with FCC radiation exposure limits set forth for an uncontrolled environment. In order to avoid the possibility of exceeding the FCC radio frequency
exposure limits, human proximity to the antenna shall not be less than 20cm (8 inches) during normal operation.
12

IC Notice This device complies with Industry Canada license-exempt RSS standard(s). Operation is subject to the following two conditions: (1) This device may not cause interference, and (2) This device must accept any interference, including interference that may cause undesired operation of the device. This Class B digital apparatus complies with Canadian ICES-003.
IC: 20533-Global Locator001 IC RF Exposure Statement This device complies with IC radiation exposure limits set forth for an uncontrolled environment. In order to avoid the possibility of exceeding the IC radio frequency
exposure limits, human proximity to the antenna shall not be less than 20cm (8 inches) during normal operation.
This device is capable of operation on the following frequencies, subject to location and network availability.
Operating Mode Operating Frequency Range Maximum Transmit Power (Conducted) dBm
Tx(MHz) Rx(MHz)
GSM900 880.2–914.8 925.2–959.8 33.5 GSM1800 1710.2 ~ 1784.8 1805.2–1879.8 30.5 3G BAND I 1922.4–1977.6 2112.4–2167.6 24.0 Operating Mode Operating Frequency Range Maximum
EIRP Average Power dBm
WLAN 2.4G 2412 ~ 2472 MHz 17.40
13

Bluetooth 2402 ~ 2480 MHz 5.6 GPS 1,575.42 Mhz N/A –(Rx only)
Adapter shall be installed near the equipment and shall be easily accessible. Please make sure the device will be operated in the ambient temperature from 0 ˚C ~ 50 ˚C (the temperature range used for CE safety test). The minimum distance between the user and/or any bystander and the radiating structure of the transmitter is 20cm.
Importer
TUMI Services GmbH
Hans-Boeckler-Str.6,
DE-59423 Unna, Germany
Manufacturer
LugTrack LLC
225 US Highway 35, Suite # 201
Red Bank, NJ 07701
Declaration of Conformity
Hereby, LugTrack, LLC. declares that the radio equipment type [014341D] is in compliance with Directive 2014/53/EU. The full text of the EU declaration of conformity is
available at the following internet address: www.lugtrack.com.
UL RECOGNITION:
The 3,500 mAh Lithium Polymer battery cell and battery pack are UL approved.
FAA COMPLIANT:
The TUMI Global Locator is classified as a Portable Electronic Device (PED), is in compliance with and meets the requirements of, the latest FAA Advisory Circular (AC) 91.21.1D
issued for use of electronic devices aboard aircraft. For complete information on the FAA Circular (AC) 91.21-1D, please visit: https://www.faa.gov.
14

Appendix
A.1
A.2
A.3
A.4
B.1
B.2
B.3
B.4
15

B.5
C.1
C.2
C.3
C.4
C.5
C.6
C.7
16