Chapter 2: Suspense Management - PeopleStrategy · CHAPTER 2: SUSPENSE MANAGEMENT ... To open a...
42
Application Reference Manual Chapter 2: Suspense Management 1 Chapter 2: Suspense Management CHAPTER 2: SUSPENSE MANAGEMENT ........................................................................................................................ 1 SUSPENSE MANAGEMENT OVERVIEW........................................................................................................................................ 2 SCREEN TITLES AND NUMBERS ................................................................................................................................................. 2 SUSPENSE MANAGEMENT MENU ............................................................................................................................................. 4 OPEN SUSPENSE .................................................................................................................................................................... 5 SUSPENSE FILE MENU ............................................................................................................................................................ 5 Release Transactions to an Intermediate File ............................................................................................................... 6 Release and/or Delete Batches ..................................................................................................................................... 7 List or Delete all Batches ............................................................................................................................................... 7 Release Designated Cycles ............................................................................................................................................ 8 Delete Designated Cycles - Release None ..................................................................................................................... 8 Update Release Parameters ......................................................................................................................................... 8 Add Transactions via an External File ......................................................................................................................... 12 Modify Transactions ................................................................................................................................................... 13 Scan for Employee Activity.......................................................................................................................................... 14 Modify Time Entry and Adjustment Transactions ....................................................................................................... 15 CLOSE SUSPENSE ................................................................................................................................................................. 25 SUSPENSE BALANCING .......................................................................................................................................................... 25 Balancing Scheme Maintenance ................................................................................................................................. 27 Balance a Batch .......................................................................................................................................................... 28 Change the Balancing Scheme on a Batch to Generate Totals ................................................................................... 29 List Batches ................................................................................................................................................................. 30 List Balancing Schemes ............................................................................................................................................... 30 RETRIEVE A TRANSACTION FOR MODIFICATION.......................................................................................................................... 30 EDIT AND UPDATE SCHEDULING ............................................................................................................................................. 31 Preparing for Automated Processing .......................................................................................................................... 31 Automated Scheduling in the Edit and Update Phase ................................................................................................ 34 Creating Selective Unload and Load Transactions ...................................................................................................... 37 Automated Scheduling in the Output Production Phase ............................................................................................ 37 Compile Time Options ................................................................................................................................................. 38 EDIT AND UPDATE CONTROL TRANSACTION .............................................................................................................................. 38 RETRIEVE DATA BY FIELD NAME ............................................................................................................................................. 40 QUERY SCHEDULE BY DATE .................................................................................................................................................... 41 RETRIEVING DELETED BATCHES .............................................................................................................................................. 42 Tell the System Which Batch to Restore ..................................................................................................................... 42
Transcript of Chapter 2: Suspense Management - PeopleStrategy · CHAPTER 2: SUSPENSE MANAGEMENT ... To open a...
Application Reference Manual Chapter 2: Suspense Management 1
Chapter 2: Suspense Management
CHAPTER 2: SUSPENSE MANAGEMENT ........................................................................................................................ 1
SUSPENSE MANAGEMENT OVERVIEW ........................................................................................................................................ 2 SCREEN TITLES AND NUMBERS ................................................................................................................................................. 2 SUSPENSE MANAGEMENT MENU ............................................................................................................................................. 4 OPEN SUSPENSE .................................................................................................................................................................... 5 SUSPENSE FILE MENU ............................................................................................................................................................ 5
Release Transactions to an Intermediate File ............................................................................................................... 6 Release and/or Delete Batches ..................................................................................................................................... 7 List or Delete all Batches ............................................................................................................................................... 7 Release Designated Cycles ............................................................................................................................................ 8 Delete Designated Cycles - Release None ..................................................................................................................... 8 Update Release Parameters ......................................................................................................................................... 8 Add Transactions via an External File ......................................................................................................................... 12 Modify Transactions ................................................................................................................................................... 13 Scan for Employee Activity .......................................................................................................................................... 14 Modify Time Entry and Adjustment Transactions ....................................................................................................... 15
CLOSE SUSPENSE ................................................................................................................................................................. 25 SUSPENSE BALANCING .......................................................................................................................................................... 25
Balancing Scheme Maintenance ................................................................................................................................. 27 Balance a Batch .......................................................................................................................................................... 28 Change the Balancing Scheme on a Batch to Generate Totals ................................................................................... 29 List Batches ................................................................................................................................................................. 30 List Balancing Schemes ............................................................................................................................................... 30
RETRIEVE A TRANSACTION FOR MODIFICATION .......................................................................................................................... 30 EDIT AND UPDATE SCHEDULING ............................................................................................................................................. 31
Preparing for Automated Processing .......................................................................................................................... 31 Automated Scheduling in the Edit and Update Phase ................................................................................................ 34 Creating Selective Unload and Load Transactions ...................................................................................................... 37 Automated Scheduling in the Output Production Phase ............................................................................................ 37 Compile Time Options ................................................................................................................................................. 38
EDIT AND UPDATE CONTROL TRANSACTION .............................................................................................................................. 38 RETRIEVE DATA BY FIELD NAME ............................................................................................................................................. 40 QUERY SCHEDULE BY DATE .................................................................................................................................................... 41 RETRIEVING DELETED BATCHES .............................................................................................................................................. 42
Tell the System Which Batch to Restore ..................................................................................................................... 42
2 Chapter 2: Suspense Management Application Reference Manual
Suspense Management Overview This chapter describes the functions that govern Suspense File activity. The
Suspense File only holds those transactions that are designated as deferred.
Deferred transactions include all pay producing functions, all data elements that have
been marked as deferred (D) on the Integrated Data Dictionary (IDD), and some
group processing functions.
The deferred transactions that are created when you use the Genesys screens are
stored in batches on the Suspense File. The Suspense File is a temporary holding
area that keeps batches until they are either deleted or released for processing. Once
processed, the data updates the Master Database.
The suspense management functions enable you to maintain batches while they are
held in the Suspense File; maintenance functions include:
Both automatically and manually generating the 60 Control Transaction
to activate a group for Edit and Update Phase processing.
Assigning cycle numbers to batches and releasing batches.
Maintaining balancing schemes.
Retrieving transactions for modification or deletion.
Note that all your daily processing does not end up on the Suspense File. Most of
what you do each day is processed immediately; therefore updating the Master
Database immediately. As mentioned above, the Suspense File only holds those
transactions that have been designated as ‘deferred’.
Genesys recommends that you limit access to Suspense Management to supervisors.
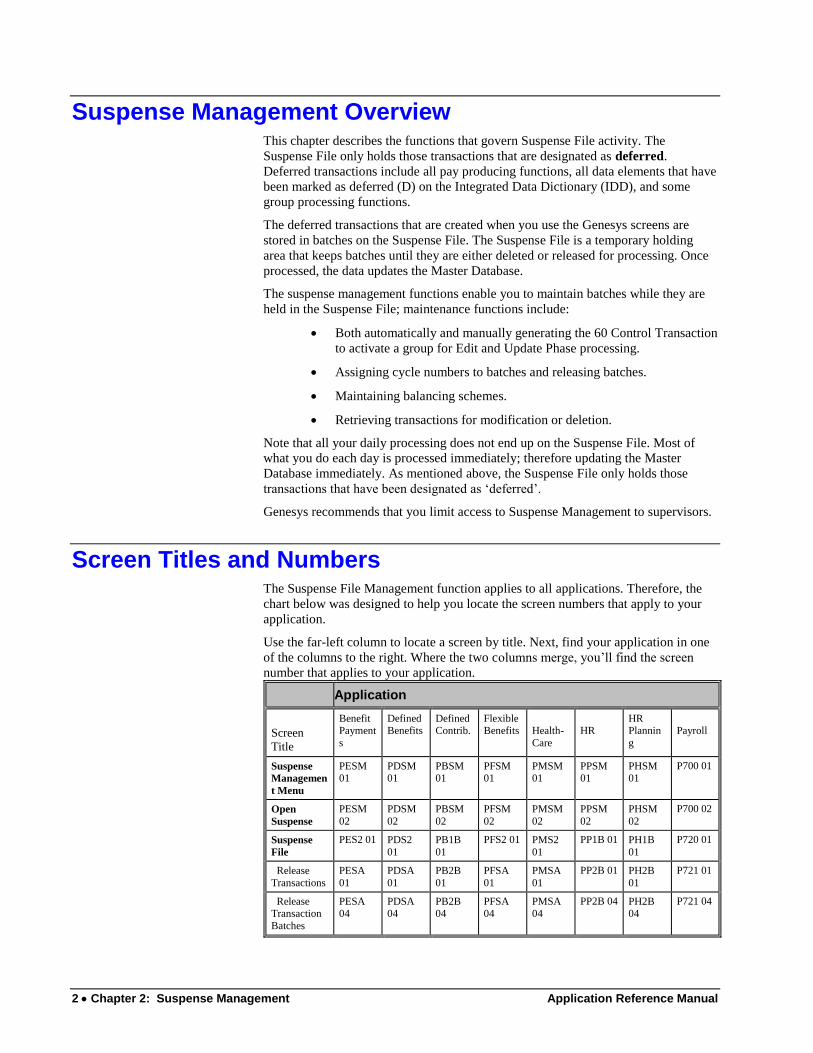
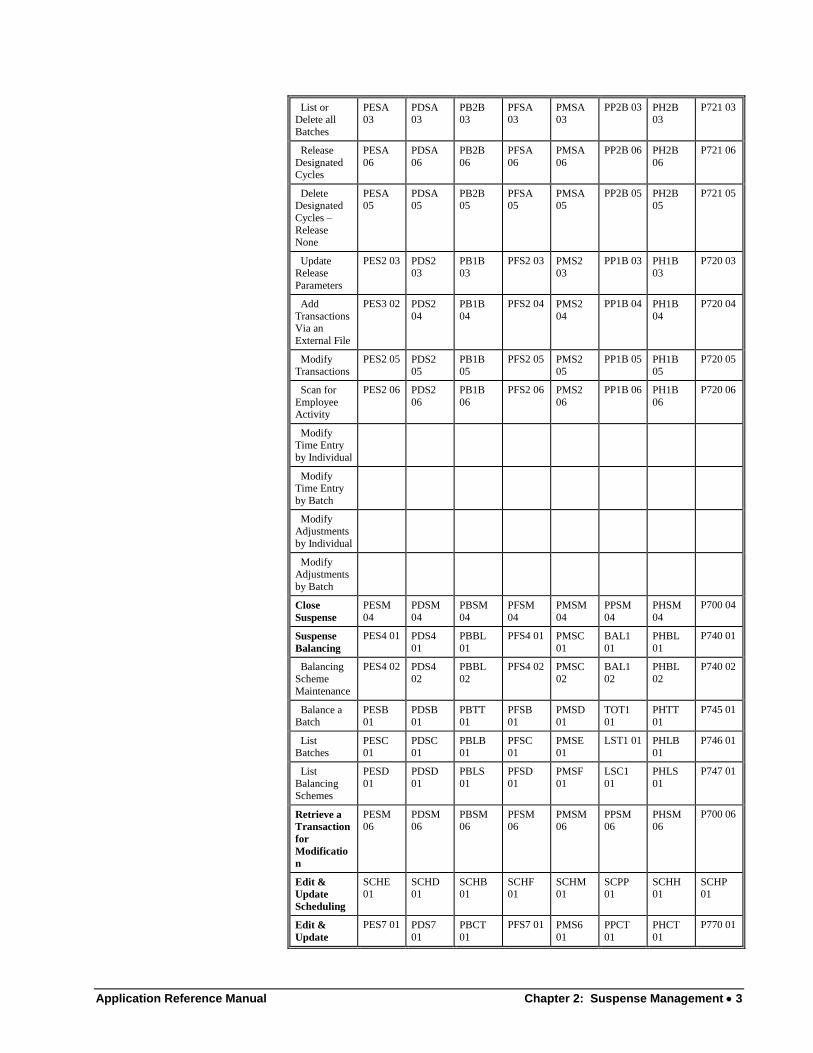
Screen Titles and Numbers The Suspense File Management function applies to all applications. Therefore, the
chart below was designed to help you locate the screen numbers that apply to your
application.
Use the far-left column to locate a screen by title. Next, find your application in one
of the columns to the right. Where the two columns merge, you’ll find the screen
number that applies to your application.
Application
Screen
Title
Benefit Payment
s
Defined Benefits
Defined Contrib.
Flexible Benefits
Health-
Care
HR
HR Plannin
g
Payroll
Suspense
Managemen
t Menu
PESM 01
PDSM 01
PBSM 01
PFSM 01
PMSM 01
PPSM 01
PHSM 01
P700 01
Open
Suspense
PESM
02
PDSM
02
PBSM
02
PFSM
02
PMSM
02
PPSM
02
PHSM
02
P700 02
Suspense
File
PES2 01 PDS2
01
PB1B
01
PFS2 01 PMS2
01
PP1B 01 PH1B
01
P720 01
Release
Transactions
PESA
01
PDSA
01
PB2B
01
PFSA
01
PMSA
01
PP2B 01 PH2B
01
P721 01
Release Transaction
Batches
PESA 04
PDSA 04
PB2B 04
PFSA 04
PMSA 04
PP2B 04 PH2B 04
P721 04
Application Reference Manual Chapter 2: Suspense Management 3
List or Delete all
Batches
PESA 03
PDSA 03
PB2B 03
PFSA 03
PMSA 03
PP2B 03 PH2B 03
P721 03
Release
Designated Cycles
PESA
06
PDSA
06
PB2B
06
PFSA
06
PMSA
06
PP2B 06 PH2B
06
P721 06
Delete Designated
Cycles –
Release None
PESA 05
PDSA 05
PB2B 05
PFSA 05
PMSA 05
PP2B 05 PH2B 05
P721 05
Update Release
Parameters
PES2 03 PDS2 03
PB1B 03
PFS2 03 PMS2 03
PP1B 03 PH1B 03
P720 03
Add
Transactions Via an
External File
PES3 02 PDS2
04
PB1B
04
PFS2 04 PMS2
04
PP1B 04 PH1B
04
P720 04
Modify Transactions
PES2 05 PDS2 05
PB1B 05
PFS2 05 PMS2 05
PP1B 05 PH1B 05
P720 05
Scan for
Employee Activity
PES2 06 PDS2
06
PB1B
06
PFS2 06 PMS2
06
PP1B 06 PH1B
06
P720 06
Modify Time Entry
by Individual
Modify Time Entry
by Batch
Modify Adjustments
by Individual
Modify Adjustments
by Batch
Close
Suspense
PESM
04
PDSM
04
PBSM
04
PFSM
04
PMSM
04
PPSM
04
PHSM
04
P700 04
Suspense
Balancing
PES4 01 PDS4
01
PBBL
01
PFS4 01 PMSC
01
BAL1
01
PHBL
01
P740 01
Balancing
Scheme
Maintenance
PES4 02 PDS4
02
PBBL
02
PFS4 02 PMSC
02
BAL1
02
PHBL
02
P740 02
Balance a Batch
PESB 01
PDSB 01
PBTT 01
PFSB 01
PMSD 01
TOT1 01
PHTT 01
P745 01
List Batches
PESC 01
PDSC 01
PBLB 01
PFSC 01
PMSE 01
LST1 01 PHLB 01
P746 01
List
Balancing Schemes
PESD
01
PDSD
01
PBLS
01
PFSD
01
PMSF
01
LSC1
01
PHLS
01
P747 01
Retrieve a
Transaction
for
Modificatio
n
PESM 06
PDSM 06
PBSM 06
PFSM 06
PMSM 06
PPSM 06
PHSM 06
P700 06
Edit &
Update
Scheduling
SCHE 01
SCHD 01
SCHB 01
SCHF 01
SCHM 01
SCPP 01
SCHH 01
SCHP 01
Edit &
Update
PES7 01 PDS7
01
PBCT
01
PFS7 01 PMS6
01
PPCT
01
PHCT
01
P770 01
4 Chapter 2: Suspense Management Application Reference Manual
Control
Transaction
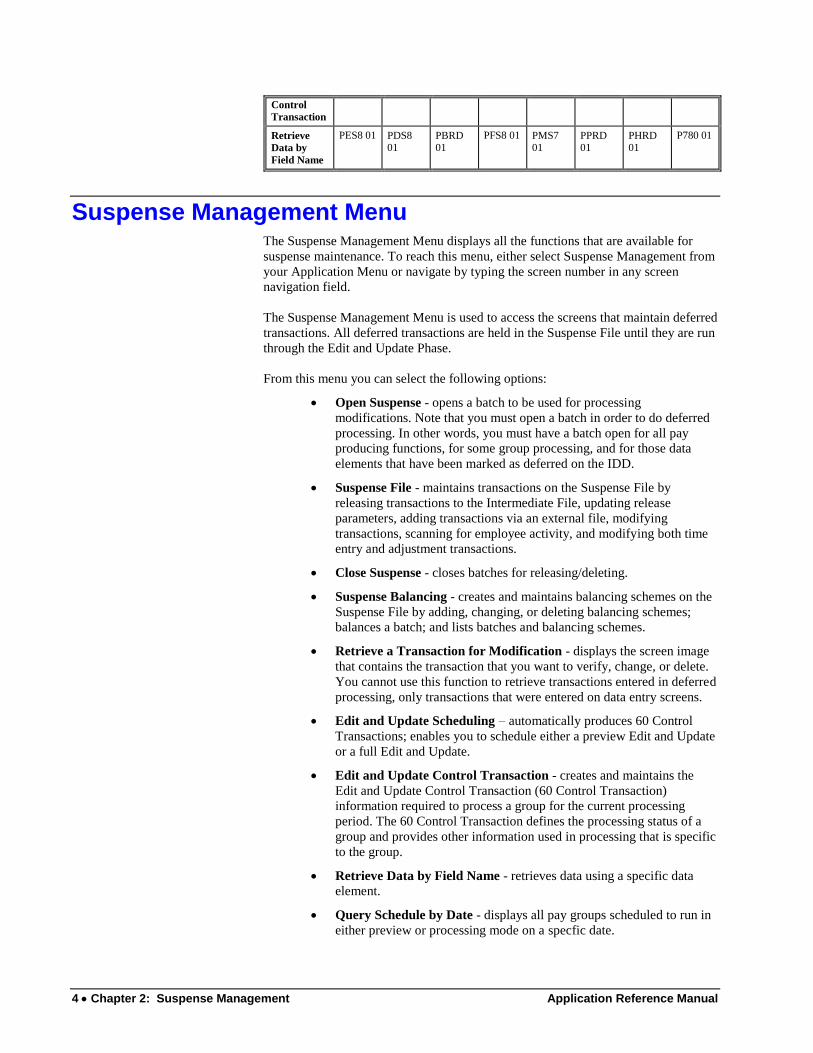
Retrieve
Data by
Field Name
PES8 01 PDS8 01
PBRD 01
PFS8 01 PMS7 01
PPRD 01
PHRD 01
P780 01
Suspense Management Menu The Suspense Management Menu displays all the functions that are available for
suspense maintenance. To reach this menu, either select Suspense Management from
your Application Menu or navigate by typing the screen number in any screen
navigation field.
The Suspense Management Menu is used to access the screens that maintain deferred
transactions. All deferred transactions are held in the Suspense File until they are run
through the Edit and Update Phase.
From this menu you can select the following options:
Open Suspense - opens a batch to be used for processing
modifications. Note that you must open a batch in order to do deferred
processing. In other words, you must have a batch open for all pay
producing functions, for some group processing, and for those data
elements that have been marked as deferred on the IDD.
Suspense File - maintains transactions on the Suspense File by
releasing transactions to the Intermediate File, updating release
parameters, adding transactions via an external file, modifying
transactions, scanning for employee activity, and modifying both time
entry and adjustment transactions.
Close Suspense - closes batches for releasing/deleting.
Suspense Balancing - creates and maintains balancing schemes on the
Suspense File by adding, changing, or deleting balancing schemes;
balances a batch; and lists batches and balancing schemes.
Retrieve a Transaction for Modification - displays the screen image
that contains the transaction that you want to verify, change, or delete.
You cannot use this function to retrieve transactions entered in deferred
processing, only transactions that were entered on data entry screens.
Edit and Update Scheduling – automatically produces 60 Control
Transactions; enables you to schedule either a preview Edit and Update
or a full Edit and Update.
Edit and Update Control Transaction - creates and maintains the
Edit and Update Control Transaction (60 Control Transaction)
information required to process a group for the current processing
period. The 60 Control Transaction defines the processing status of a
group and provides other information used in processing that is specific
to the group.
Retrieve Data by Field Name - retrieves data using a specific data
element.
Query Schedule by Date - displays all pay groups scheduled to run in
either preview or processing mode on a specfic date.
Application Reference Manual Chapter 2: Suspense Management 5
Open Suspense The Open Suspense screen enables you to open a batch and to assign a balancing
scheme to the batch.
Note that you must open a batch in order to do deferred processing. In other words,
you must have a batch open for all pay producing functions, for some group
processing, and for those data elements that have been marked as deferred on the
IDD.
1. The Batch Number To Open field enables you to open an existing
batch or to open a new, empty batch.
To open an existing batch, type the batch number in this field. To see a
list of existing batch numbers, use the List Or Delete All Batches
screen.
To open a new, empty batch, simply type a new number.
2. In the Use Balancing Scheme field, you can assign an existing
balancing scheme or assign a new scheme to the batch you are opening.
To assign an existing scheme, type the scheme number in this field. To
see a list of existing schemes, use the Balancing Scheme Maintenance
screen.
To assign a new scheme, see the section title Suspense Balancing in
this chapter.
3. Select either F1 or F3.
Suspense File Menu The Suspense File Menu displays all the functions that are available within the
Suspense File option. To reach this menu, either select Suspense File from the
Suspense Management Menu or navigate by typing the screen number in any screen
navigation field.
The Suspense File Menu is used to manage the transactions that are stored on the
Suspense File. From this menu you can select the following options:
Release Transactions - releases the Suspense File and sends data to
the Release File.
Update Release Parameters - assigns cycle numbers to batches, sets
the release and delete parameters for up to 12 batches at a time, closes
an open batch, and most notable, runs either a partial Edit and Update
or a full Edit and Update.
Add Transactions Via an External File - adds transactions that were
created in deferred processing to the Suspense File.
Modify Transactions - changes, verifies, or deletes a transaction on
the Suspense File.
Scan for Employee Activity – displays transactions that exist on the
Suspense File for a specific employee (the system uses the employee
TRAN key to search for transactions).
6 Chapter 2: Suspense Management Application Reference Manual
Benefit Payments Users = This option is titled Scan for Payee Activity.
Defined Contribution Users = This option is titled Scan for Participant
Activity.
Human Resource Planning Users = This option is titled Scan for
Position Activity.
Modify Time Entry by Individual - retrieves all time entry
transactions for a specific individual for display and modification.
Modify Time Entry by Batch – retrieves all time entry transactions
for a specific batch number for display and modification.
Modify Adjustments by Individual - retrieves all adjustment
transactions for a specific individual for display and modification.
Modify Adjustments by Batch - retrieves all adjustment transactions
for a specific batch number for display and modification.
The above four options are available to payment-producing
applications only; they do not apply to stand-alone Human Resources
and Human Resource Planning.
Release Transactions to an Intermediate File
The Release Transactions Menu displays the functions that are available within the
Release Transaction option. To reach this menu, either select Release Transactions to
Intermediate File from the Suspense File Menu or navigate by typing the screen
number in any screen navigation field.
Use the Release Transactions Menu to access the functions available to release
and/or delete batches that are stored in the Suspense File.
You can release batches individually or in groups by batch or cycle number. The
batch number, used in conjunction with the Suspense File's menus and screens, helps
control the batches as well as receive specific information about the batches.
Note that once you release a batch, it is still available for additional processing.
When you use the Release Transactions to an Intermediate File option, a message
appears on the bottom of the screen. When the message indicates that the Task is
Complete, the batch is once again available for additions, changes, etc. Wait until the
Task is Complete before making any changes to the batch. Wait until the Edit and
Update Phase is complete before adding more transactions to the batch.
Once a batch is established, it can be used over and over until it is deleted.
You can select the following options from the Release Transaction Menu:
Use Existing Batch Parameters - releases a batch using the
parameters that you defined on the Update Release Parameters screen,
or the default parameters if you have not changed them (see the Update
Release Parameters section in this chapter). If you choose not to use
the existing parameters, you can change them on the Update Release
Parameters screen, or you use one of the override keys (F2 - F7) on this
menu.
Application Reference Manual Chapter 2: Suspense Management 7
Override All Batch Parameters – releases and/or deletes by batch or
by cycle. When you release/delete by a batch, all batches in the
Suspense File are released/deleted. When you release/delete by cycle,
you can specify up to five cycles. Cycle 999 is always released by
default, but it is not automatically deleted.
List - lists all batches with a value of Y on the Transaction Log from
Program ASBPPBB. The batch does not have to be released to be
listed, but you must run Program ASBPPBB to create the listing of
batches. The list provides you with batch information, including
transaction and sequence number.
Display Status Of Suspense File - displays the current status of the
Suspense File. This information includes a listing of the delayed
processing status, as well as the status of the file the last time it was
processed.
Cancel Pending Activity - cancels a scheduled delayed release.
Suspense Management - returns to the Suspense Management Menu.
Release and/or Delete Batches
The Release Transaction Batches screen is used to release a batch using existing
parameters, release all batches (deleting none), or release and delete all batches.
Note that releasing a batch does not automatically start the Edit and Update Phase.
You are simply releasing a batch and making it available for when the Edit and
Update Phase runs.
1. To postpone processing, type the delayed time in the Delay
Processing By 00 Hours 00 Minutes field.
2. To indicate whether to run the transaction in BYPASS mode, type
either a Y (yes) or an N (no) in the Run Bypass? field.
3. To indicate whether to print the Transaction Proof Report, type either a
Y (yes) or an N (no) in the Tran Proof? field.
4. To indicate whether to list any error messages, type either a Y (yes) or
an N (no) in the Error List? field.
List or Delete all Batches
There are several options on the Release Transaction Menu. Selecting two of these
options displays the List Or Delete All Batches screen:
F4 = Delete
F8 = List
The option that you select on the Release Transactions Menu determines what will
happen when the List Or Delete All Batches screen is displayed. If you selected F4,
you can delete the batches that are displayed. If you selected F8, you can only view
the batches that are displayed; deletion is not possible at this time.
To postpone processing, type the delayed time in the Delay Processing By 00
Hours And 00 Minutes field.
8 Chapter 2: Suspense Management Application Reference Manual
Release Designated Cycles
Use the Release Designated Cycles screen to release specific cycles.
1. To indicate which cycles you want processed, type the cycle in the
Cycles To Process field.
2. To postpone processing, type the delayed time in the Delay
Processing By 00 Hours And 00 Minutes field.
3. To indicate whether to run the transaction in BYPASS mode, type
either a Y (yes) or an N (no) in the Run Bypass? field.
4. To indicate whether to print the Transaction Proof Report, type either a
Y (yes) or an N (no) in the Tran Proof? field.
5. To indicate whether to list any error messages, type either a Y (yes) or
an N (no) in the Error List? field.
Delete Designated Cycles - Release None
Use the Delete Designated Cycles - Release None screen to delete specific cycles
without releasing them for processing.
1. To indicate which cycles you want processed, type the cycle in the
Cycles To Process field.
2. To postpone processing, type the delayed time in the Delay
Processing By 00 Hours And 00 Minutes field.
Update Release Parameters
The Update Release Parameters screen (P720 03) is very useful, enabling you to
perform several functions at one time, on one screen. Most notably, you can run
either a partial Edit and Update (referred to as a Preview) or a full Edit and Update,
directly from this screen by selecting function key F4 or F5, respectively.
Setting Up Function Keys
Before you can use the Update Release Parameters screen to run either type of Edit
and Update, you must first set up function keys F4 and F5 to work properly for each
application. You only need to set up these function keys once for each Genesys
application that you have.
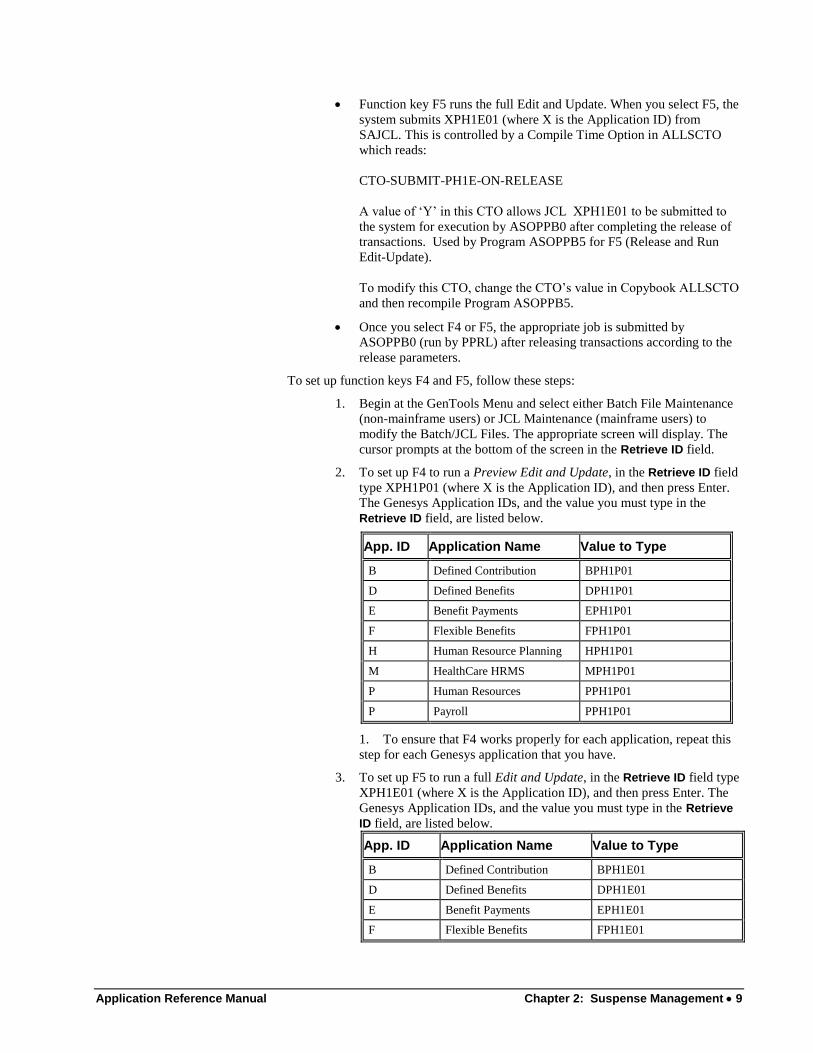
Function key F4 runs the Preview Edit and Update. When you select F4
on the Update Release Parameters screen, the system submits
XPH1P01 (where X is the Application ID) from SAJCL. This is
controlled by a Compile Time Option (CTO), which reads:
CTO-SUBMIT-PH1P-ON-RELEASE
A value of ‘Y’ in this CTO allows Job XPH1P01 to be submitted to
the system for execution by ASOPPB0 after completing the release of
transactions. Used by Program ASOPPB5 for F4 (Release and Run
Edit-Preview).
To modify this CTO, change the CTO’s value in Copybook ALLSCTO
and then recompile Program ASOPPB5.
Application Reference Manual Chapter 2: Suspense Management 9
Function key F5 runs the full Edit and Update. When you select F5, the
system submits XPH1E01 (where X is the Application ID) from
SAJCL. This is controlled by a Compile Time Option in ALLSCTO
which reads:
CTO-SUBMIT-PH1E-ON-RELEASE
A value of ‘Y’ in this CTO allows JCL XPH1E01 to be submitted to
the system for execution by ASOPPB0 after completing the release of
transactions. Used by Program ASOPPB5 for F5 (Release and Run
Edit-Update).
To modify this CTO, change the CTO’s value in Copybook ALLSCTO
and then recompile Program ASOPPB5.
Once you select F4 or F5, the appropriate job is submitted by
ASOPPB0 (run by PPRL) after releasing transactions according to the
release parameters.
To set up function keys F4 and F5, follow these steps:
1. Begin at the GenTools Menu and select either Batch File Maintenance
(non-mainframe users) or JCL Maintenance (mainframe users) to
modify the Batch/JCL Files. The appropriate screen will display. The
cursor prompts at the bottom of the screen in the Retrieve ID field.
2. To set up F4 to run a Preview Edit and Update, in the Retrieve ID field
type XPH1P01 (where X is the Application ID), and then press Enter.
The Genesys Application IDs, and the value you must type in the
Retrieve ID field, are listed below.
App. ID Application Name Value to Type
B Defined Contribution BPH1P01
D Defined Benefits DPH1P01
E Benefit Payments EPH1P01
F Flexible Benefits FPH1P01
H Human Resource Planning HPH1P01
M HealthCare HRMS MPH1P01
P Human Resources PPH1P01
P Payroll PPH1P01
1. To ensure that F4 works properly for each application, repeat this
step for each Genesys application that you have.
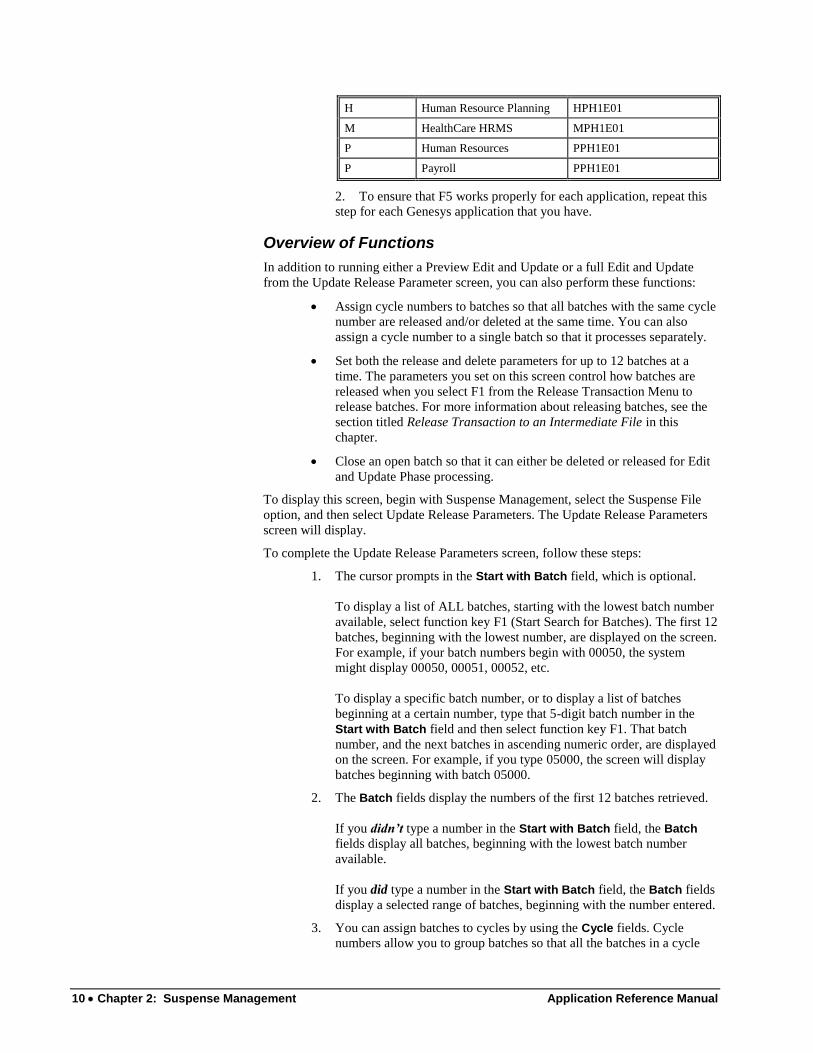
3. To set up F5 to run a full Edit and Update, in the Retrieve ID field type
XPH1E01 (where X is the Application ID), and then press Enter. The
Genesys Application IDs, and the value you must type in the Retrieve
ID field, are listed below.
App. ID Application Name Value to Type
B Defined Contribution BPH1E01
D Defined Benefits DPH1E01
E Benefit Payments EPH1E01
F Flexible Benefits FPH1E01
10 Chapter 2: Suspense Management Application Reference Manual
H Human Resource Planning HPH1E01
M HealthCare HRMS MPH1E01
P Human Resources PPH1E01
P Payroll PPH1E01
2. To ensure that F5 works properly for each application, repeat this
step for each Genesys application that you have.
Overview of Functions
In addition to running either a Preview Edit and Update or a full Edit and Update
from the Update Release Parameter screen, you can also perform these functions:
Assign cycle numbers to batches so that all batches with the same cycle
number are released and/or deleted at the same time. You can also
assign a cycle number to a single batch so that it processes separately.
Set both the release and delete parameters for up to 12 batches at a
time. The parameters you set on this screen control how batches are
released when you select F1 from the Release Transaction Menu to
release batches. For more information about releasing batches, see the
section titled Release Transaction to an Intermediate File in this
chapter.
Close an open batch so that it can either be deleted or released for Edit
and Update Phase processing.
To display this screen, begin with Suspense Management, select the Suspense File
option, and then select Update Release Parameters. The Update Release Parameters
screen will display.
To complete the Update Release Parameters screen, follow these steps:
1. The cursor prompts in the Start with Batch field, which is optional.
To display a list of ALL batches, starting with the lowest batch number
available, select function key F1 (Start Search for Batches). The first 12
batches, beginning with the lowest number, are displayed on the screen.
For example, if your batch numbers begin with 00050, the system
might display 00050, 00051, 00052, etc.
To display a specific batch number, or to display a list of batches
beginning at a certain number, type that 5-digit batch number in the
Start with Batch field and then select function key F1. That batch
number, and the next batches in ascending numeric order, are displayed
on the screen. For example, if you type 05000, the screen will display
batches beginning with batch 05000.
2. The Batch fields display the numbers of the first 12 batches retrieved.
If you didn’t type a number in the Start with Batch field, the Batch
fields display all batches, beginning with the lowest batch number
available.
If you did type a number in the Start with Batch field, the Batch fields
display a selected range of batches, beginning with the number entered.
3. You can assign batches to cycles by using the Cycle fields. Cycle
numbers allow you to group batches so that all the batches in a cycle

Application Reference Manual Chapter 2: Suspense Management 11
can be released and/or deleted at the same time. Cycle numbers also
allow you to process selected batches separately.
Each cycle is a unique, three-digit number (001-999). Cycle number
999 is always released by default whenever you initiate a release, but it
is not automatically deleted. Since 999 is the default setting, you can
assign any of the other cycle numbers, 001-998.
To assign a batch to a cycle number, first locate the batch number in the
Batch column; next, type the cycle number in the corresponding Cycle
field. Note that if you don’t assign a cycle number, the system
automatically assigns the batch to cycle 999.
4. In the Rlse fields, type either a Y or an N to indicate whether the batch,
which is currently in the Suspense File, should be released from the
Suspense File when you initiate a general release.
5. In the Dlte fields, type either a Y or an N to indicate whether the batch,
which is currently in the Suspense File, should be deleted from the
Suspense File.
Note that if you select function key F4 after completing this screen, the
system will release batches but will not delete any, even if this Dlte
field specifies to delete a batch. However, if you select function key F5
after completing this screen, the system will release batches and delete
batches, if the release parameters indicate to do so.
6. The Balancing Scheme fields display the balancing scheme currently
assigned to each batch, if applicable. Balancing schemes accumulate
the totals for numeric values entered during data entry and then display
the totals and the number of transactions entered into the batch.
7. In the Close Batch fields, type either a Y or an N to indicate whether a
batch should be closed. A batch must be closed if…
You are releasing the batch for Edit and Update Phase processing.
You are deleting the batch.
8. The Open Oper. fields display the User ID of the operator who
currently has a batch open, or who exited the system without closing a
batch. A value in this field indicates that a batch is currently open;
therefore, you might want to use the Close Batch function.
9. The Last Oper. fields display the User ID of the person who last
opened each batch.
10. The Last Opened fields display the date (as MM-DD-CCYY) when
each batch was last opened.
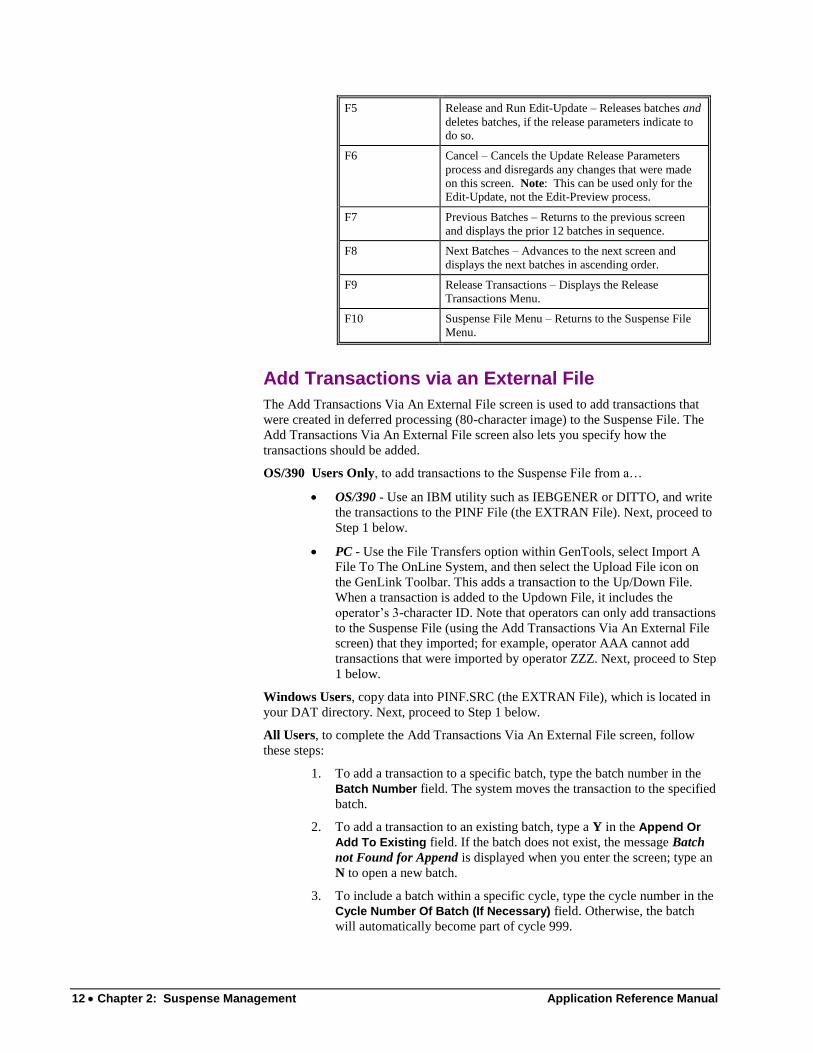
11. After completing this screen, you have several options. Review the
chart below and then select a function key based on the task you want
to perform.
Function Key Task it Performs
F4 Release and Run Edit-Preview – Releases batches but
does not delete any, even if the release parameters specify to delete a batch.
12 Chapter 2: Suspense Management Application Reference Manual
F5 Release and Run Edit-Update – Releases batches and
deletes batches, if the release parameters indicate to do so.
F6 Cancel – Cancels the Update Release Parameters
process and disregards any changes that were made
on this screen. Note: This can be used only for the Edit-Update, not the Edit-Preview process.
F7 Previous Batches – Returns to the previous screen
and displays the prior 12 batches in sequence.
F8 Next Batches – Advances to the next screen and
displays the next batches in ascending order.
F9 Release Transactions – Displays the Release
Transactions Menu.
F10 Suspense File Menu – Returns to the Suspense File
Menu.
Add Transactions via an External File
The Add Transactions Via An External File screen is used to add transactions that
were created in deferred processing (80-character image) to the Suspense File. The
Add Transactions Via An External File screen also lets you specify how the
transactions should be added.
OS/390 Users Only, to add transactions to the Suspense File from a…
OS/390 - Use an IBM utility such as IEBGENER or DITTO, and write
the transactions to the PINF File (the EXTRAN File). Next, proceed to
Step 1 below.
PC - Use the File Transfers option within GenTools, select Import A
File To The OnLine System, and then select the Upload File icon on
the GenLink Toolbar. This adds a transaction to the Up/Down File.
When a transaction is added to the Updown File, it includes the
operator’s 3-character ID. Note that operators can only add transactions
to the Suspense File (using the Add Transactions Via An External File
screen) that they imported; for example, operator AAA cannot add
transactions that were imported by operator ZZZ. Next, proceed to Step
1 below.
Windows Users, copy data into PINF.SRC (the EXTRAN File), which is located in
your DAT directory. Next, proceed to Step 1 below.
All Users, to complete the Add Transactions Via An External File screen, follow
these steps:
1. To add a transaction to a specific batch, type the batch number in the
Batch Number field. The system moves the transaction to the specified
batch.
2. To add a transaction to an existing batch, type a Y in the Append Or
Add To Existing field. If the batch does not exist, the message Batch
not Found for Append is displayed when you enter the screen; type an
N to open a new batch.
3. To include a batch within a specific cycle, type the cycle number in the
Cycle Number Of Batch (If Necessary) field. Otherwise, the batch
will automatically become part of cycle 999.
Application Reference Manual Chapter 2: Suspense Management 13
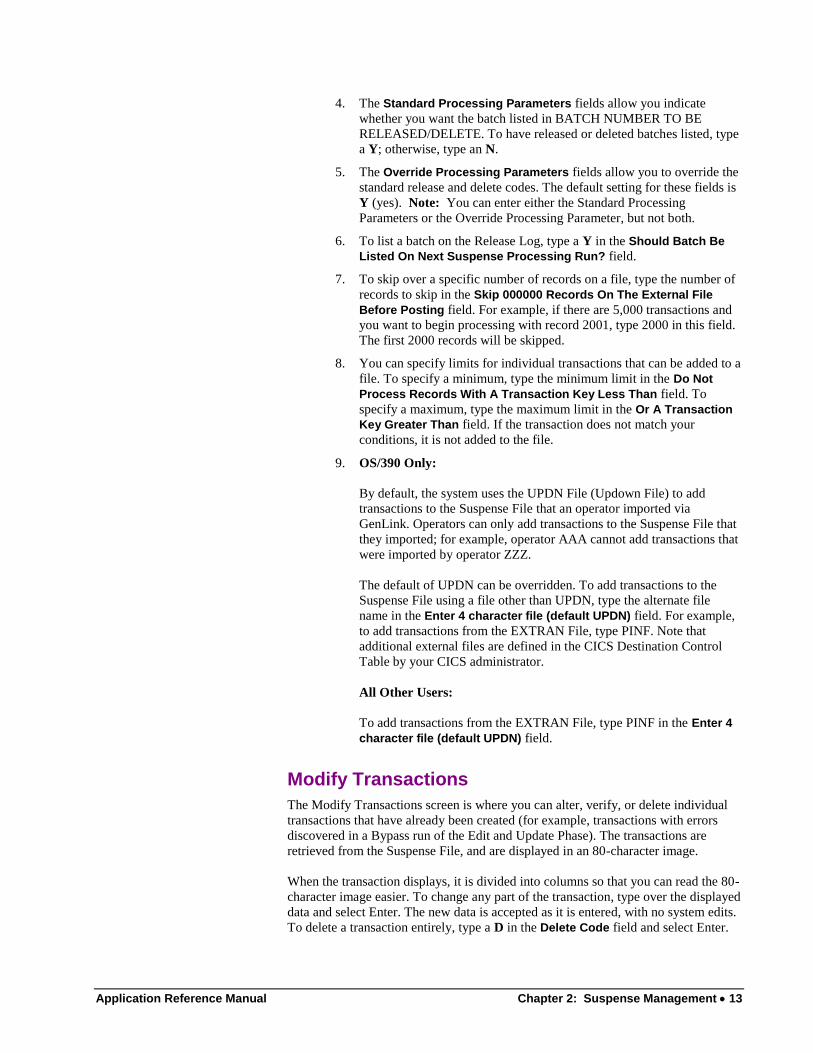
4. The Standard Processing Parameters fields allow you indicate
whether you want the batch listed in BATCH NUMBER TO BE
RELEASED/DELETE. To have released or deleted batches listed, type
a Y; otherwise, type an N.
5. The Override Processing Parameters fields allow you to override the
standard release and delete codes. The default setting for these fields is
Y (yes). Note: You can enter either the Standard Processing
Parameters or the Override Processing Parameter, but not both.
6. To list a batch on the Release Log, type a Y in the Should Batch Be
Listed On Next Suspense Processing Run? field.
7. To skip over a specific number of records on a file, type the number of
records to skip in the Skip 000000 Records On The External File
Before Posting field. For example, if there are 5,000 transactions and
you want to begin processing with record 2001, type 2000 in this field.
The first 2000 records will be skipped.
8. You can specify limits for individual transactions that can be added to a
file. To specify a minimum, type the minimum limit in the Do Not
Process Records With A Transaction Key Less Than field. To
specify a maximum, type the maximum limit in the Or A Transaction
Key Greater Than field. If the transaction does not match your
conditions, it is not added to the file.
9. OS/390 Only:
By default, the system uses the UPDN File (Updown File) to add
transactions to the Suspense File that an operator imported via
GenLink. Operators can only add transactions to the Suspense File that
they imported; for example, operator AAA cannot add transactions that
were imported by operator ZZZ.
The default of UPDN can be overridden. To add transactions to the
Suspense File using a file other than UPDN, type the alternate file
name in the Enter 4 character file (default UPDN) field. For example,
to add transactions from the EXTRAN File, type PINF. Note that
additional external files are defined in the CICS Destination Control
Table by your CICS administrator.
All Other Users:
To add transactions from the EXTRAN File, type PINF in the Enter 4
character file (default UPDN) field.
Modify Transactions
The Modify Transactions screen is where you can alter, verify, or delete individual
transactions that have already been created (for example, transactions with errors
discovered in a Bypass run of the Edit and Update Phase). The transactions are
retrieved from the Suspense File, and are displayed in an 80-character image.
When the transaction displays, it is divided into columns so that you can read the 80-
character image easier. To change any part of the transaction, type over the displayed
data and select Enter. The new data is accepted as it is entered, with no system edits.
To delete a transaction entirely, type a D in the Delete Code field and select Enter.
14 Chapter 2: Suspense Management Application Reference Manual
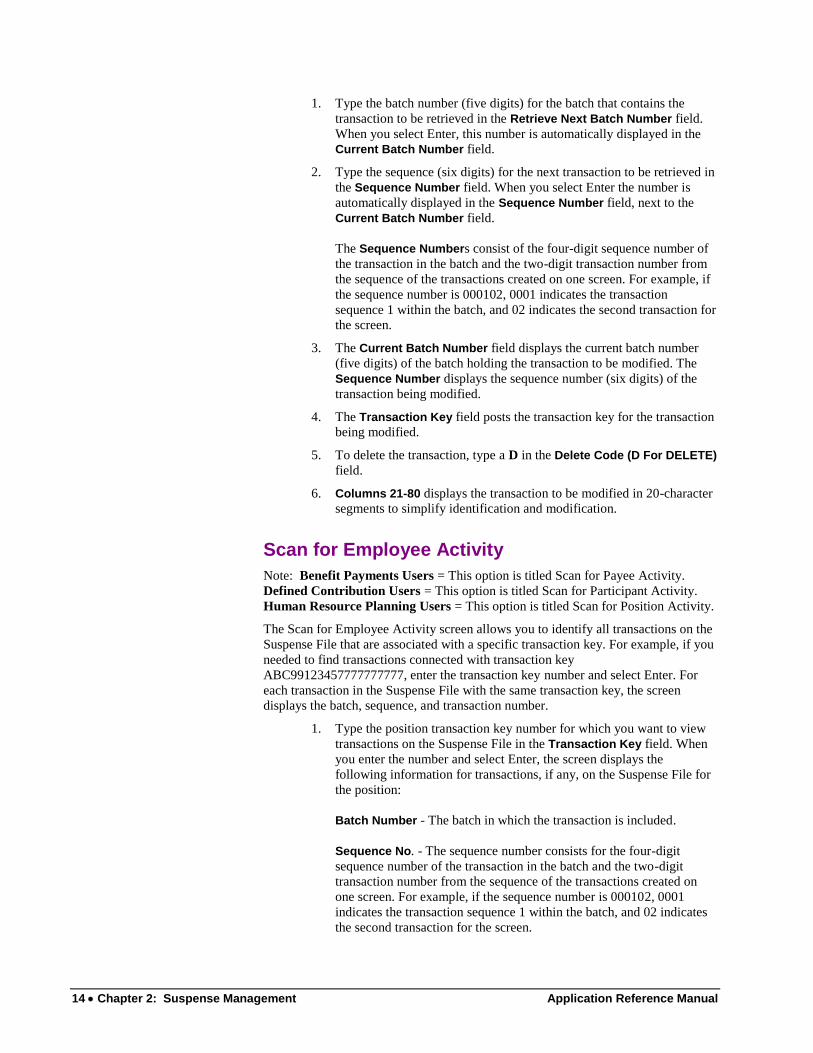
1. Type the batch number (five digits) for the batch that contains the
transaction to be retrieved in the Retrieve Next Batch Number field.
When you select Enter, this number is automatically displayed in the
Current Batch Number field.
2. Type the sequence (six digits) for the next transaction to be retrieved in
the Sequence Number field. When you select Enter the number is
automatically displayed in the Sequence Number field, next to the
Current Batch Number field.
The Sequence Numbers consist of the four-digit sequence number of
the transaction in the batch and the two-digit transaction number from
the sequence of the transactions created on one screen. For example, if
the sequence number is 000102, 0001 indicates the transaction
sequence 1 within the batch, and 02 indicates the second transaction for
the screen.
3. The Current Batch Number field displays the current batch number
(five digits) of the batch holding the transaction to be modified. The
Sequence Number displays the sequence number (six digits) of the
transaction being modified.
4. The Transaction Key field posts the transaction key for the transaction
being modified.
5. To delete the transaction, type a D in the Delete Code (D For DELETE)
field.
6. Columns 21-80 displays the transaction to be modified in 20-character
segments to simplify identification and modification.
Scan for Employee Activity
Note: Benefit Payments Users = This option is titled Scan for Payee Activity.
Defined Contribution Users = This option is titled Scan for Participant Activity.
Human Resource Planning Users = This option is titled Scan for Position Activity.
The Scan for Employee Activity screen allows you to identify all transactions on the
Suspense File that are associated with a specific transaction key. For example, if you
needed to find transactions connected with transaction key
ABC99123457777777777, enter the transaction key number and select Enter. For
each transaction in the Suspense File with the same transaction key, the screen
displays the batch, sequence, and transaction number.
1. Type the position transaction key number for which you want to view
transactions on the Suspense File in the Transaction Key field. When
you enter the number and select Enter, the screen displays the
following information for transactions, if any, on the Suspense File for
the position:
Batch Number - The batch in which the transaction is included.
Sequence No. - The sequence number consists for the four-digit
sequence number of the transaction in the batch and the two-digit
transaction number from the sequence of the transactions created on
one screen. For example, if the sequence number is 000102, 0001
indicates the transaction sequence 1 within the batch, and 02 indicates
the second transaction for the screen.
Application Reference Manual Chapter 2: Suspense Management 15
Code - Transaction code number (for a description of transaction
codes, see the chapter titled Master Database Maintenance).
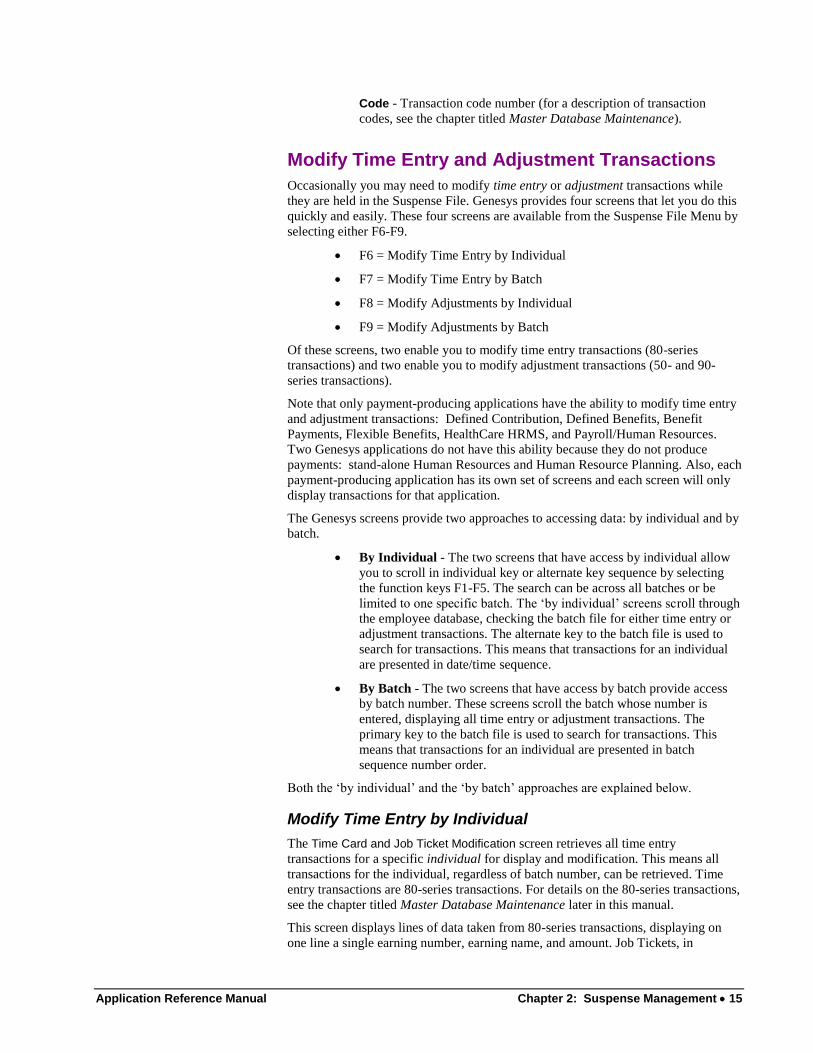
Modify Time Entry and Adjustment Transactions
Occasionally you may need to modify time entry or adjustment transactions while
they are held in the Suspense File. Genesys provides four screens that let you do this
quickly and easily. These four screens are available from the Suspense File Menu by
selecting either F6-F9.
F6 = Modify Time Entry by Individual
F7 = Modify Time Entry by Batch
F8 = Modify Adjustments by Individual
F9 = Modify Adjustments by Batch
Of these screens, two enable you to modify time entry transactions (80-series
transactions) and two enable you to modify adjustment transactions (50- and 90-
series transactions).
Note that only payment-producing applications have the ability to modify time entry
and adjustment transactions: Defined Contribution, Defined Benefits, Benefit
Payments, Flexible Benefits, HealthCare HRMS, and Payroll/Human Resources.
Two Genesys applications do not have this ability because they do not produce
payments: stand-alone Human Resources and Human Resource Planning. Also, each
payment-producing application has its own set of screens and each screen will only
display transactions for that application.
The Genesys screens provide two approaches to accessing data: by individual and by
batch.
By Individual - The two screens that have access by individual allow
you to scroll in individual key or alternate key sequence by selecting
the function keys F1-F5. The search can be across all batches or be
limited to one specific batch. The ‘by individual’ screens scroll through
the employee database, checking the batch file for either time entry or
adjustment transactions. The alternate key to the batch file is used to
search for transactions. This means that transactions for an individual
are presented in date/time sequence.
By Batch - The two screens that have access by batch provide access
by batch number. These screens scroll the batch whose number is
entered, displaying all time entry or adjustment transactions. The
primary key to the batch file is used to search for transactions. This
means that transactions for an individual are presented in batch
sequence number order.
Both the ‘by individual’ and the ‘by batch’ approaches are explained below.
Modify Time Entry by Individual
The Time Card and Job Ticket Modification screen retrieves all time entry
transactions for a specific individual for display and modification. This means all
transactions for the individual, regardless of batch number, can be retrieved. Time
entry transactions are 80-series transactions. For details on the 80-series transactions,
see the chapter titled Master Database Maintenance later in this manual.
This screen displays lines of data taken from 80-series transactions, displaying on
one line a single earning number, earning name, and amount. Job Tickets, in
16 Chapter 2: Suspense Management Application Reference Manual
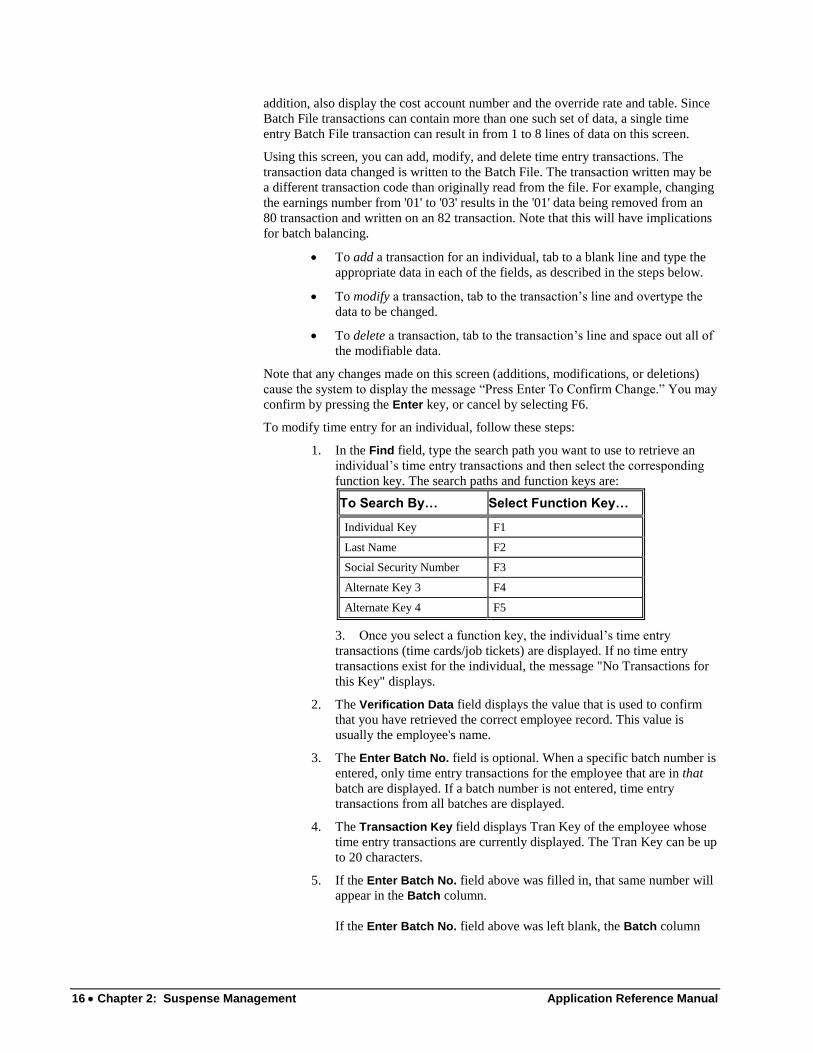
addition, also display the cost account number and the override rate and table. Since
Batch File transactions can contain more than one such set of data, a single time
entry Batch File transaction can result in from 1 to 8 lines of data on this screen.
Using this screen, you can add, modify, and delete time entry transactions. The
transaction data changed is written to the Batch File. The transaction written may be
a different transaction code than originally read from the file. For example, changing
the earnings number from '01' to '03' results in the '01' data being removed from an
80 transaction and written on an 82 transaction. Note that this will have implications
for batch balancing.
To add a transaction for an individual, tab to a blank line and type the
appropriate data in each of the fields, as described in the steps below.
To modify a transaction, tab to the transaction’s line and overtype the
data to be changed.
To delete a transaction, tab to the transaction’s line and space out all of
the modifiable data.
Note that any changes made on this screen (additions, modifications, or deletions)
cause the system to display the message “Press Enter To Confirm Change.” You may
confirm by pressing the Enter key, or cancel by selecting F6.
To modify time entry for an individual, follow these steps:
1. In the Find field, type the search path you want to use to retrieve an
individual’s time entry transactions and then select the corresponding
function key. The search paths and function keys are:
To Search By… Select Function Key…
Individual Key F1
Last Name F2
Social Security Number F3
Alternate Key 3 F4
Alternate Key 4 F5
3. Once you select a function key, the individual’s time entry
transactions (time cards/job tickets) are displayed. If no time entry
transactions exist for the individual, the message "No Transactions for
this Key" displays.
2. The Verification Data field displays the value that is used to confirm
that you have retrieved the correct employee record. This value is
usually the employee's name.
3. The Enter Batch No. field is optional. When a specific batch number is
entered, only time entry transactions for the employee that are in that
batch are displayed. If a batch number is not entered, time entry
transactions from all batches are displayed.
4. The Transaction Key field displays Tran Key of the employee whose
time entry transactions are currently displayed. The Tran Key can be up
to 20 characters.
5. If the Enter Batch No. field above was filled in, that same number will
appear in the Batch column.
If the Enter Batch No. field above was left blank, the Batch column

Application Reference Manual Chapter 2: Suspense Management 17
lists all the batches that contain time entry transactions for this
employee. The Batch fields are non-modifiable.
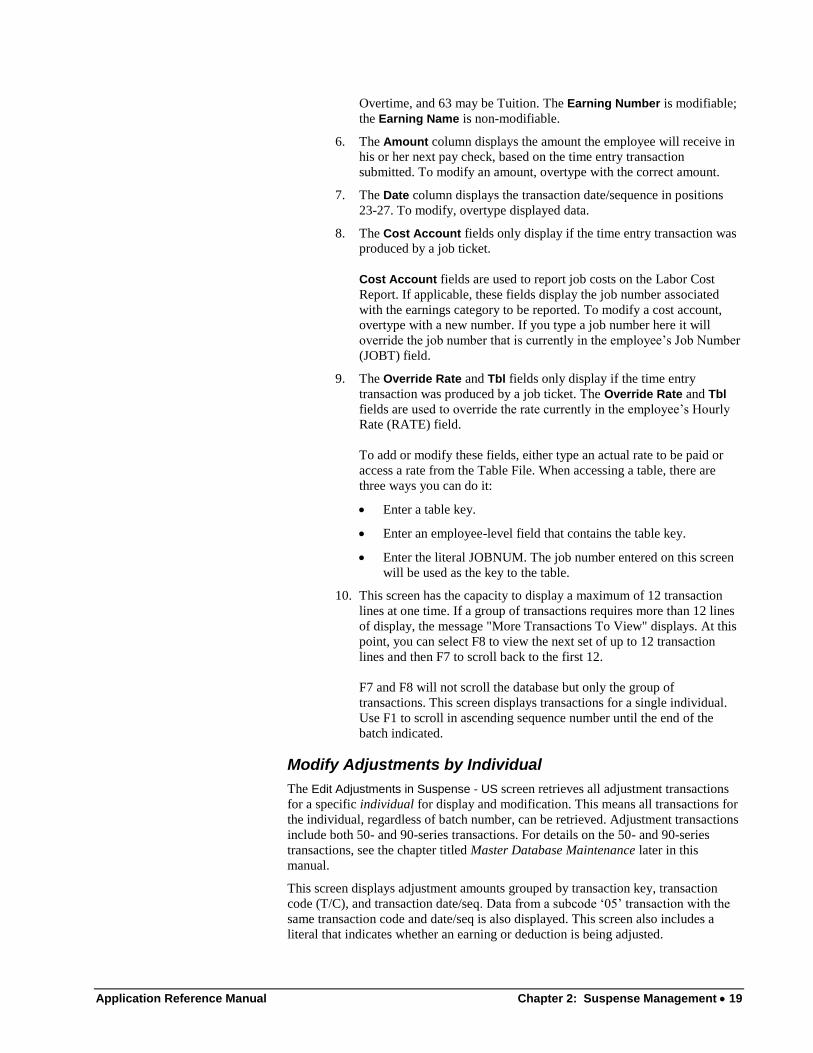
6. The Earning column displays the earnings number (CE number) and
earnings name to which each time entry transaction applies. For
example, earnings number 01 may be Regular Pay, 02 may be
Overtime, and 63 may be Tuition. The Earning Number is modifiable;
the Earning Name is non-modifiable.
7. The Amount column displays the amount the employee will receive in
his or her next pay check, based on the time entry transaction
submitted. To modify an amount, overtype with the correct amount.
8. The Date column displays the transaction date/sequence in positions
23-27. To modify, overtype displayed data.
9. The Cost Account fields only display if the time entry transaction was
produced by a job ticket.
Cost Account fields are used to report job costs on the Labor Cost
Report. If applicable, these fields display the job number associated
with the earnings category to be reported. To modify a cost account,
overtype with a new number. If you type a job number here it will
override the job number that is currently in the employee’s Job Number
(JOBT) field.
10. The Override Rate and Tbl fields only display if the time entry
transaction was produced by a job ticket. The Override Rate and Tbl
fields are used to override the rate currently in the employee’s Hourly
Rate (RATE) field. To add or modify these fields, either type an actual
rate to be paid or access a rate from the Table File. When accessing a
table, there are three ways you can do it:
Enter a table key.
Enter an employee-level field that contains the table key.
Enter the literal JOBNUM. The job number entered on this screen
will be used as the key to the table.
11. This screen has the capacity to display a maximum of 12 time entry
transactions at one time. If more than 12 transactions exist, the message
"More Transactions To View" displays. At this point, you can select F8
to view the next set of up to 12 transactions and then F7 to scroll back
to the first 12. All time entry transactions for an individual are
presented in one group, scrollable with F7 and F8. F7 and F8 will not
scroll the database but only the time entry transactions for a single
individual.
12. To retrieve time entry transactions for another individual, select the
function key used earlier (F1-F5) to locate the next individual in
sequence along the indicated search path (Individual Key, Last Name,
etc.). Access is by increasing key. All time entry transactions for an
individual are treated as a group and each use of F1-F5 will scroll to the
next individual regardless of the number of entries found.
Modify Time Entry by Batch
The Edit Time Cards and Job Tickets in Suspense screen retrieves all time entry
transactions for a specific batch number for display and modification. This means all
transactions for the batch, including all individuals in the batch, are retrieved. Time
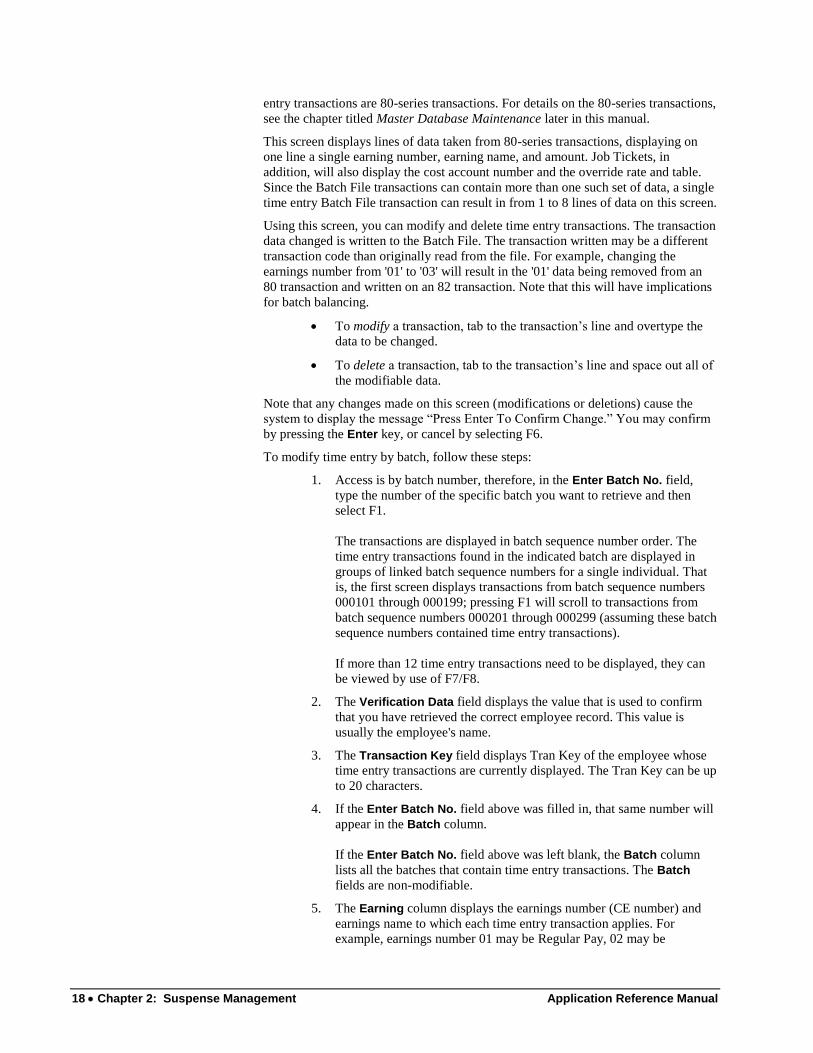
18 Chapter 2: Suspense Management Application Reference Manual
entry transactions are 80-series transactions. For details on the 80-series transactions,
see the chapter titled Master Database Maintenance later in this manual.
This screen displays lines of data taken from 80-series transactions, displaying on
one line a single earning number, earning name, and amount. Job Tickets, in
addition, will also display the cost account number and the override rate and table.
Since the Batch File transactions can contain more than one such set of data, a single
time entry Batch File transaction can result in from 1 to 8 lines of data on this screen.
Using this screen, you can modify and delete time entry transactions. The transaction
data changed is written to the Batch File. The transaction written may be a different
transaction code than originally read from the file. For example, changing the
earnings number from '01' to '03' will result in the '01' data being removed from an
80 transaction and written on an 82 transaction. Note that this will have implications
for batch balancing.
To modify a transaction, tab to the transaction’s line and overtype the
data to be changed.
To delete a transaction, tab to the transaction’s line and space out all of
the modifiable data.
Note that any changes made on this screen (modifications or deletions) cause the
system to display the message “Press Enter To Confirm Change.” You may confirm
by pressing the Enter key, or cancel by selecting F6.
To modify time entry by batch, follow these steps:
1. Access is by batch number, therefore, in the Enter Batch No. field,
type the number of the specific batch you want to retrieve and then
select F1.
The transactions are displayed in batch sequence number order. The
time entry transactions found in the indicated batch are displayed in
groups of linked batch sequence numbers for a single individual. That
is, the first screen displays transactions from batch sequence numbers
000101 through 000199; pressing F1 will scroll to transactions from
batch sequence numbers 000201 through 000299 (assuming these batch
sequence numbers contained time entry transactions).
If more than 12 time entry transactions need to be displayed, they can
be viewed by use of F7/F8.
2. The Verification Data field displays the value that is used to confirm
that you have retrieved the correct employee record. This value is
usually the employee's name.
3. The Transaction Key field displays Tran Key of the employee whose
time entry transactions are currently displayed. The Tran Key can be up
to 20 characters.
4. If the Enter Batch No. field above was filled in, that same number will
appear in the Batch column.
If the Enter Batch No. field above was left blank, the Batch column
lists all the batches that contain time entry transactions. The Batch
fields are non-modifiable.
5. The Earning column displays the earnings number (CE number) and
earnings name to which each time entry transaction applies. For
example, earnings number 01 may be Regular Pay, 02 may be
Application Reference Manual Chapter 2: Suspense Management 19
Overtime, and 63 may be Tuition. The Earning Number is modifiable;
the Earning Name is non-modifiable.
6. The Amount column displays the amount the employee will receive in
his or her next pay check, based on the time entry transaction
submitted. To modify an amount, overtype with the correct amount.
7. The Date column displays the transaction date/sequence in positions
23-27. To modify, overtype displayed data.
8. The Cost Account fields only display if the time entry transaction was
produced by a job ticket.
Cost Account fields are used to report job costs on the Labor Cost
Report. If applicable, these fields display the job number associated
with the earnings category to be reported. To modify a cost account,
overtype with a new number. If you type a job number here it will
override the job number that is currently in the employee’s Job Number
(JOBT) field.
9. The Override Rate and Tbl fields only display if the time entry
transaction was produced by a job ticket. The Override Rate and Tbl
fields are used to override the rate currently in the employee’s Hourly
Rate (RATE) field.
To add or modify these fields, either type an actual rate to be paid or
access a rate from the Table File. When accessing a table, there are
three ways you can do it:
Enter a table key.
Enter an employee-level field that contains the table key.
Enter the literal JOBNUM. The job number entered on this screen
will be used as the key to the table.
10. This screen has the capacity to display a maximum of 12 transaction
lines at one time. If a group of transactions requires more than 12 lines
of display, the message "More Transactions To View" displays. At this
point, you can select F8 to view the next set of up to 12 transaction
lines and then F7 to scroll back to the first 12.
F7 and F8 will not scroll the database but only the group of
transactions. This screen displays transactions for a single individual.
Use F1 to scroll in ascending sequence number until the end of the
batch indicated.
Modify Adjustments by Individual
The Edit Adjustments in Suspense - US screen retrieves all adjustment transactions
for a specific individual for display and modification. This means all transactions for
the individual, regardless of batch number, can be retrieved. Adjustment transactions
include both 50- and 90-series transactions. For details on the 50- and 90-series
transactions, see the chapter titled Master Database Maintenance later in this
manual.
This screen displays adjustment amounts grouped by transaction key, transaction
code (T/C), and transaction date/seq. Data from a subcode ‘05’ transaction with the
same transaction code and date/seq is also displayed. This screen also includes a
literal that indicates whether an earning or deduction is being adjusted.
20 Chapter 2: Suspense Management Application Reference Manual
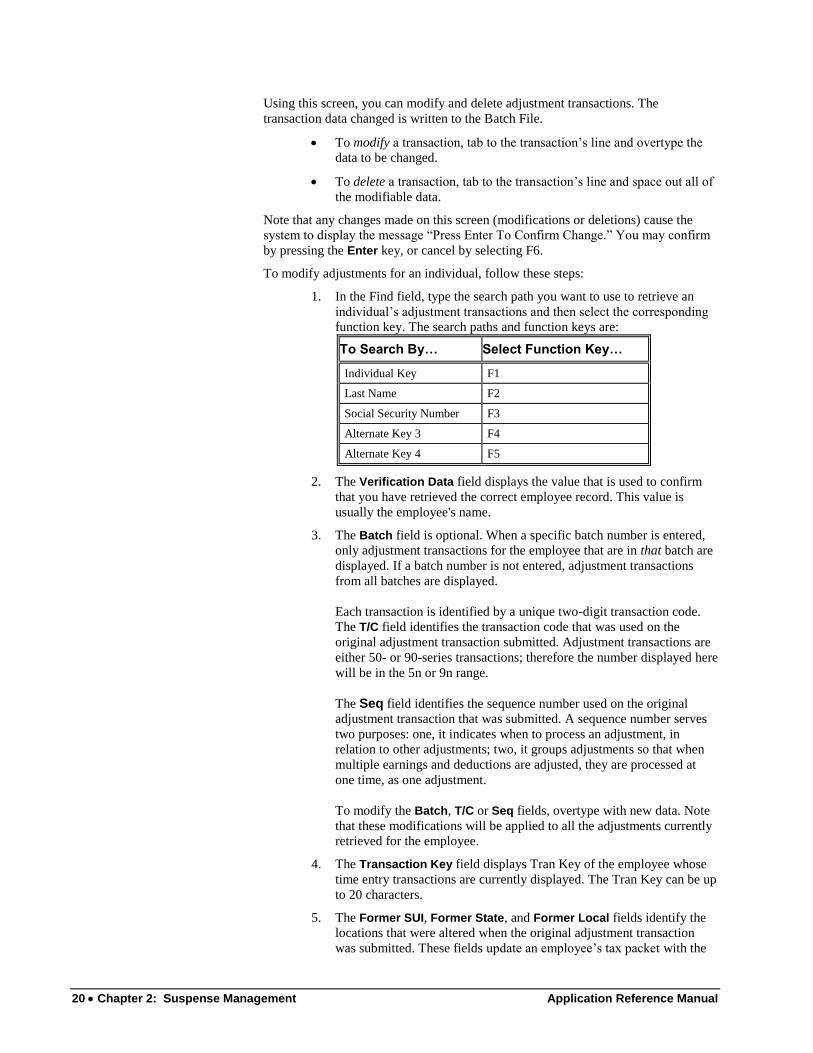
Using this screen, you can modify and delete adjustment transactions. The
transaction data changed is written to the Batch File.
To modify a transaction, tab to the transaction’s line and overtype the
data to be changed.
To delete a transaction, tab to the transaction’s line and space out all of
the modifiable data.
Note that any changes made on this screen (modifications or deletions) cause the
system to display the message “Press Enter To Confirm Change.” You may confirm
by pressing the Enter key, or cancel by selecting F6.
To modify adjustments for an individual, follow these steps:
1. In the Find field, type the search path you want to use to retrieve an
individual’s adjustment transactions and then select the corresponding
function key. The search paths and function keys are:
To Search By… Select Function Key…
Individual Key F1
Last Name F2
Social Security Number F3
Alternate Key 3 F4
Alternate Key 4 F5
2. The Verification Data field displays the value that is used to confirm
that you have retrieved the correct employee record. This value is
usually the employee's name.
3. The Batch field is optional. When a specific batch number is entered,
only adjustment transactions for the employee that are in that batch are
displayed. If a batch number is not entered, adjustment transactions
from all batches are displayed.
Each transaction is identified by a unique two-digit transaction code.
The T/C field identifies the transaction code that was used on the
original adjustment transaction submitted. Adjustment transactions are
either 50- or 90-series transactions; therefore the number displayed here
will be in the 5n or 9n range.
The Seq field identifies the sequence number used on the original
adjustment transaction that was submitted. A sequence number serves
two purposes: one, it indicates when to process an adjustment, in
relation to other adjustments; two, it groups adjustments so that when
multiple earnings and deductions are adjusted, they are processed at
one time, as one adjustment.
To modify the Batch, T/C or Seq fields, overtype with new data. Note
that these modifications will be applied to all the adjustments currently
retrieved for the employee.
4. The Transaction Key field displays Tran Key of the employee whose
time entry transactions are currently displayed. The Tran Key can be up
to 20 characters.
5. The Former SUI, Former State, and Former Local fields identify the
locations that were altered when the original adjustment transaction
was submitted. These fields update an employee’s tax packet with the
Application Reference Manual Chapter 2: Suspense Management 21
codes that apply to the employee’s prior tax jurisdiction (that is, prior
state unemployment insurance code, state tax code, and local tax code).
If a field is incorrect, overtype with the correct code.
6. The Check No. field identifies the check to which the original
adjustment transaction applied.
This was the pre-printed check number that was used to either void a
check that was previously issued by the Genesys system or to post a
check that was issued outside of the Genesys system. To change the
check number, overtype with a new number.
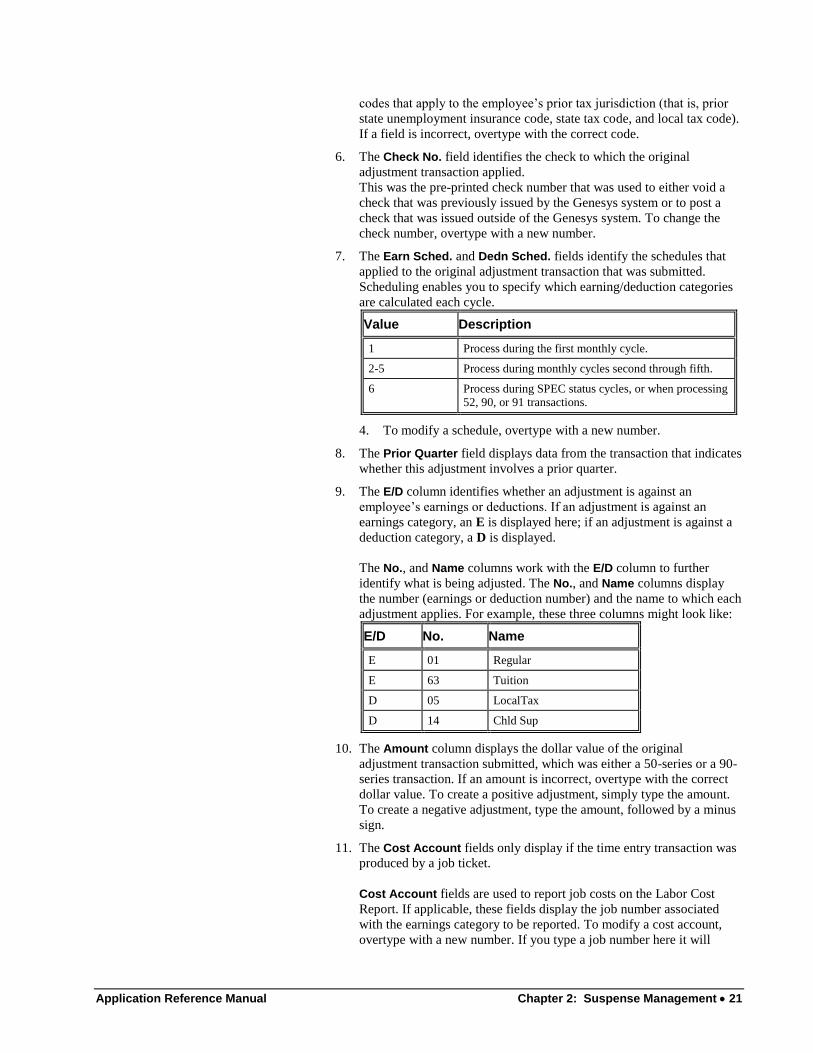
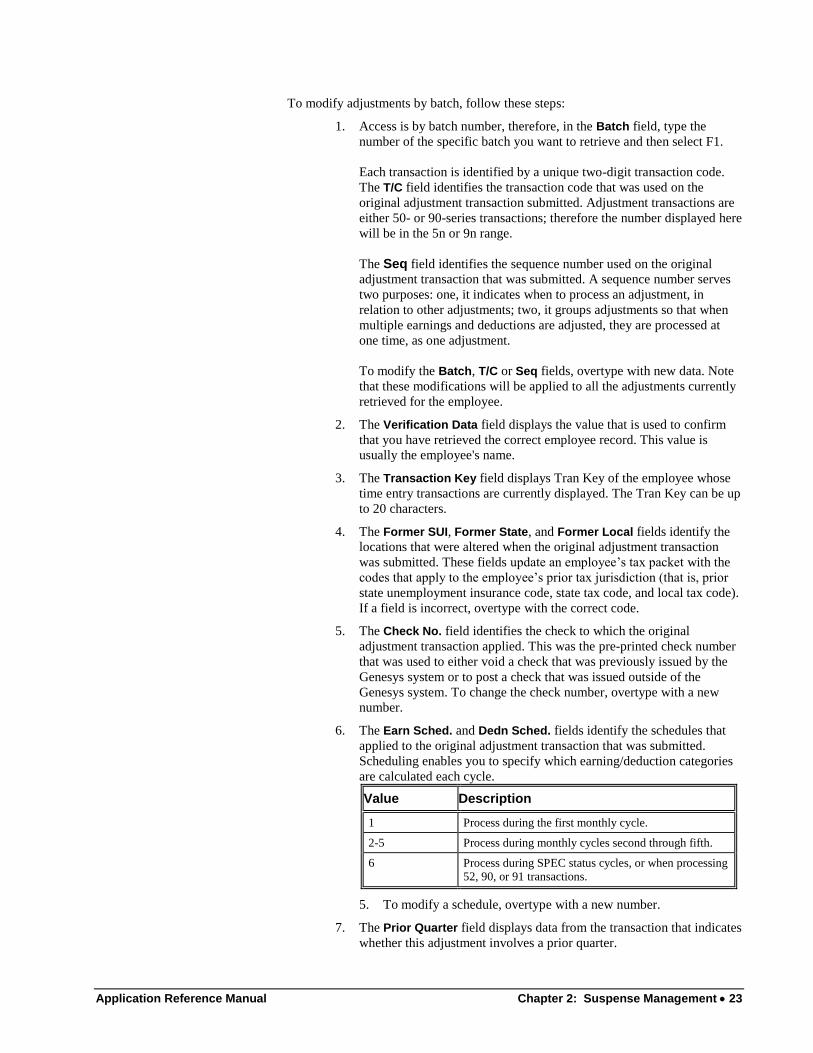
7. The Earn Sched. and Dedn Sched. fields identify the schedules that
applied to the original adjustment transaction that was submitted.
Scheduling enables you to specify which earning/deduction categories
are calculated each cycle.
Value Description
1 Process during the first monthly cycle.
2-5 Process during monthly cycles second through fifth.
6 Process during SPEC status cycles, or when processing 52, 90, or 91 transactions.
4. To modify a schedule, overtype with a new number.
8. The Prior Quarter field displays data from the transaction that indicates
whether this adjustment involves a prior quarter.
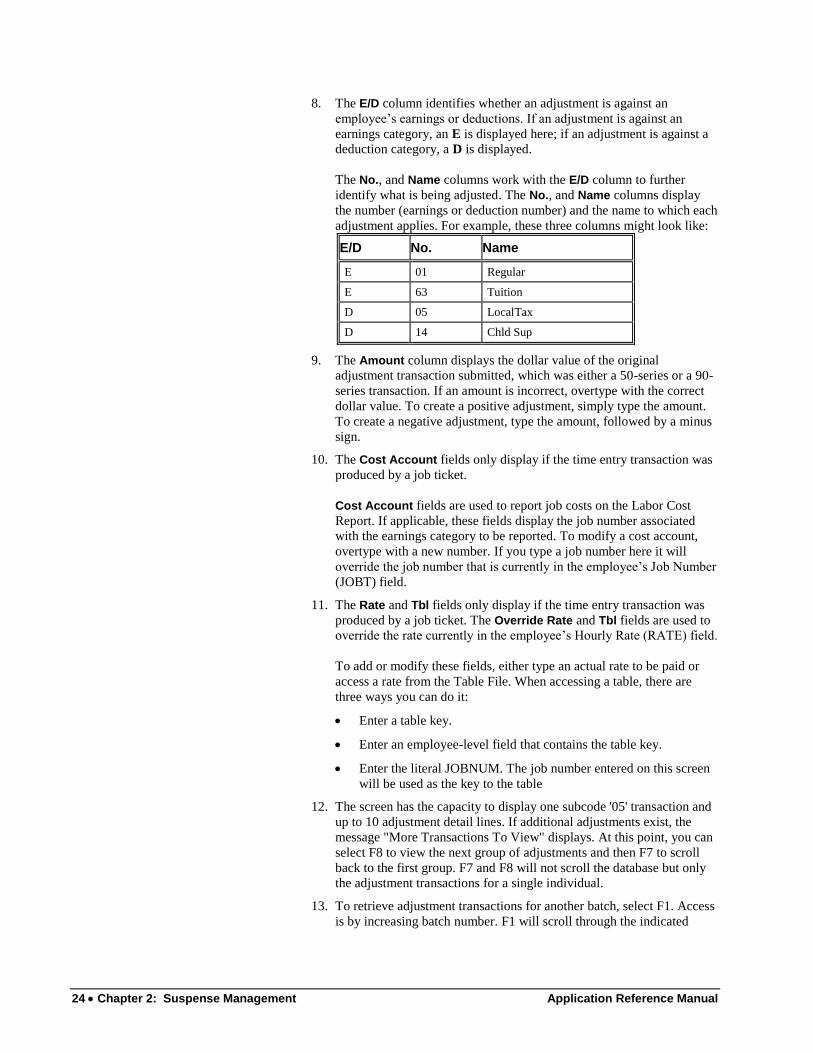
9. The E/D column identifies whether an adjustment is against an
employee’s earnings or deductions. If an adjustment is against an
earnings category, an E is displayed here; if an adjustment is against a
deduction category, a D is displayed.
The No., and Name columns work with the E/D column to further
identify what is being adjusted. The No., and Name columns display
the number (earnings or deduction number) and the name to which each
adjustment applies. For example, these three columns might look like:
E/D No. Name
E 01 Regular
E 63 Tuition
D 05 LocalTax
D 14 Chld Sup
10. The Amount column displays the dollar value of the original
adjustment transaction submitted, which was either a 50-series or a 90-
series transaction. If an amount is incorrect, overtype with the correct
dollar value. To create a positive adjustment, simply type the amount.
To create a negative adjustment, type the amount, followed by a minus
sign.
11. The Cost Account fields only display if the time entry transaction was
produced by a job ticket.
Cost Account fields are used to report job costs on the Labor Cost
Report. If applicable, these fields display the job number associated
with the earnings category to be reported. To modify a cost account,
overtype with a new number. If you type a job number here it will
22 Chapter 2: Suspense Management Application Reference Manual
override the job number that is currently in the employee’s Job Number
(JOBT) field.
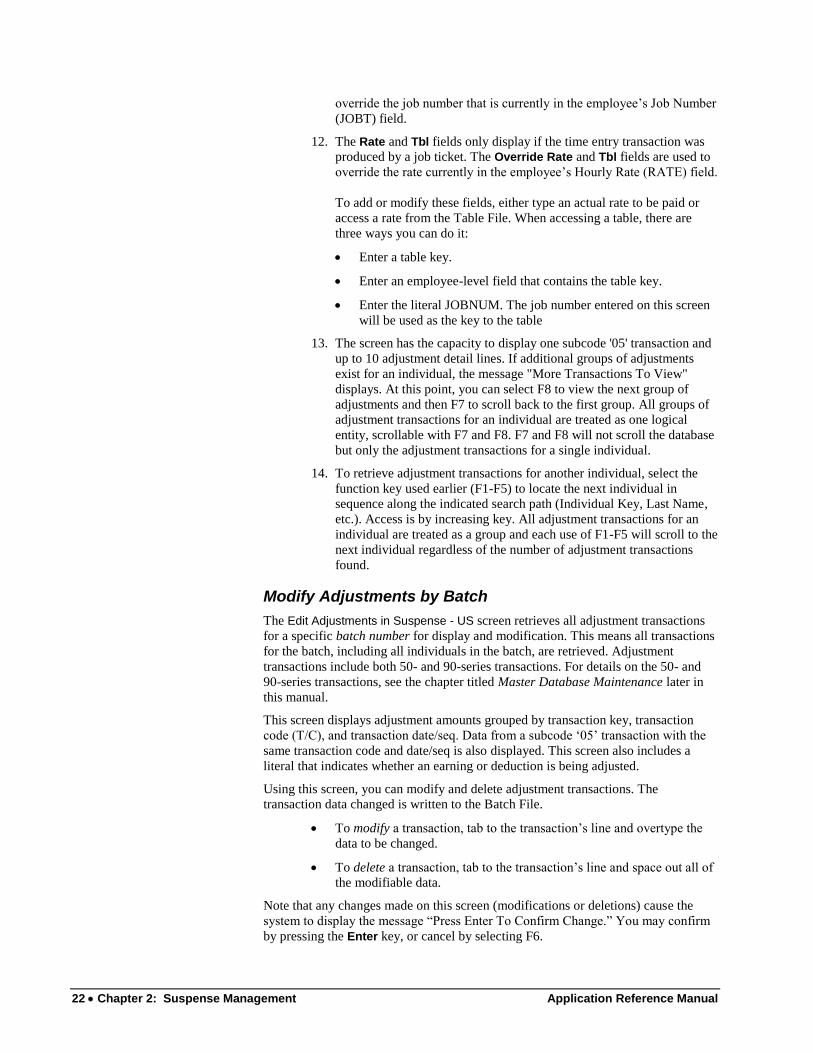
12. The Rate and Tbl fields only display if the time entry transaction was
produced by a job ticket. The Override Rate and Tbl fields are used to
override the rate currently in the employee’s Hourly Rate (RATE) field.
To add or modify these fields, either type an actual rate to be paid or
access a rate from the Table File. When accessing a table, there are
three ways you can do it:
Enter a table key.
Enter an employee-level field that contains the table key.
Enter the literal JOBNUM. The job number entered on this screen
will be used as the key to the table
13. The screen has the capacity to display one subcode '05' transaction and
up to 10 adjustment detail lines. If additional groups of adjustments
exist for an individual, the message "More Transactions To View"
displays. At this point, you can select F8 to view the next group of
adjustments and then F7 to scroll back to the first group. All groups of
adjustment transactions for an individual are treated as one logical
entity, scrollable with F7 and F8. F7 and F8 will not scroll the database
but only the adjustment transactions for a single individual.
14. To retrieve adjustment transactions for another individual, select the
function key used earlier (F1-F5) to locate the next individual in
sequence along the indicated search path (Individual Key, Last Name,
etc.). Access is by increasing key. All adjustment transactions for an
individual are treated as a group and each use of F1-F5 will scroll to the
next individual regardless of the number of adjustment transactions
found.
Modify Adjustments by Batch
The Edit Adjustments in Suspense - US screen retrieves all adjustment transactions
for a specific batch number for display and modification. This means all transactions
for the batch, including all individuals in the batch, are retrieved. Adjustment
transactions include both 50- and 90-series transactions. For details on the 50- and
90-series transactions, see the chapter titled Master Database Maintenance later in
this manual.
This screen displays adjustment amounts grouped by transaction key, transaction
code (T/C), and transaction date/seq. Data from a subcode ‘05’ transaction with the
same transaction code and date/seq is also displayed. This screen also includes a
literal that indicates whether an earning or deduction is being adjusted.
Using this screen, you can modify and delete adjustment transactions. The
transaction data changed is written to the Batch File.
To modify a transaction, tab to the transaction’s line and overtype the
data to be changed.
To delete a transaction, tab to the transaction’s line and space out all of
the modifiable data.
Note that any changes made on this screen (modifications or deletions) cause the
system to display the message “Press Enter To Confirm Change.” You may confirm
by pressing the Enter key, or cancel by selecting F6.
Application Reference Manual Chapter 2: Suspense Management 23
To modify adjustments by batch, follow these steps:
1. Access is by batch number, therefore, in the Batch field, type the
number of the specific batch you want to retrieve and then select F1.
Each transaction is identified by a unique two-digit transaction code.
The T/C field identifies the transaction code that was used on the
original adjustment transaction submitted. Adjustment transactions are
either 50- or 90-series transactions; therefore the number displayed here
will be in the 5n or 9n range.
The Seq field identifies the sequence number used on the original
adjustment transaction that was submitted. A sequence number serves
two purposes: one, it indicates when to process an adjustment, in
relation to other adjustments; two, it groups adjustments so that when
multiple earnings and deductions are adjusted, they are processed at
one time, as one adjustment.
To modify the Batch, T/C or Seq fields, overtype with new data. Note
that these modifications will be applied to all the adjustments currently
retrieved for the employee.
2. The Verification Data field displays the value that is used to confirm
that you have retrieved the correct employee record. This value is
usually the employee's name.
3. The Transaction Key field displays Tran Key of the employee whose
time entry transactions are currently displayed. The Tran Key can be up
to 20 characters.
4. The Former SUI, Former State, and Former Local fields identify the
locations that were altered when the original adjustment transaction
was submitted. These fields update an employee’s tax packet with the
codes that apply to the employee’s prior tax jurisdiction (that is, prior
state unemployment insurance code, state tax code, and local tax code).
If a field is incorrect, overtype with the correct code.
5. The Check No. field identifies the check to which the original
adjustment transaction applied. This was the pre-printed check number
that was used to either void a check that was previously issued by the
Genesys system or to post a check that was issued outside of the
Genesys system. To change the check number, overtype with a new
number.
6. The Earn Sched. and Dedn Sched. fields identify the schedules that
applied to the original adjustment transaction that was submitted.
Scheduling enables you to specify which earning/deduction categories
are calculated each cycle.
Value Description
1 Process during the first monthly cycle.
2-5 Process during monthly cycles second through fifth.
6 Process during SPEC status cycles, or when processing 52, 90, or 91 transactions.
5. To modify a schedule, overtype with a new number.
7. The Prior Quarter field displays data from the transaction that indicates
whether this adjustment involves a prior quarter.
24 Chapter 2: Suspense Management Application Reference Manual
8. The E/D column identifies whether an adjustment is against an
employee’s earnings or deductions. If an adjustment is against an
earnings category, an E is displayed here; if an adjustment is against a
deduction category, a D is displayed.
The No., and Name columns work with the E/D column to further
identify what is being adjusted. The No., and Name columns display
the number (earnings or deduction number) and the name to which each
adjustment applies. For example, these three columns might look like:
E/D No. Name
E 01 Regular
E 63 Tuition
D 05 LocalTax
D 14 Chld Sup
9. The Amount column displays the dollar value of the original
adjustment transaction submitted, which was either a 50-series or a 90-
series transaction. If an amount is incorrect, overtype with the correct
dollar value. To create a positive adjustment, simply type the amount.
To create a negative adjustment, type the amount, followed by a minus
sign.
10. The Cost Account fields only display if the time entry transaction was
produced by a job ticket.
Cost Account fields are used to report job costs on the Labor Cost
Report. If applicable, these fields display the job number associated
with the earnings category to be reported. To modify a cost account,
overtype with a new number. If you type a job number here it will
override the job number that is currently in the employee’s Job Number
(JOBT) field.
11. The Rate and Tbl fields only display if the time entry transaction was
produced by a job ticket. The Override Rate and Tbl fields are used to
override the rate currently in the employee’s Hourly Rate (RATE) field.
To add or modify these fields, either type an actual rate to be paid or
access a rate from the Table File. When accessing a table, there are
three ways you can do it:
Enter a table key.
Enter an employee-level field that contains the table key.
Enter the literal JOBNUM. The job number entered on this screen
will be used as the key to the table
12. The screen has the capacity to display one subcode '05' transaction and
up to 10 adjustment detail lines. If additional adjustments exist, the
message "More Transactions To View" displays. At this point, you can
select F8 to view the next group of adjustments and then F7 to scroll
back to the first group. F7 and F8 will not scroll the database but only
the adjustment transactions for a single individual.
13. To retrieve adjustment transactions for another batch, select F1. Access
is by increasing batch number. F1 will scroll through the indicated
Application Reference Manual Chapter 2: Suspense Management 25
batch in batch sequence order, displaying groups of adjustments with
matching transaction keys, transaction code, and date/sequence.
Close Suspense The Close Suspense screen is used to close a batch after you have finished entering
data. You only need to close a batch when you are ready to release the batch for Edit
and Update Phase processing. Note that there is no limit to the number of
transactions that can be held in a batch.
1. Type the number of the batch you want closed in the Close Batch
field. Type the cycle number in the Cycle field.
2. The Balancing Scheme In Use field displays the balancing scheme
you are using for this batch.
3. The Total of Transactions In Batch field displays the total of all the
transactions that have been entered in this batch. You can use this total
to check the number of actual transactions entered against the number
of transactions you had to enter.
4. The Total of Transaction Codes fields displays the total of all actual
Transaction Code numbers used to generate transactions during your
data entry sessions for the batch displayed at the top of the screen.
5. The Field No. field displays the batch number(s) that you have been
working in. If a balancing scheme is in use, that number is also
displayed.
6. The Data Element/Mask field displays the data element code, or the
transaction mask, such as 300125, that was used to define the balancing
scheme.
7. The Total field displays the total of the numeric values that were
entered into the data element or transaction mask displayed in the field
labeled Field/Mask. Example: If you added three new employees in a
batch, the value displayed in the Total field would equal three, the total
number of employees added.
Suspense Balancing The Suspense Balancing Menu displays all the functions that are available within the
suspense Balancing option. To reach this menu, either select Suspense Balancing
from the Suspense Management Menu or navigate by typing the screen number in
any screen navigation field.
The Suspense Balancing Menu is where you access the functions used to create and
maintain balancing schemes on the Suspense File. Balancing schemes accumulate
the totals for numeric values entered during data entry and then display the totals and
the number of transactions entered into the batch.
The Suspense Balancing functions provide you with an easy way to collect data not
available through any other menu or screen (for example, listings, total number of
transactions, etc.) and oversee the data entry process (check that transactions were
entered correctly by comparison; how much work your data entry operators have
actually done, etc.)

26 Chapter 2: Suspense Management Application Reference Manual
Note: Before you can add, change, or delete a balancing scheme, you must first
enter a name for the balancing scheme in the Balancing Scheme Name field. Once
you have entered the name, select one of the functions by selecting the appropriate F
key.
From this menu you can select the following options:
Add Balancing Scheme - adds a balancing scheme for a batch on the
Suspense File.
Defining a balancing scheme for Suspense File Management does not
require any programming or calculations. The first step in creating a
balancing scheme is choosing the data elements or transaction masks
for which you want to accumulate totals.
Each balancing scheme contains up to eight data elements or
transaction masks. A transaction mask consists of: the transaction
code, the subcode, and the number of the first position where the data
appears (for information on transaction codes and subcodes, see the
chapter titled Master Database Maintenance). The data element is the
name associated with every field in the system. For specific
information on data elements, see the IDD (Integrated Data
Dictionary). You can use any data element or transaction mask to
define the scheme as long as the data element or mask has a numeric
value and resides in the IDD.
Different types of data entry functions require different types of
balancing schemes. For example, the balancing scheme you use when
you add a position differs from the balancing scheme you use when you
change a position's budget.
When you create a balancing scheme, you do not need to specify the
length of the field; the OnLine System extracts this information from
the IDD. The OnLine System does not limit the number of balancing
schemes you can create, however only one scheme can be active for a
specific batch.
Change Balancing Scheme - changes the application identifiers and
the data elements or masks in a balancing scheme. You can change the
data elements/masks or add additional data elements/masks to the
scheme. To change a data element/mask, type over the data currently in
the field. To add a data element/mask, type the data in a blank field.
Delete Balancing Scheme - deletes a balancing scheme from the
Suspense File.
For the DELETE function, the screen displays the data elements or
masks entered when the scheme was added.
Display Balancing Scheme - displays a balancing scheme.
Balance a Batch – displays or updates the totals for a batch, or changes
the balancing scheme to update new totals.
List Batches - lists all of the batches on the Suspense File.
List Balancing Schemes - lists all of the balancing schemes currently
in the Suspense File for a particular application, their cycle number, the
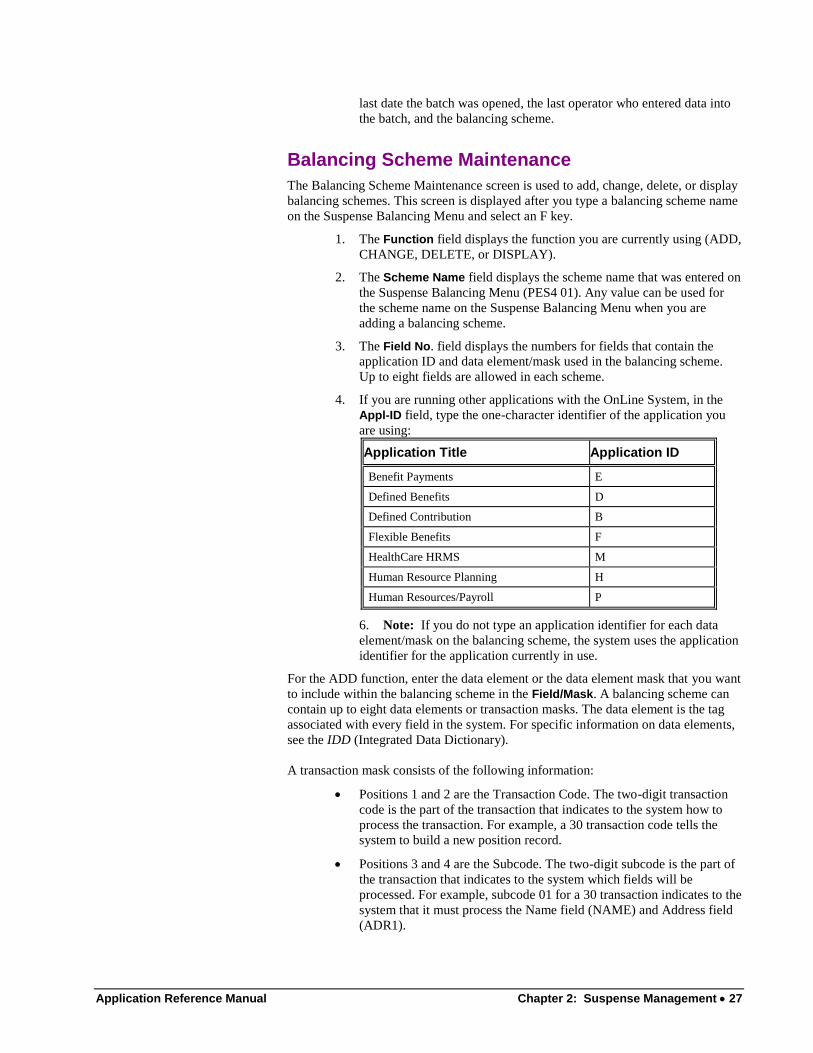
Application Reference Manual Chapter 2: Suspense Management 27
last date the batch was opened, the last operator who entered data into
the batch, and the balancing scheme.
Balancing Scheme Maintenance
The Balancing Scheme Maintenance screen is used to add, change, delete, or display
balancing schemes. This screen is displayed after you type a balancing scheme name
on the Suspense Balancing Menu and select an F key.
1. The Function field displays the function you are currently using (ADD,
CHANGE, DELETE, or DISPLAY).
2. The Scheme Name field displays the scheme name that was entered on
the Suspense Balancing Menu (PES4 01). Any value can be used for
the scheme name on the Suspense Balancing Menu when you are
adding a balancing scheme.
3. The Field No. field displays the numbers for fields that contain the
application ID and data element/mask used in the balancing scheme.
Up to eight fields are allowed in each scheme.
4. If you are running other applications with the OnLine System, in the
Appl-ID field, type the one-character identifier of the application you
are using:
Application Title Application ID
Benefit Payments E
Defined Benefits D
Defined Contribution B
Flexible Benefits F
HealthCare HRMS M
Human Resource Planning H
Human Resources/Payroll P
6. Note: If you do not type an application identifier for each data
element/mask on the balancing scheme, the system uses the application
identifier for the application currently in use.
For the ADD function, enter the data element or the data element mask that you want
to include within the balancing scheme in the Field/Mask. A balancing scheme can
contain up to eight data elements or transaction masks. The data element is the tag
associated with every field in the system. For specific information on data elements,
see the IDD (Integrated Data Dictionary).
A transaction mask consists of the following information:
Positions 1 and 2 are the Transaction Code. The two-digit transaction
code is the part of the transaction that indicates to the system how to
process the transaction. For example, a 30 transaction code tells the
system to build a new position record.
Positions 3 and 4 are the Subcode. The two-digit subcode is the part of
the transaction that indicates to the system which fields will be
processed. For example, subcode 01 for a 30 transaction indicates to the
system that it must process the Name field (NAME) and Address field
(ADR1).
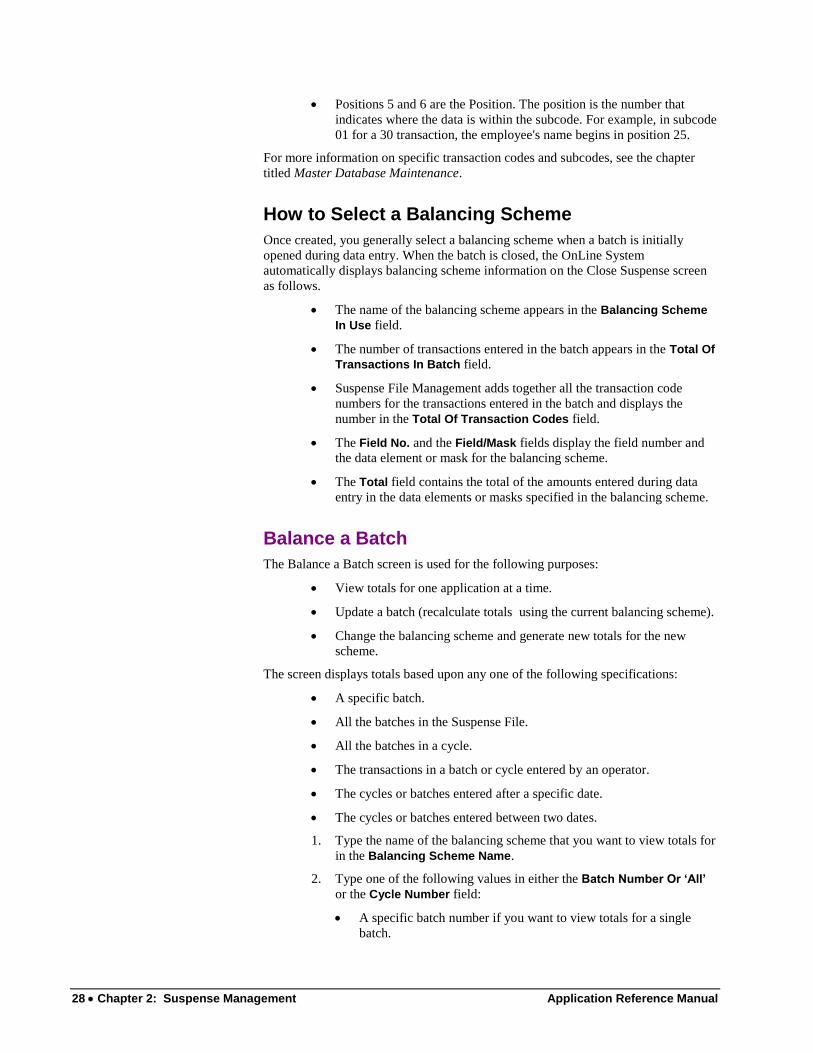
28 Chapter 2: Suspense Management Application Reference Manual
Positions 5 and 6 are the Position. The position is the number that
indicates where the data is within the subcode. For example, in subcode
01 for a 30 transaction, the employee's name begins in position 25.
For more information on specific transaction codes and subcodes, see the chapter
titled Master Database Maintenance.
How to Select a Balancing Scheme
Once created, you generally select a balancing scheme when a batch is initially
opened during data entry. When the batch is closed, the OnLine System
automatically displays balancing scheme information on the Close Suspense screen
as follows.
The name of the balancing scheme appears in the Balancing Scheme
In Use field.
The number of transactions entered in the batch appears in the Total Of
Transactions In Batch field.
Suspense File Management adds together all the transaction code
numbers for the transactions entered in the batch and displays the
number in the Total Of Transaction Codes field.
The Field No. and the Field/Mask fields display the field number and
the data element or mask for the balancing scheme.
The Total field contains the total of the amounts entered during data
entry in the data elements or masks specified in the balancing scheme.
Balance a Batch
The Balance a Batch screen is used for the following purposes:
View totals for one application at a time.
Update a batch (recalculate totals using the current balancing scheme).
Change the balancing scheme and generate new totals for the new
scheme.
The screen displays totals based upon any one of the following specifications:
A specific batch.
All the batches in the Suspense File.
All the batches in a cycle.
The transactions in a batch or cycle entered by an operator.
The cycles or batches entered after a specific date.
The cycles or batches entered between two dates.
1. Type the name of the balancing scheme that you want to view totals for
in the Balancing Scheme Name.
2. Type one of the following values in either the Batch Number Or ‘All’
or the Cycle Number field:
A specific batch number if you want to view totals for a single
batch.
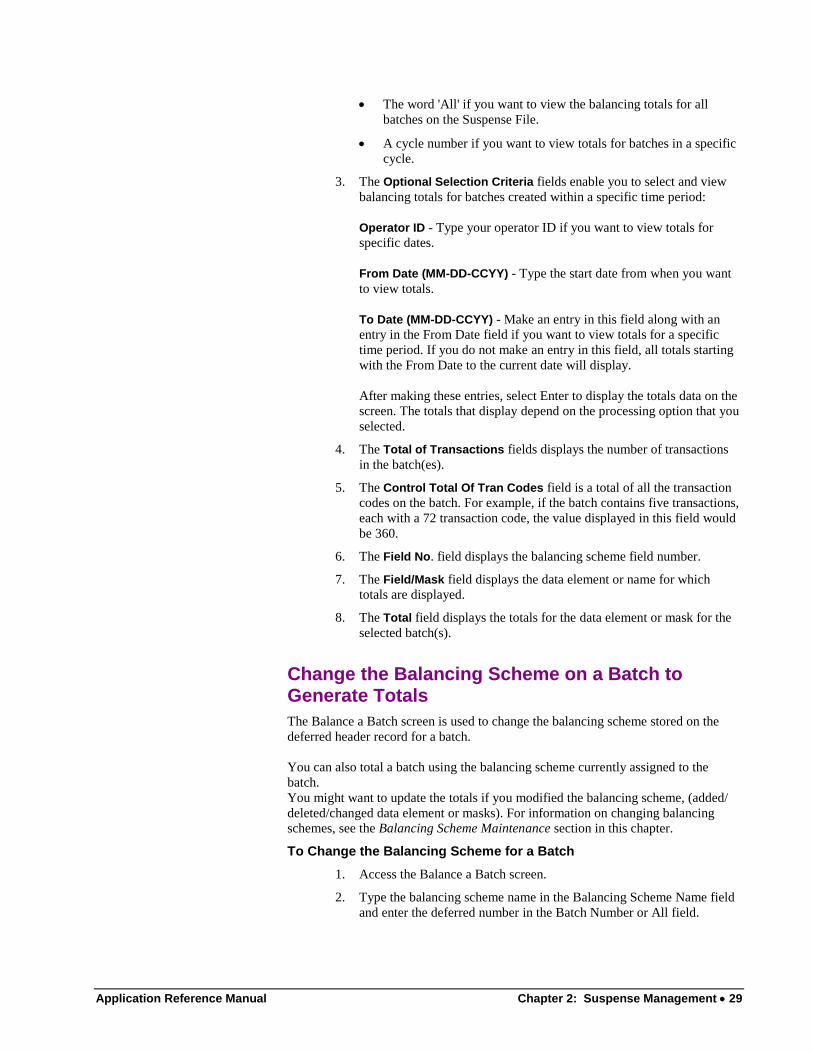
Application Reference Manual Chapter 2: Suspense Management 29
The word 'All' if you want to view the balancing totals for all
batches on the Suspense File.
A cycle number if you want to view totals for batches in a specific
cycle.
3. The Optional Selection Criteria fields enable you to select and view
balancing totals for batches created within a specific time period:
Operator ID - Type your operator ID if you want to view totals for
specific dates.
From Date (MM-DD-CCYY) - Type the start date from when you want
to view totals.
To Date (MM-DD-CCYY) - Make an entry in this field along with an
entry in the From Date field if you want to view totals for a specific
time period. If you do not make an entry in this field, all totals starting
with the From Date to the current date will display.
After making these entries, select Enter to display the totals data on the
screen. The totals that display depend on the processing option that you
selected.
4. The Total of Transactions fields displays the number of transactions
in the batch(es).
5. The Control Total Of Tran Codes field is a total of all the transaction
codes on the batch. For example, if the batch contains five transactions,
each with a 72 transaction code, the value displayed in this field would
be 360.
6. The Field No. field displays the balancing scheme field number.
7. The Field/Mask field displays the data element or name for which
totals are displayed.
8. The Total field displays the totals for the data element or mask for the
selected batch(s).
Change the Balancing Scheme on a Batch to Generate Totals
The Balance a Batch screen is used to change the balancing scheme stored on the
deferred header record for a batch.
You can also total a batch using the balancing scheme currently assigned to the
batch.
You might want to update the totals if you modified the balancing scheme, (added/
deleted/changed data element or masks). For information on changing balancing
schemes, see the Balancing Scheme Maintenance section in this chapter.
To Change the Balancing Scheme for a Batch
1. Access the Balance a Batch screen.
2. Type the balancing scheme name in the Balancing Scheme Name field
and enter the deferred number in the Batch Number or All field.
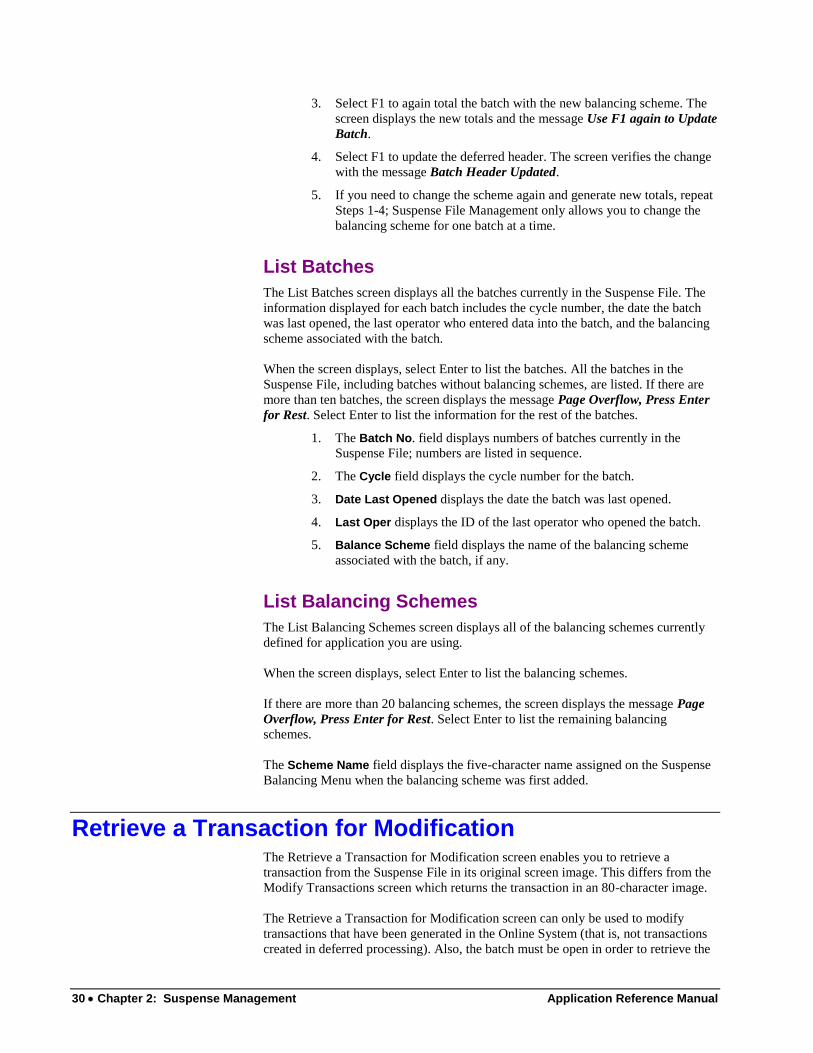
30 Chapter 2: Suspense Management Application Reference Manual
3. Select F1 to again total the batch with the new balancing scheme. The
screen displays the new totals and the message Use F1 again to Update
Batch.
4. Select F1 to update the deferred header. The screen verifies the change
with the message Batch Header Updated.
5. If you need to change the scheme again and generate new totals, repeat
Steps 1-4; Suspense File Management only allows you to change the
balancing scheme for one batch at a time.
List Batches
The List Batches screen displays all the batches currently in the Suspense File. The
information displayed for each batch includes the cycle number, the date the batch
was last opened, the last operator who entered data into the batch, and the balancing
scheme associated with the batch.
When the screen displays, select Enter to list the batches. All the batches in the
Suspense File, including batches without balancing schemes, are listed. If there are
more than ten batches, the screen displays the message Page Overflow, Press Enter
for Rest. Select Enter to list the information for the rest of the batches.
1. The Batch No. field displays numbers of batches currently in the
Suspense File; numbers are listed in sequence.
2. The Cycle field displays the cycle number for the batch.
3. Date Last Opened displays the date the batch was last opened.
4. Last Oper displays the ID of the last operator who opened the batch.
5. Balance Scheme field displays the name of the balancing scheme
associated with the batch, if any.
List Balancing Schemes
The List Balancing Schemes screen displays all of the balancing schemes currently
defined for application you are using.
When the screen displays, select Enter to list the balancing schemes.
If there are more than 20 balancing schemes, the screen displays the message Page
Overflow, Press Enter for Rest. Select Enter to list the remaining balancing
schemes.
The Scheme Name field displays the five-character name assigned on the Suspense
Balancing Menu when the balancing scheme was first added.
Retrieve a Transaction for Modification The Retrieve a Transaction for Modification screen enables you to retrieve a
transaction from the Suspense File in its original screen image. This differs from the
Modify Transactions screen which returns the transaction in an 80-character image.
The Retrieve a Transaction for Modification screen can only be used to modify
transactions that have been generated in the Online System (that is, not transactions
created in deferred processing). Also, the batch must be open in order to retrieve the
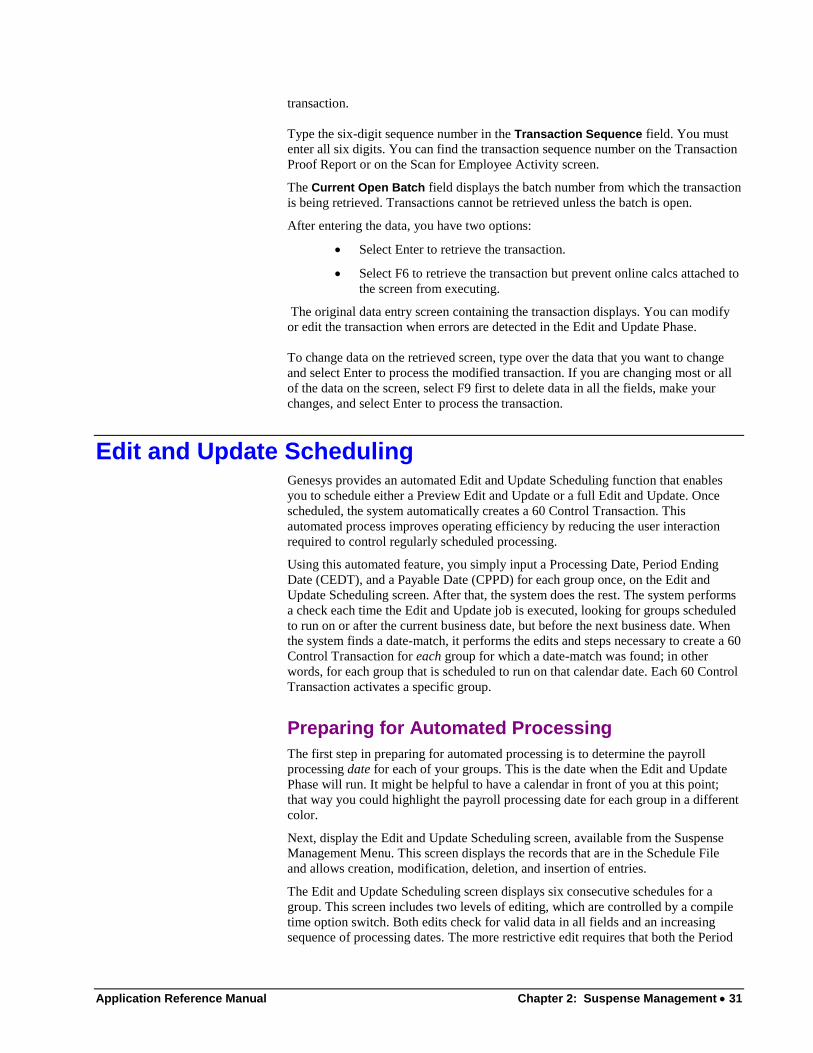
Application Reference Manual Chapter 2: Suspense Management 31
transaction.
Type the six-digit sequence number in the Transaction Sequence field. You must
enter all six digits. You can find the transaction sequence number on the Transaction
Proof Report or on the Scan for Employee Activity screen.
The Current Open Batch field displays the batch number from which the transaction
is being retrieved. Transactions cannot be retrieved unless the batch is open.
After entering the data, you have two options:
Select Enter to retrieve the transaction.
Select F6 to retrieve the transaction but prevent online calcs attached to
the screen from executing.
The original data entry screen containing the transaction displays. You can modify
or edit the transaction when errors are detected in the Edit and Update Phase.
To change data on the retrieved screen, type over the data that you want to change
and select Enter to process the modified transaction. If you are changing most or all
of the data on the screen, select F9 first to delete data in all the fields, make your
changes, and select Enter to process the transaction.
Edit and Update Scheduling Genesys provides an automated Edit and Update Scheduling function that enables
you to schedule either a Preview Edit and Update or a full Edit and Update. Once
scheduled, the system automatically creates a 60 Control Transaction. This
automated process improves operating efficiency by reducing the user interaction
required to control regularly scheduled processing.
Using this automated feature, you simply input a Processing Date, Period Ending
Date (CEDT), and a Payable Date (CPPD) for each group once, on the Edit and
Update Scheduling screen. After that, the system does the rest. The system performs
a check each time the Edit and Update job is executed, looking for groups scheduled
to run on or after the current business date, but before the next business date. When
the system finds a date-match, it performs the edits and steps necessary to create a 60
Control Transaction for each group for which a date-match was found; in other
words, for each group that is scheduled to run on that calendar date. Each 60 Control
Transaction activates a specific group.
Preparing for Automated Processing
The first step in preparing for automated processing is to determine the payroll
processing date for each of your groups. This is the date when the Edit and Update
Phase will run. It might be helpful to have a calendar in front of you at this point;
that way you could highlight the payroll processing date for each group in a different
color.
Next, display the Edit and Update Scheduling screen, available from the Suspense
Management Menu. This screen displays the records that are in the Schedule File
and allows creation, modification, deletion, and insertion of entries.
The Edit and Update Scheduling screen displays six consecutive schedules for a
group. This screen includes two levels of editing, which are controlled by a compile
time option switch. Both edits check for valid data in all fields and an increasing
sequence of processing dates. The more restrictive edit requires that both the Period

32 Chapter 2: Suspense Management Application Reference Manual
End Date (CEDT) and the Payable Date (CPPD) be greater than the Processing Date.
The schedule data is also edited to ensure that the number of edit and update cycles
do not exceed the Pay Cycles Per Year (CPNO) during the one year period from any
scheduled processing date. Editing does not allow scheduling more than two years
into the future from the initial cycle.
To complete the Edit and Update Scheduling screen, follow these steps.
1. In the Group Number field, type the number of the group for whom
you are scheduling Edit and Update Phases.
2. The Pay Cycles Per Year (CPNO) field displays the value of CPNO
for this group.
3. The Group Name field identifies the group currently displayed.
4. The next area on the screen, labeled Preview / Processing Date, is
actually two separate fields.
The top field, which is the Preview Date field, is optional. If desired,
type the date when you want the next scheduled Preview Edit & Update
Phase to run, using the format MM-DD-CCYY. Otherwise, you can
leave this date field blank.
The bottom field, which is the Processing Date field is required. Type
the date when you want the next scheduled full Edit & Update Phase to
run. Type the date in MM-DD-CCYY format.
Now that you’ve entered both a Preview Date and a Processing Date,
you must tell the system which type of processing you want to do –
either run a preview Edit and Update or a full Edit and Update. To do
this, you must modify Program 005. For details, see the next section
titled Automated Scheduling in the Edit and Update Phase.
5. The Period End Date (CEDT) field is required. Type the date when the
pay period will end. Type the date in MM-DD-CCYY format.
6. The Payable Date (CPPD) field is required. Type the Payable Date.
Type the date in MM-DD-CCYY format.
7. At this point, after entering a Group Number, and a Processing Date,
Period End Date, and Payable Date, you have the option to either
continue inputting dates manually to complete the Edit and Update
Scheduling screen, or you can use the automatic scheduling option.
To use the automatic scheduling option, you must complete three date
fields: Processing Date, Period End Date, and Payable Date. Then,
simply select F10, which is the Project Schedule key. This
automatically creates one screen’s worth of entries, based on the
Processing Date, Period End Date (CEDT), and the Payable Date
(CPPD) of the last entry for a group. Automatic scheduling defaults the
initialization switches to Y (turned on) for the first Payable Date in a
new month, quarter, or year (see the columns labeled MO, QR, and
YR); job period initialization defaults to blank (see the columns labeled
FP and FY); and the processing status defaults to spaces (see Proc.
Stat.). However, these defaults can be overridden as explained in Steps
8-10 below.
Automatic scheduling increments the dates as follows:

Application Reference Manual Chapter 2: Suspense Management 33
Increments by… If the Number of Pay cycles Per Year (CPNO) equals…
1 year 1
6 months 2
3 months 4
2 months 6
1 month 12
15 days, alternating with 1
month
24
14 days 26 or 27
7 52 or 53
Other values of CPNO will increment by a factor of 365 divided by CPNO.
7. Note: To project dates further, select F8 to advance to the next
screen. They system carries the last dates from the current screen
forward to the next screen and uses them to calculate projected dates.
Next, select F10 to project another screen’s worth of entries.
8. The Initialize fields are optional; however, if you elected to use the
automatic scheduling option described in Step 7, some of the Initialize
fields will contain defaults. To modify these fields, type either a Y or
an N to indicate whether to clear the field and begin a new period. The
fields, and the periods they represent, are:
Value Description
MO Clear and begin a new calendar month (NCMO)
QR Clear and begin a new calendar quarter (NCQR)
YR Clear and begin a new calendar year (NCYR)
FR Clear and begin a new accounting period (NJFP)
FY Clear and begin a new accounting year (NJFY)
9. Use the Schedules fields to indicate both earning and deduction
schedules.
You must enter a value from 1-5 in the first position of the field,
otherwise the entire field defaults to 1234. If you enter a value from 1-5
in the first position, but leave a subsequent position blank or enter an
invalid value (that is, not 1-5), the value you entered in the preceding
position is repeated for that position also.
10. The Proc. Stat. fields identify the processing status to use, if the Edit
and Update Phase is something other than normal processing (which is
identified by blanks in this field). If the status is something other than
normal, type one of the four-character statuses listed below.
Value Description
CONV Conversion run.
TRAN Transfer from one Master Database to another.
TEST Test group as active, then revert to inactive.
SPEC Special run.

34 Chapter 2: Suspense Management Application Reference Manual
11. After completing this screen, you have several options. If the screen is
to your liking, select ENTER to process your changes. Otherwise,
review the chart below and then select a function key based on the task
you want to perform.
Function Key Task it Performs
F1 Deletes at the cursor.
F2 Inserts at the cursor.
F3 Cancels all activity on the screen.
F4 Displays schedules for the next group in numeric
order.
F7 Scrolls up one screen’s worth of information.
F8 Scrolls down one screen’s worth of information.
F10 Projects future scheduled transactions; automatically
fills the screen based on the first line of information.
Automated Scheduling in the Edit and Update Phase
To accommodate automatic scheduling, two steps run after Program ASBPPBB (see
note below regarding Program ASBPPBB). These are a sort and Program 005
(PROG005). The released transactions out of Program ASBPPBB are sorted into
group and transaction sequence with any 60 control transactions at the front of each
group’s transactions. The scheduler, which is run by PROG005, runs after the sort.
The scheduler control transaction is 33 positions in length and contains three control
switches (Y/N/B), two dates, and an area to identify the type of Edit and Update to
be run (either Preview or full):
Position Description
1 The switch that controls the release of scheduled edit/update
control transactions from the schedule file.
2 Blank
3 The switch that controls the release of unscheduled transactions
from the transaction file.
4 Blank
5-14 Contains the business date for which you are processing. The
values for positions 5–14 are either a valid date entered in MM-
DD-CCYY format, or the literal TODAY.
16-25 Contains the next business date.
26 Blank
27-33 Contains the identifier as to which type of Edit and Update is to be
run. The values for positions 27–33 are PREVIEW, EDITUPD, or
spaces. When PREVIEW is entered in these positions, the group
control transactions that are released are based on the Preview Date
entered on the Edit and Update Scheduling screen. When
EDITUPD is entered in these positions, or these positions are left
blank (default), the group control transactions released are based
on the Processing Date entered on that screen.
The three control switches perform the following functions:
Y = Release Unscheduled Transactions and Create a 60 Control Transaction.
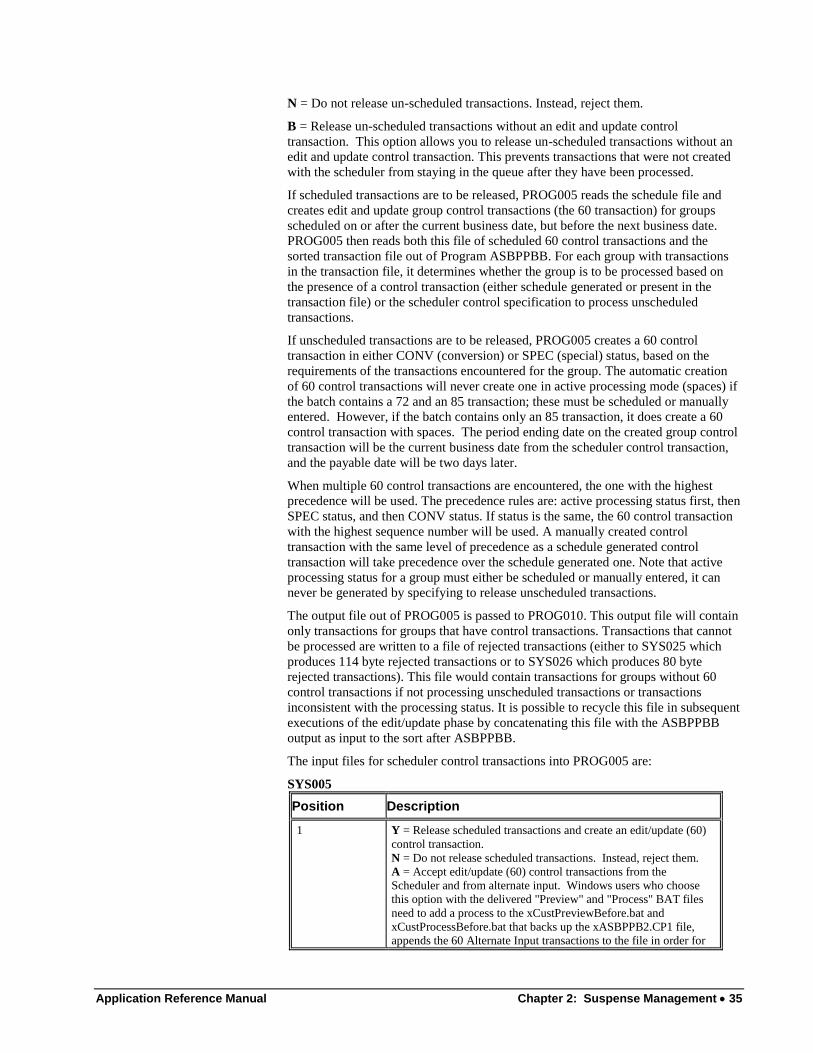
Application Reference Manual Chapter 2: Suspense Management 35
N = Do not release un-scheduled transactions. Instead, reject them.
B = Release un-scheduled transactions without an edit and update control
transaction. This option allows you to release un-scheduled transactions without an
edit and update control transaction. This prevents transactions that were not created
with the scheduler from staying in the queue after they have been processed.
If scheduled transactions are to be released, PROG005 reads the schedule file and
creates edit and update group control transactions (the 60 transaction) for groups
scheduled on or after the current business date, but before the next business date.
PROG005 then reads both this file of scheduled 60 control transactions and the
sorted transaction file out of Program ASBPPBB. For each group with transactions
in the transaction file, it determines whether the group is to be processed based on
the presence of a control transaction (either schedule generated or present in the
transaction file) or the scheduler control specification to process unscheduled
transactions.
If unscheduled transactions are to be released, PROG005 creates a 60 control
transaction in either CONV (conversion) or SPEC (special) status, based on the
requirements of the transactions encountered for the group. The automatic creation
of 60 control transactions will never create one in active processing mode (spaces) if
the batch contains a 72 and an 85 transaction; these must be scheduled or manually
entered. However, if the batch contains only an 85 transaction, it does create a 60
control transaction with spaces. The period ending date on the created group control
transaction will be the current business date from the scheduler control transaction,
and the payable date will be two days later.
When multiple 60 control transactions are encountered, the one with the highest
precedence will be used. The precedence rules are: active processing status first, then
SPEC status, and then CONV status. If status is the same, the 60 control transaction
with the highest sequence number will be used. A manually created control
transaction with the same level of precedence as a schedule generated control
transaction will take precedence over the schedule generated one. Note that active
processing status for a group must either be scheduled or manually entered, it can
never be generated by specifying to release unscheduled transactions.
The output file out of PROG005 is passed to PROG010. This output file will contain
only transactions for groups that have control transactions. Transactions that cannot
be processed are written to a file of rejected transactions (either to SYS025 which
produces 114 byte rejected transactions or to SYS026 which produces 80 byte
rejected transactions). This file would contain transactions for groups without 60
control transactions if not processing unscheduled transactions or transactions
inconsistent with the processing status. It is possible to recycle this file in subsequent
executions of the edit/update phase by concatenating this file with the ASBPPBB
output as input to the sort after ASBPPBB.
The input files for scheduler control transactions into PROG005 are:
SYS005
Position Description
1 Y = Release scheduled transactions and create an edit/update (60)
control transaction.
N = Do not release scheduled transactions. Instead, reject them.
A = Accept edit/update (60) control transactions from the
Scheduler and from alternate input. Windows users who choose
this option with the delivered "Preview" and "Process" BAT files
need to add a process to the xCustPreviewBefore.bat and
xCustProcessBefore.bat that backs up the xASBPPB2.CP1 file,
appends the 60 Alternate Input transactions to the file in order for
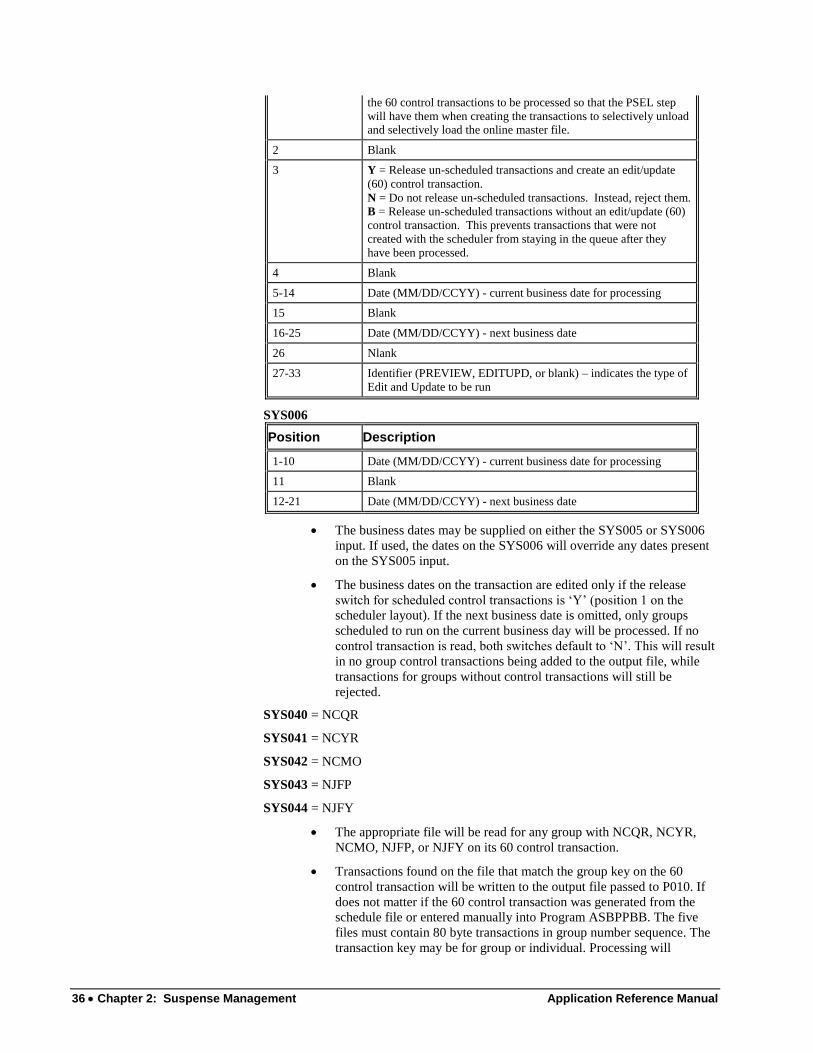
36 Chapter 2: Suspense Management Application Reference Manual
the 60 control transactions to be processed so that the PSEL step
will have them when creating the transactions to selectively unload and selectively load the online master file.
2 Blank
3 Y = Release un-scheduled transactions and create an edit/update
(60) control transaction.
N = Do not release un-scheduled transactions. Instead, reject them.
B = Release un-scheduled transactions without an edit/update (60)
control transaction. This prevents transactions that were not
created with the scheduler from staying in the queue after they
have been processed.
4 Blank
5-14 Date (MM/DD/CCYY) - current business date for processing
15 Blank
16-25 Date (MM/DD/CCYY) - next business date
26 Nlank
27-33 Identifier (PREVIEW, EDITUPD, or blank) – indicates the type of
Edit and Update to be run
SYS006
Position Description
1-10 Date (MM/DD/CCYY) - current business date for processing
11 Blank
12-21 Date (MM/DD/CCYY) - next business date
The business dates may be supplied on either the SYS005 or SYS006
input. If used, the dates on the SYS006 will override any dates present
on the SYS005 input.
The business dates on the transaction are edited only if the release
switch for scheduled control transactions is ‘Y’ (position 1 on the
scheduler layout). If the next business date is omitted, only groups
scheduled to run on the current business day will be processed. If no
control transaction is read, both switches default to ‘N’. This will result
in no group control transactions being added to the output file, while
transactions for groups without control transactions will still be
rejected.
SYS040 = NCQR
SYS041 = NCYR
SYS042 = NCMO
SYS043 = NJFP
SYS044 = NJFY
The appropriate file will be read for any group with NCQR, NCYR,
NCMO, NJFP, or NJFY on its 60 control transaction.
Transactions found on the file that match the group key on the 60
control transaction will be written to the output file passed to P010. If
does not matter if the 60 control transaction was generated from the
schedule file or entered manually into Program ASBPPBB. The five
files must contain 80 byte transactions in group number sequence. The
transaction key may be for group or individual. Processing will
Application Reference Manual Chapter 2: Suspense Management 37
continue normally if these files do not exist, as well as if the DD
statements are omitted.
System Reminder to Post Checks In order to prevent the processing of control transactions created outside the
scheduler, the system will return an error message if, for example, an off-cycle check
has not been posted prior to a scheduled processing run. The un-posted transaction
will be rejected from the processing run, and the transaction will be included as an
erroneous transaction on the Transaction Proof Report.
Automatic Scheduler Allows Additional Schedule Dates To allow for exception runs, holiday runs, and any other processing requirements
you may have, the Automatic Scheduler automatically allows additional schedule
dates beyond the current calendar year.
Note Regarding Program ASBPPBB: Program ASBPPBB is a preprocessor for
the Edit and Update Phase. When batches are released from the Suspense File, they
are held in the Release File until Program ASBPPBB is run. This program formats
transactions for the Edit and Update Phase.
Note: If a data record transfer is encountered for a company that has not been
included as part of the schedule, the system will automatically produce a schedule
for it to process with the current date, in conversion mode.
Creating Selective Unload and Load Transactions
Large-scale processing installations may choose to run the Edit and Update phase
against an online master file that includes only the information that is being updated.
To accomplish this, modify the edit and update job to run Program APPLSEL and
Program 911 after steps 004 (sort) and 005 (Program 005). Program 911 will use the
transactions created by APPLSEL to selectively unload the online master, and the
edit and update will continue against a smaller master file. Later, Program 910 will
run and use the transactions created by APPLSEL to load the updated data from the
sequential master to the online master.
Program APPLSEL takes the output of program APPL005 that is passed to Program
APPL010 and reads it in at SYS005 for all "60" control transactions. It also reads
the 910 table on the USRTABLE into SYS015 to retrieve any group overrides to the
defaulted '00' security level and 'NAME' verification field.
The program creates the following two outputs: all the transaction required to
selectively unload (SYS020) the sequential master and all the transactions required
to selectively reload (SYS021) the online master.
Automated Scheduling in the Output Production Phase
PROG050 has an output file (SYS020) that contains group control transactions for
the production output job (suitable for use as input to PROG060 at SYS001). The file
contains a PROG060 header transaction set to Select Processing Mode for the output
production job and ‘A’ transactions for any groups that generated data for a check,
deposit, or memo in the edit and update job.
Report selection is set to produce checks, memos, the reconciliation file, and the
Combined Register. The report selection defaults can be changed by modifying
copybook APPLCTOX (where X is the application identifier) for the desired
application and recompiling PROG050. The control record layouts are called CTO-
P060-H-REC and CTO-P060-A-REC.
38 Chapter 2: Suspense Management Application Reference Manual
Compile Time Options
Online
Listed below are the online compile time options in ALLSCTO:
CTO-SCHEDULER-RESTRICTIVE
Controls restrictive editing for the edit and update control scheduling.
Intended for use with Benefit Payments systems. A value of ‘Y’
imposes the more restrictive edit that CEDT (Period End Date) and
CPNO (Pay Cycles Per Year) be greater than the processing date. Used
by ASOSCHD.
CTO-SCHEDULER-PROJECTION
Controls the projection feature of edit and update control scheduling. A
value of ‘Y’ implements the projection feature; a value of ‘N’ disables
it. Used by ASOSCHD.
CTO-SCHEDULER-HIDE-STAT
Controls the display of the processing status on the Edit and Update
Scheduling screen. A value of ‘Y’ hides the fields. Used by
ASOSCHD.
Deferred
Deferred compile time options in APPLCTOX allow customization of the Output
Production Phase select mode group control transactions.
Edit and Update Control Transaction The Edit and Update Control Transaction screen is where you create the 60 Control
Transaction that is required to process a group record. You can complete the Edit and
Update Control Transaction screen anytime prior to running an Edit and Update
Phase. Note that a batch must be open to process your deferred transactions.
Also note that completing this screen does not automatically start the Edit and
Update Phase. You must submit an *HDR card to initiate the Edit and Update Phase.
See the chapter titled Edit and Update Phase Processing for details on the Edit and
Update Phase.
1. Type the six-digit group TRAN key number (CTRN) for which you are
making the update in the Group Key field.
2. Type the date when the current processing period ends in the Current
Pay Period Ending Date field in MM-DD-CCYY format.
3. Type the two-digit sequence number for which you are making the
update in the Enter Sequence Number field.
4. Type the date payment is being made in the Date of Pay field.
5. The NCMO - New Calendar Period field indicates the start of the new
calendar period (usually indicates a new month).
6. Use the four-character Earnings Schedule field to indicate the
earnings schedule for CE categories.
You must enter a value from 1-5 in the first position of the field,
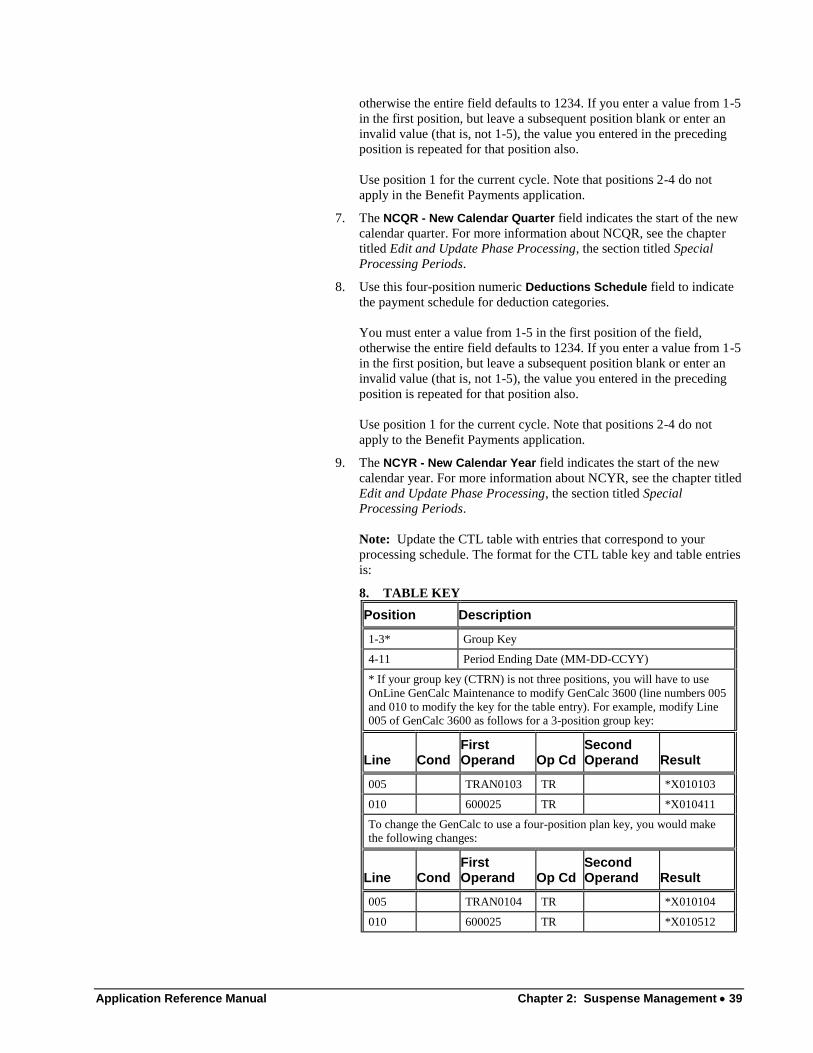
Application Reference Manual Chapter 2: Suspense Management 39
otherwise the entire field defaults to 1234. If you enter a value from 1-5
in the first position, but leave a subsequent position blank or enter an
invalid value (that is, not 1-5), the value you entered in the preceding
position is repeated for that position also.
Use position 1 for the current cycle. Note that positions 2-4 do not
apply in the Benefit Payments application.
7. The NCQR - New Calendar Quarter field indicates the start of the new
calendar quarter. For more information about NCQR, see the chapter
titled Edit and Update Phase Processing, the section titled Special
Processing Periods.
8. Use this four-position numeric Deductions Schedule field to indicate
the payment schedule for deduction categories.
You must enter a value from 1-5 in the first position of the field,
otherwise the entire field defaults to 1234. If you enter a value from 1-5
in the first position, but leave a subsequent position blank or enter an
invalid value (that is, not 1-5), the value you entered in the preceding
position is repeated for that position also.
Use position 1 for the current cycle. Note that positions 2-4 do not
apply to the Benefit Payments application.
9. The NCYR - New Calendar Year field indicates the start of the new
calendar year. For more information about NCYR, see the chapter titled
Edit and Update Phase Processing, the section titled Special
Processing Periods.
Note: Update the CTL table with entries that correspond to your
processing schedule. The format for the CTL table key and table entries
is:
8. TABLE KEY
Position Description
1-3* Group Key
4-11 Period Ending Date (MM-DD-CCYY)
* If your group key (CTRN) is not three positions, you will have to use
OnLine GenCalc Maintenance to modify GenCalc 3600 (line numbers 005
and 010 to modify the key for the table entry). For example, modify Line
005 of GenCalc 3600 as follows for a 3-position group key:
Line
Cond
First Operand
Op Cd
Second Operand
Result
005 TRAN0103 TR *X010103
010 600025 TR *X010411
To change the GenCalc to use a four-position plan key, you would make
the following changes:
Line
Cond
First Operand
Op Cd
Second Operand
Result
005 TRAN0104 TR *X010104
010 600025 TR *X010512
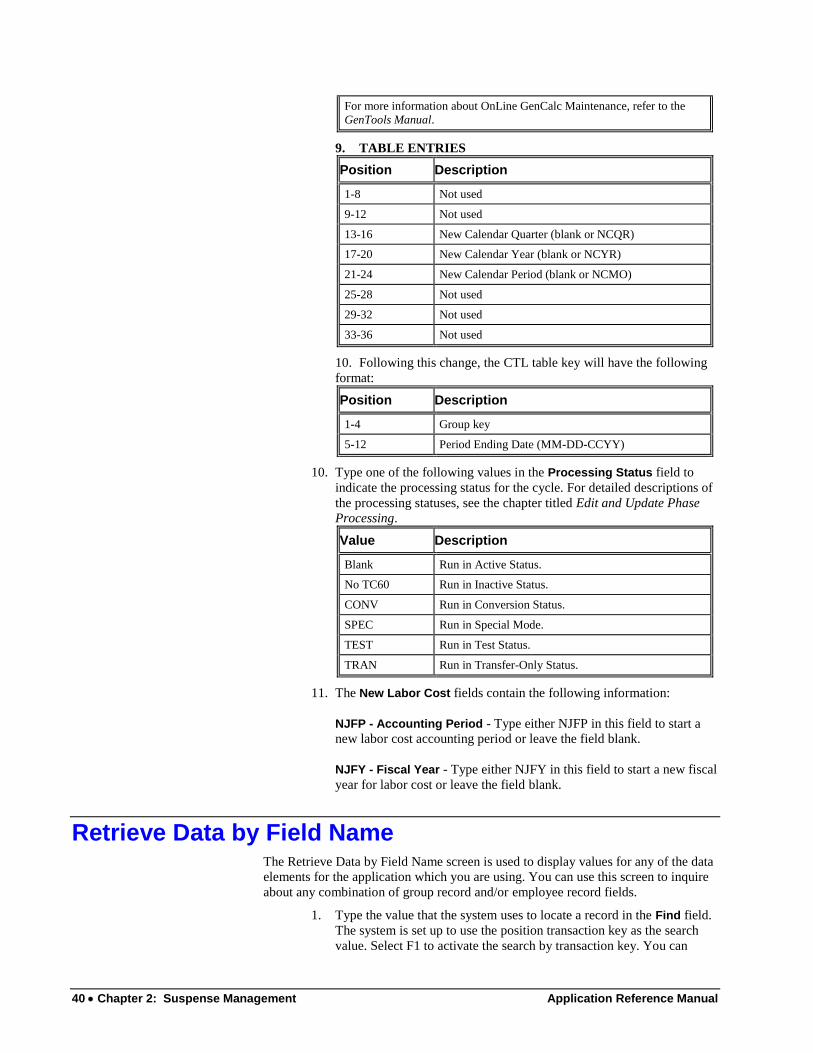
40 Chapter 2: Suspense Management Application Reference Manual
For more information about OnLine GenCalc Maintenance, refer to the
GenTools Manual.
9. TABLE ENTRIES
Position Description
1-8 Not used
9-12 Not used
13-16 New Calendar Quarter (blank or NCQR)
17-20 New Calendar Year (blank or NCYR)
21-24 New Calendar Period (blank or NCMO)
25-28 Not used
29-32 Not used
33-36 Not used
10. Following this change, the CTL table key will have the following
format:
Position Description
1-4 Group key
5-12 Period Ending Date (MM-DD-CCYY)
10. Type one of the following values in the Processing Status field to
indicate the processing status for the cycle. For detailed descriptions of
the processing statuses, see the chapter titled Edit and Update Phase
Processing.
Value Description
Blank Run in Active Status.
No TC60 Run in Inactive Status.
CONV Run in Conversion Status.
SPEC Run in Special Mode.
TEST Run in Test Status.
TRAN Run in Transfer-Only Status.
11. The New Labor Cost fields contain the following information:
NJFP - Accounting Period - Type either NJFP in this field to start a
new labor cost accounting period or leave the field blank.
NJFY - Fiscal Year - Type either NJFY in this field to start a new fiscal
year for labor cost or leave the field blank.
Retrieve Data by Field Name The Retrieve Data by Field Name screen is used to display values for any of the data
elements for the application which you are using. You can use this screen to inquire
about any combination of group record and/or employee record fields.
1. Type the value that the system uses to locate a record in the Find field.
The system is set up to use the position transaction key as the search
value. Select F1 to activate the search by transaction key. You can

Application Reference Manual Chapter 2: Suspense Management 41
define up to four alternate values to use as the search key. These
alternate search values are activated by function keys 2 through 5.
2. Type the value that indicates the type of record that will display in the
FLAG field. The FLAG values are:
Value Description
0 Displays permanent records (FLAG=0) only.
1 Displays temporary records (FLAG=1) and permanent
records (FLAG-0).
3. The Search Code field indicates how the system uses the value entered
in the key field to search for a record. The values for this field are:
Value Description
G Search for a record that is greater or equal to the value
in the key field.
E Search for a record that is equal to the value entered in
the key field.
4. Type the name of the field that you want to display in Field. Each field
is identified by a four-character data element. For a complete list of
data elements delivered with the system, see the IDD (Integrated Data
Dictionary).
5. Use the Strt field to indicate the position within the data element where
you want the displayed data to begin. For example, if you are inquiring
about the NAME data element, but want only the employee's last name
to display, you might enter 05 to indicate the starting position within
the data element, if that is the position where the last name begins.
6. Use the Len field to indicate the length of the data element that you are
inquiring about. For information about the length of data elements, see
the IDD (Integrated Data Dictionary).
7. Use the Tbl field to enter the table name if data you want displayed is
stored in the Table File.
At this point you would select the function key associated with the
search value entered in the key field to display the data element data.
The Tab Key and Data Retrieved fields display the retrieved
information.
8. The Tab Key field displays the key used to locate data stored on the
table in the Table File, if a table name was entered in the Tbl field.
9. The Data Retrieved field displays the value stored in the data element,
or if a table name was entered, the value stored on the table.
Query Schedule by Date To display a list of pay groups that are scheduled to run on a specific date, follow
these steps:
1. From the Suspense Menu, select Query Schedule by Date.
2. Type the date you want to display in the box after List Pay Groups
Scheduled to Run on. Use this format: MM-DD-CCYY.
3. Type a Y in either the Preview or Processing mode box.
42 Chapter 2: Suspense Management Application Reference Manual
4. Select Enter.
The system displays all pay groups that are scheduled to process on the date you
specified.
For the pay groups displayed, you may change preview and processing dates, period
end dates, payable dates, initialization counters, and earnings/deductions schedules
on this screen.
Retrieving Deleted Batches Have you ever released batches through the online system for processing and deleted
them – to find moments later you wished you hadn’t? Don’t worry, most batches
can be retrieved by using Program ASBBTCH. Program ASBBTCH restores
batches to the batch file that were deleted after they were released through the online
system for processing.
In order to retrieve batches, you should be in the habit of backing up the PPRTRAN
File to tape before running Program ASBPPBB. The batches that are available to be
restored are the ones contained in the last release on the PPRTRAN File backup
tape. Therefore, if many batches were released before the PPRTRAN File was
backed up, only the batches on the last release are available for restore.
Tell the System Which Batch to Restore
As long as the batch to be restored is contained on the PPRTRAN File backup tape,
restoring is simply a matter of completing an Input Control Transaction. The Input
Control Transaction contains the batch number of each batch that you want to
restore. The layout of the Input Control Transaction is a series of five digits,
separated by a space. You can include up to 13 batch numbers per line, and you can
restore a maximum of 50 batches at one time.
For example, say you want to restore batches 12345, 11111, and 22222.
The Input Control Transaction would look like: 12345 11111 22222