Chapter 1: Digital Information · through the introduction of two new widgets, the Text Compression...
37
UNIT 2 Ch. 1 1 2 3 4 5 6 Big Questions How are images and other complex information represented in a computer? How can we reduce the size of digital information and what tradeoffs are involved? Why are there so many different formats for representing the same kind of information? Enduring Understandings 1.1 Creative development can be an essential process for creating computational artifacts. 1.3 Computing can extend traditional forms of human expression and experience. 2.1 A variety of abstractions built upon binary sequences can be used to represent all digital data. 3.3 There are trade offs when representing information as digital data. Unit 2 - Digital Information This unit explores the way large and complex pieces of digital information are stored in computers and the associated challenges. Through a mix of online research and interactive widgets, students learn about foundational topics like compression, image representation, and the advantages and disadvantages of different file formats. To conclude the unit, students research the history and characteristics of a real-world file format. Chapter 1: Digital Information Week 1 Lesson 1: Bytes and File Sizes Research Students are introduced to the standard units for measuring the sizes of digital files: bytes, kilobytes, megabytes, gigabytes, etc. and research the sizes of files they make use of every day. Lesson 2: Text Compression Widget | Individual and Group Discovery At some point we reach a physical limit of how fast we can send bits and if we want to send a large amount of information faster, we have to find a way to represent the same information with fewer bits - we must compress the data.
Transcript of Chapter 1: Digital Information · through the introduction of two new widgets, the Text Compression...

UNIT
2Ch. 1 1 2 3 4 5 6
Big Questions
How are images and other complex informationrepresented in a computer?How can we reduce the size of digital information andwhat tradeoffs are involved?Why are there so many different formats forrepresenting the same kind of information?
Enduring Understandings
1.1 Creative development can be an essential processfor creating computational artifacts.1.3 Computing can extend traditional forms of humanexpression and experience.2.1 A variety of abstractions built upon binarysequences can be used to represent all digital data.3.3 There are trade offs when representinginformation as digital data.
Unit 2 - Digital InformationThis unit explores the way large and complex pieces of digital information are stored in computers and the associatedchallenges. Through a mix of online research and interactive widgets, students learn about foundational topics likecompression, image representation, and the advantages and disadvantages of different file formats. To conclude the unit,students research the history and characteristics of a real-world file format.
Chapter 1: Digital Information
Week 1
Lesson 1: Bytes and File SizesResearch
Students are introduced to the standard units for measuring the sizesof digital files: bytes, kilobytes, megabytes, gigabytes, etc. andresearch the sizes of files they make use of every day.
Lesson 2: Text CompressionWidget | Individual and Group Discovery
At some point we reach a physical limit of how fast we can send bits and if wewant to send a large amount of information faster, we have to find a way torepresent the same information with fewer bits - we must compress the data.
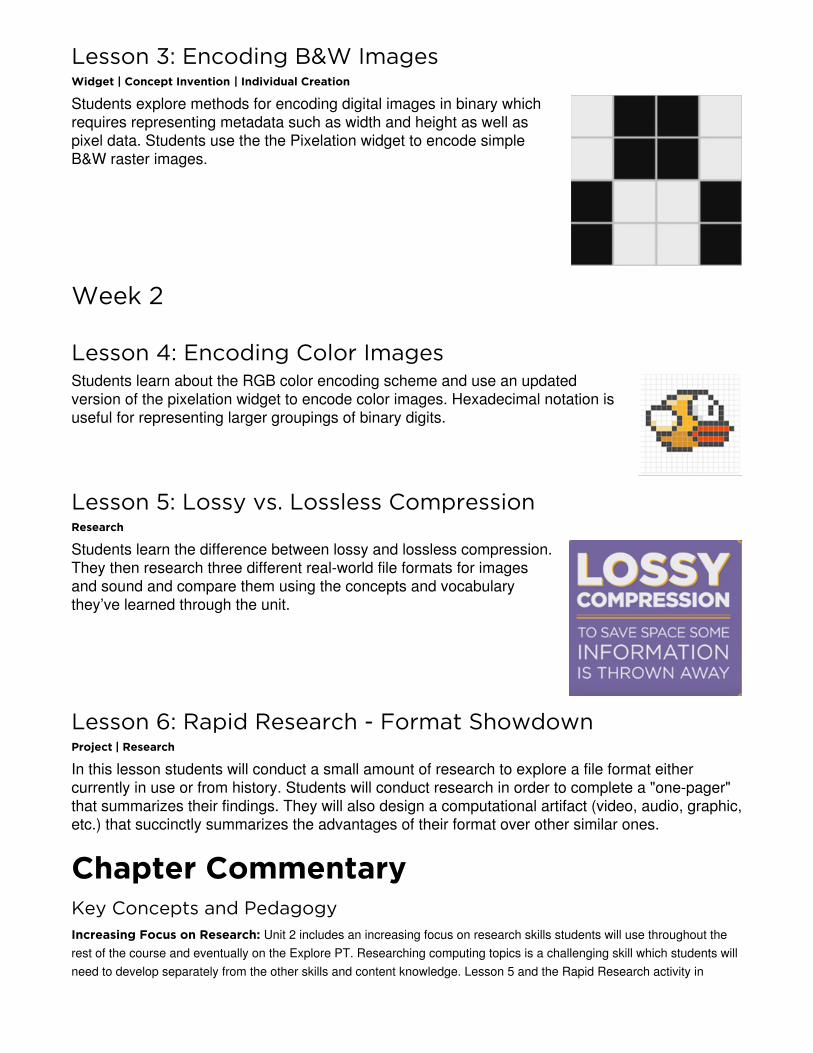
Lesson 3: Encoding B&W ImagesWidget | Concept Invention | Individual Creation
Students explore methods for encoding digital images in binary whichrequires representing metadata such as width and height as well aspixel data. Students use the the Pixelation widget to encode simpleB&W raster images.
Week 2
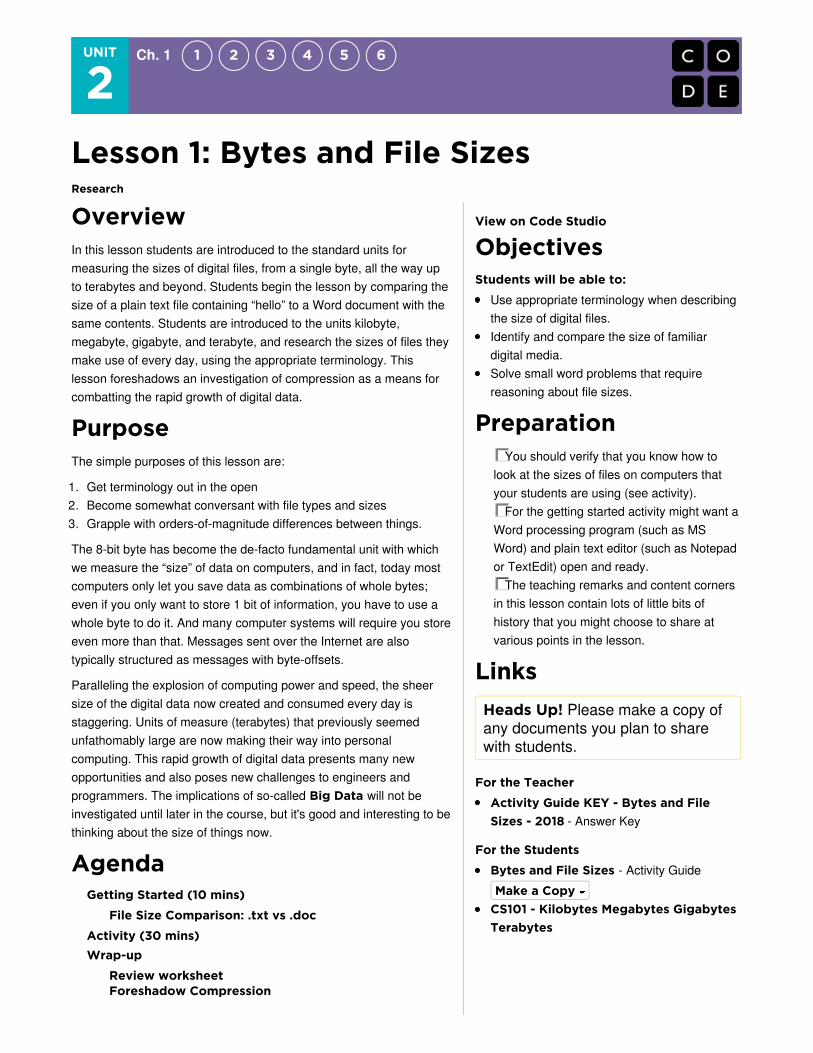
Lesson 4: Encoding Color ImagesStudents learn about the RGB color encoding scheme and use an updatedversion of the pixelation widget to encode color images. Hexadecimal notation isuseful for representing larger groupings of binary digits.
Lesson 5: Lossy vs. Lossless CompressionResearch
Students learn the difference between lossy and lossless compression.They then research three different real-world file formats for imagesand sound and compare them using the concepts and vocabularythey’ve learned through the unit.
Lesson 6: Rapid Research - Format ShowdownProject | Research
In this lesson students will conduct a small amount of research to explore a file format eithercurrently in use or from history. Students will conduct research in order to complete a "one-pager"that summarizes their findings. They will also design a computational artifact (video, audio, graphic,etc.) that succinctly summarizes the advantages of their format over other similar ones.
Chapter CommentaryKey Concepts and PedagogyIncreasing Focus on Research: Unit 2 includes an increasing focus on research skills students will use throughout therest of the course and eventually on the Explore PT. Researching computing topics is a challenging skill which students willneed to develop separately from the other skills and content knowledge. Lesson 5 and the Rapid Research activity in

Lesson 6 in particular explicitly review these research skills as students apply the knowledge they’ve developed elsewherein the unit to research the differences between familiar file formats.
A Familiar Pedagogy: Many of the lessons in this unit will feel similar to Unit 1 Chapter 1. Students will explore real worldconcepts and problems in data representation through collaborative problem solving activities. This process is aidedthrough the introduction of two new widgets, the Text Compression Widget in Lesson 2 and the Pixelation Widget inLessons 3 and 4. As with the Internet Simulator, students can’t “break” these tools and so are encouraged to freely explorethem with minimal content frontloading to discover the concepts they highlight. In keeping with the “ABC CBV” approach,technical vocabulary is only introduced only once these exploratory activities ensure all students have developed a sharedunderstanding of the concepts.

If you are interested in licensing Code.org materials for commercial purposes, contact us.
UNIT
2Ch. 1 1 2 3 4 5 6
Lesson 1: Bytes and File SizesResearch
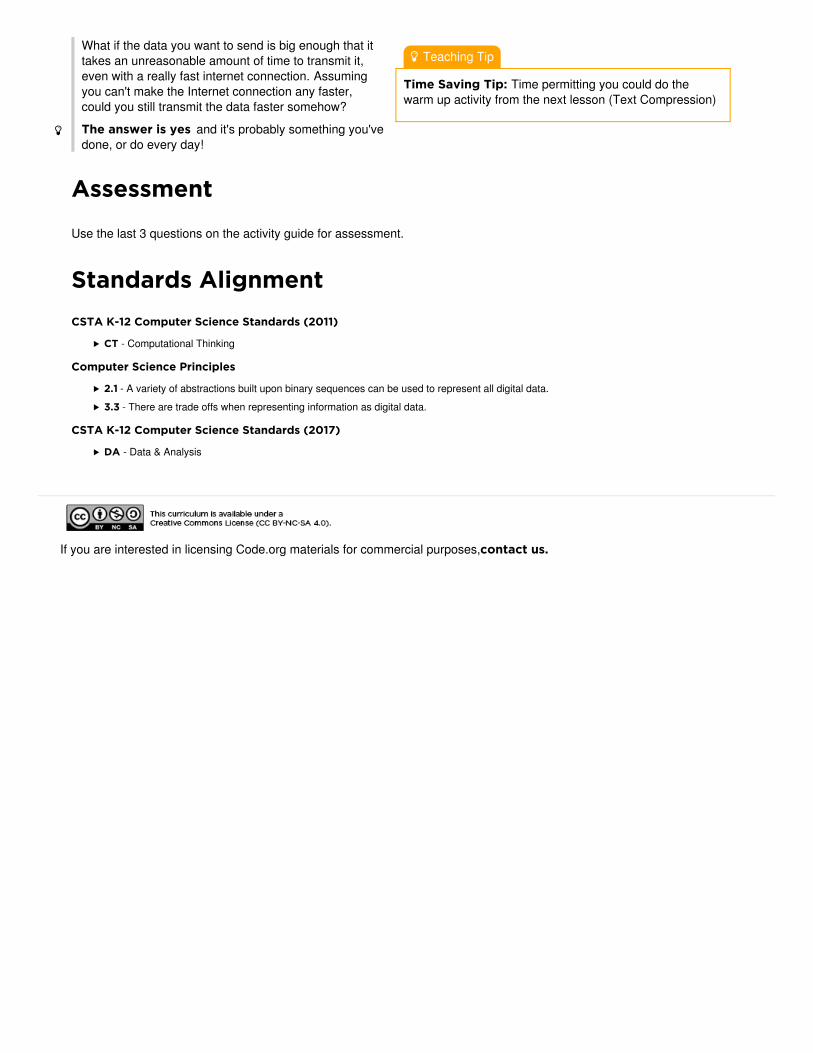
OverviewIn this lesson students are introduced to the standard units formeasuring the sizes of digital files, from a single byte, all the way upto terabytes and beyond. Students begin the lesson by comparing thesize of a plain text file containing “hello” to a Word document with thesame contents. Students are introduced to the units kilobyte,megabyte, gigabyte, and terabyte, and research the sizes of files theymake use of every day, using the appropriate terminology. Thislesson foreshadows an investigation of compression as a means forcombatting the rapid growth of digital data.
PurposeThe simple purposes of this lesson are:
1. Get terminology out in the open2. Become somewhat conversant with file types and sizes3. Grapple with orders-of-magnitude differences between things.
The 8-bit byte has become the de-facto fundamental unit with whichwe measure the “size” of data on computers, and in fact, today mostcomputers only let you save data as combinations of whole bytes;even if you only want to store 1 bit of information, you have to use awhole byte to do it. And many computer systems will require you storeeven more than that. Messages sent over the Internet are alsotypically structured as messages with byte-offsets.
Paralleling the explosion of computing power and speed, the sheersize of the digital data now created and consumed every day isstaggering. Units of measure (terabytes) that previously seemedunfathomably large are now making their way into personalcomputing. This rapid growth of digital data presents many newopportunities and also poses new challenges to engineers andprogrammers. The implications of so-called Big Data will not beinvestigated until later in the course, but it's good and interesting to bethinking about the size of things now.
AgendaGetting Started (10 mins)
File Size Comparison: .txt vs .doc
Activity (30 mins)Wrap-up
Review worksheetForeshadow Compression
View on Code Studio
ObjectivesStudents will be able to:
Use appropriate terminology when describingthe size of digital files.Identify and compare the size of familiardigital media.Solve small word problems that requirereasoning about file sizes.
PreparationYou should verify that you know how to
look at the sizes of files on computers thatyour students are using (see activity).
For the getting started activity might want aWord processing program (such as MSWord) and plain text editor (such as Notepador TextEdit) open and ready.
The teaching remarks and content cornersin this lesson contain lots of little bits ofhistory that you might choose to share atvarious points in the lesson.
LinksHeads Up! Please make a copy ofany documents you plan to sharewith students.
For the Teacher
Activity Guide KEY - Bytes and FileSizes - 2018 - Answer Key
For the Students
Bytes and File Sizes - Activity Guide
CS101 - Kilobytes Megabytes GigabytesTerabytes
Make a Copy

Assessment
Content Corner
Why is a Byte 8 bits?: The 8-bit byte was not alwaysstandard. Computers used many different "byte" sizesover the course of history, depending on hardware andhow addressable memory worked. However, much of theearly computing world relied on representing data andcomputer instructions encoded in ASCII text where everycharacter is 8 bits. Thus, 8-bits was such a commonchunk-size for representing information that it stuck andthey gave it its own name - byte.
There are various accounts about why it was called a“byte” but most point to early days at IBM where “bite” wasused to to refer to groups of 8-bits that a computer wasprocessing, as in it could “bite” off 8 bits at time. Thespelling was changed to “byte” to avoid confusion with“bit”.
Bytes became the fundamental unit with which wemeasure the “size” of data on computers, and in fact,today most computers only let you save data ascombinations of whole bytes; even if you only want to store1 bit of information, you have to use a whole byte to do it.
Teaching Tip
Try a Live Demo: If you wish, it might be more fun tocreate these files in front of your students, saving them onthe desktop for a quick demo. To make a plain ASCII textfile you’ll need to use the correct program:
PC/Windows: use NotepadMac: use TextEdit (Note: TextEdit needs to be switchedinto plain text mode from rich text. Go to Format →Make Plain Text)
Teaching GuideGetting Started (10 mins)
Remarks
As we start a new unit about Data and DigitalInformation we need to get familiar with terminologyabout data and different types of data files.
Vocabulary: Recall that a single character of ASCII textrequires 8 bits. The technical term for 8 bits of data is abyte.
A byte is the standard fundamental unit (or “chunk size”)underlying most computing systems today. You may haveheard "megabyte", "kilobyte", "gigabyte", etc. which areall different amounts of a bytes. We're going to learnmore about them today.
File Size Comparison: .txt vs .docPrompt: In Unit 1 we learned that in addition to theactual text of a document, it is usually necessary to storethe formatting information that allows the text to bedisplayed correctly. We might wonder just how muchextra information, i.e. how many extra bytes, we need tostore when we include all of this formatting. Let's find out!
If a single ASCII character is one byte then if we were to store the word “hello” in a plain ASCII text file in a computer, wewould expect it to need 5 bytes (or 40 bits) of memory.
What about a Microsoft Word document that contains the single word "hello"? How many more bytes will a Word documentrequire to store the word “hello” than a plain text document?
Discuss: Have students silently make their prediction, then share with a partner, then share with the group. Prompt acouple students to share why they chose the size they did.
Demonstrate: Do a live demo where you show the sizeof the different files. Here are some files you candownload to use.
Plain text document hello.txtMS word document hello.docx
To find the actual size of a file on your computer, do oneof the following:
PC/Windows: Right-click and choose “Properties”Mac: Ctrl+click and choose “Get Info”
In general, the Word Doc should be thousands oftimes larger than the plain text. For the files above:
hello.txt - 5 byteshello.docx = 21,969 bytes
Review: Review students predictions to see how close they were.
Remarks

Content Corner
NOTE: A 5-byte file is so small that some computers won'tallocate a chunk of memory that small. For example youmight see something like this:
Which indicates that even though the file is 5 bytes, it'staking up 4 Kilobytes of memory on your computer.
Content Corner
There are some discrepancies in common usage of thekilo, mega, giga prefixes.
From the Stanford CS 101 website :
It's convenient within the computer to organizethings in groups of powers of 2. For example, 2 is1024, and so a program might group 1024 itemstogether, as a sort of "round" number of thingswithin the computer. The term "kilobyte" aboverefers to this group size of 1024 things. However,people also group things by thousands -- 1thousand or 1 million items.
There's this problem with the word "megabyte" ..does it mean 1024 * 1024 bytes, i.e. 2 which is1,048,576, or does it mean exactly 1 million, 1000 *1000. It's just a 5% difference, but marketers tendto prefer the 1 million, interpretation, since itmakes their hard drives etc. appear to hold a littlebit more. In an attempt to fix this, the terms"kibibyte" "mebibyte" "gibibyte" "tebibyte" havebeen introduced to specifically mean the 1024based units (see wikipedia kibibyte article). Theseterms do not seem to have caught on verystrongly thus far.
If nothing else, remember that terms like "megabyte" havethis little wiggle room in them between the 1024 and 1000based meanings. For purposes of CS Principles thedistinction is not important - "about a millionbytes" is a fine, close-enough interpretation for"megabyte".
Teaching Tip
Finding Solutions: Note that answers to 3 of the 6questions on the activity guide can be found on theStanford CS 101 page linked to in the activity guide.
Perfect accuracy is not important for some sections in thisactivity, but using the correct terminology and achieving arough estimate of size (one million bytes vs. one billion) isimportant. Encourage students to practice using terms likemegabyte, gigabyte, and terabyte to gain comfort withthem.
The big difference in file size between .txt and .docx is due to the extensive formatting information included along with theactual text in .docx. Modern data files typically measure in the thousands, millions, billions or trillions of bytes. Let's get alittle practice looking at files and how big they are.
Activity (30 mins)
Activity Guide: Bytes and File Sizes -Bytes and File Sizes -Activity GuideActivity Guide
Group: Put students in pairs to find answers or workindividually.
Distribute: Activity Guide: Bytes and File Sizes -Activity Guide
Introduces the terminologyRefers to websites for students to use as reference
Stanford CS 101 websiteComputer Hope
Has questions and space for students to writeanswers to questions like:
How many bytes are in a Megabyte?Give an example of a file type that is measured inGigabytesWhat is the typical size of a .jpg image, .mp3audio etc.
Allow students time to finish this activity eitherindividually or in pairs by conducting online research.
There are 6 practice questions on the 2nd page ofthe activity guide.
Wrap-up
Review worksheetShare: Provide students an opportunity to clear up anyremaining confusion and share interesting pieces ofinformation they came across.
Review: Answers to the questions on the Activity Guide.
Foreshadow Compression Remarks
As you have seen data file size can grow very quicklyin size. In the modern world there is a lot of data aroundus and usually we want it transmitted over the internet.
There is a problem though : If you want to transmit alot of data you are limited by the speed of your internetconnection. Even if you have a fast Internet connectionthere is a physical limit to how fast you can transmitbits.
10
20
Teaching Tip
Time Saving Tip: Time permitting you could do thewarm up activity from the next lesson (Text Compression)
What if the data you want to send is big enough that ittakes an unreasonable amount of time to transmit it,even with a really fast internet connection. Assumingyou can't make the Internet connection any faster,could you still transmit the data faster somehow?
The answer is yes and it's probably something you'vedone, or do every day!
Assessment
Use the last 3 questions on the activity guide for assessment.
Standards AlignmentCSTA K-12 Computer Science Standards (2011)
CT - Computational Thinking
Computer Science Principles
2.1 - A variety of abstractions built upon binary sequences can be used to represent all digital data.
3.3 - There are trade offs when representing information as digital data.
CSTA K-12 Computer Science Standards (2017)
DA - Data & Analysis
If you are interested in licensing Code.org materials for commercial purposes, contact us.
UNIT
2Ch. 1 1 2 3 4 5 6
Lesson 2: Text CompressionWidget | Individual and Group Discovery
OverviewAt some point we reach a physical limit of how fast we can send bitsand if we want to send a large amount of information faster, we haveto find a way to represent the same information with fewer bits - wemust compress the data.
In this lesson, students will use the Text Compression Widget tocompress segments of English text by looking for patterns andsubstituting symbols for larger patterns of text. After someexperimentation students are asked to come up with a process (oralgorithm) for arriving at a "good" amount of compression despite thefact that there is no way to know what is best or optimal. In developinga so-called "heuristic approach" to this problem, students will grapplewith the tradeoffs in compressing data and begin to develop a senseof computing problems that are “hard” to solve.
PurposeThis is a big lesson that covers a lot of bases. It should easily take 2or more days of class. First and foremost it covers two or three topicsdirectly from the CSP framework.
1. lossless compression
The basic principle behind compression is to develop a method orprotocol for using fewer bits to represent the original information. Theway we represent compressed data in this lesson, with a “dictionary”of repeated patterns is similar to the LZW compression scheme,but it should be noted that LZW is slightly different from what studentsdo in this lesson. Students invent their own way here. LZW is used notonly for text (zip files), but also with the GIF image file format.
2. heuristics
The lesson touches on computationally hard problems and heuristicsbut please note that computationally hard problems andheuristics will be revisited later on. A general "hand-wavy"understanding is all that's needed from this lesson.
We do want students to see, however, that there is no single correctway to compress text using the method we use in this lesson becausea) there is no known algorithm for finding an optimal solution, and b)we don’t even know a way to verify whether a given solution isoptimal. There is no way to prove it or derive it beyond trying allpossibilities by brute force. This is an example of an algorithmthat cannot run in a “reasonable amount of time” - one of theCSP learning objectives.
View on Code Studio
ObjectivesStudents will be able to:
Collaborate with a peer to find a solution to atext compression problem using the TextCompression Widget (lossless compressionscheme).Explain why the optimal amount ofcompression is impossible or “hard” toidentify.Explain some factors that make compressionchallenging.Develop a strategy (heuristic algorithm) forcompressing text.Describe the purpose and rationale forlossless compression.
PreparationTest out the Text Compression WidgetReview the teaching tips to decide which
options you want to use
LinksHeads Up! Please make a copy ofany documents you plan to sharewith students.
For the Teacher
Activity Recap - Decode this Message -Activity Recap
For the Students
Decode this message - Activity Guide
Activity Guide - Text Compression -Activity Guide
Video: Text Compression with AloeBlacc - Video (download)Activity Guide - Text CompressionHeuristics - Activity Guide
Make a Copy
Make a Copy
Make a Copy
Make a Copy

3. Foreshadowing programming behaviors
Lastly, the Text Compression Activity is an important lesson torefer back to when students start programming. The activityengages students in thinking and problem solving behaviors thatforeshadow skills that are particularly useful for programming laterdown the line. In particular, when students recognize patterns thatrepeat, and then represent those patterns as abstract symbols, andthen further recognize patterns within those patterns, it is very similarto the kinds of abstractions we develop when writing functions andprocedures when programming. Decoding the message in thewarm-up activity is very similar to tracing a sequence of function callsin a program.
AgendaGetting Started (5-7 mins)
Warm up: Abbr In Ur Txt Msgs (5-7 mins)
Activity (45 mins)
Decode this Mystery Text (10-15 mins)Use theText Compression WidgetDiscuss properties and challenges with compression.
Activity 2 (30 mins)
Develop a heuristic for doing compressionWhat's best?
Wrap-up (20 mins)
Recap QuestionsCompression in the Real World (.zip)
AssessmentExtended Learning
VocabularyHeuristic - a problem solving approach(algorithm) to find a satisfactory solutionwhere finding an optimal or exact solution isimpractical or impossible.Lossless Compression - a datacompression algorithm that allows the originaldata to be perfectly reconstructed from thecompressed data.
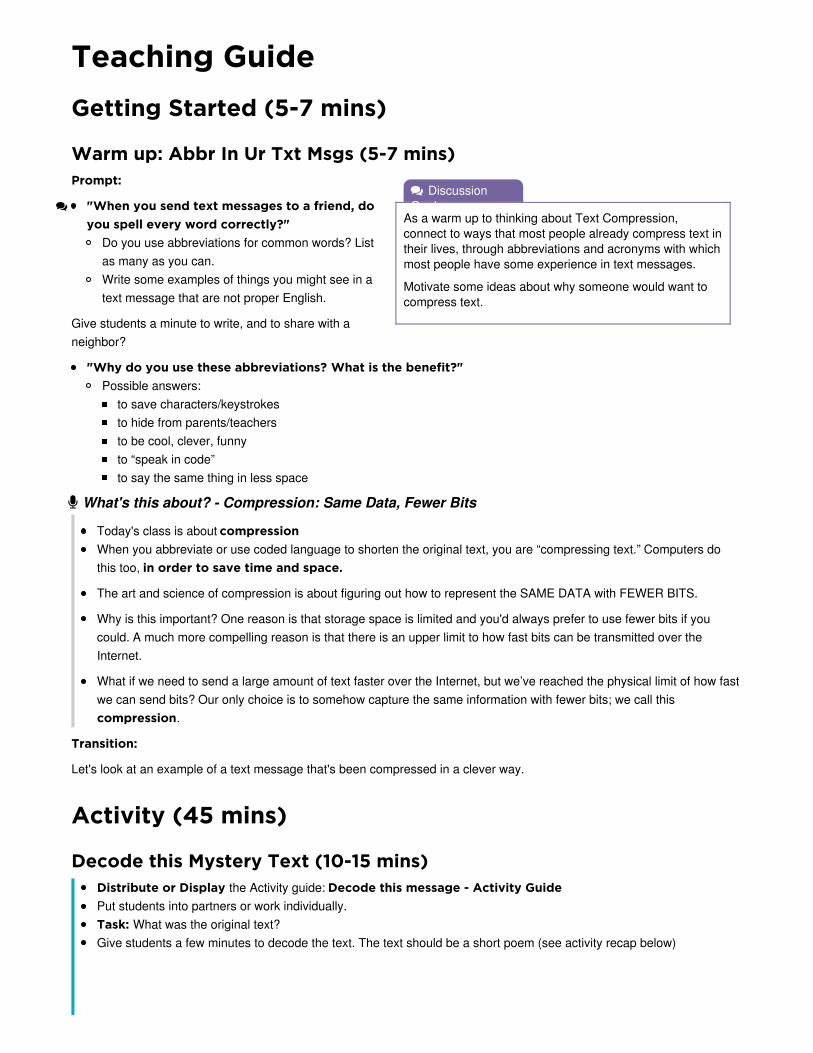
DiscussionGoal
As a warm up to thinking about Text Compression,connect to ways that most people already compress text intheir lives, through abbreviations and acronyms with whichmost people have some experience in text messages.
Motivate some ideas about why someone would want tocompress text.
Teaching GuideGetting Started (5-7 mins)
Warm up: Abbr In Ur Txt Msgs (5-7 mins)Prompt:
"When you send text messages to a friend, doyou spell every word correctly?"
Do you use abbreviations for common words? Listas many as you can.Write some examples of things you might see in atext message that are not proper English.
Give students a minute to write, and to share with aneighbor?
"Why do you use these abbreviations? What is the benefit?"Possible answers:
to save characters/keystrokesto hide from parents/teachersto be cool, clever, funnyto “speak in code”to say the same thing in less space
What's this about? - Compression: Same Data, Fewer Bits
Today's class is about compressionWhen you abbreviate or use coded language to shorten the original text, you are “compressing text.” Computers dothis too, in order to save time and space.
The art and science of compression is about figuring out how to represent the SAME DATA with FEWER BITS.
Why is this important? One reason is that storage space is limited and you'd always prefer to use fewer bits if youcould. A much more compelling reason is that there is an upper limit to how fast bits can be transmitted over theInternet.
What if we need to send a large amount of text faster over the Internet, but we’ve reached the physical limit of how fastwe can send bits? Our only choice is to somehow capture the same information with fewer bits; we call thiscompression.
Transition:
Let's look at an example of a text message that's been compressed in a clever way.
Activity (45 mins)
Decode this Mystery Text (10-15 mins)Distribute or Display the Activity guide: Decode this message - Activity GuidePut students into partners or work individually.Task: What was the original text?Give students a few minutes to decode the text. The text should be a short poem (see activity recap below)

Student Activity Guide Activity Recap
Distribute or Display Activity guide:Decode this message - ActivityGuide
(Display or draw yourself) Activity Recap:Activity Recap - Decode this Message -Activity Recap
Recap: How much was it compressed?
To answer, we need to compare the number of characters in the original poem to the number of characters needed torepresent the compressed version.
Let's break it down.
Display or Demonstrate yourself ideas from: Activity Recap - Decode this Message - Activity Recap (shown intable above)
Important Note:
The compressed poem is not just this part: If you were to send this to someoneover the Internet they would not be able to decode it.The full compressed text includes BOTH the compressed text and the key to solve it.Thus, you must account for the total number of characters in the message plus the total number of characters in thekey to see how much you've compressed it over the original.
Transition
Now you're going to get to try your hand at compressing some things on your own.
Use theText Compression Widget
Code Studio levels
Lesson Overview Student Overview
Text Compression Student Overview
Widget: Text Compression Student Overview

Content Corner
The video explains a little bit about compression in general- the difference between lossless compression and lossycompression. Todays class is about losslesscompression we'll do lossy compression in a class ortwo after looking at image encoding.
Teaching Tip
Teacher's Choice whether to show the video to thewhole class or let students watch it from within CodeStudio. There are benefits and drawbacks to each.
Option to Consider: Get students into the textcompression tool BEFORE showing the video. You mightfind students are more receptive to some of theinformation in the video if they have tried to use the toolfirst.
Communication and Collaboration: To developcommunication and collaboration between students,include one of the following scenarios in class:
Have students who were assigned the same poemcompare results, or seat them in the same area of theroom.Have a little friendly competition - but be careful not tolet “bad” competition seep in - to see which pair cancompress a poem the most. Use a poem that none ofthe students have compressed yet.For each poem, have the group(s) who did it figure outthe best in the class, and record it on the board orsomewhere that people can see.
Have a class goal of getting the compressionpercentages for the four poems as high as possible.The groups with the best compression percentagesmay be asked to share their strategy with the class.
Students may be reluctant to share if they feel they don’thave the best results, but students should see others’work and offer advice and strategies.
Video: Text Compression with Aloe Blacc -
Video
Video explains compressionDemonstrates the use of the Text Compression Tool.NOTE: This video pops up automatically whenstudents visit the text compression stage in CodeStudio.
Divide students into groups of 2Assign each pair one of the poems provided andchallenge them, as a pair to compress their poem asmuch as possible.Deliver or put simple instructions on the board sostudents can follow.
Challenge: compress your assigned poem asmuch as possible.Compare with other groups to see if you can dobetter.Try to develop a general strategy that will lead to agood compression.
After some time, have pairs that did the same poemget together to compare schemes. As a group theirjob is to come up with the best compression for thatpoem for the class.
Optionally: you may hand out Activity Guide - TextCompression - Activity Guide and have studentscomplete it individually. It may work well as an out-of-class activity or assessment.
Discuss properties andchallenges with compression.Ask groups to pause to discuss the questions at the endof the activity.
Prompts:
"What makes doing this compression hard?"
Invite responses. Some of these issues shouldsurface: You can start in lots of different ways. Early choices affect later ones. Once you find one set of patterns,others emerge.There is a tipping point: you might be making progress compressing, but at some point the scale tips and thedictionary starts to get so big that you lose the benefit of having it. But then you might start re-thinking the dictionary totweak some bits out.
"Do we think that these compression amounts that we’ve found are the the best? Is there a way to knowwhat the best compression is?"
We probably don’t know what’s best.There are so many possibilities it’s hard to know. It turns out the only way to guarantee perfect compression is bruteforce. This means trying every possible set of substitutions. Even for small texts this will take far too long. The “best” isreally just the best we’ve found so far.
Check Your Understanding 4 5 6 7 (click tabs to see student view)

Teaching Tip
You may elect to not do this heuristic activity and insteadget the key take-aways (see Activity Goal below) acrossthrough discussion following the previous activity.
ActivityGoal
The point here is to establish:
There is no real way to determine for sure that you'vegot the best compression besides trying everythingpossible by brute force.Heuristics are techniques for at least making progresstoward a "good enough" solution.Following the same heuristic might lead to differentresults.
"But is there a process a person can follow to find the best (or a pretty good) compression for a piece oftext?"
Yes, but it’s imprecise -- you might leave this as a lingering question that leads to the next student task.
Activity 2 (30 mins)
Develop a heuristic for doingcompressionDistribute or Display: Activity Guide - TextCompression Heuristics - Activity Guide
In computer science there is a word for strategies to usewhen you're not sure what the exact or best solution to aproblem is.
Vocabulary: heuristic a problem solving approach (typically an algorithm) to find a satisfactory solution where finding anoptimal or exact solution is impractical or impossible.
Instructions:
Continue working on compressing your poem using the Text Compression Widget. As you do so, develop a set ofrules, or a “heuristic” that generally seems to provide good results.
Record your heuristic as a list of steps that someone else unfamiliar with the problem could follow and still end upwith decent compression.
Trade your heuristics with another group. Arethey clear and specific enough that you always knowwhat to do? If not, provide feedback to one anotherand improve your heuristics to provide clearerinstructions.
Using another group’s heuristic, attempt to compressone or more of the poems in the tool. Record theamount of compression you achieve.
What's best?Share Findings:
Have one member of each group give a summary of their heuristic and the results on each of the poems. If time is limited,these presentations can be done between groups instead in front of the entire class. The discussion questions below couldalso be done group to group.
Reflection Prompts (from the Activity Guide)
"Do you think it’s possible to describe (or write) a specific set of instructions that a person could followthat would always result in better text compression than your heuristic? Why or why not?"
Some compression programs (like zip) do a great job if the file is sufficiently large and has reasonable amounts ofrepetition.However, it is also possible to create a “compressed file” that is larger than the original because the heuristic does workin every single case.
"Is there a way to know that a compressed piece of text is compressed the most possible? If yes, describehow you could determine it. If no, why not?"
Stress that there is no perfect solution.The size and shape of the data will determine what the “best” answer is and we often cannot even be sure it is the best

Teaching Tip
You do not have to review or demo LZW compressionin depth here. It is an interesting real-world applicationof the activity done in class.
While details of LZW compression are not part of theAP course content, but the idea of lossless compressionis.
Recommendation: demonstrate zip quickly.
Have a large text file at the ready, such as theplaintext version of HamletUse the .zip utility on your computer to compress into azip file and then compare the file size to the original.(We learned how to do this in the previous lesson).
answer (only that it is better than other answers we have tried.)
Wrap-up (20 mins)
Recap Questions"What did all groups’ processes for compression have in common?"
Pattern RecognitionAbstraction (patterns referring to other patterns)
"Will following this process always lead to the same compression? (i.e. two people following the processfor the same poem, will result in the same compression?)"
No. It’s imprecise, but still OK. The text still gets compressed, no matter what.Since there is no way to know what’s best, all we need is a process that comes up with some solution, and a way tomake progress.
Terminology: Verify students know or use an *exit ticket on this vocabulary:
lossless compression v. lossy compressionheuristic
Compression in the Real World (.zip)Zip Compression
There is a compression algorithm called LZWcompression upon which the common “zip” utility isbased. Zip compression does something very similarto what you did today with the text compressionwidget.
Here is an animation of lzw in action . You can seethe algorithm doesn't compress it the most, but it isfollowing a heuristic that will lead to better and bettercompression over time.
Do you want to use zip compression for real? Mostcomputers have it built in:
Windows: select a file or group of files, right-click,and choose “Send To...Compressed (zipped)Folder.”Mac: select a file or group of files, ctrl+click, andchoose “Compress Items.”
Warning: if you try this results may vary.
Zip works really well for text, but only on large files. If you try to compress the simple hello.txt file we used in aprevious lesson, you'll see the resulting file is actually bigger.Zip is meant for text. It might not work well on non-text files very well because they are already compressed or don’thave the same kinds of embedded patterns that text documents do.
Assessment
Code Studio: Assessment questions are available on the Code Studio
Extended Learning
Extended Learning
Real World: Zip Compression
Experiment with zip using text files with different contents. Are the results for small files as good as for large files? (OnMacs, in the Finder choose “get info” for a file to see the actual number of bytes in the file, since the Finder display willshow 4KB for any file that’s less than that.)
Warning: results may vary. Zip works really well for text, but it might not compress other files very well because theyare already compressed or don’t have the same kinds of embedded patterns that text documents do.
Challenge: Research the LZW algorithm
.zip compression is based on the LZW Compression Scheme
While the idea behind the text compression tool is similar to LZW (zip) algorithm, tracing the path of compression anddecompression is somewhat challenging. Learning more about LZW and what happens in the course of this algorithmwould be an excellent extension project for some individuals.
Standards AlignmentCSTA K-12 Computer Science Standards (2011)
CL - Collaboration
CPP - Computing Practice & Programming
CT - Computational Thinking
Computer Science Principles
2.1 - A variety of abstractions built upon binary sequences can be used to represent all digital data.
2.2 - Multiple levels of abstraction are used to write programs or create other computational artifacts
3.1 - People use computer programs to process information to gain insight and knowledge.
3.3 - There are trade offs when representing information as digital data.
4.2 - Algorithms can solve many but not all computational problems.
CSTA K-12 Computer Science Standards (2017)
DA - Data & Analysis
If you are interested in licensing Code.org materials for commercial purposes, contact us.
UNIT
2Ch. 1 1 2 3 4 5 6
Lesson 3: Encoding B&W ImagesWidget | Concept Invention | Individual Creation
OverviewIn this lesson, students will begin to explore the way digital imagesare encoded in binary. The class begins by asking students to inventtheir own image encoding protocol in order to familiarize themselveswith some of the subtle complications of encoding images, namely theneed for other data, called metadata, that describes properties of theimage necessary for rendering it. Students will learn about pixels,raster images, and what an image file format is. Students will encodebinary image data using a widget in Code Studio.
PurposeThe main purpose of this lesson is for students to exhibit somecreativity while getting some hands-on experience manipulating binarydata that represents something other than plain numbers or text.Connections to abstraction in data can be made here. Connectionscan be made back to file sizes and file formats here as well - e.g. howmany bytes does it take to store an image v. text? If you want tobroach the subject, the concept of data compression can come inhere too - it is interesting to think about how a black and white imagemight be compressed. You should be aware that this lesson largelyacts a stepping stone to the next lesson which addresses how RGBcolors are represented in binary.
Image file types have some similarities to data packets we saw in theInternet unit -- because images must include metadata, or data aboutthe data. The data of a black-and-white image is the list of bits thatrepresent whether each pixel is on or off. To create the image,however, we must also know how wide and tall the image is in orderto recreate it accurately. This necessitates the creation of a file formatwhich clearly defines how this metadata will be encoded, since it iscrucial for interpreting the subsequent data of the image. It is similar tohow an internet packet doesn't only contain the data you need tosend, but must also include metadata like the to and from addressesand packet number.
Digital images can be stored in many formats, but one of the mostcommon formats is "raster". Raster images store the image as anarray of individual pixels, each of which has a particular color. Higher-quality images can be obtained by decreasing the size of the pixels(resolution). While full color will be addressed in the next lesson, animportant idea here is that images on computer screens are createdwith light by illuminating pixels on the screen. This is why it is typical
View on Code Studio
ObjectivesStudents will be able to:
Explain how images are encoded with pixeldata.Describe a pixel as an element of a digitalimage.Encode a B&W image in binary representingboth the pixel data (intensity) and metadata(width, height).Create the necessary metadata to representthe width and height of a digital image, usinga computational tool.Explain why image width and height aremetadata for a digital image.
Preparation(Optional) Graph or grid paper for drawing
pixel images by hand
LinksHeads Up! Please make a copy ofany documents you plan to sharewith students.
For the Teacher
Activity Guide KEY - Encode a B&WImage - Answer KeyTeaching Tips & Tricks Video -Encoding Images - Video (download)
For the Students
B&W Pixelation Widget - Activity Guide
Extension: Magnify an Image (optional)- Activity Guide
B&W Pixelation Tutorial - Video(download)Invent a B&W image encoding scheme -Activity Guide
Make a Copy
Make a Copy
Make a Copy

in a black and white image for the value 1 to represent white - it meansturn the light on - and 0 represents black - light off. If you weredrawing on paper you might do the inverse.
AgendaGetting Started (10 mins)
Invent An Encoding Scheme for B&W Images
Activity (40 mins)
Video: The Pixelation widget
Wrap-up (10 mins)AssessmentExtended Learning
VocabularyImage - A type of data used for graphics orpictures.metadata - is data that describes other data.For example, a digital image may includemetadata that describe the size of the image,number of colors, or resolution.Pixel - short for "picture element", thefundamental unit of a digital image, typically atiny square or dot that contains a single pointof color of a larger image.
ActivityGoal
The purpose of this little concept invention activity is to becreative and to get the mind moving. There is no exactright answer that we're going for here.
There are many clever and interesting ways this could bedone. Most students will likely end up saying that eachpixel should be represented with either a 0 or a 1.
But what we really want to draw out is the idea of"metadata". Simply encoding the pixel data is not enough.We also need to encode the width and height of theimage, or the image could not be recreated - other thanthrough trial and error
Content Corner
There is some mystery about the etymology of the word"pixel". You can read more about it on the Wikipedia:pixel page
Teaching GuideGetting Started (10 mins)
Remarks
Back in the Internet Unit you encoded a line-drawing image as a list of numbers that made up the coordinates of thepoints in the image. That works for line drawings, but how might you encode a different kind of image? Today we’re goingto consider how you might use bits to encode a photographic image, or if you like: how could I encode vision?
Today, we're going to start to learn about images, but we're going to start simple, with black and white images.
Invent An Encoding Scheme for B&W ImagesDistribute Invent a B&W image encodingscheme - Activity GuideSeparate students into pairs, and hand each studenta copy of the activity guide.Students should work the first two pagesGive groups time to work
Discuss:
Ask students to share-out their file format to identifycommonalities and patterns.
As a class, address students’ questions that arisefrom the concept invention activity.Use the questions below to spur conversation. If theconcept of metadata, or data about data, arisesnaturally, then address it here.
Prompts:
How have you encoded white and black portions of your image, what do 0 and 1 stand for in your encoding?Are your encodings flexible enough to accommodate images of any size? * How do they accomplish this?Is your encoding intuitive and easy to use?Is your encoding efficient?
Remarks
Vocabulary: each little dot that makes up a picturelike this is called a pixel. Where did this word pixelcome from? It turns out that originally the dots werereferred to as "picture elements", that got shortenedto "pict-el" and eventually "pixel".
What we've discovered is that the data for our image file must contain more than just a 0 or 1 for every pixel. It mustcontain other data that describes the pixel data.
This is called metatdata. In this case the metadata encodes the width and height of the image.
We've seen forms of metadata before. For example: an internet packet. The packet contains the data that needs to besent, but also other data like the to and from address and packet number.
Activity (40 mins)
Introduction
View on CodeStudio
View on CodeStudio
View on CodeStudio
The pixelation widget in Code Studio will allow us to play with these ideas a little more.This widget follows a particular encoding scheme for images that you'll have to follow.
Video: The Pixelation widgetShow the tutorial video: B&W Pixelation Tutorial - Video
NOTE: This video pops up the first time you visit the pixelation widget in Code Studio. You might perfer to have studentswatch it there on their own.
Code Studio levelsLevels 2 3
Student Instructions
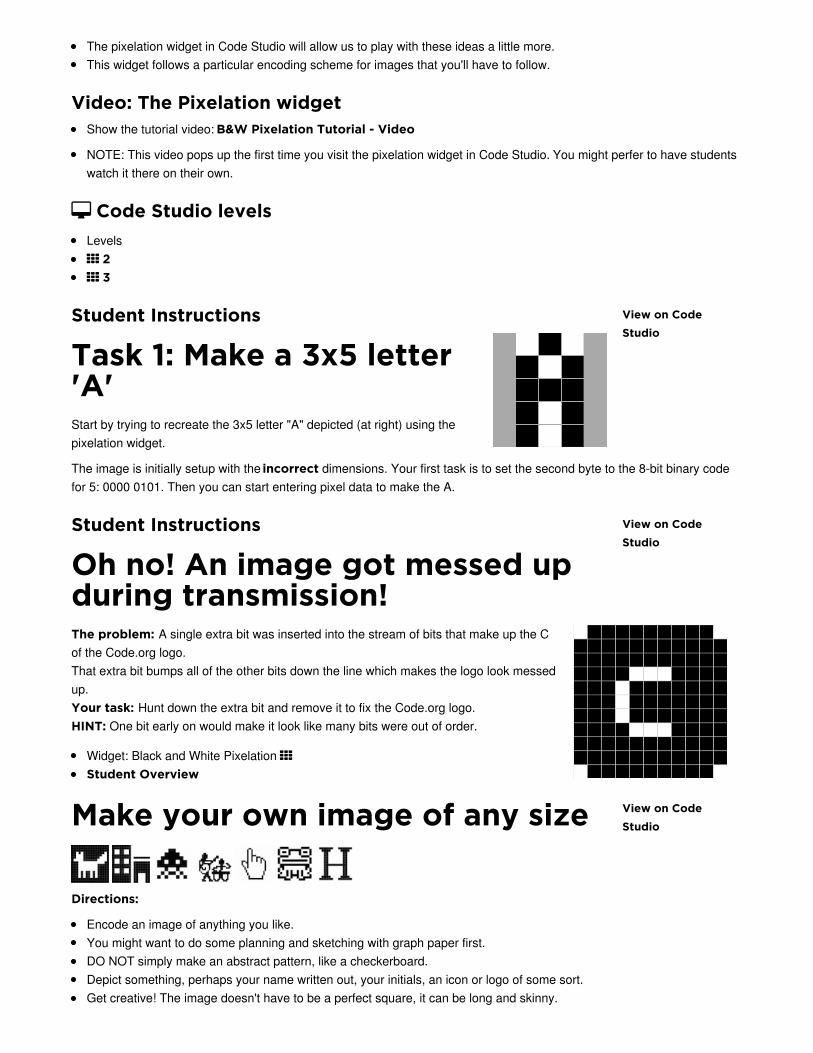
Task 1: Make a 3x5 letter'A'Start by trying to recreate the 3x5 letter "A" depicted (at right) using thepixelation widget.
The image is initially setup with the incorrect dimensions. Your first task is to set the second byte to the 8-bit binary codefor 5: 0000 0101. Then you can start entering pixel data to make the A.
Student Instructions
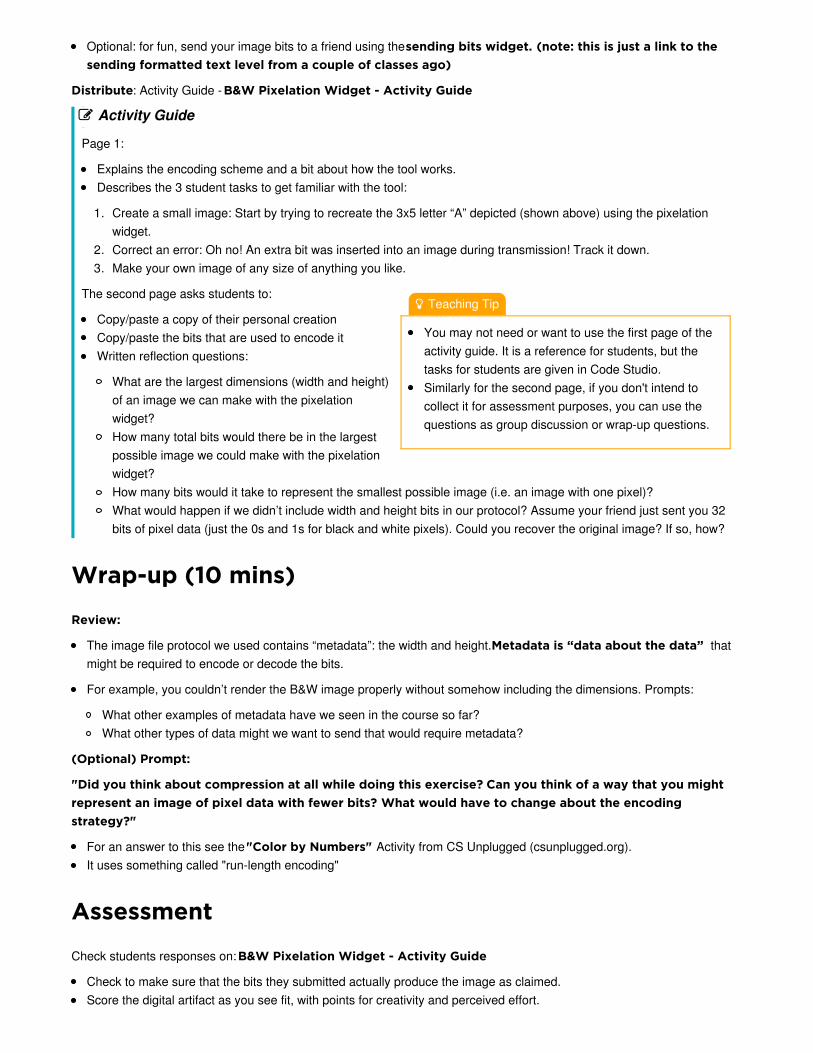
Oh no! An image got messed upduring transmission!The problem: A single extra bit was inserted into the stream of bits that make up the Cof the Code.org logo. That extra bit bumps all of the other bits down the line which makes the logo look messedup. Your task: Hunt down the extra bit and remove it to fix the Code.org logo. HINT: One bit early on would make it look like many bits were out of order.
Widget: Black and White Pixelation Student Overview
Make your own image of any size
Directions:
Encode an image of anything you like.You might want to do some planning and sketching with graph paper first.DO NOT simply make an abstract pattern, like a checkerboard.Depict something, perhaps your name written out, your initials, an icon or logo of some sort.Get creative! The image doesn't have to be a perfect square, it can be long and skinny.
Teaching Tip
You may not need or want to use the first page of theactivity guide. It is a reference for students, but thetasks for students are given in Code Studio.Similarly for the second page, if you don't intend tocollect it for assessment purposes, you can use thequestions as group discussion or wrap-up questions.
Optional: for fun, send your image bits to a friend using the sending bits widget. (note: this is just a link to thesending formatted text level from a couple of classes ago)
Distribute: Activity Guide - B&W Pixelation Widget - Activity Guide
Activity Guide
Page 1:
Explains the encoding scheme and a bit about how the tool works.Describes the 3 student tasks to get familiar with the tool:
1. Create a small image: Start by trying to recreate the 3x5 letter “A” depicted (shown above) using the pixelationwidget.
2. Correct an error: Oh no! An extra bit was inserted into an image during transmission! Track it down.3. Make your own image of any size of anything you like.
The second page asks students to:
Copy/paste a copy of their personal creationCopy/paste the bits that are used to encode itWritten reflection questions:
What are the largest dimensions (width and height)of an image we can make with the pixelationwidget?How many total bits would there be in the largestpossible image we could make with the pixelationwidget?How many bits would it take to represent the smallest possible image (i.e. an image with one pixel)?What would happen if we didn’t include width and height bits in our protocol? Assume your friend just sent you 32bits of pixel data (just the 0s and 1s for black and white pixels). Could you recover the original image? If so, how?
Wrap-up (10 mins)
Review:
The image file protocol we used contains “metadata”: the width and height. Metadata is “data about the data” thatmight be required to encode or decode the bits.
For example, you couldn’t render the B&W image properly without somehow including the dimensions. Prompts:
What other examples of metadata have we seen in the course so far?What other types of data might we want to send that would require metadata?
(Optional) Prompt:
"Did you think about compression at all while doing this exercise? Can you think of a way that you mightrepresent an image of pixel data with fewer bits? What would have to change about the encodingstrategy?"
For an answer to this see the "Color by Numbers" Activity from CS Unplugged (csunplugged.org).It uses something called "run-length encoding"
Assessment
Check students responses on: B&W Pixelation Widget - Activity Guide
Check to make sure that the bits they submitted actually produce the image as claimed.Score the digital artifact as you see fit, with points for creativity and perceived effort.
The following questions can be found in the Activity Guide and also appear on Code StudioAnswers these questions can be found here: Activity Guide KEY - Encode a B&W Image - Answer Key
Using the B&W file format from the pixelation widgetWhat are the largest dimensions (width and height) of an image we can make with the pixelation widget?How many total bits would there be in the largest possible image we could make with the pixelation widget?How many bits would it take to represent the smallest possible image (i.e. an image with one pixel)?
What would happen if we didn’t include width and height bits in our protocol? Assume your friend just sent you 32 bitsof pixel data (just the 0s and 1s for black and white pixels). Could you recover the original image? If so, how?
Extended Learning
Check out the "Color by Numbers" from CS Unplugged (csunplugged.org) which uses a different clever encodingscheme for B&W images.
Do the Extension: Magnify an Image (optional) - Activity Guide activity (double the size of an image on thePixelation Tool).
Have students research raster graphics in anticipation of the subsequent lesson.Attempting to communicate with possible intelligent life beyond our solar system has been a dream for humans and thegoal of scientists for many years. Questions about messages to send, as well as how to send messages deep into spaceto unknown recipients have been debated. In 1974, scientists sent the Arecibo message to the star cluster M13 some25,000 light years away. Read about the message they sent using 1,679 binary digits(https://en.m.wikipedia.org/wiki/Arecibo_message).
How would you change the content of the message? What would you delete and add? Why would your change besignificant in a communication to other intelligent beings?Sketch the segment of the design you would alter. Remember, you must retain the original number of bits.List the details in this article that you understand more deeply because of what you have learned in this class up tothis point.
Standards AlignmentCSTA K-12 Computer Science Standards (2011)
CL - Collaboration
CPP - Computing Practice & Programming
CT - Computational Thinking
Computer Science Principles
1.1 - Creative development can be an essential process for creating computational artifacts.
1.2 - Computing enables people to use creative development processes to create computational artifacts for creative expression or to solve a
problem.
1.3 - Computing can extend traditional forms of human expression and experience.
2.1 - A variety of abstractions built upon binary sequences can be used to represent all digital data.
2.3 - Models and simulations use abstraction to generate new understanding and knowledge.
3.1 - People use computer programs to process information to gain insight and knowledge.
3.2 - Computing facilitates exploration and the discovery of connections in information.
3.3 - There are trade offs when representing information as digital data.
CSTA K-12 Computer Science Standards (2017)
CS - Computing Systems
DA - Data & Analysis

If you are interested in licensing Code.org materials for commercial purposes, contact us.

UNIT
2Ch. 1 1 2 3 4 5 6
Lesson 4: Encoding Color ImagesOverviewIn this lesson students are asked to consider how color is representedon a computer and to imagine how it might be encoded in binary.Students then learn about how color is actually represented on acomputer - using the RGB color scheme - and create their ownimages in an new version of the pixelation widget that allows you usemore than 1 bit per pixel to represent color information. After grapplingwith the prospect of possibly many bits just to represent a single pixel,students are shown how using hexadecimal allows us to representmany bits with fewer characters. Students use a new version of thepixelation tool to encode an image with color and create a personalfavicon.
PurposeThe main purpose here, similar to the B&W pixelation activity is forstudents to get hands-on and "down and dirty" with bits. A majoroutcome will also be understanding the relationship betweenhexadecimal (base-16) and binary (base-2), and how useful it is to usehex to represent groups of 4 bits. It's important to realize that usinghex is not a form of data compression, it's simply a different view intothe bits.
The most common color representation scheme - RGB - typically uses24 bits (3 bytes) with 8 bits each for Red, Green and Blue intensities.And one of the most common ways you see these colors representedis in hexadecimal. The pixelation widget, with its ability to choose howmany bits represent the color value for each pixel, can be a veryuseful tool for showing the utility of hex representations for bits.
The process of rendering color on a computer screen by mixing red,green and blue light is an important concept of this lesson. The resultsare not always intuitive, because mixing pigment and mixing coloredlights (like what’s on a computer screen) lead to different results.
Another important objective of this lesson is to understand how(uncompressed) image file sizes can become quite large. Forexample, even a relatively small image of 250x250 pixels is a total of62,500 pixels, each requiring up to three bytes (24 bits) or colorinformation, resulting in a total of 1.5 million bits to store one image!Thus, interesting connections to compression can be made here, butnote that lossy compression and image formats like .jpg are coveredin the next lesson.
AgendaGetting Started (5 mins)
View on Code Studio
ObjectivesStudents will be able to:
Use the Pixelation Tool to encode small colorimages with varying bits-per-pixel settings.Explain the color encoding scheme for digitalimages.Use the Pixelation Tool to encode an image ofthe student’s design.Explain the benefits of using hexadecimalnumbers for representing long streams of bits.
Preparation(Optional) Consider demonstrating the
color pixelation widget instead of showing thevideo.
LinksHeads Up! Please make a copy ofany documents you plan to sharewith students.
For the Teacher
Teaching Tips & Tricks Video -Encoding Images - Video (download)Activity Guide KEY - Encoding ColorImages - 2018 - Answer KeyVideo Guide KEY for "A Little Bit aboutPixels" - 2018 - Answer KeyActivity Guide KEY - HexadecimalNumbers (optional) - 2018 - Answer Key
For the Students
A Little Bit about Pixels - Video(download)Worksheet - Video Guide for "A LittleBit about Pixels" (optional) - Worksheet
Encoding Color Images - Activity Guide
Hexadecimal Numbers (optional) -Activity Guide
Make a Copy
Make a Copy
Make a Copy
Prompt: How might you encode colors?
Activity (40 mins)
Video: A Little Bit about PixelsColor Pixelation Widget
Activity 2 (30-40 mins)
Personal Favicon Project
Wrap-up
Submit FaviconGallery Walk
AssessmentExtended Learning
Personal Favicon Project - Activity Guide
Rubric - Personal Favicon Project -Rubric
VocabularyHexadecimal - A base-16 number systemthat uses sixteen distinct symbols 0-9 and A-Fto represent numbers from 0 to 15.Pixel - short for "picture element", thefundamental unit of a digital image, typically atiny square or dot that contains a single pointof color of a larger image.RGB - the RGB color model uses varyingintensities of (R)ed, (G)reen, and (B)lue lightare added together in to reproduce a broadarray of colors.
Make a Copy
Make a Copy
DiscussionGoal
It is likely that many students will come up with an idealike making a list of colors and just assigning a number toeach one. That is fine and reasonable.
Some students may already be aware of a numeric RGBcolor scheme. If they can describe that here, that is fine aswell.
Regardless of their encoding, students should be thinkingabout the number of bits they will allocate to the encodingand how that will affect the number of colors that can beencoded.
Teaching GuideGetting Started (5 mins)
Prompt: How might you encode colors?Use a getting started strategy to address thesequestions (for ideas consult: Teaching Strategies forthe CS Classroom - Resource)
In the previous lesson we came up with a simpleencoding scheme for B&W images. What if we wantedto have color?Devise an encoding scheme for color in an image file.How would you represent color for each pixel?How many different colors could you represent? Doyou have a particular order to the colors?
Pair and share ideas
Discuss some of the difficulties of representing colorCompare and contrast the different schemes students come up with.
Activity (40 mins)
Remarks
The way color is represented in a computer is different from the ways we represented text or numbers. With text, we justmade a list of characters and assigned a number to each one. As you are about to see, with color, we actually use binaryto encode the physical phenomenon of LIGHT. You saw this a little bit in the previous lesson, but today we will see how tomake colors by mixing different amounts of colored light.
Video: A Little Bit about PixelsShow the video: A Little Bit about Pixels - VideoKevin Systrom, founder of Instagram, explains pixels and RGB color.(Optional) complete the video worksheet: Video Guide KEY for "A Little Bit about Pixels" - Answer Key
Discuss:
Following the video, you might address any questions (or give students time to complete the video worksheet)
Important ideas from this video include:
Image sharing services are a universal and powerful way of communicating all over the world.Digital images are just data (lots of data) composed of layers of abstraction: pixels, RGB, binary.The RGB color scheme is composed of red, green, and blue components that have a range of intensities from 0 to 255.Screen resolution is the number of pixels and how they are arranged vertically and horizontally, and density is thenumber of pixels per a given area.Digital photo filters are not magic! Math is applied to RGB values to create new ones.
Color Pixelation WidgetDistribute the Activity Guide: Encoding Color Images - Activity GuideDirect students to work in Code Studio.
There are 3 tutorial videos that appear in Code Studio that guide students through theThis activity guides students through a few levels to get used to representing pixel data with more than one bit per pixel.
Teaching Tip
If you are comfortable you might considerdemonstrating the pixelation tool for each of the 3steps in the activity guide rather than having studentswatch the tutorial video. Demonstrating might be a moreefficient and interactive/engaging way bring studentsthrough each step.
It works up to full 24-bit RGB color and will present hexadecimal as a convenient way to represent binary information forhumans to read.
Guide: Encoding Color ImagesGuide: Encoding Color Images
Each of the items below are presented to students onthe activity guide and in Code Studio.
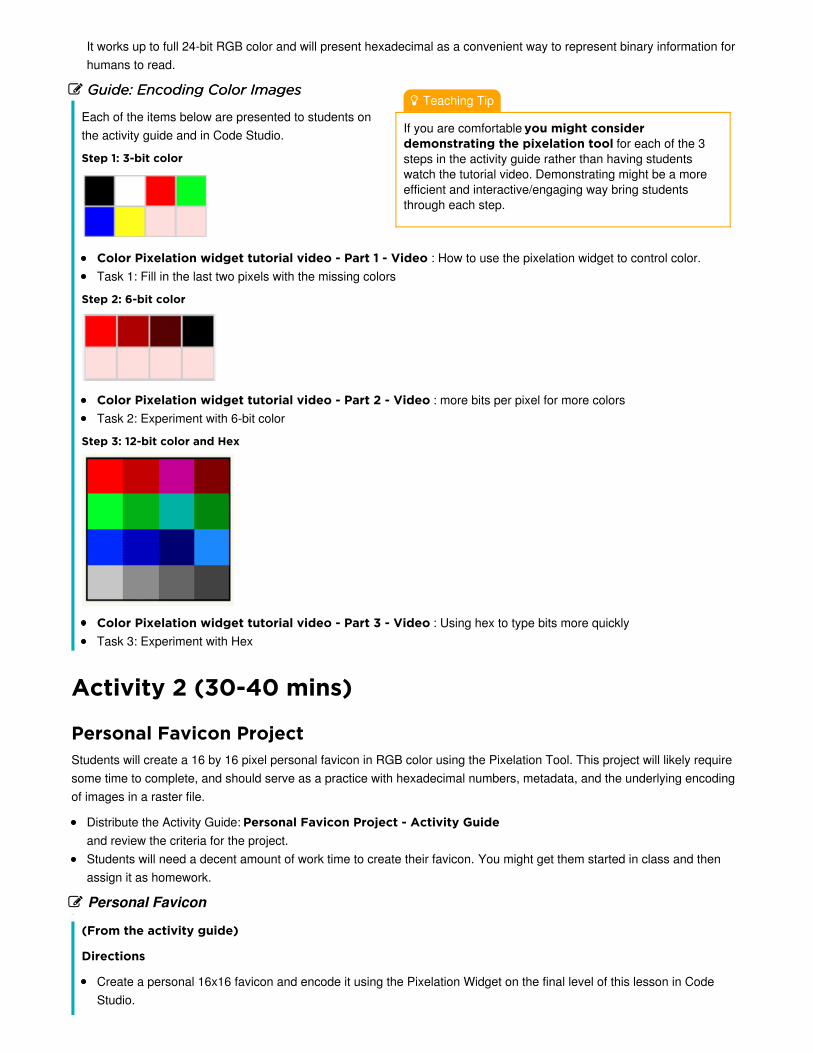
Step 1: 3-bit color
Color Pixelation widget tutorial video - Part 1 - Video : How to use the pixelation widget to control color.Task 1: Fill in the last two pixels with the missing colors
Step 2: 6-bit color
Color Pixelation widget tutorial video - Part 2 - Video : more bits per pixel for more colorsTask 2: Experiment with 6-bit color
Step 3: 12-bit color and Hex
Color Pixelation widget tutorial video - Part 3 - Video : Using hex to type bits more quicklyTask 3: Experiment with Hex
Activity 2 (30-40 mins)
Personal Favicon ProjectStudents will create a 16 by 16 pixel personal favicon in RGB color using the Pixelation Tool. This project will likely requiresome time to complete, and should serve as a practice with hexadecimal numbers, metadata, and the underlying encodingof images in a raster file.
Distribute the Activity Guide: Personal Favicon Project - Activity Guide and review the criteria for the project.Students will need a decent amount of work time to create their favicon. You might get them started in class and thenassign it as homework.
Personal Favicon
(From the activity guide)
Directions
Create a personal 16x16 favicon and encode it using the Pixelation Widget on the final level of this lesson in CodeStudio.
Content Corner
RGB color model - Additive Light
Computer screens emit light, so when you mix RGBcolors, you are really mixing light together. This iscounterintuitive for many students who have grown upmixing paints in school. When you mix paint it absorbslight.
It is illustrative to look at how you make black and whitewith paint vs. light:
To make black: with paint, mix a full spectrum of colorstogether; with light, turn off all the lights.To make white: with paint, don’t use any paint(assuming canvas is white); with light, turn on all lightsfor a full spectrum of color.
This can make mixing colors a little bizarre too:
With paint, mix full red and full blue to make PurpleWith light, mix full red and full blue to make Pink
The Pixelation Tool is in RGB mode, as long as thenumber of bits per pixel is a multiple of 3 (3, 6, 9, 12, etc.)This allows for the same number of bits to be allocated toeach color channel. Other bits-per-pixel settings will setthe image to grayscale, with more bits allowing finercontrol over the shade of gray.
Hexadecimal Numbers:
When working through the Activity Guide for the colorversion of the Pixelation Tool, students will be introducedto the concept of hexadecimal numbers, so-called becausethere are 16 unique symbols that can appear in each placevalue, 0-9, A, B, C, D, E, and F.
MISCONCEPTION ALERT
It is important to note that hexadecimal numbersare used to aid humans in reading longer strings ofbits, but they in no way change the underlyingdata being represented. Instead, they allow us toread 4 bits at a time rather than 1, and so allow usto more easily parse binary information.Hexadecimal representation is NOT a form ofcompression, since the underlying binaryrepresentation is not changing at all. Rather it is amore convenient way of representing that binaryinformation when humans need to read andinteract with it.
You may wish to separately address this topic as a class.Students can practice with the Hexadecimal Odometerand can complete this Hexadecimal Numbers(optional) - Activity Guide if you deem more practicenecessary.
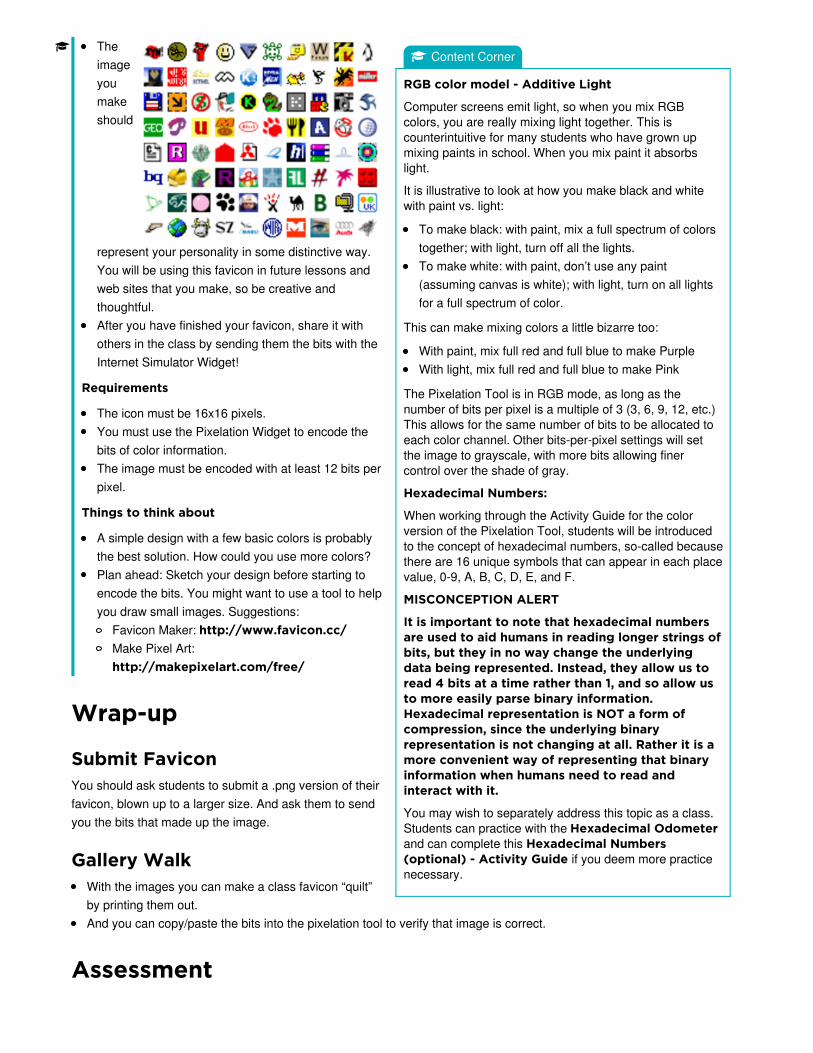
Theimageyoumakeshould
represent your personality in some distinctive way.You will be using this favicon in future lessons andweb sites that you make, so be creative andthoughtful.After you have finished your favicon, share it withothers in the class by sending them the bits with theInternet Simulator Widget!
Requirements
The icon must be 16x16 pixels.You must use the Pixelation Widget to encode thebits of color information.The image must be encoded with at least 12 bits perpixel.
Things to think about
A simple design with a few basic colors is probablythe best solution. How could you use more colors?Plan ahead: Sketch your design before starting toencode the bits. You might want to use a tool to helpyou draw small images. Suggestions:
Favicon Maker: http://www.favicon.cc/Make Pixel Art:http://makepixelart.com/free/
Wrap-up
Submit FaviconYou should ask students to submit a .png version of theirfavicon, blown up to a larger size. And ask them to sendyou the bits that made up the image.
Gallery WalkWith the images you can make a class favicon “quilt”by printing them out.And you can copy/paste the bits into the pixelation tool to verify that image is correct.
Assessment

Questions:
How many bits (or bytes) are required to encode an image that is 25 pixels wide and 50 pixels tall, if you encode it with24 bits per pixel?
To help students understand how quickly the bit size of images expands as the image is enlarged, start with smallernumbers (5 X 10) and then incrementally increase the width and height to illustrate the concept.
Imagine that you have an image that is too dark or too bright. Describe how you would alter the RGB settings to brightenor darken it. Give an example.
Extended Learning
If you had to send your favicon using the sending bits widget, it would probably take a long time. Could you compressyour image? How? Describe in broad strokes the kinds of things you could do.Read Blown to Bits (www.bitsbook.com), Chapter 3 , Ghosts in the Machine, pp. 95-99 (Hiding Information inImages), then answer the following questions:
Besides hiding information sent to others, what other uses can steganography have for everyday users? For example,what uses would steganography have for an American businessman in China?
Standards AlignmentCSTA K-12 Computer Science Standards (2011)
CL - Collaboration
CPP - Computing Practice & Programming
CT - Computational Thinking
Computer Science Principles
1.1 - Creative development can be an essential process for creating computational artifacts.
1.2 - Computing enables people to use creative development processes to create computational artifacts for creative expression or to solve a
problem.
1.3 - Computing can extend traditional forms of human expression and experience.
2.1 - A variety of abstractions built upon binary sequences can be used to represent all digital data.
2.2 - Multiple levels of abstraction are used to write programs or create other computational artifacts
2.3 - Models and simulations use abstraction to generate new understanding and knowledge.
3.1 - People use computer programs to process information to gain insight and knowledge.
3.2 - Computing facilitates exploration and the discovery of connections in information.
3.3 - There are trade offs when representing information as digital data.
CSTA K-12 Computer Science Standards (2017)
CS - Computing Systems
DA - Data & Analysis
If you are interested in licensing Code.org materials for commercial purposes, contact us.

UNIT
2Ch. 1 1 2 3 4 5 6
Lesson 5: Lossy vs. Lossless CompressionResearch
OverviewStudents learn the difference between lossy and losslesscompression by experimenting with a simple lossy compressionwidget for compressing text. Students then research three real-worldcompressed file formats to fill in a research guide. Throughout theprocess they review the skills and strategies used to researchcomputer science topics online, in particular to cope with situationswhen they don't have the background to fully understand everythingthey're reading (a common situation even for experienced CSstudents).
PurposeThe first goal of this lesson is straightforward: understand what lossycompression is and when/why it might be used. Students should seea number of examples of this distinction throughout the lesson andshould leave the lesson being able to describe the relative benefits ofeach.
The second goal of this lesson is to build up students' research skillsboth for the project they will complete in the next lesson and for theExplore PT at the end of the year. Students will need practice findingreliable sources, reading technical articles, and synthesizinginformation. The teacher's role in calling out the skills being used, notmerely the facts being found, is significant.
AgendaGetting Started (15 mins)
Quick Discovery: Lossy Text CompressionLossless vs. Lossy Compression
Activity (40 mins)Wrap-up (5 mins)
View on Code Studio
ObjectivesStudents will be able to:
Explain the difference between lossy andlossless compression.Explain the relative benefits or drawbacks ofdifferent file formats, particularly in terms ofhow they compress information.Identify reliable sources of information whendoing researchExplain the difference between open sourceand licensed software.
PreparationPrepare print or digital copies of File
Formats and Compression Activity Guide
LinksHeads Up! Please make a copy ofany documents you plan to sharewith students.
For the Students
Lossy Text Compression App - App LabFile Formats and Compression - ActivityGuide
VocabularyLossless Compression - a datacompression algorithm that allows the originaldata to be perfectly reconstructed from thecompressed data.Lossy Compression - (or irreversiblecompression) a data compression methodthat uses inexact approximations, discardingsome data to represent the content. Mostcommonly seen in image formats like .jpg.
Make a Copy

DiscussionGoal
Goal: As you circulate first make sure that all groups trytyping their own text into the app. They should see that theapp keeps the first character of every word but thenremoves all vowels.
During the share out aim to hear from multiple groups. Ifyou ask leading questions you might direct theconversation towards the following points.
The text is certainly "smaller" than before so at least itmight be compression.This is different from what they saw with the textcompression widget though. Some information is beingentirely thrown away and if you only had thecompressed text there's no way to get back the originaltext.That said, you can usually still read the text. Themeaning hasn't been lost even if some parts of theoriginal message could never be perfectly recovered.The word "lossy" probably has something to do with thefact that some letters (information) are entirely losthere.
Your goal in this discussion isn't that students arrive at adefinition. You're aiming for all students to see that thistype of compression is different from what they've seenbefore and prep them all for the following remarks.
Teaching GuideGetting Started (15 mins)
Quick Discovery: Lossy TextCompressionPrompt: With a partner, go to the Lossy TextCompression App - App Lab. Use it for a coupleminutes, discuss with your partner what's happening, andthen answer the following questions.
Should this “count” as text compression? Why or whynot?What do you think the word “lossy” refers to?
Discuss: Give pairs of students a couple minutes toexplore the app. Then ask discuss what they are seeing.Finally ask them to write down brief responses to the twoprompts. Once all pairs have had a chance to writeresponses have a few groups share opinions with thegroups.
Lossless vs. Lossy Compression Remarks
This is an example of compression since the totalnumber of bits needed to represent the message isreduced. As we've seen, though, it's different than thecompression we saw with the text compression widget.
The text compression widget uses "lossless"compression. This means that it is possible to reversethe compression and recover the original information(message) in its entirety. This is what the dictionarywas for.
The text compression we just saw is "lossy" compression. This means that it isn't possible to perfectly reverse thecompression and recover the original (message). Some of it is lost forever. If you saw the word “fd” it could be “food”,“feed”, “feud”, or “fad”. You might be able to guess what it was supposed to be, but there’s no algorithm that will alwaysgive you the original message.
Vocabulary: Display these definitions
Lossless Compression: a data compression algorithm that allows the original data to be perfectly reconstructed fromthe compressed data.Lossy Compression: (or irreversible compression) a data compression method that uses inexact approximations,discarding some data to represent the content. Most commonly seen in image formats like .jpg.
Prompt: Have students briefly discuss the prompt below with a neighbor.
When you use lossy compression you lose the ability to decompress your information and get back a perfect copy. Evenso, people use lossy compression all the time. Can you think of reasons or situations where someone would still uselossy compression?
Discuss: Have pairs briefly discuss with one another. Circulate and listen to ideas as they're discussed. Then have a couplegroups share with the whole room.
Transition: We’ve been looking at image file formats. And we’ve also seen text compression. Both of those attempted torender perfectly every piece of information.

DiscussionGoal
Researching CS Topics: When researching a computerscience topic (e.g. as students will have to do on theExplore PT) it is important to remember that this is aunique and separate skill. It often requires students toread text that they don't completely understand or whichuses advanced vocabulary. At other times they'll need toconsult sources typically considered unreliable like onlineforums or Wikipedia. Part of the goal of this lesson iscalling out the fact that this is a separate skill, practicingthe individual component, and preparing students to do itmore independently in the following lesson.
Content Corner
Formats in Everyday Life: The file extension you oftensee on a file (for example: myPhoto.jpg) is really just anindicator to the computer of how the underlying bits areorganized, so the computer can interpret them. If youchange the name of the file to myPhoto.gif, that does notmagically change the underlying bits; all you’ve done isconfuse the computer. It won’t be able to open the filebecause it will attempt to interpret the file as a GIF whenreally the bits are in JPG format.
DiscussionGoal
Goal: This prompt serves two roles. It first should getstudents a chance to practice using the vocabulary youjust introduced. Use their responses to judge whetherstudents understand the distinction between the two typesof compression. If necessary review the two beforecontinuing to the main activity.
Secondly it prompts students to begin thinking criticallyabout the tradeoffs of the two compression types whichthey will be doing for the remainder of the lesson.
Both the image file format and the text compression scheme we used were lossless. Lossy compression schemes usuallytake advantage of the fact that a human is supposed tointerpret the data at the other end, and human brains aregood at filling the gaps when information is missing.
Activity (40 mins)
Group: Place students in pairs. Each group will onlyneed a single computer.
Distribute: File Formats and Compression -Activity Guide to each group.
Rapid Research - Compression FormatsRapid Research - Compression Formats
JPG: Ask all groups to research the answers to the firstcolumn in the activity guide together. In particularremind them to keep track of their sources ofinformation.
Share: Have pairs share their answers with anotherpair. If there are disagreements have them discuss withone another the sources of their information and try toarrive at a shared solution.
Discuss: Share the solution to the first column as a class. Resolve any discrepancies. Afterwards briefly acknowledge thefollowing points.
JPG is lossy compression. Many images on the web are converted to JPG. Odds are if you've seen a grainy orpixelated image on the Internet, it's a JPG.Lossy compression like this results in a lower quality image with fewer details, but as humans we can still tell what's inthe picture. Especially in instances where you don't need a high quality image and bandwidth is limited JPG makes alot of sense.This is a free and open format, but even so there have been disputes about its ownership.
Prompt: Let's think for a minute about how you aredoing your research. What kinds of sources are youfinding? How are you actually reading these sources?
Discuss: Have students briefly share their thoughts attheir tables before discussing as a class. Use thediscussion to lead into to the comments below.
Remarks
Conducting research online about CS topics is a skill.Often it means hunting through articles you don'tcompletely understand for the key pieces ofinformation that you do. Other subjects like history ormath may have classic agreed upon texts but in theworld of CS you'll often end up on Wikipedia or onlineforums. This is ok. We're going to keep working on this skill of reading technical articles. If you sometimes are confusedthat's ok and entirely normal. There is no one on earth who understands everything about CS with how large a subject itis and how quickly it's changing. When you're doing research as a computer scientist it usually means sticking with iteven if a lot of the content doesn't make sense at first.
MP3 and PNG: Have pairs fill in the MP3 and PNG columns of the table.
Share: Once both columns have been filled out have pairs share their results across the table again.
Discuss: Share out the results of the research with the whole class, reviewing the results.

Teaching Tip
Record Research Strategies: Throughout this activityconsider writing and recording strategies that students areusing in order to conduct their research. This could be ona poster, the board, or some kind of shared digital notes.Students are going to have another chance to researchformats in the following lesson, so an important goal inthis lesson is highlighting how students are succeeding atdoing this research, not just the information they'refinding.
DiscussionGoal
Goal: This discussion is primarily a way to check thatstudents have understood the difference between lossyand lossless compression. Lossy compression is fine ifyou just need a "good enough" version of something andcare about saving space or bandwidth. For example, if youdon't want to use up the data plan on your phone youwould use compressed images.
Wrap-up (5 mins)
Prompt: Lossy compression seems to be "worse" thanlossless compression but obviously both are being usedall the time. Write down three reasons or situations wheresomeone would be willing to use lossy compression eventhough it means some loss of quality.
Discuss: Students should silently list their responses,then share with a neighbor, then finally discuss with theentire class. Have multiple pairs or tables share theirresponses.
Remarks
Today we accomplished a lot. We explored thedifference between lossy and lossless compression, wepracticed reading and researching a CS topic, and welearned a little bit about the complicated world of fileformats! Next time we'll close out this unit by digging alittle deeper on all of these topics.
Standards AlignmentCSTA K-12 Computer Science Standards (2011)
CD - Computers & Communication Devices
CL - Collaboration
CT - Computational Thinking
Computer Science Principles
3.3 - There are trade offs when representing information as digital data.
7.3 - Computing has a global affect -- both beneficial and harmful -- on people and society.
7.5 - An investigative process is aided by effective organization and selection of resources. Appropriate technologies and tools facilitate the
accessing of information and enable the ability to evaluate the credibility of sources.
CSTA K-12 Computer Science Standards (2017)
AP - Algorithms & Programming
DA - Data & Analysis
If you are interested in licensing Code.org materials for commercial purposes, contact us.

UNIT
2Ch. 1 1 2 3 4 5 6
Lesson 6: Rapid Research - FormatShowdownProject | Research
OverviewIn this lesson students will conduct a small amount of research toexplore a file format either currently in use or from history. Studentswill conduct research in order to complete a "one-pager" thatsummarizes their findings. They will also design a computationalartifact (video, audio, graphic, etc.) that succinctly summarizes theadvantages of their format over other similar ones.
This lesson is intended to be a quick, short version of a performancetask in which students rapidly do some research and respond inwriting. It might take 2 class days but should not take more. The goalis to develop skills that students will use when they complete theactual Explore PT later in the year.
PurposeThis lesson concludes Unit 2's investigation of file sizes, formats,metadata, and compression. The activity is designed for students topractice research skills that will be beneficial when completing theExplore PT while also applying the knowledge they have developedacross the unit. The "showdown" aspect of the project is designed toboth encourage students to think more deeply about the inherenttradeoffs of different file formats and also provide a motivating contextin which to perform their research. The computational artifactcompleted in this project has a direct parallel to the computationalartifact students are expected to design for the Explore PT.
AgendaWarm Up (5 mins)Activity (90 mins)
Rapid Research - Format ShowdownDay 1 - Choose Format, Research, Begin One-PagerDay 2 - Complete One-pager and ComputationalArtifact
Wrap Up (10-60 mins)
Presentation (Optional):
View on Code Studio
ObjectivesStudents will be able to:
Identify reliable sources of information whendoing researchSynthesize information taken from multipleonline sourcesCreate an artifact (video, image, slide, poster,etc.) to communicate information about acomputing topic.
PreparationPrepare printed / digital copies of the
Rapid Research - Format Showdown -Activity Guide and Rapid Research -Format Showdown - One-pagerTemplate to share with students
LinksHeads Up! Please make a copy ofany documents you plan to sharewith students.
For the Students
Rapid Research - Format Showdown -Activity Guide
Rapid Research - Format Showdown -One-pager Template
Make a Copy
Make a Copy

DiscussionGoal
Goal: There's no expectation that students come up withevery reason listed. The goal is to get students in themindset of comparing formats. This discussion should alsohighlight that there's lots of different ways to consider oneformat better than the other. This is also why there's somany different formats!
Teaching Tip
Differences from the actual Explore PT: The actualExplore Performance Task will be completed over 8 classhours. The fact that this schedule is significantly shorterreflects several differences in this Practice PT.
Students are not choosing a computing innovation bythe College Board's definition (file formats and protocolsdo not process data, include program code, etc.)Students are not completing most of the prompts of theExplore PTResearch in this project is presumed to be less detailed
Teaching GuideWarm Up (5 mins)
Prompt: Imagine I was comparing two different file formats for representing images. All I tell you that one of them is"better" than the other. Based on everything that you've learned in this unit, what might "better" mean? Try to come up withat least three ideas and incorporate vocabulary from the unit.
Discuss: Have students quietly write their responses,then share with a neighbor, then discuss with the class.Some potential responses might include:
Better compression ratio or better quality image evenwhen compressedCan hold larger or more complex types of informationDifferent kinds of metadataIncludes features not found in other formatsUsed by more peopleOpen, no licensing feesNewer and optimized for modern technology
Remarks
Today we're going to dig a little deeper into this question by doing a Rapid Research project. Not only are you going toresearch your own file format, you're going to make the case why yours is the best!
Activity (90 mins)
Rapid Research - Format ShowdownDistribute: Rapid Research - Format Showdown - Activity Guide and Rapid Research - Format Showdown -One-pager Template and review as a class.
Below is a suggested schedule for completing the project.
Day 1 - Choose Format,Research, Begin One-PagerReview Activity Guide and Rubric:
At the beginning of the project, emphasize theimportance of reviewing the one-pager template andrubric. Students may assume that more is required ofthem than is actually the case.
Choosing Your Format: It is recommended that youplace a time limit on this process (e.g. 10 minutes). Youmay even consider simply assigning formats yourself.They are all essentially equivalent in terms of difficulty. There's minimal difference in terms of "quality" so long as studentstake a creative angle towards the presentation. All these formats have been used by someone at some point, so their jobis to find out why and creatively play up that angle.
Conduct Your Research: This document is intended to serve primarily as a guide to students for identifying onlinesources of information. The skill students need to develop is identifying useful resources on their own and thensynthesizing this information. Being presented with a structured way of doing this means students will have a model forhow to complete their research when completing the actual Explore PT.

Teaching Tip
Reinforce Research Skills from the PreviousLesson: As students saw in the previous lesson,performing research on computing topics is a skill untoitself. Reinforce skills reviewed in the previous lesson asstudents move to this part of the activity.
Teaching Tip
Timing Consideration: Having opportuities to sharework promotes a communal classroom atmosphere but bethoughtful about time. If you feel you are not pressed fortime using a full class period for presentations may be agreat way to end the unit, but otherwise you may belooking for a quicker way to share highlights from thisproject.
The "Key Information to Find" highlights specific terminology from the Explore PT that students will benefit from havingseen earlier in the course.
Begin One-Pager: Have students begin working onfilling in the details of their one-pager as they research.
Day 2 - Complete One-pagerand Computational ArtifactComplete One-Pager: Students should continue filling in their one-pagers. Remind students to record their sources ofinformation as they go.
Computational Artifact: Decide if you will encourage students to all create separate kinds of computational artifacts orif they will do them in a unified way. You might have everyone create a slide, a short video (e.g. a 30 second "campaignad" for their format) etc. Remind students of the requirements for this artifact (noted below):
A list of other formats you’d specifically like to target in your computational artifactThree key points you’d like to make in your artifact explaining the benefits of your format
Wrap Up (10-60 mins)
Presentation (Optional):If time allows, students may wish to have an opportunityto share their one-pagers and computational artifacts withone another. Consider other options like creating a “FileFormats Hall of Fame” by posting links to all theirdocuments in single shared document. Or even printthem out and post them in the room to be reviewed in agallery walk.
Standards AlignmentComputer Science Principles
1.1 - Creative development can be an essential process for creating computational artifacts.
1.2 - Computing enables people to use creative development processes to create computational artifacts for creative expression or to solve a
problem.
2.1 - A variety of abstractions built upon binary sequences can be used to represent all digital data.
2.2 - Multiple levels of abstraction are used to write programs or create other computational artifacts
3.2 - Computing facilitates exploration and the discovery of connections in information.
3.3 - There are trade offs when representing information as digital data.
7.3 - Computing has a global affect -- both beneficial and harmful -- on people and society.
7.5 - An investigative process is aided by effective organization and selection of resources. Appropriate technologies and tools facilitate the
accessing of information and enable the ability to evaluate the credibility of sources.
CSTA K-12 Computer Science Standards (2017)
AP - Algorithms & Programming
DA - Data & Analysis
If you are interested in licensing Code.org materials for commercial purposes, contact us.