
Chapter 0 Introduction to KMI-R1
176
Chapter 0 Introduction to KMI-R1
Transcript of Chapter 0 Introduction to KMI-R1

Chapter 0
Introduction to KMI-R1

2
1. Overview
K*Grid project is an initiative in Grid researches supported by MIC (Ministry of
Information and Communication), Republic of Korea and started in 2002.
KISTI (Korea Institute of Science and Technology Information) plays a leading
role in building and operating a production quality Grid infrastructure needed
for large-scale collaborative Grid researches including scientific and business
applications.
KMI (K*Grid Middleware Initiative) is an integrated Grid middleware package
which makes scientists able to set easily the computational Grid and data Grid
environment for their researches and harness all the advantages of Grid in
their fingertips. KMI is developed for building K*Grid infrastructure, but not
limited for it.
Figure 0-1 Architecture of KMI-R1
KMI is an integration of the MoreDream Toolkit (KISTI), which contains
GRASP (Grid Resource Allocation Services Package) for Grid resource
allocation service, GAIS (Grid Advanced Information System) for Grid
information service and MPICH-GX for parallel computing service, with some
key software packages such as Globus Toolkit® (ANL), KGridCA System

3
(KISTI) for Grid CA Service, AIService (CNU) for Grid accounting service,
SRB (Storage Resource Broker, SDSC) and KMI-GridSphere (GridLab)
The detailed descriptions of each system in KMI are in the following chapters.

4
Chapter 1
MoreDream

5
1. GRASP
1.1 Introduction The problem of Grid resource allocation is concerning about delivering the
users distributed resources with computing powers, data storage capacity,
network connectivity, etc. The Managed job service in Globus toolkit 3.x (GT3)
is the service to be used to run the job on a remote resource. However, in
order to build more useful Grid, there should be added some user-friendly
features and advanced resource allocation techniques including resource
brokering, scheduling, job monitoring, and so forth. To meet this requirement
in Grid resource management area, we designed and implemented a
resource allocation system named GRASP(Grid Resource Allocation Services
Package), which is to let users to submit their jobs in more efficient and
intelligent manner to the Grid resources. The services of GRASP were
implemented based on the OGSI specification implementation of GT3 as well
as other services in MoreDream. Followings are brief introduction of GRASP
functionalities.
1.1.1 Architecture and Components of GRASP 1.1.1.1 Overview GRASP supports scientific applications with the high performance computing
features such as MPI, high throughput computing features such as parametric
studies, and data intensive features. GRASP can handle three kinds of job
type: SINGLE, XMPI, and HTC. SINGLE is a simple job to use only one
computing node. XMPI is an MPI job which can be run over multiple

6
resources. Lastly, HTC is a job for HTC applications such as parametric study.
In Both XMPI and HTC job case, GRASP co-allocates multiple resources to
the job even though the resources are remotely distributed. To support data
intensive features, we added the feature to automatically stage in files from
SRB server and stage out the files to SRB server
Furthermore, we have designed the job description language, named JRDL
(Job and Resource Description Language) to overcome the limitation of the
GT3. RSL2, the GT3 job description language, just describes job
specifications rather than resource specifications such as resource preference.
RSL2 is also not considering about co-allocation. Therefore, we have
proposed JRDL to meet both requirements for the job and resource’s
preference. The resource preference part is used in matchmaking step in Grid
scheduling service (GSS). JRDL is designed based on XML schema.
GRASP is composed of four useful services needed to allocate the resources
in Grid as illustrated in Figure 1-1. Firstly, the resource brokering is done by
Grid scheduling service (GSS). This service finds out resources from the
index service which are fit to a user’s job and then reserve the resources in
advance through Resource reservation service (RSS). To select proper
resources it performs matchmaking between the resource specification from
the user and the job/user specification preferred by the resource administrator.
And then the resources are allocated to the job. Secondly, Job submission
service (JSS) does co-allocation of resources and co-monitoring of the job.
Co-allocation in GRASP makes it possible the job submission to the multiple
distributed resources simultaneously. And co-monitoring allows the user to
monitor her job flow. Lastly, Resource manager service (RMS) authenticates
the user for the job execution on a local resource and submits the job to the
local batch queuing system such as PBS. RMS should get the permission to
allocate resource from RRS before submitting the job.
Followings are the main features of GRASP, job types that is handled by
GRASP and job statuses defined in GRASP. The explanation of each service,

7
JSS (Job Submission Service), GSS (Grid Scheduling Service), RMS
(Resource Manager Service), and RRS (Resource Reservation Service), will
be followed after this overview section.
Figure 1-1 Architecture of GRASP
A. Main Features
· All services are OGSI-compliant Grid services.
· GRASP supports three kinds of job type: SINGLE, XMPI, and HTC.
SINGLE is a simple job which uses only one computing node. XMPI is
an MPI job which can be run over multiple resources. Lastly, HTC is a
job for high throughput computing such as parametric study.
· Multiple resources can be co-allocated to a job even though the
resources are remotely distributed.

8
· Scheduler can automatically select resources by matchmaking
process.
· Job can reserve resources in advance.
· The input files can be staged in from SRB server and the output files
can be staged out to SRB server automatically.
· We provide JRDL (Job and Resource Description Language) as a
general language to describe a job and user preferences required
allocating resources for a job in Grid environment.
· We bring client tools for job creating, submission, controlling, and
monitoring. They provide three user interfaces having same
functionality: a command line interface, a graphic user interface, and
web interface.
B. Job Type
We are supporting three kinds of job type: SINGLE, XMPI, and HTC.
· SINGLE: It is a simple job which uses only one computational node
(e.g. simple script for pre/post processing).
· XMPI: It is an MPI job which uses multiple resources to run even
though resources are remotely distributed. Each resource could have
several nodes.
· HTC: It is a job which uses multiple resources to run and have no
communication between each of all subjobs (e.g. parametric study).
Each subjob must be a SINGLE job.
C. Job Status
(a) Job Submission Status
Job submission service manages the status of job submission. The Status has
following information:
· State of job

9
· All subjobs’ statuses
· Fault message.
(b) Job State
· "Unsubmitted": JRDL is unsubmitted to Job submission service.
· "Scheduling": Job is scheduling to find proper resources at Grid
scheduling service.
· "Pending": Job is pending even though the subjob is submitted to
Resource manager service.
· "Active": Job is active.
· "Suspended": Job is suspended.
· "Done": Job is done.
· "Failed": Job is failed.
(c) Subjob Status
Resource manager service manages the statuses of subjobs. Each status has
following information:
· Subjob id
· State of subjob state
· Execution time of subjob: start time and end time of job
· Allocation information of subjob: allocated resources’ address
· Fault message.
(d) Subjob State
· "Unsubmitted": Subjob is unsubmitted to ResourceManagerService.
· "StageIn": Subjob is staging in the files to need to execute.
· "Waiting": Subjob is waiting for its requested execution time to be
reached
· "Pending": Subjob is pending even though the subjob is submitted to
the local job manager

10
· “XMPI_init”: XMPI subjob is initializing
· "Active": Subjob is active.
· "StageOut": Subjob is staging out the files to result from executing
· "Suspended": Subjob is suspended.
· "Done": Subjob is done.
· "Failed": Subjob is failed.
1.1.1.2 JSS (Job Submission Service)
A. Key concepts
JSS is a Grid service to enable a job to submit to the resources in Grid
testbed and enable a user to monitor the status of submitted job. We provide
JRDL language to describe the job, which is "an atomic task" of a workflow
specification or other kinds of a complex, multi-step application. The service
has the status of job submission and the requested JRDL which are provided
as service data.
B. Architecture
The job submission process is illustrated in Figure 1-2. When JSS receives
the JRDL, the service can determine resources by GSS which is a Grid
service to find out resources which are fit to the user's job from information
provider and make a reservation to RRS on each resource. User could the
resources manually by specifying the address and local job manager type of
resources to JRDL. If the resources are decided, the job is divided into
subjobs, then that are co-allocated to RMS on each resource.

11
Figure 1-2 Job Submission Process
1.1.1.3 GSS (Grid Scheduling Service)
A. Key concepts
Grids consist of a large variety of services which reveal accessibilities to
resources and the access to a resource is under control of the policies of the
resource owners. Besides, complicate bottom layer Grid fabric should be
hidden from Grid users. Therefore, the scheduling service which coordinates
between various resources and higher level consumers satisfying policies on
both sides is acutely needed in the Grid computing environment. The GSS in
GRASP was designed and implemented to do scheduling in such a complex
Grid infrastructure for the jobs from various applications.
Major purpose of the GSS is to find resources which meet user’s
requirements and select resources according to a scheduling algorithm. In
order to discover proper resources the GSS queries an information service,

12
GAIS in MoreDream, with resource specification for the job. The GSS does
screening process to choose the resources which meet minimal requirements
to execute the job.
And then, with the filtered resources, selection is done by the specific
scheduling policy. The Grid scheduling service can have several scheduling
plugins which implement application-specific policies or scheduling algorithms.
The plugin selected by the user will be applied to select most appropriate
resources.
Once the selection process is done by a scheduling plugin, the service tries
reservations to the selected resources for the time that user have specified in
JRDL file. If the reservation fails, the service gains recent information about
available resources from the reservation services, does scheduling again, and
then retries reservation to the resources. These processes are repeated until
the selected resources are confirmed with reservation IDs.
B. Architecture
The architecture of GSS is described in Figure 1-3. Following paragraphs
explains each parts of GSS.
The GSS has the factory mechanism i.e. the GSS factory service creates a
GSS instance and the created instance deals with the requested job until it
gains resources. GSS acquires candidate resources thru Resource Broker. In
this step, Resource Broker queries information of available resources to GAIS
filtering out the unfit resources.
The scheduling plugin which was specified in the job request takes the job
and resource candidates. And then it makes a map between the job and
resources according to the scheduling policy. Scheduling plugin can have
policies or selection algorithm. GSS has the default plugin, in which a
opportunistic load balancing (OLB) algorithm is implemented. OLB assigns
each task in the job, in arbitrary order, to the next available node, regardless
of the task’s expected execution time on that resource. In the distribution of

13
GRASP package, HTC plugin and MPI plugin is included for each type of jobs
in addition to the default plugin.
The Reservation Agent takes selected by scheduling plugin and tries to
reserve resources for the certainty of the schedule. When the reservation
trials are not complete, it asks available node resource capacity to the
resource candidates and repeats scheduling and reservation keeping
succeeded reservations.
Figure 1-3 Architecture of GSS
1.1.1.4 RMS (Resource Manager Service)
A. Key concepts
RMS is a Grid service to enable subjobs to allocate resources and be
executed by the local batch scheduler such as PBS. Resources are
computational nodes to be managed by the local batch scheduler. The service

14
has the statuses of subjobs which are provided as service data.
B. Architecture
Local resource allocation and execution process is illustrated in Figure 1-4.
When RMS receives the execution request for subjobs, the service must
allocate local resources. This service can allocate resources when the service
gets the permission from RRS, which has established the reservation by the
request of Grid scheduling service. RMS then invokes JMS (Job Manager
Script) to submit the subjobs to designated local batch scheduler. While the
subjobs are running, the service manages the status of each subjob. Because
RMS is managed by Job submission service, this service notify the status of
subjob to JSS whenever the status changes.
Figure 1-4 Local Resource Allocation and Execution Process
JMS (Job Manger Script)
JMS module processes file stage-in, file stage-out, submit, poll, and kill
requests instead of RMS. Job manager script is written in PHP language, and

15
can be executed by the java Runtime.exec() method. The requests from the
RMS is delivered to JMS as an XML document form. JMS parses the XML
and processes the requested function.
JMS is installed under $GLOBUS_LOCATION/libexec/grasp-jms-php
JMS can be executed manually in a command line prompt:
$ jms -file < filename>
The filename is a path name of an XML file, which has the format: <xml> <action>ACTION</action> <manager>MANAGER</manager> <jobtype>JOBTYPE</jobtype> ... </xml>
where, ACTION = proxy_relocate | submit | poll | stage_in |
stage_out MANAGER = pbs | fork JOBTYPE = single | htc | xmpi
File stage-in and stage-out actions use globus-url-copy command to copy files
between local file system and remote server. To use PBS manager, OpenPBS
must be installed in the local system. The configuration file (config.php) sets
up these path information.
1.1.1.5 RRS (Resource Reservation Service)
A Grid resource is composed of many kinds of resources, such as CPUs and
memory, storage space, network bandwidth, special purpose instruments.
RRS manages reservation of resources which are able to be reserved on the
Grid. As a simple case, computing nodes of a cluster system is a kind of a
resource which can be reserved. RRS makes a reservation to only computing
nodes of a cluster.

16
In general, to make a reservation to resources, a user should specify the
followings:
- The start time of reservation
- The end time of reservation (or duration from the start time)
- The kind of resource to reserve
- The identity of reservation maker
- Amount of resource to reserve
Time
Am
ount
of R
esou
rce
Start Time End TimedurationNow
Figure 1-5 Reservation information: start time, duration, amount of resource, the type of resource and the identity of reservation maker
Reservation Status
Figure 1-6 and Figure 1-7 show the status change of a reservation item. It
starts from the ‘unknown’ status. Until the start time, the reservation is in
‘waiting’ status, which means that the reservation is valid but it is not ready to
be allocated yet. Immediately after the start time the status of the reservation
changes to be ‘wait_alloc’ status, which means the reservation is valid and it
is available for allocation now. After the job runs on the resources, the status
of the reservation changes to be ‘allocated’. Finally, when the job finished
successfully, the status changes to be ‘done’. If the valid reservation interval is
over with no job allocated, the reservation status becomes to ‘invalid’ status.
Reservations can be canceled if the status is one of ‘unknown’, ‘waiting’, or
‘wait_alloc’ status.

17
cancel invalid
unknown
wait_alloc
allocated
done
final stat
final stat
final stat
Reservation Serviceregister a new reservation
Reservation Manager Threadbecomes aware of a new reservation
Reservation Manager Thread update statusif the reservation valid interval has been started
Reservation Manager Thread invalidates the statusif the reservation valid interval has been finished
Reservation Service cancels the reservationif it receives a cancellation request
Job Execution Module allocate a job withthe reserved resource
waiting
Job Execution Module changes the statusif the job has finished.
Figure 1-6 Status changes of a reservation
The ‘cancel’, ‘invalid’, and ‘done’ are final status. The ‘waiting’, ‘wait_alloc’ and
‘allocated’ status are valid status, which means that reserved resources are
not be reserved or available by other users.
Requesta reservation
Requestan allocation
starttime
endtime
valid interval
JobFinishes
unknown,waiting
wait_alloc allocated done
Figure 1-7. Reservation status changes in a time line
The Figure 1-7 depicts the status changes of a reservation in a time line.
1.1.1.6 SRB enabled globus-url-copy

18
Overview
globus-url-copy, which is an application of Globus toolkit, copies a file
specified by source URL to a location specified by destination URL, using the
GASS transfer API. It is used to stage in/out files from/to storage device for
executing jobs. All protocols supported by GASS (local file, http, https, ftp, and
gsiftp) are supported. Piping to/from stdin/stdout (setting source/dest
argument = '-') is also supported. However, it could not retrieve/save data
from/to storage not to be able to use protocol supported by GASS. The
Storage Resource Broker (SRB) is client-server middleware that provides a
uniform interface for connecting to heterogeneous data resources over a
network and accessing replicated data sets. SRB support a lot of interfaces
for data resources including HRM, HPSS, DB2, Oracle, Illustra, ObjectStore,
ADSM, UniTree, UNIX, NTFS, and HTTP. Therefore, we modify globus-
url-copy application to support SRB protocols as well as GASS protocols
for accessing various data resources and replicated data sets.
SRB URI
The location of data file should be described with URL format to use globus-
url-copy. Thus, the location of data in SRB could be described with URI
format as showed in Figure 1-8. Actually, both replica and resource are not
included in “http://www1.ietf.org/proceedings_new/04nov/IDs/draft-gilbert-srb-
uri-00.txt”. replica might be used for accessing replicated data sets.
resource might be used to specify the resource name for creating new data to
SRB.

19
Figure 1-8 Syntax for SRB URI
As mentioned above, the data could be retrieved from SRB server or be
saved to SRB server by specified SRB URI format. If there are no attributes
except replica and path in specified format, default configuration will be read
in ~/.srb/.MdasEnv file. The ~/.srb/.MdasEnv file includes following default
configuration information to connect to SRB server.
· mdasCollectionName: default collection name
· mdasDomainName: default domain name
· srbUser: default SRB user id
· srbHost: default host IP of SRB server
· srbPort: default host port of SRB server
· defaultResource: default storage resource name
· AUTH_SCHEME: default authentication mechanism:
PASSWD_AUTH, GSI_AUTH, and ENCRYPT1
· SERVER_DN: server DN of proxy to invoke SRB server in case of
GSI authentication
SRB Authentication
SRB server accepts ENCRYPT1 or GSI authentication. If password exists, it
authenticates to SRB server via ENCRYPT1 mechanism. Otherwise, by
default, it uses GSI authentication. Because the server DN of proxy to invoke
SRB server must be specified in case of GSI authentication, the server DN
srb:// [username.mdasdomain [.zone] [:password] @]
host [:port]
[?replica=replica_id][?resource=resources_name]
[/path]
where square brackets [...] delineate optional components, the
characters :, /, @, and . stand for themselves, and spaces should be

20
could be read via –s, -ss, and –ds among options of globus-url-copy.
If the option is not specified, the server DN should be described by
SERVER_DN in ~/.srb/.MdasEnv file.
1.1.1.7 Client Tools
GRASP provides client tools. They provide three user interfaces: a command
line interface (CLI), a graphic user interface (GUI), and web interface (WI).
They have same functionality for creating and modifying JRDL for a job,
submitting the job to JSS, and controlling and monitoring the job. The detail
usage of these client tools will appear in another document about GRASP,
users’ guide.
Command Line Interface (CLI): grasprun
The CLI lets you execute commands via grasprun at the shell prompt. The
CLI could be run at Linux or Windows environment. The user should install
the library and certificates to use grasprun and know the syntax of JRDL to
describe a job.
Graphic User Interface (GUI)
The GUI is a graphic interface based on Java SWING, which is OS
independent. While the user must write a JRDL manually in case of
grasprun, GUI provides convenient interface to load and write the JRDL.
Web Interface (WI): Job Submission Portlet
The WI is a web interface based on Gridsphere, which provides an open-
source portlet based Web portal. While the user should install the library and
certificates in case of both CLI and GUI, he/she does not have to care about
installation as well as the syntax of JRDL in web interface. We have
implemented Job submission portlet enabling the user to easily make a JRDL,

21
load the JRDL, submit a job to JSS, and monitor the submitted job.
1.2 Installation and Configuration
1.2.1 Support software 1.2.1.1 Required
· OS: Linux (RedHat 7.3 or more are recommended)
· J2SDK 1.4 (developed under 1.4.2_04, 2.4.2_06)
· ANT (developed under 1.6.2)
· Globus Toolkit 3 (developed under 3.2.1)
Following softwares are required only for RMS and RRS
· MySQL Database (tested under 3.23.49, 4.0.16, and 4.0.20)
· JDBC Driver: MySQL-Connector/J (tested under 3.0.14)
· PHP4 (4.3.4 or latest)
1.2.1.2 Optional
· Apache Web server (optional, for reservation status monitoring)
1.2.2 Installing support softwares
1.2.2.1 Installing Java SDK
Required for: GT3 Webservices components
Recommended Versions: 1.4.x
Download Link: http://java.sun.com/j2se

22
1.2.2.2 Installing Globus Toolkit
1. Download all source code from http://www.globus.org
2. As globus, untar the source installer.
3. Make sure that ANT_HOME and JAVA_HOME are set, and that ant and
java are on your PATH.
4. Run
# ./install-gt3 /path/to/install
7. Configure the Globus Toolkit 3.2, looking through
http://www-unix.globus.org/toolkit/docs/3.2/installation/install_config.html
1.2.2.3 MySQL Database
Download a latest MySQL distribution from http://www.mysql.com/.
You can find a copy of MySQL distribution in software archive directory of
KISTI Grid Testbed web site :
http://testbed.gridcenter.or.kr/software/index.php?dir=./DBMS/mysql
Move to a temporary directory and extract the distribution file.
# cd /usr/local/src (download the distribution file in this directory)
# tar zxvf mysql-4.0.16.tar.gz
# cd mysql-4.0.16
Configure and compile the source
# ./configure --prefix=/usr/local/mysql --with-mysqld-user=root
# make
Copy the compiled binaries to the install location.
# make install
Make a symbolic link for ‘mysql’ command line client, or add it to the $PATH
variable.
# ln -s /usr/local/mysql/bin/mysql /usr/local/bin/mysql

23
Database initialization
# /usr/local/mysql/bin/mysql_install_db
Start MySQL server daemon
# /usr/local/mysql/bin/mysqld_safe -u root &
To start MySQL server daemon during system startup, add a line to the
rc.local file.
# vi /etc/rc.d/rc.local
...
/usr/local/mysql/bin/mysqld_safe -u root &
...
Refer to other books or documents about managing and using MySQL.
1.2.2.4 MySQL-Connector/J 3.0 (JDBC Driver)
Download it from http://dev.mysql.com/downloads/connector/j/3.0.html
# tar zxvf mysql-connector-java-3.0.14-production.tar.gz
# cp mysql-connector-java-3.0.14-production/mysql-connector-java-
3.0.14-production-bin.jar $JAVA_HOME/jre/lib/ext/
1.2.2.5 PHP4
PHP4 (command line interface) is required for Job Manager Script module in
GRASP.
PHP4 compiled with Apache web server is optionally required for monitoring
reservation database table.
The libxml2 module must be compiled with PHP.
Download the latest version of libxml2 from http://xmlsoft.org/sources/.
# tar zxvf libxml2-2.6.16.tar.gz
# cd libxml2-2.6.16/

24
# ./configure --prefix=/usr/local/libxml2 &> configure.log
# make &> make.log
# make install &> install.log
The zlib library must be installed.
Download a latest PHP distribution from http://www.php.net/
# cd /usr/local/src
# tar zxvf php-4.3.9.tar.gz
# cd php-4.3.9
# ./configure \
--enable-pcntl \
--with-dom=/usr/local/libxml2 --with-zlib-dir=/usr --disable-cgi
# make clean
# make
# make install
The configure option ‘--enable-pcntl’, which is for process control in PHP, is
required in job manager script module. The ‘--with-dom’ is required for XML
processing in PHP.
The ‘--with-zlib-dir’ is required for libxml2 in PHP.
1.2.2.6 PHP4 + Apache Web Server (optional)
Apache should be configured before compiling PHP.
Download a latest apache distribution from http://www.apache.org/
# cd /usr/local/src
# tar zxvf apache_1.3.33.tar.gz
# cd apache-1.3.33/
# ./configure

25
Download a latest PHP distribution from http://www.php.net/
# cd /usr/local/src
# tar zxvf php-4.3.9.tar.gz
# cd php-4.3.9
# ./configure --with-apache=../apache_1.3.33/ \
--with-config-file-path=/etc/httpd \
--with-mysql=/usr/local/mysql --enable-pcntl \
--with-dom=/usr/local/libxml2 --with-zlib-dir=/usr --disable-cgi
# make clean
# make
# make install
Compile the Apache web server and install it.
# cd /usr/local/src/apache-1.3.33/
# ./configure --prefix=/usr/local/apache \
--activate-module=src/modules/php4/libphp4.a
# make clean
# make
# make install
Setup the PHP installation
# cd /usr/local/src/php-4.3.9
# mkdir /etc/httpd; cp php.ini-dist /etc/httpd/php.ini
Setup the Apache web server
# vi /usr/local/apache/conf/httpd.conf
...
LINE 808(approx.): add a line
# PHP
AddType application/x-httpd-php .php

26
</IfModule>
...
:wq
{Start | stop | restart} the apache web server
# /usr/local/apache/bin/apachectl {start | stop | restart}
1.2.2.7 OpenPBS and Cluster Configuration
Computing nodes in a cluster should be configured for rsh and ssh. The job
manager script module uses ssh for executing remote program in other
computing nodes in the cluster. The rsh have a problem to be used for this
purpose. To configure ssh add host keys of all the computing nodes to
/etc/ssh/ssh_known_hosts of each computing nodes. The hostname in the
known_hosts file should be fully qualified domain name(FQDN).
1.2.3 Installing GRASP
JSS enables a Grid job to submit to resources managed by RMS. This service
could be installed at Linux based server. Even though JSS could be deployed
with RMS at the same service container, we recommend separate installation.
RMS enables a Grid job to allocate resources and be executed at
computational nodes in local resource. This service could be deployed at front
node of each Linux based cluster.
GSS selects best-fit resources for a Grid job automatically. It uses GAIS, the
information service, to find out resources’ status and RRS in selected
resources to make reservations.
In addition, we provide two kinds of packages: one is a package containing
both a command line interface (CLI) and a graphic user interface (GUI), and

27
the other is a package providing a web interface (WI) based on Gridsphere
portlet.
Download
http://kmi.moredream.org/downloads/index.php
You can download the whole package of GRASP from the web site written
above. And then you can get following files of each components of GRASP. Grasp-0.9 |-- jobsubmissioin-0.3.tar.gz |-- mrmfs-0.3.tar.gz |-- gridscheduling-0.3-src.tar.gz |-- globus_gass_copy-srb-0.1.tar.gz |-- grasp-client-0.2.tar.gz `-- jobsubmission-portlet-0.3.tar.gz
1.2.3.1 JSS (Job Submission Service)
A. Installation
As the globus container administrator’s account,
$ tar zxvf jobsubmission-0.3.tar.gz
$ cd ./jobsubmission
$ ./install-gt3-jobsubmission $GLOBUS_LOCATION
$ su -
# $GLOBUS_LOCATION/bin/setperm.sh
B. Configuration
1. Check if there are hosts to be installed resource manager system in
/etc/hosts file.
1.2.3.2 GSS (Grid Scheduling Service)
A. Installation
28
As the globus container administrator’s account,
$ tar zxvf gridscheduling-0.1-src.tar.gz
$ cd ./gridscheduling-0.1
$ ./gss-install $GLOBUS_LOCATION
B. Configuration
$GLOBUS_LOCATION/etc/base-info-service.xml
This file contains the information of a Grid information service which GSS will
contact to query resource information. The administrator has to indicate the
address of the information service, service data name of resource information,
and namespace of the service data.
1.2.3.3 RMS (Resource Manager Service) and RRS (Resource Reservation Service)
Because both RMS and RRS must be installed simultaneously on same
container, both services are packaged to one file: mrmfs-0.11.tar.gz
A. Required software
· MySQL Database (tested under 3.23.49, 4.0.16, and 4.0.20)
· PHP4 (4.3.4 or latest)
· JDBC Driver: MySQL-Connector/J (tested under 3.0.14)
B. Optional software
· PHP4 + Apache Web server (for reservation status monitoring)
· OpenPBS (Portable Batch System)
· SRB enabled globus-url-copy
C. Installation of SRB enabled globus-url-copy $ tar zxvf globus_gass_copy-srb-0.1.tar

29
$ cd globus_gass_copy-srb
$ mkdir /usr/local/srb
$ tar zxvf SRB3_2_1e.tar.gz –C /usr/local/srb
$ export SRB_LOCATION=/usr/local/srb/SRB3_2_1e
$ ./install.sh
D. Configuration of SRB enabled globus-url-copy
You should edit the ~/.srb/.MdasEnv file to use SRB server. The
~/.srb/.MdasEnv file includes following default configuration information to
connect to SRB server.
· mdasCollectionName: default collection name
· mdasDomainName: default domain name
· srbUser: default SRB user id
· srbHost: default host IP of SRB server
· srbPort: default host port of SRB server
· defaultResource: default storage resource name
· AUTH_SCHEME: default authentication mechanism: PASSWD_AUTH,
GSI_AUTH, and ENCRYPT1 (You have to specify AUTH_SCHEME.)
· SERVER_DN: server DN of proxy to invoke SRB server (If you choose
GSI_AUTH for AUTH_SCHEME, you should specify.)
E. Testing of SRB enabled globus-url-copy
After configuring the above instructions, you should be able to execute
globus-url-copy.
As the globus container administrator’s account,
$ grid-proxy-init
$ globus-url-copy \
srb://username.userdomain@IPADDRESS/collectaioname/filen
ame \
file:////tmp/filename

30
$ more /tmp/filename
F. Installation of RMS and RRS
As the globus container administrator’s account,
$ tar zxvf mrmfs-0.3.tar.gz
$ cd ./mrmfs
$ ./install-gt3-mrmfs $GLOBUS_LOCATION
$ su -
# $GLOBUS_LOCATION/bin/setperm.sh
G. Configuration of RMS and RRS
After building the service, we should do some configurations.
(a) Configuring Database
We provide SQL files to create or drop database in
$GLOBUS_LOCATION/etc/reservation-sql.
Create a database named ‘moredream’ and make tables:
$ mysql [–u user] [–p]
mysql> create database moredream;
mysql> quit
$ cd $GLOBUS_LOCATION/etc/reservation-sql
$ mysql [–u user] [-p] moredream < create_tables.sql
Refer to other documents to use mysql command.
(b) Edit configuration file
Open $GLOBUS_LOCATION/etc/reservation.conf and edit the database
connection values:
$ vi $GLOBUS_LOCATION/etc/reservation.conf
# # reservation.conf ###

31
### database connection ### dbhost=hostname.example.com dbport=3306 dbuser=root dbpass=password dbname=moredream ### ### reservation service ### res.resid_prefix=hostname.example.com res.interval=3000 res.total_nodes=10 # 86400 = 3600*24 = 1 day # 604800 = 3600*24*7 = 1 week # 10800 = 3600 * 3 = 3 dyas res.default_duration=1800 res.default_start_before=10800 res.max_duration=86400 res.start_not_before=60 res.start_not_after=604800
(c) Starting and Testing of RMS and RRS
Now, you are ready to start reservation service. Start the globus container.
$ globus-start-container
...
http://...:8080/ogsa/services/base/grasp/ReservationService
...
To test if RRS is correctly deployed and configured, run a test client program:
$ $GLOBUS_LOCATION/bin/test-rrs
http://127.0.0.1:8080/ogsa/services/base/grasp/ReservationSer
vice test
Database connection was successful
The service is correctly deployed
1.2.3.4 Client Tools
A. A client package containing both the CLI and the GUI: grasp-client-

32
0.1.tar.gz
This package could be run on both Windows and Linux. This package is also
included in JSS package.
(a) Required
· Globus Toolkit 3.2.1 WS Core
(http://www-unix.globus.org/toolkit/downloads/3.2.1/#core)
(b) Download
http://kmi.moredream.org/downloads/index.php
(c) Linux Installation
Note: Before installing, you must set environment variable GLOBUS_LOCATION
and copy grasp-client-0.1.tar.gz to $GLOBUS_LOCATION.
$ cd $GLOBUS_LOCATION
$ tar zxvf grasp-client-0.2.tar.gz
(d) Linux Configuration
You can specify default factory address in configuration file:
$HOME/.globus/.grasprun.
factory=http://ipaddress:port
(e) Windows Installation
Note: Before installing, you should set environment GLOBUS_LOCATION
1. unzip grasp-client-0.2.zip to %GLOBUS_LOCATION%
(f) Windows Configuration
You can specify default factory address in configuration
file: %HOME%\.globus\.grasprun, where %HOME% is home directory. In
case of Windows XP and 2000, home directory is “C:\Documents and

33
Settings\username\”
factory=http://ipaddress:port
B. A Job submission portlet package providing the WI: jobsubmission-
portlet-0.1.tar.gz
(a) Required
· Gridsphere 2.0.1
· Gridportlets portlet
(b) Download
http://kmi.moredream.org/downloads/index.php
(c) Installation $ cd $GRIDSPHERE_LOCATION/projects
$ tar zxvf jobsubmission-portlet-0.3.tar.gz
$ cd jobsubmission-portlet
$ ant install
1.2.3.5 Testing
A. Running the first job
Now you can test that the services works properly with a simple job. This
example executes a single job to echo some arguments by “FORK” local job
manager. It determines the resources not by GSS but by user’s assignment.
Therefore, you need to edit the string rms_machine in
$GLOBUS_LOCATION/schema/base/grasp/jobsubmission/examples/fork_sin
gle.xml to be actual hostname deployed RMS to wish to run a job. You should
check if there is hostname of installed job submission machine in /etc/hosts
file. Here we use a job submission client “grasprun” to make a job submitted

34
to JSS.
$ grid-proxy-init
$ grasprun -factory
http://jobsubmission_machine:8080/ogsa/services/base/gra
sp/JobSubmissionFactoryService -file
$GLOBUS_LOCATION/schema/base/grasp/jobsubmission/example
s/fork_single.xml
Note: If you have configured the factory address in ~/.globus/.grasprun file,
you do not have to specify –factory option.
If you want to make RMS use “PBS” instead of “FORK”, you should try
pbs_single.xml instead of fork_single.xml
$ grasprun –factory
http://jobsubmission_machine:8080/ogsa/services/base/gra
sp/JobSubmissionFactoryService -file
$GLOBUS_LOCATION/schema/base/grasp/jobsubmission/example
s/pbs_single.xml
If you want to automatically determine resources by GSS, you should try
single.xml.
$ grasprun -factory
http://jobsubmission_machine:8080/ogsa/services/base/gra
sp/JobSubmissionFactoryService -file
$GLOBUS_LOCATION/schema/base/grasp/jobsubmission/example
s/single.xml
35
1.2.4 Operation of GRASP services
As you might get an intuition where to install and use each service in GRASP
from the architecture, each service of GRASP has to be properly installed and
operated. Please understand the Figure 1-1 and the role of each service
before deployment. Both JSS and GSS do not have to be installed together
on a same computing node and they could be operated on the same machine
or separated.
Followings are what you have to know to operate services properly.
1.2.4.1 JSS
JSS enables a Grid job to submit to resources by using RMS. This service
could be installed at Linux based server. Even though JSS could be deployed
with RMS at the same service container, we recommend separate installation.
A. Logging
JSS provide logging support by adding following three lines to
$GLOBUS_LOCATION/ogsilogging.properties file where jobsubmission.log
is a target file to append the log for job submission.
org.moredream.ogsa.impl.base.grasp.jobsubmission.JobSubmi
ssionThread=jobsubmission.log,info
org.moredream.ogsa.impl.base.grasp.jobsubmission.JobSubmi
ssionImpl=jobsubmission.log,info
org.moredream.ogsa.impl.base.grasp.jobsubmission.Multiple
JobSubmissionThread=jobsubmission.log,info
1.2.4.2 GSS
A. $GLOBUS_LOCATION/etc/sched-plugin-conf.xml

36
This file provides information of the scheduling plugins which is included in the
GSS. GSS can have several scheduling plugins. Whenever a plugin is added,
the administrator has to add required information in this file. The contents of
this file will be provided to users in the form of service data of GSFS (Grid
Scheduling Factory Service).
1.2.4.3 RMS
RMS enables a Grid job to allocate resources and be executed at
computational nodes in local resource. This service could be deployed at front
node of each Linux based cluster. If you want to use SRB server at machine
installed RMS, you should install the SRB enabled globus-url-copy.
A. Logging
RMS provide logging support by adding following four lines to
$GLOBUS_LOCATION/ log4j.propertie file. Logging information will be
appended to ~/.globus/uhe-hostname/log file of each local account.
log4j.category.org.moredream.ogsa.impl.base.grasp.rms.job
manager.ResourceManagerImpl=DEBUG
log4j.category.org.moredream.ogsa.impl.base.grasp.rms.job
manager.JobManager=DEBUG
log4j.category.org.moredream.ogsa.impl.base.grasp.rms.job
manager.JobManagerScript=DEBUG
log4j.category.org.moredream.ogsa.impl.base.grasp.rms.job
manager.JobExecutionTimeHelper=DEBUG
1.2.4.4 RRS
RRS has one configuration file related to database connection and one
module to help monitoring the reservation status in

37
$GLOBUS_LOCATION/etc directory.
A. Logging
RRS provide logging support by adding following two lines to
$GLOBUS_LOCATION/ogsilogging.properties file where reservation.log is
a target file to append the log for resource reservation.
org.moredream.ogsa.impl.base.grasp.reservation.impl.ReservationProvider
=reservation.log,trace
org.moredream.ogsa.impl.base.grasp.reservation.impl.ReservationManager
Thread=reservation.log,trace
B. Database Connection
Using $GLOBUS_LOCATION/etc/reservation.conf, you can configure the
database connection for RSS. # # reservation.conf ### ### database connection ### dbhost=hostname.example.com dbport=3306 dbuser=root dbpass=password dbname=moredream ### ### reservation service ### res.resid_prefix=hostname.example.com res.interval=3000 res.total_nodes=10 # 86400 = 3600*24 = 1 day # 604800 = 3600*24*7 = 1 week # 10800 = 3600 * 3 = 3 dyas res.default_duration=1800 res.default_start_before=10800 res.max_duration=86400 res.start_not_before=60 res.start_not_after=604800

38
C. Monitoring Reservation Status
Using $GLOBUS_LOCATION/etc/reservation-dumpdb module included in the
distribution, you can monitor the reservation status.
For that, you need to install Apache + PHP4 to a web server host.
Extract the distribution file under the web root directory (e.g.
/usr/local/apache/htdocs) in your web server. Edit the config.php to configure
database connection parameters:
$ vi dumpdb/config.php
...
# database connection
$conf['dbhost'] = "localhost";
$conf['dbuser'] = "root";
$conf['dbpasswd'] = "";
$conf['dbname'] = "moredream";
...
And open dumpdb.php using your web browser.
Figure 1-8 Monitoring reservation status using web browser

39
Figure 1-9 Database table of reservation items
1.3 Using GRASP
1.3.1 JRDL (Job & Resource Description Language)
1.3.1.1 Overview The Globus Resource Specification Language (RSL) 2 provides a common
interchange language to describe a Grid job. However the RSL 2 does not
contain user preferences to select automatically resources for allocating the
job. Moreover the RSL 2 has no features to describe elements required to co-
allocate the job and to represent sequent jobs. Therefore we provide the Job
and Resource Description Language (JRDL) as a general language to
describe a job and user preferences required allocating resources for the job
in Grid environment based on XML.
JRDL has a collection of jobs, each of which is "an atomic task" of a workflow
specification or other kinds of a complex, multi-step application. A job consists
of job attributes and resource attributes as showed in Figure 1-11. Job
attributes are elements to need to reserve resources in advance, allocate
resources, and execute job. Resource attributes are user preferences to
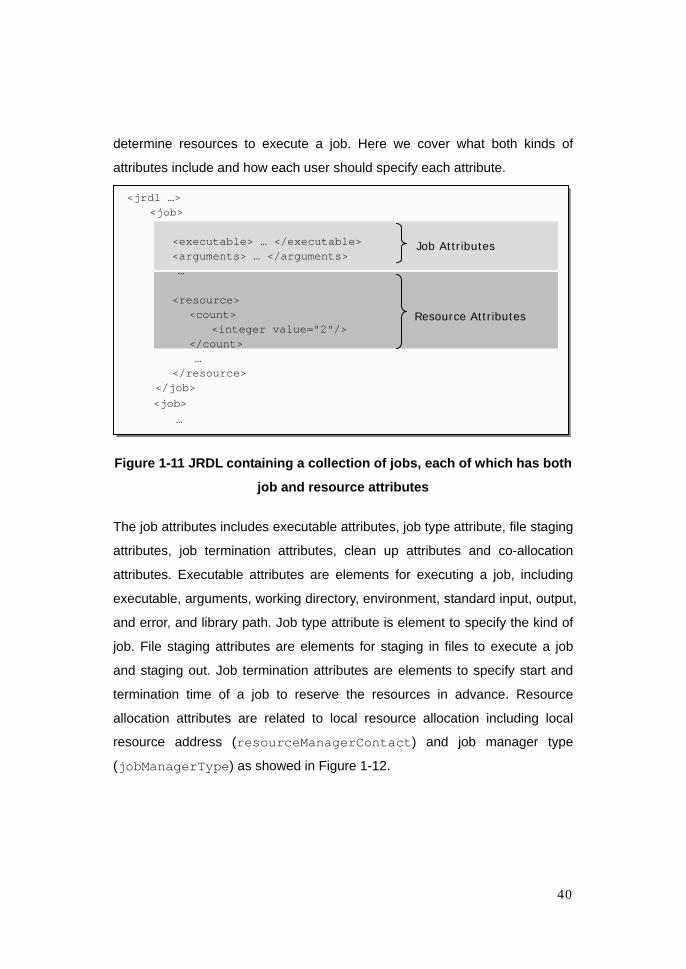
40
determine resources to execute a job. Here we cover what both kinds of
attributes include and how each user should specify each attribute.
Figure 1-11 JRDL containing a collection of jobs, each of which has both
job and resource attributes
The job attributes includes executable attributes, job type attribute, file staging
attributes, job termination attributes, clean up attributes and co-allocation
attributes. Executable attributes are elements for executing a job, including
executable, arguments, working directory, environment, standard input, output,
and error, and library path. Job type attribute is element to specify the kind of
job. File staging attributes are elements for staging in files to execute a job
and staging out. Job termination attributes are elements to specify start and
termination time of a job to reserve the resources in advance. Resource
allocation attributes are related to local resource allocation including local
resource address (resourceManagerContact) and job manager type
(jobManagerType) as showed in Figure 1-12.
Job Attributes
Resource Attributes
<jrdl …> <job> <executable> … </executable> <arguments> … </arguments> … <resource> <count> <integer value="2"/> </count> … </resource> </job>
<job>
…

41
Figure 1-12 Job Containing only the Job Specification
The resource specification is user preference to determine resources to
submit a job, including total CPU count, OS type, processor type, size and
availability of memory and storage, free CPU, processor load, local job
manager type, and scheduler plug-in type. If user specifies the resource
allocation attributes in the job specification, which means user want to
determine the resources manually without scheduler, he/she does not have to
describe the resource specification as showed in Figure 1-12. However
he/she should specify total CPU count if he/she wants to use scheduler as
showed in Figure 1-13.
<jrdl …>
<job>
<executable> … </executable>
…
<subjob>
<resourceManagerContact>
<string>
<stringElement value=
"http://eros01.gridcenter.or.kr:8080"/>
</string>
</resourceManagerContact>
<jobManagerType>
<enumeration>
<enumerationValue><pbs/></enumerationValue>
</enumeration>
</jobManagerType>
<count>
<integer value="2"/>
</count>
…
</subjob>

42
Figure 1-13 Job Containing both the Job Specification and User
Preferences to Select Automatically Resources by Scheduler
Basically, we use RSL2 schema to describe contents of each attribute. For
example, job executable attribute must include path element to describe
executable file as shown in Figure 1-14. In addition, as RSL2 provides, each
element could include substitutionRef element replaced by the element
where substituionDef element defines. For instance, job executable
attribute showed in Figure 1-14 could be replaced with job executable
attribute including substitutionRef element illustrated in Figure1-15.
Job Specification
Resource Specification
<jrdl …>
<job>
<executable> … </executable>
<arguments> … </arguments>
…
<resource>
<count>
<integer value="4"/>
</count>
…
</resource>
</job>
</jrdl>

43
Figure 1-14 Job executable attribute
Figure 1-15 Job executable attribute including substituionRef element
By default, as illustrated Figure 1-15, if you want to use substitutionRef
element, substituionDef element must be specified except reserved
substituionDef elements to be defined at local resources as shown in Table 1-
1.
<jrdl …>
<job>
<executable>
<path>
<stringElement value="/home/user/executable"/>
</path>
</executable>
…
</job>
</jrdl>
<jrdl …>
<substitutionDef name="HOME">
<stringElement value="/home/user"/>
</substitutionDef>
<job>
<executable >
<path>
<substitutionRef name="HOME"/>
<stringElement value="/executable"/>
</path>
</executable >…
</job>
</jrdl>

44
Table 1-1 Reserved substitution definition
Substitution Definition Meaning
HOME Home directory path of user account
LOGNAME Log name
GLOBUS_LOCATION Globus location
X509_CERT_DIR Certificate directory
GLOBUS_HOST_CPUTYPE Host CPU type
GLOBUS_HOST_MANUFACTURER Host manufacturer
GLOBUS_HOST_OSNAME Host OS name
GLOBUS_HOST_OSVERSION Host OS version
GLOBUS_RMS_JOB_CONTACT The contact address of RMS
GLOBUSRUN_GASS_URL The address of GASS server that a job
submission client invoke automatically
1.3.1.2 Job attributes Job attributes are elements to need to reserve resources in advance, allocate
resources, and execute job, including executable attributes, job type attribute,
file staging attributes, job termination attributes, clean up attributes and co-
allocation attributes. Executable attributes are elements for executing a job,
including executable, arguments, working directory, environment, standard
input, output, and error, and library path. Job type attribute is element to
specify the kind of job. File staging attributes are elements for staging in files
to execute a job and staging out. Job termination attributes are elements to
specify start and termination time of a job to reserve the resources in advance.
Co-allocation attributes are related to local resource allocation including local
resource addresses, job manager type and CPU count.

45
Basically, a user might want to automatically determine resources by meta-
scheduler as illustrated in Figure 1-11. However If user wants to determine
resources manually, co-allocation attributes must be used as showed in
Figure 1-16.
Figure 1-16 Co-allocation attributes to specify local resource to submit a
job
When a job is submitted to resources, the job should be divided into several
subjobs, each of which might has different job attributes. Therefore, you can
specify different job attributes for each subjob as illustrated in Figure 1-17. In
this job, there are two subjobs, which have different executable file. One is
“a.out,” and the other is “b.out”.
<jrdl …> <job> <executable> … </executable> … <subjob> <resourceManagerContact> <string> <stringElement value= "http://eros01.gridcenter.or.kr:8080"/> </string> </resourceManagerContact> <jobManagerType> <enumeration> <enumerationValue><pbs/></enumerationValue> </enumeration> </jobManagerType> <count> <integer value="2"/> </count> … </subjob> <subjob> … </subjob> </job>
Co-allocation attributes

46
Figure 1-17 Job containing different job attributes for a subjob
A. Executable attributes
(a) Job executable attribute
The source of executable file is local or remote file. If executable file is a form
of GASS-compatible URL like “gsiftp://ip/path/file”, executable file could be
staged from the GASS-compatible file server.
An element in your document might look like this:
<executable> <path>
<stringElement value=”EXECUTABLE”/> </path>
</executable>
<jrdl …> <job> <executable>
<path><stringElement value=”a.out”/></path> </executable>
<jobType>
<enumeration>
<enumerationValue><htc/></enumerationValue>
</enumeration>
</jobType>
<subjob>
<executable>
<path><stringElement value=”b.out”/></path>
</executable>
</subjob>
<resource> <count> <integer value="2"/> </count>
</resource> </job> </jrdl>

47
(b) Job arguments attribute
An element in your document might look like this:
(c) Job directory attribute
An element in your document might look like this:
(d) Environment attribute
An element in your document might look like this:
(e) Standard input attribute
The source of standard input file is STDIN. STDIN is local or remote file. If
STDIN is a form of GASS-compatible URL, STDIN could be received from the
<arguments> <stringArray> <string> <stringElement value="arg1"/> </string> <string> <stringElement value="arg2"/> </string> </stringArray>
</arguments>
<directory> <path>
<stringElement value="/path/to"/> </path> </directory>
<environment> <hashtable> <entry name="HOME"> <stringElement value="/path/to"/> </entry> </hashtable> </environment>

48
GASS-compatible file server.
An element in your document might look like this:
(f) Standard output attribute
The destination of standard output file is STDOUT. Standard output file might
have multiple destinations and each destination is local or remote file.
An element in your document might look like this:
(g) Standard error attribute
The destination of standard error file is STDERR. Standard error file might
have multiple destinations and each destination is local or remote file.
An element in your document might look like this:
<stdin> <path>
<stringElement value=”STDIN”/> </path>
</stdout>
<stdout> <pathArray>
<path> <stringElement value="STDOUT"/>
</path> </pathArray>
</stdout>
<stderr> <pathArray>
<path> <stringElement value="STDERR"/>
</path> </pathArray>
</stderr>

49
(h) Library path attribute
Job might need to specify library paths. Each library path must be local path.
An element in your document might look like this:
B. Job type attributes
(a) Job type attribute
Job type attribute is element to specify the kind of job. JRDL has three kinds
of job type: single, xmpi, and htc.
An element in your document might look like this:
C. File staging attributes
(a) File staging in attribute
<libraryPath> <pathArray>
<path> <stringElement value="/librarypath/to"/>
</path> </pathArray>
</libraryPath>
<jobType> <enumeration> <enumerationValue> <htc/> </enumerationValue> </enumeration>
</jobType>

50
You can specify a list of ("remote URL" "local file") pairs which indicate files to
be staged into the cache. Symbolic link from the cache to the "local file" path
will be made.
An element in your document might look like this:
(b) File staging out attribute
You can specify a list of ("local file" "remote URL") pairs which indicate files to
be staged from the job to a GASS-compatible file server.
An element in your document might look like this:
D. Job lifetime attributes
<fileStageIn> <fileInputArray> <fileInput> <url> <urlElement value="gsiftp://ip/path/file"/> </url> <path> <stringElement value="file"/> </path> </fileInput> </fileInputArray> </fileStageIn>
<fileStageOut> <fileOutputArray> <fileOutput>
<path> <stringElement value="file"/> </path> <url> <urlElement value="gsiftp://ip/path/file"/> </url>
</fileOutput> </fileOutputArray>

51
These attributes are attributes related to the start time and end time of a job.
Job start time and Job start before are mutually exclusive. Therefore, if you
want to specify start time of a job, you have to determine between Job start
time and Job start before.
(a) Job start time
If a job should start at a specific time, you should describe a time by Job start
time. The dateTime data type is used to specify a date and a time.
The dateTime is specified in the following form "YYYY-MM-DDThh:mm:ss"
where:
· YYYY indicates the year
· MM indicates the month
· DD indicates the day
· T indicates the start of the required time section
· hh indicates the hour
· mm indicates the minute
· ss indicates the second
Note: All components are required.
To specify a time zone, you can either enter a dateTime in UTC time by
adding a "Z" behind the time.
An element in your document might look like this:
(b) Job start before
If a job should start before a specific duration, you should describe a time
interval by Job start before. The duration data type is used to specify a time
interval.
The time interval is specified in the following form "PnYnMnDTnHnMnS"
where:
<jobStartTime>2004-10-21T01:10:00.000Z</jobStartTime>

52
· P indicates the period (required)
· nY indicates the number of years
· nM indicates the number of months
· nD indicates the number of days
· T indicates the start of a time section (required if you are going to
specify hours, minutes, or seconds)
· nH indicates the number of hours
· nM indicates the number of minutes
· nS indicates the number of seconds
An element in your document might look like this:
(c) Job duration
If a job should execute during a specific interval, you should describe a time
interval by Job duration. The duration data type is used to specify a time
interval.
An element in your document might look like this:
E. Clean up attributes
(a) Clean up attribute
This attribute specifies files to clean up after a job has completed.
An element in your document might look like this:
<jobStartBefore>PT10H3M</jobStartBefore>
<jobDuration>PT10H3M</jobDuration>
<fileCleanUp> <pathArray>
<path> <stringElement value="cleanUpFile"/>
</path> </pathArray>
</fileCleanUp>
53
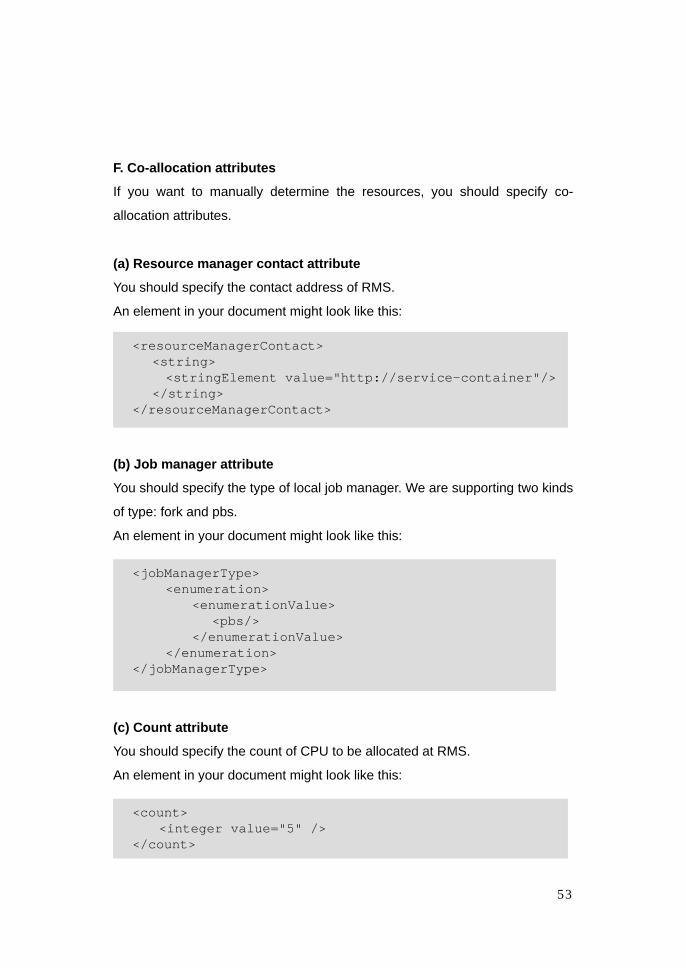
F. Co-allocation attributes
If you want to manually determine the resources, you should specify co-
allocation attributes.
(a) Resource manager contact attribute
You should specify the contact address of RMS.
An element in your document might look like this:
(b) Job manager attribute
You should specify the type of local job manager. We are supporting two kinds
of type: fork and pbs.
An element in your document might look like this:
(c) Count attribute
You should specify the count of CPU to be allocated at RMS.
An element in your document might look like this:
<resourceManagerContact> <string> <stringElement value="http://service-container"/> </string> </resourceManagerContact>
<jobManagerType> <enumeration> <enumerationValue> <pbs/> </enumerationValue> </enumeration> </jobManagerType>
<count> <integer value="5" />
</count>

54
1.3.1.3 Resource attributes
The resource attributes are user preferences to determine resources to
submit a job, including total CPU count, OS type, processor type, size and
availability of memory and storage, free CPU, processor load, local job
manager type, and scheduler plug-in type.
A. Count attribute
You must specify the total count of CPU to be allocated to submit a job.
An element in your document might look like this:
B. Operating system attribute
You might need to describe the specific name of operating system of nodes to
be selected in resource pools.
An element in your document might look like this:
C. Processor attribute
You might need to describe the minimum clock speed of processor of nodes
to be selected in resource pools. The unit of clock speed is megahertz.
An element in your document might look like this:
<operatingSystem> <name> <string> <stringElement value="Linux"/> </string> </name> </operatingSystem>
<count> <integer value="5" />
</count>

55
D. Minimum main memory attributes
(a) Minimum RAM available attribute
You might need to describe the minimum available RAM size of nodes to be
selected in resource pools. The unit of RAM size is mega byte.
An element in your document might look like this:
(b) Minimum RAM size attribute
You might need to describe the minimum RAM size of nodes to be selected in
resource pools. The unit of RAM size is mega byte.
An element in your document might look like this:
E. Minimum storage attribute
You might need to describe the minimum available storage size of nodes to
be selected in resource pools. The unit of storage size is mega byte.
An element in your document might look like this:
<minMainMemory> <minRAMSize> <integer value="256" /> </minRAMSize> </minMainMemory>
<minMainMemory> <minRAMAvailable> <integer value="100" /> </minRAMAvailable> </minMainMemory>
<processor> <clockSpeed> <integer value="1000" /> </clockSpeed> </processor>

56
F. Minimum free CPU attribute
You might need to describe the minimum available CPU number of nodes to
be selected in resource pools.
An element in your document might look like this:
G. Processor load attributes
(a) last15Min attribute
You might need to describe the average processor availability during last 15
minutes of nodes to be selected in resource pools. The average processor
availability is expressed as a percentage.
An element in your document might look like this:
(b) last5Min attribute
You might need to describe the average processor availability during last 5
minutes of nodes to be selected in resource pools. The average processor
availability is expressed as a percentage.
An element in your document might look like this:
<processorLoad> <last15Min> <integer value="10" /> </last15Min> </processorLoad>
<minFreeCPU> <integer value="4" /> </minFreeCPU>
<minStorage> <minStorageAvailable> <integer value="1000" /> </minStorageAvailable> </minStorage>

57
(c) last1Min attribute
You might need to describe the average processor availability during last 1
minute of nodes to be selected in resource pools. The average processor
availability is expressed as a percentage.
An element in your document might look like this:
H. Scheduling type attribute
You might need to describe the type of local job scheduler of nodes to be
selected in resource pools. The type of scheduler must be either fork or
scheduler.
An element in your document might look like this:
I. Scheduling plug-in attribute
You might need to describe the name of scheduling plug-in to be selected in
resource pools. The name of plug-in must be either Default Plugin or
another plugin-provider-defined name. The plugin name could be referenced
<schedulingType> <string> <stringElement value="scheduler"/> </string> </schedulingType>
<processorLoad> <last1Min> <integer value="10" /> </last1Min> </processorLoad>
<processorLoad> <last5Min> <integer value="10" /> </last5Min> </processorLoad>

58
by querying to the GAIS.
An element in your document might look like this:
1.3.1.4. JRDL Examples
Here are some typical JRDL examples to be used in job submission. There
are three kinds of job types in JRDL: single, XMPI, and htc. For each job type,
we are giving several examples.
A. Single job examples
1. This example is about a single job to use “FORK” local job manager and be
submitted to dedicated host “rms_machine”
<schedulingPlugin> <string> <stringElement value="Default Plugin"/> </string> </schedulingPlugin>
<?xml version="1.0" encoding="UTF-8"?> <jrdl xmlns="http://www.moredream.org/namespaces/2003/09/jrdl"> <job> <!-- executable attribute --> <executable> <path> <stringElement value="/bin/echo"/> </path> </executable> <!-- arguments attribute -->

59
<arguments> <stringArray> <string> <stringElement value="arg1"/> </string> <string> <stringElement value="arg2"/> </string> </stringArray> </arguments> <!-- stdout attribute --> <stdout> <pathArray> <path> <stringElement value="stdout"/> </path> </pathArray> </stdout> <!-- stderr attribute --> <stderr> <pathArray> <path> <stringElement value="stderr"/> </path> </pathArray> </stderr> <!-- job type attribute--> <jobType> <enumeration> <enumerationValue> <single/> </enumerationValue> </enumeration> </jobType>
<subjob> <resourceManagerContact> <string> <stringElement value="http://rms_machine"/> </string> </resourceManagerContact> <jobManagerType>
<enumeration>

60
2. This example is about a single job to use “PBS” local job manager and be
submitted to dedicated host “rms_machine”
<enumerationValue><fork/></enumerationValue> </enumeration> </jobManagerType> <count> <integer value="1"/> </count> </subjob> </job>
</jrdl>
<?xml version="1.0" encoding="UTF-8"?> <jrdl xmlns="http://www.moredream.org/namespaces/2003/09/jrdl"> <job> <!-- executable attribute --> <executable> <path> <stringElement value="/bin/echo"/> </path> </executable> <!-- arguments attribute -->
<arguments> <stringArray> <string> <stringElement value="arg1"/> </string> <string> <stringElement value="arg2"/> </string> </stringArray> </arguments> <!-- stdout attribute --> <stdout> <pathArray> <path> <stringElement value="stdout"/> </path>

61
3. This example is about a single job to allocate resources automatically by
meta-scheduler.
</pathArray> </stderr> <!-- job type attribute --> <jobType> <enumeration> <enumerationValue> <single/> </enumerationValue> </enumeration> </jobType>
<subjob> <resourceManagerContact> <string> <stringElement value="http://rms_machine"/> </string> </resourceManagerContact> <jobManagerType> <enumeration> <enumerationValue><pbs/></enumerationValue> </enumeration> </jobManagerType> <count> <integer value="1"/> </count> </subjob> </job>
</jrdl>
<?xml version="1.0" encoding="UTF-8"?> <jrdl xmlns="http://www.moredream.org/namespaces/2003/09/jrdl"> <job> <!-- executable attribute --> <executable>

62
<path> <stringElement value="/bin/echo"/> </path> </executable> <!-- arguments attribute -->
<arguments> <stringArray> <string> <stringElement value="arg1"/> </string> <string> <stringElement value="arg2"/> </string> </stringArray> </arguments> <!-- stdout attribute --> <stdout> <pathArray> <path> <stringElement value="stdout"/> </path> </pathArray> </stdout> <!-- stderr attribute --> <stderr> <pathArray> <path> <stringElement value="stderr"/> </path> </pathArray> </stderr> <!-- job type attribute --> <jobType> <enumeration> <enumerationValue> <single/> </enumerationValue> </enumeration>
</jobType>

63
1.3.2 Client Program Providing Command Line Interface (CLI) : grasprun grasprun is a client program providing CLI to submit, monitor, and control a
job as well as validate a job description language called JRDL. Here we
describe the usage of grasprun for each functionality.
1.3.2.1 Validate a JRDL grasprun can parse a job description language called JRDL, validate parsed
JRDL, and then show each attribute of JRDL. You might specify like this:
, where –p or –parse option is parsing operation, and –f or –file option is JRDL
<resource> <count>
<integer value="1"/> </count>
</resource> </job>
</jrdl>
$ grasprun -parse -f cpi_spec.xml
Job Type: XMPI
Executable: /home/guest01/kmi-test/cpi/cpi[local]
Environment: LD_LIBRARY_PATH[/usr/local/gt3.2.1/lib]
Stdout: stdout
Stderr: stderr
Subjob [0]
Resource Manager Contact: http://vega01.gridcenter.or.kr:8080
Job Manager Type: pbs
Count: 10

64
file name.
1.3.2.2 Job Submission
grasprun provides two kinds of job submission modes: batch and interactive
mode. If you want to submit, monitor, and control a job interactively, you might
specify like this:
$ grasprun –f a.xml –factory http://factory_address:8080
-o Job ID: http://
factory_address:8080/ogsa/services/base/grasp/JobSubmissio
nFactoryService/hash-23449824-1112770816197
WAITING FOR JOB TO FINISH
=============== Job Status =================
Job Status: Pending
[vega01.gridcenter.or.kr, PBS] Unsubmitted
============================================
=============== Job Status =================
Job Status: Active
[vega01.gridcenter.or.kr, PBS] Active(vega03+vega02)
============================================
pi is approximately 3.1416009869231249, Error is
0.0000083333333318
wall clock time = 4.702783
Process 0 on vega03.gridcenter.or.kr
=============== Job Status =================
Job Status: Done
[vega01.gridcenter.or.kr, PBS] Done(vega03+vega02)
============================================
It takes 87.0 seconds.

65
, where –f or –file option is JRDL file name, –factory option is a service
container address including JSS service, and –o option let standard output of
job to print the console. If you configure the default setting for grasprun in
~/.globus/.grasprun file as following, you do not have to specify –factory
option. Additionally, the message of job status is fully shown, as property “full”
set to “true”.
If you want to submit a job in a batch mode, you might specify like this:
1.3.2.3 Job List and Information grasprun can list the submitted job. Especially for batch job, it is essential to
get the list. You might specify like this:
, where –list or –l option is list operation.
And also information of the job could be checked like this:
$ grasprun -file cpi_spec.xml \
-b Job ID:
http://factory_address:8080/ogsa/services/base/grasp/JobSu
bmissionFactoryService/hash-28099439-1112773501104
factory=http://factory_address:8080
full=true
$ grasprun -list
Job ID:
http://factory_address:8080/ogsa/services/base/grasp/JobSu
bmissionFactoryService/hash-23449824-1112770816197
Job ID: http://
factory_address:8080/ogsa/services/base/grasp/JobSubmissio
nFactoryService/hash-28099439-1112773501104

66
, where –info or –i option is job information operation.
1.3.2.4 Job Monitoring and Controlling Submitted job might be checked the status of the job like this:
$ grasprun -info
http://factory_address:8080/ogsa/services/base/grasp/JobSubm
issionFactoryService/hash-23449824-1112770816197
Job ID:
http://150.183.234.231:8080/ogsa/services/base/grasp/JobSubm
issionFactoryService/hash-23449824-1112770816197
Subbmited Time: Thu Apr 07 09:40:41 KST 2005
Job Type: XMPI
Executable: /home/guest01/kmi-test/cpi/cpi[local]
Environment: LD_LIBRARY_PATH[/usr/local/gt3.2.1/lib]
Stdout: stdout, /dev/stdout[local]
Stderr: stderr, /dev/stderr[local]
Subjob [0]
Resource Manager Contact:
http://vega01.gridcenter.or.kr:8080
Job Manager Type: pbs
Count: 10
$ grasprun -status
http://factory_address:8080/ogsa/services/base/grasp/JobSubm
issionFactoryService/hash-23449824-1112774942696
=============== Job Status =================
Job Status: Done
[eros01.gridcenter.or.kr, FORK] Done
============================================

67
, where –status or –s option is status operation.
And also, submitted job might be killed like this:
, where –kill or –k option is kill operation.
$ grasprun -kill
http://factory_address:8080/ogsa/services/base/grasp/JobSubm
issionFactoryService/hash-23449824-1112774942696

68
2. GAIS
2.1 Introduction
Grid information system is a critical component for Grid computing, by which
all types of Grid resources are virtually integrated and their information can be
effectually managed and accessed. Furthermore, the efficiency of Grid
computing is dependent on the functionalities supported by Grid information
system. But the existing information system such as MDS (Monitoring and
Discovery System) of GT (Globus Toolkit), which is currently received wide
publicity in Grid community, is not appropriate for a production-mode service
or a long-lived service because it supports only basic functions. That is why
we developed a new Grid information system named Grid Advanced
Information System (GAIS), which is a versatile information system that
provides information about the available resources on Grids and their status.
GAIS is the information services component of the MoreDream and is
composed of a collection of OGSI-compliant services which add and extend
the functionalities of GT3 MDS3. It is differentiated from the dynamic
management and the flat network of directory servers mentioned below.
2.1.1 Components
GAIS is composed of three grid services and two information providers. Each
service is related to manage and search information in a Grid, whereas two
providers play information sources for the GAIS.
2.1.1.1 Datacan Factory Service (DFS)

69
Datacan (a compound word of “data” and “can”) is an enhanced version of
GT3.x index service. Like an index service, it aggregates Service Data from
Resource Services such as RIPS (Resource Information Provider Service) or
other Grid service instances by means of the Aggregator mechanism. It also
registers Grid service instances using the ServiceGroup mechanism. For
these aggregation and registration, it uses the RegistryPublishPrivder
mechanism. Additionally, it provides the following functionalities:
1) It removes stale data to assure data accuracy using the Data Sweep
mechanism. When a datacan is created, the mechanism in the datacan
calls a ServiceDataSweeper, which periodically checks the available time
of registered service data and deletes old service data.
2) It has two types. The one is a public datacan (pubcan) to announce its
information to a VO, and the other is a private datacan (prican) to share it
only in a domain. A DFS administrator can configure a pubcan suitable for
a VO according to her policy and she can also set up a prican to serve
some users’ purpose in her domain. It operates together with CAS
(Community Authority Service) to control access to a pubcan or prican
(not implemented).
DFS manages the lifecycle of a datacan using the Factory mechanism and
maintains the snapshot of DFS status (the list of published datacans) through
the Configuration mechanism. The snapshot is stored in a configuration file.
Figure 1-18 shows the structure of DFS.

70
Datacan Factory Service
create
VO A VO B
VO RosterService
VO RosterService
RIPS
RIPS
GS
RegistryPublishProvider
DatacanCreator
ServiceDataSweeper
Pubcan Pubcan Prican
AggregatorMechanism
ProviderMechanism
ServiceGroupMechanism
Datacan
ConfigurationMechanism
Data SweepMechanism
Acess ControlMechanism
Configfile
registration Periodic sweep
call
call
FactoryMechanism
Figure 1-18 The structure of Datacan Factory Service
2.1.1.2 VO Roster Service (VRS)
Only one VRS exists in a VO because it typifies a VO. It manages the
participants of VO and provides a registration interface to the VO. The
structure of VRS is as Figure 1-19.
VO Roster Service
Pubcan Pubcan Pubcan Pubcan
Site A Site B Site C Site D
registration
DatacanRegister
Configfile
VOConfiguration
Mechanism
ServiceGroupMechanism
Join ControlMechanism
call
periodicregistration
Figure 1-19 The structure of VO Roster Service

71
It provides the following functionalities:
1) It uses the ServiceGroup mechanism to register/unregister a datacan to
its own VO.
2) It admits only a pubcan. The registration of a prican is rejected. The Join
Control mechanism does this.
3) It makes use of the Configuration mechanism to store the snapshot of VO
status (the list of registered datacan). But the status of resources in a VO
changes dynamically. This may make the maintenance of the VO
snapshot difficult. A DatacanRegister executes periodic registrations to
preserve this.
2.1.1.3 VO Crawler Factory Service (VCFS)
VCFS provides a user with VO information. Only one VCFS exists in a VO
because it is basically a service for a VO like VRS, but we recommend a site-
based deployment of this service to avoid heavy load from plenty of users in a
VO. This enables the load to be decentralized to each site in the VO. Figure
1-20 illustrates the structure of DFS. VO Crawler
Factory Service
VO CrawlerService
…
create
VO RosterService
Site A
Site B
Site C
VO CrawlerService
VO CrawlerService
Pubcan
Pubcan
Pubcan
Crawler
Crawler
Crawler
CrawlingCoordinatorFactory
Mechanism
VO snapshot
find-service-data
registration
find-vo-data &find-vo-service
Figure 1-20 The structure of VO Crawler Factory Service

72
It provides the following functionalities:
1) This service has two query options. The one of two options is the find-vo-
data, which crawls on VO information for a user. The other is the find-vo-
service, which provides the location (GSH: Grid Service Handle) of a Grid
service in a VO for a user. Actually, the find-vo-service is a special form of
the find-vo-data to serve the convenience of a user.
2) It also creates the VO Crawler Service (VCS) using the Factory
mechanism to protect a user session. VCS gains a VO snapshot from
VRS. To achieve the efficiency of query, VCS creates the Crawlers
corresponding to each participant (pubcan) using the Thread mechanism.
Each crawler uses the OGSI find-service-data to query its own pubcan.
The CrawlingCoordinator orchestrates each crawler’s behavior.
2.1.1.4 MoreDream Providers
MoreDream Information Providers provide lots of information about data
replication as well as computing resource. It is based on the use of provider
execution mechanism. They are composed of McsScriptProvider and
MseScriptProvider. MceScriptProvider provides lots of resource information
used in K*Grid. It conforms to Glue schema and extends it. MseScriptProvider
provides information about data replications. It defines a new information
schema related to storage elements. You can easily obtain information that is
produced in MCAT-enabled SRB (Storage Resource Broker) Server. If you’d
like to add new information, you have only to create your own provider and
register it to RIPS.

73
MceScriptProvider
MseScriptProvider
Java Provider
XML document
XML document
New Provider
…
registration
mse:SRBElement
registration
mce:ComputingElement
RIPS
Shell Scripts
MceScriptProvider
MseScriptProvider
Java Provider
XML document
XML document
New Provider
…
registration
mse:SRBElement
registration
mce:ComputingElement
RIPS
Shell Scripts
Figure 1-21 The registration of MoreDream Information Providers
2.1.2 Schema GAIS uses the MoreDream schema, which adds and extends GLUE (Grid
Laboratory Uniform Environment) schema. The schema is categorized into
two element; MoreDream Computing Element (MCE) and MoreDream
Storage Element (MSE). MCE enhances the computing element of GLUE
schema 1.1 for supporting GRASP (Grid Resource Allocation Services
Package), a resource management component of MoreDream. MSE is
formed by processing the data replication information of SRB and it will be
changed to agree to the storage element of GLUE schema later.
Table 1-2 shows the content of MCE.
Table 1-2 MoreDream Computing Element
Category Object Description Unit
Name ComputingElement name ComputingEl
ement UniqueID ComputingElement ID
LRMSType Local Resource Manager type Info
LRMSVersion Local Resource Manager version

74
GRAMVersio
n
GRAM version
HostName Host name
GateKeeperP
ort
GateKeeper port
TotalCPUs Total CPUs
Staus Queue status
TotalJobs Total Jobs
RunningJobs Running Jobs
WaitingJobs Waiting Jobs
State
FreeCPUs Free CPUs
Policy HostName Host name
LocalID Local user ID
DN User DN
Quota Local user Quota MB UserStorage
DefaultCapaci
ty
Local user default Quota MB
GlobalID Global Job ID
LocalID Local Job ID
LocalOwner Local Owner ID
GlobalOwner Global Owner ID
Job
Status Job status
Name Cluster name Cluster
UniqueID Cluster ID
Name SubCluster name SubCluster
UniqueID SubCluster ID
Name File system name
Root File system root Path
Filesystem
Size Total size MB

75
AvailableSpac
e Available space MB
ReadOnly Read only or not T/F
Type File system type eg. NFS
Vendor CPU vendor name
Model Model name
Version CPU version
Clockspeed CPU Clock speed MHz Processor
OtherProcess
orDescription Other description
RAMSize RAM size MB
RAMAvailabl
e Available RAM size MB
VirtualSize Virtual RAM size MB
MainMemor
y
VirtualAvaila
ble Available virtual RAM size MB
Last1Min 1-minute average processor
availability %
Last5Min 5-minute average processor
availability %
ProcessorLo
ad
Last15Min 15-minute average processor
availability %
Name OS name
Release OS Release # OperatingSy
stem Version OS version
Name Interface name
IPAddress IP address IP addr
MTU MTU size Byte
NetworkAda
pter
OutboundIP OutboundIP or not T/F

76
InboundIP InboundIP or not T/F
Name Host name (Computation Element) Host
UniqueID Host ID
Last1Min 1-minute average processor
availability
%
Last5Min 5-minute average processor
availability
% ProcessorLo
ad
Last15Min 15-minute average processor
availability
%
RAMSize RAM size MB
RAMAvailabl
e
Available RAM size MB
VirtualSize Virtual RAM size MB
MainMemor
y
VirtualAvaila
ble
Available virtual RAM size MB
Table 1-3 describes the content of MSE.
Table 1-3 MoreDream Storage Element
Category Object Description Unit
CollectionName Collection name
UserName User name SRBElement
ServerLocation SRB server location IP addr
CollectionName Collection name
UserName User name SRBResources
ServerLocation SRB server location IP addr
ResourceName Resource name
ResourceLocation Resource location IP addr
SRBResource
ResourceType Resource type

77
ResourceClassName Resource class name
AdminName Admin name
DomainDesc Domain description
ZoneID MCAT Zone ID
CollectionName Collection name
UserName User name SRBReplicas
ServerLocation SRB server location IP addr
CollectionName Collection name
UserName User name
ServerLocation SRB server location IP addr
FileName File name
FileSize File size Byte
SRBReplica
FileType File type
FileReplicationID replica ID
ResourceLocation Resource location IP addr ReplicaDetail
ResourceName Resource name
2.1.3 User Interface
There are now ways in which you can view VO information collected by GAIS
or manage GAIS itself: the GAIS portlets and the GAIS PortType panels.
1) GAIS portlets: They offer resource information, service information or data
replication information of a VO to users.
2) GAIS PortType panels: They enable a system administrator to control
GAIS services.
The user interfaces will be added continuously as the version of GAIS is up.

78
2.1.4 Features
GAIS whose aim is to facilitate the management of information in Grid has the
following features.
1) Dynamic management of directory server (datacan): GAIS can create a
datacan easily whenever needed and can also destroy it freely. This
enables a resource owner to share his resource according to his policies.
For example, he can publish a datacan, which contains the entire
information of his resource, for VO A, whereas the other datacan, which
holds half of the information, for VO B.
2) Flat network of directory servers: The network of directory servers in GAIS
is not configured hierarchically. Instead, it is flat. This has some merit.
First, information is not duplicated. In hierarchy, higher level directory
overlaps the information of lower level. Second, consistent
synchronization of information is guaranteed. Hierarchical structure may
pollute the consistency of information when the fault or the
subscription/unsubscription of a directory server.
3) Persistent configuration management: For a production-level service and
a long-lived service, the configuration of an information system must be
preserved persistently. GAIS provides a file-based configuration
management.
4) Smart query processing: Simultaneous query using Thread mechanism
alleviates the decline of the query performance which the flat network
takes place. GAIS offers the find-vo-service operation, which can easily
find a service in Grid, as well as the find-vo-data operation, which can
search the information of a service in detail.
5) Rich information providers: GAIS supplies plenty of information about data
replication as well as computing resource through providers conforming to
MoreDream schema.

79
2.1.5 GAIS in actions
Figure 1-22 shows GAIS which configures 2 VOs (VO-A and VO-B) through
the combination of 4 sites. VO-A is composed of site A, B and C, whereas VO-
B consists of site B, C and D. A user has two query types. For VO query, he
uses the find-vo-data and the find-vo-service. He also utilizes the find-service-
data for Site query.
DatacanFactoryService
Prican
Pubcan
Prican
PubcanPubcan
Site A
Site B
RIPS GSGS
GS
RIPS
GS GS
Registration &Subscription
Prican
PubcanPubcan
Site C
Prican
Pubcan
Site D
DatacanFactoryService
DatacanFactoryService
DatacanFactoryService
IP IP IP IPIP
RIPS
IP IPIP
VO RosterService
VO CrawlerFactory Service
VO RosterService
VO-A VO-B
VO Registration
VO CrawlerFactory Service
VO CrawlerService
VO Query(find-vo-data & find-vo-service)
Site Query(find-service-data)
VO snapshot VO CrawlerService
VO snapshot
Thread based query
Figure 1-22 GAIS in actions
2.2 Installation and Configuration
2.2.1. Requirements
To install and use GAIS, you need a Linux system and the following softwares.

80
1) Hardware
* Linux System
2) Software
* OS: Linux (Redhat 7.3 or more except Readhat 8.x are recommended)
* Globus Toolkit 3.2.x
* Gridsphere 2.0.x
: If you want to use GAIS portlets, Gridsphere should be installed.
* OpenPBS (Portable Batch System)
: If you'd like to obtain the information about cluster, OpenPBS should be
installed
* SRB Account
: If you'd like to obtain the information that is produced in MCAT-enabled
SRB Server, contact the admin of MCAT-enabled SRB Server and obtain it.
2.2.2. Installing required software
2.2.2.1. Installing Globus Toolkit
The information about Globus Toolkit can be found at: http://www.globus.org
2.2.2.2 Installing Gridsphere
The information about Gridsphere can be found at: http://www.gridsphere.org
2.2.2.3 Installing OpenPBS
The information about OpenPBS can be found at: http://www.openpbs.org
2.2.3 Installing GAIS

81
2.2.3.1. Download and extract Download gais_v1.0.tar.gz from GAIS web site:
http://kmi.moredream.org/MoreDream/GAIS/
Untar the distribution file and move to gais_v1.0.
$ tar xvfz gais_v1.0.tar.gz
$ cd gais_v1.0
You can find some files & directories as follows:
gais_v1.0
|-- INSTALL.txt
|-- README.txt
|-- build.xml Ant build script
|-- gais-datacanFactory Datacan Factory Service
|-- gais-voRoster VO Roster Service
|-- gais-voCrawlerFactory VO Crawler Factory Service
|-- gais-providers
|-- mceScriptProvider MCE Information Provider
|-- mseScriptProvider MSE Information Provider
|-- gais-portlets Portlets
2.2.3.2 Compile & Installation
Basic GAIS package includes source files. If you want to obtain binary files
(coming soon), visit GAIS web site http://kmi.moredream.org/MoreDream/GAIS/.
It is very simple to install. As we mentioned above, GAIS is composed of 3
Grid Services, 2 Information Providers and 1 Portlets. It is your choice
whether whole components are installed or not.
Note 1: We assume that GT3.x is installed and GLOBUS_LOCATION is set
Note 2: Current directory is gais_v1.0

82
(1) Installation of GAIS Services & Providers
: First, must be the administrator of GT (ex. globus).
: Second, check $GLOBUS_LOCATION environment variable.
: Third, select the proper ant <target> according to your purpose and run it.
$ ant { deployAll | deployVoServices | deployDatacanWithVoCrawler |
deployDatacanWithProviders | deployProviders }
: Next, edit the config files of each services and providers (See 2.3.3
Configuration section).
: Finally, run GT container.
$ cd $GLOBUS_LOCATION
$ bin/globus-start-container
: You should see the following line in the output.
http://<hostname>:<port>/ogsa/services/base/gais/DatacanFactoryService
http://<hostname>:<port>/ogsa/services/base/gais/VoCrawlerFactoryService
http://<hostname>:<port>/ogsa/services/base/gais/VoRosterService
(2) Installation of GAIS Portlets
: First, must be the administrator of Jakarta Tomcat (ex. root)
: Second, check $CATALINA_HOME environment variable
: Third, edit build.properties to modify location of Gridsphere source and
build directory
$ edit build.properties
: Next, just run the following ant build script
$ ant install
: Finally, restart Jakarta Tomcat container.
$ cd $CATALINA_HOME
$ bin/shutdown.sh
$ bin/startup.sh

83
2.2.3.3 How to set up GAIS services After 3 GAIS grid services and GAIS providers are installed, you can test your
installation. Before test, you should edit some files. After installation of GAIS,
you can see files that start with gais-* in $GLOBUS_LOCATI-ON/etc. Now, we
will explain about the configuration files.
1) How to create a datacan
You can create a datacan which participates in a VO by editing gais-data-
factory-config.xml and adding a datacan element in the publishedDatacans
element. At below example, the “DomainIndexService” and “Sample-
VoMember” datacan will be created. The type of datacan will be “PUBLIC” or
“PRIVATE.” PUBLIC datacan is open to a VO. On the contrary, PRIVATE
datacan is used in only local domain.
…
xmlns="http://www.moredream.org/namespaces/2004/12/dataca
n_factory"
…
<publishedDatacans>
<datacan type="PRIVATE" name="DomainIndexService"
desc="Index Service for my domain"/>
<datacan type="PUBLIC" name="Sample-VoMember"
desc="Index Service for sample VO"/>
</publishedDatacans>
…
2) Datacan setup
gais-datacan-config.xml contains serviceDataSweeper, installedProviders
and executedProviders elements. The serviceDataSweeper element assigns

84
the execution period (the unit is second) of MoreDream Service Data Sweeper.
The targetData element, a child of serviceDataSweeper element, contains the
name and namespace of a Service Data to be checked periodically. The
installedProviders element specifies the core Service Data Providers. One or
more piece(s) of service data is produced by each execution of each Service
Data Provider specified in the executedProviders.
Note: For MoreDream Service Data Sweeper to operate correctly, you should
synchronize the time clock of resource in a VO.
…
xmlns="http://www.moredream.org/namespaces/2005/01/dataca
n"
…
<serviceDataSweeper period="30">
<targetData namespace="http://www.moredream.org/ce/1.0"
name="ComputingElement"/>
<targetData namespace="http://www.moredream.org/se/1.0"
name="SRBElement"/>
</serviceDataSweeper>
…
<installedProviders>
<providerEntry
class="org.moredream.ogsa.impl.base.providers.servicedata
.impl.MceScriptProvider" />
…
</installedProviders>
…
<executedProviders>

85
<provider-exec:ServiceDataProviderExecution>
<provider-exec:serviceDataProviderName>
MceScriptProvider
</provider-exec:serviceDataProviderName>
<provider-exec:serviceDataProviderImpl>
org.moredream.ogsa.impl.base.providers.servicedata.i
mpl.MceScriptProvider
</provider-exec:serviceDataProviderImpl>
<provider-exec:serviceDataProviderArgs>
</provider-exec:serviceDataProvider Args>
<provider-exec:serviceDataName
xmlns:mce="http://www.moredream.org/ce/1.0">
mce:ComputingElement
</provider-exec:serviceDataName>
<provider-exec:refreshFrequency>30</provider-
exec:refreshFrequency>
<provider-exec:async>true</provider-exec:async>
</provider-exec:ServiceDataProviderExecution>
…
</executedProviders>
…
3) How to register datacans to GAIS-Vo-Roster Service
You can register some datacans by editing gais-vo-roster-config.xml. datacan
element, a child of registeredDatacans element, specifies the domain,
handle and description of a registered datacan. At below example, the
Sample-VoMember datacan will be registered in the VO managed by this VO
roster service. The period attribute in datacanRegister element means how
often this VO roster service tries to register datacan entries to maintain
registration information in spite of the fault and error of resource in the VO.

86
…
xmlns="http://www.moredream.org/namespaces/2005/01/vo_ros
ter"
…
<datacanRegister period="10"/>
<registeredDatacans>
<datacan domain="localhost.localdomain"
handle=http://127.0.0.1:8080/ogsa/services/base/gais/Data
canFactoryService/Sample-VoMember
desc="VoMember for Sample VO in localhost.localdomain"/>
</registeredDatacans>
4) VO Crawler Factory Service setup
You first should configure the location of VO roster service to query service
data and find service location in a VO by editing gais-vo-crawler-config.xml.
Register it by adding voRoster element. At below example, a local
VoRosterService will be used.
…
xmlns="http://www.moredream.org/namespaces/2005/01/vo_cra
wler"
…
<voRoster
handle="http://127.0.0.1:8080/ogsa/services/base/gais/VoR
osterService"/>
...
5) MCE provider setup (lrms-info.conf)
87
Configure the type of your local scheduler by editing lrms-info.conf.
$ vi lrms-info.conf
...
LRMSType=PBS # PBS or FORK
…
6) MSE provider setup.
When MSE information provider initiates, it need some information about GSI.
They are the file path of user proxy and CA. This information is in gais-mse-
proxy.properties file.
$ vi gais-mse-proxy.properties
proxy=/tmp/x509up_<uid>
gridcas=/etc/grid-security/certificates/<hash#>.0
7) Registering a Resource Service to an Datacan Factory Service
The Service Data of any Grid service can be registered to GAIS Datacan
Factory Service using the core RegistryPublishProvider. The
RegistryPublishProvider should be configured in the WSDD of each resource
service (for example, RIPS or MMJFS) by the administrators of those services.
Note: The administrator of the Datacan Factory Service does not need to take
action in order for a new resource service to register.
(1) Create an XML configuration file for the registration in
$GLOBUS_LOCATION/etc/ data_registration_config.xml
<?xml version="1.0" encoding="UTF-8" ?>
<serviceConfiguration

88
xmlns:ogsi="http://www.gridforum.org/namespaces/2003/03
/OGSI"
xmlns:aggr="http://www.globus.org/namespaces/2003/09/da
ta_aggregator"
xmlns:xsd="http://www.w3.org/2001/XMLSchema">
<registrations>
<registration
registry="http://127.0.0.1:8080/ogsa/services/base/gais/D
atacanFactoryService/DomainIndexService"
keepalive="true"
lifetime="120"
remove="true">
<aggr:DataAggregation>
<ogsi:params>
<aggr:AggregationSubscription>
<ogsi:serviceDataNames>
<ogsi:name
xmlns:mce="http://www.moredream.org/ce/1.0">mce:Computing
Element</ogsi:name>
</ogsi:serviceDataNames>
<aggr:lifetime>60000</aggr:lifetime>
</aggr:AggregationSubscription>
</ogsi:params>
</aggr:DataAggregation>
</registration>
</registrations>
</serviceConfiguration>
(2) Edit the fields as appropriate. Most importantly, edit the registry attribute

89
to refer to the Datacan Factory Service instance (datacan) you want to
register with. DataAggregation element contains service data name which
subscribes to the instance.
(3) You must add the RegistryPublishProvider operation provider to the
resource service's deployment descriptor in the Server Configuration file
(server-config.wsdd).
(4) Find service element (for example, <service name="base/gram
/ResourceInformationProviderService"…) definition for a resource
service.
(5) Then, add the following parameters in the service element:
<parameter name="operationProviders"
value="org.globus.ogsa.impl.core.registry.RegistryPublishProvider "/>
<parameter name="registrationConfig"
value="etc/data_registration_config.xml"/>
8) Registering a Grid Service to an Datacan Factory Service
Any Grid Service Handle (GSH) can be registered to GAIS Datacan Factory
Service using the core RegistryPublishProvider. The RegistryPublishProvider
should be configured in the WSDD of each Grid service (for example,
PingService) by the administrators of those services.
Note: The administrator of the Datacan Factory Service does not need to take
action in order for a grid service to register.
(1) Create an XML configuration file for the registration in
$GLOBUS_LOCATION/etc/service_registration_config.xml

90
<?xml version="1.0" encoding="UTF-8" ?>
<serviceConfiguration
xmlns:ogsi="http://www.gridforum.org/namespaces/2003/03/O
GSI"
xmlns:aggr="http://www.globus.org/namespaces/2003/09/data
_aggregator"
xmlns:xsd="http://www.w3.org/2001/XMLSchema">
<registrations>
<registration
registry="http://127.0.0.1:8080/ogsa/services/base/gais/D
atacanFactoryService/ DomainIndexService "
keepalive="true"
lifetime="120"
remove="true">
</registration>
</registrations>
</serviceConfiguration>
(2) Edit the fields as appropriate. Most importantly, edit the registry attribute
to refer to the Datacan Factory Service instance (datacan) you want to
register with.
(3) You must add the RegistryPublishProvider operation provider to the grid
service's deployment descriptor in the Server Configuration file (server-
config.wsdd).
(4) Find service element (for example, <service name="core/ping/
PingService"…) definition for a grid service.

91
(5) Then, add the following parameters in the service element:
<parameter name="operationProviders"
value="org.globus.ogsa.impl.core.registry.RegistryPub
lishProvider "/>
<parameter name="registrationConfig"
value="etc/service_registration_config.xml"/>
9) Registering GAIS information providers to RIPS
GAIS information providers should be registered to RIPS as follows
($GLOBUS_LOCATION/etc/rips-service-config.xml). They produce
{http://www.moredream.org/ce/1.0}ComputingElement and
{http://www.moredream.org/se/1.0} SRBElement as Service Data.
(1) Register MCE Information Provider.
$ vi $GLOBUS_LOCATION/etc/rips-service-config.xml
...
<installedProviders>
<providerEntry
class="org.globus.ogsa.impl.base.providers.servi
cedata.impl.ScriptExecutionProvider"
handler="jobDataHandler"/>
<providerEntry
class="org.globus.ogsa.impl.base.providers.servicedata.im
pl.HostScriptProvider" />
<providerEntry
class="org.moredream.ogsa.impl.base.providers.servicedata
.impl.MceScriptProvider" />
</installedProviders>
...
<executedProviders>

92
...
<provider-exec:ServiceDataProviderExecution>
<provider-exec:serviceDataProviderName>
MceScriptProvider
</provider-exec:serviceDataProviderName>
<provider-exec:serviceDataProviderImpl>
org.moredream.ogsa.impl.base.providers.servicedata
.impl.MceScriptProvider</provider-
exec:serviceDataProviderImpl>
<provider-exec:serviceDataProviderArgs>
</provider-exec:serviceDataProviderArgs>
<provider-exec:serviceDataName
xmlns:mce="http://www.moredream.org/ce/1.0">mce:Computing
Element
</provider-exec:serviceDataName>
<provider-exec:refreshFrequency>30
</provider-exec:refreshFrequency>
<provider-exec:async>true</provider-
exec:async>
</provider-exec:ServiceDataProviderExecution>
...
</executedProviders>
...
(2) Register MSE Information Provider.
$ vi $GLOBUS_LOCATION/etc/rips-service-config.xml
...
<installedProviders>
<providerEntry
class="org.globus.ogsa.impl.base.providers.servi

93
cedata.impl.ScriptExecutionProvider"
handler="jobDataHandler"/>
<providerEntry
class="org.globus.ogsa.impl.base.providers.servicedata.im
pl.HostScriptProvider" />
<providerEntry
class="org.moredream.ogsa.impl.base.providers.servicedata
.impl.SRBScriptProvider" />
</installedProviders>
...
<executedProviders>
...
<provider-exec:ServiceDataProviderExecution>
<provider-exec:serviceDataProviderName>
SRBScriptProvider</provider-
exec:serviceDataProviderName>
<provider-exec:serviceDataProviderImpl>
org.moredream.ogsa.impl.base.providers.servicedata
.impl.SRBScriptProvider
</provider-exec:serviceDataProviderImpl>
<provider-exec:serviceDataProviderArgs>
</provider-exec:serviceDataProviderArgs>
<provider-exec:serviceDataName
xmlns:mse="http://www.moredream.org/mse/1.0"
>mse:SRB
</provider-exec:serviceDataName>
<provider-
exec:refreshFrequency>30</provider-exec:refreshFrequency>
<provider-exec:async>true</provider-
exec:async>
94
</provider-exec:ServiceDataProviderExecution>
...
</executedProviders>
...
10) Enabling OGSA Service Browser GUI
If you want to use the OGSA Service Browser GUI, you will need the GUI
control panels for the GAIS Service, which is configured in a different file. Add
the following lines to the client-gui-config.xml file in $GLOBUS_LOCATION
…
<panel portType="DatacanFactoryPortType"
class="org.moredream.ogsa.gui.DatacanFactoryPortTypePanel"/>
<panel portType="VoRosterPortType"
class="org.moredream.ogsa.gui.VoRosterPortTypePanel"/>
<panel portType="VoCrawlerFactoryPortType"
class="org.moredream.ogsa.gui.VoCrawlerFactoryPortTypePanel"/>
…
2.2.3.4. Starting
A. Starting GAIS Service
Now, let’s test your GAIS services installation. Verify whether the installation is
okay or not as follows.
1) To start GT3.2.x container, run as GT administrator:
$ cd $GLOBUS_LOCATION
$ bin/globus-start-container

95
2) To start GT3.2.x service browser, run:
$ bin/globus-service-browser
3) Find a VO Crawler Factory Service at Service Group Entry Inspection of
ContainerRegistry Servcie. By double clicking of that, the VO Crawler Factory
Service browser will be displayed.
4) Query “ComputingElement” Service Data with “http://www.moredream.org/ce/1.0”
namespace at find-vo-data tab of VO Query. If “mce:ComputingElement” is shown,
your installation is successful.
5) Query with “service” pattern at find-vo-service tab of VO Query. In case of
successful installation, registered GSH will be shown.
B. Starting GAIS Portlets
Next, let’s test your GAIS portlets installation. Verify whether the installation is
okay or not as follows.
1) To start Jakarta Tomcat container, run as Tomcat administrator:
$ cd $CATALINA_HOME
$ bin/startup.sh
2) Browse the following URL
http://<hostname>:<port>/gridsphere/gridsphere
3) Login with the appropriate ID
4) Click the Configuration link of the Information Service tab
5) Configure the GSH of your VO Crawler Factory Service.
2.3 Using GAIS

96
How about your installation, successful or failed? We expect your successful
installation & configuration. Now, let’s use GAIS in real Grid environment. We
assume that there is a KMI (Korea Middleware Initiative) VO at Figure 1-23.
GAIS services can be deployed as like following Table 1-4.
Table 1-4. KMI VO configuration
Service/Provider Machine name with the service/provider
DFS sdd107, eros01, vega01
VRS gais
VCFS sdd107, eros01, vega01, gais
MCE provider orin01,nova01, eros01, nova01 Front node of cluster
MSE provider sdd107
Note. To obtain the information that is produced in MCAT-enabled SRB Server,
contact the admin of MCAT-enabled SRB Server and obtain a SRB account.
eros (13 nodes)
DFS+VCFS
DFS+VCFS+MCEP+RMS
VRS+VCFSJSS+GSS
Portal
sdd107
gaisgrasp
portal
•DFS: Datacan Factory Service•VRS: VO Roster Service•VCFS: VO Crawler Factory Service•JSS: Job Submission Service•GSS: Grid Scheduling Service•RMS: Resource Mgmt Service•MCEP: Moredream CE Provider•MSEP: Moredream SE Provider
orion (16 nodes)
eros01 vega (12 nodes)
DFS+VCFS+MCEP+RMS
vega01
KMI Testbed
orion01
MCEP+RMS
Figure 1-23 KMI VO

97
2.3.1 Querying the GAIS GAIS has two type of query. One is find-vo-data and the other is find-vo-
service. You can find Service Data in a VO using find-vo-data, and get the
GSH (Grid Service Handle) of a Grid Service in a VO through find-vo-service.
2.3.1.1 Querying Service Data The following code snippet describes the process to obtain the information in
a VO. The type of result is the Element class. You can variously translate the
format of this result through the AnyHelper class.
…
Element result = null;
VoCrawlerPortType voCrawler = null;
try {
OGSIServiceGridLocator gridLocator
= new OGSIServiceGridLocator();
Factory factory
= ridLocator.getFactoryPort(this.defaultEndpoint);
GridServiceFactory voCrawlerFactory
= new GridServiceFactory(factory);
LocatorType locator
= voCrawlerFactory.createService();
VoCrawlerServiceGridLocator voCrawlerLocator
= new VoCrawlerServiceGridLocator();
voCrawler = voCrawlerLocator.getVoCrawlerPort(locator);
ExtensibilityType queryResult
= voCrawler.findVoData(queryExpression);
98
if (queryResult.get_any() == null) {
// a null any in the case of an xpath query means
//results
Object obj
= AnyHelper.getAsSingleObject(queryExpression);
if (obj instanceof
ServiceDataXPathQueryExpressionType) {
throw new Exception("XPath Query: No results found");
}
}
result = AnyHelper.getAsParentElement(queryResult);
} catch (Exception e) {
e.printStackTrace();
} finally {
try {
if(voCrawler != null) {
voCrawler.destroy();
}
} catch (Exception e1) {
e1.printStackTrace();
}
}
…
2.3.1.2 Querying the GSH find-vo-service is a wrapper of find-vo-data to facilitate the discovery of a
Grid Service. The type of result is the array of the String class.

99
…
String[] result = null;
VoCrawlerPortType query = null;
try {
OGSIServiceGridLocator gridLocator = new OGSIServiceGridLocator();
Factory factory = gridLocator.getFactoryPort(this.defaultEndpoint);
GridServiceFactory queryFactory = new GridServiceFactory(factory);
LocatorType locator = queryFactory.createService();
VoCrawlerServiceGridLocator queryLocator
= new VoCrawlerServiceGridLocator();
query = queryLocator.getVoCrawlerPort(locator);
result = query.findVoService(pattern);
} catch (Exception e) {
e.printStackTrace();
} finally {
try {
if(query != null) {
query.destroy();
}
} catch (Exception e1) {
e1.printStackTrace();
}
}
…

100
2.4. Writing out the MoreDream
Providers
Before you read this material, visit http://www-
unix.globus.org/toolkit/docs/3.2/infosvcs/ws
/developer/servicedataproviders.html. This section is based on that document.
2.4.1 Service Data Providers Service Data Provider components consist of the
ServiceDataProviderManager Java class and one or more “plug-in”
ServiceDataProvider classes, which are regularly executed by the Service
Data Provider Manager (using Java TimerTasks). These provider plug-in
programs can be the supplied providers that are part of GT3.2 or user-created,
custom providers.
A valid provider is defined as any Java class that implements at least one of
three predefined Java interfaces (SimpleDataProvider, DOMDataProvider,
and AsyncDataProvider), and generates a well-formed, compatible XML
document as the output of its execution.
"Well-formed" above means that the XML document can be parsed in any
environment, i.e., any parsing tools written in any programming language can
be used. “Compatible” above means a form compatible with the Service Data
Provider Manager, i.e., a Java output stream or DOM representation.
2.4.2 Core GT3.2 Service Data Providers GT3.2 supplies the following Service Data Providers:
SimpleSystemInformationProvider

101
HostScriptProvider
AsyncDocumentProvider
ScriptExecutionProvider
2.4.3 Provider interfaces The Service Data Provider interfaces are designed to support execution in
either a synchronous ("pull") mode or asynchronous ("push") mode. It is up
to the developer to choose the appropriate provider interface to implement,
based on specific application needs. There are three provider interfaces
SimpleDataProvider, DOMDataProvider, and AsyncDataProvider.
2.4.4 Creating Custom Service Data Providers Service Data Providers can be as simple or as complicated as the situation
requires. The baseline case requires only that the provider developer create a
Java class implementing the functions of one interface – SimpleDataProvider
– whose purpose is to produce XML output in the form of a Java
OutputStream as the result of its execution.
The following steps are the essence of creating a new Service Data Provider:
1) Choose the provider interface to be implemented, based on application
needs or constraints.
2) Write code to produce your dataset as an XML document. This can
either be in an OS-specific external program, or native Java code that is
executed by the provider class itself.
3) Create an entry for the service in which you intend to run the provider in
your auxiliary service configuration file. This service is assumed to have
incorporated the functionality of the Service Data Provider Manager,
which parses the provider configuration file property specified in the
102
service's deployment descriptor entry (in the default server configuration
file, server.config.wsdd), loads the provider, and executes it according to
parameters specified by a client service.
2.4.5 For example, MceScriptProvider
New information providers can be made easily by modifying some methods
and member variables in sample information providers. For example,
MceScriptProvider is very similar to HostScriptProvider that is supplied by
GT3.x. But MceScriptProvider provides lots of information including the basic
information about computing resources.
Let's make MceScriptProvider. First, choose AsyncDataProvider interface and
implement it. If you intend to modify HostScriptProvider, you have only to
change some member variables and method like composeDocument().
Second, write code to produce your dataset as an XML document. There are
many script files to make XML document in MceScriptProvider. Then, you
need to make a configuration file like gais-mce-providers.conf that defines the
sequence of each script execution. Finally, there are some steps to register
MceScriptProvider (See 3.8. Registering MoreDream information providers to
RIPS).

103
Figure 1-24 MceScriptProvider UML Diagram
Figure 1-25 MceScriptProviderExecutionThread UML Diagram

104
2.4.6 Service data provider input Input to Service Data Provider execution is specified via a set of string
arguments to the run method. The argument string that gets passed to the
provider is the serviceDataProviderArgs member of the
ServiceDataProviderExecutionType structure that is passed to the
executeProvider port type method. The getDefaultArgs method may be used
to retrieve a default argument list for the provider. For Service Data Provider
input, the following is an example of an XML serialized form of parameters to
executeProvider :
<executedProviders>
...
<provider-exec:ServiceDataProviderExecution>
<provider-exec:serviceDataProviderName>MceScriptProvider
</provider-exec:serviceDataProviderName>
<provider-exec:serviceDataProviderImpl>
org.moredream.ogsa.impl.base.providers.servicedata.impl.M
ceScriptProvider</provider-exec:serviceDataProviderImpl>
<provider-exec:serviceDataProviderArgs>
</provider-exec:serviceDataProviderArgs>
<provider-exec:serviceDataName
xmlns:mce="http://www.moredream.org/ce/1.0">
mce:ComputingElement
</provider-exec:serviceDataName>
<provider-exec:refreshFrequency>30</provider-
exec:refreshFrequency>
<provider-exec:async>true</provider-exec:async>
</provider-exec:ServiceDataProviderExecution>

105
...
</executedProviders>
2.4.7 Service data provider output The output of a Service Data Provider is XML – either in the form of a Java
OutputStream or a Java org.w3c.dom document. This output becomes the
value of a Service Data Element and hence available as part of the hosting
service's Service Data Elements. These Service Data Elements can then be
used for the various WS Information Services functions.
2.4.8 Registering MoreDream information providers to RIPS GAIS information providers should be registered to RIPS as follows
($GLOBUS_LOCATION/etc/rips-service-config.xml). They produce
{http://www.more dream.org/ce/1.0} ComputingElement and
{http://www.moredream.org/se/1.0} SRBElement as service data.
2.4.8.1. Register MCE Information Provider
$ vi $GLOBUS_LOCATION/etc/rips-service-config.xml
...
<installedProviders>
<providerEntry
class="org.globus.ogsa.impl.base.providers.servicedata.im
pl. ScriptExecutionProvider" handler="jobDataHandler"/>
<providerEntry
class="org.globus.ogsa.impl.base.providers.servicedata.im
pl.HostScriptProvider" />
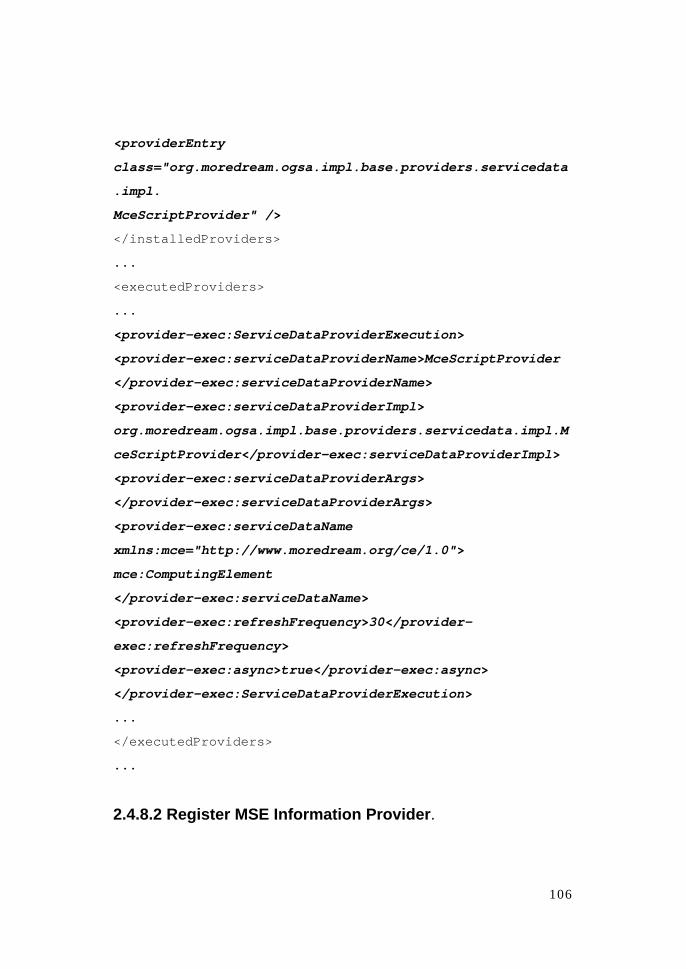
106
<providerEntry
class="org.moredream.ogsa.impl.base.providers.servicedata
.impl.
MceScriptProvider" />
</installedProviders>
...
<executedProviders>
...
<provider-exec:ServiceDataProviderExecution>
<provider-exec:serviceDataProviderName>MceScriptProvider
</provider-exec:serviceDataProviderName>
<provider-exec:serviceDataProviderImpl>
org.moredream.ogsa.impl.base.providers.servicedata.impl.M
ceScriptProvider</provider-exec:serviceDataProviderImpl>
<provider-exec:serviceDataProviderArgs>
</provider-exec:serviceDataProviderArgs>
<provider-exec:serviceDataName
xmlns:mce="http://www.moredream.org/ce/1.0">
mce:ComputingElement
</provider-exec:serviceDataName>
<provider-exec:refreshFrequency>30</provider-
exec:refreshFrequency>
<provider-exec:async>true</provider-exec:async>
</provider-exec:ServiceDataProviderExecution>
...
</executedProviders>
...
2.4.8.2 Register MSE Information Provider.

107
$ vi $GLOBUS_LOCATION/etc/rips-service-config.xml
...
<installedProviders>
<providerEntry
class="org.globus.ogsa.impl.base.providers.servicedata.im
pl. ScriptExecutionProvider" handler="jobDataHandler"/>
<providerEntry
class="org.globus.ogsa.impl.base.providers.servicedata.im
pl.HostScriptProvider" />
<providerEntry
class="org.moredream.ogsa.impl.base.providers.servicedata
.impl.SRBScriptProvider" />
</installedProviders>
...
<executedProviders>
...
<provider-exec:ServiceDataProviderExecution>
<provider-exec:serviceDataProviderName>SRBScriptProvider
</provider-exec:serviceDataProviderName>
<provider-exec:serviceDataProviderImpl>
org.moredream.ogsa.impl.base.providers.servicedata.impl.S
RBScriptProvider</provider-exec:serviceDataProviderImpl>
<provider-exec:serviceDataProviderArgs>
</provider-exec:serviceDataProviderArgs>
<provider-exec:serviceDataName
xmlns:mse="http://www.moredream.org/mse/1.0"> mse:SRB
</provider-exec:serviceDataName>
<provider-exec:refreshFrequency>30</provider-
exec:refreshFrequency>
<provider-exec:async>true</provider-exec:async>

108
</provider-exec:ServiceDataProviderExecution>
...
</executedProviders>
...

109
3. MPICH-GX
3.1 Introduction
MPICH-GX is a patch of MPICH-G2 to extend some required functionalities.
MPICH-G2 is a well-defined implementation of Grid-enabled MPI, but it is
needed to be modified for supporting some requirements of Grid applications.
Thus, MPICH-GX provides useful functionalities for supporting the private IP
and fault tolerance
The rest of this chapter is organized as follows. In section 1.1, we describe
the architecture of MPICH-GX. Section 1.2 presents the functionalities
supporting the private IP and fault tolerance. We introduce two initialization
mechanism of MPICH-GX in section 1.3. Lastly, we provide client tools with
Java library in section 1.4
3.1.1 Architecture of MPICH-GX
Basically, MPICH-GX is based on MPICH-G2. Thus, it has similar architecture
of MPICH-G2 as shown in Figure1-26. It consists of the GX device, a proxy
daemon named nproxy, a local job manager called local-job-manager, a
package of Java library called CM (Coallocator for MPICH-GX) and client
tools based on Java. The GX device modifies ‘globus2 device’ of MPICH to
add required functions. The nproxy relays the messages of MPI processes
when the process is located in private IP clusters. The local-job-manager
invokes a process and monitors the status of the process. The CM is a
package of Java library for supporting the middlewares which are executing
MPICH-GX applications. Lastly, we bring client tools based on Java. Client
tools compose of gxrun as a tool for job submission and gxlrm as a deamon

110
for local resource managerorl of ontion toolools based on java library. The
gxrun could submit a job through the gxlrm running in each distributed
resource.
As shown in Figure1-26, application developer can make MPICH-GX
applications by using standard MPI API. It can be mapped to the globus2
device passing through ADI layer. We modify the globus2 device, so that
some functions in MPICH-GX are different from MPICH-G2.
Figure 1-26 Architecture of MPICH-GX
3.1.2 Functionalities of MPICH-GX MPICH-GX provides mainly two functionalities for supporting the private IP
and fault tolerance. In this section, we describe the details of two
functionalities.
3.1.2.1 Private IP Support
It is a well-known problem that MPICH-G2 does not support private IP clusters.
In MPICH-G2, processes communicate with each other based on IP
addresses. Thus, it cannot support private IP clusters by the nature.
To support private IP clusters, MPICH-GX uses a communication relay
scheme combining the NAT service with a user level proxy named ‘nproxy.’ In

111
this approach, only incoming messages are handled by a user-level proxy to
relay them into proper nodes inside the cluster, while the outgoing messages
are handled by the NAT service at the front-end node of the cluster. Figure 1-
27 shows the conceptual diagram of our relay scheme.
(a) Between two private IP clusters
(b) Between a private IP clusters + public IP cluster
Figure 1-27 Communication Relay Scheme in MPICH-GXs

112
3.1.2.2 Fault Tolerant Support
We provide a checkpointing-recovery system for Grids. Our library requires no
modifications of application source codes, and it affects the MPICH
communication characteristics as less as possible. The features are that it
supports the direct message transfer mode and that all of the implementation
has been done at the low level, that is, the abstract device level.
Figure 1-27 describes the library structure of MPICH-GX for fault tolerant
support. Although fault-tolerance module has been implemented at the
abstract device level, please note that it is still user-level. It contains a
checkpoint toolkit, an atomic message transfer management, and a
connection re-establishment module. The checkpoint toolkit dumps the user-
level memory image into the stable storage on the request. Messages that are
in kernel memory or at network are assumed as in-transit messages. The
atomicity of message transfer at the abstract device level realizes fine grained
checkpoint timing compared to the higher-level approach, because it narrows
the code area that should be exclusive against the checkpoint procedure.
Figure 1-28 The Structure of MPICH-GX Device for Fault Tolerant
Support
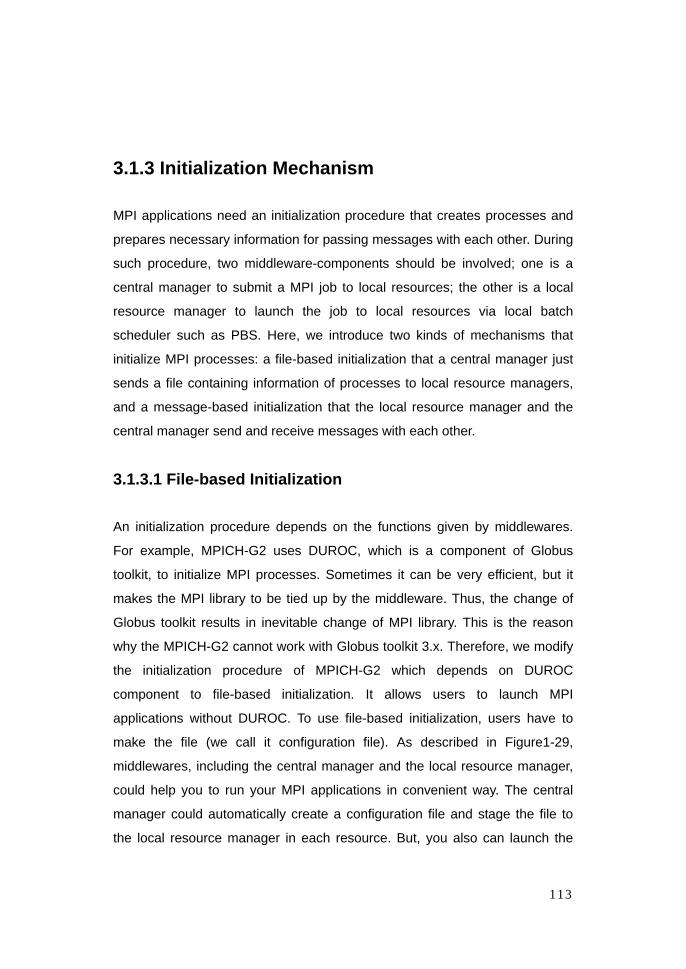
113
3.1.3 Initialization Mechanism
MPI applications need an initialization procedure that creates processes and
prepares necessary information for passing messages with each other. During
such procedure, two middleware-components should be involved; one is a
central manager to submit a MPI job to local resources; the other is a local
resource manager to launch the job to local resources via local batch
scheduler such as PBS. Here, we introduce two kinds of mechanisms that
initialize MPI processes: a file-based initialization that a central manager just
sends a file containing information of processes to local resource managers,
and a message-based initialization that the local resource manager and the
central manager send and receive messages with each other.
3.1.3.1 File-based Initialization
An initialization procedure depends on the functions given by middlewares.
For example, MPICH-G2 uses DUROC, which is a component of Globus
toolkit, to initialize MPI processes. Sometimes it can be very efficient, but it
makes the MPI library to be tied up by the middleware. Thus, the change of
Globus toolkit results in inevitable change of MPI library. This is the reason
why the MPICH-G2 cannot work with Globus toolkit 3.x. Therefore, we modify
the initialization procedure of MPICH-G2 which depends on DUROC
component to file-based initialization. It allows users to launch MPI
applications without DUROC. To use file-based initialization, users have to
make the file (we call it configuration file). As described in Figure1-29,
middlewares, including the central manager and the local resource manager,
could help you to run your MPI applications in convenient way. The central
manager could automatically create a configuration file and stage the file to
the local resource manager in each resource. But, you also can launch the

114
applications manually without any launching program if you know the method
to make the configuration file. The contribution of the file-based initialization is
that it is independent of middlewares. Even though the Grid middleware is
changed more and more, we can launch the MPI application in a same way
when we use the file-based initialization.
Once the central manager sends the file to each local resource, because it
does not receive messages, the central manager could not detect the failure
of the job. Hence, you could not restart for failed job via file-based initialization.
Figure 1-29 File-based Initialization
3.1.3.2 Message -based Initialization
File-based initialization is very simple and easy to apply to middlewares,
including the central manager and the local resource manager, whereas it
cannot support to restart for failed job. Therefore, we provide another
mechanism called message-based initialization to support for fault-tolerance.
Because a central manager sends messages to local resource managers and
receives messages from local resource managers, the central manager could
know the failure of the process by getting the messages from the local
resource manager, as illustrated in Figure1-30.

115
While the central manager must know the channel information of all
processes before job submission at file-based initialization, it could get the
channel information along with the ‘CHANNEL_INFO’ message from each
local resource manager after job submission. Once the central manager gains
the all ‘CHANNEL_INFO’ messages from participating local resource
managers, it sends the ‘CHANNEL_INFO_ACK’ message to each local
resource manager. Then, initialization procedure gets completed. In other
words, it gets ready for passing messages with each other.
We provide Java library called CM (Coallocator for MPICH-GX) to give a help
to implement message-based initialization. When the central manager and the
local resource manager transfer messages with each other via some
message passing protocols such as socket API, SOAP and etc., they could be
easily implemented through our Java library. You can refer the details of Java
library at section 3.1.4
Figure 1-30 Message-based Initialization
3.1.4 Java Library and Client Tools
We provide Java library called CM (Coallocator for MPICH-GX) based on
Java. The CM is some bundles of Java library for supporting the middlewares

116
running MPICH-GX applications. Also, we bring some client tools to be
implemented by Java library. Client tools contain gxrun which is both a client
and a central manager, and gxlrm which is a local resource manager.
CM is mainly composes of two parts: one part is a bundle of packages related
to the central manager as depicted in Figure 1-31, and the other is a bundle of
packages related to the local job manager as illustrated in Figure 1-32.
Developers could easily implement not only client tools but also services
based on Globus Toolkit via CM.
Figure 1-31. UML Class Diagram Regarding to the Central Manager

117
Figure 1-32. UML Class Diagram Regarding to the Local Resource
Manager
Client tools are implemented using CM library. Client tools compose of gxrun
as a tool for job submission and gxlrm as a deamon for local resource
manager as described in Figure 1-31. The gxrun could submit a job through
the gxlrm running in each distributed resource as illustrated in Figure 1-32.
Once each gxlrm gets the request from gxrun, the gxlrm submit the job
through local batch scheduler such as PBS. Then, PBS launches the local-
job-manager, which invoke a process.
The job schema is JRDL (Job & Resource Description Language). JRDL is an
extension of RSL2, which is a job description language used by Globus Toolkit
3.x. JRDL is mainly composes of two parts: one is elements related to a job,
including executable, path, and etc, and the other is elements related to
resources, which are preferences used to select proper resources by meta-
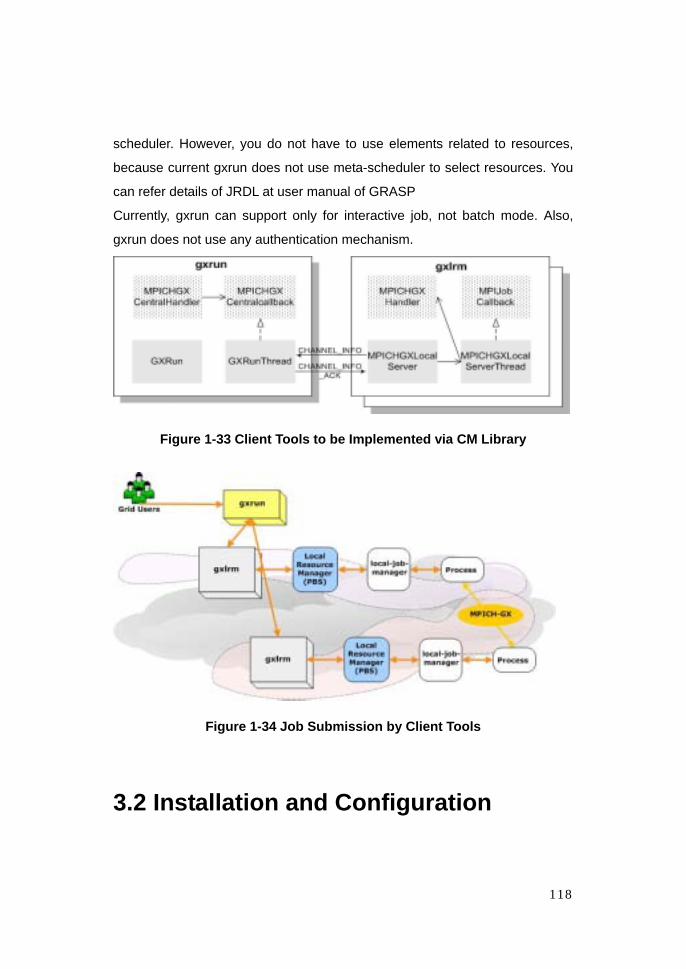
118
scheduler. However, you do not have to use elements related to resources,
because current gxrun does not use meta-scheduler to select resources. You
can refer details of JRDL at user manual of GRASP
Currently, gxrun can support only for interactive job, not batch mode. Also,
gxrun does not use any authentication mechanism.
Figure 1-33 Client Tools to be Implemented via CM Library
Figure 1-34 Job Submission by Client Tools
3.2 Installation and Configuration

119
3.2.1 Requirements
OS: Linux (RedHat 7.3 or more are recommended)
Installing Globus Toolkit 2.4.3 or more (But, 2.4.3 is required to use
nproxy)
Extracting MPICH 1.2.6 source code from a tar ball
3.2.2 Installing Required Softwares
3.2.2.1 Installing Java SDK
Required for: Client tools
Recommended Versions: 1.4.x
Download Link: http://java.sun.com/j2se
3.2.2.2 Installing Globus Toolkit
1. Download all source code from http://www.globus.org
2. As globus, untar the source installer.
3. Make sure that ANT_HOME and JAVA_HOME are set, and that ant and
java are on your PATH.
4. Run
# ./install-gt3 /path/to/install
7. Configure the Globus Toolkit 3.2, looking through
http://www-unix.globus.org/toolkit/docs/3.2/installation/install_config.html
3.2.2.3 PHP4
PHP4 (command line interface) is required for Job Manager Script module in
gxlrm.

120
The libxml2 module must be compiled with PHP.
Download the latest version of libxml2 from http://xmlsoft.org/sources/.
# tar zxvf libxml2-2.6.16.tar.gz
# cd libxml2-2.6.16/
# ./configure --prefix=/usr/local/libxml2 &>
configure.log
# make &> make.log
# make install &> install.log
The zlib library must be installed.
Download a latest PHP distribution from http://www.php.net/
# cd /usr/local/src
# tar zxvf php-4.3.9.tar.gz
# cd php-4.3.9
# ./configure \
--enable-pcntl \
--with-dom=/usr/local/libxml2 --with-zlib-dir=/usr --
disable-cgi
# make clean
# make
# make install
The configure option ‘--enable-pcntl’, which is for process control in PHP, is
required in job manager script module. The ‘--with-dom’ is required for XML
processing in PHP.
The ‘--with-zlib-dir’ is required for libxml2 in PHP.
3.2.2.4 OpenPBS and Cluster Configuration
Computing nodes in a cluster should be configured for rsh and ssh. The job
manager script module uses ssh for executing remote program in other
computing nodes in the cluster. The rsh have a problem to be used for this

121
purpose. To configure ssh add host keys of all the computing nodes to
/etc/ssh/ssh_known_hosts of each computing nodes. The hostname in the
known_hosts file should be fully qualified domain name(FQDN).
3.2.3 Installing MPICH-GX
3.2.3.1 Download
http://kmi.moredream.org/downloads/index.php
You can download the file “mpich-gx-0.1.tar.gz” of MPICH-GX from the web
site written above. The file includes following three components. You could
install two packages(mpich-gx library and misc components) at local
resources, and gxrun binary package at client side
- mpich_1.2.6_gx-0.1.tar.gz: mpich-gx library
- gx-0.1.tar.gz: misc components including local job manager, java library
and client tools
- gxrun-0.1.tar.gz: gxrun binary package
3.2.3.2 Installation at Local Resource
As the globus account,
$ export GX_LOCATION=/usr/local/mpich-gx
$ tar zxvf mpich_1.2.6_gx-0.1.tar.gz
$ cd ./mpich-1.2.6
$ ./configure --with-device=ft_globus:-flavor=gcc32dbg -
-prefix=$GX_LOCATION
$ make
$ make install
$ tar zxvf gx-0.1.tar.gz

122
$ cd ./gx
$ ./install-gt3-gx –gx-dir $GX_LOCATION $GLOBUS_LOCATION
, where GX_LOCATION is a location of installation regarding to MPICH-GX
and GLOBUS_LOCATION is a location of installation for Globus Toolkit.
3.2.3.3 Installation at Client
As a user account,
$ tar zxvf gxrun-0.1.tar.gz
$ cd ./gxrun
3.2.4 Configuration
3.2.4.1 Startup gxlrm on the front-end node for client tools
If you want to launch the job through gxlrun, you have to invoke a daemon
called gxlrm at local resources. Before invoking the gxlrm, you have to
configure the information related to the log and the globus location to
“~/.gx.conf” file as follows.
$ vi ~/.gx.conf
log.level=error
#log.file=/usr/local/gt3.2.1/var/gxlrm.log
#log.append=true
globusLocation=/usr/local/gt3.2.1
Then, you can launch a gxrlm at local resources as follows:
$ cd $GLOBUS_LOCATION/sbin
$ ./gxlrm &

123
3.2.4.2 Startup NAT Service and nproxy on the front-end node
Our message relay scheme uses NAT service to send a message from a
private IP node to others. You can startup Nat service by followings below
commands. See [?] to learn more about NAT services.
As a root,
# vi /etc/rc.d/rc.local
Iptables –A POSTROUTING –t nat –o eth0 –j MASQURADE
echo 1> /proc/sys/net/ipv4/ip_forward
:wq
# /etc/init.d/xinetd restart
Once you startup NAT service, you have to launch a deamon called ‘nproxy’,
where is located in $GLOBUS_LOCATION/sbin.
$ cd $GLOBUS_LOCATION/sbin
$ ./nproxy &> ../var/nproxy_log.txt &
3.2.4.3 Set environmental variables for File-based initialization
If you want to invoke a job by file-based initialization instead of our client tools,
you have to follow following directions. Add variables “FILENAME” and
“FRONT_NAME” in your shell configuration script. FILENAME represent the
name of configuration file for file-based initialization. FRONT_NAME stands
for the FQDN of front-end node of the cluster. If you use public IP clusters,
you need not to specify FRONT_NAME in your shell configuration.

124
# vi ~/.bashrc
export FILENAME={the name of process file}
export FRONT_NAME={FQDN of front-end node}
export FILE_BASED=1
: wq
# source ~/.bashrc
3.3 Running MPI applications
In this Section, we describe the ways to launch MPI applications by using
MPICH-GX. Assume that a user hope to run a simple CPI program on 4
machines. CPI is a program to calculate pi.
3.3.1 Compile your MPI program
You have to compile your MPI application by using MPICH-GX library. It is not
different from the general compilation method of MPI programs.
# mpicc –o gx_cpi cpi.c
3.3.2 Launching your MPI applications by gxrun
Make sure that gxlrm is running in local resources.
3.3.2.1 Configuration
You might configure the information related to the log and the port range of
socket server to “~/.gxrun” file as follows. You do not have to make a

125
configuration file.
$ vi ~/.gxrun
log.level=error
#log.file=filename
#log.append=true
serverPortBegin=16000
serverPortEnd=17000
3.3.2.2 Writing a job
As mentioned above, gxlrm’s job template is JRDL. Follows is an example to
run a simple CPI on remote two clusters, where each cluster use two nodes.
And the period to checkpoint is 30 sec.
$ vi cpi.xml
<?xml version="1.0" encoding="UTF-8"?>
<jrdl
xmlns="http://www.moredream.org/namespaces/2003/09/jrdl">
<job>
<executable>
<path>
<stringElement value="cpi"/>
</path>
</executable>
<directory>
<path>
<stringElement value="/home/globus"/>
</path>
</directory>

126
<environment>
<hashtable>
<entry name="LD_LIBRARY_PATH">
<stringElement
value="/usr/local/gt3.2.1/lib"/>
</entry>
</hashtable>
<hashtable>
<entry name="CKPT_PERIOD">
<stringElement value="30000"/>
</entry>
</hashtable>
</environment>
<stdout>
<pathArray>
<path>
<stringElement value="stdout"/>
</path>
</pathArray>
</stdout>
<stderr>
<pathArray>
<path>
<stringElement value="stderr"/>
</path>
</pathArray>
</stderr>
<jobType>
<enumeration>
<enumerationValue>

127
<xmpi/>
</enumerationValue>
</enumeration>
</jobType>
<subjob>
<resourceManagerContact>
<string>
<stringElement
value="solar16.gridcenter.or.kr"/>
</string>
</resourceManagerContact>
<jobManagerType>
<enumeration>
<enumerationValue><pbs/></enumerationValue>
</enumeration>
</jobManagerType>
<count>
<integer value="2"/>
</count>
</subjob>
<subjob>
<resourceManagerContact>
<string>
<stringElement
value="solar21.gridcenter.or.kr“/>
</string>
</resourceManagerContact>
<jobManagerType>

128
<enumeration>
<enumerationValue><pbs/></enumerationValue>
</enumeration>
</jobManagerType>
<count>
<integer value="2"/>
</count>
</subjob>
</job>
</jrdl>
3.3.2.3 Submitting the job
Staging executable to each cluster
$ scp /home/globus/cpi user@solar16:/home/globus/cpi
$ scp /home/globus/cpi user@solar21:/home/globus/cpi
Submitting the job
$ gxrun cpi.xml
Request a new job 700
Job is done.
$
3.3.3 Launching your MPI applications based on File-based initialization
You can launch your application in various ways. You can use original ‘mpirun’
or ‘globusrun’ or you can even launch your application manually without any
launching program.
129
3.3.3.1 Manual Launching
Manual launching must be a very inconvenient way, but it can help you
understand entire steps of launching MPI applications.
A. Making ‘process_info’ file:
As stated above, you should make a configuration file to help MPI processes
with performing the initialization procedure. Following is an example when a
user runs ‘cpi’ application on 2 clusters each of which has 2 nodes. Details of
‘process_info’ file are described in Section 4.
# vi process_info
4 2 9292
# Protocol information of each process
0 0 0 2 33501 36000 nova03.gridcenter.or.kr nova01.gridcenter.or.kr
1 0 1 2 33501 36000 nova04.gridcenter.or.kr nova01.gridcenter.or.kr
2 1 0 2 33501 36000 solar18.gridcenter.or.kr solar18.gridcenter.or.kr
3 1 1 2 33501 36000 solar19.gridcenter.or.kr solar19.gridcenter.or.kr
# cp process_info FILE_NAME
B. Staging ‘process_info’ file to all execution nodes:
# echo $FILE_NAME
/home/globus/process_info
# scp /home/globus/process_info ser@execution_node:FILE_NAME
C. Staging executables:
# scp /home/globus/cpi user@execution_node:/home/globus/cpi

130
D. Run executables on each remote machine:
nova03]# /home/globus/cpi RANK=0
nova04]# /home/globus/cpi RANK=1
solar18]# /home/globus/cpi RANK=2
solar19]# /home/globus/cpi RANK=3
3.3.3.2 Launching by ‘mpirun’
You also can launch MPI application by using old ‘mpirun.’
A. Configuration:
Make sure that two clusters are properly configured regarding to ssh and rsh
with each other
B. Making and Staging ‘process_info’ file:
It is same with above direction of manual launching
C. Making ‘machine file’:
# vi machinefile
“cluster1/jobmanager-pbs” 2
“dccsun/jobmanager-pbs” 2
:wq
D. Launching executable by using ‘mpirun’:
# mpirun –np 4 –machinefile machinefile –s cpi
3.3.4 How to make ‘process_info’ file?
We will describe the details of ‘process_info’ file as depicted in Figure 1-35.

131
Both dccsaturn and dccneptune exist on private IP domiain, whereas both
cluster203 and cluster202, where hostname is same domain name with front’s,
are running on public IP domain
4 2 9292
# This is Init file example (You can use # for commenting something
# Shared information (MyWorldSize, nsubjobs, unique value)
# Protocol information of each process
0 2
1 2
0 2
1 2
01
2
3
33501
33501
33501
33501
36000
36000
36000
36000
dccsaturn.sogang.ac.kr
dccneptune.sognag.ac.kr
cluster203.yonsei.ac.kr
cluster202.yonsei.ac.kr
dccsun.sogang.ac.kr
dccsun.sogang.ac.krcluster203.yonsei.ac.kr
cluster202.yonsei.ac.kr
Global_rank
Rank_in_my_subjobMy_subjob_size
Listen port
Barrier porthostname
Front hostname
Figure 1-35 An example of process_info file
,

132
Chapter 2
KGridCA

133
1. Introduction
1.1. What is KGridCA?
CA (Certificate Authority) is an entity in PKI (Public Key Infrastructure), which
is responsible for establishing and vouching for the authenticity of public keys.
KGridCA is a software for constructing a certificate authority in a simple
manner. KGridCA can be accessed by web browsers, and generations of
certificate are done by OpenSSL. Issued certificates are stored and managed
by DBMS.
1.2. Architecture of KGridCA
Figure 2-1 is the architecture of KGridCA. A certificate requestor access to the
public web server to upload his CSRs(Certificate Signing Request). Uploaded
CSR are stored in a database. The administrator accesses to an internal web
server to issue a certificate. The internal web server should be protected from
outside world for security. Issued certificates are stored in the database, which
can be downloaded by the certificate requestor through the public web server.
Figure 2-1 Architecture of KGridCA
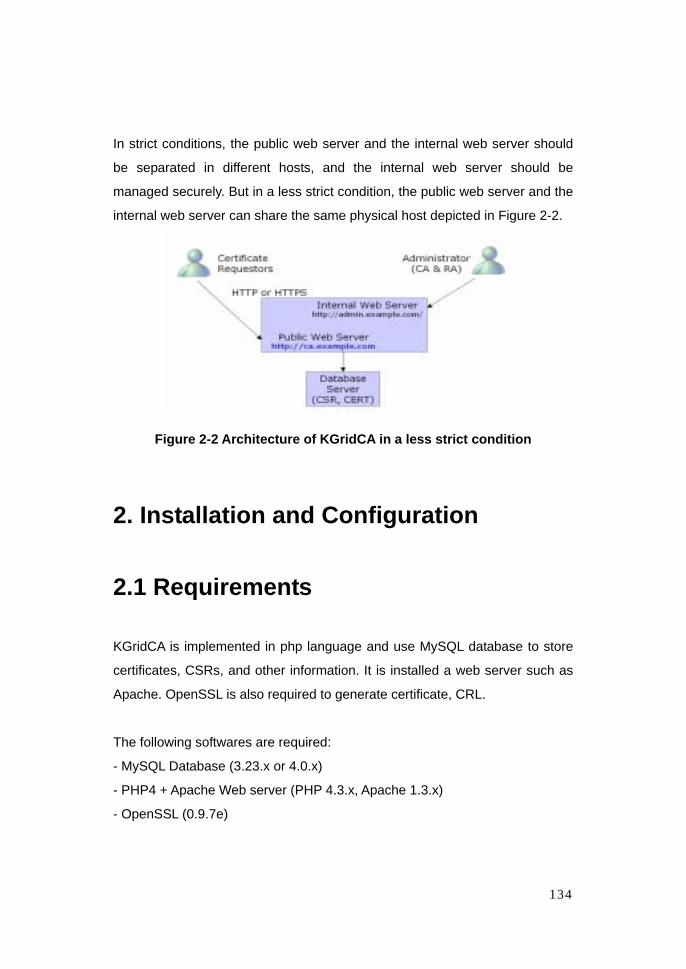
134
In strict conditions, the public web server and the internal web server should
be separated in different hosts, and the internal web server should be
managed securely. But in a less strict condition, the public web server and the
internal web server can share the same physical host depicted in Figure 2-2.
Figure 2-2 Architecture of KGridCA in a less strict condition
2. Installation and Configuration
2.1 Requirements
KGridCA is implemented in php language and use MySQL database to store
certificates, CSRs, and other information. It is installed a web server such as
Apache. OpenSSL is also required to generate certificate, CRL.
The following softwares are required:
- MySQL Database (3.23.x or 4.0.x)
- PHP4 + Apache Web server (PHP 4.3.x, Apache 1.3.x)
- OpenSSL (0.9.7e)

135
2.2. Installing required software
2.2.1. Installing MySQL Database
Download a latest MySQL distribution from http://www.mysql.com/.
Move to a temporary directory and extract the distribution file.
# cd /usr/local/src (download the distribution file in this directory)
# tar zxvf mysql-4.0.16.tar.gz
# cd mysql-4.0.16
Configure and compile the source
# ./configure --prefix=/usr/local/mysql --with-mysqld-user=root
# make
Copy the compiled binaries to the install location.
# make install
Make a symbolic link for ‘mysql’ command line client, or add it to the $PATH
variable.
# ln -s /usr/local/mysql/bin/mysql /usr/local/bin/mysql
Database initialization
# /usr/local/mysql/bin/mysql_install_db
Start MySQL server daemon
# /usr/local/mysql/bin/mysqld_safe -u root &
To start MySQL server daemon during system startup, add a line to the

136
rc.local file.
# vi /etc/rc.d/rc.local
...
/usr/local/mysql/bin/mysqld_safe -u root &
...
Refer to other books or documents about managing and using MySQL.
2.2.2. Installing PHP4 + Apache Web Server
Apache should be configured before compiling PHP.
Download a latest apache distribution from http://www.apache.org/
# cd /usr/local/src
# tar zxvf apache_1.3.33.tar.gz
# cd apache_1.3.33/
# ./configure
Download a latest PHP distribution from http://www.php.net/
# cd /usr/local/src
# tar zxvf php-4.3.11.tar.gz
# cd php-4.3.11
# ./configure --with-apache=../apache_1.3.33/ \
--with-config-file-path=/etc/httpd --with-
mysql=/usr/local/mysql
# make clean
# make
# make install
Compile the Apache web server and install it.
# cd /usr/local/src/apache_1.3.33/
# ./configure --prefix=/usr/local/apache \

137
--activate-module=src/modules/php4/libphp4.a
# make clean
# make
# make install
Setup the PHP installation
# cd /usr/local/src/php-4.3.11
# mkdir /etc/httpd; cp php.ini-dist /etc/httpd/php.ini
Setup the Apache web server
# vi /usr/local/apache/conf/httpd.conf
...
LINE 808(approx.): add a line
# PHP
AddType application/x-httpd-php .php
</IfModule>
...
:wq
{Start | stop | restart} the apache web server
# /usr/local/apache/bin/apachectl {start | stop | restart}
2.3. Installing KGridCA
2.3.1. Download and Extract
You can download the distribution files from KMI web site
http://kmi.moredream.org/.
Download and untar the distribution file under your web server root directory.

138
$ cd /usr/local/apache/htdocs
Download KGridCA-1.0.tar.gz from http://kmi.moredream.org/
$ tar zxvf KGridCA-1.0.tar.gz
$ cd KGridCA-1.0
Directory structure is as follows:
KGridCA-1.0
|-- img
|-- inc
|-- rootca # root ca repository
|-- sql # MySQL commands
|-- ssl.conf # OpenSSL configuration
`-- tmp # temporary file
2.3.2. Configuration
Create a database named ‘gridca’ and make tables:
$ mysql [–u user] [–p]
mysql> create database gridca;
mysql> quit
$ cd sql
$ mysql [–u user] [-p] gridca < create_tables.sql
Refer to other documents to use mysql command.
Open inc/config.php to edit the database connection parameters and others:
$ vi inc/config.php
# database access
$conf[dbhost] = "localhost"; # database server
$conf[dbuser] = "root"; # database user

139
$conf[dbpasswd] = ""; # database user's password
$conf[dbname] = "gridca"; # database name
# path and location
$conf[openssl] = "/usr/local/bin/openssl"; # openssl path
$conf[gridca_path] = "/www/html/GridCA";
$conf[rootca_path] = "$conf[gridca_path]/rootca";
# openssl config files
$conf[openssl_config_1] = "$conf[gridca_path]/ssl.conf/ssl.ca.conf";
$conf[openssl_config_2] = "$conf[gridca_path]/ssl.conf/ssl.general.conf";
$conf[tmpdir] = "/www/html/GridCA/tmp"; # temporary directory
$conf[tmpdir_prefix] = "gridca_";
$conf[clear_files] = 1; # if true, clear generated files
$conf[sitehome] = "https://ca.example.com/GridCA"; # home URL
$conf[managerhome] = "http://admin.example.com/GridCA"; # home
URL
$conf[href_prefix] = "/GridCA";
$conf[https_only] = false;
$conf[crl_scp_prefix] = "host.example.com:/path/to/CRL";
# administration
$conf[admin_sendmail] = 0; # if true, send emails to admin
$conf[admin_email] = "[email protected]"; # administrator email address
$conf[project_name] = "GridCA"; # project name
$conf[allow_admin_login] = true;
# timezone
$conf[gmt_to_local] = 3600*9; # local time shift based on GMT time in
seconds

140
$conf[timezone_str] = 'KST[GMT+9]'; # time zone
# database tables (from/sql/db.mysql.sql)
$conf[dbtblcert] = "gridca_cert"; # cert table name
$conf[dbtblcsr] = "gridca_csr"; # csr table name
$conf[dbtblpasswd] = "gridca_passwd"; # passwd table name
$conf[dbtbllog] = "gridca_log"; # log table name
$conf[dbtblsn] = "gridca_sn"; # serial number table name
# cookies configuration
$conf[cookie_prefix] = 'GRIDCA_'; # cookie variable prefix
$conf[secure_cookie] = 1; # use hashed token cookie value
$conf[static_cookie] = "MY_COOKIE_STRING";
$conf[min_passwd_len] = 4; # the minimum length of passwords
$conf[root_ca_valid_days] = 365*5;# valid period of root CA
$conf[cert_valid_days] = 365; # valid period of certificates
$conf[default_org1] = "Grid"; # default value of organization name 1
$conf[default_org2] = "Globus";# default value of organization name 2
$conf[default_country] = "KR"; # default value of country code
$conf[newtime] = 3600*24; # displayed as new for newtime in seconds
$conf[ipp] = 10; # items per page
$conf[session_check_period] = 60;
2.3.3. Configure Administration Login Name
As an administrator, you should add an admin account to login KGridCA.
$ cd sql
$ php insert_admin.php “admin” “password” “[email protected]”
> sql
where “admin” is the administrator’s account name, “password” is his

141
password, and the last one is the email address.
$ mysql [-u user] [-p] gridca < sql
Open a web browser and load index.php.
Click ‘Login’ and input the administrator’s account and password created
above.
If the login was successful, You will see the following page:

142
2.3.4. Generating Root Certificate
Click ‘Generate Self-Signed Root CA’ in the main menu.
The ‘rooca’ directory should be writable by the web server daemon.
Temporary change the mode 777 in this step. (chmod 777 rootca)
.crt, .key, .info files are generated.

143
Chapter 3
KMI-GridSphere

144
1. Introduction
1.1 What is Gridsphere?
GridSphere is the open-source porltet based portal framework which is part of
the Gridlab project funded by the European Commission under the Fifth
Framework Programme of the Information Society Technology. Gridsphere is
compliant 100% JSR 169 Portlet API and supports higher-level model for
building complex portlets using visual beans and the GridSphere User
Interface tag lib
We develop the basic portlets for using Grid environment to support
implementation of Grid portal and implement Bio Informatics Grid Portal and
Data Grid portal for Belle Code using Gridsphere. Also, we implement
MoreDream Grid service portlets - GRASP job submission porlet, GAIS
information
We have modified bannaer and GuestLayOut Pages. This product includes
software developed by and/or derived from the GridSphere Project
(http://www.gridsphere.org/).
2. Installation and Configuration
2.1 Requirements
- OS : Linux (RedHat 7.3 or more are recommended)
- Java 2 Platform, Standard Edition 1.3.1 or 1.4.2+
- Ant 1.5.3-1+

145
- Tomcat 4.1+ (not tested in Tomcat 5.+)
2.2. Installing required software
2.2.1. Installing Java 2Platform, Standard Edition
You can download Java 2 SDK from http://java.sun.com. Following is
described about binary installation in Redhat Linux.
1. Login as root
$ su –
2. Download and extract the downloaded file.
# cd $JDK_DOWNLOAD_DIRECTORY
# chmod 755 j2sdk-1_X_X-linux-i586.bin
# ./j2sdk-1_X_X-linux-i586.bin
Sun Microsystems, Inc.
Binary Code License Agreement
for the
JAVATM 2 RUNTIME ENVIRONMENT (J2RE), STANDARD EDITION,
VERSION 1.X.X_X
...
Do you agree to the above license terms? [yes or no] yes
3. Run the rpm command to install. It is installed in /usr/java/ j2sdk1.X.X by
default.
# rpm –ivh j2sdk-1_X_X-linux-i586.rpm
4. Set Java environment variables.
$ vi ~/.bashrc
export JAVA_HOME=/usr/java/j2sdk1.X.X

146
export PATH=$JAVA_HOME/bin:$PATH
2.2.2 Installing Ant
You can download Ant from http://ant.apache.org.
1. Login as root.
$ su –
2. Extract the downloaded file.
# cd $ANT_DOWNLOAD_DIRECTORY
# tar zxvf apache-ant-1.X.X-X-bin.tar.gz
3. Move to the extracted files installation directory.
# mv apache-ant-1.X.X-X /usr/local/
4. Set Ant environment variables.
# vi ~/.bashrc
export ANT_HOME=/usr/local/apache-ant-1.X.X-X
export PATH=$ANT_HOME/bin:$PATH
2.2.3. Installing Tomcat
You can download Ant from http://jakarta.apache.org/tomcat.
1. Login as root.
$ su – tomcat
2. Extract the downloaded file.
# cd $TOMCAT_DOWNLOAD_DIRECTORY
# tar zxvf jakarta-tomcat-4.X.X.tar.gz
3. Move to the extracted files installation directory.
# mv jakarta-tomcat-4.X.X /usr/local/
4. Set Ant environment variables.
# vi ~/.bashrc
export CATALINA_HOME=/usr/local/ jakarta-tomcat-4.X.X

147
2.3. Installing Gridsphere
2.3.1. Downloading and extraction
You can download from http://www.gridcenter.or.kr/kmi and
http://www.gridsphere.org. We recommend to download from
http://www.gridcenter.or.kr/kmi. Gridsphere is being developed and modified
continually, to use the portlets in KMI packages you must download KMI
version.
2.3.2. Installation
1. Extract the downloaded file.
$ cd $GRIDSPHERE_DOWNLOAD_DIRECTORY
$ tar xvzf gridsphere-kmi.1.X.X.tar.gz
From now on, $GRIDSPHERE_HOME is
$GRIDSPHERE_DOWNLOAD_DIRECTORY/gridsphere.
2. Install Gridsphere
Using Ant, you can install Gridsphere to Tomcat Web Application.
$GRIDSPHERE_HOME/build.xml supports the following tasks:
install -- builds and deploys GridSphere, makes the
documentation and installs the database
clean -- removes the build and dist directories
including all the compiled classes
compile -- compiles the GridSphere source code
deploy -- deploys the GridSphere framework and all
portlets to a Tomcat servlet container located at
$CATALINA_HOME
create-database - creates a new, fresh database with

148
original GridSphere settings, this wipes out your current
database!
docs -- compiles all GridSphere docbook documentation
and builds the Javadoc documentation from the source code
run-tests -- runs all Junit tests inside the Tomcat
container using the Jakarta Cactus framework
$ cd gridsphere
$ ant install
Type ”y” about question of Gridsphere License Agreement and Gridsphere is
installed to $CATALINA_HOME/webapp/gridsphere.
2.3.3. Configuration of Tomcat Environment
To manages the portlets, Gridsphere uses Tomcat Manager Web Application.
So, you must insert gridsphere user with manager role to Tomcat User. Edit
$CATALINA_HOME/conf/tomcat-user.xml.
<user name=”gridsphere” password=”gridsphere” role=”manager” />
To prevent the portal users access Tomcat Manager Web Application, edit
$CATALINA_HOME/webapp/manager.xml like following.
<Context path=”/manager” debug=”0” privileged=”ture”
docBase=”$CATALINA_HOME/server/webapps/manager”>
<valve className=”org.apache.catalina.valves.RemoteAddrValve”
allow=”127.0.0.1”/>
</Context>
2.3.4. Starting Gridsphere

149
You just restart Tomcat container and connect to
http://localhost:8080/gridsphere/gridshere. You can see following web page.
2.4. Installing Gridportlets
We just use certification portlets and applet(including web start), so to use full
function of Gridportlets you modify xml files in
$GRIDPORTLETS_HOME/webapp/WEB-INF/.
2.4.1. Downloading and extraction
Like Gridsphere, you can download from http://www.gridcenter.or.kr/kmi and

150
Gridsphere CVS repository. We recommend to download from
http://www.gridcenter.or.kr/kmi. Gridsphere is being developed and modified
continually, to use the portlets in KMI packages you must download KMI
version.
After download the package, you extract file to
$GRIDSPHERE_HOME/projects. From now on, $GRIDPORTLETS_HOME is
$GRIDSPHERE_HOME/projects/gridportlets.
2.4.2. Configuration of Gridportlets
Before you install Gridportlets, you must install Gridsphere and modify
$GRIDPORTLETS_HOME/build.properties file and
$GRIDPORTLETS_HOME/webapp/WEB-INF/Resources.xml.
1. Modify build.properties
1.1. Set OGAS Library version
#ogsa.version=ogsa-3.0.2
ogsa.version=ogsa-3.2.1
1.2. Set keystore properties. “Keystore” is a path of keyStore file generated
by keytool. “storealias” is the value of “–alias” option.
CN=K*GRID
OU=
O=KISTI
C=KR
keystore=/usr/local/tomcat/portalcert/testKeyStore
storetype=JKS
storepass=gridsphere
signalias=gridsphere
This version supports just keytool but next version supports keytool and
openssl. Above keystore directory must be made before installation.

151
Generation of keyStore using keytool※
$ keytool –genkey –keystore testKeyStore –alias gridsphere
$ keytool –selfcert –alias gridspher –keystore testKeyStore
$ keytool –list –keystore testKeyStore
1.3. Set hostname and MyProxy Server
# CA email address.
install.ca.email.address=
# default MyProxy server to use.
install.myproxy=nstargate.gridcenter.or.kr
# host name
install.hostname=sk-joon.supercomputing.re.kr
# host port
install.port=8080
2. Modify Resources.xml
You must set Myproxy server information in
$GRIDPORTLETS_HOME/webapp/WEB-INF/Resources.xml.
<grid-resources>
<hardware-resource label="K*Grid Myproxy machine"
description="Myproxy resource"
hostname="nstargate.gridcenter.or.kr">
<myproxy-resource label="KISTI Myproxy Service"
description="The KISTI Myproxy service"
authorizedProxyFile=""
authorizedCertFile=""
authorizedKeyFile=""/>
</hardware-resource>
</grid-resources>

152
2.4.3. Installation Using ant, you just run command “ant install” and the package is installed in
$CATALINA_HOME/webapp/gridportlets.
$ ant install
2.4.4. Starting GridPortlets
You just restart Tomcat container and log in
http://localhost:8080/gridsphere/gridshere. In “Welcome->Settings->Configure
group memebership”, you check gridportlets and click “Save” button.

153
Chapter 4
AIServie (Acccount Information Service)

154
1. Introduction
The object of this document describes how to install and configure AIService,
an accounting service which is efficient, flexible and OGSI-compliant service.
Here, we illustrate the schematics of this accounting service and its main
functionalities.
For purposes of this document, it is assumed that
-You are familiar with Unix or Linux.
-You have some understanding of the concepts underlying computational
grids.
-You have some understanding of the concepts of traditional Unix (or Linux)
accounting.
-You have basic knowledge of XML.
1.1. What is AIService?
This project is intended to develop an OGSI-compliant service which gather
accounting information from heterogeneous platforms and provide accounting
information as a standard form. We named it as ‘AIService’ (Accounting
Information Service).
There are two topics:
Gathering grid accounting information
Service of grid accounting information

155
Figure 4-1 A schematic view of AIService
Accounting in the grid environment is very different from that in the traditional
computing environment, because the concept of the user is different from the
traditional local user and the format of accounting data of each system is
different from each other. Accounting information in the grid environment is
not produced by the local user but by the grid user. And the format of
accounting data is different from platform to platform. By the use of
AIService, these problems can be resolved.
Development of this project focuses on the GT3. To provide accounting
information to grid users, AIService is developed to be OGSI-compliant.
Anyone who uses GT3 client can retrieve his accounting information via
AIService.
1.2. Architecture of AIService
Figure 4-1 shows a schematic view of AIService. This system is divided into
two major parts: AIT and AIS. AIT (Accounting Information Tracker) gathers
local accounting information at each site, converts into grid accounting
information format, and accumulate in database. AIS (Accounting Information

156
Service) serves as OGSI-compliant interface against user’s GT3 request.
Figure 4-2 shows more detail view of AIService.
Figure 4-2 AIService Architecture
AIT-server
- Accumulates grid accounting information into database for AIS
We use MySQL as DBMS.
For the future expansion, we will use Xindice
MySQL
AIT-client-*
- ait-client-put for OpenPBS
We use PBS XML Accounting Toolkit
(http://pbsaccounting.sourceforge.net) to extract accounting
information produced by PBS.

157
- ait-client-lut for LoadLeveler
We use C API to get accounting information from LoadLeveler’s
history.
- Convert local accounting information at each site into grid-aware
accounting information.
Local accounting information does not include the real owner of
each record. The owner of this record is not local account but
grid user.
The owner of accounting information can be tracked by using
the information in ‘grid-mapfile’ or ‘globus-gatekeeper.log’ or
other resource broker’s. Each method has their own
advantage and disadvantage.
By default, we use the information in ‘grid-mapfile’. To guarantee
end-to-end user identity, we limit the mapping of user’s subject
and local account to 1-to-1 mapping ( not n-to-1 ).
- Transform grid-aware accounting information to standard XML format
suggested by UR-WG in GGF.
At each site, a client module against AIT is located. They are
tries to find local accounting information from the local job
manager and provides information as the standard XML format.
If we need to include new platform, we just develop this client
module for new platform.
AIService
- Developed as an OGSI-compliant service.
- Select records that fill user’s condition and provide.
AIS-portlets
- A grid portlet working on gridsphere framework.
- Show some chart image extracted from accounting information data
and summarized information

158
2. Installation and Configuration
2.1. Requirements
To manage extracted grid accounting information, you need to have DBMS.
For AIService, the following environment is required:
OS : Linux (Redhat 7.3 or more are recommended)
Globus Toolkit 3.0 or later : required to provide OGSI-compliant service
MySQL Database : stores grid accounting information
J2SDK 1.4.0 or later : AIService is written in pure java language on GT3
JDBC Mysql driver : required to access MySQL Database from the java code
2.2. Installing required software
2.2.1. Installing Globus
AIService works on Globus Toolkit 3.0 or later. So, you need to download it
and install in usual scheme.
For the more detailed information, see
http://www-unix.globus.org/toolkit/docs/3.0/index.html.
2.2.2. Installing MySQL Database
Download a latest MySQL distribution from http://www.mysql.com/.
You can find a copy of MySQL distribution in software archive directory of
KISTI Grid Testbed
web site : http://testbed.gridcenter.or.kr/software/index.php?dir=./DBMS

159
Move to a temporary directory and extract the compressed file.
# cd /usr/local/src
# tar zxvf mysql-4.0.16.tar.gz
# cd mysql-4.0.16
Refer to the --help output for configure options
# ./configure –help
Configure and compile the source
# ./configure --prefix=/usr/local/mysql --with-mysqld-user=root
# make
Copy the compiled binaries to the install location.
# make install
Make a symbolic link for ‘mysql’ command line client, or add it to the $PATH
variable.
# ln -s /usr/local/mysql/bin/mysql /usr/local/bin/mysql
Database initialization
# /usr/local/mysql/bin/mysql_install_db
Start MySQL server daemon
# /usr/local/mysql/bin/mysqld_safe -u root &
To start MySQL server daemon during system startup, add a line to the
rc.local file.
# vi /etc/rc.d/rc.local
...
# mysql
/usr/local/mysql/bin/safe_mysqld -u root &
...
Refer to other books or documents about managing and using MySQL.
2.2.3. Installing J2SDK, Ant, JDBC driver
Install J2SDK 1.4.2 under /usr/java/.

160
Get it from http://java.sun.com/
# mkdir /usr/java
# cd /usr/java/
# chmod 755 j2sdk-1_4_2-linux-i586.bin
# ./j2sdk-1_4_2-linux-i586.bin
...
Do you agree to the above license terms? [yes or no]
yes
Add a configuration to the .bashrc
# vi ~/.bashrc
...
# java
export JAVA_HOME=/usr/java/j2sdk1.4.2
export PATH=$JAVA_HOME/bin:$PATH
...
:wq
Install Jakarta Ant tool
Download ant from http://ant.apache.org/.
# tar zxvf apache-ant-1.5.3-1-bin.tar.gz
# mv apache-ant-1.5.3-1 /usr/local/
# cd /usr/local
# ln -s apache-ant-1.5.3-1 ant
Add a configuration to the .bashrc
# vi ~/.bashrc
...
# ant
export ANT_HOME=/usr/local/ant
export PATH=/usr/local/ant/bin:$PATH

161
...
:wq
Install JDBC driver MySQL-connector/J
Download it from http://www.mysql.com/.
# tar zxvf mysql-connector-java-3.0.8-stable.tar.gz
# cp mysql-connector-java-3.0.8-stable/mysql-connector-
java-3.0.8-stable-bin.jar $JAVA_HOME/jre/lib/ext/
2.3. Installing AIService
2.3.1. Downloading and extracting
For AIS and AIT, download aiservice-1.0.0.tgz from ftp://tea07.chonbuk.ac.kr.
In this document, we use /usr/local/aiservice-1.0.0 as the installation directory.
Move to /usr/local/ and extract the distribution file.
# cd /usr/local/
# tar zxvf aiservice-1.0.0.tgz
The directory structure is :
aiservice-1.0.0
|-- ais-server source & binary files for AIS
|-- ais-portlet source & binary files for AIS portlet
|-- ait-client source & binary files for AIT clients
|-- ait-server source & binary files for AIT server
\-- DB_Tool tools for management of DBMS
For ait-client-put, download ait-client-put-1.0.0.tgz from
http://kmi.moredream.org.
Move to your directory and extract the distribution file.

162
# cd ~/ait-client-put
# tar zxvf ait-client-put-1.0.0.tgz
The directory structure is :
ait-client-put-1.0.0
|-- bin runnable script files
|-- etc configuration files
|-- lib binary java archives
|-- var log files & temporary files
| \-- spool
\-- other source & scripts
2.3.2. Compiling and Installing AIS & AIT
For AIT clients, source and binary files are provided. If you want to use source
version, move to AIT client directory and execute a simple script named
‘build.sh’. To install compiled binaries, set environment variable
$AIT_CLIENT_PUT and run a script named ‘install.sh’.
# cd ./ait-client-put-1.0.0
# ./build.sh
# export AIT_CLIENT_PUT=/usr/local/ait-client-put
# ./install.sh
For AIT server, move to AIT client directory and execute a simple script
named ‘build.sh’. To install compiled binaries, set environment variable
$AIT_SERVER and run a script named ‘install.sh’.
# cd ./ait-server-1.0.0
# ./build.sh
# export AIT_SERVER=/usr/local/ait-server
# ./install.sh

163
For AIS, you can use source and binary version.
If you want to use source version, move to AIS directory and execute a script
named ‘build.sh’.
# cd ./ais-server
# ./build.sh
For AIS-portlet, move to AIS-portlet directory and execute ant.
# cd ./ais-portlet
# ant compile
# ant deploy
2.3.3. Creating database and tables Move to ‘DB_Tool’, there are three files.
DB_Tool
|-- README : information and usage
|-- create-add-host-sql : a script to create usage record table
\-- init_db.sql : SQL statements to initialize db
To initialize database, use ‘init_db.sql’.
# mysql –u root –p < ./init_db.sql
Then, database and its management table will be created.
To add new site in this database, use script ‘create-add-host-sql’.
# ls
README
create-add-host-sql
init_db.sql
# ./create-add-host-sql joker.chonbuk.ac.kr
# ls

164
README
add_joker_chonbuk_ac_kr.sql
create-add-host-sql
init_db.sql
Created file is an SQL statement to create usage record table for this site.
To add table, use this SQL statement
# mysql –u root –p < ./add_joker_chonbuk_ac_kr.sql
2.3.4. Configuration
For AIT & AIS, there is no need to configure.
For AIT client, edit files in ‘etc’ directory.
ait-client-put-1.0.0/etc
|-- PbsUsageTracker.conf : main configuration file
|-- ur-config.xsl : your host name
\-- ur.xsl : xsl for transformation from pbs to grid
In ‘PbsUsageTracker.conf’, there are following fields.
# cat $AIT_CLIENT_PUT/etc/PbsUsageTracker.conf
Interval=60 # a time period to check log
PbsAcctLogDir=/usr/spool/PBS/server_priv/accounting
# real path of pbs accounting log directory
PUTInfoFile=./var/PbsUsageTracking.info
# intermediate information of suspended log
URXslFile=./etc/ur.xsl # xsl for transformation from
pbs to grid
OutHost=tea07.chonbuk.ac.kr
# database server
OutHostPort=2410 # database server port
GridMapfile=/etc/grid-security/grid-mapfile

165
# real path of grid-mapfile
In ‘ur-config.xsl’, the host name which is registered in the database server.
(Each host is registered by using ‘create-add-host-sql’. See 2.3.3) So, you
must put your host name which is or will be registered in the database server.
For AIT client, edit files in ‘etc’ directory.
ait-client-put-1.0.0/etc
\-- ait-server.conf : main configuration file
In ‘ait-server.conf’, there are following fields.
# cat $AIT_SERVER/etc/ait-server.conf
Port=2410 # database server port
DatabaseURL=jdbc:mysql://210.117.187.244:3306/AcctInfo
# A databse url of form « jdbc :subprotocol :subname »
User=tr_venus # database user name
Passwd=tr_venus # password of database user ‘tr_venus’
For AIS, edit a configuration file ‘AIS.conf’ in $GLOBUS_LOCATION/etc
directory.
In ‘AIS.conf’, there are following fields.
# cat $GLOBUS_LOCATION/etc/AIS.conf
DatabaseURL=jdbc:mysql://210.117.187.244:3306/AcctInfo
# A databse url of form « jdbc :subprotocol :subname »
User=tr_venus # database user name
Passwd=tr_venus # password of database user ‘tr_venus’
For AIS-portlet, edit a configuration file ‘ais-config’ in ‘webapp/WEB-INF’ of
this portlet. Fill AIS-server and resource-list element.
# cat webapp/WEB-INF/ais-config
<ais-config>
<ais-server>210.117.187.244</ais-server>

166
<resource-list>
<resource>vega01.gridcenter.or.kr</resource>
<resource>eros01.gridcenter.or.kr</resource>
<resource>venus.gridcenter.or.kr</resource>
</resource-list>
</ais-config>
2.3.5. Starting
For AIT client, just run a script named ‘run-ait-client-put’ in
‘$AIT_CLIENT_PUT/bin directory.
# cd $AIT_CLIENT_PUT
# ./bin/run-ait-client-put
For AIT server, just run a script named ‘run-ait-client-put’ in
‘$AIT_CLIENT_PUT/bin directory.
# cd $AIT_SERVER
# ./bin/run-ait-server
For AIS, deploy the service into a grid services container.
# cd ./AIS
# ant deploy \
–Dgar.name=./build/lib/org_globus_kgrid_services_AIS.gar
Run grid services container.
# cd $GLOBUS_LOCATION
# globus-start-container
AIS-portlet is a portlet working on Gridsphere which is working as a servlet on
tomcat. So, to run AIS-portlet, restart tomcat.
# $CATALINA_HOME/bin/shutdown.sh

167
# $CATALINA_HOME/bin/startup.sh
2.4. Management of Database
To add new host,
1. Add hostname and its table name into ‘job_ur_tables’ table
2. Create table of new host
Above operations are performed by using ‘create-add-host-sql’ script.
If you want to add the host ‘joker.chonbuk.ac.kr’,
# ls -F
README
create-add-host-sql*
init_db.sql
# ./create-add-host-sql joker.chonbuk.ac.kr
# ls -F
README
add_joker_chonbuk_ac_kr.sql
create-add-host-sql
init_db.sql
The created file includes SQL statements to add item into ‘job_ur_tables’ table
and create table of new host. To perform these operations, use this SQL
statement
# mysql –u root –p < ./add_joker_chonbuk_ac_kr.sql
If you want to change the table name of new host, modify the created file and
run SQL statement. (But, don’t change field name or properties.)
Following figure shows tables in the database and contents in ‘job_ur_tables’
table.

168
Figure 4-3 Accounting Information Database

169
3. Using AIService
AIService is implemented to be a OGSI-compliant service. So, users must
request using GT3-based service call. Therefore, client’s system must have
installed GT3 and related development tools (for example, Java SDK,
GridSphere).
Figure 4-4 shows an example of service call to AIService.
import org.globus.kgrid.services.AIS.impl.*;
import
org.globus.kgrid.stubs.AIService.service.AIServiceGridL
ocator;
import org.globus.kgrid.stubs.AIService.AIPortType;
import org.globus.ogsa.impl.security.Constants;
import
org.globus.ogsa.impl.security.authorization.NoAuthoriza
tion;
import javax.xml.rpc.Stub;
import java.net.URL;
...
try {
// Get command-line arguments
URL GSH = new java.net.URL(args[0]);
int a = Integer.parseInt(args[1]);
// Get a reference to the AIService instance

170
AIServiceGridLocator aiServiceLocator= new
AIServiceGridLocator();
AIPortType ai =
aiServiceLocator.getAIServicePort(GSH);
QueryField qf = new QueryField();
Try {
qf.set( QueryField.UID_GLOBALUSERDN,
"/C=KR/O=KISTI/OU=Grid/CN=Globus" );
qf.set( QueryField.RID_CREATETIME_FROM,
"2004-08-22 00:00:00" );
qf.set( QueryField.RID_CREATETIME_TO,
"2004-08-24 05:00:00" );
qf.set( QueryField.UR_MACHINENAME,
"eros01.gridcenter.or.kr" );
} catch( Exception qfe ) {
}
ai.search( qf.makeString() );
String strResult = ai.getResult();
} catch(Exception e) {
}
...
Figure 4-4 An example code to call AIService
In this example, class QueryField is used. QueryField used to build SQL
statement in AIService to query database server. QueryField has following
fields :
public class QueryField {
public static int UID_GLOBALUSERDN = 0x00;
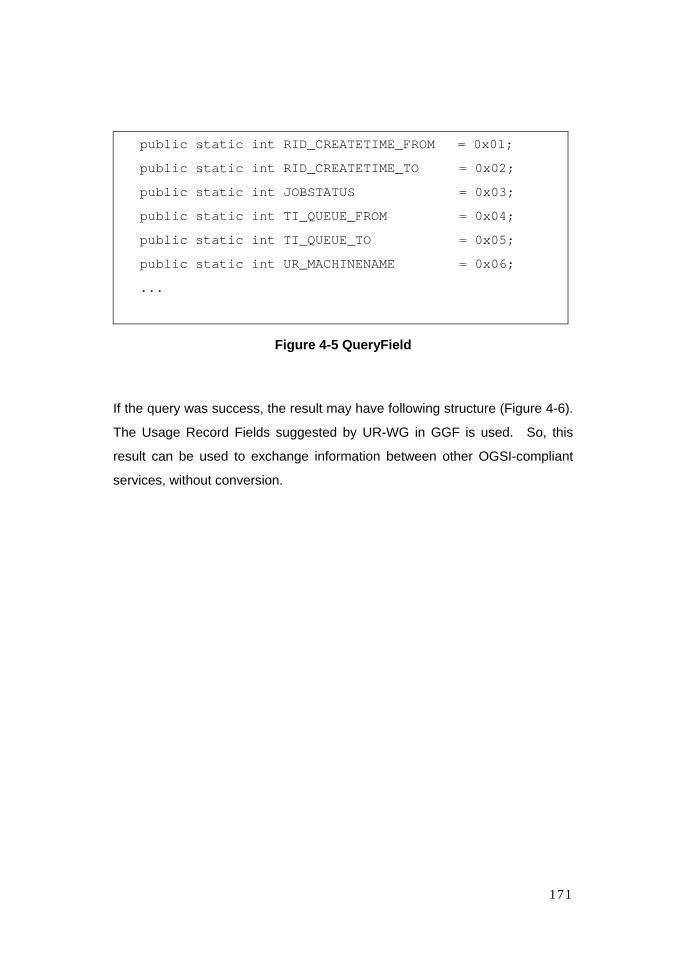
171
public static int RID_CREATETIME_FROM = 0x01;
public static int RID_CREATETIME_TO = 0x02;
public static int JOBSTATUS = 0x03;
public static int TI_QUEUE_FROM = 0x04;
public static int TI_QUEUE_TO = 0x05;
public static int UR_MACHINENAME = 0x06;
...
Figure 4-5 QueryField
If the query was success, the result may have following structure (Figure 4-6).
The Usage Record Fields suggested by UR-WG in GGF is used. So, this
result can be used to exchange information between other OGSI-compliant
services, without conversion.

172
Figure 4-6 An example of the result of AIService

173
Figure 4-7. An example view of AIS-portlet
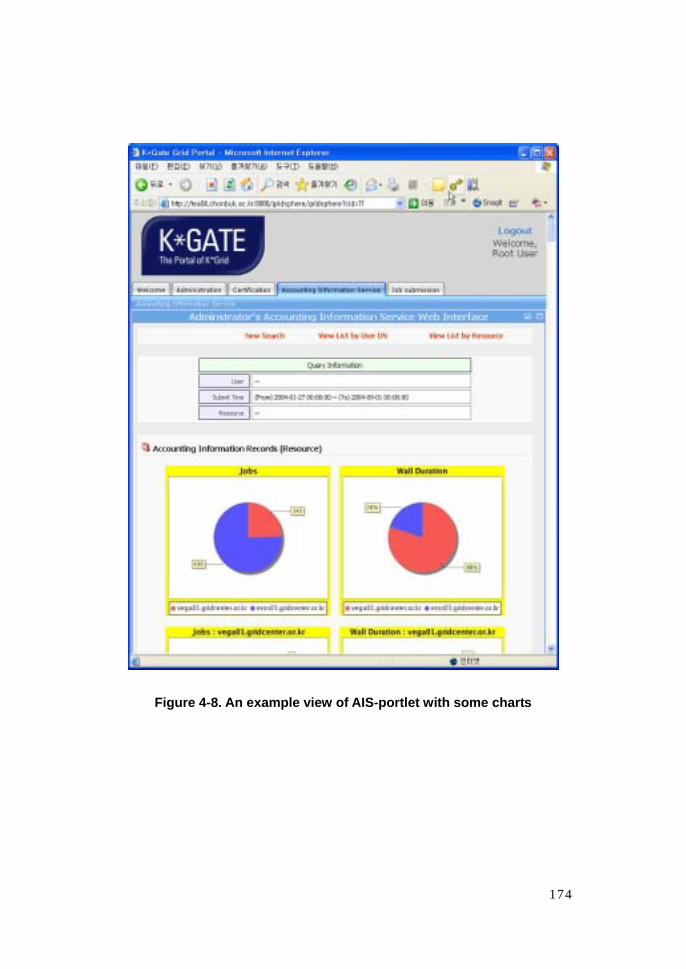
174
Figure 4-8. An example view of AIS-portlet with some charts

175
Reference [1] http://www-unix.globus.org/toolkit/docs/3.2/installation/index.html
[2] http://java.sun.com/j2se/1.4.2/index.jsp
[3] http://ant.apache.org/manual/index.html
[4] http://testbed.gridcenter.or.kr/software/OpenPBS/doc/v2.3_admin.pdf
[5] http://www.gridsphere.org/gridsphere/docs/index.html
[6] MySQL ( http://www.mysql.com/ )
[7] PHP ( http://www.php.net/ )
[8] http://www.moredream.org/gais.htm
[9] http://www.npaci.edu/DICE/SRB/
[10] http://testbed.gridcenter.or.kr/software/OpenPBS/doc/v2.3_admin.pdf
[11] Kyung-Lang Park et al. “Design and Implementation of a Dynamic
Communication MPI Library for the GRID,” International Journal of Computers
and Applications, Vol. 26, No. 3, 2004, pp. 165-172
[12] Kum-Rye Park et al., “MPICH-GP: A Private-IP-enabled MPI over Grid
Environments,” In Proceeding of the 2nd International Symposium on Parallel
and Distributed Processing and Applications (ISPA 2004).
[13] Si-Youl Choi et al., “An NAT-Based Communication Relay Scheme for
Private-IP-enabled MPI over Grid Environments,” In Proceeding of the
International Conference on Computational Science 2004 (ICCS 2004). June
2004. pp. 499-502.
[14] User’s Guide of GRASP, online at http://www.moredream.org
[15]KISTI Grid Certificate Authority (http://ca.gridcenter.or.kr/)
[16]Handbook of Applied Cryptography (http://www.cacr.math.uwaterloo.ca/hac/)
[17] http://jakarta.apache.org/tomcat
[18] http://dev.mysql.com/doc/mysql/en/index.html
[19] http://ant.apache.org/manual/index.html
[20] http://testbed.gridcenter.or.kr/software/Apache/httpd/doc/httpd-docs-
2.0.49.ko.zip

176


![Indonesia[1] kmi tmi copy](https://static.fdocuments.in/doc/165x107/5a6ce6127f8b9a1b428b45c9/indonesia1-kmi-tmi-copy.jpg)


![[PPT]KMI Goes To ITS - Himatekla FTK ITS Surabaya · Web view Komunitas Migas Indonesia Swastioko Budhi Suryanto – Ketua Umum KMI KMI Goes To Campus OCEANO ITS ...](https://static.fdocuments.in/doc/165x107/5b00260b7f8b9a89598c2ad9/pptkmi-goes-to-its-himatekla-ftk-its-surabaya-view-komunitas-migas-indonesia.jpg)