Builders Breakfast Series November 26-27, 2008 - PHBI · Builders Breakfast Series November 26-27,...
114
Builders Breakfast Series November 26-27, 2008 Presented by: Dave Pasolli Western Wood Truss Association of Alberta
Transcript of Builders Breakfast Series November 26-27, 2008 - PHBI · Builders Breakfast Series November 26-27,...

Builders Breakfast Series
November 26-27, 2008
Presented by:
Dave Pasolli
Western Wood Truss
Association of Alberta

12 things you should know about
installing trusses properly and
safely
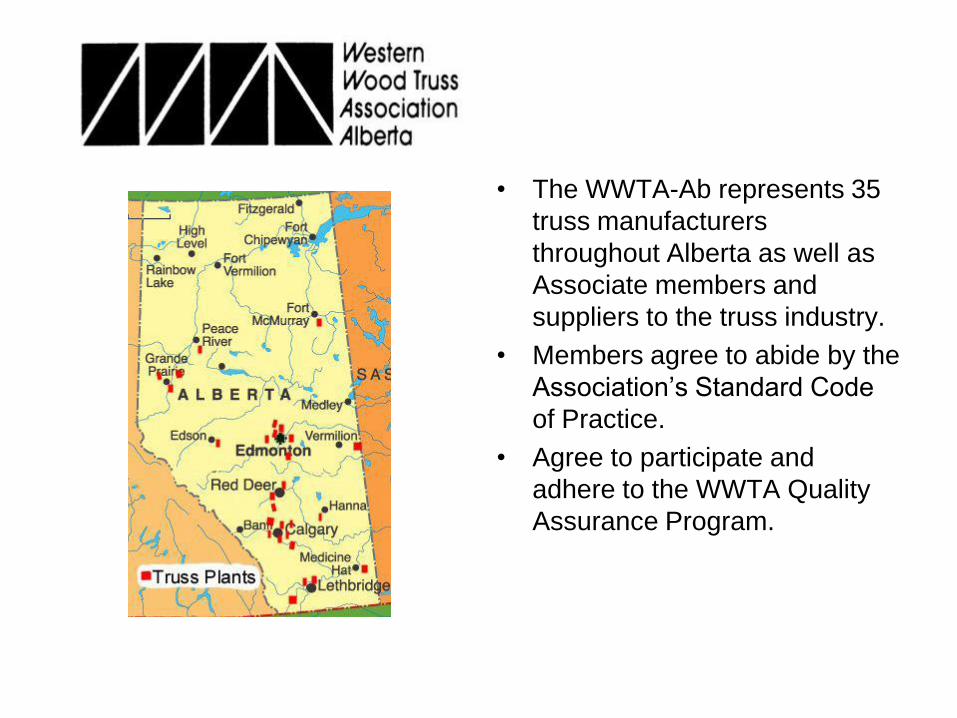
• The WWTA-Ab represents 35
truss manufacturers
throughout Alberta as well as
Associate members and
suppliers to the truss industry.
• Members agree to abide by the
Association’s Standard Code
of Practice.
• Agree to participate and
adhere to the WWTA Quality
Assurance Program.

Safely Handling and Erecting
Trusses
• Supplied with every
package by a WWTA
member. • Erection Procedure
• Mechanical Handling
• Alignment guidelines
• Temporary Bracing
• Permanent Bracing

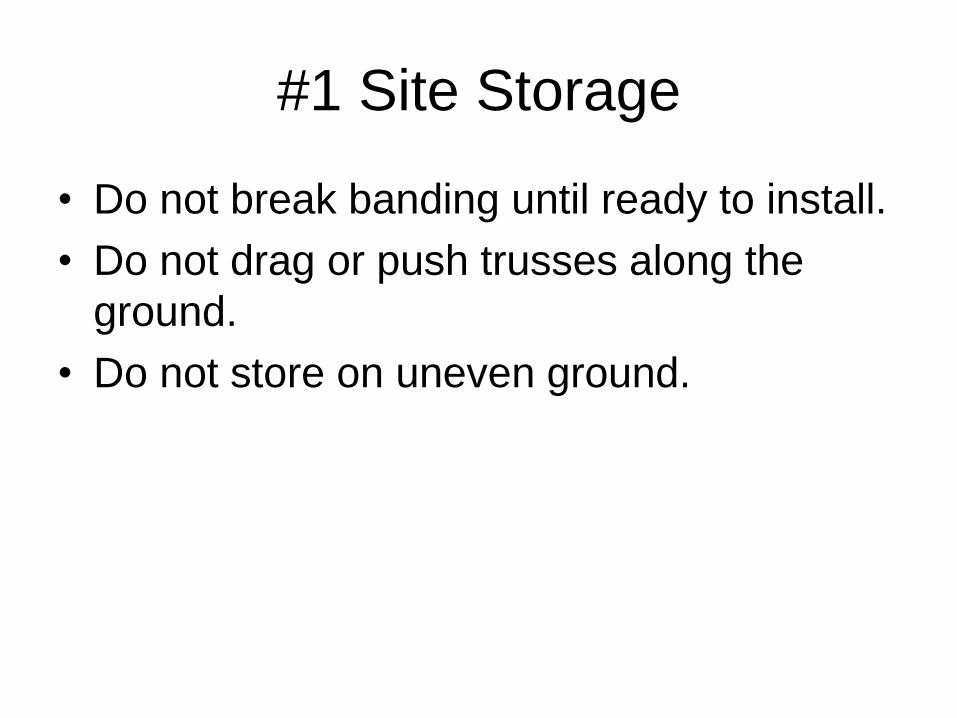
#1 Site Storage
• Store trusses in a stable position and on
relatively smooth dry ground.
• Trusses stored horizontally, should be
blocked every 8 to 10 feet.
• Do not store bundles upright unless
properly braced.

#1 Site Storage
Trusses can not be used as a bulldozer to clear
the jobsite
#1 Site Storage
• Do not break banding until ready to install.
• Do not drag or push trusses along the
ground.
• Do not store on uneven ground.

#1 Site Storage


Excessive lateral bending can pop the connector plates off!

Damage should be addressed before installation of trusses

#2 Ensure Trusses are at the right
location

#2 Ensure Trusses are at the right
location
Pay close attention to symmetrical trusses with multiple bearings
Cantilever Trusses or
Trusses installed upside down

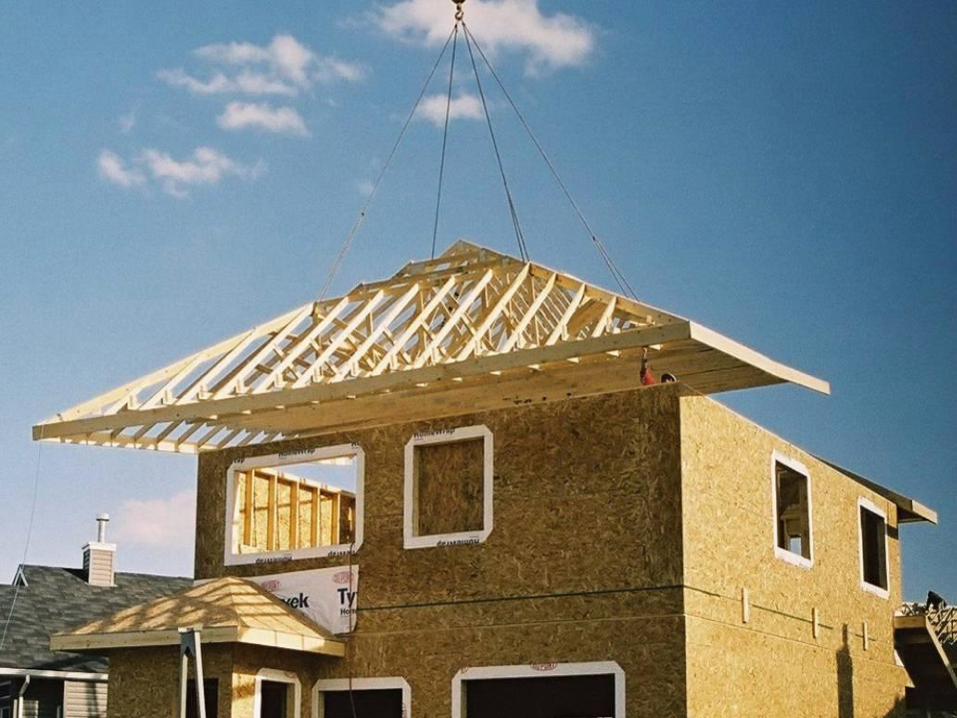
#3 Mechanical Handling
20’ or less a single pick up point
may be used
Trusses up to 30’ should be lifted
using 2 pick up points so that the
distance between them is about ½
the length of the truss
Trusses 30-60’ should be lifted
with a spreader bar and short
cable slings. Over 60’ they should
be lifted with a strongback which
is 2/3 to ¾ the length of the truss

Best Practice
Pre-assemble the roof truss system on the
ground when possible. Divide large heavy
roofs into smaller sections when necessary.

Web Bracing is NOT designed to hold a module of
trusses together for lifting

Web Bracing is NOT designed to hold a
module of trusses together for lifting

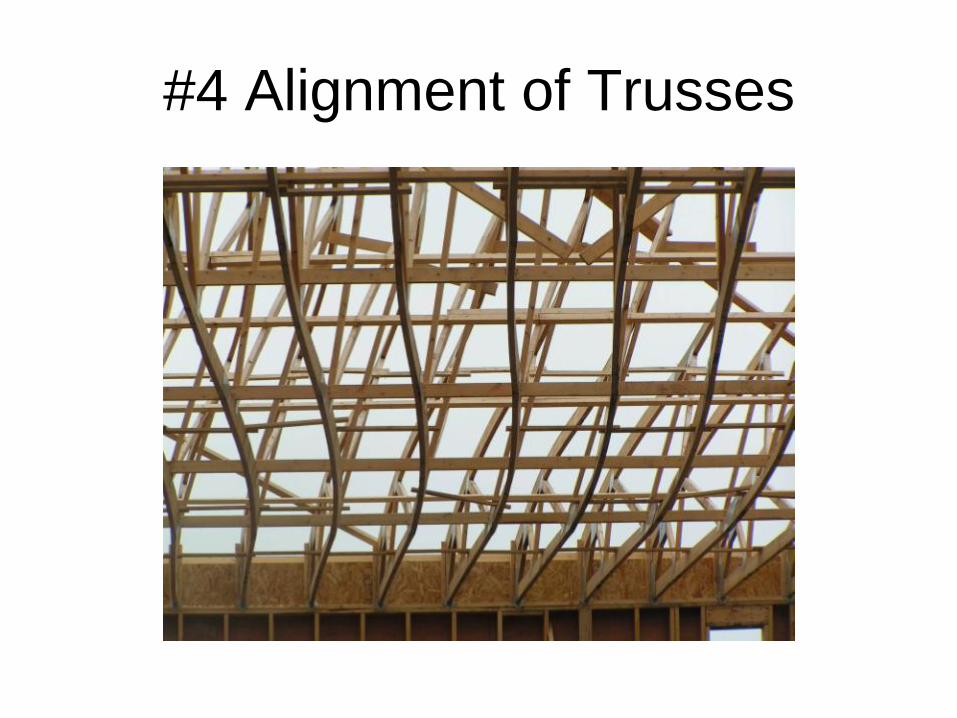
#4 Alignment of Trusses
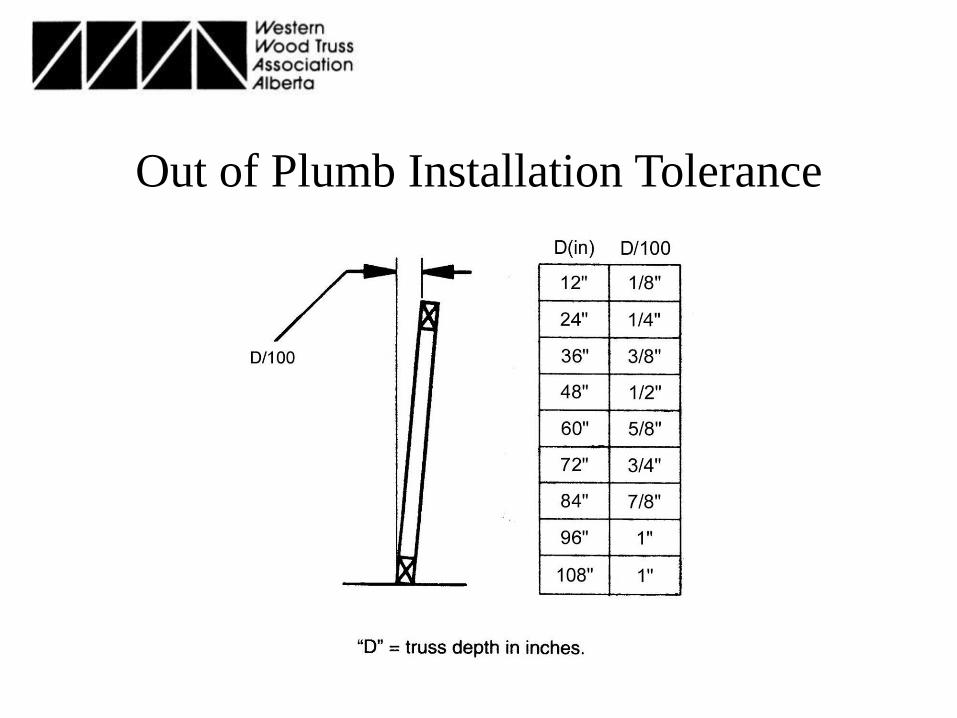
Out of Plumb Installation Tolerance

Alignment Tolerance along Truss Length

#5 Permanent Lateral Bracing
• Is Specified on the Truss Design Drawings
• May also be Specified on the Building
Structural Drawings

Buckling due to compression force P

Required Continuous Lateral Bracing
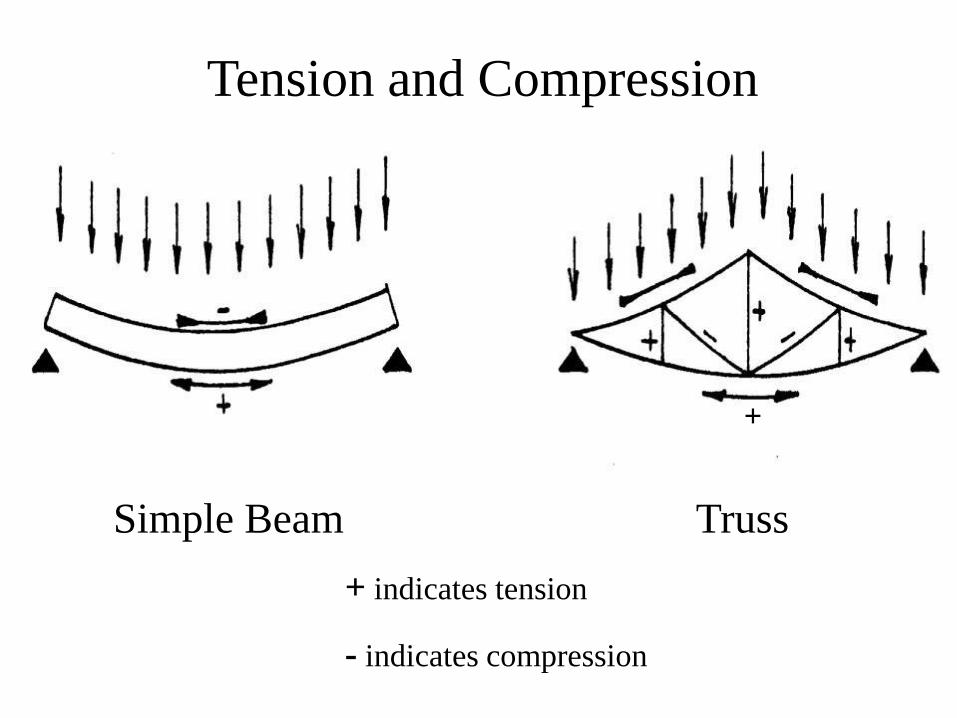
+
Simple Beam Truss
+ indicates tension
- indicates compression
Tension and Compression
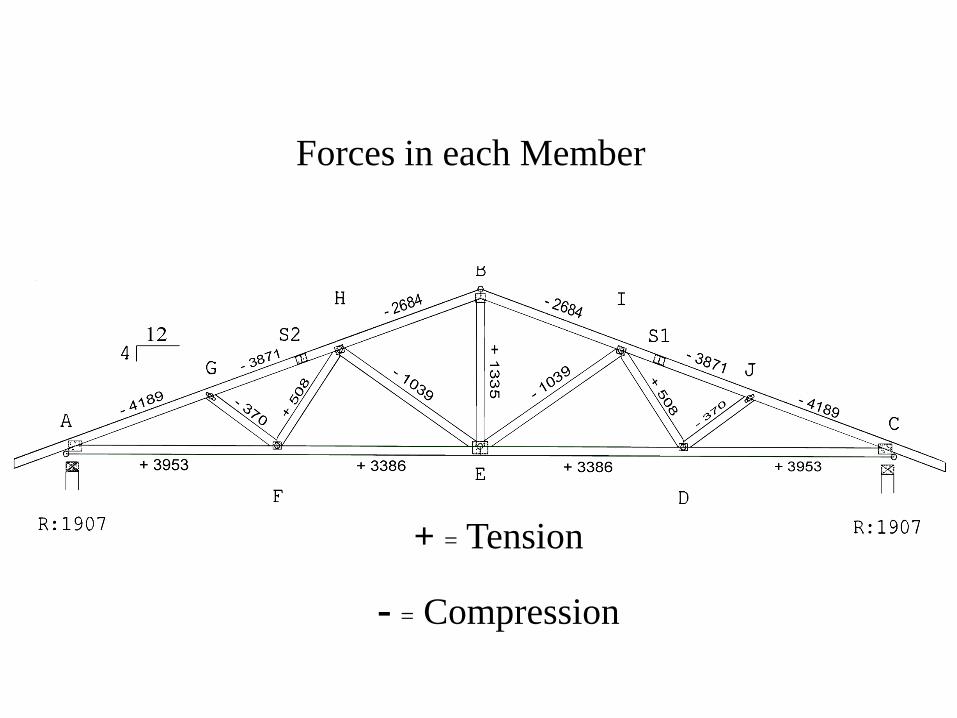
Forces in each Member
+ = Tension
- = Compression


No Lateral Bracing on
Compression Web
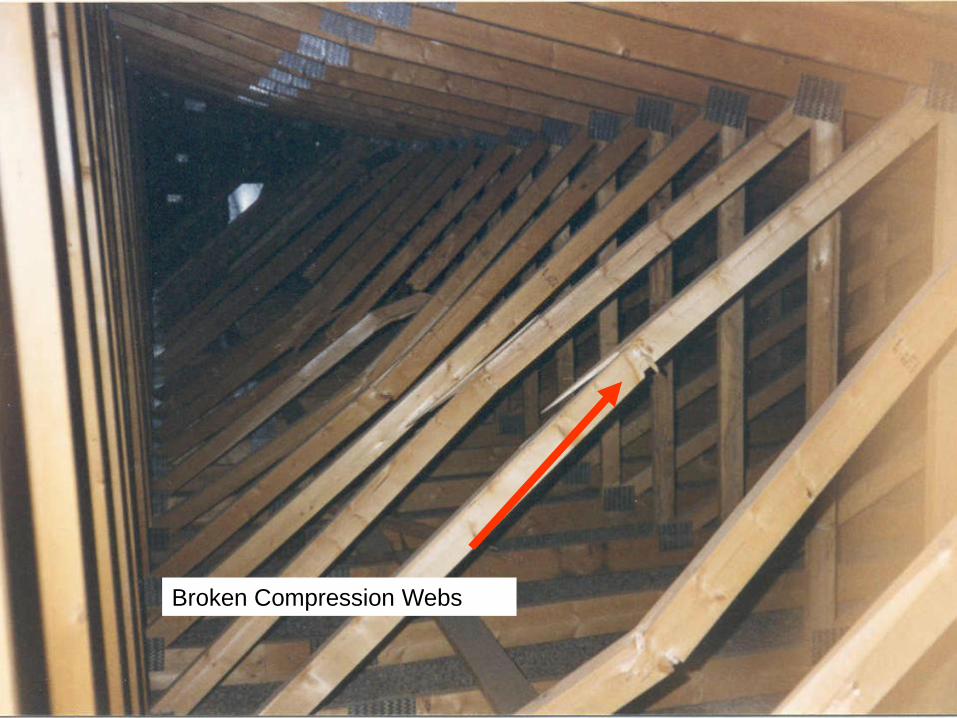
Broken Compression Webs


1x4 bracing bent to find webs


Permanent Continuous Lateral Bracing
Anchored by X-bracing at each end
Permanent Continuous Lateral
Bracing anchored by X-Bracing at
each end or every 20’
Brace the Braces-Look for Triangles

Permanent Continuous Lateral Bracing
Anchored by X-bracing at each end #6 Permanent Top Chord Bracing
• Plywood or OSB sheathing fastened
directly to the top chord
• Purlins
• Blocking


2x4 @ 24” o.c.
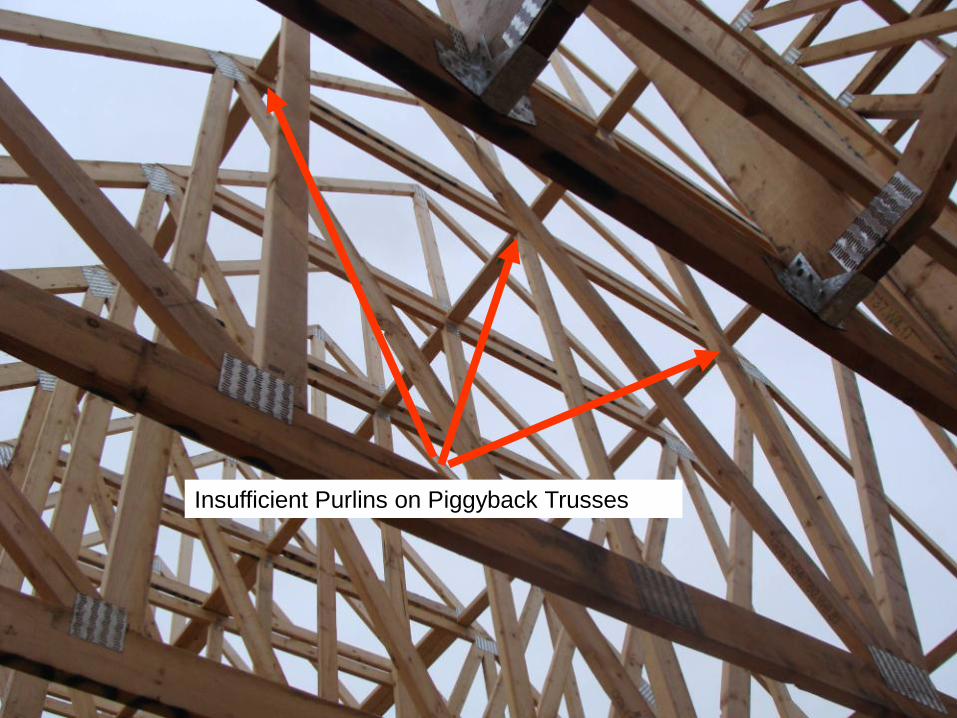
Insufficient Purlins on Piggyback Trusses

Blocking at Girder Trusses and Regular Hip Systems


Permanent Bracing of the Bottom
Chord Plane
• Maintains truss
spacing
• Keeps the bottom
chord in plane
• Prevents bottom
chord from buckling in
buildings where there
is internal pressure

Cantilever truss with Bottom Chord
in Compression

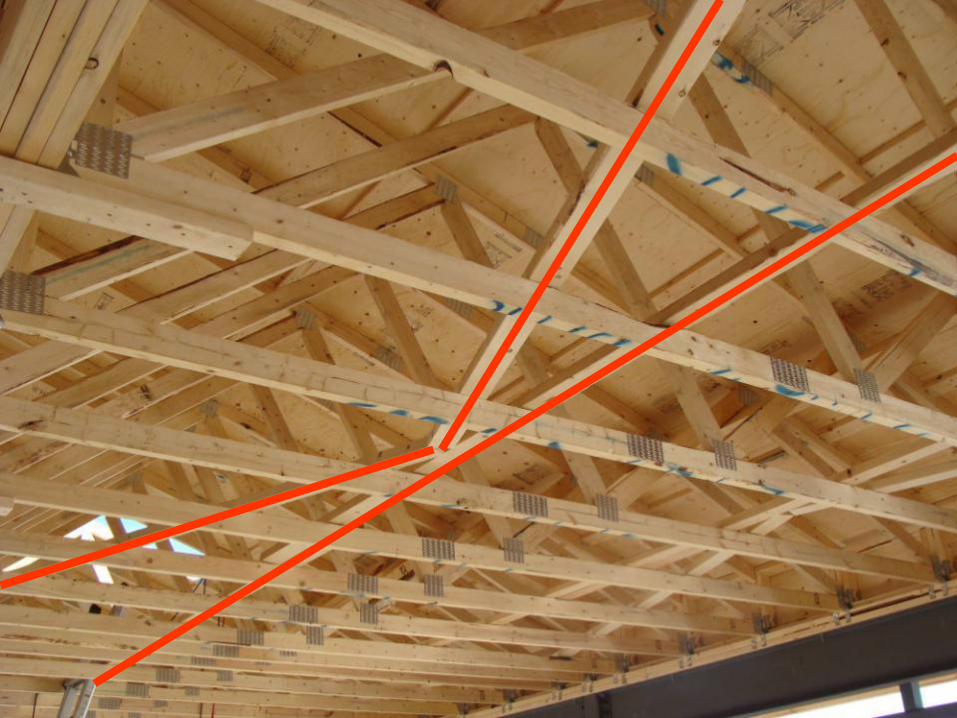
#7 Gable Wall Bracing

#7 Gable Wall Bracing

#7 Gable Wall Bracing


Tall Wall Bracing
• For walls over 11.9’ with a stacked gable
truss on top requires a design to
permanently brace the wall.
• It is the Builder/Designers responsibility to
design a Permanent Building Bracing
System to resist the lateral loads applied
for the wall and the gable.
• All walls must me looked at individually.
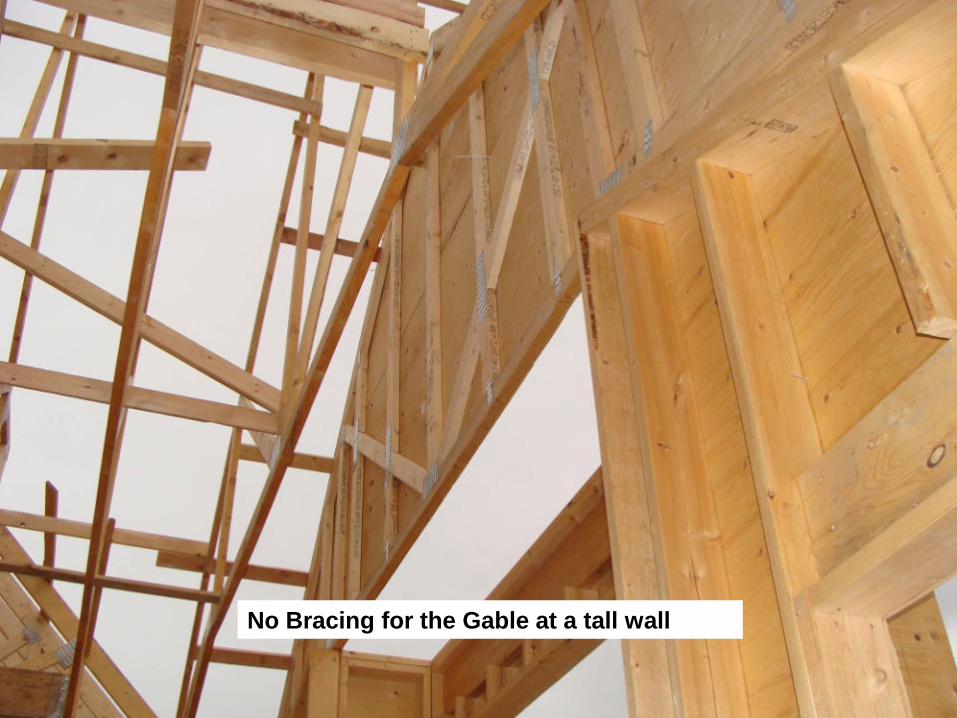
No Bracing for the Gable at a tall wall


#8 Correct Connections
• During the review of the installation make
sure all trusses have the proper connector
and that the correct nails for the hanger
are used
• Ensure that Girder Trusses are connected
properly according to instructions on the
truss design drawing.

Sloped Truss Bottom Chord in a Flat Hanger

Tie-Down for a Girder Truss

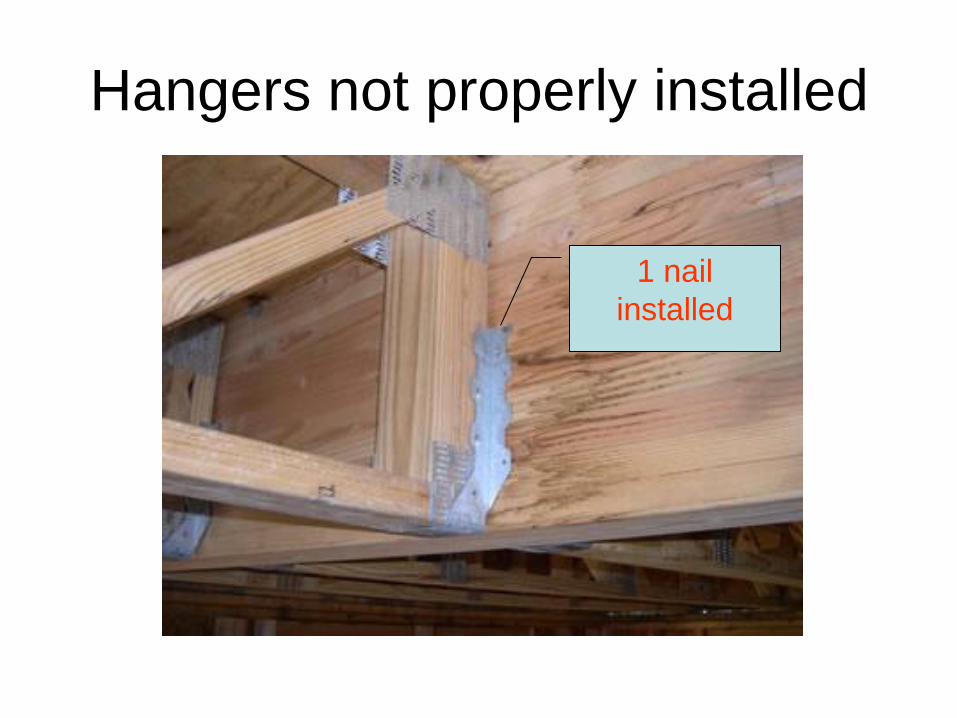
Hangers not properly installed
1 nail
installed

Girder Truss Bolted Together

Ledger Connection at ICF Wall

#9 Proper Bearing for Trusses
• Ensure Load is
transferred correctly
to foundation.
• Solid columns under
Girder Trusses.
• Look out for when a
Roof Girder is bearing
on a floor.

#10 Construction Loads

Stacking bundles of shingles as shown above may load
the middle of the top chord panel of the truss with a point
load exceeding 800 lbs.
Placement of Roofing Materials
Placement of materials
788(1) An employer must ensure that supplies and roofing
materials stored on a roof are located not less than
2 metres from a roof edge.
(2) An employer must ensure that the weight of
supplies and roofing materials stored on a roof is
uniformly distributed.
Part 38


CONSTRUCTION LOADS
Construction loads (lifts of sheathing, bundles of
shingles, lifts of drywall etc) should be placed only
on fully braced & sheathed structures
WARNING! Trusses are very unstable and have
NO CAPACITY to carry load until they are
properly braced and sheathed. Placing loads on
unbraced truss assemblies is a hazardous act and
can cause property damage, or worse, severe
personal injury or death.

CONSTRUCTION LOADS
Use extreme caution when placing construction
loads and only stack reasonable amounts of
materials.
Distribute loads over as many trusses as possible.
Position sheets or bundles with the longest edge
perpendicular to the trusses.
WARNING! Stacking excessive construction loads
on roof or floor trusses is an unsafe act and can
cause property damage, or worse, severe personal
injury or death.

CONSTRUCTION LOADS
Make every attempt to stack materials along
outside supports or directly over inside supports.
If bundles of asphalt shingles must be placed along
the roof ridge lines, distribute the bundles along
both sides of ALL ridge lines to avoid high stacks
and over loading in one area. Do not stack shingles
more than two bundles high.
CONSTRUCTION LOADS
If stacks of plywood or OSB must be placed on
trusses, distribute the stacks along the outside
supports with no stack exceeding 16 inches in
height. Distribute the stacks over as many trusses
as possible. Position sheets flat with the longest
edge perpendicular to the trusses.
Take every precaution to secure the sheets to
prevent them from sliding or being blown off the
roof.
WARNING! Stacking excessive construction loads
on roof or floor trusses is an unsafe act and can
cause property damage, or worse, severe personal
injury or death.

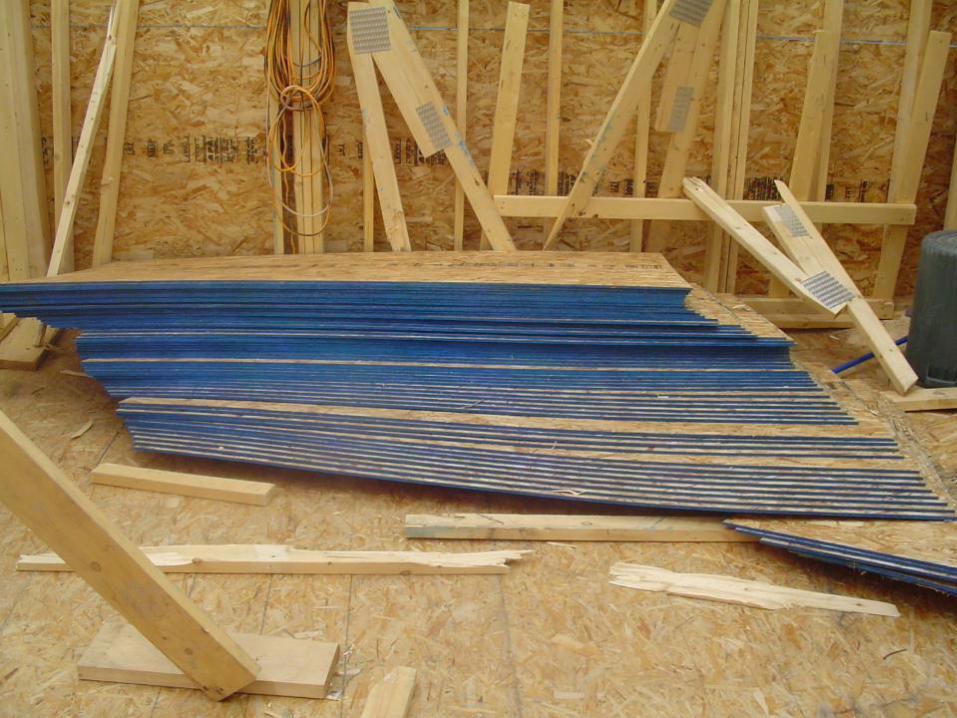
Trusses Collapsed Under Load of Roof
Sheathing


#11 Safely Installing Trusses

Placing Trusses
Hazards:
• Falling.
• Being struck.
Control Measures:
• Workers placing trusses MUST be protected from falling and
from being struck by the trusses.
Options may include the use of:
- scaffolding, ladders, a fall protection system or
mechanical means.

Placing Trusses
Control Measures:
• Workers must NOT walk on walls where there is the
potential of falling 3 m (10 ft) or more without adequate fall
protection.
• If the employer’s written fall protection plan for roofers
includes a travel restraint system and requires the installation
of anchors to specific trusses, the anchors must be installed as
shown and specified on the house plans and should be
installed on the designated trusses prior to lifting. Workers
installing trusses or applying sheathing must not use these
“roofer anchors” as these anchors require all trusses be
completely installed including bracing and sheathing.


#12 Fall Protection
• A Fall Protection system may Include:
– Guardrails
– Travel restraint or fall arrest system
– Safety net
– Control zone, or
– Some other equally effective means that
protects the worker from falling.


Travel Restraint System
A travel restraint system prevents a worker from
traveling to an edge or position from which the worker
could fall.
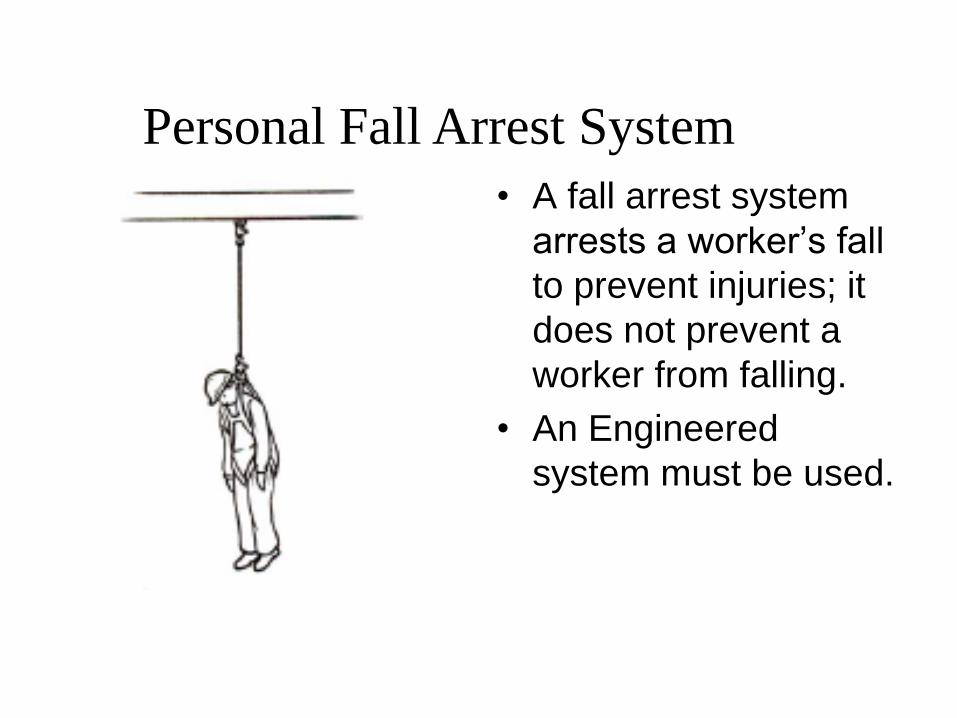
Personal Fall Arrest System
• A fall arrest system
arrests a worker’s fall
to prevent injuries; it
does not prevent a
worker from falling.
• An Engineered
system must be used.


Anchors for personal fall arrest
systems or a travel restraint system
attached to trusses must not be
used until the trusses are
completely installed including all
bracing and sheathing.

Fall Protection and Roof Trusses
A falling worker attached to a single truss
can cause all the trusses on the structure to
collapse in a domino effect
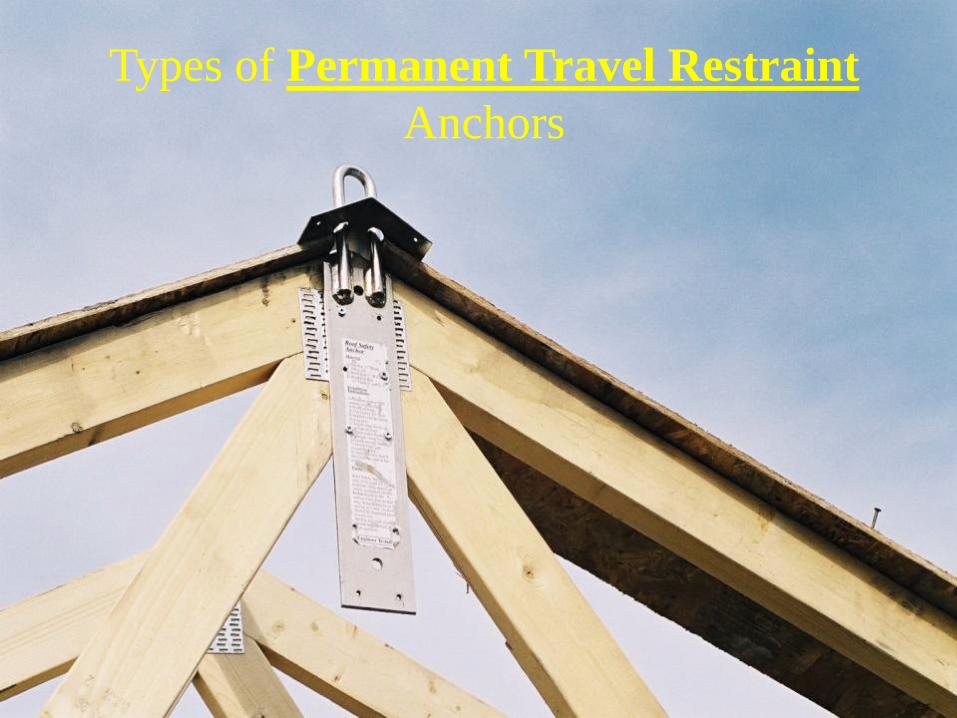
Types of Permanent Travel Restraint
Anchors

OH&S Code 2008 Changes
• It was proposed that an owner must ensure that permanent anchorages meeting the requirements of section 149 are installed or designated on all structures after September 1, 2008.The anchorage is capable or sagely withstanding the impact forces applied by a personal fall arrest system that has a minimum breaking strength per attached worker of 16 kilonewtons.

OH&S Code 2008 Changes
• It is the position of the WWTA that when
permanent fall protection anchors are
specified it is the Building Designer’s
responsibility to design a bracing system
to resist these lateral loads.
OH&S Code 2008 Changes
• This change was opposed by the
Homebuilders of Alberta and is currently
being reviewed.

Repairs and Damage
• Report all damage to the truss
manufacturer immediately.
• Not all repairs are the same
• Inspect trusses prior to unloading and
installing

Modified Trusses
CAN NOT
MODIFY PLATED
TRUSSES TO
MAKE AN ATTIC

Broken Roof Truss
• Most likely broken before installation
• Requires Engineers Repair

Floor Truss Damage


The Assurance of Quality
• Management commitment to quality
• Agreement to abide by the WWTA Code of Practices
• Design drawing requirements
• Documentation requirements
• Lumber handling and storing requirements
• Continuous inspections of metal plate placements
• Continuous inspections of truss dimensions
• A process of continuously improving quality
• Pass the WWTA quality assurance audit
The Assurance of Quality
• What is the big deal with sealed truss
design drawings?
• What do they tell you?
• Don’t trusses have a big safety factor?
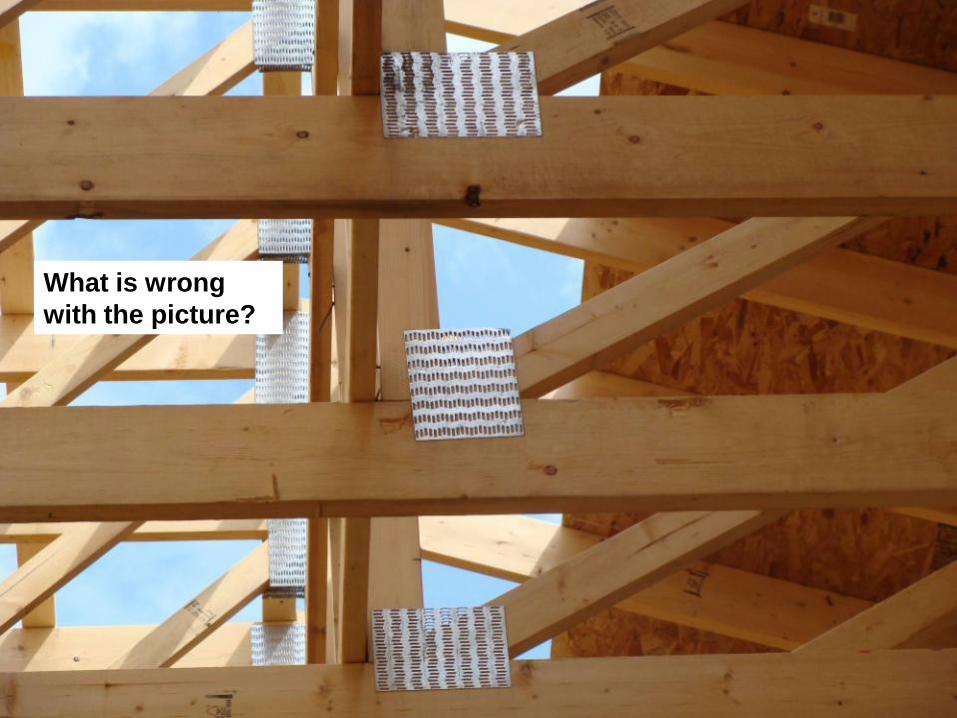
What is wrong
with the picture?

Plate deformation due to
gap in compression
member

Metal plate not placed
properly

Missing Truss Plate

The Assurance of Quality
The Western Wood Truss
Association of Alberta
Questions? Dave Pasolli
WWTA
(403) 279-3385

Thank You for Attending!
See you at the next
BUILDER BREAKFAST