Build your own NeXT with a virtual machine
22
Build your own NeXT with a virtual machine Created by Matthew Goodrich https://learn.adafruit.com/build-your-own-next-with-a-virtual-machine Last updated on 2021-11-15 07:35:26 PM EST ©Adafruit Industries Page 1 of 22
Transcript of Build your own NeXT with a virtual machine
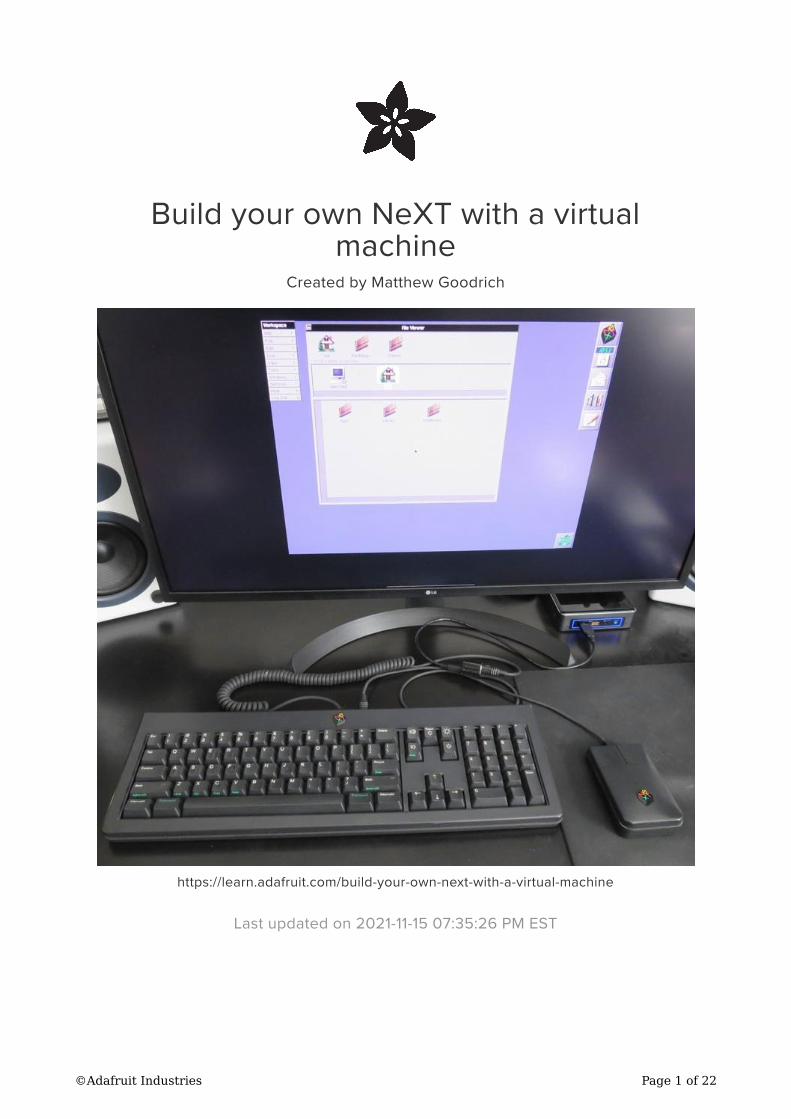
Build your own NeXT with a virtual
machine
Created by Matthew Goodrich
https://learn.adafruit.com/build-your-own-next-with-a-virtual-machine
Last updated on 2021-11-15 07:35:26 PM EST
©Adafruit Industries Page 1 of 22
3
5
8
11
14
21
Table of Contents
Overview
Set Up the VM
Install OPENSTEP
Install OPENSTEP Part 2
Post-Install and Patching
Resources
©Adafruit Industries Page 2 of 22
Overview
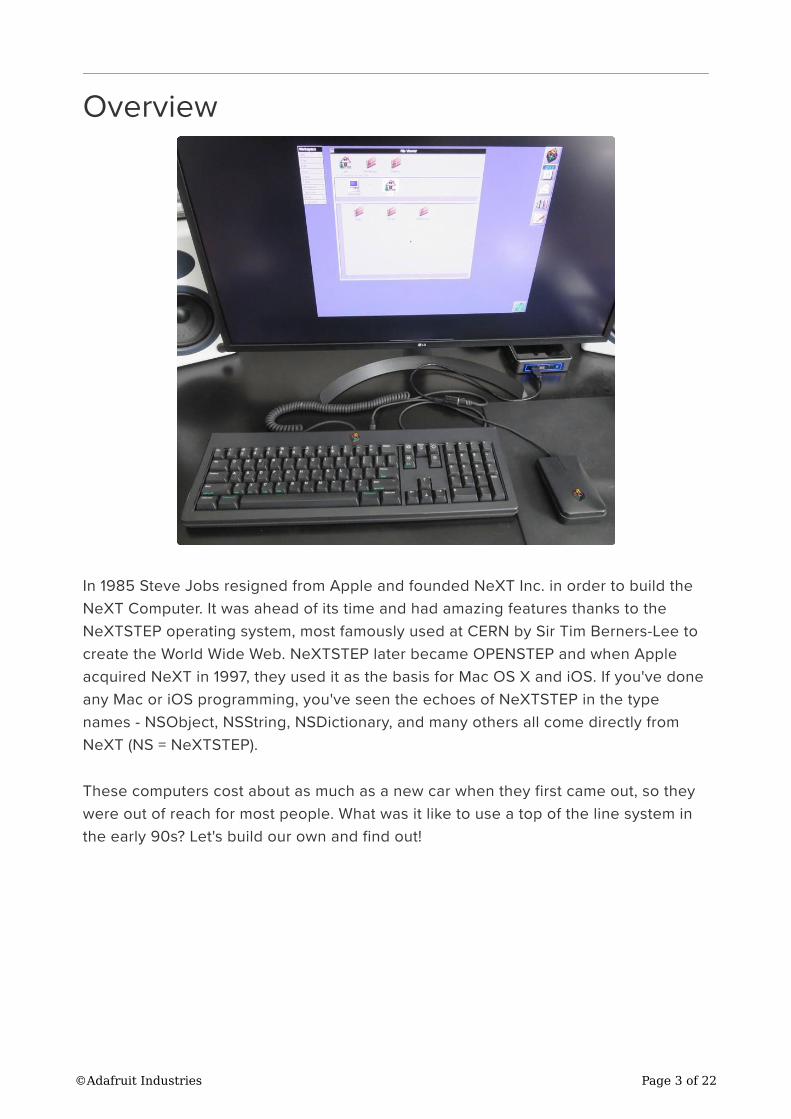
In 1985 Steve Jobs resigned from Apple and founded NeXT Inc. in order to build the
NeXT Computer. It was ahead of its time and had amazing features thanks to the
NeXTSTEP operating system, most famously used at CERN by Sir Tim Berners-Lee to
create the World Wide Web. NeXTSTEP later became OPENSTEP and when Apple
acquired NeXT in 1997, they used it as the basis for Mac OS X and iOS. If you've done
any Mac or iOS programming, you've seen the echoes of NeXTSTEP in the type
names - NSObject, NSString, NSDictionary, and many others all come directly from
NeXT (NS = NeXTSTEP).
These computers cost about as much as a new car when they first came out, so they
were out of reach for most people. What was it like to use a top of the line system in
the early 90s? Let's build our own and find out!
©Adafruit Industries Page 3 of 22
You'll need the following:
A computer that can run VirtualBox
VirtualBox (https://www.virtualbox.org) - Download it for your system and get the
extension pack
OPENSTEP ISOs and floppy images, you can find them at http://openstep.bfx.re/
You'll want OPENSTEP 4.2 User for Intel, Install Disk Floppy Image, Drivers
Floppy Image, and Network Driver + Patch 4 Bundle.
After extracting the floppyimage zip files, rename the images from
.floppyimage to .img
(optional) NeXT Keyboard and Mouse, plus a USB adapter - you can build one
yourself with the guide here, or get a NeXT2USB adapter from Drakware
•
•
•
◦
◦
•
©Adafruit Industries Page 4 of 22
Set Up the VM
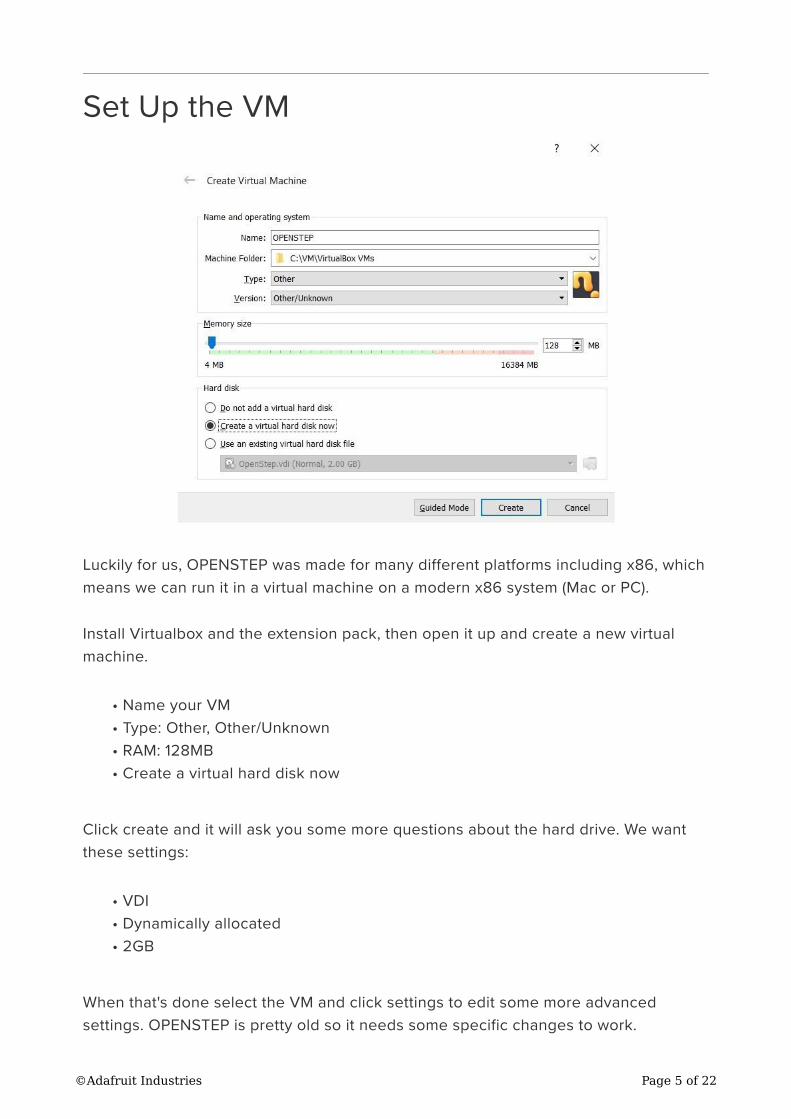
Luckily for us, OPENSTEP was made for many different platforms including x86, which
means we can run it in a virtual machine on a modern x86 system (Mac or PC).
Install Virtualbox and the extension pack, then open it up and create a new virtual
machine.
Name your VM
Type: Other, Other/Unknown
RAM: 128MB
Create a virtual hard disk now
Click create and it will ask you some more questions about the hard drive. We want
these settings:
VDI
Dynamically allocated
2GB
When that's done select the VM and click settings to edit some more advanced
settings. OPENSTEP is pretty old so it needs some specific changes to work.
•
•
•
•
•
•
•
©Adafruit Industries Page 5 of 22
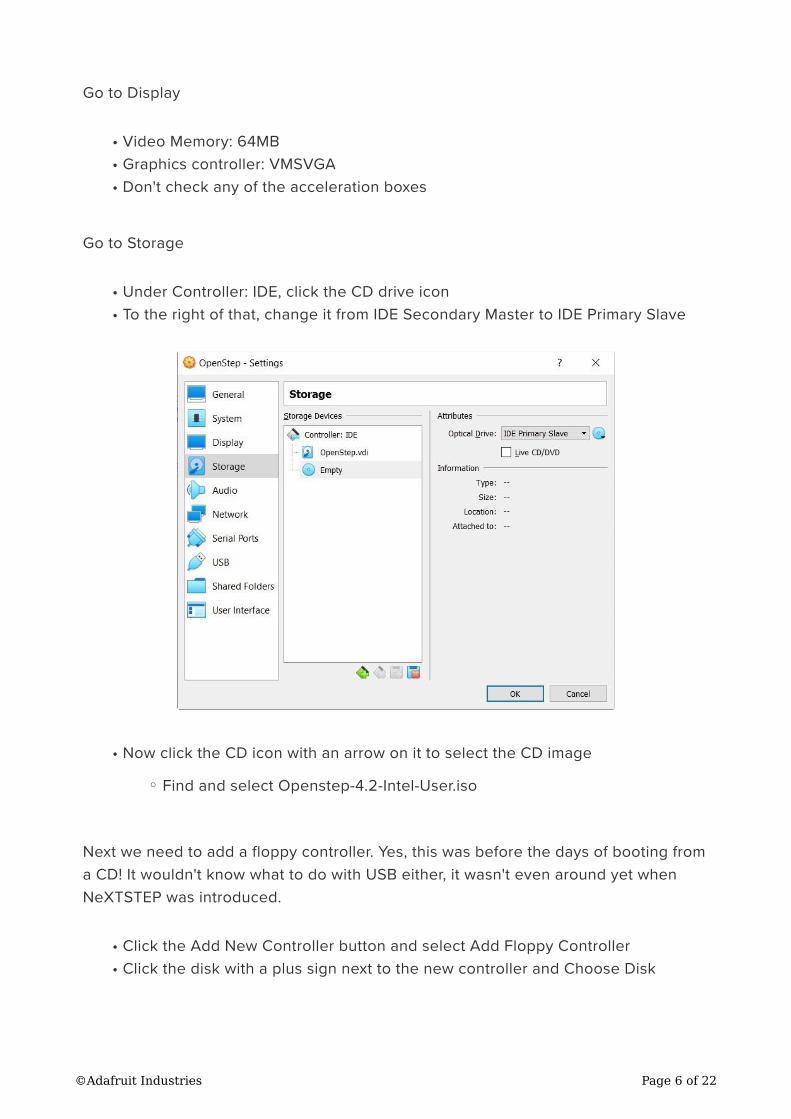
Go to Display
Video Memory: 64MB
Graphics controller: VMSVGA
Don't check any of the acceleration boxes
Go to Storage
Under Controller: IDE, click the CD drive icon
To the right of that, change it from IDE Secondary Master to IDE Primary Slave
Now click the CD icon with an arrow on it to select the CD image
Find and select Openstep-4.2-Intel-User.iso
Next we need to add a floppy controller. Yes, this was before the days of booting from
a CD! It wouldn't know what to do with USB either, it wasn't even around yet when
NeXTSTEP was introduced.
Click the Add New Controller button and select Add Floppy Controller
Click the disk with a plus sign next to the new controller and Choose Disk
•
•
•
•
•
•
◦
•
•
©Adafruit Industries Page 6 of 22

Click Add, find 4.2_Install_Disk.img and add it, then select it in the list and click
Choose
You'll need to rename the floppy images from .floppyimage to .img in order
for Virtualbox to use them.
Now your storage page should look like the one below:
Now go to Audio and select SoundBlaster 16 for Audio Controller.
•
◦
©Adafruit Industries Page 7 of 22
If you want to try networking, go to the Network tab and select Attached to: Bridged
Adapter. The virtual network card in the VM will act like a real one and show up as a
separate device on your network. You'll also need to click Advanced and select Adap
ter Type: PCnet-PCI II (Am79C970A).
On the USB page you can uncheck Enable USB Controller since the OS doesn't know
anything about it.
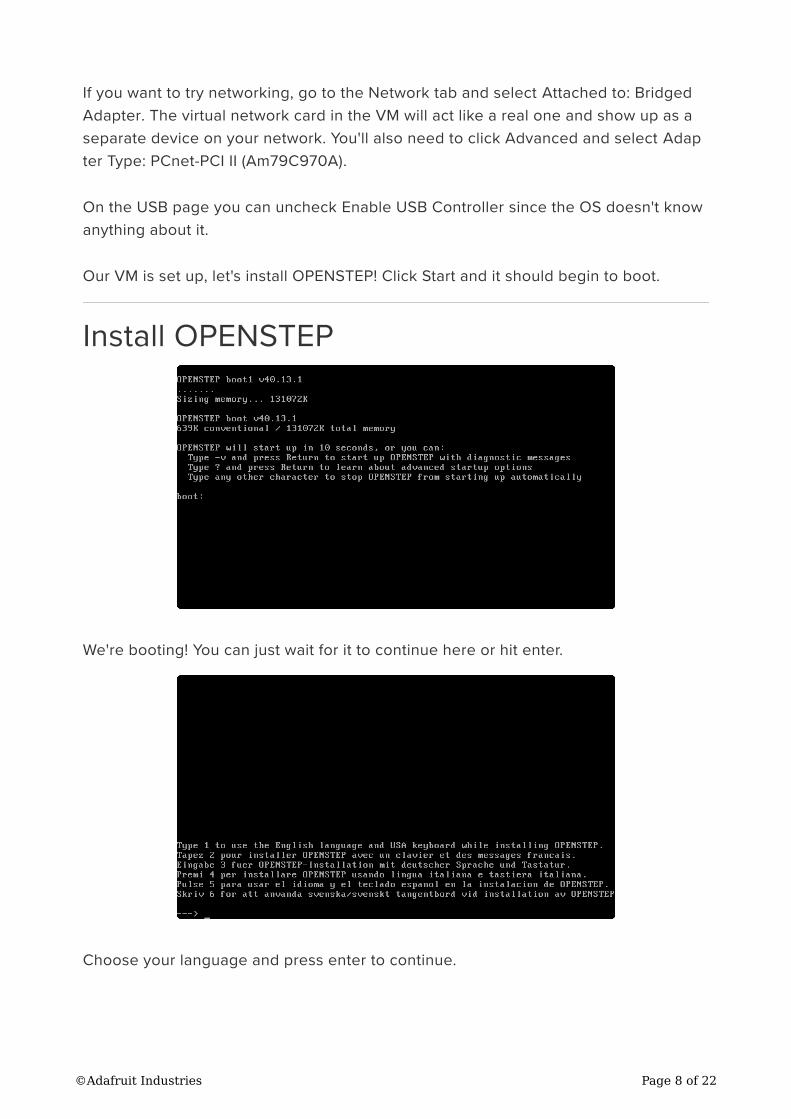
Our VM is set up, let's install OPENSTEP! Click Start and it should begin to boot.
Install OPENSTEP
We're booting! You can just wait for it to continue here or hit enter.
Choose your language and press enter to continue.
©Adafruit Industries Page 8 of 22
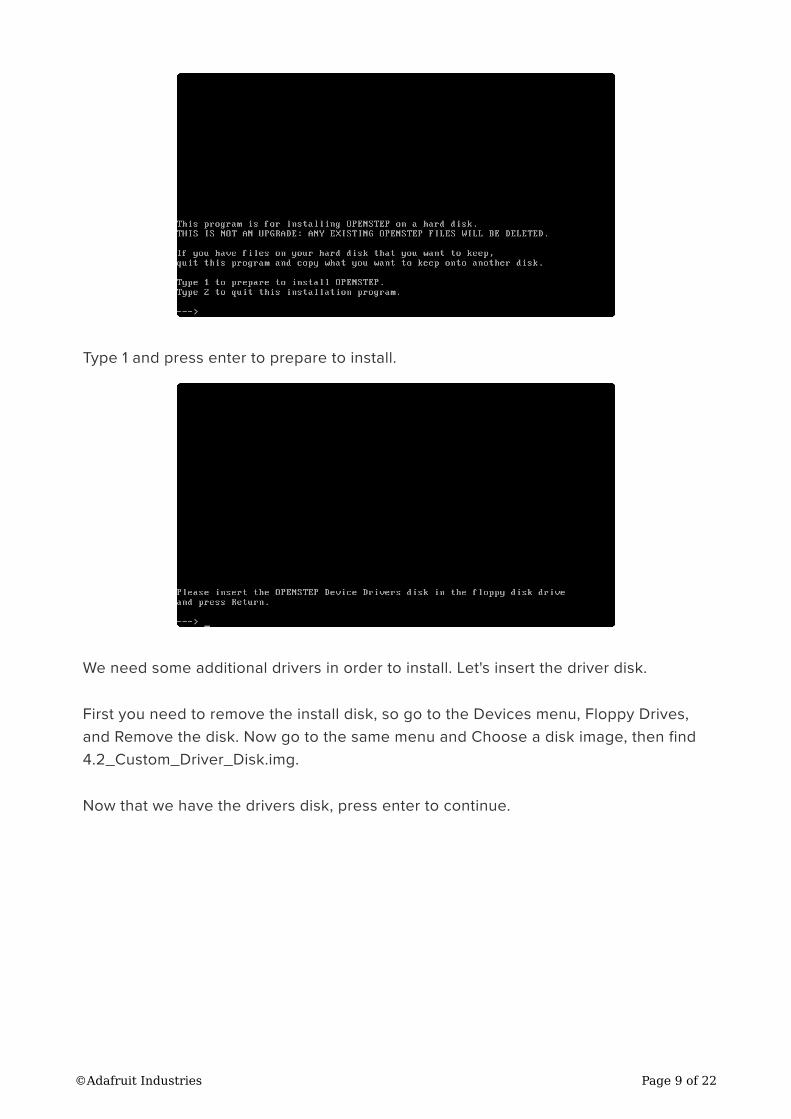
Type 1 and press enter to prepare to install.
We need some additional drivers in order to install. Let's insert the driver disk.
First you need to remove the install disk, so go to the Devices menu, Floppy Drives,
and Remove the disk. Now go to the same menu and Choose a disk image, then find
4.2_Custom_Driver_Disk.img.
Now that we have the drivers disk, press enter to continue.
©Adafruit Industries Page 9 of 22
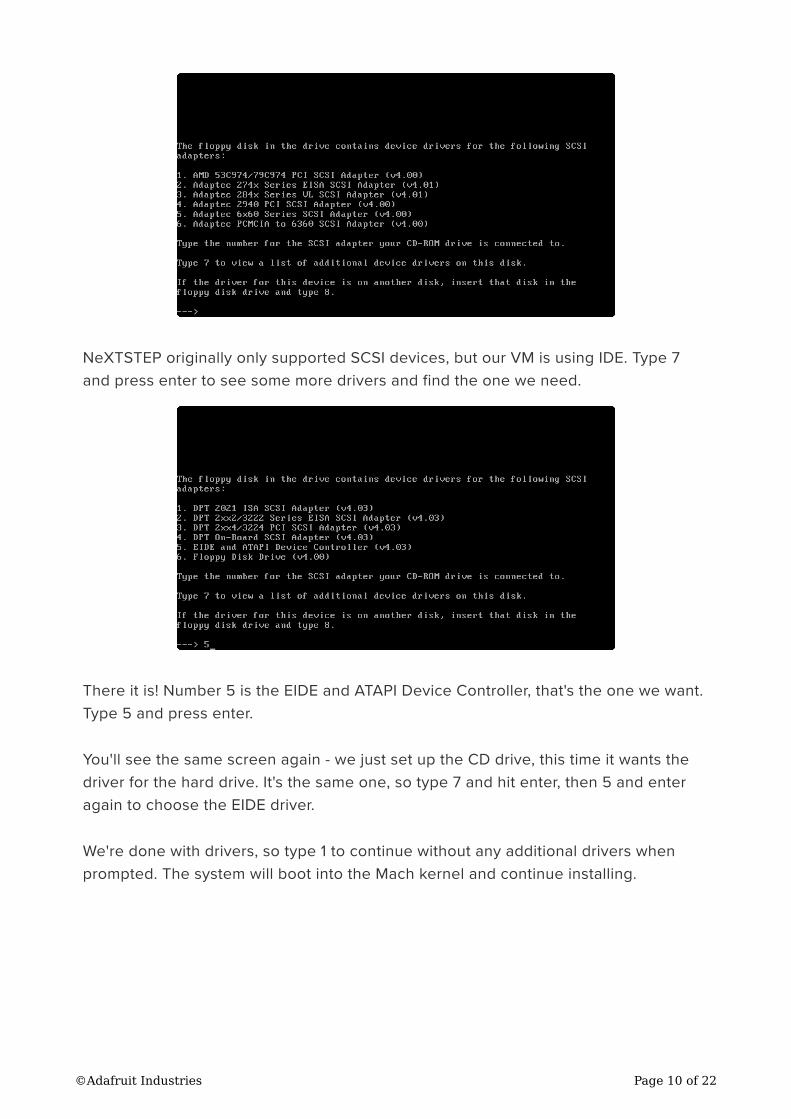
NeXTSTEP originally only supported SCSI devices, but our VM is using IDE. Type 7
and press enter to see some more drivers and find the one we need.
There it is! Number 5 is the EIDE and ATAPI Device Controller, that's the one we want.
Type 5 and press enter.
You'll see the same screen again - we just set up the CD drive, this time it wants the
driver for the hard drive. It's the same one, so type 7 and hit enter, then 5 and enter
again to choose the EIDE driver.
We're done with drivers, so type 1 to continue without any additional drivers when
prompted. The system will boot into the Mach kernel and continue installing.
©Adafruit Industries Page 10 of 22
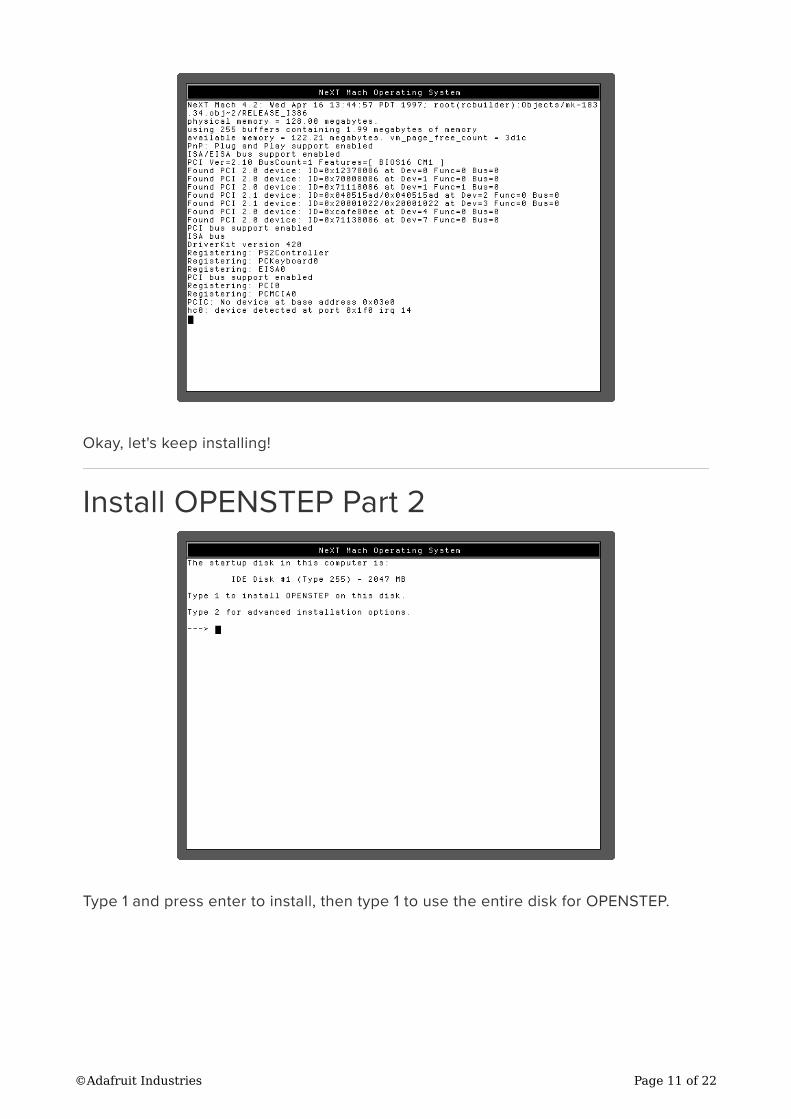
Okay, let's keep installing!
Install OPENSTEP Part 2
Type 1 and press enter to install, then type 1 to use the entire disk for OPENSTEP.
©Adafruit Industries Page 11 of 22
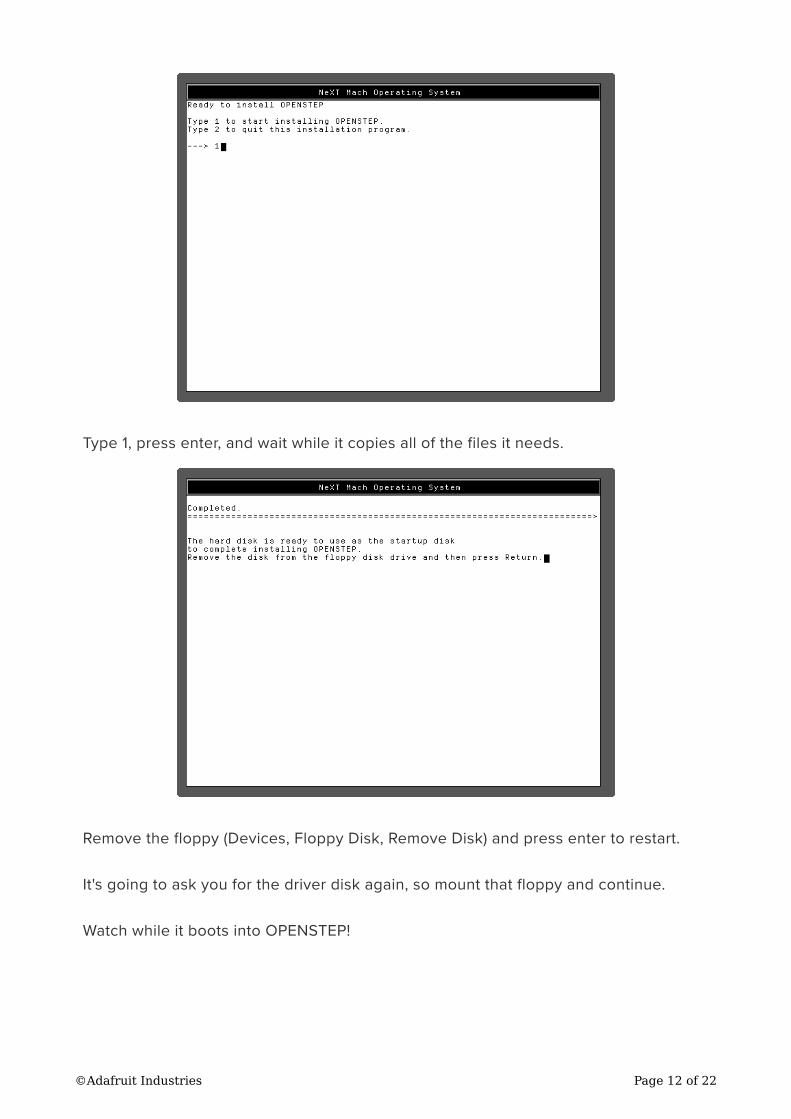
Type 1, press enter, and wait while it copies all of the files it needs.
Remove the floppy (Devices, Floppy Disk, Remove Disk) and press enter to restart.
It's going to ask you for the driver disk again, so mount that floppy and continue.
Watch while it boots into OPENSTEP!
©Adafruit Industries Page 12 of 22
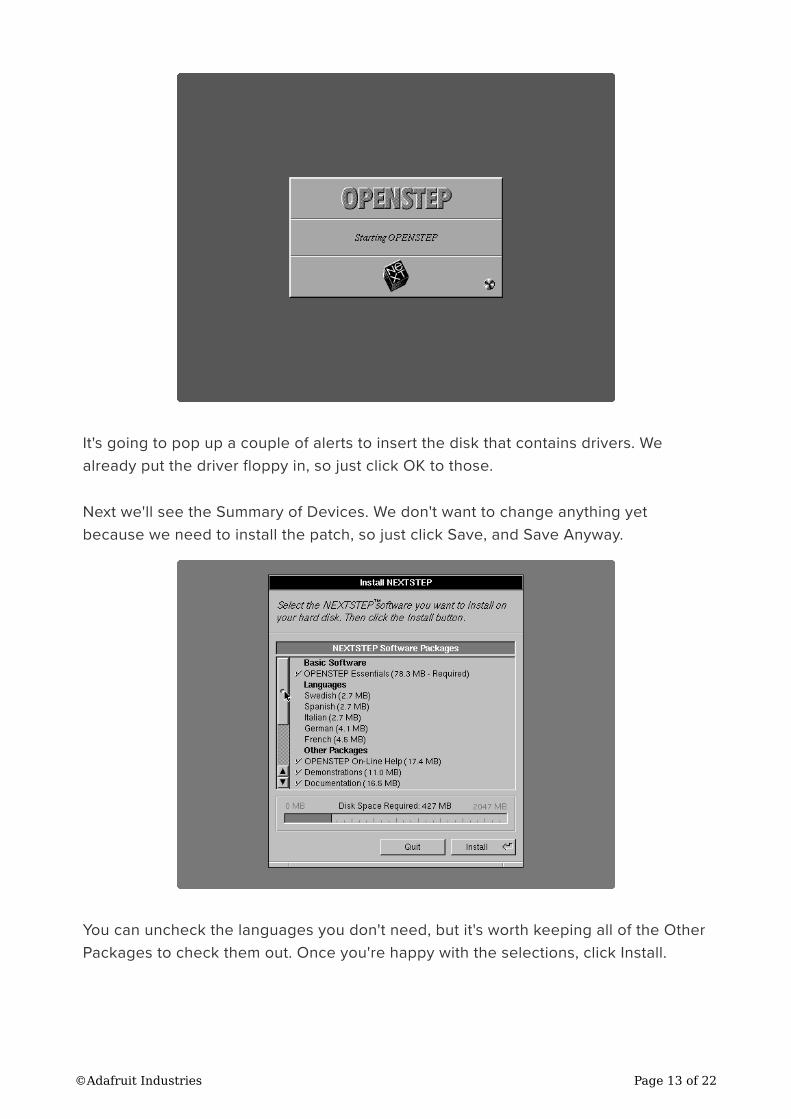
It's going to pop up a couple of alerts to insert the disk that contains drivers. We
already put the driver floppy in, so just click OK to those.
Next we'll see the Summary of Devices. We don't want to change anything yet
because we need to install the patch, so just click Save, and Save Anyway.
You can uncheck the languages you don't need, but it's worth keeping all of the Other
Packages to check them out. Once you're happy with the selections, click Install.
©Adafruit Industries Page 13 of 22
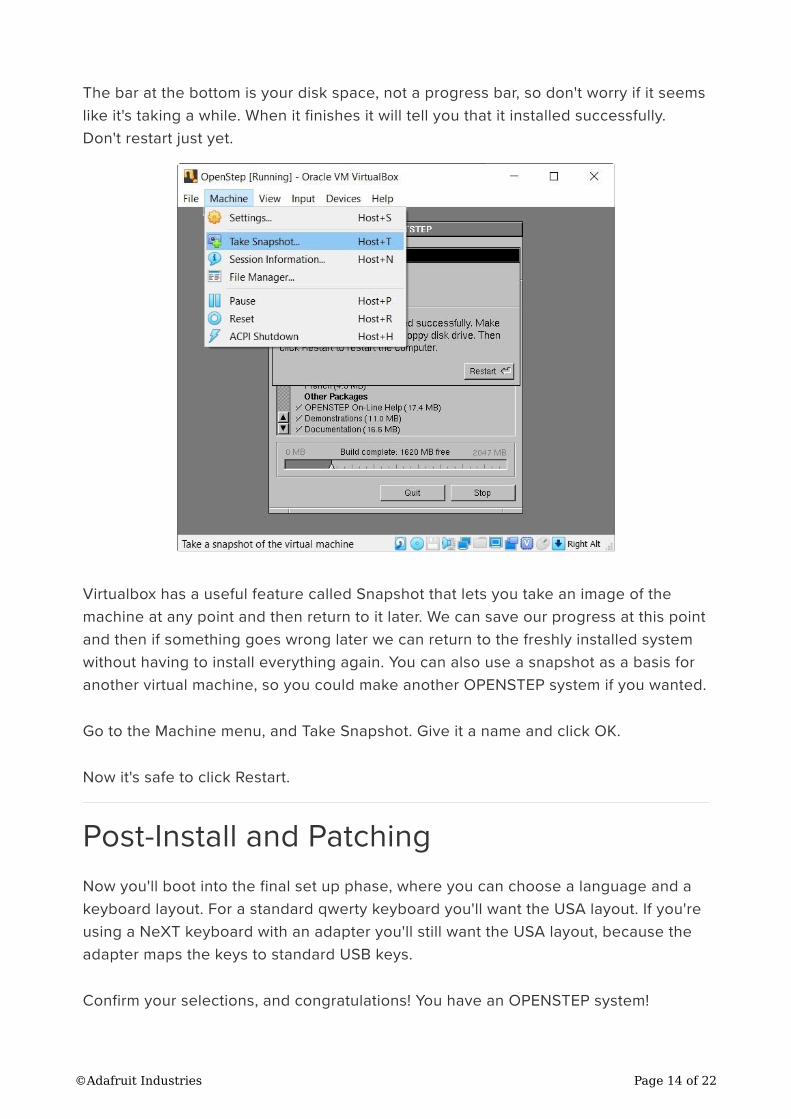
The bar at the bottom is your disk space, not a progress bar, so don't worry if it seems
like it's taking a while. When it finishes it will tell you that it installed successfully.
Don't restart just yet.
Virtualbox has a useful feature called Snapshot that lets you take an image of the
machine at any point and then return to it later. We can save our progress at this point
and then if something goes wrong later we can return to the freshly installed system
without having to install everything again. You can also use a snapshot as a basis for
another virtual machine, so you could make another OPENSTEP system if you wanted.
Go to the Machine menu, and Take Snapshot. Give it a name and click OK.
Now it's safe to click Restart.
Post-Install and Patching
Now you'll boot into the final set up phase, where you can choose a language and a
keyboard layout. For a standard qwerty keyboard you'll want the USA layout. If you're
using a NeXT keyboard with an adapter you'll still want the USA layout, because the
adapter maps the keys to standard USB keys.
Confirm your selections, and congratulations! You have an OPENSTEP system!
©Adafruit Industries Page 14 of 22
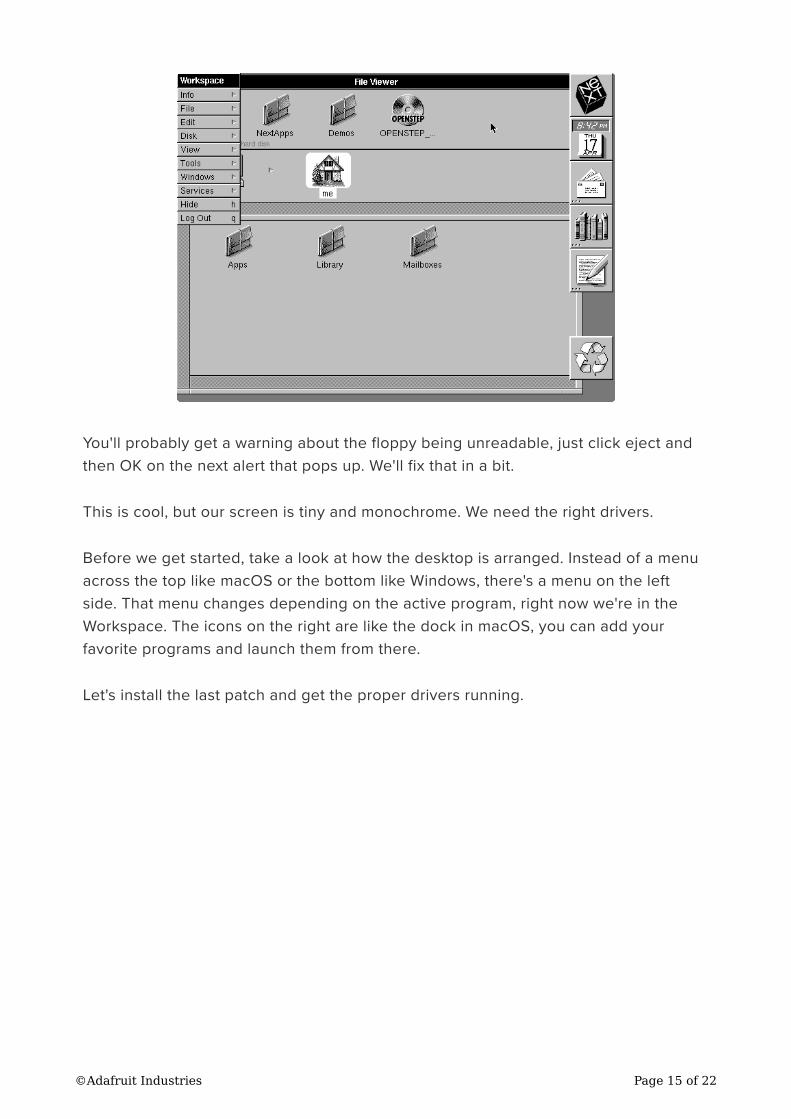
You'll probably get a warning about the floppy being unreadable, just click eject and
then OK on the next alert that pops up. We'll fix that in a bit.
This is cool, but our screen is tiny and monochrome. We need the right drivers.
Before we get started, take a look at how the desktop is arranged. Instead of a menu
across the top like macOS or the bottom like Windows, there's a menu on the left
side. That menu changes depending on the active program, right now we're in the
Workspace. The icons on the right are like the dock in macOS, you can add your
favorite programs and launch them from there.
Let's install the last patch and get the proper drivers running.
©Adafruit Industries Page 15 of 22
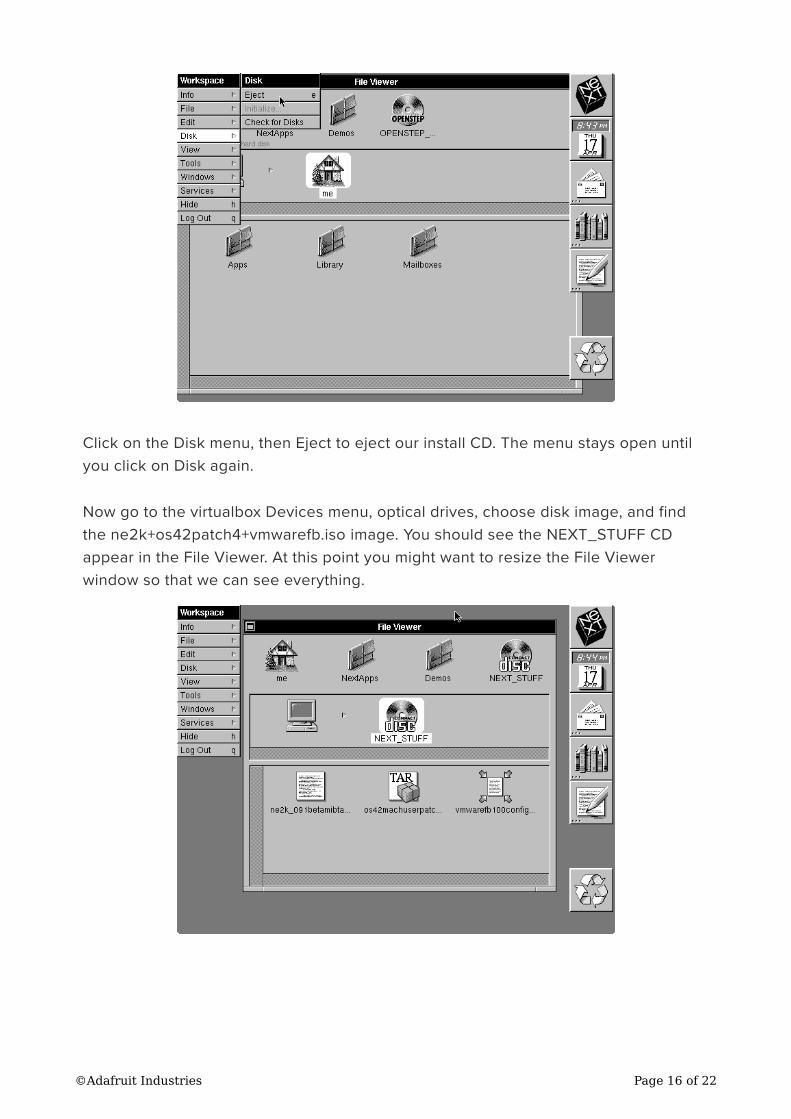
Click on the Disk menu, then Eject to eject our install CD. The menu stays open until
you click on Disk again.
Now go to the virtualbox Devices menu, optical drives, choose disk image, and find
the ne2k+os42patch4+vmwarefb.iso image. You should see the NEXT_STUFF CD
appear in the File Viewer. At this point you might want to resize the File Viewer
window so that we can see everything.
©Adafruit Industries Page 16 of 22

We want the os42machuserpatch.tar file, but we need to extract it on our system.
Click and drag it to the me icon to copy it to the home folder. There's no copy dialog
to show the progress, but you'll see the word copying show up on the right side of the
window. It'll disappear when done copying.
Go to the me folder and double click os42machuserpatch.tar. Click Unarchive. There's
no progress bar here either, but it's working. You should see a file with a question
mark show up. When it's finished it'll look like the picture below, with a nice cardboard
box icon.
Now it's safe to close the Archive Inspector (click the X in the top right corner).
We want to run the patch file but wait, we need privileges to do that. OPENSTEP is
based on BSD Unix, so it has user accounts and permissions just like a modern
system. To run the file as root, we'll use the OpenSesame service. Select the OS42M
achUserPatch4.pkg file by clicking it, then go to the Services menu, OpenSesame,
and Open As Root. It'll ask for a password but we haven't set one up yet, so leave it
blank and press enter.
Now you can click Install to begin installing the patch. Click Continue when the alerts
pop up.
©Adafruit Industries Page 17 of 22
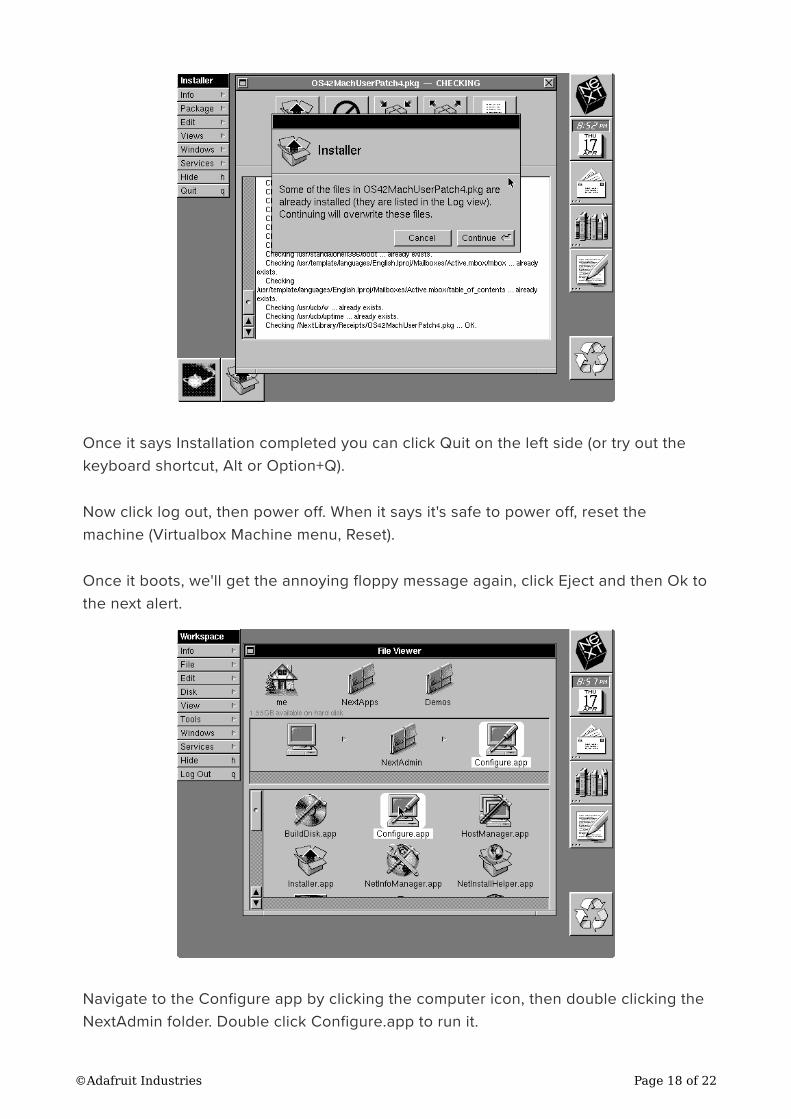
Once it says Installation completed you can click Quit on the left side (or try out the
keyboard shortcut, Alt or Option+Q).
Now click log out, then power off. When it says it's safe to power off, reset the
machine (Virtualbox Machine menu, Reset).
Once it boots, we'll get the annoying floppy message again, click Eject and then Ok to
the next alert.
Navigate to the Configure app by clicking the computer icon, then double clicking the
NextAdmin folder. Double click Configure.app to run it.
©Adafruit Industries Page 18 of 22
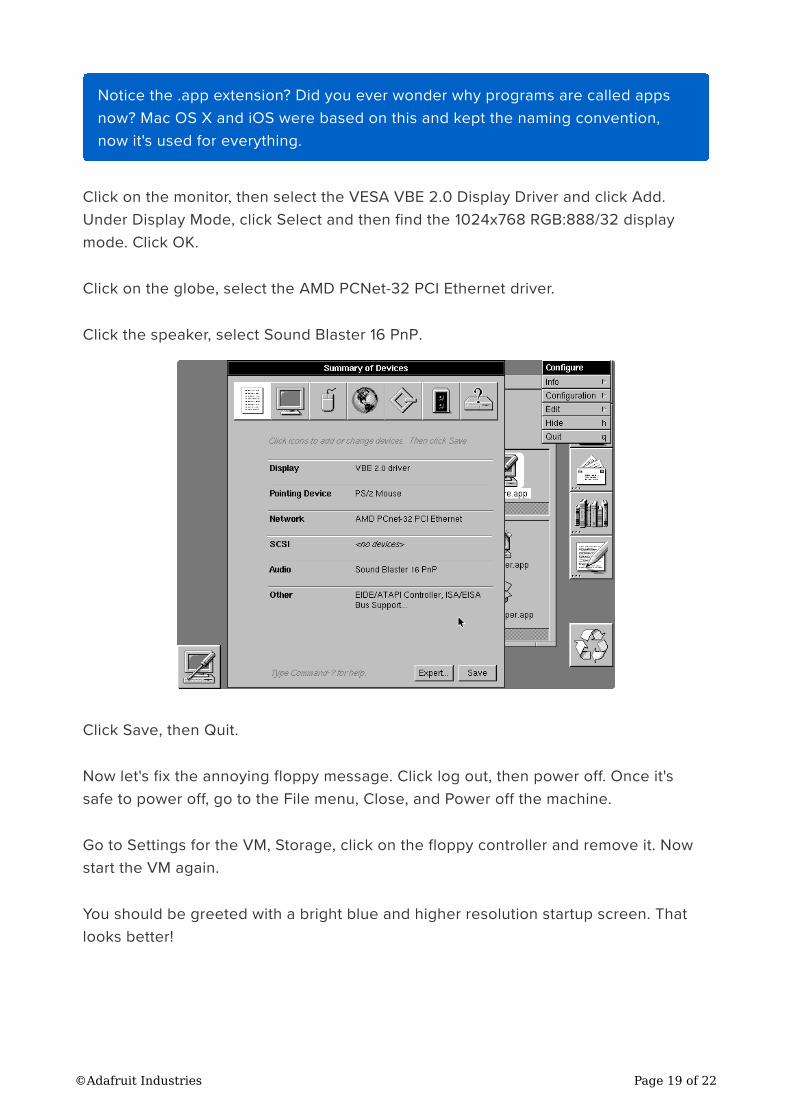
Click on the monitor, then select the VESA VBE 2.0 Display Driver and click Add.
Under Display Mode, click Select and then find the 1024x768 RGB:888/32 display
mode. Click OK.
Click on the globe, select the AMD PCNet-32 PCI Ethernet driver.
Click the speaker, select Sound Blaster 16 PnP.
Click Save, then Quit.
Now let's fix the annoying floppy message. Click log out, then power off. Once it's
safe to power off, go to the File menu, Close, and Power off the machine.
Go to Settings for the VM, Storage, click on the floppy controller and remove it. Now
start the VM again.
You should be greeted with a bright blue and higher resolution startup screen. That
looks better!
Notice the .app extension? Did you ever wonder why programs are called apps
now? Mac OS X and iOS were based on this and kept the naming convention,
now it's used for everything.
©Adafruit Industries Page 19 of 22
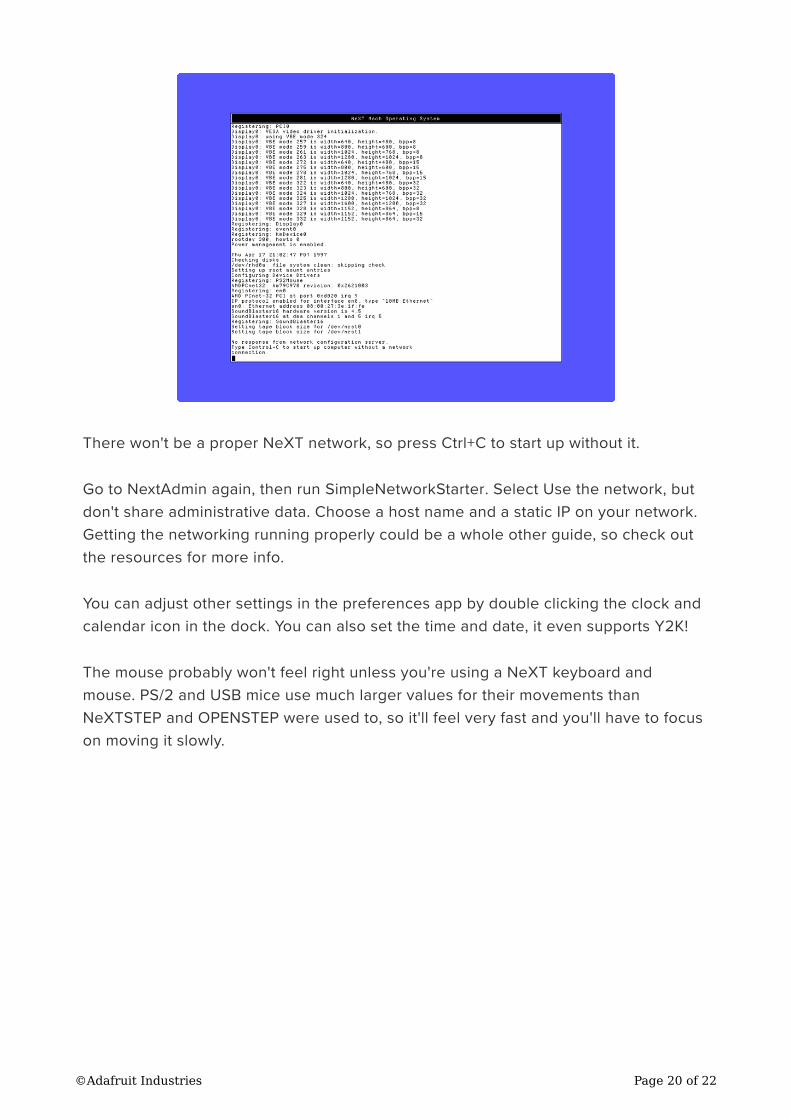
There won't be a proper NeXT network, so press Ctrl+C to start up without it.
Go to NextAdmin again, then run SimpleNetworkStarter. Select Use the network, but
don't share administrative data. Choose a host name and a static IP on your network.
Getting the networking running properly could be a whole other guide, so check out
the resources for more info.
You can adjust other settings in the preferences app by double clicking the clock and
calendar icon in the dock. You can also set the time and date, it even supports Y2K!
The mouse probably won't feel right unless you're using a NeXT keyboard and
mouse. PS/2 and USB mice use much larger values for their movements than
NeXTSTEP and OPENSTEP were used to, so it'll feel very fast and you'll have to focus
on moving it slowly.
©Adafruit Industries Page 20 of 22
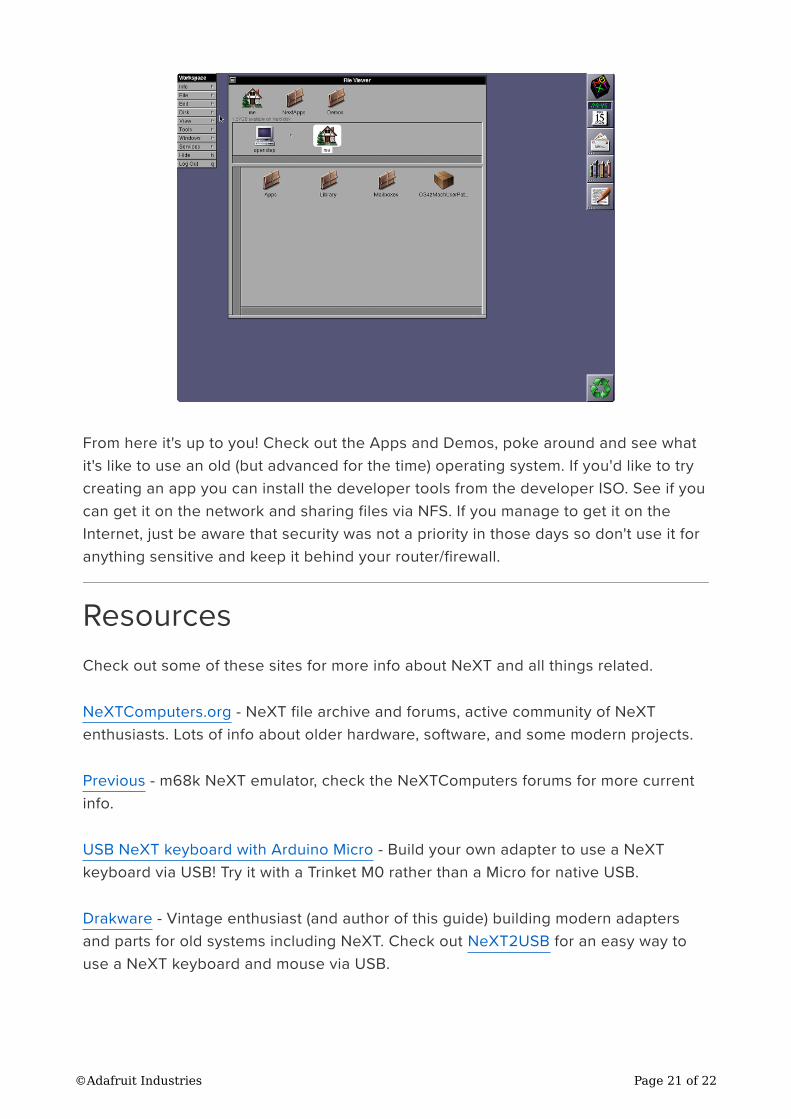
From here it's up to you! Check out the Apps and Demos, poke around and see what
it's like to use an old (but advanced for the time) operating system. If you'd like to try
creating an app you can install the developer tools from the developer ISO. See if you
can get it on the network and sharing files via NFS. If you manage to get it on the
Internet, just be aware that security was not a priority in those days so don't use it for
anything sensitive and keep it behind your router/firewall.
Resources
Check out some of these sites for more info about NeXT and all things related.
NeXTComputers.org - NeXT file archive and forums, active community of NeXT
enthusiasts. Lots of info about older hardware, software, and some modern projects.
Previous - m68k NeXT emulator, check the NeXTComputers forums for more current
info.
USB NeXT keyboard with Arduino Micro - Build your own adapter to use a NeXT
keyboard via USB! Try it with a Trinket M0 rather than a Micro for native USB.
Drakware - Vintage enthusiast (and author of this guide) building modern adapters
and parts for old systems including NeXT. Check out NeXT2USB for an easy way to
use a NeXT keyboard and mouse via USB.
©Adafruit Industries Page 21 of 22

NeXT Non-ADB Keyboard Protocol - My investigation into the keyboard protocol for
old NeXT systems. Useful if you're building your own adapter.
©Adafruit Industries Page 22 of 22