Blood Collection Routine Venipuncture
73
-
Upload
payneje -
Category
Healthcare
-
view
1.746 -
download
49
Transcript of Blood Collection Routine Venipuncture


List the required information on a requisition form.
Describe correct patient identification and specimen labeling procedures.
Describe patient preparation and the variables that can affect some laboratory tests.

Correctly assemble venipuncture equipment and supplies.
Name and locate the three most frequently used veins for venipuncture, and describe when these sites would be unacceptable.
Correctly apply a tourniquet and state why the tourniquet can be applied for only 1 minute.

List four methods used to locate veins that are not prominent.
Describe the different antiseptics used to cleanse the venipuncture site.
State the steps in a venipuncture procedure, and correctly perform a routine venipuncture using an evacuated tube system.

Demonstrate safe disposal of contaminated needles and supplies.
Deliver specimens to the laboratory in a timely manner.
Recommended step-by-step venipuncture procedure
Possible complications


Purpose◦ Patient
identification◦ Organization of
equipment◦ Collection of
appropriate specimens


Name Identification number Accession number Location Health-care provider’s name Test requested Date and time of collection

Patient’s date of birthSpecial collection informationSpecial patient informationNumbers and type of collection tubes
Status of specimen

Introduce yourself◦ Begin communication process◦ Look and listen
Explain purpose of visit◦ Informed consent◦ Patient has the right to refuse–Patient Bill of Rights
Guilty of assault if patient has the perception that blood collector is ignoring his or her refusal
Wake a sleeping patient Greet unconscious patients

THIS IS THE MOST IMPORTANT STEP !
Written protocol ◦ Hospital inpatients◦ Outpatients
Two identifiers
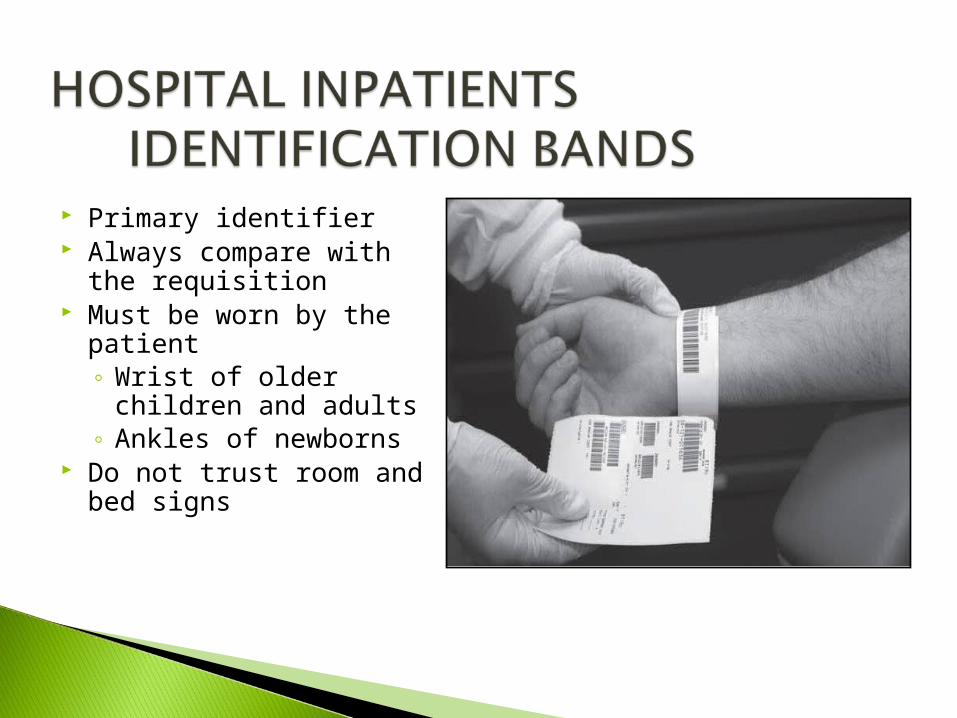
Primary identifier Always compare with the
requisition Must be worn by the
patient◦ Wrist of older children
and adults◦ Ankles of newborns
Do not trust room and bed signs

Second identifier◦ Have the patient state full name◦ CLSI requirement

Primary identifier◦ Have the patient state full name
Secondary identifier◦ Ask additional information
Date of birth Spell name Compare unique data with the requisition form

CLSI requires a caregiver or family member to provide information on patient’s behalf if patient is unable to before drawing specimen
Document the name of the verifier Drug testing might require photo ID

Unidentified patients◦ Tagged with temporary number◦ Tentative name
Commercial blood bank system◦ Place additional stickers from ID band on:
Specimen Requisition form Units of blood

Reassure the patient Explain procedure
◦ Do not explain the purpose of the test! Do not say procedure is painless!
Alert patient to every step of the procedure Remind patient to hold still

Basal state◦ Preferred state
Fasting Activities
◦ Medications A variety of both prescription and over-the-counter
medications can influence lab test results


Site is convenient and supported◦ Place pillow under arm◦ Place fist under elbow◦ Place arm at downward
angle to prevent reflux Safety
◦ Patient is sitting or lying down
◦ Remove objects from patient’s mouth
◦ Be alert for syncope


Place all supplies close to patient◦ Collection equipment◦ Antiseptic pads◦ Gauze◦ Bandage◦ Needle disposal system◦ Examination requisition
form Number and type of tubes Extra tubes in case of loss of vacuum

Wash hands between patients Change gloves between patients

Vein locationIncrease amount of available blood
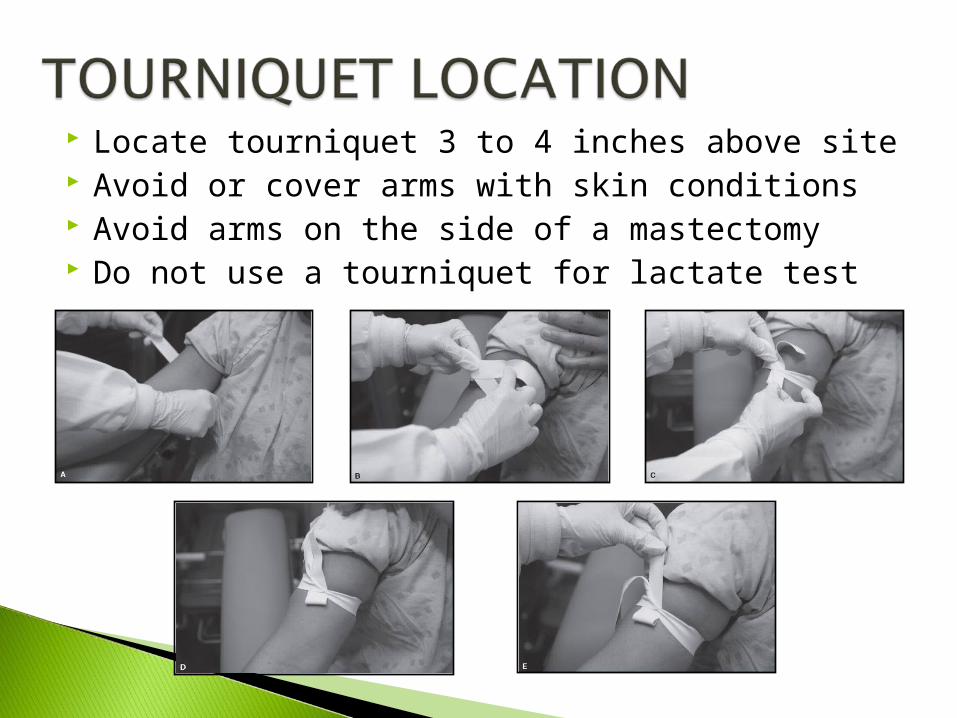
Locate tourniquet 3 to 4 inches above site Avoid or cover arms with skin conditions Avoid arms on the side of a mastectomy Do not use a tourniquet for lactate test

Maximum time is 1 minute Apply for site selection Release for 2 minutes Reapply Release when blood flows Prolonged tourniquet application
◦ Causes hemoconcentration Increase in the ratio of certain analytes to plasma Biochemical changes take place in the trapped blood

Other causes◦ Excessive squeezing◦ Probing a site◦ Long-term IV therapy◦ Sclerosed or occluded veins◦ Vigorous fist clenching
Increases cellular elements

◦ Uncomfortable for patient◦ Obstruct blood flow◦ No radial pulse◦ Appearance of petechiae
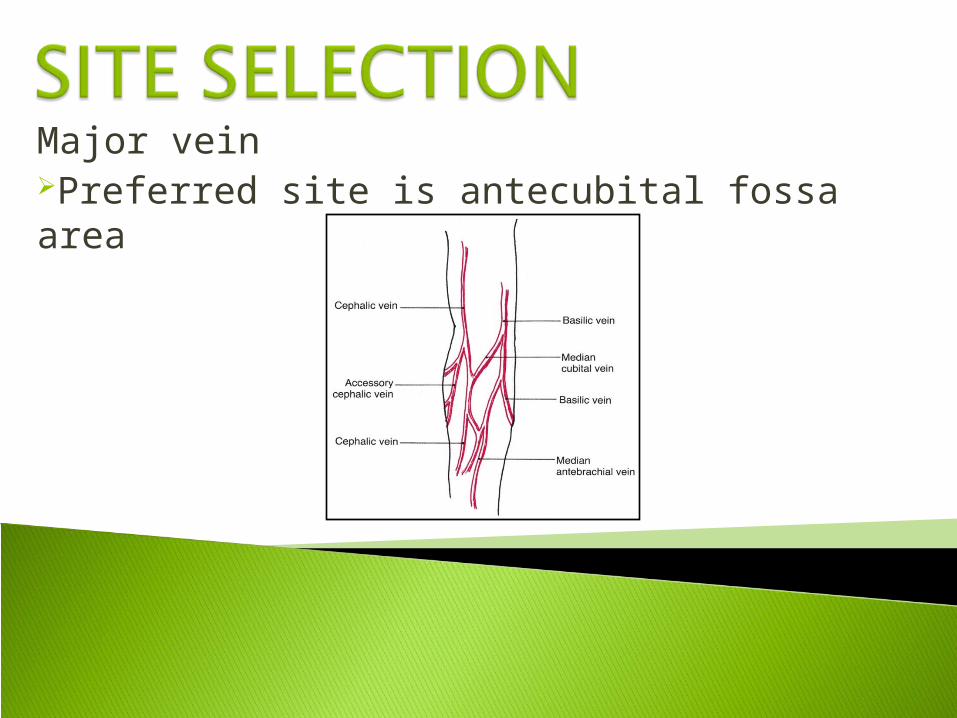
Major veinPreferred site is antecubital fossa area
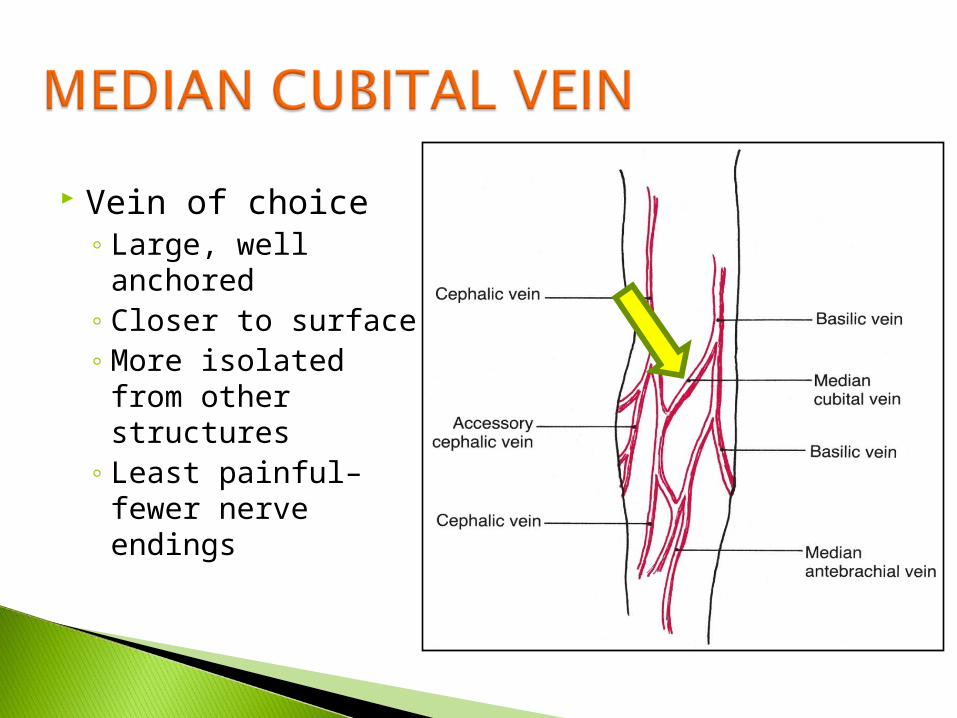
Vein of choice◦ Large, well
anchored◦ Closer to surface◦ More isolated from
other structures◦ Least painful–fewer
nerve endings

◦ Located on thumb side of arm
◦ Second site of choice◦ Close to the surface
Use lower angle of needle insertion (15°)
Possible blood spurt◦ May be prominent in
larger patients

◦ Located on the underside of the arm
◦ Third choice for venipuncture (H3-A6 recommends using only as a last resort) Least firmly anchored (vein
may “roll”) Near brachial artery and
median nerve Hematoma formation more
likely Consider using a syringe for
more control

Apply tourniquet 3 to 4 inches above venipuncture site
Have patient form a fist◦ Do not pump fist
Causes hemoconcentration Only acceptable for blood donations

◦ Feeling is more important than sight
◦ Probe with index finger, thumb has a pulse
◦ Push, don’t stroke◦ Determine: size, depth,
direction◦ Remember: veins are
spongy, tendons are rigid, arteries have a pulse

Check both arms Listen to patient’s suggestions of previously successful areas
Massage the arm upward from the wrist
Briefly hang the arm down Apply heat Transilluminator device

Wrists and hands◦ Apply tourniquet to forearm◦ Consider a smaller needle, syringe, winged blood
collection set H3-A6 states to avoid veins from the
underside of the wrist◦ Possibility of puncturing the radial or ulnar nerve
or artery Can cause permanent nerve
damage and inability to open and close the hand
Require physician approval More susceptible to infection and thrombi
Avoid in patients with diabetes, cardiac problems, coagulation disorders

Occluded veins◦ Thrombi◦ Multiple punctures◦ Feel hard◦ Impaired circulation
Hematomas◦ Do not puncture hematoma, noncirculation of blood◦ Draw below hematoma◦ Use other arm
Areas with edema Areas with extensive burns, scars or tattoos
◦ More susceptible to infection◦ Decreased circulation◦ Difficult to palpate
Mastectomies◦ Lymphostasis
Increased lymphocytes Increased waste products
◦ Patient danger Lymphedema Infection
Double Mastectomies◦ Consult physician◦ Possibly perform fingerstick
Never obtain blood from a finger on the side affected by a mastectomy (CLSI H$A6) without physician-written permission

IV Fluids◦ Ideally use other arm◦ Avoid sites of previous IVs for 24–48 hours◦ Note same arm collection on requisition◦ Select site below infusion site, caregiver turns off IV for 2
minutes ◦ Preferably use a different vein◦ Avoid drawing blood at the same time dye for radiological
procedure or blood components are being infused
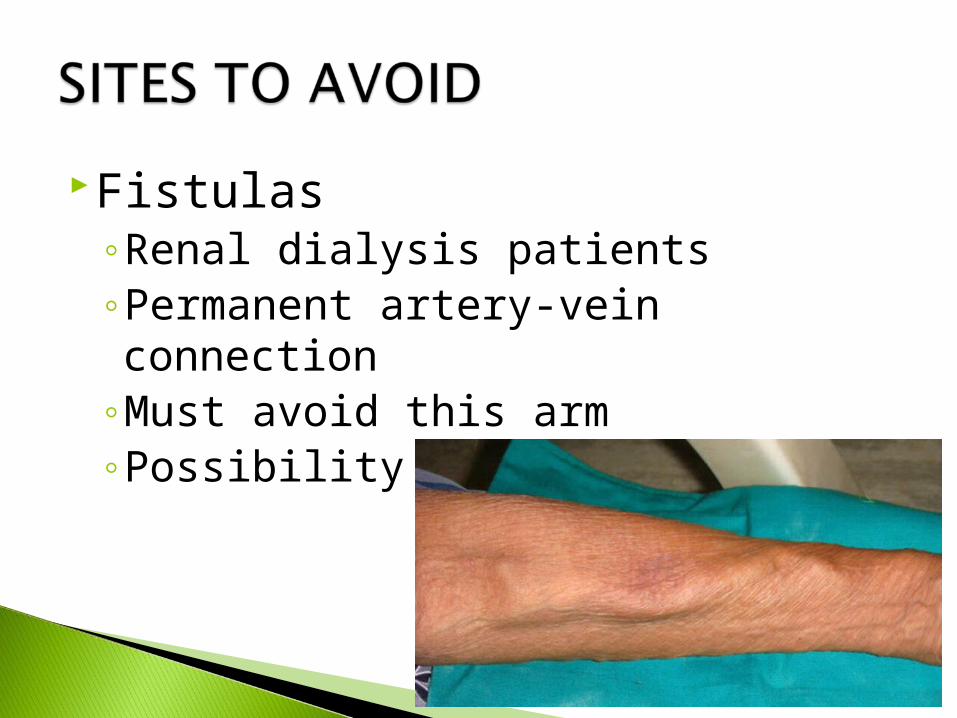
Fistulas◦Renal dialysis patients ◦Permanent artery-vein connection◦Must avoid this arm ◦Possibility of infection

Cannula◦Temporary (external) AV shunt◦T-tube connector with diaphragm◦Only specially trained personnel can draw from a cannula

Turn off IV for at least 2 minutes◦ Discard first 5 mL blood◦ Collect specimen in a new syringe◦ Coagulation tests, discard 10 mL
Second 5 mL can be used for other tests Document the type of IV fluid and location
on requisition


Apply 70% isopropyl alcohol using a circular motion cleanse from inside to outside
Allow to air dry, 30–60 seconds will give maximum bacteriostatic action
Avoid wiping off with gauze Failure to let alcohol dry
causes a stinging sensation for patient
Specimen hemolysis
Blood cultures or arterial blood gases◦Povidone-iodine◦Tincture of iodine◦Chlorhexidine gluconate
Blood Alcohol Collection◦Do not cleanse site with alcohol◦Soap and water are recommended◦Iodine or benzalkonium chloride (Zephiran
Chloride) may be acceptable

Perform while alcohol is drying Screw the stopper-puncturing end
of needle into the holder Insert first collection tube into the
holder Advance tube only to mark on holder

Perform immediately before puncture◦ Blunt end◦ Barbed point

Reapply tourniquet Confirm puncture site Cleanse gloved palpating finger if
necessary Place holder in dominant hand
Place thumb on top, fingers underneath After insertion, fingers can be braced on
patient’s arm


Place thumb of nondominant hand 1–2 inches below site
Place fingers on back of arm
Do not anchor above and below site with thumb and index finger◦ Possible accidental self-
puncture


Bevel up 15-to-30 degree
angle Resistance lessens
when the needle enters the vein

Nondominant hand can be used after vein is entered
Use flared ends of holder

Brace the hand holding the holder against the patient’s arm
Gently twist tubes on and off the needle

Mix tubes as they are removed from the holder needle◦ Can be done before next tube is inserted
Remove and mix the last tube before removing the needle from the vein◦ Blood will drip from the needle

Remove the tourniquet if still applied Failure to remove can cause
a hematoma Patient may relax fist Withdraw needle and apply
pressure to gauze at the same time

Capable patients can apply pressure using digital pressure
Arm is raised and outstretched◦ Do not bend the elbow
Collector must apply pressure if necessary

Immediately activate needle safety device
Dispose in a conveniently located sharps container
NEVER BEND, CUT, OR RECAP NEEDLE

Label tube before leaving the patient Less chance of tubes being
mixed up Use a pen Confirm information on
preprinted labels Verify correct labeling with
the patient (CLSI H3-A6)

Patient’s name and ID number Date and time of collection Collector’s initials Additional information
◦ Blood bank identification

Check arm before bandaging H3-A6 states collector must
observe for hematoma formation before applying bandage
Apply hypoallergenic bandage over gauze for extra pressure
Self-adhering material Patient’s instructions
Avoid carrying heavy objects Remove bandage within 1
hour

Pressure must be applied until bleeding stops◦ Patients on anticoagulants/aspirin/herb therapy
Accidental arterial puncture◦ Collector must apply pressure for 5 minutes or until bleeding
has stopped◦ Notify nursing staff and physician
Allergy to adhesive◦ Avoid use in children under 2 years old

Place in biohazard containers Remove gloves Wash hands

Return patient’s bed to original position
Replace bedrails

Use designated biohazard bags/containers

Observe any special handling procedures Deliver as soon as possible
◦ No longer than 45 minutes Transport in an upright position
◦ Facilitate clotting◦ Prevent hemolysis
Complete all required paperwork

Separate serum and plasma from the cells within 2 hours of collectiono Hemolysis severely affects potassium valueso Cellular metabolism decreases glucose levels

Coagulation specimens for a PTT can remain at RT for 4 hours; if patient is on unfractionated heparin, the plasma must be removed from the cells within 1 hour, test within 4
PT are stable for 24 hours at RT Blood smears from EDTA tubes should be
made within 1 hour of collection. Specimen can be refrigerated for up to 4
hours