Aussie Neighborhood, Mulberry Street -Ruby's: -Cozy Popular Aussie Bar Restaurant;
description

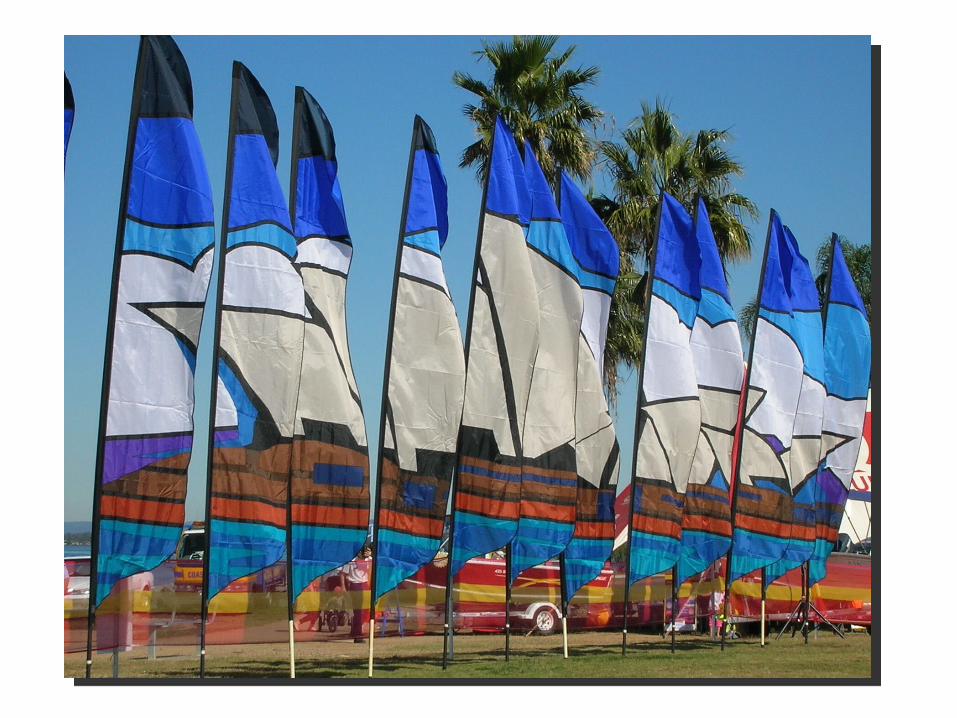
Banners Aussie-styleHow Do They Do It?
• Size & Shape• Poles• Ground Anchor• Design Graphics• Fabric• Pattern preparation• Tools

Shape• Rectangular – top
corner flop, bottom corner flick (children)
• Flat/rigid – message always readable but no pizzazz!
• Feather – smooth edge, waving and attractive

Size
• Too small = difficult to cut & sew
• Too large = weight / gravity issues, strain on the pole system
• Our optimum is now 5:87/1 height to width
• Banner weight 450gm

Poles
Bamboo• Temporary• Sharp edges (snags)• Single length (hard to
transport)• Cheap for some
PVC tube / plumbing• Cheap• Softens in summer• Bends unevenly,
looks drunk• Not conveniently
collapsible• Requires modified
sleeve top• Heavy, users
unhappy

Poles cont…
Fishing rod blanks
• Whippy tips
• Poke through sleeve tops
• Top section too weak for banner nylon
• Alternative = remove thinnest section
• Add vinyl tip to prevent poke through

Banner Poles
• Specific for banners• Use load-spreading tips, no
more poking through• Top section reinforced,
thicker, withstands strain• Often in a carry bag• Ideally with clip for bungee

Bungee
• Bungee acts as a shock absorber
• Pre-test for optimum length to fit pole being used
• NOT taut, NOT loose, slight tension
• Bungee clip prevents fly-away banners

Ground Anchor
• Wooden broomstick, sharpen one end, 1m long• Solid fibreglass ideal, 12mm diameter, 1m long• Insert no more than 20cm, leave 80% exposed• NEVER use metal – it erodes inside of pole
Maintain flex by inserting only 20cm

Design Graphics
• For own use, Microsoft ClipArt or own drawn
• With computer software, need Vector graphic to manipulate
• With photo or image can project onto wall, trace around.

Design Tips #1
• Keep designs away from uppermost trailing edge – area of high waving
• Be mindful of too many stitch holes near high-speed waving
• Avoid too many seams in near proximity to each other
• Keep each component as large as possible

Design Tips #2
• Bleed images over edges, or
• Crop or enlarge to avoid pea-on-a-drum effect
• Duplicate single image to create impression of fullness


Design Tips #3
• Add black outline on all lettering / art to show where stitch lines will be
• Too many lines causes sewing MAYHEM!
• Simplify as much as possible to create less mess

Design Tips #4
• Best effects are darker backgrounds• Lighter letters/images show in sunlight like a
neon sign

Design Tips #5
• Know hot colours vs. cool colours
• Select colours from opposites
• Cool colours hold vibrancy longer
• Similar colour shades offer a 3D look
• Dark backgrounds make good contrasts

Design Tips #6
Font styles• Simpler reads better• Waving fabric creates
mystique so make message readable
• Too many fonts confuse
• Think - newspapers overload

Design Tips #7
Never mix upper & lower case!!Leave correct spacing between words.
Horizontal layout is how we’re trained to read. Top to bottom is better on FIXED signage.

Design Tips #8
Zoom in & crop or focus on a definitive feature (e.g. dress frills)

Design Tips #9
Simplify drawings, remove excess lines, reduce colours to basic

Design Tips #10
Create designsfrom photographsor amend existing
drawings

Design Tips #11
Simplify!

Design Tips #12• Always check outlines by zooming in then reduce as many direction changes as possible
• What looks good in small scale could be a nightmare at full size

Fabrics
• Banner nylon, 200 denier, SolarMax UV-inhibitor coated to resist fading
• Cut darker colours first. Lift. Cut lighter colour then replace darker colour
• Hot dot, zig zag from reverse side. Easier to sew from lighter side

Finishing Off
• Top Cap is 1000D Cordura • Edging is 20mm edge binding
(awning tape, UV-stabilised).• Sleeving is banner nylon cut to
suitable width for widest part of pole
• Or, can be 1½ oz. ripstop cut to width & length
• Your choice: bungee threaded through a loop at base of sleeve, or length of cord for tying.

Pattern Preparation options
• Individual sheets A4 stuck to right size• Transparency, overhead projector onto full-size
paper pattern (B&W)• Opaque Projector / Epidiascope onto full-size
paper pattern (Colours)• Printshop, print out full size paper pattern ($$)• Wide format printer, print full size paper pattern• Laser cutting machine directly cuts fabric pieces

Tools