B-5 Organ V3 User Guide
24
B-5 Organ V3 User Guide 1 / 24
Transcript of B-5 Organ V3 User Guide
B-5 Organ V3 User Guide
1 / 24
Welcome to Acousticsamples
Thank you for using the B-5 Organ V3 library. We hope you enjoy playing the instrument and wish itsupports your musical ideas or even better: inspire new ones.In this User Guide we will provide you with an overview of how to use the B-5 Organ V3 library.
If you have any questions, feel free to email us at:[email protected]
or use the contact form on our websitewww.acousticsamples.net
The B-5 Organ V3 library, produced byAcousticsamples
All Rights not expressly granted are reserved.Copyright © 2021 by Acousticsamples
2 / 24

Requirements and Installation
Step 1 - Authorize your library
The first thing to do is make sure you have an iLok ID and that it is the correct one. If you never used iLok, just go to theilok.com website and create a free account.
You will be asked to enter a user ID, this is what you will need to enter later on the authorization page. This will also bethe ID you will need to get connected to the iLok license manager.
On the download/serials page, you can find the serial number associated with your library, it should look like this:PROASXX-XXXXXXX.
You can click on the authorize button or copy it and go to thispage: http://acousticsamples.net/index.php?route=account/authorizeIlok you can find the link in the top menu underaccount as well as on the "my account" page. Of course you need to be logged in to view this page.
Now enter the serial number in the serial number box (it will be filled already if you used the authorize button) as well asyour iLok id. The iLok id is the username you use to log into your iLok account, don't confuse it with the number writtenon the key.
Then simply hit the authorize button and wait a little. At the end of this process, you will see a message telling you if theauthorization was successful. You will also get a confirmation email.
Sometimes the iLok servers will not respond and you will get a blank page, in this case, please contact us and we willproceed to the authorization for you manually.
Step 2 - Download and extract your libraries
Registering your serial number will generate your download links, they will be create and available on thedownloads/serials page.
The files are delivered in RAR format and sometimes these files are split (for the large libraries).
You need to use winrar on windows or UnrarX on mac (www.unrarx.com or directly here) to extract them, othersoftwares will probably not extract the files properly, we use the recovery functions of Rar (to avoid download corruption)and these two softwares are are the only ones to handle it properly. If there are multiple parts (part01.rar, part02.rar),you need to put them all in the same folder before extracting. If the extraction gives you errors, then your download didnot complete or got corrupted, you need to download it again.
Step 3 - Download and install UVI Workstation
Download and install the UVI workstation (our free sample player) from here:http://www.acousticsamples.net/uviworkstation.
3 / 24
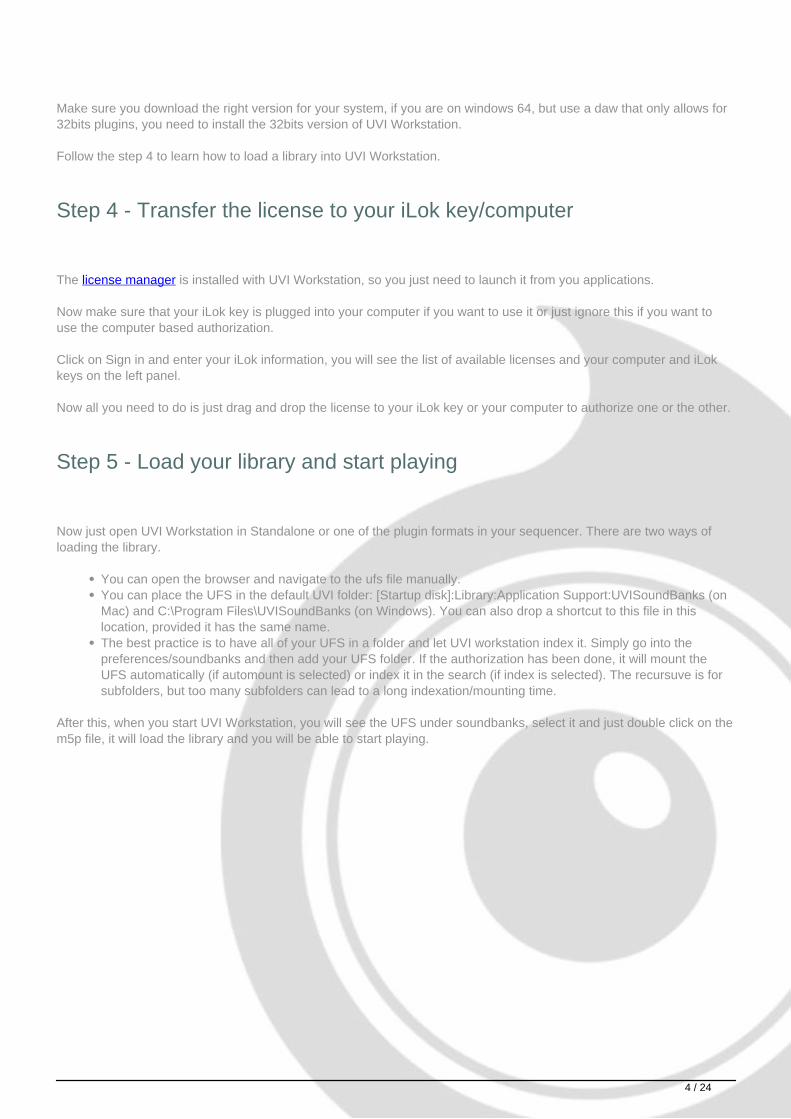
Make sure you download the right version for your system, if you are on windows 64, but use a daw that only allows for32bits plugins, you need to install the 32bits version of UVI Workstation.
Follow the step 4 to learn how to load a library into UVI Workstation.
Step 4 - Transfer the license to your iLok key/computer
The license manager is installed with UVI Workstation, so you just need to launch it from you applications.
Now make sure that your iLok key is plugged into your computer if you want to use it or just ignore this if you want touse the computer based authorization.
Click on Sign in and enter your iLok information, you will see the list of available licenses and your computer and iLokkeys on the left panel.
Now all you need to do is just drag and drop the license to your iLok key or your computer to authorize one or the other.
Step 5 - Load your library and start playing
Now just open UVI Workstation in Standalone or one of the plugin formats in your sequencer. There are two ways ofloading the library.
You can open the browser and navigate to the ufs file manually.You can place the UFS in the default UVI folder: [Startup disk]:Library:Application Support:UVISoundBanks (onMac) and C:\Program Files\UVISoundBanks (on Windows). You can also drop a shortcut to this file in thislocation, provided it has the same name.The best practice is to have all of your UFS in a folder and let UVI workstation index it. Simply go into thepreferences/soundbanks and then add your UFS folder. If the authorization has been done, it will mount theUFS automatically (if automount is selected) or index it in the search (if index is selected). The recursuve is forsubfolders, but too many subfolders can lead to a long indexation/mounting time.
After this, when you start UVI Workstation, you will see the UFS under soundbanks, select it and just double click on them5p file, it will load the library and you will be able to start playing.
4 / 24

Interface and Parameters
The B5 Organ V3
Based on real tonewheel samples and fully modeled: from the tonewheelpickups and the AO-28 amp to the resistive wires, to the drawbars and keycontacts... Everything has been carefully measured on different models and
adjusted to match real organs.
The true sound of an organ with the flexibility of synthesis.
A Hybrid Approach
Hammond organs are complex beasts, full of wires and mechanical parts. Until now, the best renditions (short of areal organ) were made using pure synthesis, mainly because the organ works using a set of 91 frequencies thatare connected via contactors under each key and whose volume is controlled by the drawbars. Sample basedlibraries consist of stacking drawbar samples at the same time. This works, but causes a major problem:sometimes you play the same frequency twice and because of phase cancellation, you never get the same soundtwice when you press the same keys. We have found a way using the 91 frequencies synthesis approach, but withreal samples, which allows you to enjoy the best of both worlds: a real recorded organ tone plus the realmechanical behavior but with the added benefits of functioning drawbar controls and synthesis tweakability.
B-5 V3 vs real Organ and real Leslie 122 comparison
5 / 24

Sample based synthesis
There are things in the Organ sound that can't befaked: tonewheels, keyclicks, vibrato scanner... sowe sampled them.
We then meticulously reproduced the whole signalchain: tonewheel pickups, resistance wires, AO-28frequency response, drawbars, swell pedal,percussion circuit, as well as all of the knobs andcontrols available on a real organ. Even the smallwiring and electrical peculiarities have beenreproduced like foldback, internal noise, leakage andeven more complex ones like tone control, loudnessrobbing, voltage stealing, etc.
Here is a list of features that you will find in the main interface:
- The Drawbars
The upper and lower manuals each have a set of 9 drawbars and the bas has 2 drawbars (the version 1 had 3drawbars, but we revised our model to really mimic the real frequency combination of the real pedalboards).
The volume curve of each drawbar has been carefully measured and reproduced so you can be sure that asetting you know on a real organ will sound the same.
Of course, since our system is based on virtual tone generators, the drawbars can be moved in real time.
The set1 and set2 are just like the A# and B black keys on a real organ, the set2 is the B black key and is theonly preset that contains the percussions.
- The percussions
Just like on a real organ, the percussion system works only for the upper manual and will disable one drawbarfrom it. By default, it is set to the 9th, but you can choose which one and even allow all drawbars from theadvanced preferences. Remember that to hear the percussions, you need to enable the second set of
6 / 24

drawbars (B preset key).
There are more information about the percussion system in the percussion section.
- The scannervibrato
The original scanner vibrato is not a simple vibrato, tremolo or flanger effect, it could be modelled by using adelay line.
The vibrato created by Mr Hammond relies on a rotating delay that creates the vibrato (V-1, V-2 and V-3) towhich the initial signal is added to create the chorus effect (C-1, C-2, C-3).
Instead of trying to recreate it, we preferred sampling each of the 6 different settings and we aligned them tomake sure they always stay in phase.
Of course, just like on the real machine, you can activate for the vibrato for the upper and lower manualsindependently.
- Volume control
We measured and replicated the evolution of the swell pedal as well as the percussion volume and of the"normal" and "soft" volume.
We also added a general volume button in case the sound gets too loud and saturates too much.
- Presets
You can select a drawbar preset for each manual and browse through them by clicking the prev or next buttonwhile you play. The list of presets can be edited in the preferences.
At the bottom of the interface, you will see the general presets, you can choose one of them from the list, andyou can also save and load exported ones.
- Rotating speaker Speed
Regular rotary speakers have a slow and a fast rotation speed (respectively called Chorale and Tremolo), it iscommon to add a brake position as well.
This function is accessible from the interface but also by using the Modulation Wheel.
- The FX
We also added a tube distortion to imitate the behaviour of the rotary speaker when you increase the inputvolume.
We added a reverb knob based on a spring, plate or real room reverb. On the front panel, you can only controlits amount, but in the FX panel, you can ompletely control the time, type, pre/post and amount of reverb you
7 / 24

want.
- The Tone control
This is an addition of the V3, this know is present on real organs and control the response of the AO-28 amp,so it's some kind of brightness control but that isn't just a filter, it actually increases the volume the higher tonegenerators or lowers it before it goies into the whole divide down system of drawbars.
- the tonewheels model
This is again an addition of the V3, you can choose the model of the tonewheel from 4 different models that wesampled. a B3 from 1986, a C3 from 1960, another C3 from 1969 and an A100 from 1965. They all haveslightly different tones and crosstalk amounts.
- The voicing models
That's probably the most advanced feature of this default panel, it allows you to choose btween hundreds ofvoicing models measured by our friend Kon Zissis, a hammond enthusiast that serviced and measured a largenumber of hammond organs over the years. You have now access to different B3, C3 and A100 in differentconditions, with wax capacitors, with brand new capacitors andd also after full voicing adjustment, but you alsohave access to a number of other models, including A, A2, V, B, B2, C2, BA, BC CV, RT3 and a few others.The voicings can be edited further by clicking on the small arrow next to themenu.
Advanced preferences
In the prefs panel, you have a few very advanced but extremely useful features that actually make the organssound how they sound.
Hammonds are electric and the amount of volume each tonewheel outputs is limited, when you playtwo notes that use the same tone, you don't just get double the volume, "the loudness robbing" is aneffect inherent to the hammond circuit that reduces the volume of that tonewheel depending on thenumber of notes that access the same tonewheel.For similar reasons, the "voltage stealing" is another effect that also reduces the overall volume basedon the number of notes played, but this time of the whole organ, not just on the tonewheels. And since itwould be too easy, that reduction isn't the same depending on what notes are played, what drawbarsare used, etc.Every hammond organ produces a background noise, most people try to remove it, but it's still asignature of the hammond organs, so you can control its amount.The crosstalk is basically the frequencies of the nearby tonewheels that leak into the pickups plus thequality and age of the small filter after the pickup. You can control its amount here and make it soundlike a pure sine or greatly boost it if you want.The keyclick is also a very recognizable feature of the organs, that Mr Hammond did not want.Depending on the age of the organ and it's restoration state, that click will be more or less dark orbright, and you can control that here.Since organs basically only have 91 possible frequencies, on the last drawbar, there were not enoghfrequencies to cover the whole range of the keyboard, before Bs, Mr hammond just decided to just notadd anything else, but this meant that the tone was abruptly changing at those points. He thenintroduced the foldback that basically repeats the same frequencies of an octave below, giving a feelingof continuity. The B3s and similar use a standard foldback the older A and BC models used a different
8 / 24

one and the spinets don't use any. You have the choice to use any ofthe three to match the voicing andtapering values set in the voicing panel.
Rotary Speaker Simulation
Version 3 is an entirely new Leslie simulation, muchmore detailed and true to the 122A recordings.
You can choose between a few different Lesliemodels for each rotor: a 122, a 147, a 3300 and afew other variations.
It is also completely adjustable: microphonepositions, angles, distance, and volume, pan, speedsand acceleration times can be modifiedindependantly for each rotor.
We added three new features: driver distortion,microphone bleed and room simulation andcombined with our V3 model, they make for an ultrarealistic Leslie sound.
The rotary speaker has a strange story, Mr hammond did not like the "Leslie" speaker, and never accepted tosell an organ with it even though almost every organ today is paired to one. Instead the organs were sold witha "Hammond Tone cabinet". Mr Leslie never gave up and always made models that would be compatible withevery new organ, while Mr Hammond made sure that every new organ would change its connectivity.
The rotary speaker consists of two different rotating systems, each of which receives a filtered signal from a800Hz crossover circuit.
The Horn (at the top), receives every frequency above 800Hz and is made of a small speaker directed to adouble rotating horn (one of which is actually here only for mass compensation to stabilise the system whenrotating). That rotation creates three big effects, a volume change, a filter change and a doppler effect that will
9 / 24

modulate the pitch.
The Drum (at the bottom) is similar as it also rotates, but at a slightly different speed and gets the frequenciesbelow 800Hz. To still have an effect at lower frequencies, it is bigger.
We made the most detailed measurements of these effects and created the best simulation available today.
The combination of both these rotators and the wooden box they are into give the rotating speaker this verytypical sound that will vary with the rotation speed.
You can customise almost everything on this model in the speaker panel.
- The overall volume of the Leslie, as well as the DI signal or a guitar cab simulation can be adjusted. If forexample you want to use another Leslie simulation, you can completely bypass it by setting the Roraty Vol to 0and use the DI sound instead, since version 3 you can also pan the DI and play it along the leslie signal. Ontop of the Leslie and DI, you can add a guitar amp and cabinet, you get a choice between a few amps (Twin,Bassman, Deluxe, etc...) and you can tweak its volume and pan as well as the input gain and a 3 band EQ. Toaccess the latter, you just need to click on the small icon next to the amp choice).
- The main purpose of the Speaker panel is to adjust the Leslie parameters. First of all, all of the praeters areadjustable independantly for the horn and the drum.So on each rotor, you can control the folowing:
The input volume: controls the volume input of each speaker (this does not exist on 12 Leslies, but it'sthere on the 3300).The microphone bleed: controls the amount drum sound going into the horn microphones and viceversa.The pan: controls the right left pan of each rotor.The Driver Distortion: We realized while measuring the horn and drum without the Leslie amp that therewas some inherent distortion to the speakers themselves, so you can control how much of this effectyou want.A 3 band EQ: controls the frequency response of each rotor.Slow and fast speeds: controls the speeds of each rotor when in chorale or tremolo.Accel and Decel times: controls how long it takes for each rotor to reach the fast speed when youswitch the leslie to fast and the same thing when it slows down.The Speed random: adds a little variation to the speeds, and if you set for example the horn and drumat the same exact speed, you will still get variations instead of something very static.The Memphis: this is a feature that was asked by customers a lot, it allows to simply disconnect thecorresponding motor which will stop it from spinning, the memphis mod is usually used on the bassrotor.The Brake position: controls the position of the rotor when you hit the brake button on the maininterface. By default and just anything that rotates and is stopped, it will stop to a random naturalposition that depends on when it was stopped and the time needed to do so. We added the posibility touse a fixed position to always have the same position when the rotator stops.Deflector on/off: it's only available on the horn, we created two models, one with the deflector on andone with the deflector off and you can choose between the two options. When you remove thedeflector, you will immediately hear that the amplitude modulation is very much accentuated, but it willalso feel less "airy".Drum Panel: it's only available for the drum and controls if you want the leslie with or without thewooden back panel between the drum and the microphones.
10 / 24
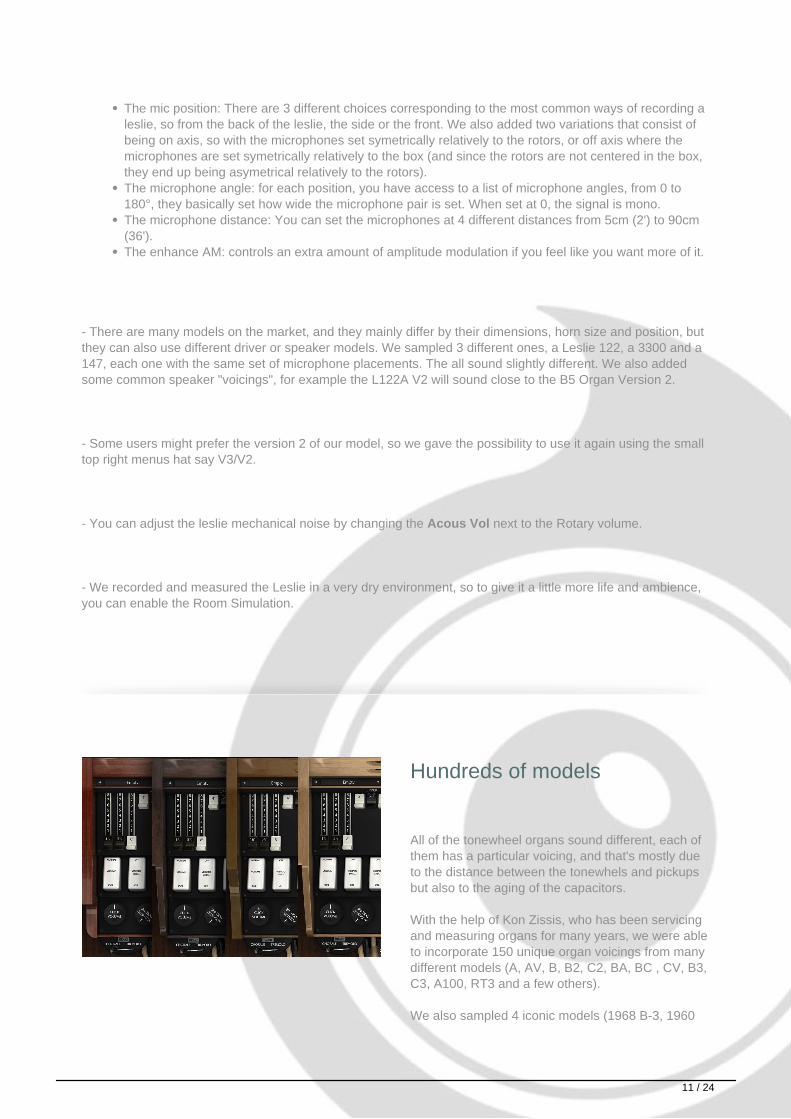
The mic position: There are 3 different choices corresponding to the most common ways of recording aleslie, so from the back of the leslie, the side or the front. We also added two variations that consist ofbeing on axis, so with the microphones set symetrically relatively to the rotors, or off axis where themicrophones are set symetrically relatively to the box (and since the rotors are not centered in the box,they end up being asymetrical relatively to the rotors).The microphone angle: for each position, you have access to a list of microphone angles, from 0 to180°, they basically set how wide the microphone pair is set. When set at 0, the signal is mono.The microphone distance: You can set the microphones at 4 different distances from 5cm (2') to 90cm(36').The enhance AM: controls an extra amount of amplitude modulation if you feel like you want more of it.
- There are many models on the market, and they mainly differ by their dimensions, horn size and position, butthey can also use different driver or speaker models. We sampled 3 different ones, a Leslie 122, a 3300 and a147, each one with the same set of microphone placements. The all sound slightly different. We also addedsome common speaker "voicings", for example the L122A V2 will sound close to the B5 Organ Version 2.
- Some users might prefer the version 2 of our model, so we gave the possibility to use it again using the smalltop right menus hat say V3/V2.
- You can adjust the leslie mechanical noise by changing the Acous Vol next to the Rotary volume.
- We recorded and measured the Leslie in a very dry environment, so to give it a little more life and ambience,you can enable the Room Simulation.
Hundreds of models
All of the tonewheel organs sound different, each ofthem has a particular voicing, and that's mostly dueto the distance between the tonewhels and pickupsbut also to the aging of the capacitors.
With the help of Kon Zissis, who has been servicingand measuring organs for many years, we were ableto incorporate 150 unique organ voicings from manydifferent models (A, AV, B, B2, C2, BA, BC , CV, B3,C3, A100, RT3 and a few others).
We also sampled 4 iconic models (1968 B-3, 1960
11 / 24
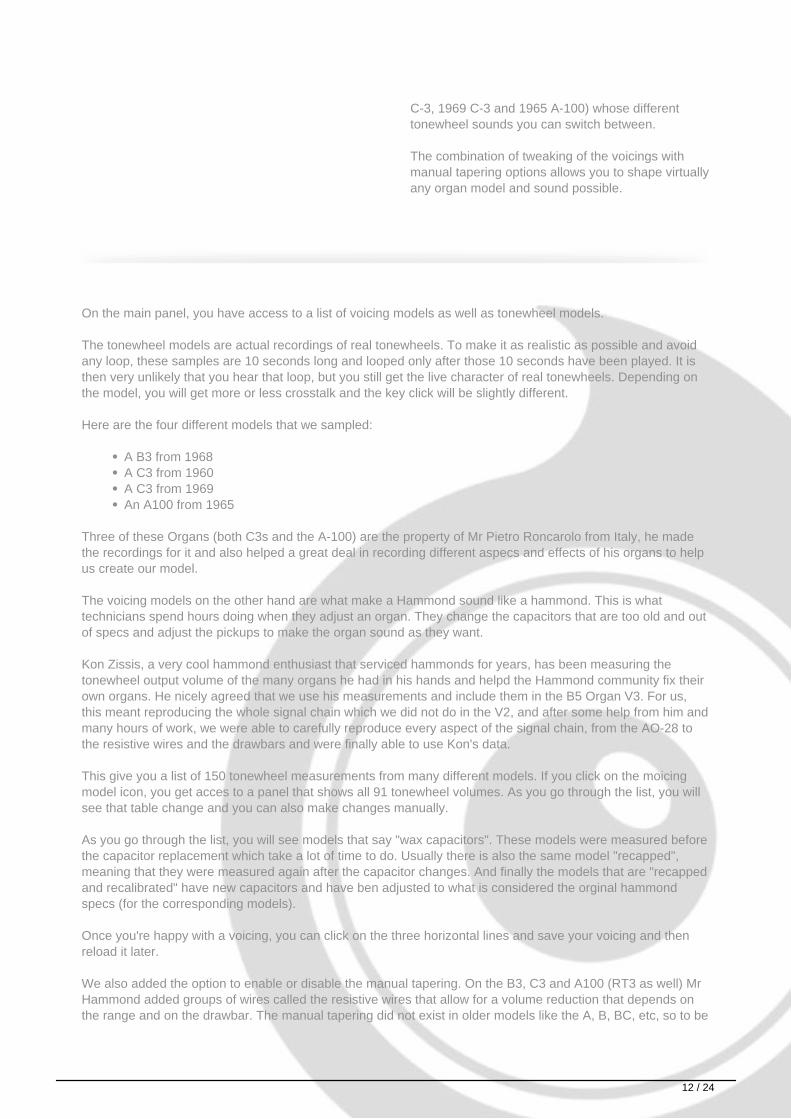
C-3, 1969 C-3 and 1965 A-100) whose differenttonewheel sounds you can switch between.
The combination of tweaking of the voicings withmanual tapering options allows you to shape virtuallyany organ model and sound possible.
On the main panel, you have access to a list of voicing models as well as tonewheel models.
The tonewheel models are actual recordings of real tonewheels. To make it as realistic as possible and avoidany loop, these samples are 10 seconds long and looped only after those 10 seconds have been played. It isthen very unlikely that you hear that loop, but you still get the live character of real tonewheels. Depending onthe model, you will get more or less crosstalk and the key click will be slightly different.
Here are the four different models that we sampled:
A B3 from 1968A C3 from 1960A C3 from 1969An A100 from 1965
Three of these Organs (both C3s and the A-100) are the property of Mr Pietro Roncarolo from Italy, he madethe recordings for it and also helped a great deal in recording different aspecs and effects of his organs to helpus create our model.
The voicing models on the other hand are what make a Hammond sound like a hammond. This is whattechnicians spend hours doing when they adjust an organ. They change the capacitors that are too old and outof specs and adjust the pickups to make the organ sound as they want.
Kon Zissis, a very cool hammond enthusiast that serviced hammonds for years, has been measuring thetonewheel output volume of the many organs he had in his hands and helpd the Hammond community fix theirown organs. He nicely agreed that we use his measurements and include them in the B5 Organ V3. For us,this meant reproducing the whole signal chain which we did not do in the V2, and after some help from him andmany hours of work, we were able to carefully reproduce every aspect of the signal chain, from the AO-28 tothe resistive wires and the drawbars and were finally able to use Kon's data.
This give you a list of 150 tonewheel measurements from many different models. If you click on the moicingmodel icon, you get acces to a panel that shows all 91 tonewheel volumes. As you go through the list, you willsee that table change and you can also make changes manually.
As you go through the list, you will see models that say "wax capacitors". These models were measured beforethe capacitor replacement which take a lot of time to do. Usually there is also the same model "recapped",meaning that they were measured again after the capacitor changes. And finally the models that are "recappedand recalibrated" have new capacitors and have ben adjusted to what is considered the orginal hammondspecs (for the corresponding models).
Once you're happy with a voicing, you can click on the three horizontal lines and save your voicing and thenreload it later.
We also added the option to enable or disable the manual tapering. On the B3, C3 and A100 (RT3 as well) MrHammond added groups of wires called the resistive wires that allow for a volume reduction that depends onthe range and on the drawbar. The manual tapering did not exist in older models like the A, B, BC, etc, so to be
12 / 24

able to take advantage of these models, we give you a way to not use it, or even to use a Hybrid one.
The hybrid model is a mod that is often applied on older models like the A, B, A2, B2, etc and that consist of adifferent set of resistive wires that will not reduce the highs and lows as much, but still remove a little of theharshness.
FX Panel
On top of our Leslie tube saturation, we added apanel of 7 FX.
It includes chorus, phaser, delay, overdrive, fuzz,wah (which can also be an auto-wah) and reverb(spring, plate and real room variations).
These FX are pre-Leslie, except for the reverb,which can be pre or post.
Now you can truly recreate the sound of any organor song, including progressive rock!
Tube saturation
The tube saturation on a Leslie 122 is very differentfrom what you hear from other tube amps.
We completely redesigned it in version 3 to matchreal recordings even more accurately.
Advanced Percussion System
13 / 24
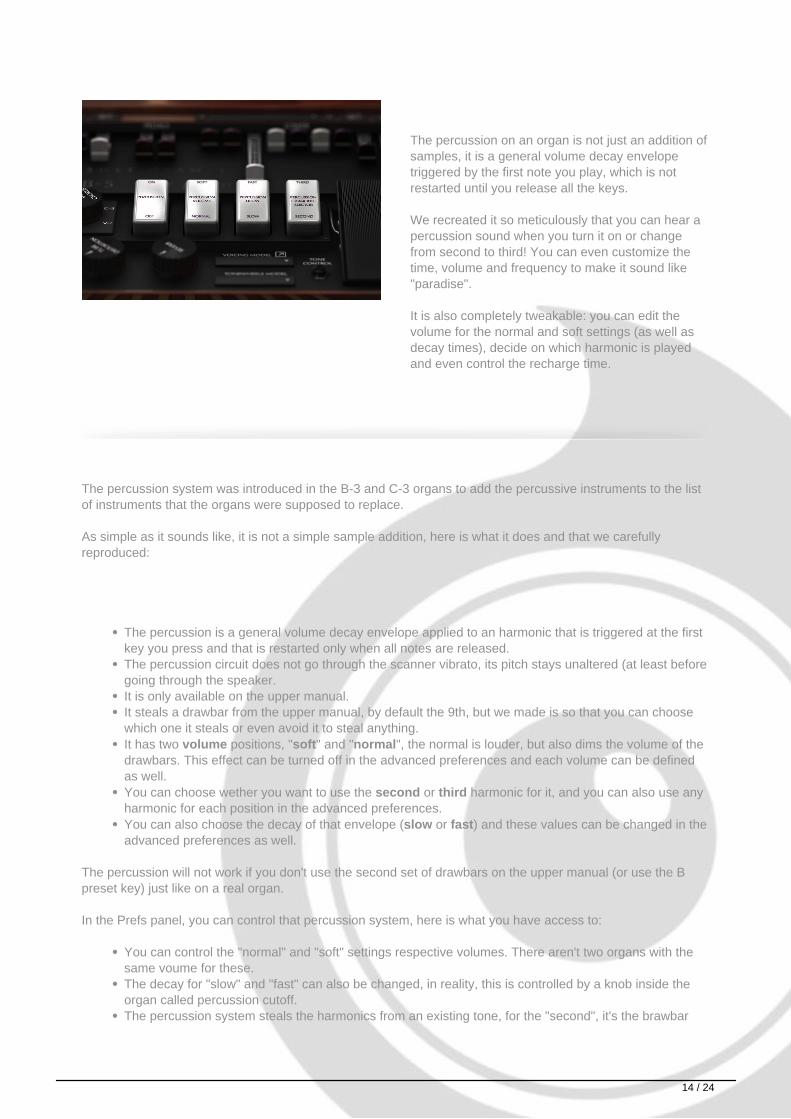
The percussion on an organ is not just an addition ofsamples, it is a general volume decay envelopetriggered by the first note you play, which is notrestarted until you release all the keys.
We recreated it so meticulously that you can hear apercussion sound when you turn it on or changefrom second to third! You can even customize thetime, volume and frequency to make it sound like"paradise".
It is also completely tweakable: you can edit thevolume for the normal and soft settings (as well asdecay times), decide on which harmonic is playedand even control the recharge time.
The percussion system was introduced in the B-3 and C-3 organs to add the percussive instruments to the listof instruments that the organs were supposed to replace.
As simple as it sounds like, it is not a simple sample addition, here is what it does and that we carefullyreproduced:
The percussion is a general volume decay envelope applied to an harmonic that is triggered at the firstkey you press and that is restarted only when all notes are released.The percussion circuit does not go through the scanner vibrato, its pitch stays unaltered (at least beforegoing through the speaker.It is only available on the upper manual.It steals a drawbar from the upper manual, by default the 9th, but we made is so that you can choosewhich one it steals or even avoid it to steal anything.It has two volume positions, "soft" and "normal", the normal is louder, but also dims the volume of thedrawbars. This effect can be turned off in the advanced preferences and each volume can be definedas well.You can choose wether you want to use the second or third harmonic for it, and you can also use anyharmonic for each position in the advanced preferences.You can also choose the decay of that envelope (slow or fast) and these values can be changed in theadvanced preferences as well.
The percussion will not work if you don't use the second set of drawbars on the upper manual (or use the Bpreset key) just like on a real organ.
In the Prefs panel, you can control that percussion system, here is what you have access to:
You can control the "normal" and "soft" settings respective volumes. There aren't two organs with thesame voume for these.The decay for "slow" and "fast" can also be changed, in reality, this is controlled by a knob inside theorgan called percussion cutoff.The percussion system steals the harmonics from an existing tone, for the "second", it's the brawbar
14 / 24

n°4 and for the "third", it's the 5th drawbar. You can change that if you want to to mimic what's possibleon some spinets for example.On real organs, selecting the normal position will increase the volume of the percussion but alsodecrease the volume of the tones. This is called the voluem drop and you can disable it if you want, thisis a known mod on real organs.The percussion system relies on capacitors and they need a certain time to recharge once all keyshave been released, this for example makes very fast repeated passages sound different with thepercussion volume reduced a bit as it did not have enough time to recharge between each note.We added two other mods, the "paradise" button that will prevent the percussion from decaying, or the"always on" that will play a percussion sound everytime you press a note.
Real Key Contact Modeling
There are 9 electric contacts under each key, andeach of them produces a small click, but they don'tall happen at the same time. Also, the intensity andtimbre of each click depends on the phase of thetonewheel signal when the circuit is closed.
Mr. Hammond hated them, but it wouldn't be aTonewheel organ without them.
We completely recreated this for version 3. Theprogressive 9 contacts are now simulated withvelocity, and the variation of timbre and volume isnow based on the current phase of thetonegenerators.
You can also control their overall volume and timbre.
15 / 24

Organ Modifications
Every organ player likes to tweak their instrument, soall the modification that organists can do areavailable.
- Paradise button
- Percussion always on
- Percussion volume decrease
- String Bass
- Foldback removal
And many other mods... but without having to solderor unscrew the whole thing.
There are many available organ modifications and they are not always done the same way, but we find outwhich were the most common ones and included them.
In the preference panel, you can also modify the Drawbar Volumes which would mean changing theresistance wires for every drawbar connector.The String Bass is an organ add on that makes the pedal tones decay longer and steal the previousnote to make it easy to play legato notes with your feet. Its decay can be changed.Many organ players don't use the pedals and prefer to use the lower manual instead, the problem isthat Mr Hammond used the "foldback" to limit the number of tones to 91 and also assign the very lowand more complex tones only to the pedals. A common mod is to rewire these to the lower manual twolower octaves. We give the possibility to do this on both manuals.When the percussion is on "normal", the whole volume of the organ decreases while the percussiongets louder. The "Percussion volume drop" mod avoids this volume loss.As mentioned in the percussion section, you can control every aspect of the percussion system, the volume, decay and the harmonic used for each switch position.A less known effect is the percussion recharge time, which represents how much time the percussiongeneral ramp needs to go back to its maximum value, as an example, if you play very quickly the samenote, the volume of the percussion will be lowered as you play faster, if the time between tworepetitions is above the recharge time, it will play at full volume, otherwise it will play at a fraction of it.The percussion system "steals" a drawbar, you can change which one gets stolen or even if it getsstolen at all.Jimmy Smith used a broken organ on a few records, the percussion system did not work properly andthe percussion never decayed, this mod is called "adding a Paradise button".
16 / 24
All Three Keyboards
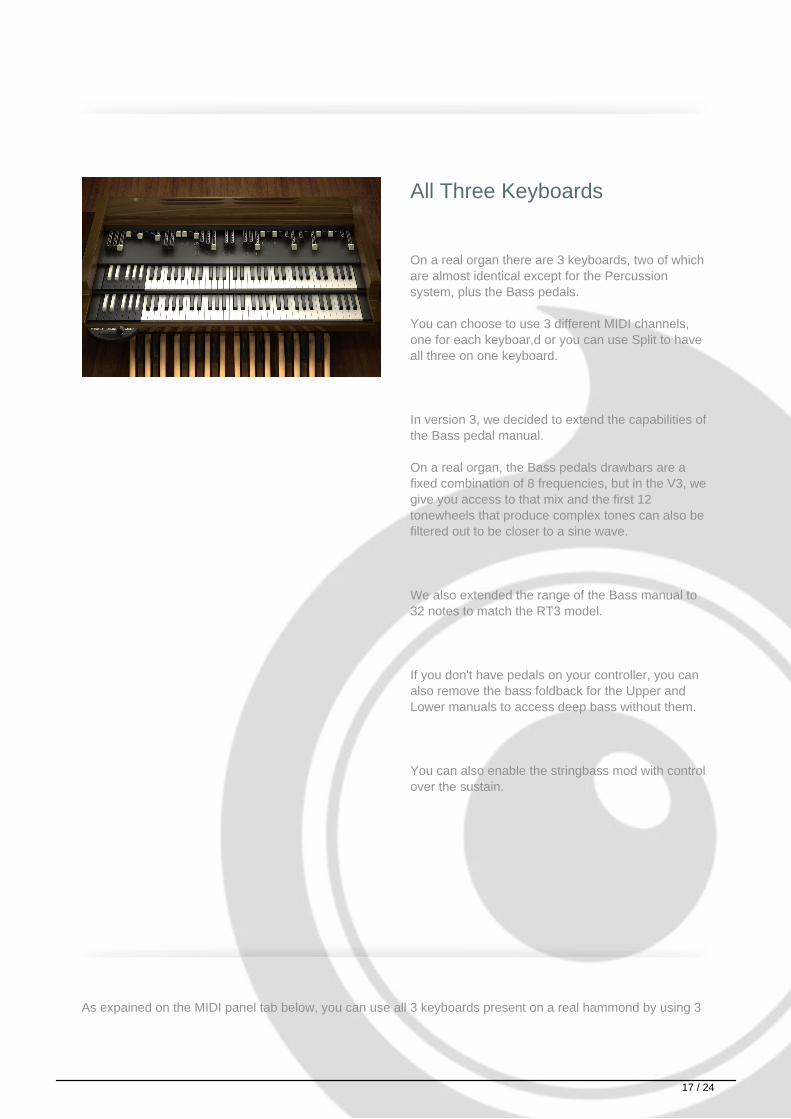
On a real organ there are 3 keyboards, two of whichare almost identical except for the Percussionsystem, plus the Bass pedals.
You can choose to use 3 different MIDI channels,one for each keyboar,d or you can use Split to haveall three on one keyboard.
In version 3, we decided to extend the capabilities ofthe Bass pedal manual.
On a real organ, the Bass pedals drawbars are afixed combination of 8 frequencies, but in the V3, wegive you access to that mix and the first 12tonewheels that produce complex tones can also befiltered out to be closer to a sine wave.
We also extended the range of the Bass manual to32 notes to match the RT3 model.
If you don't have pedals on your controller, you canalso remove the bass foldback for the Upper andLower manuals to access deep bass without them.
You can also enable the stringbass mod with controlover the sustain.
As expained on the MIDI panel tab below, you can use all 3 keyboards present on a real hammond by using 3
17 / 24
MIDI channels or using a split.
The Upper and Lower manuals have been covered in depth, but an important part of Hammonds is oftenoverlooked and it's the pedals. The pedals only have 2 drawbars, but each of them is actually a premix of tonesand that pre mix, like anything on a hammond, varies greatly from organ to organ. Also a few different mods toaccess the low tones are quite common so we created a section dedicated to that in the preferences, here iswhat you can control from it:
The string bass, its a feature that exists only in an add on, but that is used quite often, the pedal noteswill not stop as soon as they are released, but will follow a sustain time. That system is also mono,meaning that every new note will stop the previous one, this is often used for bass walkings.The Bass on lower or upper manual first octave will allow the usage of the first 11 bass tonewheels onthe upper or lower manual, this is useful for players that don't have pedals or that just play the bass withtheir left hand.You can control the overall volume of the bass pedals.The first 11 bass tonewheels are not as close to a pure sine as the rest of the tonewheels, thay arecalled complex tonewheels and they already produce a mix of frequencies. Organ players often prfer asine sound and will add a capacitor to filter them. You can now do that in the B5 as well.As mentioned above, the pedal drawbars consist of a pre mix of tones, in the V3, we added topossibility to modify it to your liking, if you click on the small icon in the "bass manual settings" you willsee two tabs representing the amount of each tone used for each drawbar.
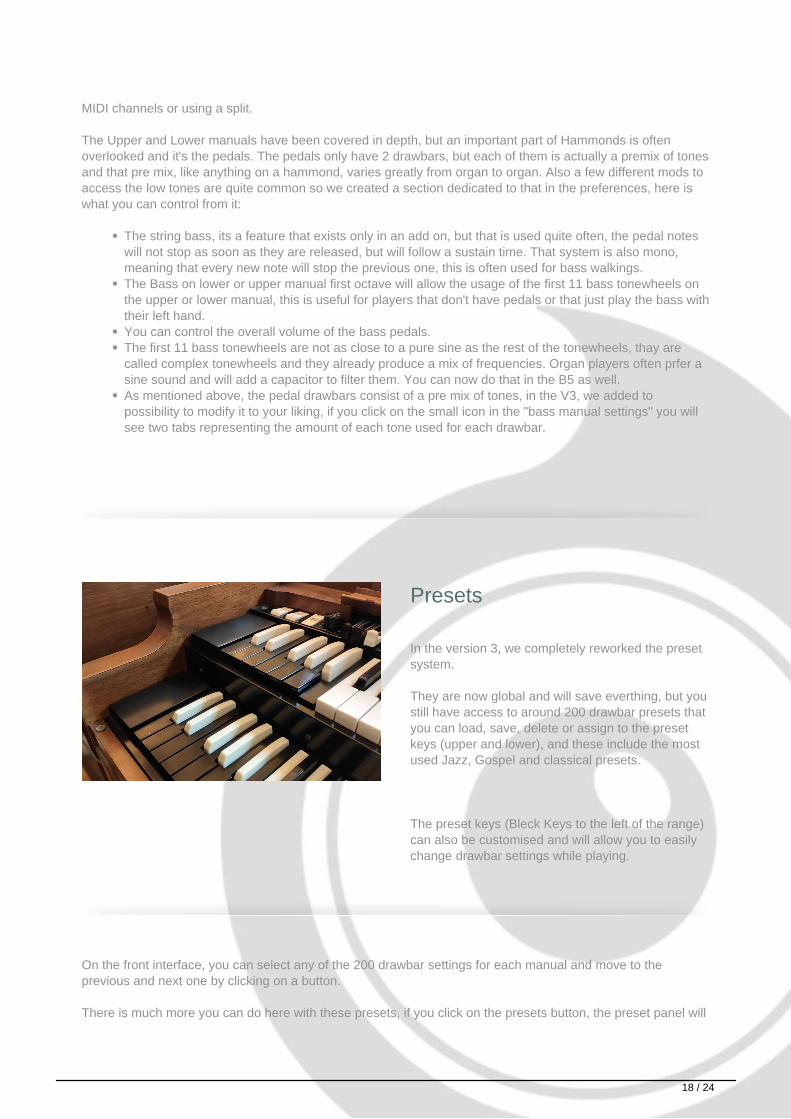
Presets
In the version 3, we completely reworked the presetsystem.
They are now global and will save everthing, but youstill have access to around 200 drawbar presets thatyou can load, save, delete or assign to the presetkeys (upper and lower), and these include the mostused Jazz, Gospel and classical presets.
The preset keys (Bleck Keys to the left of the range)can also be customised and will allow you to easilychange drawbar settings while playing.
On the front interface, you can select any of the 200 drawbar settings for each manual and move to theprevious and next one by clicking on a button.
There is much more you can do here with these presets, if you click on the presets button, the preset panel will
18 / 24

appears, and here you can choose your current drawbar setting, give it a name and add it to the preset list tobe able to use it live.
You can even create your own preset list by removing or adding items or export and reload lists created by youor other users.
There are also general presets that include every setting of the library that you can save and load withoutreloading the whole library, we included a selection of presets to get a good stating point and shape the soundin seconds.
To play with your settings live, you can go in the advanced preferences and assign a preset to each of the 12key selectors just like on a real organ, the only difference is that you choose the settings here and don't have torewire everything each time you want to change them.
MIDI assignment andcontrollers
Every element of the interface can be assigned toany MIDI CC and Channel easily using ourassignment panel or our MIDI Learn function.
To make things even easier, we included a fewmapping presets for the most common organ clonecontrollers, this includes, the XK and SK series, allNord keyboards, the Crumar, the HX3, the B4D andsome others.
We even included most tweaks required by somecontrollers like the inversion of the drawbarmovement or the toggle for the leslie speed.
The volume pedal is a crucial element when playingthe organ and you have the possibility to adjust thecurve and range of the volume and filter affected bythe pedal.
19 / 24
In the MIDI panel, you have access to a few things, the first one being a list of all the elements of the interfaceand their respective MIDI CCs. For each element, you can choose the MIDI CC number, the MIDI Channel aswell as invert it or toggle it if it is a switch and you want a button to toggle between the two states.
Here is for example how to set the MIDI CC 32 to the drawbar 5 of the upper manual:
In the MIDI panel, you locate the element you want to control, in our case, the "Upper manual drawbar 5" thenyou simply click on the "learn" button next to it and then move the physical controller of your choice, it willautomatically map the CC and the channel. You can also set this manually if you want.
There is also a default feature in UVI that allows to right click on an element on the interface and learn a MIDICC, but just remember that you can't use both features at the same time, by default, the drawbars are tied to aCC, so if you want to use your own CCs, you need to set the CC value in the assignment panel to -1 to avoidconflict.
In this panel you can also control if you want to use different MIDI Channels to play each manual (upper, lowerand pedals) or if you want to split your keyboard. To do that, just select the mode you want to use and changethe split points and the transpose value for each manual accordingly.
In the MISC section, there are a few other MIDI related things that you can control.
The global tuning of the organ in cents, you can turn it down or up a semitone.The swell pedal minimum volume can be adjusted, this controls the overall volume of the organ whenthe swell pedal is at its minimum.You can also adjust the "swell pedal volume curve" to control how quickly it goes to the maximumvolume.Some people requested to be able to sustain the tones using the sustain pedal, this does not exist in ahammond, bt you can enable it here.The "velocity to contact speed" controls how quickly all contacts under each key are closed. This is notexactly how an organ works, but basically the harder you play, the faster the contacts are closed.Some keyboards only have a pitch bend wheel and controling teh Leslie speed for example can beuseful, so we added the option to use the pitch bend as the CC 127. You can then simply set anyelment to CC 127 in the list and use it.
20 / 24

Features
UVI Workstation v3.0.15 (delivered with every purchase) or Falcon 2.1.1 is required for the library to functionproperly.
900Mb compressed in lossless flac format, around 1800 samples for each tonewheel model.
Version 3 changelog:
- Interface redesign, upon user request, the switches are now arranged like on a real B3.
- New preset system. Saving a preset is now global and will save everything, including the voicing and thetonewheel model.
- Separation of the “brake” and Leslie speed features, they can now be controlled separately.
- To add variety, the voicing is now separate from the tonewheel models.
- In collaboration with Kon Zissis, we incorporated a new electrical chain model and were able to add about 150Voicing models (A, BC, A100, B3, C3, RT3) that he measured over the years from various models and usingdifferent capacitors, old and new and different voicings, following the different Hammond technicians regulation.
- These voicings can be changed manually using a large table.
- To go with these voicings, we offer the choice to add/remove manual tapering or even to use a hybrid manualtapering that will get older models like the A to have both bass and treble (will explain that in detail).
- New “TONE CONTROL” knob that simulates the tone control potentiometer present inside the real Hammondsthat allow to control the overall brightness of the organ, it’s not a simple filter, it’s a voicing element that acts onthe 91 tonewheels before the whole drawbar system.
- New FX panel with Chorus, Phaser, Delay, Wah (and auto Wah), overdrive and fuzz that come between the tonegeneration and the Leslie Amp. You can also choose between a spring reverb, a plate or a real room and you canput it pre or post Leslie.
- The tube distortion has been completely changed to match the AO-28 amp distortion.
- Entirely new Leslie simulation, much more detailed and true to the 122A recordings. You can now mix (volumeand pan) the Leslie signal with the DI and also an additional guitar cab. You also have control over the crossoverfilter to simulate the aging of the capacitors.
- Addition of the "room simulation" that allows you to put the Leslie in a less Dry environment.
This update also includes the following new features that are available independently for each speaker (ie, Hornand Drum):
- Speaker distortion
- Pan
- The acceleration and deceleration curves have been reworked and you can also add some speed variations to
21 / 24
replicate the imperfections of the Leslie motor.
- Microphone position around the Leslie
- Microphone angle (from mono to very wide stereo)
- Microphone distance, from 2’ to 36’ (5cm to 90cm)
- Microphone bleed
- Memphis option (one of the speaker’s rotation is just stopped while the other one is still functional)
- Fixed or natural brake position.
- An amplitude modulation enhancer for a stronger wobbling effect.
- The deflector can be removed from the Horn and the Back panel can be removed from the Drum.
- New MIDI panel with control over the inversion, the toggle, MIDI C and MIDI Channel for each element.
- MIDI learn function for each element, all you have to do is click next to the control name and move a MIDIcontroller.
- You can now save and reload your MIDI Mapping.
- You can now use the Pitch Ben as a MIDI CC (CC127) to control whatever you want.
- Improved vibrato and chorus thanks to a new phase lock model.
- Pedal drawbars CPU efficiency improved.
- Pedal keyclick fixed to match the real ones.
- Pedal range extended to 32 notes to match the RT3 model range.
- CPU load reduced on the swell pedal.
- Control over the pedal harmonic mix
- Added mod for sine sound on the 11 first complex tonewheels
- Added MOD to have the percussion playing all the time with no volume drop.
- Added control over the crosstalk (leakage)
- Added control over the Keyclick Brightness.
- The click volume is now smooth and can be changed in real time.
- The acoustic sound of the pedals is now from real pedals and not manual keys anymore.
- Added the ability to disable the foldback.
22 / 24

- Click sound improved with much accurate volume and tone variation.
- Better control over the drawbar preset list which can now be organized, modified, saved, loaded and reset.
- Addition of a panic button that will stop all running Tone generators.
- Better control over the black keys presets, they can now be deactivated for users that accidentally triggered themwhile playing.
- Extended the pedal range to 32 notes to account for the RT3 pedal range
23 / 24

Terms & Conditions. EULA(End User License Agreement)
Acousticsamples Copyright, Terms and conditions.
Please read the terms of the following License Agreement before using any of these audio samples. By using any ofthese audio samples, you agree to become bound by the terms of the License Agreement. If you do not agree with the
terms of the License Agreement, do not use any of these audio samples.
You may use these Samples provided on this website, on a royalty-free basis, to create your own original musiccompositions or audio projects. You may broadcast and/or distribute your own music compositions or audio projects thatwere created using the Audio Content, however, individual audio loops may not be commercially or otherwise distributedon a standalone basis, nor may they be repackaged in whole or in part as audio samples, sound effects or music beds.
No orders will be refundable given the numerical nature of our products. We stay at your disposal for any help orsupport.
If you have any queries please do not hesitate to contat us
ALL RIGHTS NOT EXPRESSLY GRANTED ARE RESERVED.
Powered by TCPDF (www.tcpdf.org)
24 / 24