ASEPTIC TECHNIQUE PROCEDURE OF WATER SAMPLE...
37
WORK INSTRUCTION MANUAL LABORATORY SECTION 1 | Page ASEPTIC TECHNIQUE PROCEDURE OF WATER SAMPLE COLLECTION 1. VOLUME OF SAMPLE The volume of sample should be sufficient to carry out all tests required, preferably not less than 100mL When the sample is collected, leave ample air space (at least 2.5 cm) to facilitate mixing by shaking, before examination. 2. IDENTIFICATION OF SAMPLES Sampling bottles must be tagged with complete and accurate identification and description. Samples should be clearly labeled with the site, date, time, nature of the analysis to be done, and other relevant information. The information about the samples can be recorded in a request form for analysis of water quality. 3. SAMPLE CONTAINER Collect samples for microbiological examination in nonreactive 120-mL clear bottles that have been cleansed and rinsed carefully, given a final rinse with distilled water, and sterilized as directed. Use glass bottles capable of holding a sufficient volume of sample for all required tests and an adequate air space, permitting proper washing, and maintaining samples uncontaminated until examinations are completed. Plastic autoclaveable bottles of suitable size, wide-mouthed and made of non-toxic materials polypropylene that can be sterilized repeatedly are also suitable for sample bottles. Sampling bottles should be provided with either ground glass stoppers or metal/plastic screw caps and ensure that the use of these caps produces no toxic compounds during sterilization. Cover tops and necks of sample bottles with Kraft paper or thin aluminum foil before sterilization. Presterilized plastic bottles, with or without dechlorinating agent , are also available commercially and may be used. Plastic containers eliminate the possibility of breakage during shipment.
Transcript of ASEPTIC TECHNIQUE PROCEDURE OF WATER SAMPLE...
WORK INSTRUCTION MANUAL LABORATORY SECTION
1 | P a g e
ASEPTIC TECHNIQUE PROCEDURE OF WATER SAMPLE COLLECTION
1. VOLUME OF SAMPLE
The volume of sample should be sufficient to carry out all tests required,
preferably not less than 100mL
When the sample is collected, leave ample air space (at least 2.5 cm) to
facilitate mixing by shaking, before examination.
2. IDENTIFICATION OF SAMPLES
Sampling bottles must be tagged with complete and accurate identification and
description. Samples should be clearly labeled with the site, date, time, nature
of the analysis to be done, and other relevant information.
The information about the samples can be recorded in a request form for
analysis of water quality.
3. SAMPLE CONTAINER
Collect samples for microbiological examination in nonreactive 120-mL clear bottles
that have been cleansed and rinsed carefully, given a final rinse with distilled water,
and sterilized as directed.
Use glass bottles capable of holding a sufficient volume of sample for all required
tests and an adequate air space, permitting proper washing, and maintaining samples
uncontaminated until examinations are completed.
Plastic autoclaveable bottles of suitable size, wide-mouthed and made of non-toxic
materials polypropylene that can be sterilized repeatedly are also suitable for sample
bottles.
Sampling bottles should be provided with either ground glass stoppers or metal/plastic
screw caps and ensure that the use of these caps produces no toxic compounds during
sterilization.
Cover tops and necks of sample bottles with Kraft paper or thin aluminum foil before
sterilization.
Presterilized plastic bottles, with or without dechlorinating agent , are also available
commercially and may be used. Plastic containers eliminate the possibility of
breakage during shipment.
WORK INSTRUCTION MANUAL LABORATORY SECTION
2 | P a g e
4. DECHLORINATION
If the water to be examined is treated likely with chlorine, chloramines, chlorine
dioxide, ozone, or other disinfectants, then sodium thiosulfate should be added to the
sampling bottle before sterilization/autoclaving the sample bottle, so as to neutralize
any residual disinfectant of water sample obtained, in which neutralization takes place
inside the sample bottle.
For drinking water samples, in a 120-ml sample bottle, add 0.1 ml of a
3% solution of sodium thiosulfate before sterilization. This will
neutralize up to 5mg/l residual chlorine.
5. PRESERVATION AND STORAGE
Holding Time and Temperature
a.) General.
i. Start microbiological analysis of water as soon as possible after
collection to after sampling and certainly within 24 hours. Avoid
unpredictable changes in the microbial population
ii. The changes may occur in the bacterial content of water on storage can
be reduced to a minimum by ensuring that samples are not exposed to
light and are kept cool. preferably between 4⁰C and 10⁰C, but not
frozen.
iii. For most accurate results ice samples during transport to the
laboratory, if they cannot be processed within one (1) hour after
collection.
iv. If samples cannot be cooled, they must be examined within 6 hours of
sampling.
v. If neither condition can be met, the sample should not be analyzed.
vi. The time elapsed between collections and processing should not
exceed 24 hours
vii. The box used to carry samples should be cleaned and disinfected after
use to avoid contaminating the surfaces of bottles and the sampler's
hand.
b.) Drinking water for compliance purposes .
Preferably hold samples at <10⁰C during transit to the laboratory .
Analyze samples on day of receipt whenever possible and refrigerate
overnight if arrival is too late for the processing time on the same day.
WORK INSTRUCTION MANUAL LABORATORY SECTION
3 | P a g e
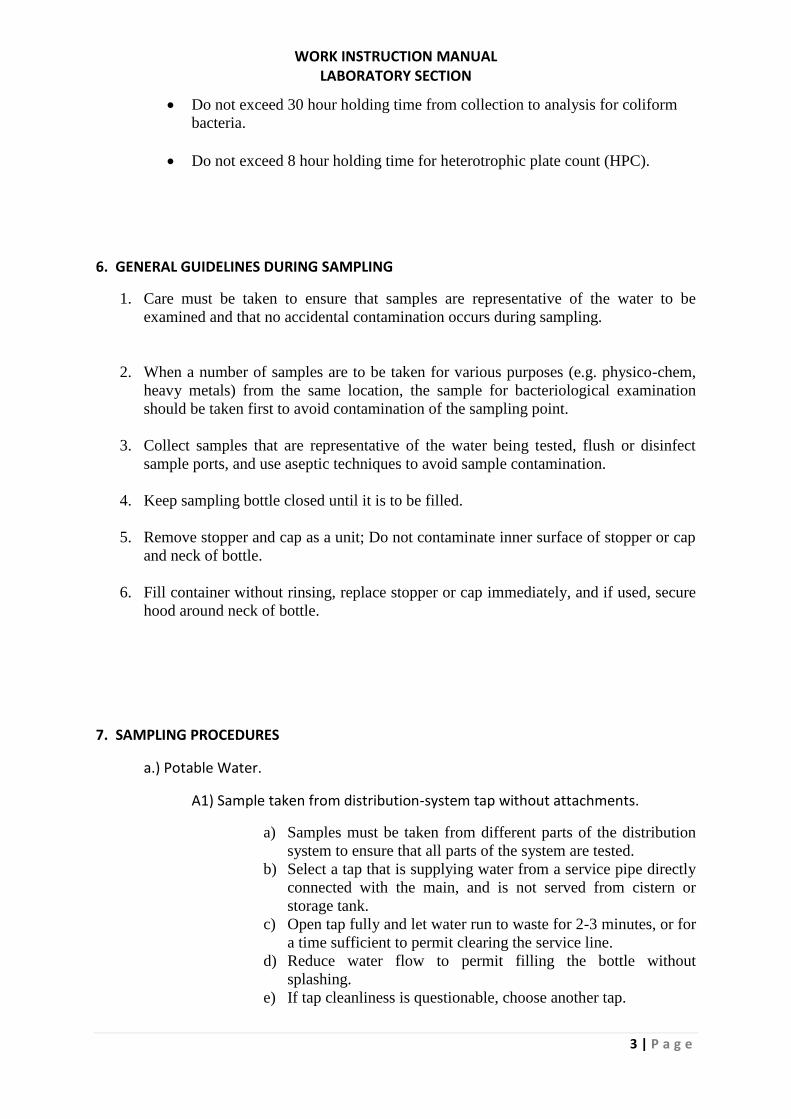
Do not exceed 30 hour holding time from collection to analysis for coliform
bacteria.
Do not exceed 8 hour holding time for heterotrophic plate count (HPC).
6. GENERAL GUIDELINES DURING SAMPLING
1. Care must be taken to ensure that samples are representative of the water to be
examined and that no accidental contamination occurs during sampling.
2. When a number of samples are to be taken for various purposes (e.g. physico-chem,
heavy metals) from the same location, the sample for bacteriological examination
should be taken first to avoid contamination of the sampling point.
3. Collect samples that are representative of the water being tested, flush or disinfect
sample ports, and use aseptic techniques to avoid sample contamination.
4. Keep sampling bottle closed until it is to be filled.
5. Remove stopper and cap as a unit; Do not contaminate inner surface of stopper or cap
and neck of bottle.
6. Fill container without rinsing, replace stopper or cap immediately, and if used, secure
hood around neck of bottle.
7. SAMPLING PROCEDURES
a.) Potable Water.
A1) Sample taken from distribution-system tap without attachments.
a) Samples must be taken from different parts of the distribution
system to ensure that all parts of the system are tested.
b) Select a tap that is supplying water from a service pipe directly
connected with the main, and is not served from cistern or
storage tank.
c) Open tap fully and let water run to waste for 2-3 minutes, or for
a time sufficient to permit clearing the service line.
d) Reduce water flow to permit filling the bottle without
splashing.
e) If tap cleanliness is questionable, choose another tap.
WORK INSTRUCTION MANUAL LABORATORY SECTION
4 | P a g e
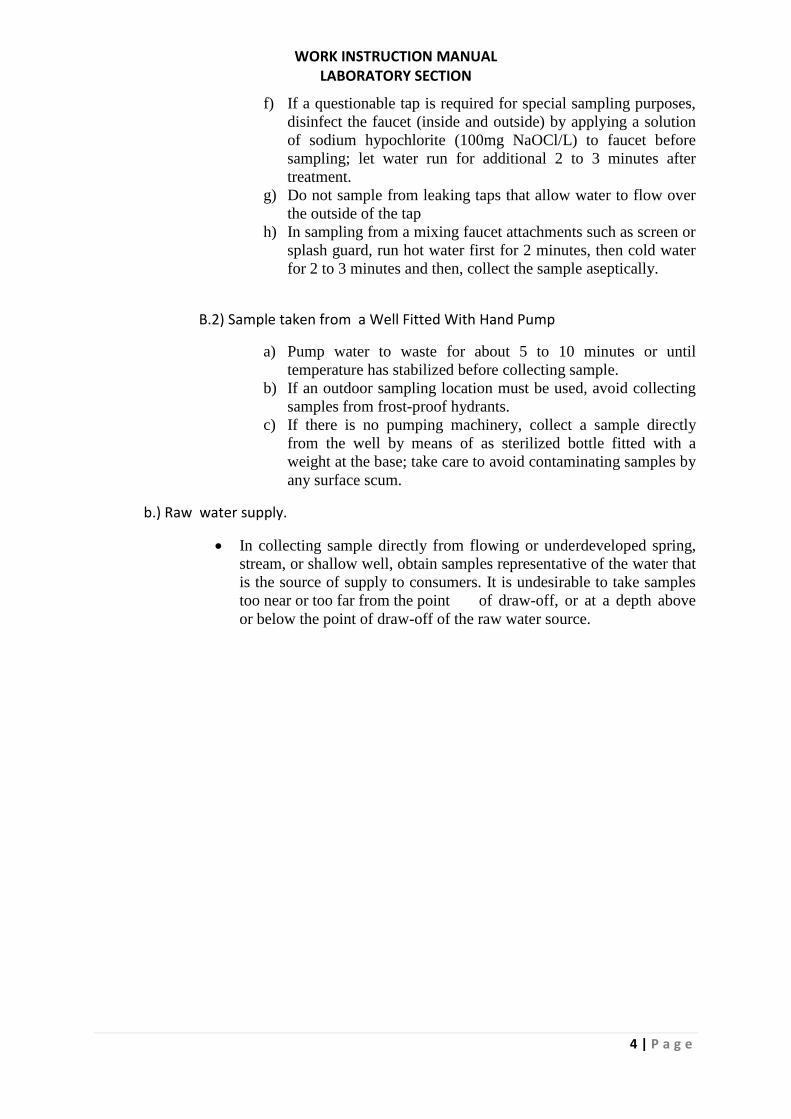
f) If a questionable tap is required for special sampling purposes,
disinfect the faucet (inside and outside) by applying a solution
of sodium hypochlorite (100mg NaOCl/L) to faucet before
sampling; let water run for additional 2 to 3 minutes after
treatment.
g) Do not sample from leaking taps that allow water to flow over
the outside of the tap
h) In sampling from a mixing faucet attachments such as screen or
splash guard, run hot water first for 2 minutes, then cold water
for 2 to 3 minutes and then, collect the sample aseptically.
B.2) Sample taken from a Well Fitted With Hand Pump
a) Pump water to waste for about 5 to 10 minutes or until
temperature has stabilized before collecting sample.
b) If an outdoor sampling location must be used, avoid collecting
samples from frost-proof hydrants.
c) If there is no pumping machinery, collect a sample directly
from the well by means of as sterilized bottle fitted with a
weight at the base; take care to avoid contaminating samples by
any surface scum.
b.) Raw water supply.
In collecting sample directly from flowing or underdeveloped spring,
stream, or shallow well, obtain samples representative of the water that
is the source of supply to consumers. It is undesirable to take samples
too near or too far from the point of draw-off, or at a depth above
or below the point of draw-off of the raw water source.
WORK INSTRUCTION MANUAL LABORATORY SECTION
5 | P a g e
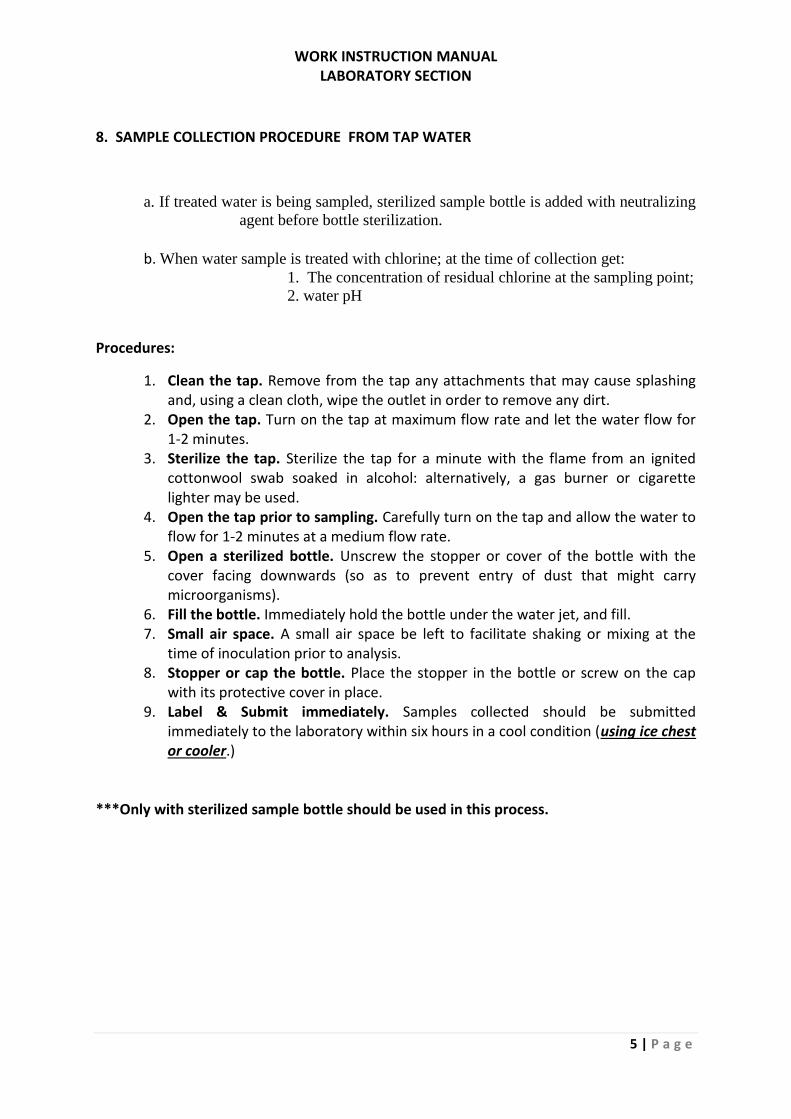
8. SAMPLE COLLECTION PROCEDURE FROM TAP WATER
a. If treated water is being sampled, sterilized sample bottle is added with neutralizing
agent before bottle sterilization.
b. When water sample is treated with chlorine; at the time of collection get:
1. The concentration of residual chlorine at the sampling point;
2. water pH
Procedures:
1. Clean the tap. Remove from the tap any attachments that may cause splashing and, using a clean cloth, wipe the outlet in order to remove any dirt.
2. Open the tap. Turn on the tap at maximum flow rate and let the water flow for 1-2 minutes.
3. Sterilize the tap. Sterilize the tap for a minute with the flame from an ignited cottonwool swab soaked in alcohol: alternatively, a gas burner or cigarette lighter may be used.
4. Open the tap prior to sampling. Carefully turn on the tap and allow the water to flow for 1-2 minutes at a medium flow rate.
5. Open a sterilized bottle. Unscrew the stopper or cover of the bottle with the cover facing downwards (so as to prevent entry of dust that might carry microorganisms).
6. Fill the bottle. Immediately hold the bottle under the water jet, and fill. 7. Small air space. A small air space be left to facilitate shaking or mixing at the
time of inoculation prior to analysis. 8. Stopper or cap the bottle. Place the stopper in the bottle or screw on the cap
with its protective cover in place. 9. Label & Submit immediately. Samples collected should be submitted
immediately to the laboratory within six hours in a cool condition (using ice chest or cooler.)
***Only with sterilized sample bottle should be used in this process.
WORK INSTRUCTION MANUAL LABORATORY SECTION
6 | P a g e
9. FREQUENCY OF SAMPLING
The minimum number of samples to be collected and examined periodically must be based
on:
The mode and source of water supply.
Past frequency of records yielding unsatisfactory results
the quality of raw water treated
the number of raw water resources
the adequacy of treatment and capacity of the treatment plant
risks of contamination at the source and in the distribution system
the size and complexity of the distribution system
the risk of an epidemic
the practice of disinfection (with disinfectants, e.g. chlorine)
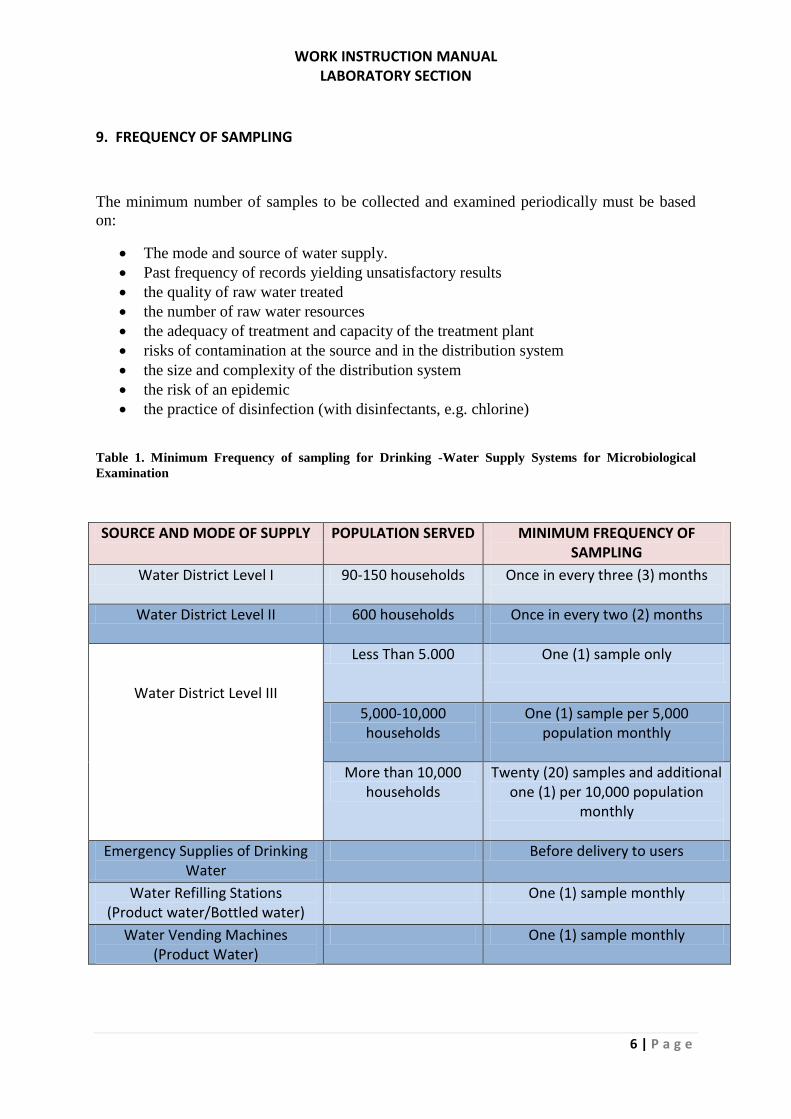
Table 1. Minimum Frequency of sampling for Drinking -Water Supply Systems for Microbiological
Examination
SOURCE AND MODE OF SUPPLY POPULATION SERVED MINIMUM FREQUENCY OF SAMPLING
Water District Level I 90-150 households Once in every three (3) months
Water District Level II 600 households Once in every two (2) months
Water District Level III
Less Than 5.000 One (1) sample only
5,000-10,000 households
One (1) sample per 5,000 population monthly
More than 10,000 households
Twenty (20) samples and additional one (1) per 10,000 population
monthly
Emergency Supplies of Drinking Water
Before delivery to users
Water Refilling Stations (Product water/Bottled water)
One (1) sample monthly
Water Vending Machines (Product Water)
One (1) sample monthly
WORK INSTRUCTION MANUAL LABORATORY SECTION
7 | P a g e
10. LOCATION OF SAMPLING POINTS
Adherence to the set guidelines for sampling point selection must be observed. These
guidelines cover zoning of piped water supply as well as sampling from point of source.
GUIDELINES FOR SELECTING THE LOCATION OF SAMPLING POINTS.
10.1 Piped Water supply zoning
A zone can be considered as coverage area per source, service reservoir
supplies specific area, an area where different parts of distribution system
operates at different pressures and elevations and an area where leakages or
reliability differs in different parts of the system.
Zoning must be adequately covered for water quality sampling.
10.2 Point Source
Samples should be taken from the point source from the principal outlet-
handpump or spring outlet.
For routine monitoring boreholes or deepwells generally requires less frequent
sampling as they are usually of better quality than shallow groundwater given
the depths of water abstraction.
I t is also important to undertake an extended assessment of point source
quality in order to develop an understanding of the process causing water
quality failure and thus the appropriate interventions required to improves.
10.3 Selection Of Sampling Sites
10.3.1 Sample locations and frequencies of sampling visits must be calculated
first.
10.3.2 The final stage then, is the selection of sampling sites.
Sample sites can be:
Fixed - i.e. every time sampling is carried out in the area, a
sample is always picked from the sample point.
Random- with the exact location of the sample point in zone or
areas varying between sample rounds.
10.3.3 Key fixed points that should always be included in the surveillance
include:
Water leaving treatment works (usually the first Tap)
The inlets and outlets of service reservoirs
The critical points in the distribution system- (e.g. low-
pressure area or parts of the system prone to frequent
discontinuity.
WORK INSTRUCTION MANUAL LABORATORY SECTION
8 | P a g e
Pumping Stations (fixed sampling sites)
Service Connections - random sampling
Service Connections as per concessionaire's request.
Service Connections - during service interruptions and
pipeline repairs.
10.3.4 Regular sampling points will include public taps in high density areas or in places such as markets where large number of people congregate.
WORK INSTRUCTION MANUAL LABORATORY SECTION
9 | P a g e
Water Analysis Methods On Enumerating and
Detecting E.coli & Coliform Bacteria
Definition
Coliform Bacteria are aerobic and facultative aerobic, gram negative, non- spore-forming
lactose-fermenting bacteria that produce gas within 48 hours at 35⁰C-37⁰C. Escherichia coli (E.coli),
is a coliform bacteria which consistently inhabits the intestinal tract(enteric) of humans and other
warm blooded animals is generally regarded as the primary indicator of fecal contamination in
drinking water.
The production of ß-D-glucuronidase is unique to E.coli among the Escherichia spp.
However, this enzyme is also found in some Salmonella, Shigella and Yersenia. ß-D-glucuronidase
breaks down the substrate 4-methylumbelliferyl-β-D-glucuronidase (MUG) to release 4-
methylumbelliferone which fluoresces under long wave ultraviolet (UV) rays. There are three (3)
widely accepted practices done in bacteriological examination of potable water. These are:
1. Conventional Method - this established method widely used in laboratory and academe
worldwide and had established strict method of determining E. coli and coliform bacteria as
primary indicator of water drinking contamination. This involves 3 processes such as
Multiple Tube Fermentation Technique. (MTFT), Heterotrophic Plate Count (HPC), and
Streak Plate Method on selective agar.
2. Chromogenic Substrate Method - The Chromogenic Substrate Method for water analysis is
granted NF (French Norm) Validation by Association Française de Normalisation (AFNOR)
Certification as an alternative method to the standard ISO 9308-1 for enumeration of
Escherichia coli ß-D-glucuronidase positive and coliform bacteria ß-D-galactosidase positive
in drinking water. It is now being allowed in the Philippines to be used as an alternative
method aside from conventional method, granted by the Philippine National Standards for
Drinking Water (PNSDW) and the Department of Health (DOH).
3. Primary Health Care (PHC) Method – This is chemical test used as an alternative method for
water analysis. This screening test used to detect the presence and the absence of coliform
group of bacteria rather than enumerating it and useful in urban water supplies where
resources, time and manpower are limited in which no available bacteriological laboratory.
WORK INSTRUCTION MANUAL LABORATORY SECTION
10 | P a g e
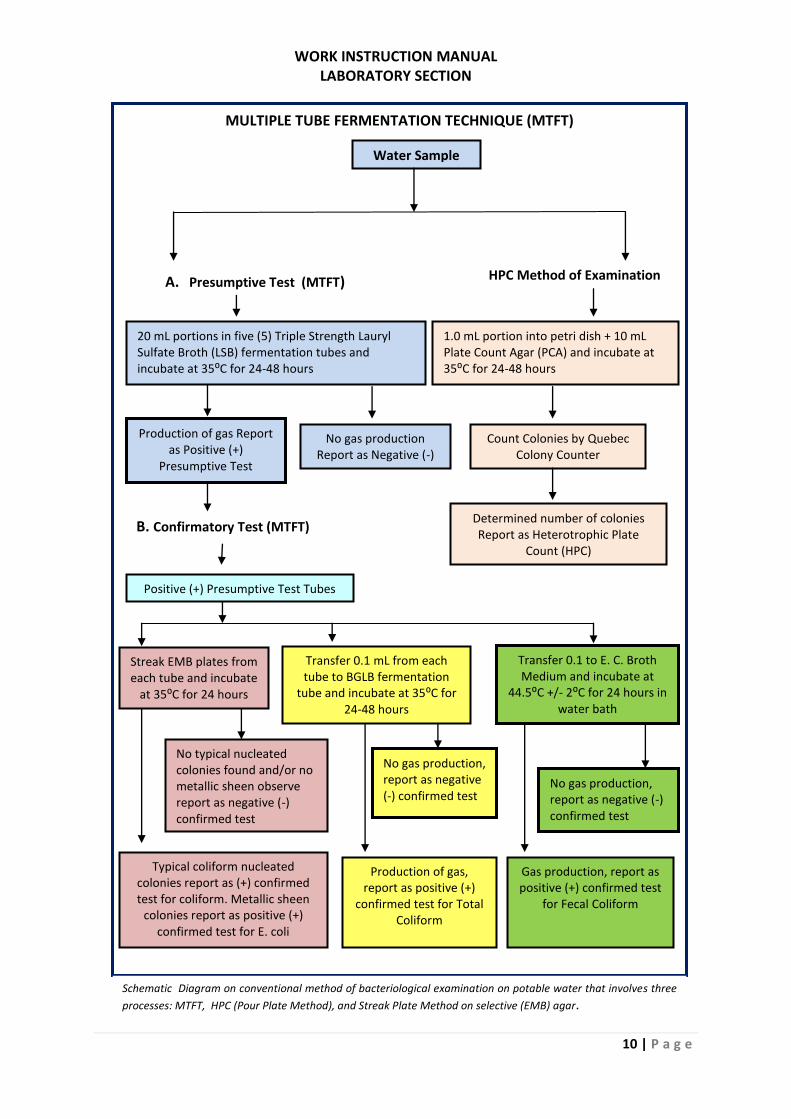
MULTIPLE TUBE FERMENTATION TECHNIQUE (MTFT)
Water Sample
20 mL portions in five (5) Triple Strength Lauryl Sulfate Broth (LSB) fermentation tubes and incubate at 35⁰C for 24-48 hours
1.0 mL portion into petri dish + 10 mL Plate Count Agar (PCA) and incubate at 35⁰C for 24-48 hours
Production of gas Report as Positive (+)
Presumptive Test
No gas production Report as Negative (-)
Count Colonies by Quebec Colony Counter
Determined number of colonies Report as Heterotrophic Plate
Count (HPC)
B. Confirmatory Test (MTFT)
Positive (+) Presumptive Test Tubes
Transfer 0.1 mL from each tube to BGLB fermentation
tube and incubate at 35⁰C for 24-48 hours
Transfer 0.1 to E. C. Broth Medium and incubate at
44.5⁰C +/- 2⁰C for 24 hours in water bath
Streak EMB plates from each tube and incubate
at 35⁰C for 24 hours
A. Presumptive Test (MTFT) HPC Method of Examination
Typical coliform nucleated colonies report as (+) confirmed test for coliform. Metallic sheen
colonies report as positive (+) confirmed test for E. coli
No gas production, report as negative (-) confirmed test
No typical nucleated colonies found and/or no metallic sheen observe report as negative (-) confirmed test
Production of gas, report as positive (+)
confirmed test for Total Coliform
Gas production, report as positive (+) confirmed test
for Fecal Coliform
No gas production, report as negative (-) confirmed test
Schematic Diagram on conventional method of bacteriological examination on potable water that involves three
processes: MTFT, HPC (Pour Plate Method), and Streak Plate Method on selective (EMB) agar.

WORK INSTRUCTION MANUAL LABORATORY SECTION
11 | P a g e
Multiple Tube Fermentation Technique (MTFT)
One of the standard methods used in Water Microbiology which aids in the detection of
coliform group of organisms (including Thermotolerant/Fecal Coliform) in the drinking water. This is
a tube-dilution method using a nutrient rich medium. Which involves two (2) PHASES:
A. ) Presumptive Phase - using LSB (Lauryl Sulfate Broth) as culture medium;
B.) Confirmed Phase - using BGLB (Brilliant Green Lactose Bile Broth) particular for Total
coliform, EC Broth and EMB agar for fecal coliform group.
During presumptive phase, for every one (1) water sample is coupled with one (1) plate of
Petri dish undergoing heterotrophic plate count (HPC) using pour plate method; and when a
particular sample being subjected to confirmed phase using EC broth, it will also undergo streak
plate method using EMB selective agar to correlate results from EC enrichment broth specific for
fecal coliform group detection and quantifying processes.
Thus, one sample will undergo MTFT, HPC, and streak plate selective enrichment (EMB) agar
method as a complete package for bacteriological analysis of water. This is also true when using
rapid (chromogenic /enzyme substrate) test but with the absence of correlation with EMB agar
plates because rapid test is more precise and specific on quantifying E.coli instead of fecal coliform
group.
The results are reported in terms of Most Probable Number (MPN) of organism present.
Most Probable Number is based on certain probability formulas and is an estimate of the mean
density of coliforms in the sample. On the other hand, colonies on agar plates will be counted and
reported as colony forming units cfu/mL.
WORK INSTRUCTION MANUAL LABORATORY SECTION
12 | P a g e
Equipments/Materials/ Paraphernalia/Apparatus:
Autoclave
Water Bath
Refrigerator
Hot Plate with magnetic Stirrer
Pressure cooker in 121⁰C with 0.15 MPa
Alcohol Lamp
Aluminum Foil
Mechanical Pipettor,
Balance, analytical and top-loading
Vortex Shaker
Reagent Dispenser (10ml)
Fermentation Tubes, 20x150mm
Thermometer
Beaker, 500mL, 1000ml, 2000ml
Erlenmeyer Flasks, 250ml, 500ml
Incubator
Durham Tubes, 8x45 mm
Inoculating Loop (Wire Loop, Michrome Loop)
Petri Dishes (15x100mm)
Reagent Bottles (Clear, Amber Color)
Culture of E. coli, Enterobacter aerogens, Klebsiella pneumonia and Bacillus spizizenil (ATC6633)
Cotton
Biosafety Cabinet
Test Tube rack
Disinfectants: Isopropyl OH 70%,
Ethyl OH 70%,
Lysol (O-Benzyl-Chlorophenol)
Zonrox (Sodium Hypochlorite)
WORK INSTRUCTION MANUAL LABORATORY SECTION
13 | P a g e
WASHING AND STERILIZATION
1. All glasswares should be thoroughly washed with liquid detergent and Sodium Hypochlorite)
Zonrox for disinfection.
2. To remove all traces of residual washing compounds, glasswares should be sterilize for not
less than one hour at 170⁰C in dry-sterilization oven by putting the glasswares in one (1)
craft paper pouch in a bundle of 35 pcs with Durham tubes for fermentation tubes, and 10
pcs in one (1) craft paper pouch for Petri dish plates.
3. Place a foil cap in the beaker mouth for the beakers, stirring rods in a aluminum foil, cap the
mouth of the Erlin Meyer flasks with aluminum foil, etc. when autoclaving.
4. Sample bottles, autocleavable plastics, etc., should sterilized in an autoclave for 15 minutes
in 0.15 MPa/121⁰C.
WORK INSTRUCTION MANUAL LABORATORY SECTION
14 | P a g e
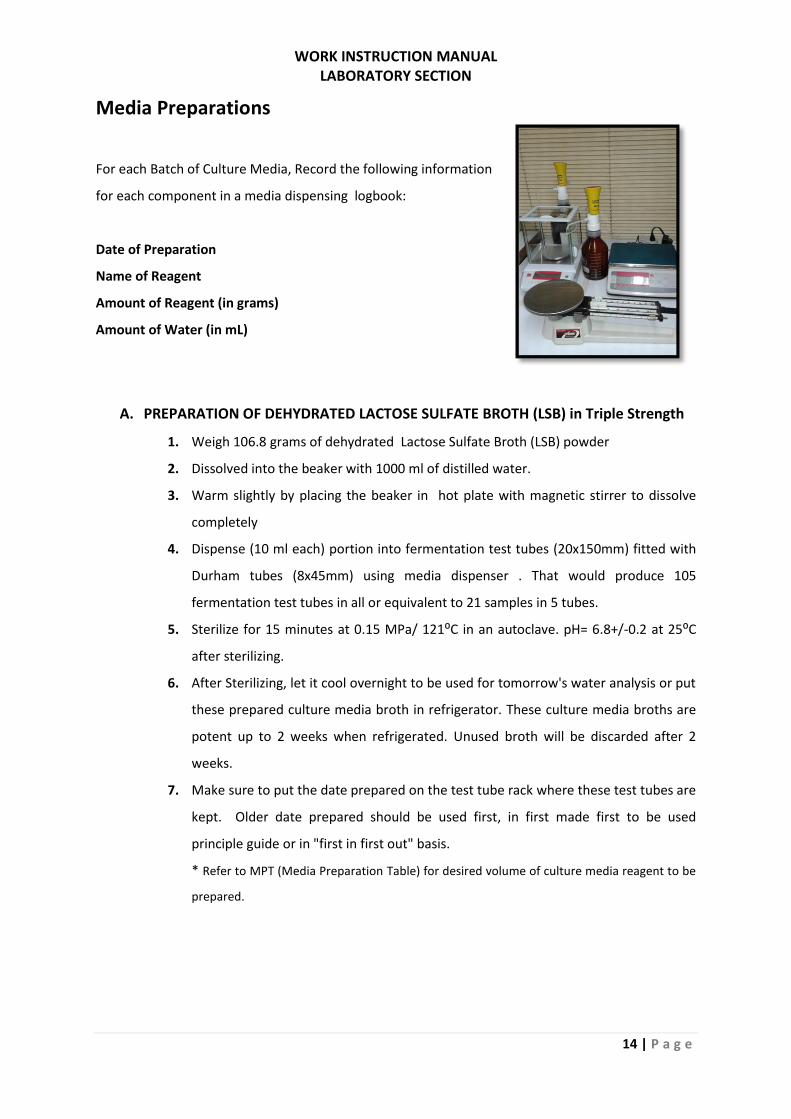
Media Preparations
For each Batch of Culture Media, Record the following information
for each component in a media dispensing logbook:
Date of Preparation
Name of Reagent
Amount of Reagent (in grams)
Amount of Water (in mL)
A. PREPARATION OF DEHYDRATED LACTOSE SULFATE BROTH (LSB) in Triple Strength
1. Weigh 106.8 grams of dehydrated Lactose Sulfate Broth (LSB) powder
2. Dissolved into the beaker with 1000 ml of distilled water.
3. Warm slightly by placing the beaker in hot plate with magnetic stirrer to dissolve
completely
4. Dispense (10 ml each) portion into fermentation test tubes (20x150mm) fitted with
Durham tubes (8x45mm) using media dispenser . That would produce 105
fermentation test tubes in all or equivalent to 21 samples in 5 tubes.
5. Sterilize for 15 minutes at 0.15 MPa/ 121⁰C in an autoclave. pH= 6.8+/-0.2 at 25⁰C
after sterilizing.
6. After Sterilizing, let it cool overnight to be used for tomorrow's water analysis or put
these prepared culture media broth in refrigerator. These culture media broths are
potent up to 2 weeks when refrigerated. Unused broth will be discarded after 2
weeks.
7. Make sure to put the date prepared on the test tube rack where these test tubes are
kept. Older date prepared should be used first, in first made first to be used
principle guide or in "first in first out" basis.
* Refer to MPT (Media Preparation Table) for desired volume of culture media reagent to be
prepared.
WORK INSTRUCTION MANUAL LABORATORY SECTION
15 | P a g e
B. PREPARATION OF DEHYDRATED BRILLIANT GREEN LACTOSE BILE (BGLB) BROTH
1. Weigh 40 grams of dehydrated Brilliant Green Lactose Bile (BGLB) broth powder .
2. Dissolved into the beaker with 1000ml of distilled water.
3. Warm slightly by placing the beaker in hot plate with magnetic stirrer to dissolve
completely.
4. Dispense (10 ml each) portion into fermentation test tubes (20x150mm) fitted with
Durham tube (8x45mm) using media dispenser. That would produce 100
fermentation test tubes in all or equivalent to 20 samples in 5 tubes.
5. Sterilize for 15 minutes at 0.15 MPa/121⁰C in an autoclave. pH= 7.2+/-0.2 at 25⁰c
after sterilizing.
6. After Sterilizing, let it cool overnight to be used for tomorrow's water analysis or put
these prepared culture media broth in a refrigerator. These culture media broths are
potent up to 2 weeks when refrigerated. Unused broth will be discarded after 2
weeks.
7. Make sure to put the date prepared on the test tube rack where these test tubes are
keep. Older date prepared should be used first, in first made first to be used
principle guide or in "first in first out" basis.
* Refer to MPT (Media Preparation Table) for desired volume of culture media reagent to be
prepared.
WORK INSTRUCTION MANUAL LABORATORY SECTION
16 | P a g e
C. PREPARATION OF DEHYDRATED EC BROTH
1. Weigh 37 grams of dehydrated EC broth powder .
2. Dissolved into the beaker with 1000ml of distilled water.
3. Warm slightly by placing the beaker in hot plate with magnetic stirrer to dissolve
completely
4. Dispense (10 ml each) portion into fermentation test tubes (20x150mm) fitted with
Durham tube (8x45mm). using media dispenser. That would produce 100
fermentation test tubes in all or equivalent to 20 samples in 5 tubes.
5. Sterilize for 15 minutes at 0.15 MPa/121⁰C in an autoclave. pH= 6.9+/-0.2 at 25⁰C
after sterilizing.
6. After Sterilizing, let it cool overnight to be used for tomorrow's water analysis or put
these prepared culture media broth in a refrigerator. These culture media broths are
potent up to 2 weeks when refrigerated. Unused broth will be discarded after 2
weeks.
7. Make sure to put the date prepared on the test tube rack where these test tubes
are keep. Older date prepared should be used first, in first made first to be used
principle guide or in "first in first out" basis.
* Refer to MPT (Media Preparation Table) for desired volume of culture media reagent to be
prepared.
WORK INSTRUCTION MANUAL LABORATORY SECTION
17 | P a g e
D. PREPARATION OF DEHYDRATED PLATE COUNT AGAR (PCA) Plates
1. Weigh 22.5 grams of dehydrated PCA (Casein-peptone glucose yeast extract) agar
powder.
2. Dissolved into the Erlenmeyer flask with 1000ml of distilled water.
3. Mix thoroughly. Heat with frequent agitation by placing it into hot plate with
magnetic stirrer for 1 minute to dissolve powder. Note that the mixture will become
clear eventually after the agar is thoroughly mixed.
4. Sterilize for 15 minutes at 0.15MPa/121⁰C in an autoclave. pH= 7.0+/-0.2 at 25⁰C
after sterilizing.
5. After sterilization, let it cool overnight reserve for tomorrow's water analysis or put
in refrigerator to prolong preservation up to 2 weeks potency.
6. During Heterotrophic Plate Count (HPC) Method, the solidified PCA agar will be
reheated again into hot plate with magnetic stirrer. After the agar thoroughly
melted again with lukewarm heat, distribute/pour into sterile Petri dishes (10ml
each) portion with 1ml water sample in each Petri dish in pour plate method. The
1000ml PCA agar sample will produce 100 prepared agar in Petri dishes.
* Refer to MPT (Media Preparation Table) for desired volume of culture media reagent to be
prepared.
WORK INSTRUCTION MANUAL LABORATORY SECTION
18 | P a g e
E. PREPARATION OF DEHYDRATED EOSIN METHYLENE BLUE (EMB) AGAR Plates
1. Weigh 36 grams of dehydrated EMB agar powder.
2. Dissolved into the Erlenmeyer flask with 1000ml of distilled water.
3. Mix thoroughly. Heat with frequent agitation by placing it into hot plate with
magnetic stirrer for 1 minute to dissolve powder. Note that the mixture will become
clear eventually after the agar is thoroughly mixed with no undissolve powder is
visible.
4. Sterilize for 15 minutes at 0.15MPa/121⁰C in an autoclave. pH= 7.1+/-0.2 at 25⁰C
after sterilizing.
5. Distribute or pour 10ml portion into sterile Petri dishes. Let it cool and solidified. The
1000 ml EMB agar will produce up to 100 prepared agar in Petri dishes.
6. Place into incubator overnight in an inverted stacked position and observe growth of
bacterial colonies. If no visible colonies observed, that means that no bacteria in the
surrounding air contaminates the Petri dishes and is ready for use, or place it in
refrigerator in inverted position for future use. Potency is up to 2 weeks to 1 month.
7. The prepared EMB agar in Petri dish should be place in a close container inside the
refrigerator so that no occurrence of dehydration of prepared agar in a dish.
* Refer to MPT (Media Preparation Table) for desired volume of culture media reagent to be
prepared.
WORK INSTRUCTION MANUAL LABORATORY SECTION
19 | P a g e
F. PREPARATION OF DEHYDRATED CETRIMIDE (Pseudomonas selective) AGAR Plates
1. Weigh 45.3 grams of dehydrated EMB agar powder.
2. Dissolved into the Erlenmeyer flask with 1000ml of distilled water.
3. Add 10 mL glycerol into the mixture in Erlenmeyer flask.
4. Mix thoroughly. Heat with frequent agitation by placing it into hot plate with
magnetic stirrer for 1 minute to dissolve powder. Note that the mixture will become
clear eventually after the agar is thoroughly mixed with no undissolve powder is
visible.
5. Sterilize for 15 minutes at 0.15MPa/121⁰C in an autoclave. pH= 7.1+/-0.2 at 25⁰C
after sterilizing.
6. Distribute or pour 10ml portion into sterile Petri dishes. Let it cool and solidified. The
1000 ml cetrimid agar will produce up to 100 prepared agar in Petri dishes.
7. Place into incubator overnight in an inverted stacked position and observe growth of
bacterial colonies. If no visible colonies observed, that means that no bacteria in the
surrounding air contaminates the Petri dishes and is ready for use, or place it in
refrigerator in inverted position for future use. Potency is up to 2 weeks to 1 month.
8. The prepared CETRIMID agar in Petri dish should be place in a close container inside
the refrigerator so that no occurrence of dehydration of prepared agar in a dish.
* Refer to MPT (Media Preparation Table) for desired volume of culture media reagent to be
prepared.
WORK INSTRUCTION MANUAL LABORATORY SECTION
20 | P a g e
G. PREPARATION OF DEHYDRATED NUTRIENT AGAR (NA) Plates
1. Weigh 20 grams of dehydrated NA agar powder.
2. Dissolved into the Erlenmeyer flask with 1000ml of distilled water.
3. Mix thoroughly. Heat with frequent agitation by placing it into hot plate with
magnetic stirrer for 1 minute to dissolve powder. Note that the mixture will become
clear eventually after the agar is thoroughly mixed with no undissolve powder is
visible.
4. Sterilize for 15 minutes at 0.15MPa/121⁰C in an autoclave. pH= 7.1+/-0.2 at 25⁰C
after sterilizing.
5. Distribute or pour 10ml portion into sterile Petri dishes. Let it cool and solidified. The
1000 ml cetrimid agar will produce up to 100 prepared agar in Petri dishes.
6. Place into incubator overnight in an inverted stacked position and observe growth of
bacterial colonies. If no visible colonies observed, that means that no bacteria in the
surrounding air contaminates the Petri dishes and is ready for use, or place it in
refrigerator in inverted position for future use. Potency is up to 2 weeks to 1 month.
7. The prepared NA agar in Petri dish should be place in a close container inside the
refrigerator so that no occurrence of dehydration of prepared agar in a dish.
* Refer to MPT (Media Preparation Table) for desired volume of culture media reagent to be
prepared.
WORK INSTRUCTION MANUAL LABORATORY SECTION
21 | P a g e
Multiple Tube Fermentation Technique (MTFT) Test Procedure
A. Presumptive Test Procedure
1. Shake water sample 25 times by making up and down of back and forth movements of
about 0.3 (1ft) in 7 seconds.
2. Pipet 10 mL of the water sample into each 5 tubes of primary pre-enrichment LSB
fermentation tubes.
3. Incubate at 35⁰C-36⁰C for 24 hours.
4. Observe at the end of 24 hours and record the presence or absence of gas.
5. Separate the gas positive tubes (with gas formation trapped in Durham tubes and the
sample is turbid) to undergo confirmatory test. While the clear negative tubes record as
or interpret as negative sample result.
6. Incubate for another 24 hours if the sample tube may fall in the category of doubtful
observation.
7. If no gas has developed after 48 hours, record as or interpret as negative sample result.
8. If gas formation observes after 48 hours, then proceed to confirmatory method.
*Examination for gas formation after 48 hours has an arbitrary limit of 48 hours for doubtless
observation excludes occasional members of the coliform group which form gas slowly, but
for the purpose of a standard test based on definition of coliform, exclusion of occasional
slow-gas-forming is satisfactory.
WORK INSTRUCTION MANUAL LABORATORY SECTION
22 | P a g e
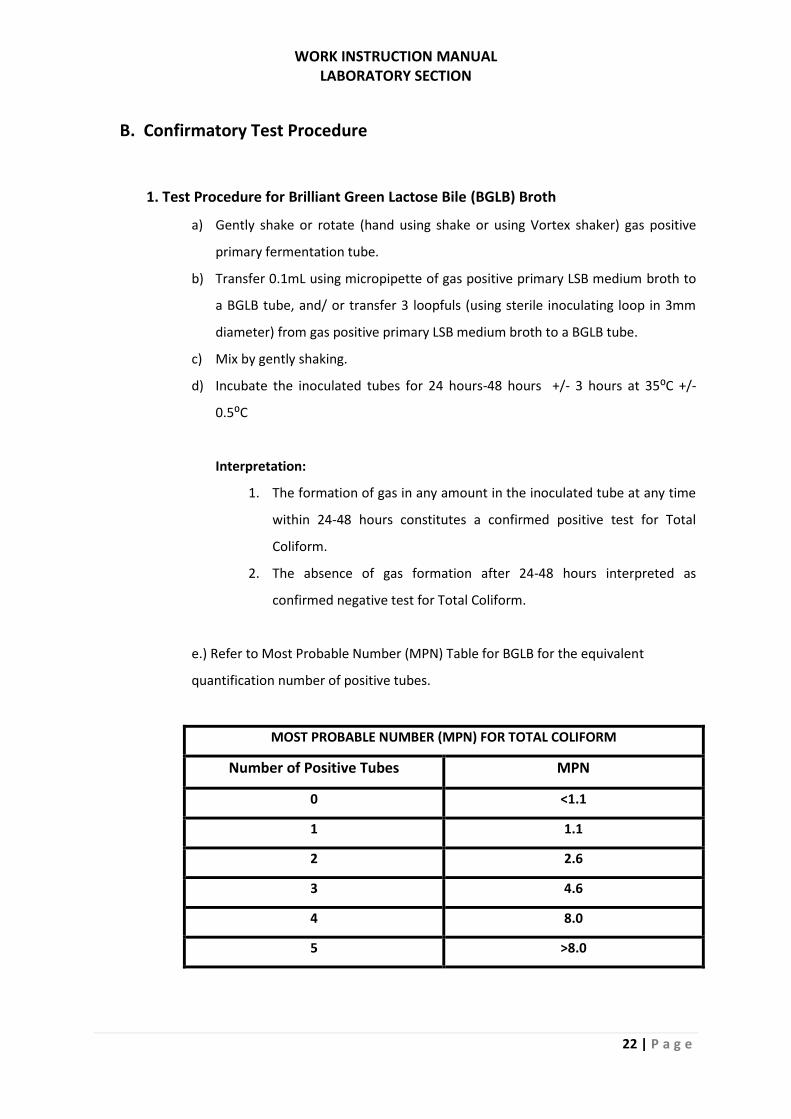
B. Confirmatory Test Procedure
1. Test Procedure for Brilliant Green Lactose Bile (BGLB) Broth
a) Gently shake or rotate (hand using shake or using Vortex shaker) gas positive
primary fermentation tube.
b) Transfer 0.1mL using micropipette of gas positive primary LSB medium broth to
a BGLB tube, and/ or transfer 3 loopfuls (using sterile inoculating loop in 3mm
diameter) from gas positive primary LSB medium broth to a BGLB tube.
c) Mix by gently shaking.
d) Incubate the inoculated tubes for 24 hours-48 hours +/- 3 hours at 35⁰C +/-
0.5⁰C
Interpretation:
1. The formation of gas in any amount in the inoculated tube at any time
within 24-48 hours constitutes a confirmed positive test for Total
Coliform.
2. The absence of gas formation after 24-48 hours interpreted as
confirmed negative test for Total Coliform.
e.) Refer to Most Probable Number (MPN) Table for BGLB for the equivalent
quantification number of positive tubes.
MOST PROBABLE NUMBER (MPN) FOR TOTAL COLIFORM
Number of Positive Tubes MPN
0 <1.1
1 1.1
2 2.6
3 4.6
4 8.0
5 >8.0
WORK INSTRUCTION MANUAL LABORATORY SECTION
23 | P a g e
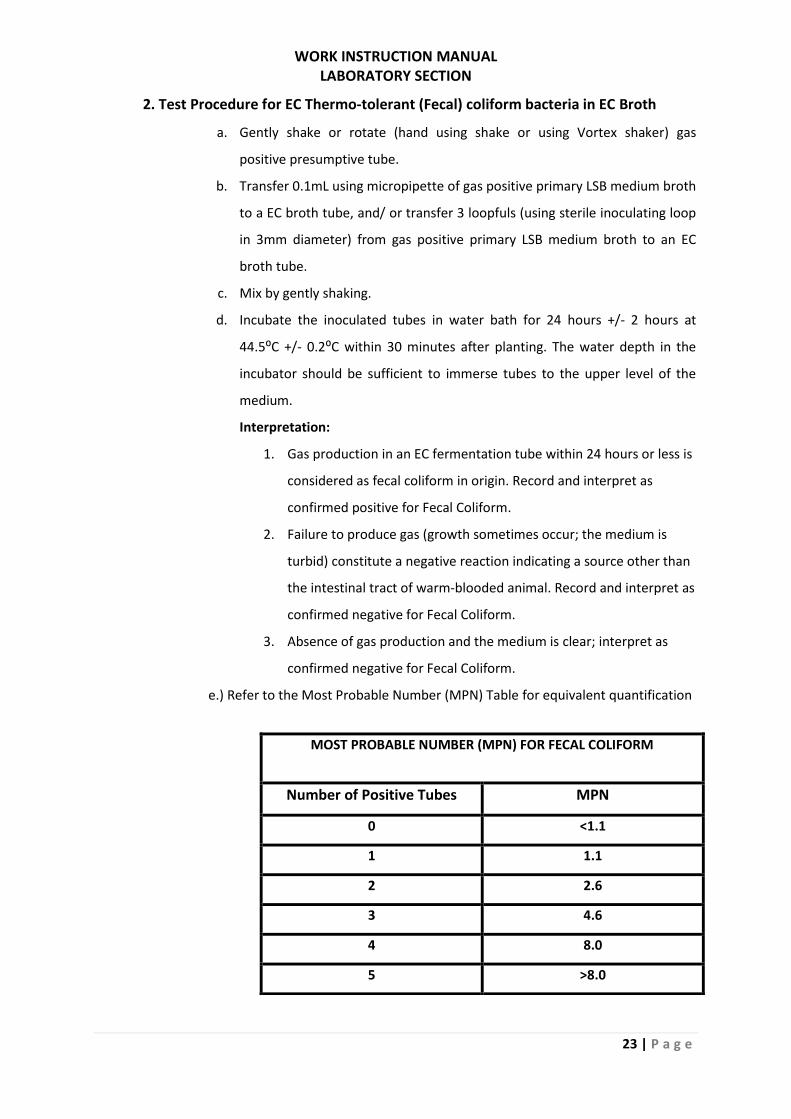
2. Test Procedure for EC Thermo-tolerant (Fecal) coliform bacteria in EC Broth
a. Gently shake or rotate (hand using shake or using Vortex shaker) gas
positive presumptive tube.
b. Transfer 0.1mL using micropipette of gas positive primary LSB medium broth
to a EC broth tube, and/ or transfer 3 loopfuls (using sterile inoculating loop
in 3mm diameter) from gas positive primary LSB medium broth to an EC
broth tube.
c. Mix by gently shaking.
d. Incubate the inoculated tubes in water bath for 24 hours +/- 2 hours at
44.5⁰C +/- 0.2⁰C within 30 minutes after planting. The water depth in the
incubator should be sufficient to immerse tubes to the upper level of the
medium.
Interpretation:
1. Gas production in an EC fermentation tube within 24 hours or less is
considered as fecal coliform in origin. Record and interpret as
confirmed positive for Fecal Coliform.
2. Failure to produce gas (growth sometimes occur; the medium is
turbid) constitute a negative reaction indicating a source other than
the intestinal tract of warm-blooded animal. Record and interpret as
confirmed negative for Fecal Coliform.
3. Absence of gas production and the medium is clear; interpret as
confirmed negative for Fecal Coliform.
e.) Refer to the Most Probable Number (MPN) Table for equivalent quantification
MOST PROBABLE NUMBER (MPN) FOR FECAL COLIFORM
Number of Positive Tubes MPN
0 <1.1
1 1.1
2 2.6
3 4.6
4 8.0
5 >8.0
WORK INSTRUCTION MANUAL LABORATORY SECTION
24 | P a g e
3. Test Procedure for Eosin Methylene Blue (EMB) Agar Plates
a. Gently shake or rotate presumptive positive tubes.
b. Streak each positive presumptive tube into EMB agar plates with a straight
inoculating needle slightly bent at the tip to prevent scratch and produce
well isolated colonies.
c. Incubate the plates in inverted position at 35⁰C +/- 0.5⁰C for 24 hours.
Interpretation:
The colonies developing on EMB agar plates maybe divided as:
1. Typical colonies- nucleated colony with metallic sheen color in
reflected light record as confirmed positive for E.coli.
2. Atypical- colonies are larger than those of E. coli, opaque, pink
mucoid, confluent, unnucleated record as confirmed positive for
Total Coliform
3. Translucent, amber colored, clear watery colonies or swarming
4. colonies record as confirmed negative for Total and Fecal Coliform.
5. Clear, no growth or no colonies observed record as confirmed
negative for Total and Fecal Coliform.
WORK INSTRUCTION MANUAL LABORATORY SECTION
25 | P a g e
HETEROTROPHIC PLATE COUNT
Procedure: Pour Plate Method
a. Mix sample by making 25 complete up and down or back and forth movements, of
about 0.3 (1ft.) in 7 seconds.
b. Pipet 1mL or 0.1 mL of the sample into a sterile petri dish
c. Pour aseptically 10 mL melted PCA agar medium which has been allowed to cool as
like lukewarm heat.
d. Rotate the plate over a smooth surface first in one direction, then in the opposite
direction or by rotating it so that the melted agar and the water sample will mix
thoroughly. Take care not to splash mixture over the edge of the dish.
e. Allow the plates to solidify (within 10 minutes) on a level surface.
f. Invert the plates and incubate at 35⁰C+/- 0.5⁰C for 24-48 hours +/- 3 hours.
g. Check sterility of medium by having control plates for each series of samples.
h. After incubation, count no. of growth per petri dish
i. if growth is less than 30 colonies per plate, count as is
j. if growth is more than 30 colonies per plate, count growth by means of colony
counter.
k. Report results as colony forming units.
WORK INSTRUCTION MANUAL LABORATORY SECTION
26 | P a g e
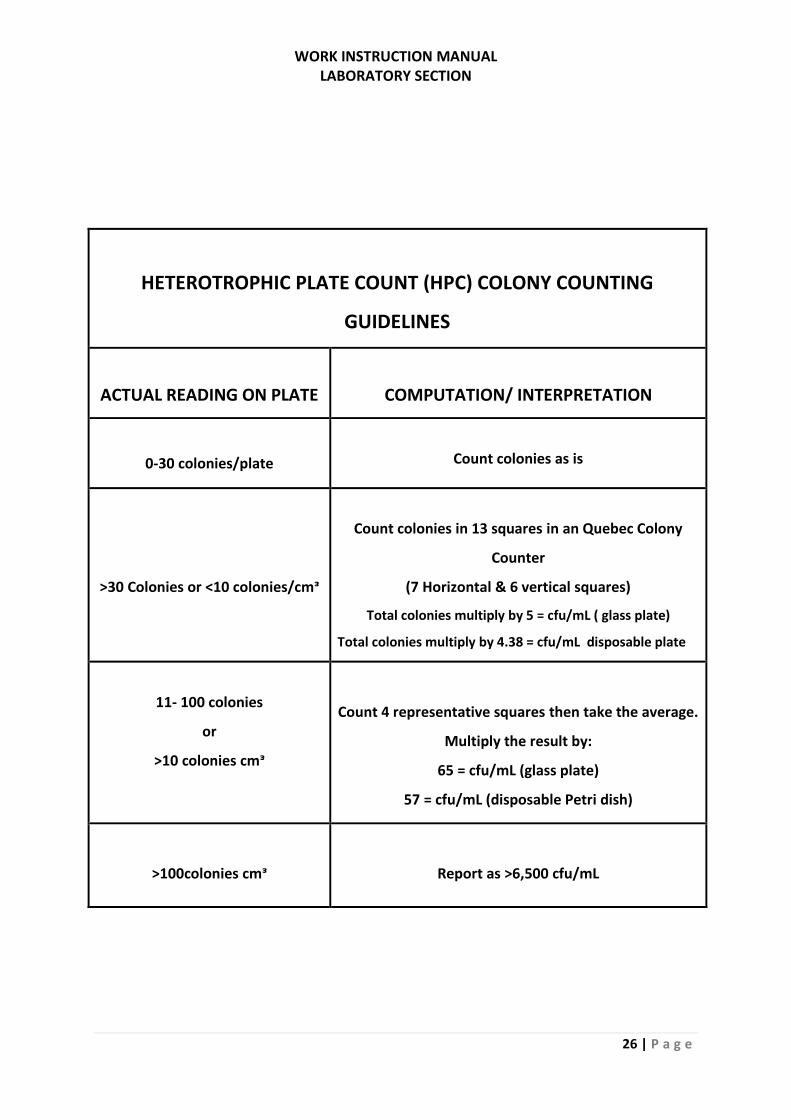
HETEROTROPHIC PLATE COUNT (HPC) COLONY COUNTING
GUIDELINES
ACTUAL READING ON PLATE
COMPUTATION/ INTERPRETATION
0-30 colonies/plate
Count colonies as is
>30 Colonies or <10 colonies/cmᵌ
Count colonies in 13 squares in an Quebec Colony
Counter
(7 Horizontal & 6 vertical squares)
Total colonies multiply by 5 = cfu/mL ( glass plate)
Total colonies multiply by 4.38 = cfu/mL disposable plate
11- 100 colonies
or
>10 colonies cmᵌ
Count 4 representative squares then take the average.
Multiply the result by:
65 = cfu/mL (glass plate)
57 = cfu/mL (disposable Petri dish)
>100colonies cmᵌ
Report as >6,500 cfu/mL
WORK INSTRUCTION MANUAL LABORATORY SECTION
27 | P a g e
Water Analysis Methods On Enumerating E. coli and
Coliform Group of Bacteria
2. CHROMOGENIC SUBSTRATE METHOD (Rapid Test)
Summary
All materials and reagents had been sterilized to ensure high quality standards of these factory
prepared reagents for rapid test/enumeration and detection of fecal contamination in the water
sample. The Quanti-Tray had been sterilized with ethylene oxide and designed to give quantified
bacterial counts of 100ml samples using prepared sterile reagent product. The sterile clear bottle
had been added with sodium thiosulfate as a neutralizing agent for those chlorine-treated water
samples. Treated water sample has an incubation period of three (3) weeks. But with the addition of
sodium thiosulfate, the incubation time is 18-22 hours only. The 100mL water sample will be poured
out to the sterile clear bottle and the sterile prepared reagent in a snap pack will be added. Then,
the reagent/sample mixture will be poured into Quanti-Tray, to be sealed in a Sealer and will be
incubated per the reagent instructions. After incubation, positive wells will be counted using Most
Probable Number (MPN) Table to determine the MPN of coliforms while positive wells for E. coli on
the other hand, would be determined with the aid of UV Lamp as to make the E. coli fluoresce under
specific range of UV light and then positive wells will be referred to the MPN Table to determine the
MPN of the E. coli.
WORK INSTRUCTION MANUAL LABORATORY SECTION
28 | P a g e
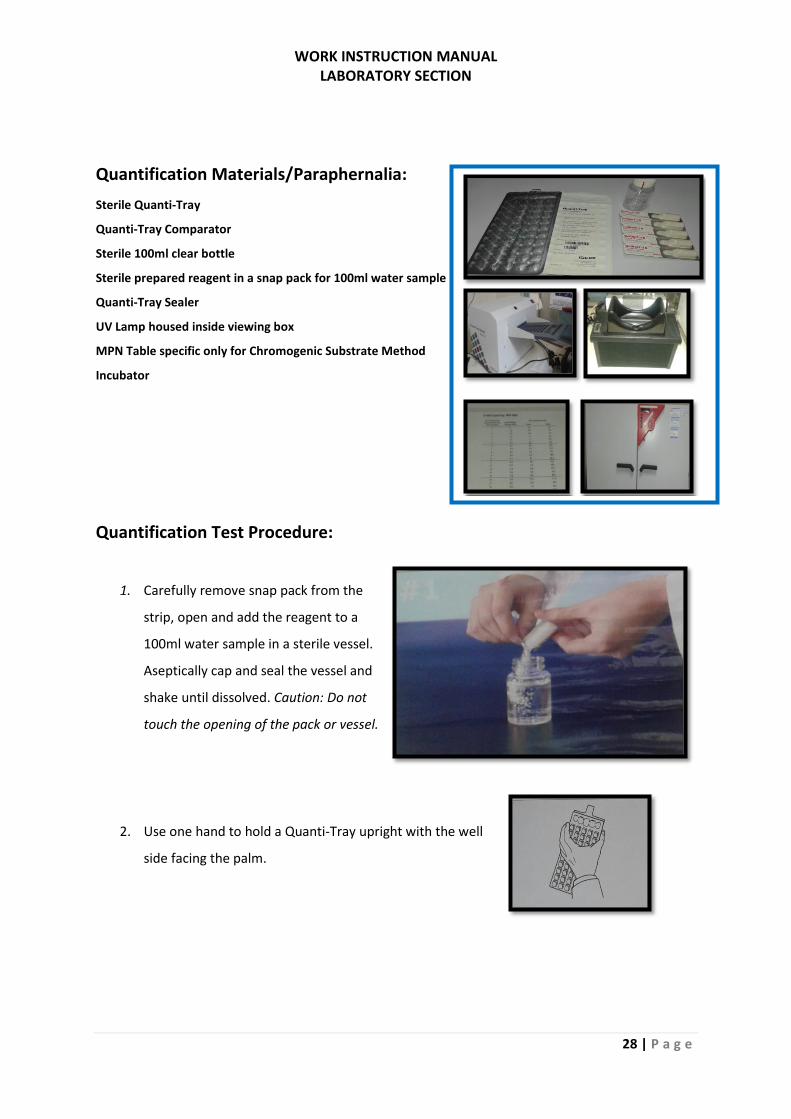
Quantification Materials/Paraphernalia:
Sterile Quanti-Tray
Quanti-Tray Comparator
Sterile 100ml clear bottle
Sterile prepared reagent in a snap pack for 100ml water sample
Quanti-Tray Sealer
UV Lamp housed inside viewing box
MPN Table specific only for Chromogenic Substrate Method
Incubator
Quantification Test Procedure:
1. Carefully remove snap pack from the
strip, open and add the reagent to a
100ml water sample in a sterile vessel.
Aseptically cap and seal the vessel and
shake until dissolved. Caution: Do not
touch the opening of the pack or vessel.
2. Use one hand to hold a Quanti-Tray upright with the well
side facing the palm.
WORK INSTRUCTION MANUAL LABORATORY SECTION
29 | P a g e
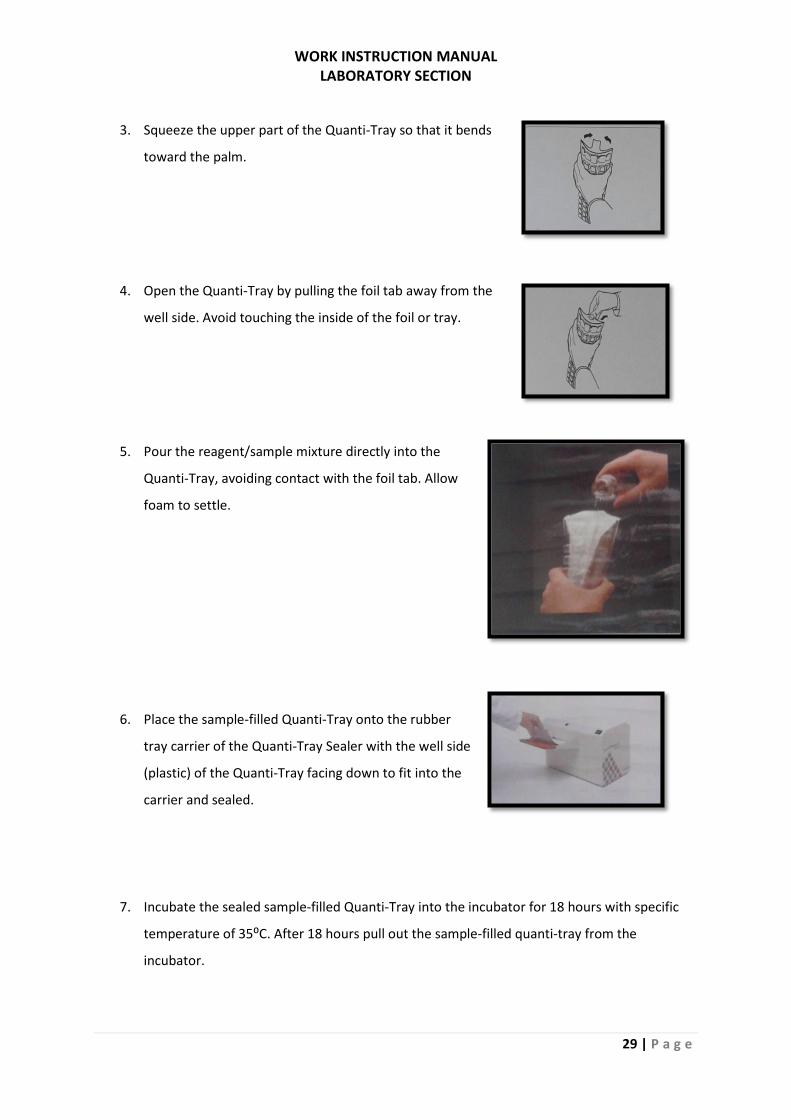
3. Squeeze the upper part of the Quanti-Tray so that it bends
toward the palm.
4. Open the Quanti-Tray by pulling the foil tab away from the
well side. Avoid touching the inside of the foil or tray.
5. Pour the reagent/sample mixture directly into the
Quanti-Tray, avoiding contact with the foil tab. Allow
foam to settle.
6. Place the sample-filled Quanti-Tray onto the rubber
tray carrier of the Quanti-Tray Sealer with the well side
(plastic) of the Quanti-Tray facing down to fit into the
carrier and sealed.
7. Incubate the sealed sample-filled Quanti-Tray into the incubator for 18 hours with specific
temperature of 35⁰C. After 18 hours pull out the sample-filled quanti-tray from the
incubator.
WORK INSTRUCTION MANUAL LABORATORY SECTION
30 | P a g e
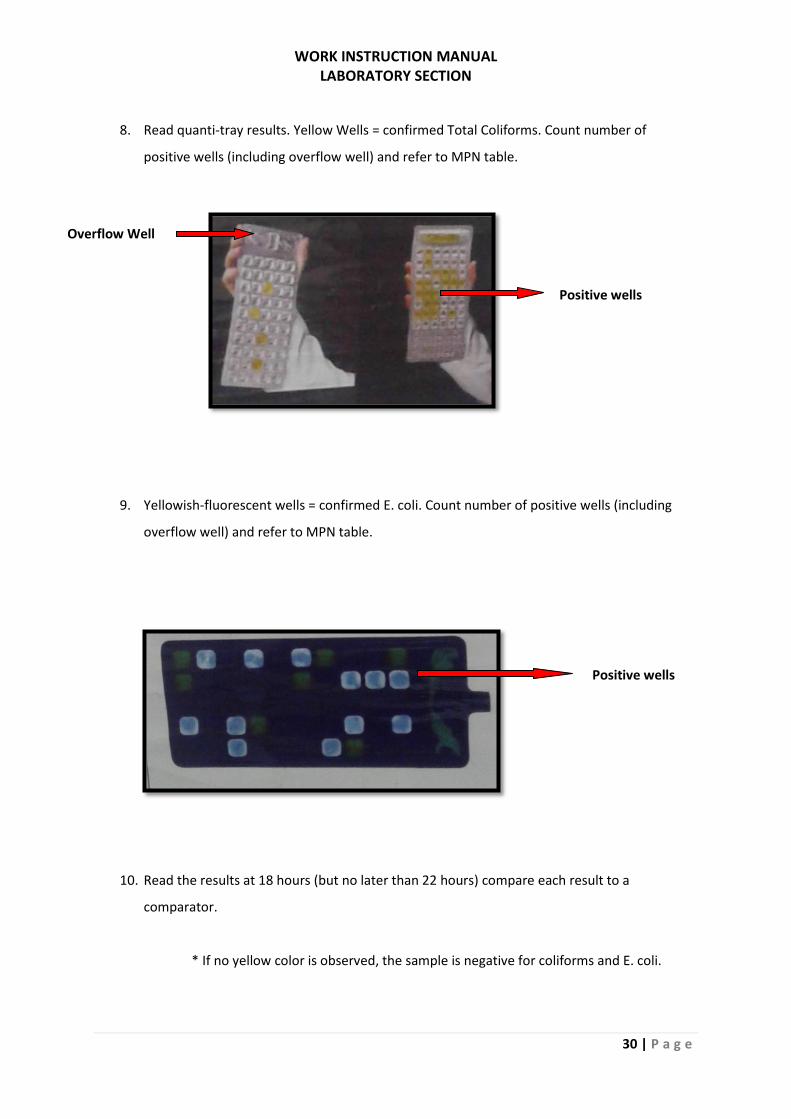
8. Read quanti-tray results. Yellow Wells = confirmed Total Coliforms. Count number of
positive wells (including overflow well) and refer to MPN table.
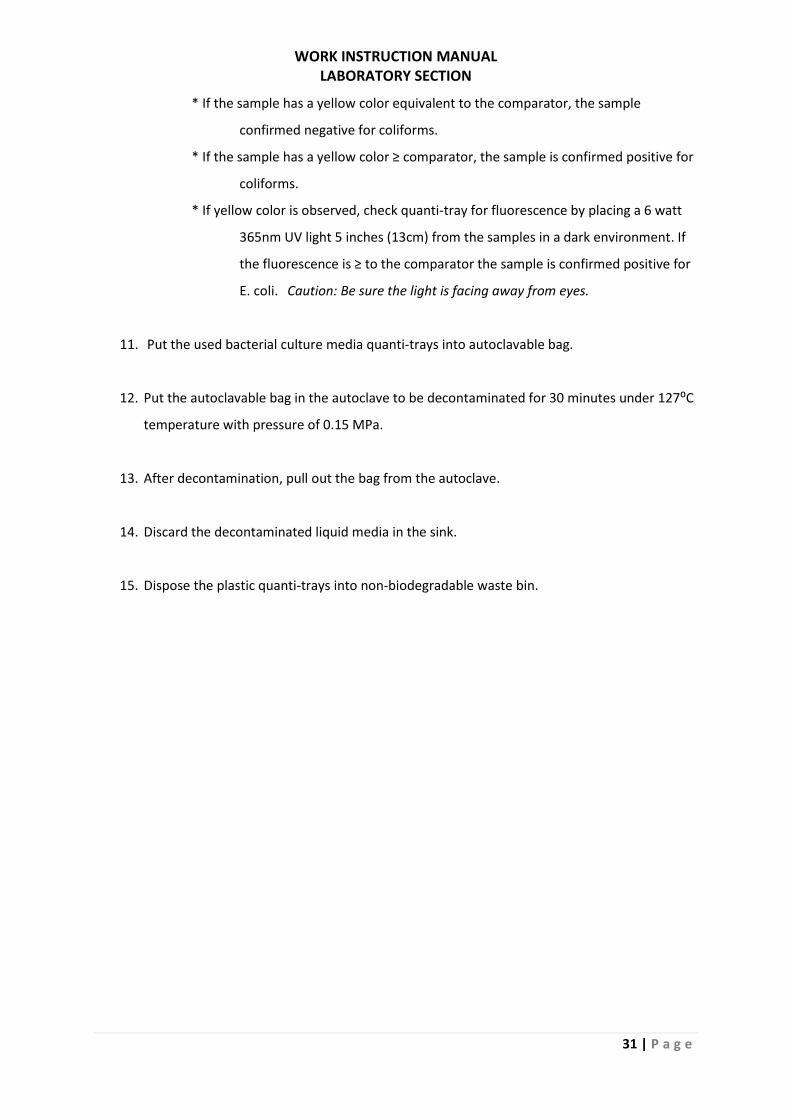
9. Yellowish-fluorescent wells = confirmed E. coli. Count number of positive wells (including
overflow well) and refer to MPN table.
10. Read the results at 18 hours (but no later than 22 hours) compare each result to a
comparator.
* If no yellow color is observed, the sample is negative for coliforms and E. coli.
Overflow Well
Positive wells
Positive wells
WORK INSTRUCTION MANUAL LABORATORY SECTION
31 | P a g e
* If the sample has a yellow color equivalent to the comparator, the sample
confirmed negative for coliforms.
* If the sample has a yellow color ≥ comparator, the sample is confirmed positive for
coliforms.
* If yellow color is observed, check quanti-tray for fluorescence by placing a 6 watt
365nm UV light 5 inches (13cm) from the samples in a dark environment. If
the fluorescence is ≥ to the comparator the sample is confirmed positive for
E. coli. Caution: Be sure the light is facing away from eyes.
11. Put the used bacterial culture media quanti-trays into autoclavable bag.
12. Put the autoclavable bag in the autoclave to be decontaminated for 30 minutes under 127⁰C
temperature with pressure of 0.15 MPa.
13. After decontamination, pull out the bag from the autoclave.
14. Discard the decontaminated liquid media in the sink.
15. Dispose the plastic quanti-trays into non-biodegradable waste bin.
WORK INSTRUCTION MANUAL LABORATORY SECTION
32 | P a g e
Water Analysis Method on Detecting Coliform Group Of
Bacteria
3. Primary Health Care
This is a chemical test used to detect the presence of H₂S in water which is associated with E.
coli and other organisms which indicate the presence of fecal contamination in drinking water
supplies. H₂S producing microorganisms are consistently associated with the presence of coliform in
water. Enteric bacteria such as Citrobacter, Salmonella, Proteus and certain species of Klebsiella also
produce H₂S in which further studies also reported H₂S producing variants of E.coli of fecal in origin.
PRINCIPLE:
The test is based on the ability of the coliform bacteria to produce H₂S (Hydrogen Sulfide)
PURPOSE:
To obtain rapid testing result (24hours) in the absence of modern laboratory facilities
MEDIA PREPARATION FOR PHC (WHICH MAKES APPROXIMATELY 120 BOTTLES):
Ingredients:
*Peptone - 40 grams
Dipotassium Hydrogen Phosphate - 3 grams
Ferric Ammonium Citrate - 1.5 grams
**Sodium Thiosulfate, anhydrous - 2 grams
Teepol (dishwashing liquid) - 2 grams
Distilled Water - 100 grams
Fine Facial Tissue (white)
WORK INSTRUCTION MANUAL LABORATORY SECTION
33 | P a g e
*If Peptone is not available, 30 grams of casamino acid maybe used.
*8 If sodium thiosulfate, anhydrous (Na₂S₂O₃) is not available, 3.14 grams of sodium thiosulfate,
Hypo (Na₂S₂O₃5H₂O) maybe used.
DIRECTION:
1. Carefully weigh the preceding chemicals in top loading balance and place in a glass
beaker (400mL)
2. 2. Add 100 mL distilled water
3. Place the beaker in hot plate with magnetic stirrer so as to mix the chemicals
thoroughly with moderate heat. Set Aside the dissolved medium after mixed
thoroughly for a while
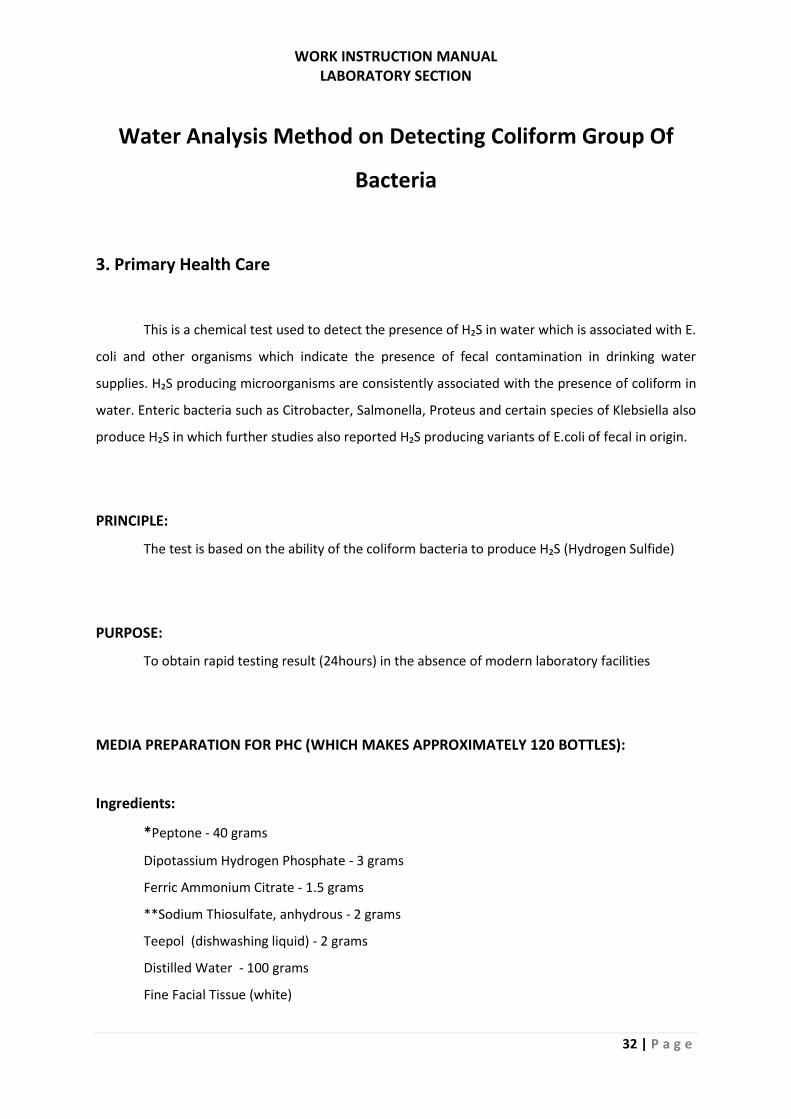
4. Fold facial tissue several times
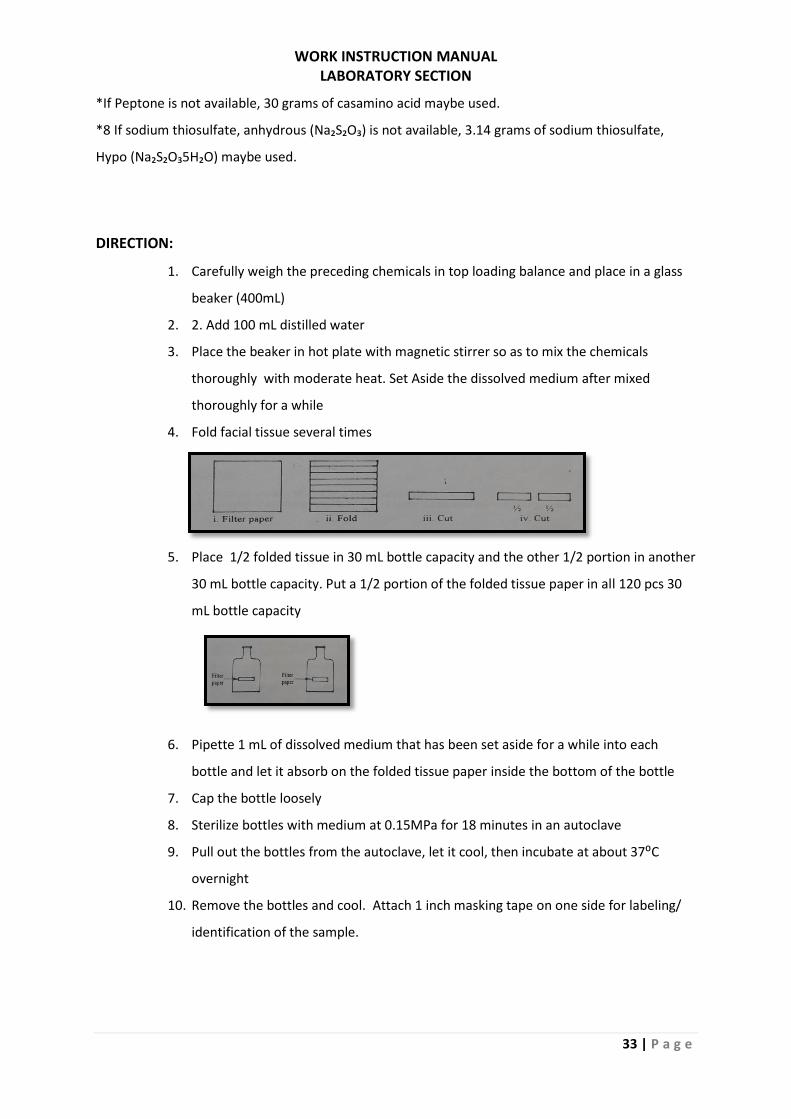
5. Place 1/2 folded tissue in 30 mL bottle capacity and the other 1/2 portion in another
30 mL bottle capacity. Put a 1/2 portion of the folded tissue paper in all 120 pcs 30
mL bottle capacity
6. Pipette 1 mL of dissolved medium that has been set aside for a while into each
bottle and let it absorb on the folded tissue paper inside the bottom of the bottle
7. Cap the bottle loosely
8. Sterilize bottles with medium at 0.15MPa for 18 minutes in an autoclave
9. Pull out the bottles from the autoclave, let it cool, then incubate at about 37⁰C
overnight
10. Remove the bottles and cool. Attach 1 inch masking tape on one side for labeling/
identification of the sample.
WORK INSTRUCTION MANUAL LABORATORY SECTION
34 | P a g e
WATER TESTING PROCEDURE USING PHC BOTTLE:
1. Open the cap and fill the sterilized PHC bottle with water sample (water to be tested) up to
the neck of the bottle
2. Cap the bottle tightly and taking care not to contaminate the top or the inside of the bottle
with your hands
3. The water inside the bottle then turns yellowish, do not be alarmed, this is normal
4. Allow to stand at room temperature away from direct sunlight for 24 hours (If an incubator
is available, incubate sample bottles at 30-37⁰C for 12-18 hours)
5. Observe the appearance of the water sample after 24 hours
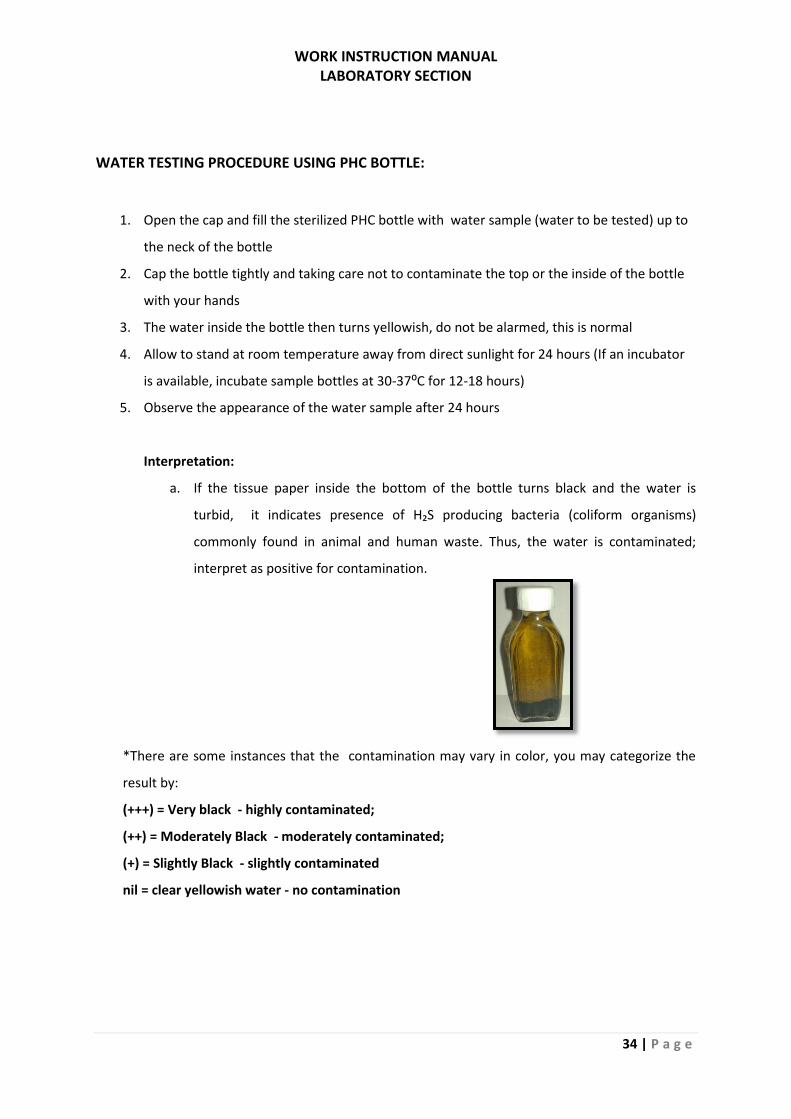
Interpretation:
a. If the tissue paper inside the bottom of the bottle turns black and the water is
turbid, it indicates presence of H₂S producing bacteria (coliform organisms)
commonly found in animal and human waste. Thus, the water is contaminated;
interpret as positive for contamination.
*There are some instances that the contamination may vary in color, you may categorize the
result by:
(+++) = Very black - highly contaminated;
(++) = Moderately Black - moderately contaminated;
(+) = Slightly Black - slightly contaminated
nil = clear yellowish water - no contamination
WORK INSTRUCTION MANUAL LABORATORY SECTION
35 | P a g e
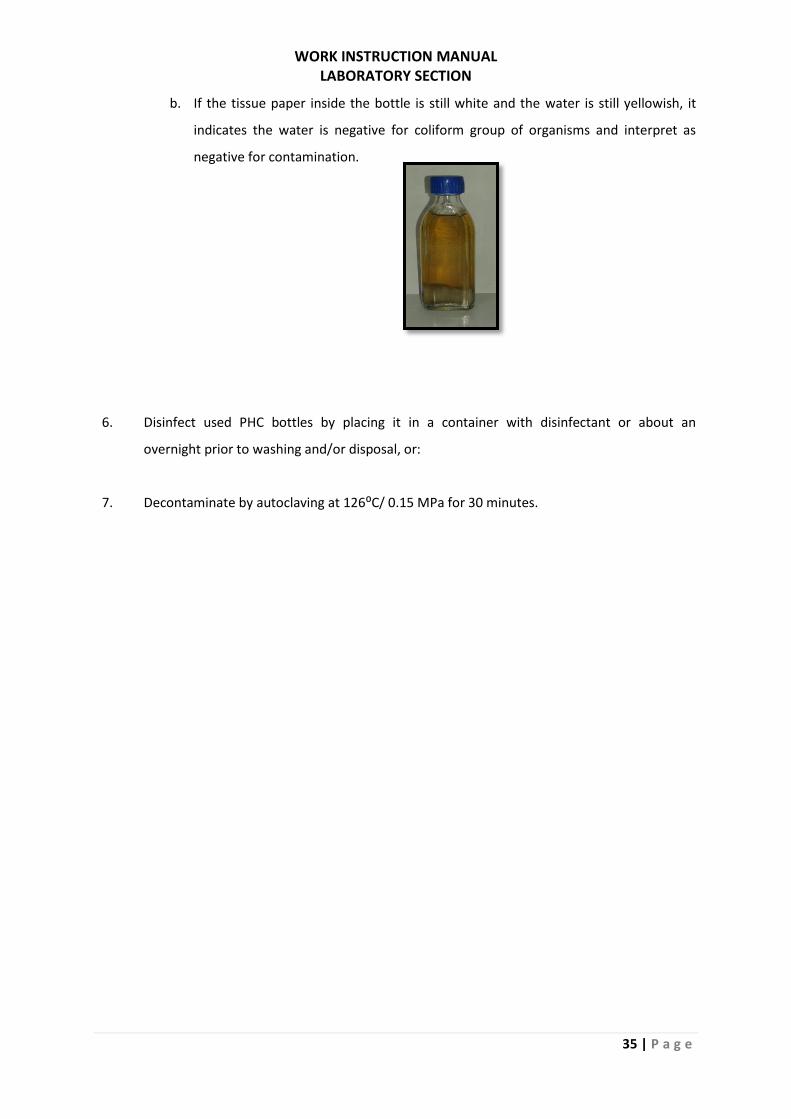
b. If the tissue paper inside the bottle is still white and the water is still yellowish, it
indicates the water is negative for coliform group of organisms and interpret as
negative for contamination.
6. Disinfect used PHC bottles by placing it in a container with disinfectant or about an
overnight prior to washing and/or disposal, or:
7. Decontaminate by autoclaving at 126⁰C/ 0.15 MPa for 30 minutes.
WORK INSTRUCTION MANUAL LABORATORY SECTION
36 | P a g e
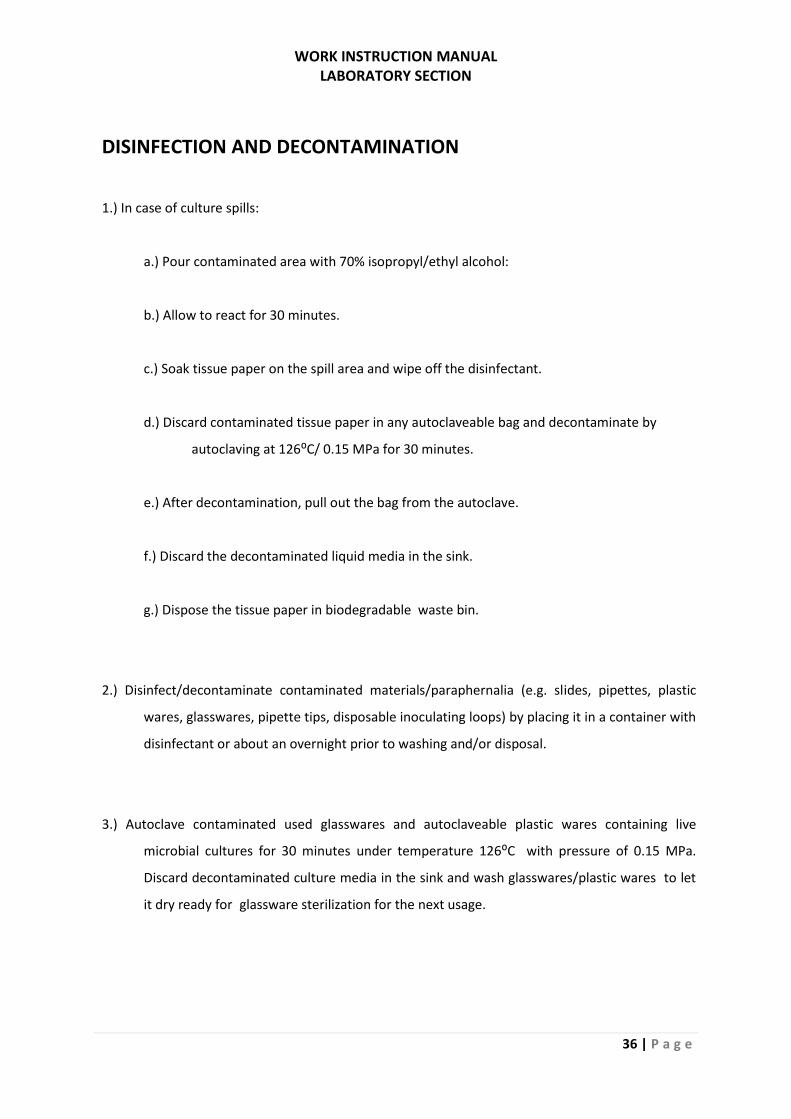
DISINFECTION AND DECONTAMINATION
1.) In case of culture spills:
a.) Pour contaminated area with 70% isopropyl/ethyl alcohol:
b.) Allow to react for 30 minutes.
c.) Soak tissue paper on the spill area and wipe off the disinfectant.
d.) Discard contaminated tissue paper in any autoclaveable bag and decontaminate by
autoclaving at 126⁰C/ 0.15 MPa for 30 minutes.
e.) After decontamination, pull out the bag from the autoclave.
f.) Discard the decontaminated liquid media in the sink.
g.) Dispose the tissue paper in biodegradable waste bin.
2.) Disinfect/decontaminate contaminated materials/paraphernalia (e.g. slides, pipettes, plastic
wares, glasswares, pipette tips, disposable inoculating loops) by placing it in a container with
disinfectant or about an overnight prior to washing and/or disposal.
3.) Autoclave contaminated used glasswares and autoclaveable plastic wares containing live
microbial cultures for 30 minutes under temperature 126⁰C with pressure of 0.15 MPa.
Discard decontaminated culture media in the sink and wash glasswares/plastic wares to let
it dry ready for glassware sterilization for the next usage.
WORK INSTRUCTION MANUAL LABORATORY SECTION
37 | P a g e
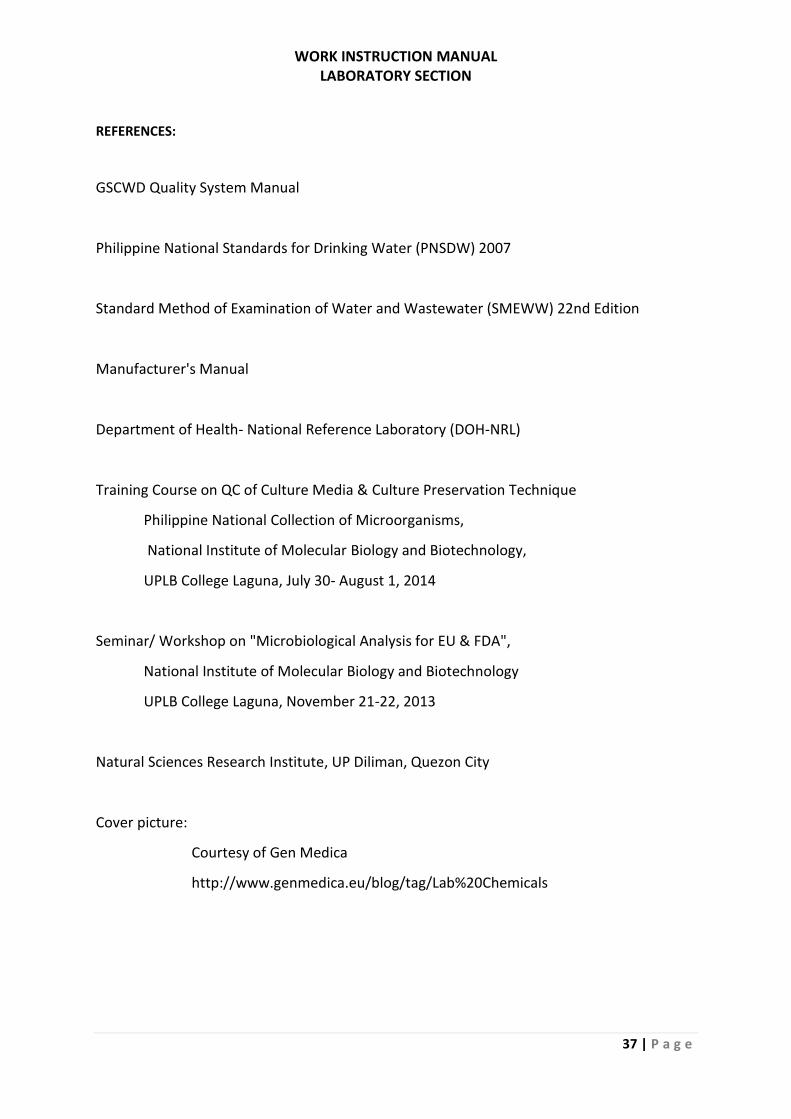
REFERENCES:
GSCWD Quality System Manual
Philippine National Standards for Drinking Water (PNSDW) 2007
Standard Method of Examination of Water and Wastewater (SMEWW) 22nd Edition
Manufacturer's Manual
Department of Health- National Reference Laboratory (DOH-NRL)
Training Course on QC of Culture Media & Culture Preservation Technique
Philippine National Collection of Microorganisms,
National Institute of Molecular Biology and Biotechnology,
UPLB College Laguna, July 30- August 1, 2014
Seminar/ Workshop on "Microbiological Analysis for EU & FDA",
National Institute of Molecular Biology and Biotechnology
UPLB College Laguna, November 21-22, 2013
Natural Sciences Research Institute, UP Diliman, Quezon City
Cover picture:
Courtesy of Gen Medica
http://www.genmedica.eu/blog/tag/Lab%20Chemicals