Art Lesson Plan- watercolor - · PDF fileKelly Junis ART 332 Intro to Art Education October...
11
Kelly Junis ART 332 Intro to Art Education October 26, 2008 Art Lesson Plan (Basic Format) I. Watercolor Landscapes 3 rd /4 th Grade Lesson #1 II. Focus - Students will begin to discover and explore different watercolor techniques. The final piece should illustrate a wide range of techniques and a piece that is visually interesting. III. Objectives - To learn different watercolor techniques. - To find inspiration from historical landscapes and from personal observations. - To understand how personal experiences have an effect on what individuals create. IV. Standards and Benchmarks ART.II.VA.EL.1 ART.II.VA.EL.2 ART.II.VA.EL.3 ART.II.VA.EL.4 ART.III.VA.EL.1 ART.III.VA.EL.3 ART.III.VA.EL.4 ART.III.VA.EL.5 ART.V.VA.EL.1 V. Resources The attached images are to be used as visuals either by projecting them directly from the website, power point, or by viewing the actual prints. - Vincent Van Gogh’s Starry Night (France, June 1889) (http://www.vangoghgallery.com/painting/starryindex.html ) - Thomas Cole’s The Oxbow (Massachusettes 1836) (http://www.metmuseum.org/toah/ho/10/na/hod_08.228.htm ) - Images from a Watercolor Blog site to be used as technique examples (http://www.watercolorpaint.info/genres/watercolor/) - Example of a more controlled watercolor from Sandra Martens (http://www.sandramartens.com ) VI. Time Required - One class period (45m) and an additional 15 minutes of the next class period used for discussion. VII. Materials and Preparation - Watercolor - Straws - Paint Brushes (large and small) - Watercolor paper
Transcript of Art Lesson Plan- watercolor - · PDF fileKelly Junis ART 332 Intro to Art Education October...

Kelly Junis
ART 332 Intro to Art Education
October 26, 2008 Art Lesson Plan (Basic Format)
I. Watercolor Landscapes
3rd /4th Grade Lesson #1
II. Focus - Students will begin to discover and explore different watercolor techniques. The final piece should illustrate a wide range of techniques and a piece that is visually interesting.
III. Objectives - To learn different watercolor techniques. - To find inspiration from historical landscapes and from personal
observations. - To understand how personal experiences have an effect on what
individuals create.
IV. Standards and Benchmarks ART.II.VA.EL.1 ART.II.VA.EL.2 ART.II.VA.EL.3 ART.II.VA.EL.4 ART.III.VA.EL.1
ART.III.VA.EL.3 ART.III.VA.EL.4 ART.III.VA.EL.5 ART.V.VA.EL.1
V. Resources
The attached images are to be used as visuals either by projecting them directly from the website, power point, or by viewing the actual prints.
- Vincent Van Gogh’s Starry Night (France, June 1889) (http://www.vangoghgallery.com/painting/starryindex.html)
- Thomas Cole’s The Oxbow (Massachusettes 1836) (http://www.metmuseum.org/toah/ho/10/na/hod_08.228.htm)
- Images from a Watercolor Blog site to be used as technique examples (http://www.watercolorpaint.info/genres/watercolor/ )
- Example of a more controlled watercolor from Sandra Martens (http://www.sandramartens.com)
VI. Time Required - One class period (45m) and an additional 15 minutes of the next class period used for discussion.
VII. Materials and Preparation - Watercolor - Straws
- Paint Brushes (large and small)
- Watercolor paper
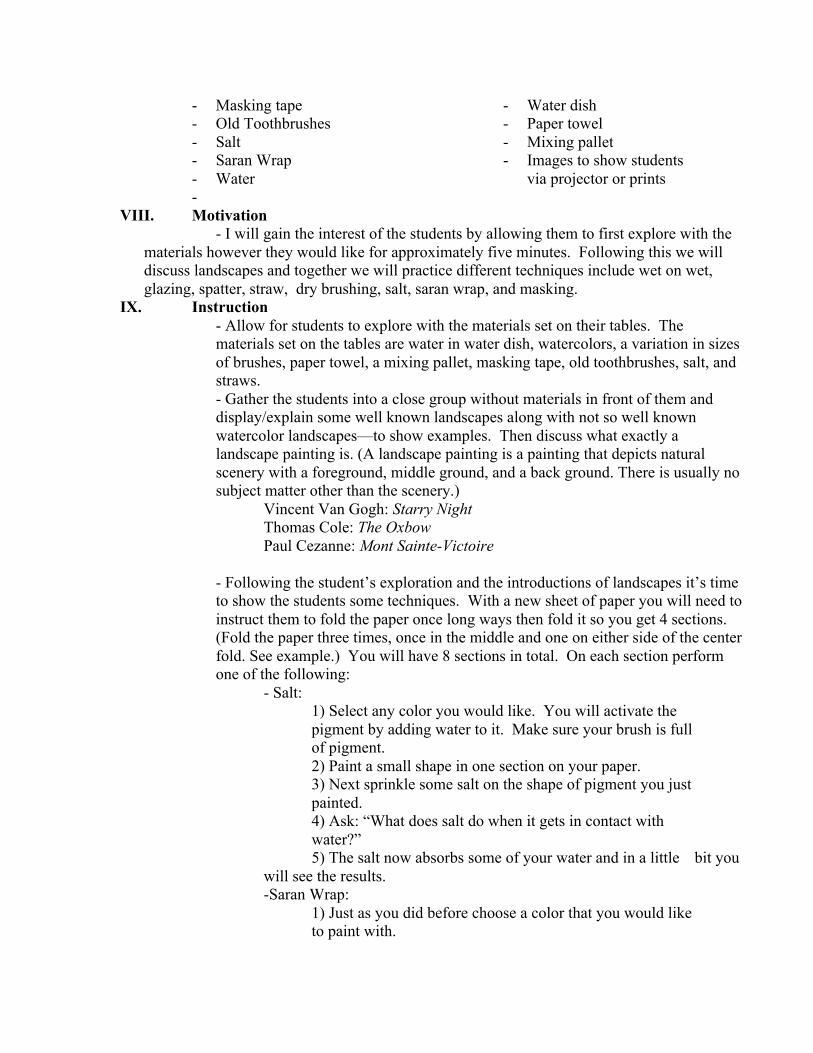
- Masking tape - Old Toothbrushes - Salt - Saran Wrap - Water
- Water dish - Paper towel - Mixing pallet - Images to show students
via projector or prints-
VIII. Motivation - I will gain the interest of the students by allowing them to first explore with the materials however they would like for approximately five minutes. Following this we will discuss landscapes and together we will practice different techniques include wet on wet, glazing, spatter, straw, dry brushing, salt, saran wrap, and masking.
IX. Instruction - Allow for students to explore with the materials set on their tables. The
materials set on the tables are water in water dish, watercolors, a variation in sizes of brushes, paper towel, a mixing pallet, masking tape, old toothbrushes, salt, and straws.
- Gather the students into a close group without materials in front of them and display/explain some well known landscapes along with not so well known watercolor landscapes—to show examples. Then discuss what exactly a landscape painting is. (A landscape painting is a painting that depicts natural scenery with a foreground, middle ground, and a back ground. There is usually no subject matter other than the scenery.)
Vincent Van Gogh: Starry Night Thomas Cole: The Oxbow Paul Cezanne: Mont Sainte-Victoire - Following the student’s exploration and the introductions of landscapes it’s time
to show the students some techniques. With a new sheet of paper you will need to instruct them to fold the paper once long ways then fold it so you get 4 sections. (Fold the paper three times, once in the middle and one on either side of the center fold. See example.) You will have 8 sections in total. On each section perform one of the following:
- Salt: 1) Select any color you would like. You will activate the pigment by adding water to it. Make sure your brush is full of pigment. 2) Paint a small shape in one section on your paper. 3) Next sprinkle some salt on the shape of pigment you just painted. 4) Ask: “What does salt do when it gets in contact with water?” 5) The salt now absorbs some of your water and in a little bit you will see the results. -Saran Wrap: 1) Just as you did before choose a color that you would like to paint with.
2) Paint a small shape about the size of a spoon. 3) Next you need to grab the saran wrap on your table and crumple it up. Now just put your crumpled up saran wrap on top of your pigment. 4) Allow that to sit and dry before you take the saran wrap off. -Masking: 1) Take the masking tape on your table and tear off a few small pieces. 2) Place them in a section on your paper. 3) Choose a color of pigment and paint over your pieces of masking tape. 4) Allow the watercolor to dry before removing the tape.
- Wet on wet: 1) Fill the middle of a section with clean water.
2) Rinse out your brush and dip your brush in whatever color of paint desired. Now just speckle the area of your paper you just put water on. 3) Notice how the paint stays inside your shape and the paint pools at the corners to stop.
- Glazing: 1) Chose a darker color to paint with and paint a small shape in a section of your paper. 2) Allow for that paint to dry. Start another technique if desired in the mean time. 3) Chose a darker color and paint a line directly through the shape you painted. 4) Notice the lighter color still allows some of the darker color through.
- Spatter: 1) Instead of using your paintbrush we are going to use the toothbrush on our table. Place pigment on your toothbrush with your paintbrush. 2) Now you are going to use your finger to speckle another section with paint. 3) Demonstrate to them. - Straw/Blowing: 1) Place a dot of pigment on a clean section of your paper. 2) Grab a straw and begin to blow through it onto the dot of pigment. - Dry Brush: 1) Lastly take your paint brush with little pigment on it and wipe even more of it off on the paper towel. 2) Once it feels close to dry begin to paint in the last section on your page.
- Now the students can continue to experiment on a new sheet of paper by illustrating their own landscape but they must use at least three of the demonstrated techniques.
X. Vocabulary (according to Merriam-Webster Dictionary)
- Landscape “a picture representing a view of natural inland scenery” - Pigment “a substance that imparts black or white or a color to other materials”
- Watercolor “a paint of which the liquid is a water dispersion of the binding material (as glue, casein, or gum)”
XI. Assessment and Evaluation - The painting should illustrate the understanding of at least three of the eight
demonstrated techniques and include a foreground, middle ground, and background. The scene should be from their favorite vacation spot—imaginary or real.
- After everyone’s finished with their landscape they will be displayed for the class at the next meeting. Each student will get five sticky notes to write what they like most about that painting (without know who was the artist of each). Some examples could be:
- the use of foreground, middle ground, and background - similar vacation spot or somewhere where you would like to go. After students select certain work that they are drawn to for different reasons they we can discuss the array of landscapes and how the different techniques were used in a good way in each of the pieces and how personal experiences have effected some students works.
XII. Background Watercolor is usually a media that is less controlled than other painting mediums. Watercolor is activated by adding water to the pigment unlike many other painting materials. The more water you add to pigment the more transparent and lighter the paint becomes. Depending on how watered down you get your pigment you can get something called a watercolor “wash”. A wash has more water than pigment. You can also get your watercolor very dark by adding more pigment than water to your brush. You can sometimes erase areas of color on your paper by just rubbing a clean brush with water over the area of color lightly then you can pick up even more pigment by blotting with paper towel. Depending on the time of day you paint in your landscape can depend on the mood that you give the viewer along with what season you paint. Some examples are painting before or after a storm, winter compared to summer, morning and night, etc. Landscape paintings are done all over the world and by many different artists, it’s a type of painting and is not specific to one time period.
XIII. Extensions or Adaptations for Students with Disabilities

- This could be brought into other disciplines such as a science course and illustrating different plants within the landscape. It could illustrate different climates and what types of plants live in those climates. The landscape could also illustrate different animal environments/habitats. The students could paint a habitat and after cut out construction paper animals or draw different animals that live in that habitat.

“Starry Night”
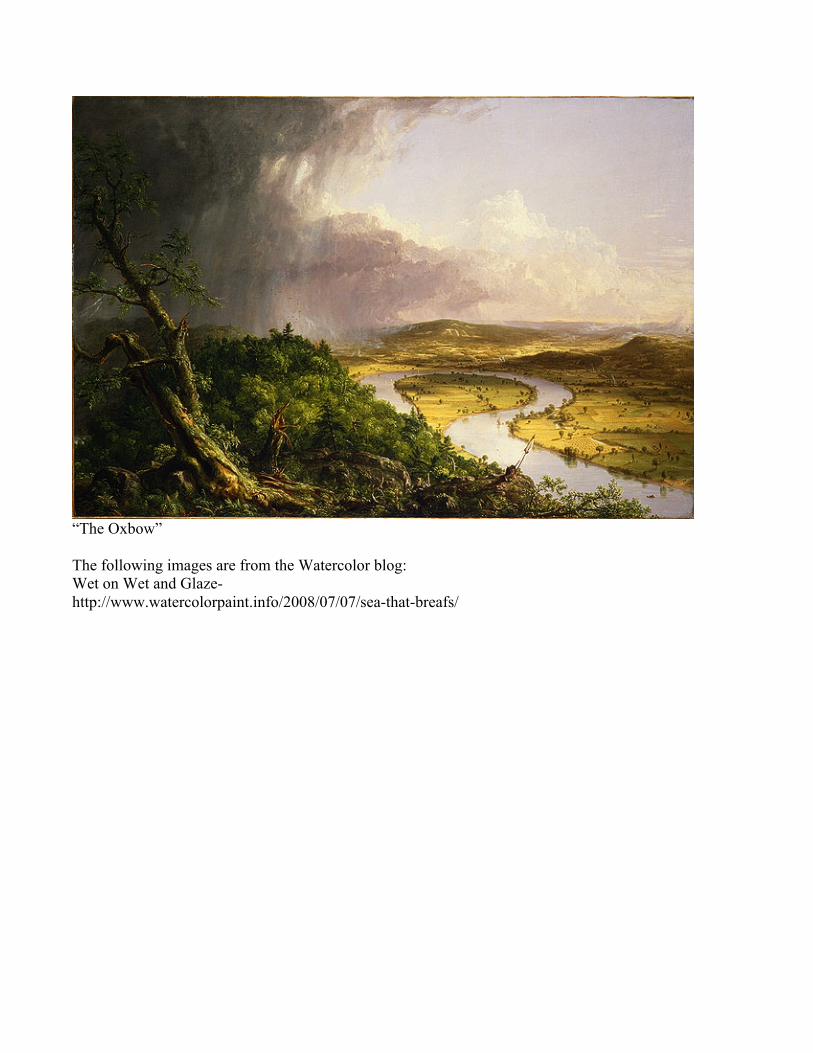
“The Oxbow” The following images are from the Watercolor blog: Wet on Wet and Glaze- http://www.watercolorpaint.info/2008/07/07/sea-that-breafs/
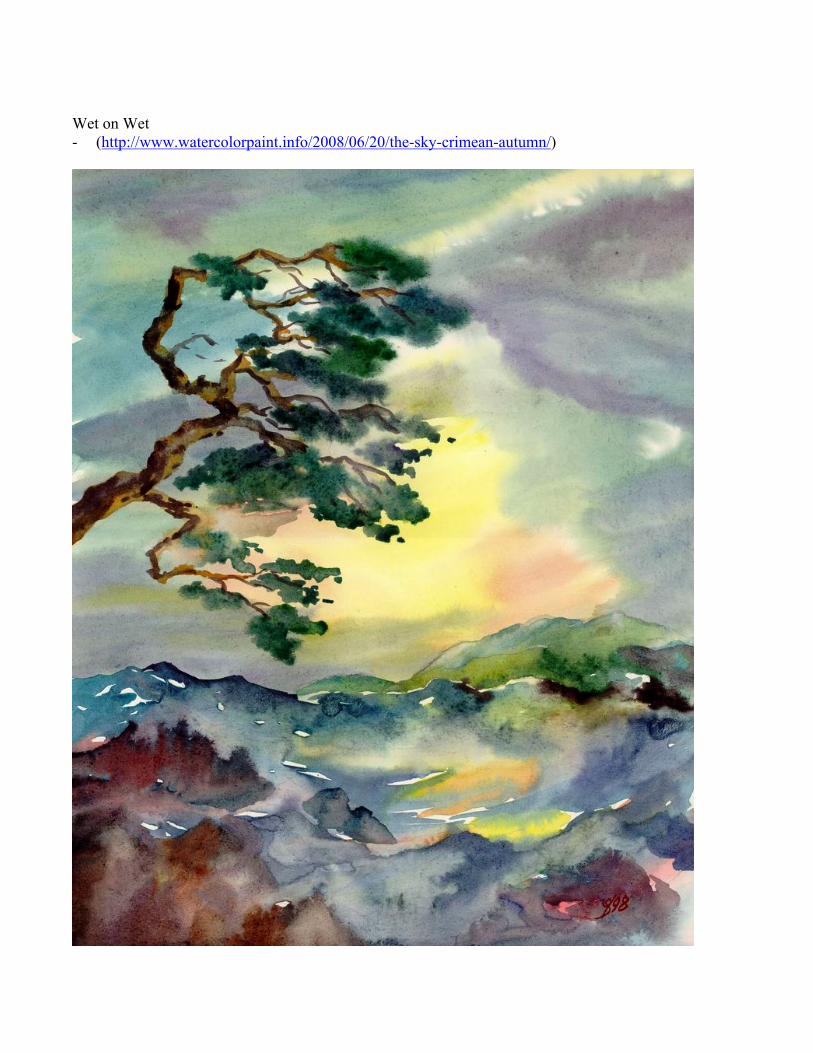
Wet on Wet - (http://www.watercolorpaint.info/2008/06/20/the-sky-crimean-autumn/)

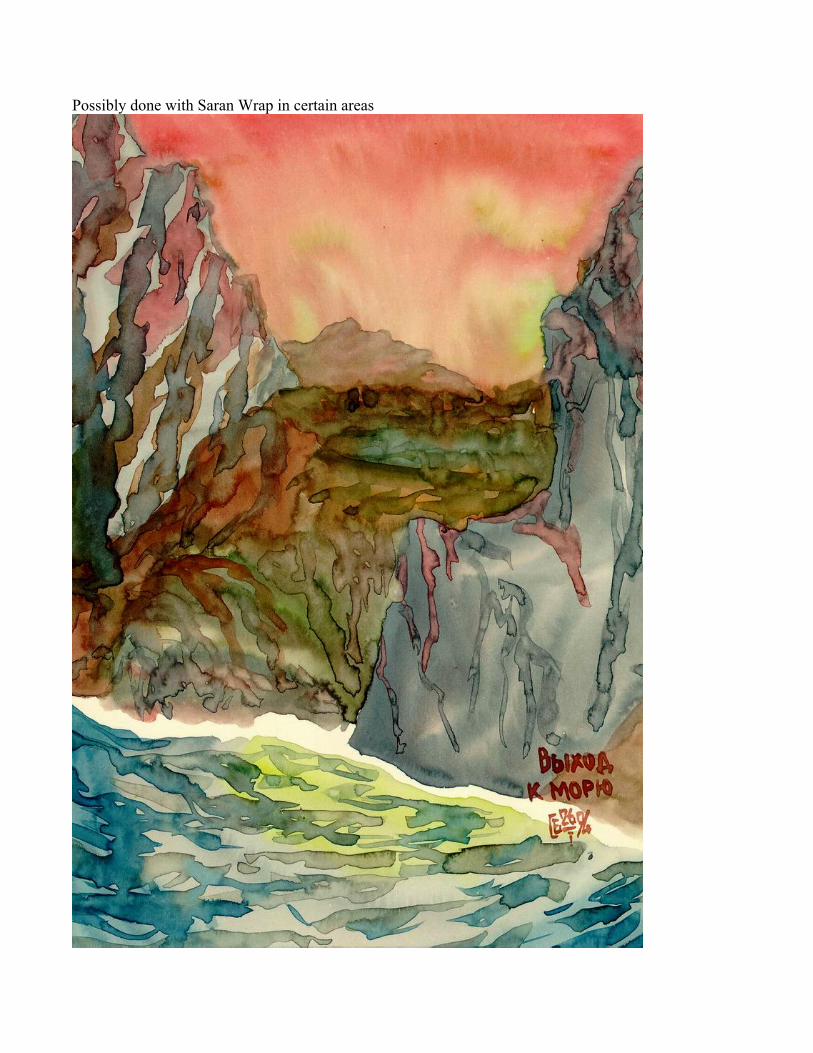
Possibly done with Saran Wrap in certain areas
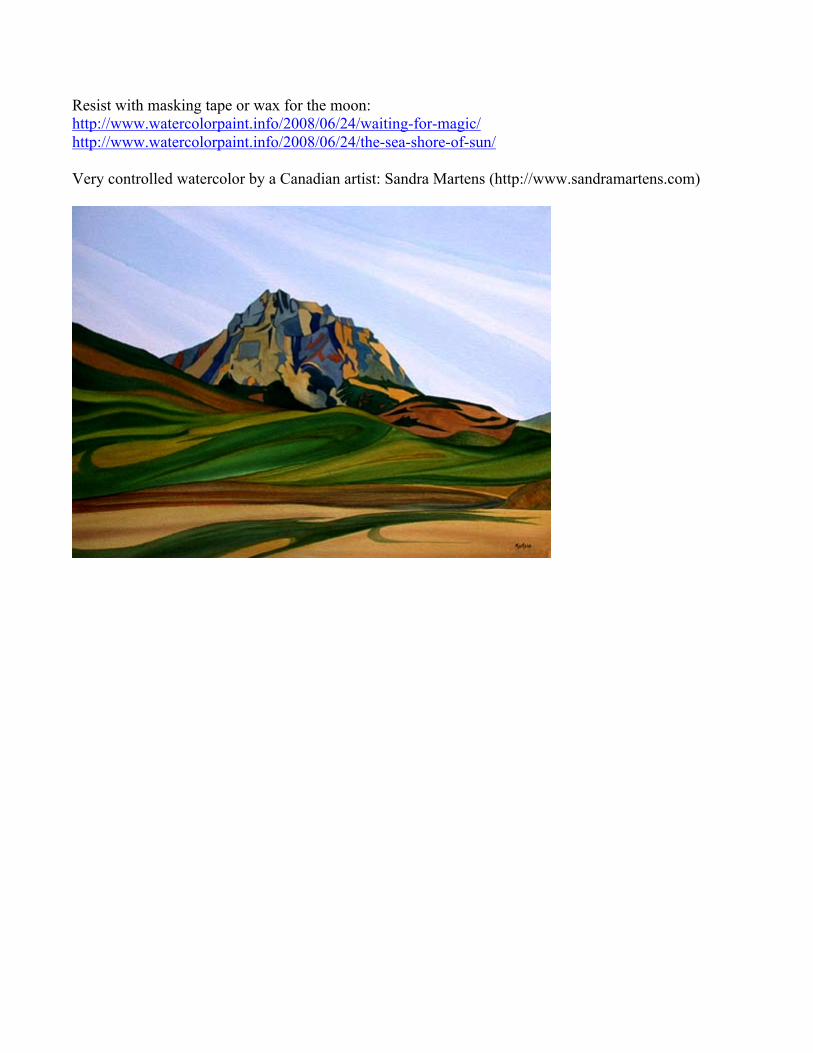
Resist with masking tape or wax for the moon: http://www.watercolorpaint.info/2008/06/24/waiting-for-magic/ http://www.watercolorpaint.info/2008/06/24/the-sea-shore-of-sun/ Very controlled watercolor by a Canadian artist: Sandra Martens (http://www.sandramartens.com)