AirPatrol WiFi Version 2 Full Manual · AirPatrol WiFi Setup 1.1.1 Controller ID In case something...
34
AirPatrol WiFi Version 2 Full Manual for Android V4.2
Transcript of AirPatrol WiFi Version 2 Full Manual · AirPatrol WiFi Setup 1.1.1 Controller ID In case something...

AirPatrol WiFi Version 2 Full Manual
for Android
V4.2

Index • What AirPatrol WiFi does? 3
• Lights and buttons 4
• WiFi Network 5
• Installing AirPatrol Wifi 6 • Quick Setup steps 7 • AirPatrol WiFi setup 8
• Sending commands (low heat mode) 23
• Add / delete favourites 24
• Settings menu 25
• Alarms settings 26
• Local weather report 29
• Timer function / Scheduled events 30
• Celsius / Fahrenheit conversion 33
2
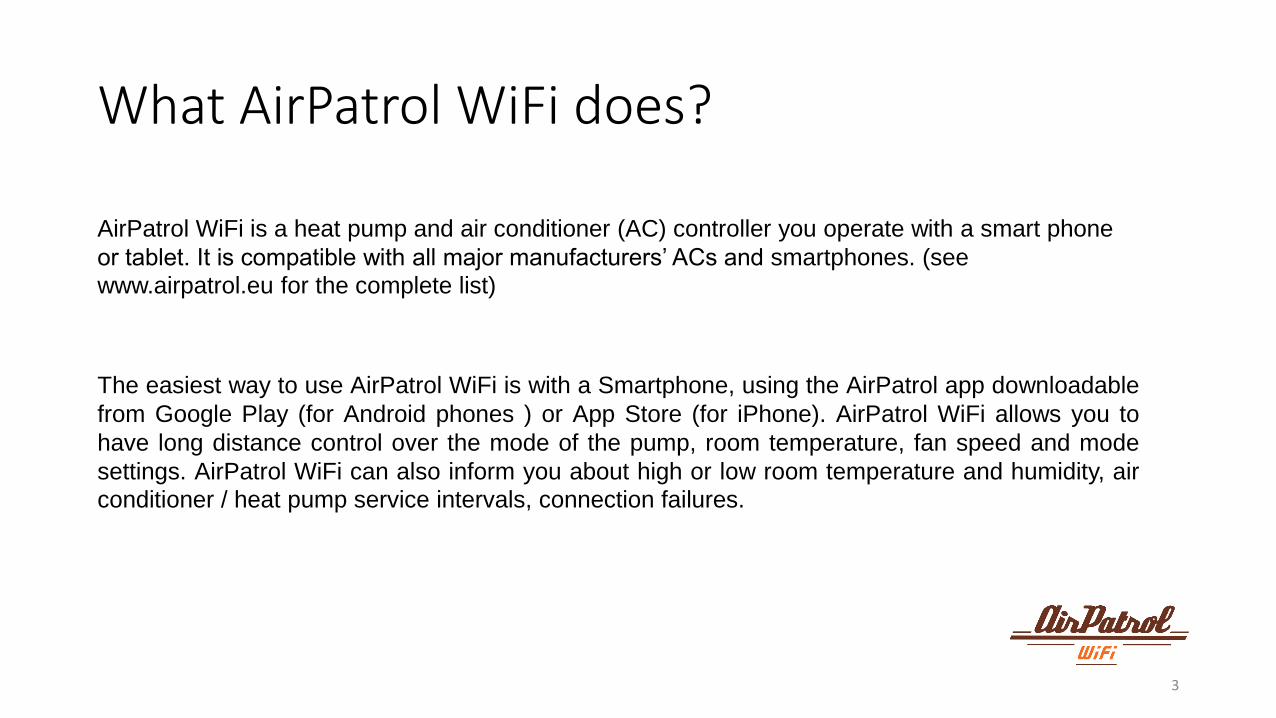
What AirPatrol WiFi does?
3
AirPatrol WiFi is a heat pump and air conditioner (AC) controller you operate with a smart phone
or tablet. It is compatible with all major manufacturers’ ACs and smartphones. (see
www.airpatrol.eu for the complete list)
The easiest way to use AirPatrol WiFi is with a Smartphone, using the AirPatrol app downloadable
from Google Play (for Android phones ) or App Store (for iPhone). AirPatrol WiFi allows you to
have long distance control over the mode of the pump, room temperature, fan speed and mode
settings. AirPatrol WiFi can also inform you about high or low room temperature and humidity, air
conditioner / heat pump service intervals, connection failures.
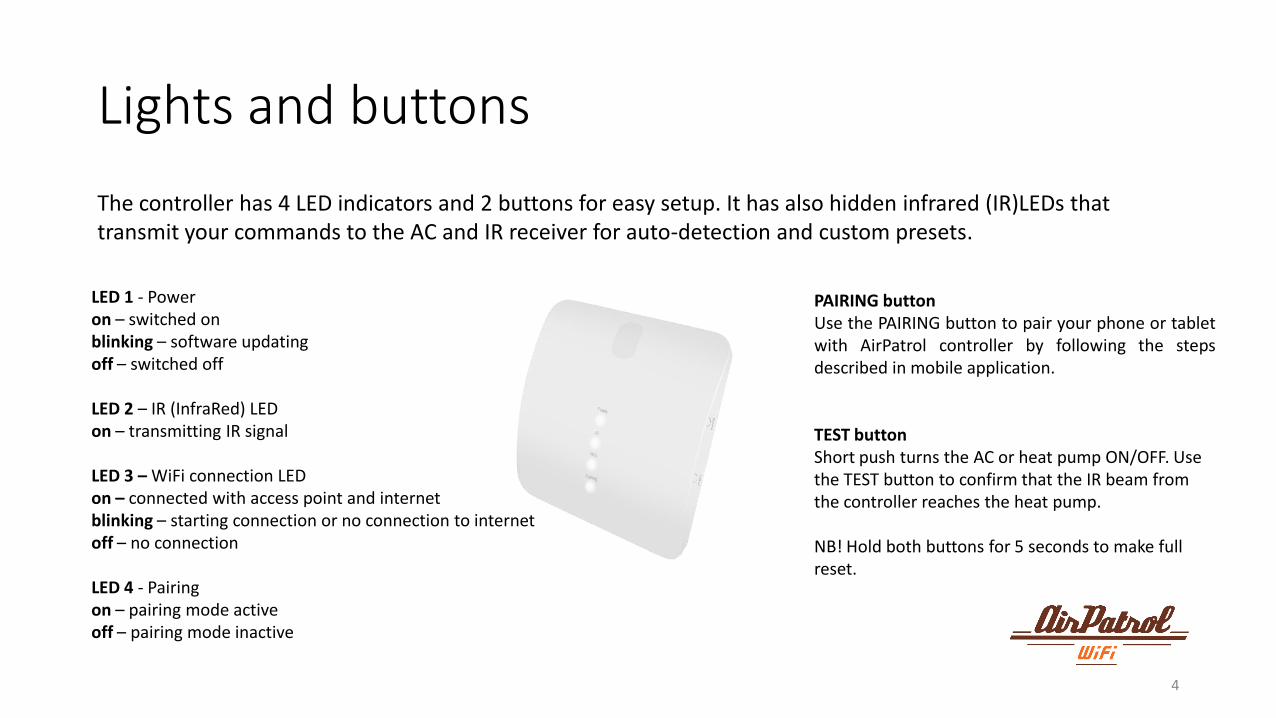
Lights and buttons
4
The controller has 4 LED indicators and 2 buttons for easy setup. It has also hidden infrared (IR)LEDs that transmit your commands to the AC and IR receiver for auto-detection and custom presets.
LED 1 - Power on – switched on blinking – software updating off – switched off LED 2 – IR (InfraRed) LED on – transmitting IR signal LED 3 – WiFi connection LED on – connected with access point and internet blinking – starting connection or no connection to internet off – no connection LED 4 - Pairing on – pairing mode active off – pairing mode inactive
PAIRING button Use the PAIRING button to pair your phone or tablet with AirPatrol controller by following the steps described in mobile application. TEST button Short push turns the AC or heat pump ON/OFF. Use the TEST button to confirm that the IR beam from the controller reaches the heat pump. NB! Hold both buttons for 5 seconds to make full reset.

WiFi Network
• AirPatrol WiFi requires a router that is compatible with IEEE 802.11 b/g/n standards.
• Only IEEE 802.11a/ac (and other, more exotic 802.11) standards are not supported.
• AirPatrol WiFi supports open networks, WEP, WPA-PSK and WPA2-PSK security modes
• Only 2.4GHz band is supported (5GHz band is not supported)
• Make sure you have good WiFi signal at the location you are installing AirPatrol controller.
5

Installing AirPatrol WiFi
6
AirPatrol WiFi should be mounted near AC’s or heat pump’s indoor unit, with its IR transmitter pointing to the unit. This way the IR beam reaches the AC’s sensor most efficiently. All mounting configurations are possible as long as IR transmission from the controller to the pump works. NB! Thick carpets and dark floors can distort the IR beam. Make sure the IR beam reaches the pump’s sensor by using the controller’s Test function. To see if AirPatrol WiFi can send commands to your AC or heat pump, turn off the pump and press the controller’s TEST button. When the connection is established, AirPatrol WiFi turns the pump on with its last settings and you can proceed using the controller.
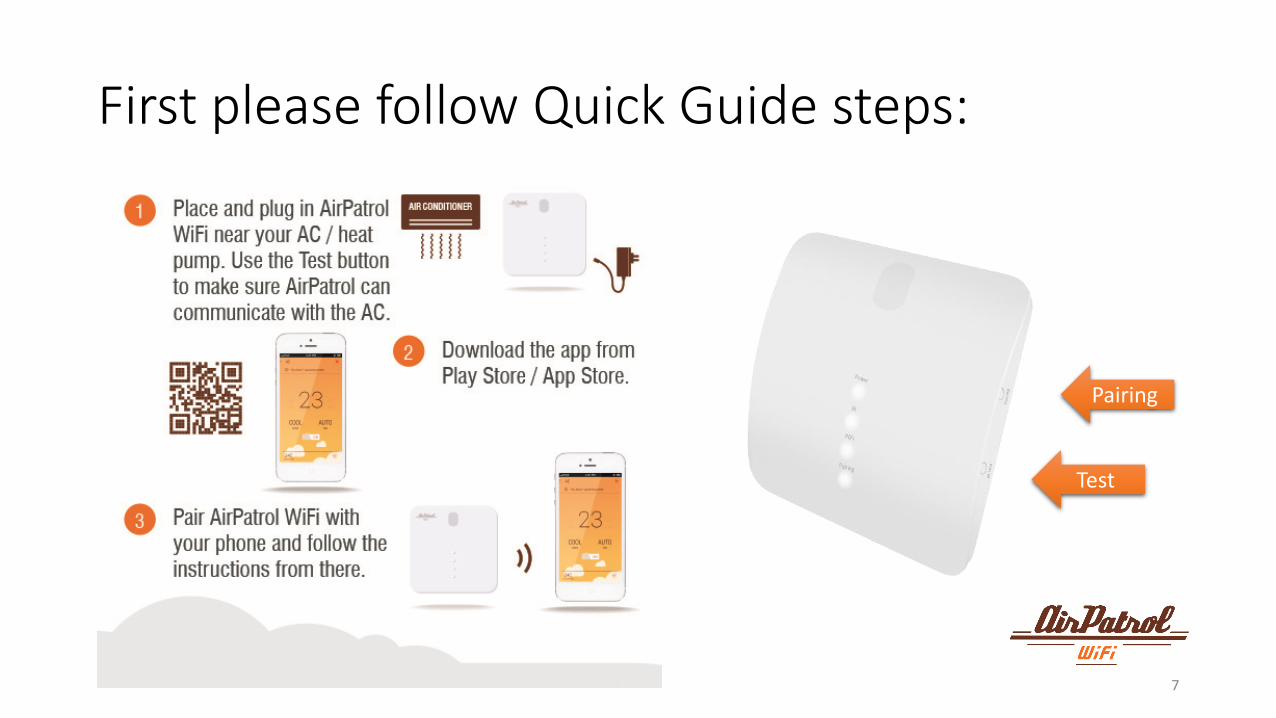
First please follow Quick Guide steps:
7
Pairing
Test

AirPatrol WiFi Setup Start AirPatrol app and choose WiFi as controller type.
8

AirPatrol WiFi Setup 1 Controller ID Scan the QR code under your AirPatrol WiFi controller.
Do not worry if you cannot read the QR code, you can enter the ID manually.
9

AirPatrol WiFi Setup 1.1 Controller ID App will notify you if QR code scanning was successful and you can proceed to the next step.
10

AirPatrol WiFi Setup 1.1.1 Controller ID In case something went wrong or you are unable to scan QR code you can either choose scan again or enter ID manually.
1.1.2 Controller ID Entering ID manually - please type the ID code of your cont-roller. It is located under the controller just below the QR code.
11
In case QR code scanning was unsuccessful:
Manually choose your controller hardware version from drop down list.
1.1.3 Controller ID

AirPatrol WiFi Setup 2 Connecting to WiFi & pairing Select WiFi for your AirPatrol controller.
This is the WiFi network your AirPatrol controller will use for communication (for example your home WiFi)
12

AirPatrol WiFi Setup 2.1 Connecting to WiFi & pairing
The app will check if you are already connected to WiFi network and suggests to connect to this network or change to another WiFi network.
13

AirPatrol WiFi Setup 2.2 Connecting to WiFi & pairing You will be then asked to enter your WiFi network password.
In case you do not have a password protected network then leave it empty.
14
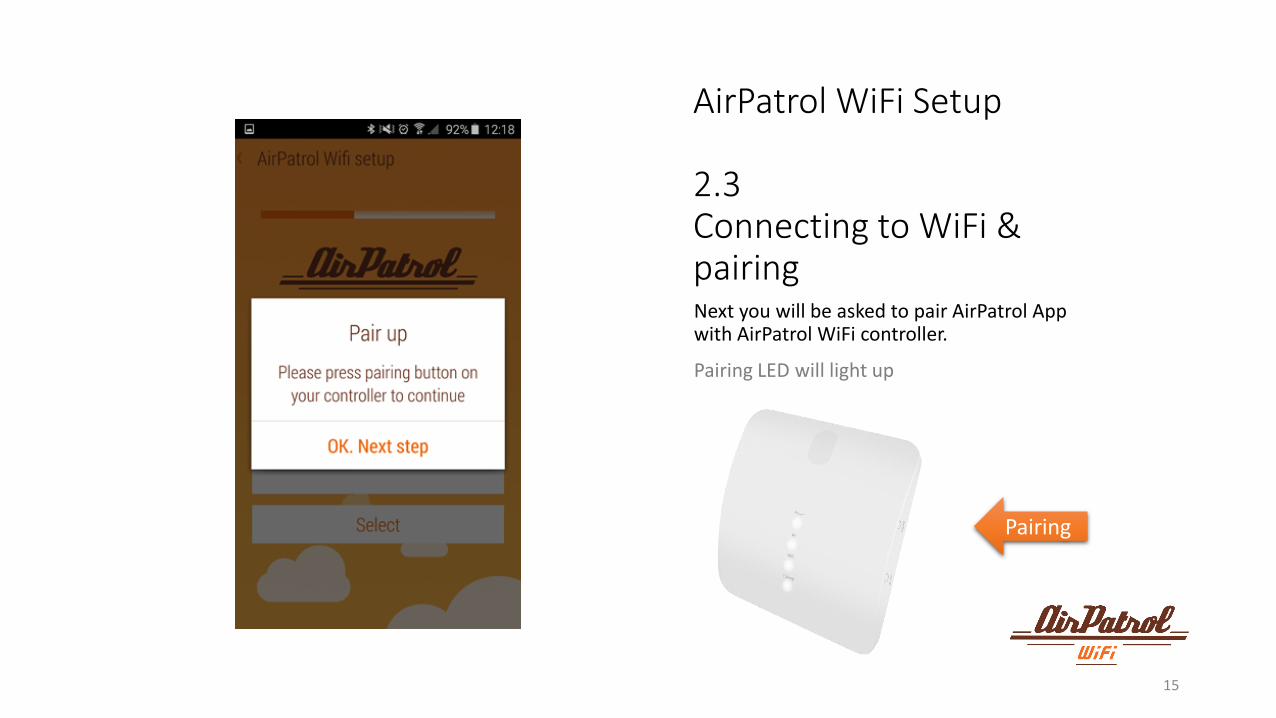
AirPatrol WiFi Setup 2.3 Connecting to WiFi & pairing Next you will be asked to pair AirPatrol App with AirPatrol WiFi controller.
Pairing LED will light up
15
Pairing
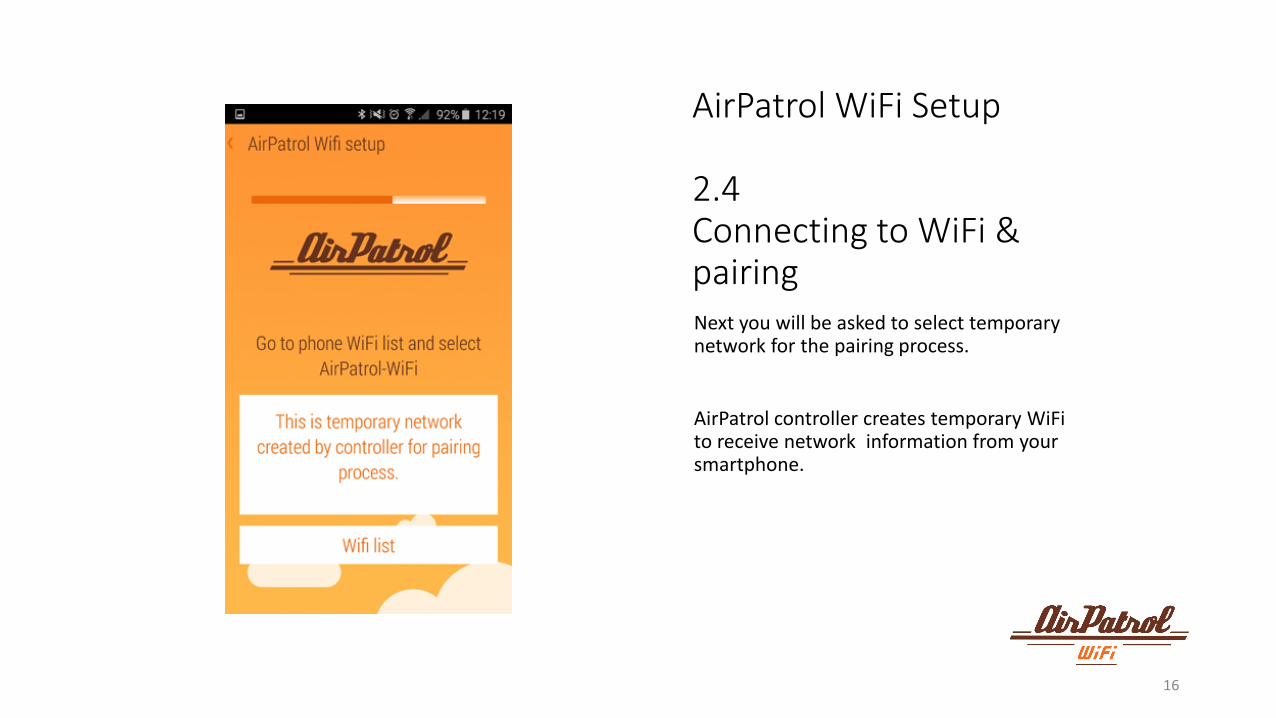
AirPatrol WiFi Setup 2.4 Connecting to WiFi & pairing Next you will be asked to select temporary network for the pairing process.
AirPatrol controller creates temporary WiFi to receive network information from your smartphone.
16

AirPatrol WiFi Setup
Next choose the temporary WiFi network created by the controller.
17
After connection is estab-lished return to AirPatrol app by pressing the BACK button.
2.5 Connecting to WiFi & pairing
In the app press the Connect button. WiFi LED will turn on.

AirPatrol WiFi Setup 2.6 Connecting to WiFi & pairing AirPatrol controller is now connecting to WiFi network.
After that your controller starts pairing with your smartphone.
18

AirPatrol WiFi Setup 2.7 Connecting to WiFi & pairing
If the pairing process failed then:
A) Check that WiFi password was entered correctly.
OR
B) Activate WPS on your WiFi router and press pairing button on your AirPatrol controller.
19
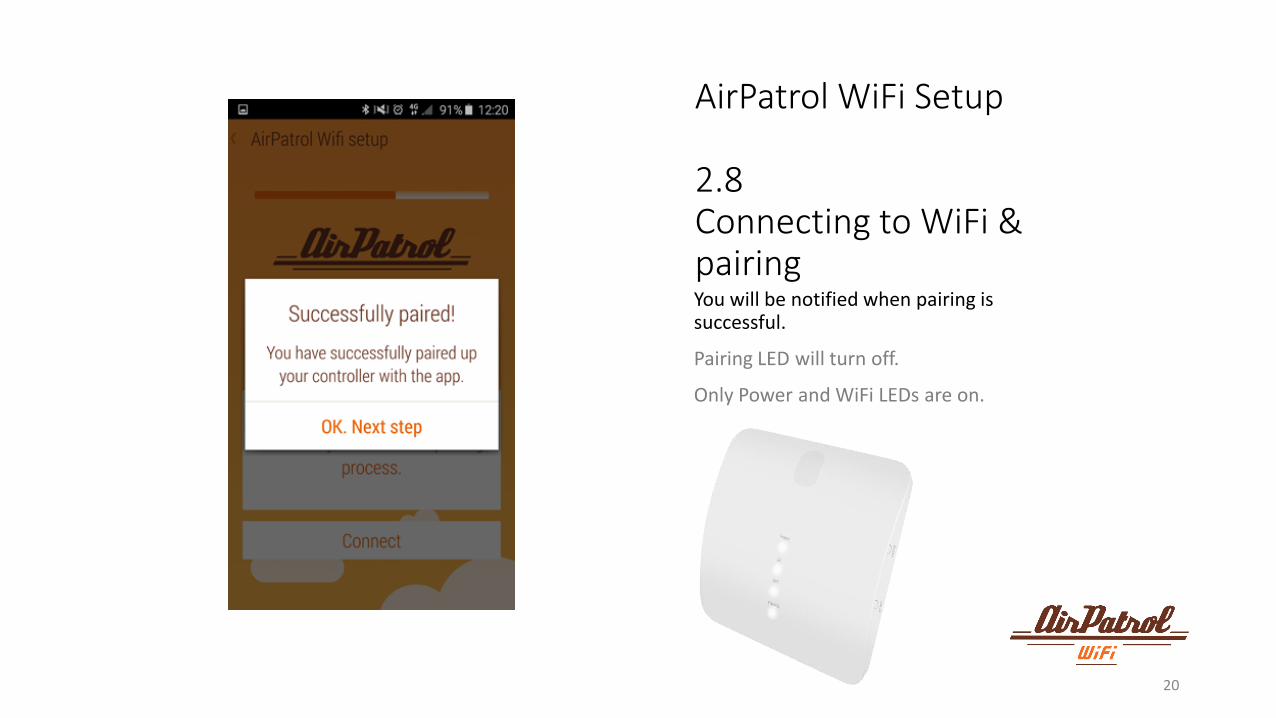
AirPatrol WiFi Setup 2.8 Connecting to WiFi & pairing You will be notified when pairing is successful.
Pairing LED will turn off.
Only Power and WiFi LEDs are on.
20

AirPatrol WiFi Setup 3 Information In the last step you are asked to select your AC brand, model and give it a name.
After that press DONE.
21
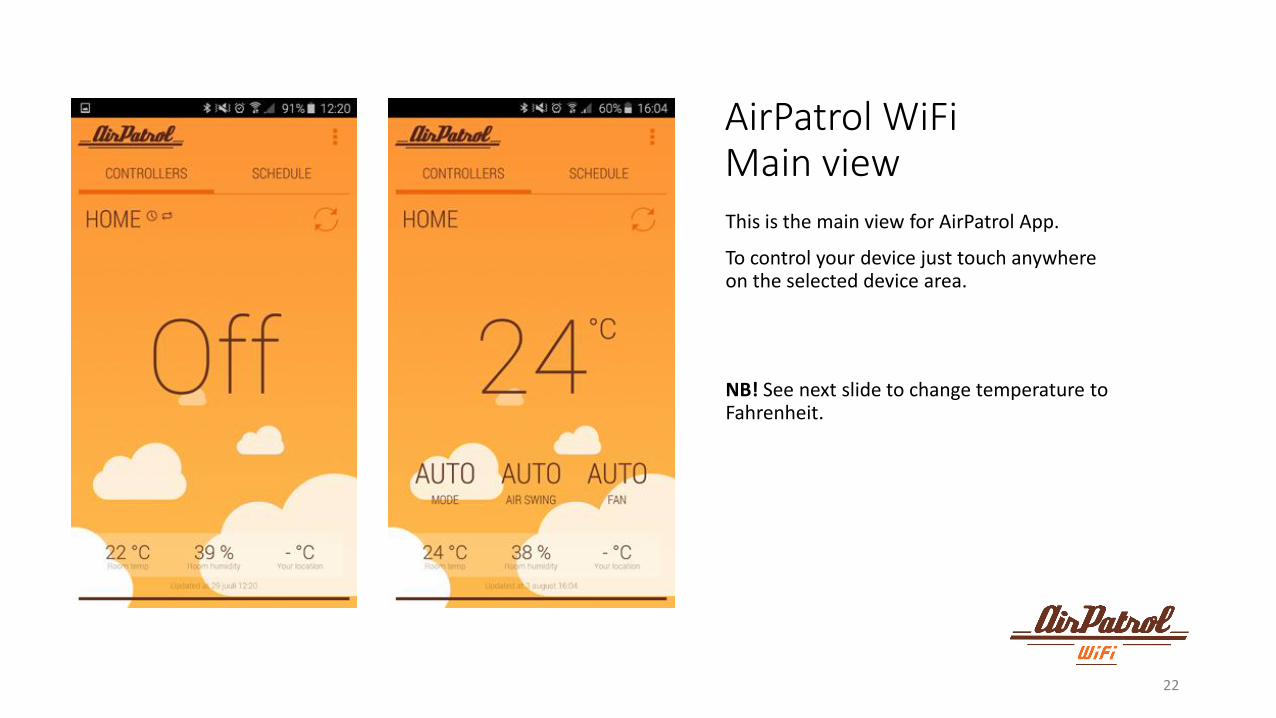
AirPatrol WiFi Main view This is the main view for AirPatrol App.
To control your device just touch anywhere on the selected device area.
NB! See next slide to change temperature to Fahrenheit.
22

Sending commands
23
Sending commands is easy, just select your desired settings and push send button. For example setting LOW HEAT mode:
1. Make sure the ON/OFF switch is ON
2. Select MODE and LOW HEAT
3. Press SEND button
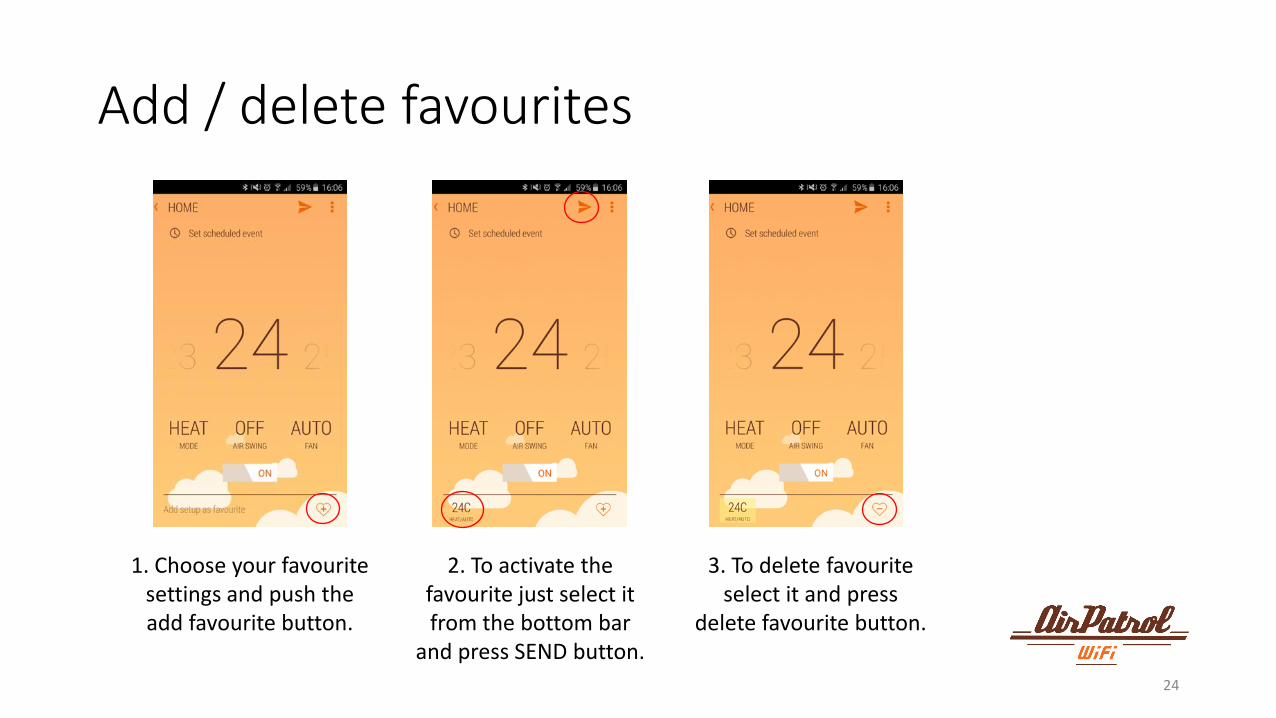
Add / delete favourites
24
1. Choose your favourite settings and push the add favourite button.
2. To activate the favourite just select it from the bottom bar
and press SEND button.
3. To delete favourite select it and press
delete favourite button.
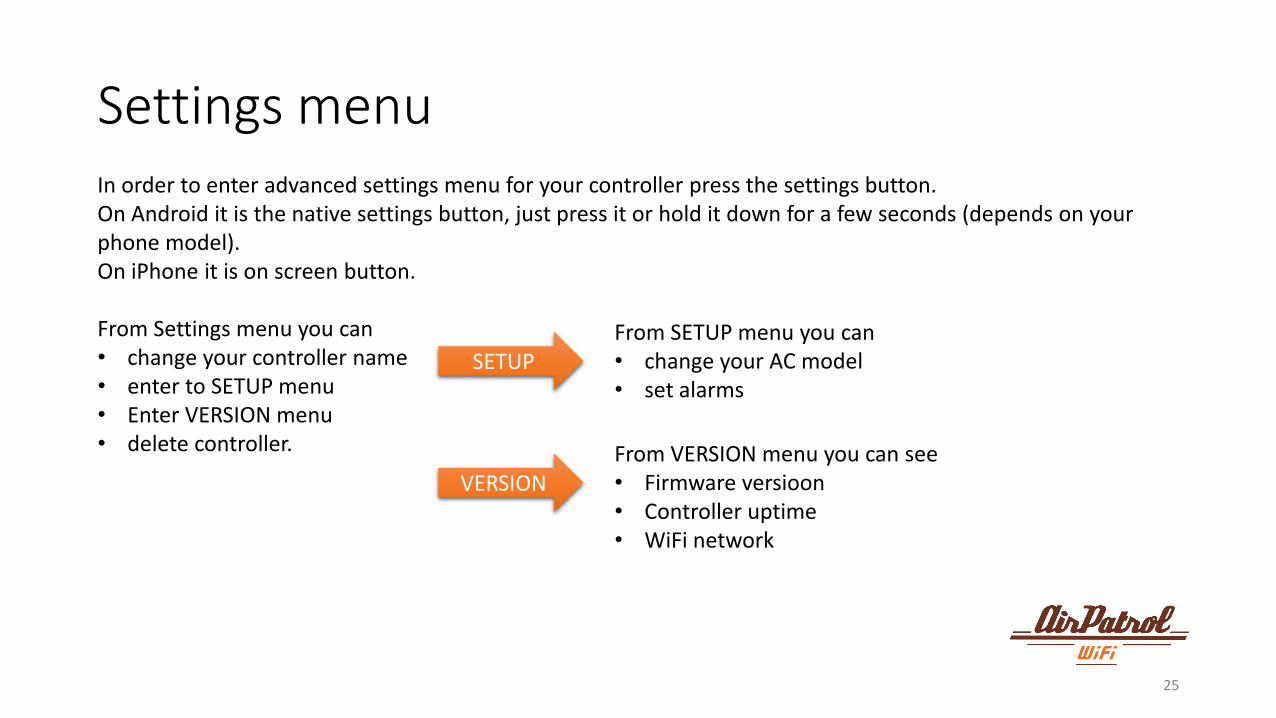
Settings menu
25
In order to enter advanced settings menu for your controller press the settings button. On Android it is the native settings button, just press it or hold it down for a few seconds (depends on your phone model). On iPhone it is on screen button. From Settings menu you can • change your controller name • enter to SETUP menu • Enter VERSION menu • delete controller.
From VERSION menu you can see • Firmware versioon • Controller uptime • WiFi network
From SETUP menu you can • change your AC model • set alarms
SETUP
VERSION

26
First go to settings menu (see page 25). From Settings menu select SETUP.
Alarms settings 1 Alarms menu

27
All alarms are set OFF by default. In order to turn alarm ON just press on it and remove the tick from "Alarm disabled" box. After that you can scroll to the temperature that you would like to set the alarm trigger.
Alarms settings 2 Alarms setup

28
After setting an alarm it will be displayed in alarms menu as well. To confirm all settings press Apply changes. All values are then sent to the controller and are applied.
Alarms settings 3 Alarms setup

29
To see local weather report press on the temperature value next to humidity. You are then able to search your local region or any other location you like. The region you selected will be shown in more detail and also later on main view.
Local weather report
30
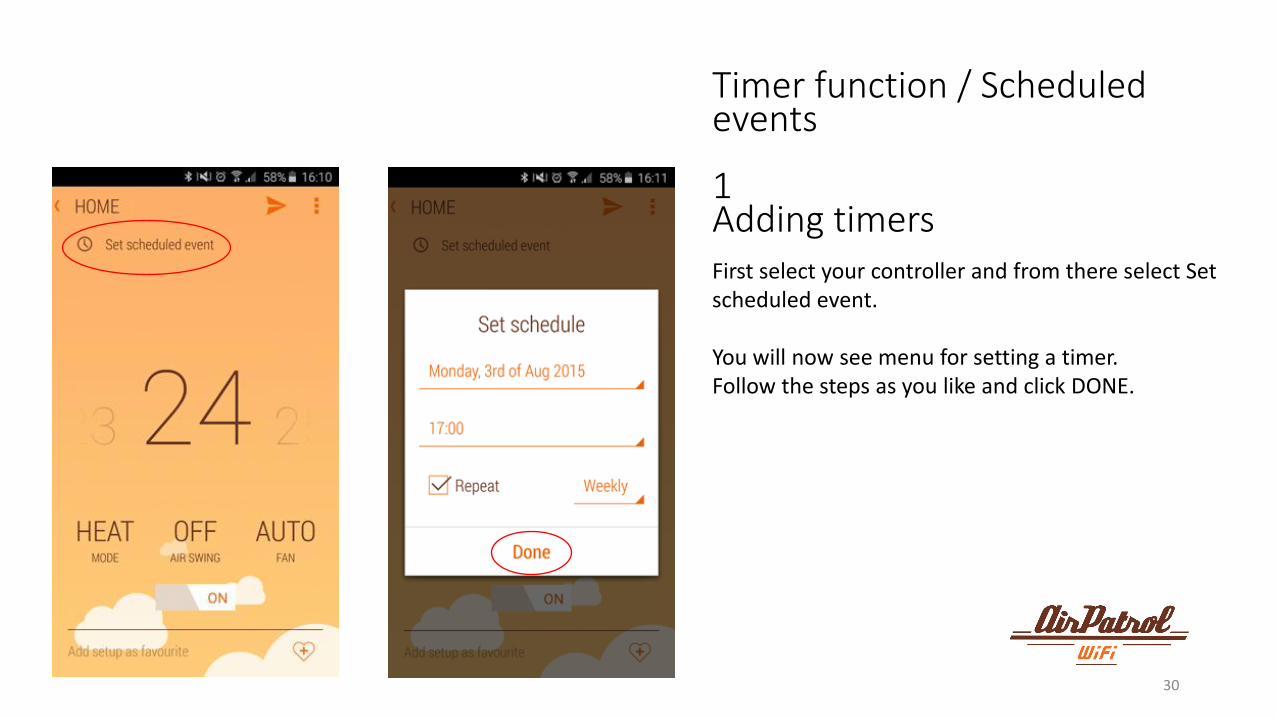
First select your controller and from there select Set scheduled event. You will now see menu for setting a timer. Follow the steps as you like and click DONE.
Timer function / Scheduled events 1 Adding timers
31
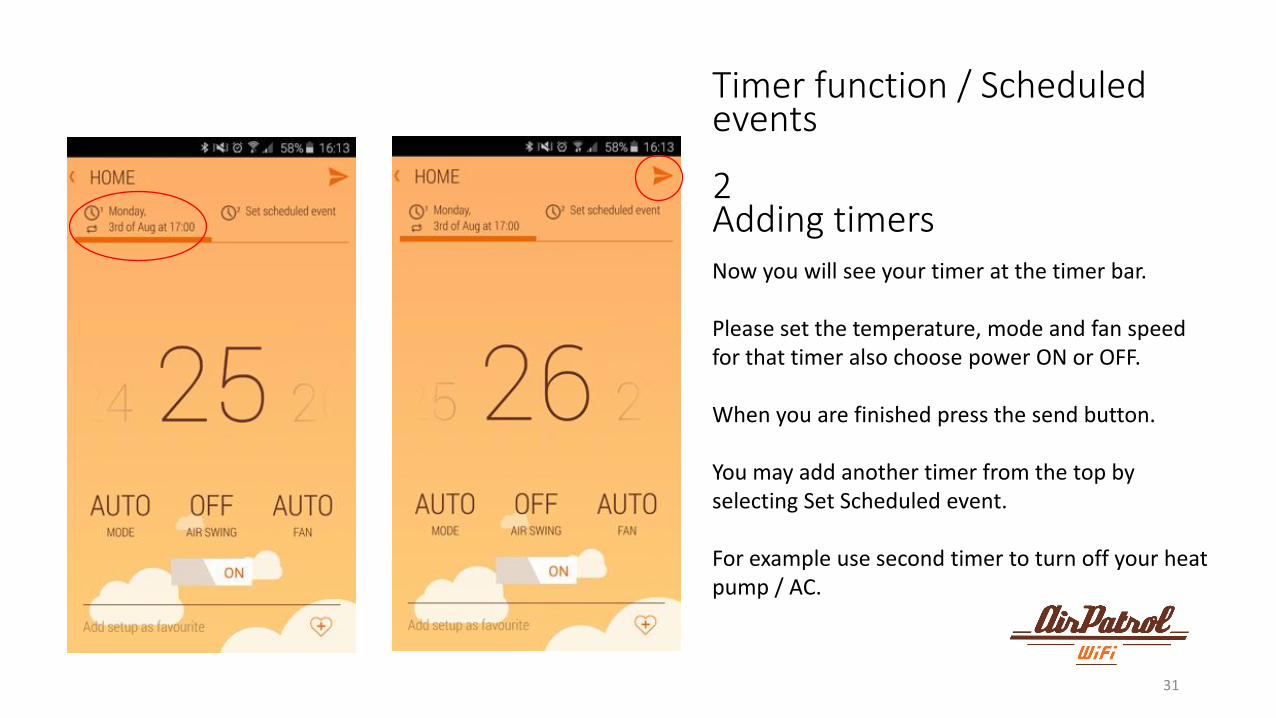
Now you will see your timer at the timer bar. Please set the temperature, mode and fan speed for that timer also choose power ON or OFF. When you are finished press the send button. You may add another timer from the top by selecting Set Scheduled event. For example use second timer to turn off your heat pump / AC.
Timer function / Scheduled events 2 Adding timers

32
Timer function / Scheduled events 2 Adding timers Timers can be adjusted any time by clicking on the schedule bar. A symbol is displayed on main screen to remind you about upcoming and / or reoccurring timers.
33
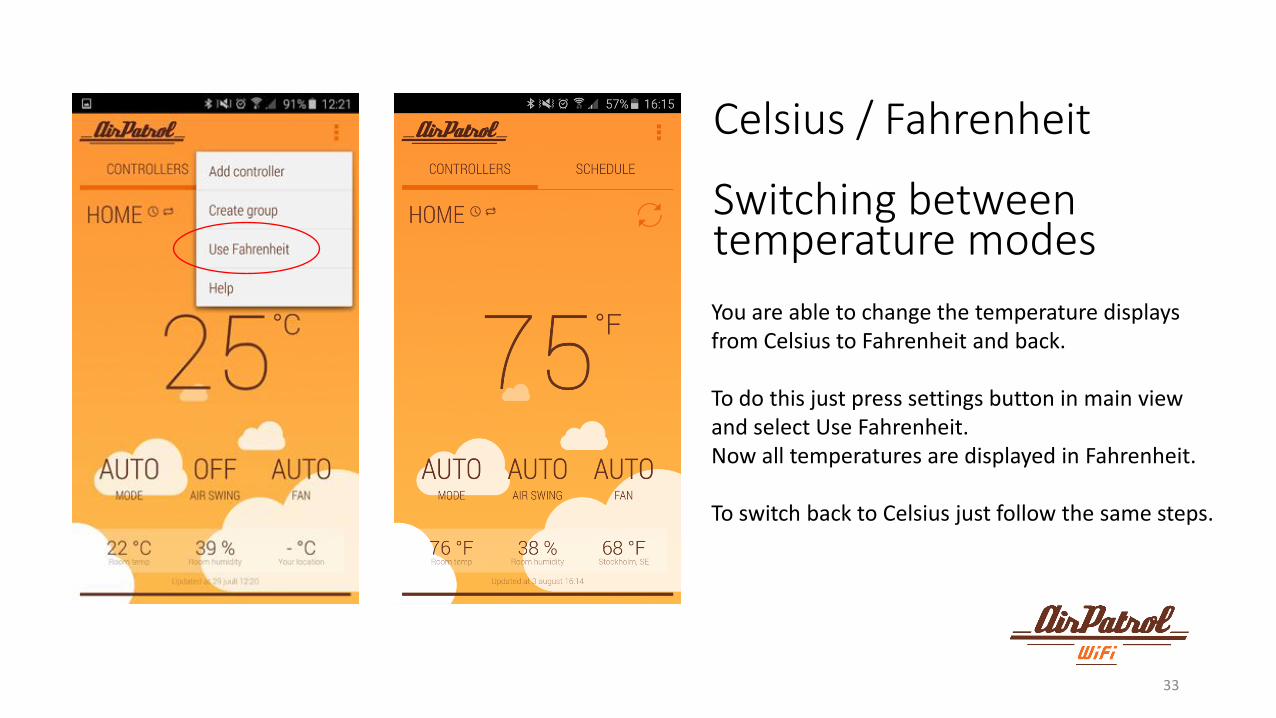
You are able to change the temperature displays from Celsius to Fahrenheit and back. To do this just press settings button in main view and select Use Fahrenheit. Now all temperatures are displayed in Fahrenheit. To switch back to Celsius just follow the same steps.
Celsius / Fahrenheit Switching between temperature modes

Thank you! SAVE MONEY, GAIN COMFORT
For more materials and support visit:
www.airpatrol.eu/support