Presentation: Comprehensive Policies & Procedures Information Resources UNIT.
Upload
marticiabanesCategory
view
1.695download
0
Air2Web, Inc.Air2Web, Inc.Human Resources Human Resources ProceduresProcedures

1. Introduction
1.2 PURPOSE
The purpose of this document is to provide detail information on the procedure of Recruiting potential candidates, New Hire Setup with in the ADP HRB web access, termination process, HRB primary maintenance procedure, ADP Payroll instructions, and FMLA and STD descriptions.
1.3 AUDIENCE
This document is intended to be used by Air2Web Human Resources Administrators. It will provide a consistent framework for human resources procedures moving forward.
2. Human Resources Department
The Human Resources Department provides strategic and operational services which support our business, resulting in a timely delivery of solutions that enable organizational success. The goals includes be an advisor/consultant, change agent and Strategic Partners to our clients (employees and management). The goals of the HR team are as follows:
Operational - Staffing/Recruitment- Benefits Administration- Candidate Screening- New Hire Orientation- Resignation/Terminations- Policy Interpretation- Records Management- Employee Consultation- Management Coaching- HRIS System Administration
Strategic- Leadership Development- Employee Development- Policy Development- Succession Planning- HRIS System Improvement- Employee Retention- Benchmarking- Strategic Recruitment- Recognition and Celebration
3. Recruiting
2
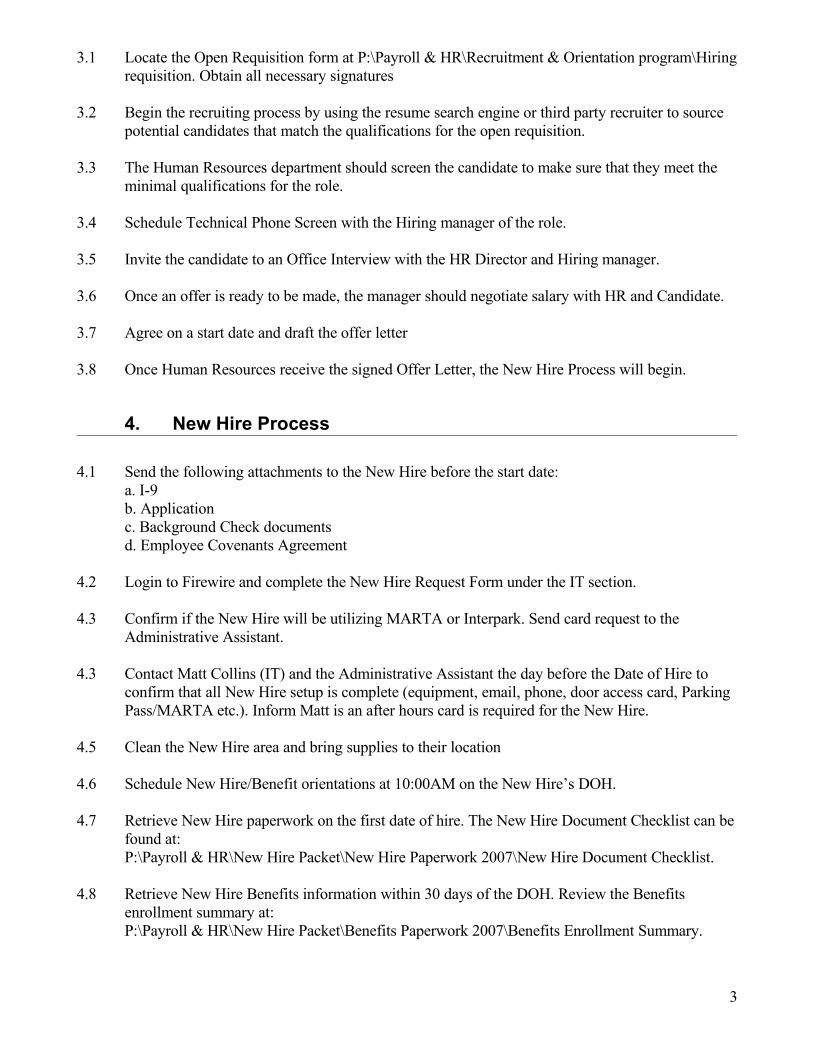
3.1 Locate the Open Requisition form at P:\Payroll & HR\Recruitment & Orientation program\Hiring requisition. Obtain all necessary signatures
3.2 Begin the recruiting process by using the resume search engine or third party recruiter to source potential candidates that match the qualifications for the open requisition.
3.3 The Human Resources department should screen the candidate to make sure that they meet the minimal qualifications for the role.
3.4 Schedule Technical Phone Screen with the Hiring manager of the role.
3.5 Invite the candidate to an Office Interview with the HR Director and Hiring manager.
3.6 Once an offer is ready to be made, the manager should negotiate salary with HR and Candidate.
3.7 Agree on a start date and draft the offer letter
3.8 Once Human Resources receive the signed Offer Letter, the New Hire Process will begin.
4. New Hire Process
4.1 Send the following attachments to the New Hire before the start date:a. I-9b. Applicationc. Background Check documentsd. Employee Covenants Agreement
4.2 Login to Firewire and complete the New Hire Request Form under the IT section.
4.3 Confirm if the New Hire will be utilizing MARTA or Interpark. Send card request to the Administrative Assistant.
4.3 Contact Matt Collins (IT) and the Administrative Assistant the day before the Date of Hire to confirm that all New Hire setup is complete (equipment, email, phone, door access card, Parking Pass/MARTA etc.). Inform Matt is an after hours card is required for the New Hire.
4.5 Clean the New Hire area and bring supplies to their location
4.6 Schedule New Hire/Benefit orientations at 10:00AM on the New Hire’s DOH.
4.7 Retrieve New Hire paperwork on the first date of hire. The New Hire Document Checklist can be found at:P:\Payroll & HR\New Hire Packet\New Hire Paperwork 2007\New Hire Document Checklist.
4.8 Retrieve New Hire Benefits information within 30 days of the DOH. Review the Benefits enrollment summary at:P:\Payroll & HR\New Hire Packet\Benefits Paperwork 2007\Benefits Enrollment Summary.
3

5. New Hire Workflow in HRB and PayExpert
5.1 Once you login click on add ee at the top right on under the Employee tab of HRB.
5.2 Complete the New Hire Wizard by selecting next at the end of each screen once all required fields are complete.
4

5.3 Once you have completed the Wizard, click the Reports To tab(edit) under the New Hire’s name.
5.4 Input the DOH and the New Hire’s Manager data in the Reports To page.
5.5 Click the Earnings tab and input the salary, bonus, and other compensation data in the necessary fields.
5

5.6 Setup the Employee Self Service Access for the New Hire.
5.7 Send an email to the New Hire that includes their User Name and Password for Employee Access. Inform the New Hire that they have 30 days to make benefit elections on Employee Access. Human Resources will then approve their requested benefits.
6

5.8 Review and confirm that all elected benefits are correct under the Benefits tab.
5.8 After the connection file to PayExpert. Confirm that all New Hire data was loaded correctly.
5.9 Under the menu tab, input the Tax and Direct Deposit data.
6. Termination Process
Voluntary and Involuntary Termination
6.1 Once you have received the termination notice, complete a status change in HRB.
7

6.2 Complete the Termination Wizard
6.3 Select Terminate benefits as of the action effective date based on the plan termination rules which is the end of the month following termination.
6.4 Record a COBRA Event if the employee has medical benefits. Fax the Generated COBRA form to Infinisource 517-279-9420 Fax # for Forms
8

6.5 For COBRA enrollees, change their Corporate Group Class to COBRA. Then Under Benefits select the elected COBRA benefits.
9

6.6 Inform JSL Administrators (Flexible Spending Account) of the term date if enrolled in FSA: Julie Allison 770-683-1146.
6.7 Archive employee in HRB.
6.8 Provide the Terminated Employee with the Exit Questionnaire and 401K Payout Notice/Form.
6.9 For Involuntary Terminations, complete/distribute the following:P:\Payroll & HR\Terminations\Term Docs\Employee Termination Checklist
Name: Department: Effective Date: Current Address: Include date of completion for each action item. Verify Address and Personal Email.
COBRA Communication
401K Communication
Georgia Unemployment Insurance
Cope with Change Document
DOL Separation Notice
10

Termination Letter
Termination Report
Severance Pay Agreement upon signature execution (if applicable)
o Period:
o Amount:
o Cobra Reimbursement:
ADP (turn off automatic pay)
HRB Update (BCBS Update)
Send COBRA Notification
Terminate Flexible Spending Account
Devices and/or Equipment Returned (if applicable). Coordinate with IT Dept.
o Laptop (check the purchase order sheet to see if he/she owns a company laptop):
o Cell Phone:
o Other:
Badges Returned (parking and building). Coordinate with front desk.
7. Payroll Instructions Overview
Payroll is processed on a bi-weekly basis (pay-out on Friday’s). There are 26 pay periods each year. The following is a general list of procedures:
1. On Wednesday, of a payroll week, log into ADP and make any additions/modifications base on
the Payroll Actions spreadsheet.
2. The detail instructions of how to access ADP and step-by-step instructions are listed below.
3. On Wednesday, continue to make any changes and enter the hourly timesheets. Calculate the
hours for non-exempt employees. Calculate retroactive payments and other salary adjustments.
Calculate prorates for New Hires. Note: No timesheets will be accepted on Wednesday on a
payroll week.
4. Payroll is submitted to ADP to generate the payroll preview, which takes about 20 minutes.
11
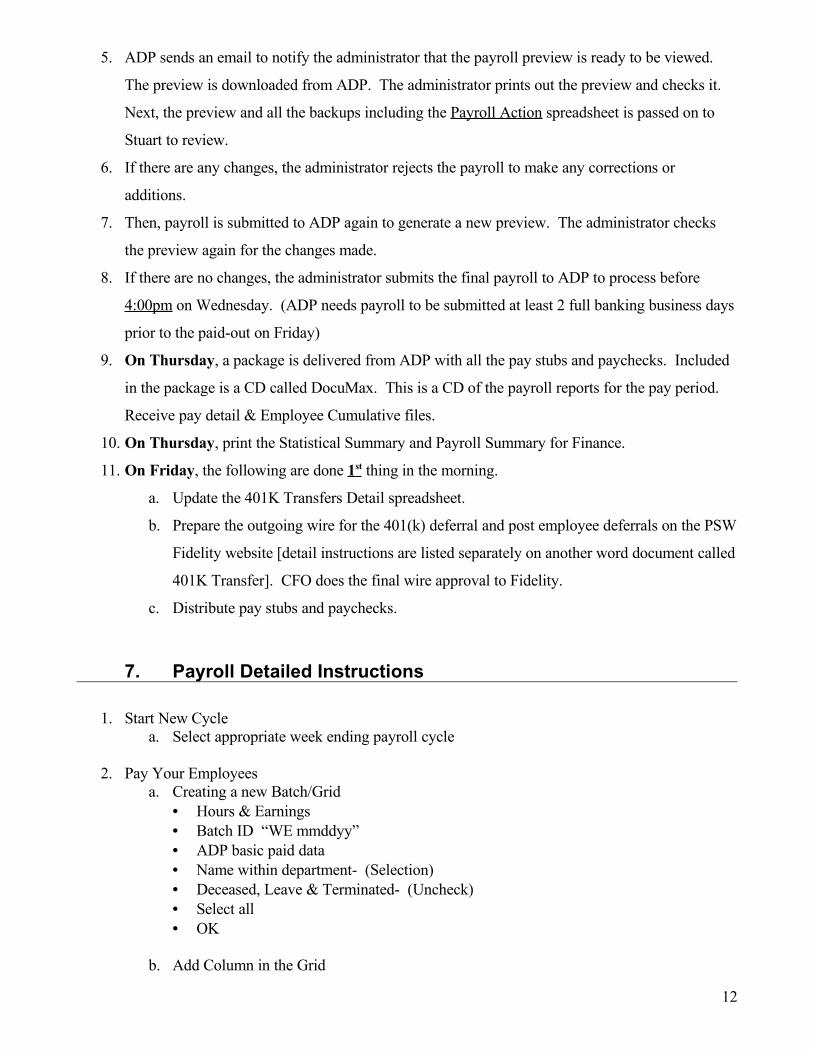
5. ADP sends an email to notify the administrator that the payroll preview is ready to be viewed.
The preview is downloaded from ADP. The administrator prints out the preview and checks it.
Next, the preview and all the backups including the Payroll Action spreadsheet is passed on to
Stuart to review.
6. If there are any changes, the administrator rejects the payroll to make any corrections or
additions.
7. Then, payroll is submitted to ADP again to generate a new preview. The administrator checks
the preview again for the changes made.
8. If there are no changes, the administrator submits the final payroll to ADP to process before
4:00pm on Wednesday. (ADP needs payroll to be submitted at least 2 full banking business days
prior to the paid-out on Friday)
9. On Thursday, a package is delivered from ADP with all the pay stubs and paychecks. Included
in the package is a CD called DocuMax. This is a CD of the payroll reports for the pay period.
Receive pay detail & Employee Cumulative files.
10. On Thursday, print the Statistical Summary and Payroll Summary for Finance.
11. On Friday, the following are done 1 st thing in the morning.
a. Update the 401K Transfers Detail spreadsheet.
b. Prepare the outgoing wire for the 401(k) deferral and post employee deferrals on the PSW
Fidelity website [detail instructions are listed separately on another word document called
401K Transfer]. CFO does the final wire approval to Fidelity.
c. Distribute pay stubs and paychecks.
7. Payroll Detailed Instructions
1. Start New Cyclea. Select appropriate week ending payroll cycle
2. Pay Your Employeesa. Creating a new Batch/Grid
• Hours & Earnings• Batch ID “WE mmddyy”• ADP basic paid data• Name within department- (Selection)• Deceased, Leave & Terminated- (Uncheck)• Select all• OK
b. Add Column in the Grid
12

• Setup @ Tool Bar• Custom Grid• Paydata• Highlight & Open• Insert => Other Earning => OK• Code: Vacation/Other => OK
c. Enter a Manual Check• Manual Check• Select Employee• OK• Pay # A, B, C, D (ADP will default)• Manual Check• Tax Frequency 2 (Bi-weekly)• Enter Hourly or Regular Earning & Check Number• Taxes Tab: Enter F/W, S/W, SS, Med• Net Pay => Compare with the check amount
d. How to calculate manual check deductionsHow to calculate Manual Bonus or Commission Checks:o 1- special payo Enter employee file #o 1- Net Payo Enter Gross (use * key for the decimal point)o 2- override pay frequencyo 3- Bonus (commission checks are taxed at bonus rate)o Tax Block? 1-Yes, don’t calculate tax or 2-No, calculate taxo Deductions (e.g. 401K)? 1-yes or 2-Noneo Deduction $ or % ? choose 2 for % (only % 401K is used)o 1- deduct from net payo 1- Pre-Tax deduction (e.g. 401K)o 1- deduct from federal taxo 1- deduct from state taxo 3- ss & medicare- tax wages- no effect
e. How to add commission• Grid => F2 to create a New Row• Folder• Earnings Tab• Pay: 2• Other Earnings => Commission (Code: C) => Enter Amount• Tax Frequency: Bonus (B) Rate• Save
f. How to add Bonus• Grid => F2 to create a New Row• Folder• Earnings Tab
13

• Pay: 2• Other Earnings => Bonus (Code: B) => Enter Amount• Tax Frequency: Bonus (B) Rate OR Bi-weekly (2) Rate
g. How to Reverse/Void an ADP Live Check• Manual Checks• New• Select Employee• Transaction Type- Reversal on an existing check• Check Box on Bottom• Okay• Close• Fill out an “ADP Check Void Request” form• Fill out the form and return along with the original check to ADP
h. How to Reverse/Void a Direct Deposit• Fill out a “Full Service Direct Deposit Item Reversal/Deletion form”• Follow instructions on the form
i. How to Add New State• Setup• Validation Tables• Payroll• State Jurisdiction Tax & SUI/SDI Tax Jurisdiction
j. How to put 401K back• Grid• Folder• Deductions Tab• Code: K => 401K• Adjust “$ negative (-) amount”
k. Add Trans ABA #s• Setup from main window• Validation Table• Payroll• Bank ABA• Open
l. How not to withhold deductions (401k, health, etc....) for 1 pay period without deleting the line from the folder• From the Grid, highlight the person, click on "folder", go to the earnings or hourly
tab.• If it is a $ deduction, pick "Z" under "special action"• If it is a % deduction, pick "K" under "special action", then, go to the "deductions" tab
and click on "select". Pick the deduction with a $ amount and adjust it so that it is $0.00.
• Note: You can't do this for direct deposits.14

• Note: % deductions happen with all gross pay. $ deductions will only happen in pay #1.
m. Allocate $x amount of tax for commission• Manual checks• New• Live check payable to employee
n. Put $ back- Direct Deposit did not go through• Misc.• 1• Type in amount
o. Add previous 401K deduction(s) for the current year• Employee• Prior File Info.• 401K• Enter amount
p. Enter vacation/sick/holiday pay• Open an employee’s folder• Cumulative tab• Accumulators (do this one time only)
• New…• Add vacation/sick/holiday• Adjustment: key in what the employee has taken so far
• Allowed/Taken • Adjustments…• Choose vacation/sick/holiday• Allowed type- “replace allowed-set taken to 0”• Allowed- key in the total number of hours for the year• Taken- key in what the employee has taken so far (in hours)
3. Create Payroll Filesa. OKb. Closec. Print the following reports:
1. Paydata Summary Report (sort in name order)2. Auto Paycancel Report (if any)3. Manual Checks Summary & Full Report (if any)4. Employee Changes Report (if any)
4. Send Payroll Files to ADP (BEFORE 6:00 ON WEDNESDAY)a. OKb. Continuec. pw: send
15

*WAIT FOR ADP’S OKAY BEFORE PROCEED*d. Preview Payroll Data
• Utilities• Receive files• Select Payroll Reg. Preview• Enter pw: send• OK• Utilities• On-site Printing• OK• Reports Tab• Double click current payroll week• Print preview
5. Send Payroll Files to ADP (BEFORE 6:00 ON WEDNESDAY)• Changes? Reject All would bring up # 2, 3, & 4. Make any necessary changes.• Changes? Accept All if no changes
9. Leave of Absence
9.1 Complete the Request for FMLA Leave of Absence Form at:P:\Payroll & HR\FMLA\ Request for FMLA Leave of Absence
9.2 Change status to Place on Leave in HRB and cancel their automatic pay in PayExpert.
9.3 Complete the STD Claim Form for employees with Short Term Disability Insurance if requesting the STD benefit. The form can be found at:P:\Payroll & HR\Insurance (new)\Guardian\Guardian\STD\STD Claim Form
16
9.4 Once the employee returns from leave, change their status back to Active in HRB.
10. Invoices
10.1 Provide Finance the Bill Summary sheet at the end of each month for:a. Blue Cross Blue Sheildb. Guardianc. EyeMed
10.2 Provide Finance with the Colony Square invoice list mid-month. This invoice will need to be paid by the 15th of each month for all active employees.
17