AiM User Guide Kit for EVO4/EVO4S and Solo/SoloDL on ...€¦ · 1 AiM User Guide Kit for...
15
1 AiM User Guide Kit for EVO4/EVO4S and Solo/SoloDL on Suzuki GSX-R Release 1.05
-
Upload
hoangkhanh -
Category
Documents
-
view
217 -
download
0
Transcript of AiM User Guide Kit for EVO4/EVO4S and Solo/SoloDL on ...€¦ · 1 AiM User Guide Kit for...

1
AiM User Guide
Kit for EVO4/EVO4S and Solo/SoloDL on Suzuki GSX-R
Release 1.05

1
1 Models and years
This user guide explains how to install AiM Solo and SoloDL on Suzuki GSX-R bikes and how to connect EVO4, EVO4S and SoloDL to the Engine Control Unit (ECU) of the bike. Supported models and years are different for Solo, SoloDL and EVO4, EVO4S.
Solo and SoloDL installation kits are available for the following models/years
GSX-R600 2001-2016
GSX-R750 2001-2016
GSX-R1000 2001-2004 and 2009-2016
EVO4, EVO4S and SoloDL connection kit are available for the following model/years:
GSX-R600 2006-2016
GSX-R750 2006-2016
GSX-R1000 2005-2016
GSX-R1300 Hayabusa Gen.2 2008-2016
Please note: not all combinations are available. With reference to the tables above, no bracket is available for SoloDL on GSX-R 1000 from 2005 to 2008 included and for GSX-R1300 Hayabusa Gen.2 2008-2016.
2 Kit content and part number
Here follow part numbers of GSX-R installation kit as well as for connection kit.

2
2.1 SoloDL installation kit
SoloDL installation kit is shown here below; part number is: V02569140CS.
The kit includes:
1 bracket (1)
1 8x45 pan head Allen screw (2)
1 toothed washer (3)
2 4x10 Allen screws with countersunk head (4)
1 rubber loose piece (5)
1 AiM interface cable for Suzuki GSX-R (6)
AiM SoloDL bracket kit for Suzuki GSX-R 1000 2009-2016 can also be bought separately as spare part. Its part number is: X46KSSGSXR.

3
2.2 AiM connection kit for SoloDL/EVO4S
Suzuki GSX-R connection kit for SoloDL/EVO4S is shown below; its part number is: V02569140.
Here below cable constructive scheme is showed.

4
2.3 AiM connection kit for EVO4
Suzuki GSX-R connection kit for EVO4 is shown below; its part number is: V02563140.
The cable features a built in resistor for K Line signal management. Here below cable constructive scheme is showed.

5
3 Installation and connection
Here you find the instructions to install Solo and SoloDL and to connect EVO4, EVO4S and SoloDL to your Suzuki GSX-R bike ECU. EVO4 cable is long enough to allow installation of the logger under the bike seat.
3.1 Installation of Solo and SoloDL
As shown here below Suzuki GSX-R bike ignition block can be on the left or on the right of the handle bar hinge:

6
Fix Solo/SoloDL bracket to the adapter bracket for Suzuki GSX-R using the two countersunk screws you find in the kit.
Screw the 8x45 pan head Allen screw in the toothed washer and screw the rubber loose piece under Suzuki adapter bracket.

7
Insert the assembled kit in the handle bar hinge until the distance piece abuts the hinge.
Tighten the central screw on the hinge so that this last grips.

8
Hook Solo/SoloDL to its bracket
Fix it using the screws already inserted rear on Solo/SoloDL bracket.

9
The image here below shows SoloDL correctly installed.
10
3.2 Connection of SoloDL, EVO4 and EVO4S to the ECU
To connect EVO4, EVO4S and SoloDL to the ECU of the bike use the connector you find under the bike seat shown below.
Uplift the bike seat. ECU connector has a black rubber cup as shown here on the right.
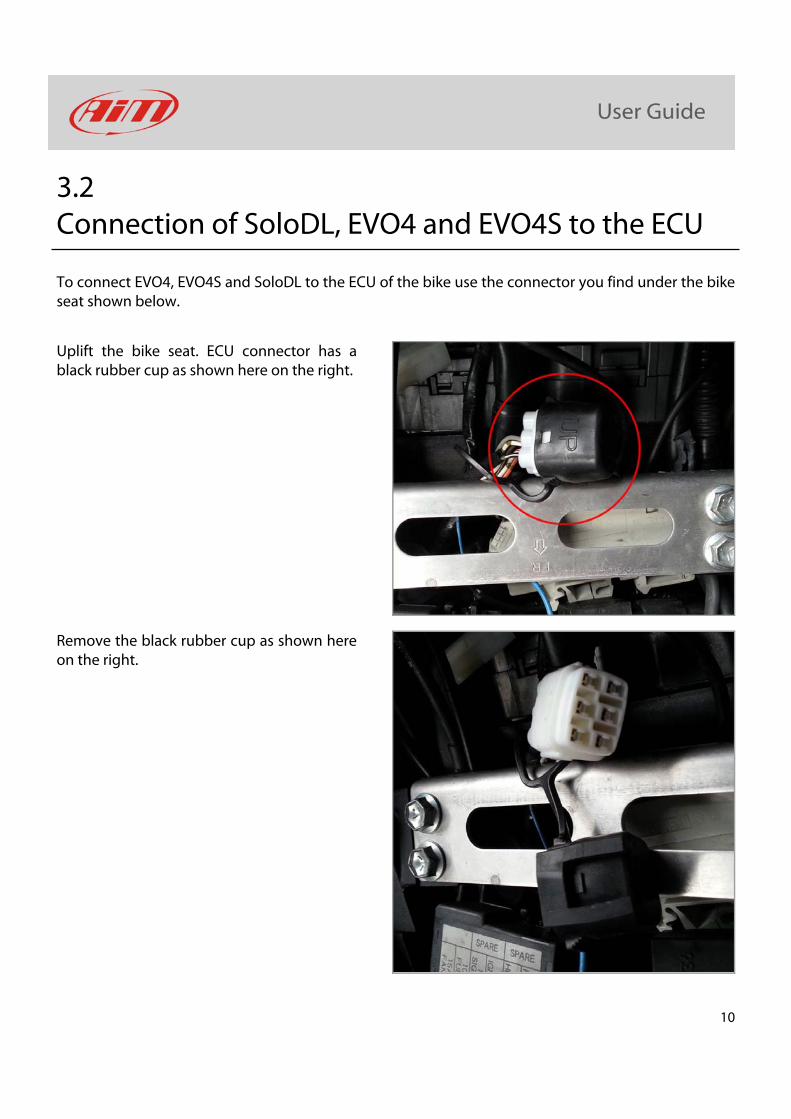
Remove the black rubber cup as shown here on the right.

11
Connect AiM cable to Suzuki wiring as here on the right.
If you have installed an AiM EVO4/EVO4S logger take the cable to the logger.
If you have installed an AiM SoloDL make the cable pass along the saddle frame as shown here on the right.
Make the cable pass between the fuel tank and the chassis as in the image on the right.
Please avoid positions where the cable would be exposed to direct heat.

12
Connect the cable to SoloDL as here on the right.
To connect SoloDL to male Binder connector of V02569140 use the 7 pins female Binder connector placed bottom right of the logger as shown here below.

13
To connect EVO4 to male Binder connector of V02563140 use the female Binder connector labelled "rpm/K DO" – the second from the right on the top row – of EVO4 as shown here below.
To connect EVO4S to male Binder connector of V02569140 use the 7 pins female Binder connector labelled "ECU" on the front of the logger as shown here below.
4 Configuring with Race Studio
Before connecting SoloDL, EVO4 and EVO4S to the ECU set it up as connected to that ECU using Race Studio software. The parameters to select in the device configuration are:
ECU Manufacturer: “Suzuki”
ECU Model: “SDS_protocol”

14
5 Suzuki SDS protocol
Channels received by SoloDL, EVO4 and EVO4S connected to "Suzuki" "SDS_Protocol" are:
ID CHANNEL NAME FUNCTION
ECU_1 SDS_RPM RPM
ECU_2 SDS_TPS Primary throttle position
ECU_3 SDS_GEAR Engaged gear
ECU_4 SDS_BATT_VOLT Battery Supply
ECU_5 SDS_CLT Engine coolant temperature
ECU_6 SDS_IAT Intake air temperature
ECU_7 SDS_MAP Manifold air pressure
ECU_8 SDS_BAROM Barometric pressure
ECU_9 SDS_BOOST Boost pressure
ECU_10 SDS_AFR Air/Fuel ratio
ECU_11 SDS_NEUT Neutral signal
ECU_12 SDS_CLUT Clutch switch
ECU_13 SDS_FUEL1_pw Fuel injector 1
ECU_14 SDS_FUEL2_pw Fuel injector 2
ECU_15 SDS_FUEL3_pw Fuel injector 3
ECU_16 SDS_FUEL4_pw Fuel injector 4
ECU_17 SDS_MS Mode selector
ECU_18 SDS_XON_ON XON switch
ECU_19 SDS_PAIR Air pressure
ECU_20 SDS_IGN_ANG Ignition angle
ECU_21 SDS_STP Secondary throttle position
Technical note: not all data channels outlined in the ECU template are validated for each manufacturer model or variant; some of the outlined channels are model and year specific, and therefore may not be applicable.