
AE-500 Basic Remote Programming
48
Welcome To The AE-500 Basic Programming Webinar Presented by Paul Jones Technical Trainer Copyright © 2010 Linear LLC – P#1199
Transcript of AE-500 Basic Remote Programming
Welcome To The AE-500
Basic Programming Webinar
Presented byPaul JonesTechnical Trainer
Copyright © 2010 Linear LLC – P#1199
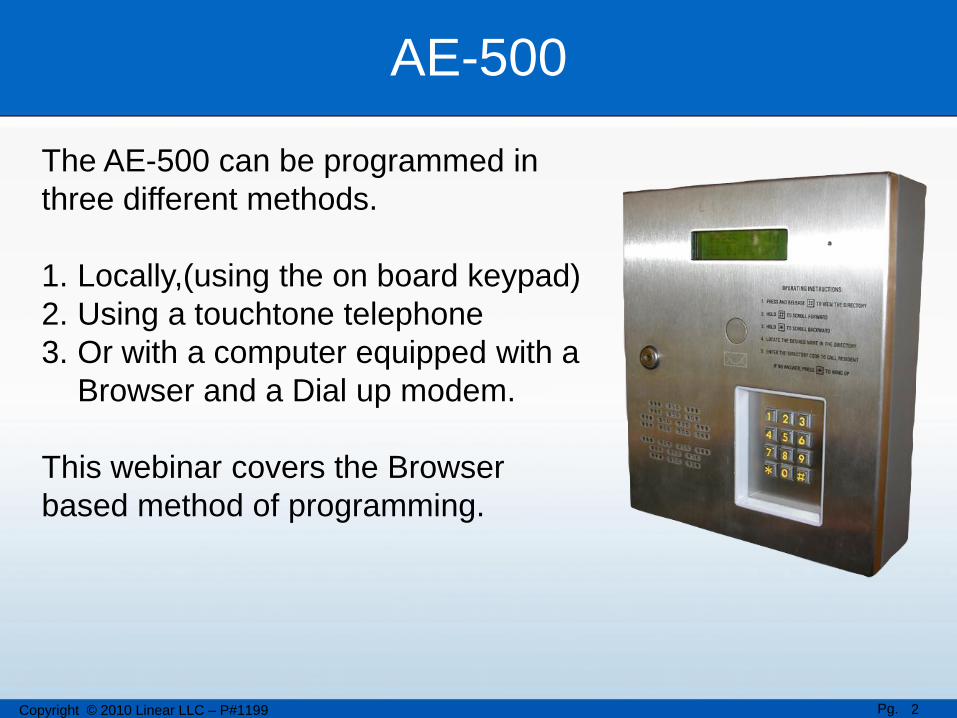
The AE-500 can be programmed in
three different methods.
1. Locally,(using the on board keypad)
2. Using a touchtone telephone
3. Or with a computer equipped with a
Browser and a Dial up modem.
This webinar covers the Browser
based method of programming.
AE-500
Pg. 2Copyright © 2010 Linear LLC – P#1199
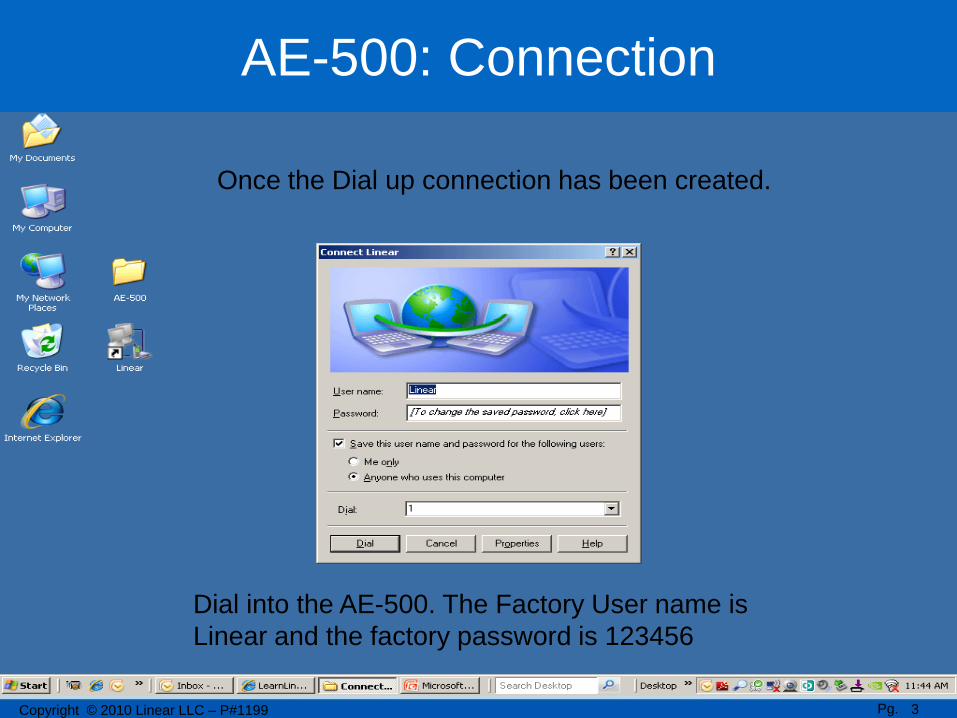
Dial into the AE-500. The Factory User name is
Linear and the factory password is 123456
Once the Dial up connection has been created.
AE-500: Connection
Pg. 3Copyright © 2010 Linear LLC – P#1199
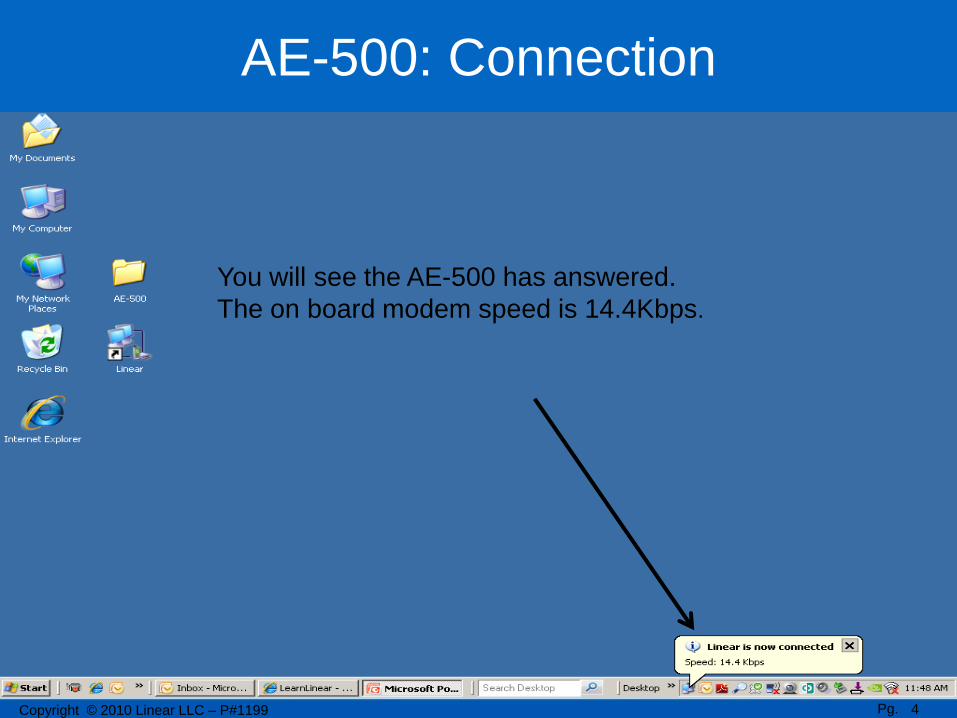
You will see the AE-500 has answered.
The on board modem speed is 14.4Kbps.
AE-500: Connection
Pg. 4Copyright © 2010 Linear LLC – P#1199
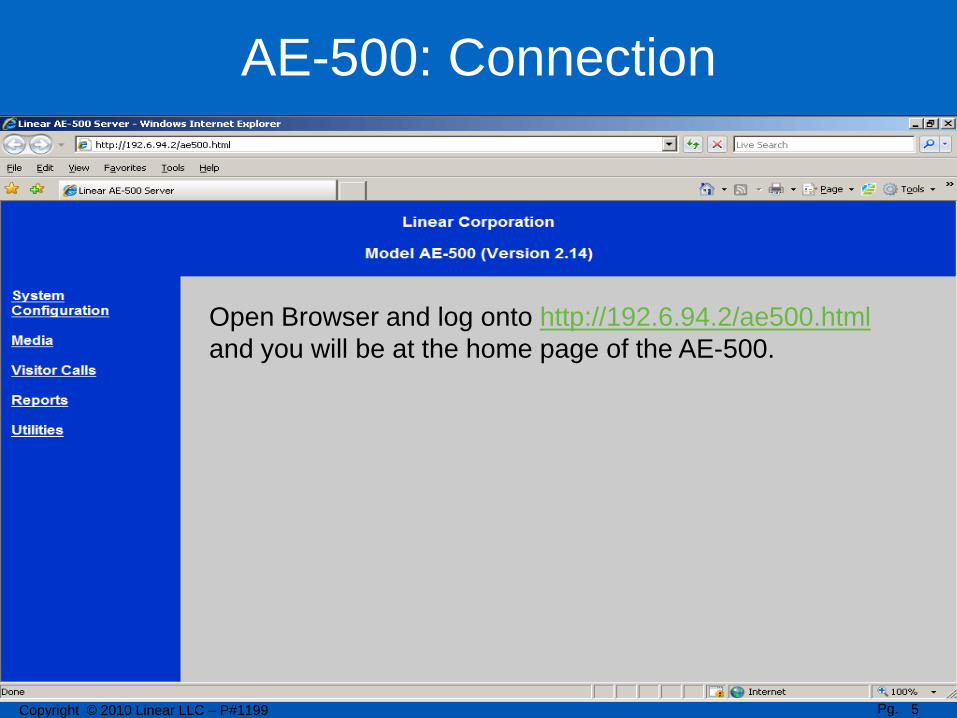
Open Browser and log onto http://192.6.94.2/ae500.html
and you will be at the home page of the AE-500.
AE-500: Connection
Pg. 5Copyright © 2010 Linear LLC – P#1199
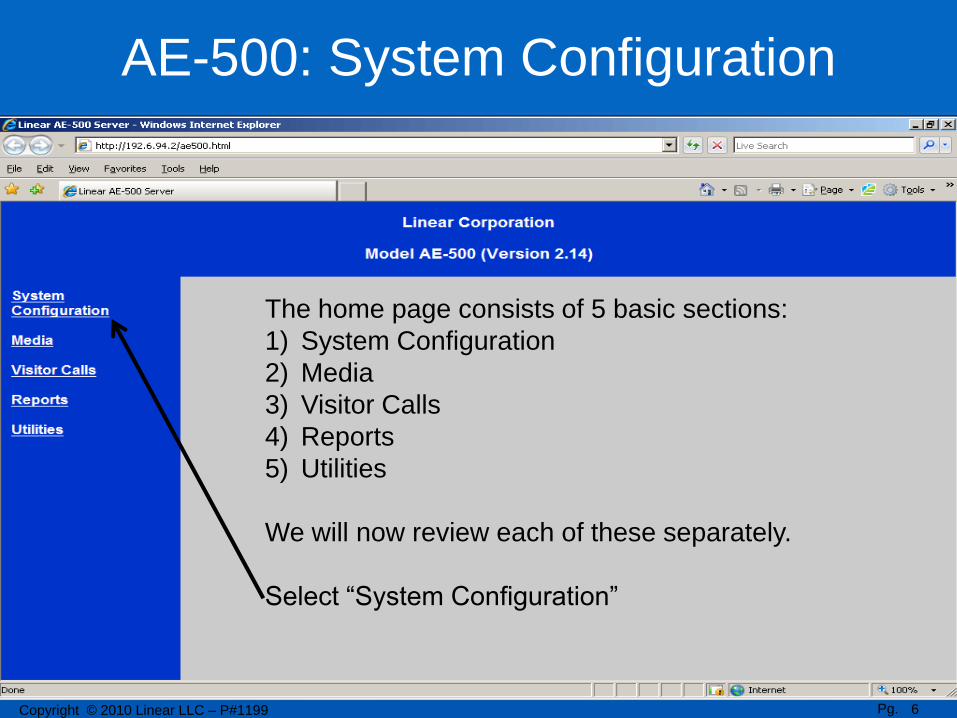
The home page consists of 5 basic sections:
1) System Configuration
2) Media
3) Visitor Calls
4) Reports
5) Utilities
We will now review each of these separately.
Select “System Configuration”
AE-500: System Configuration
Pg. 6Copyright © 2010 Linear LLC – P#1199
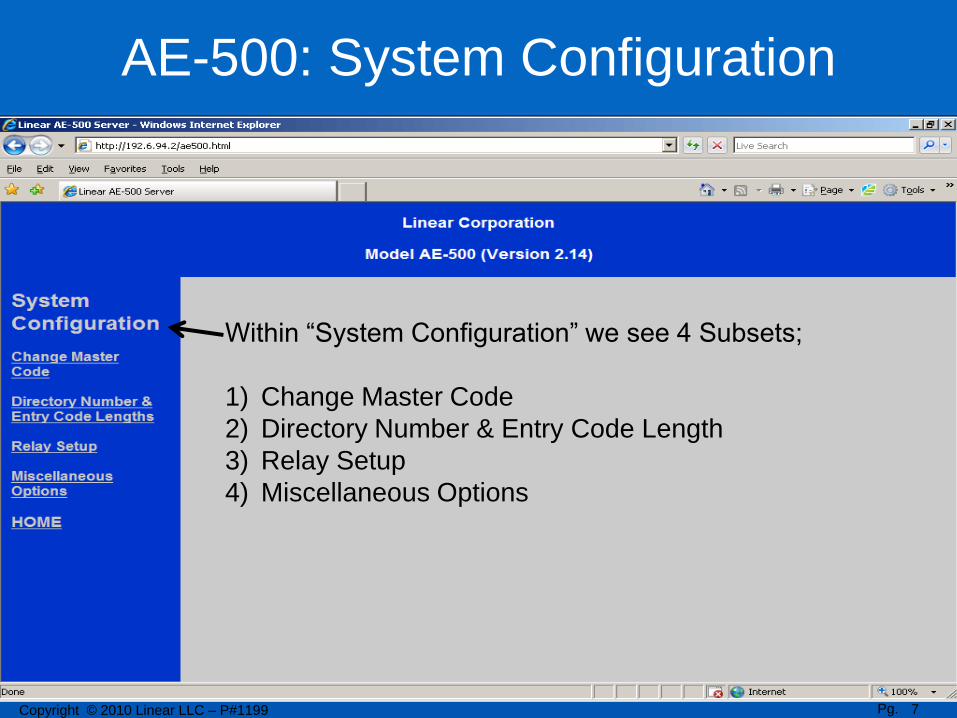
Within “System Configuration” we see 4 Subsets;
1) Change Master Code
2) Directory Number & Entry Code Length
3) Relay Setup
4) Miscellaneous Options
AE-500: System Configuration
Pg. 7Copyright © 2010 Linear LLC – P#1199

To change the Master Code, select the “Change Master
Code” link.
AE-500: System Configuration
Pg. 8Copyright © 2010 Linear LLC – P#1199
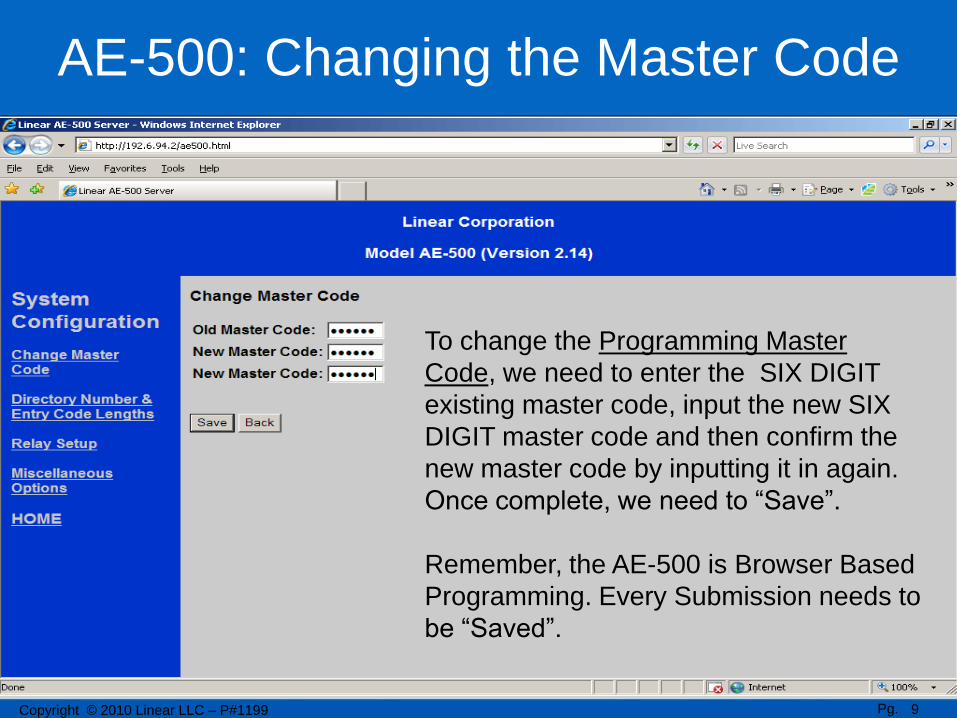
To change the Programming Master
Code, we need to enter the SIX DIGIT
existing master code, input the new SIX
DIGIT master code and then confirm the
new master code by inputting it in again.
Once complete, we need to “Save”.
Remember, the AE-500 is Browser Based
Programming. Every Submission needs to
be “Saved”.
AE-500: Changing the Master Code
Pg. 9Copyright © 2010 Linear LLC – P#1199
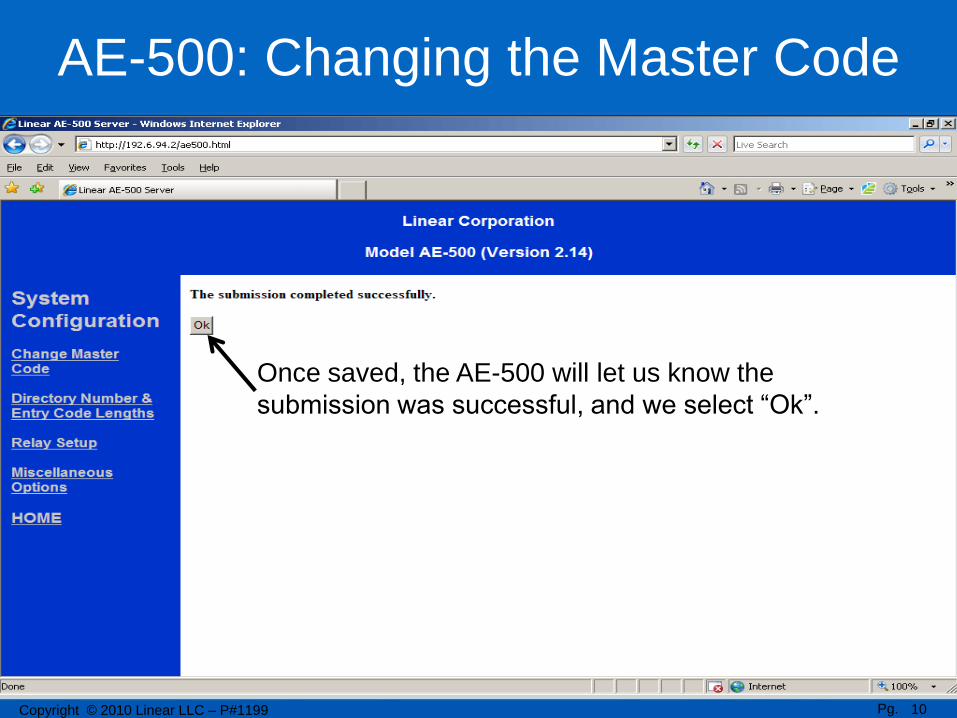
Once saved, the AE-500 will let us know the
submission was successful, and we select “Ok”.
AE-500: Changing the Master Code
Pg. 10Copyright © 2010 Linear LLC – P#1199
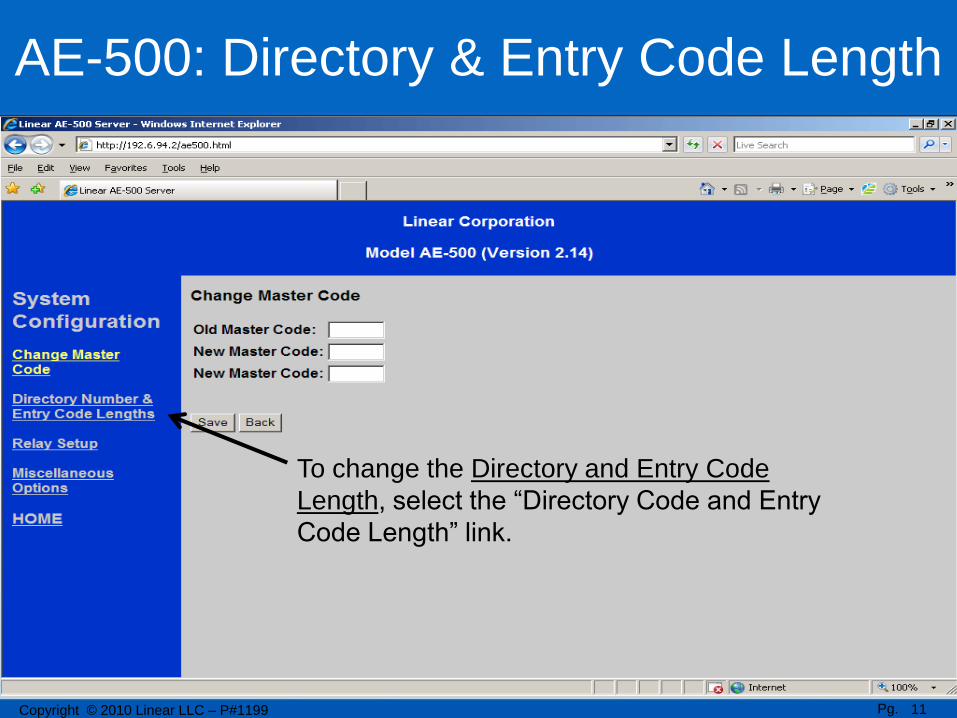
To change the Directory and Entry Code
Length, select the “Directory Code and Entry
Code Length” link.
AE-500: Directory & Entry Code Length
Pg. 11Copyright © 2010 Linear LLC – P#1199
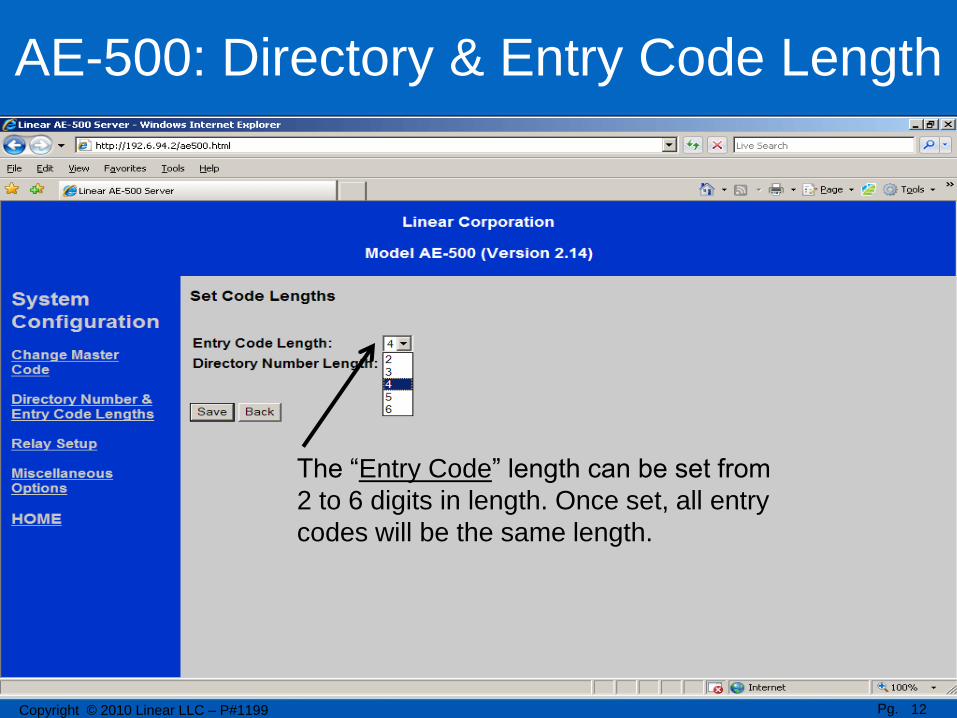
The “Entry Code” length can be set from
2 to 6 digits in length. Once set, all entry
codes will be the same length.
AE-500: Directory & Entry Code Length
Pg. 12Copyright © 2010 Linear LLC – P#1199
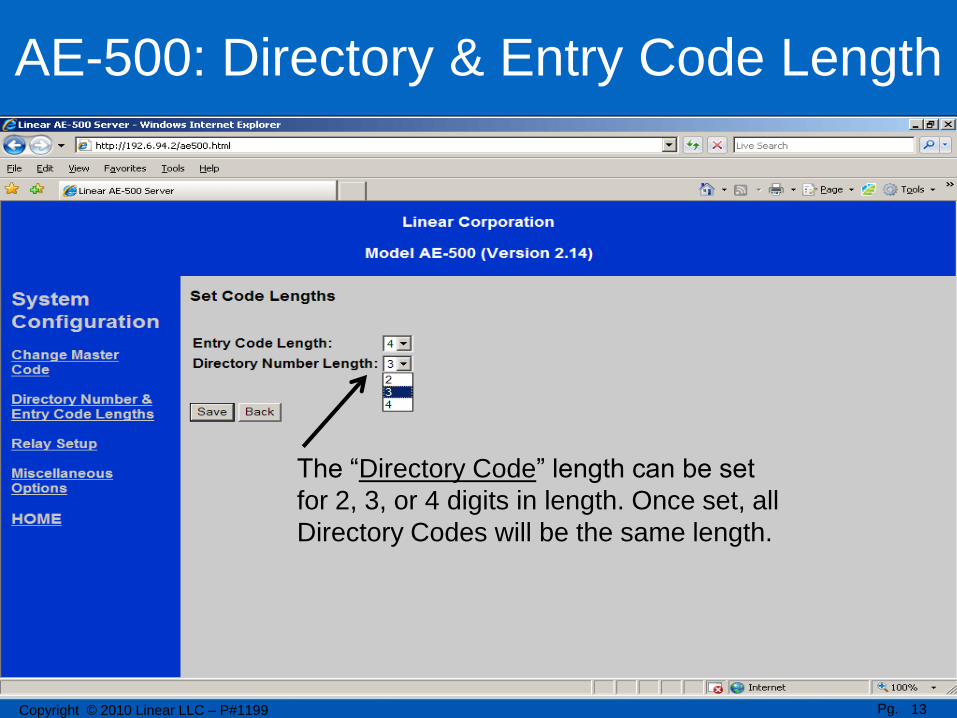
The “Directory Code” length can be set
for 2, 3, or 4 digits in length. Once set, all
Directory Codes will be the same length.
AE-500: Directory & Entry Code Length
Pg. 13Copyright © 2010 Linear LLC – P#1199
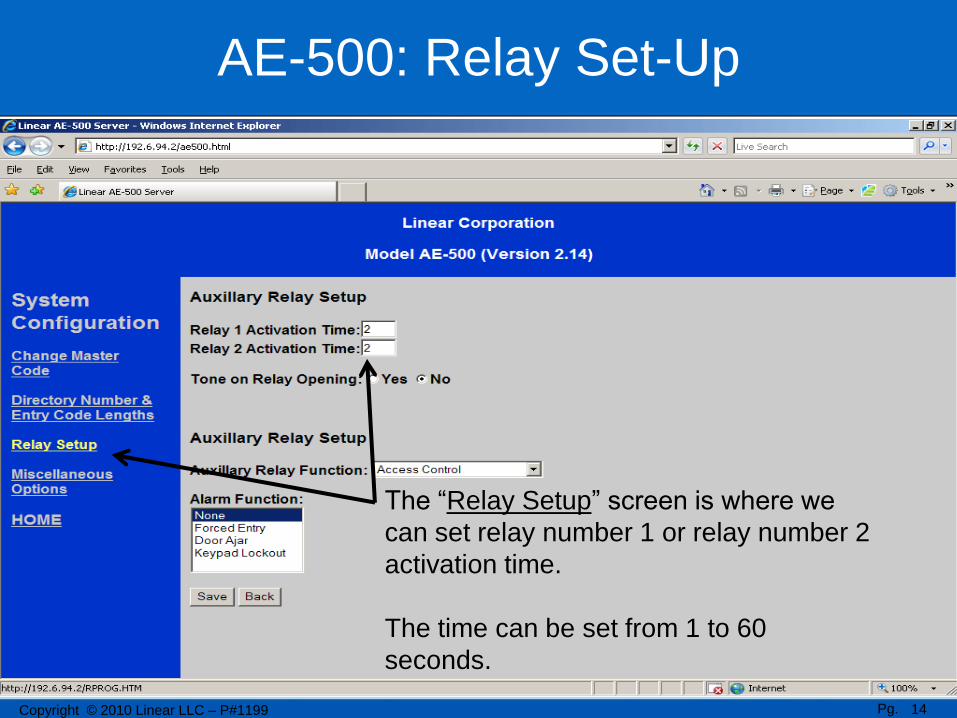
The “Relay Setup” screen is where we
can set relay number 1 or relay number 2
activation time.
The time can be set from 1 to 60
seconds.
AE-500: Relay Set-Up
Pg. 14Copyright © 2010 Linear LLC – P#1199

If desired, the AE-500 will annunciate
a tone whenever relay “A” is activated.
AE-500: Relay Set-Up
Pg. 15Copyright © 2010 Linear LLC – P#1199
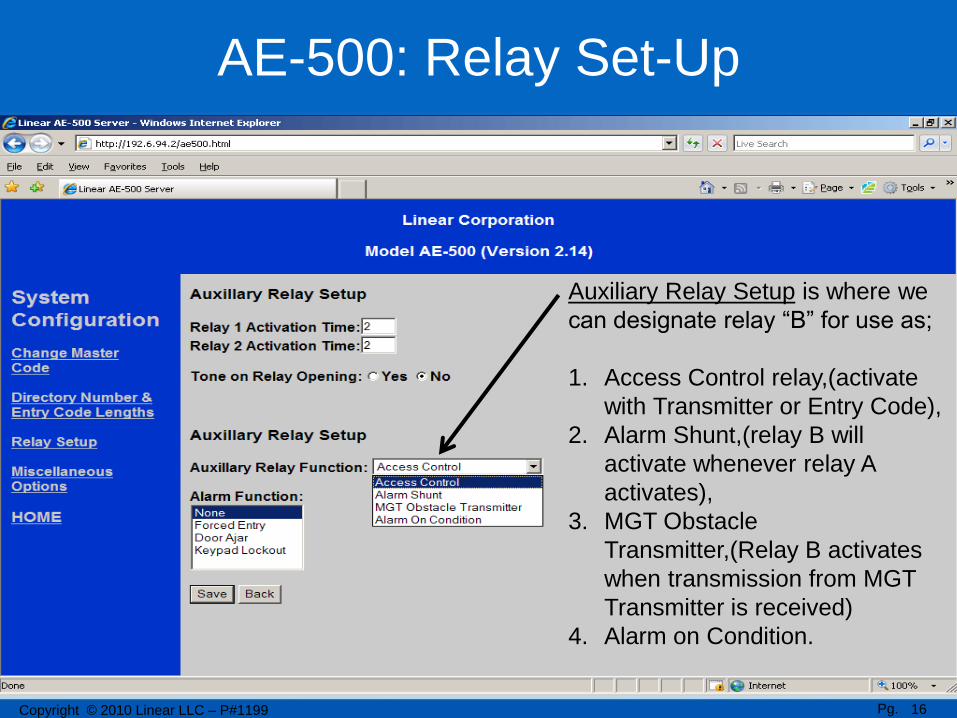
Auxiliary Relay Setup is where we
can designate relay “B” for use as;
1. Access Control relay,(activate
with Transmitter or Entry Code),
2. Alarm Shunt,(relay B will
activate whenever relay A
activates),
3. MGT Obstacle
Transmitter,(Relay B activates
when transmission from MGT
Transmitter is received)
4. Alarm on Condition.
AE-500: Relay Set-Up
Pg. 16Copyright © 2010 Linear LLC – P#1199
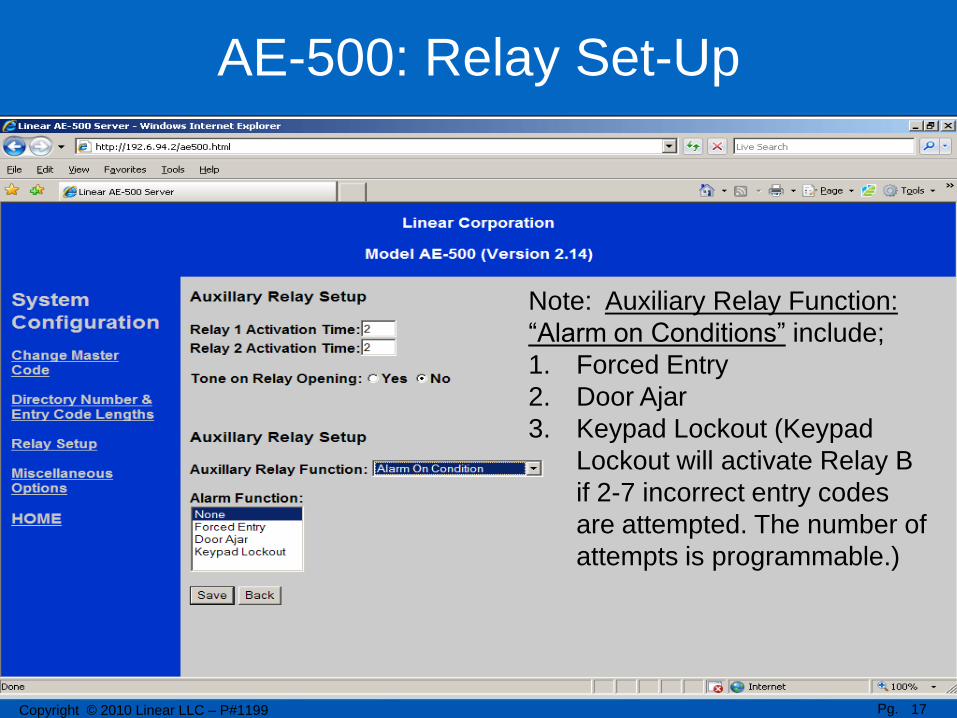
Note: Auxiliary Relay Function:
“Alarm on Conditions” include;
1. Forced Entry
2. Door Ajar
3. Keypad Lockout (Keypad
Lockout will activate Relay B
if 2-7 incorrect entry codes
are attempted. The number of
attempts is programmable.)
AE-500: Relay Set-Up
Pg. 17Copyright © 2010 Linear LLC – P#1199
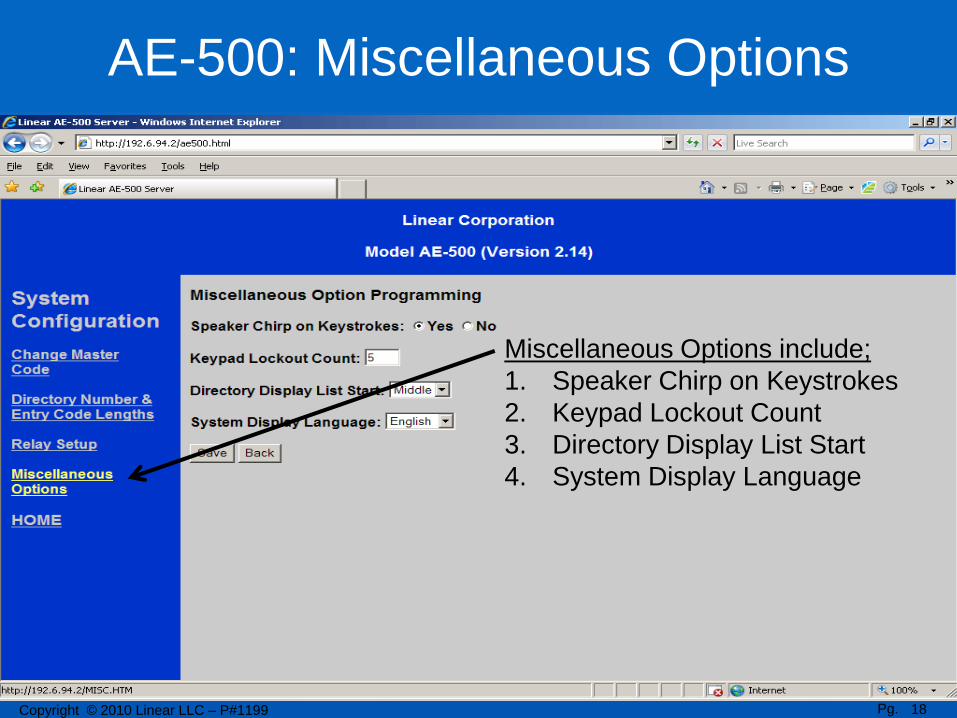
Miscellaneous Options include;
1. Speaker Chirp on Keystrokes
2. Keypad Lockout Count
3. Directory Display List Start
4. System Display Language
AE-500: Miscellaneous Options
Pg. 18Copyright © 2010 Linear LLC – P#1199

Speaker Chirp on Keystrokes:
AE500 will chirp whenever keys on
keypad are depressed.
AE-500: Miscellaneous Options
Pg. 19Copyright © 2010 Linear LLC – P#1199
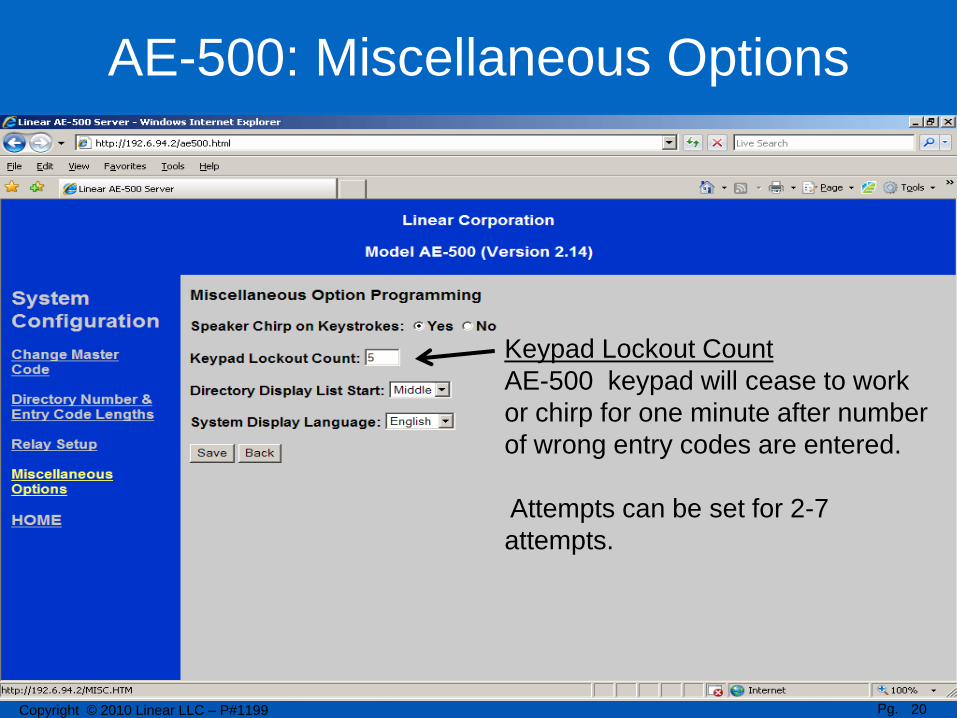
Keypad Lockout Count
AE-500 keypad will cease to work
or chirp for one minute after number
of wrong entry codes are entered.
Attempts can be set for 2-7
attempts.
AE-500: Miscellaneous Options
Pg. 20Copyright © 2010 Linear LLC – P#1199
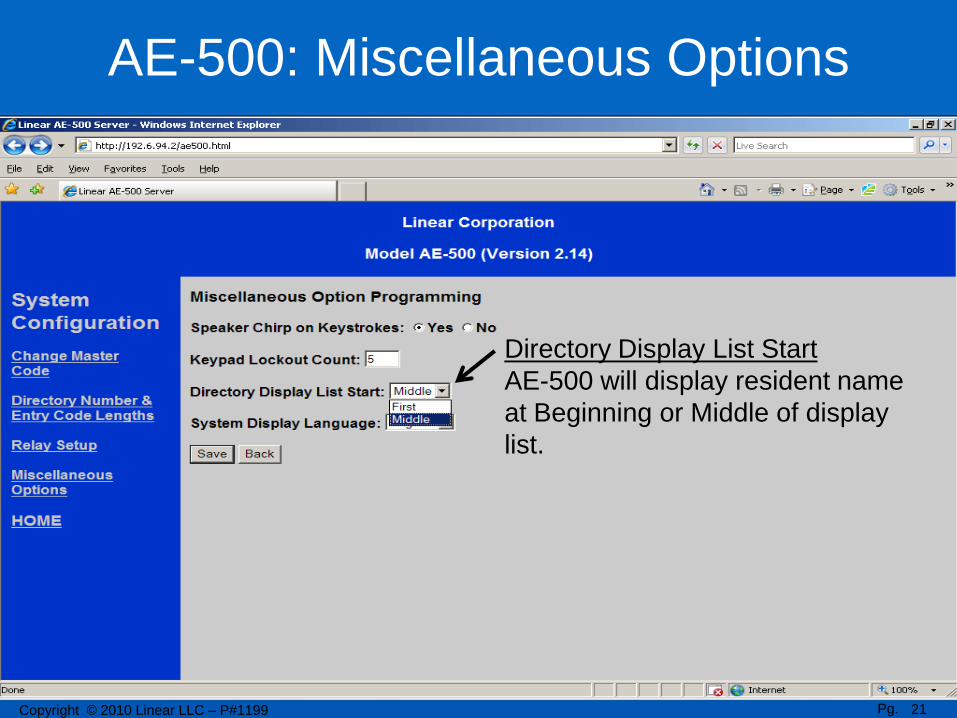
Directory Display List Start
AE-500 will display resident name
at Beginning or Middle of display
list.
AE-500: Miscellaneous Options
Pg. 21Copyright © 2010 Linear LLC – P#1199
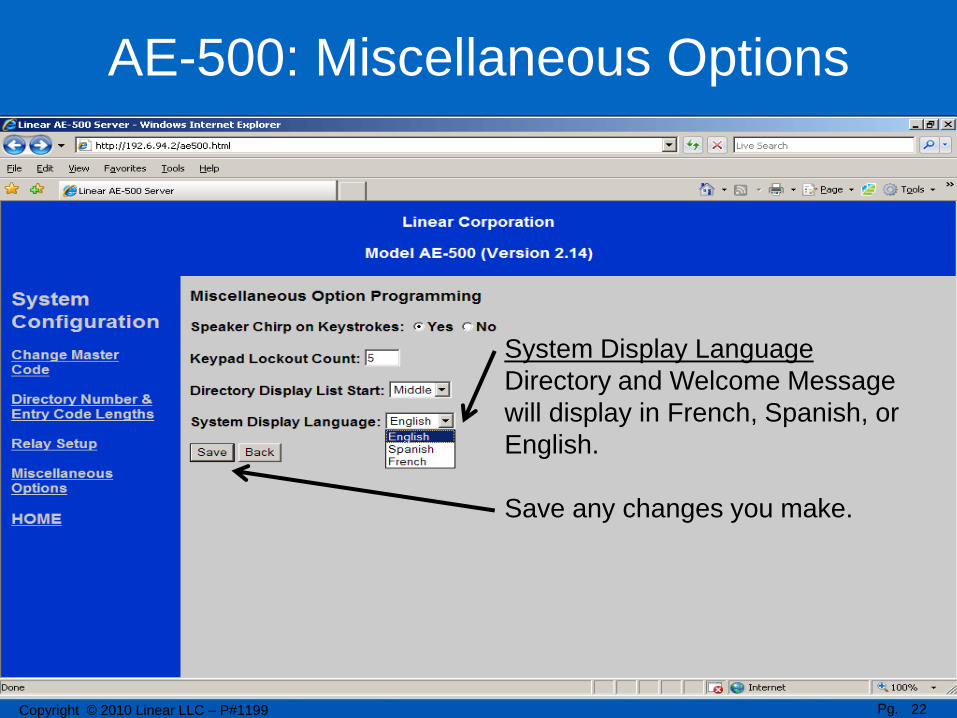
System Display Language
Directory and Welcome Message
will display in French, Spanish, or
English.
Save any changes you make.
AE-500: Miscellaneous Options
Pg. 22Copyright © 2010 Linear LLC – P#1199

This Concludes System
Configuration.
Return to the Home Page…….
AE-500: Miscellaneous Options
Pg. 23Copyright © 2010 Linear LLC – P#1199
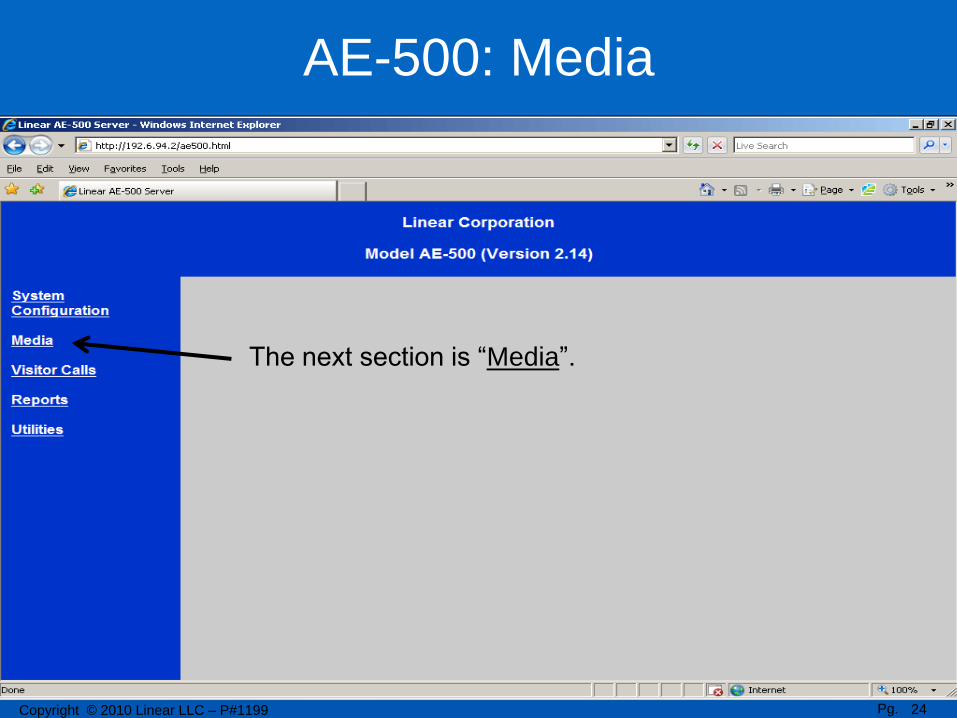
The next section is “Media”.
AE-500: Media
Pg. 24Copyright © 2010 Linear LLC – P#1199
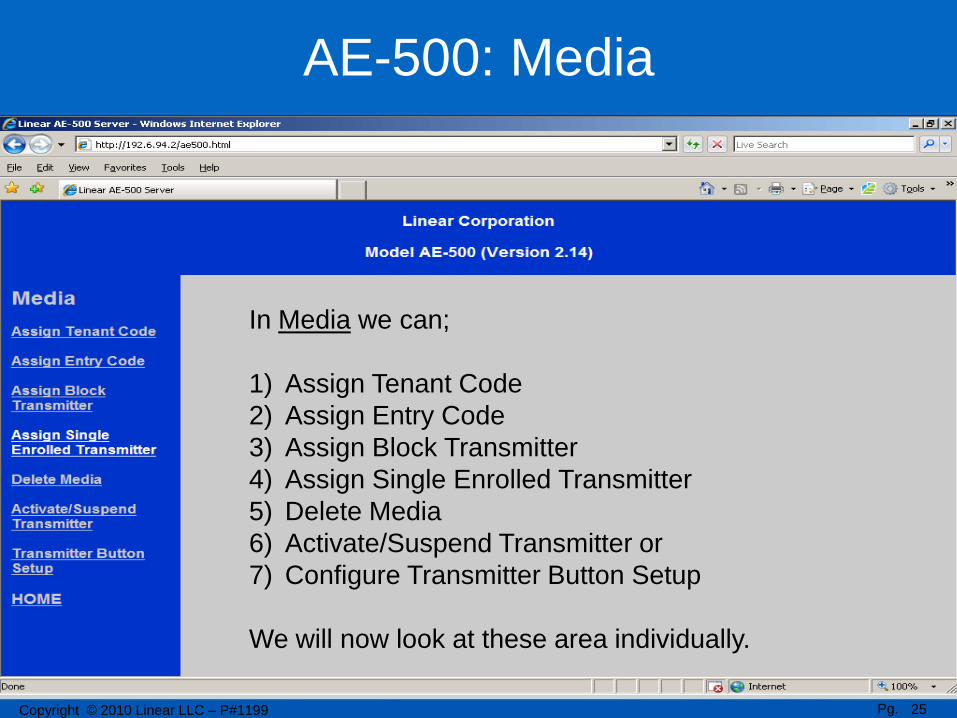
In Media we can;
1) Assign Tenant Code
2) Assign Entry Code
3) Assign Block Transmitter
4) Assign Single Enrolled Transmitter
5) Delete Media
6) Activate/Suspend Transmitter or
7) Configure Transmitter Button Setup
We will now look at these area individually.
AE-500: Media
Pg. 25Copyright © 2010 Linear LLC – P#1199
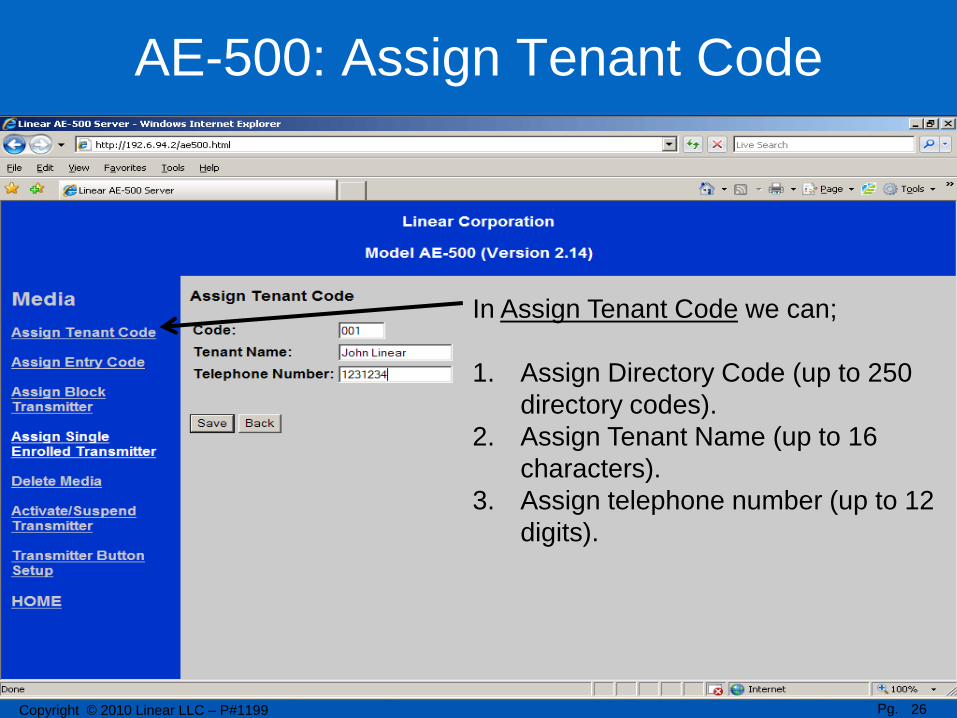
In Assign Tenant Code we can;
1. Assign Directory Code (up to 250
directory codes).
2. Assign Tenant Name (up to 16
characters).
3. Assign telephone number (up to 12
digits).
AE-500: Assign Tenant Code
Pg. 26Copyright © 2010 Linear LLC – P#1199

In Assign Entry Code we can
“Assign Entry Codes” (up to 500
codes)
AE-500: Assign Entry Code
Pg. 27Copyright © 2010 Linear LLC – P#1199

In Assign Entry Code we can
“Authorize Relays” to perform the
following;
1. Read Entry Code: option is not
used at this time and should not be
selected.
2. Activate Relay A or B
3. Activate BOTH, A and B relays
4. Toggle Relay A or B
AE-500: Assign Entry Code
Pg. 28Copyright © 2010 Linear LLC – P#1199
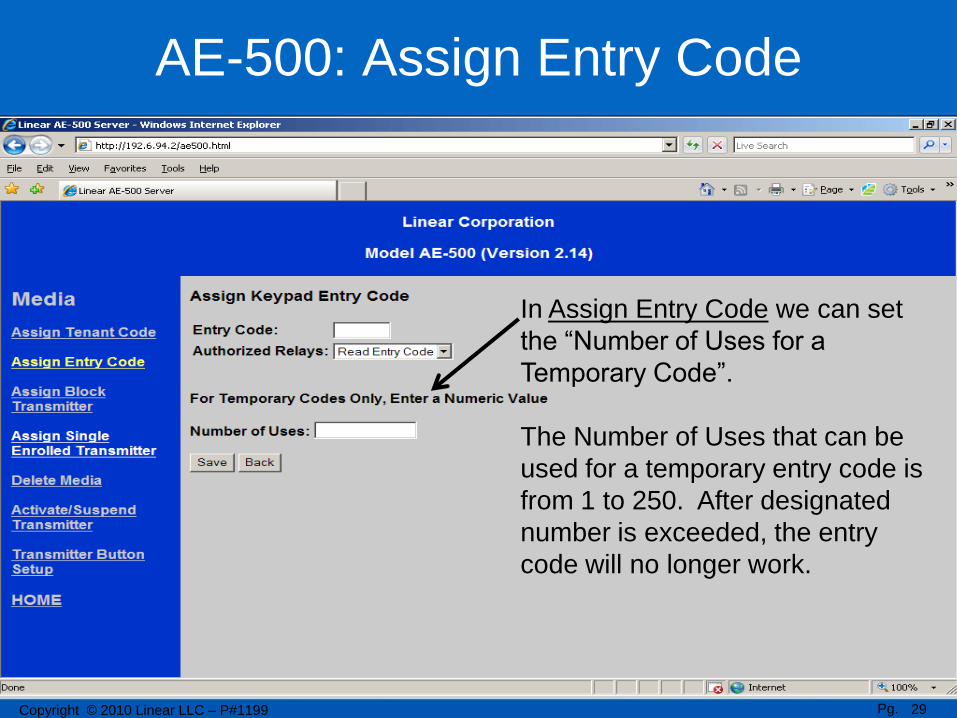
In Assign Entry Code we can set
the “Number of Uses for a
Temporary Code”.
The Number of Uses that can be
used for a temporary entry code is
from 1 to 250. After designated
number is exceeded, the entry
code will no longer work.
AE-500: Assign Entry Code
Pg. 29Copyright © 2010 Linear LLC – P#1199

In the Assign Block Transmitters section we can;
1. Program up to 500 Block coded Transmitters. Block coded
transmitters are coded sequentially and could be coded
anywhere from 1 to 65,535.
2. Assign a Facility Code. The facility code of the transmitters
are located on packaging from the original manufacturer. If
facility codes are not used, adding a zero will allow the
AE500 to ignore the facility code.
3. Assign Beginning Transmitter ID. This number will be the
lowest transmitter code of the Block.
AE-500: Assign Block Transmitter
Pg. 30Copyright © 2010 Linear LLC – P#1199
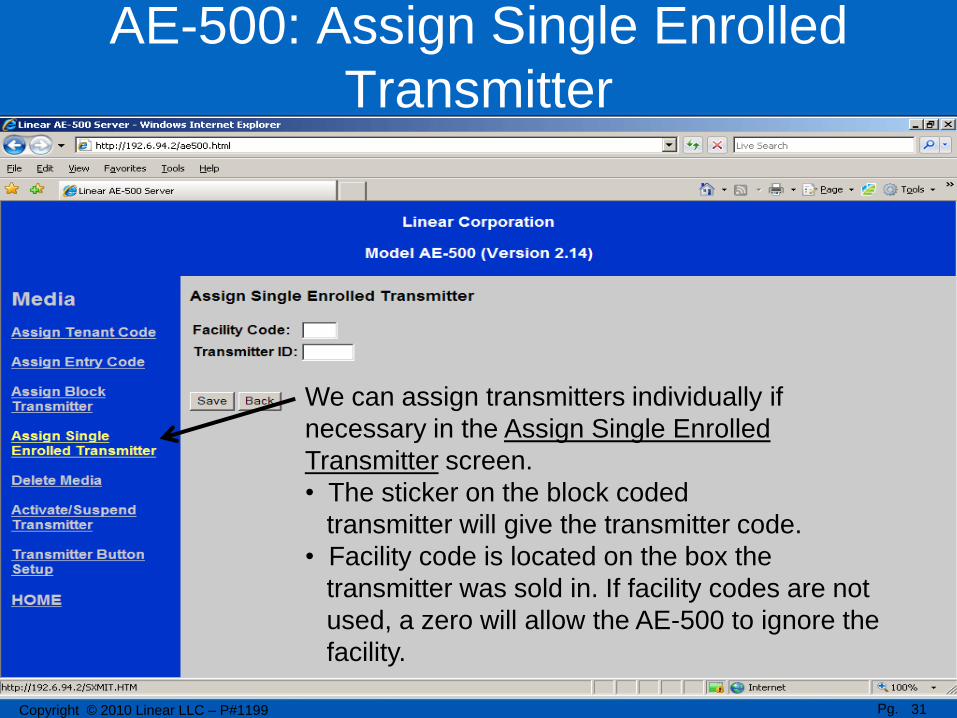
We can assign transmitters individually if
necessary in the Assign Single Enrolled
Transmitter screen.
• The sticker on the block coded
transmitter will give the transmitter code.
• Facility code is located on the box the
transmitter was sold in. If facility codes are not
used, a zero will allow the AE-500 to ignore the
facility.
AE-500: Assign Single Enrolled
Transmitter
Pg. 31Copyright © 2010 Linear LLC – P#1199
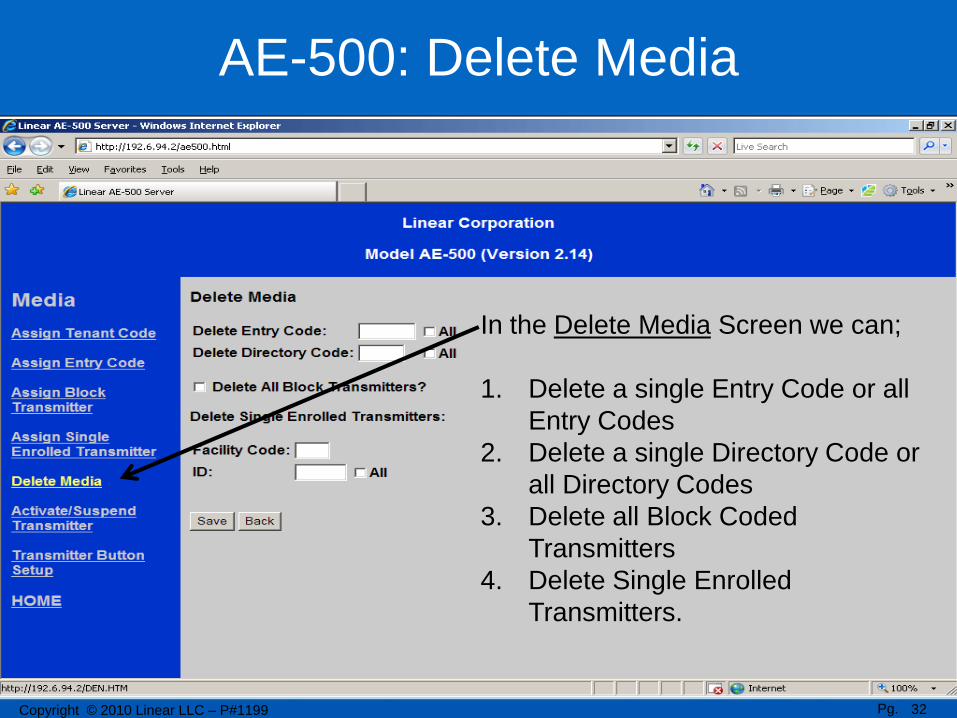
In the Delete Media Screen we can;
1. Delete a single Entry Code or all
Entry Codes
2. Delete a single Directory Code or
all Directory Codes
3. Delete all Block Coded
Transmitters
4. Delete Single Enrolled
Transmitters.
AE-500: Delete Media
Pg. 32Copyright © 2010 Linear LLC – P#1199
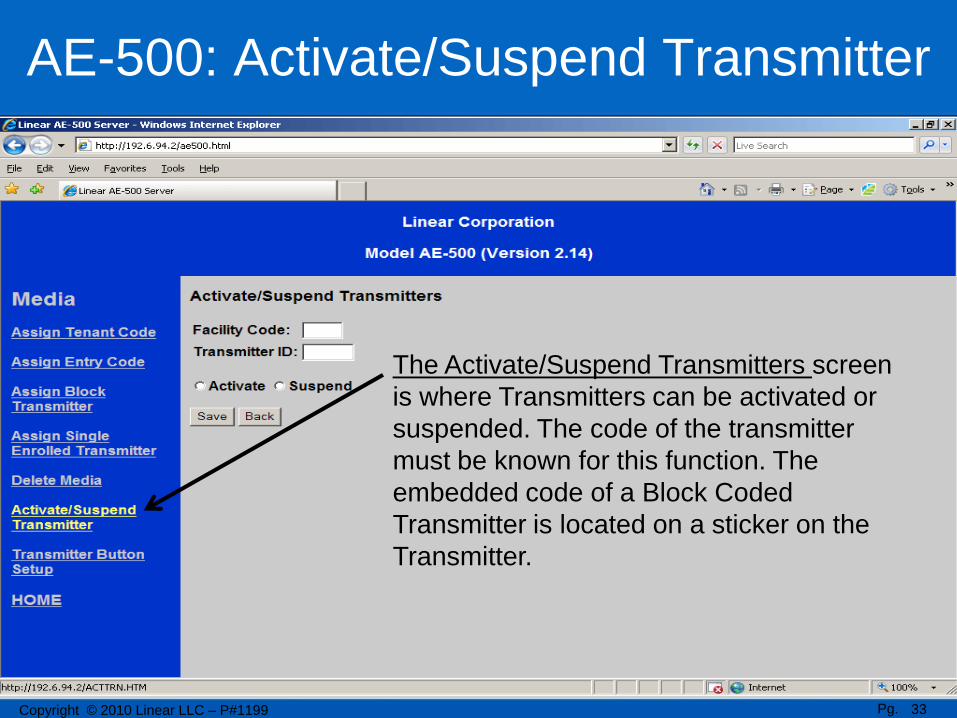
The Activate/Suspend Transmitters screen
is where Transmitters can be activated or
suspended. The code of the transmitter
must be known for this function. The
embedded code of a Block Coded
Transmitter is located on a sticker on the
Transmitter.
AE-500: Activate/Suspend Transmitter
Pg. 33Copyright © 2010 Linear LLC – P#1199

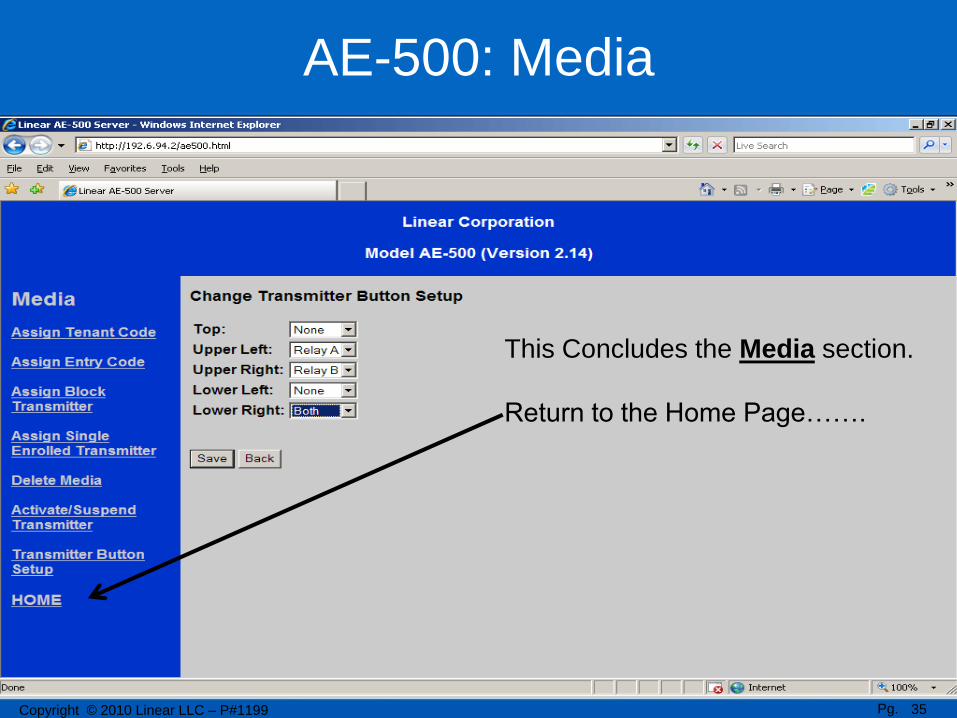
The Transmitter Button Setup screen is where
we can dictate which button on the transmitter
activates which relay. The options are;
1. None
2. Relay A
3. Relay B
4. Both Relays
AE-500: Transmitter Button Set-Up
Pg. 34Copyright © 2010 Linear LLC – P#1199
AE-500: Media
This Concludes the Media section.
Return to the Home Page…….
Pg. 35Copyright © 2010 Linear LLC – P#1199
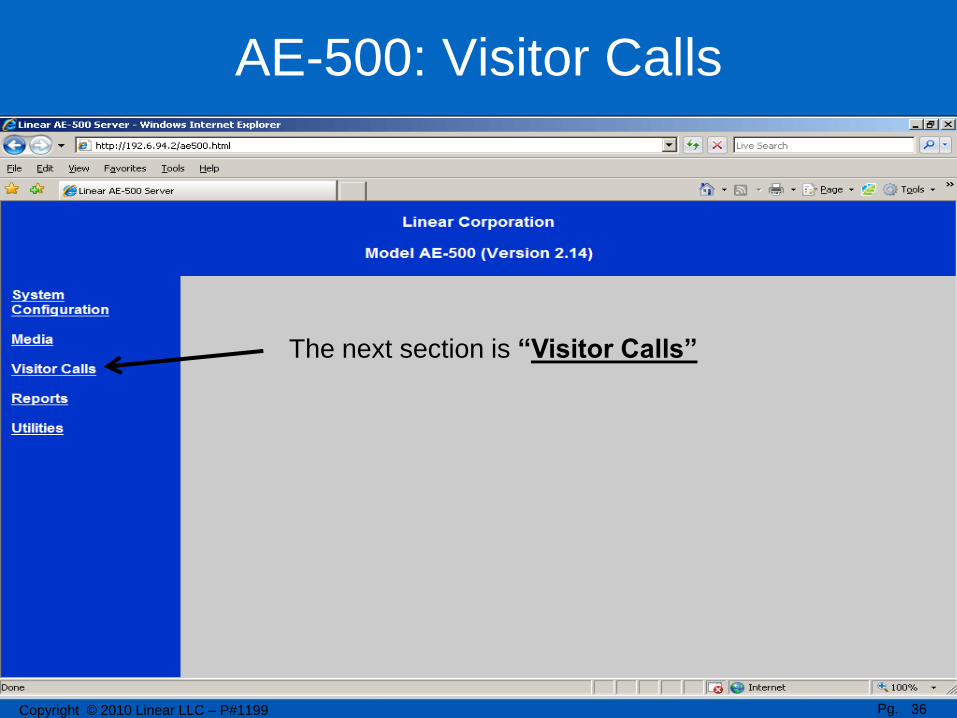
The next section is “Visitor Calls”
AE-500: Visitor Calls
Pg. 36Copyright © 2010 Linear LLC – P#1199
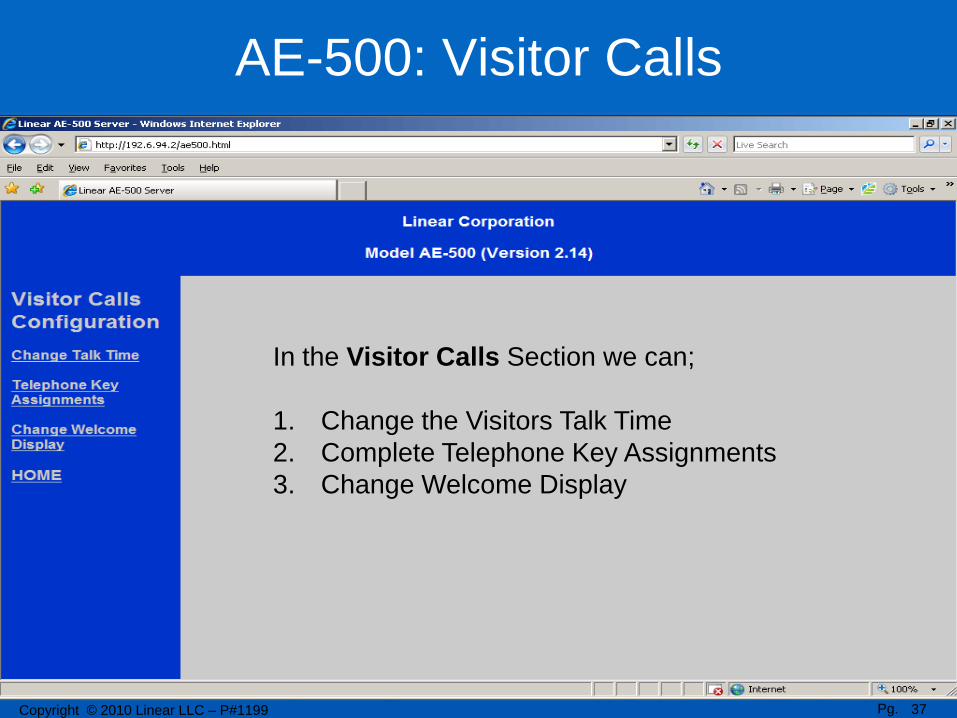
In the Visitor Calls Section we can;
1. Change the Visitors Talk Time
2. Complete Telephone Key Assignments
3. Change Welcome Display
AE-500: Visitor Calls
Pg. 37Copyright © 2010 Linear LLC – P#1199
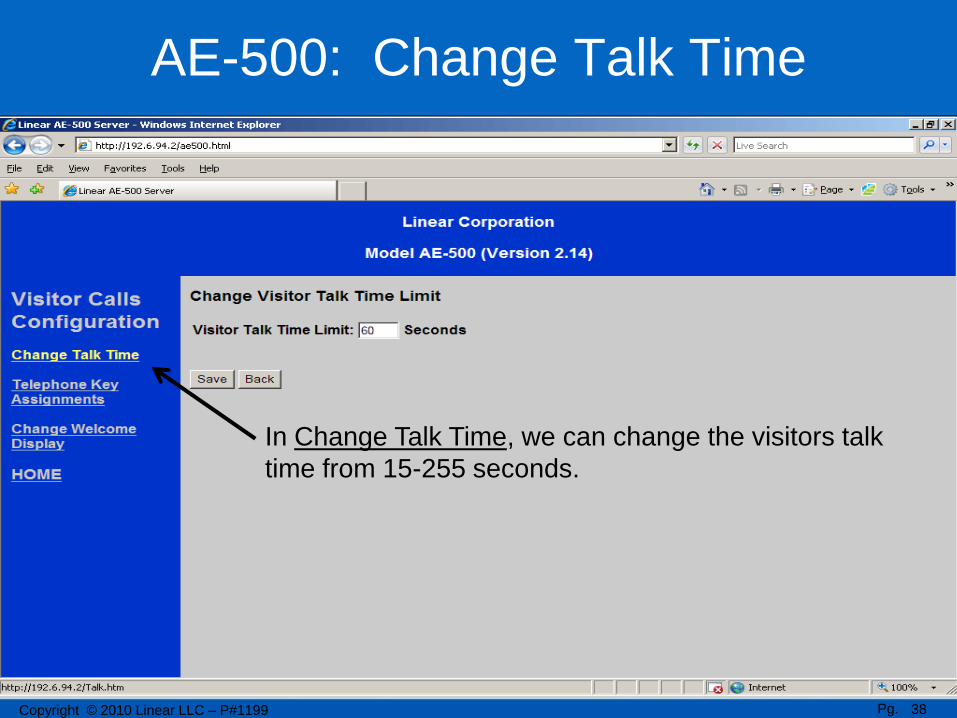
In Change Talk Time, we can change the visitors talk
time from 15-255 seconds.
AE-500: Change Talk Time
Pg. 38Copyright © 2010 Linear LLC – P#1199
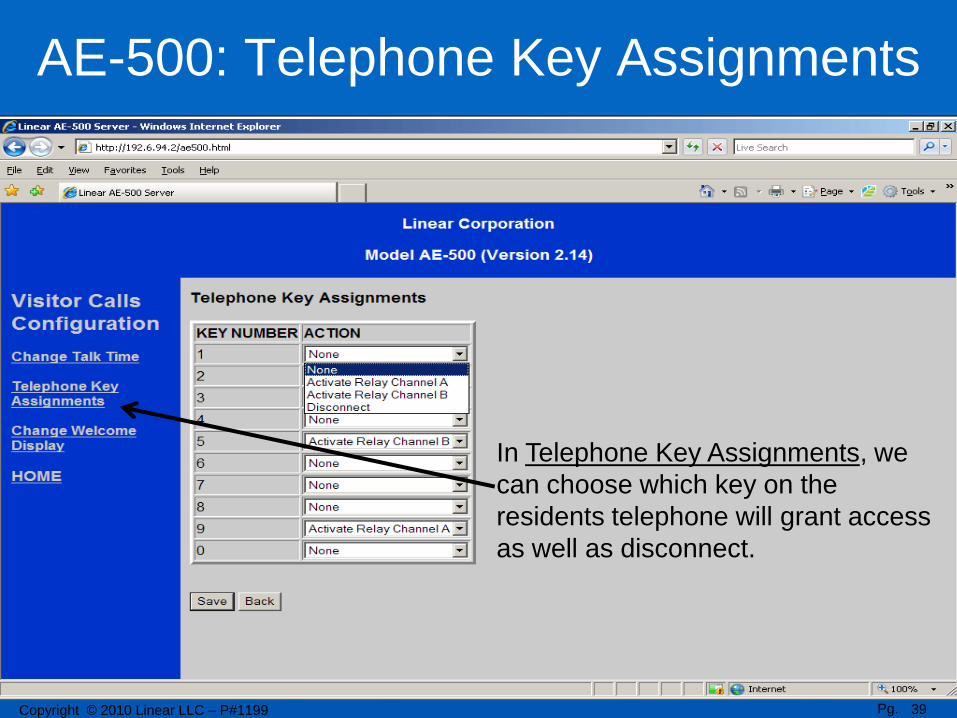
In Telephone Key Assignments, we
can choose which key on the
residents telephone will grant access
as well as disconnect.
AE-500: Telephone Key Assignments
Pg. 39Copyright © 2010 Linear LLC – P#1199

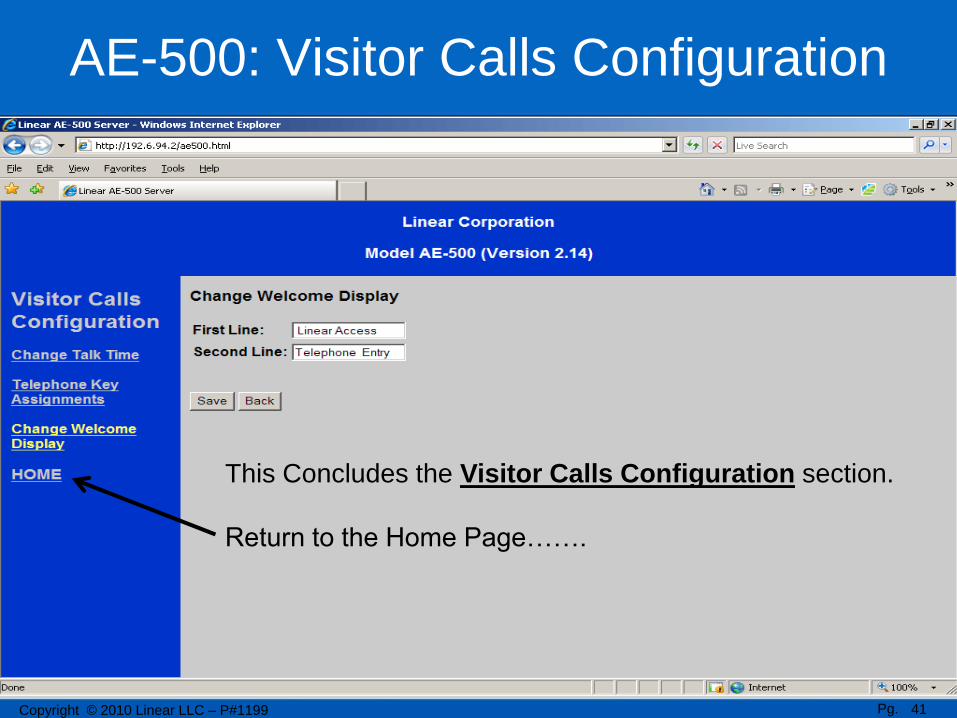
The Change Welcome Display section is where we
can configure what welcome message will be
displayed on the AE-500 while not in use.
AE-500: Change Welcome Display
Pg. 40Copyright © 2010 Linear LLC – P#1199
AE-500: Visitor Calls Configuration
This Concludes the Visitor Calls Configuration section.
Return to the Home Page…….
Pg. 41Copyright © 2010 Linear LLC – P#1199
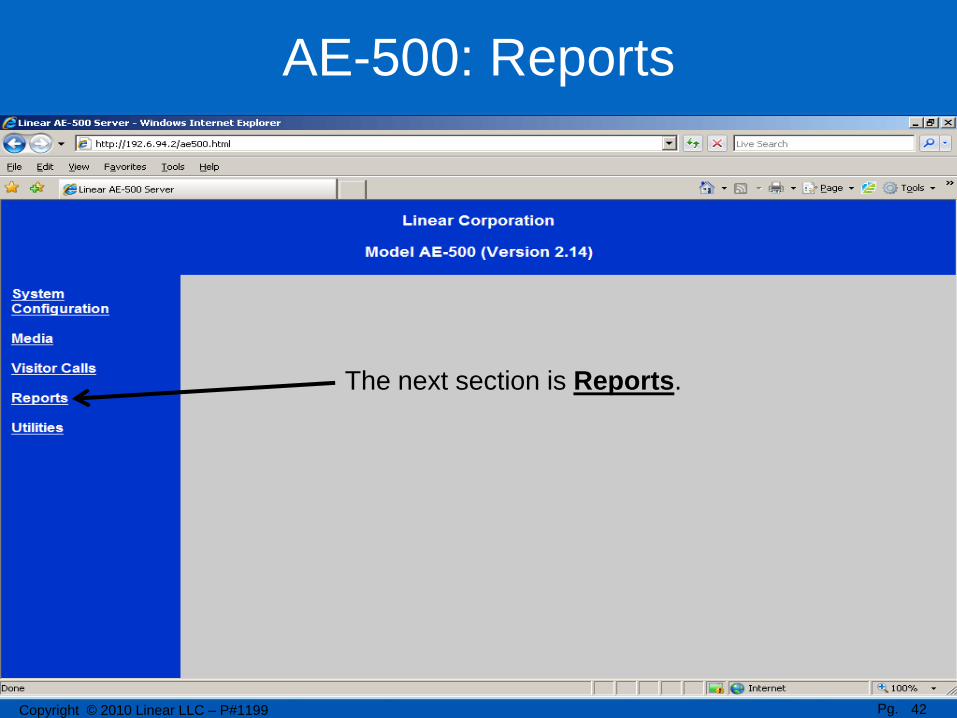
The next section is Reports.
Pg. 42Copyright © 2010 Linear LLC – P#1199
AE-500: Reports
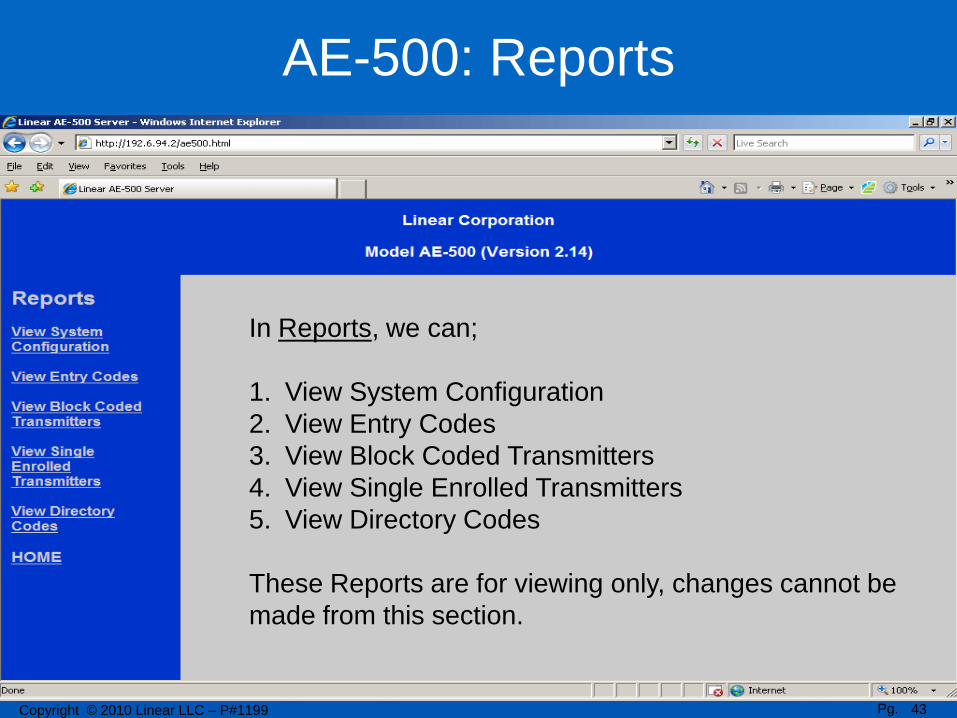
In Reports, we can;
1. View System Configuration
2. View Entry Codes
3. View Block Coded Transmitters
4. View Single Enrolled Transmitters
5. View Directory Codes
These Reports are for viewing only, changes cannot be
made from this section.
AE-500: Reports
Pg. 43Copyright © 2010 Linear LLC – P#1199

In the Reports areas, you may
see a “Next” icon at the
bottom of the page. This icon
lets you know there is another
page to be viewed.
Pg. 44Copyright © 2010 Linear LLC – P#1199
AE-500: Reports
Pg. 45Copyright © 2010 Linear LLC – P#1199
AE-500: Reports
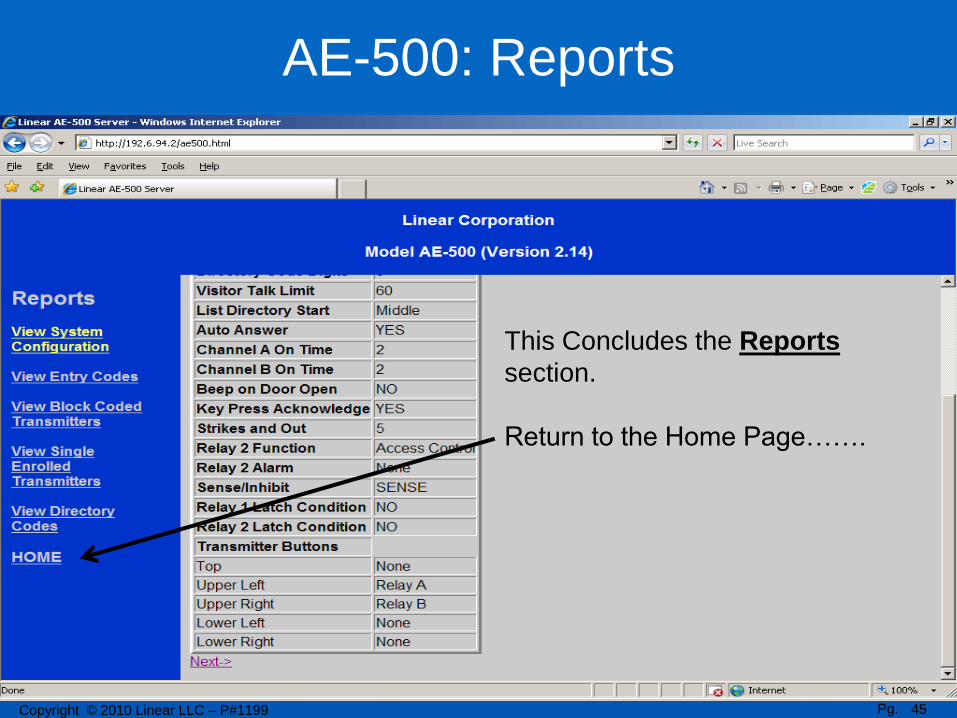
This Concludes the Reports
section.
Return to the Home Page…….
Pg. 46Copyright © 2010 Linear LLC – P#1199
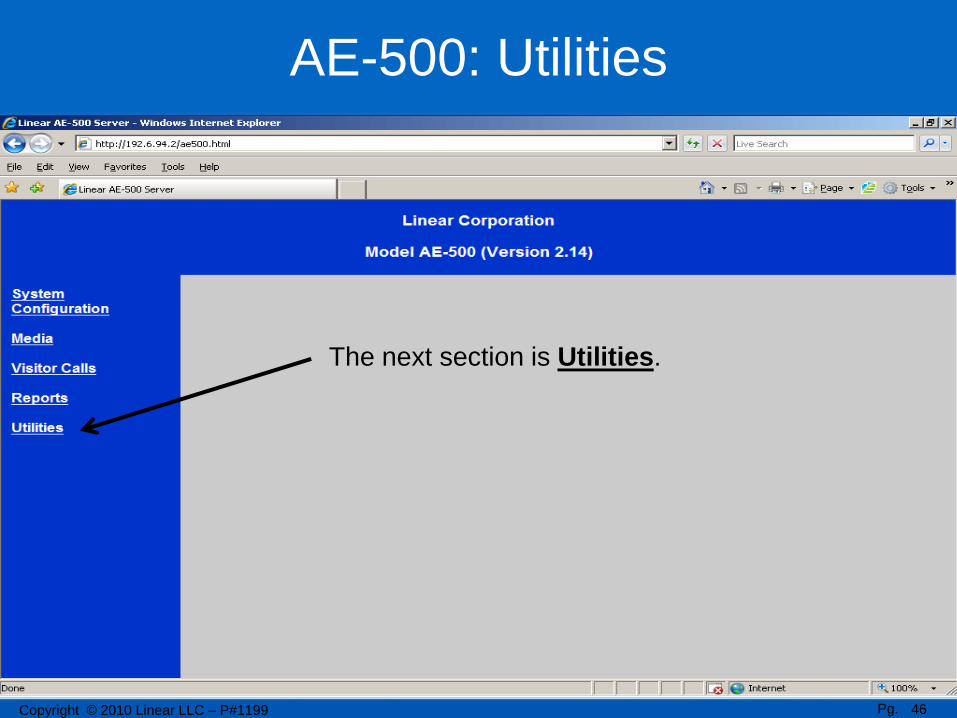
The next section is Utilities.
AE-500: Utilities

In Utilities we can perform;
1. “Data Backup”
2. “Data Restore”
3. “Load Factory Defaults”.
Note: Before a Data Restore can be performed, a Load
Factory Defaults must be performed!
The AE-500 uses Microsoft Virtual Machine for Database
Restoral. If the computer does not have Microsoft Virtual
Machine installed, go to http://www.linearcorp.com/downloads.php
and download the DRU500 executable file to accomplished
the Data Restoral.
Pg. 47Copyright © 2010 Linear LLC – P#1199
AE-500: Utilities

© 2008 Linear LLC. The information contained herein is subject to change without notice.
For other Related Product Webinars and Video Presentations (AccessBase 2000
Basics, AccessBase 2000 Start-up and AccessBase 2000 Adding Cardholders &
Credentials) or, for a list of all pre-recorded webinars and other training opportunities
visit us at www.LearnLinear.com.
For more information on sales of Linear Electronic Systems or products, please visit
us at http://www.linearcorp.com/electronic_sales.php or for information on all Linear
products and services, please visit our home page at www.linearcorp.com.
To locate a Dealer in your area to purchase a Linear product,
please visit http://www.linearcorp.com/dealers.php
Thank you!
This completes;
AE-500 Basic Programming
Pg. 48Copyright © 2010 Linear LLC – P#1199


![Deep Learning for Remote Sensing Data - Wuhan · PDF fileDeep Learning for Remote Sensing Data ... lic services, from weather ... [39]. A short while later, a number of AE-based algorithms](https://static.fdocuments.in/doc/165x107/5aa26f357f8b9a07758d03fe/deep-learning-for-remote-sensing-data-wuhan-learning-for-remote-sensing-data-.jpg)


