A note about tulle - Evil Cake Genius · A note about tulle: This tutorial uses tulle netting to...
3
Transcript of A note about tulle - Evil Cake Genius · A note about tulle: This tutorial uses tulle netting to...
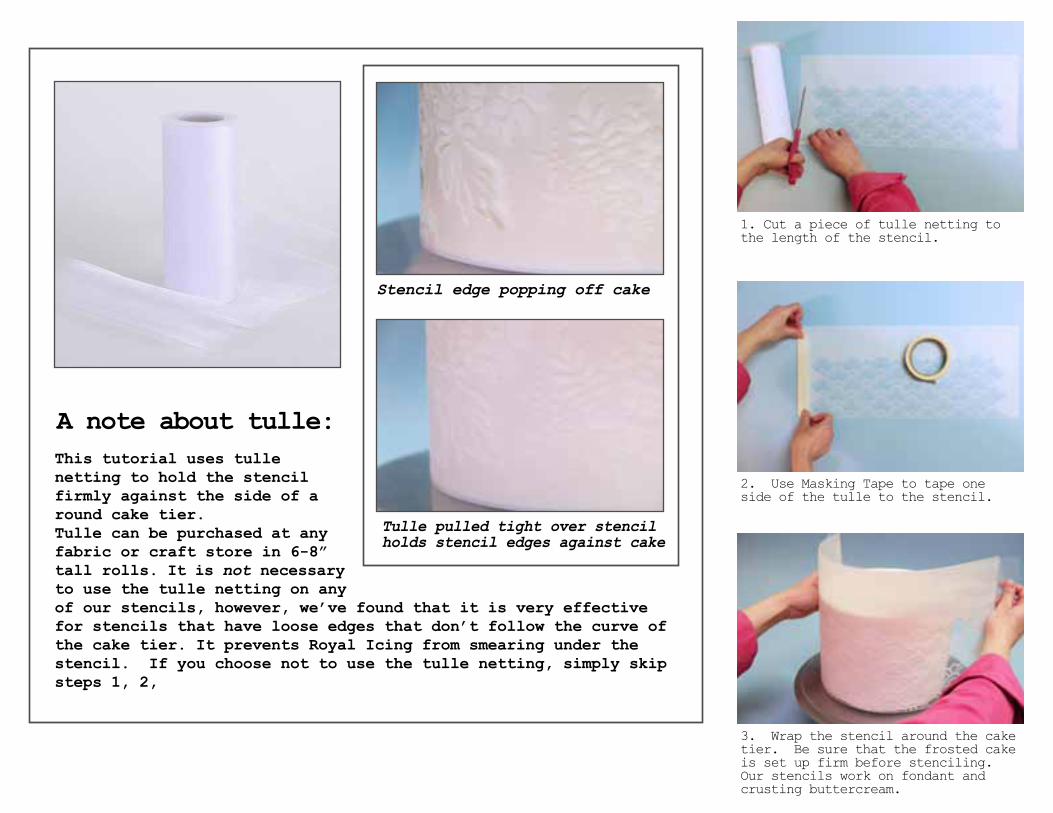
1. Cut a piece of tulle netting to the length of the stencil.
3. Wrap the stencil around the cake tier. Be sure that the frosted cake is set up firm before stenciling. Our stencils work on fondant and crusting buttercream.
2. Use Masking Tape to tape one side of the tulle to the stencil.
A note about tulle:This tutorial uses tullenetting to hold the stencilfirmly against the side of around cake tier. Tulle can be purchased at any fabric or craft store in 6-8”tall rolls. It is not necessaryto use the tulle netting on anyof our stencils, however, we’ve found that it is very effective for stencils that have loose edges that don’t follow the curve of the cake tier. It prevents Royal Icing from smearing under the stencil. If you choose not to use the tulle netting, simply skip steps 1, 2,
Stencil edge popping off cake
Tulle pulled tight over stencilholds stencil edges against cake

4. Place a piece of parchment or waxed paper across the back side of the cake. Be sure that it doesn’t block off any of the stencil openings.
10. Use a bowl scraper or the edge of a ruler to remove the excess royal icing from the stencil. We’re using our Ginormous Scraper, avail-able at www.evilcakegenius.com
11. Immediately remove the tape from the back of the cake.
6. Stretch the tulle tight across the stencil.
7. Tape the edge of the tulle to the stencil or parchment to hold it taught.
8. Stencil with Medium-thick Royal Icing.
9. Spread the Royal Icing across the stencil using an offset spatula.
12. Carefully remove the stencil. Allow any stenciling to completely dry before repeating the process on the back side of the cake.
5. Pull the stencil tight against the cake and tape the two ends of the sten-cil together. The parchment will keep the tape from adhering to the back side of the cake.